Learn How to Make a 3d Valentine's Heart-Shaped Box With a Lid With This Step-By-Step Photo and Video Tutorial, Plus Free SVG File Templates.
I love making intricate projects with my Cricut for Valentine's Day and this 3D heart-shaped Valentine's box might just be my new favorite project!
It's the perfect opportunity to choose all the pretty colors, say yes to ribbons, bows, trims, and scallops. I really can't contain my excitement when Valentine's Day comes around!
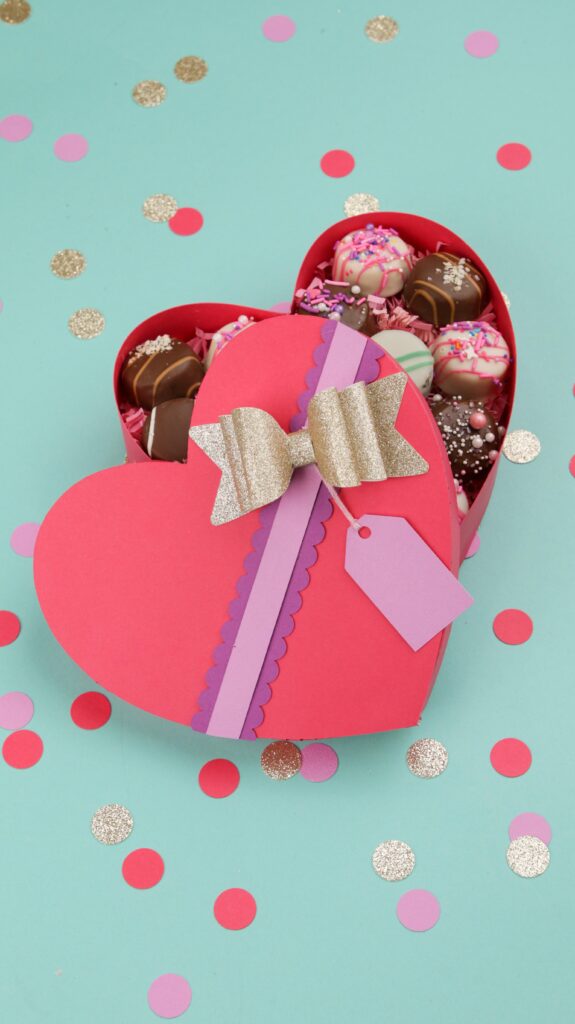
I've been desperately wanting to make this 3D cardstock heart box. I dreamed up this design a few years ago, and now I'm finally able to share it with you. Yay!🎉
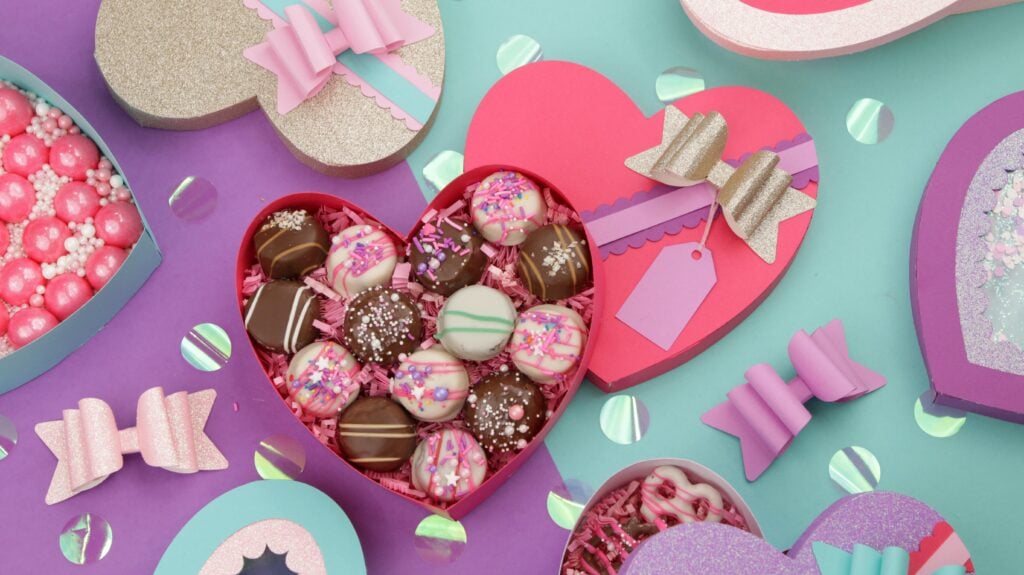
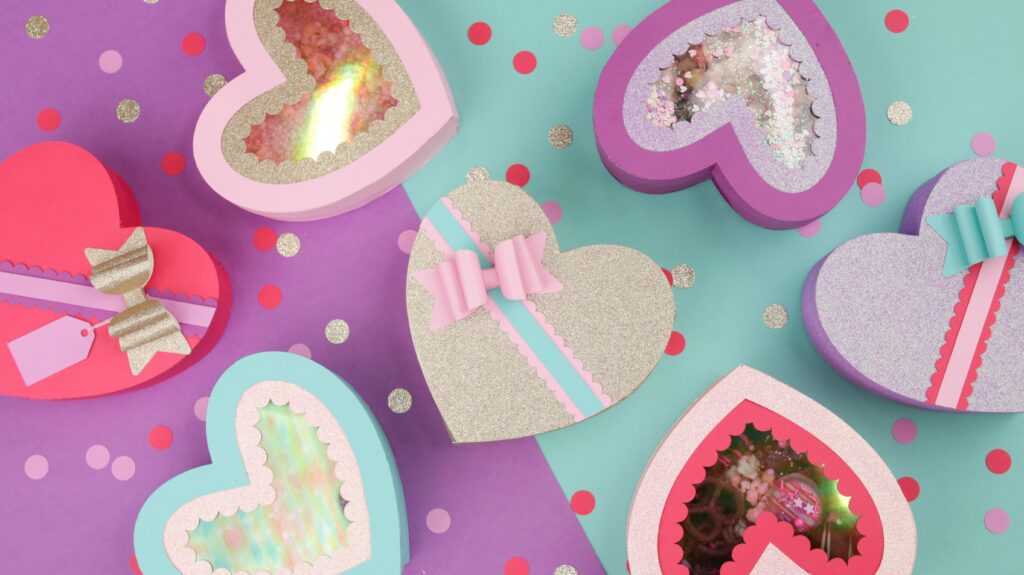
As soon as I got the chance, I dropped everything, went shopping for supplies, and got busy crafting. From the photos, you can see that I may have gotten a little bit carried away making tons of heart-shaped boxes. You really can't blame me though, right?
Once you get the hang of putting these 3D heart boxes together, you won't want to stop either!
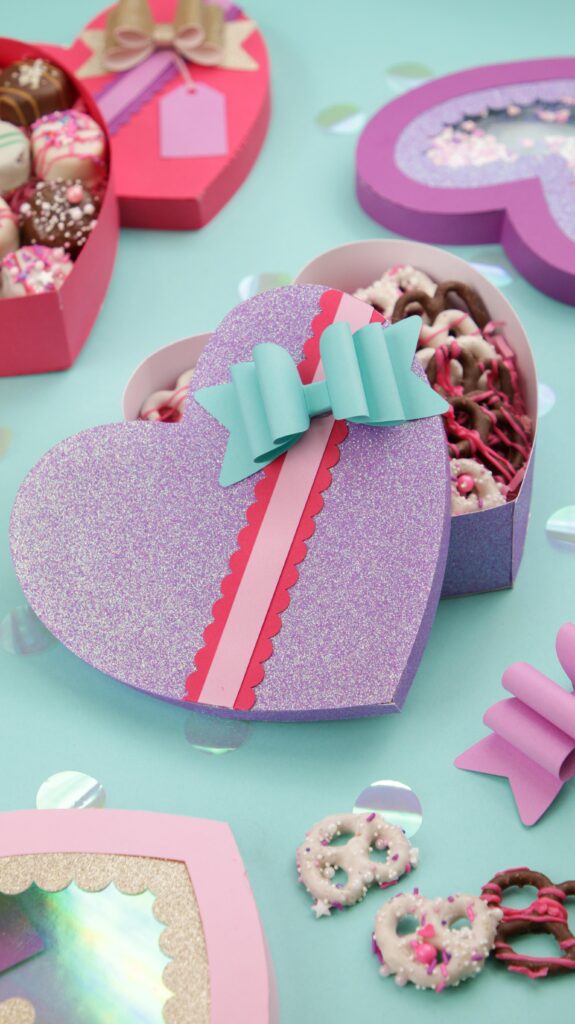
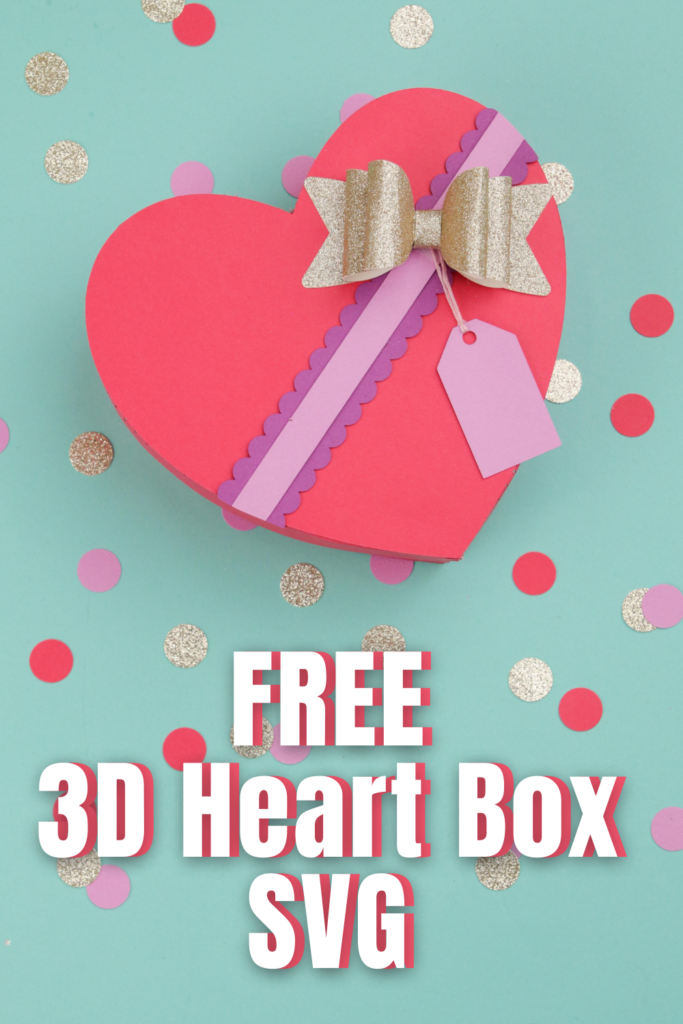
Today, I'm sharing free SVG cut files for this 3D heart-shaped Valentine's box with a lid so you can make one too...or three or four.
It's a great way to give a handmade gift and try out a new project!
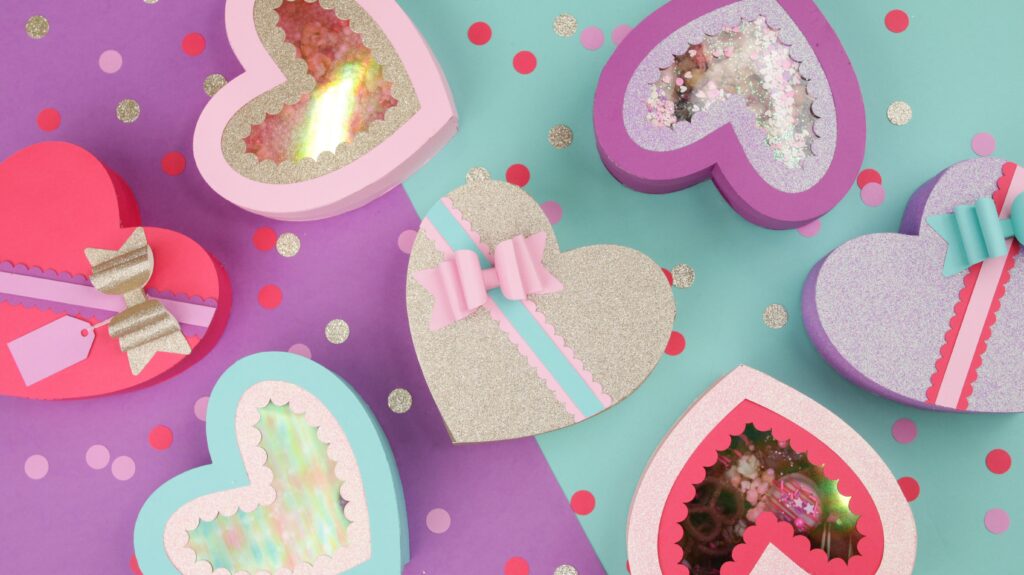
This file comes with two different styles of lids, so you can customize your Valentine's box however you like!
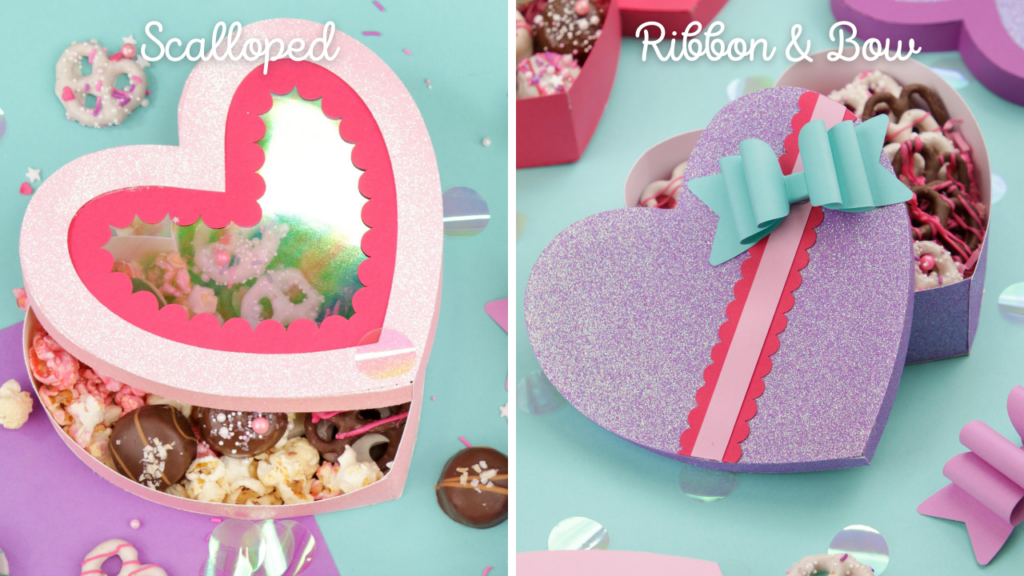
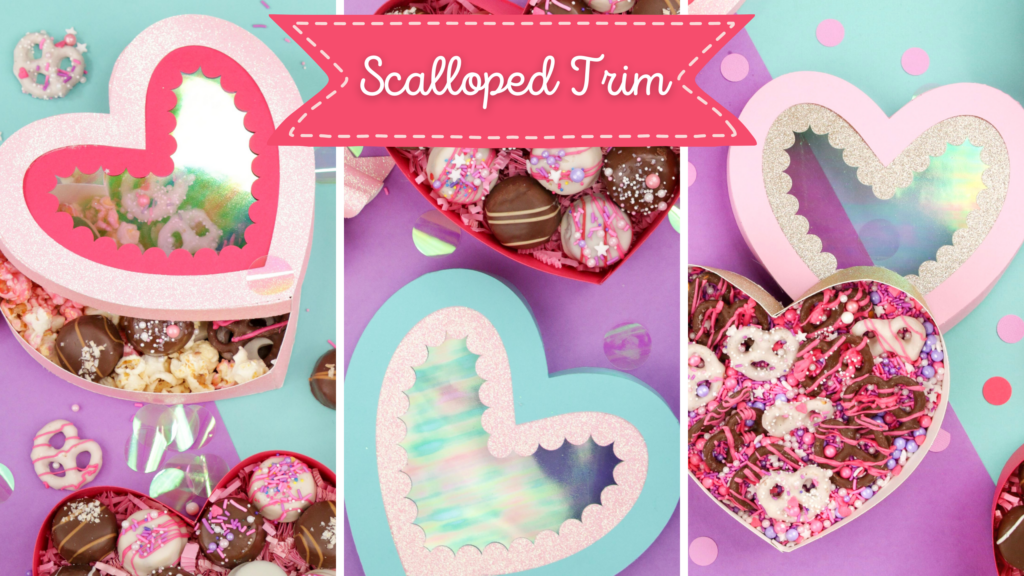
The first is a pretty scalloped lid that you can use with acetate. I don't know about you, but I love scallops, and this little box is just too cute!
The second style features a faux ribbon, (with scallops because I really couldn't help myself) a gift tag, and a layered bow.
My layered bow tutorials have been such a hit in the past and finishing this box off with a stacked bow was the icing on the cake!
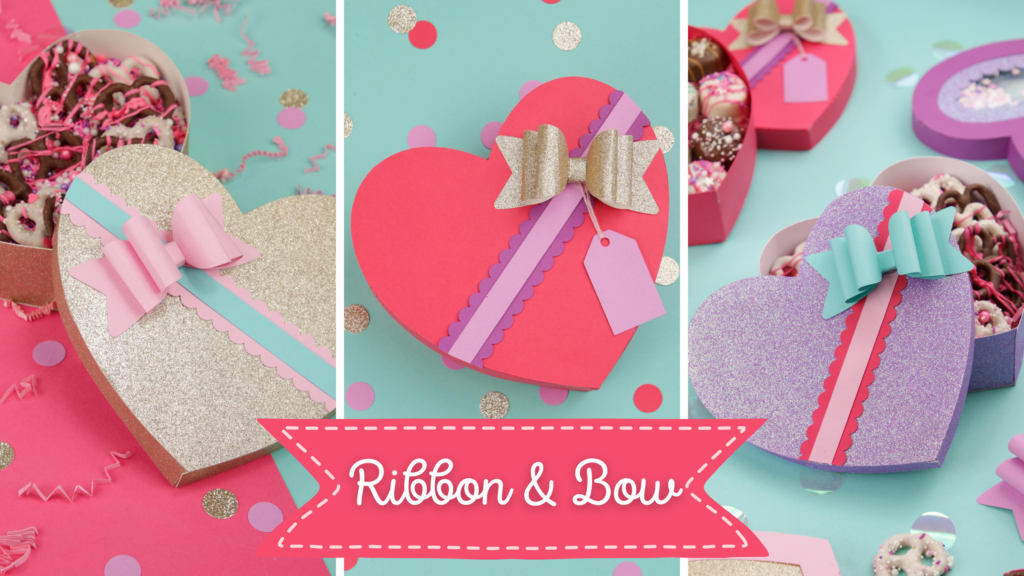
Table of Contents
What Should You Fill Your Valentine’s Box With?
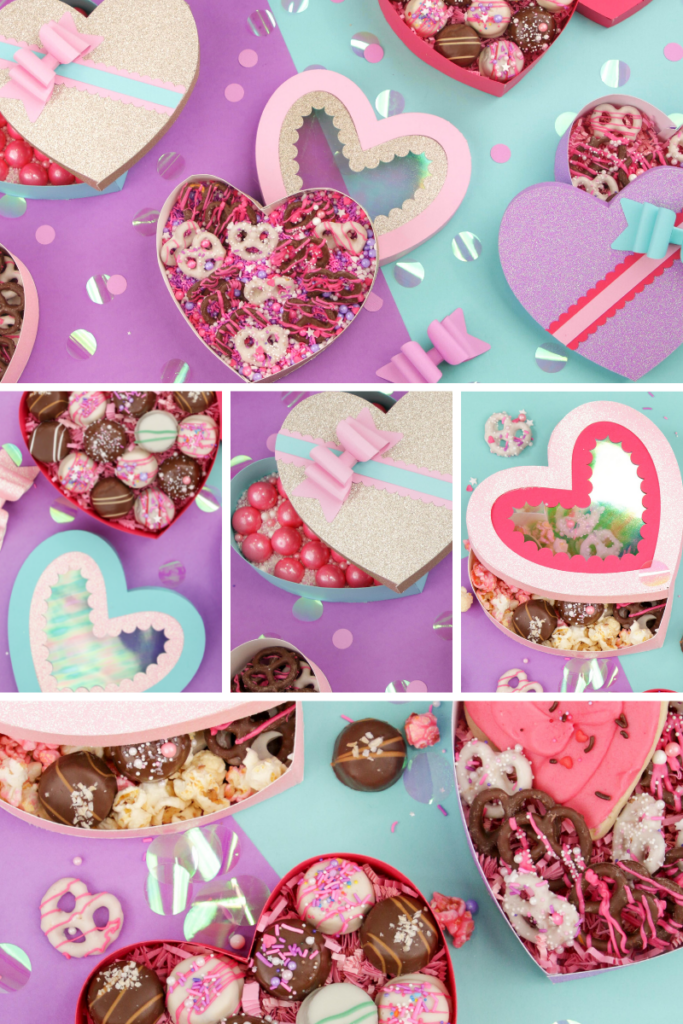
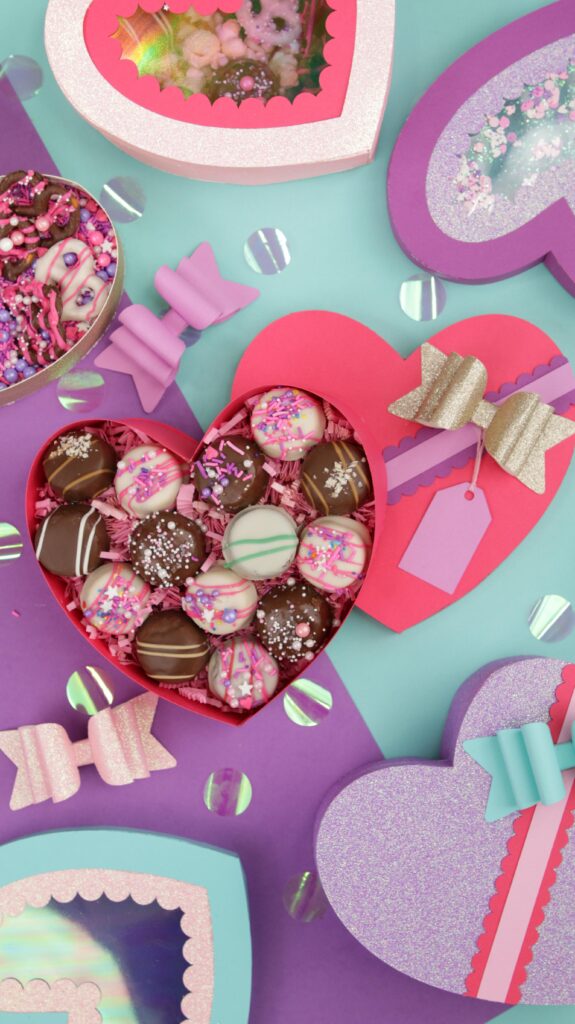
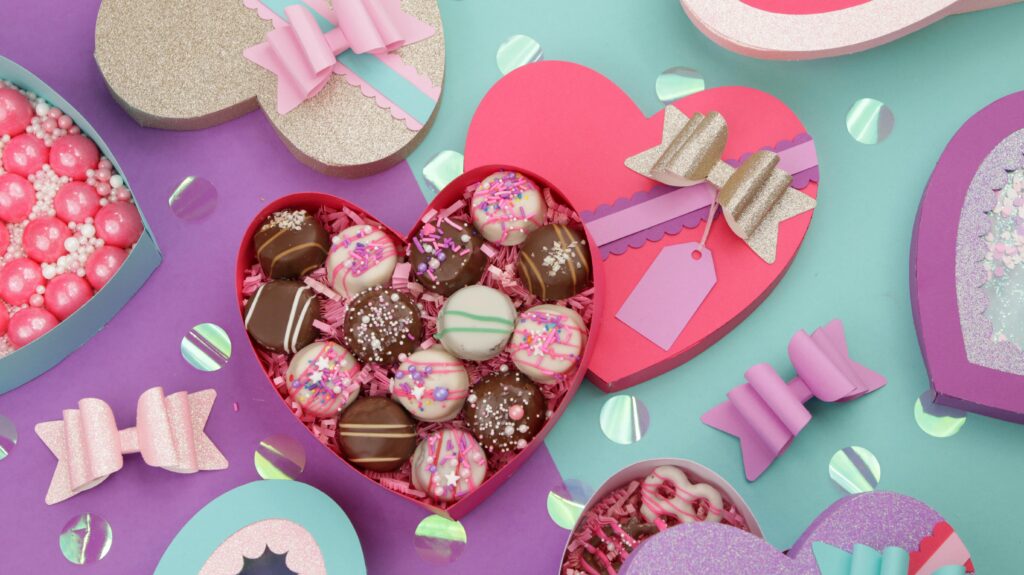
I filled my boxes with an assortment of chocolate-covered cake bites, dipped pretzels, cupcakes, cookies, kettle corn, and candies.
You could fill your box with handmade scrunchies using this tutorial.
Or you could try out some of my favorite recipes! Did you know I have recipes on my blog?
I made incredible Hot Cocoa Bombs with this tutorial. Chewy Oatmeal Chocolate Chip Cookies with my grandma's secret recipe would be delish! Just add in some pink and red M&M's.
Chocolate Oreo Pops would be oh, so cute! And of course, you really can't go wrong with my super popular Valentine's day Charcuterie Tray tutorial.
If you can't stand the thought of filling your 3D box with food, you can always display the boxes as a stand-alone decoration.
What Materials Should You Use to Make Your 3d Heart Valentine’s Box?
This 3D box works best with heavy-weight cardstock for the base and sides of the box. If you are making the scalloped version, a clear or decorative acetate can add a fun twist. For the bow, you'll want to use a lighter-weight cardstock that's easy to bend and shape.
Does the Box Need to Be Scored?
Scoring the side supports to create the box makes this project much easier! You can use a scoring stylus which is compatible with the Explore and Maker series of Cricut machines or you can use the double scoring wheel with the Maker series of machines.
When scoring specialty cardstock that has an obvious right and a wrong side, be sure to place the cardstock pretty side facing down. This will place the scoring along the back of the cardstock, making it easier to fold.
Before you cut out this project, don’t forget to change the cut lines along the side supports to scoring lines. This is really important!!
If you don't have a scoring stylus or wheel you can skip this step and manually fold the tabs along the sides of the box but it will take a bit more time!
What Size are the 3D Heart-Shaped Boxes?
This tutorial will yield one heart-shaped box that measures 7" wide by 2" tall.
If you want to make a smaller or larger box, simply increase or decrease the size of the template within Design Space. This design scales up and down really well.
Just keep in mind you won't be able to go larger than 12" x 12" if you're using a Cricut machine.
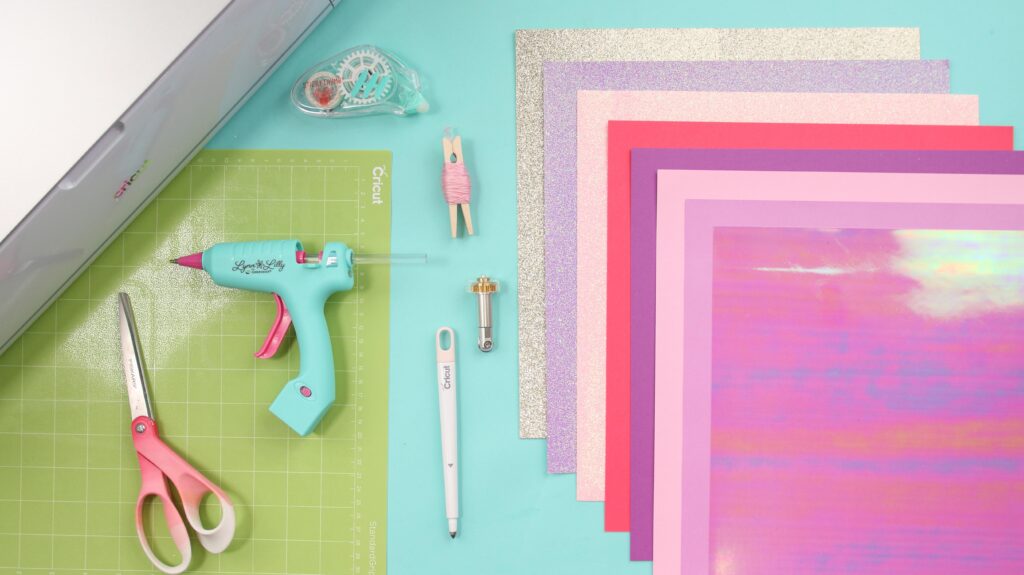
3D Heart-Shaped Box Supplies
- Cricut Maker, Cricut Explore, or Other Cutting Machine-
- Scoring Wheel or Stylus
- Fine-Point Blade
- StandardGrip Mat or LightGrip Mat
- Cardstock
- Craft Glue, Tape or Hot Glue (I Prefer Hot Glue)
- Scissors
- Acetate (Scalloped Version)
- Embroidery Floss (Ribbon & Bow Version)
- Candy, Gift Card, Treats, Cookies to Fill Box
Watch the video below!
DOWNLOAD THE FREE 3D HEART-SHAPED BOX SVG CUT FILES HERE!
STEP #1: UPLOAD THE 3D HEART BOX CUT FILES
Need help uploading your SVG file? Click here to read my blog post that will walk you through this process.
Open Cricut Design Space and click the + to create a new project.
In the Design Panel on the left, select "UPLOAD."
If you are a Design Space PRO, you can skip to step #2.
Click "UPLOAD IMAGE."
Click "BROWSE" or drag and drop the file.
Navigate to the file on your device to click "OPEN" to add it to Cricut Design Space.
On the Prepare Screen, you can change the name of the project and add tags. Click "UPLOAD."
Once you have the file uploaded, select it and click "INSERT IMAGES" to bring it onto your canvas.
STEP #2: PREPARE THE 3D HEART BOX CUT FILES IN DESIGN SPACE
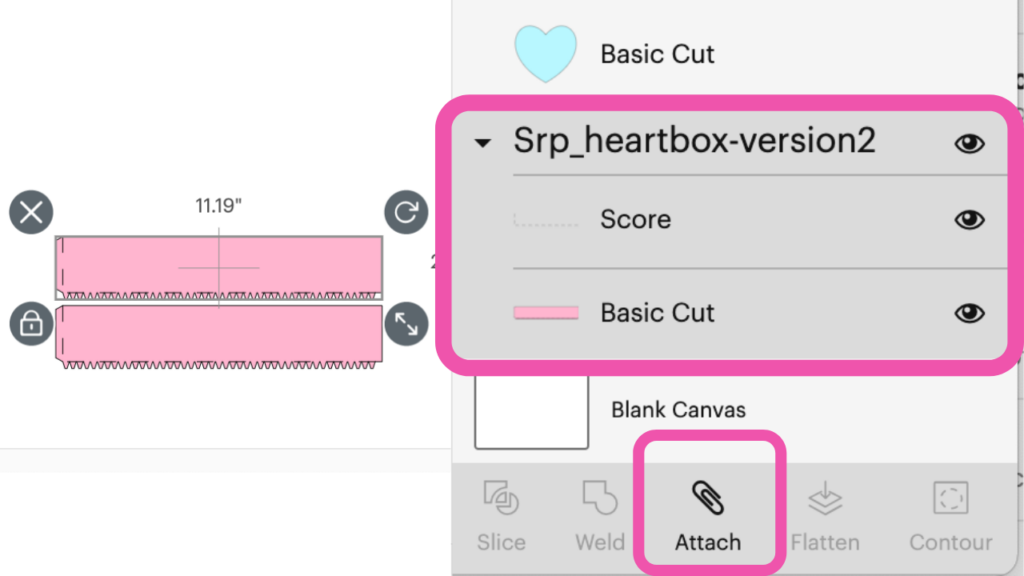
Begin, by selecting your file. Then click, "UNGROUP" in the layers panel. Next, switch the cut lines on the rectangular side supports to “SCORE.”
You will need to do this a total of 4 times for each box. Don't SKIP this step!
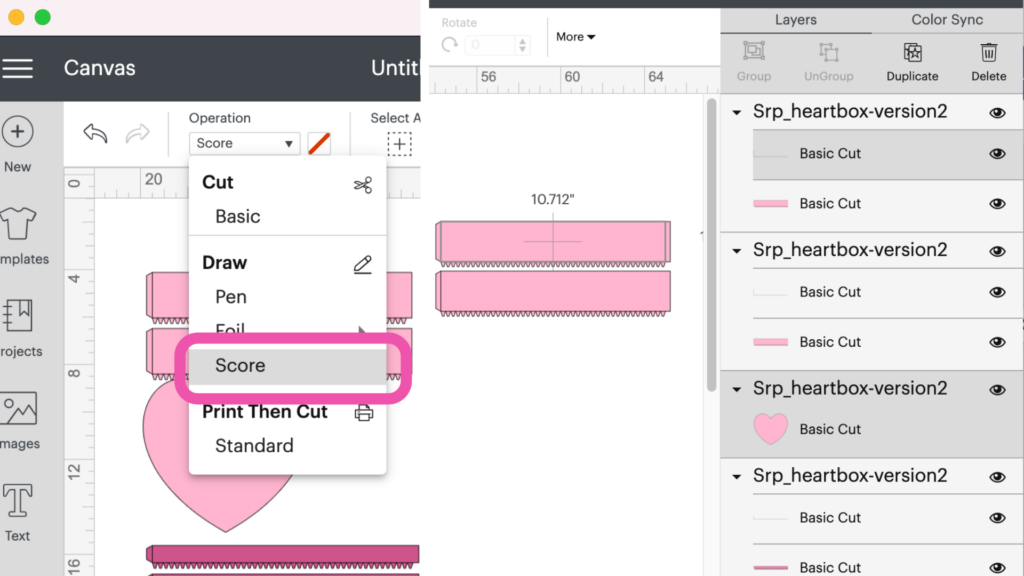
Attach the"SCORE" lines to the side supports to ensure they stay in the correct position.
Let's go over each piece, so you know exactly what you're working with and what needs to be cut out.
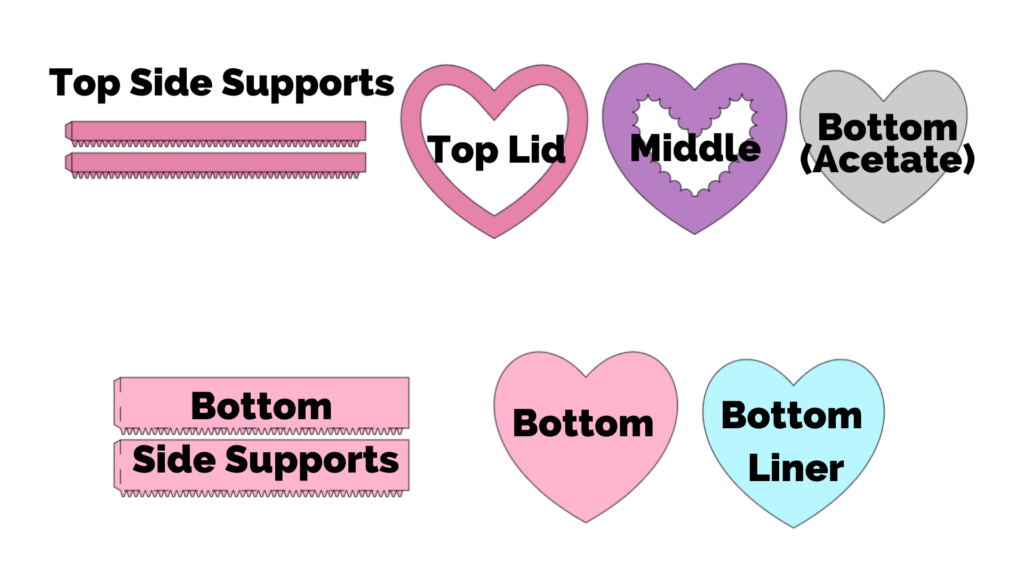
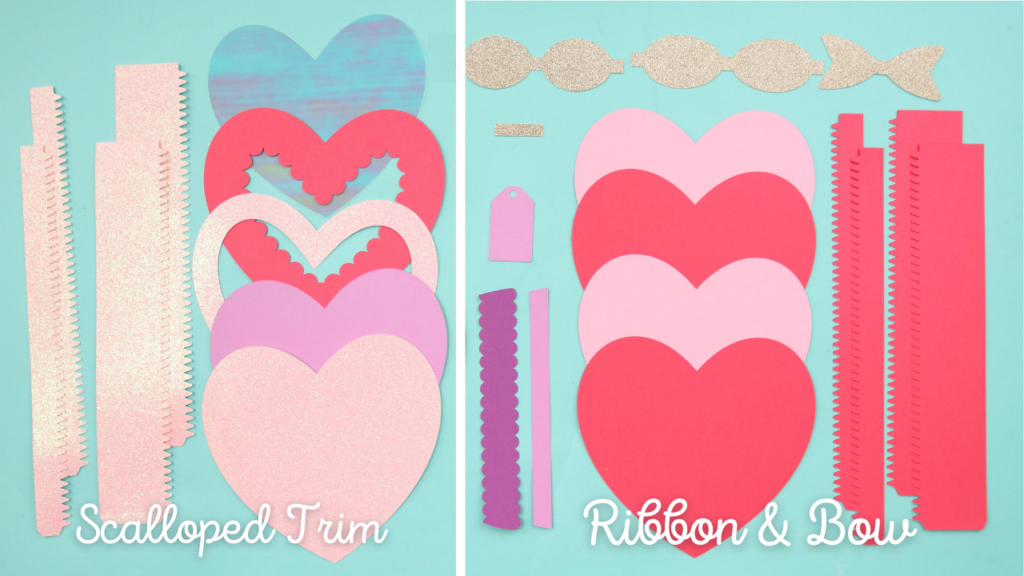
There are two different files. Let's start with the Scalloped Trim Box.
I've labeled each piece of the box so you can tell where it goes.
You'll notice there's a blue piece labeled Bottom Liner. This piece is cut smaller than the Bottom and will go over the support tabs to tidy everything up and provide additional support.
Because the Scalloped version has a middle layer, this will act as the liner that covers up the side support tabs.
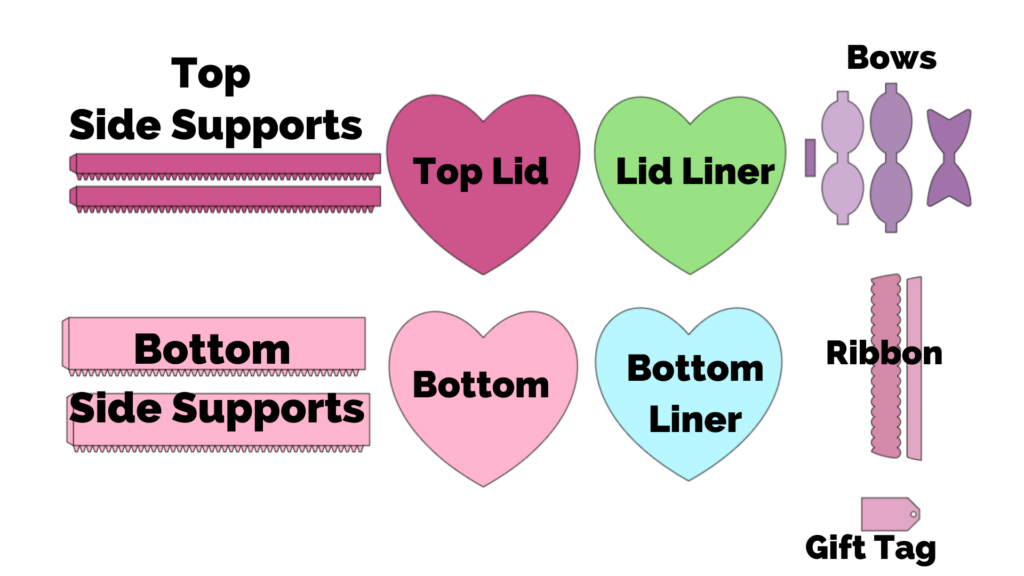
For the Ribbon and Bow version, you can see there is a lid liner as well as a bottom liner. You also have the option to add a bow, ribbon, and a gift tag.
STEP #3: CUT OUT THE 3D HEART-SHAPED BOX
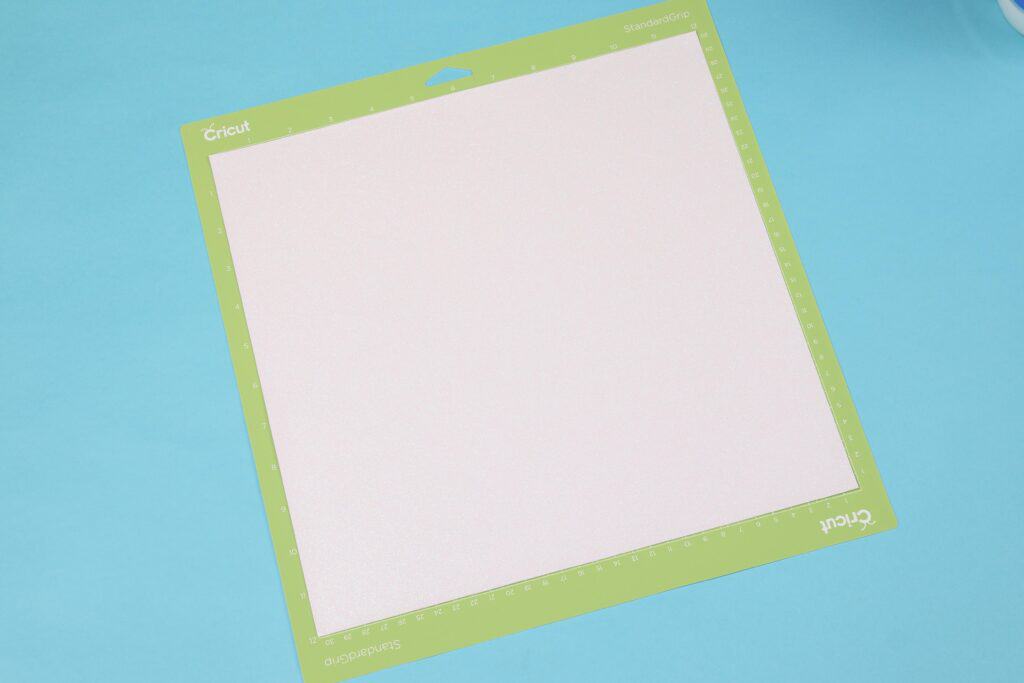
I'd recommend using a Standard Grip Mat for this project especially if you are using glitter paper or heavy cardstock.
Start by removing the clear liner from your Cricut mat and then set it aside.
Place the cardstock paper onto the mat and press down firmly on the paper to adhere it to the mat. This step is really important when cutting out cardstock to ensure you get the best results possible.
*PRO TIP - For the very best results, always check your blade before cutting cardstock. If it's covered in tiny cardstock pieces, push on the plunger to reveal the blade and gently blow on it to remove any debris.
*PRO TIP - If you are using a thick cardstock paper like glitter cardstock for the pieces with scoring lines, be sure to place those pieces of cardstock facing pretty side down. This will place the scoring line on the back of the material making it easier to fold.
Don't forget to load your scoring stylus or scoring wheel so that the machine can create your score lines. This helps to give you a guide for where to fold.
Insert the mat into the cutting machine and press "GO."
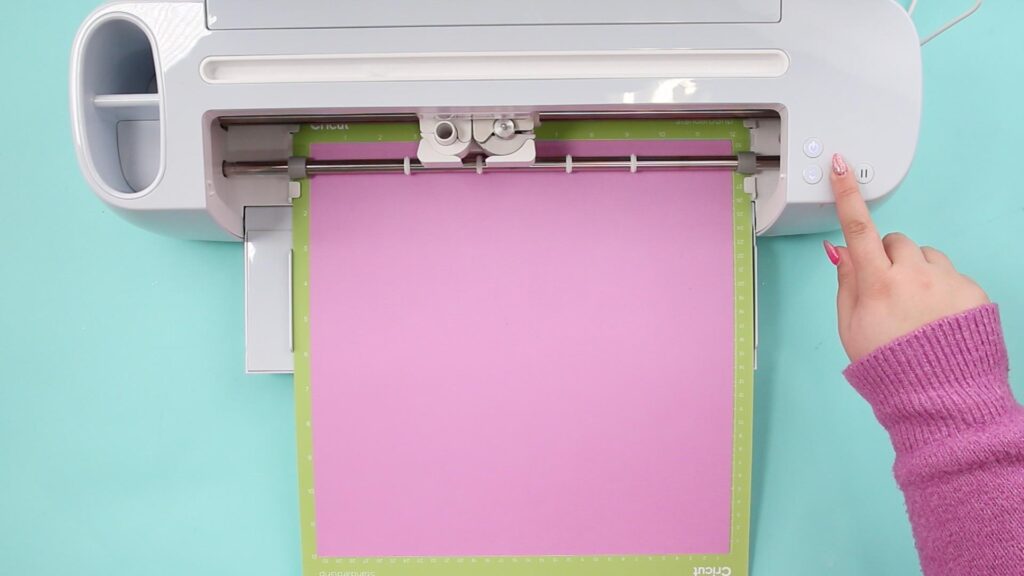
Once the machine has finished cutting the design, remove the mat from the machine. Repeat this process until you've cut out all of the pieces for your 3D Heart Box.
If you are making the Scalloped 3D Heart you should have a total of 9 pieces cut out.
If you are making the Ribbon & Bow 3D Heart you should have a total of 15 pieces cut out.
STEP #4: PREPARE 3D HEART BOX SIDE SUPPORTS
It's time to prepare the side supports! This next step applies to both types of lids as well as the bottom of the box.
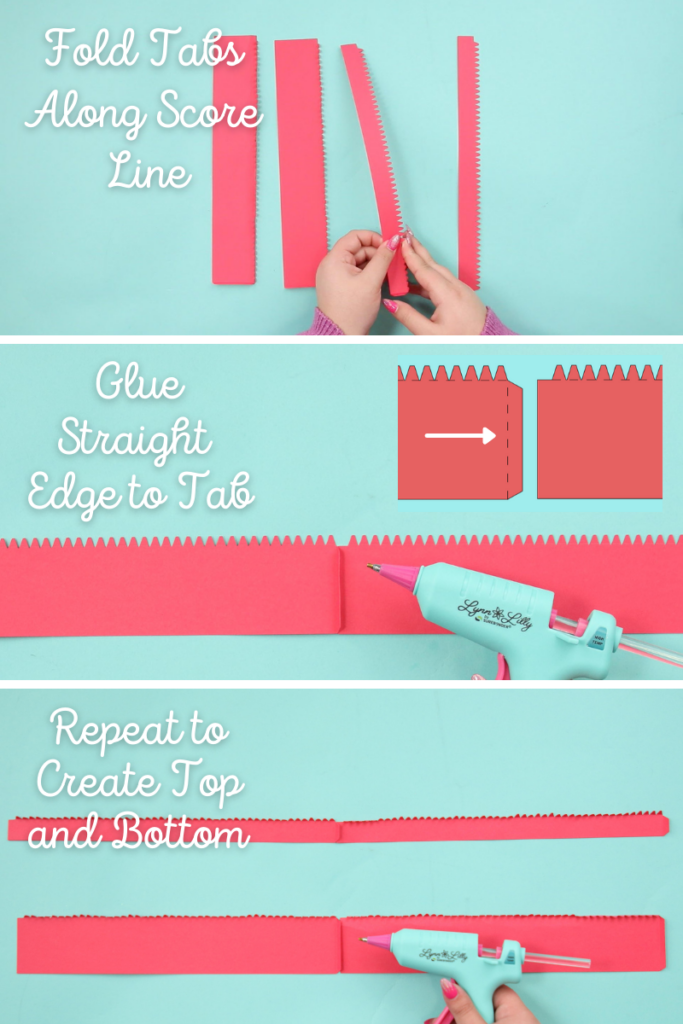
Begin by folding the side supports along the scoring lines. The tabs should be folded at a 90-degree angle.
If your paper has an obvious right and wrong side be sure to fold the tabs towards the wrong side.
The thinner side supports will create the top lid and the thicker side supports will create the bottom of the box.
STEP #5: ASSEMBLE 3D HEART-SHAPED LID (RIBBON & BOW)
Now that your side supports are folded and glued together, let's make the 3D Heart Lid.
I'm going to start with the Ribbon & Bow version. The first part of this step applies to both variations of lids.
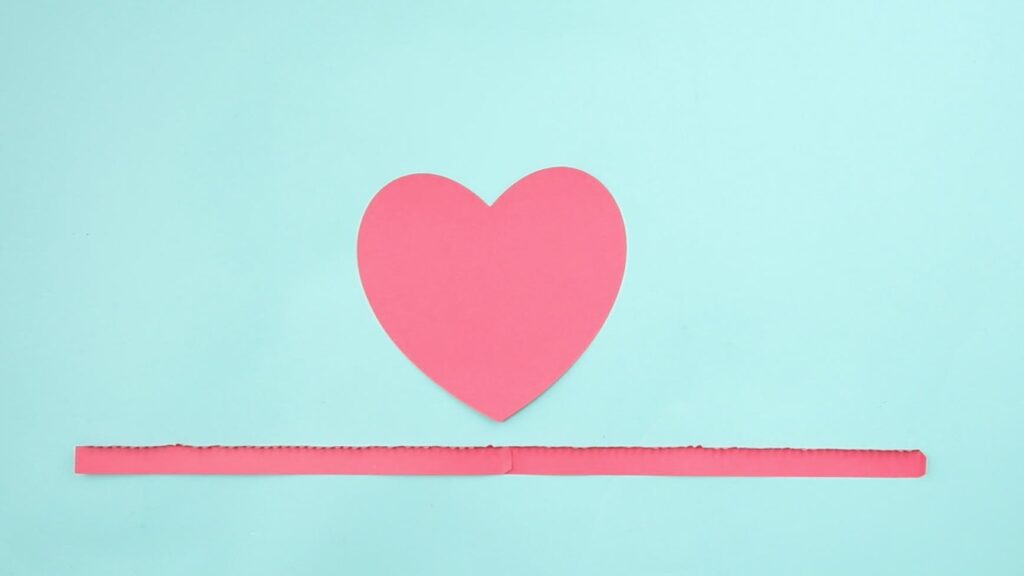
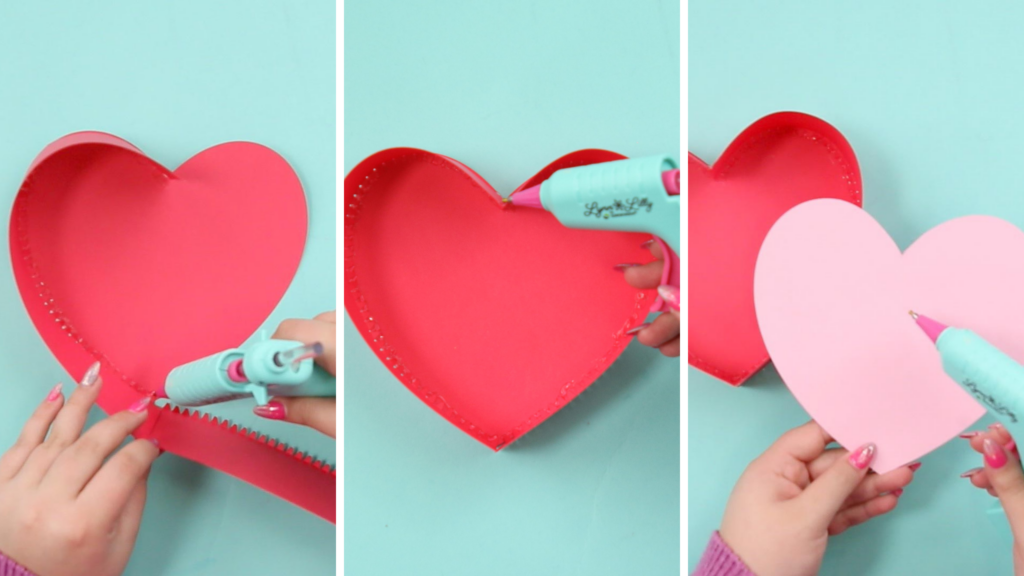
Begin at the top of the heart with the side support without the tab. Draw a small line of hot glue along the edge of the heart and gently place the side support tabs on top of it aligning the end of the side support with the innermost tip of the heart.
I like to do this while the glue is still warm so I can move it around as needed.
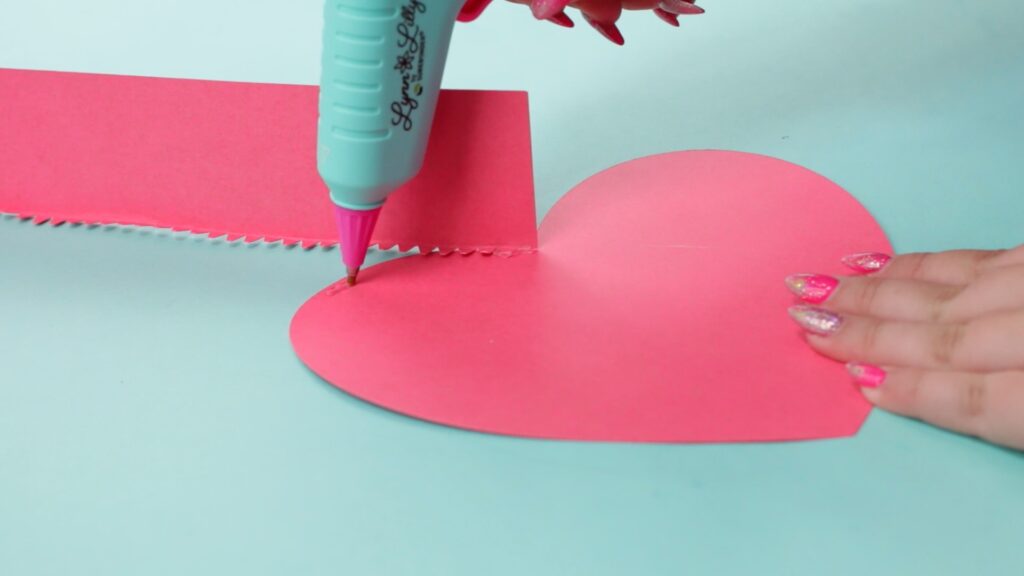
Make sure that the edge of the sides lines up with the edge of the heart. This may take a bit of practice until you get the hang of it!
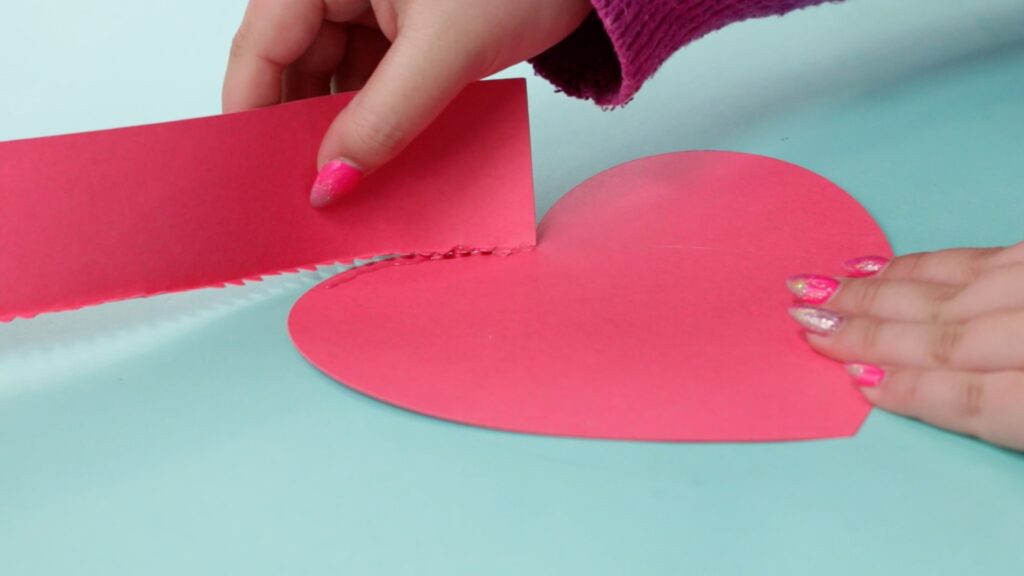
Continue this process around the entire heart one section at a time.
Once you reach the bottom of the heart, make sure the fold (where the two pieces meet) of the side support is aligned with the tip of the heart.
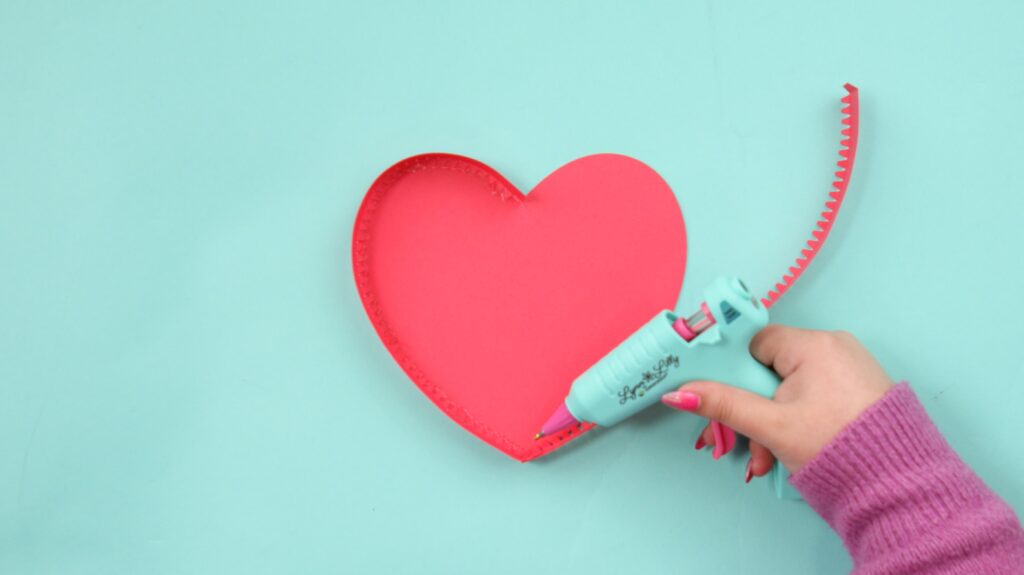
Once you reach the beginning, attach the edge of the side support to the other edge. The fold the tab over to the other side and glue it in place.
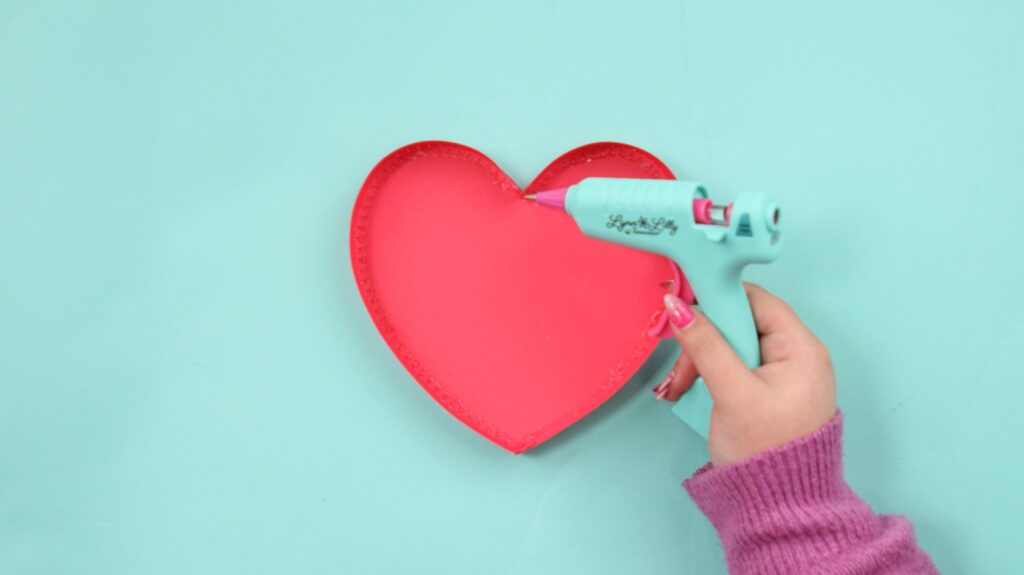
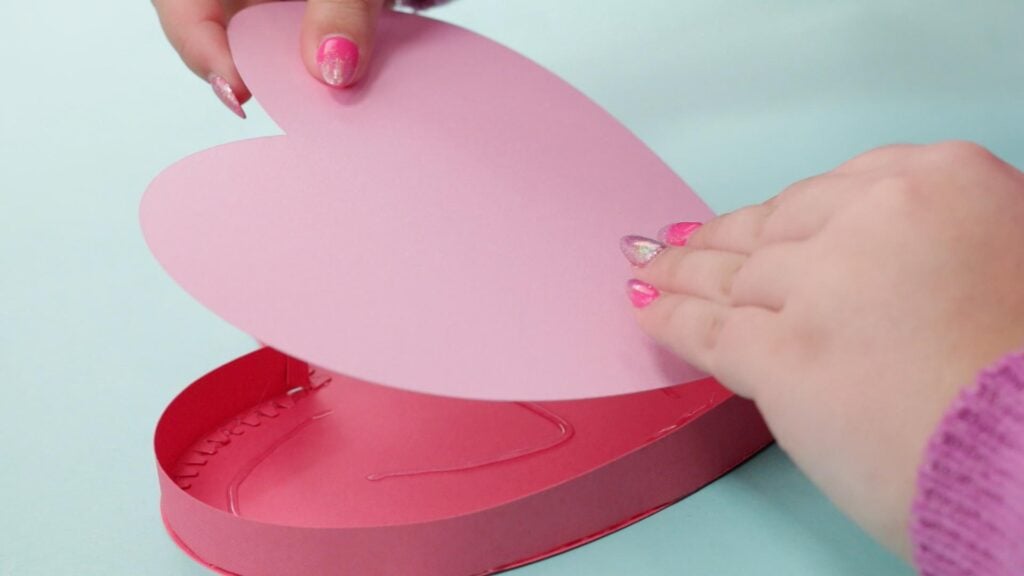
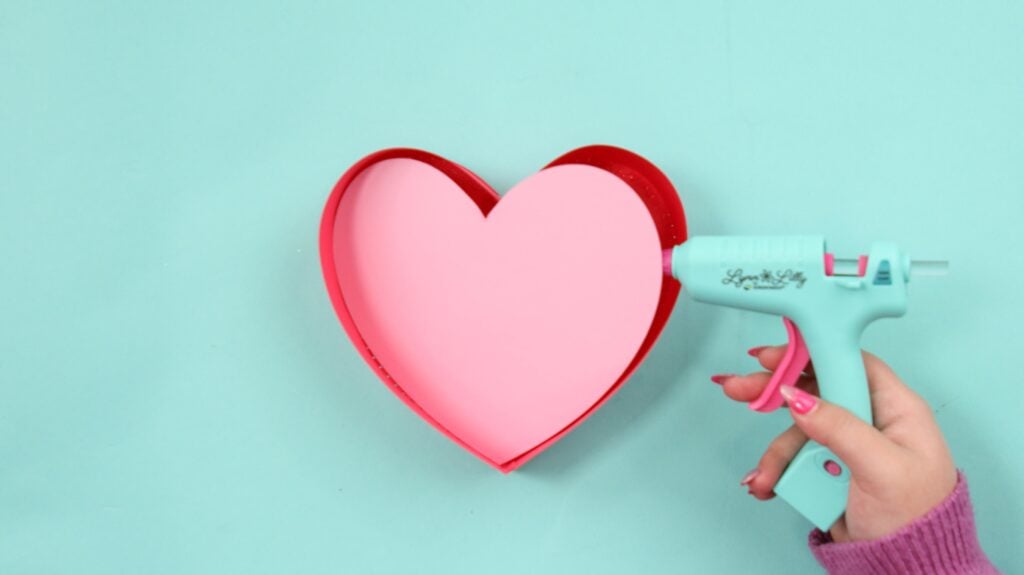
Draw a line of hot glue along the support tabs and inside the box. Place the liner into the box. Press firmly on the liner to make sure it adheres completely to the top.
The liner is meant to cover up all of the support tabs to give you a clean finish.
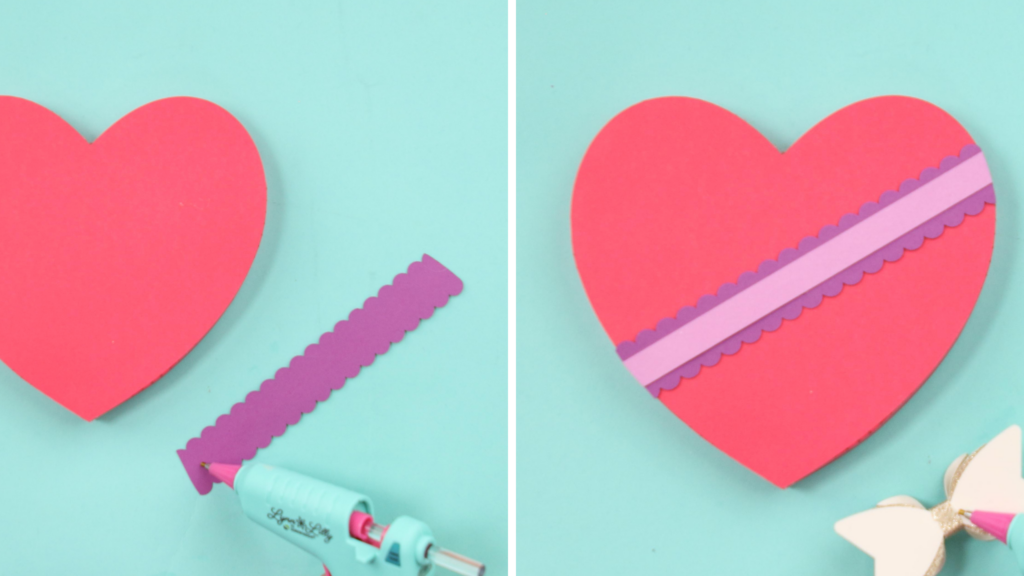
Flip the lid over and let's finish off the details on the top.
Hot glue the smaller ribbon piece on top of the larger scalloped ribbon. then attach the ribbon diagonally to the heart lid. It's sized perfectly to match the top.
The curvier end goes at the top right of the heart, while the straighter end goes at the bottom left part of the heart.
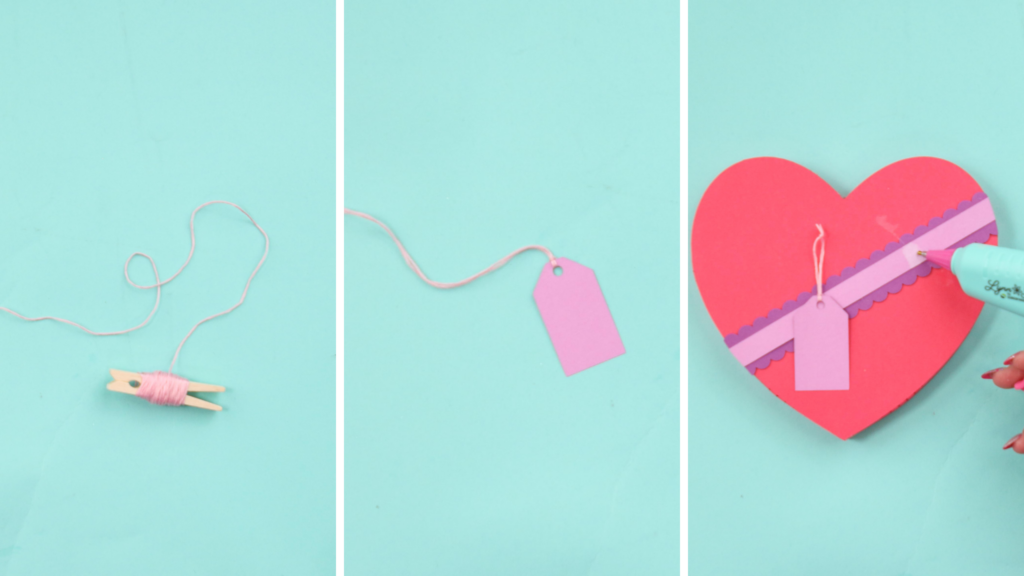
Cut a piece of embroidery floss about 12 inches long. Fold the string in half and tie a knot securing the two ends together.
Tie the floss to the name tag.
Using hot glue, secure the name tag to the box.
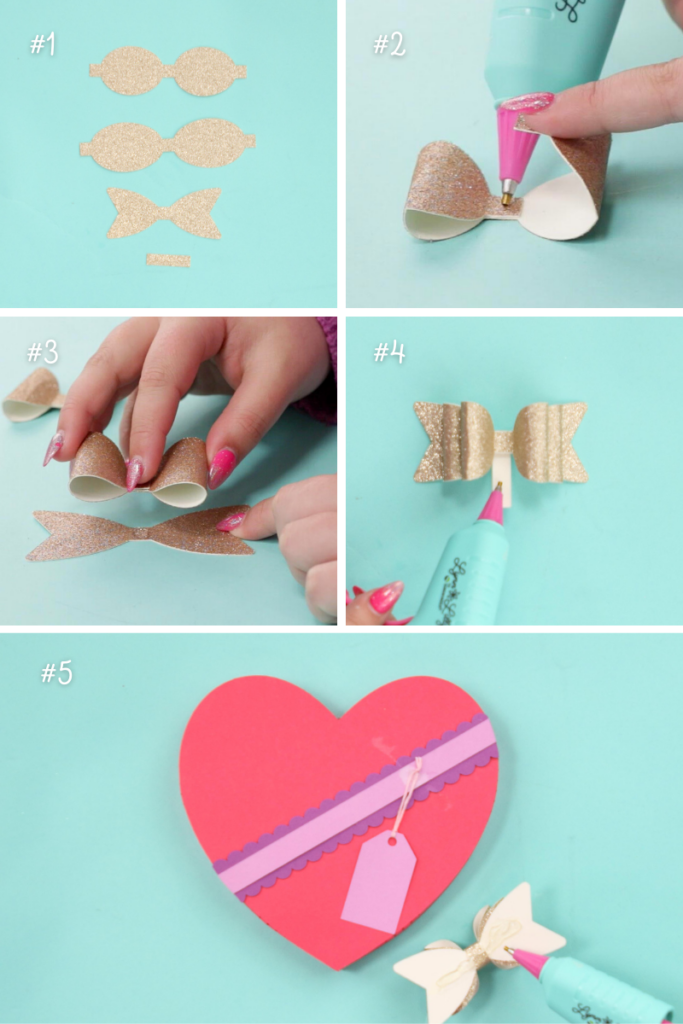
Next up is the layered bow!
For a more detailed step-by-step bow tutorial visit this blog post.
- Lay out all four pieces of the bow.
- Gently fold the sides of the bow into the center and glue them into place.
- Stack the bows on top of each other.
- Secure the three layers together with hot glue by wrapping the rectangle around them.
- Hot glue the bow onto the ribbon covering the tail of the tag.
STEP #6: ASSEMBLE 3D SCALLOPED HEART BOX LID
Use the same instructions that were listed in the previous step to create the sides of the box.
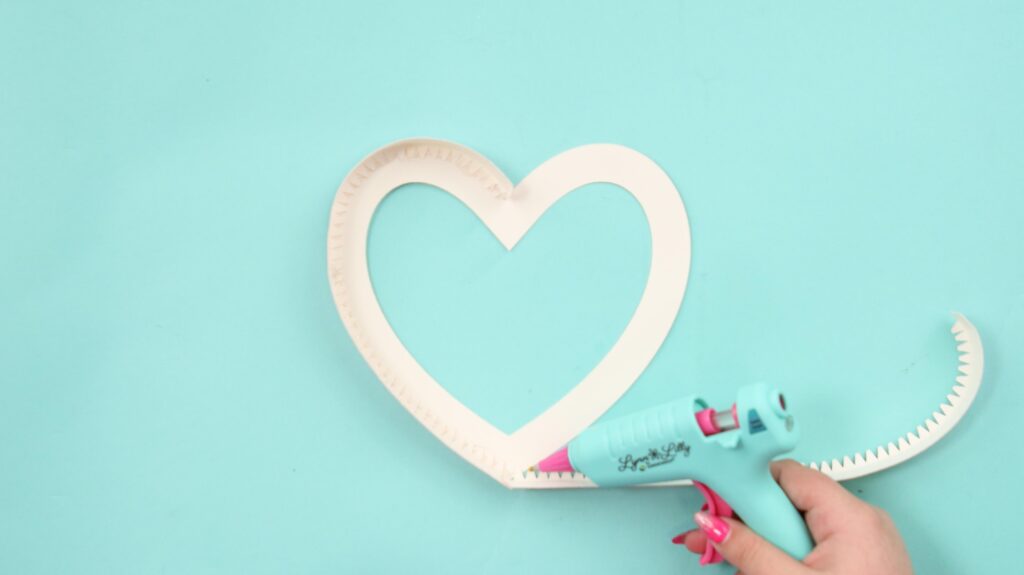
After applying the side supports, adhere the scalloped layer followed by the acetate layer.
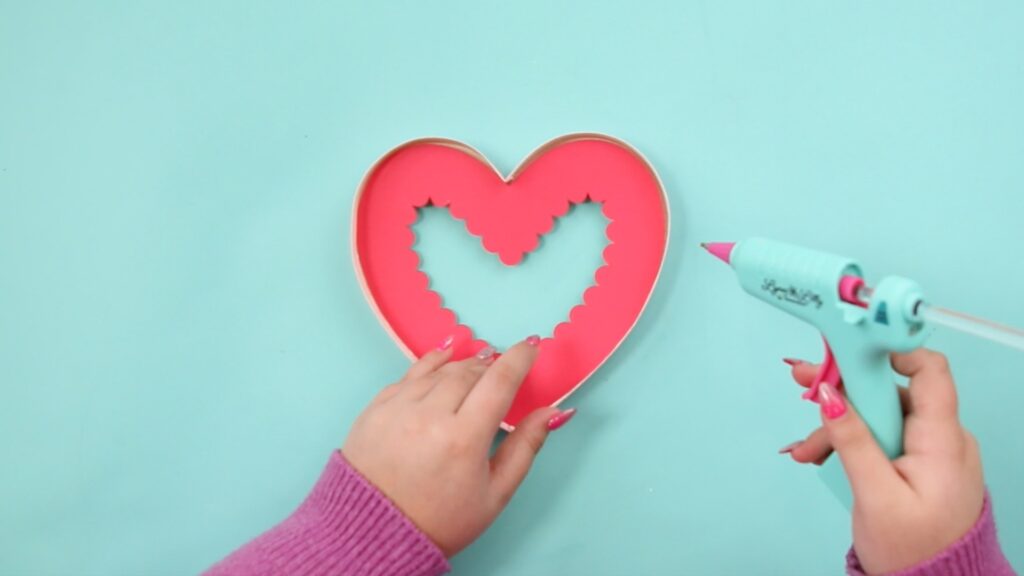
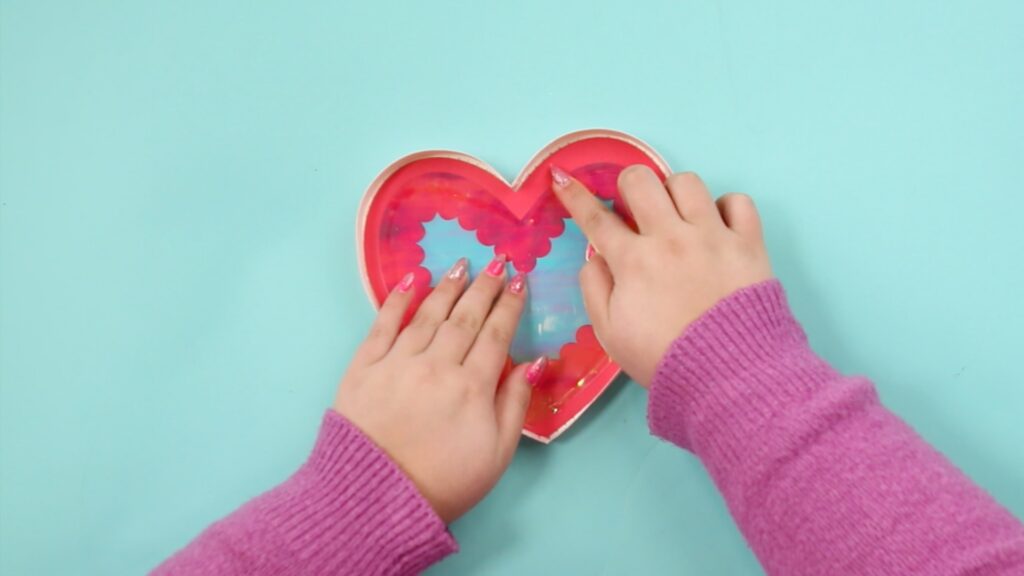
Now your Scalloped Heart Lid is complete.
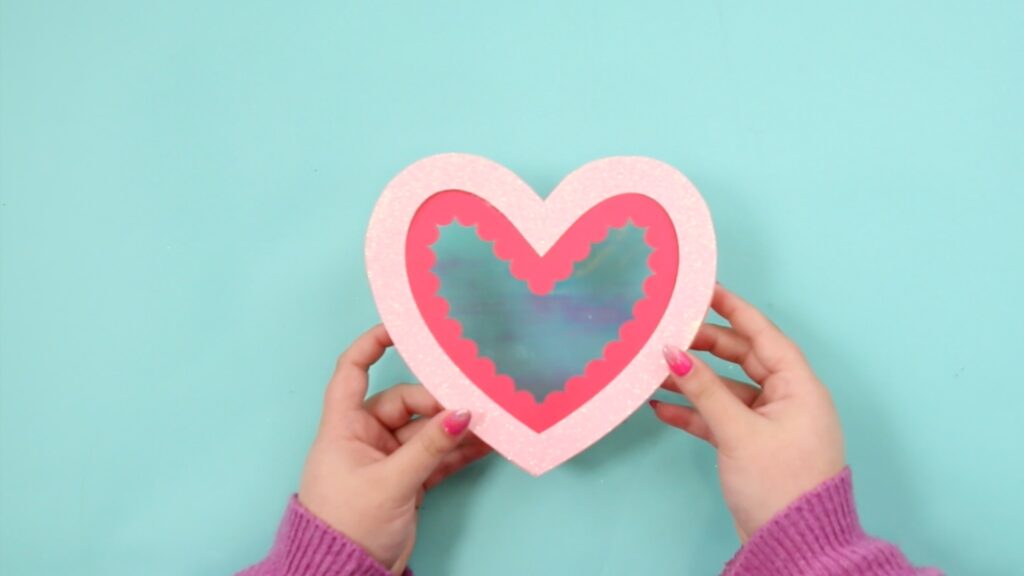
STEP #7: ASSEMBLE 3D HEART BOX BOTTOM
The bottom of the box will be assembled using the same method as the lid.
Create your side supports, glue them to the base layer, then add in your liner to cover the tabs.
STEP #8: FILL THE 3D HEART-SHAPED BOX!
I used crinkle paper shreds to build up the base of my boxes. This gives it a fun pop of color and allows you to put smaller items in the box without it looking too empty or deep.
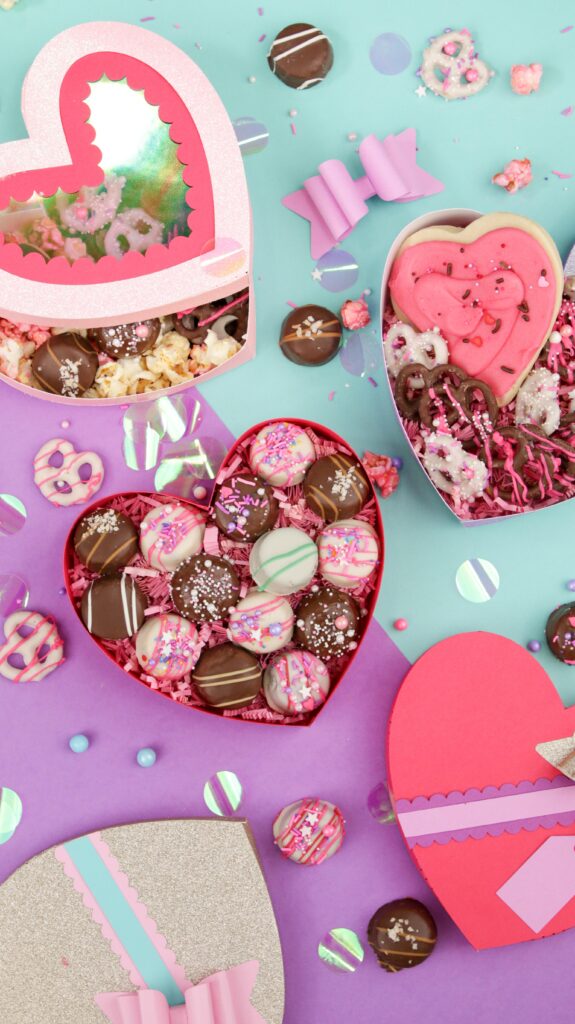

Get creative with what you fill your box with! It could be filled with anything as long as it's not too heavy!
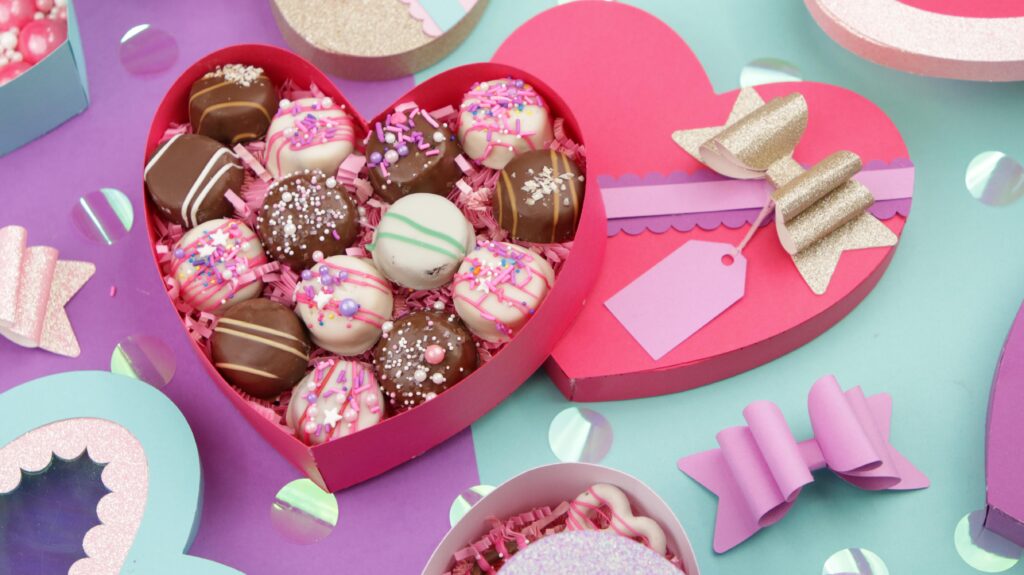
Once you're done, place the lid on top of the bottom of the box. The lid is slightly larger than the base.
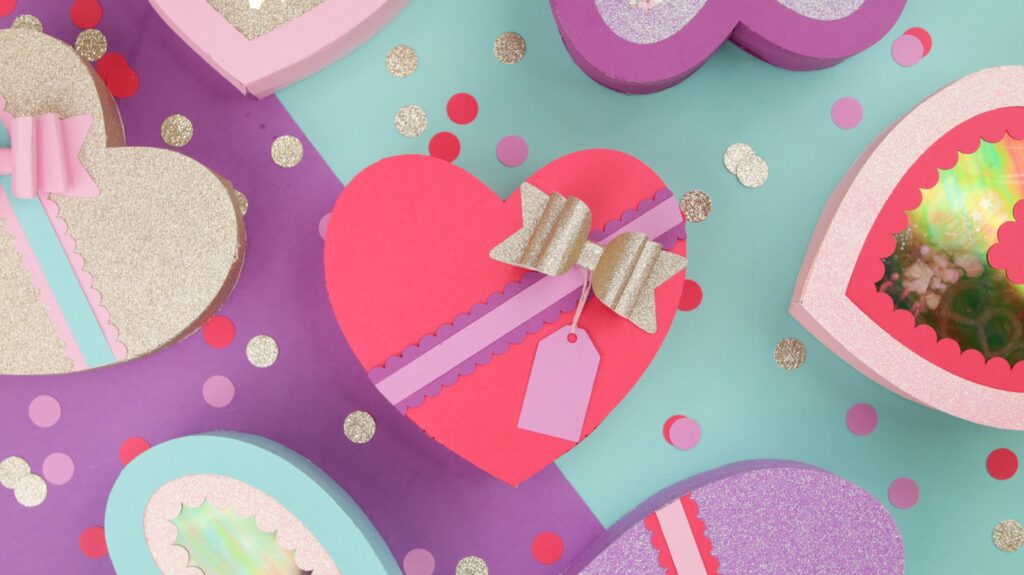
Look at all of those pretty little 3D valentine's heart boxes! I can hardly handle all of the cuteness.

Don't forget to post your finished 3D heart-shaped box on Instagram and use the hashtag #sweetredpoppy to be featured on my Instagram stories.
Join my Cricut, crafting and sewing Facebook group where you can show us what you’re making, ask questions, and learn from others!
Don’t want to forget about this project? Save it for later! Click here to save this pin to your favorite crafting Pinterest board!
Looking for even more Valentine's Day Cricut projects? Check out these other great posts!
- Valentine's Day Coffee Cup Gift Card Holder
- Valentine's Day Cricut Gift Boxes
- Felt Valentine's Banner
- Valentine's Tissue Paper Flower Shadow Box
- Free Valentine's SVG Files

The heart box is adorable, but I can't find the svg to download it
Right below the list of supplies needed there is a link to download the SVG files. You can click on the link or the graphic.
I was so excited to make these 3D heart boxes but it has been a total FAIL.
I made sure my pieces were "scored" but sadly, they are not cut. I am so STUPID that I cannot figure out HOW to make these silly boxes. Directions leave a lot to be desired. No Valentine's treats from me 🙁
Is there a video on how to assemble
I fill in the information to get the free svg but I didn’t get it to my email, what can I do to solve this problem?
Thank you so much