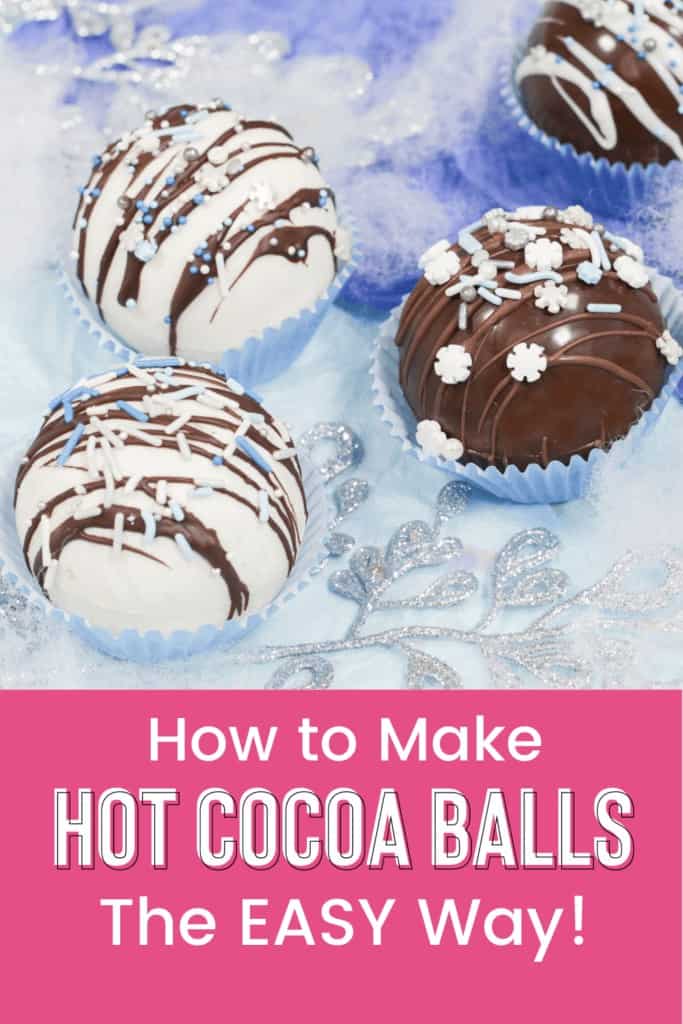
Learn How to Make Chocolate Hot Cocoa Bombs Filled With Hot Cocoa Mix and Mini Marshmallows.
Perfect for Creating a Delicious Cup of Hot Chocolate. Pour Steaming Milk Over the Top to Melt the Chocolate and Release the Hot Cocoa and Marshmallows.
Whether you’re looking for a unique gift for a coworker, a fun family night, or just looking to elevate your personal hot chocolate experience, these hot cocoa bombs are sure to be a hit.

When I saw these hot chocolate bombs go viral, I knew I had to try them out for myself. So, I ran to my local craft store and bought everything I needed to get started. After trial and error, I finally came up with a few tips and tricks of my own for creating the perfect hot cocoa bombs.
Table of Contents
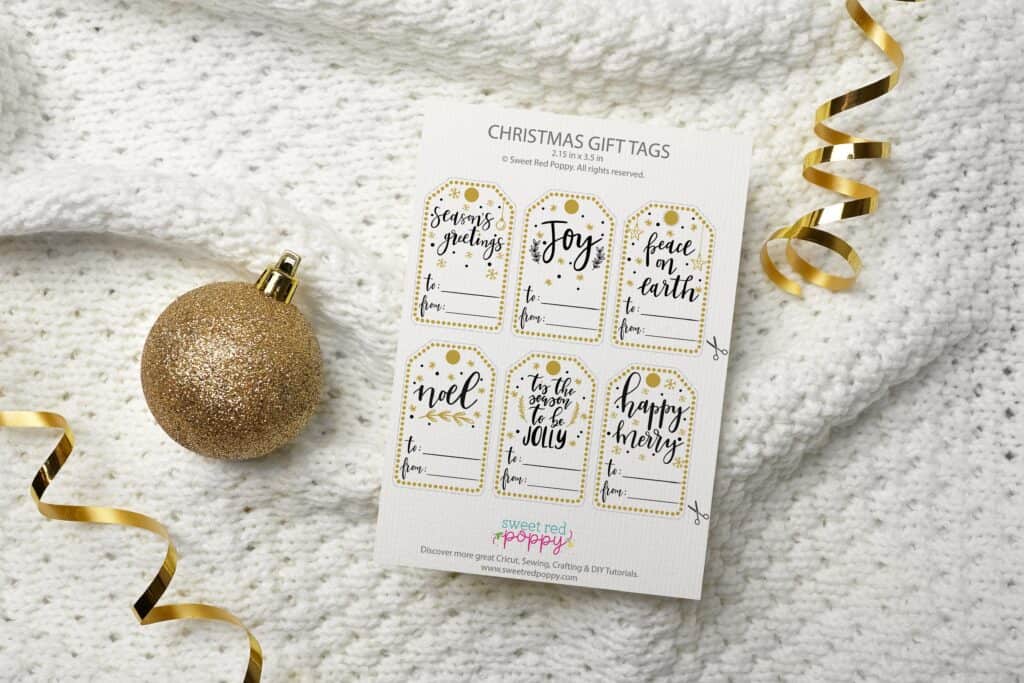
CLICK HERE TO PRINT OFF YOUR FREE PRINTABLE CHRISTMAS GIFT TAGS
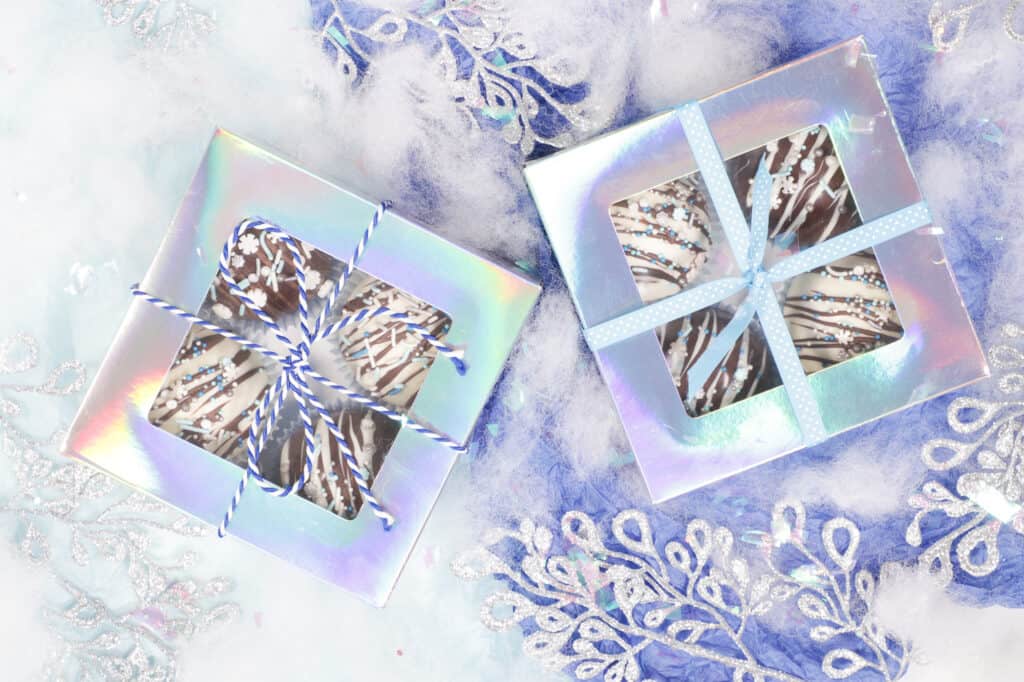
You can make these hot cocoa bombs into a Christmas gift by boxing them up and adding in my free Christmas Printable Gift Tags or Christmas Gift Tags with Your Cricut Machine!

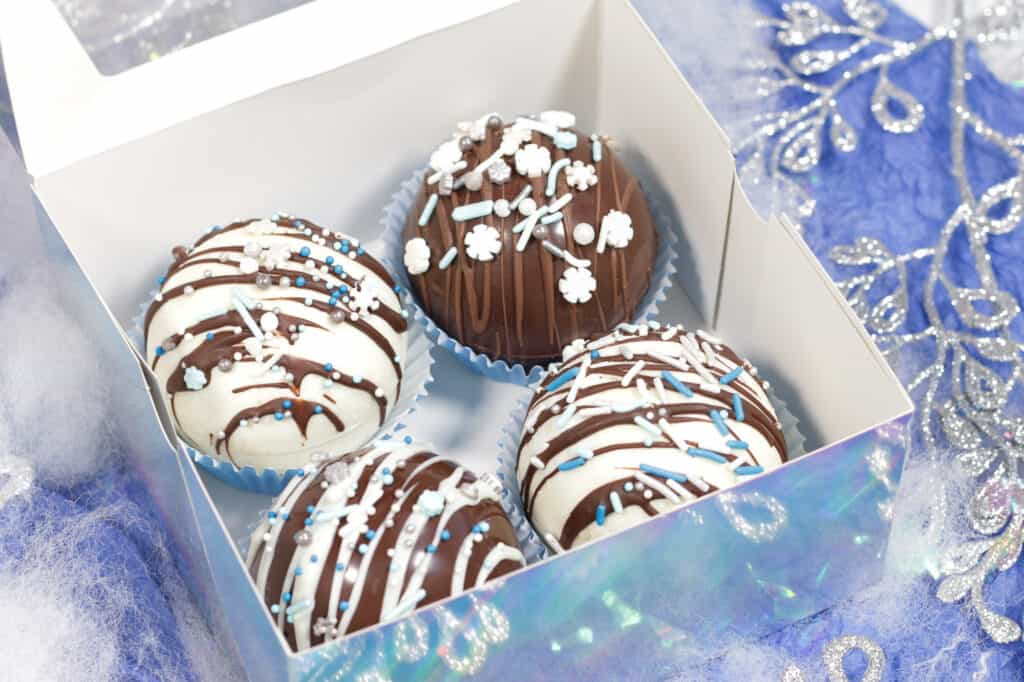
If you haven't seen these popular Hot Chocolate Bombs before let me explain them to you. They are chocolate spheres filled with hot cocoa powdered mix as well as marshmallows. When you place them in a mug and pour hot milk over them, the chocolate melts, and the hot cocoa and marshmallows release from the inside. Stir it up and enjoy a delicious cup of hot cocoa!

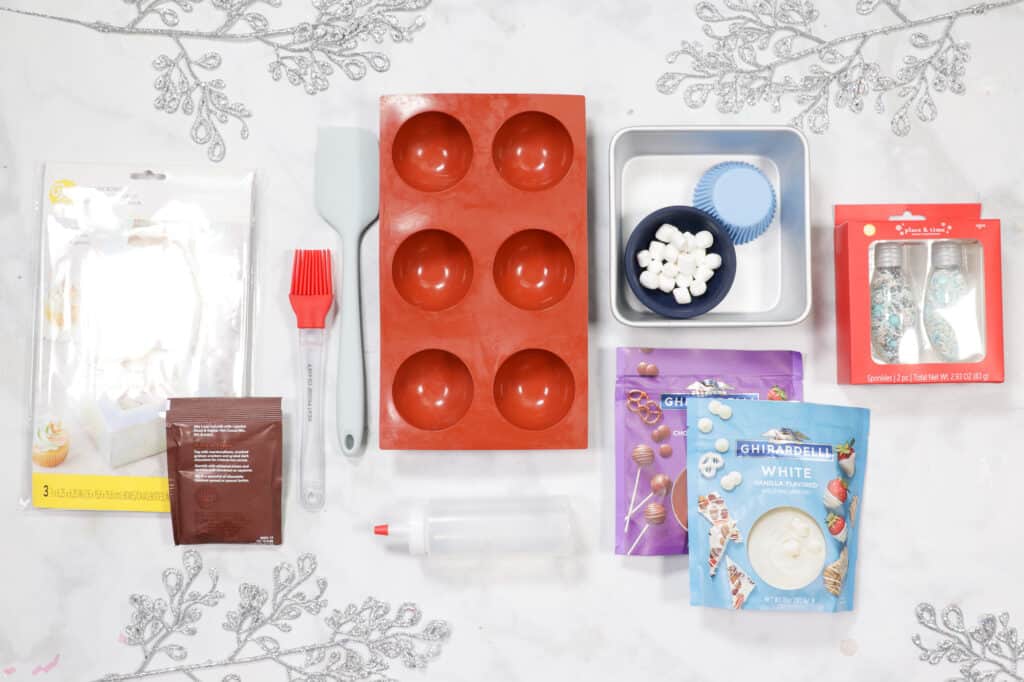
Hot Cocoa Ball Supplies
- 2.5” Half Sphere Molds
- Hot Chocolate Powder
- Marshmallows
- Chocolate Melting Wafers (White)
- Chocolate Melting Wafers (Milk)
- Wilton Squeeze Bottle
- Silicone Basting Brush
- Spatula
- Microwave Safe Bowl
- Hot Pan
- Sprinkles (Optional)
- Gift Box (Optional)
- Free Printable Gift Tags
Let's get started!
CLICK HERE TO PRINT OFF YOUR FREE PRINTABLE HOT COCOA CHRISTMAS GIFT TAGS

Step 1: Prep the Chocolate Shells
To begin, melt your chocolate melting wafers. While you can use any chocolate, I like to use melting wafers since they don’t need to be tempered. Heat your melting wafers in a microwave-safe bowl for 15 seconds at a time (be sure to stir your wafers in between). I know it's easy to skip the 15-second increments, but please don't! You want to make sure to frequently stir your wafers to avoid burning them.
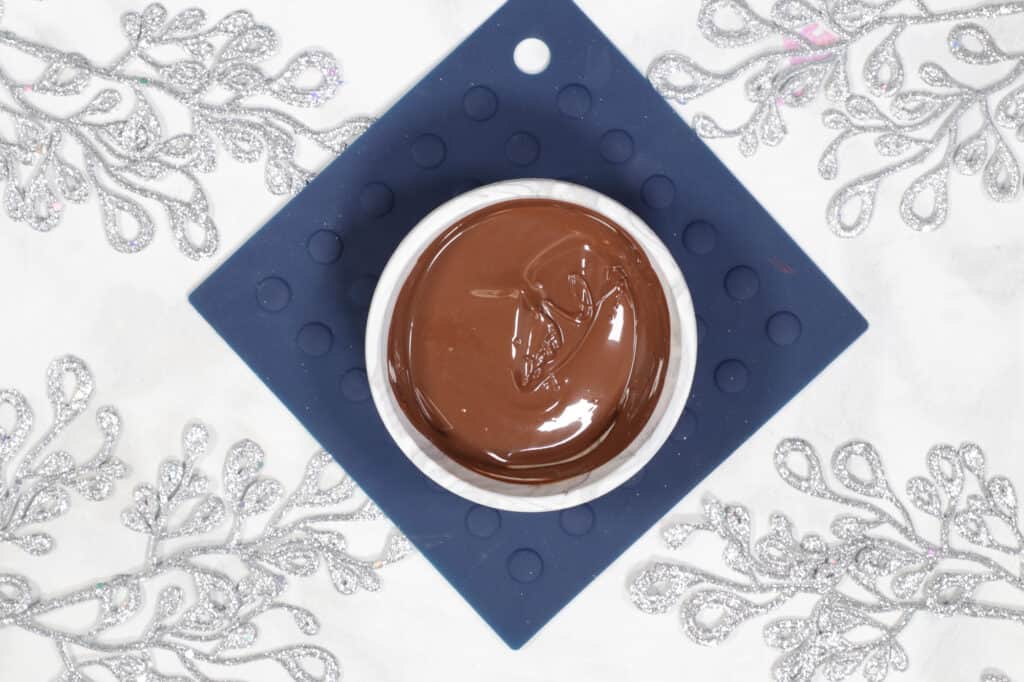
Scoop 1-2 tablespoons of warmed chocolate wafers into your mold. Using a silicone basting brush, evenly coat the interior of your mold with the melted chocolate. Make sure to bring your brush all the way up to the top of the mold, adding more chocolate as needed. You'll want to check the mold from multiple different angles to ensure that you've coated all sides of the sphere.
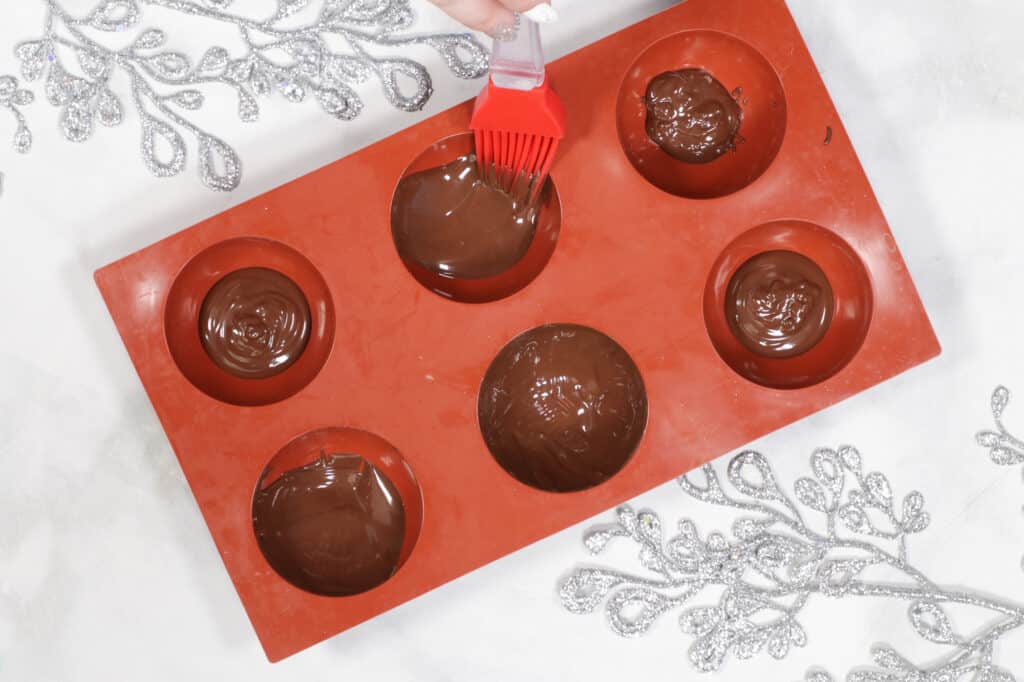
Let your molds cool slightly and flip them upside down. This will prevent the bottom from having a flat appearance and give you a nice smooth shell. To avoid streakiness or spottiness make sure to place them in the freezer for a couple of minutes to cool completely.
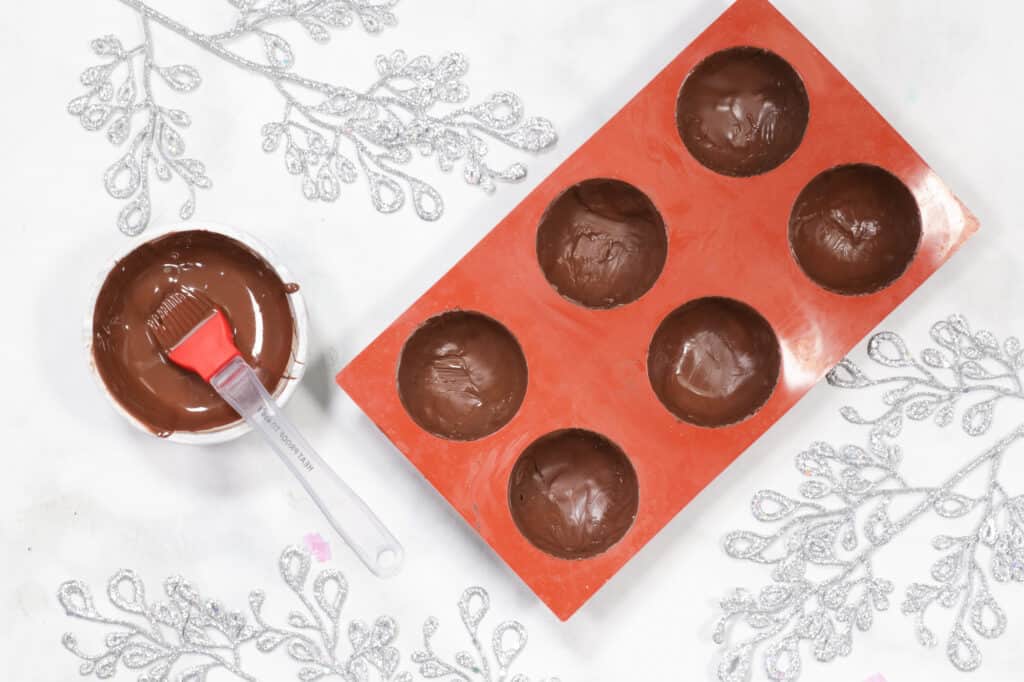
Once the chocolate has completely cooled, reapply warmed chocolate around the rim of the mold. If you can see through the chocolate to your base, your shell is too thin.
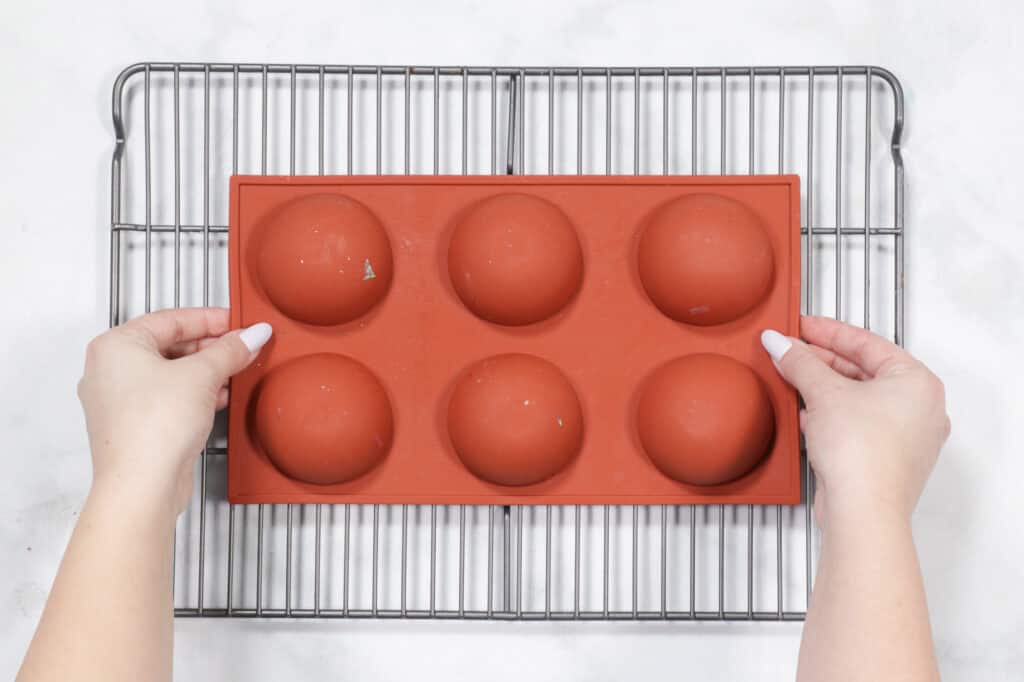
Once your molds are ready and completely cooled off, carefully remove the chocolate shells. Do this by peeling the mold away from the chocolate shells.
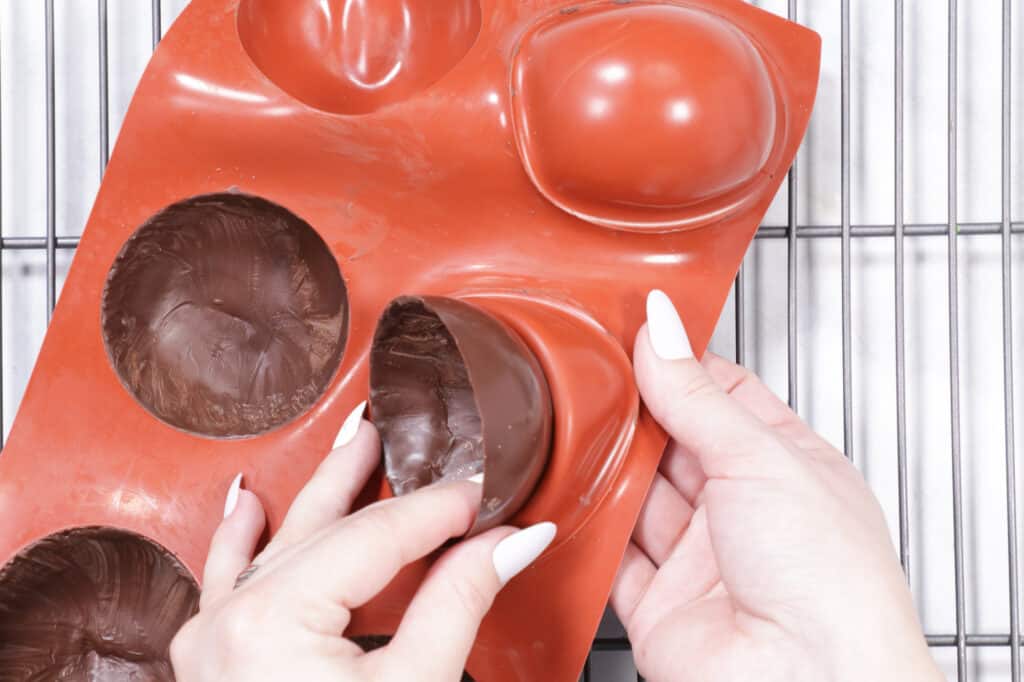
You'll want to go nice and slow to avoid breaking the chocolate. If your chocolate breaks along the top rim you'll want to create a thicker shell to give the chocolate more support.
Step 2: Fill and Assemble Shells
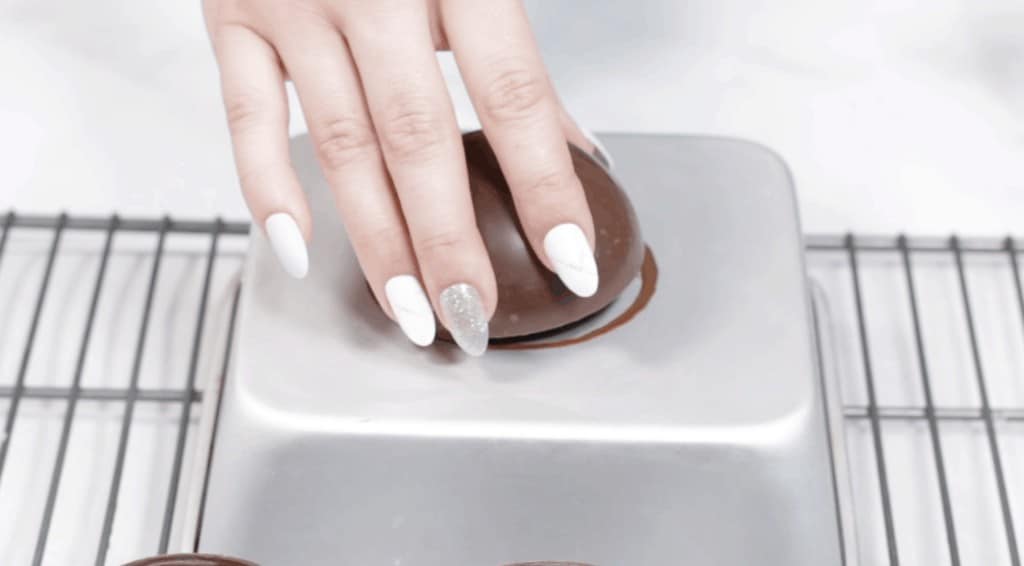
Heat up a saucepan or baking sheet on low heat.
Take one half sphere and lightly press the rim of the sphere against your warm pan for a few seconds. This ensures your shell has a smooth edge.
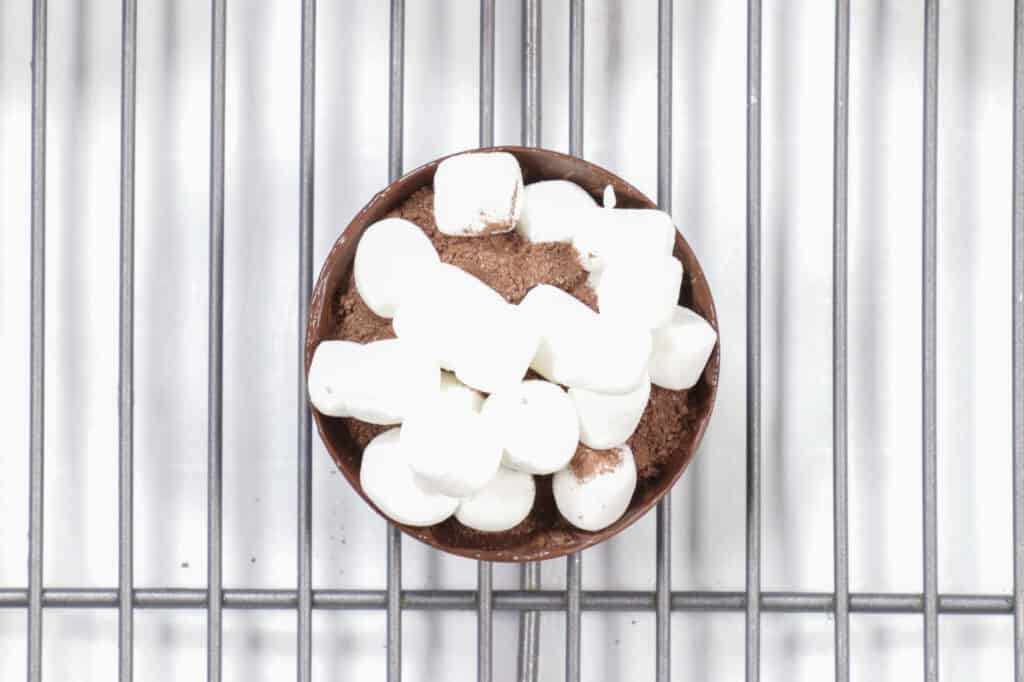
Now it's time to add your filling! While I like a classic hot chocolate with marshmallows, feel free to add any fillings you wish! You'll want to add 1-2 tablespoons of hot cocoa to your sphere. Fill the remainder of the sphere with marshmallows. I like to stack them upwards in the center of the sphere.
Next, take another half sphere and quickly melt its edges on your hot pan.
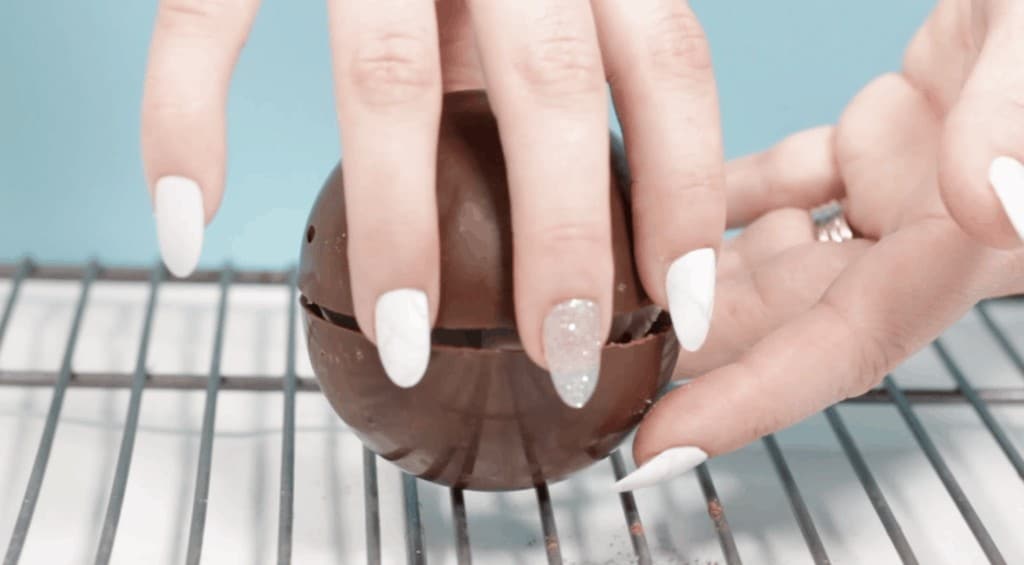
Line up the two half spheres and gently press them together. I find it's easiest to do this by making sure the chocolate is at eye level so you can see if the spheres are aligned or not. Be carefully not to hold onto the chocolate for too long or it will begin to melt!
The warm chocolate acts like glue to secure the half spheres together. While the chocolate is still warm, ensure that the entire edge has been sealed together so that the hot cocoa doesn't leak out of it.
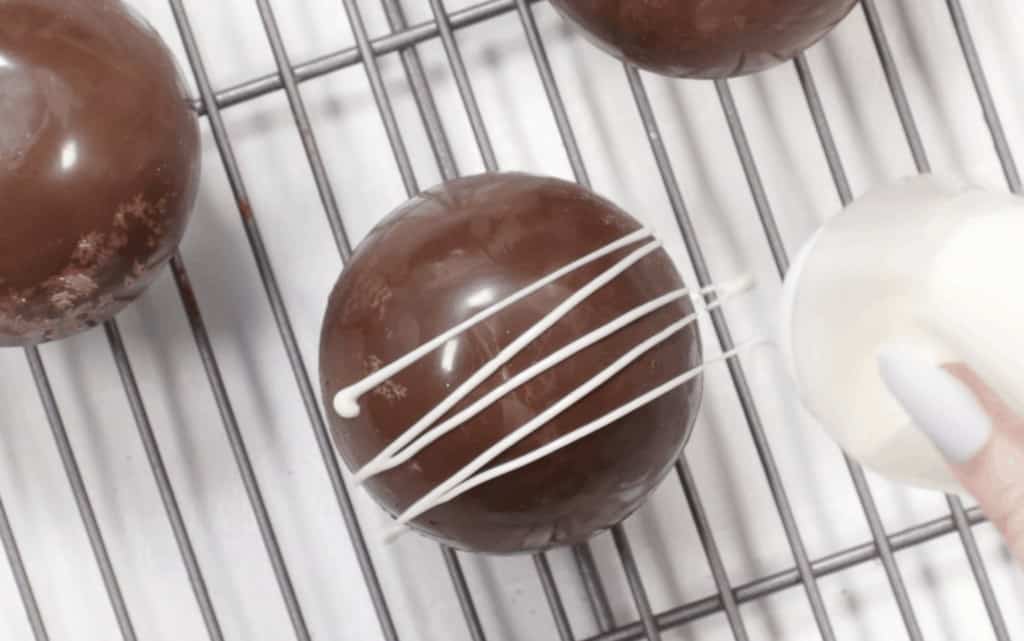
Step 3: Decorate (Optional)
Warm white chocolate melting wafers in a squeeze bottle. Complete your hot cocoa bombs with a chocolate drizzle and add in some fun winter sprinkles.
Hot Cocoa Ball Troubleshooting
Streaky Chocolate - If you are using real chocolate make sure to temper your chocolate. If you are using chocolate wafer melts, make sure to allow the chocolate to harden inside of the fridge for 3-5 minutes.
Fingerprints - Wear a tight pair of rubber gloves while working to prevent any fingerprints.
Cracking - Make sure to coat the chocolate mold two times to build up a solid layer of chocolate to prevent any cracking.
Personalize Your Hot Cocoa Bombs
Sea Salt & Dark Chocolate - Use a Dark chocolate wafer as your base and sprinkle coarsely ground sea salt on top of the hot cocoa bomb.
Peppermint - Chop up a candy cane and add it to the inside and outside of the hot cocoa bomb for a minty twist!
Mexican Hot Chocolate - Just a dash of cinnamon will add some kick to your hot cocoa!
Mint - Add a few Andes Mints to the inside of your hot cocoa bomb for a minty fresh taste!
CLICK HERE TO PRINT OFF YOUR FREE PRINTABLE HOT COCOA CHRISTMAS GIFT TAGS
Don’t want to forget about this free template? Save this project for later! Click here to save this project on Pinterest.

Wow... you really do make it look and sound easy. I avoided trying my hand at making these because it just seemed to be too much work. Thank you for sharing your method... I will have to try making some of these with a Valentine's Day theme / sprinkles!
Great thought! I hope they come out great!
What kind of cocoa powder?
Any hot cocoa mix works - Swiss Miss, Nestle, or you can make your own.
Can you tell me where to buy the 2.5 sphere mold?
Thank you so much for any help.
choosing JOY,
Vicki
My granddaughter made them and gave them as gifts. A little too sweet for us.
Shirley Brodir - increase the amount of hot water or milk. The ones I was given were the same way.
If you use an 8oz cup they are very rich; more for a 12 oz cup
We made these and for the melting of the rims, we used a dinner plate placed on a pan of very hot water. Once sealed and set, we ran the rim on the plate to get a nice finished edge.
nice idea for warming up a plate instead of pan!
thanks for the tip
Can these be made with chocolate chips?
Love these ones. I am willing to try them but I do not have a silicone mat although I have a metal one. But nlt sure if that would work .
Love these ones. I am willing to try them but I do not have a silicone mat although I have a metal one. But nlt sure if that would work .
The reason why people use a silicone mat instead of metal it doesn't bend away from the chocolate. The chocolate is thin and will break easy if you try to remove it from the pan instead of the removing the pan from the chocolate. I think you could use a metal pan, however I don't think it would work well.
Can anyone share where to buy the 2.5 there mold - Joanns does not have it - thank you so much.
choosing JOY,
Vicki
Amazon has them
Whoop, I meant "sphere" mold (2.5) size
My friend bought some of or amazon that I am going to borrow 🙂 They sell really nice ones on amazon.
Hope that helps
Thank you - I will take a peek - I just did not want to order the wrong size or poor quality product - happy cocoa making:)
JOY,
Vicki
What size box holds four bombs so neatly?
Hey Rebecca! You can find the iridescent boxes I used HERE!
Finally giving them a try. I used 2 T hot cocoa mix and still very sweet; think I will try 1 T and stick with 8oz milk to see if that is less sweet; both my 15 yr. old twin girls said it was too sweet also. Fingerprints were an issue; I’ll try the gloves next round & I love your suggestion of adding more chocolate after the first “freeze” to make sure they are thick enough. Is there a way to keep the melted chocolate soft while working with the balls?
How far in advance can these be made?
Can these cocoa bombs be made several days ahead? I have a Christmas market coming up this weekend and need to prep some ahead of time. How far in advance can these be made? I would be using chocolate melting wafers. Thanks