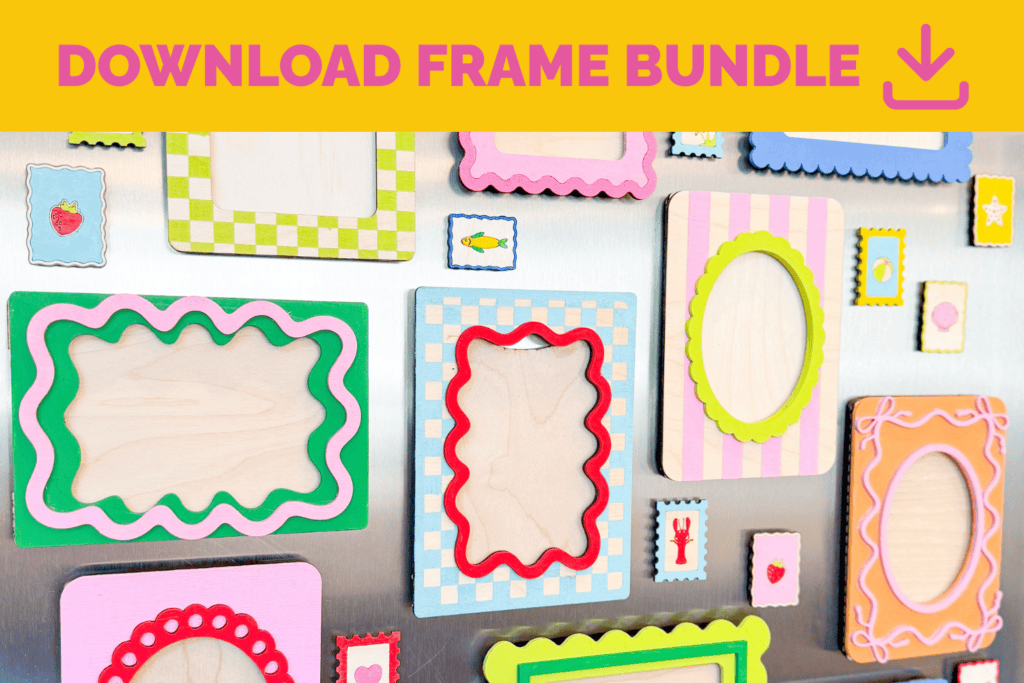
Download the FREE Picture Frame SVG Bundle in this blog post and get 20 frames, plus 20+ toppers to create a DIY Photo Frame!
If you’re looking for a fun and creative way to display your favorite memories, you’ll love this DIY project!
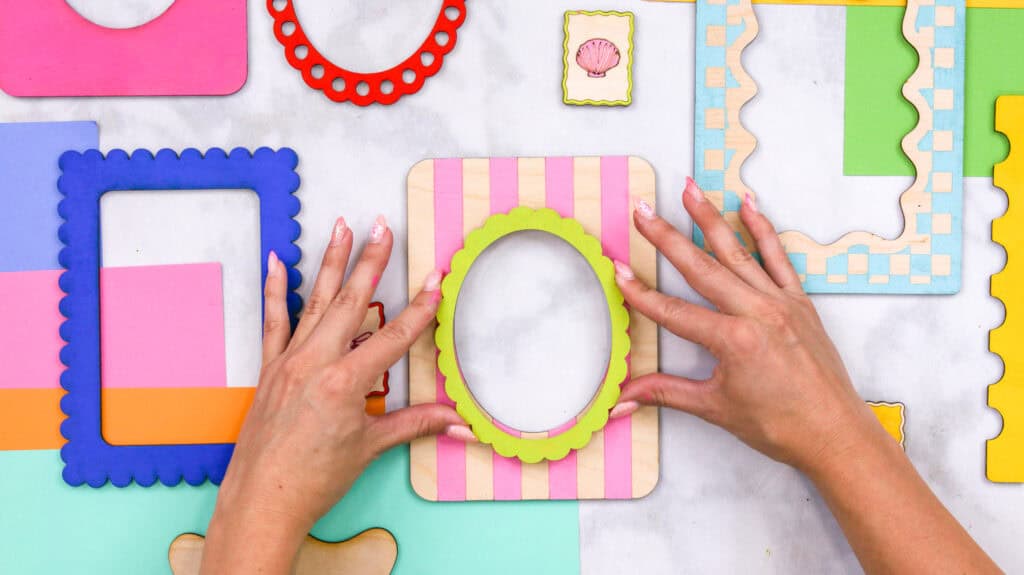
In today’s post, I’m spilling the secret to making these gorgeous one-of-a-kind frames. Choose from over 20 different frames with tons of interchangeable pieces to help you create your own personalized frame.
Use these frames as gifts for loved ones or display them on a fridge, locker, or display stand. I hosted a live video that walks you through the entire process. Click here to watch the live video on YouTube.
Grab your cutting machine or laser, download the free file bundle, and get busy crafting an unforgettable project!

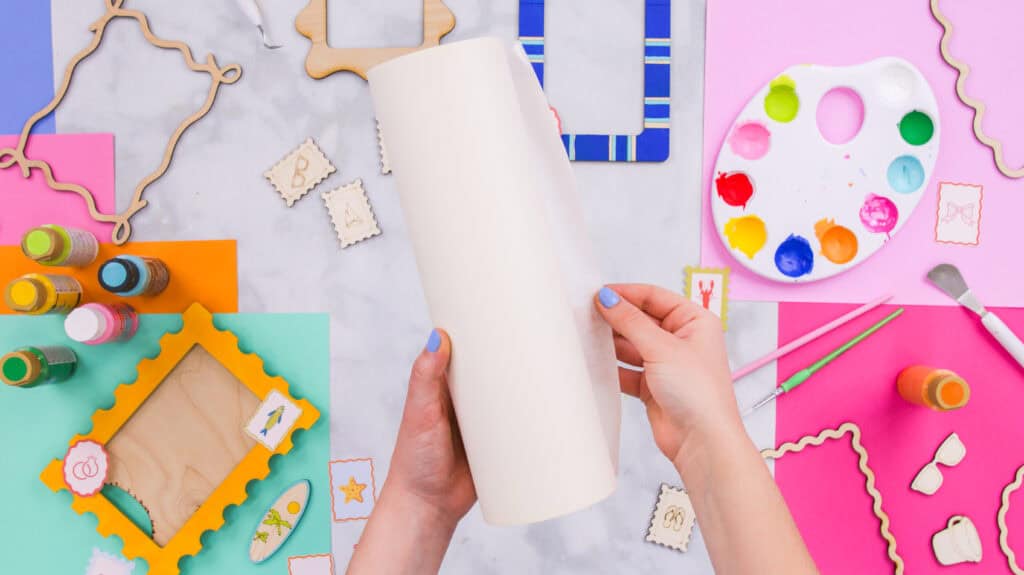
To make this project, I used the same photo frame base I used to create the DIY Father's Day Magnetic Photo Frame, which you can check out here!
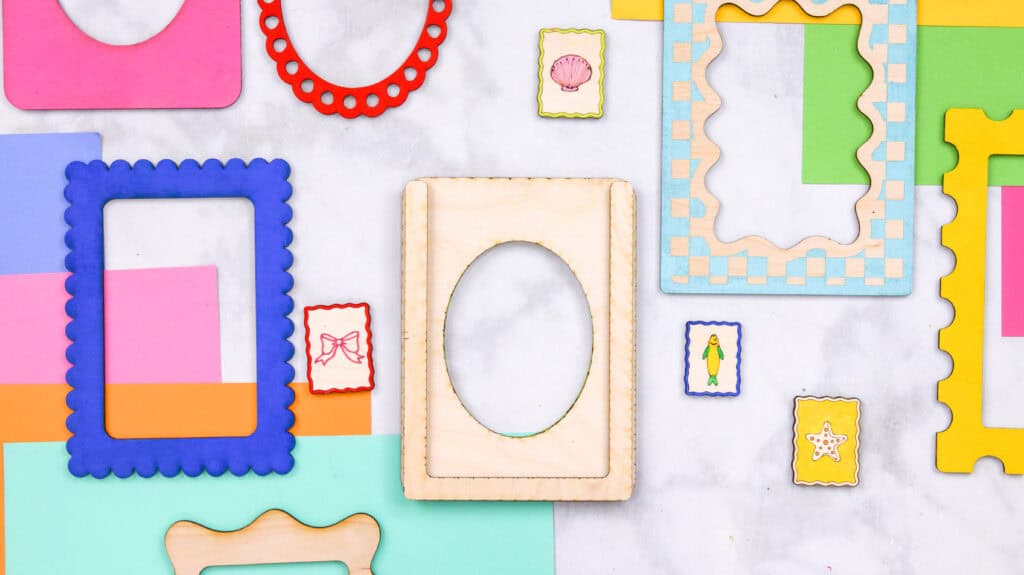
I created this project with a summer vibe of postcards and stamps in mind. The bundle includes trendy interchangeable frames, postage stamps, and other toppers that have summer elements.

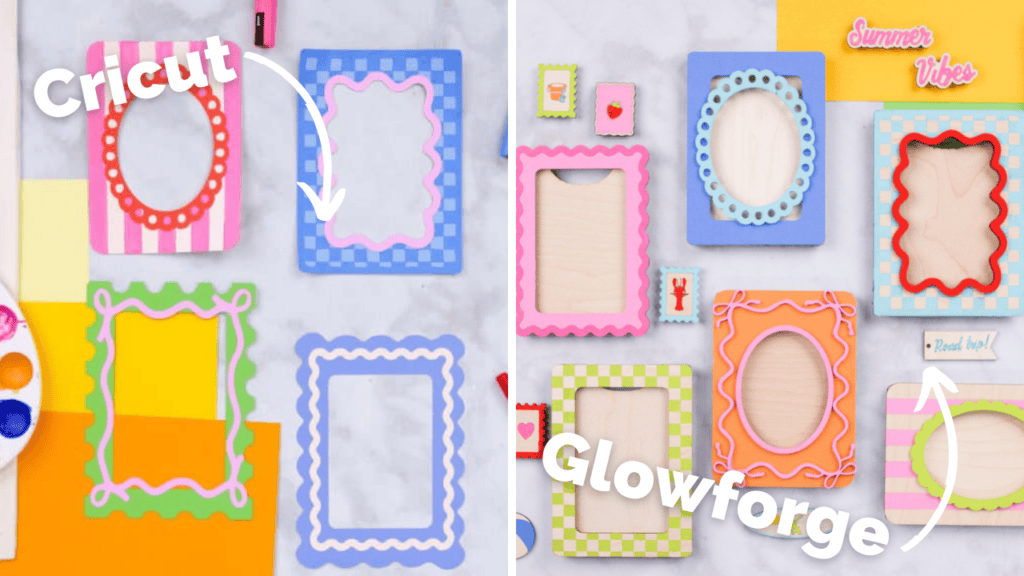
In this blog post, I'm going to go over how to cut these designs out using my Glowforge Pro machine, but I will also share tips, ideas, and material recommendations for both laser and Cricut machines.
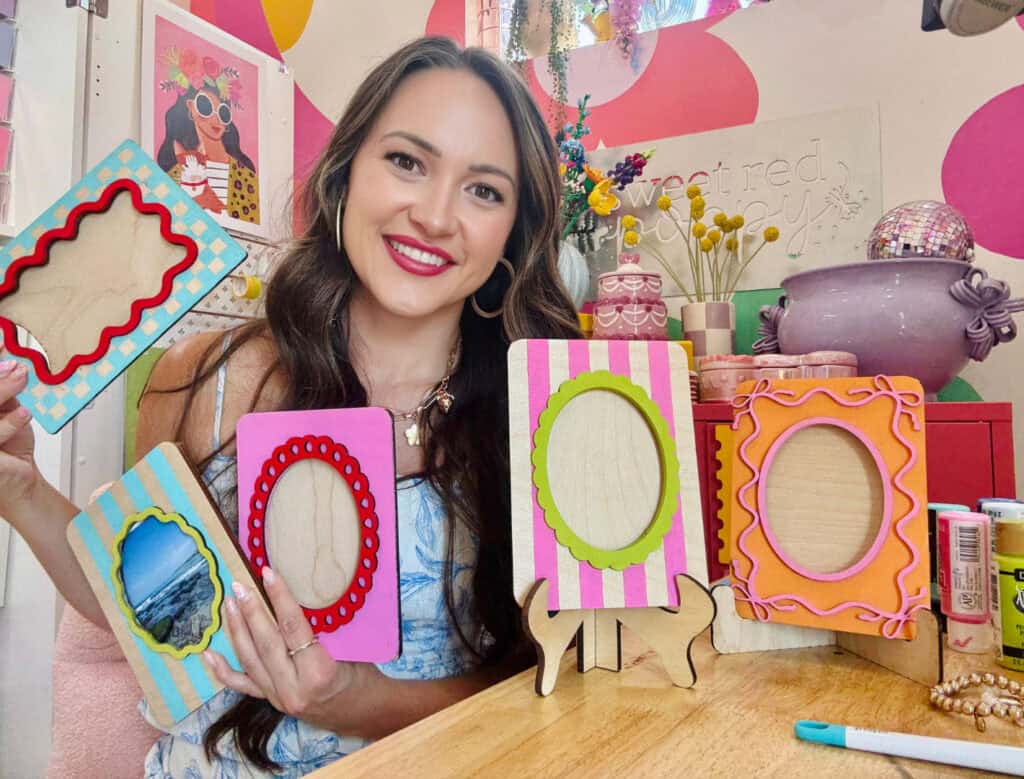
Table of Contents
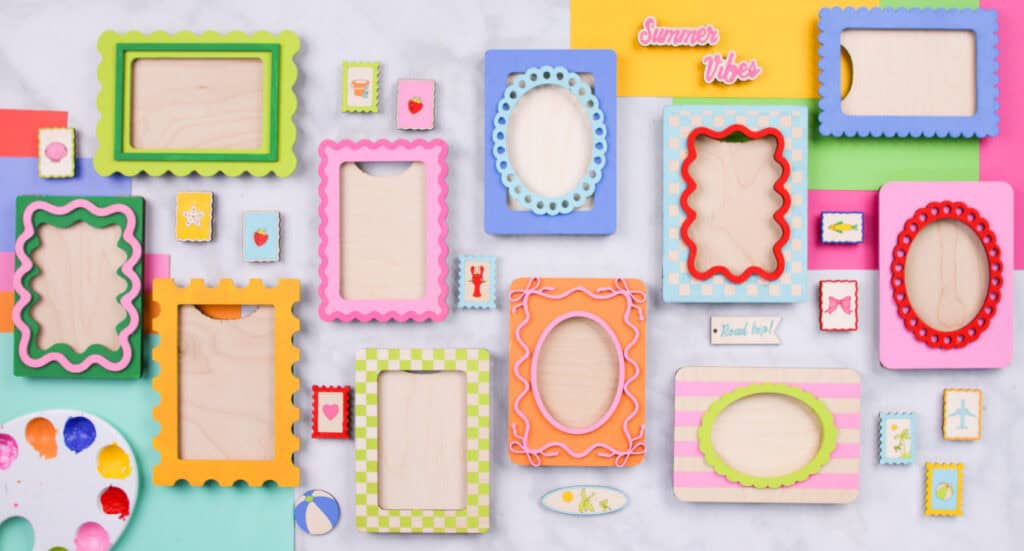
What's Included in the Bundle?
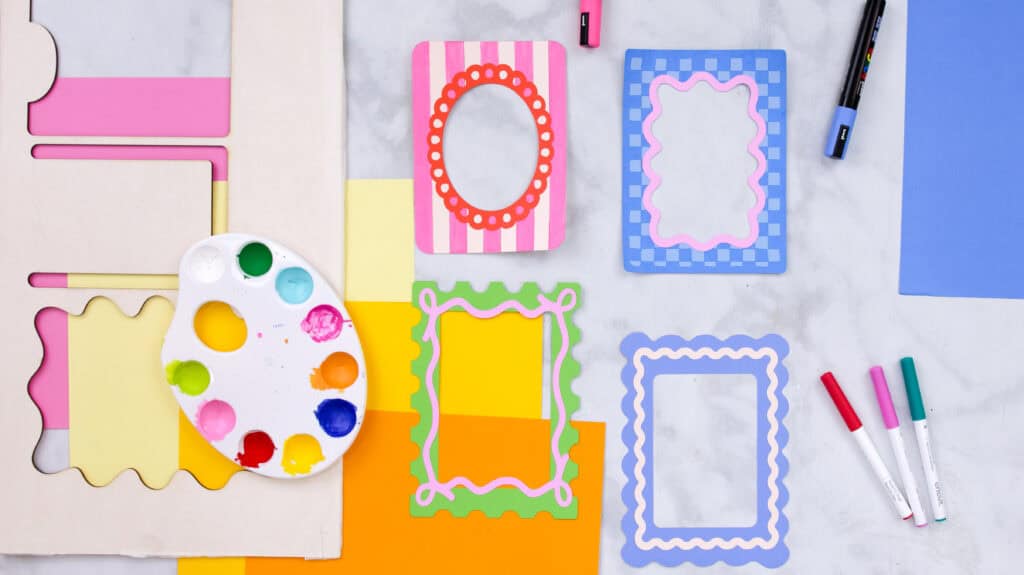
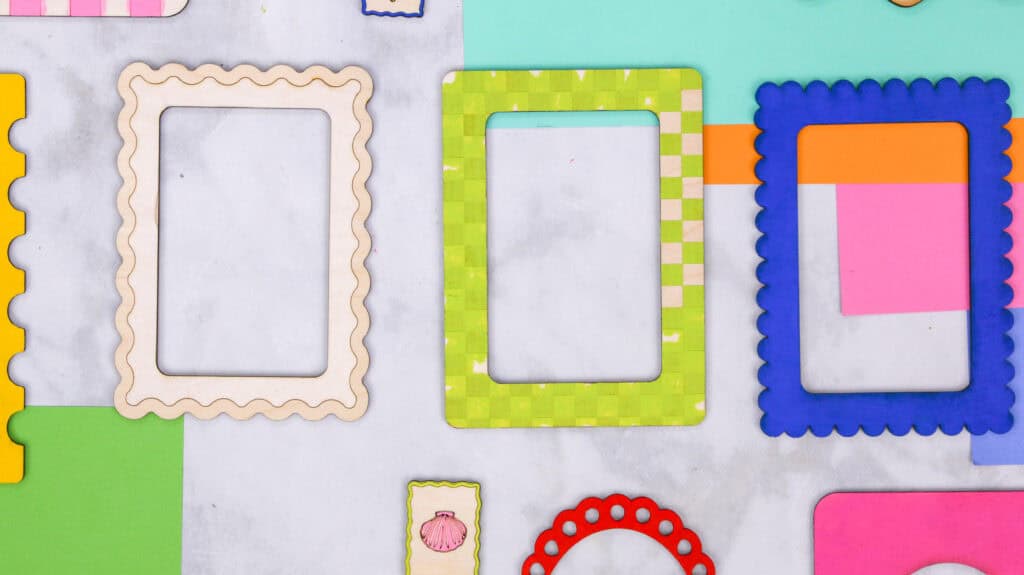
Included in the bundle are 20 frames in a variety of different shapes and patterns. Some are checkered, circular, and abstract, and some are more traditional.

The bundle includes:
- Laser and Cricut SVG files
- A PDF file
- Printable step-by-step photo instructions
- Photo Frame Base
- 10 interchangeable frames
- 10 Accent Frames
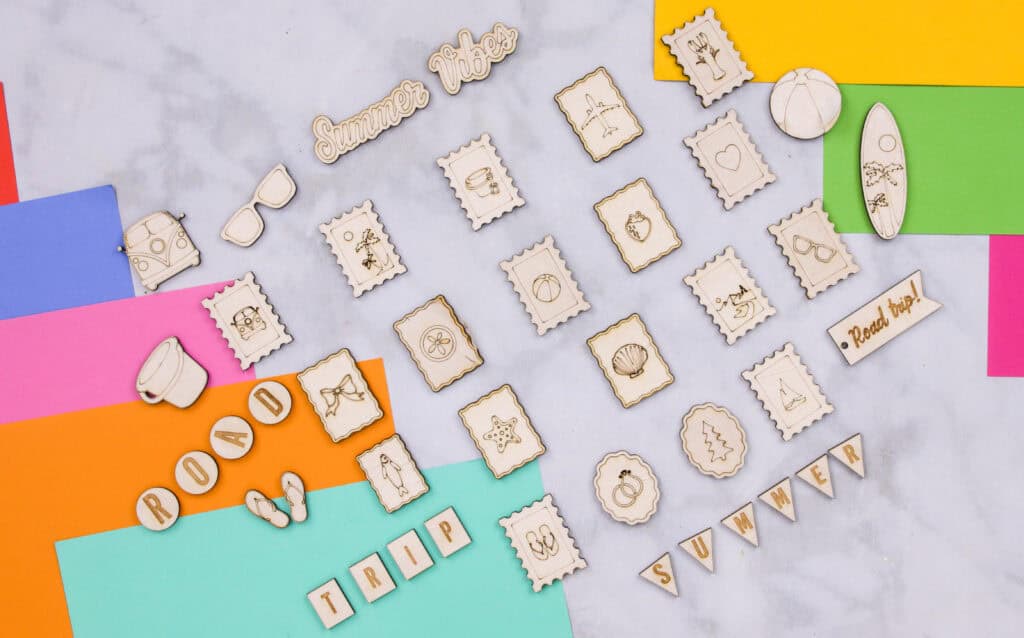
- 19 Postage Stamps
- Summer toppers
The summer toppers file includes a:
- Surfboard
- Beach ball
- VW
- Sand Bucket
- Flip Flops
- Sunglasses
And phrases: "Road Trip," "Summer," and "Summer Vibes."
Download The SVG Bundle Here!
Inspiration
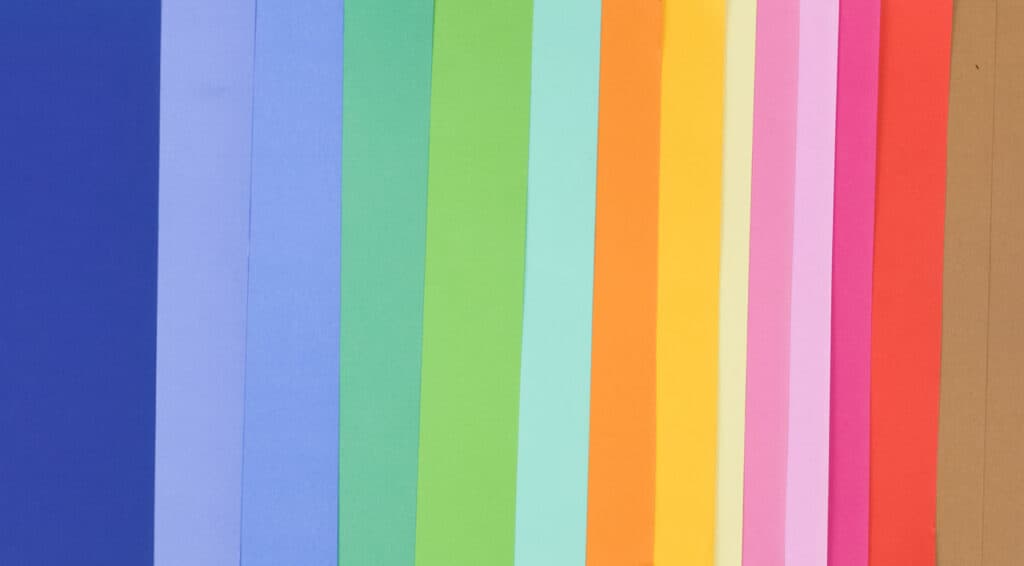
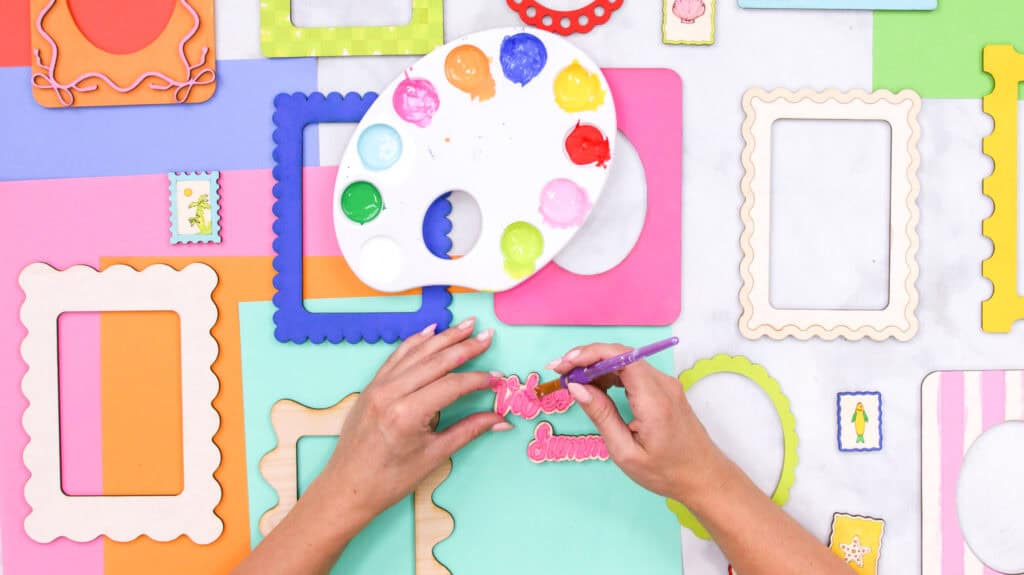
This summer, I'm seeing a ton of bright and bold primary color schemes being used in decor, fashion, and the crafting realm. And, I'm obsessed! For this project, I painted my frames with bright reds, pinks, oranges, yellows, greens, and for contrast, I used dark blue.
When I think of summer, I think of the beach, fresh fruits, and road trips. That's why many of the postage stamps feature summer elements like a beach ball, palm trees, and strawberries.
What are the Files Compatible with?
The bundles include SVG and PDF files for laser cutters and Cricut SVG files. The Cricut SVG files are also compatible with Silhouette and other cutting machines.
If you don't have an automatic cutting machine or prefer to cut by hand, you can print out the PDF that includes the photo frame base, stand, and banner templates to cut and trace onto the material you plan on cutting.
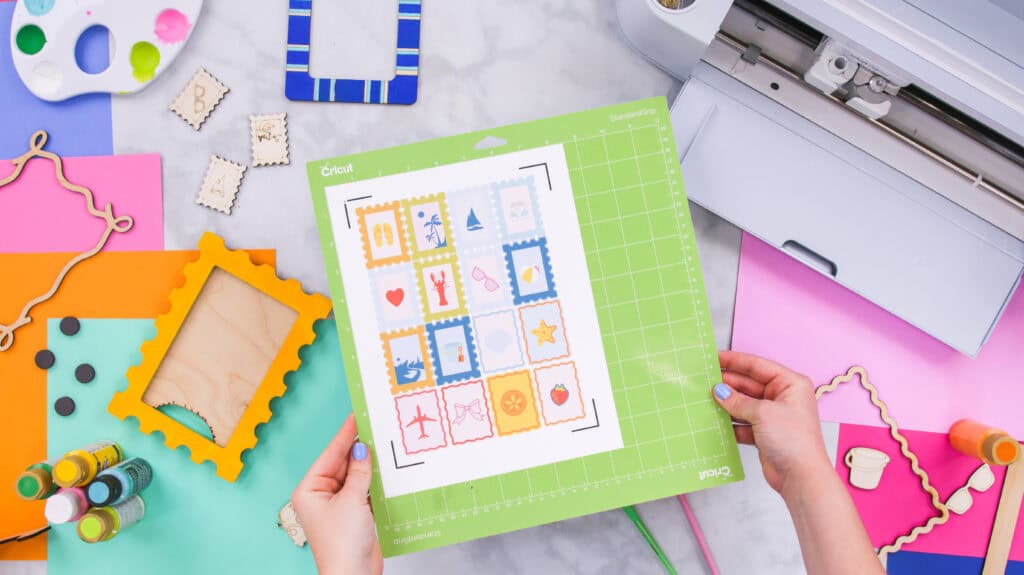
If you use Cricut Design Space, you can use the Print then Cut feature to print out the postage stamps or other toppers and let the Cricut cut the designs out for you. I'll go over exactly how to do this below.
Recommended Materials
If you're cutting this project with your Glowforge or other laser cutting machine, I recommend using 1/8 inch material. I cut this project from 12 x 24-inch sheets of 1/8-inch unfinished Birch, which I painted in a variety of different colors.
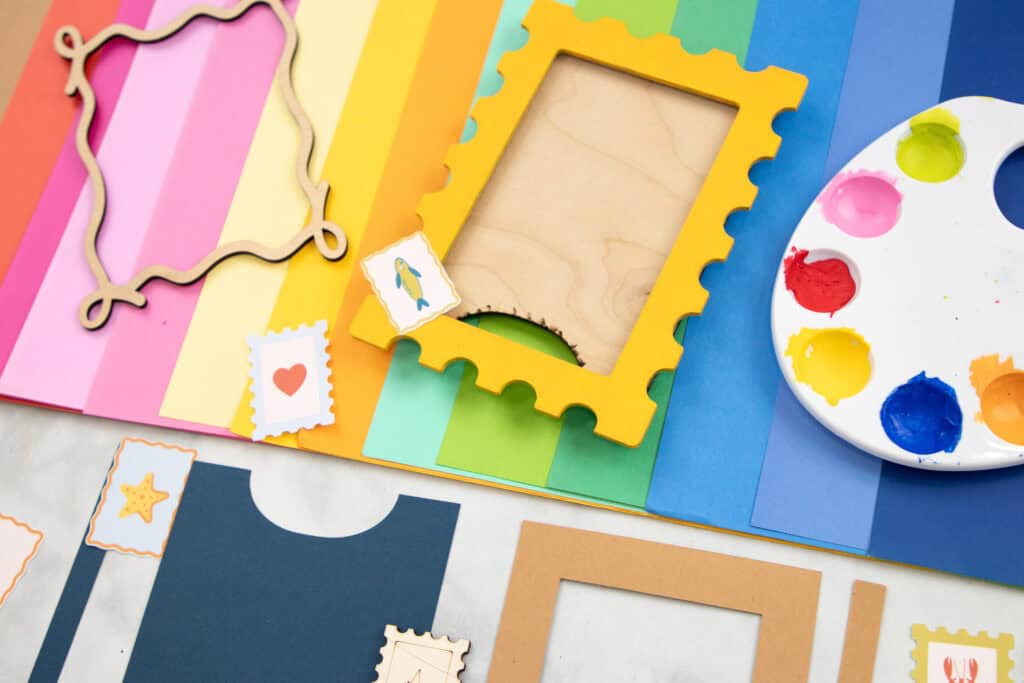
If you're not using a laser cutting machine, I recommend cutting the frames out of chipboard, Kraft Board, or Cricut Basswood if you want the base to be sturdy. The other pieces can be cut out of a light material such as 65lb or 80lb cardstock.
I cut the cardstock and chipboard with my Cricut Maker 3. If you plan on cutting chipboard with your Cricut, don't forget to load a Cricut knife blade into your machine and apply tape to all sides of the material after placing it on a StrongGrip Mat.

However, you can cut the frames out of cardstock if you'd like they just won't be as sturdy! Here's a photo of the frames I cut out of cardstock below. I had a lot of fun picking and choosing colors for each frame!
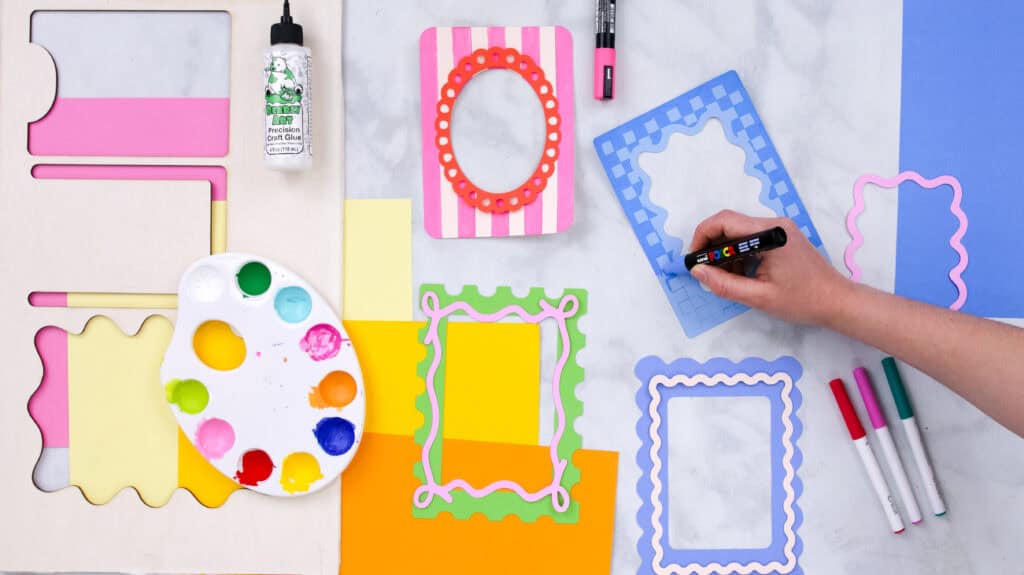
For the patterned frames, I changed the patterned layer from Basic Cut to Pen in Design Space. I then colored within the lines with a Posca marker and glued my pieces together with Bearly Arts Glue.
An idea would be to print the postage stamps or other toppers onto a sheet of Printable Vinyl with a white base. I recommend doing this because these designs are pretty intricate, especially if you're cutting them out with a Cricut machine, and having to glue them together could be a little tedious.

How to Print Then Cut on Cricut
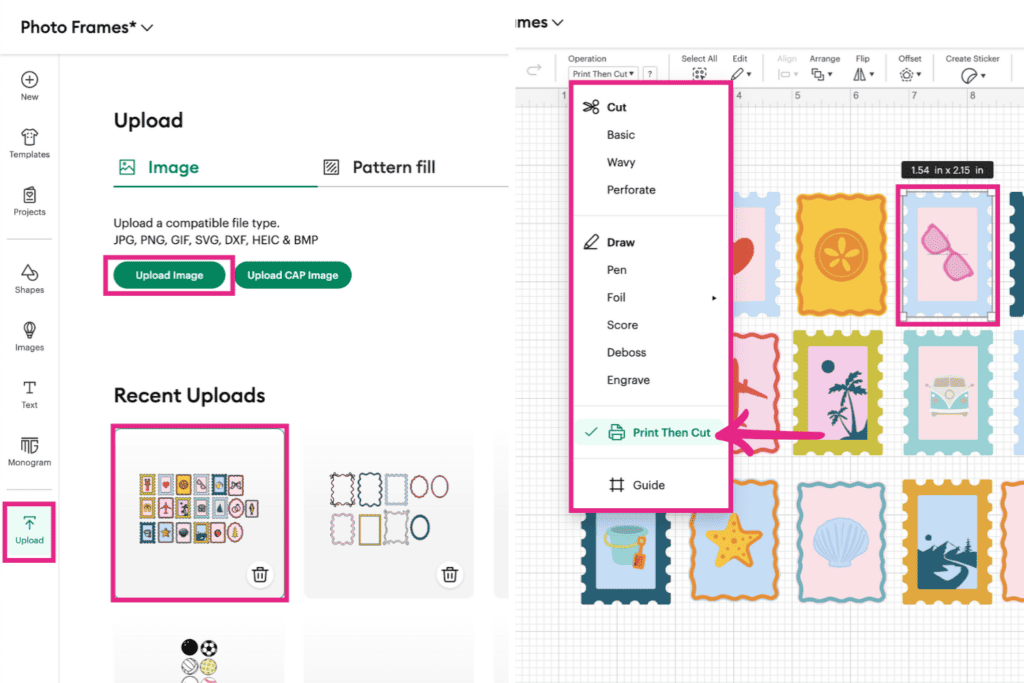
To print then cut, create a new project in Design Space, click "Upload" in the design bar to the left of the canvas. Upload the design into your Design Space canvas by clicking "Upload Image" and "Browse."
From the Cricut Files folder, select the Postage Stamps SVG file, open, continue, name the design, then select upload. The design should now be uploaded to your canvas.
Select the group of postage stamps and change the operation from Cut to Print then Cut from the top toolbar.
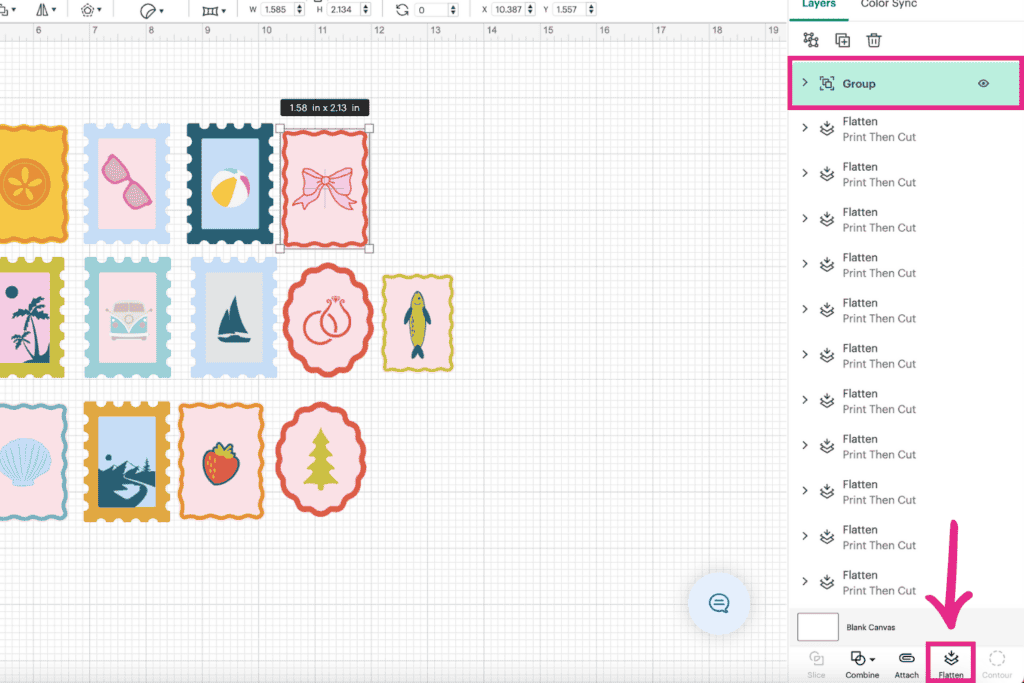
Select the group in the layers panel and click the Ungroup icon or use the keyboard shortcut Cmd+Shift+G (Mac) or Ctrl+Shift+G (Windows).
Click on one of the postage stamps and click Flatten at the bottom of the layers panel to make each group a single flat layer. Feel free to change the colors of the postage stamps to match the aesthetic you're going for! Repeat this step for each stamp.
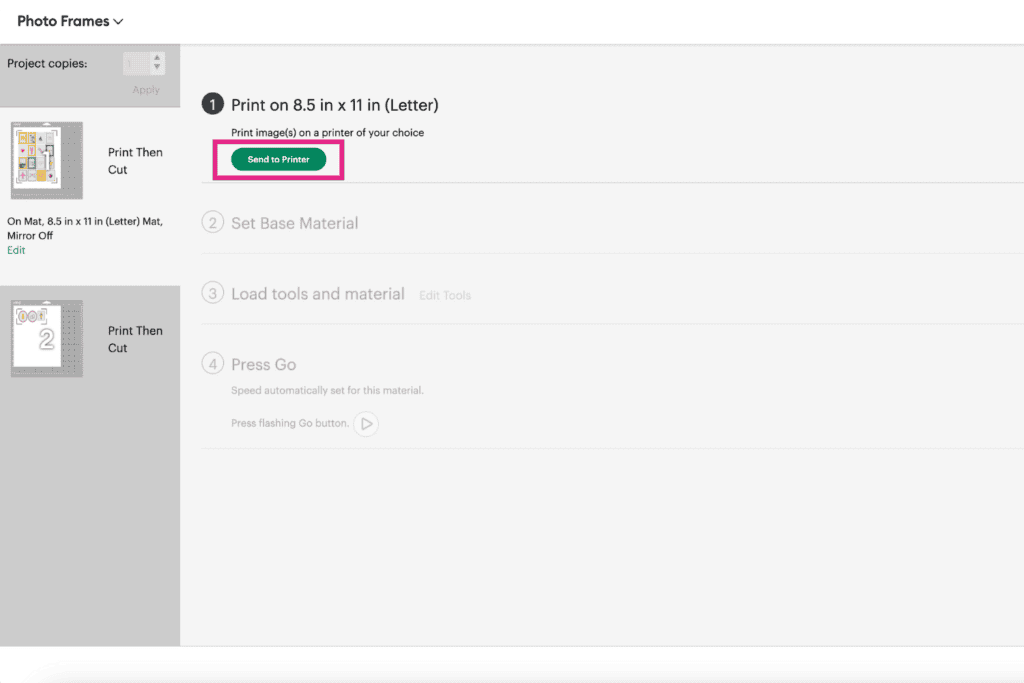
Go ahead and click "Make" in the top right corner of Design Space once you're ready, select "Continue," and send the image to your printer. (I go over print settings below.)
I'm using my Cricut Maker 3 and Canon Pixma TS9521C to make these postage stamps.

Set your base material and load your tool into you Cricut machine.
Place the printed image in the top left corner of a Standard Grip Cricut Mat, load it into your machine, and press the play button. When the machine is done cutting, unload it, and use the designs as stickers or glue them directly onto your frame.
Learn everything you need to know about Print Then Cut here, or for an updated version by Cricut, click here.
Print Settings
When printing out any of these designs, I always recommend these print settings to get clean, bright, and professional-looking prints.
In the print settings, set "Feed From" to "Rear Tray," "Media Type" to "Photo," and "Quality" to "Best.

Cutting Guide
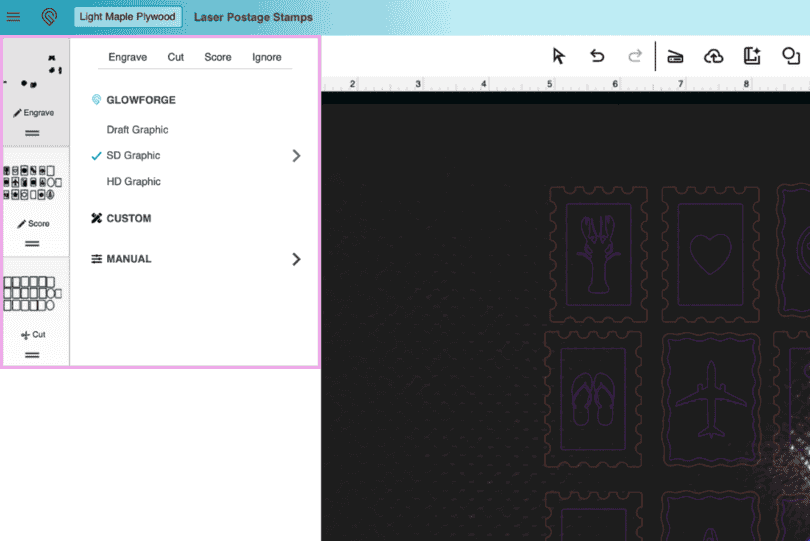
If cutting these designs with a laser cutting machine, the laser files are made up of red lines, blue lines, and purple lines. The cut lines are red, the score lines are purple, and the engaves are blue.

Cut settings I used to cut Light Maple Plywood on my Glowforge Pro:
- Score
- Speed: 420
- Power: 21
- Passes: 1x
- Cut
- Speed: 200
- Power: 99
- Passes: 1x
- Engrave
- Speed: 899
- Power: 95
- LPI: 270
- Passes: 1
Let's Get Started
To get started, let's go over the supplies you will need to create this project.
Supplies Needed
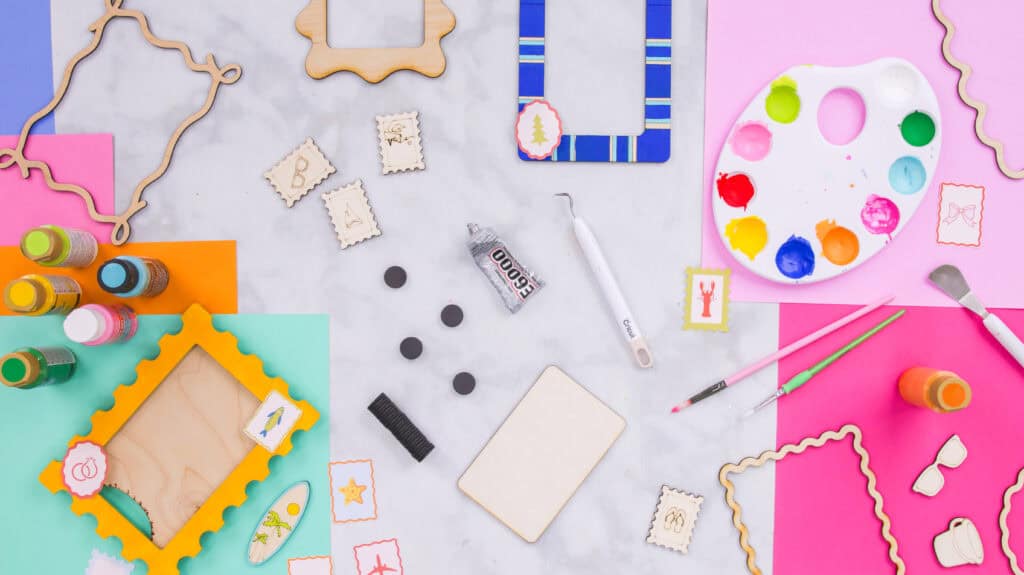
For this project, you will need:
- Laser cutting machine or Cricut machine
- 12 x 20-inch Sheets of 1/8 inch Birch Plywood- 3 frames fit on one sheet of material
- Acrylic Paint- I used paints from Americana, FolkArt, and Craft Smart
- Paint brushes
- E6000 Glue
- Craft Magnets
- Weeding Tool
Optional Supplies:
- POSCA Markers
- A variety of 65 lb or 80 lb cardstock
- Cricut Printable Vinyl
- Chipboard, Kraft Board, or Cricut Basswood
- Transfer Vinyl
- StandardGrip Mat
- Knife Blade- If cutting Chipboard or Kraft Board with your Cricut
- Bearly Arts Craft Glue
Step 1: Upload
I'm going to cut out these designs using my Glowforge Pro and the Glowforge App. To upload, go to app.Glowforge.com and select Create a New Design and Upload a File.
Step 2: Cut out Designs
Once you've uploaded your designs to the software, insert the material into your machine, manually select the material you're using in the app, and change the cut lines to score lines in the layers by clicking on each layer.
Tip: Make sure your score and engrave layers are above the cut layers. This will tell your machine to score or engrave first before cutting. To do this, click and drag the layers above the cut layers.
Select "Print" in the top right corner of the screen.
Step 3: Paint
Pro Tip: If your cut pieces have transfer vinyl, peel away only the parts you want to paint. This way, you'll get clean blocks of color on your frames and toppers when you peel the vinyl away once it dries. I recommend this specific transfer vinyl.
After cutting out the designs, it's time to paint! Grab some paintbrushes, acrylic paint, or Posca markers. I used a variety of acrylic paints from the brands Americana, FolkArt, and Craft Smart.
I used the colors Cobalt Blue, Ocean View, and Parisian Pink from Folk Art. From the Americana brand, I used True Red, Coastal Waters, Bright Yellow, Festive Green, and Citron Green. I also used the Pink Blast color from the Craft Smart brand.
Step 4: Assemble Frame
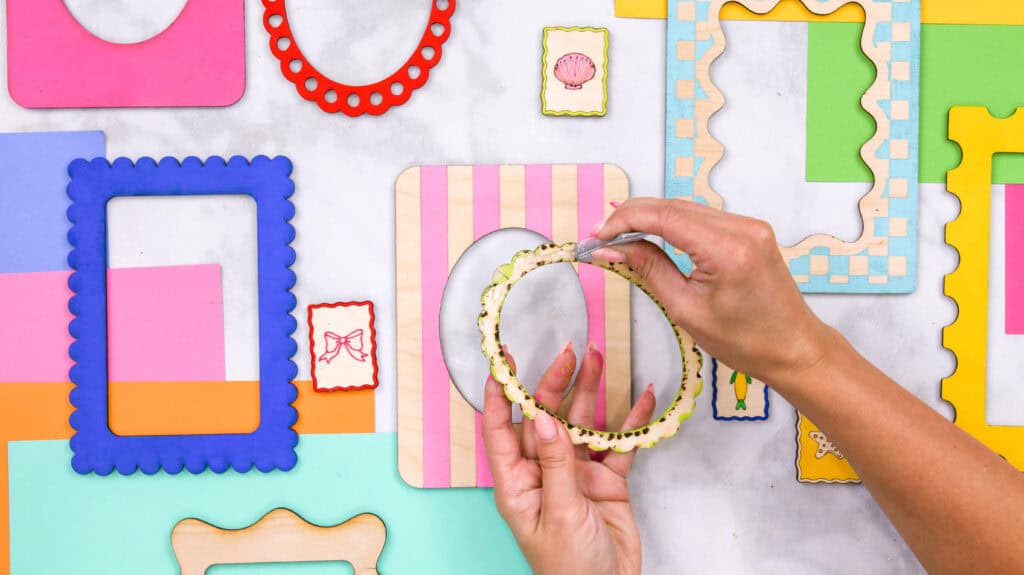
To assemble the frame, gather the three frame pieces: the top frame, the middle piece without a top, and the bottom piece with a half-oval cutout at the top.

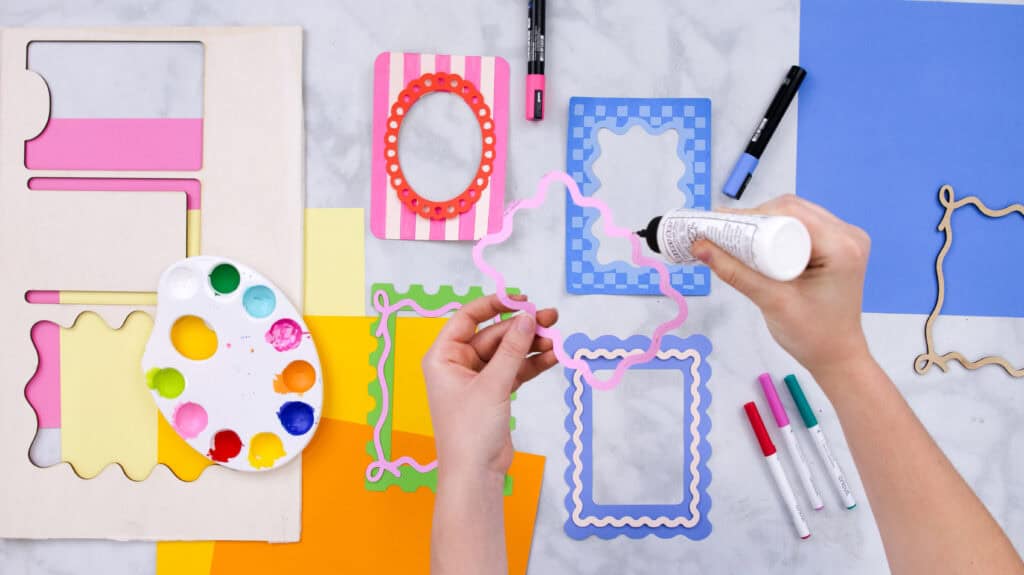
If you cut out an accent frame, apply a line of glue to the back, align it with the base frame, place it, and let it dry.
Next, grab the middle piece, apply a line of glue, and adhere it to the back of a frame piece.
Apply another line of glue to the middle piece, place the bottom piece on top, and let the photo frame dry completely.
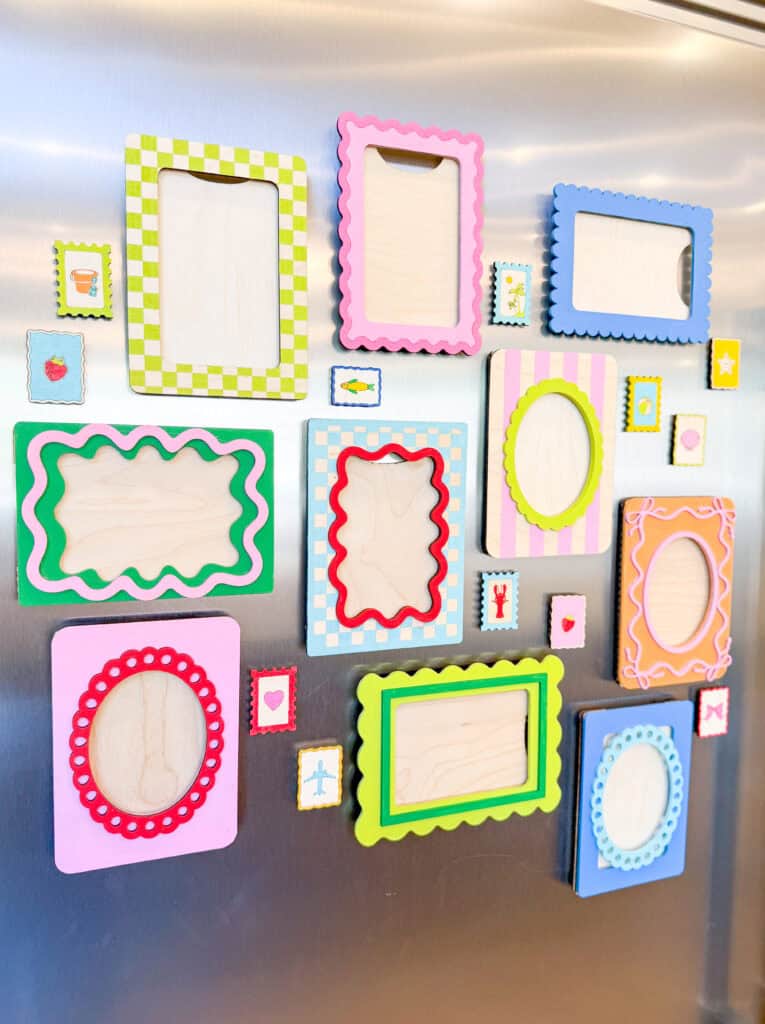
Once you're photo frame has completely dried, you can now personalize this frame with some toppers. Add your favorite postage stamps to your frame or a few summer toppers!
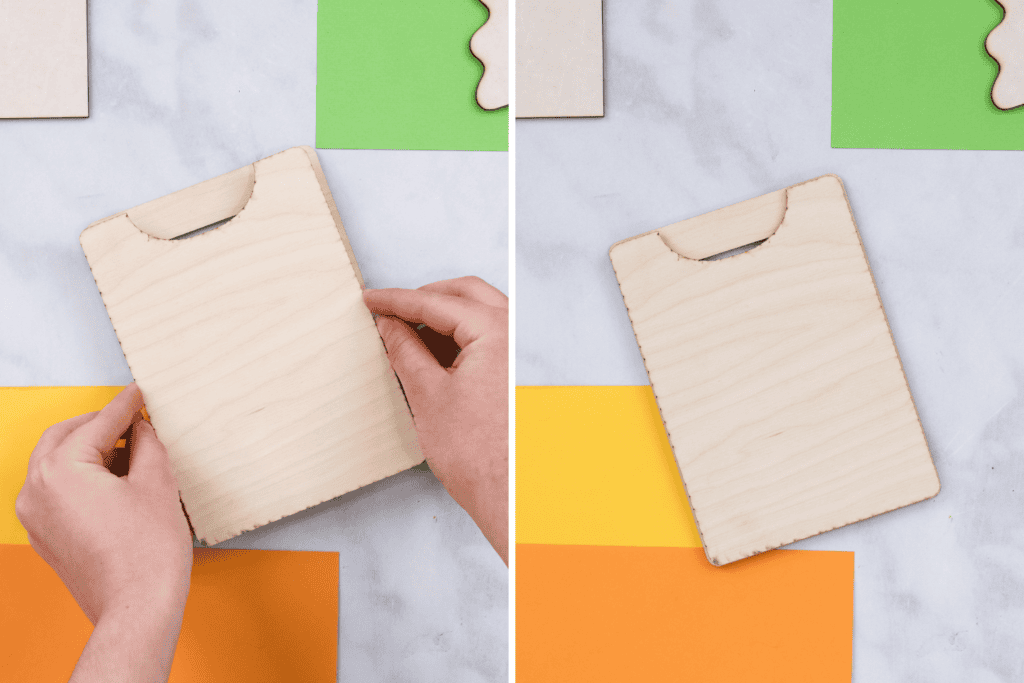
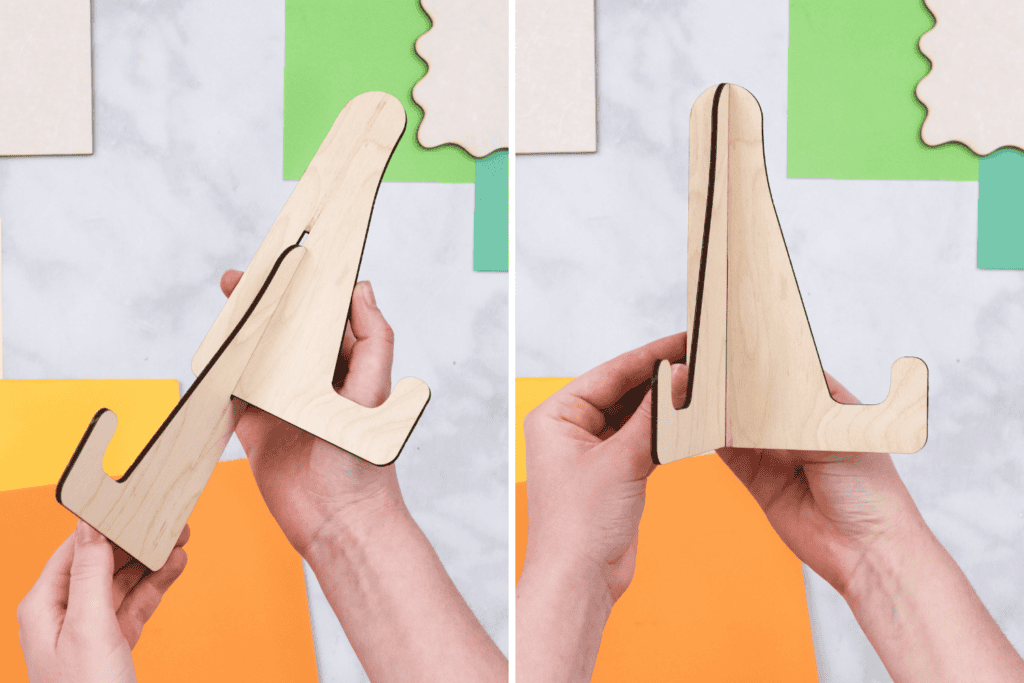
You can decide whether you want to add magnets to the back of your frame to display on a fridge or cut out the provided stand pieces to display it upright on a table!
To assemble the stand, grab the two stand pieces. You'll notice one has a slot at the top and the other has one at the bottom. Join them by aligning the slots and sliding the pieces together to create a stand.
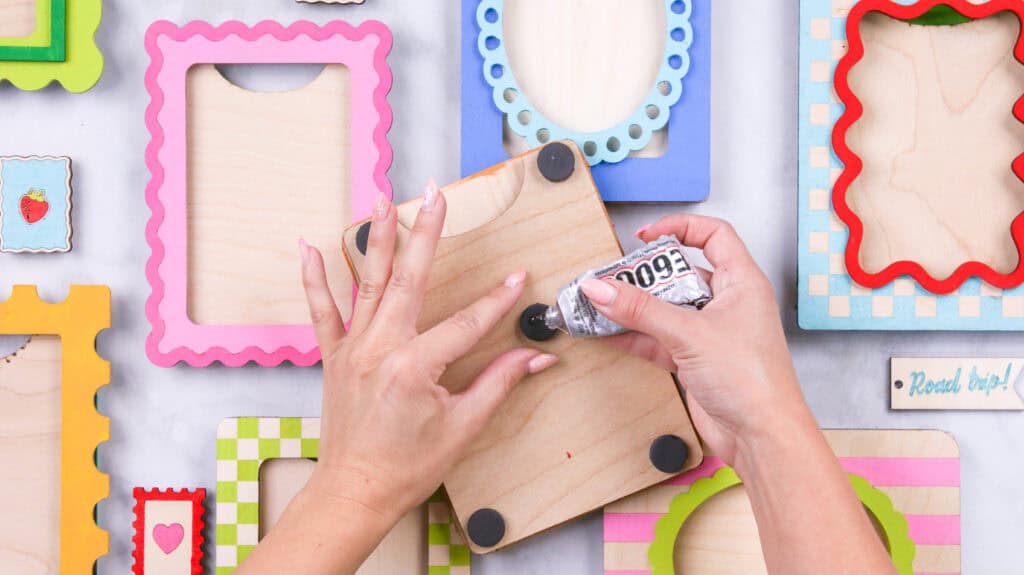
Finally, add a dot of E6000 glue to the back of 5 magnets. Apply the magnets to the sides and one to the center of the frame, and let it dry for 30 minutes.
After the magnets dry, place the frame on your fridge and show it off!
Step 5: Finished Frame
This certainly adds a pop of color to a room and is such a cute way of displaying a memorable moment! I absolutely love how these picture frames turned out and can't wait to see what you all make with these files!
These frames weren't just made for summer crafting! What's fun about these frames is how they can be customized for any holiday or occasion!
A few ideas would be to customize them for Christmas, Valentine's Day, or personalize the frames in your recipient's favorite colors and patterns.
Don’t want to forget about this free template? Save this project for later! Click here to save this project on Pinterest.
Looking for more project tutorials? Click here for more!
DIY Father's Day Magnetic Photo Frame, which you can check out here!
Join my crafting Facebook group where you can show us what you’re making, ask questions, and learn from others!
wow all these frames are so cute. Thanks. Ive just downloaded them and cant wait to make them all. Ive got a blank wall in my craft room where they are going to be perfect.