Learn How to Make a Valentine's Day Shadow Box with Tissue Paper Carnations and Cricut Glitter Adhesive Vinyl
All you Cricut lovers know how it is to get so many craft ideas and not be able to get to all of them. There are just so many things we want to make, so sometimes that one great idea gets pushed back. And a Cricut shadow box is mine. But I finally got around to it!
So today I’m going to be making this super cute shadow box for Valentine’s Day with my Cricut Maker and Cricut’s Premium Glitter Vinyl.
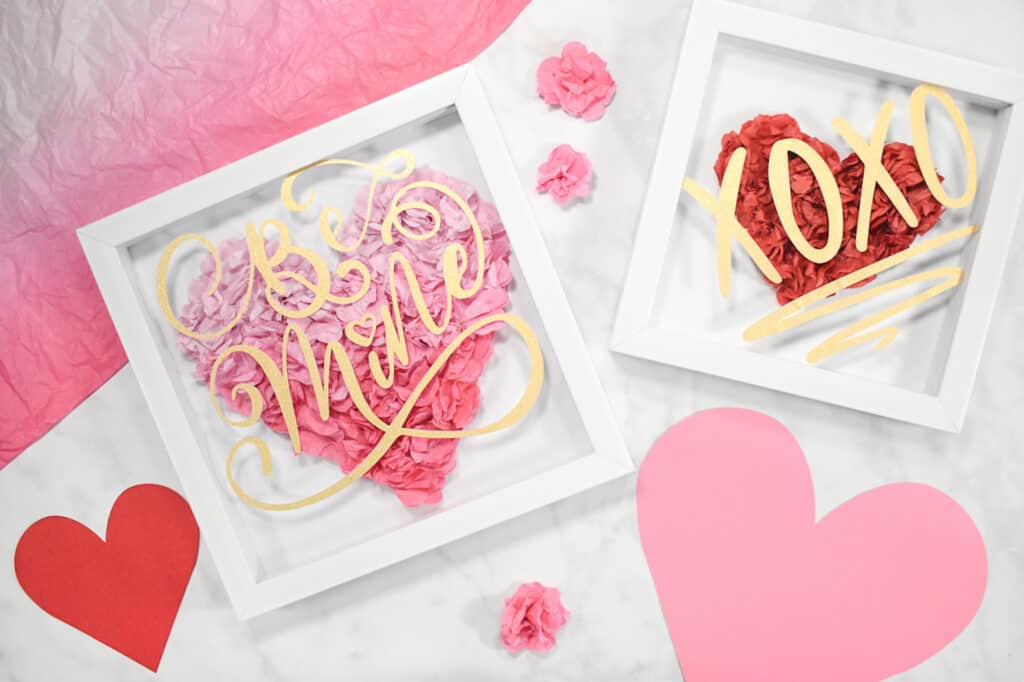
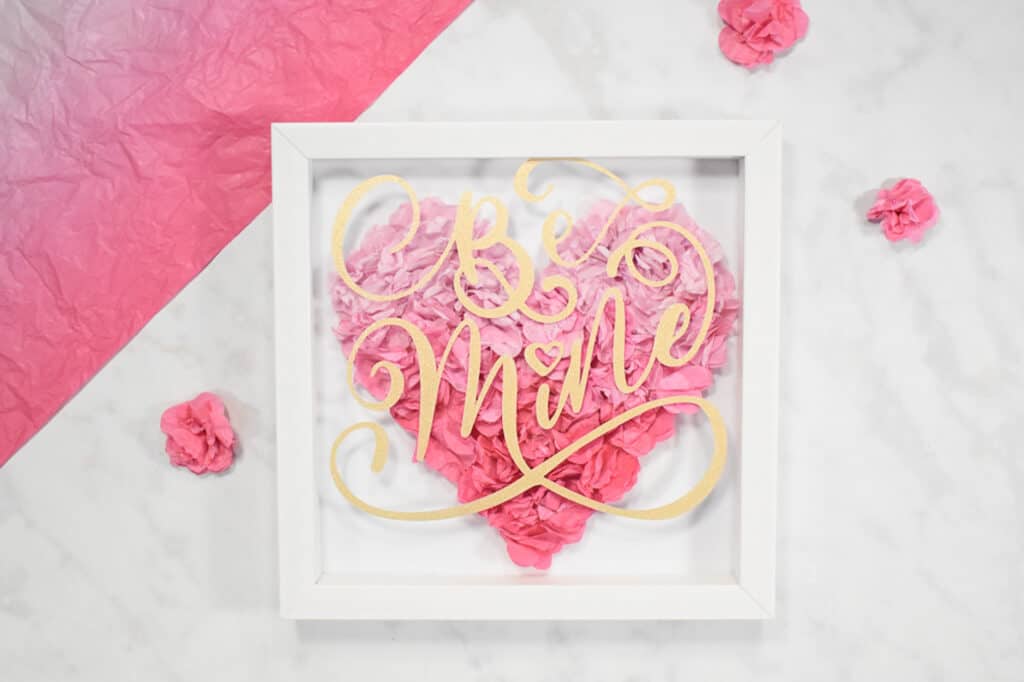
Table of Contents
Valentines Cricut Shadow Box
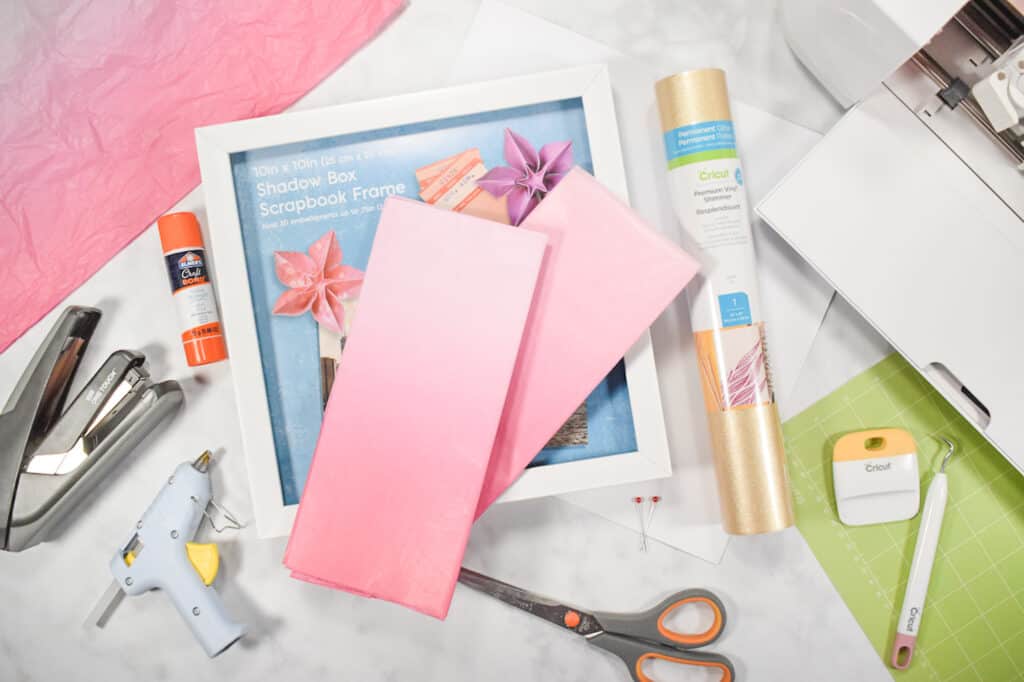
For this project, you will need:
- White Cardstock
- Cardstock to match your tissue paper
- Glue Stick
- Tissue Paper
- Scissors
- Straight Pin
- Stapler
- Shadow Box
- Hot Glue Gun
- Cricut Cutting Machine- get it at Cricut, or Amazon
- Fine Point Blade
- StandardGrip Cutting Mat
- Gold Glitter Vinyl
- Cricut Scraper
- Transfer Tape
Why Shop Through My Links?
When you shop through my affiliate links, it doesn't cost you anything extra, but it helps me out in a big way! I earn a small commission from those purchases, and that support allows me to continue creating and sharing free tutorials and patterns for you. Thank you so much for helping me keep this creative community going! 💕
Download the Valentine's SVG Files HERE!
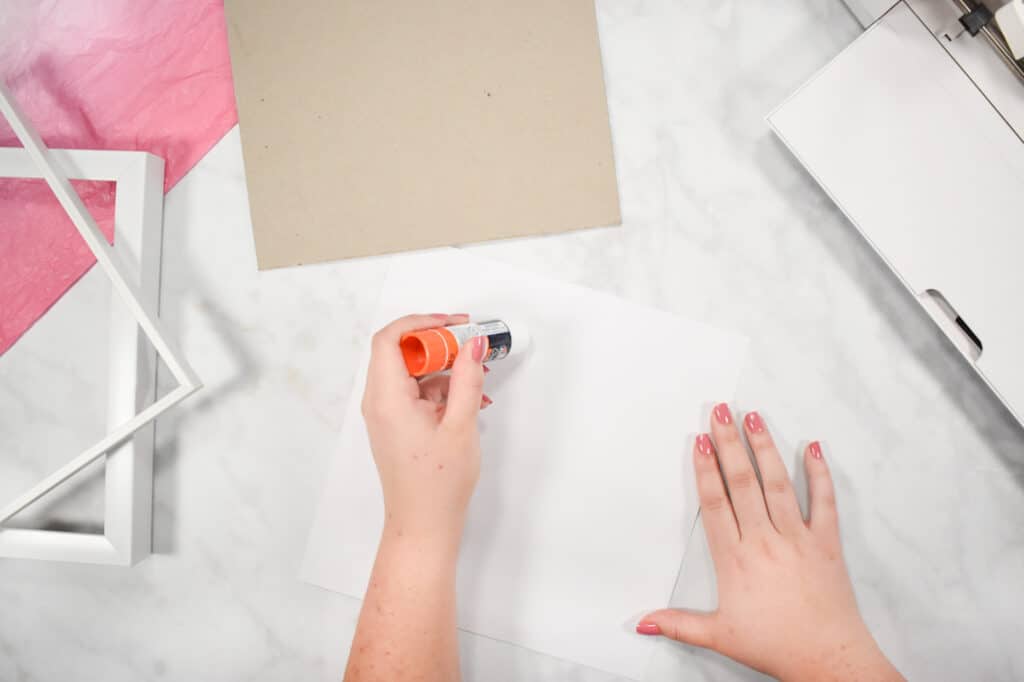
Prepare Your Shadow Box
Start by taking apart your shadow box and setting everything aside but the cardboard backing.
Trace the outlines of the cardboard onto a sheet of white cardstock and cut it down to size.
Next, glue the cardstock over the front side of the cardboard to create a white background for your project. A scrapbooking glue stick works great for this.
Make Your Tissue Paper Carnations
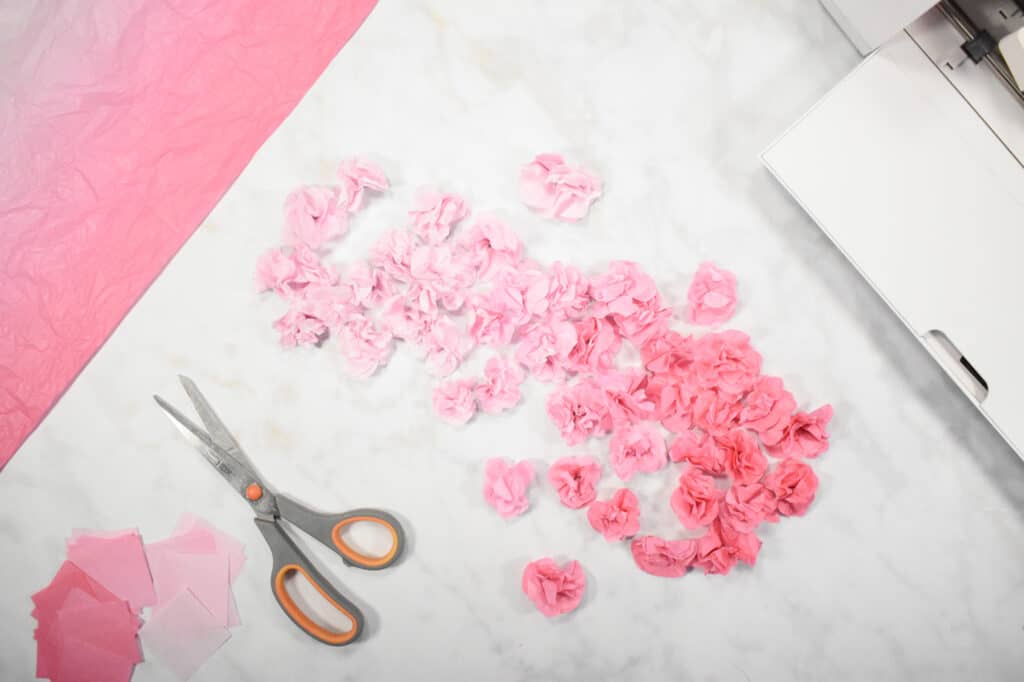
Now grab your tissue paper and scissors. Layer 6-8 sheets of tissue paper together to cut into 2” squares.
I like to cut my sheet into 2” strips first.
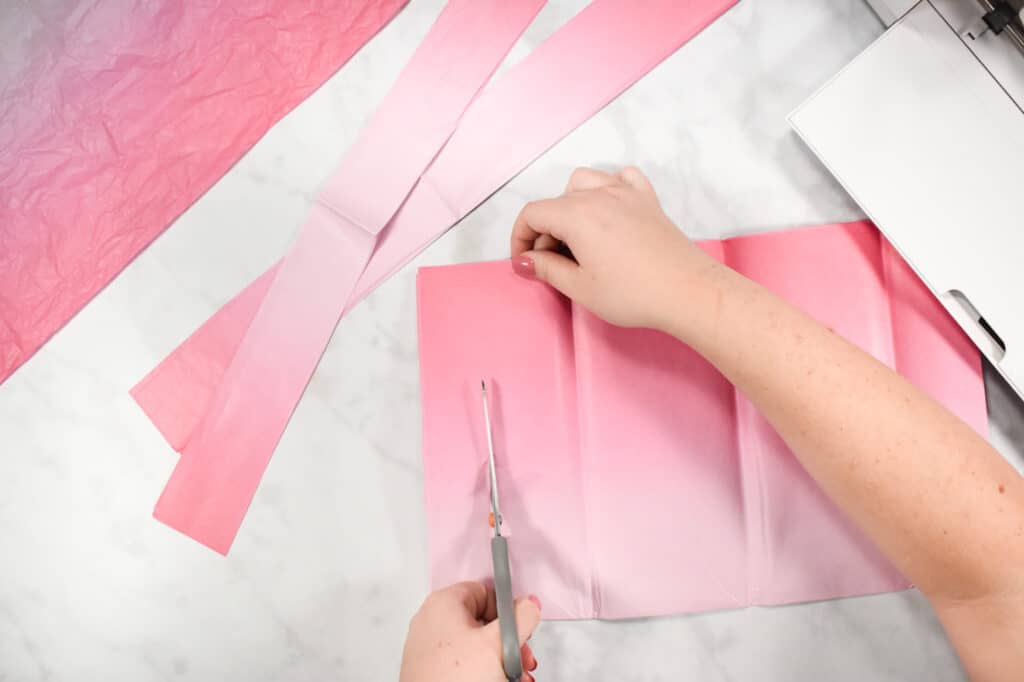
Then cut each strip into 2” squares. You’ll need about 40 flowers for a 10x10 shadow box. Make sure to keep your stacks of 6-8 sheets separated.
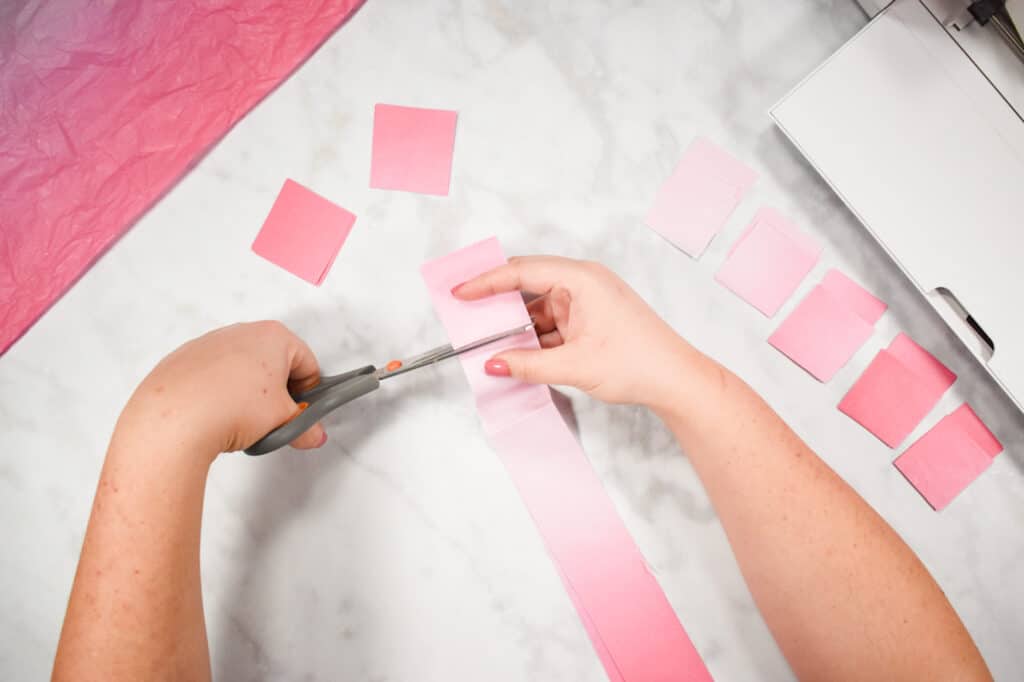
Next, cut each stack into a flower-like blob shape. No need to make them perfect or even all the same.
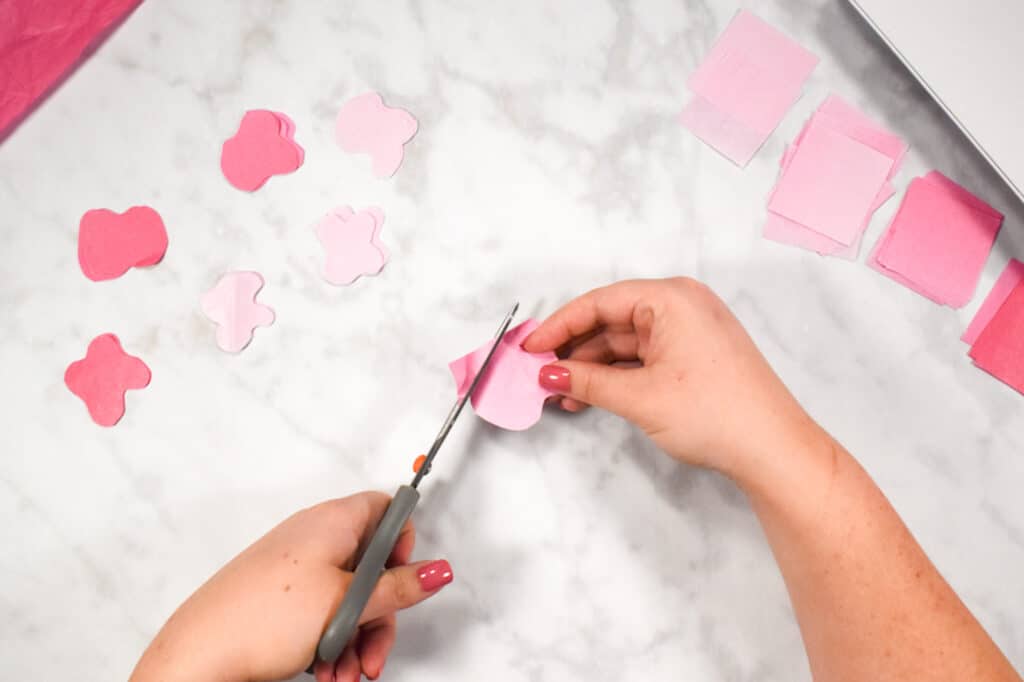
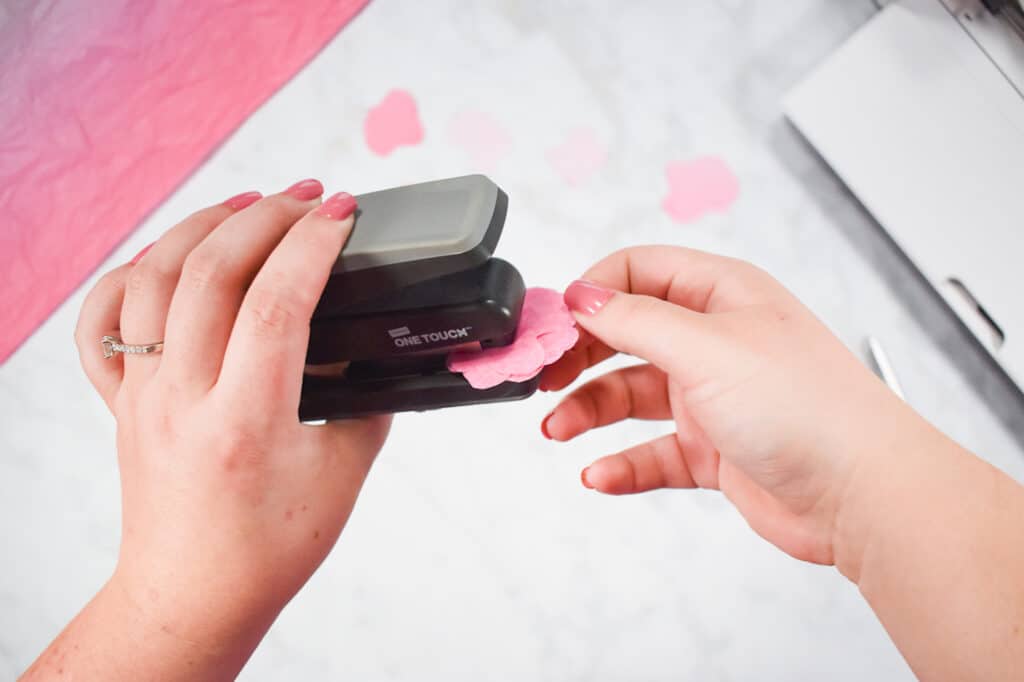
To form a carnation, take your straight pin and stick it through the middle of one of your tissue paper square stacks.
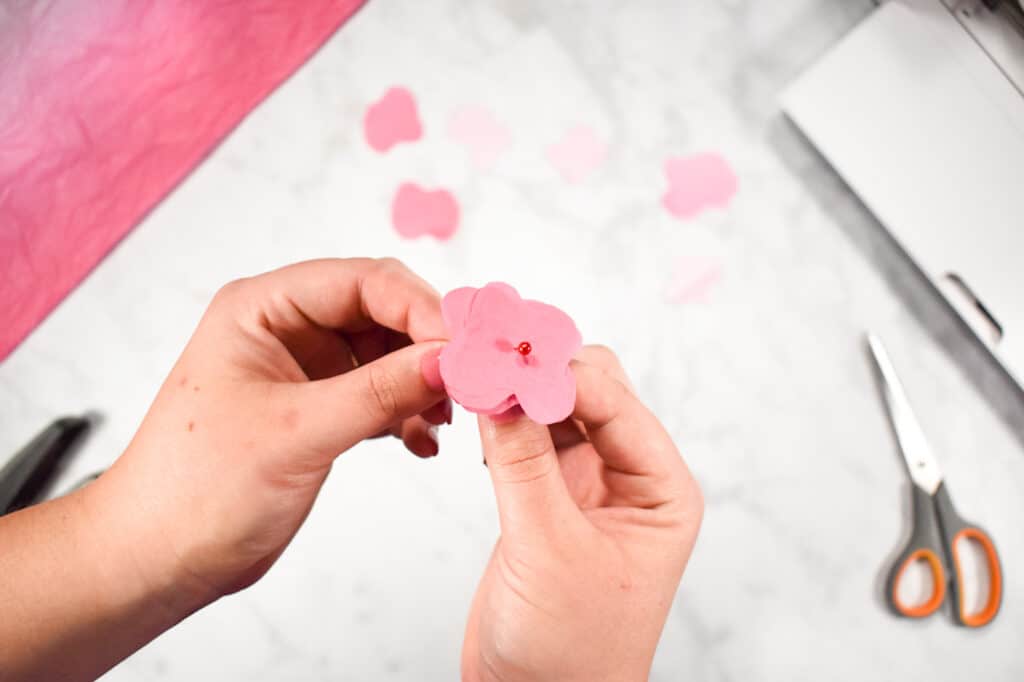
Hold the pin in one hand and use the other to rotate the layers. This creates the look of layered flower petals. Spread them between your fingers like you were fanning out a hand of playing cards.
Once they’re all turned in a different direction, hold them in place and remove the pin. Then staple them together.
Pinch the staple upward to form a V-shape.
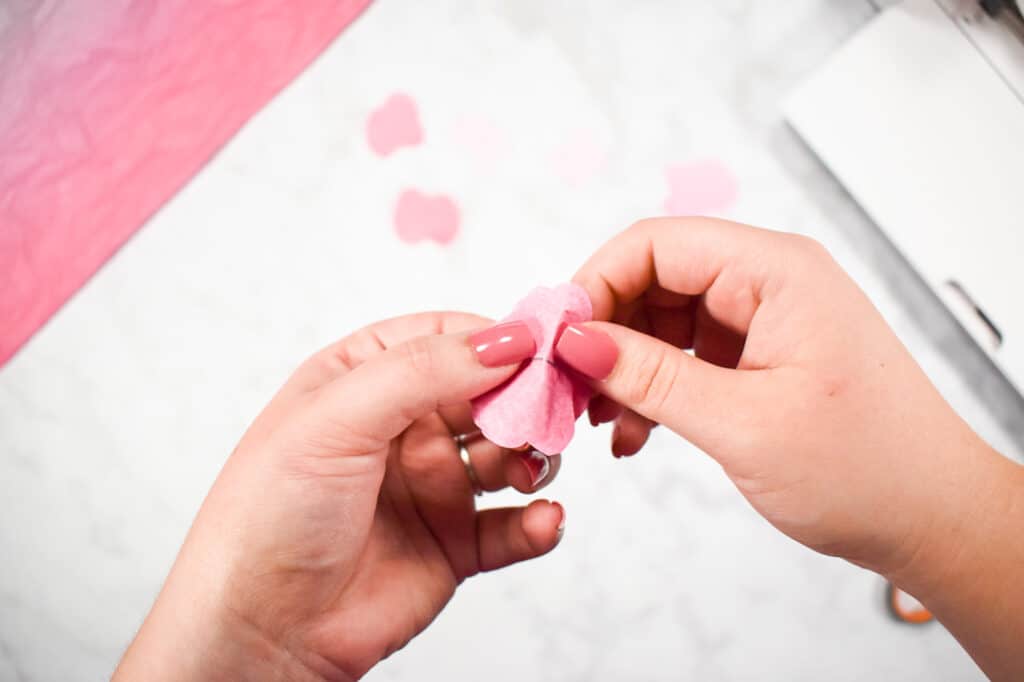
Then fold and pinch the petals together in several places and tap on the ends so that they bunch up.
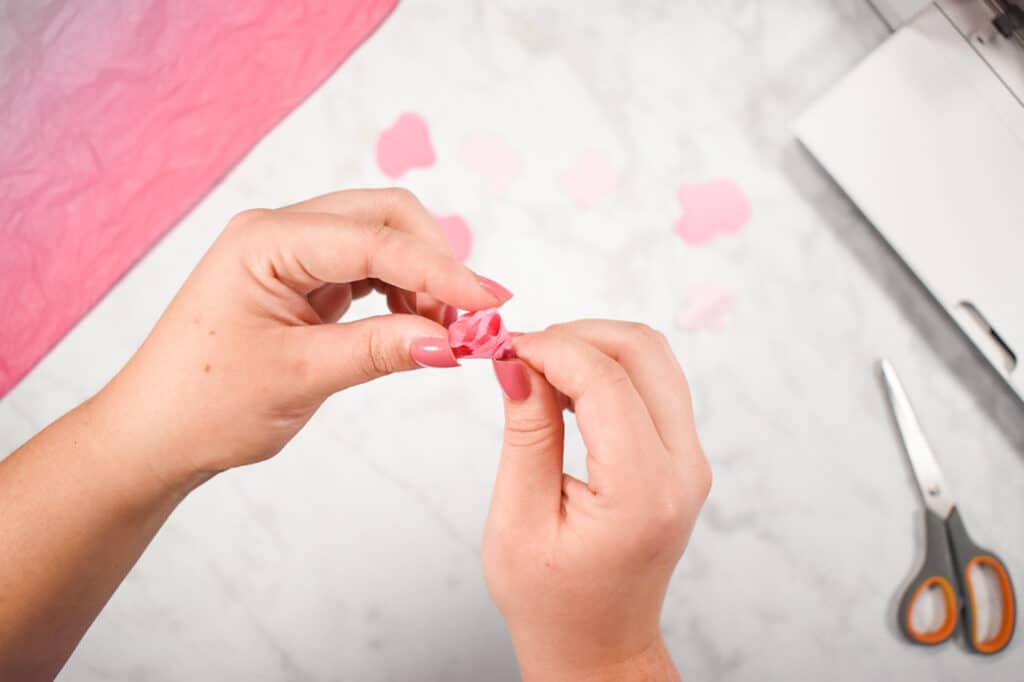
Now carefully and slowly unfold each layer and arrange into a flower shape. Don’t worry too much about making it perfect. They’re all going to get bunched together later anyway.
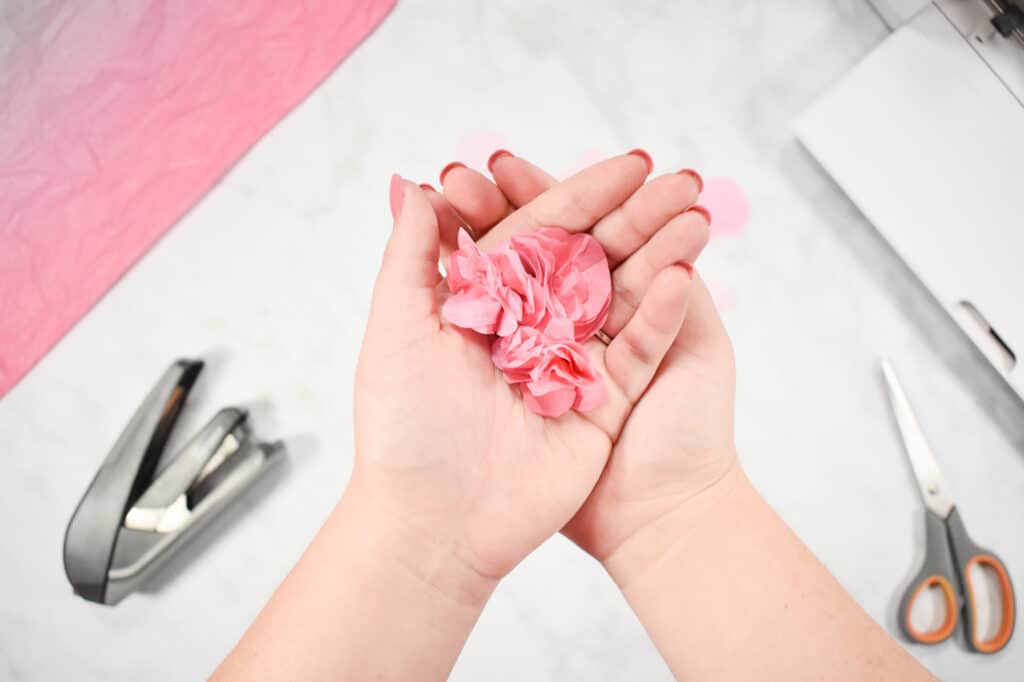
Set these off to the side and we will move on to the Cricut cutting!
Cut Your Design
Open up a new project on design space and upload the Sweet Red Poppy files for this project. You’ll have a heart and two vinyl design options.
Delete the one you’re not using and make sure the other two are sized appropriately for your shadow box. (The files are sized for a 10” shadow box but you can make them work for any size. Just change the width to 1.5”-2” smaller than your shadow box.
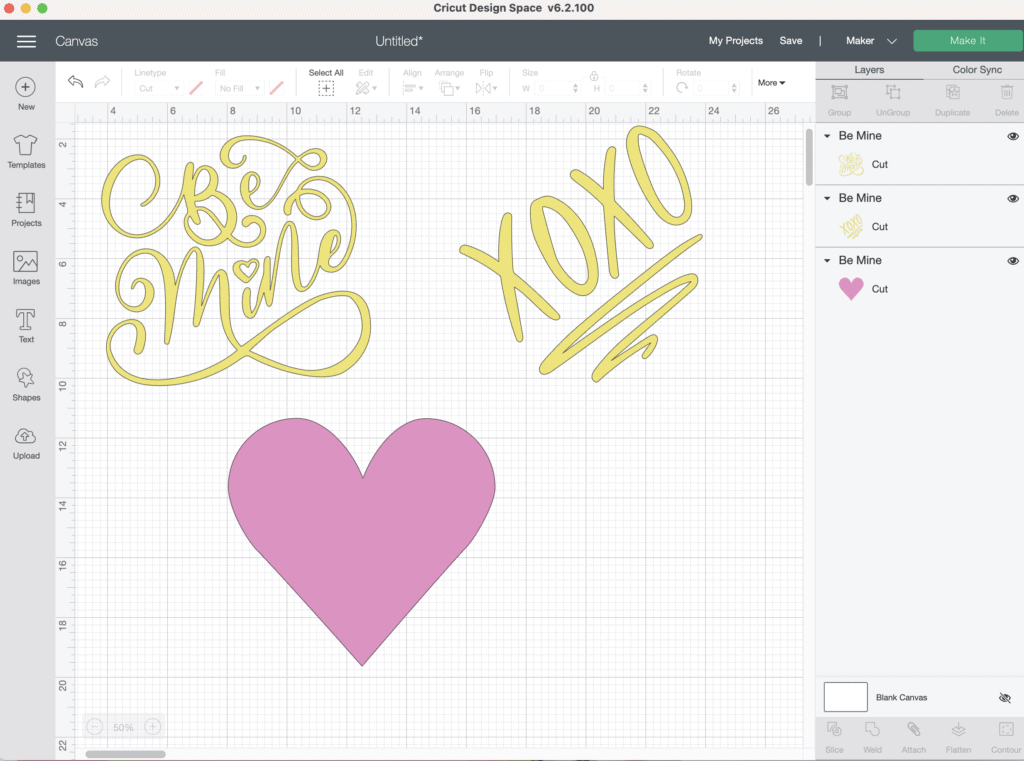
Click the Make It icon to prep for cutting.
Follow the directions for your machine to choose the correct cutting settings. If you’re using a Maker, you’ll be prompted to select your material before every new mat. If you’re using an Explore machine, don’t forget to change the cutting dial between mats!
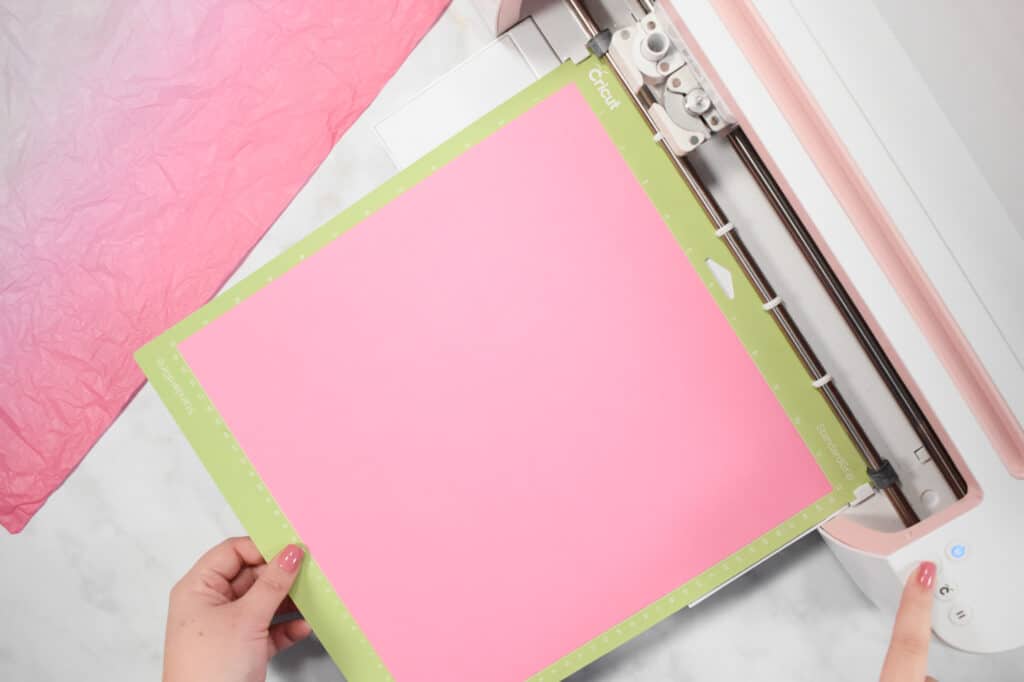
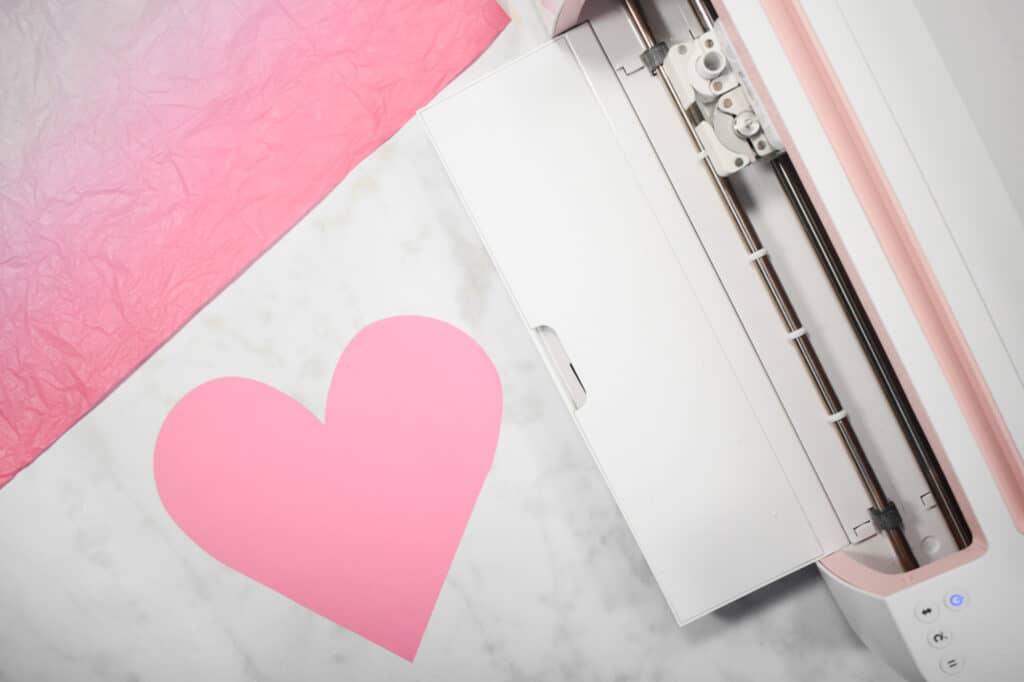
Cut out your heart from cardstock on the medium cardstock setting.
Remove the heart from the mat by flipping it upside down and curling the mat away. This will prevent your cardstock from curling up.
Press the arrow icon to load your next mat into the machine, and the Cricut icon to start cutting. Once complete, press the arrow button again to reload.
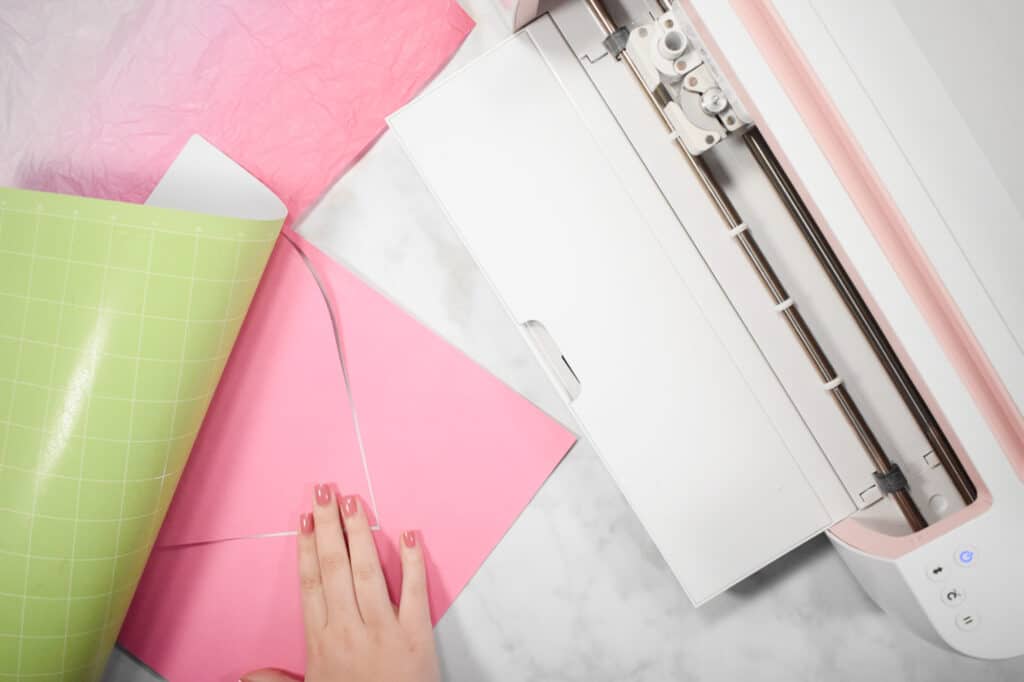
Cut your vinyl (backing side down) on the Glitter vinyl (or Vinyl+ setting). For a glitter vinyl, you may need to cut a second time, so follow these instructions carefully.
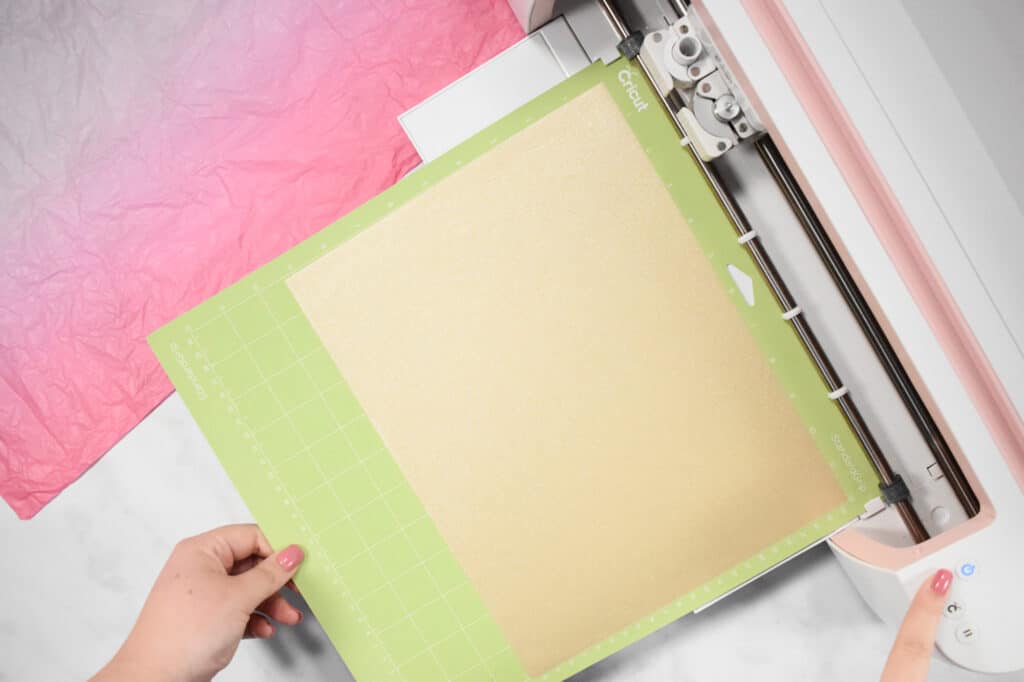
Load your mat by pressing the arrow icon button. Then start the cut with the Cricut icon button like normal.
But when the cut is finished, don’t unload it (even though the arrow button is flashing!).
Press the Cricut icon again, and your machine will repeat the cut in the same place. (If you unload and reload the mat, before repeating the cut, the mat will likely be inserted slightly differently and not cut in the same place.
You can use this trick any time you need to do a double cut on a tough material!
Once your design is cut a second time, go ahead and unload the machine.
But don’t remove the vinyl from the mat just yet.
Weed and Transfer Your Glitter Vinyl
Vinyl is easier to weed when it’s still stuck flat to your mat. I recommend weeding before removing the mat any time you are working with a complicated vinyl cut.
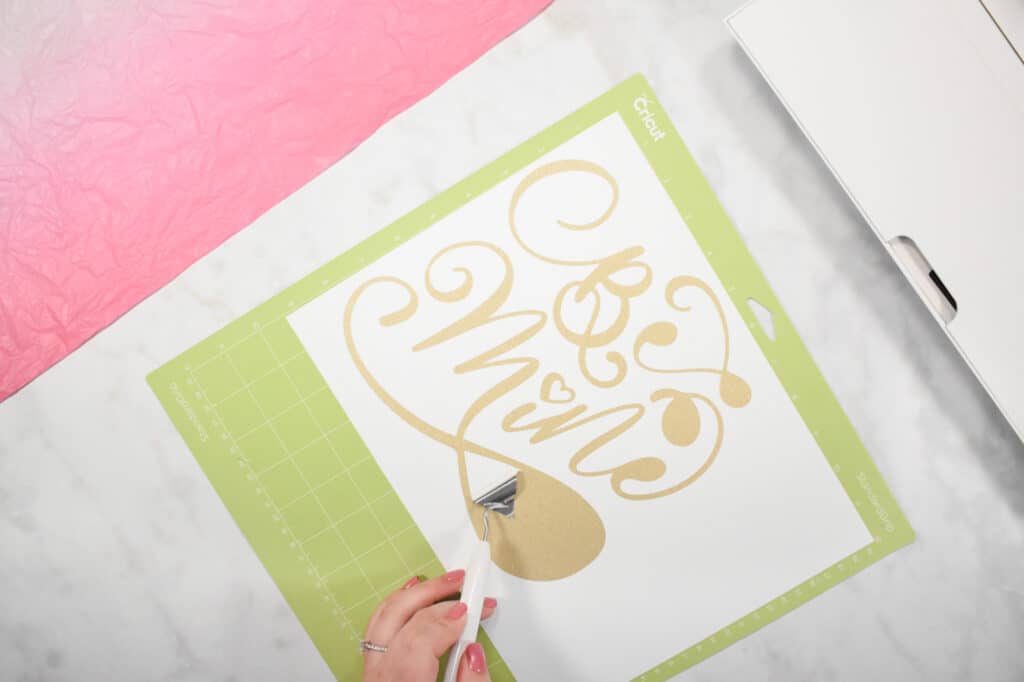
Peel back a corner of the vinyl without the backing and slowly pull it away at an angle. Use your weeding tool to peel off any small inner pieces that didn’t come off with the rest.
Now you can remove the vinyl from the cutting mat.
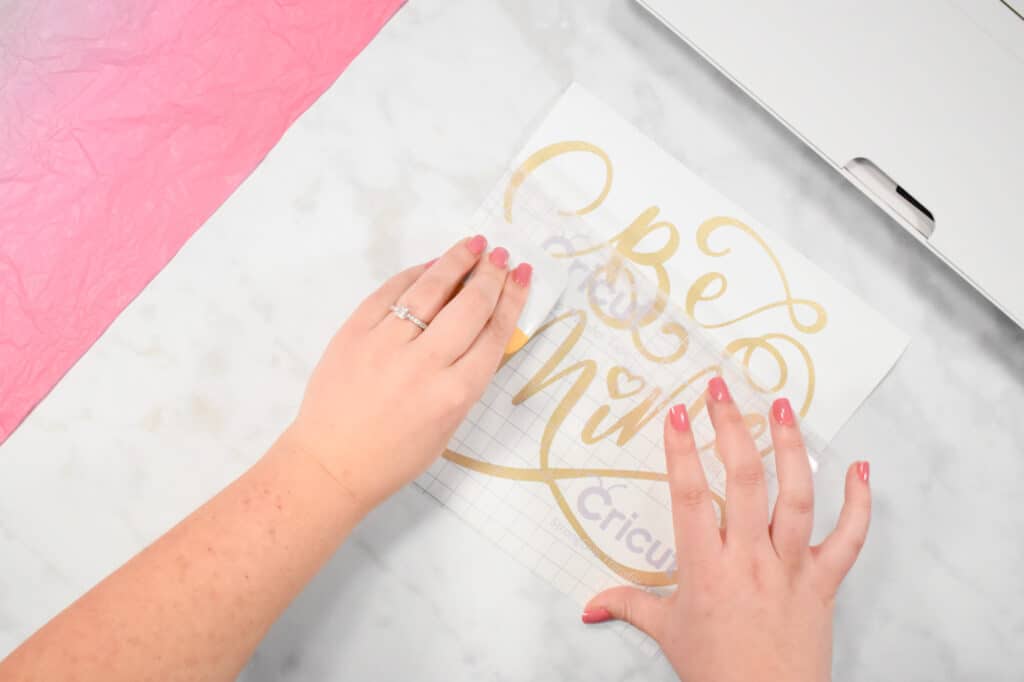
Next, cut a sheet of Strong Grip Cricut Transfer Tape to the size of your design.
Peel off the backing and press onto the top of your remaining vinyl.
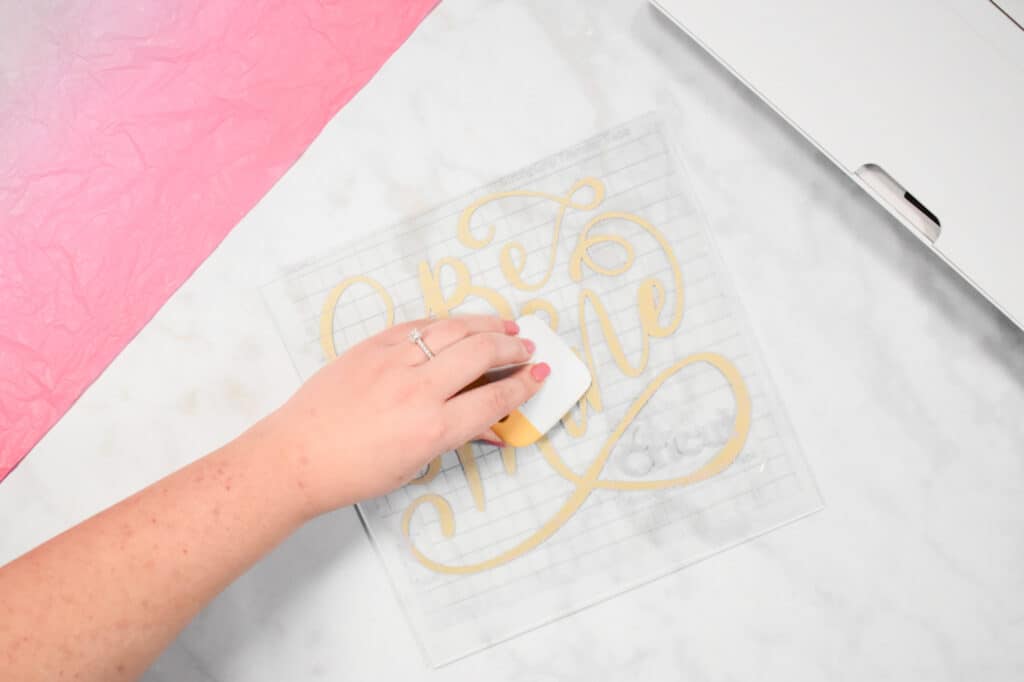
Use your Cricut scraper tool to help it lay flat and stick to the entire design.
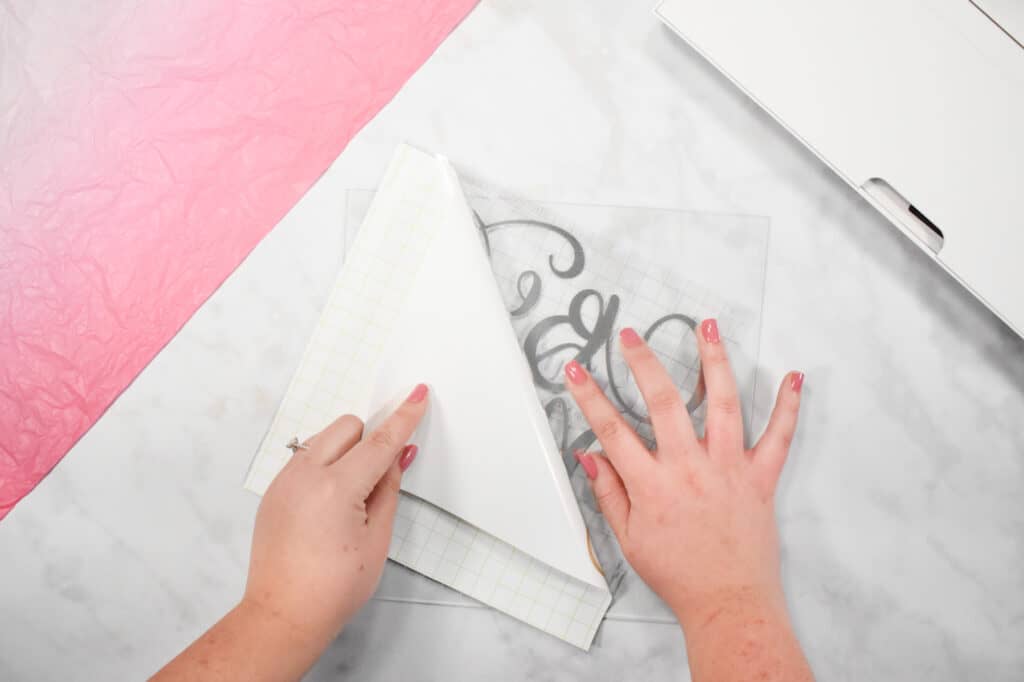
Flip over the vinyl and peel back the backing at a 45 degree angle. Go slowly and make sure ever they thing sticks to the transfer tape.
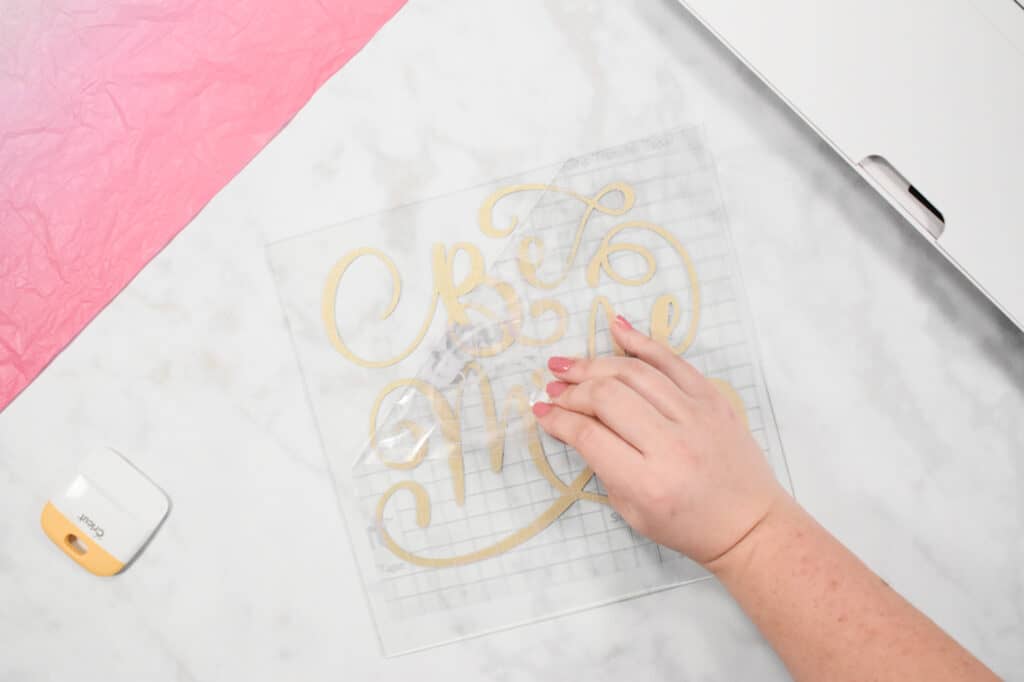
Grab the glass from your shadow box and line up the vinyl design over it.
Press down and use the scraper tool again to make sure the vinyl sticks.
Carefully peel away the transfer tape.
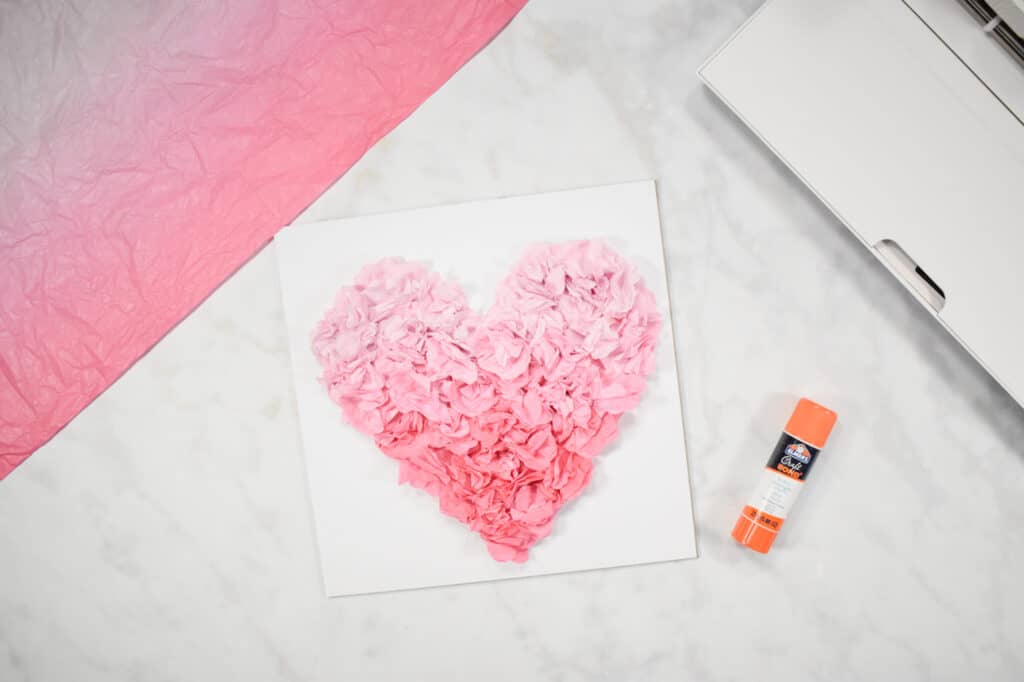
Arrange and Glue Flowers
Next, we’ll put together the flower heart for inside the shadow box.
Just hot glue the flowers to the cardstock heart.
If you’re using ombré tissue paper, arrange them in order of color before you start gluing. This will help you visualize where the gradient will be.
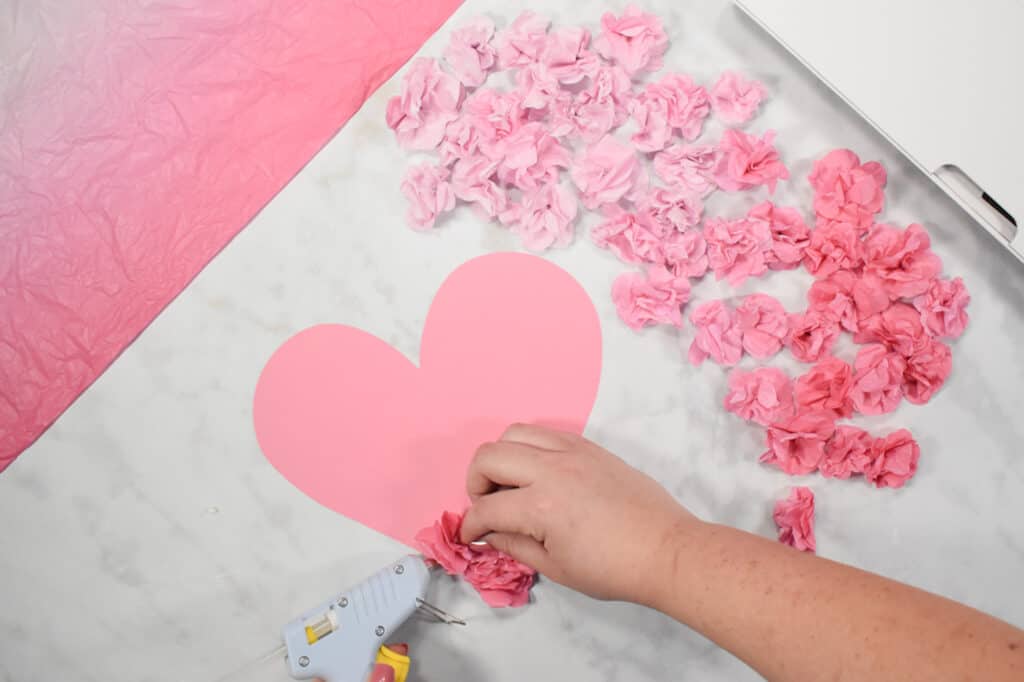
Start by gluing a ring log flowers around the outer edge of the heart to get the outline down. Then fill in the lightest and darkest areas.
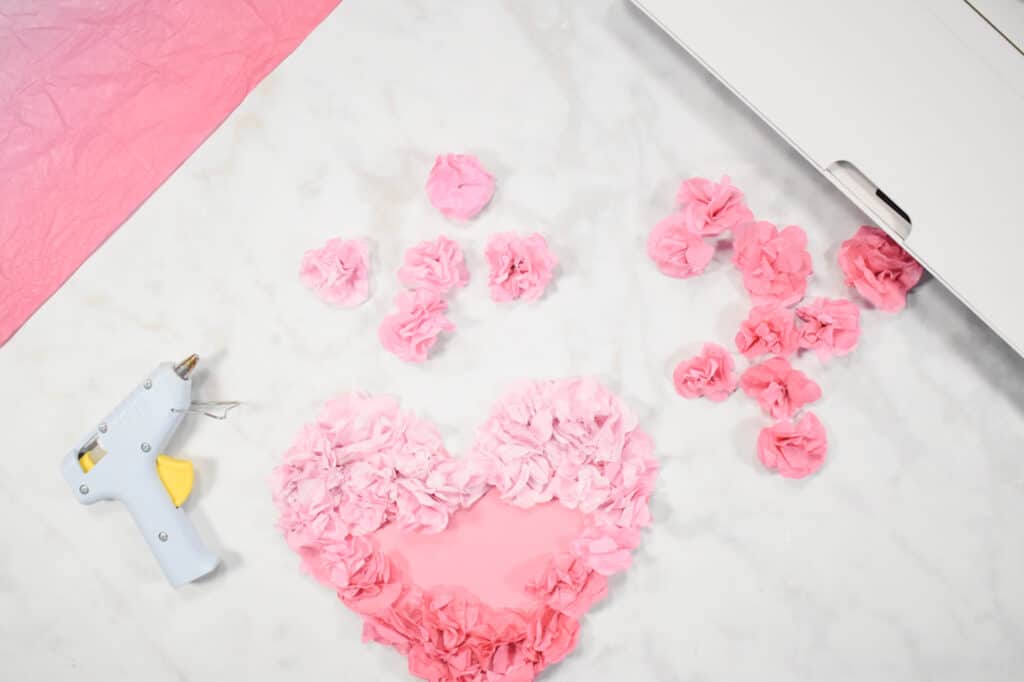
Finish out by filling in the mid-tone area in the middle.
And lastly, glue the cardstock heart to the base of the shadow box.
It was easiest for me to put down glue in the middle of the white cardstock everywhere you know will be covered and press down between the flowers.
Then peel up the edges that didn’t get glued down to add some more glue underneath.
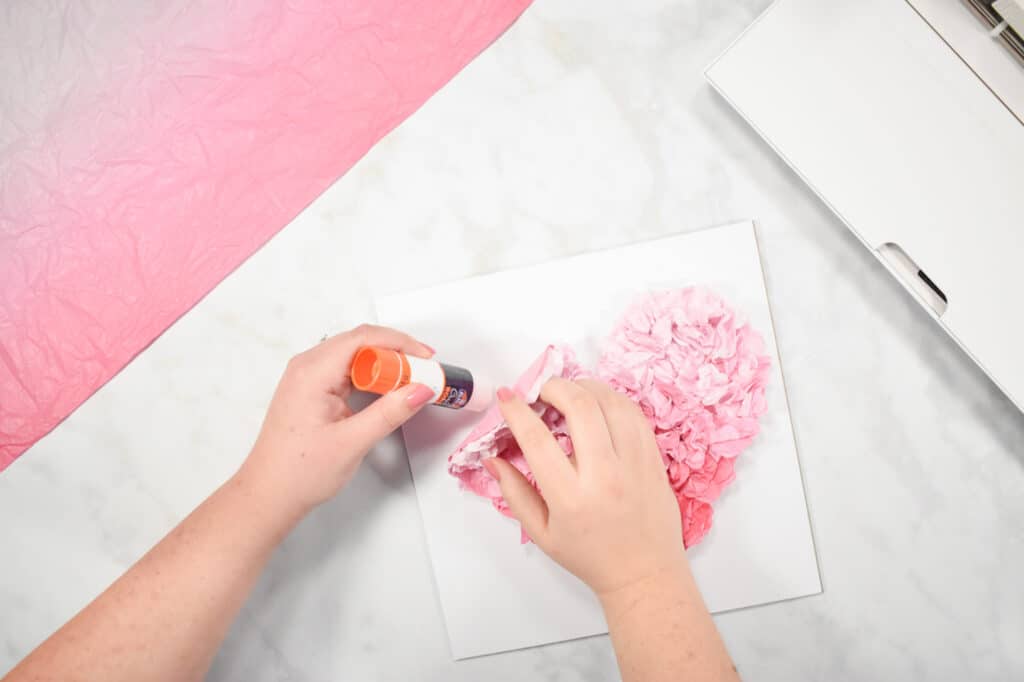
That way you don’t crush the flowers.
Reassemble Your Shadow Box
Now all that’s left to do is your shadow box back together.
It does go back together differently than how it was packaged though. First place the cardboard, then the inner frame. (It was likely the other way around when you brought it home.)
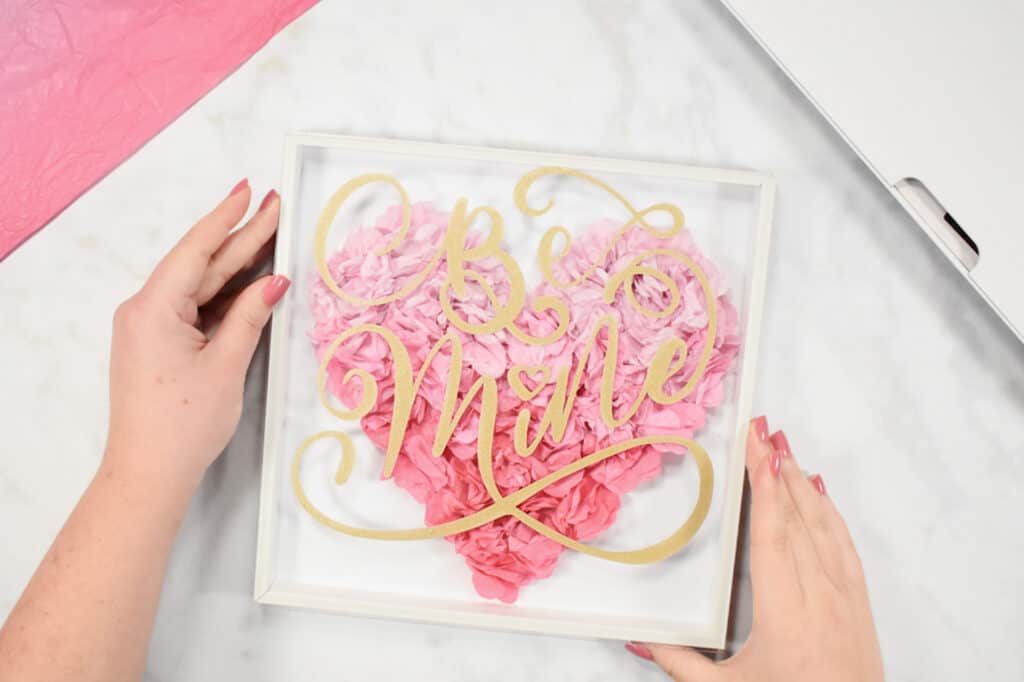
Then the glass. Then the outer frame. And look how cute!
Save this project to your DIY craft board on Pinterest here!
Don’t forget to join my crafting Facebook group where you can show us what you’re making, ask questions, and learn from others! Follow me on Instagram for daily crafting inspiration and a look behind the scenes.
Have you made a Cricut shadow box before? Let me know in a comment below!
Nice
I love almost anything shadow box, and your Valentine’s shadow box is fabulous. I got to make one. Thanks for sharing
I could not even read anything due to the annoying popup adds