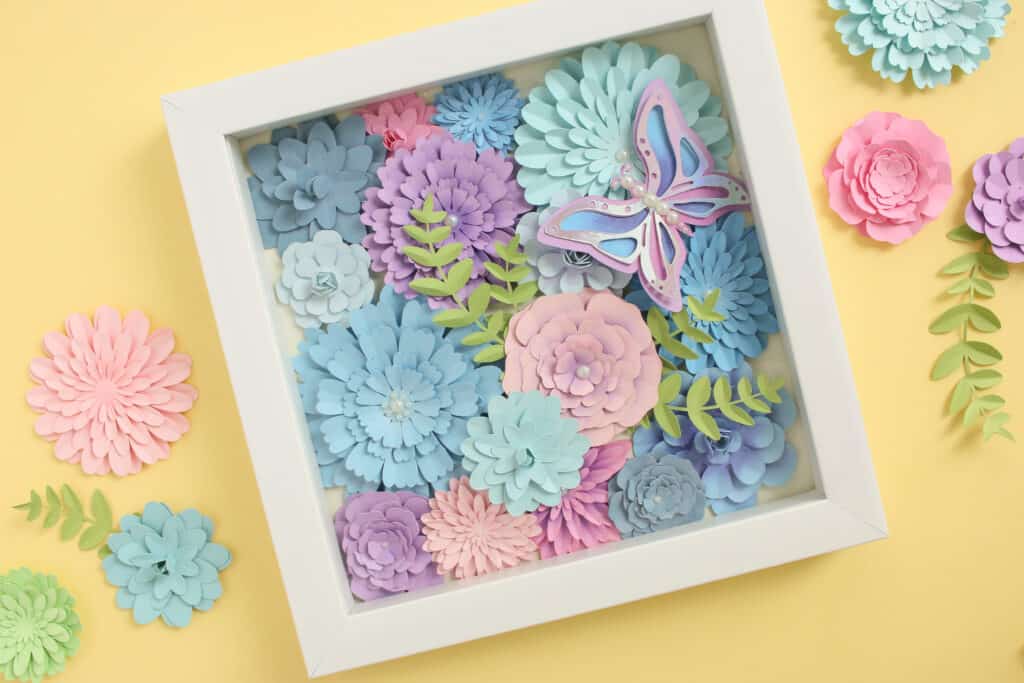
Find Out How to Make a Layered Paper Flower and Butterfly Shadow Box With This Free Cricut Template and Easy Step-By-Step Guide
Making paper flowers with a Cricut machine can be a fun and creative activity for people of all ages. Whether you are an experienced crafter or just starting out, creating paper flowers can be a relaxing and enjoyable way to express your creativity and make something beautiful!
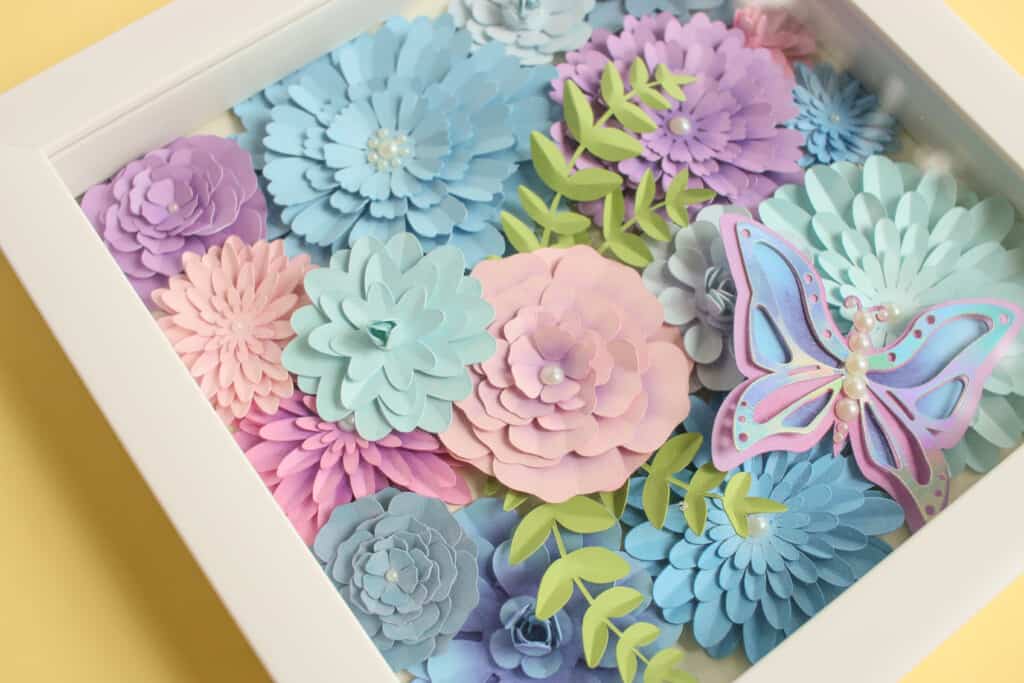
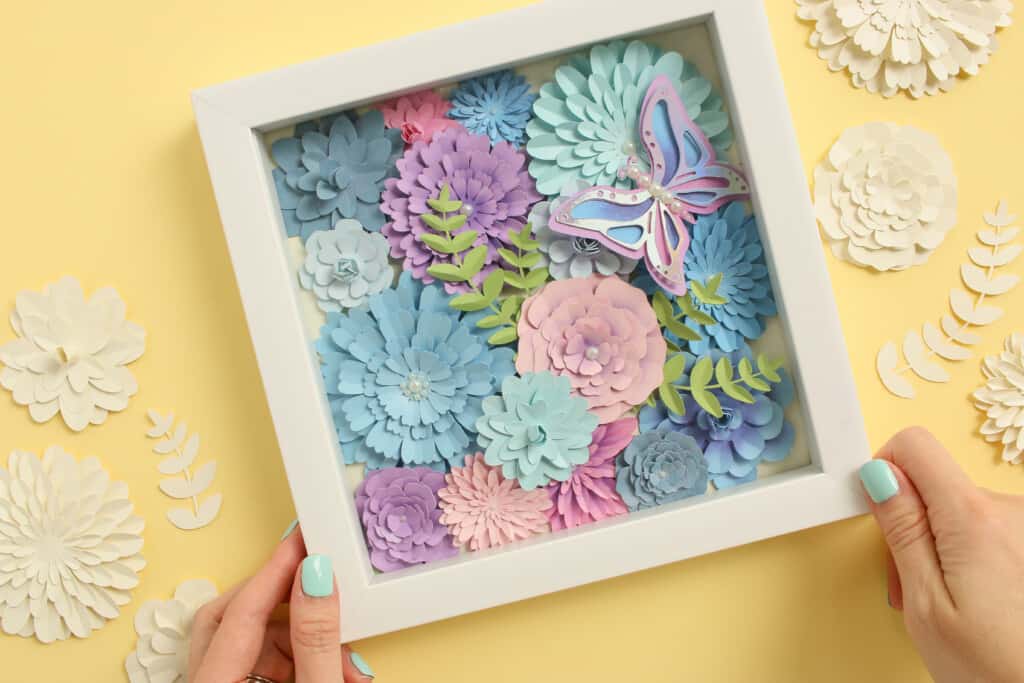
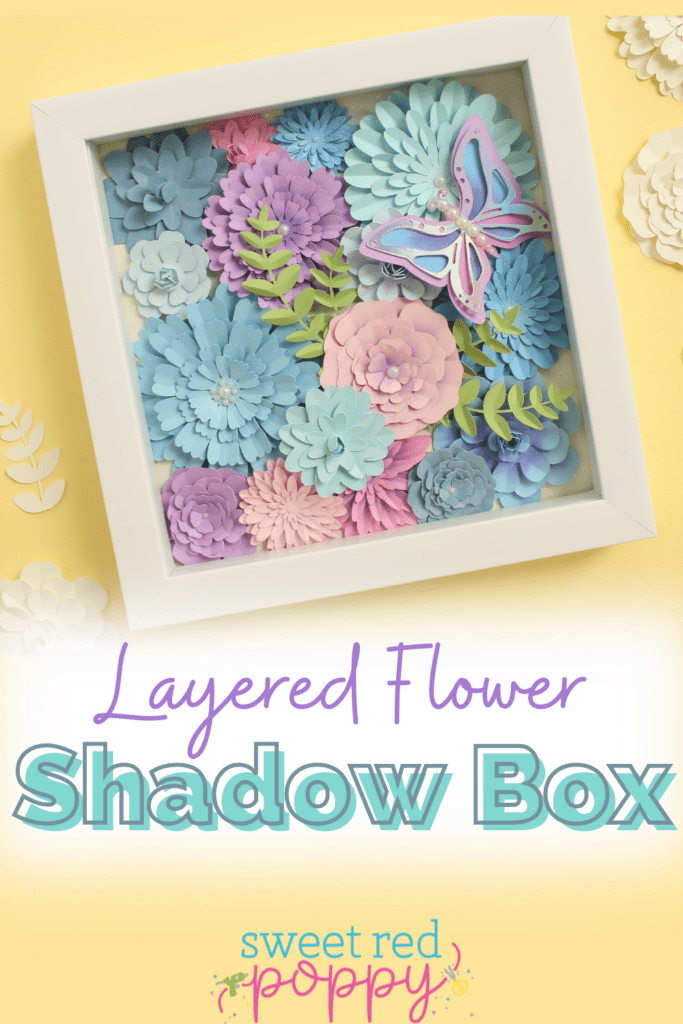
This Layered Paper Flower Shadow Box is an inexpensive craft to make, and it packs a bright and colorful punch!
Feel free to get creative and make this project your own by customizing the glass with vinyl. This would make a beautiful Mother's Day gift, or it could be displayed in a bedroom as decor.
This layered paper flower shadow box makes a lovely display and comes together quite quickly. You can easily adjust the color palette to suit your preference or the dimensions for a different size shadow box.
Did you know I have TEN more paper flower blog posts? Click here to see them all!
You'll find everything from paper Daisies, Anemones, and Peonies, to Dahlias and Oversized Roses.
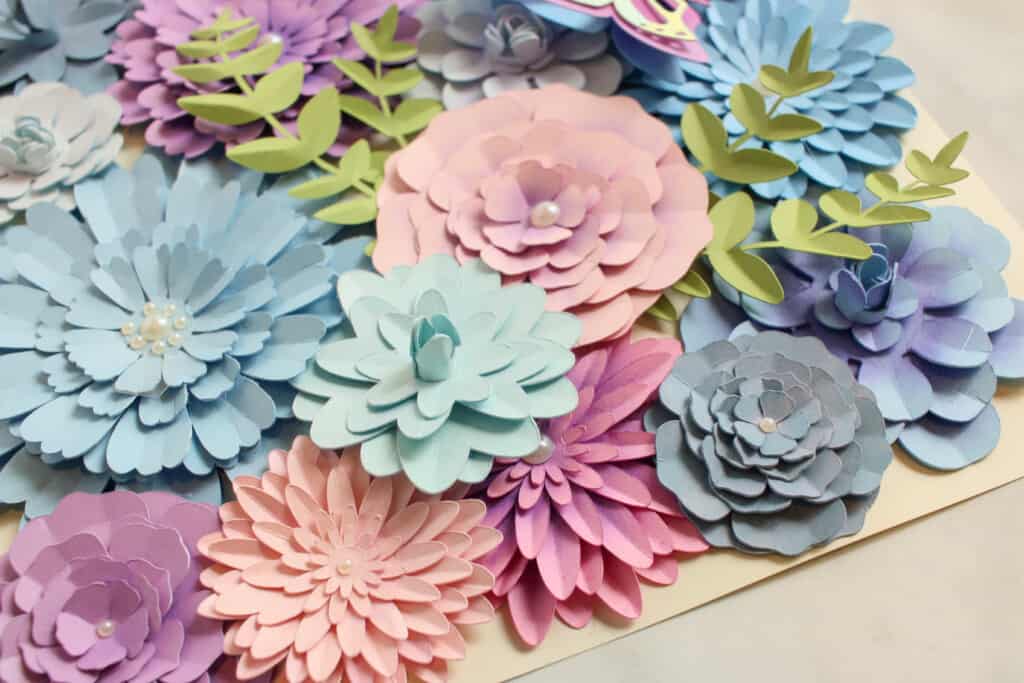
Table of Contents
What Size Shadow Box Should I Use?
I'm using an 8x8-inch shadow box for this project. If you want to use a larger shadow box, simply increase the size of the flower cut files or cut out more flowers to fill a larger space.
There is a lot of room for customization with scale, so feel free to make this project work for your space and needs!
How Do I Shape the Flowers?
You can use a few different methods to shape paper flowers. For this layered paper flower shadow box, I used a craft knife to create score lines and then proceeded to bend the petals and leaves along the lines.
You could also opt to use a foam flower shaping mat and a circular embossing tool. You use the tool to gently roll around the petal pieces, curving and cupping the petals.
The two methods can give the same flower design a very different look. You can use one or both methods depending on your preference.
A flower-shaping mat and ball embossing stylus is the faster method to shape your flowers. So if you're short on time, opt for that technique. You can quickly round and cup the flower petals to give them a 3-dimensional look.
Using a craft knife to score lines into the leaves and petals is a more time-consuming process but creates beautiful folds and gives a sharper look to the flowers.
What Kind of Paper Should I Use?
I am using 65 lb solid core colored paper for this project. 65 lb weight paper is a great weight for manipulating paper flowers.
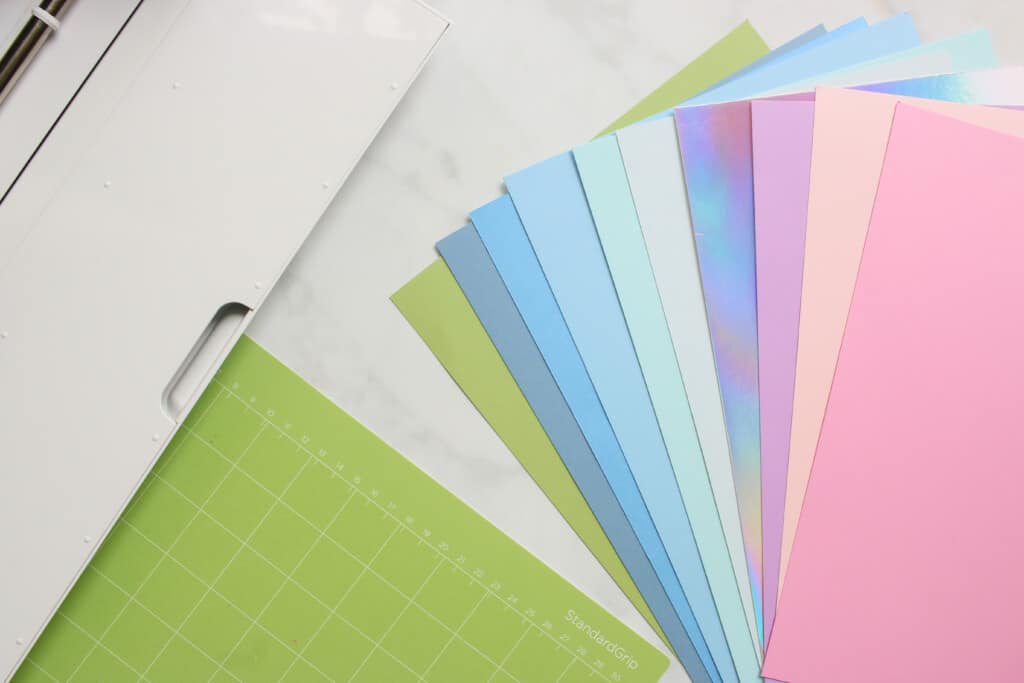
If you're unfamiliar with solid-core paper, it is paper that has been dyed all the way through, not just printed on one or two sides. This means that the edges of your flowers will be the same color as the front and back of your paper rather than white. White edges tend to give a cheaper finish to the flowers. So opt for solid-core paper if you can find it!
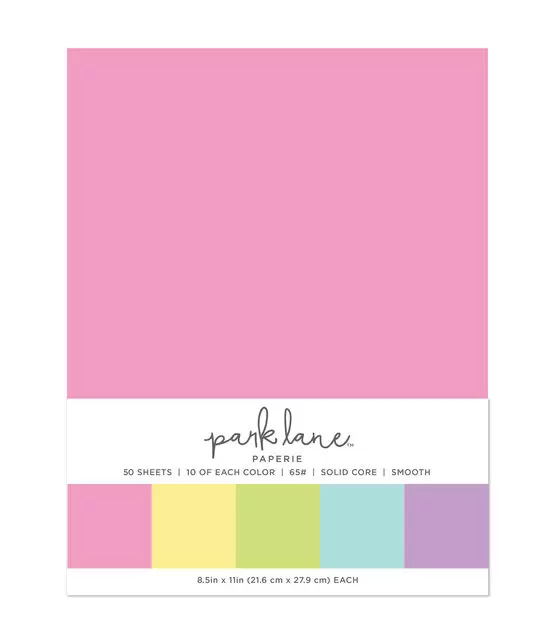
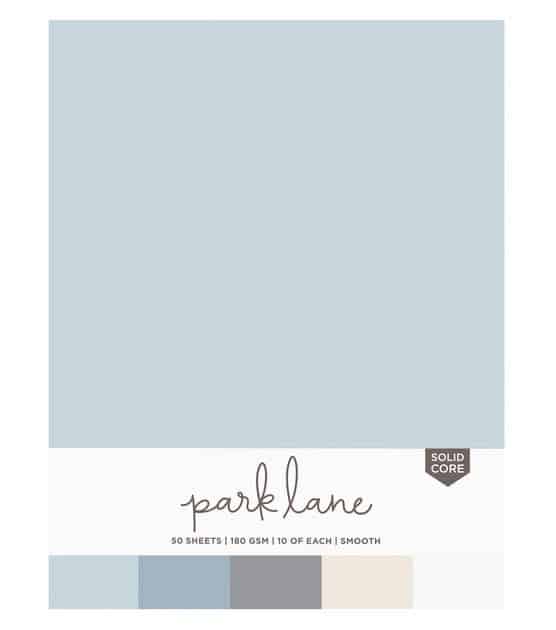
I used the following paper for the flowers in my shadow box: Pastels and First Snow.
How Much Paper Do I Need?
For an 8-inch square shadow box, you'll need 7, 8.5 x 11-inch sheets of various pastel-colored papers and 1 sheet of holographic paper for the butterfly.
If you're using less colors, then you'll need less paper. Of course, there's no harm in cutting extra flowers, so when in doubt, grab some extra paper!
You'll also find it's nice to have extra pieces while you're creating your shadowbox in case you need to fill in an empty spot.
Looking for even more FREE paper flowers and butterflies to use with this project? Click HERE!
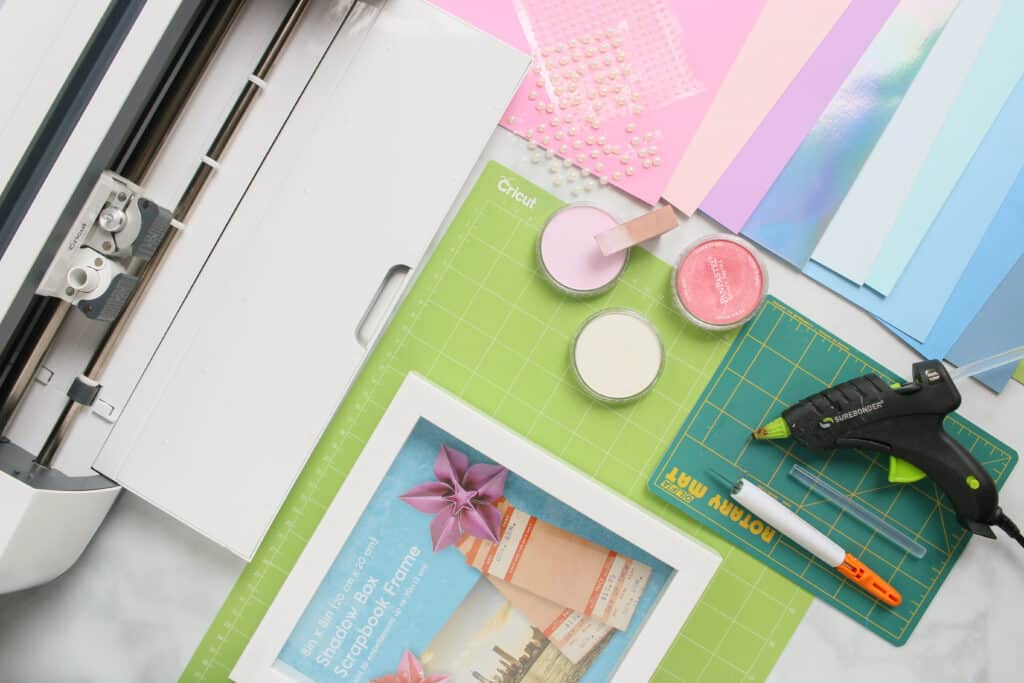
Layered Paper Flower Shadow Box Supplies
- Cricut Maker, Cricut Explore, or Other Cutting Machine
- You can cut this on any Cricut machine. If using the Cricut Joy, make sure none of your flowers are wider than 4.5”
- 12" x 12" or 12" x 24" Standard Grip Cutting Mat
- Cardstock: Pastels, First Snow
- *Layered paper flowers look best with solid core paper
- Holographic Paper
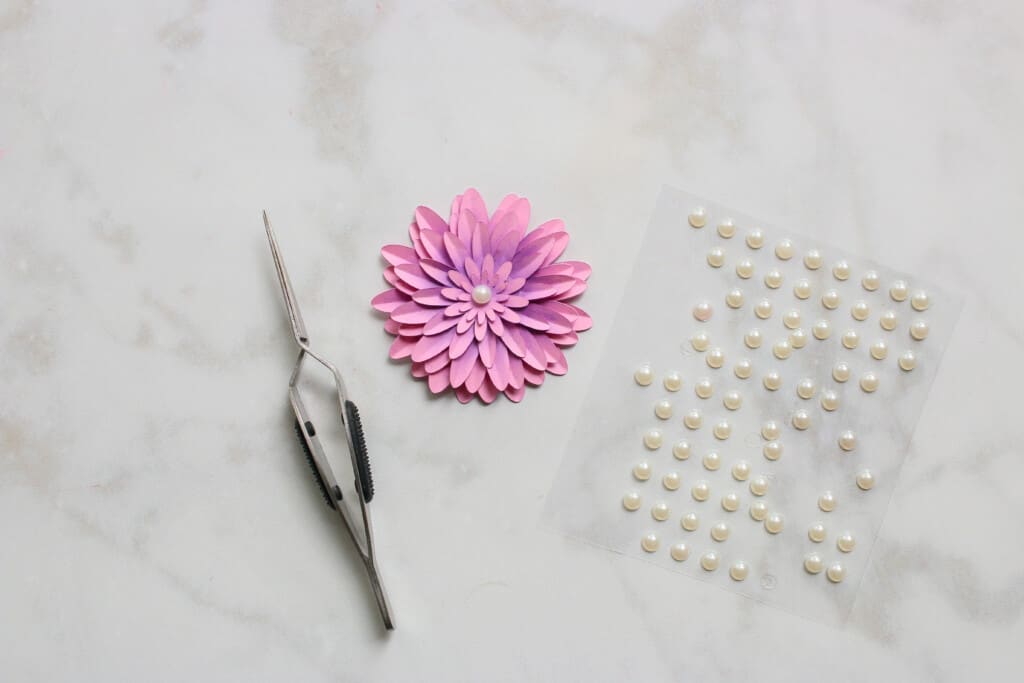
- Pearl Stickers
- Hot Glue Gun
- Hot Glue Sticks
- Finger Guards
- *Optional, to protect your fingers from hot glue burns
- 8" x 8" Shadowbox Frame
- Craft Knife
- Self-Healing Cutting Mat
- Foam mat and ball embossing stylus, optional
- Pan Pastels and Sponges, optional
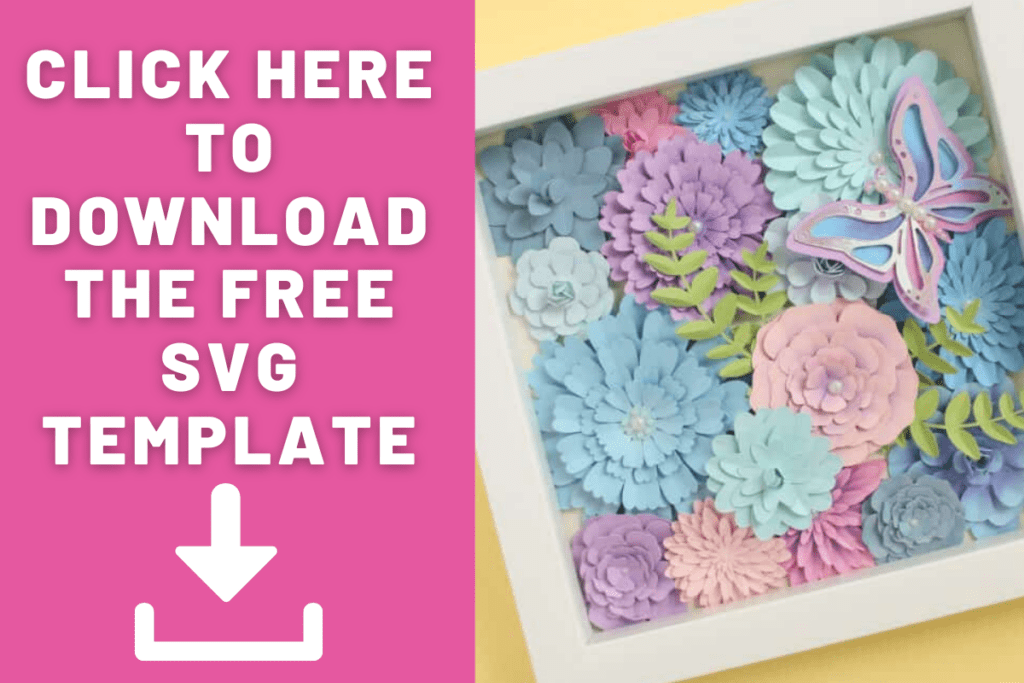
Download the FREE Templates Here
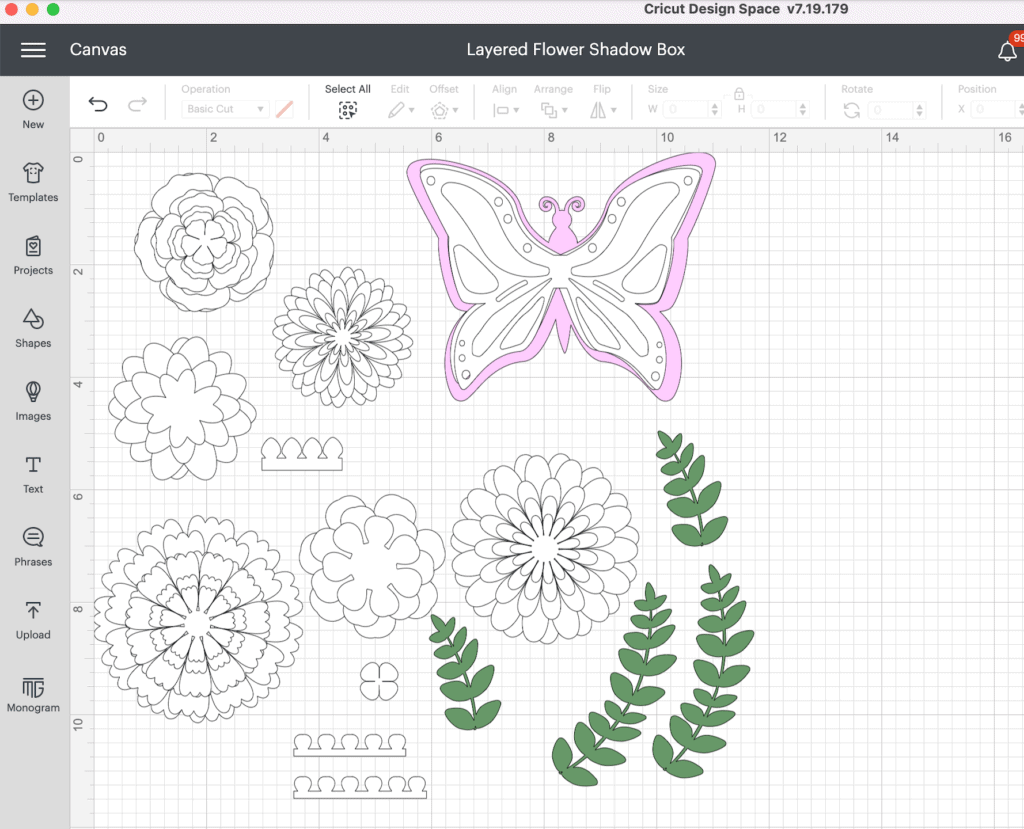
Step #1: Upload the Cut Files
Open Cricut Design Space and click the + to create a new project.
In the Design Panel on the left, select "UPLOAD."
If you are a Design Space PRO, you can skip to step #2.
Click "UPLOAD IMAGE."
Click "BROWSE" or drag and drop the file.
Navigate to the file on your device to click "OPEN" to add it to Cricut Design Space.
On the Prepare Screen, you can change the name of the project and add tags. Click "UPLOAD."
Once you have the file uploaded, select it and click "INSERT IMAGES" to bring it onto your canvas.
Select "UNGROUP" in the top right-hand corner. Then "UNGROUP" the flowers from the butterfly and the leaves.
STEP #2: PREPARE THE CUT FILES IN CRICUT DESIGN SPACE
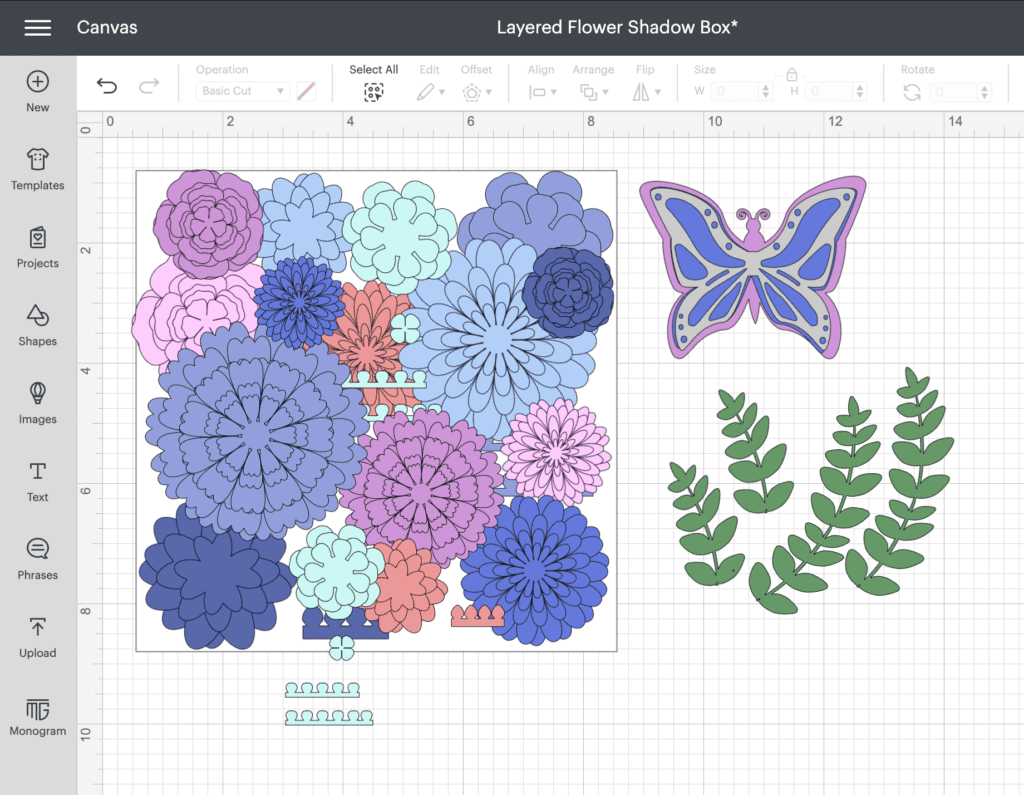
Change the colors of the flowers to imitate your paper choices.
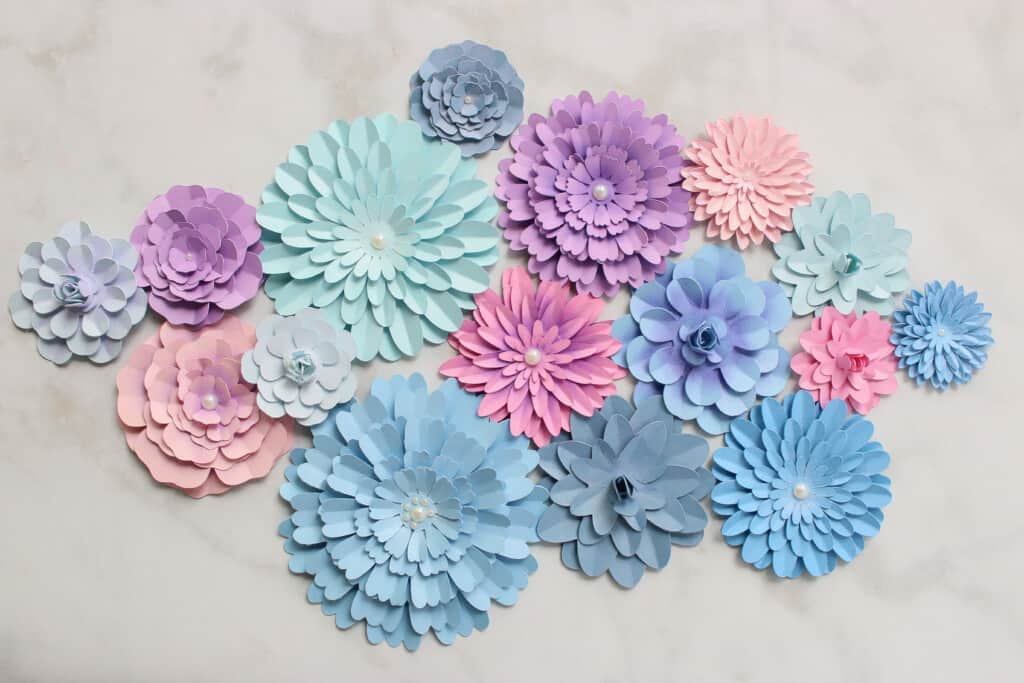
For this 8 x 8-inch shadow box, I cut out one set of flowers at the original size the files come when uploaded. Then I cut out another set of flowers at a slightly smaller size, and then a third set of a few flowers at an even smaller size.
I adjusted the size of the butterfly to be 3 inches in diameter.

*PRO TIP: Create an 8 by 8-inch square shape in Design Space to represent the shadow box. Right-Click it and send it to the back.
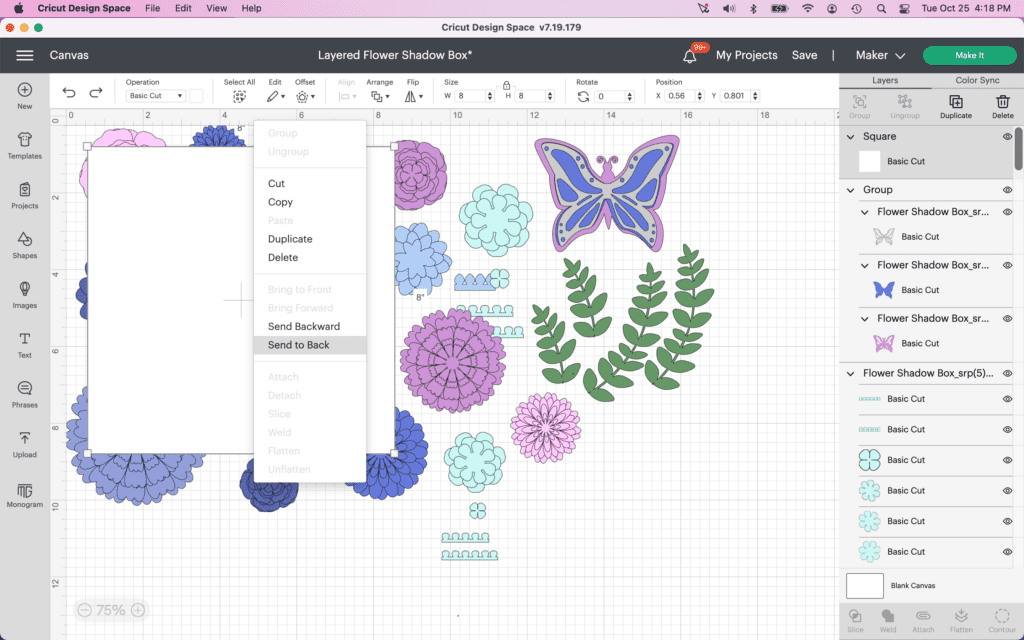
This can help you figure out how many flowers to cut out for your particular shadow box. Now you can arrange the flowers within the parameters and visualize everything before cutting out your flowers.
Of course, when in doubt, cut extra flowers! It's always helpful to have options when creating a flower arrangement.
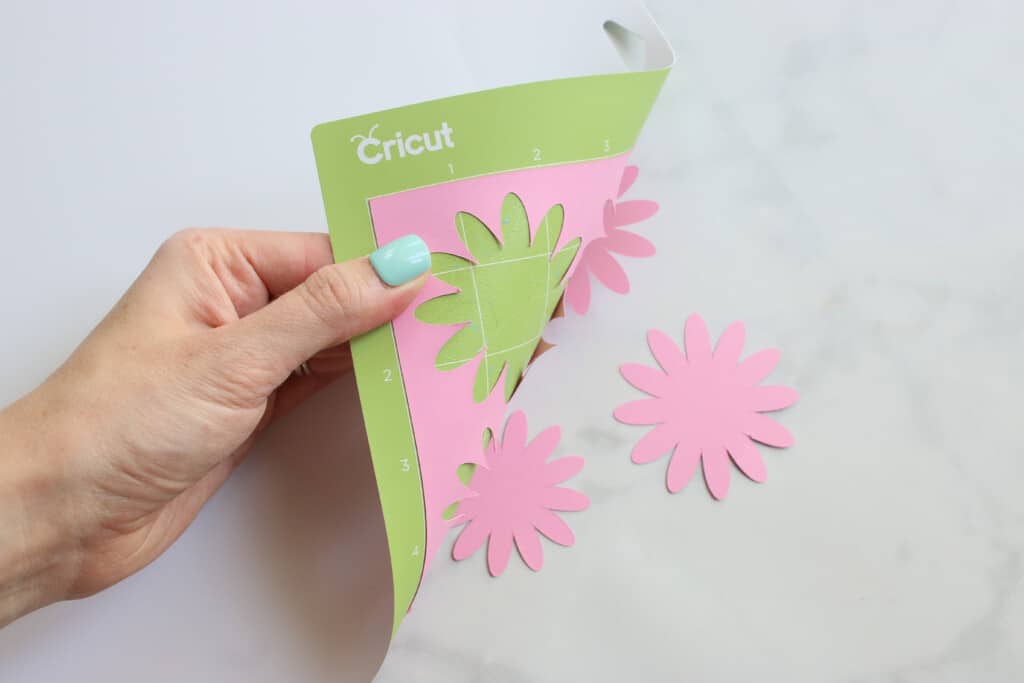
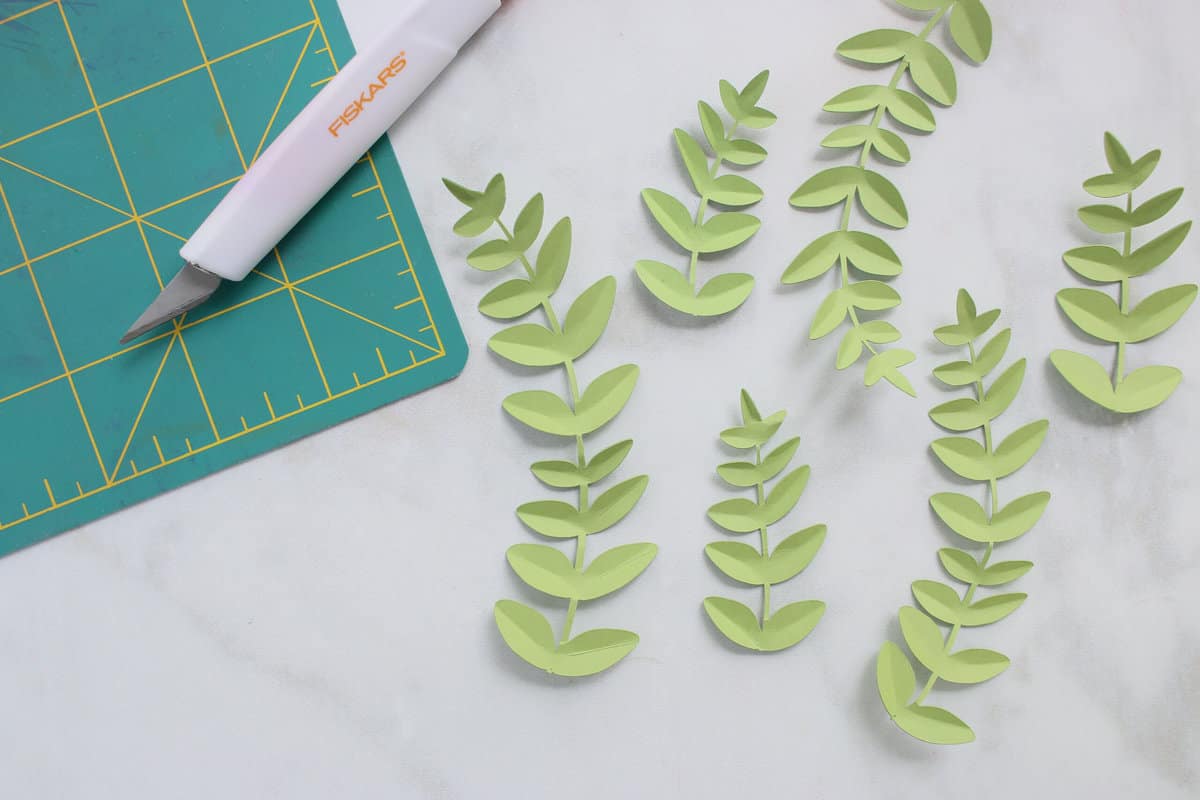
Step #3: Cut Out Flowers, Greenery, and Butterfly
Start by removing the clear liner from your Cricut mat and then set it aside.
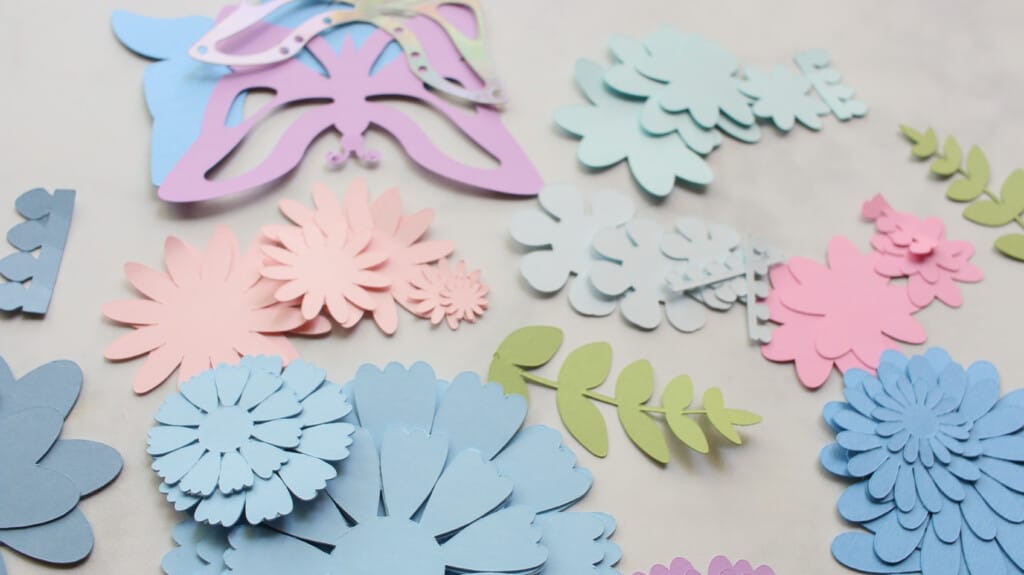
For cardstock, I used a mix of blues, purples, and pinks for my flowers and greens for the leaves.
The butterfly is blue, purple, and the top layer is a really pretty holographic paper. This is totally optional, but I love the shine it adds to the final look. So if you can, spring for the holographic paper!
Place the cardstock paper onto the mat and press down firmly on the paper to adhere it to the mat. This step is really important when cutting out cardstock to ensure you get the best results possible.
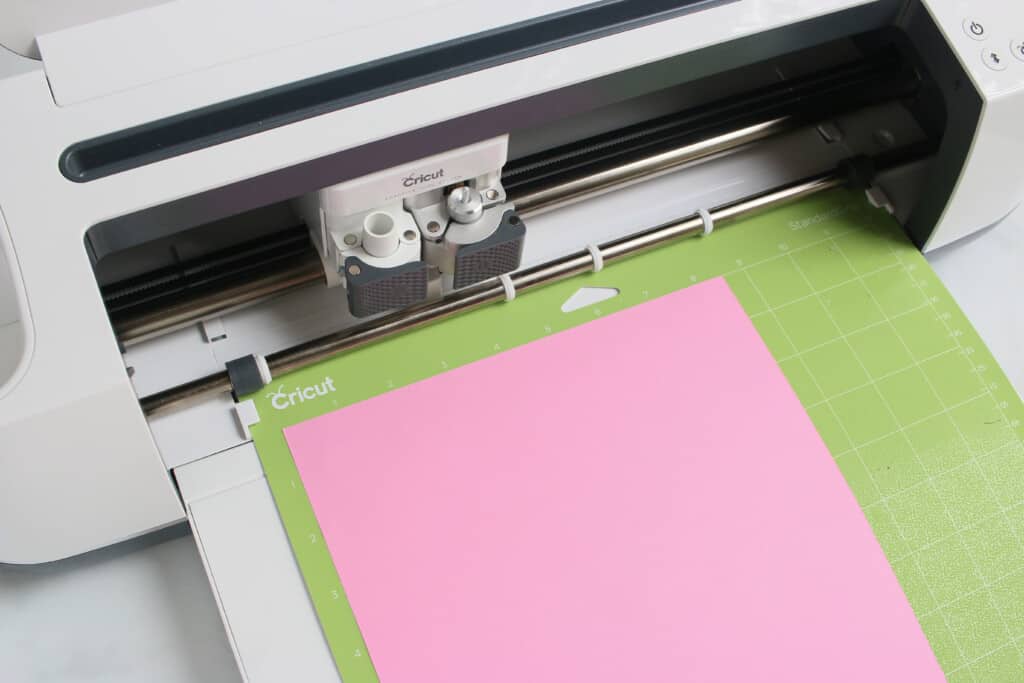
Insert the mat into the cutting machine and press "GO."
Once the machine has finished cutting the design, remove the mat from the machine. Repeat this process until you've cut out all of the pieces for your shadowbox.
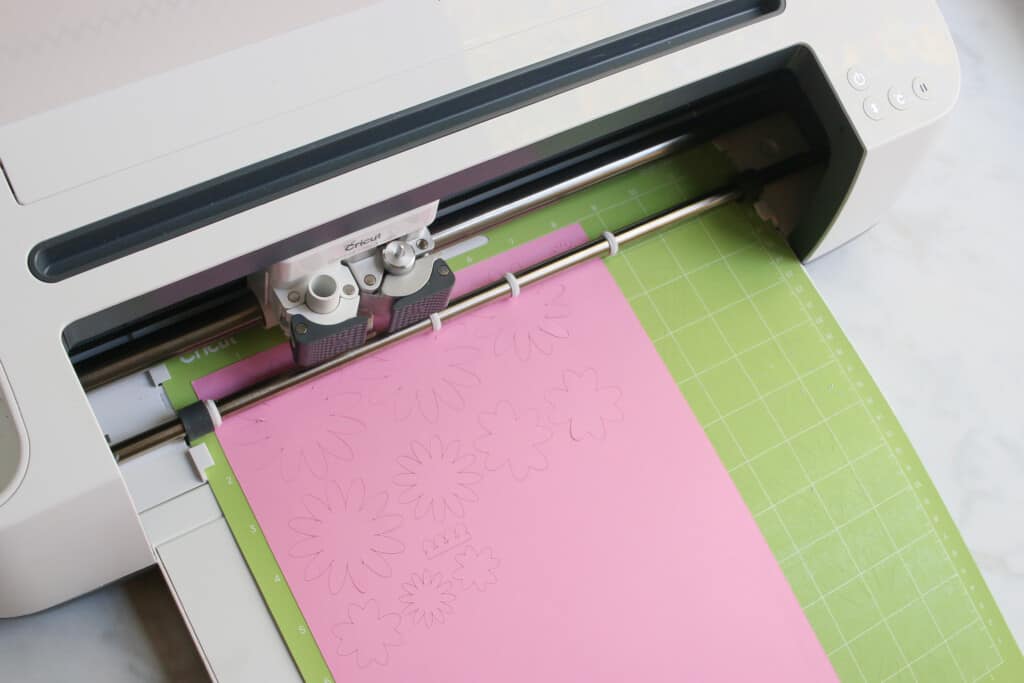
Peel the mat away from the paper to avoid bending your flower pieces.
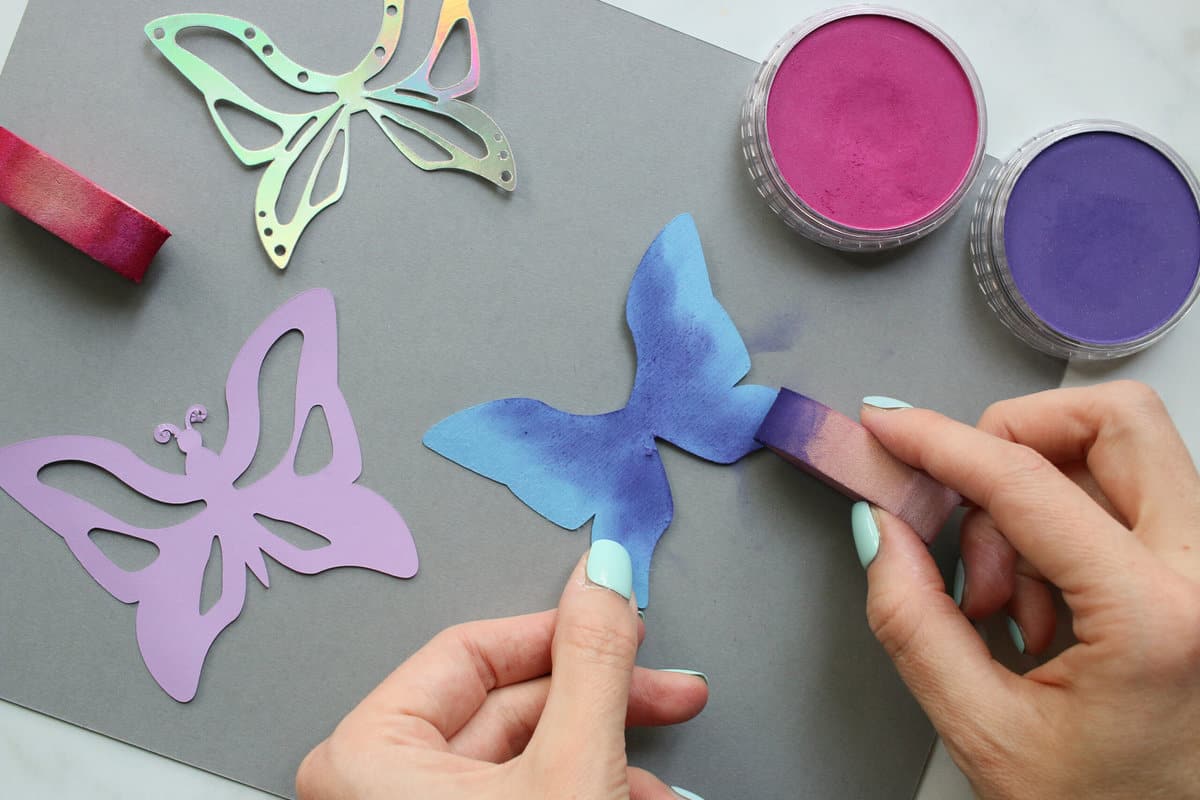
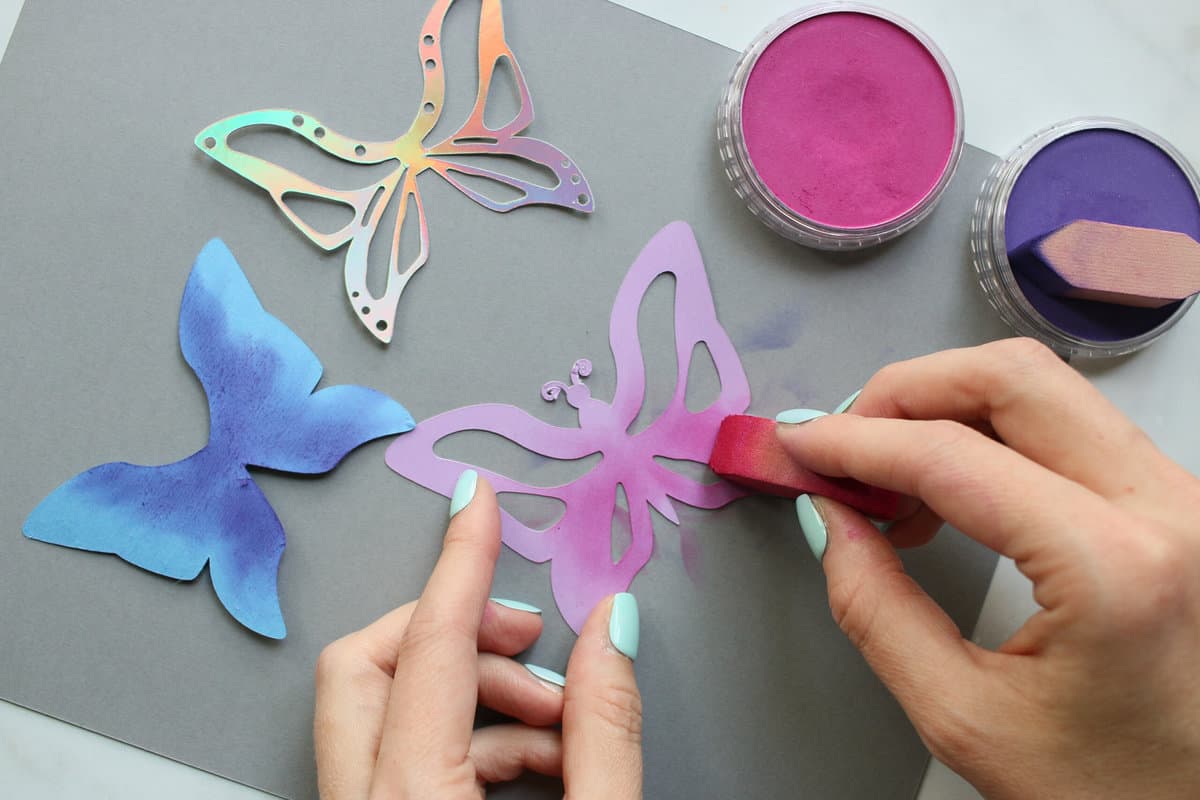
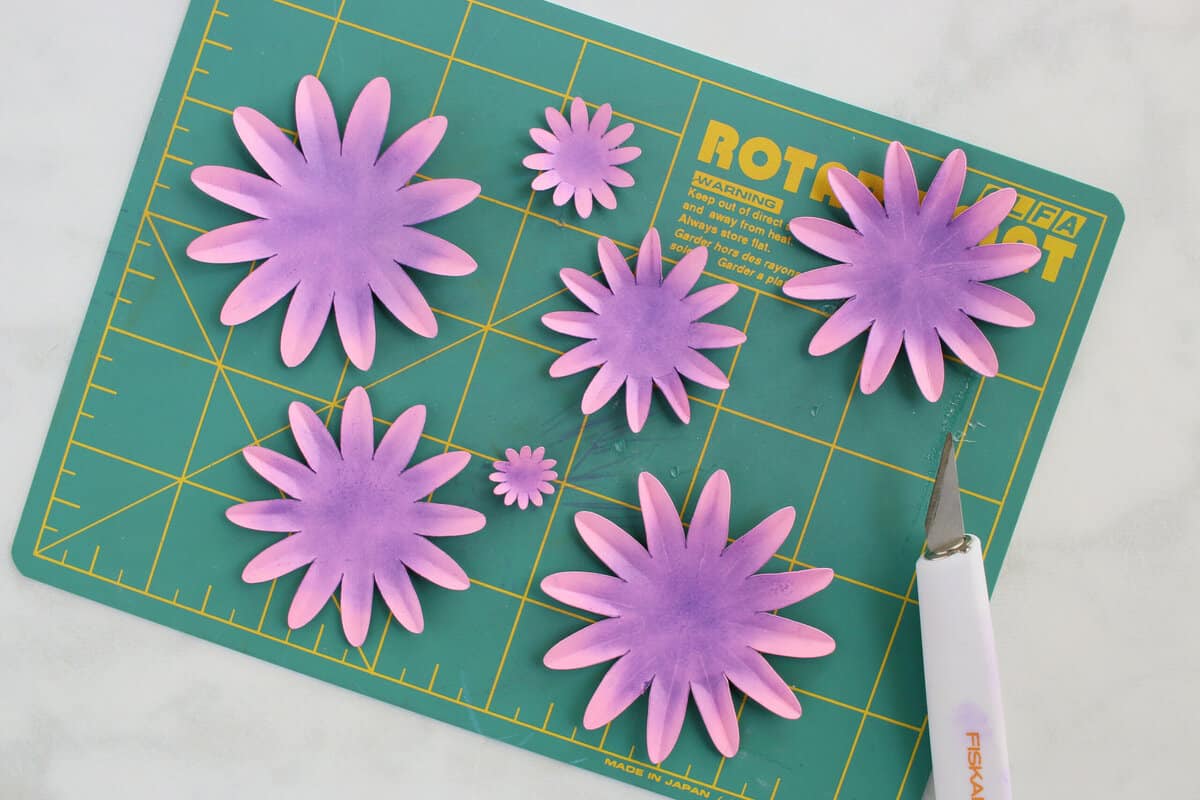
Step #4: Add Pan Pastels
This step is optional, but I highly recommend it if you have Pan Pastels on hand! They add a realistic dose of color and depth.
Protect your work area with a piece of scratch paper or paper towel. It's also helpful to have some baby wipes on hand to clean your fingers in between different flowers and colors.
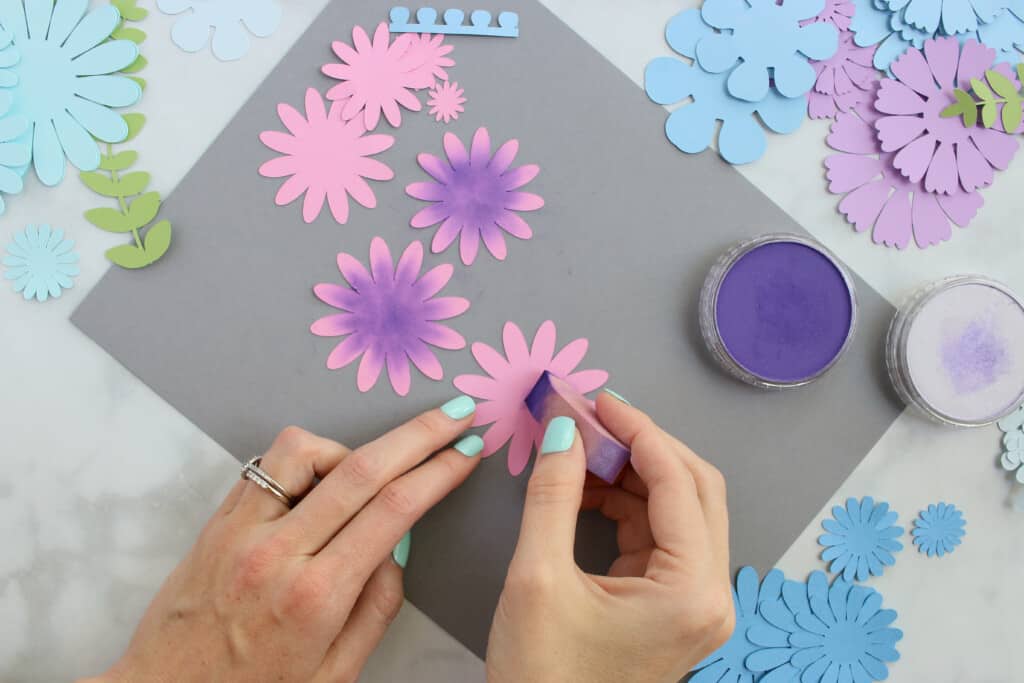
Lightly dip your sponge into your pan pastel and gently swipe the color onto your paper pieces. I like to start at the center of the flower and swipe outwards, concentrating the color in the middle and lightening up towards the edges of the petal.
I used two colors on my butterfly; violet on the blue layer and fuchsia on the purple layer.
Step #5: Shape Petal Pieces
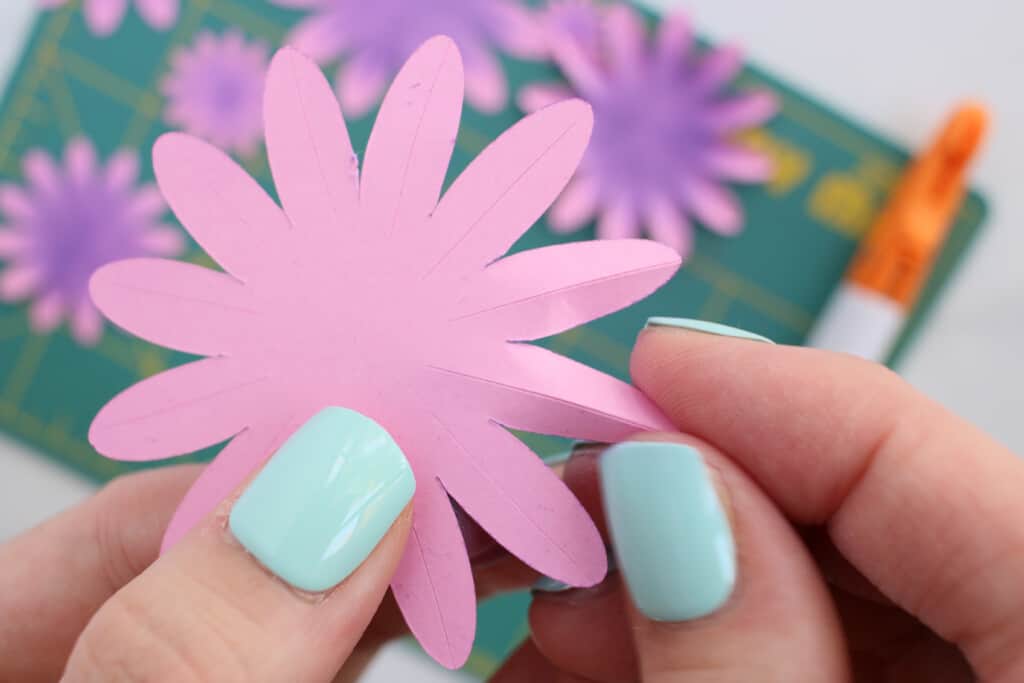
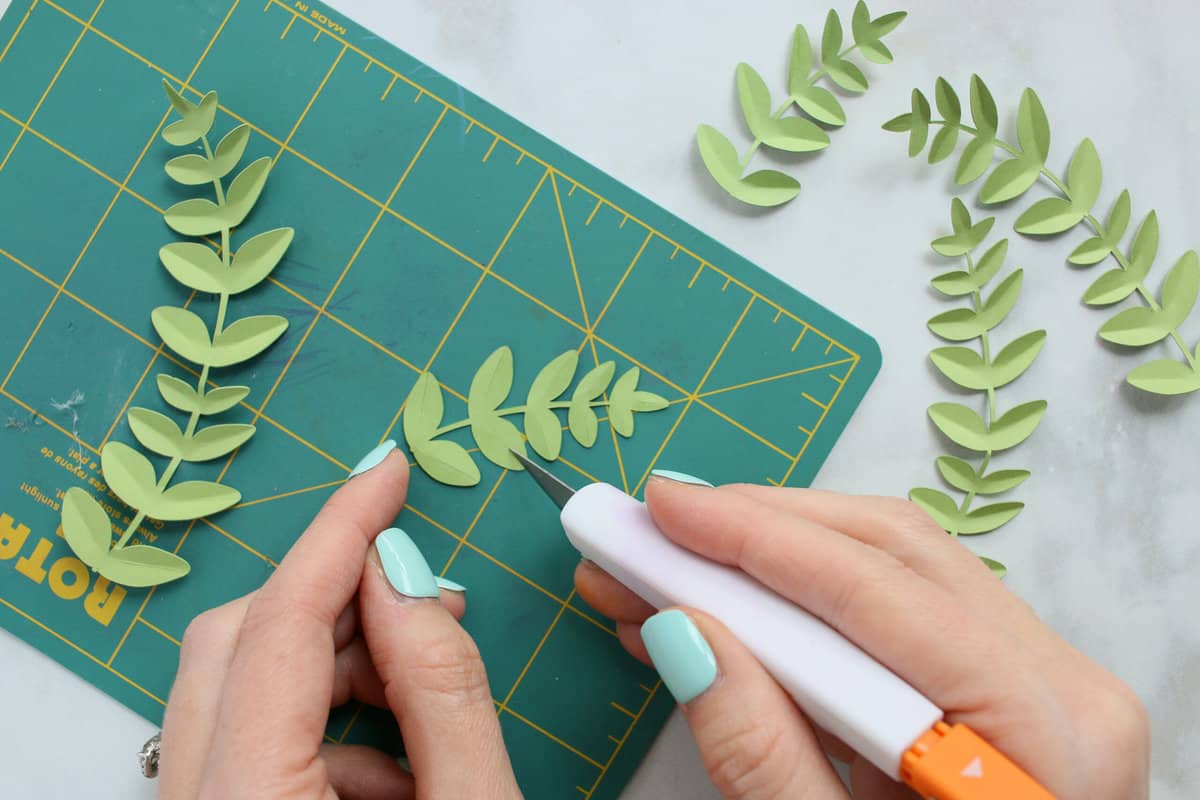
To add dimension to your flowers, I am using a craft knife and a self-healing mat to create score lines and fold my petals. I love the sharp lines this gives the flowers.
Flip your flower piece over and gently run the craft knife along the center of each petal.
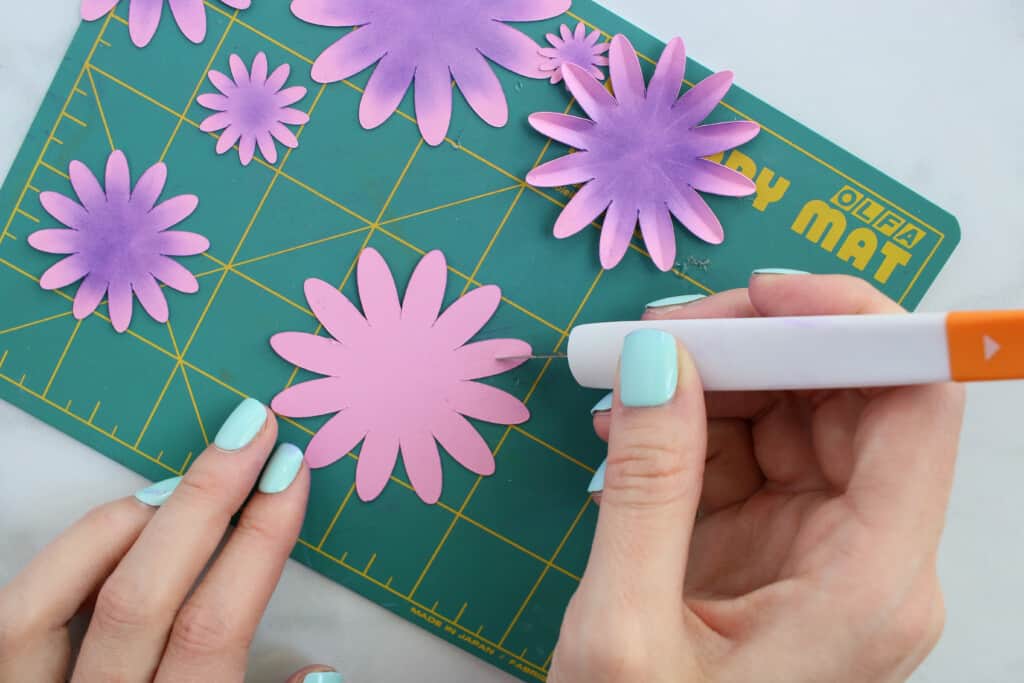
Then fold along each line you make.
You can also use a foam flower shaping mat and ball embossing stylus. This method give the flowers a softer look and is much quicker.
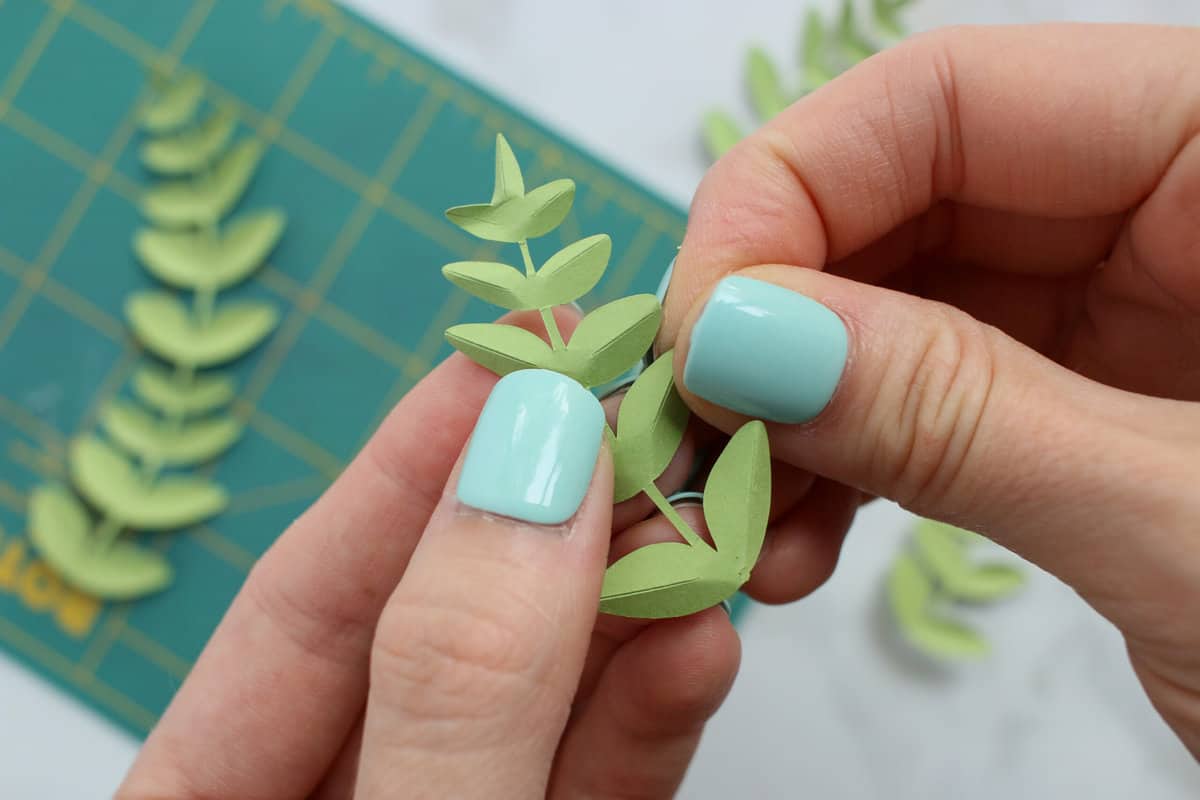
Using a craft knife and a self-healing mat, make score lines along all your petals and your leaves.
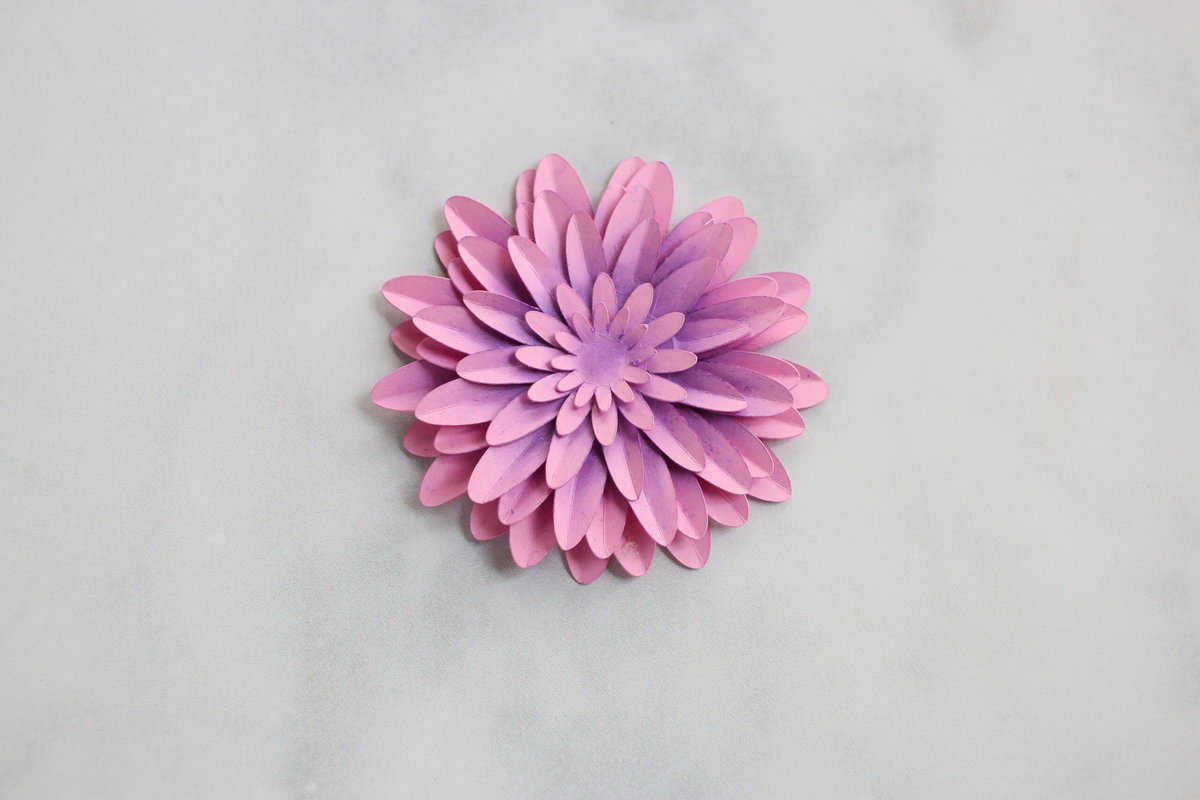
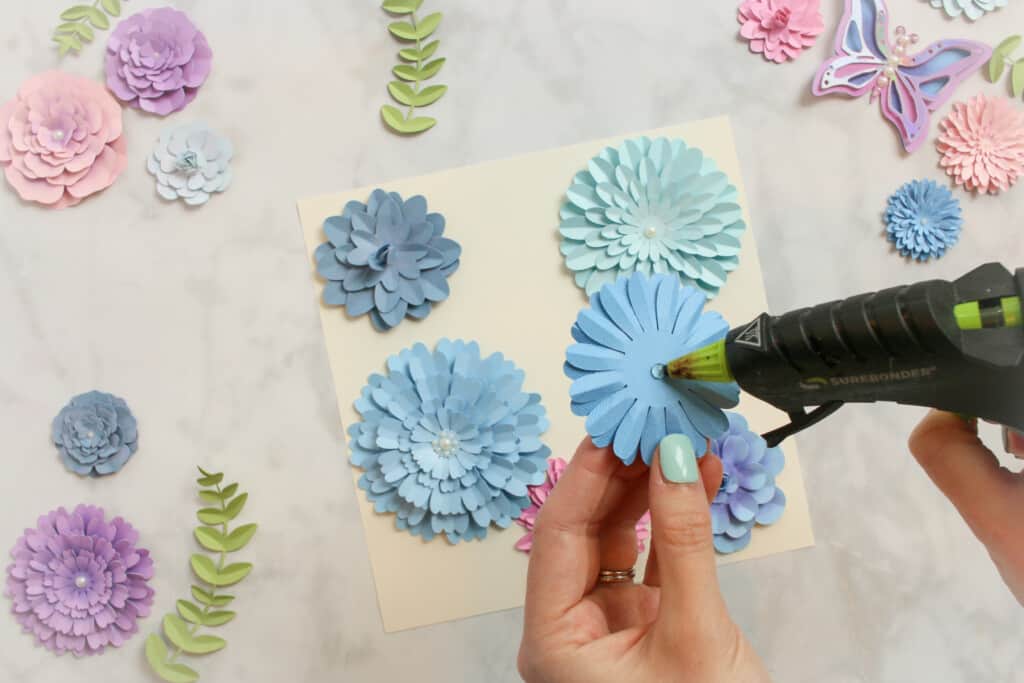
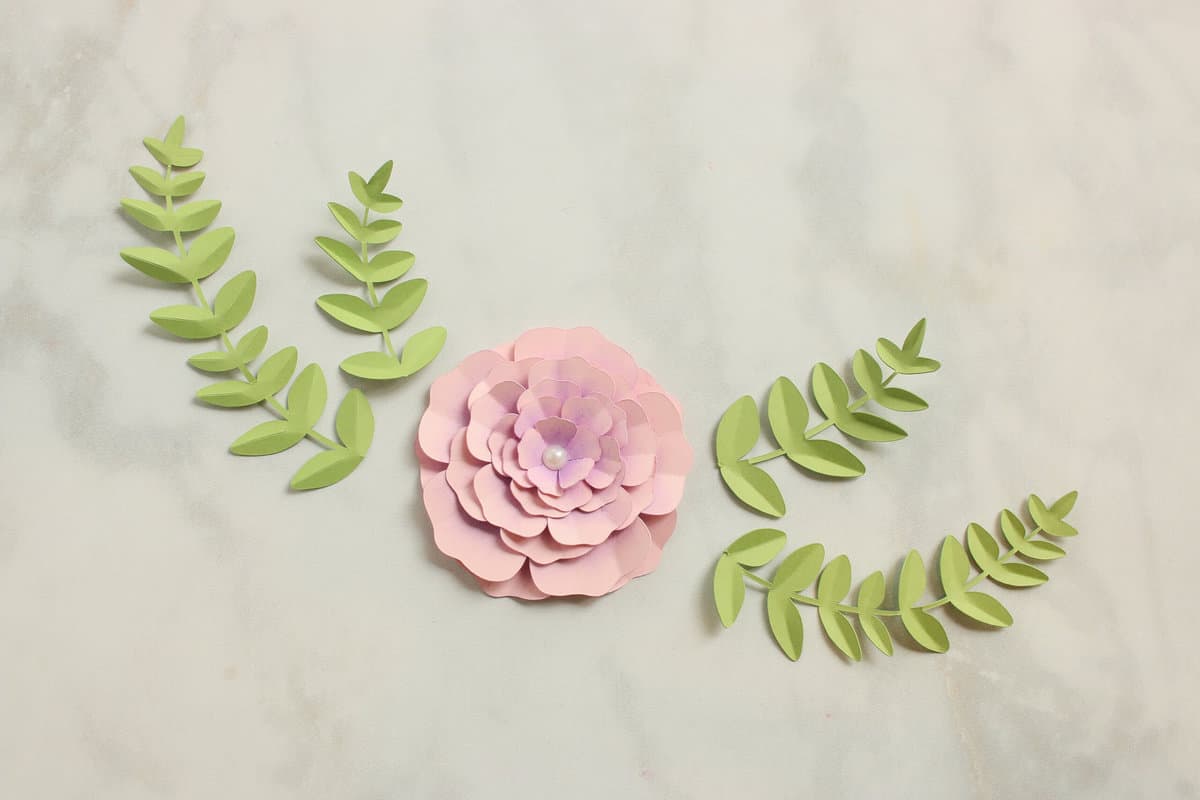
Step #6: Layer and Glue Flowers
Once you cut out, colored, and shaped all your flower pieces, it's time to glue them together. I like to just a hot glue gun because it dries so quickly. However, you can also use tacky glue if you prefer, you'll just need to give your flowers a bit more time to stabilize.
For the flowers, start with the largest petal piece and add the next largest petal, staggering the petals.
Continue gluing until you glue the smallest petal in place.
Some of the flower designs have a rolled stamen piece. To put this together you can either (1) use a quilling tool to roll up the piece or (2) roll up the piece by hand.
Then glue the stamen piece in place.
For the flowers without a stamen piece, you can place a pearl sticker in the center of the flower. Craft tweezers can be helpful for this.
Step #7: Assemble the Butterfly
The small, solid butterfly will be the base layer of the butterfly. Apply glue to the very center portion of the butterfly and apply the other colored butterfly.
Next, apply glue to the center back of the holographic butterfly and place it on top.
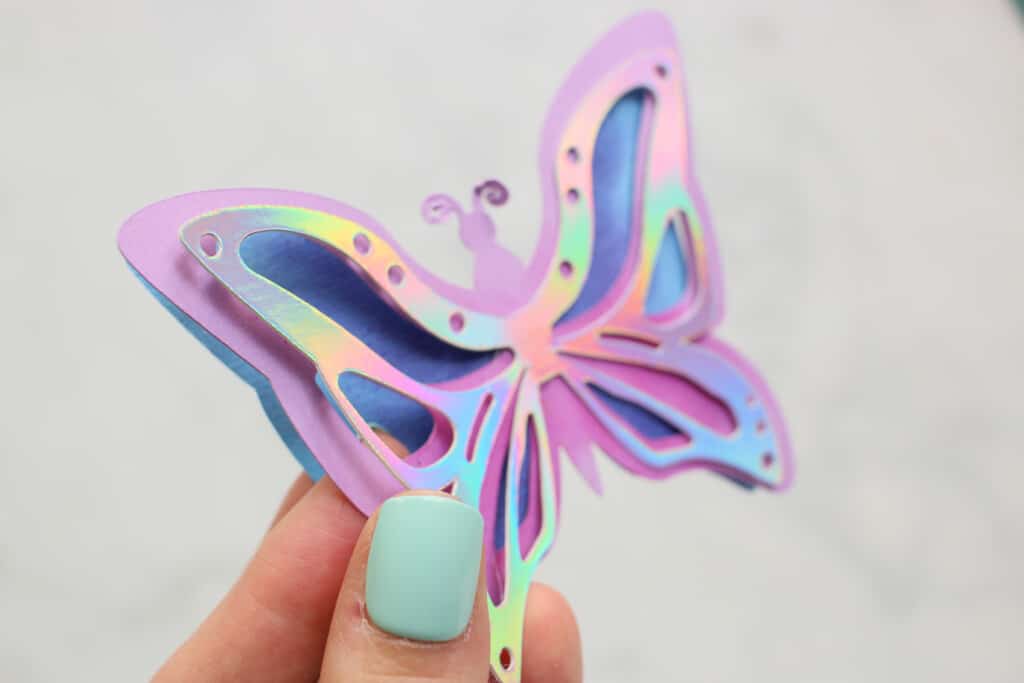
For the final touch, add pearl stickers to the body and antennas.

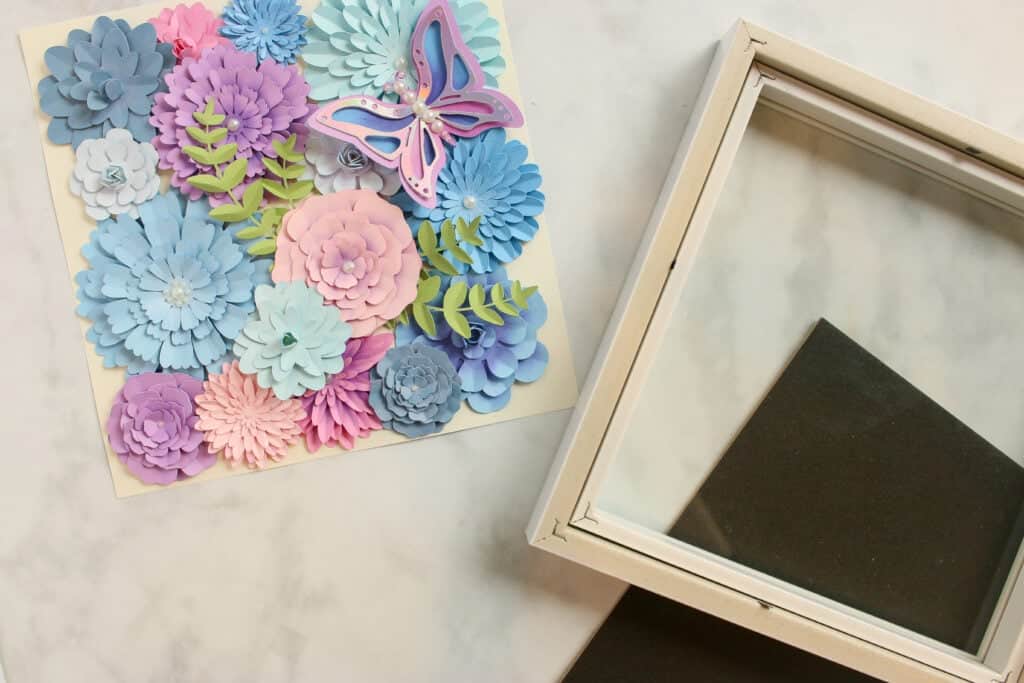
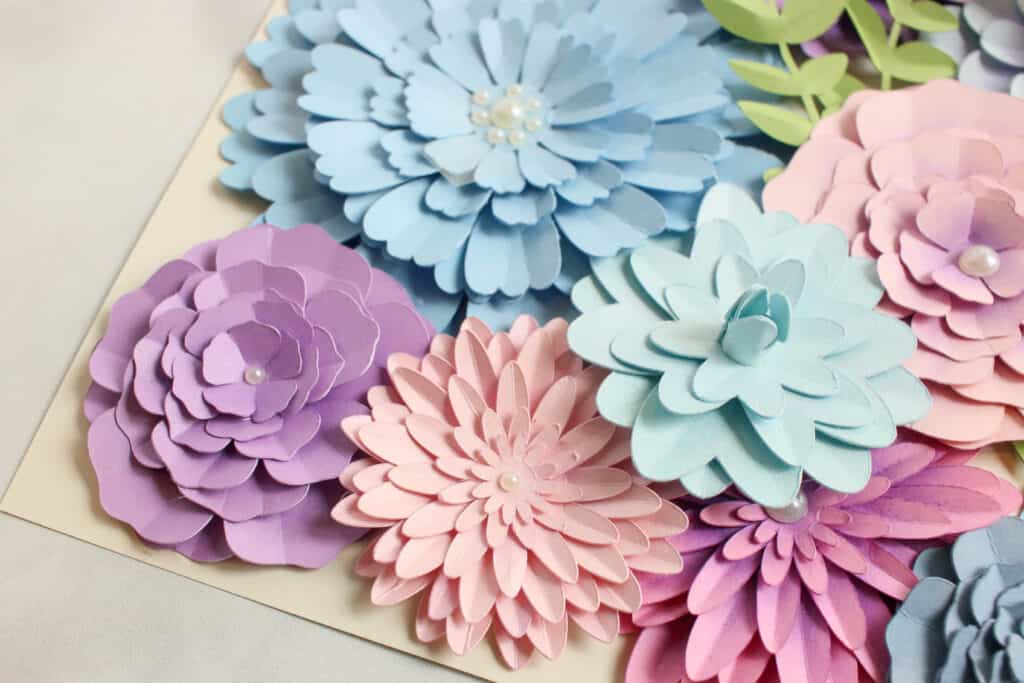
Step #8: Assemble the Shadow Box
Cut a white piece of cardstock to fit your shadow box; in my case, 8 by 8-inch. This will be the base for your layered flowers.
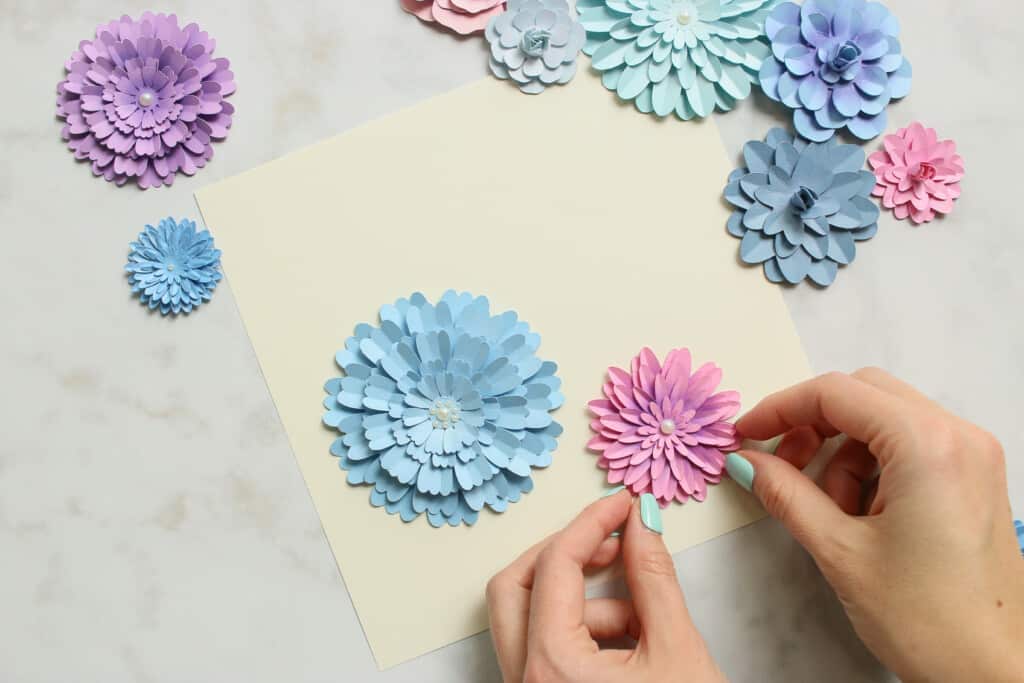
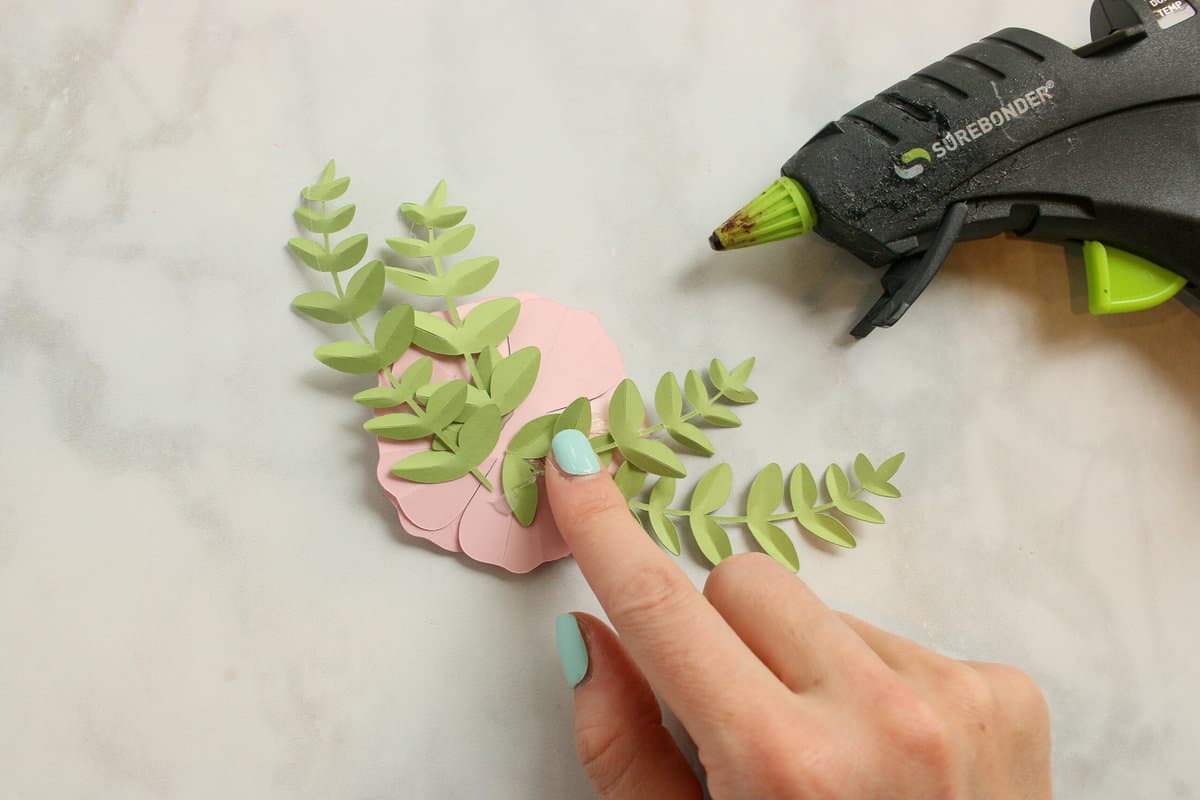
Now begin to arrange your layered flowers and greenery in your shadow box.
I like to arrange everything to my liking without gluing, and then I go back and begin to glue down the pieces. This way I avoid gluing down anything prematurely.
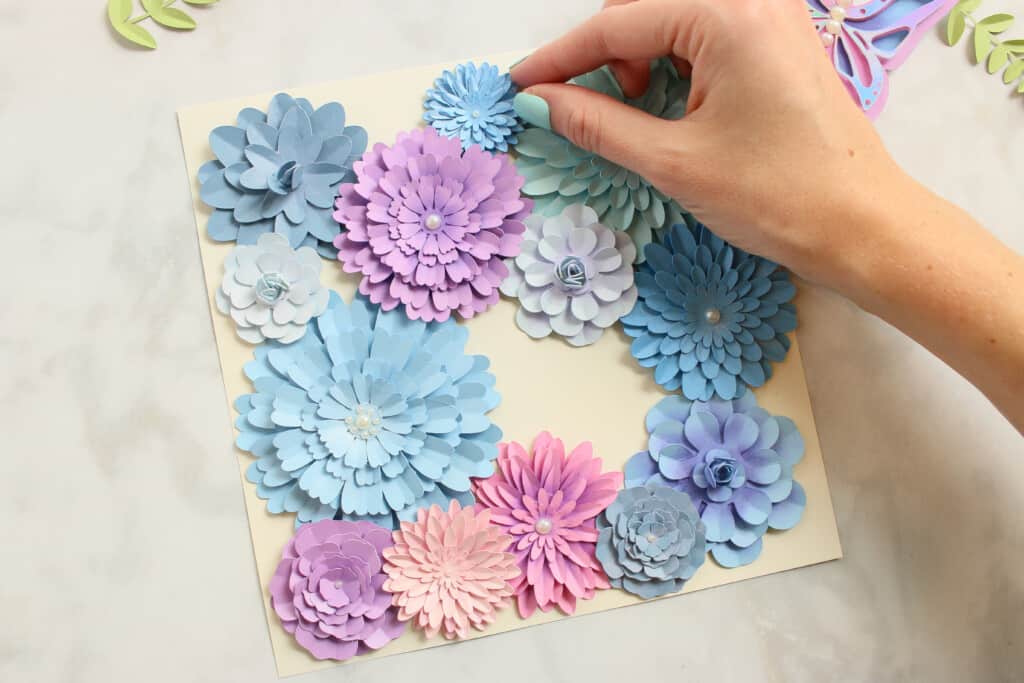
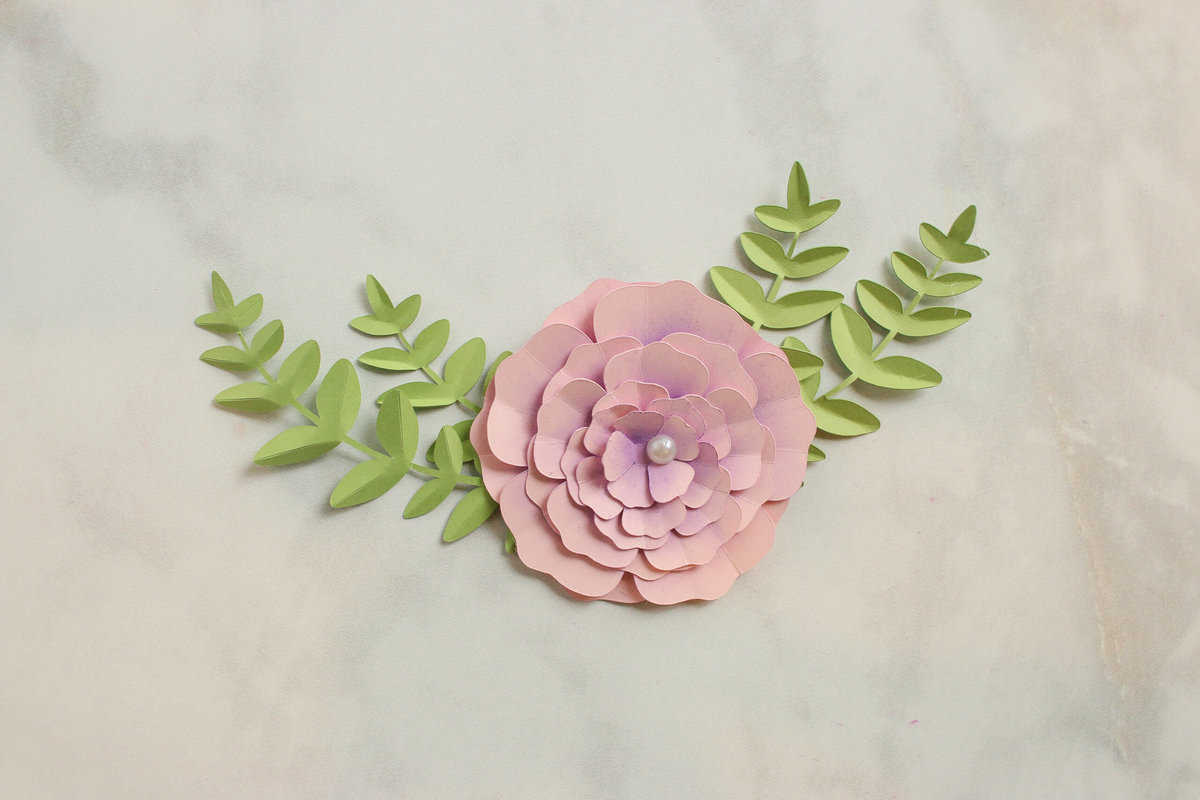
I decided to "frame" one of my roses with the greenery, so I glued four leaf pieces to the back of a pink rose before gluing it to my shadow box.
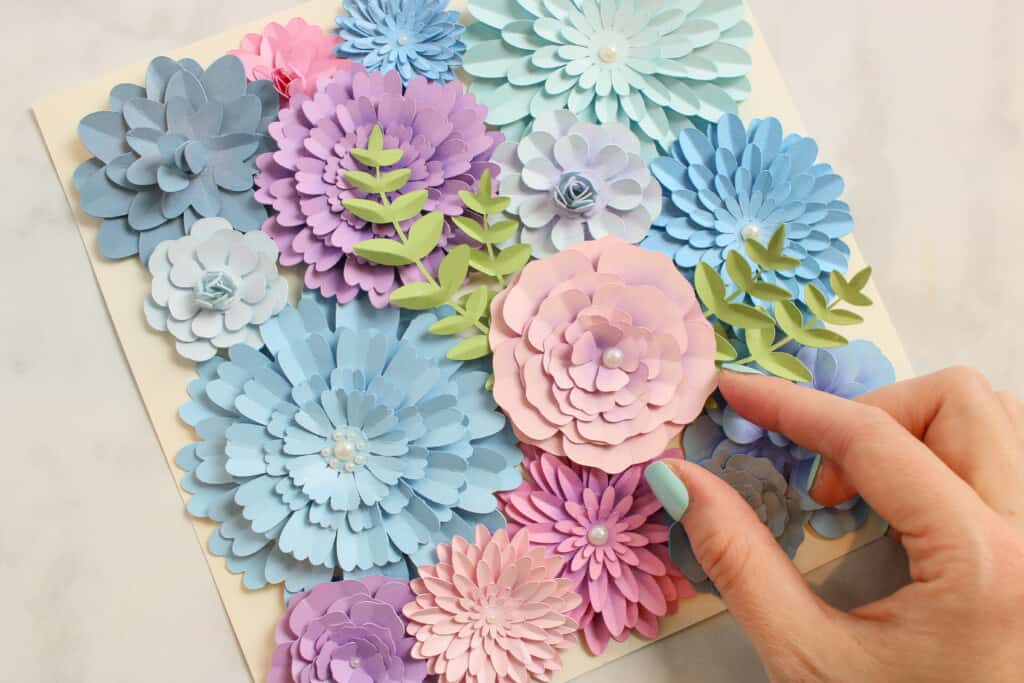
Add the butterfly at the end, placing it in one corner of your shadow box, and adhering with a dab of glue.
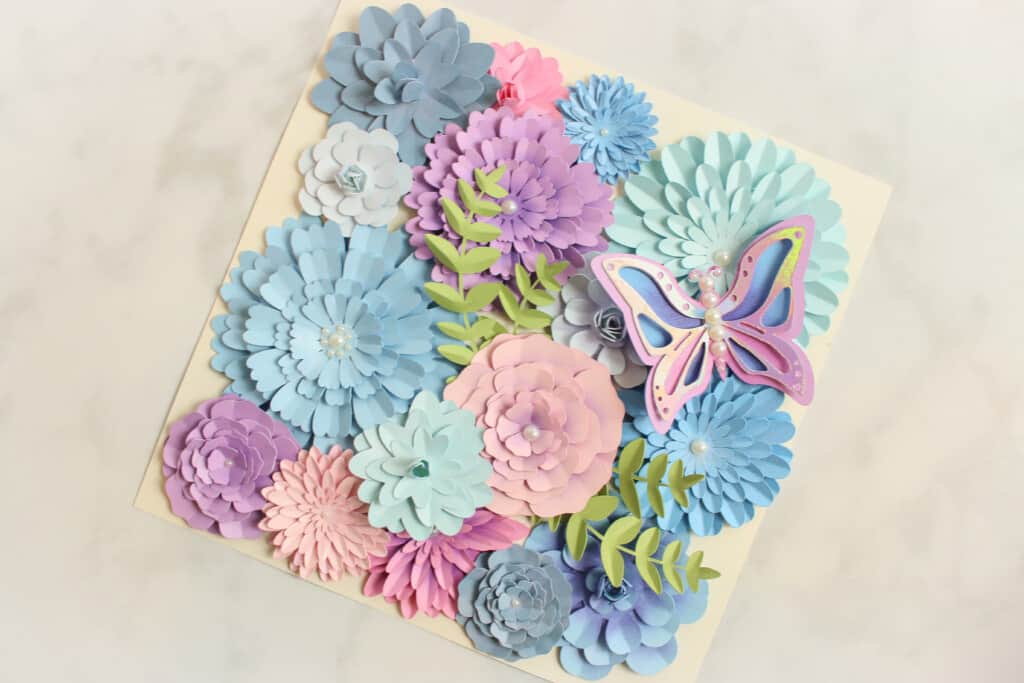
Replace your art piece back into your shadow box frame and you're done!
These layered flower designs would look lovely in many different interpretations so feel free to experiment with the application!
Want to learn how to make even MORE paper flowers?
Get The Ultimate Guide to Paper Flowers E-Book and get access to ALL of my printable paper flower tutorials and flower SVG files in my Ultimate Guide to Paper Flowers Ebook by clicking here!
Don't forget about this free SVG cut file! Pin it to your favorite Pinterest board by clicking HERE.
Looking for more paper flower projects? Click here!
Join my crafting and sewing Facebook group where you can show us what you’re making, ask questions, and learn from others!
wow. This is so amazing. I cant wait to make it. just downloaded it now. Thanks
Beautiful!
too pretty
WOW!!
Love it! I’ve always been intimated to make paper flower projects.
Very pretty.
Beautiful. Perfect for Spring/Summer display
These flowers are so pretty! I wish my daughter would make me one for Mother's Day 🙂
I just love all of your paper flowers!
Love me a good shadow box
Beautiful
spring has sprung
This is a great gift idea!!
This would look lovely in my granddaughters room❤️
I’d like to receive this as a gift!
So pretty!
this looks complicated
Such cute ideas! Thank you!
Very pretty! Love the butterfly!
Oh how adorable.
I love your finished look.
Love this!!!! I am elderly and we were only able to make flowers out of Kleenex and crape paper!!! Maybe will be able to get one of these machines one day. Enjoy seeing all the beautiful things you can make with them!!
So pretty!
This is a truly beautiful project.
This is one of the prettiest paper flower projects I have ever seen! Simply stunning!
Very cute
This one would be so fun to make.
This is probably one of My Absolute Favorite Projects EVER!!! I love all the extra details!!!
Love this!! I don’t want it have a Cricut but I can do this with my Sizzix machine!
Gorgeous project! Thanks for sharing.
Love it!!!
I decorate my house with flowers. I want this for my bedroom. Hope I can win and make it.
I like the shadow box idea, but I think I would choose another project to highlight inside.
Adorable & very detailed.
Absolutely beautiful!
This is a gorgeous arrangement and the possible color combinations for the flowers is endless.
Very pretty! Flowers that anyone can enjoy all year long. : )
So beautiful!
Omigosh! Love these colors! Can’t wait to make!
Very pretty!
This would be so sweet for a new baby's room!
I love the detail in this project and the 3-d effect!
The colors on this are amazing. Perfect for my tween.
Great detail and the perfect decoration for spring.
This is beautiful! Great Mother's Day Gift!
great shadow box
Beautiful
Lovely gift!
OMG! Adorable....
This is so cool. Would really brighten up a room.
I'd need an in-person, intro to Circuit course!
This is beautiful!
What a great take on flower shadow boxes. I’m admittedly not a fan of the rolled flower ones.
Stunning! I need to make myself this flower shadow box.
What a great idea!