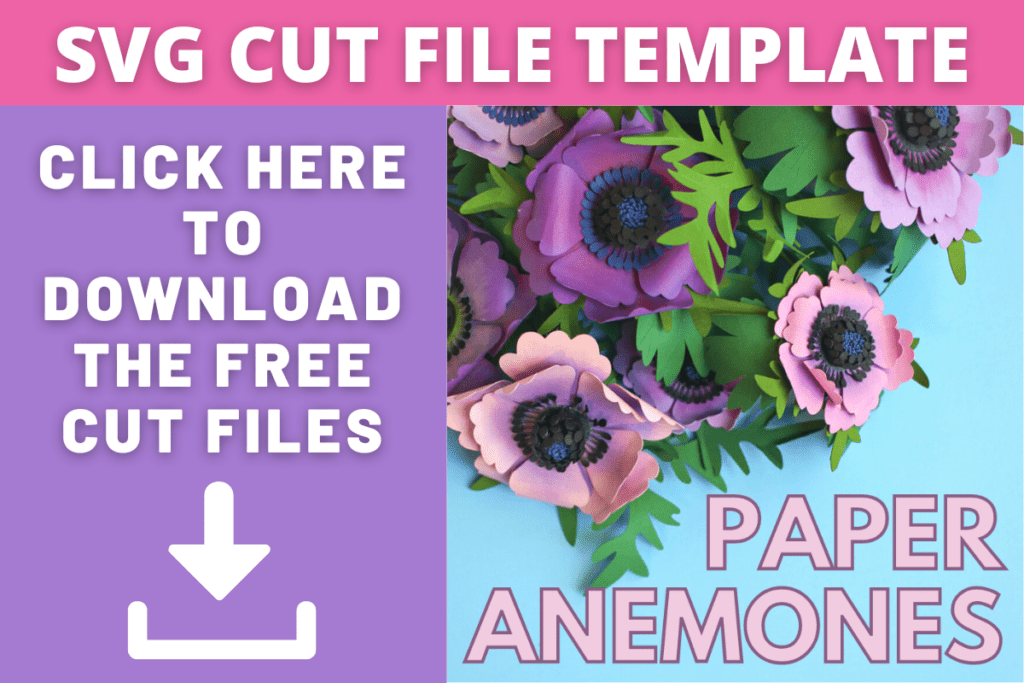
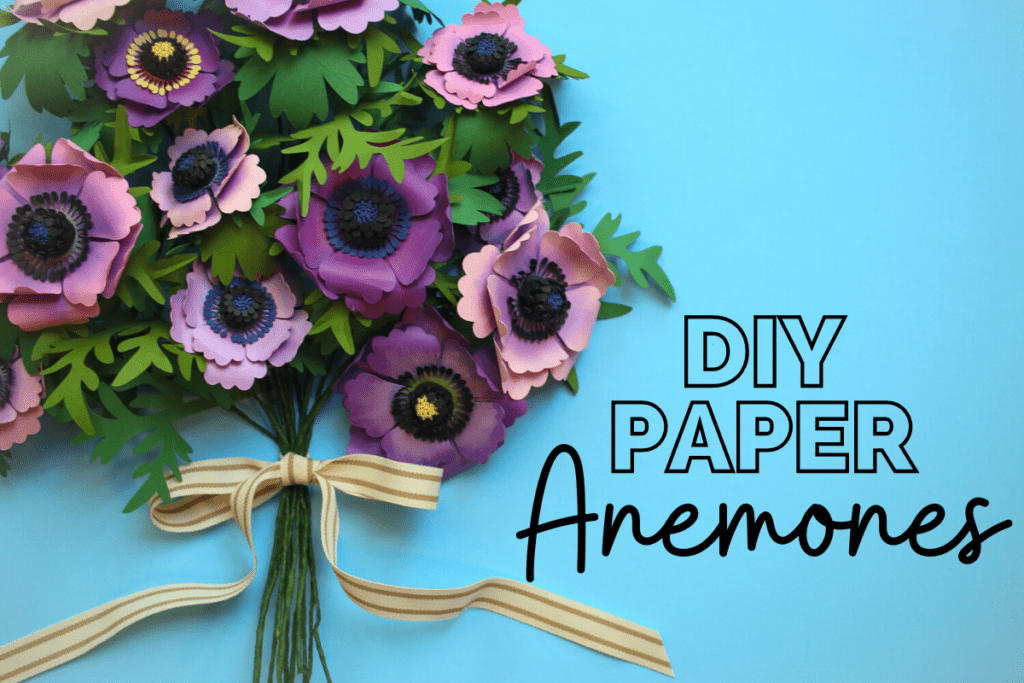
Learn How to Make a Paper Anemone Flower With This Step-By-Step Photo and Video Tutorial.
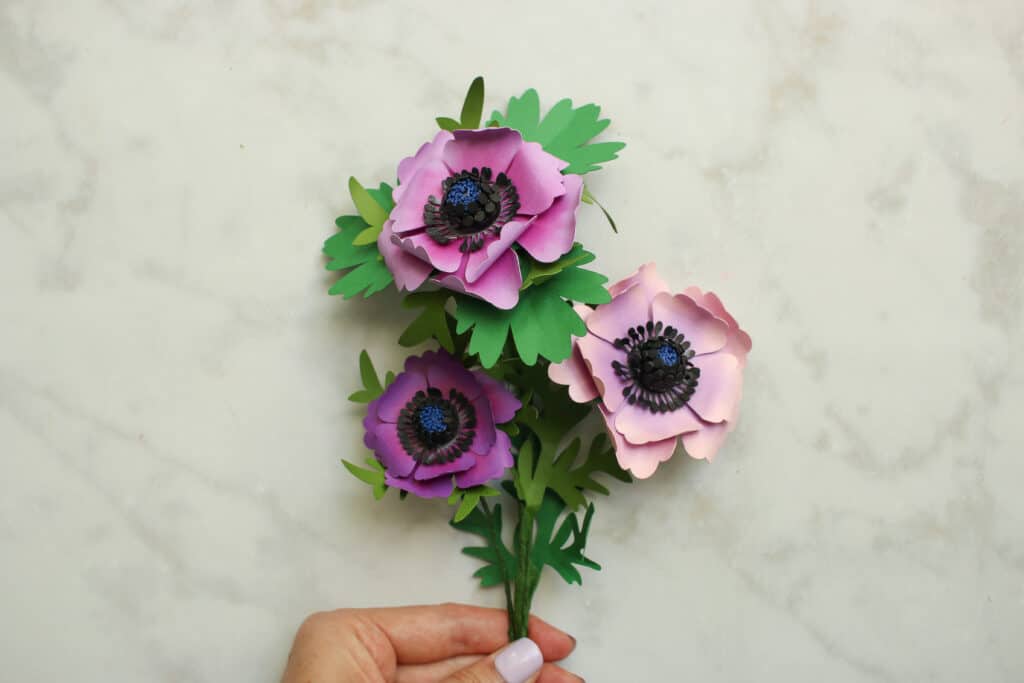
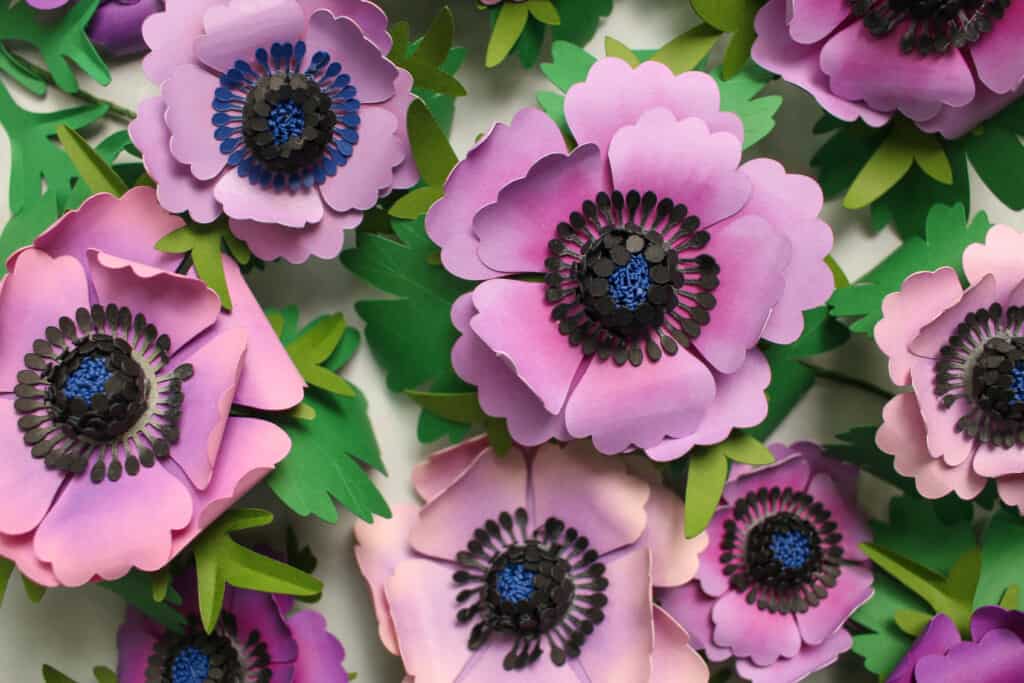
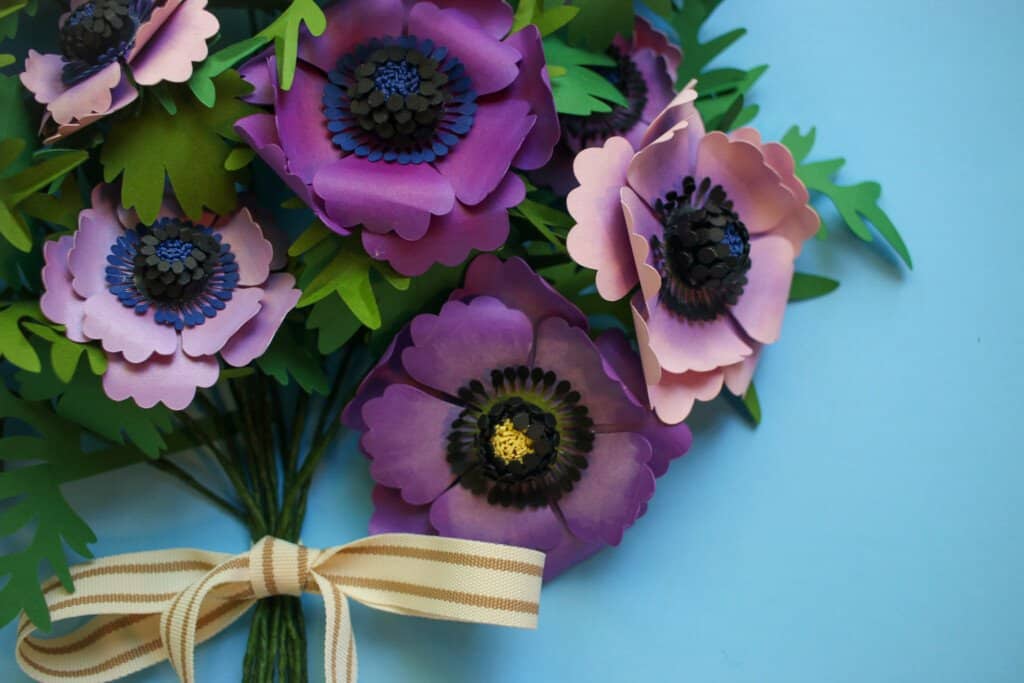
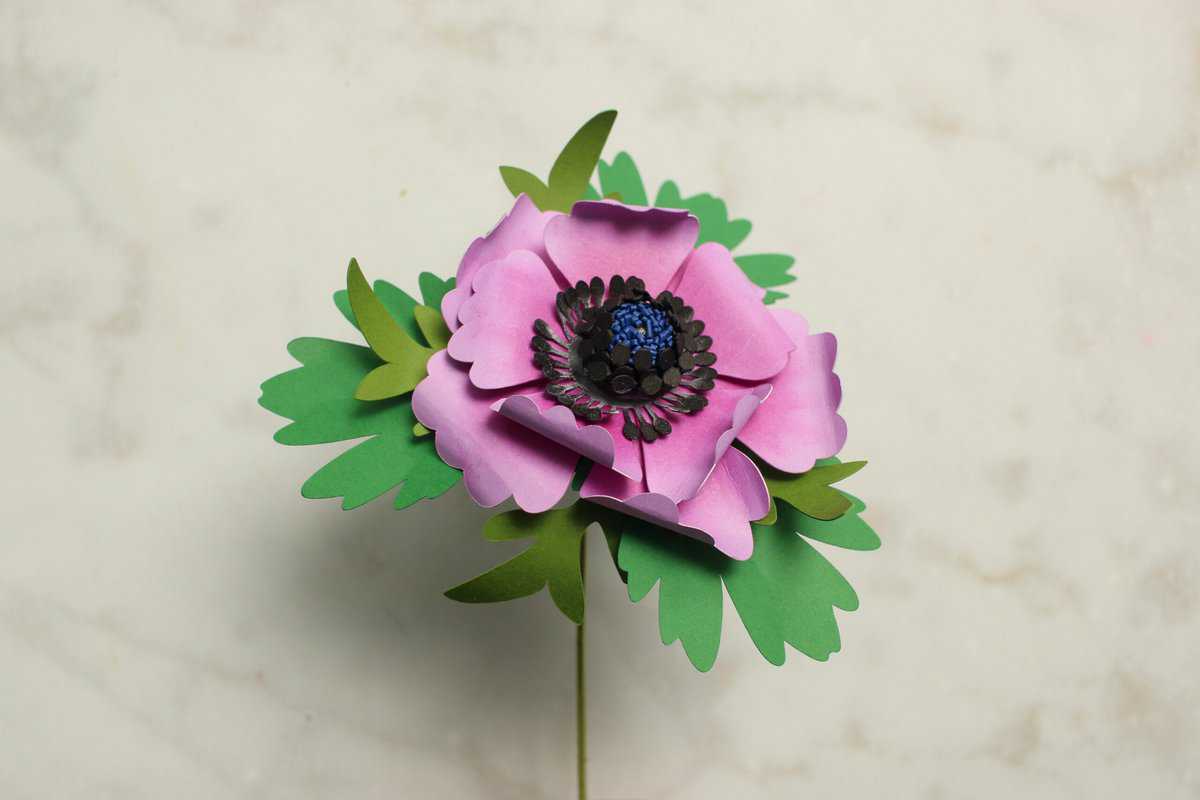
Anemones are one of my favorite flowers! They come in all sorts of colors and I love the delicate and whimsical quality they bring to a bouquet. Their dark centers make them a little dramatic but in a romantic way. Of course, I had to try and make them out of paper!
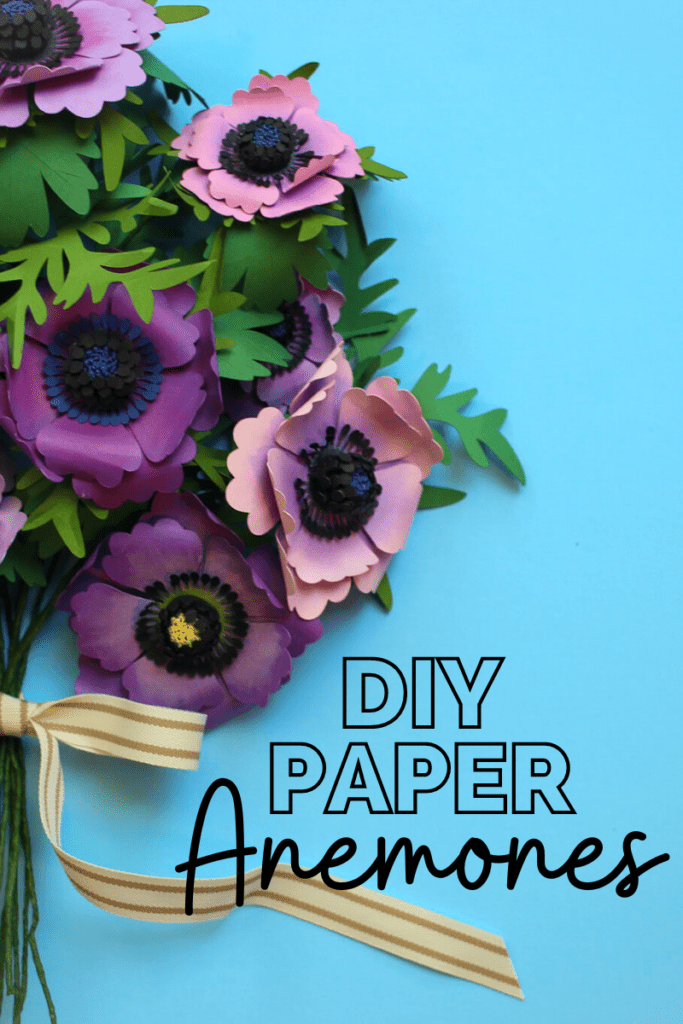
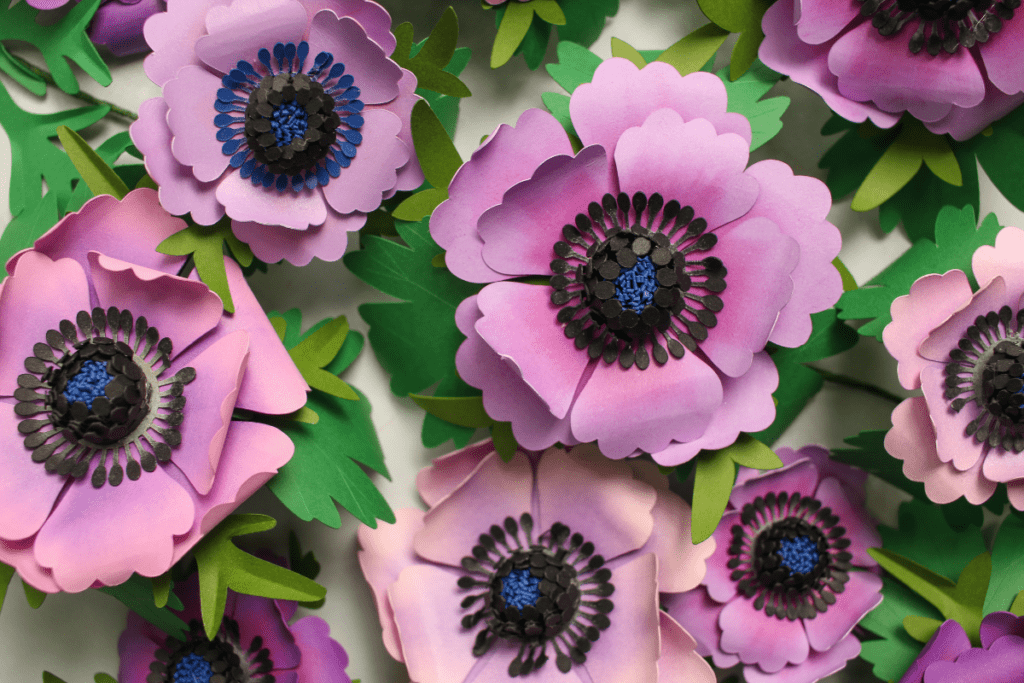
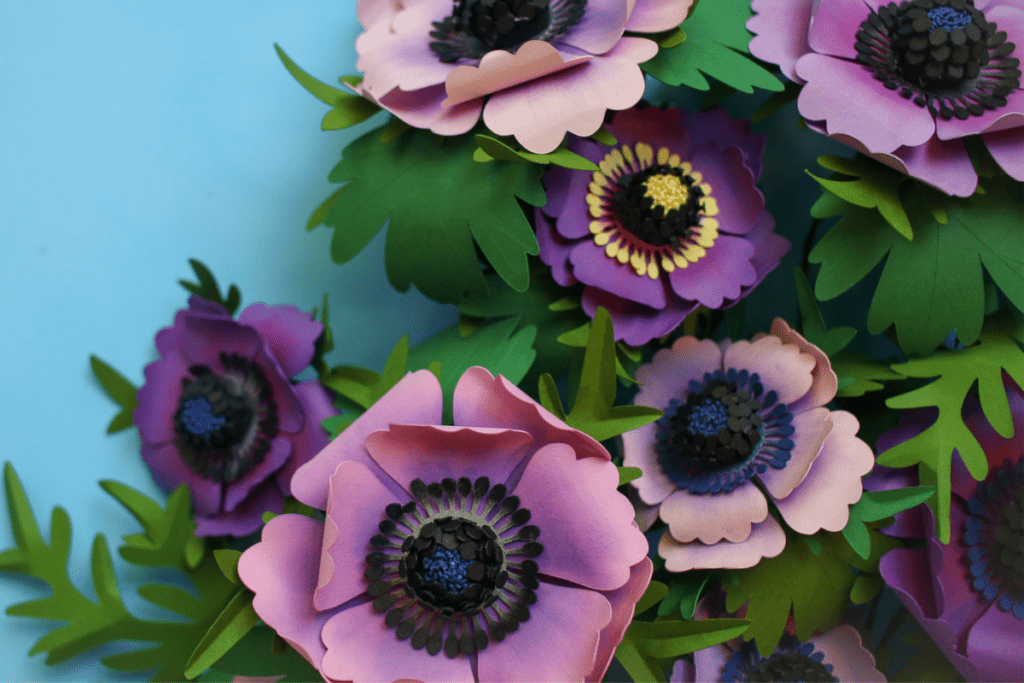
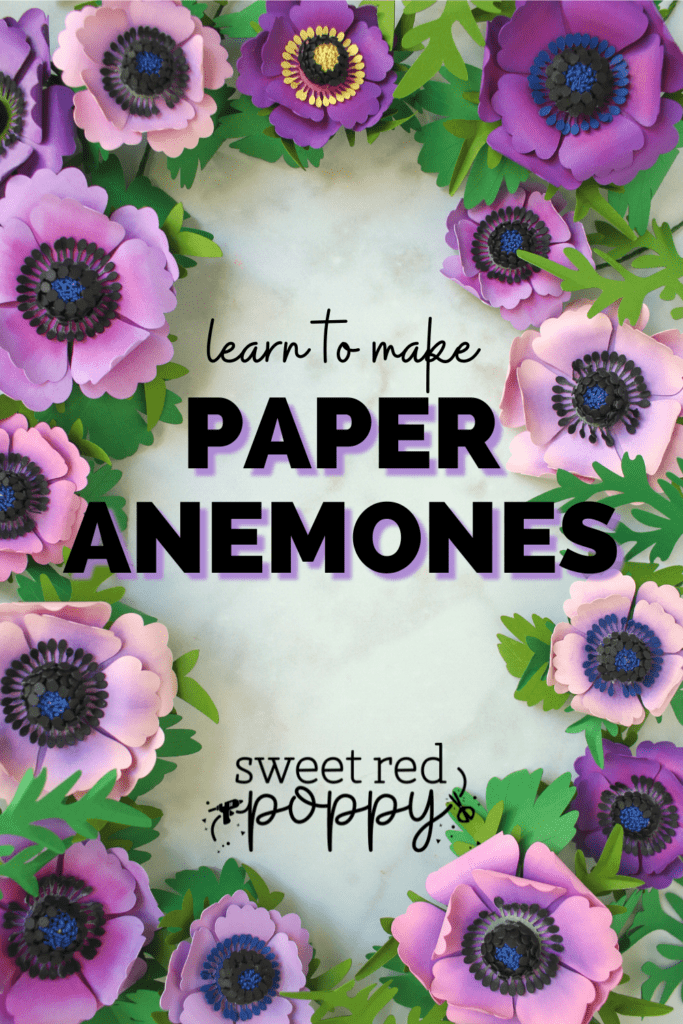
Anemones come in a lot of different varieties, so feel free to explore varying color palettes. I chose a moody purple and pink cardstock color palette and stuck to mostly dark centers with a few pops of yellow.
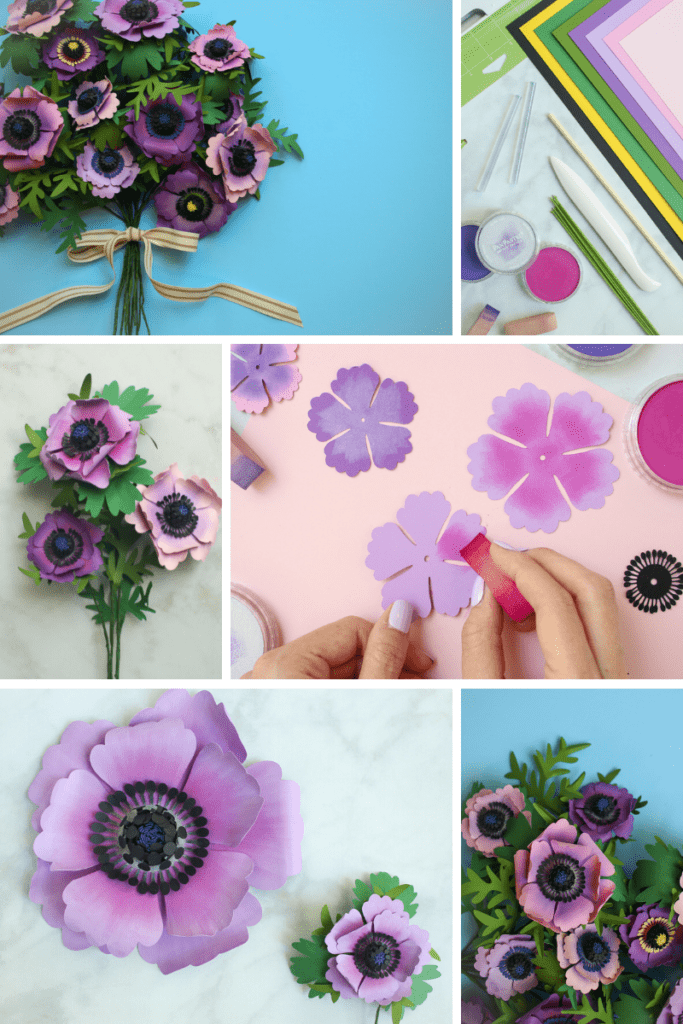
Table of Contents
What Type of Paper Should I Use?
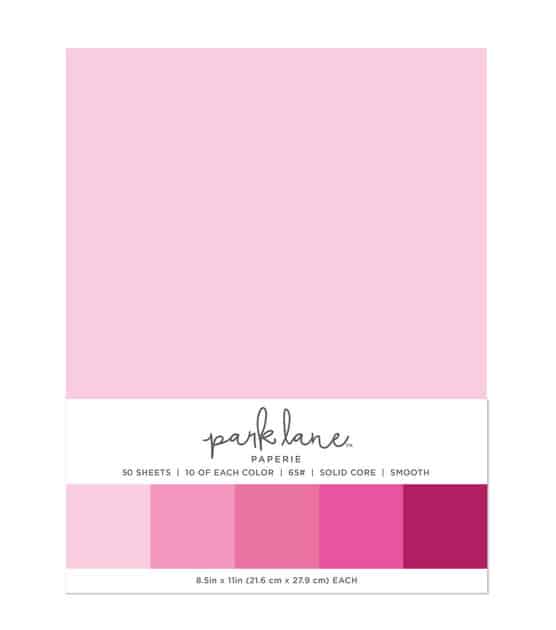
For the anemone flower, a lighter cardstock is ideal to mimic the delicate petals. Between 60-65 lbs is best. Make sure you look for Solid-Core paper, so that when your cut your pieces, you won't have a white edge exposed. This tends to cheapen the overall look of your flowers. Solid-Core paper has the same color on the outside and inside of the paper.
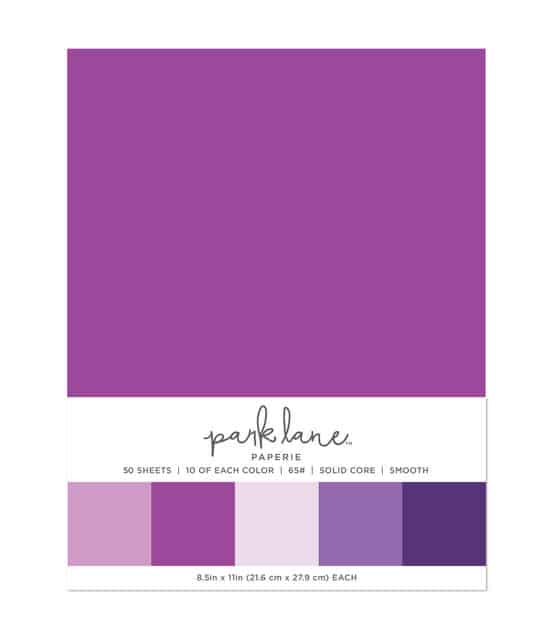
I used two different packs of Park Lane 65 lb paper to get the purple and pink color combination I wanted for the petals.
I wouldn't recommend using crepe paper for this version of Anemone. Because the petals are grouped in only two pieces, they wouldn't all line up parallel with the grain of the crepe paper, which is what you would want. The center piece and pistil pieces are also too delicate and detailed to cut successfully on the Cricut machine.

If you're wanting to try your hand at crepe paper flowers, see my Oversized Crepe Paper Dahlia tutorial.
Can I Change the Dimensions of this Flower?
You can absolutely scale this flower larger for an oversized anemone! I created the largest flower I could using letter-sized paper. The finished flower measures around 8" in diameter. I sliced the two long stamen pieces in half in order to fit them onto a letter-sized paper. Of course, you can make this even larger using 12 x 12-inch or even 12 x 24-inch paper.
See the photo below to compare the oversized size to the original.
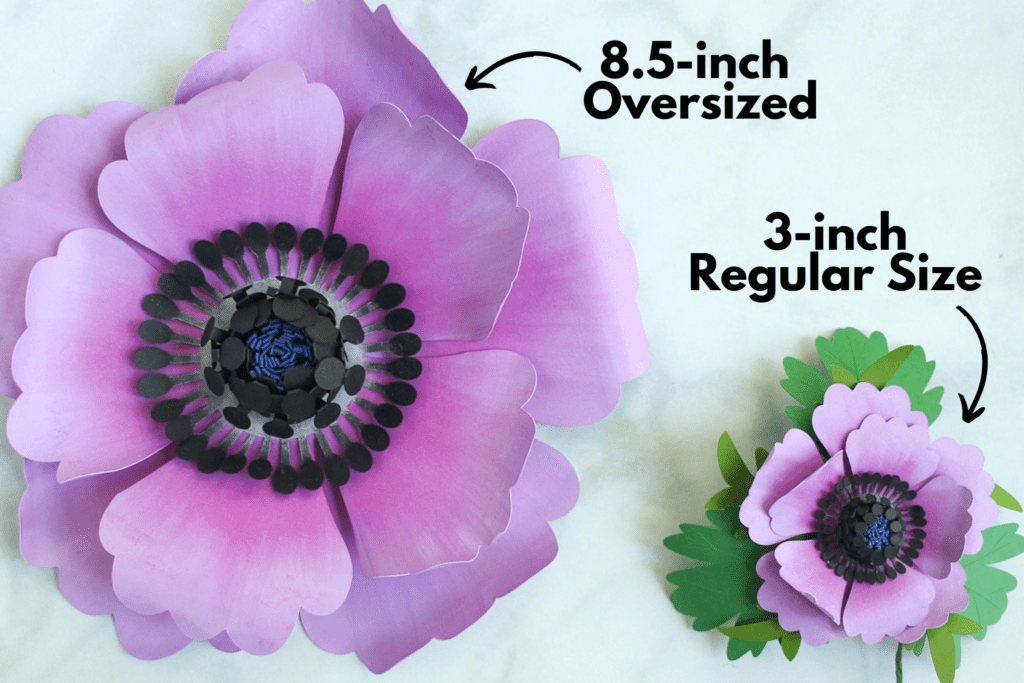
However, you wouldn't want to go much smaller than the small flower size because of the very detailed nature of the stamen pieces. Much smaller and they get very tricky to cut and handle.
What's the Best Place to Buy Paper?
I recommend shopping for cardstock at your local craft store. You can shop in person from the open paper shelves or online. Park Lane has quite a few variety packs of precision paper that work really well for this project and they offer paper in 65lb or 80lb options.
When you are shopping for paper look for cardstock that is solid core. This is really important! White core paper (or "value pack") is a cheaper type of cardstock that has color printed on each side on a white piece of cardstock. When you cut into it, it is white on the inside. It tends to look cheap when it's used with paper flowers.
Instead, you'll want to make sure you select a paper that says, "Solid Core". This means the color hasn't been printed on the outside of the paper. Solid core paper has been dyed and has the same color on the inside and outside.
Ordering a Park Lane Precision Cardstock Variety Pack will set you up for success. It comes with a variety of different colors for your flowers in an 80lb weight. Click here to shop for paper!
How Much Paper Will I Need?
These flowers don’t require too much paper when kept at their original size.
To create one blossom, I used 3 different color papers: 1 color for the petals, and 2 different colors for the center/pistal. I used black, dark blue, and yellow to create my centers.
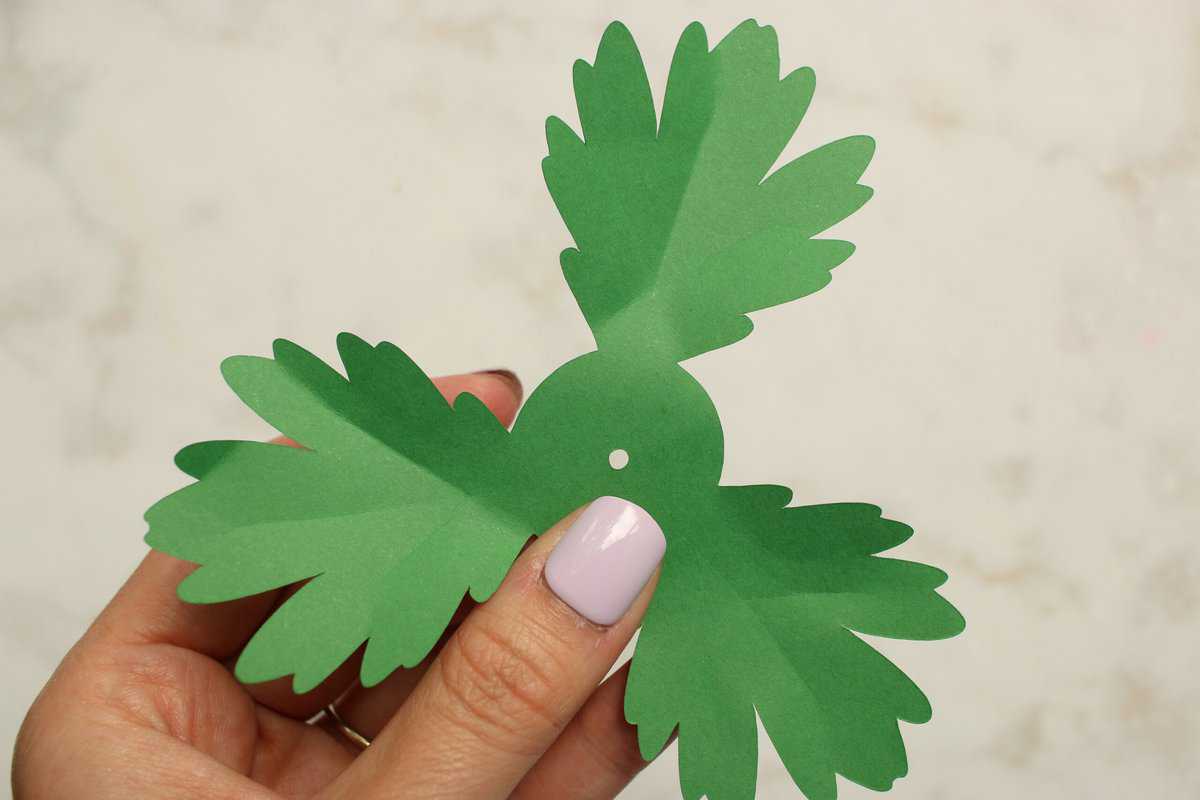
I used 2 shades of green cardstock for the leaves.
You can make about 4 flowers with just one sheet of each colored letter-sized paper.
Can I Cut these Flowers by Hand?
For this specific flower, you will need a cutting machine. The intricate nature of the center and stamen would be impossible to cut with hand scissors. So a cutting machine IS required for this specific flower, and it will make cutting out all the small details a breeze.
If you’re looking for a flower you can cut out by hand, check out THIS flower.
PRO TIP: To save time, use a 12 x 24" mat and load two pieces of paper on the mat at a time!
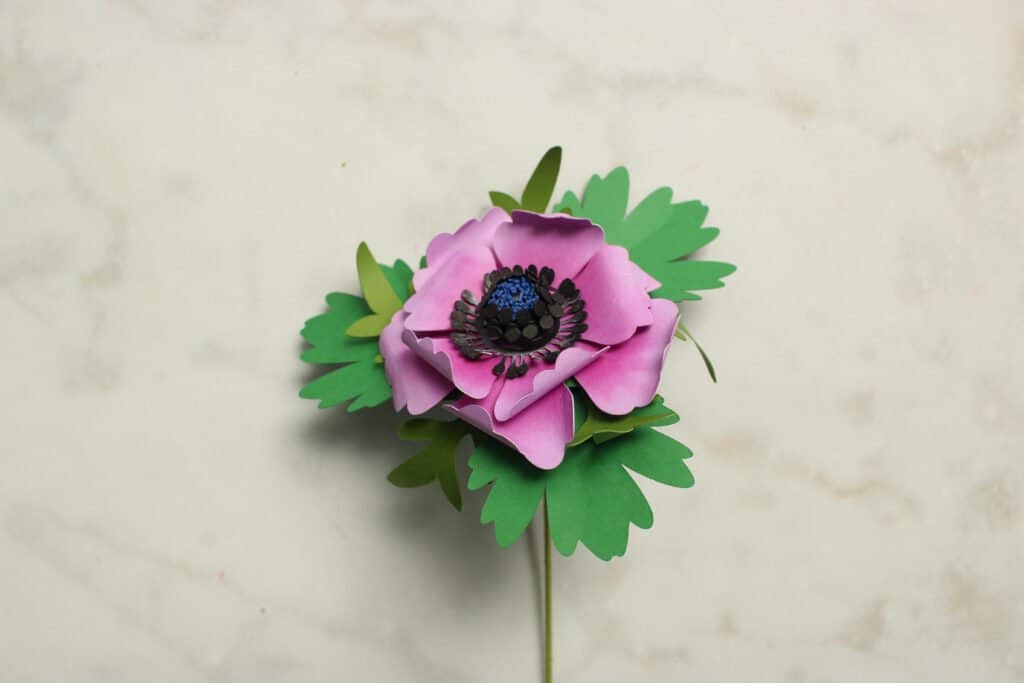
What is the Finished Size of this Flower?
This flower pattern comes in two, life-like sizes. The smaller one is about 2.5” in diameter and the larger is about 3” in diameter.
What are Pan Pastels and do I need them for this Project?
Pan pastels really bring this project to life. Some anemone petals have such unique coloring, and pan pastels are a great medium to replicate the fading and shading. You can add just a touch of color to your petals or really layer the pastels for vibrant and punchy hues.
However, pan-pastels can be pretty pricey. I've linked to my favorite pan pastel kit which will give you a variety of different colors.
For a more budget-friendly option, you can order a single pan pastel. Make sure to choose a color that's at least a few shades darker or lighter than the paper you will be working with so that it shows up and adds contrast to your flower petals.
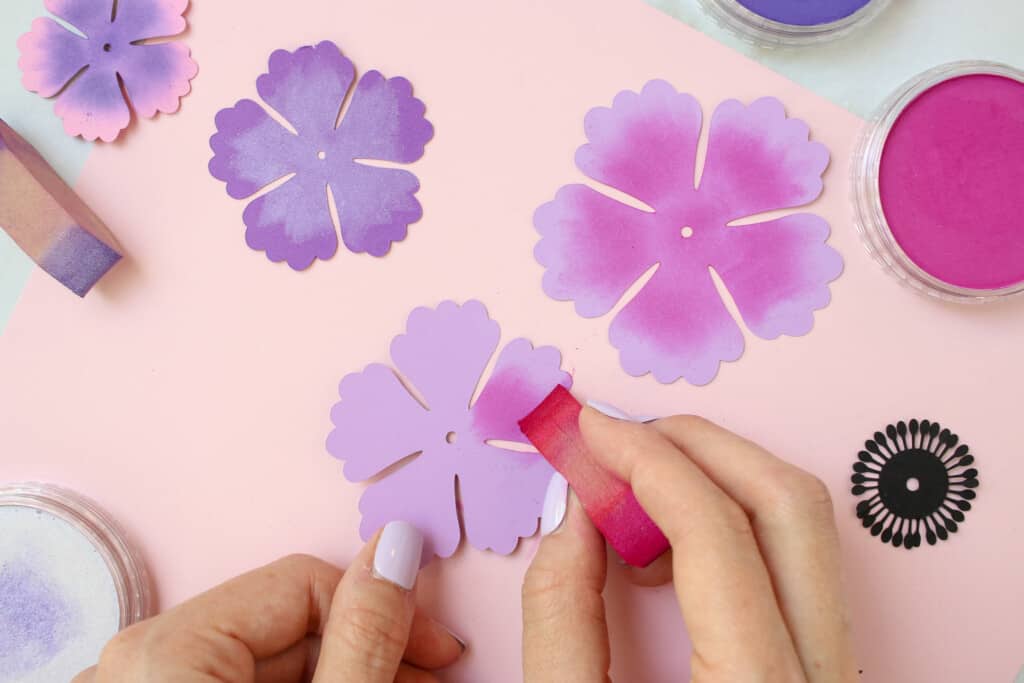
For these anemones, we used the following Pan Pastel colors: Violet, White, Violet Tint, Fuschia, and Pink Tint.
Pan pastels can be easily blended together and each little pot is loaded with color. When I say a little goes a long way, I really mean it! They are highly pigmented. They also put off very low dust and they are erasable in case of mistakes.
This kit comes with several micropore sponges which makes applying the pan pastel quite simple. The sponge is reusable, easy to clean and it’s smooth so it won’t damage your paper. The benefit of using a sponge is that it will prevent you from having any brush strokes left behind on your project, giving you an even application of color.
If you're planning on making tons of paper flowers, I'd really recommend investing in this kit. If you're not totally sold on it, try purchasing an individual pan pastel here.
What Supplies do I Need?
Shop all the supplies I used to create Anemone Flowers!
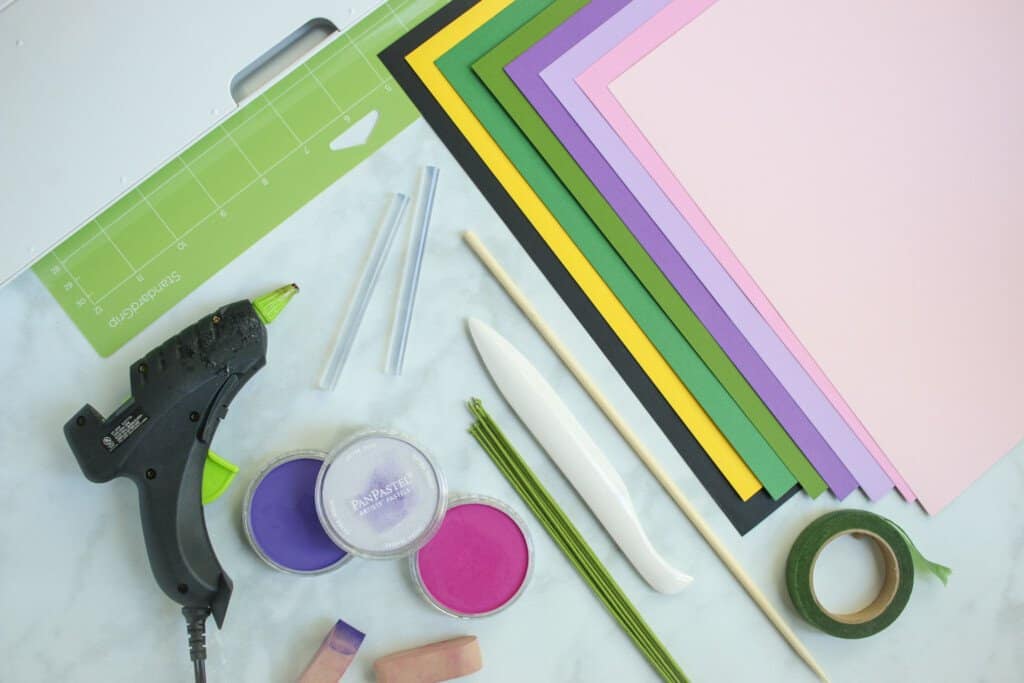
- Cricut Machine- Explore, Maker, or Joy
- Fine-point Blade
- StandardGrip Mat
- Cardstock; 65 lbs Solid Core. I used Pink and Purple for the petals, and Green for the leaves and greenery.
- Bone Folder
- Wire stems
- Hot glue gun and sticks
- Floral tape
- Pan Pastels and sponges; This kit is a great place to start. Otherwise you can buy individual colors.
- Chopsticks or a wooden dowel
Download the FREE SVG Files Here
Purchase an AD-FREE printable e-book tutorial for only $3 HERE.
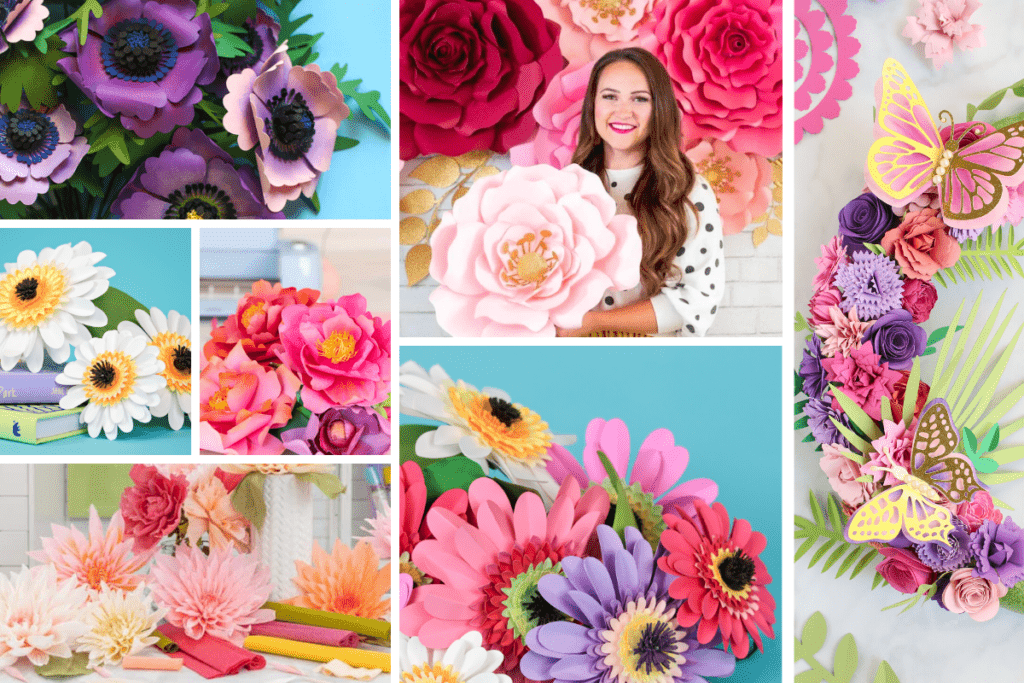
Want to learn how to make even MORE paper flowers?
Get The Ultimate Guide to Paper Flowers E-Book and get access to ALL of my printable paper flower tutorials and flower SVG files in my Ultimate Guide to Paper Flowers Ebook by clicking here!
Cricut Design Space
Download the files to your device and then upload the free SVG files to Cricut Design Space.
When uploaded in Design Space, the template will provide you with two different-sized flowers with leaves. The smaller flower measures about 2.5 inches in diameter, and the larger 3-inches.
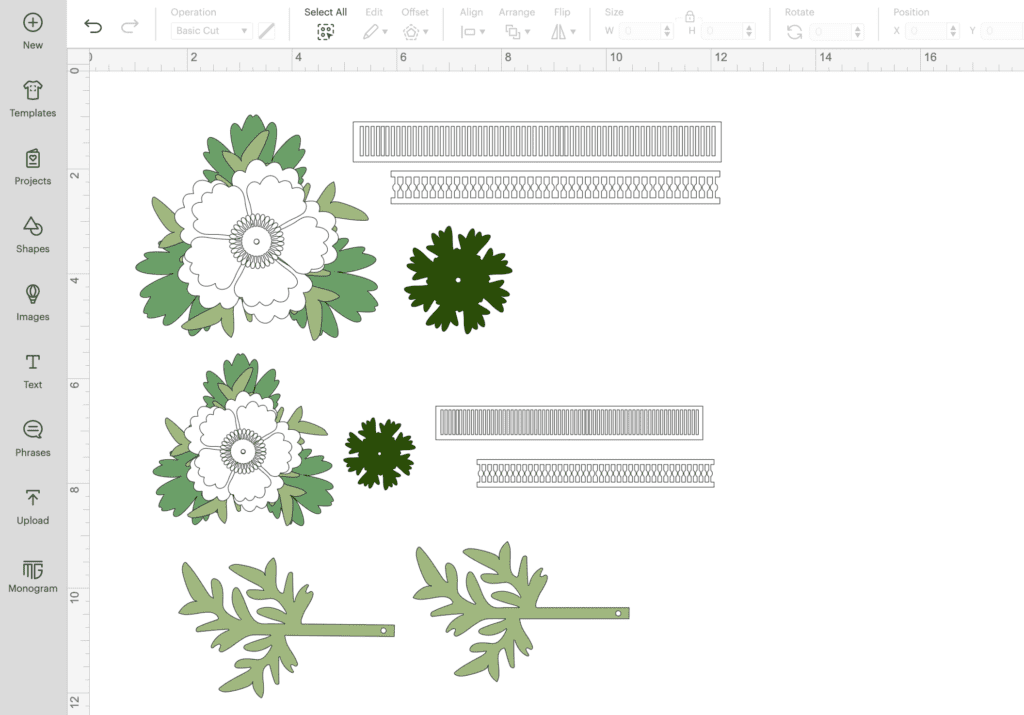
Ungroup the images to change the color or size of the various elements.
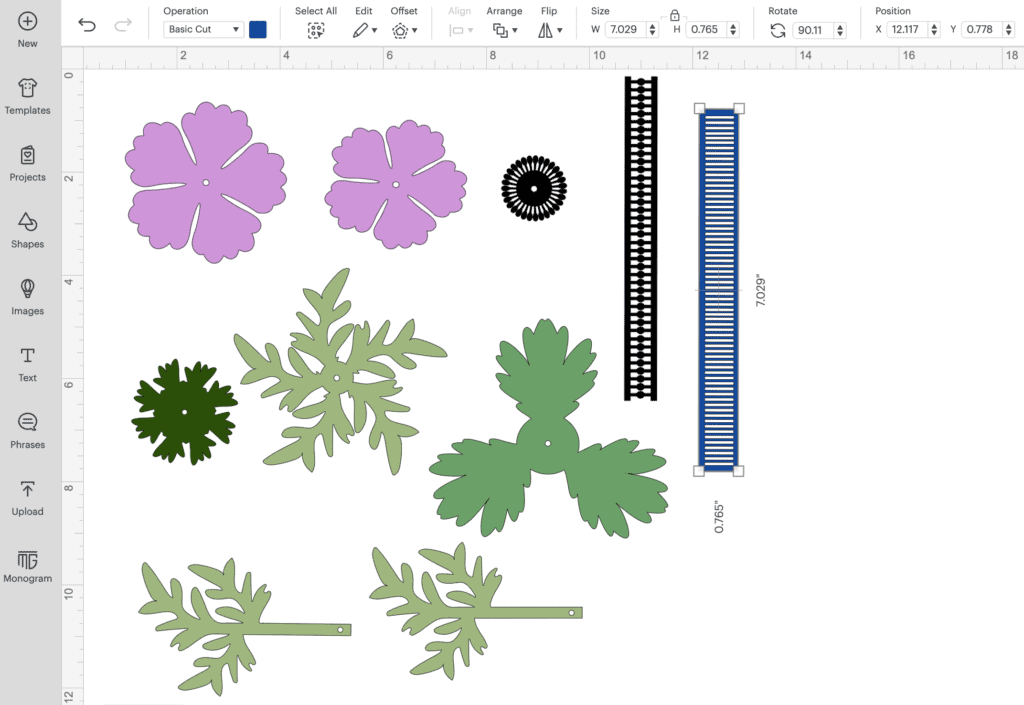
Cutting Guide:
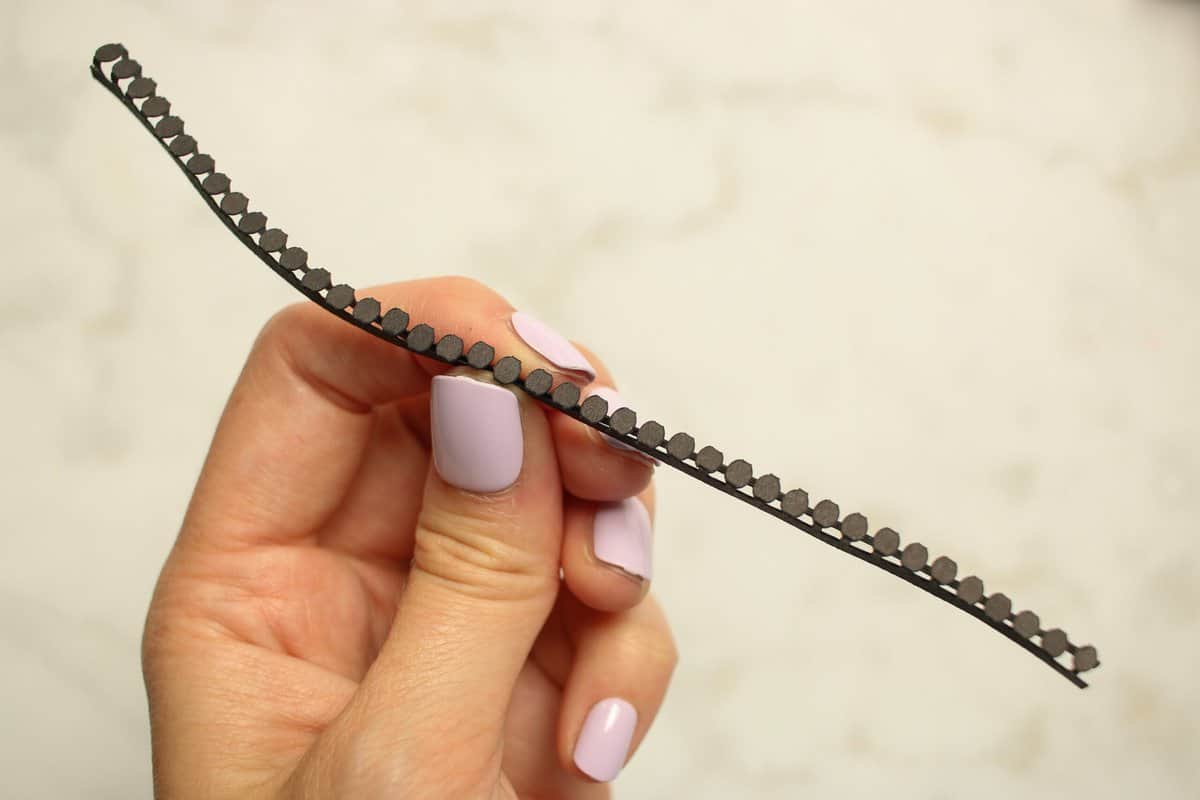
Each flower has 2 petal layers (1 small and 1 medium), a center piece, a pistil (the head of the flower which consists of 2 strips of paper: one with rectangular cutouts and the other with circle cutouts), a flower base, and 2 varieties of leaves.
Let's get Started!
Cut, Color, and Shape Anemone Pieces
Cut out all your flower pieces using your Cricut Machine.
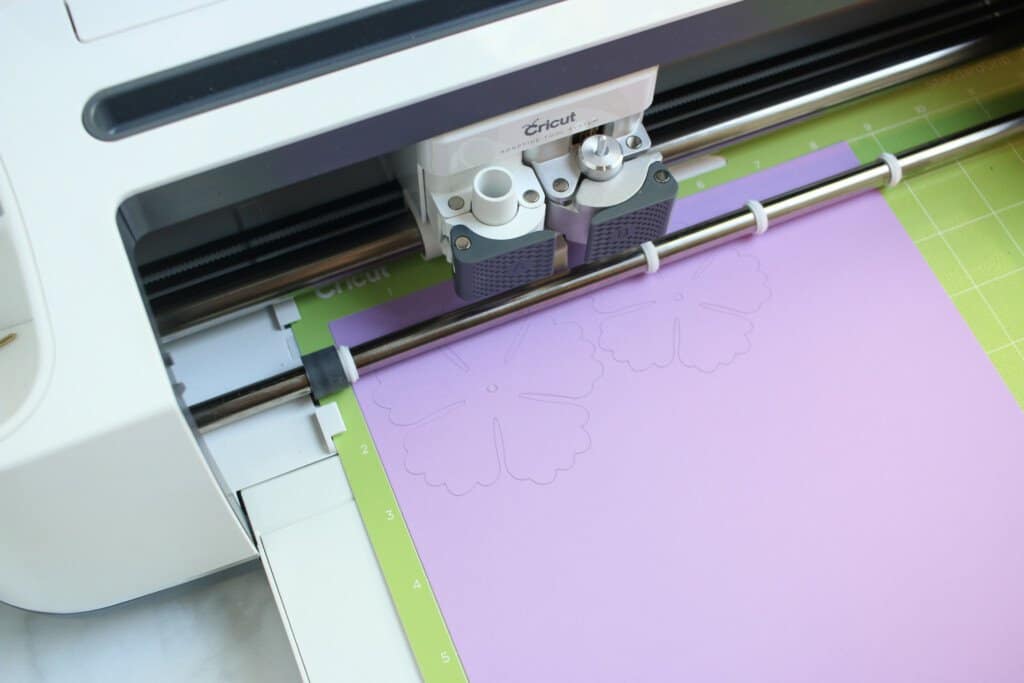
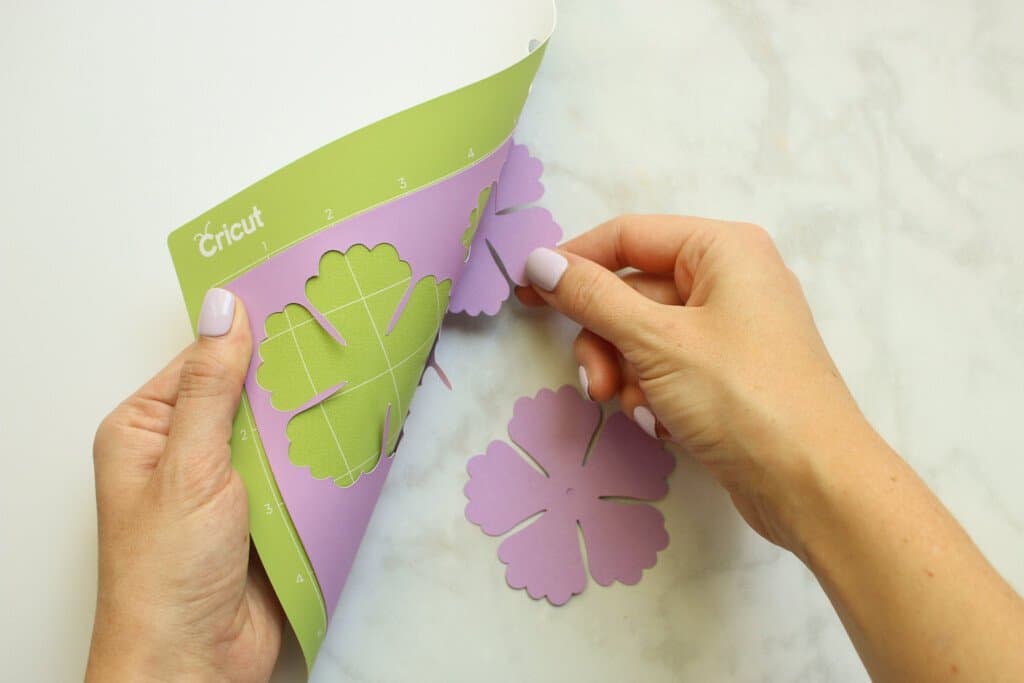
Peel your mat away from your flower pieces to avoid bending the paper.
Protect your surface area with a scratch piece of paper or paper towel.
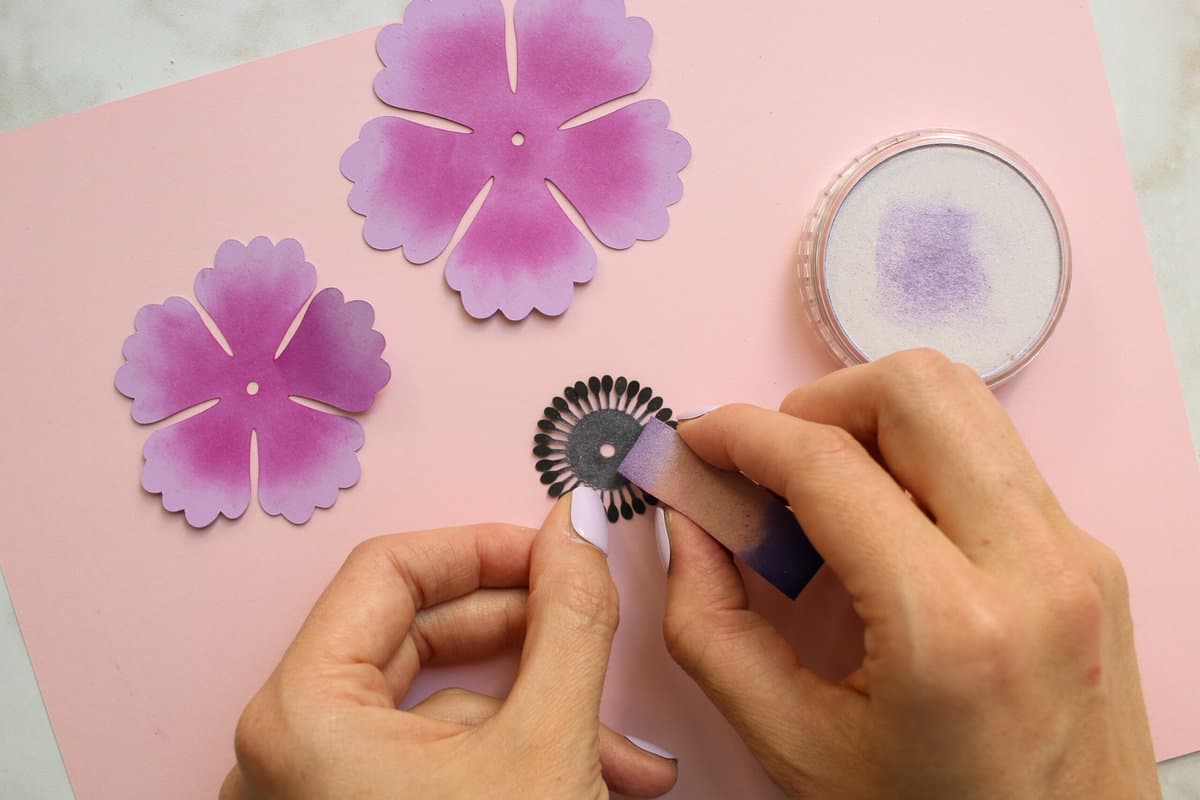
Apply pastel to your petals, center piece, and leaves to add depth. I like to start with my sponge at the center of the petal and drag it outwards to the edges of the petal, concentrating the pigment towards the center.
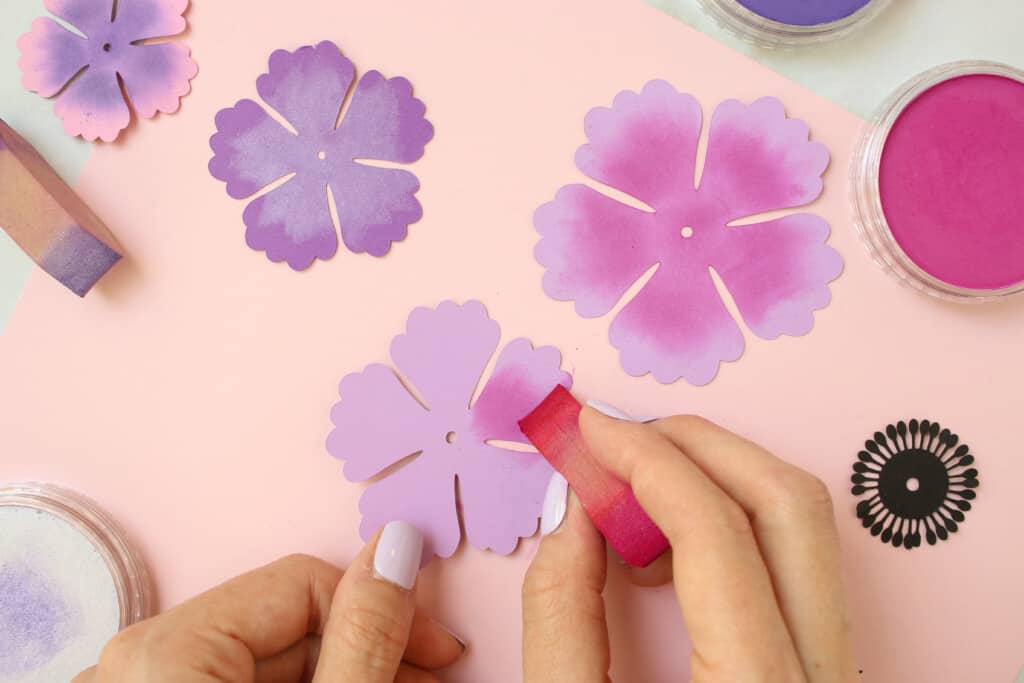
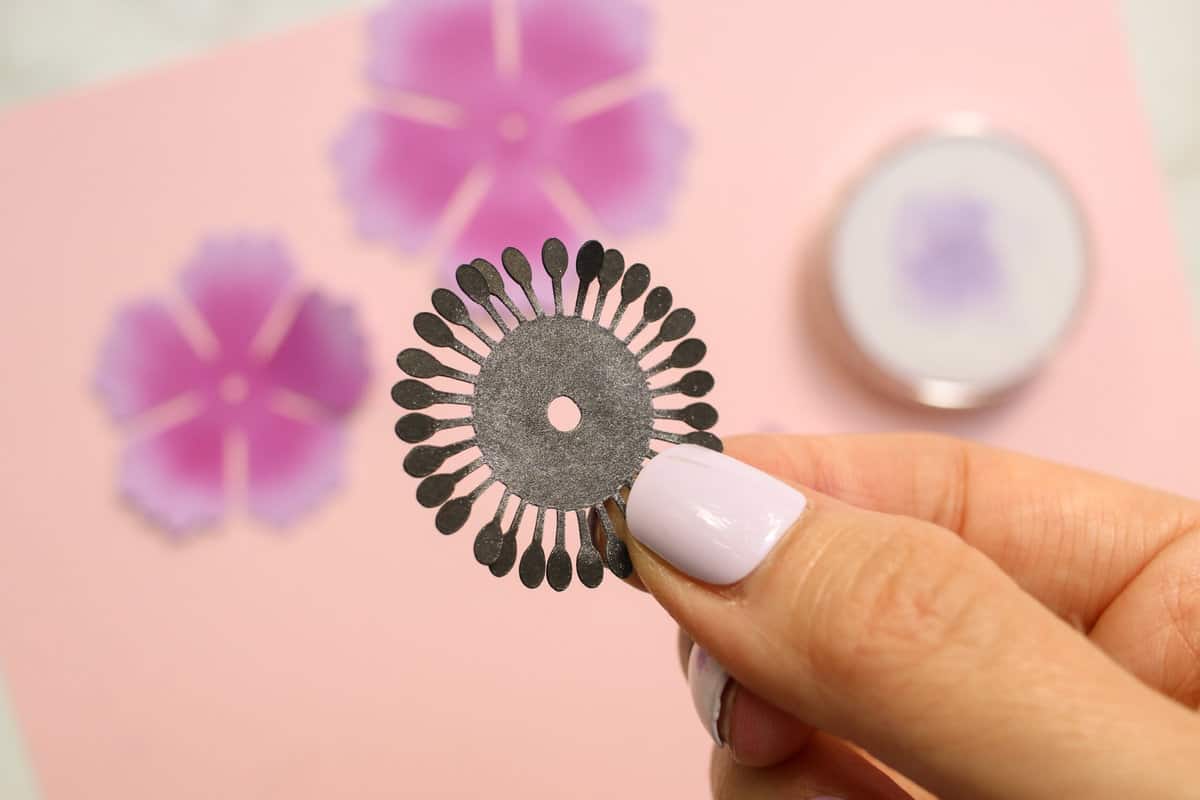
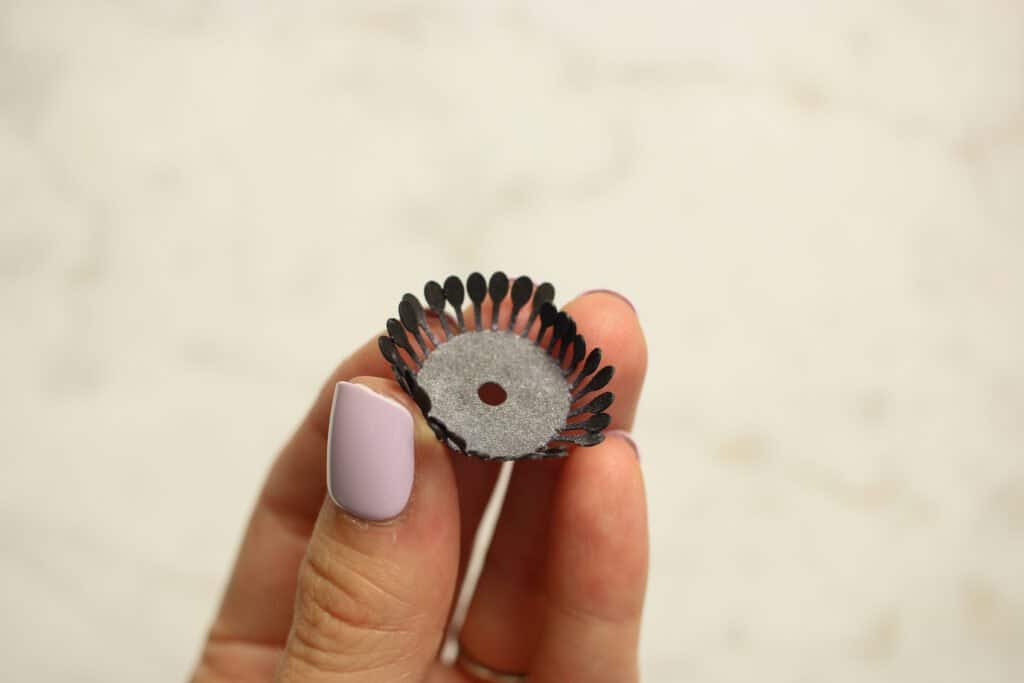
For the circular center piece, add pan pastels to the inner portion, leaving the outer fringes without color.
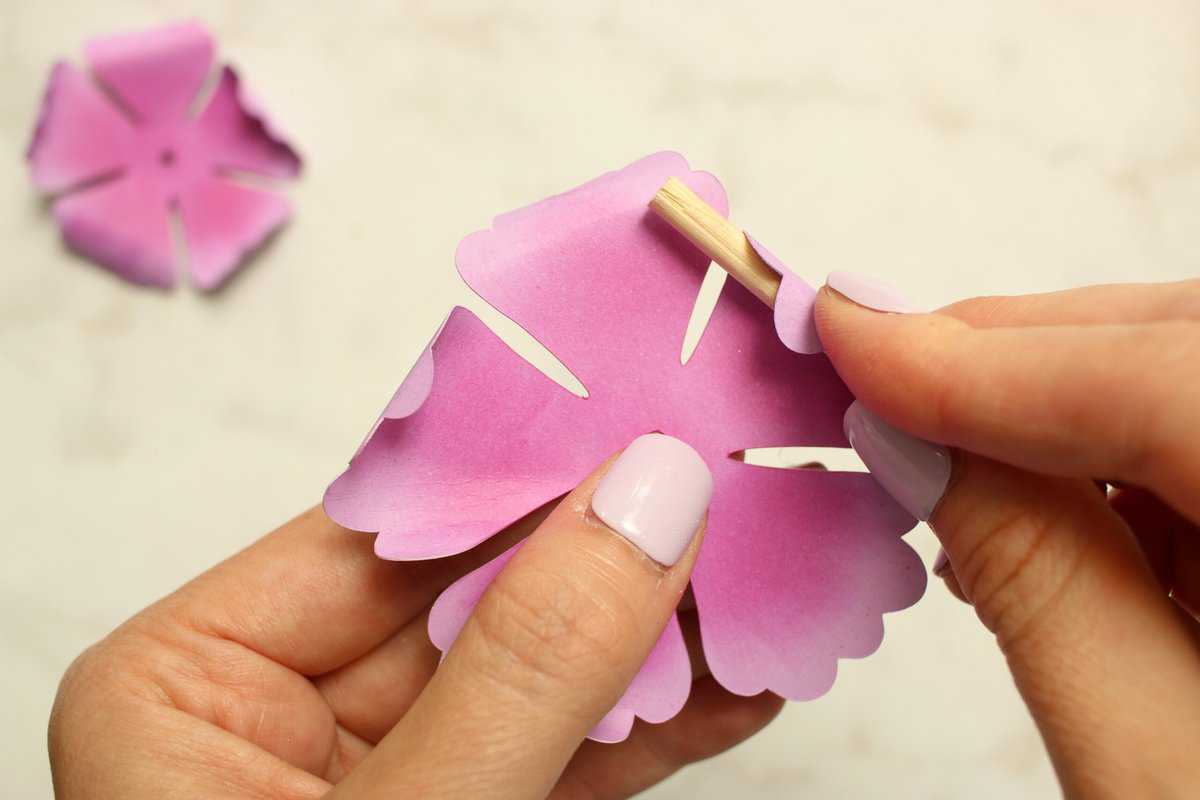
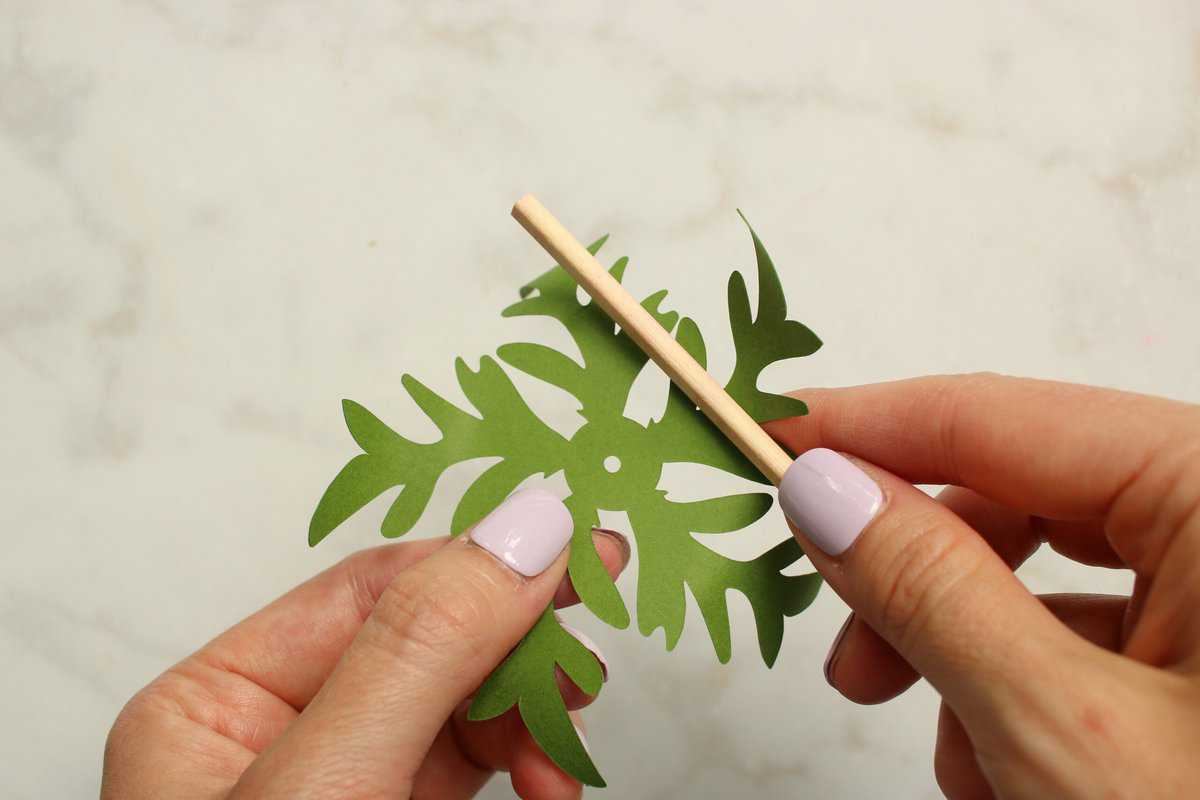
Shape your leaves and petals with a chopstick or a wooden dowel. Curl one edge of the petal inwards and the other outwards.
Fluff the outer edges of your center piece to add some movement.
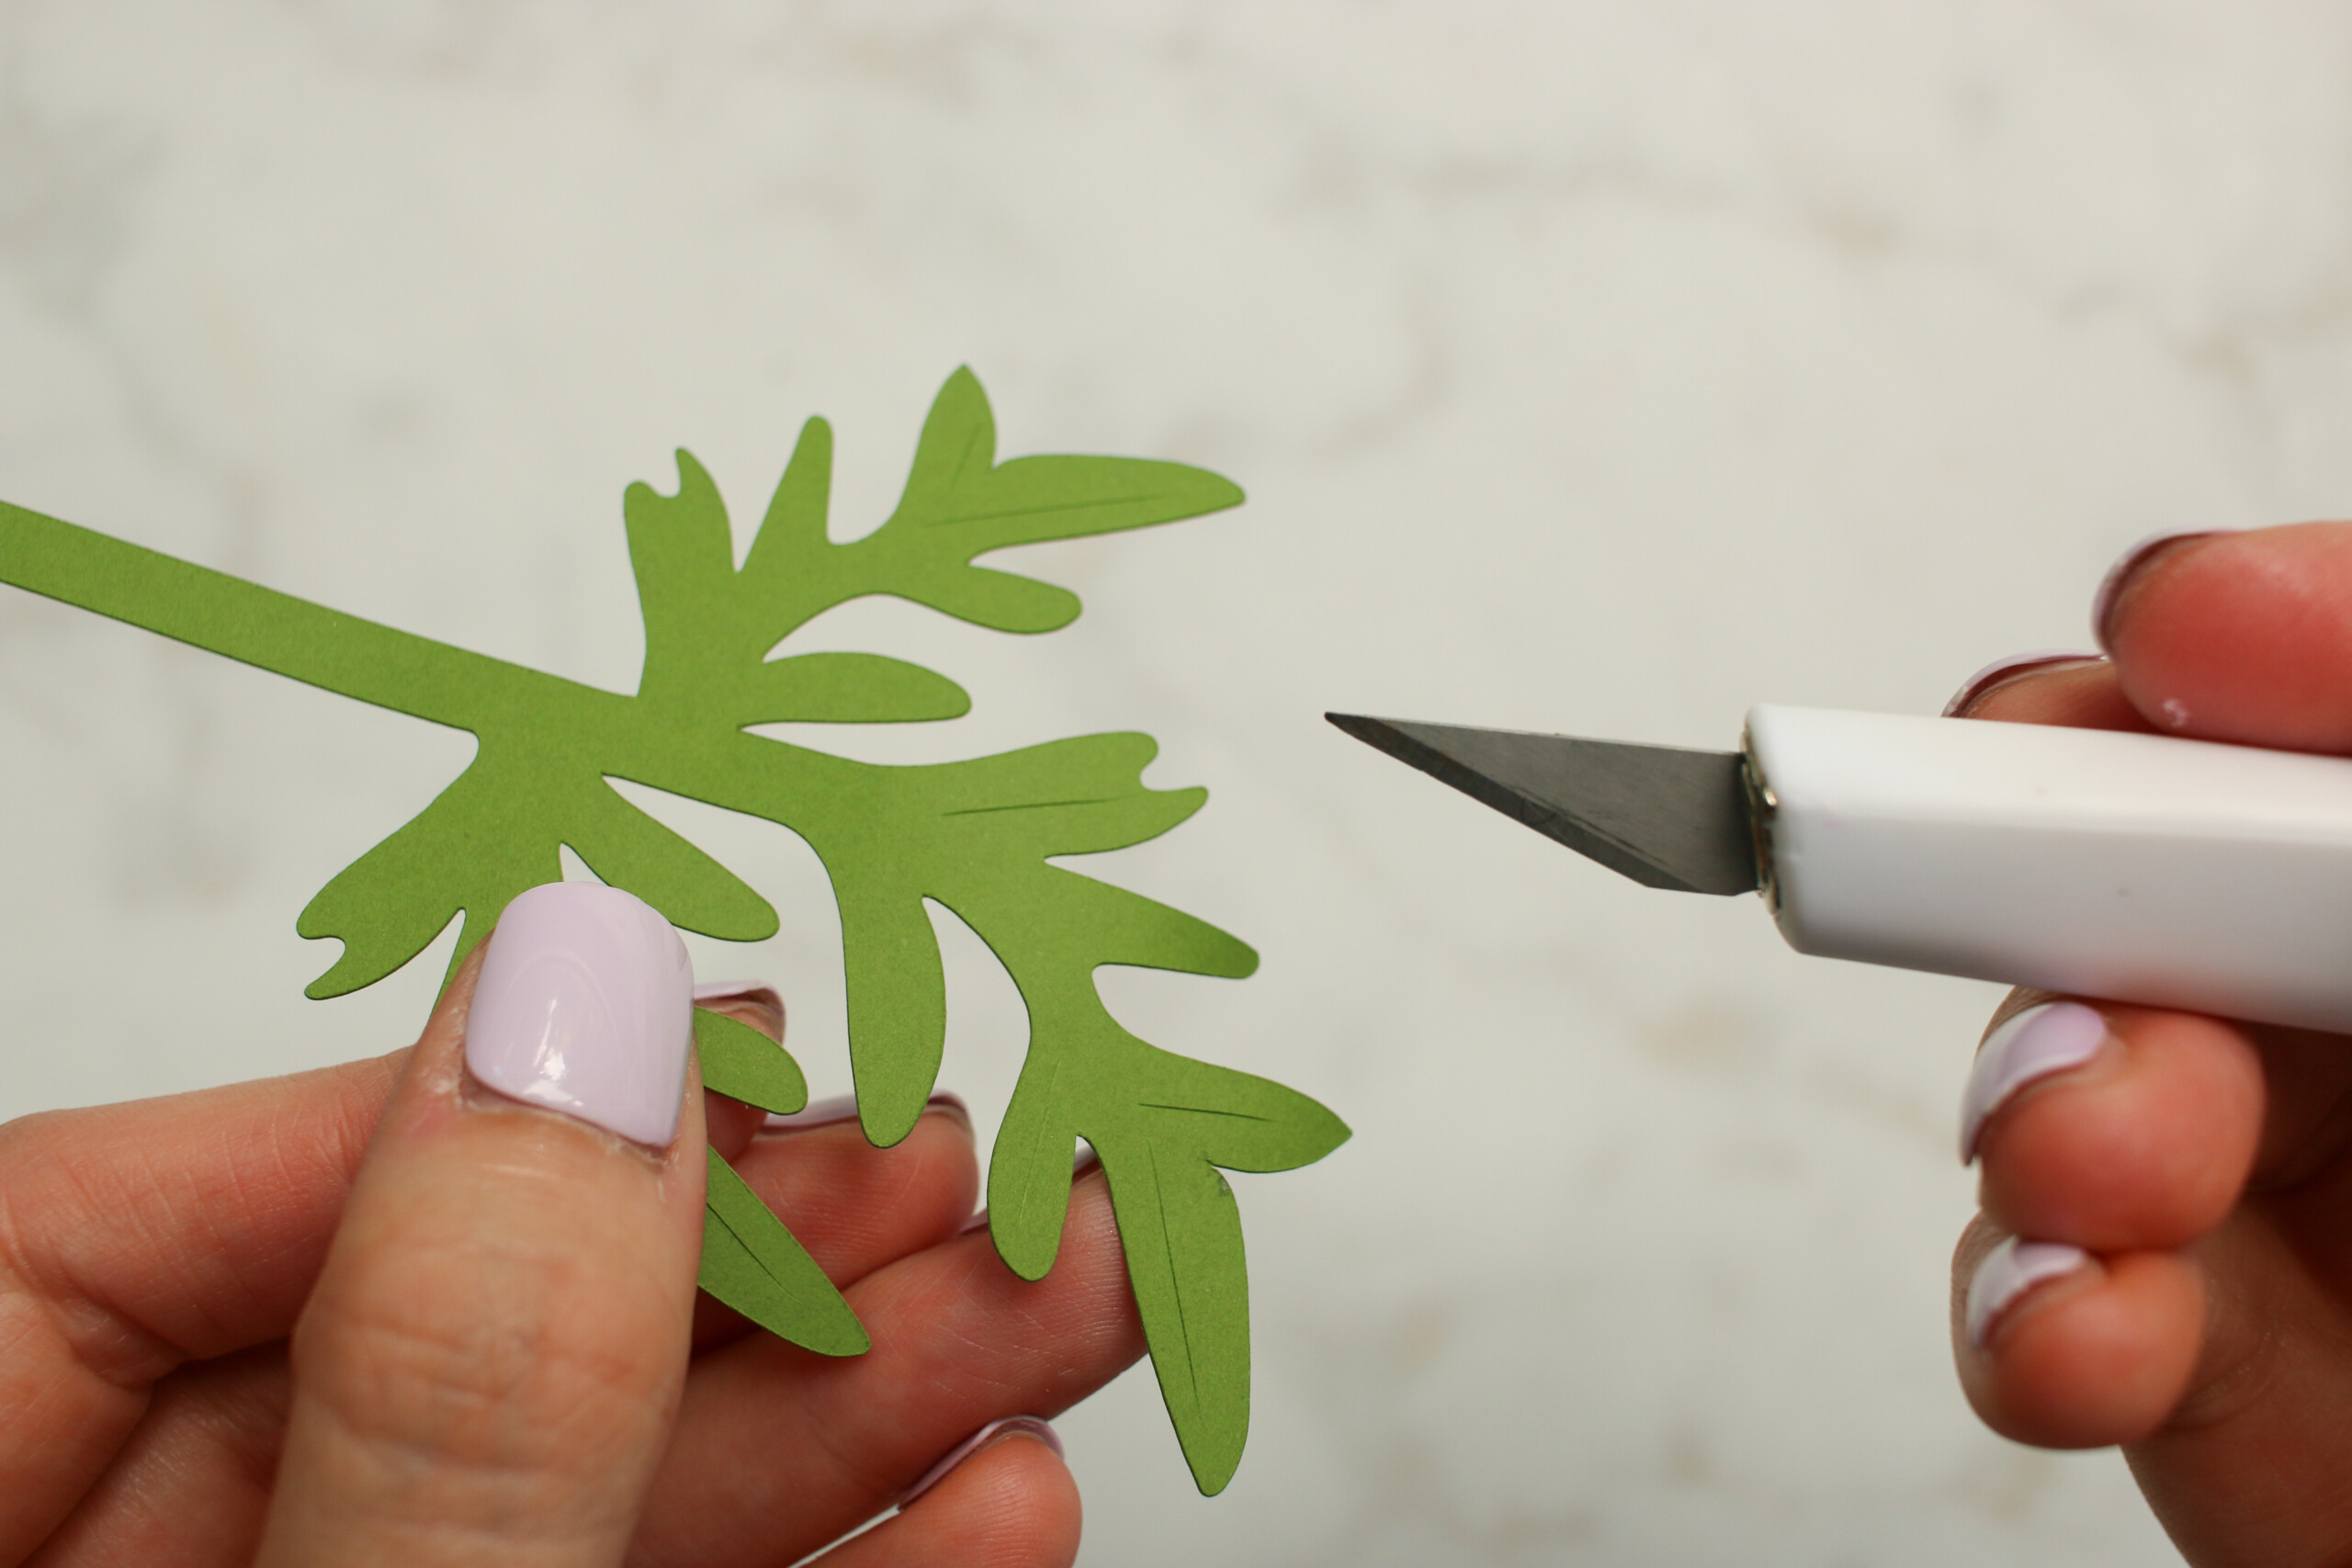
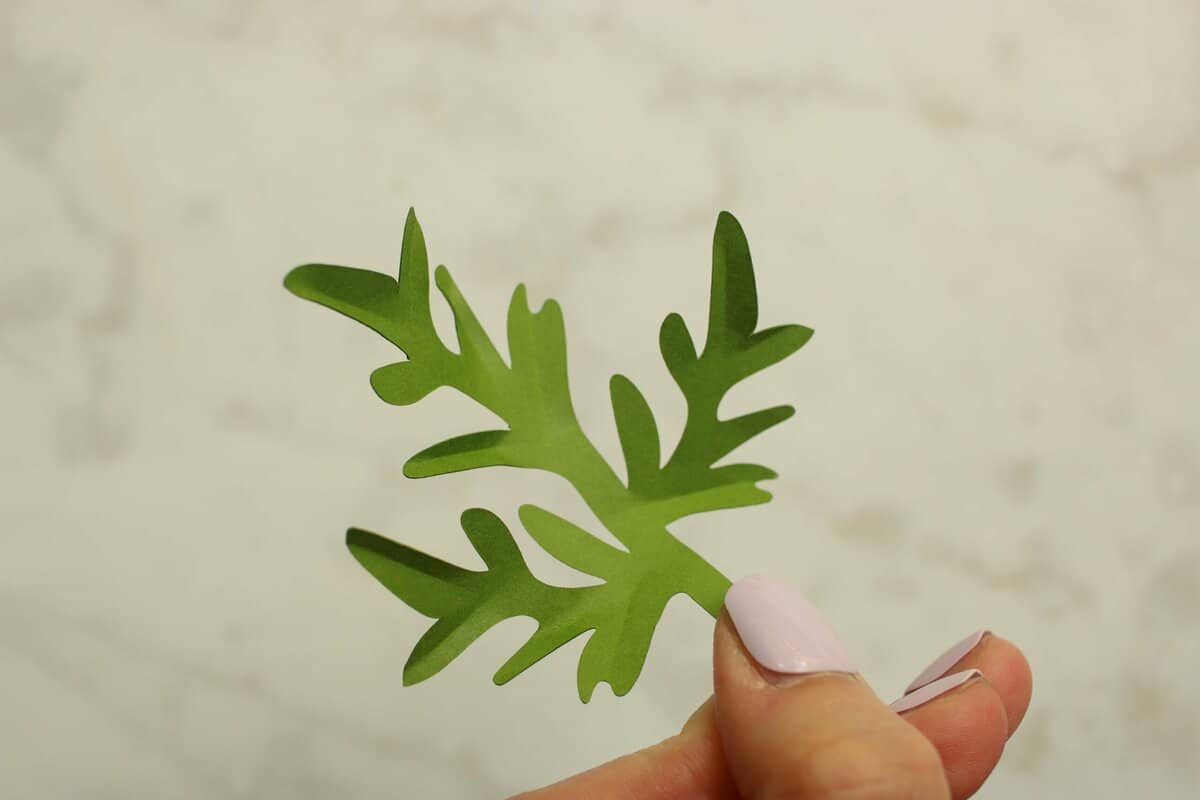
You can add veins to your leaves by scoring lines gently with an Exacto knife. Then create a crease along your folds.
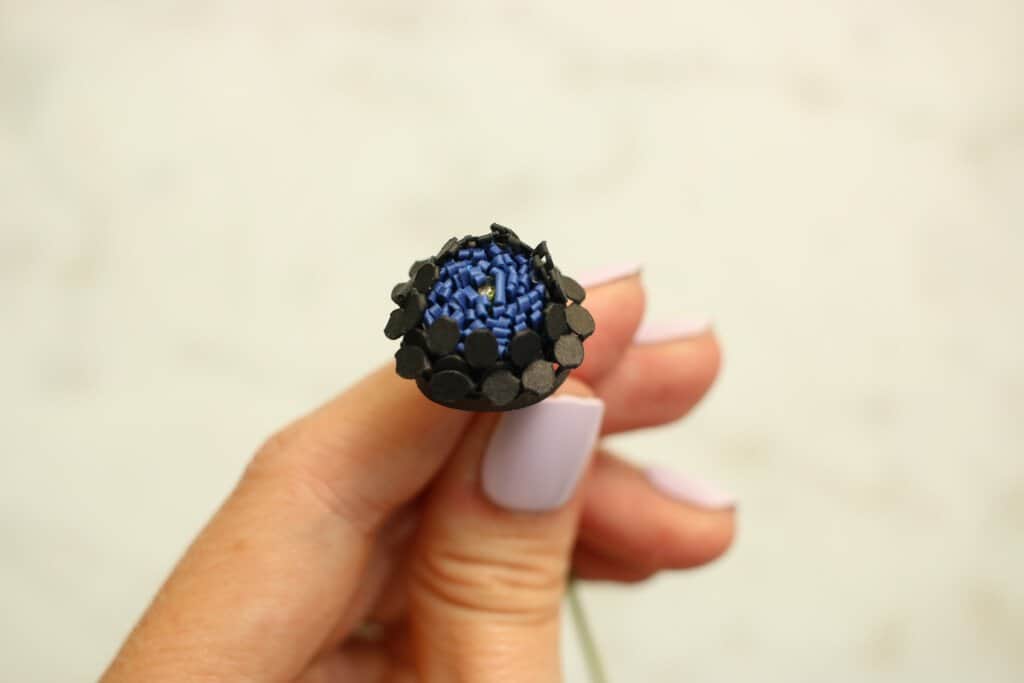
Prepare your Pistil (center)
Take your paper strip with rectangle cutouts and fold it lengthwise. A bone folder is a really helpful tool to aid in making a crisp fold.
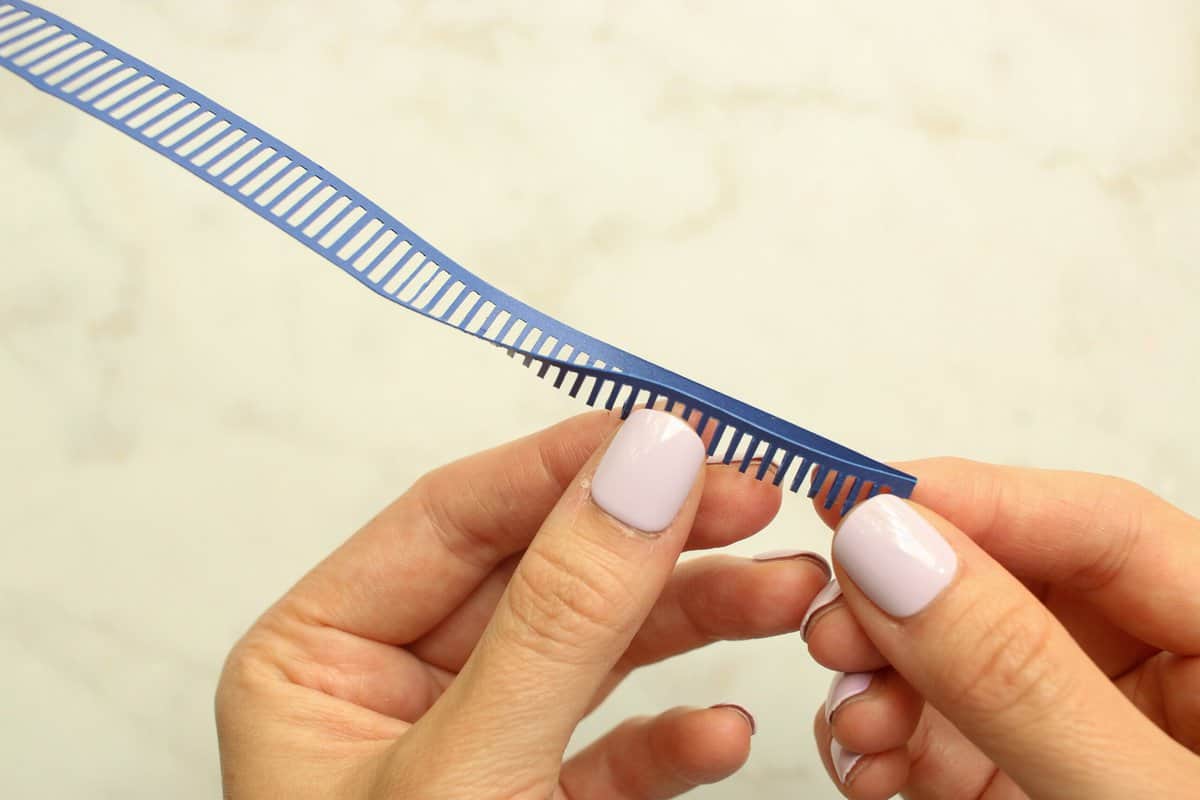
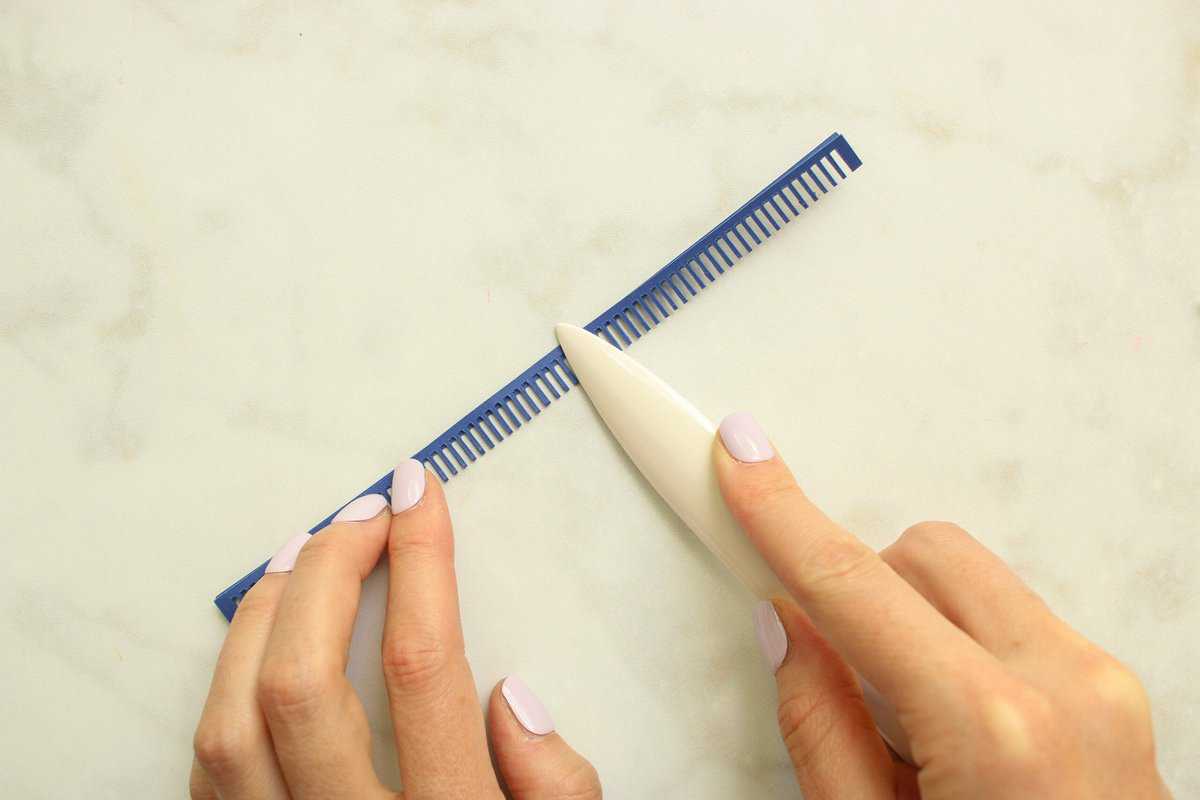
Take the strip with the circle cutouts and fold in half lengthwise, aligning the two long solid rectangles, without folding the circles. Try to maintain the circle shape without creating a crease.

Next, grab your wire stem and your folded paper strip with the rectangle cutouts.
Add a small dab of hot glue to the end of the wire and attach one end of the rectangle cutout.
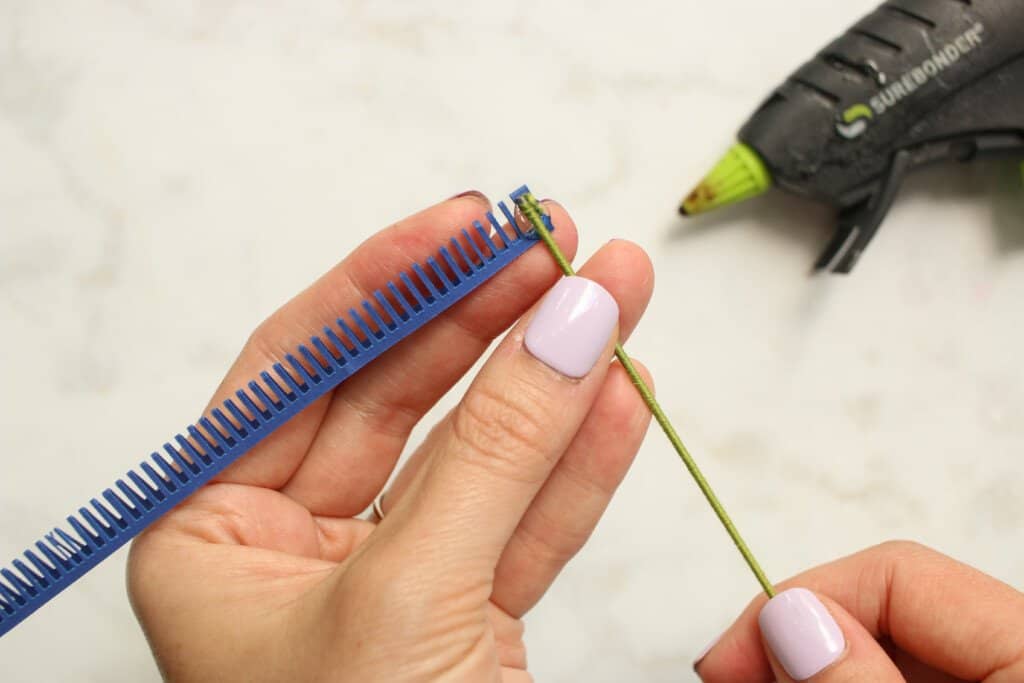
Wrap it around the tip of the wire, tightly. Secure with glue.
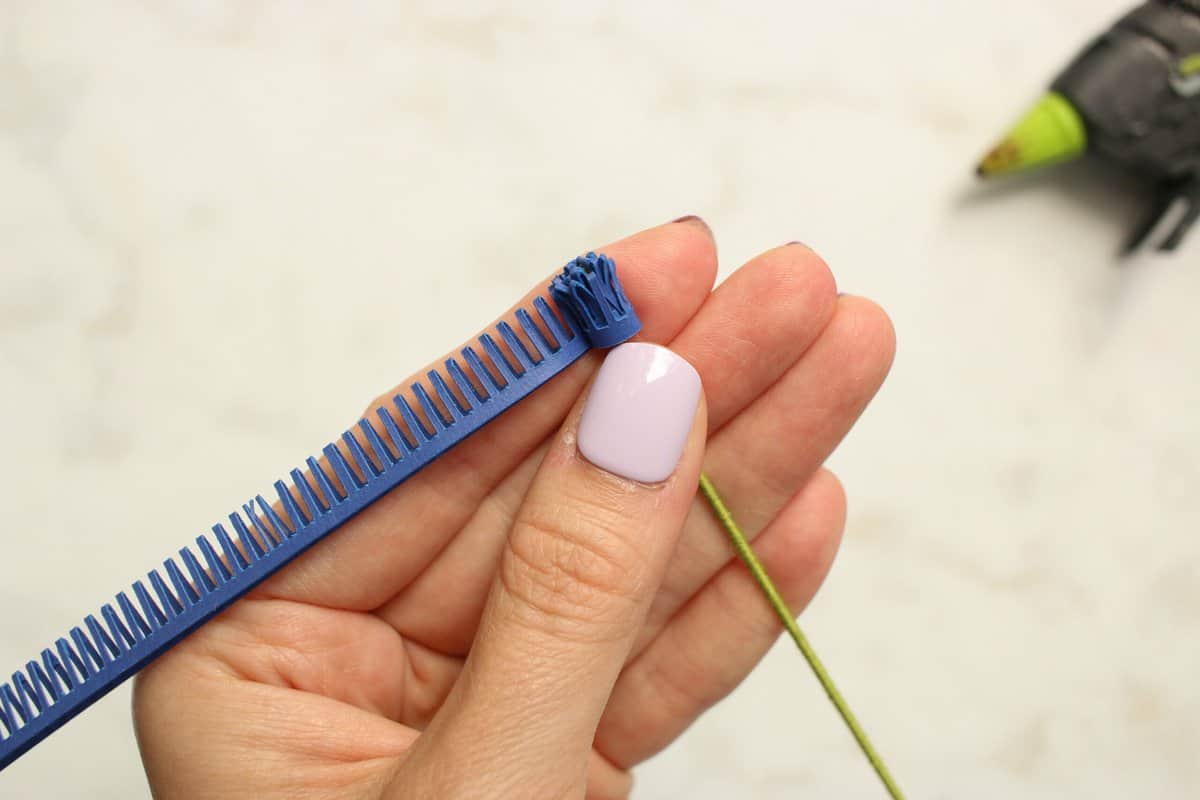
Now take the folded piece with the circle cutouts. Wrap it around the piece you just secured, using dabs of hot glue as you go.

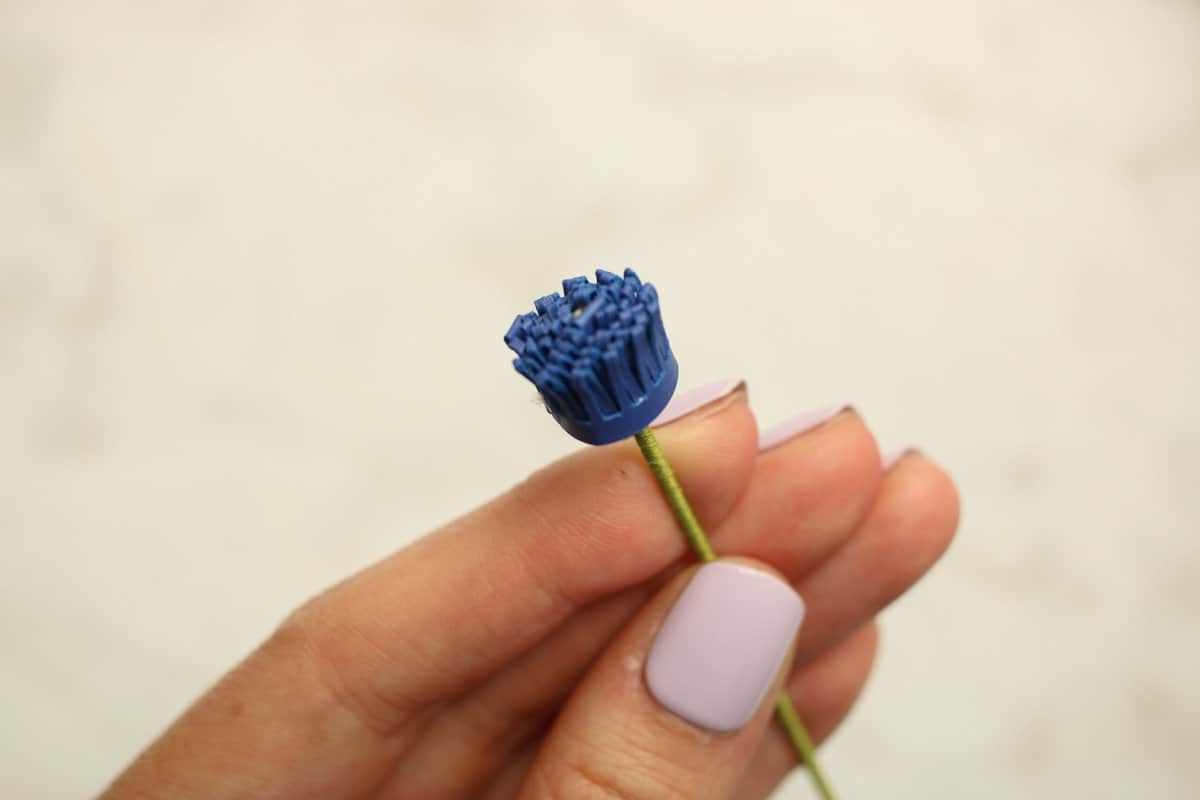
Your pistil is complete!
Assemble the Anemone
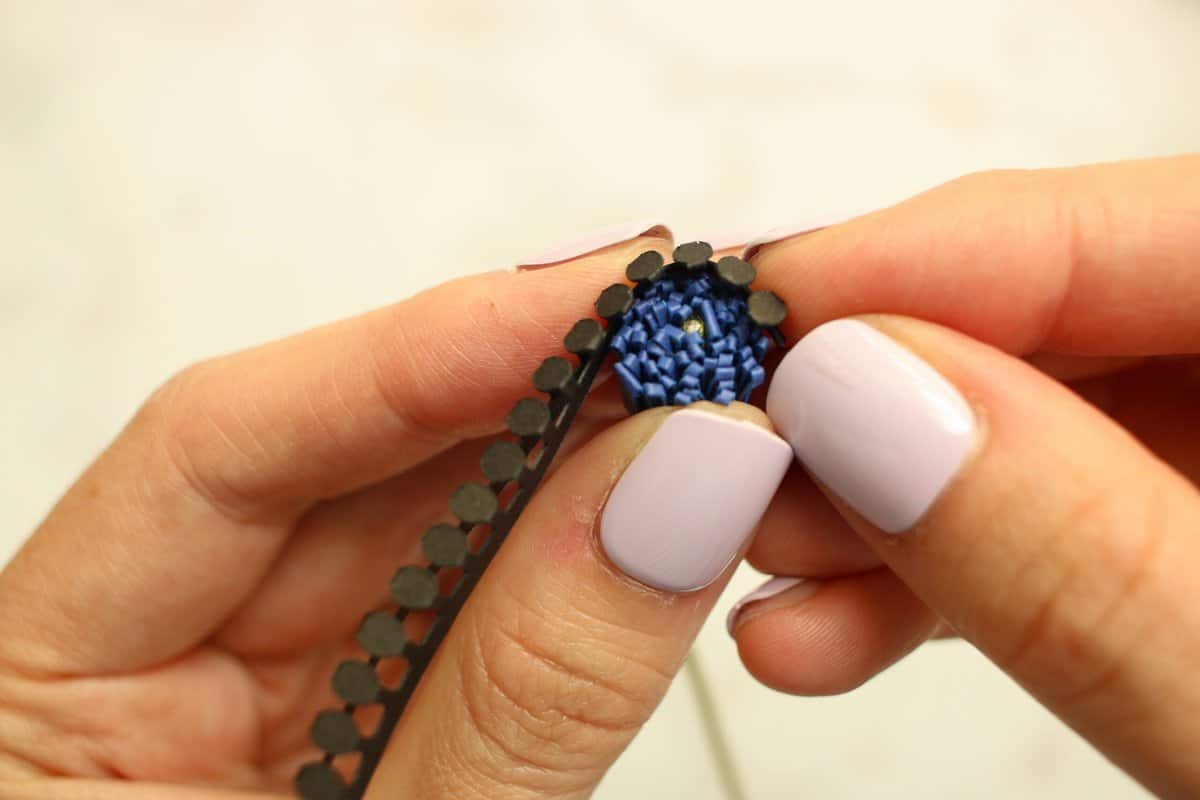
Slide the wire through the hole of the final center piece and secure it to the base of the pistil with glue.

Slide on the small petals first and secure with glue.
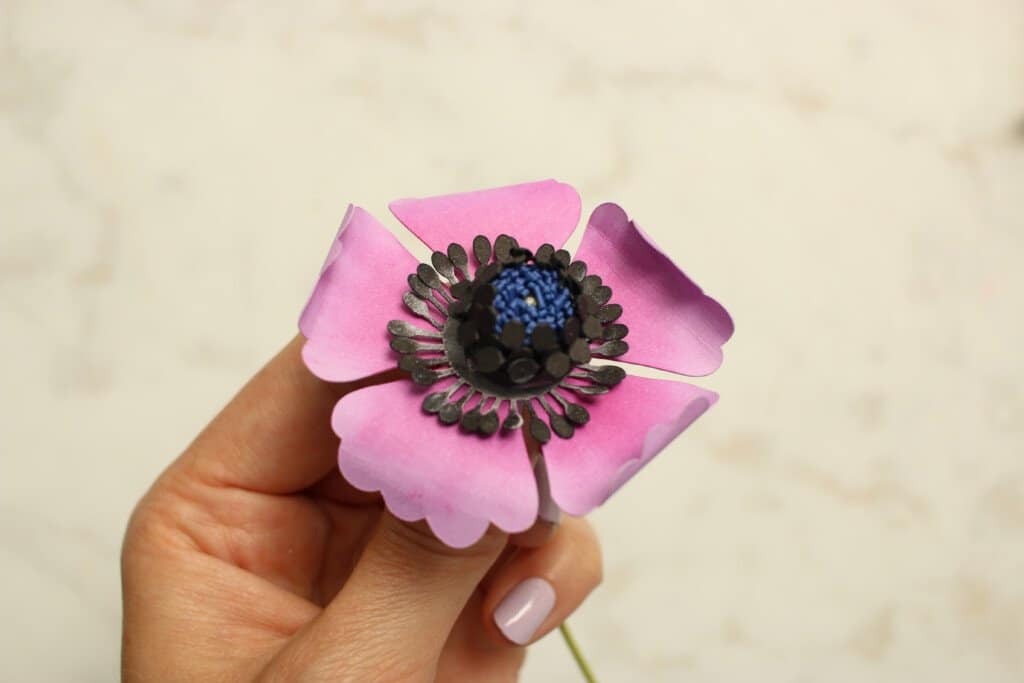
Now add the larger petals underneath, staggering the large petals with the small, and secure with glue.
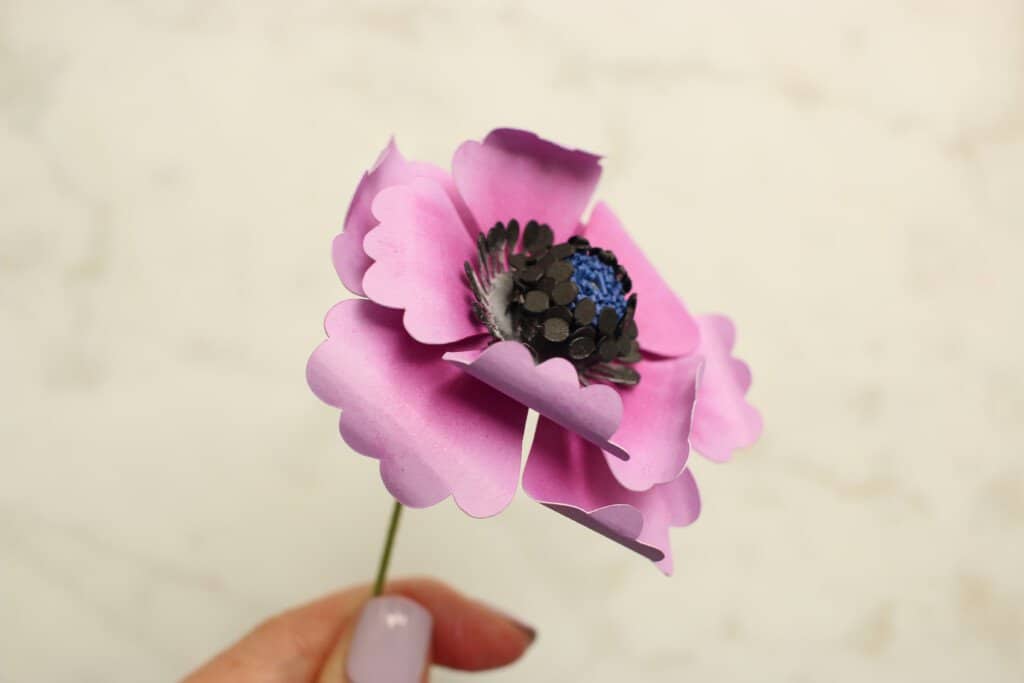
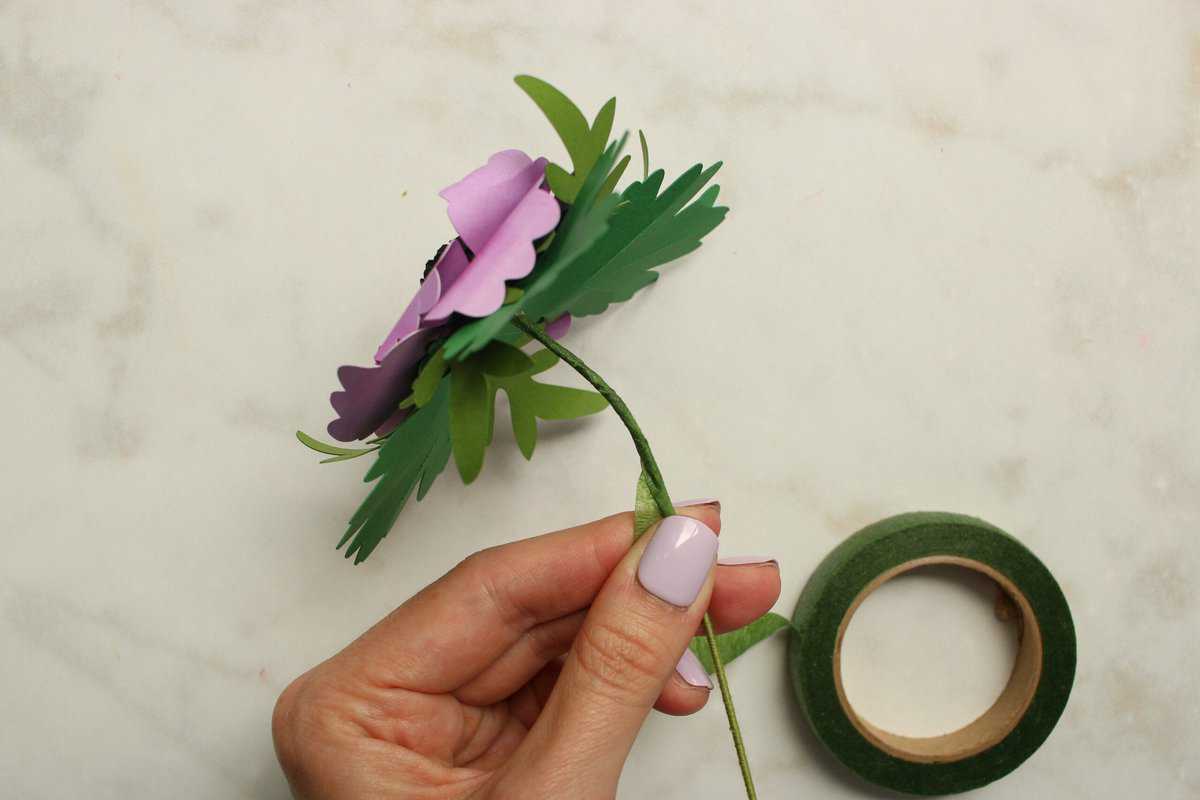
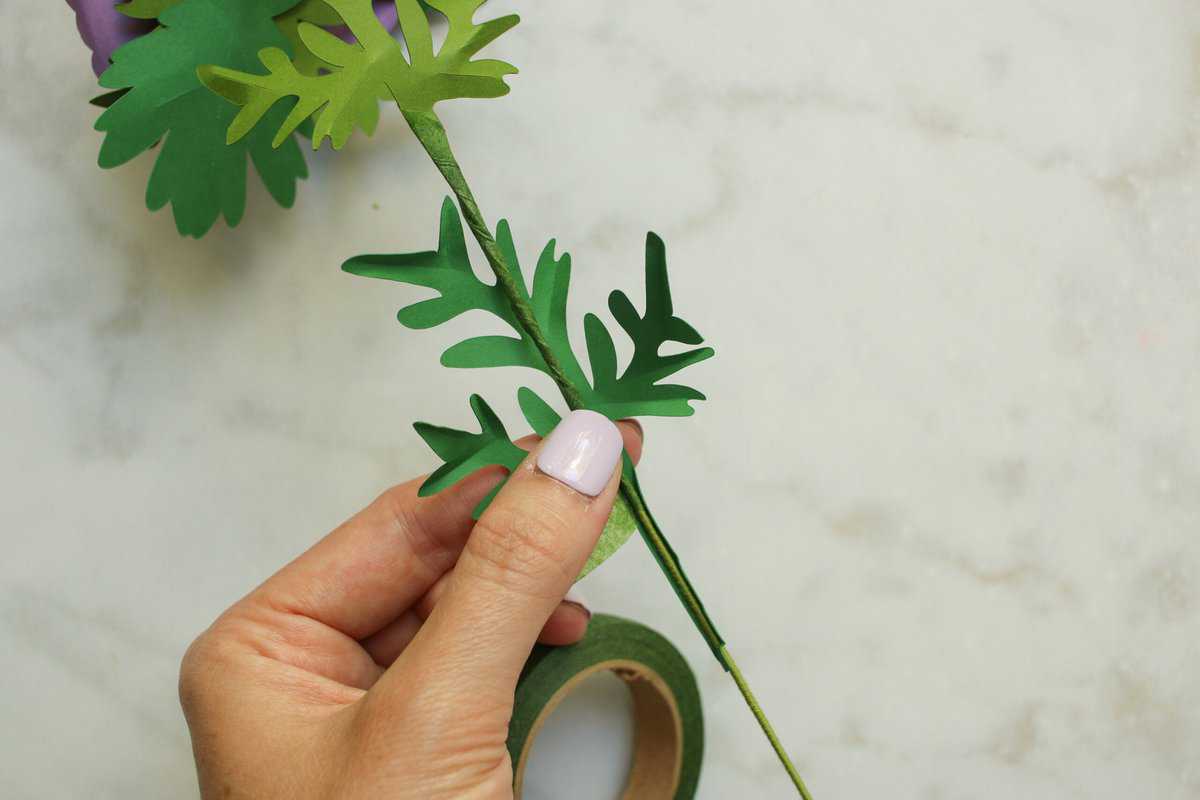
Attach the Greenery
Add the flower base, with the edges curling away from the blossom, and secure with glue.

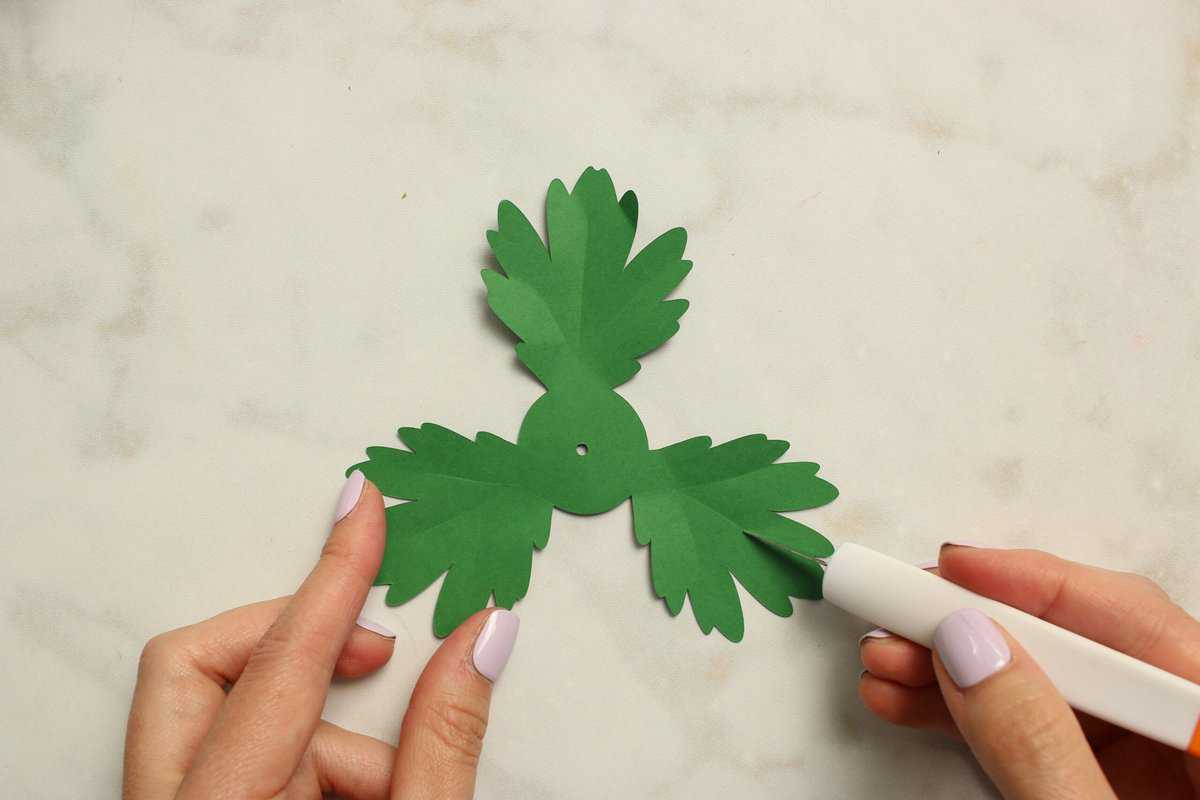
Add the additional greenery, with the 5-leafed piece first, and then the 3-leafed piece.
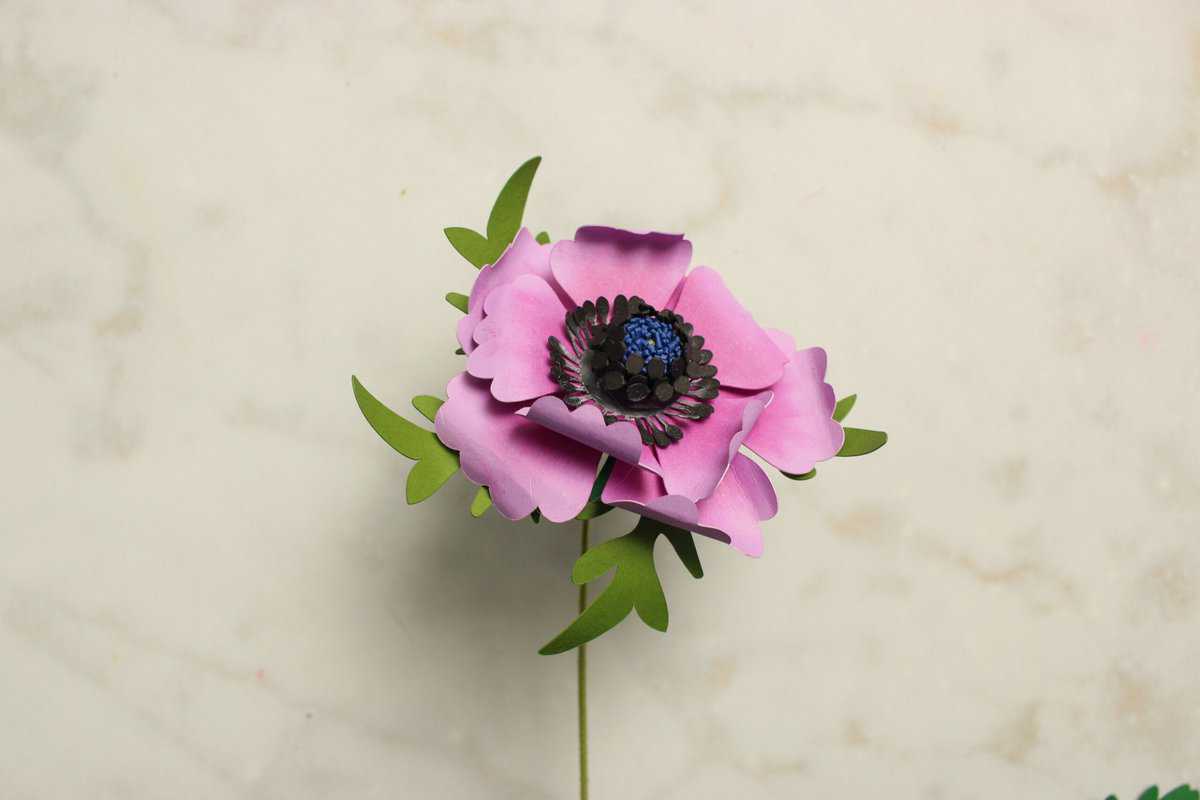
Finally, wrap the stem with floral tape, adding additional leaves if desired.
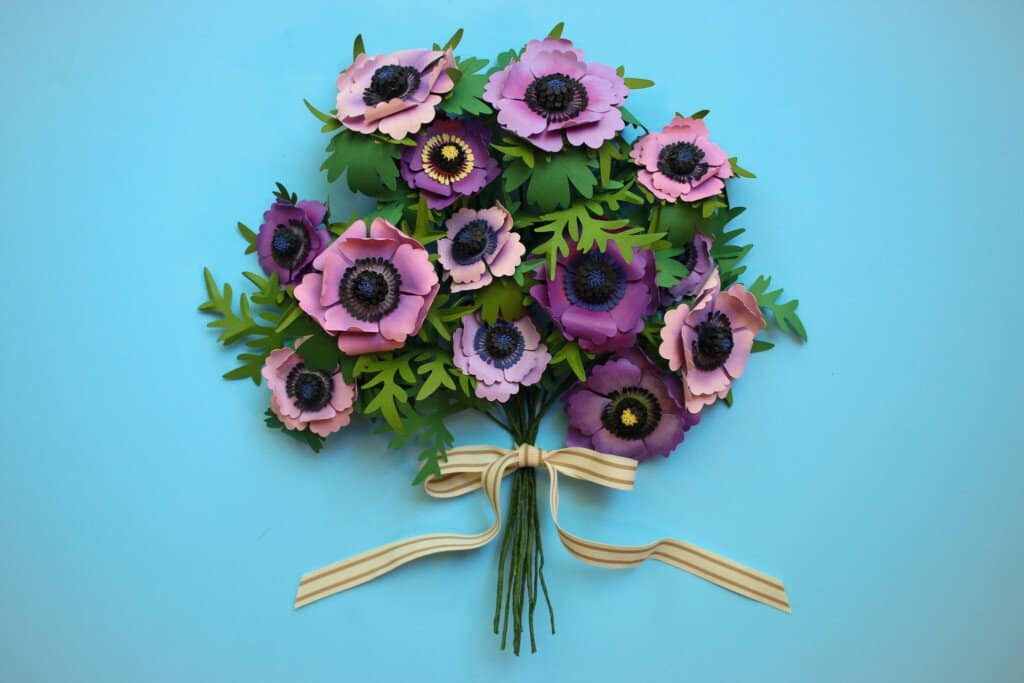
Now you have a finished anemone! Repeat to make as many blossoms as desired.
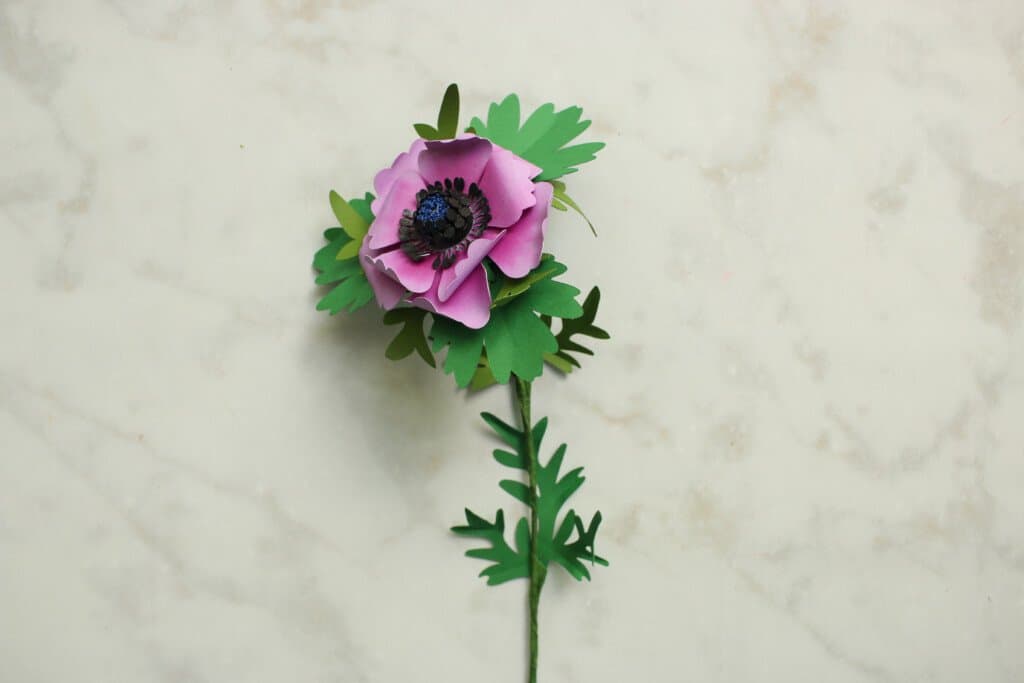
You can create a stunning paper Anemone flower bouquet by creating a variety of different colored flowers.
I love creating paper flowers, and I'm always adding more blog posts to help you create realistic-looking paper flowers! Click here for more templates!
- Daisy Paper Flower
- Peony Paper Flower
- Oversized Wild Rose Paper Flower
- Crepe Paper Dahlia
- Rolled Paper Flowers
I can't wait to see what you make with this tutorial!
Join my crafting and sewing Facebook group where you can show us what you’re making, ask questions, and learn from others!
Don't forget to share your paper flowers on Instagram and Facebook and tag me @sweetredpoppy or use the hashtag #sweetredpoppy so I can see what you create!
Purchase an AD-FREE printable e-book tutorial for only $3 HERE.

Don’t want to forget about this free flower template? Save this project for later! Click here to save this project on Pinterest.
How cute
oh wow. These are amazing. Ive just downloaded the pattern and Im going to make! Thanks for the design and pattern.
Wow so many great crafts here that I think I can even manage to do lol ! I also love how realistic they look
Lovely design, especially nice for Mother's Day.
geat looking flowers
Cool flower craft!
Your videos make them look so easy to make.
That looks pretty cool. I would take them over real flowers any day.
Thank you for this comprehensive tutorial and the template. These are so pretty, I may need to try making them.
I absolutely love how realistic they look. Great way to have beautiful flowers and not worry about them dying quickly.
looks interesting
These are so pretty! The dark centers really are striking!
These crafts look great and, most importantly, look like a lot of fun.
how cool, very interesting...thanks for the ideas
You are so talented love your flowers. You pro tips are great. Never thought I’m about using 24” mat with two 12x12 pieces of paper. Genius!
So pretty! Can’t wait to try them!
Gorgeous! I will definitely try to make these.