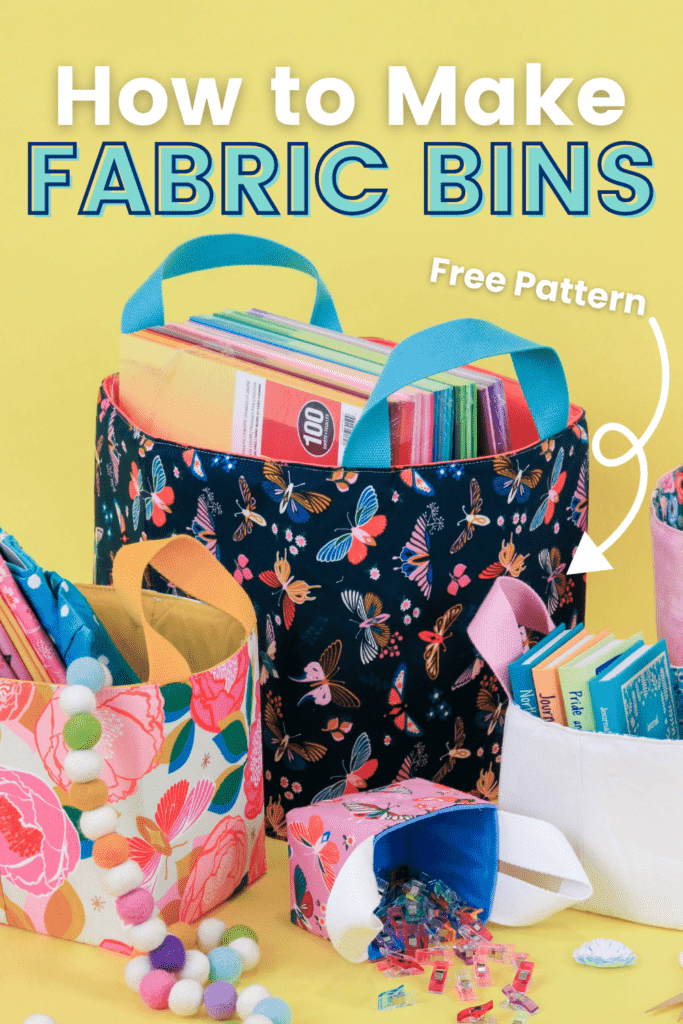
Learn How to Sew Fabric Storage Bins to Organize Your Home. Sewing a Useful Fabric Basket Is Easy With My Free Sewing Pattern and Step-By-Step Tutorial.
What better way to use your sewing skills than to create storage solutions to declutter your home? Learn how to sew fabric storage bins made from your favorite cute fabrics with this free sewing pattern and tutorial.
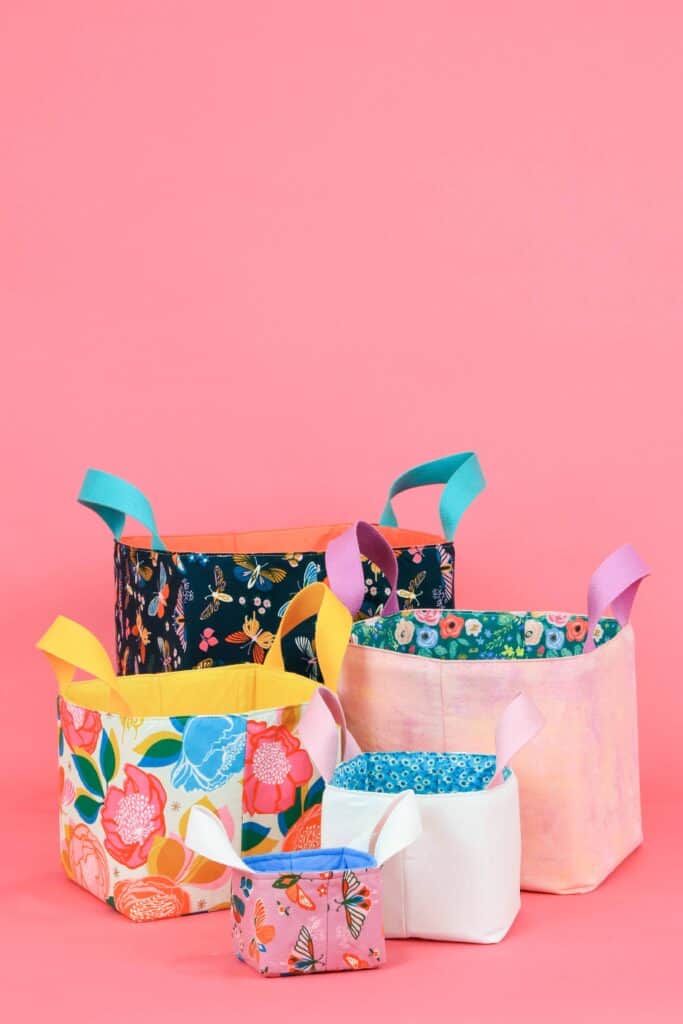
These fabric storage baskets are great for holding all sorts of items - from toiletries in the bathroom, to extra blankets by the couch, to small sewing notions in your crafting space!
Don’t want to forget this project and free pattern? Click here to save this tutorial on Pinterest!
Snag my free fabric storage basket sewing pattern and follow the step-by-step tutorial below to sew your own adorable fabric storage bins!
Table of Contents
Want to learn how to make even MORE fabric bags?
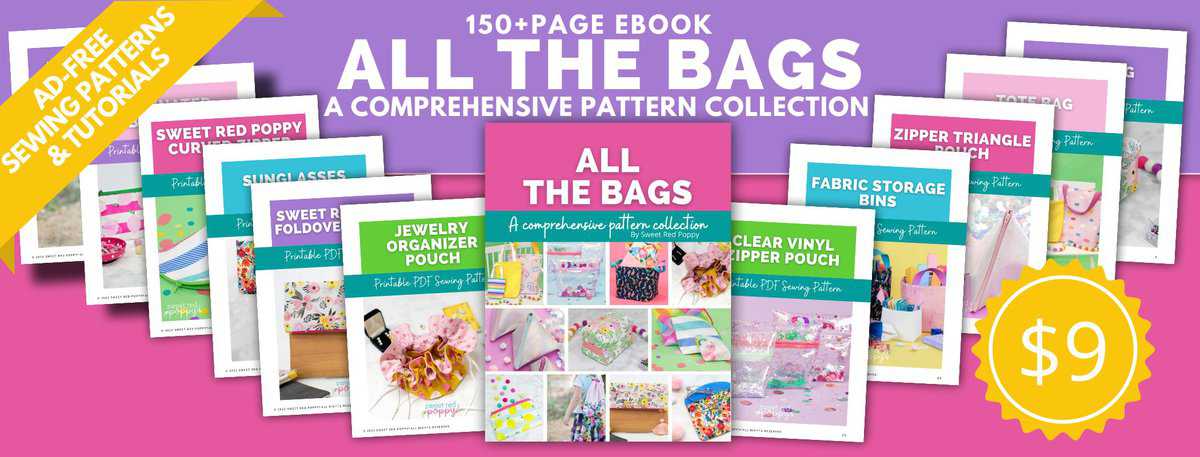
Get 11 different bag patterns and gain access to a comprehensive collection of bag patterns and tutorials my All The Bags 150+ page Ebook by clicking here.
About the Fabric Basket Sewing Pattern
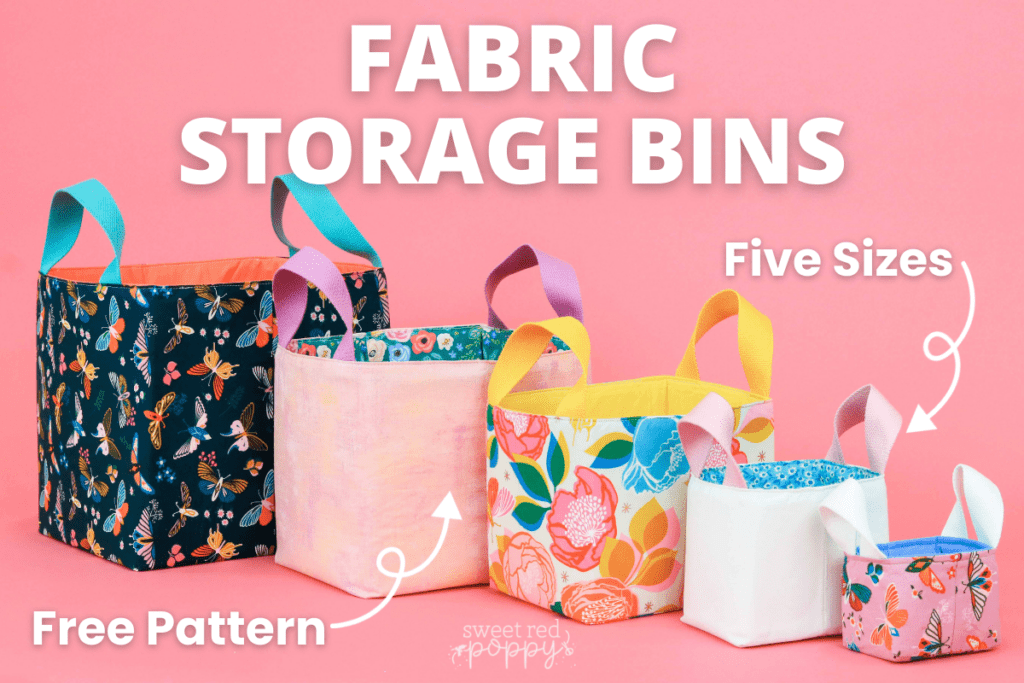
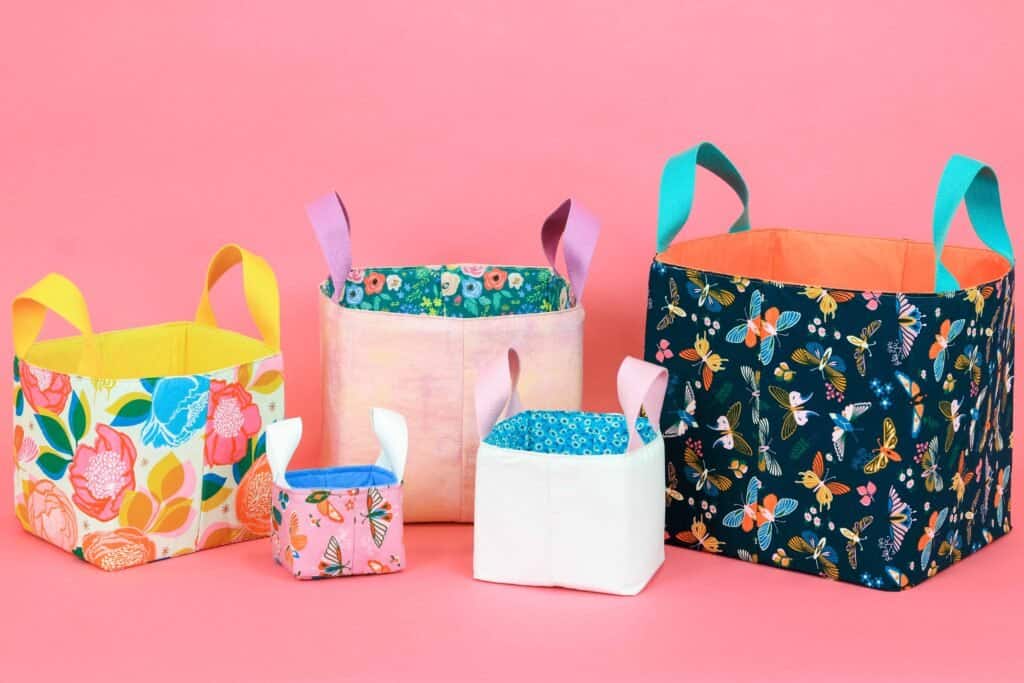
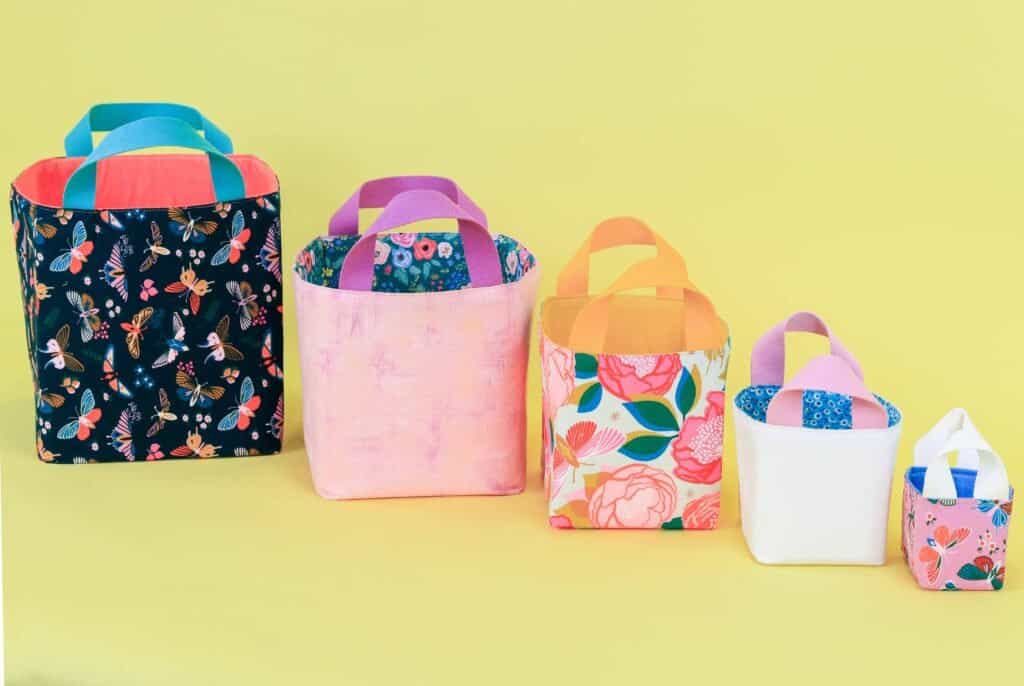
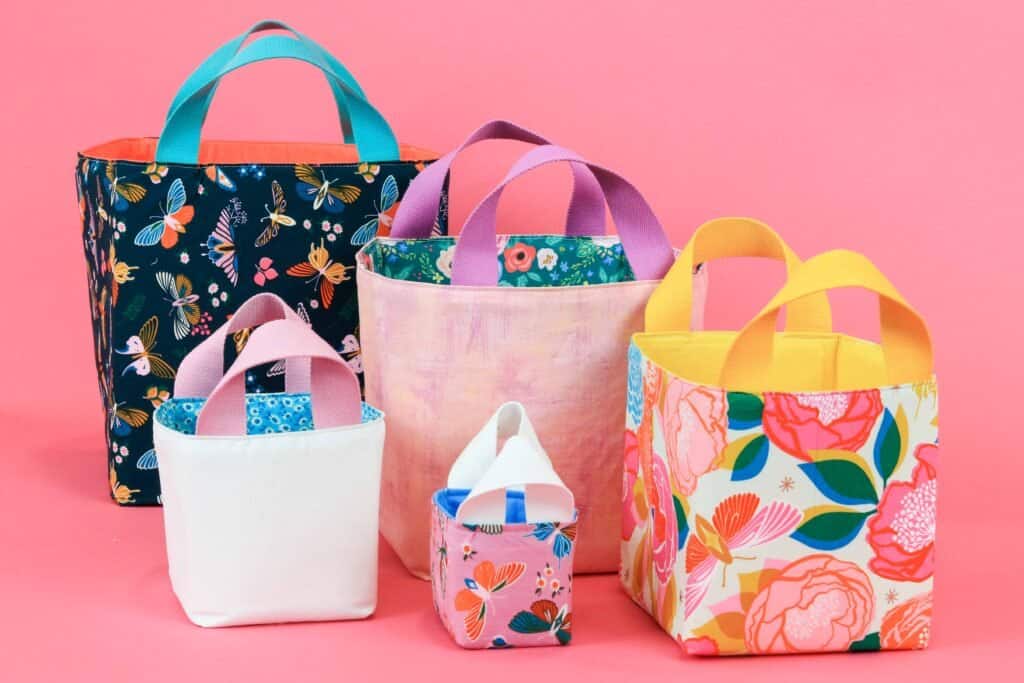
The free fabric basket sewing pattern includes 5 different sizes so you can make the right size for what you need! Or, make an entire set of matching fabric storage bins!
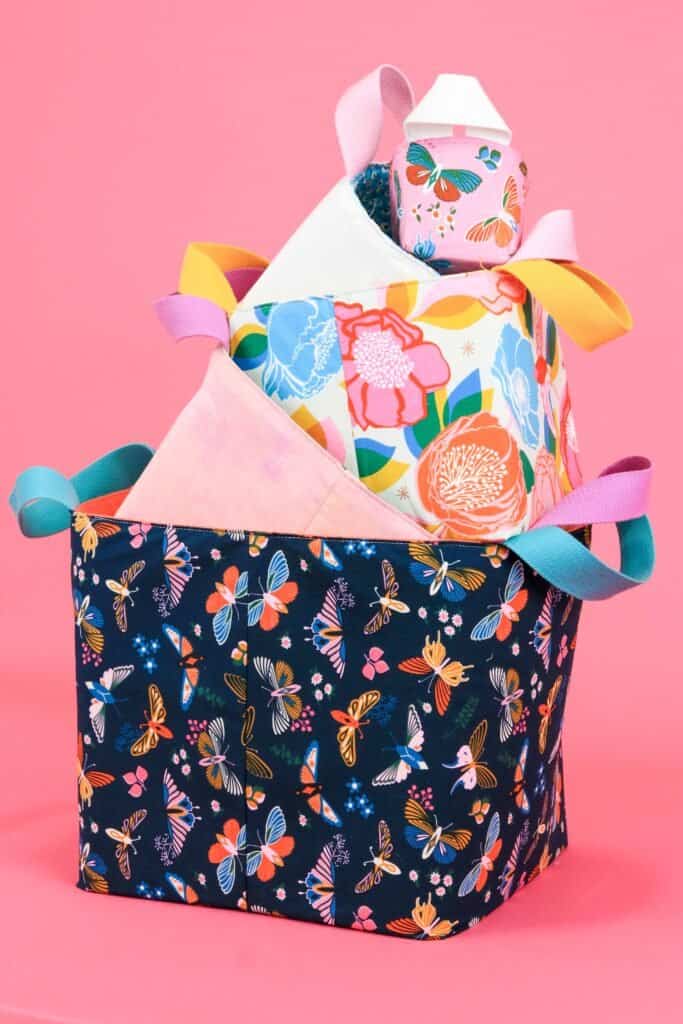
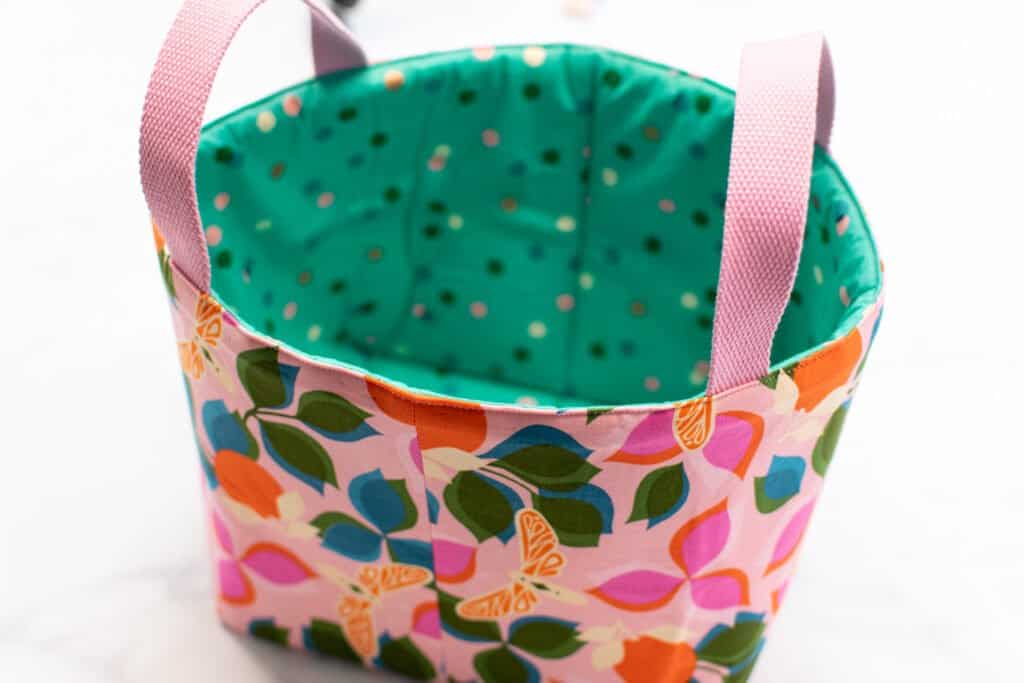
The storage baskets are fully lined and have cool boxed corners, giving them a really professional look.
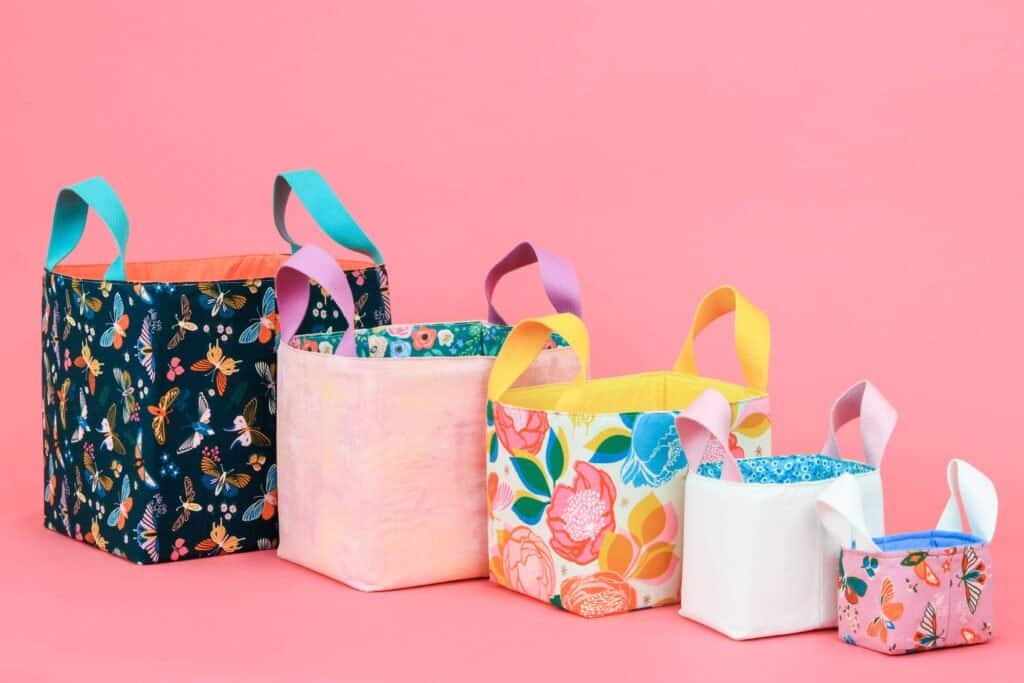
I've included a pattern for fabric straps in the pattern, so you can make matching (or contrasting) straps for your storage baskets. However, if you prefer the look of cotton webbing straps, I have instructions below on how to sew this kind of strap as well.
This pattern is geared towards a very confident beginner or intermediate sewist. While this pattern doesn't utilize any intermediate or advanced techniques it does require confidence in working with multiple layers of bulky fabric, which can be tricky. You'll need lots of pins and some patience to get the very best results!
Looking for even more FREE sewing patterns? Click the links below!
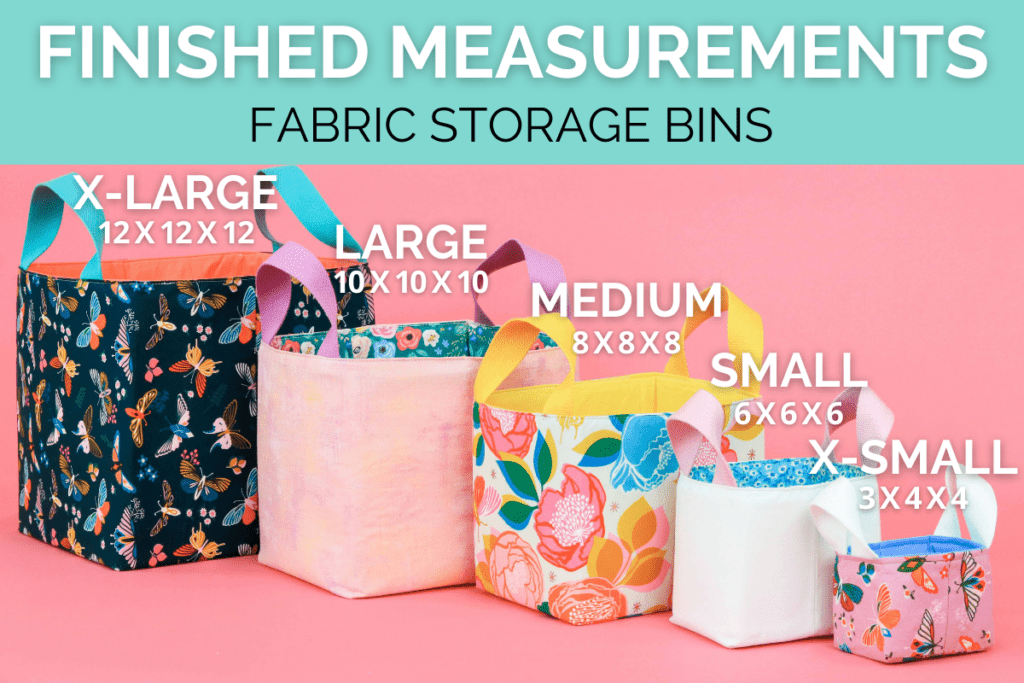
Fabric Storage Bins Finished Measurements
Here are the finished measurements of the five fabric basket sizes so you can make sure to choose the right size for your needs.
- XL: 12" x 12" x 12"
- L: 10" x 10" x 10"
- M: 8" x 8" x 8"
- S: 6" x 6" x 6"
- XS: 3" x 4" x 4"
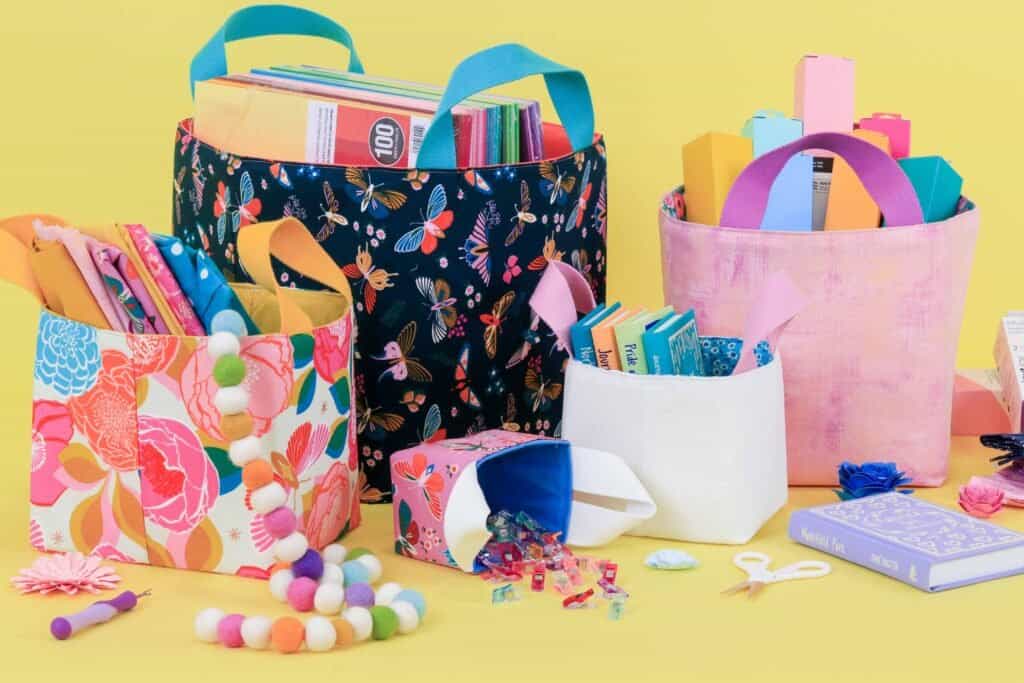
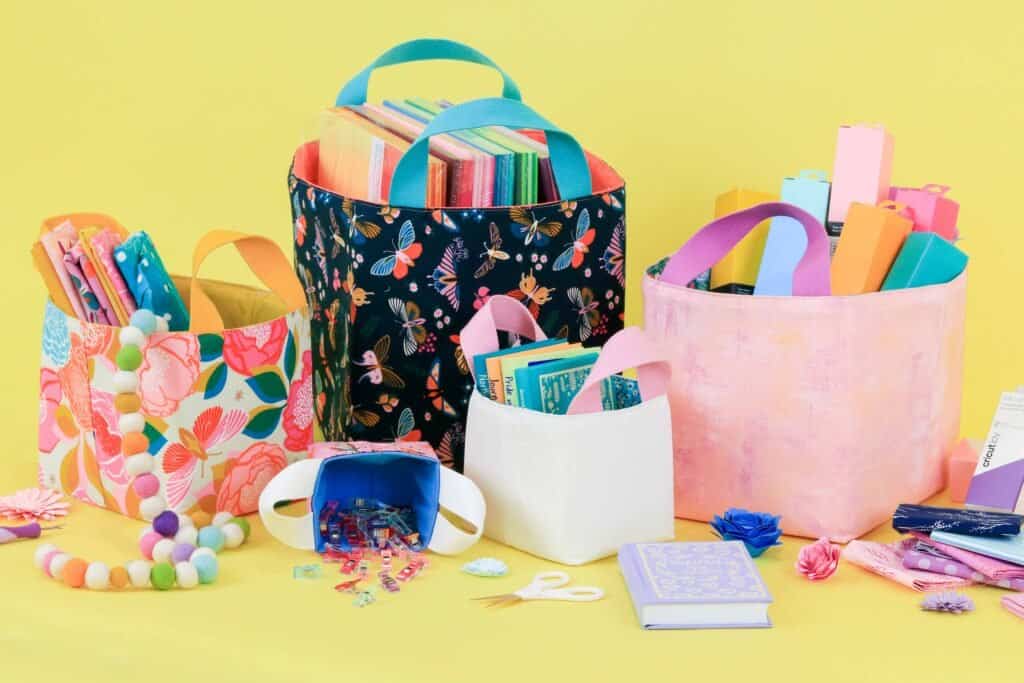
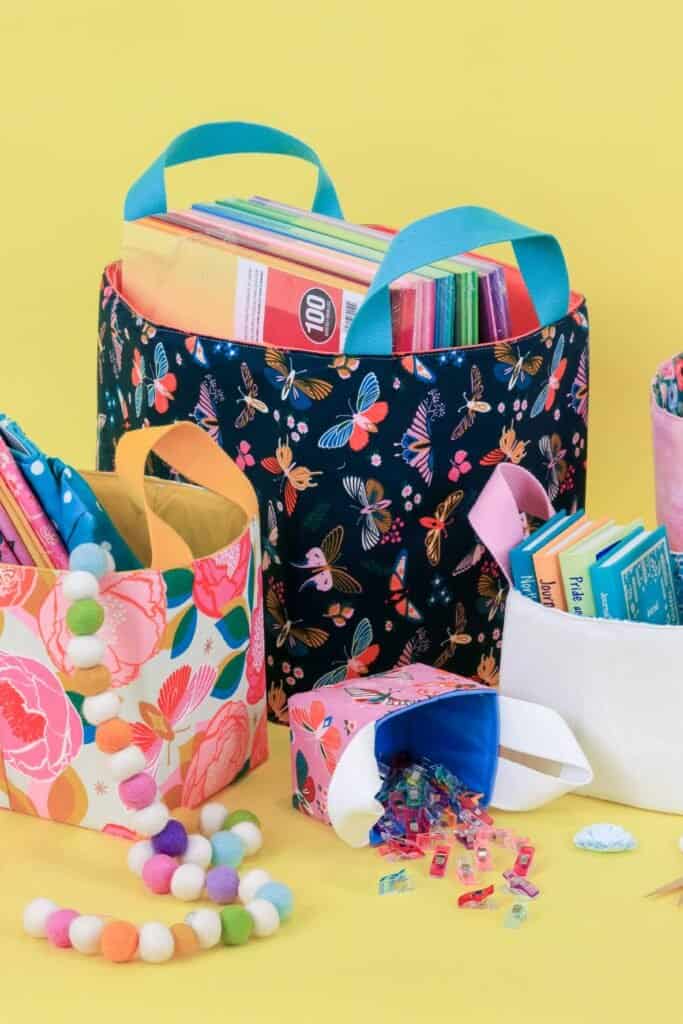
There you can see each size holding different supplies in my craft room. The XS size is perfect for holding my favorite craft clips!

The small and medium bins are great for books, fat quarters, and fabric bundles. I'd suggest using the L or XL sizes for more oversized items like 12"x12" pieces of paper, rolls of vinyl, Iron-On, and Infusible Ink.
Utilize a Walking Foot for the Best Results
When sewing with multiple layers of fabric, especially bulky materials like flex-foam, a walking foot can really come in handy!
A walking foot works by adding an extra set of feed dogs on top of your fabric. This allows the top and bottom fabrics to feed evenly.
Feed dogs grip onto thick or slippery fabrics gently pulling them through the machine evenly and consistently.
If you don’t already own a walking foot, I definitely recommend adding one to your sewing foot collection. It’s an invaluable foot to have when working with knit fabric, slippery fabrics like satin or silk and bulky fabrics with lots of layers.
Utilizing a walking foot in this project will help you to avoid puckering, ripples, and (unintentional) pintucks when sewing fabrics together. It’s especially helpful to create consistent topstitching. If you’re planning on sewing straps for this bin, a walking foot is a great foot to use to achieve consistent stitching without creating a wavy uneven effect.
When purchasing a walking foot, first check that it's compatible with your specific sewing machine.
Fabric and Interfacing for Sewing a Fabric Storage Basket
So, what fabric can you use to make your new fabric storage baskets? Any mid-weight woven fabric will work for this pattern.
My favorite fabric choice is quality quilting cotton in a cute color or design. Quilting cotton is easy to sew, holds a press well, and comes in a ton of different colors and patterns.
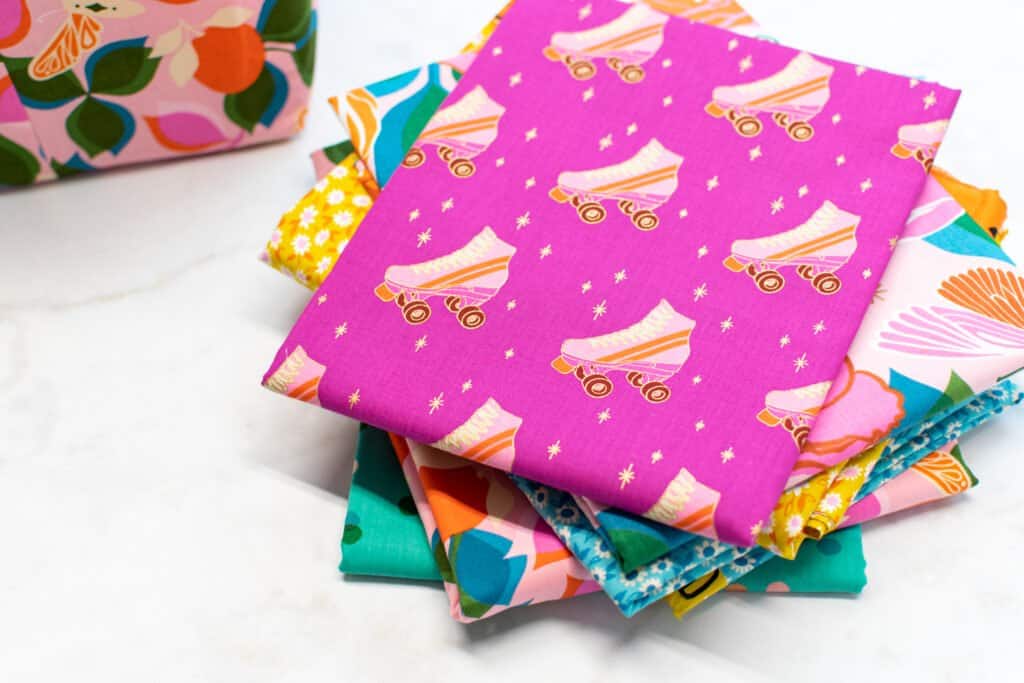
Light to medium weight cotton canvas is another great choice. Canvas is a bit sturdier than quilting cotton, which is great if your storage baskets will be seeing a lot of wear and tear.
To sew these fabric baskets, you will need 2 different types of stabilizers. First, medium-weight woven interfacing to give the fabric a smooth, crisp look. Choosing a fusible interfacing that can be ironed onto the fabric will make applying the interfacing easy.

Second, you will need a thicker stabilizer to give the basket structure, helping the sides to stand straight. This stabilizer will be applied to the lining, not the outer fabric, since it can sometimes cause wrinkles in the fabric when ironed on.

Fusible Fleece or Flex Foam
You can use fusible fleece or a flex foam stabilizer for this. The fleece is a bit thinner and easier to sew, but it won't give the basket as much structure as foam. I prefer using foam since it gives the finished fabric baskets a very professional look. You can use either sew-in or fusible foam. If using fusible foam, I recommend using one-sided fusible so it doesn't adhere to the outer fabric which can cause wrinkling.

Supplies to Sew Fabric Storage Bins
Shop my favorite sewing supplies here!
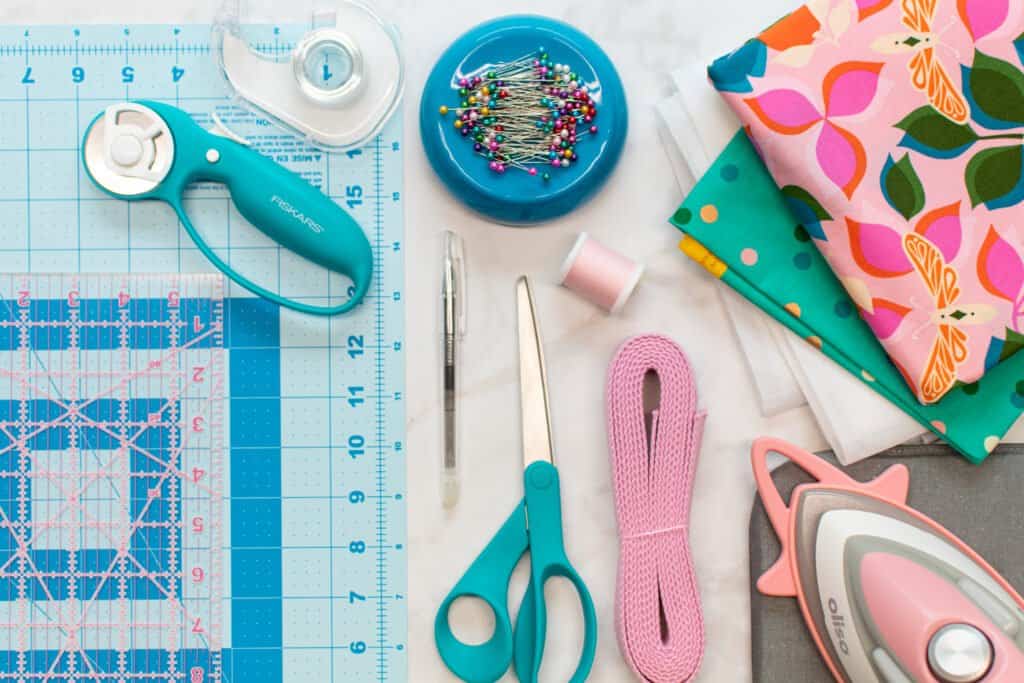
Here are the supplies you'll need to have on hand to sew your adorable fabric storage bins.
*Note that the amount of fabric you will need depends on the size of fabric basket you plan to sew. Refer to the chart below for fabric requirements for each basket.
- Mid-Weight Woven Fabric (Outer)
- Mid-Weight Woven Fabric (Lining)
- Medium Weight Interfacing
- Fusible Fleece or Foam
- Fusible Flex Foam will give you the BEST results!
- 1" Wide Cotton Webbing for Straps
- Cotton Webbing is optional, you can also use fabric to create the straps
- Scissors
- Rotary Cutter
- Rotary Cutting Mat
- Thread
- Sewing Pins
- Iron & Ironing Board
- Fabric Pen or Chalk
- Sewing Machine Needle
- Sewing Machine
- Quilting Ruler
- Tape
- Printer
- Printing Paper
- Walking Foot
- This is optional, but makes sewing with bulky fabrics much easier!
Why Shop Through My Links?
When you shop through my affiliate links, it doesn't cost you anything extra, but it helps me out in a big way! I earn a small commission from those purchases, and that support allows me to continue creating and sharing free tutorials and patterns for you. Thank you so much for helping me keep this creative community going!
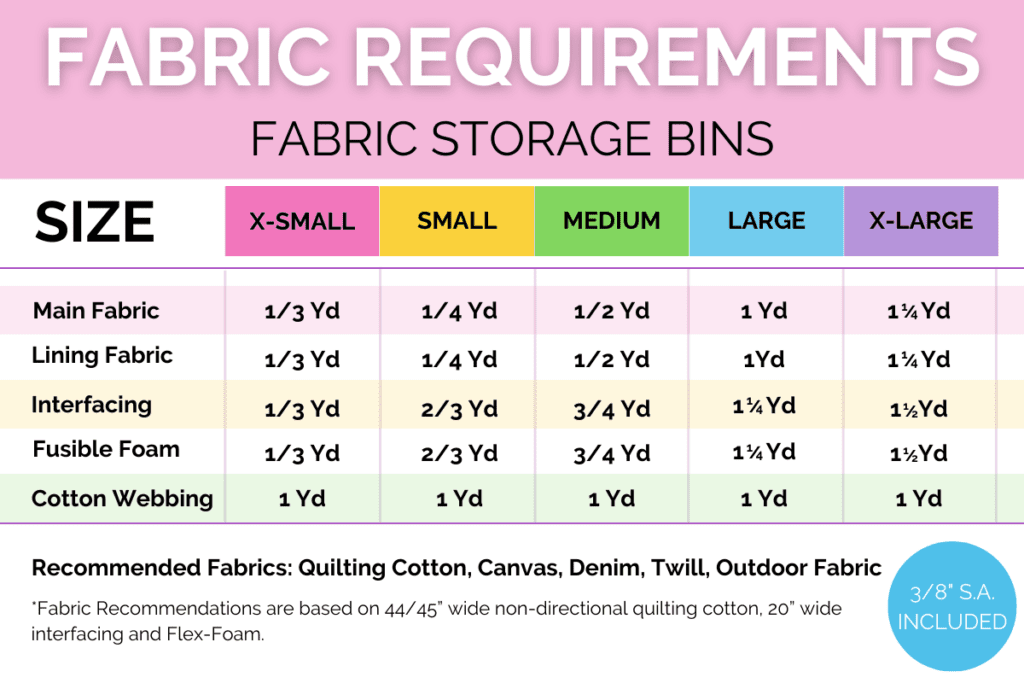
Storage Bin Fabric Requirements
I've listed all fabric, interfacing, and foam requirements in the graphic below.
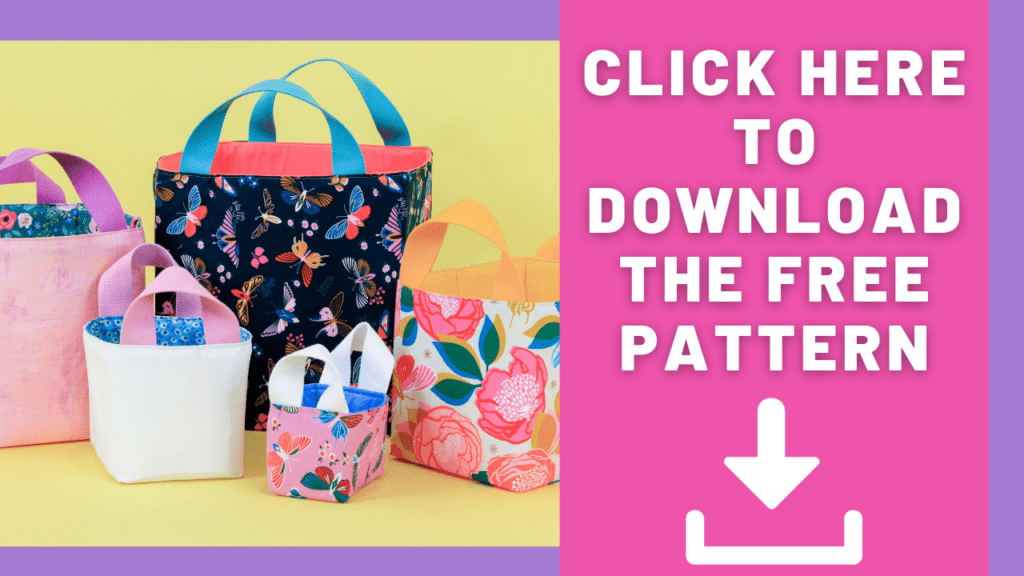
Click Here to Download the Free Fabric Storage Bin Sewing Pattern

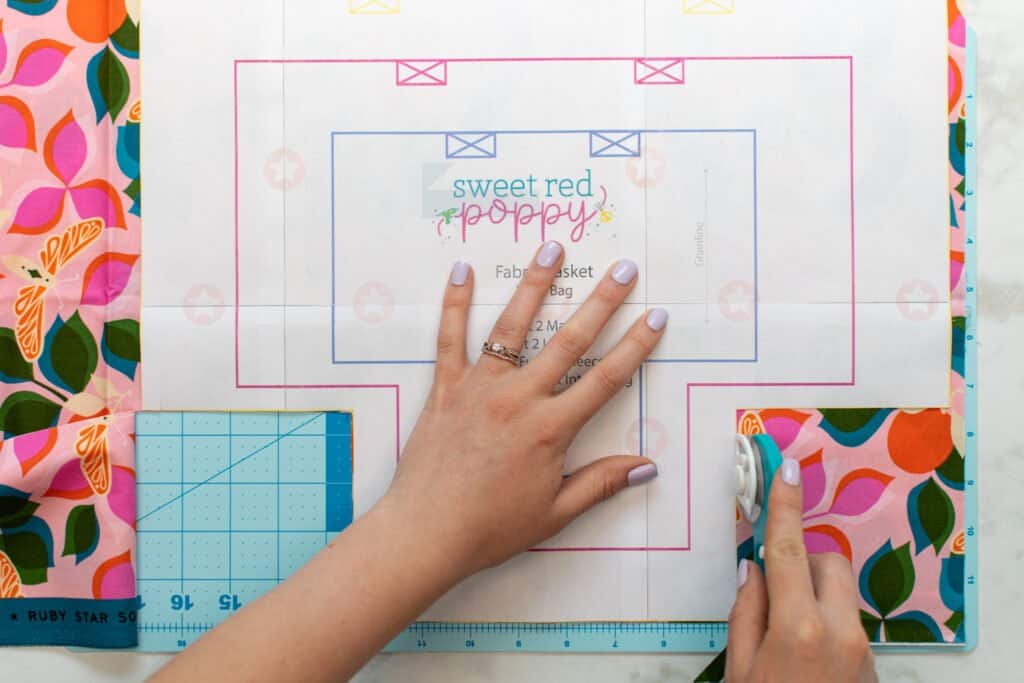
Step 1: Download the Fabric Storage Basket Pattern
Start by downloading the free pattern to your computer.
Open the pattern in your PDF reader, I recommend using Adobe Acrobat. You want to avoid printing the pattern from your browser as it can cause the scaling to be off and the border lines to print incorrectly.
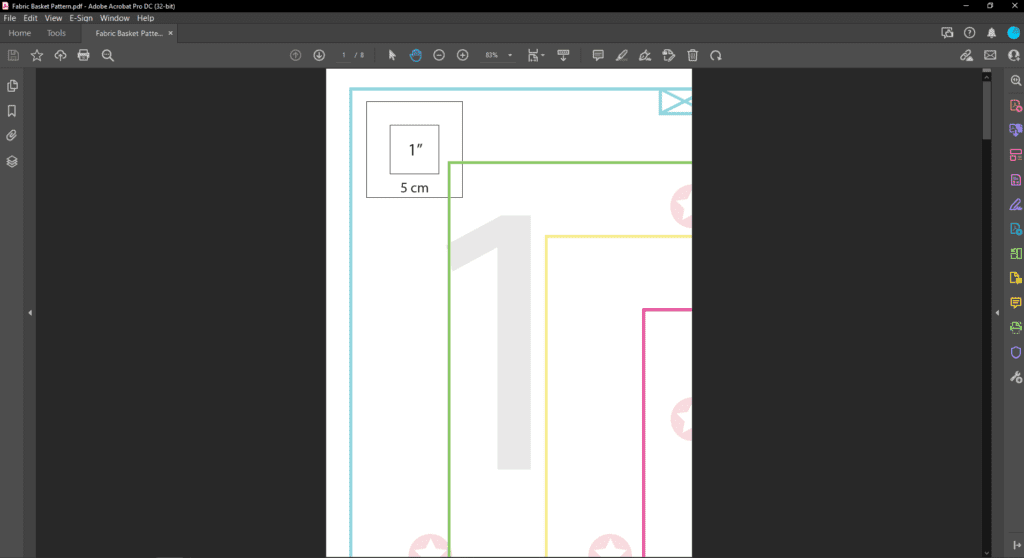
Next, click on "Print" to open the print settings box. In the print settings, make sure the scaling is set to "Actual Size" or "Custom Scaling: 100%."
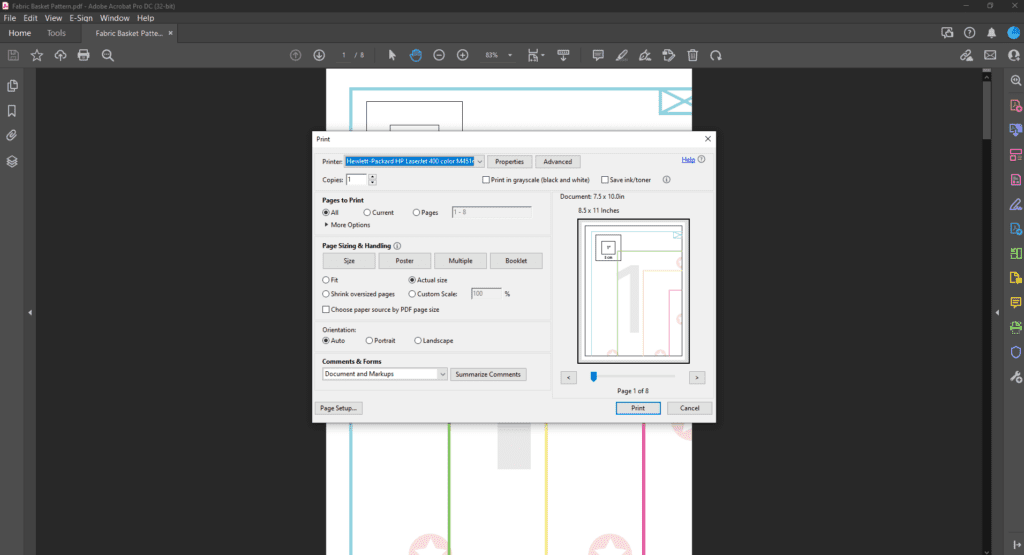
Then, print the first page of the pattern. This page contains a 1" test square to check that the scaling is correct. Once the first page prints, measure the test square. If it measures 1" x 1", print the remaining pages of the pattern. If it does not measure 1" x 1", you will need to recheck your print settings before printing the rest of the pattern.
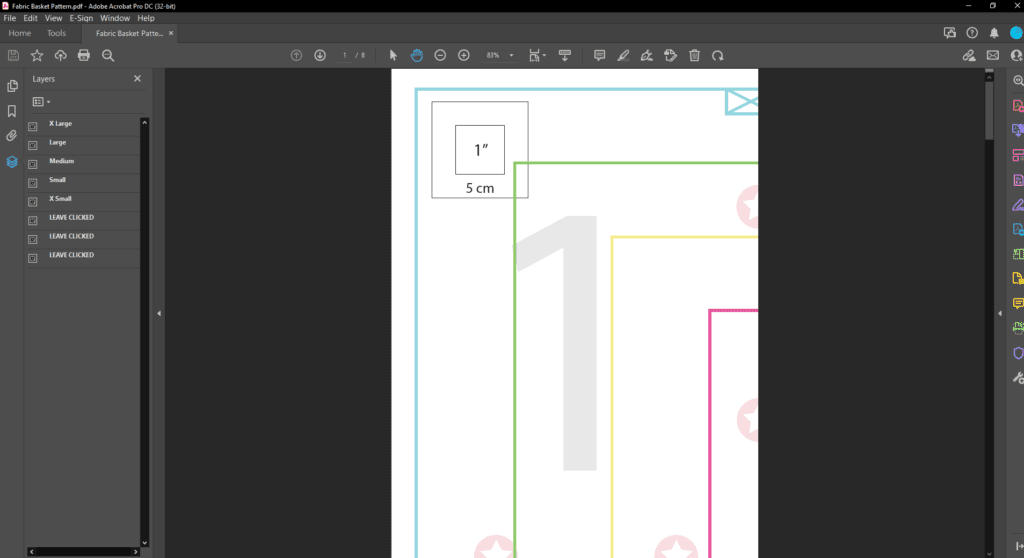
This pattern features layers for each size to make printing easier. You can print only the size(s) you want to sew!
To use the layers options, click on the icon that looks like 3 stacked papers on the left-hand side of the screen. Then, deselect the "eye" next to each size that you don't want to print.
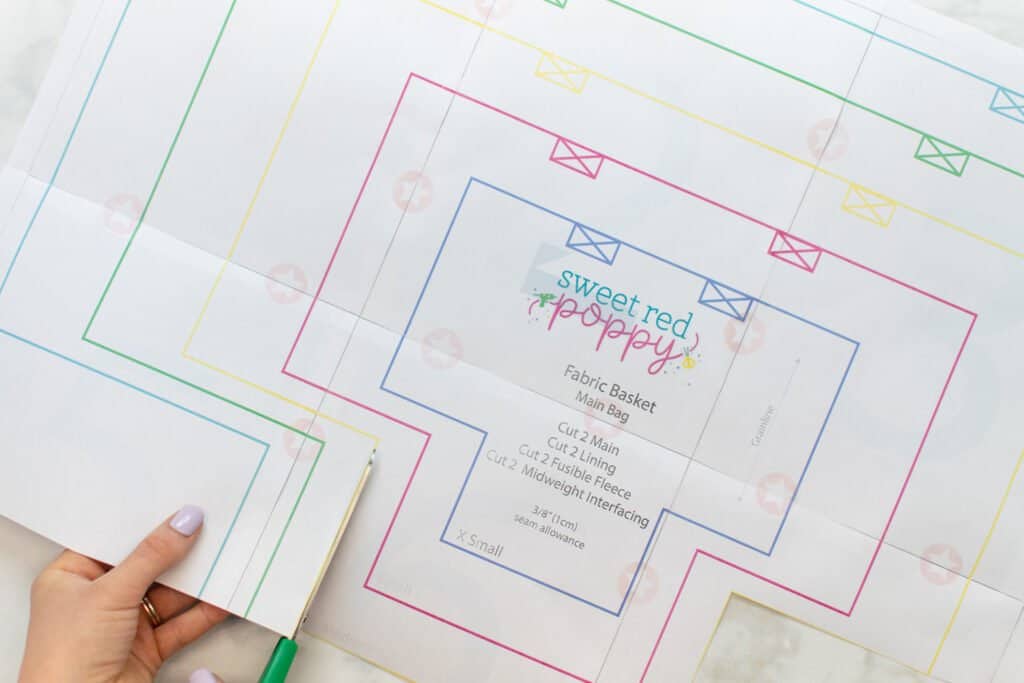
Step 2: Assemble and Cut Out the Fabric Storage Bin Pattern
Once printed, assemble the pattern by lining up the pink stars and lines of the pattern. There are large numbers in the center of each paper to help you keep the pages in order.
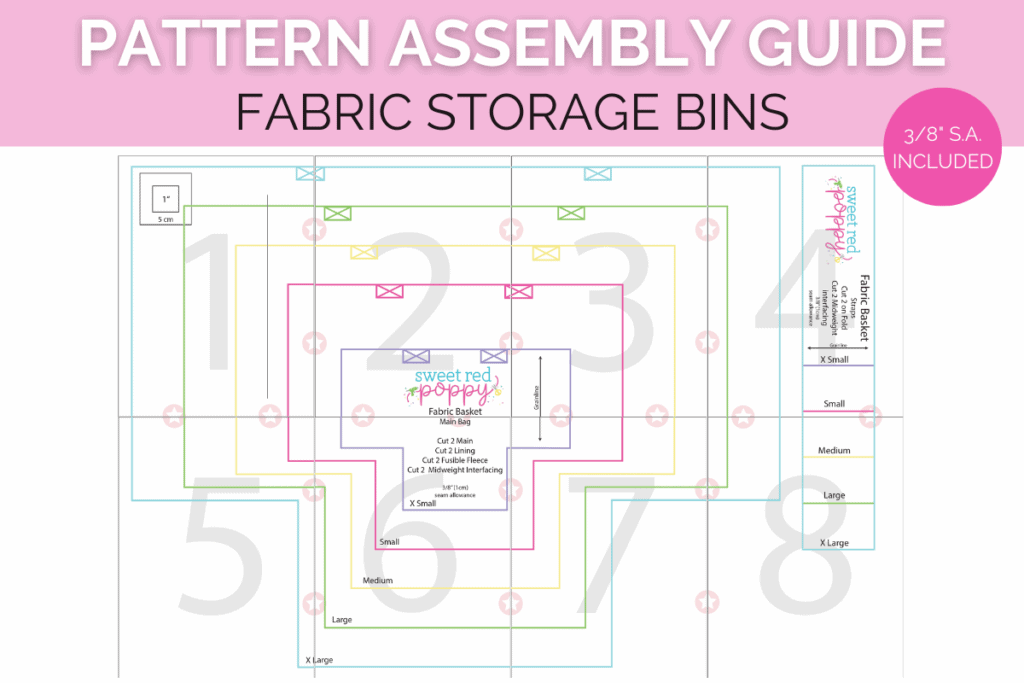

It can help to trim away the excess paper along the sides before taping the pieces of the pattern together. Or, you can simply overlap the papers. If you decide to overlap the edges, holding the pages up to a light can help you see through the paper and align the pattern lines correctly.
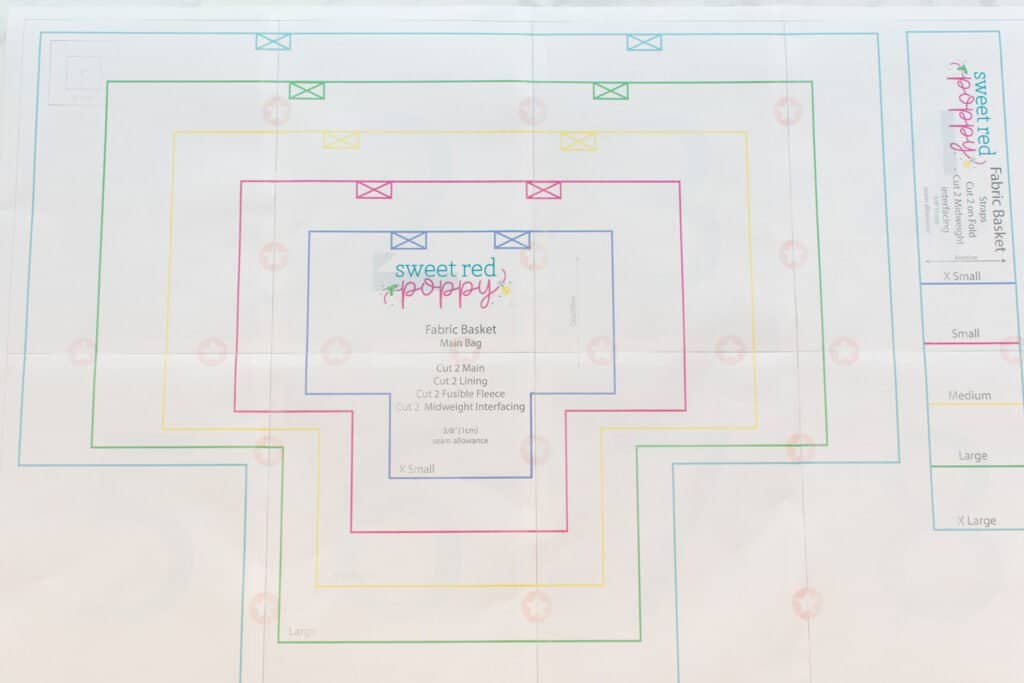
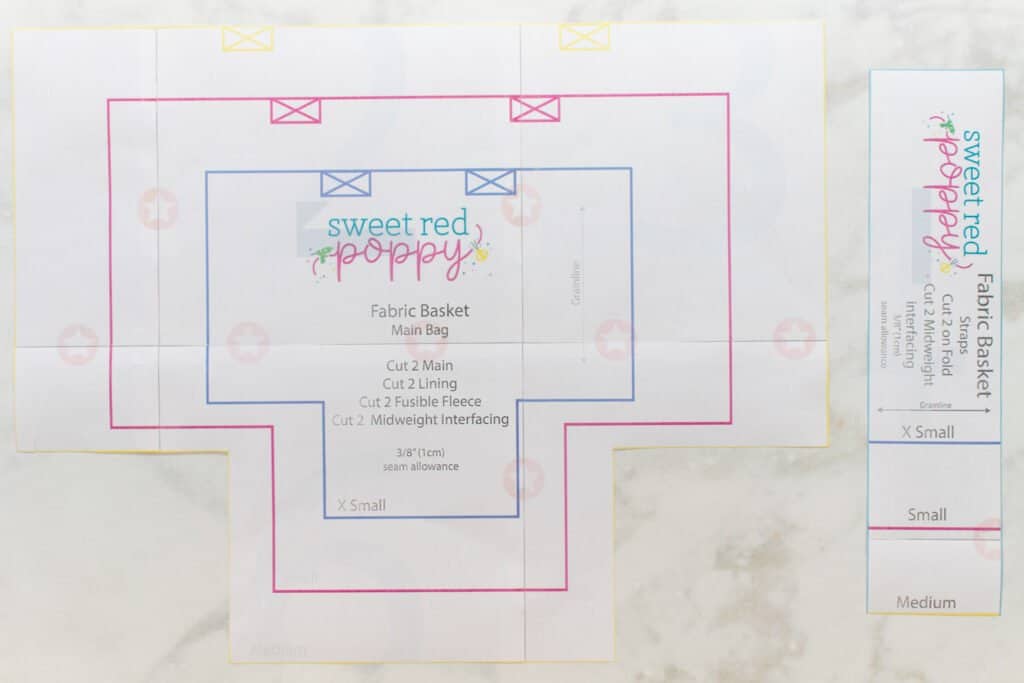
Once you have the pattern taped together, cut out the pattern pieces along the lines corresponding to the basket size you want to sew.
You should have 2 pattern pieces: the strap and the main body of the fabric basket.
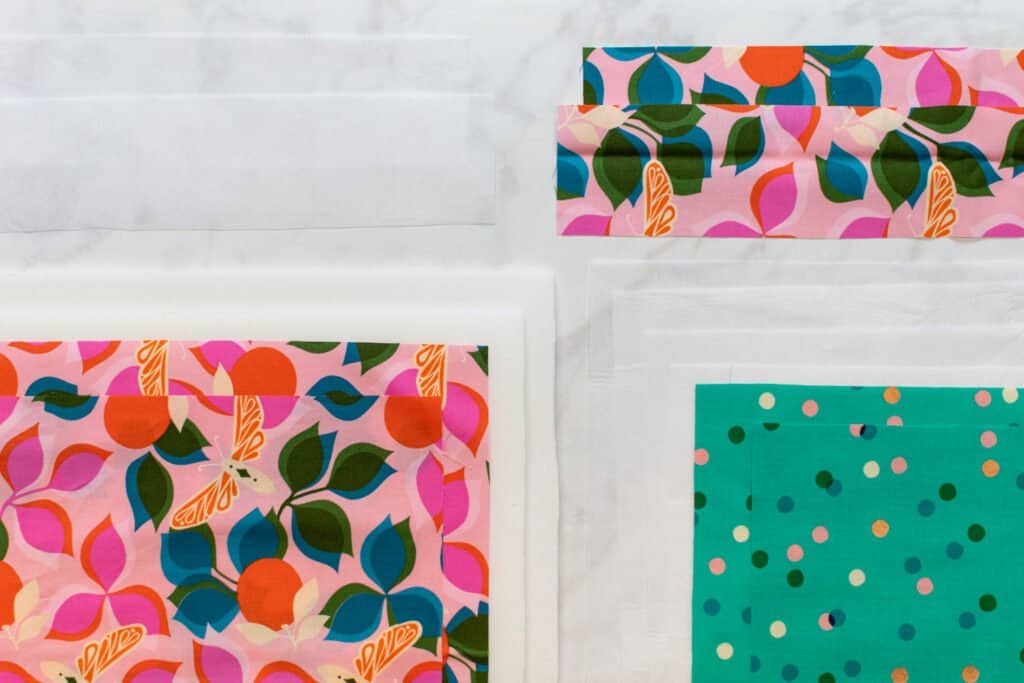
Step 3: Cut Out Fabric & Add Markings
With the pattern assembled and ready to go, it's time to cut out your fabric and interfacing!
Cut out the following number of pieces from your fabric, lining, interfacing, and foam/fleece.
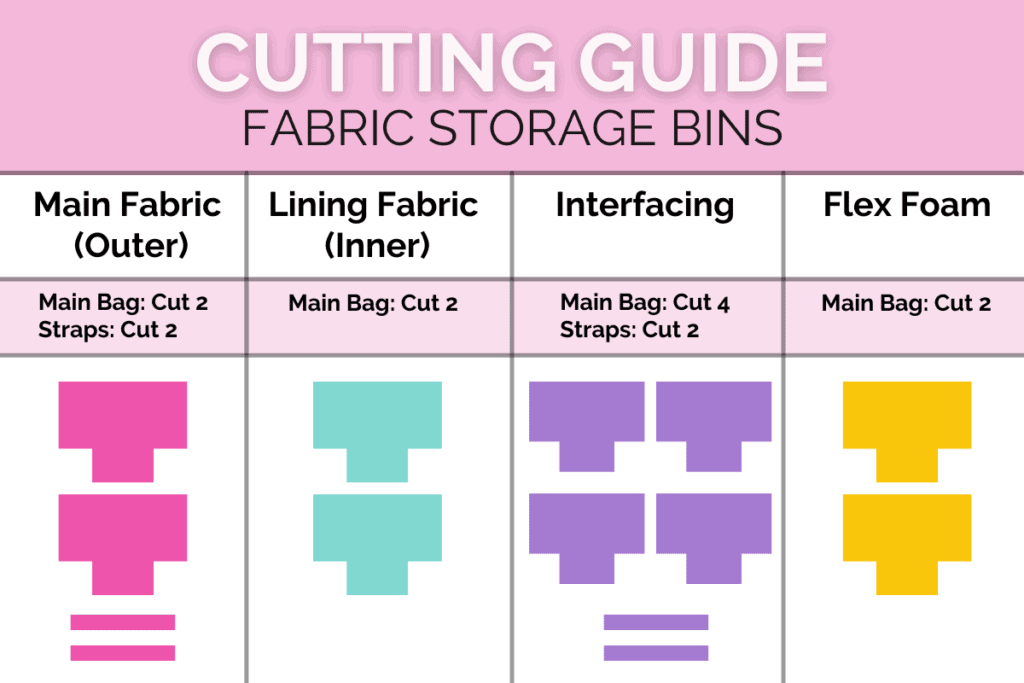
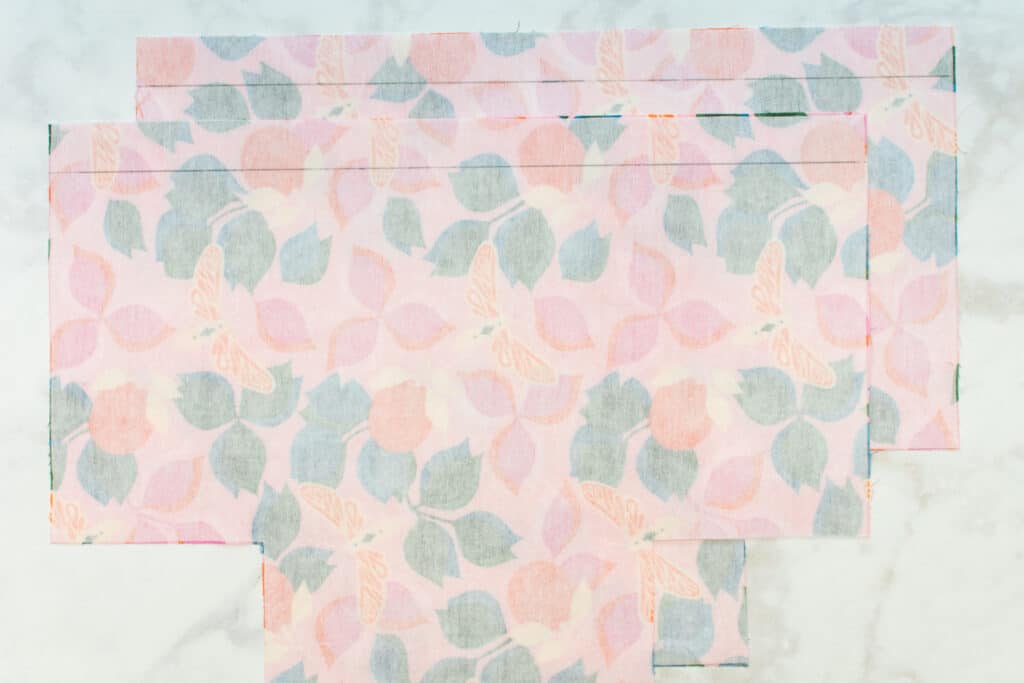
Fabric (Outer)
- Main: Cut 2
- Straps: Cut 2
Fabric (Lining)
- Main: Cut 2
Interfacing
- Main: Cut 4
- Straps: Cut 2
Foam or Fleece
- Main: Cut 2
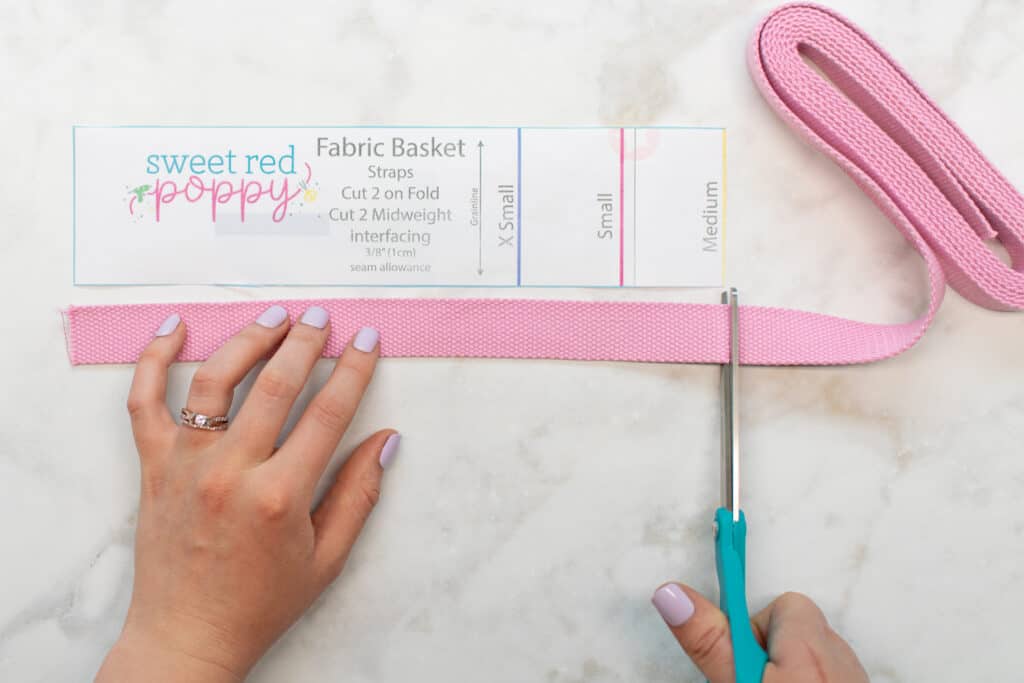
*Note: If you will be making webbing straps instead of fabric straps, skip cutting any of the strap pieces from your fabric or interfacing. Simply cut two pieces of webbing to the length of the strap pattern piece.

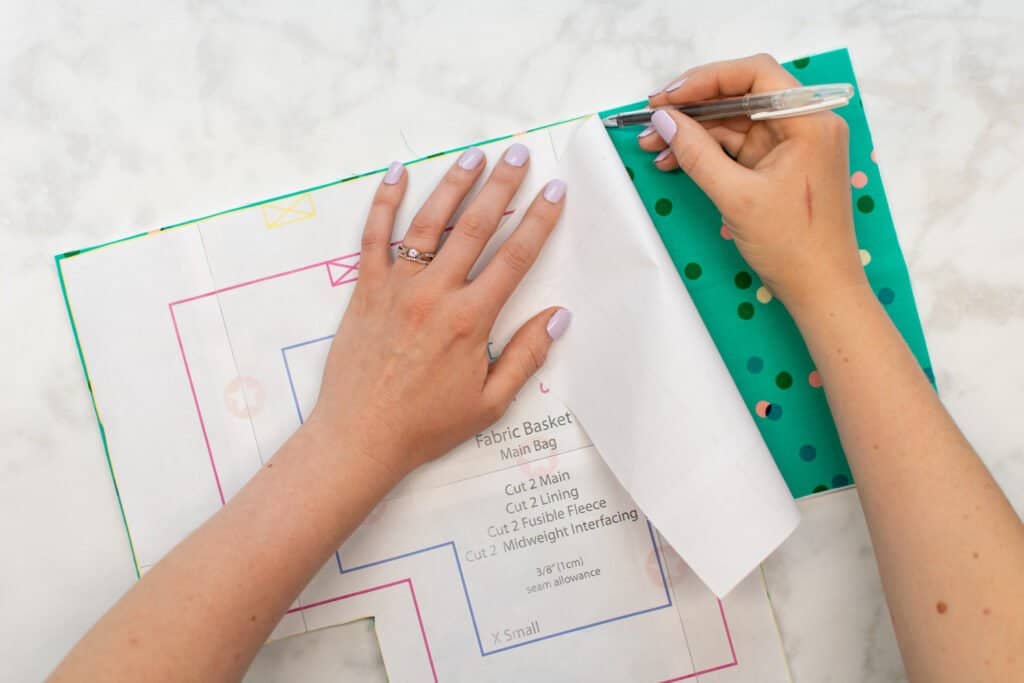
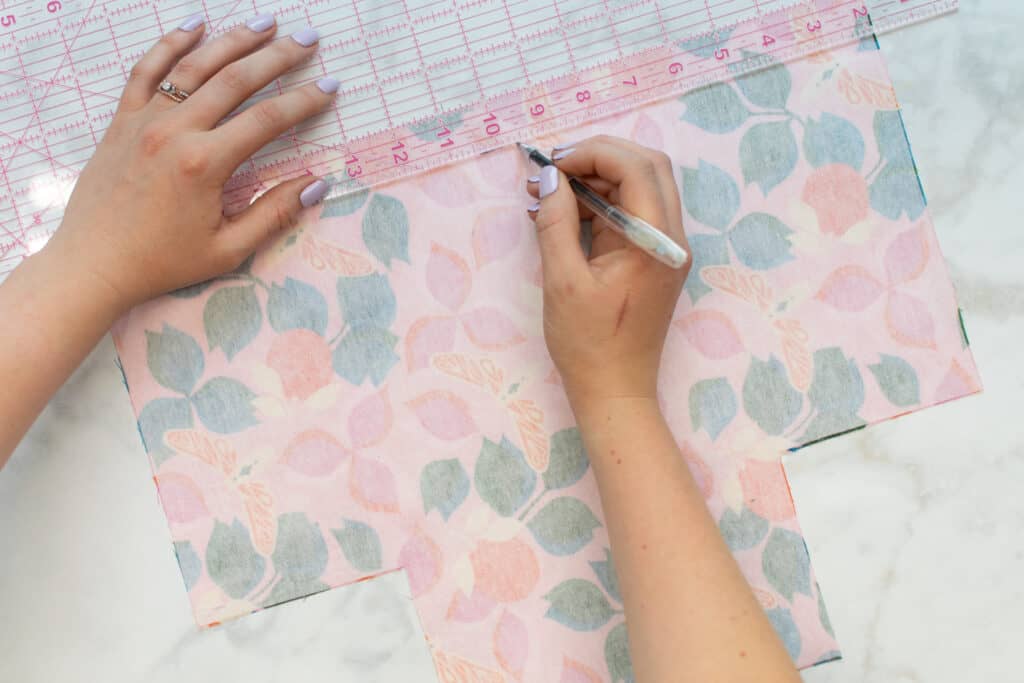
Once your pieces are cut out, you'll need to add in the fabric markings.
Use a fabric pen to transfer the strap location markings from the pattern to the top edge of the lining pieces.
Step 4: Apply Interfacing and Foam
Next, you'll need to apply the stabilizers to your fabric pieces.
Following the instructions that came with your specific interfacing, apply the cut interfacing pieces to the wrong side of the outer fabric pieces. This will include both the main body pieces and the strap pieces.
Next, apply the remaining 2 interfacing pieces to the wrong side of the 2 lining pieces.
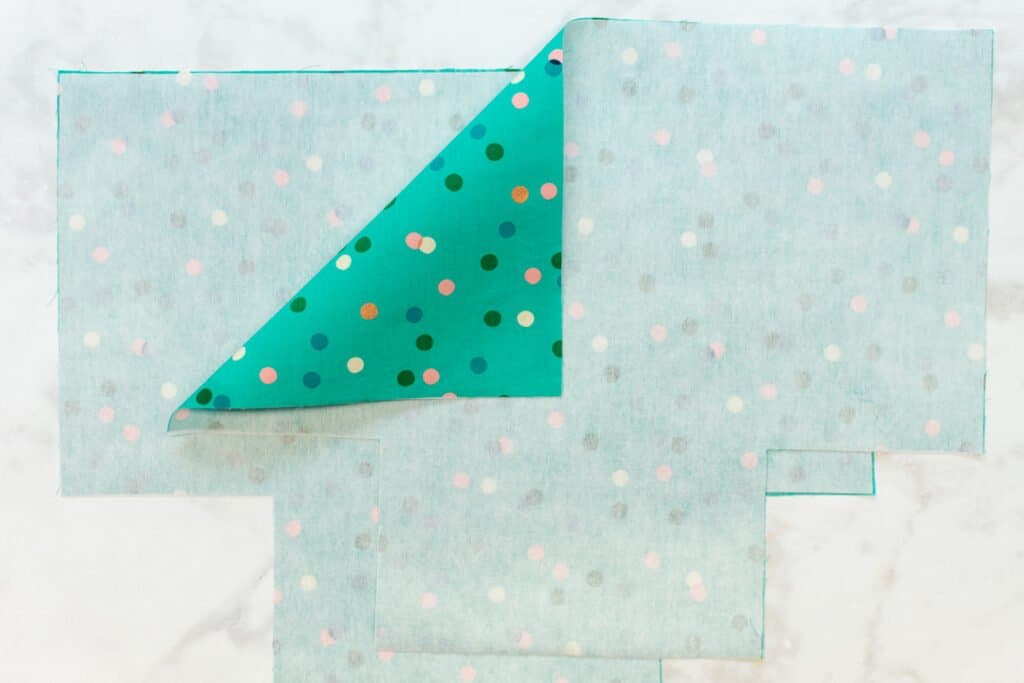
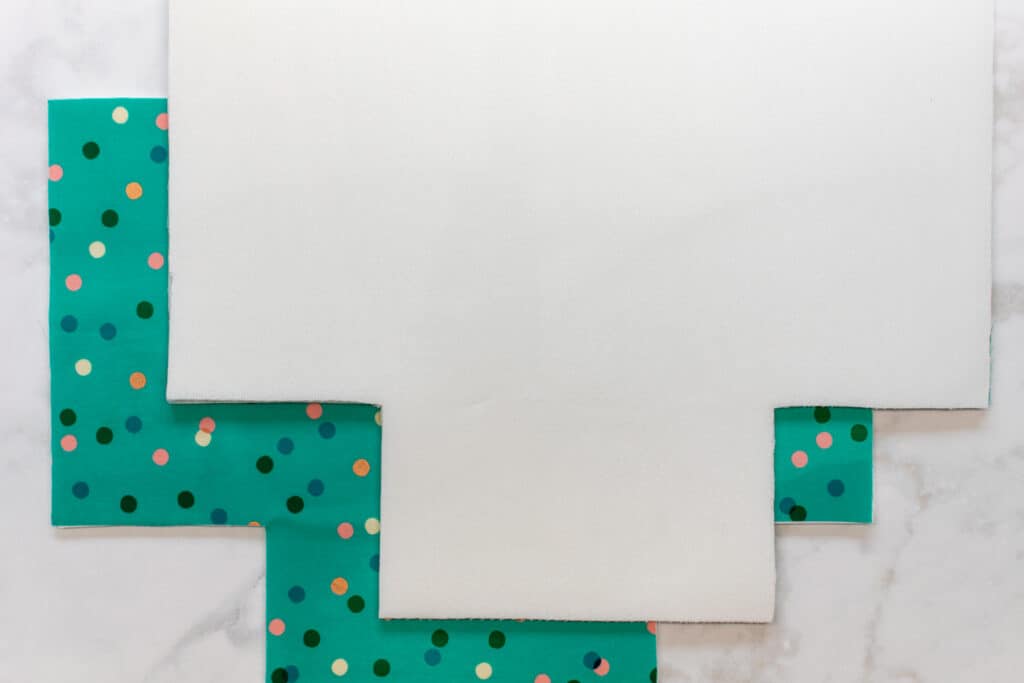
Then, apply the fusible fleece or foam pieces to the wrong side of your 2 lining pieces, over the top of the already applied interfacing. If your foam is a sew-in version and is not fusible, stitch the foam pieces to the lining by sewing a basting stitch 1/4 inch from the edge.
*PRO TIP - *You may find it helpful to trim away 1/2" from all edges of the flex foam. This will remove some of the bulkiness from the seams when sewing the fabrics together. Only do this if you are using a flex foam with a fusible adhesive.
Once the foam is applied to the lining, use a fabric pen to draw a straight line across the wrong side of each lining piece 1 inch down from the top. This will help us later when inserting the lining into the bag.
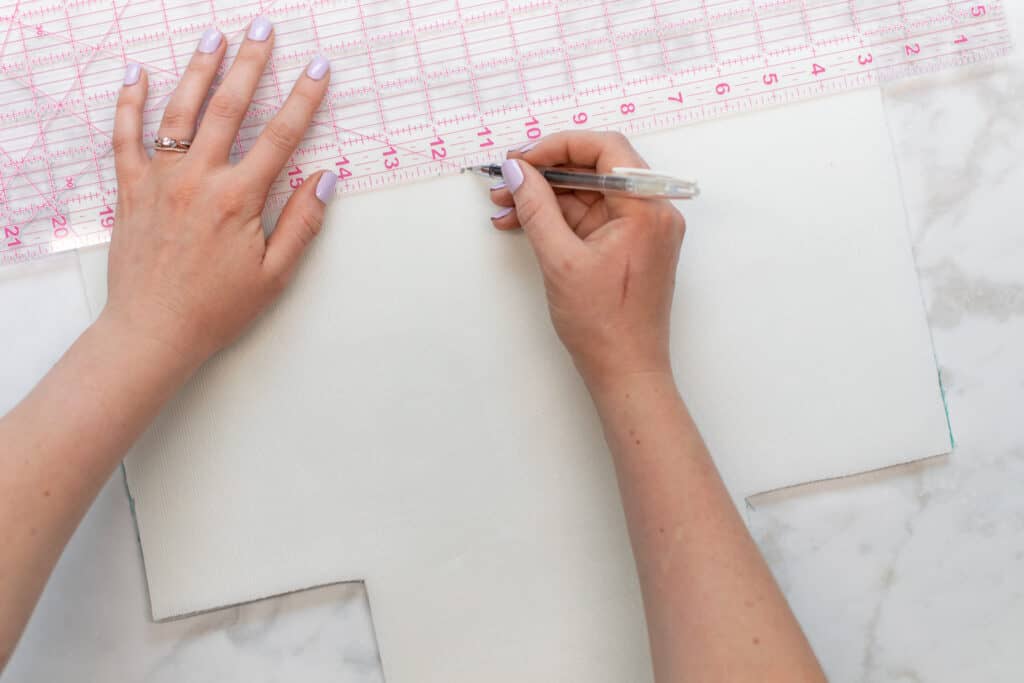
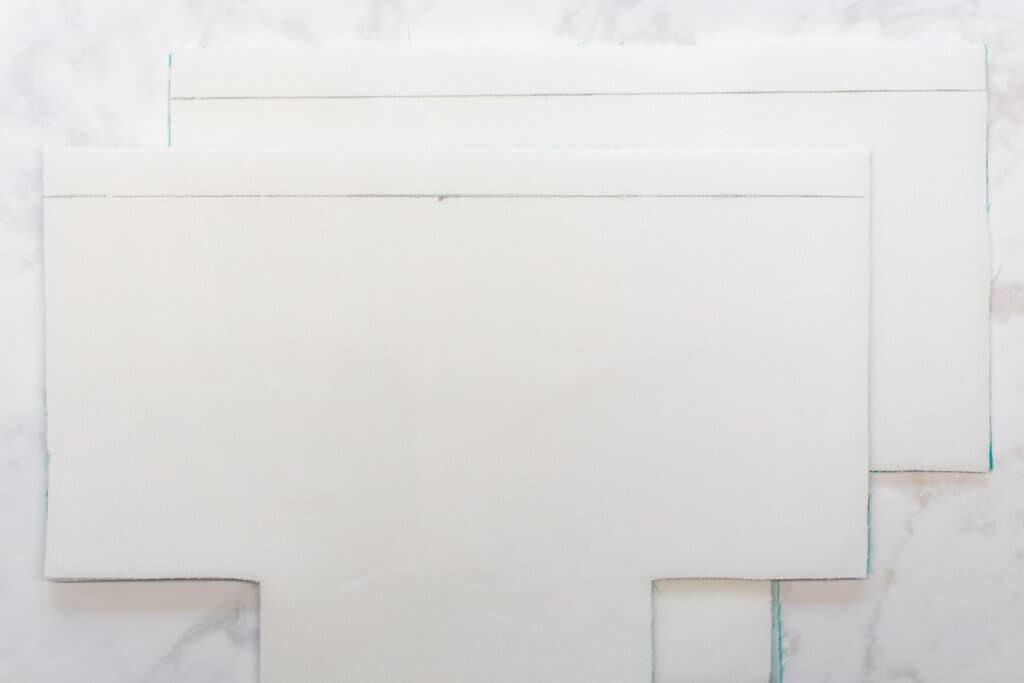
Repeat this process to draw a line 1 inch down from the top across the wrong side of both outer fabric pieces as well.
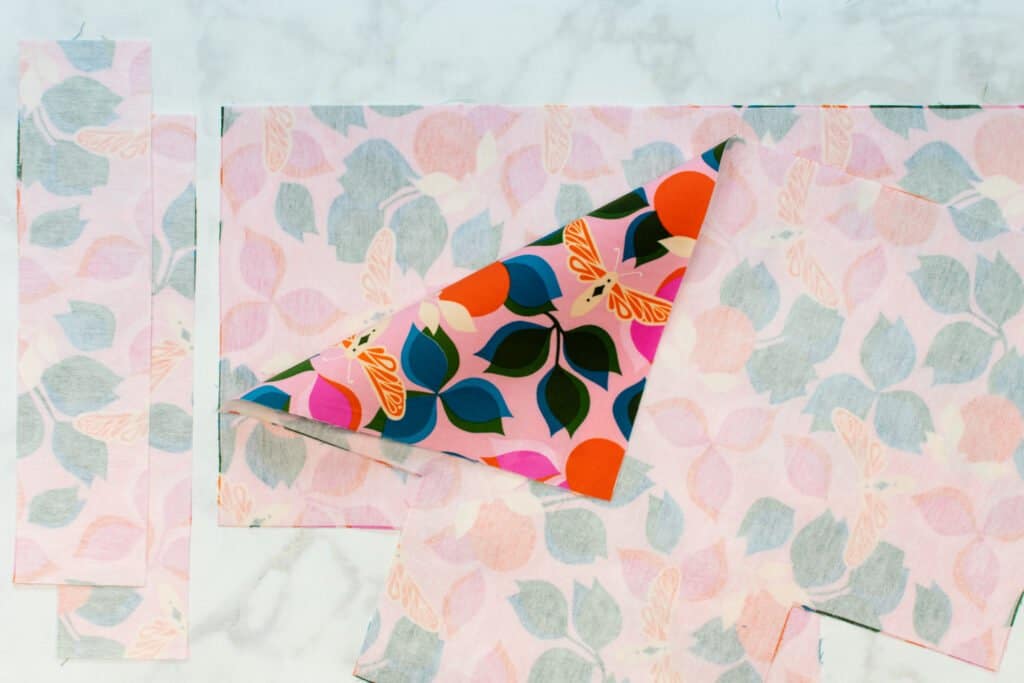
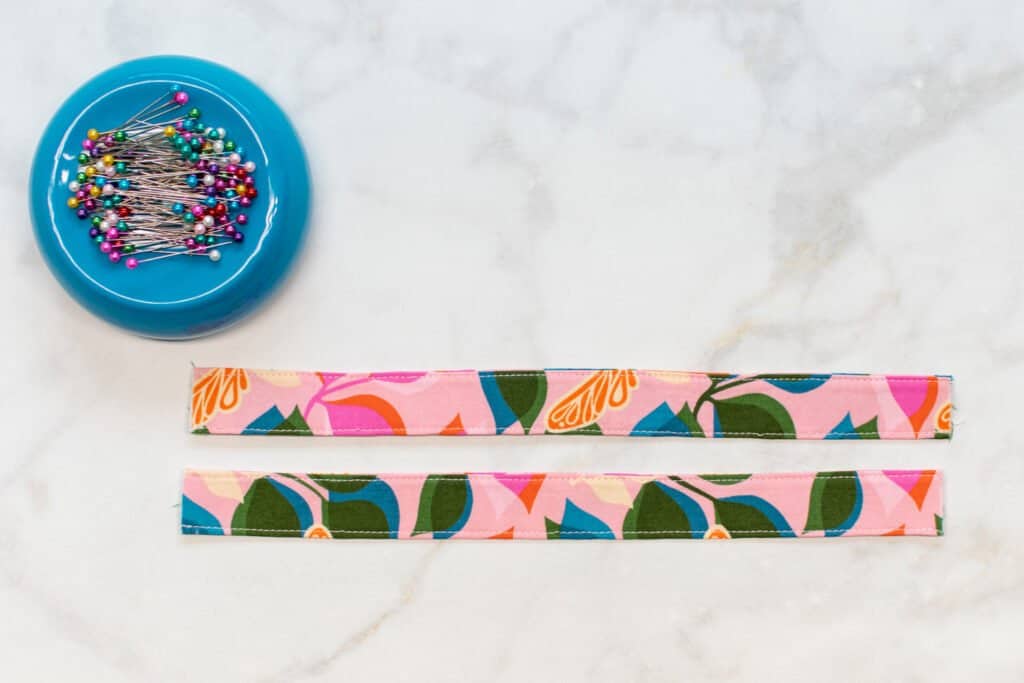
Step 5: Sew the Fabric Storage Bin Straps
Next, let's put together the straps. If you will be using webbing straps, simply cut two webbing pieces to the length of the strap pattern piece and skip this step.
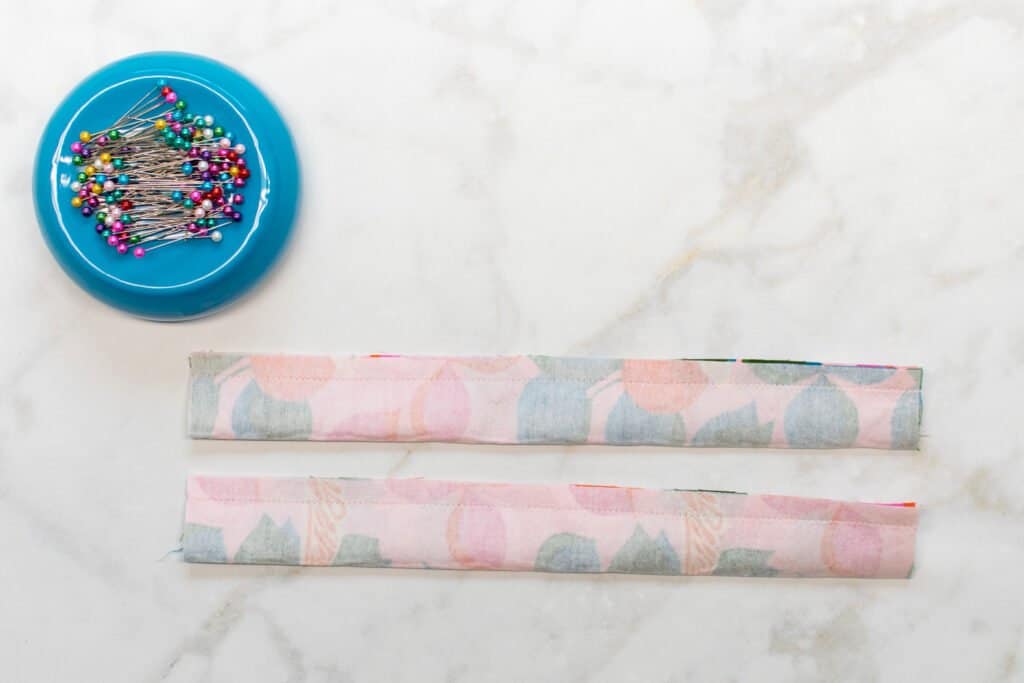
To sew the fabric straps, start by folding the straps in half lengthwise with right sides together. Line up the raw edges and pin along the long edges.
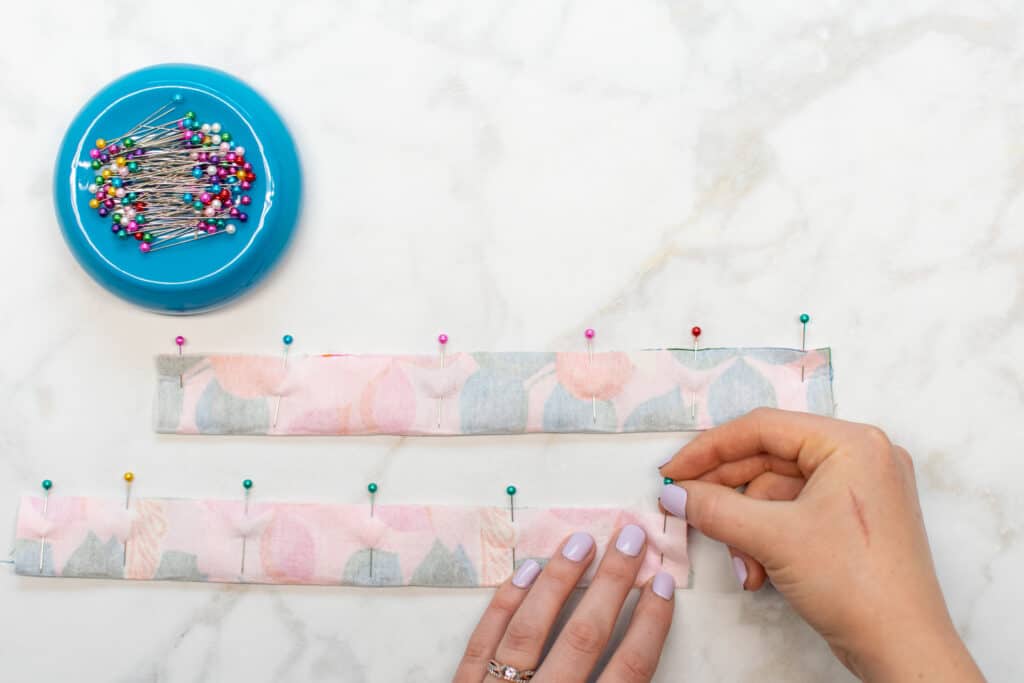
Stitch along the long edges of the two straps with a 3/8 inch seam allowance.
Trim the seam allowance down by half.
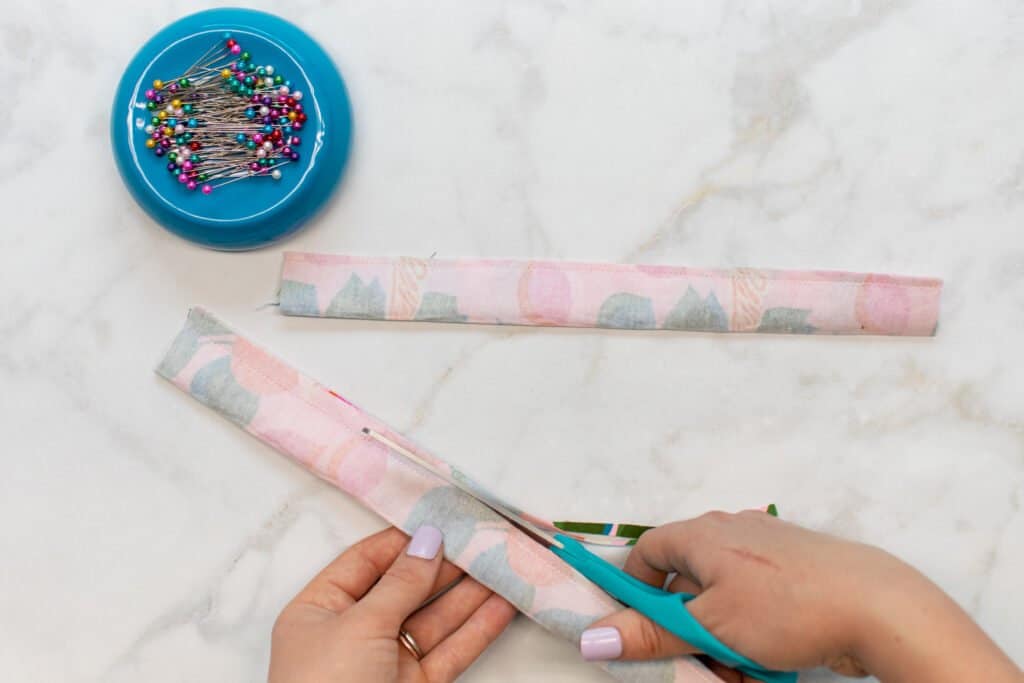
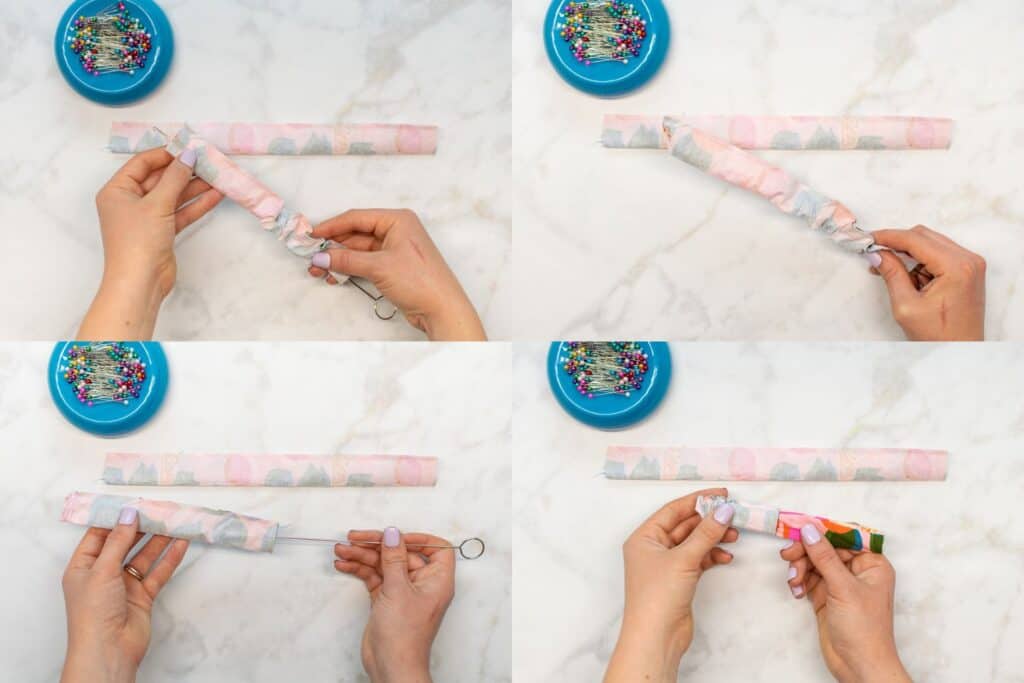
Then, turn the straps right sides out. You can use a safety pin or a loop turner for this. To use a loop turner, simply push the hooked end through the tube, hook the far end of the strap, then pull it through the tube to turn the strap right sides out.
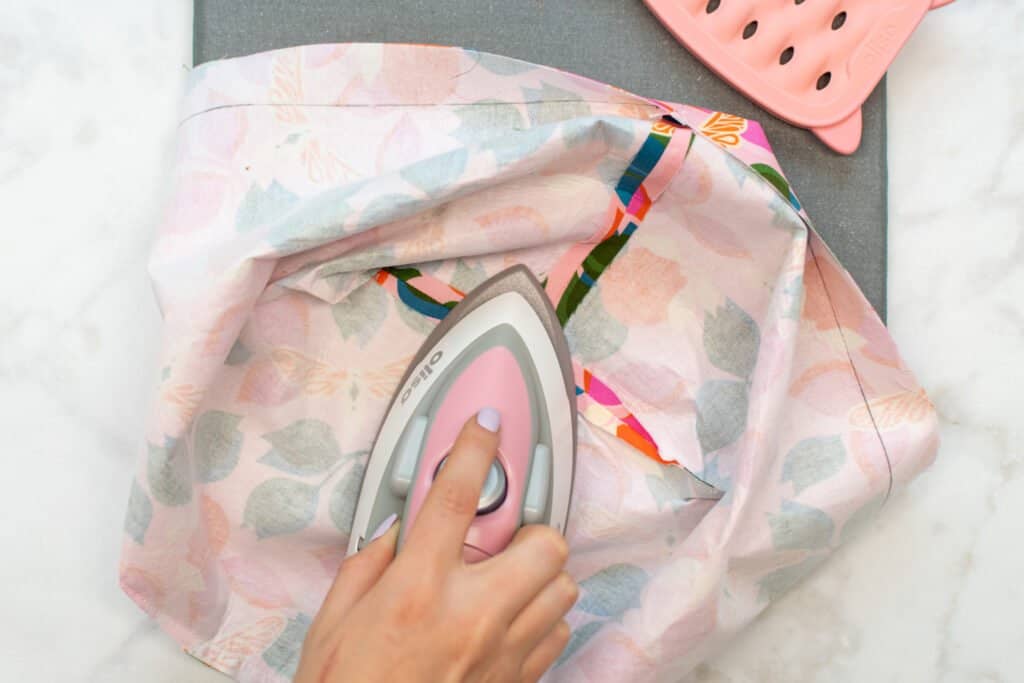
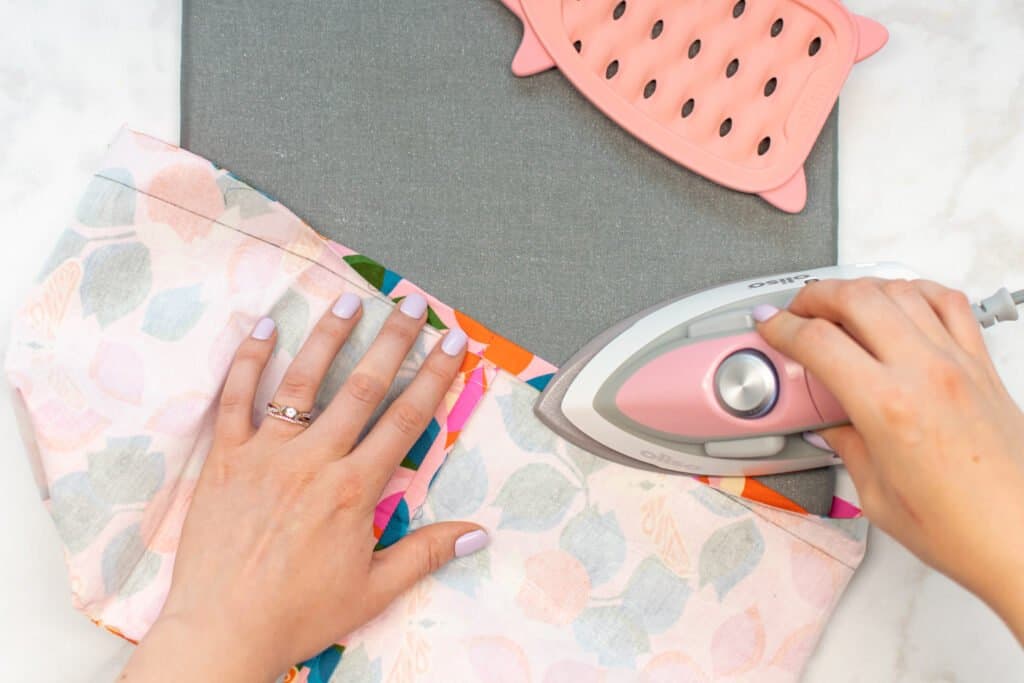
Press the straps flat with your iron, pressing the seams to either the top or bottom.
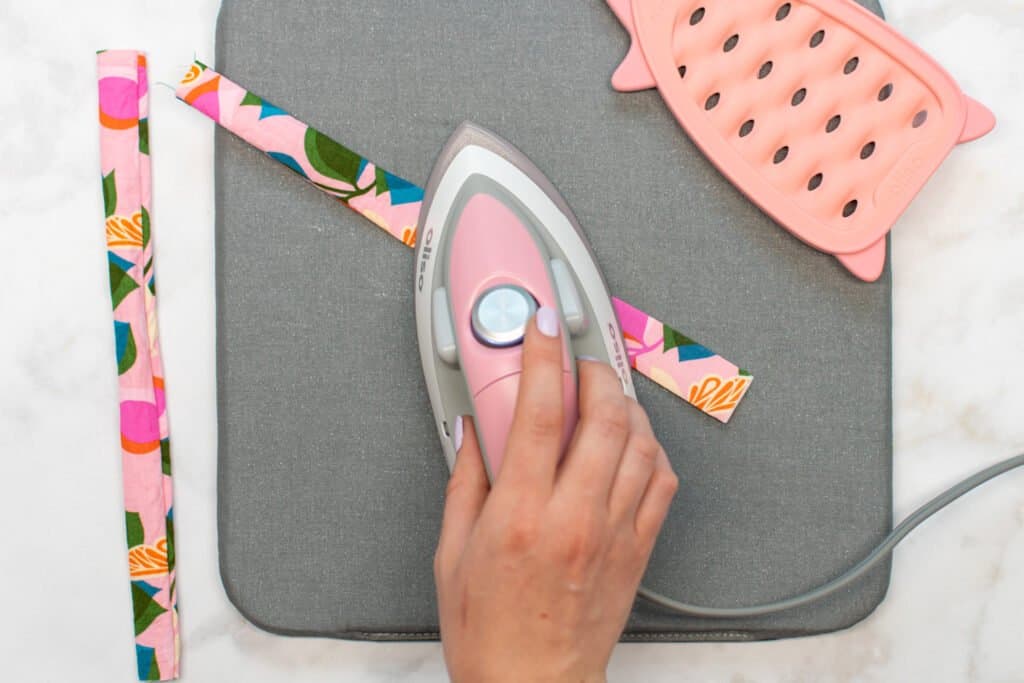
Next, topstitch along both long edges of each strap, sewing 1/8 inch from the edge.
Set the straps aside for now and let's move on to the body of the basket.
Step 6: Sew the Main Body of the Fabric Storage Bin
Place the two outer fabric body pieces right sides together. Align and pin them together along the sides and bottom.
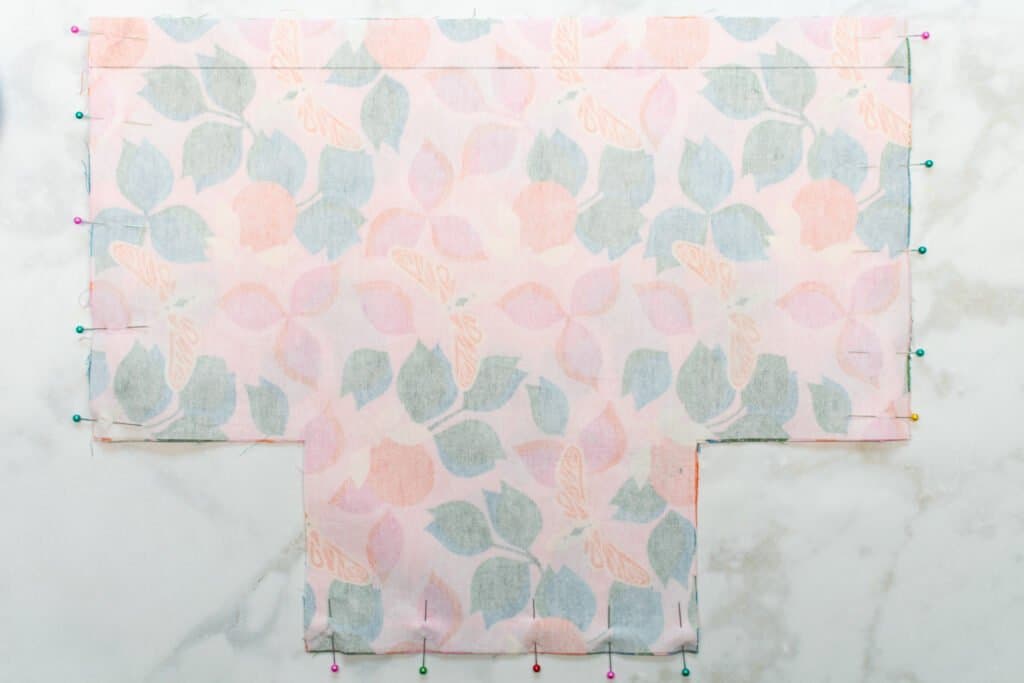
Stitch the sides and bottom with a 3/8 inch seam allowance.
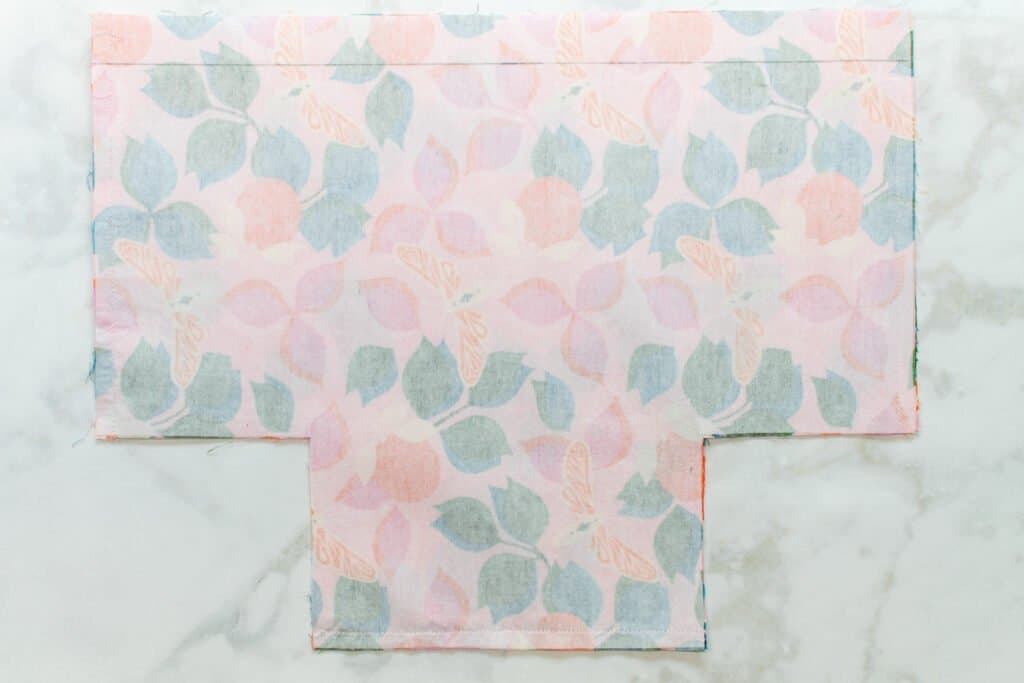
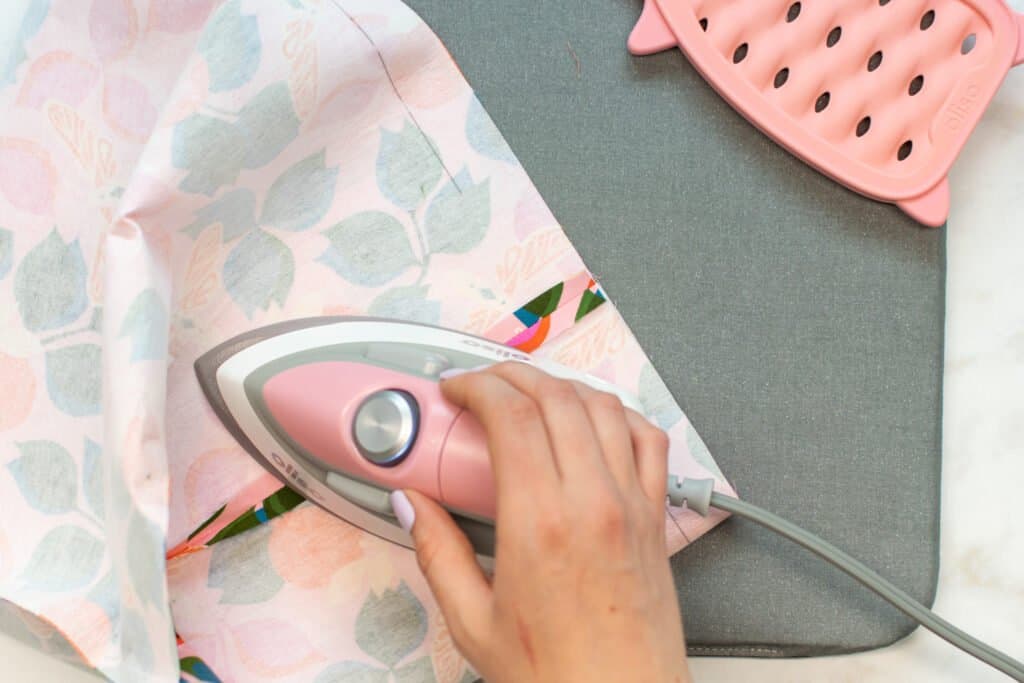
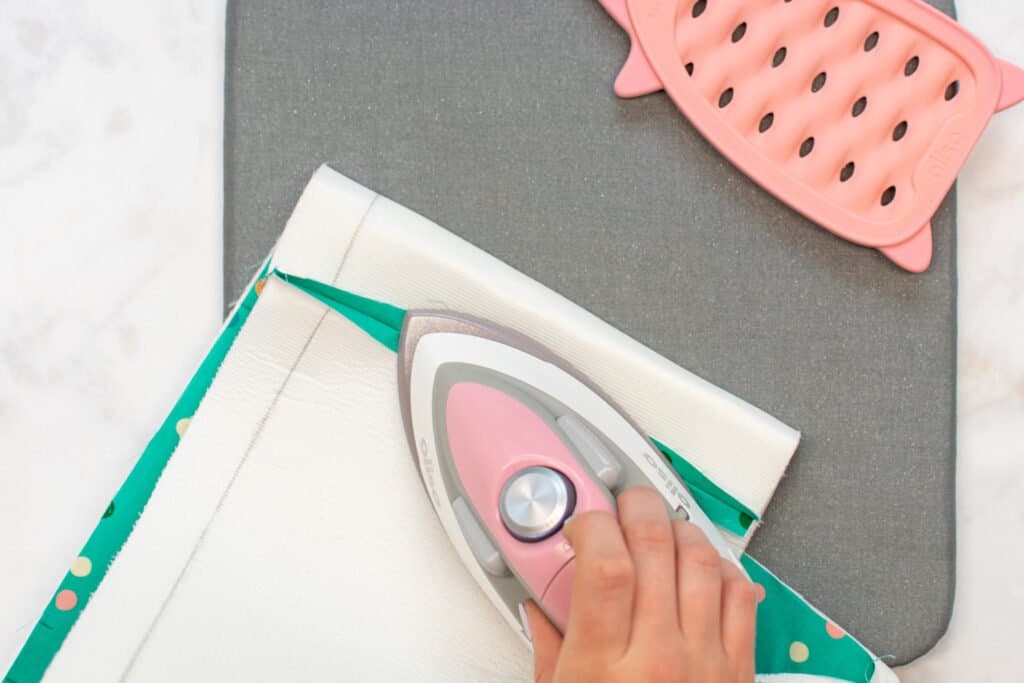
Press the seam allowances open.
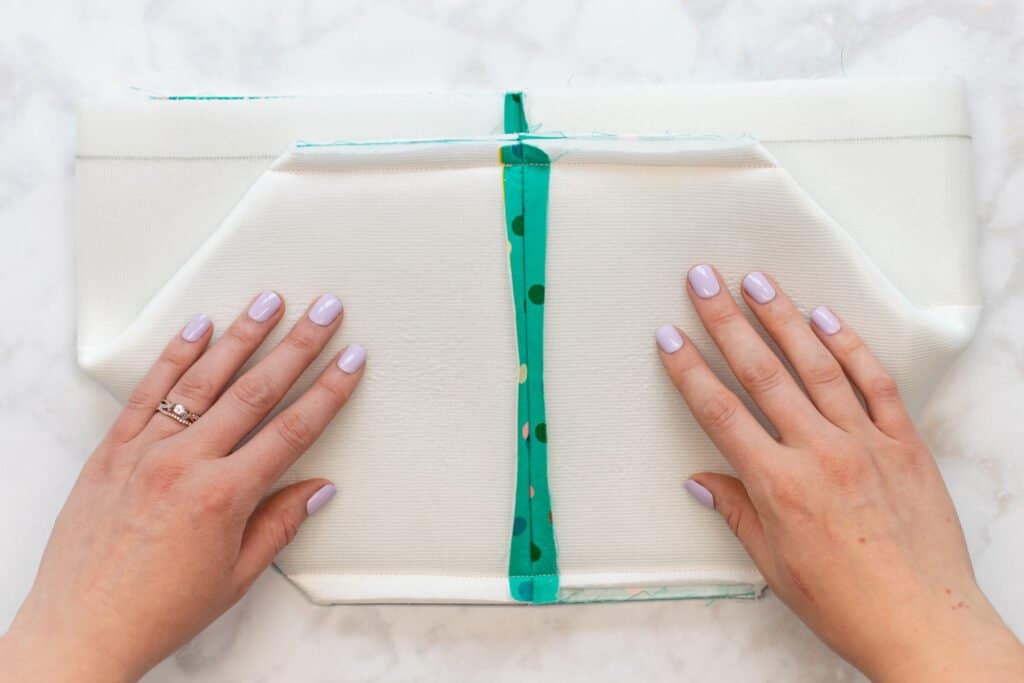
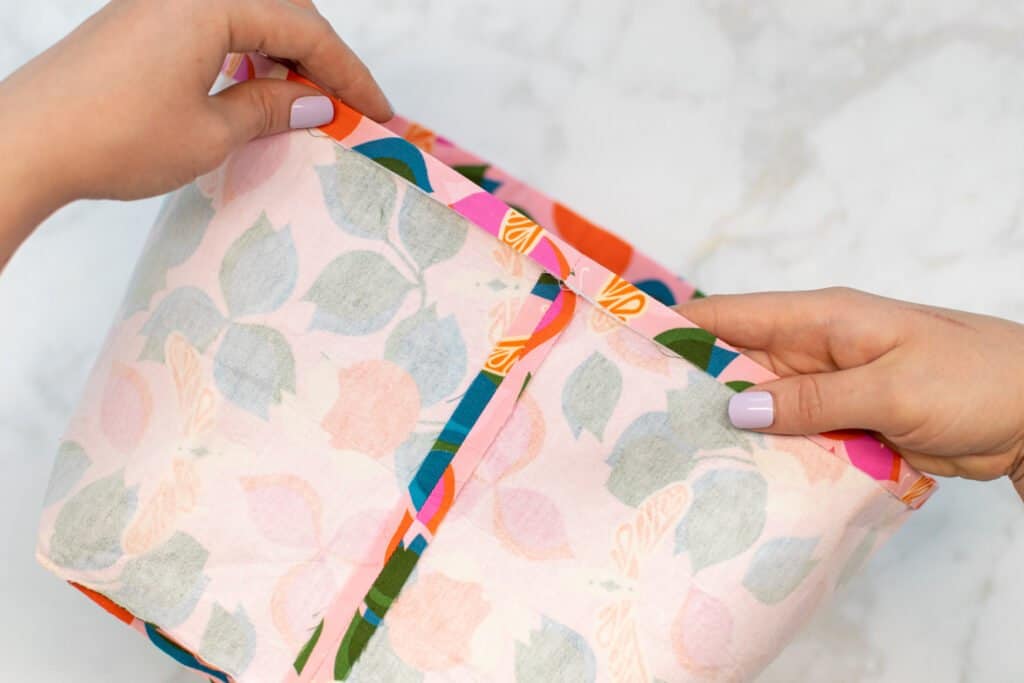
Next, grab the fabric at one of the lower, open corners of the basket. Line up the two edges with the seams matched up at the center.
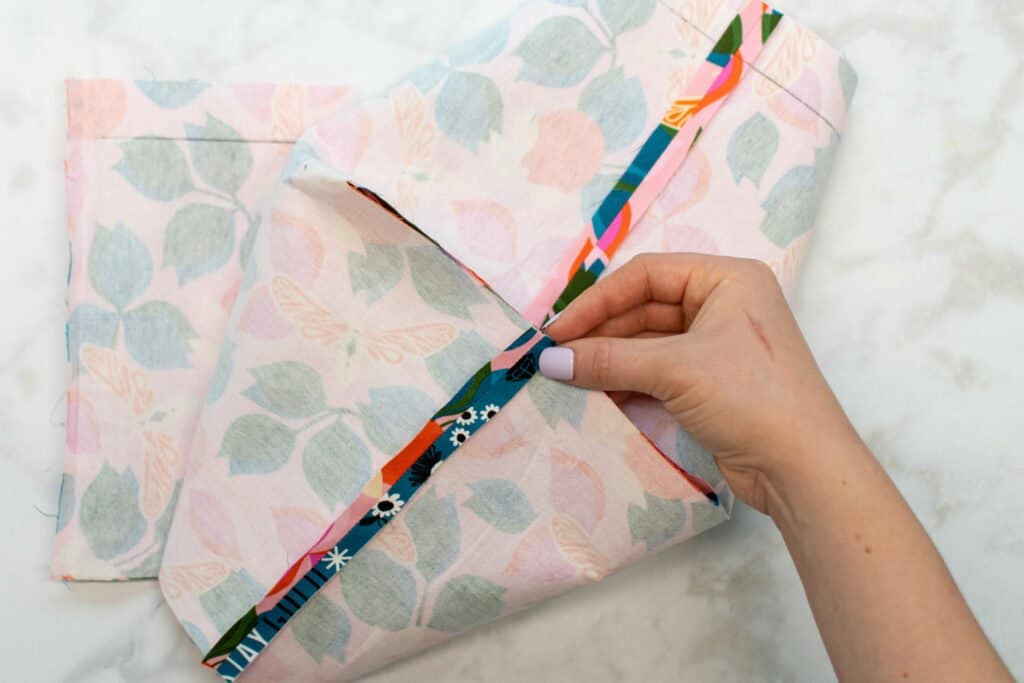
Pin the corner, double-checking that the seams are aligned perfectly. This will help you get the most professional results possible.
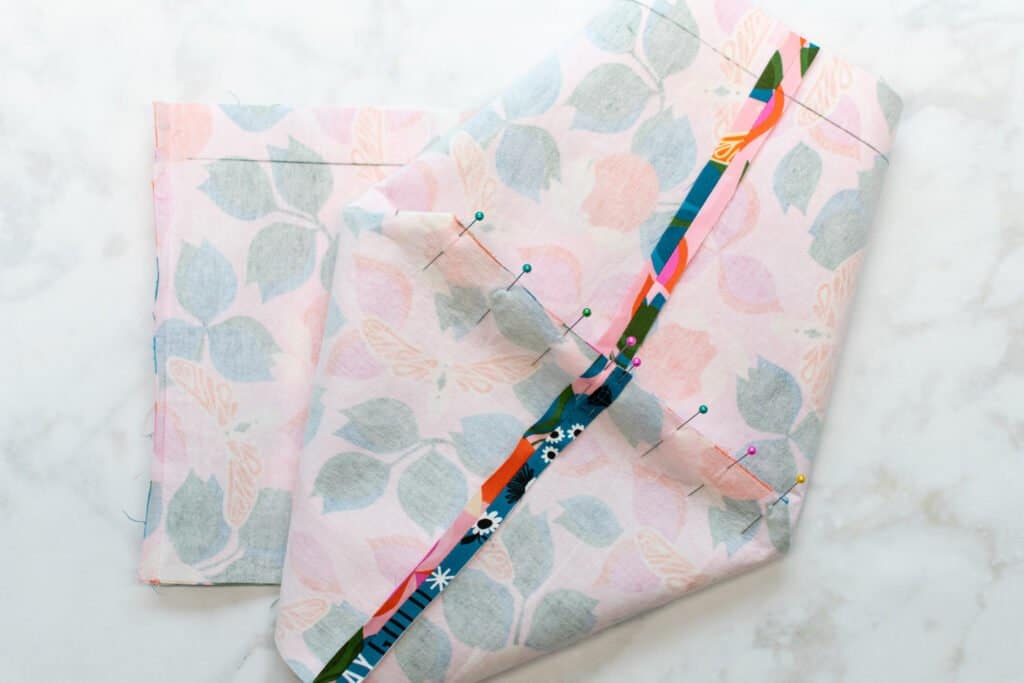
Repeat this process to pin the other corner.
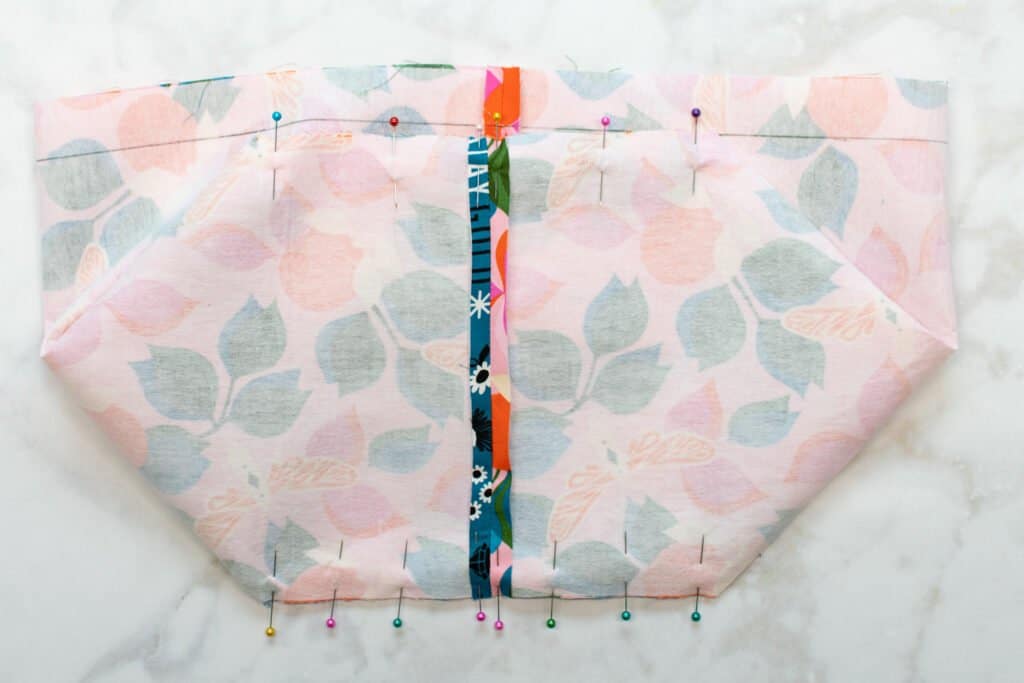
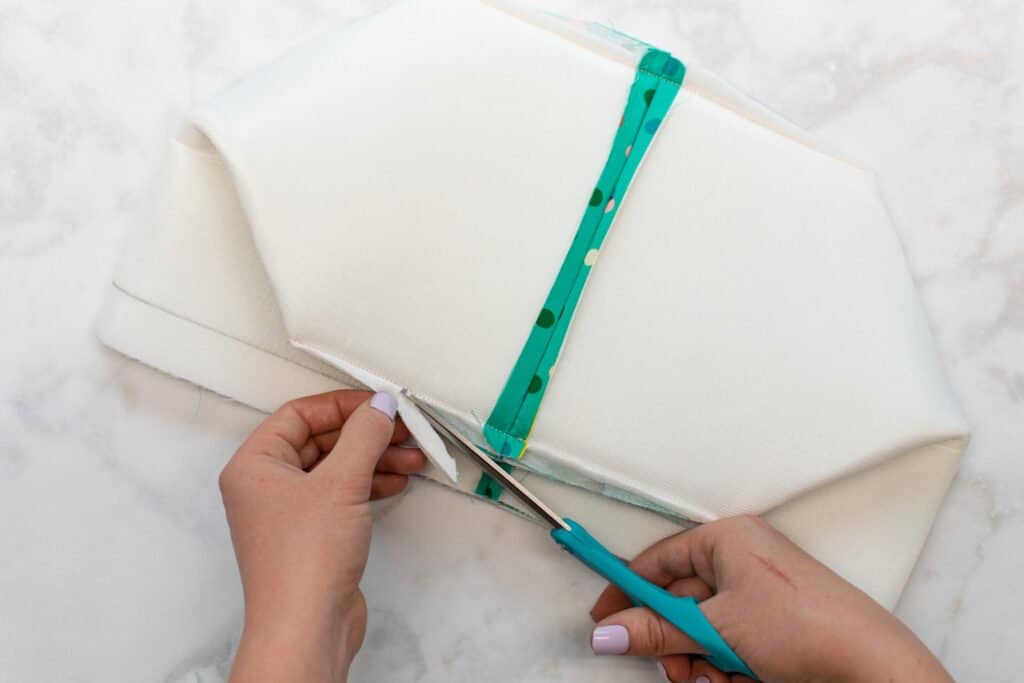
Sew across each corner with a 3/8 inch seam allowance.
Then, trim the seam allowance on each end of each corner seam close to the stitching. Make sure not to cut through your stitching!

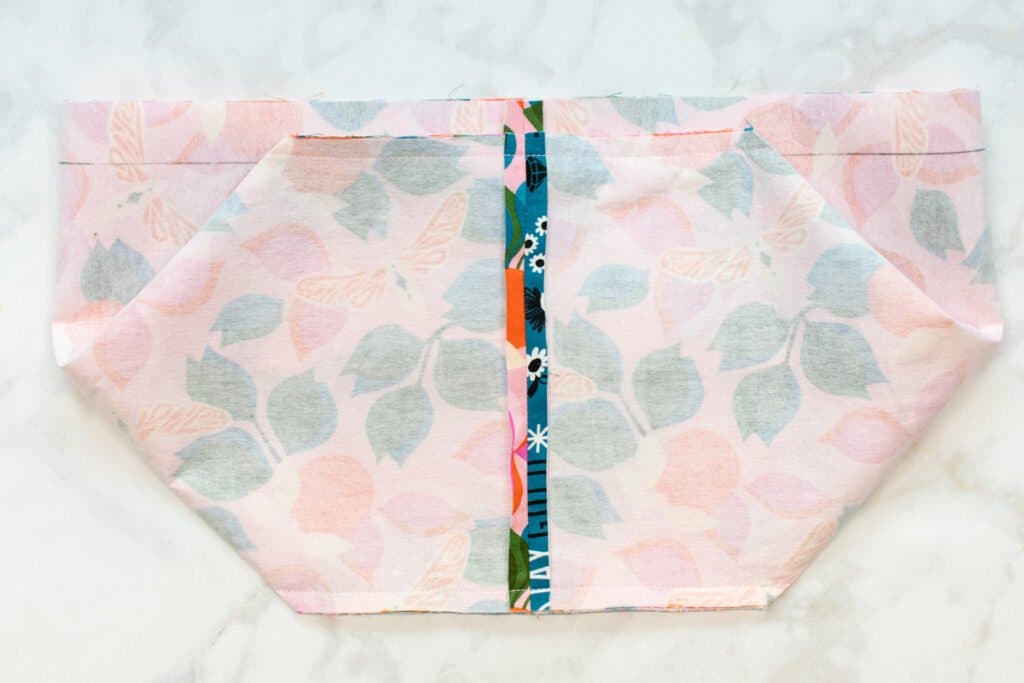
Finally, press those seam allowances open!
Step 7: Sew the Fabric Storage Bins Lining
Next, let's put together the lining.
Place the lining pieces with right sides together. Line up and pin the sides and bottom.
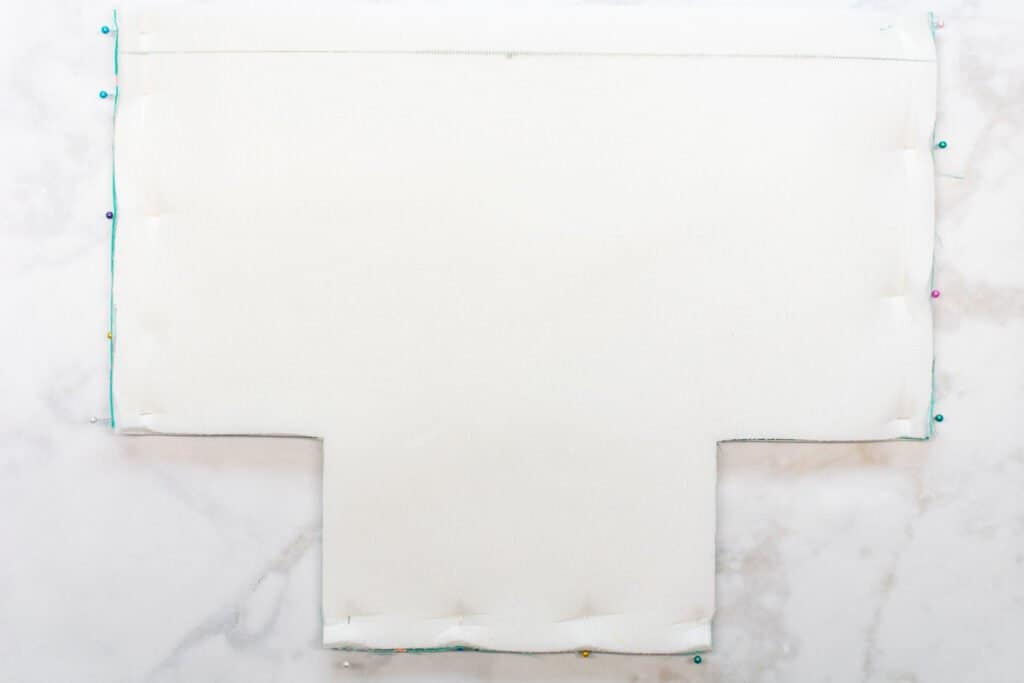
Sew the lining together along the sides and bottom with a 3/8 inch seam allowance if you are using fleece. Use a 1/2 inch seam allowance if you are using foam.
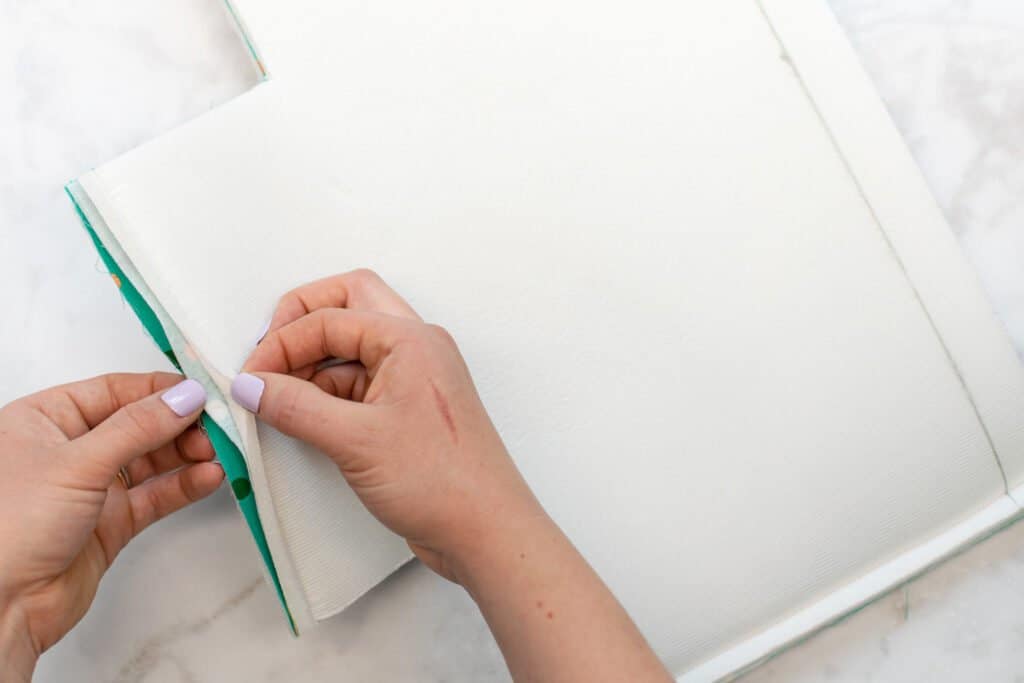
Once sewn, cut the thick foam out of the seam allowance, cutting it to about 1/16 inch from the stitching.

You can use your fingers pull the fused foam away from the fabric within the seam allowance before trimming it away.
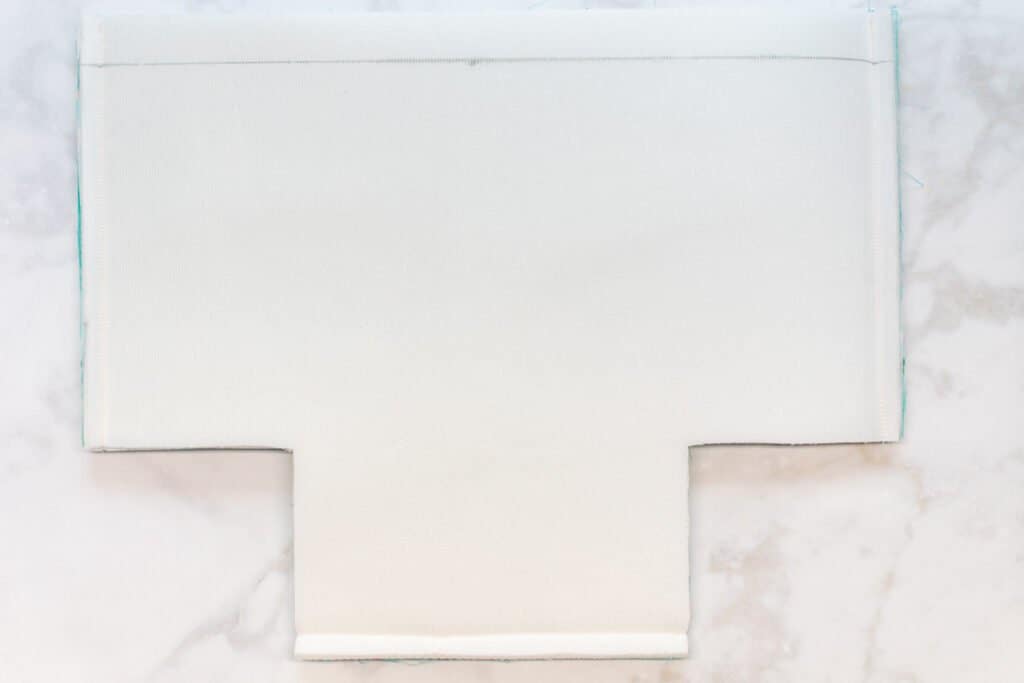
Then, press the seam allowances open.
Stitch the corners of the lining together the same way you sewed the corners of the outer fabric basket. Again, use a 1/2 inch seam allowance for foam or a 3/8 inch seam allowance for fleece.
Again, trim the foam out of the seam allowance close to the stitching. Careful not to cut your stitches! Also, trim the seam allowance at the two ends of each seam down close to the stitching.
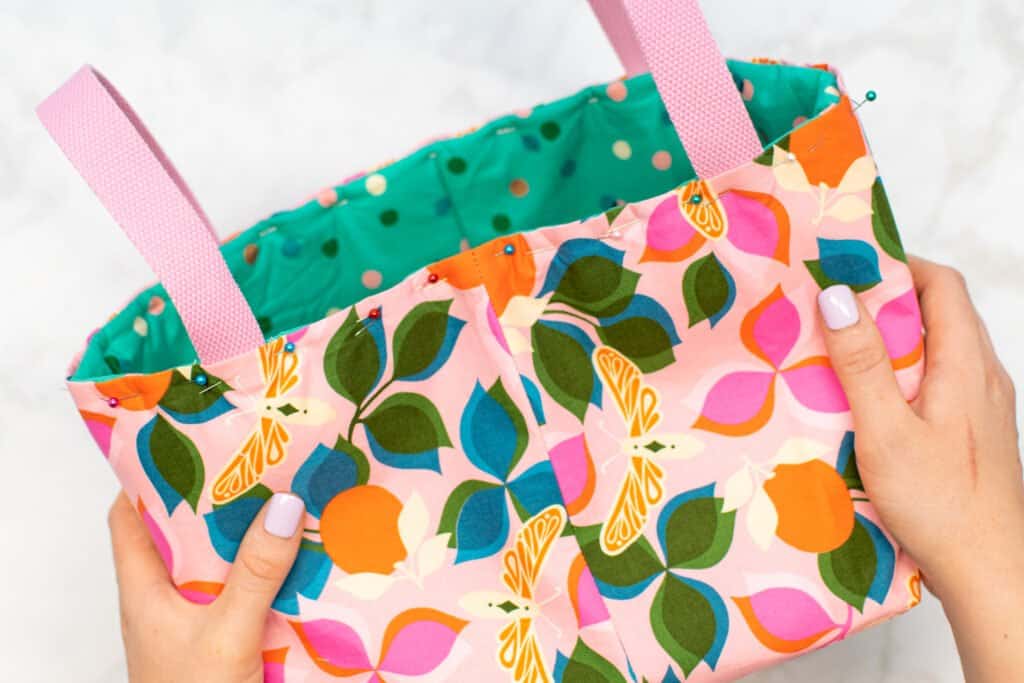
Pin one strap to each side of the lining basket, aligning the ends of the straps with the strap placement markings. The ends of the straps should line up with the raw edge at the top of the bag. Before stitching, double check that there are no twists in your straps.
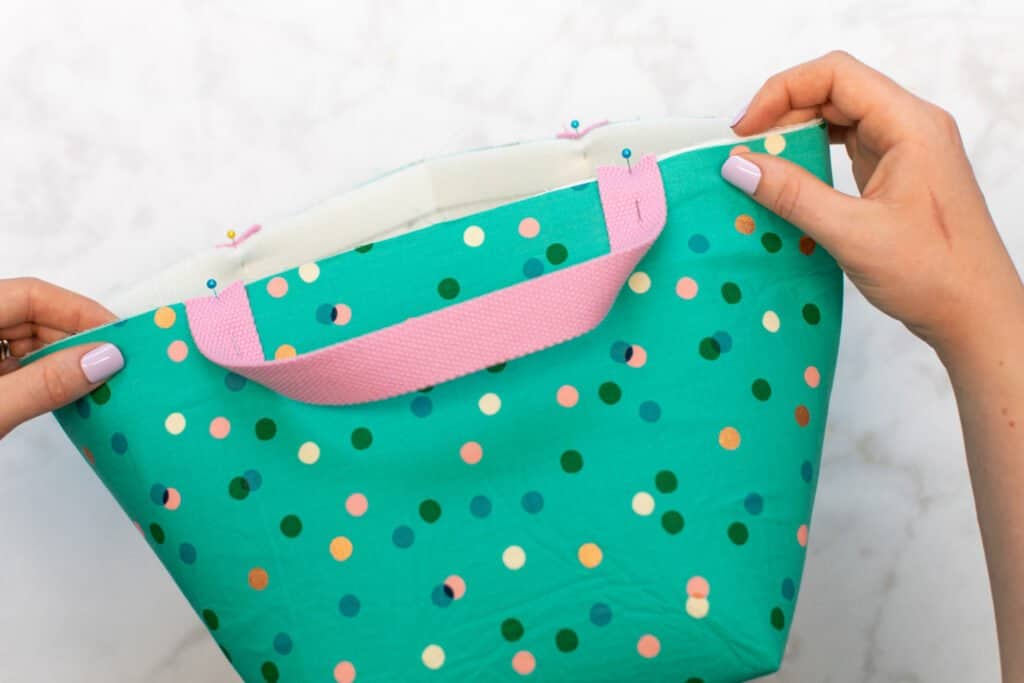
Then, baste each strap end in place with a long straight stitch 1/4 inch from the edge.
Step 8: Attach the Lining and Finish the Fabric Storage Bin
Finally, we need to sew together the lining and outer fabric to finish up this cute fabric storage bin.
We'll be using the drop-in lining method for this since it's easiest when using thick foam.
Start by folding the top edge of the lining bag down to the wrong side by 1/2 inch. The raw edge should align with the line you drew across the foam earlier.
Press and pin this folded edge in place. The straps should stick up away from the bag.
*PRO TIP: I find it easiest to pin the lining top edge down with the lining bag right sides out. It seems to help get a cleaner, less puckered edge. Once pinned, simply turn the lining inside out again so it is ready to be placed into the outer fabric bag.
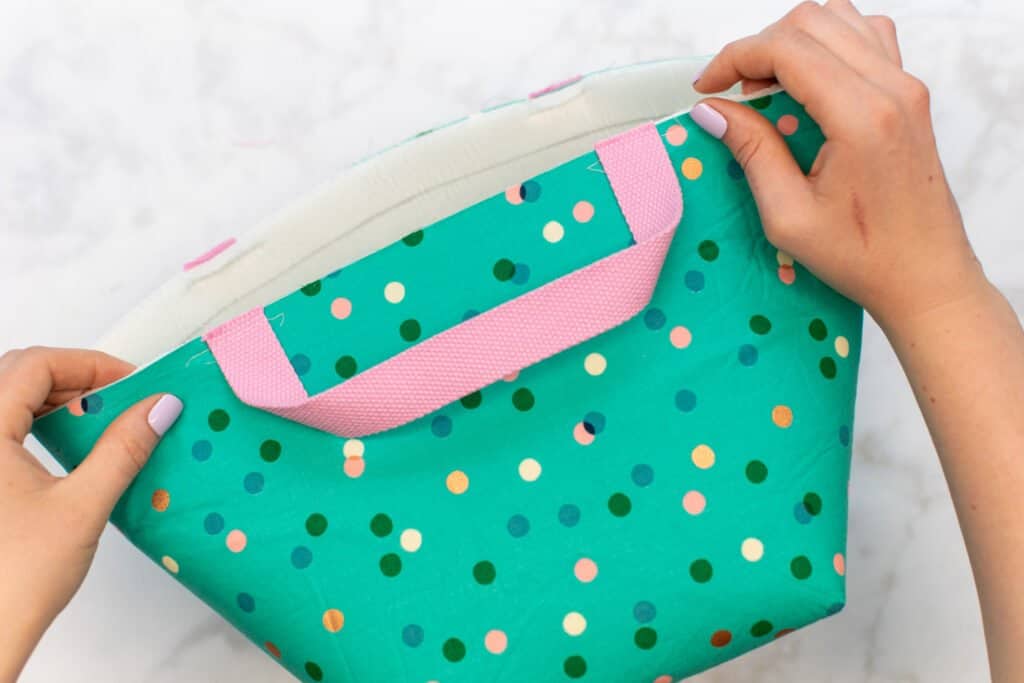
Next, fold the top edge of the outer fabric bag to the wrong side by 1 inch as well. Press well.
You likely won't need to pin this one since the outer fabric will hold a press better than the foam of the lining.
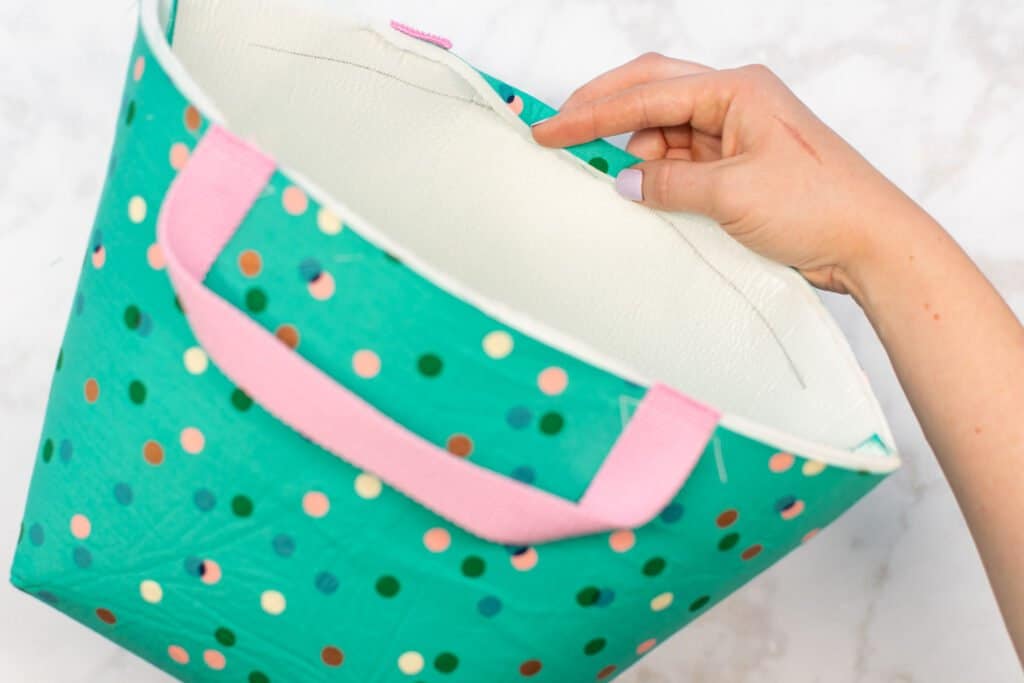
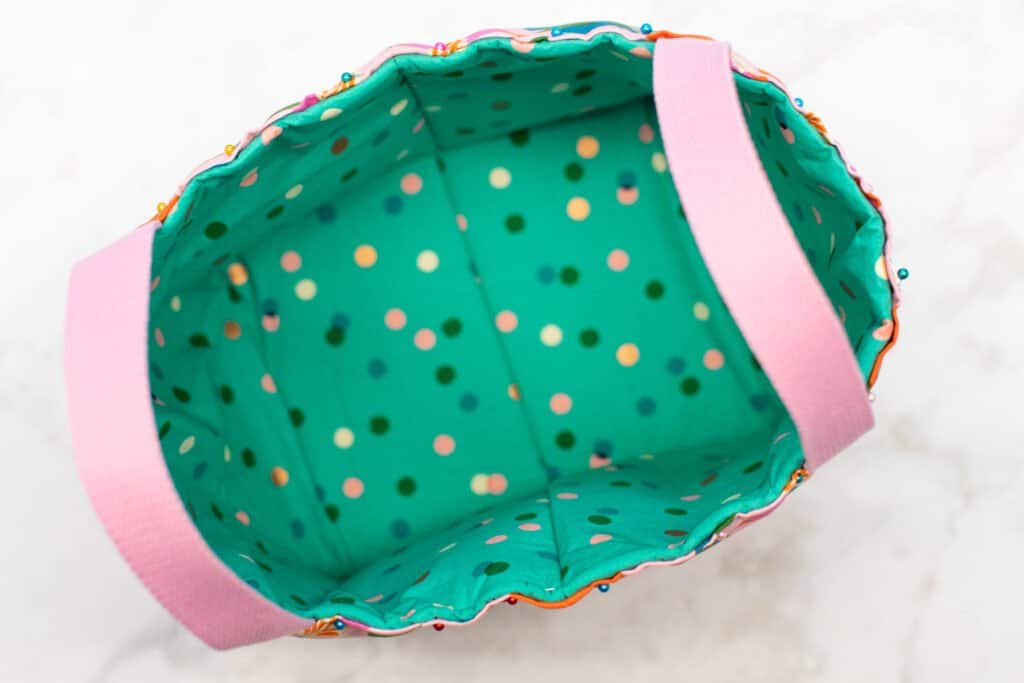
Place the lining inside the outer bag with wrong sides together.

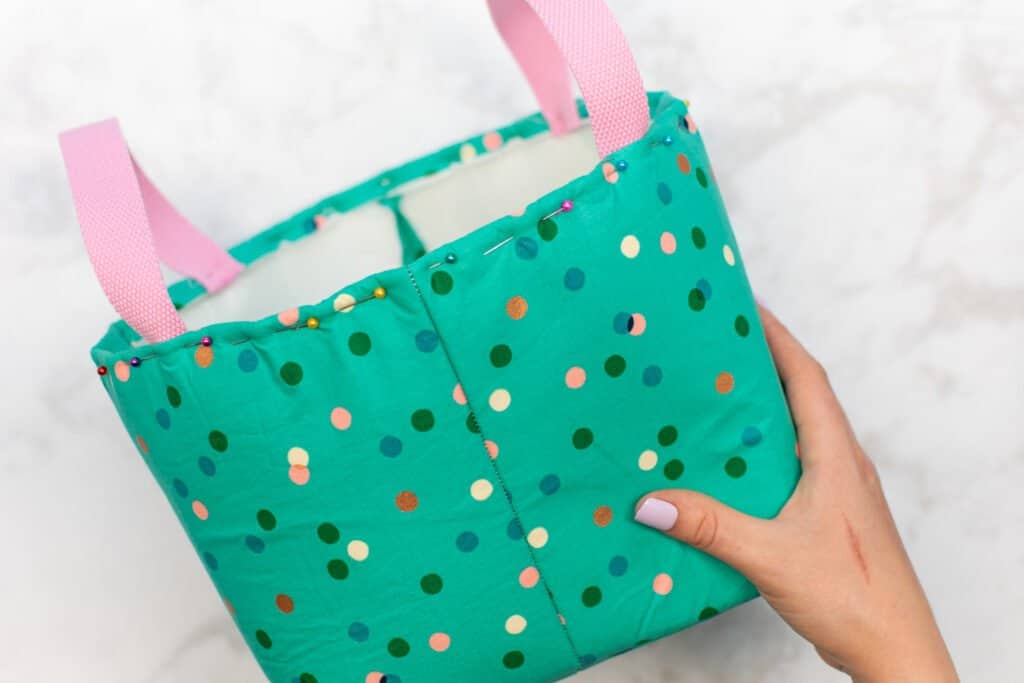
Line up the side seams and pin the 2 bags together along the top folded edge. Remove the pins already in the lining as you pin the lining to the outer fabric.
Finally, topstitch around the upper edge of the bag, sewing 1/8 inch down from the folded edge.
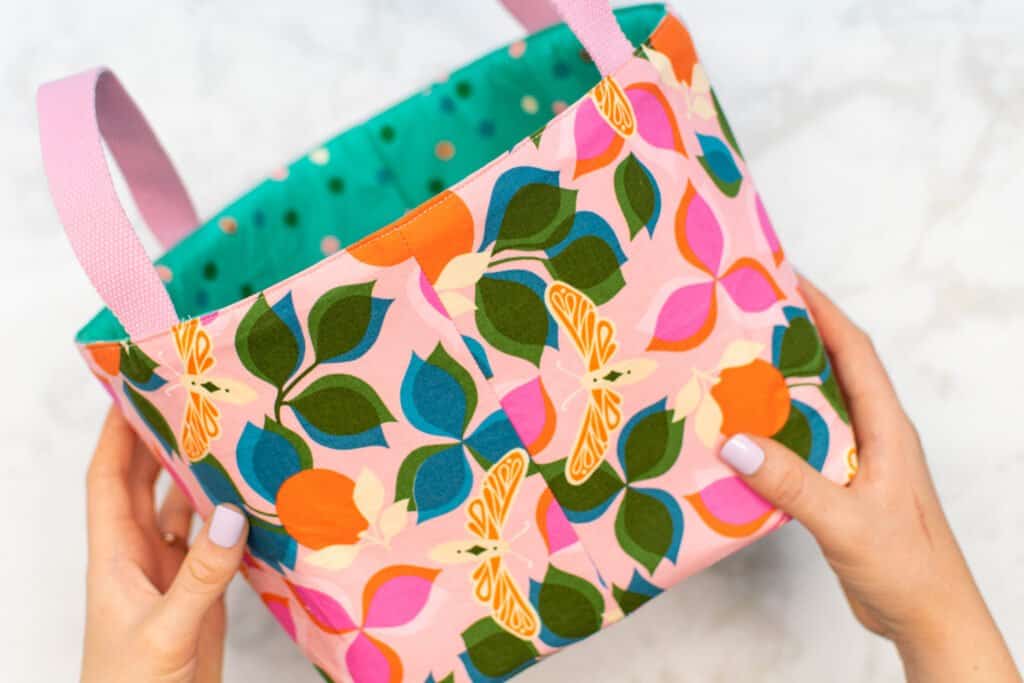
Give everything a final pressing with plenty of steam and don't forget to clip any threads from your fabric storage bins.
Now your fabric storage bin is done!
Now go forth and organize your home with your new DIY fabric storage bins!
Use your fabric storage bins to organize projects and supplies in your craft room. They also work to store toys, tidy up pantries, and make for great gifts!
I've even used the X-Large size to create a reusable shopping bag.
Looking for more awesome free sewing patterns and tutorials? Try one of the patterns below!
- Tote Bag Sewing Pattern
- Triangle Zipper Pouch Sewing Pattern
- Box Zipper Pouch Sewing Pattern
- Clear Vinyl Zipper Pouch Sewing Pattern
Did you try this pattern out? Post a picture on Instagram with the hashtag #sweetredpoppy - I would love to see how it turned out!
Don't forget to join my Facebook group where you can show us what you're making, ask questions, and learn from others.
Don’t want to forget this project and free pattern? Click here to save this tutorial on Pinterest!
Looking for even more FREE sewing patterns? Click the links below!
Having the Tutorial in a downloadable PDF would be MORE USEFUL to those who DON'T HAVE A COMPUTER IN THEIR SEWING ROOMS!!! And what is with saving to PINTREST?!?!?!? I really like the Fabric Bins and would make a number of them BUT just TOO MUCH WORK having it on a computer screen and not being able to download and print it so I can take it to my sewing room.
Hi, Gwen,
First, I’d like to mention this is a FREE tutorial. You could be greatful that Kimberly has shared this with us for no cost to us. Her HARD WORK goes into everything she shares. You can print the tutorial out if it’s absolutely necessary, seems like a lot of ink. I often use my iPad(basically a hand held computer) in my sewing room, computers take up space so having an iPad gives you easy access to all of your patterns/projects. Also, PINTEREST is a very common thing for crafters these days, you can find really great projects, recipes, activities and so much more. It’s a great way to keep all your stuff in one spot, you should give it a try. 🙂
I’m sorry you are unhappy with this tutorial. I’m sure you won’t have a problem finding a downloadable PDF pattern somewhere that works for you, though it may not be free.
Thank you, Kimberly @SweetRedPoppy, for sharing all of your beautiful patterns. I always look forward to seeing the new projects you have shared and beautiful fabrics you choose! Thank you!
I agree with Gwen. I really need printed instructions I can download and save to my desktop computer for printing. I'm disappointed I won't be able to use this pattern.
You can print the tutorial out on your computers if you want to you can choose all or only the pages you need.
Some people like myself are visual learners. We like hard copies of directions to make life easier for us. I don’t use my iPads or computers in sewing. They click off and then you have to find your spot again. With hard copies of directions it’s just easier.
Thank you for listening.
Just perfect as always! I love making my own bags because I embroider on the bags and embordering on the fabric prior to sewing the bag together makes my life so much easier! Thanks again Lynn
Loving this pattern, read through the tutorial , clear precise instructions and fab pictures, I'm going to make the little ones first so I can practice the method, guess my daughter will have lots of little storage baskets for her make up and brushes
Thank you, I appreciate your hard work and giving it freely
Do you have a projector version of this pattern?
I just have a question - first love this project and can't wait to make it. I notice the straps were made with fabric in the tutorial, but in the end the webing was used for the straps, was that just to show you can make matching straps if you don't have the webing? I just didn't see where they were used. Thank you for all you amazing projects and free patterns - I love Sweet Poppy!
My box measures 1” but my stars aren’t lining up to look like stars. Any help? Really wanted to make these! Thank you
Love these baskets. They make great presents also. So many uses for them. Great instructions, easy to follow! Thank you for sharing this pattern and tutorial!
Thanks so much. This is exactly what I was looking for and will be super helpful with storage in my camper cabinets.
Loved the basket, thanks for the tutorial. Loved the result. I quilted the two seperated pieces zo the raw edges were incased.
I would love to have the measurements of the pieces just a little diagram would be enough. I figured out how big the sides the top etc were by looking very closely. Thank you so much for making it free I have been telling everybody look you can make big baskets with fabric.
Just a thought. I would gladly pay a small fee for printed sewing instructions to this pattern. I’m planning to use it with ladies in a recovery program. The time it will take to cut and paste the sewing instructions is overwhelming to me! Each woman needs written instructions as many of them have memory issues. Thank you.