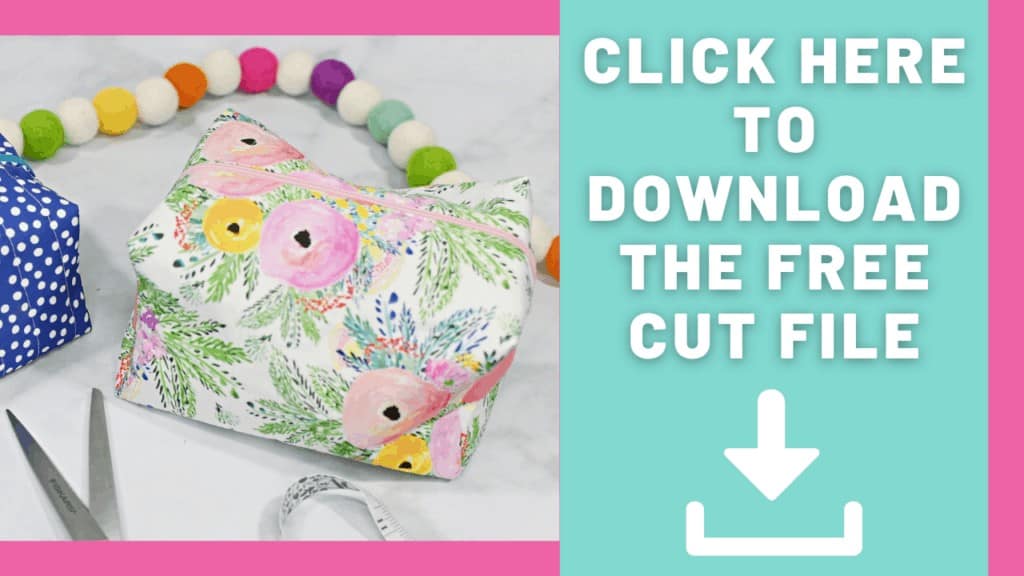
Create a Fully Lined Zippered Box Pouch With This Free and Easy-to-Use Sewing Pattern and Tutorial!
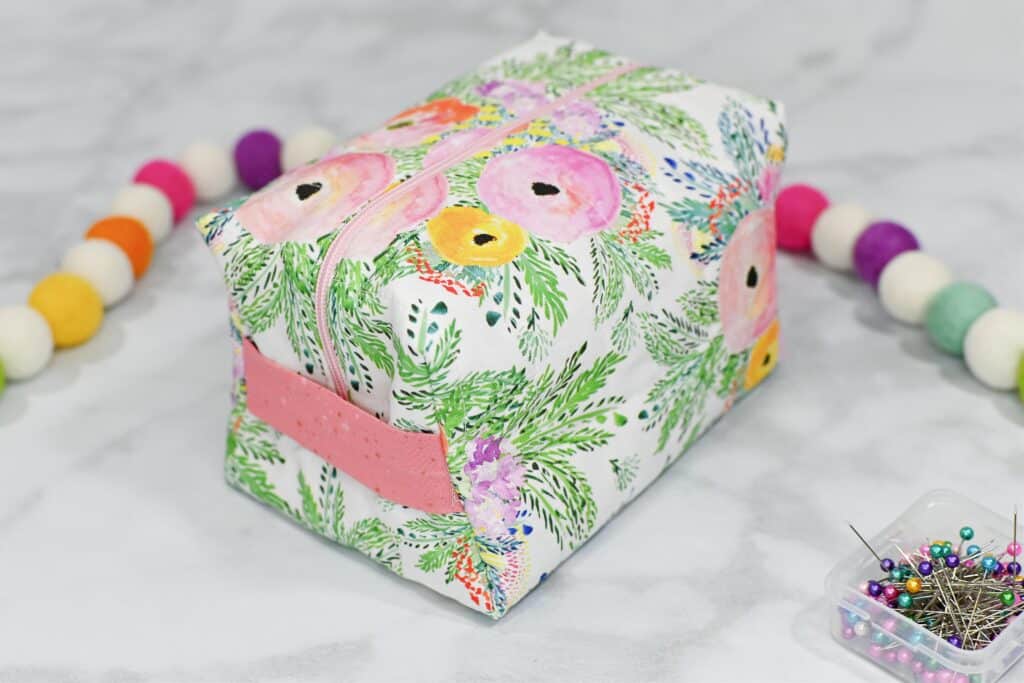
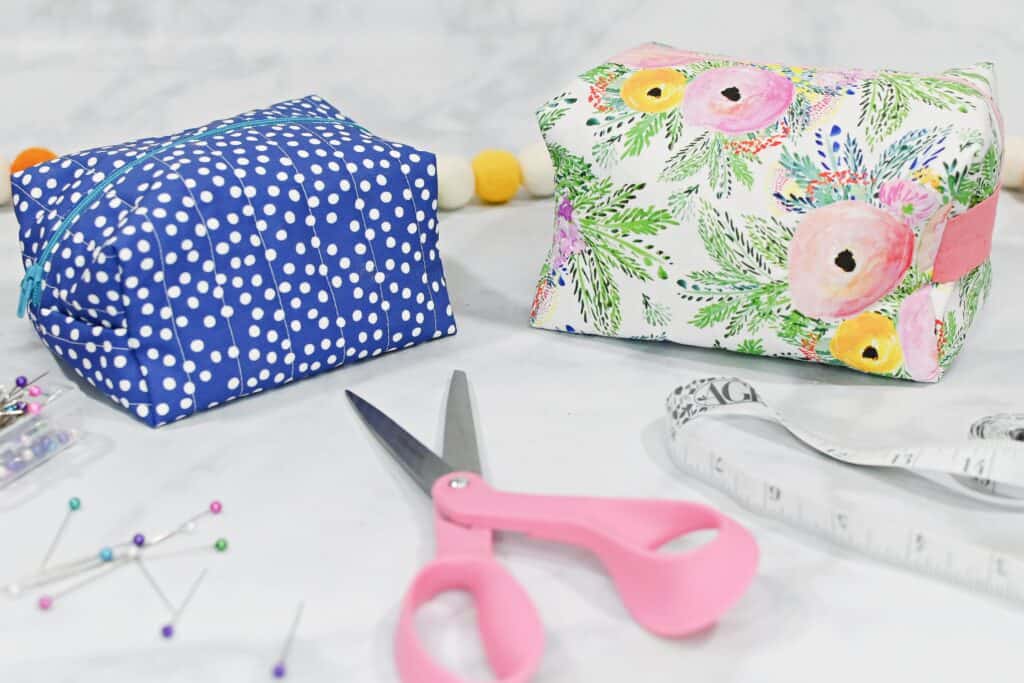
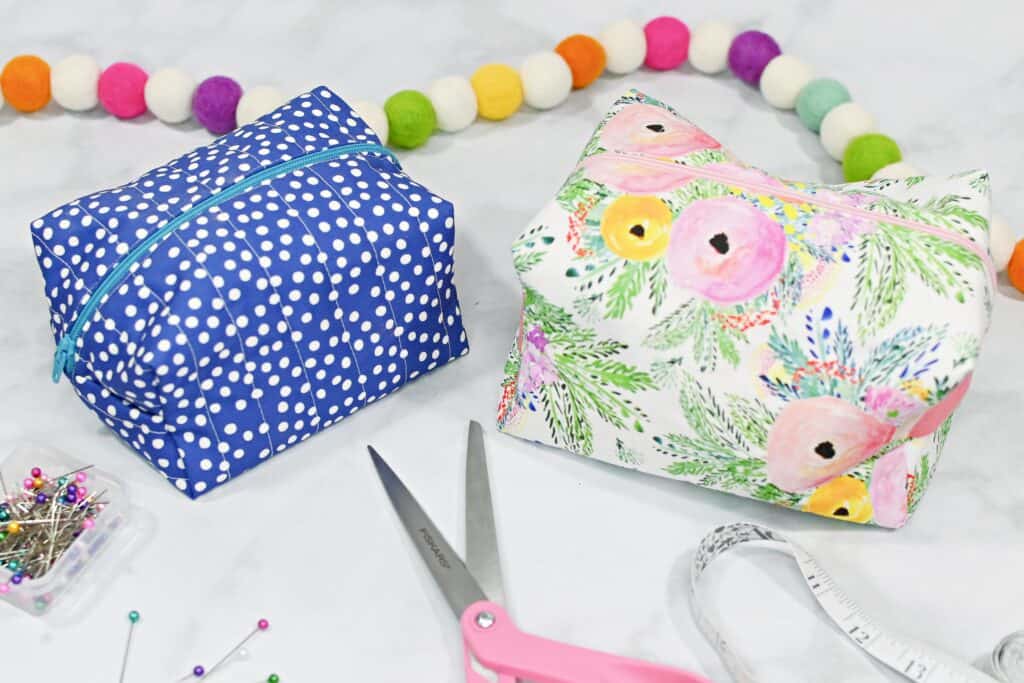
There's nothing I love as much as a cute boxy bag! This boxy zippered pouch comes in two different sizes to fit all of your needs. This tutorial features a fully lined pouch with no exposed seams for a nice and clean finish that won't come undone.
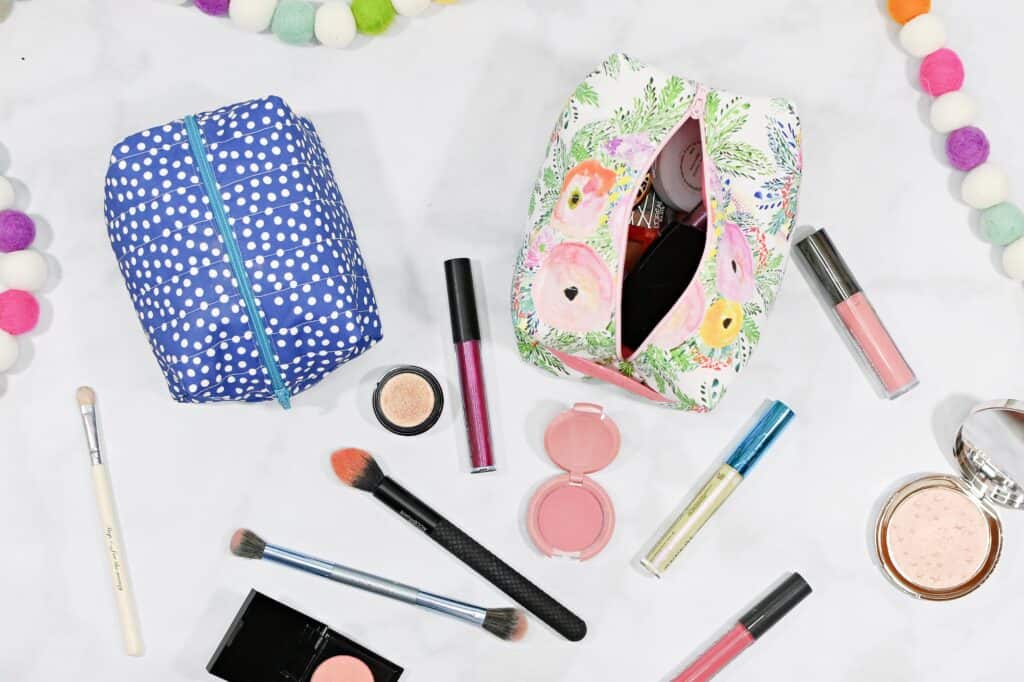
Fill it with makeup when traveling, load it up with pencils and markers or use it to organize small items in your purse. It also makes for a great gift!
Want to learn how to make even MORE fabric bags?
Get 11 different bag patterns and gain access to a comprehensive collection of bag patterns and tutorials my All The Bags 150+ page Ebook by clicking here.
Zippered Box Pouch
Now, let's talk about all of the details for this pattern.
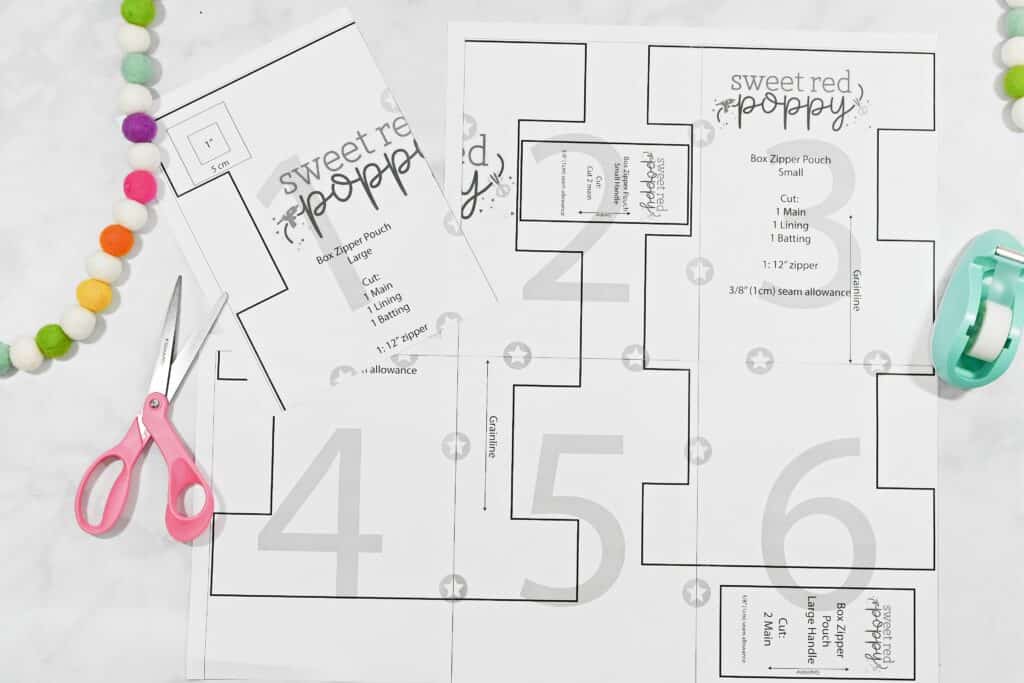
This download includes a professionally drafted Boxy Zippered Pouch Pattern. There are two sizes: Large and Small.
Large measures: 5" wide x 7" long x 4" tall. Small measures: 5" wide x 5.5" long x 3" tall.
Step-by-step detailed photos and detailed written instructions are also included.

Included in this pattern is a professionally drafted and graded color-coded pattern. Use the 1×1 inch printing guide to ensure accuracy and quickly put this pattern together with its no-trim pieces.
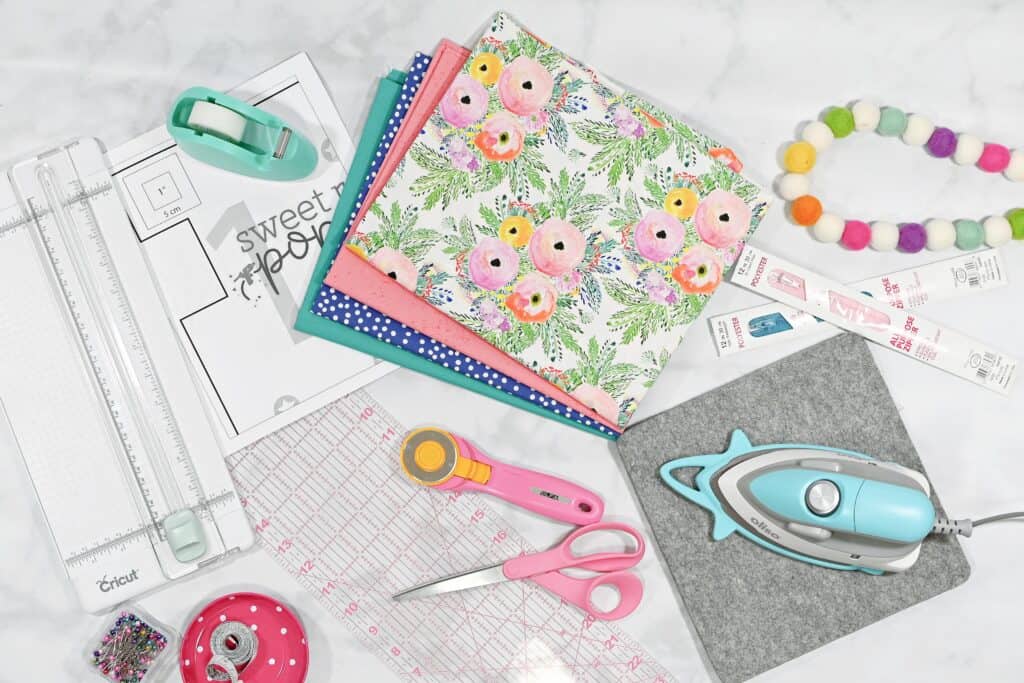
FABRIC REQUIREMENTS
For this pattern, I recommend using 100% cotton. This will give you the best results with this project. If you're looking to make a more structured bag you can use a home decor fabric but it will be slightly harder to sew.
Supplies Needed for Your Boxy Zippered Pouch
Shop my favorite sewing supplies here!
- 1 Yard Woven Fabric for Main Fabric (1/2 Yard for Main and 1/2 Yard for Lining)
- 1/2 Yard Batting
- 12" Zipper
- Sewing Machine
- Scissors or Rotary Cutter & Mat
- Thread
- Pins
- Iron & Ironing Board
- Sewing Machine Needle
- Zipper Foot
- Fabric Pen or Chalk
- Safety Pin or Bodkin
- Acrylic Ruler
- Tape
- Download the Box Zipper Pouch Pattern (Linked Below)
Why Shop Through My Links?
When you shop through my affiliate links, it doesn't cost you anything extra, but it helps me out in a big way! I earn a small commission from those purchases, and that support allows me to continue creating and sharing free tutorials and patterns for you. Thank you so much for helping me keep this creative community going!
Click Here to Download the FREE Boxy Zippered Pouch PDF Pattern.
Step 1: Download Boxy Zippered Pouch Pattern
Download this boxy zippered pouch pattern and print it off.
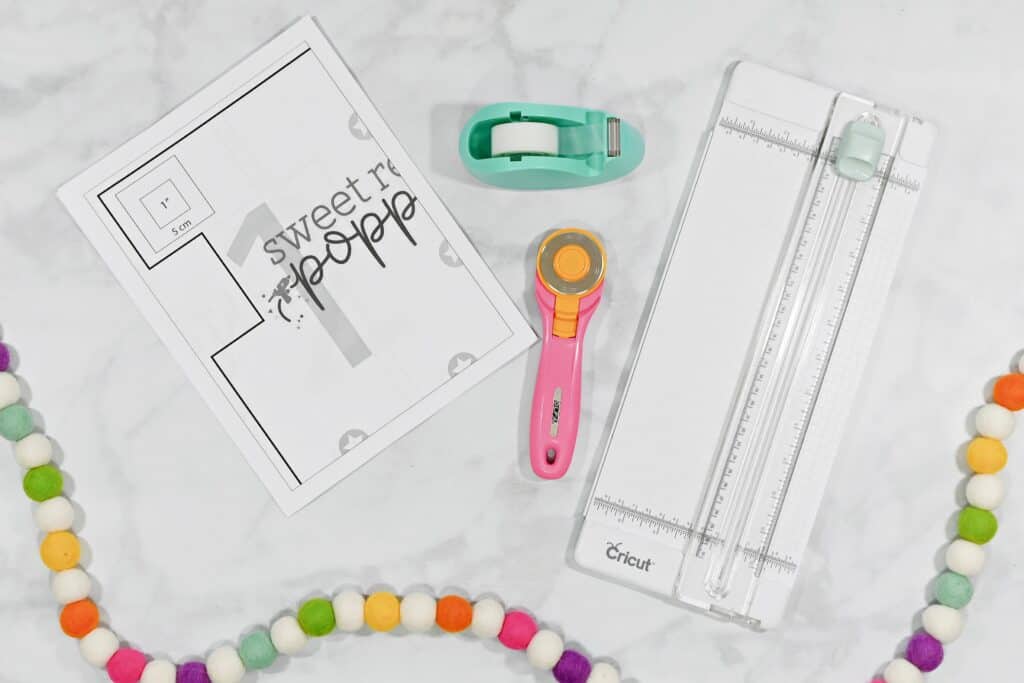
I like to print off my pattern on cardstock so that it will last for multiples uses.
Download the pattern to your computer and print the pattern at 100% with no scaling.
Trim one side and the bottoms edge using a paper cutter or scissors.
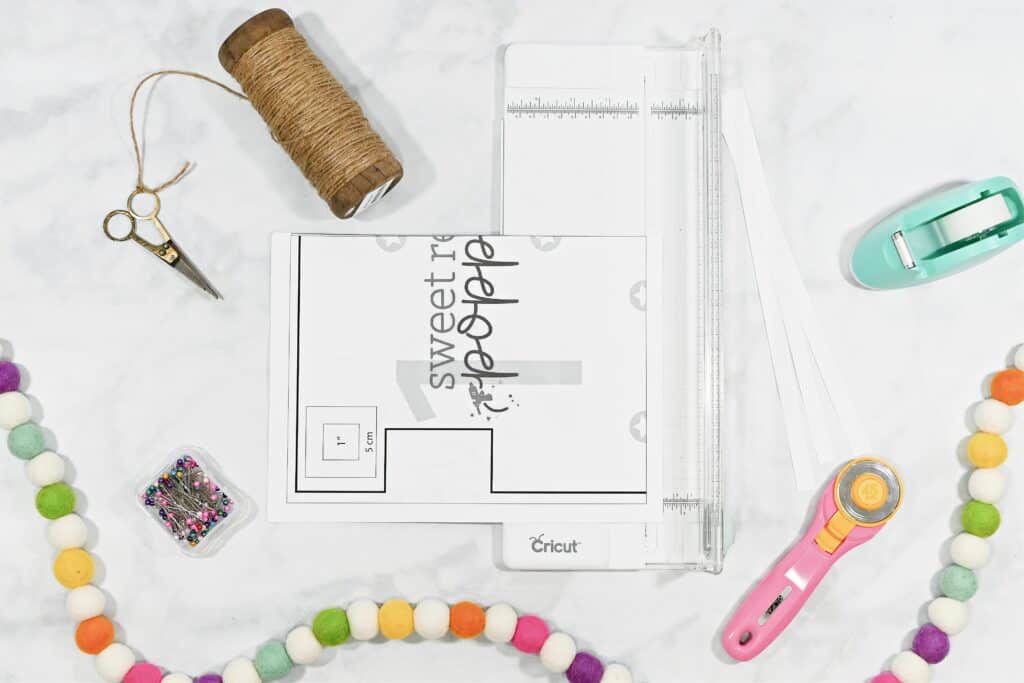
Align stars of each page and tape in place. Then, cut out the pattern.

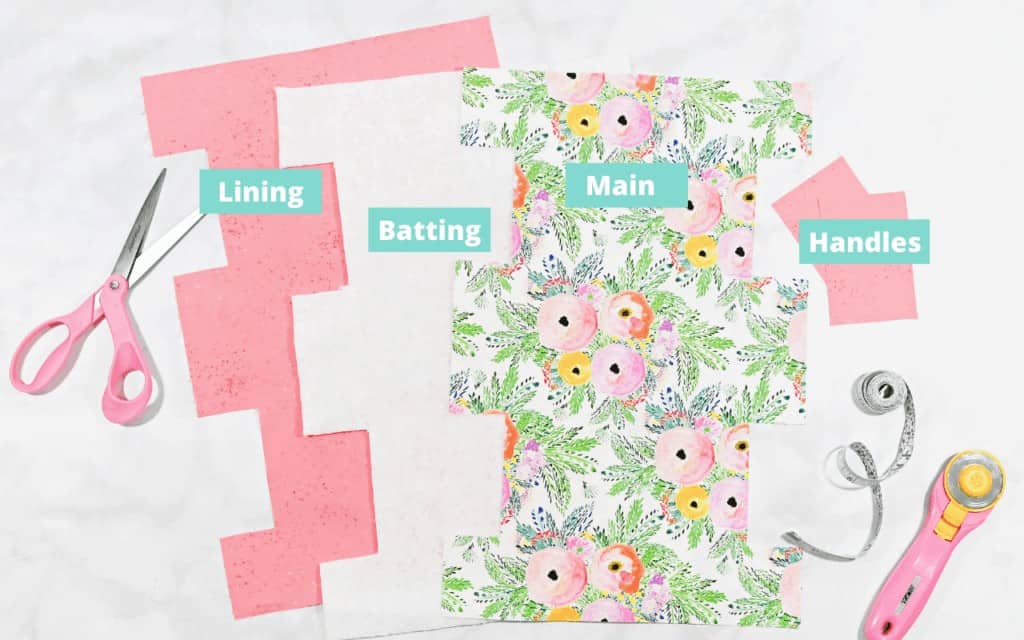
Step 2: Cut out Fabric
*PRO TIP: Make sure to iron your fabric before cutting it out to ensure the best results.
- Cut out 2 Boxy Zipper Pouches in woven fabric (1 for main, 1 for lining)
- Cut 1 Batting
- Cut 2 handles in woven fabric (optional)
You will have 5 pieces total: 1 main, 1 lining, 1 batting, and 2 handles (handles optional).
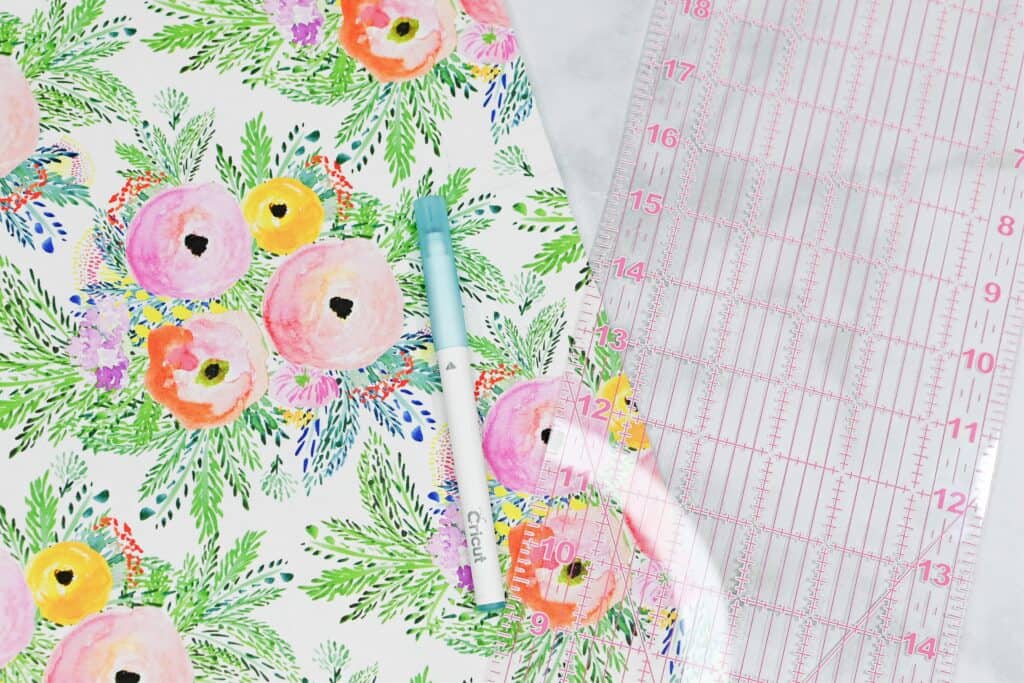
Step 3: Mark Quilting Lines
Take the Fabric Marker or Chalk, a ruler and the main fabric. Mark the quilting lines with the marker or chalk. I spaced my lines out 1" from each other.

Step 4: Quilt
Take the main fabric and lay it on top of the batting piece. Make sure the right side of the fabric is facing up and the wrong side of the fabric is touching the batting.
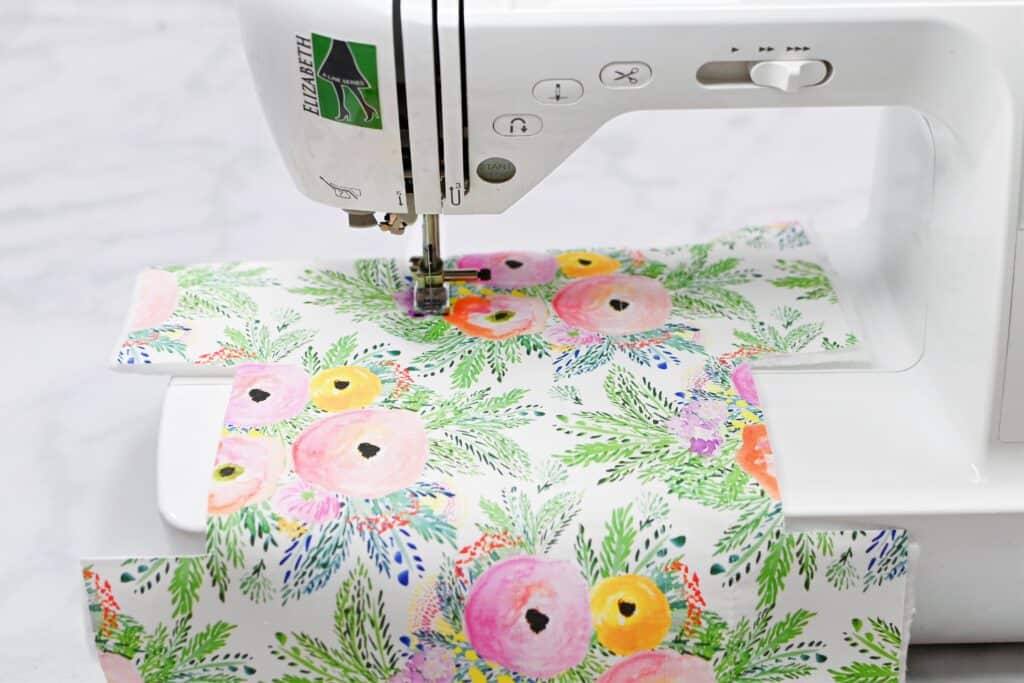
Sew along each marking to create a "quilted" piece of fabric.
Set the fabric aside for now.
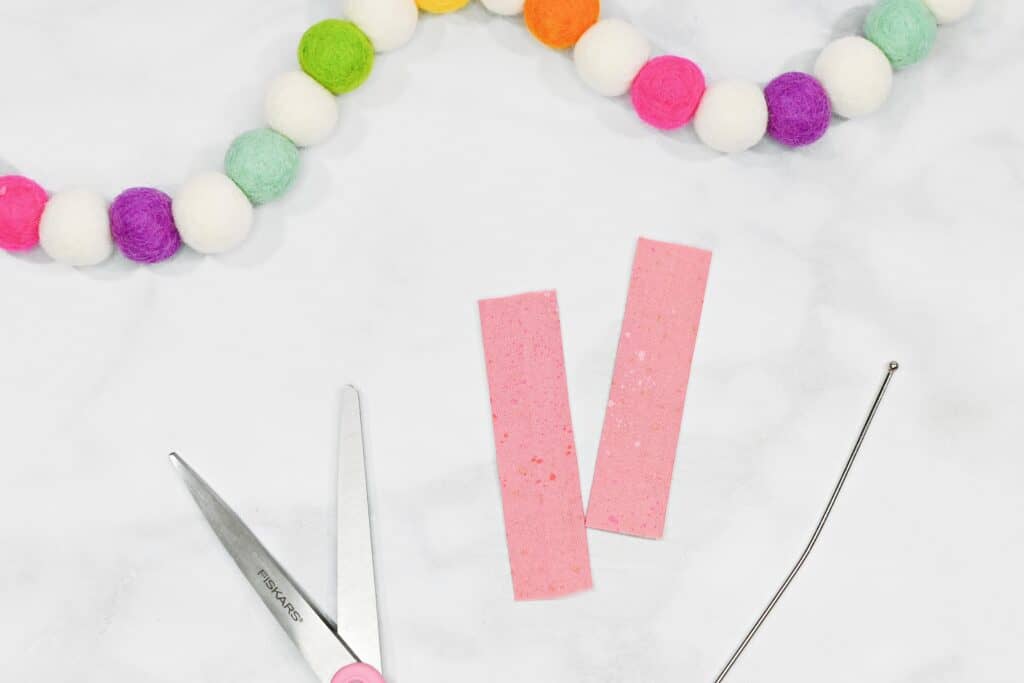
Step 5: Sew Handles
Take one handle piece and place it right sides together making sure the short sides are folded together (hot dog style). Sew down the raw edge using a 3/8" (1cm) seam allowance. Repeat with the other handle.
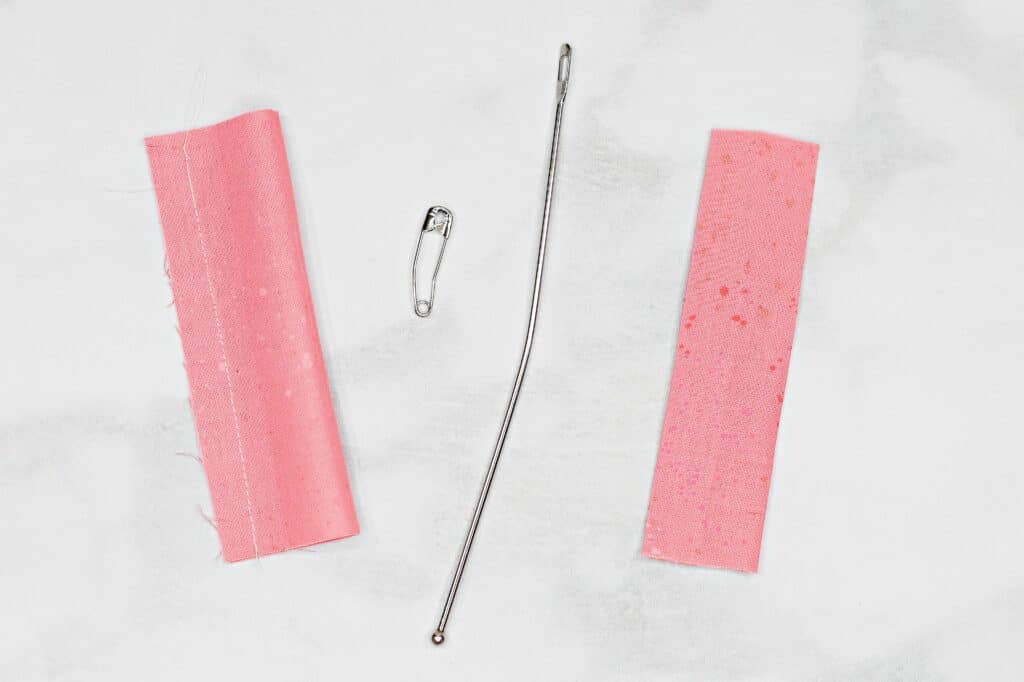
Take the safety pin or Bodkin and secure one side to the edge of the fabric. Thread it through the inside pulling it right side out. Repeat with the other handle as well.
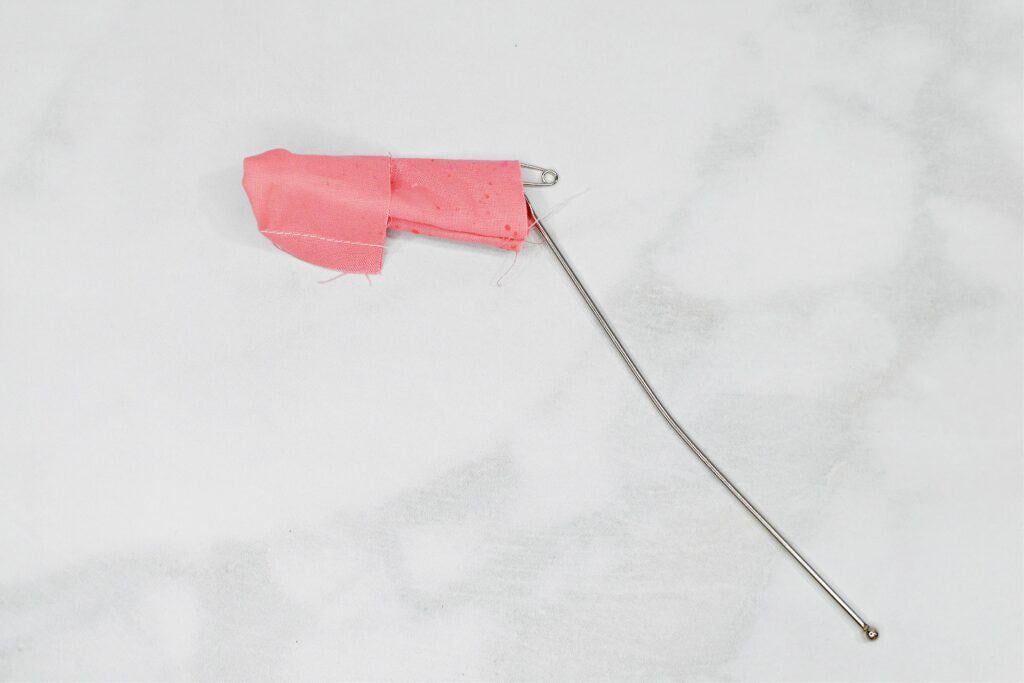
Adjust the seam to the middle and iron it in place. Set aside.

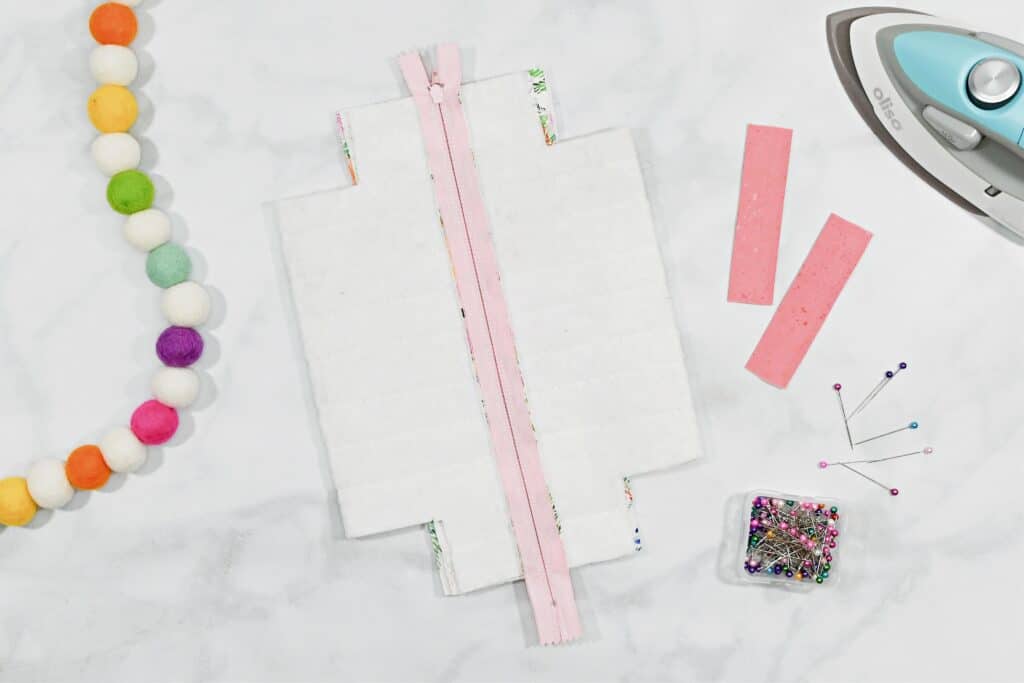
Step 6: Sew in Zipper
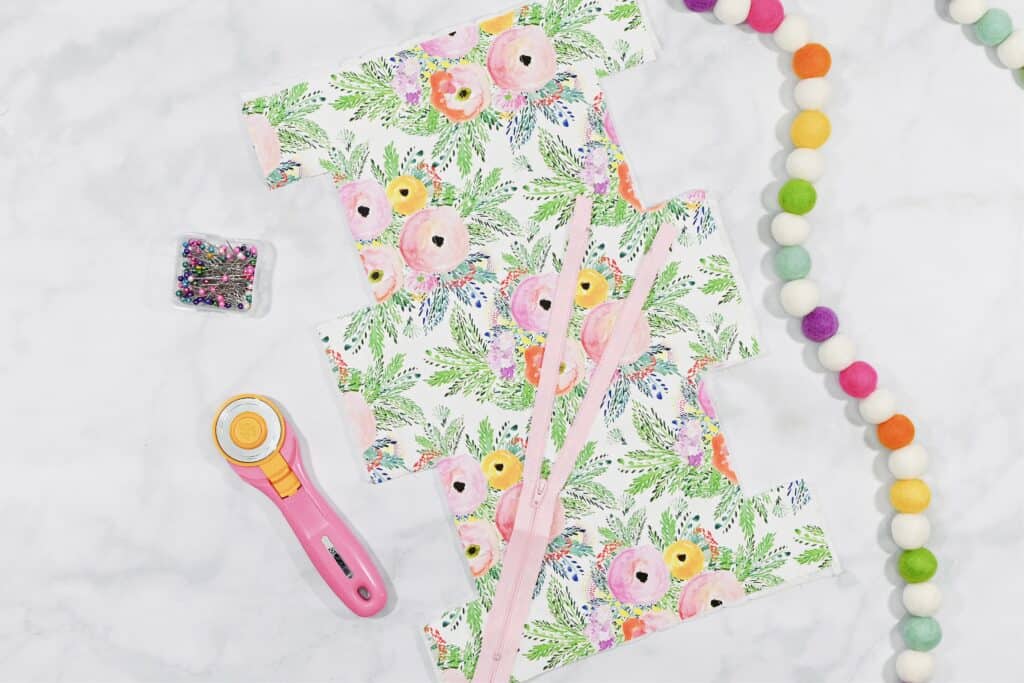
Take the zipper and align it along with one of the straight ends of the main fabric.
Place the zipper right side down, aligning the metal stopper at the edge of the fabric.
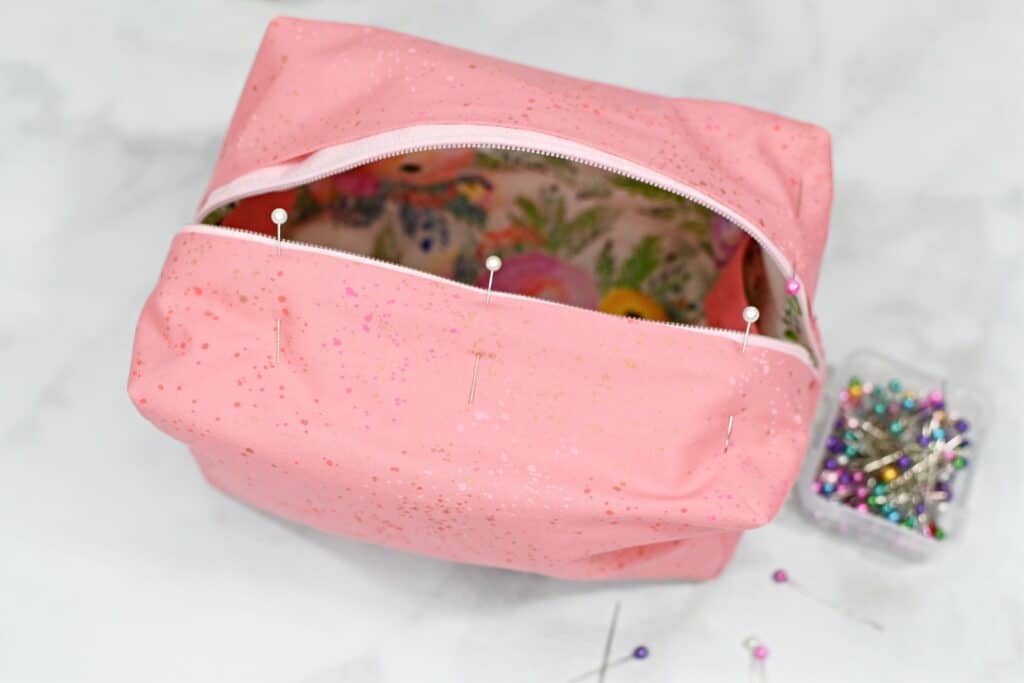
Pin the zipper in place.
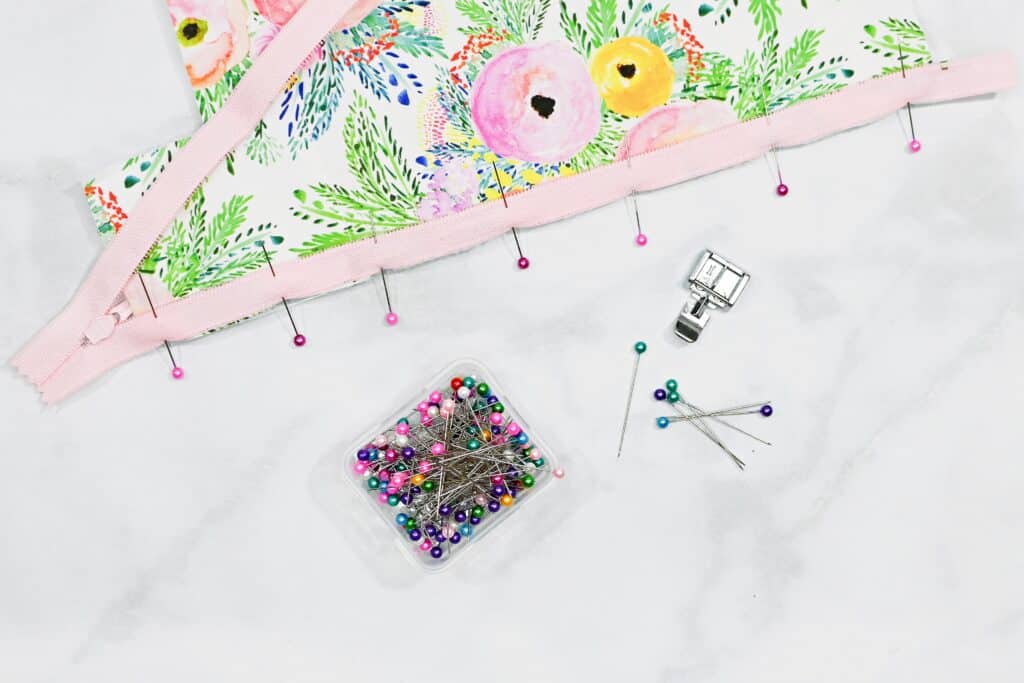
Switch your presser foot to a zipper foot.
Sew the zipper in place stitching close to but not on top of the zipper coil.
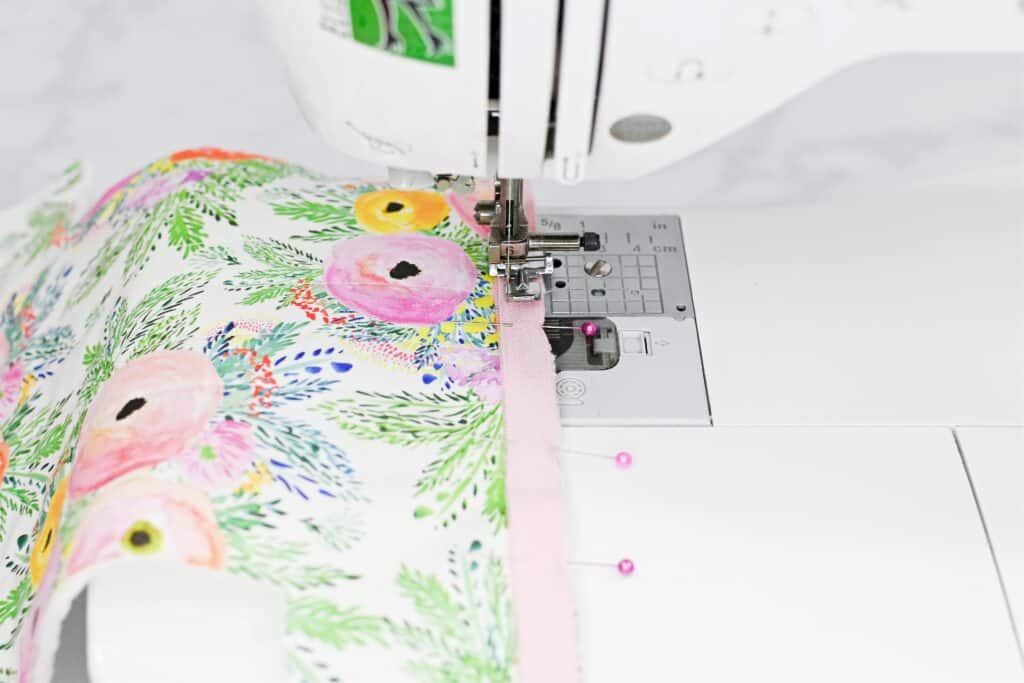
*PRO TIP: Make sure to pull pins out as you sew so you don't accidentally hit one. This can damage your needle and your machine.
Using the side you just sewed as a guide, place the other side of the zipper along the other edge of the main fabric, right sides together. Make sure the zipper isn't twisted and that the metal stopper lines up exactly in the same place as the other side. This step is really important!
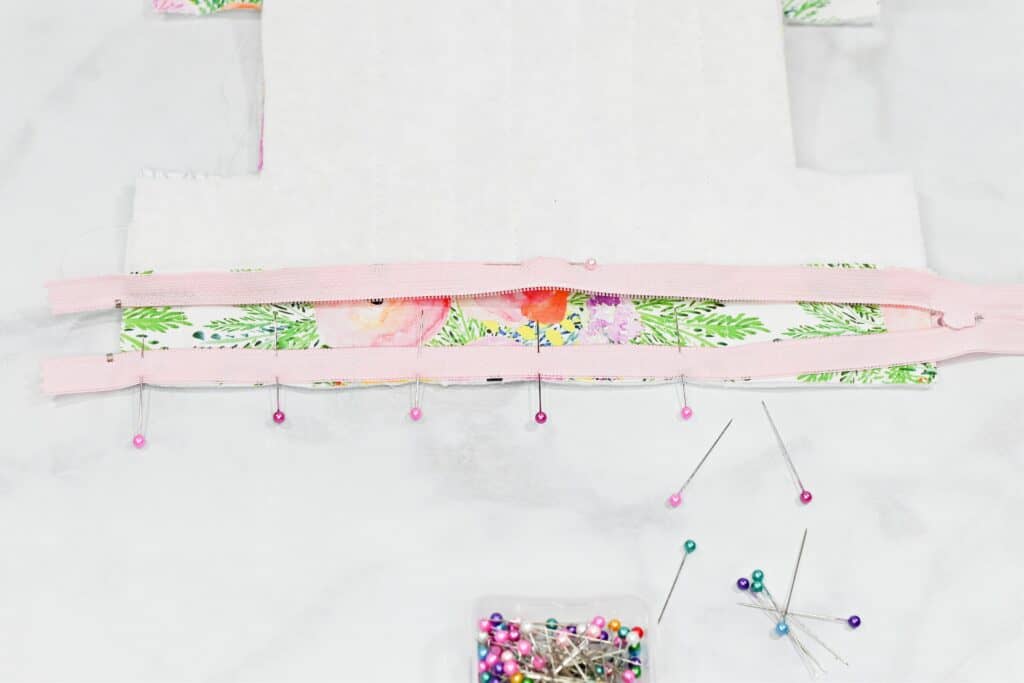
*PRO TIP: If you are new to sewing zippers, use a basting stitch to practice this step and make sure that everything aligns before using a more permanent one.
Pin in place and sew down, pulling pins out as you go.
With a hot iron, press along the zipper on both sides to flatten the seam. Taking the extra time to iron in between each step helps you to achieve professional-looking results.
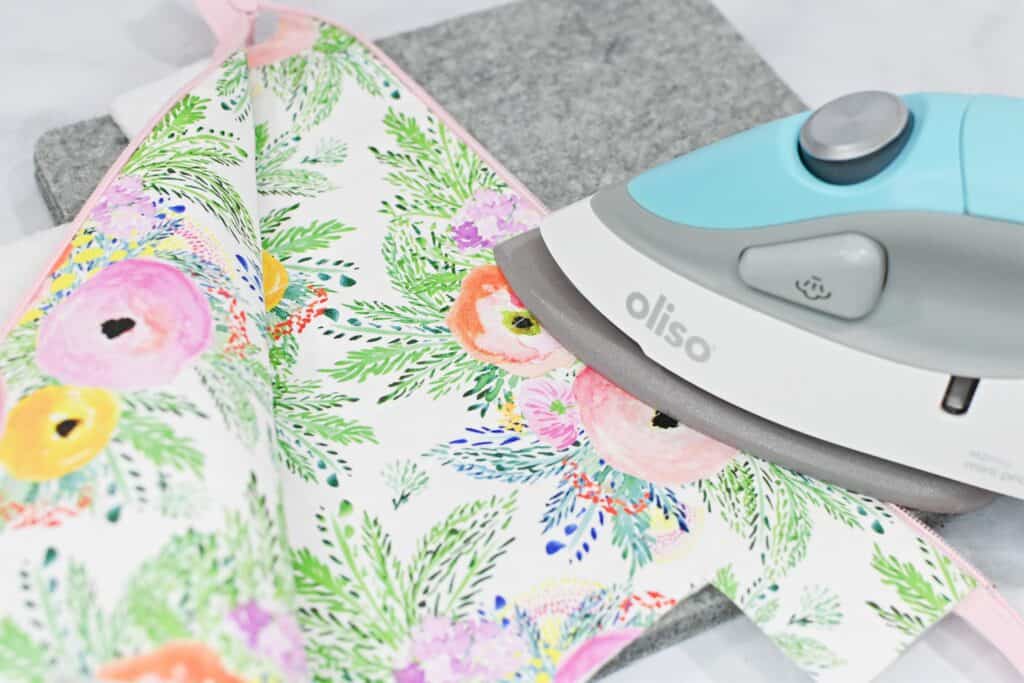
Now, go ahead and zip the zipper to check that it's all aligned correctly.
If you find that your zipper isn't lining up, unpick one of your sides of the zipper, repin it and try sewing it again.
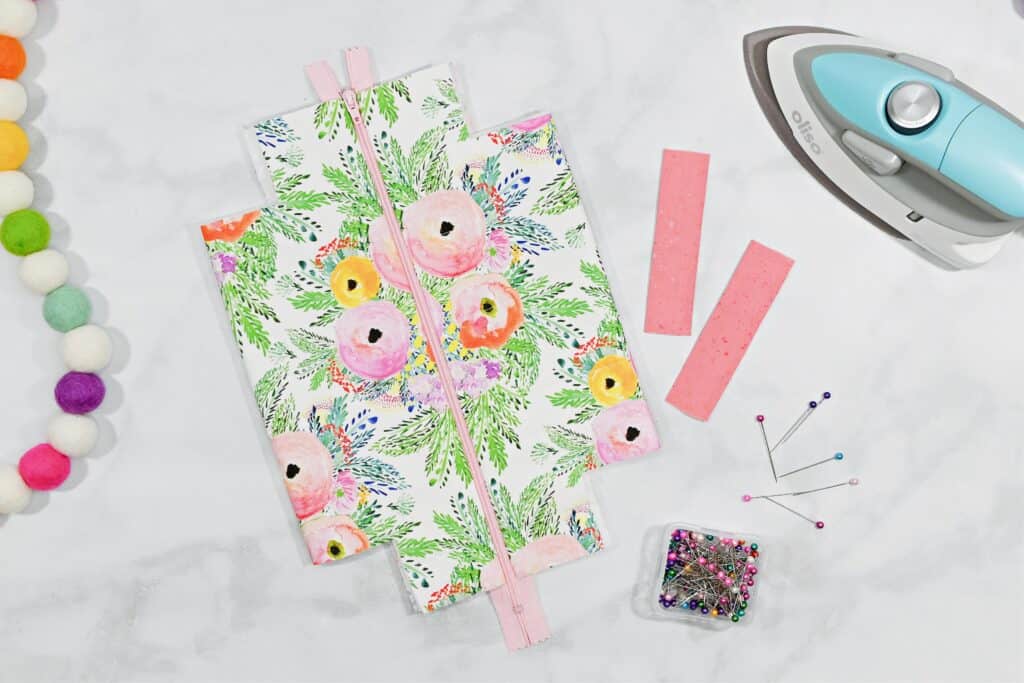
Step 7: Sew Sides
Turn the bag with the zipper inside out and align the edges right sides together.
Make sure to open the zipper before sewing so that you can turn it right side out easily.
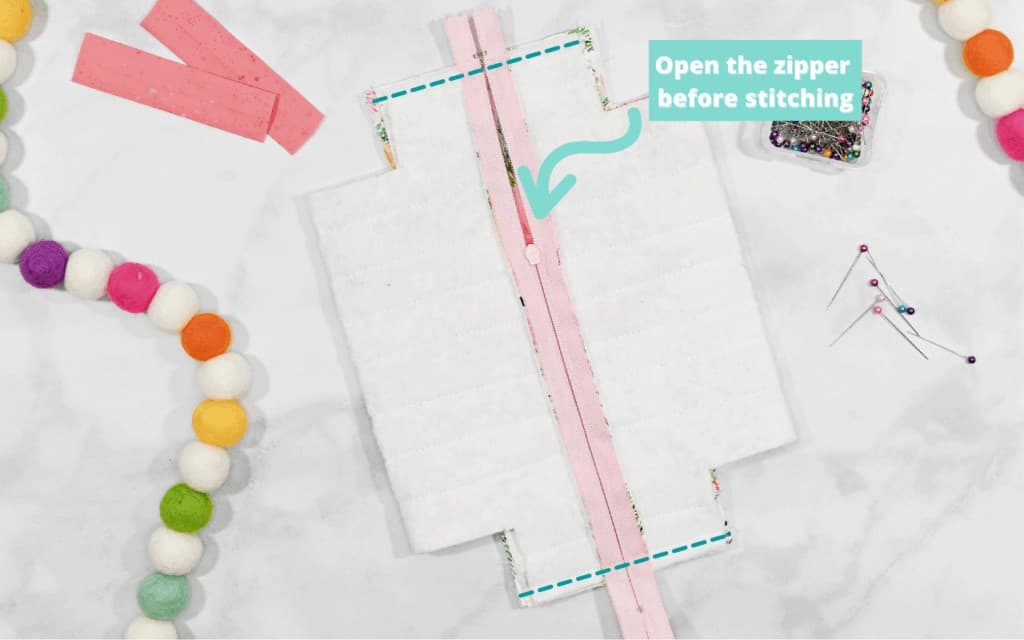
Sew along the top and bottom edge.
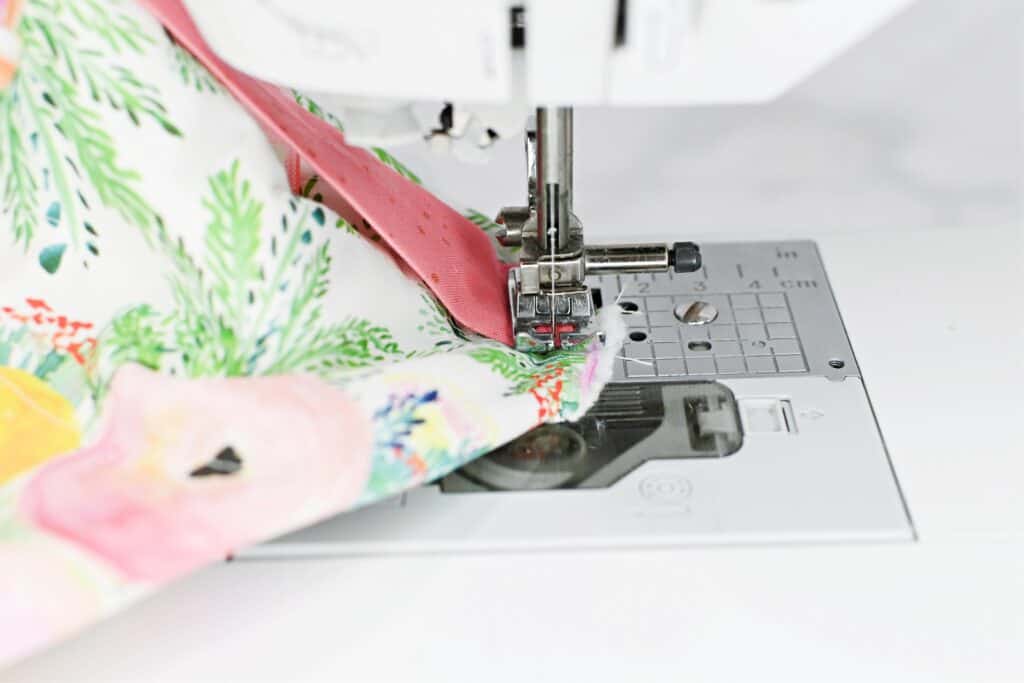
Step 8: Place Handles
Turn the bag right side out.
Place the seam of the handle facing the seam you sewed in the previous step. The handles should be perpendicular to the zipper. The wrong side of the handle (where the seam is) will be against the pouch.
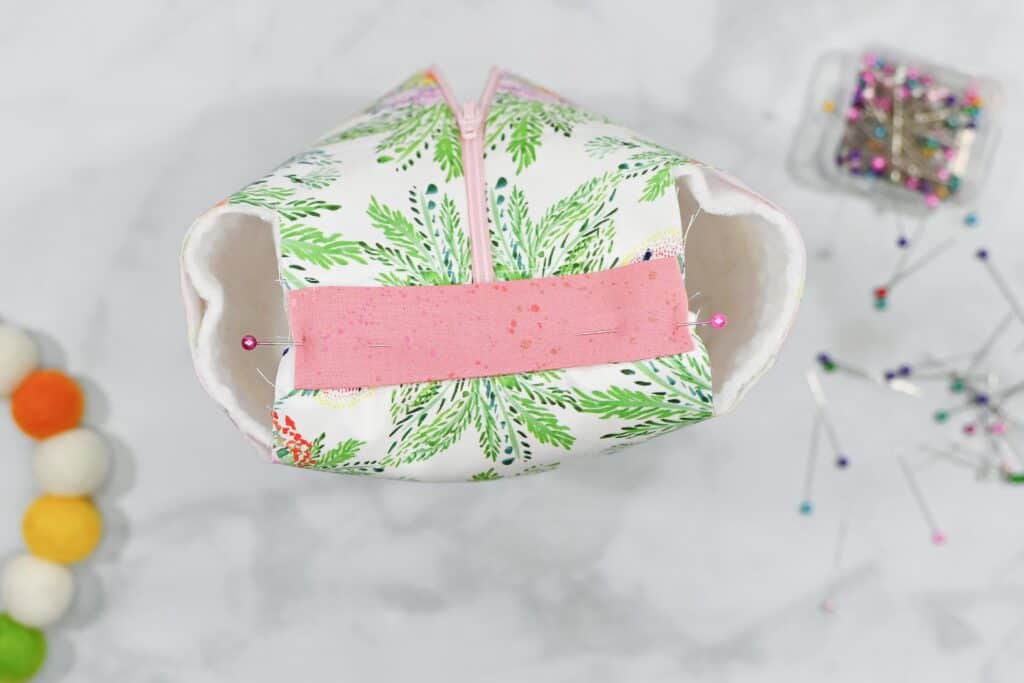
Pin in place and sew the handle to the fabric using a basting stitch (you should be sewing through the handle, main fabric and batting only) making sure not to catch the other piece of fabric in the seam.
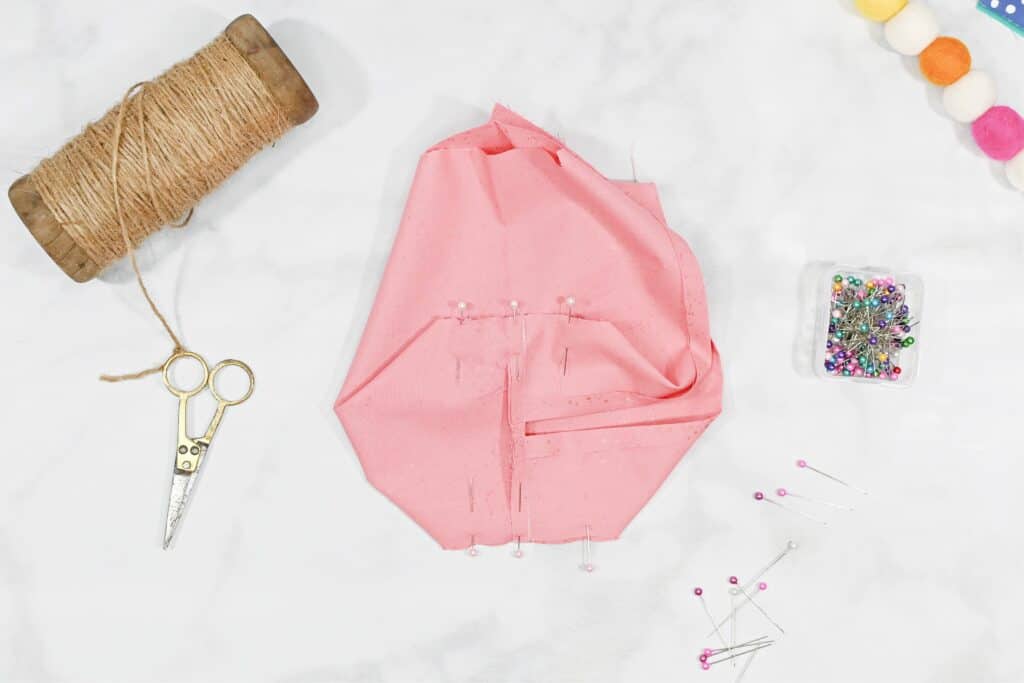
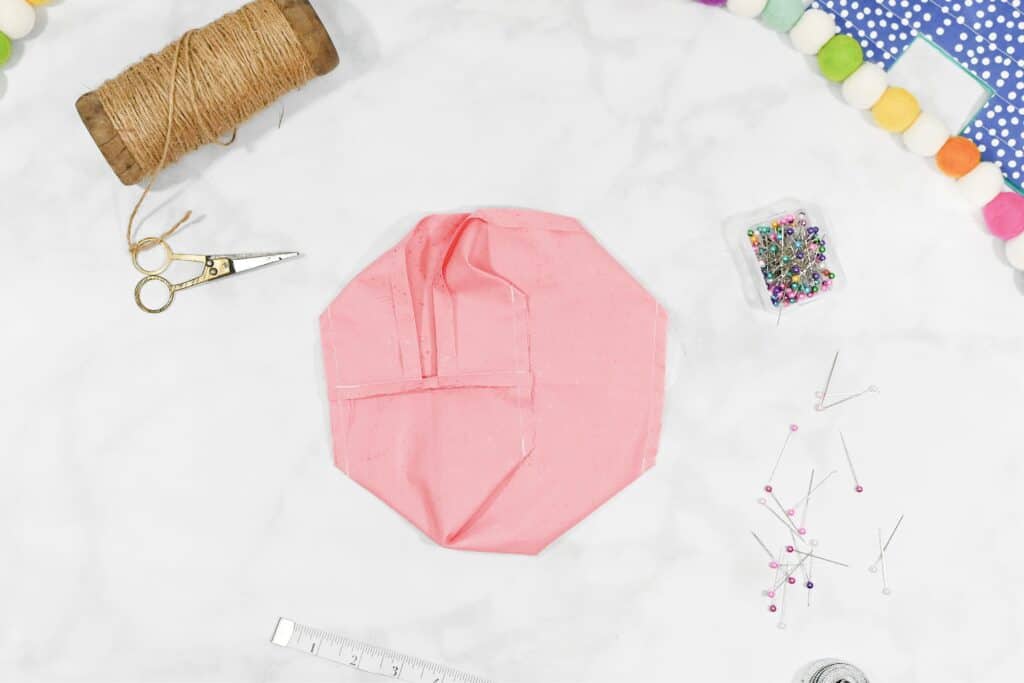
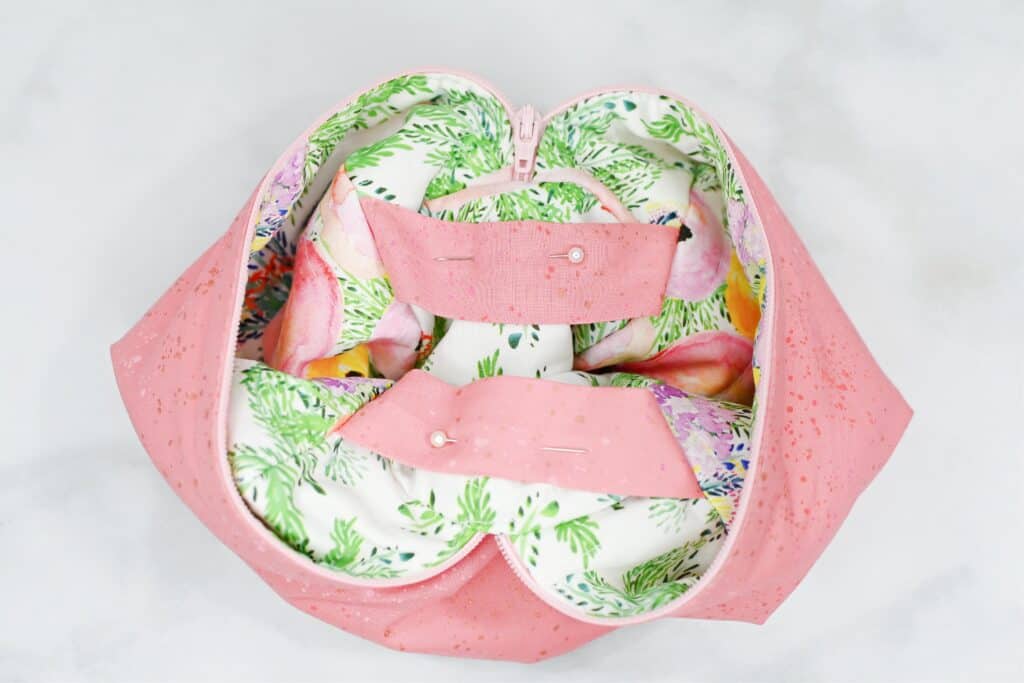
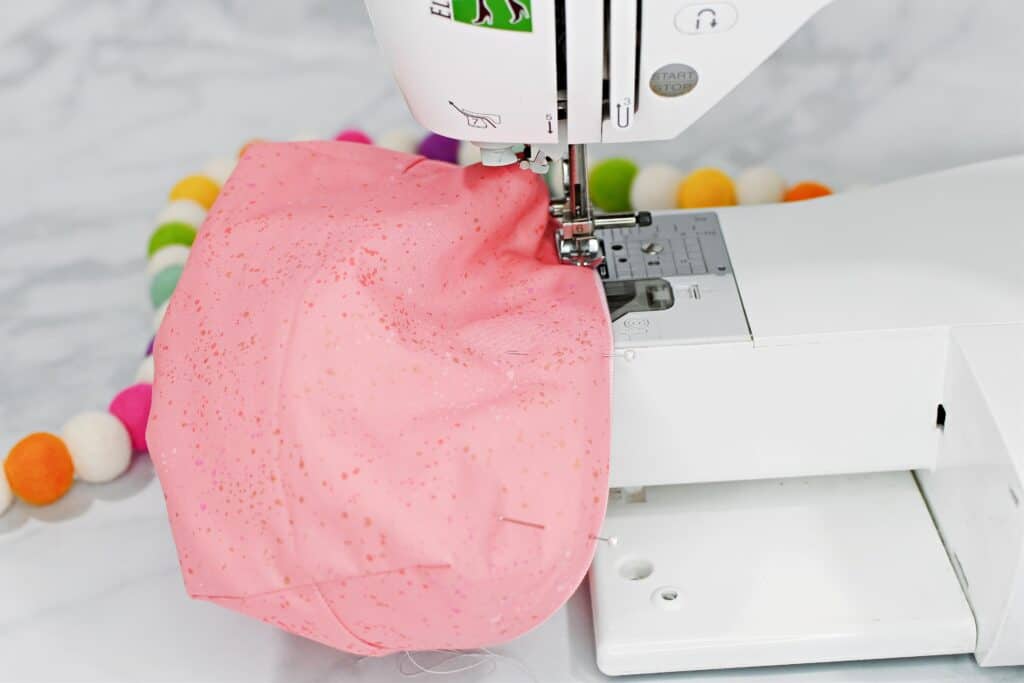
Step 9: Sew Box Seams
Turn the bag inside out.
Align the open ends together. Make sure the seams lay down towards the bottom of the pouch.
Pin in place.
Sew along each end, making sure to pull out each pin as you sew. This step will create the boxy look for this pouch.
Step 10: Sewing the Lining
Take the lining and fold each end 1/4" over towards the wrong side. You can use a measuring gauge to make this step easier.
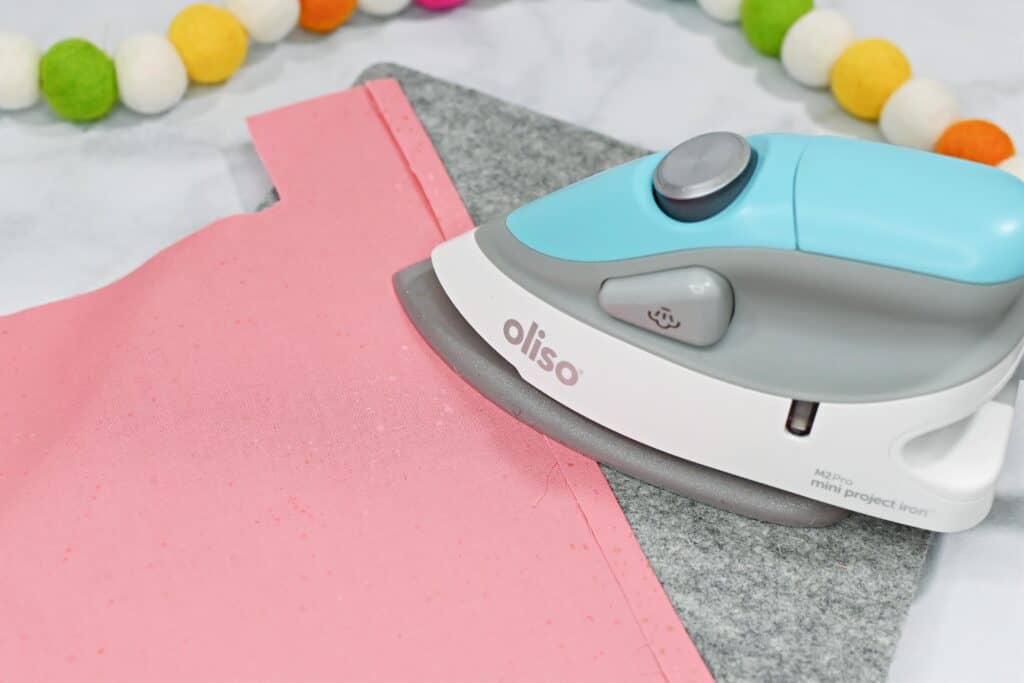
Press well with steam to set the fold.
Fold each edge in towards the middle, with right sides together. Align the outer edges of the lining to the middle of the bag aligning the square cutouts on all four sides.
There will be a small gap in the middle to account for the zipper.
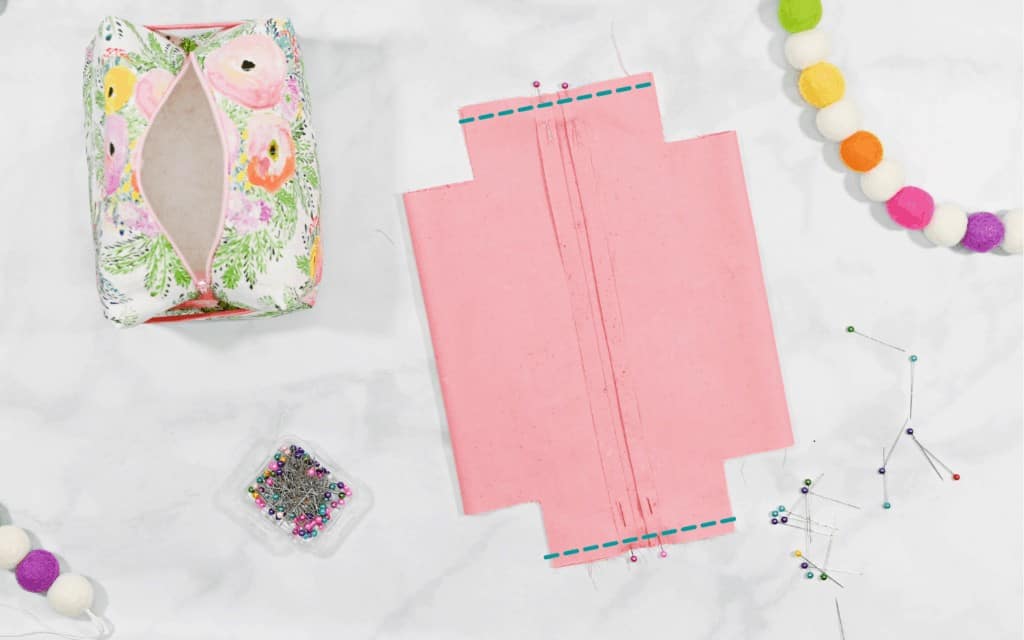
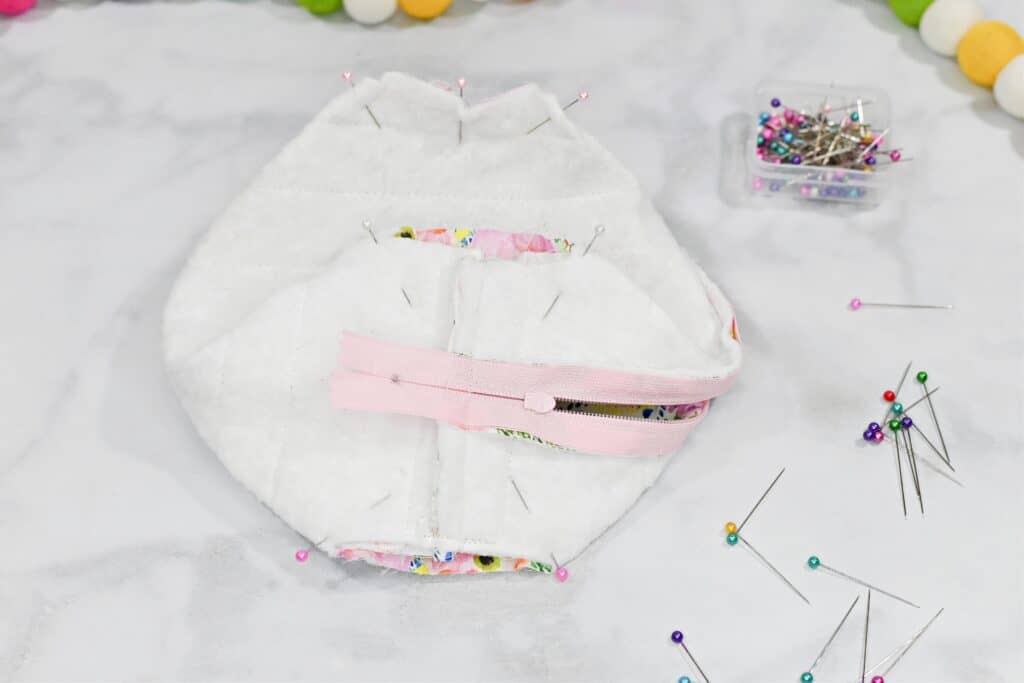
Pin the lining in place.
Sew along the two straight edges on either side of the pouch.

Now it's time to work on the box seams. With two hands start on one of the box seams. Pinch your finger and thumb on the innermost part of the square cutout on one side of the lining, do the same thing on the other. Then pull on the fabric to create a straight seam and aligning them so they are flat. (refer to the video for a better explanation of this step)
Pin in place and sew. Repeat this on all sides.
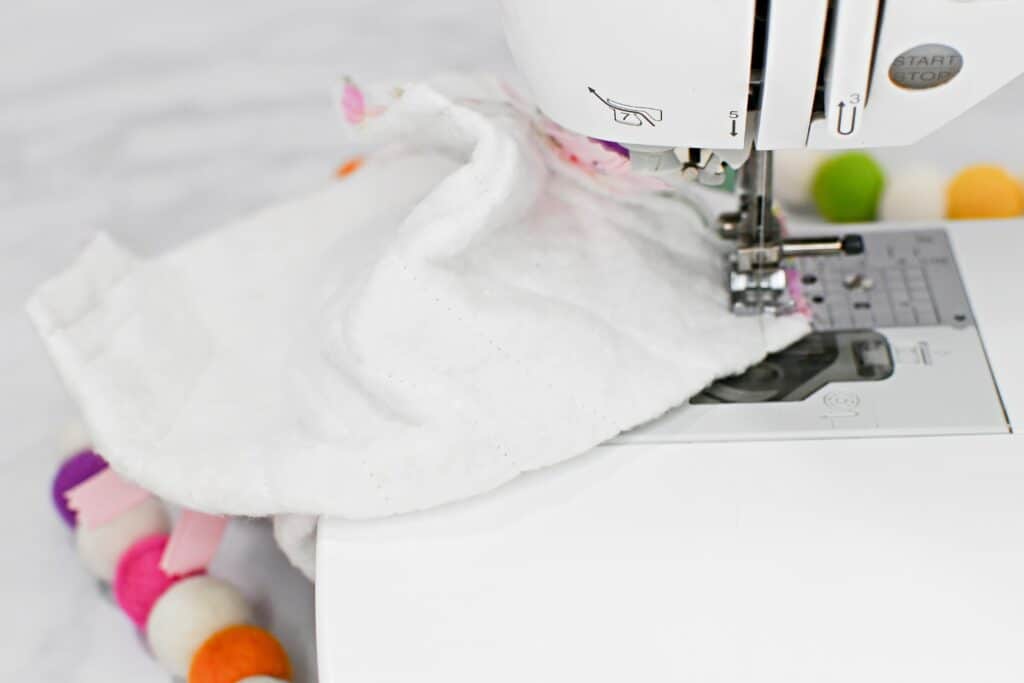
Step 11: Sewing Lining to Main
Turn main inside out and lining right side out.
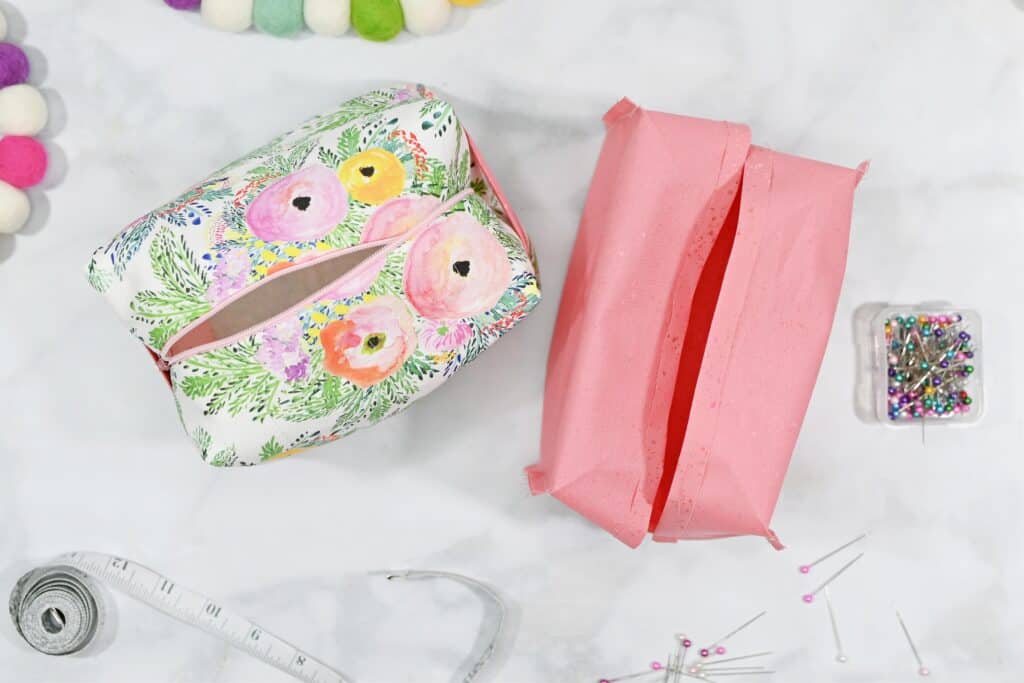
Place the main bag inside of the lining. Wrong sides should be facing each other in this step! Refer to the photo below!
Align the side seams and pin them in place.
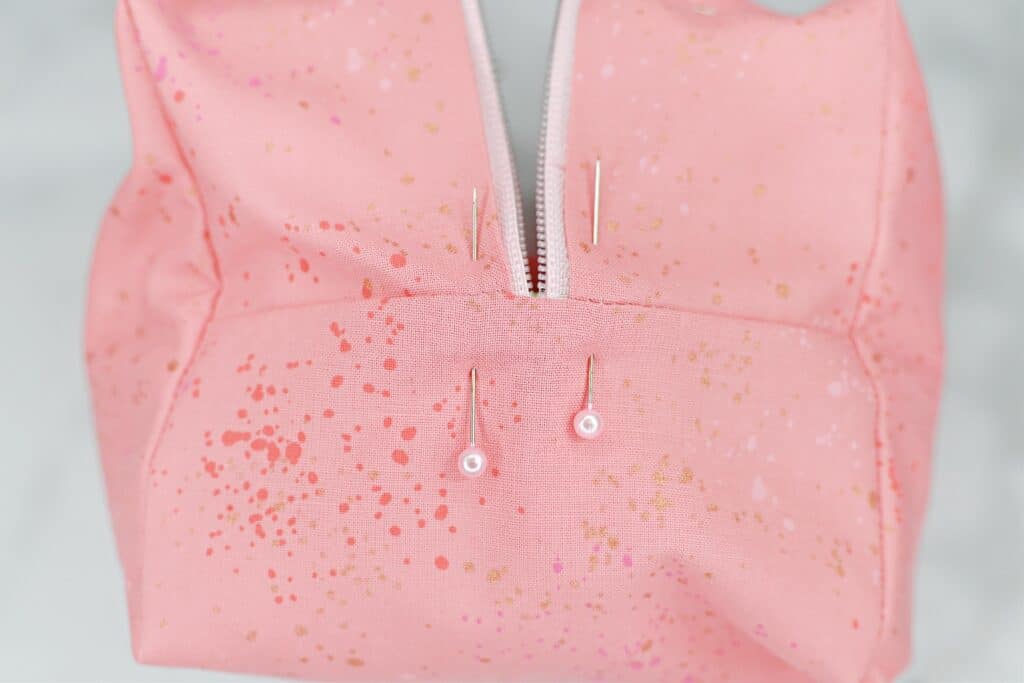
Align the lining folded edge to the zipper sewn line and pin it in place.
Pin the handles out of the way.
Sew the lining down using a 1/8" seam allowance and pivoting at each end. Sewing around the zipper pull is a bit tricky so go slow, and pull it slightly out of the way when needed by putting your needle in the down position, raising the presser foot and pull the zipper out of the way.
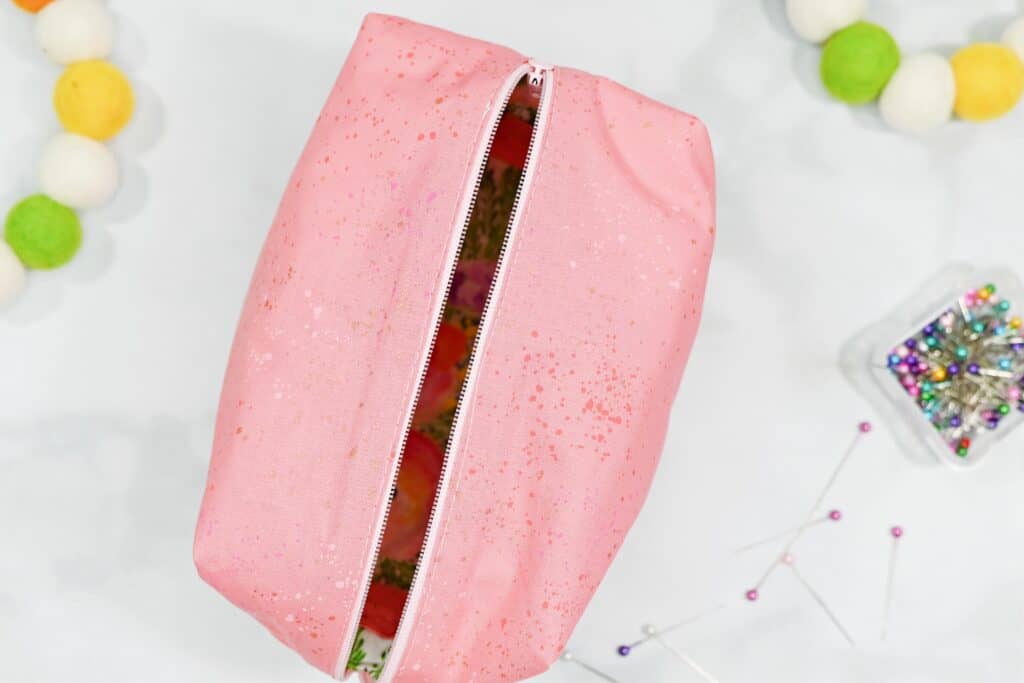
Trim all threads and pull the right side out.

You're finished!
Did you enjoy this tutorial? I'd love to see what you've made with it!
Join my crafting and sewing Facebook group where you can show us what you’re making, ask questions, and learn from others!
Follow me on Instagram for daily crafting inspiration and a look behind the scenes.
Don't want to forget about this project? Save it for later! Click here to save this project on Pinterest.
Looking for more bag sewing patterns? Check out the links below!
Do you have any questions about this zippered box pouch tutorial? Let me know in a comment below!
Hi Kim, Love your rose tutitorial. Bought my card stock and started to down load or print the template to make it with. Could not find it any where. How can I find it. I want to see how this goes before I get into buying a Cricut machine and taking your class on using it and making flowers. Thanks so much. Barb
Hi if you click the link half way down, a box will open for you to put your email address into . Then the pattern will download automatically and it will be in your download folder on your computer and you will also get a copy in your emails.
How do I download the tutorial...?
I was wondering the same thing. I cannot find the video tutorial for the boxed zipper pouch demonstrated above. I'm a visual learner. The video tutorial will help me a great deal. @sweetredpoppy
Please direct me to where I can locate the video tutorial for the boxy pouch. I downloaded the pattern but having difficulties following the written instructions. Thank you!
None of this pattern worked for me. The dimensions of the cutouts of the boxed corners didn't work at all. The finished dimensions didn't come close to your dimensions. I think there is definitely something wrong with this patterns.
What a cute and easy bag! Thank you!
Having the Tutorial in a downloadable PDF would be MORE USEFUL to those who DON'T HAVE A COMPUTER IN THEIR SEWING ROOMS!!! Love to box BUT just TOO MUCH WORK having it on a computer screen and not being able to download and print it so I can take it to my sewing room. Sad.
Step 10 says to refer to the video for a better explanation. I must be blind because I have scrolled up and down this page and cannot find a video about this project. The only video I have found is for the bucket hat.
I am going to try to make this and hope it is not a disaster.
I too and searching for the video.
The pattern isn't too hard to follow but on the downloadable pattern the dimensions are off. The bottom width is 1 inch shorter than the top width and it makes the bottom corners more difficult to sew. I don't quilt my fabric and it turns out just fine. Also, could not find a video to go with this. The only embedded video is for a bucket hat.
I could not make this pattern work at all. Do not attempt! There must be missing instructions to get the top part boxy.
Tried to make the small boxy bag. I had difficulty boxing the corners, I had to use a 5/8” seam allowance to capture all the fabric. I don’t think there was proper seam allowance included, and this changed the size of the bag. Ended up with 5”long, 3.5”tall, 4”wide… it’s a little wonky, but sewed up quickly, will try again… thanks!
Hi! I just tried to sew the large one. The pattern isn`t symetric and seam allowance is missing too... There is need to update the pattern with adding 1 cm to all along of the right side and 2 cm to all along of the left side verticales - all outside seams only. Hope it helps someone. I read the comments only after I tried to sew and was fail 😀 🙂
Me, too and you are exactly right. After two bad attempts I found as you did that the seam allowance is missing in just the areas you said. I just redrew it and made it correct to use for number three. They “work“ but only after frustration and shrinking it.
I was wondering the same thing. I cannot find the video tutorial for the boxed zipper pouch demonstrated above. I'm a visual learner. The video tutorial will help me a great deal. @sweetredpoppy
Please direct me to where I can locate the video tutorial for the boxy pouch. I downloaded the pattern but having difficulties following the written instructions. Thank you!
Hi I did the boxy bag is a great idea cute and all but the dimensions are off.
I made the large box and even though some areas did not fit exact I was able to make it work just fine. The box turned out pretty nice. I added interfacing to the lining to make it a bit stiffer. Fun project.
I make patterns for a living, I printed out this pattern because I thought it would be faster than drafting it myself. It was a HUGE waste of time, money and effort. I attempted to make the large bag. Proportions are off. Seam allowances are missing. Don't make this!
The PurlSoho free dop kit is a much better boxed bag pattern (it's not lined , but you can always make a lining.
I like the general idea of how this is constructed. After reading the comments, I have several questions:
Several people commented that the measurements were in correct. Was that due to incorrect printer settings or is the pattern incorrect? If the pattern is incorrect, have you corrected the pattern and is it available?
Several people commented that the video could not be found. I could not find it on your you tube channel. Is it available? If so, how do I access it?
I could not find a way to email you directly.
Why are questions not being answered? I just finished cutting out the pattern before reading the comments and now am very concerned I may have wasted fabric, lining, and stabilize. Not inexpensive these days! I know how life can get in the way but please can you just let the folks asking know if the current pattern is correct or not? Thanks.
Well the pattern is completely inaccurate. The drawing itself is simply wrong. Since I Disney read the comments first, I cut out my fabric, lining, and my shaping fabric (I did not want a quilted version. Then I read the comments only because I was looking for the video. Didn’t find any link to a video. Started going through the directions and other than the handles there are problems with all the rest of the pattern and instructions. I finally went looking for a similar instruction for a similar box and found one that let me somewhat salvage the mess. BUT the box corner creation is not accurate and that makes the whole thing off. I can use it myself but I would not ever create this pattern again. Since there has been no response to questions in a very long time I have to conclude life has intervened and this site is not a priority.