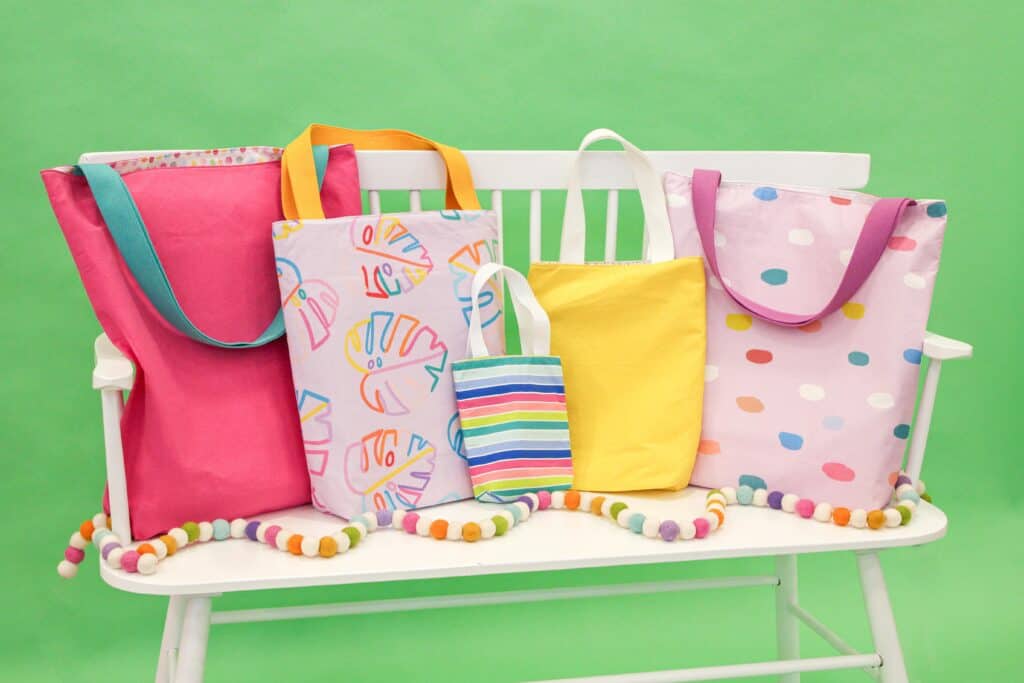
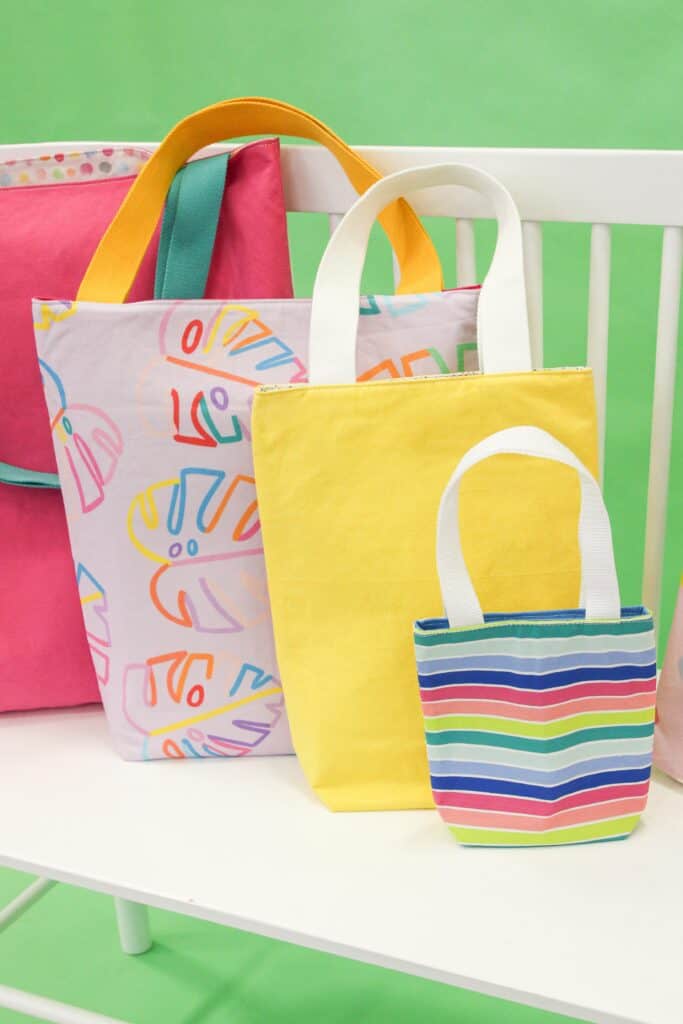
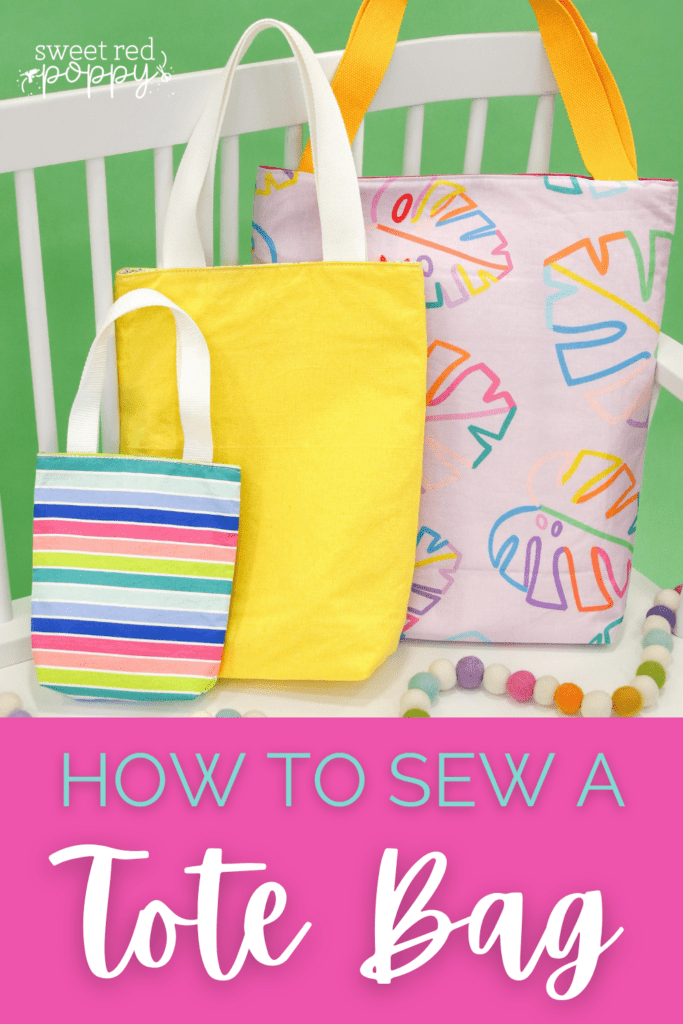
Make This Tote Bag in 5 Different Sizes. This Free Sewing Pattern Includes an Interior Pocket for Small Items and It’s Fully Lined for a Professional Finish.
A tote bag is one of the most useful items you can have around your home - and it's a fun and easy project to sew!
Tote bags are great as reusable grocery bags, perfect for packing a delicious picnic, are a useful alternative to a typical gift bag, and much more!

Grab my free tote bag sewing pattern and follow the step-by-step tutorial below to make your own beautiful tote (choose from 5 different sizes!).
Table of Contents
About the Tote Bag Sewing Pattern
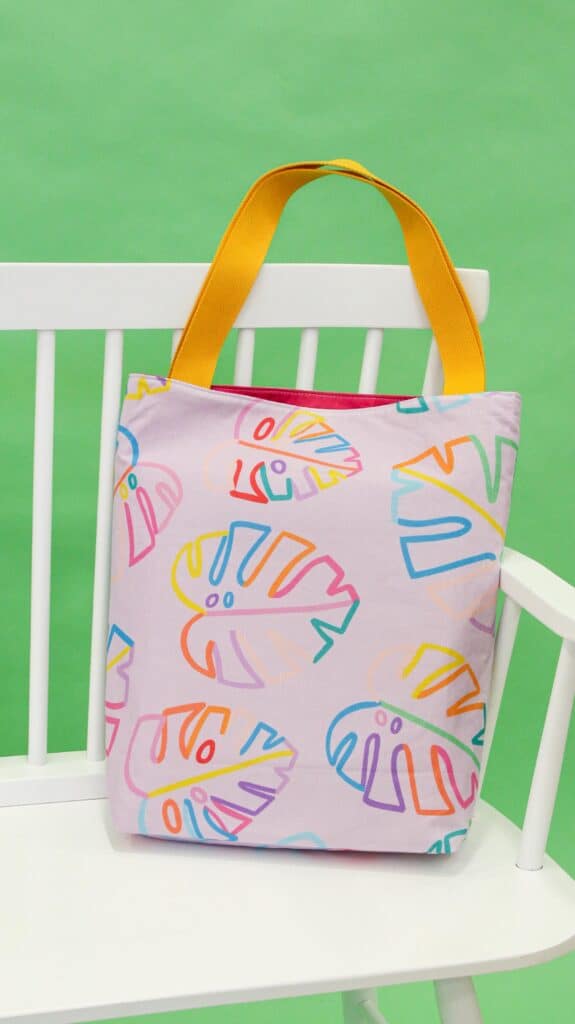
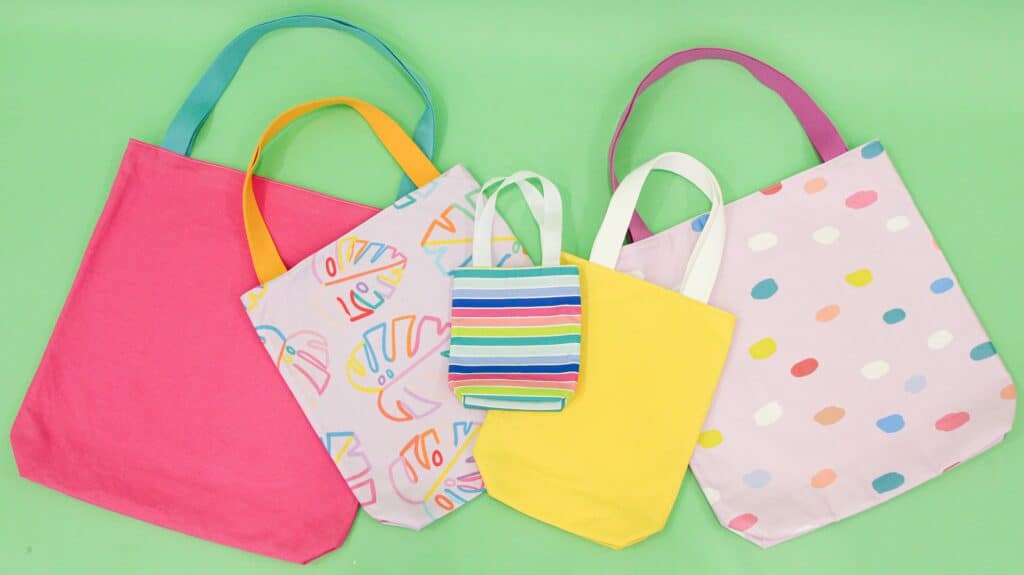
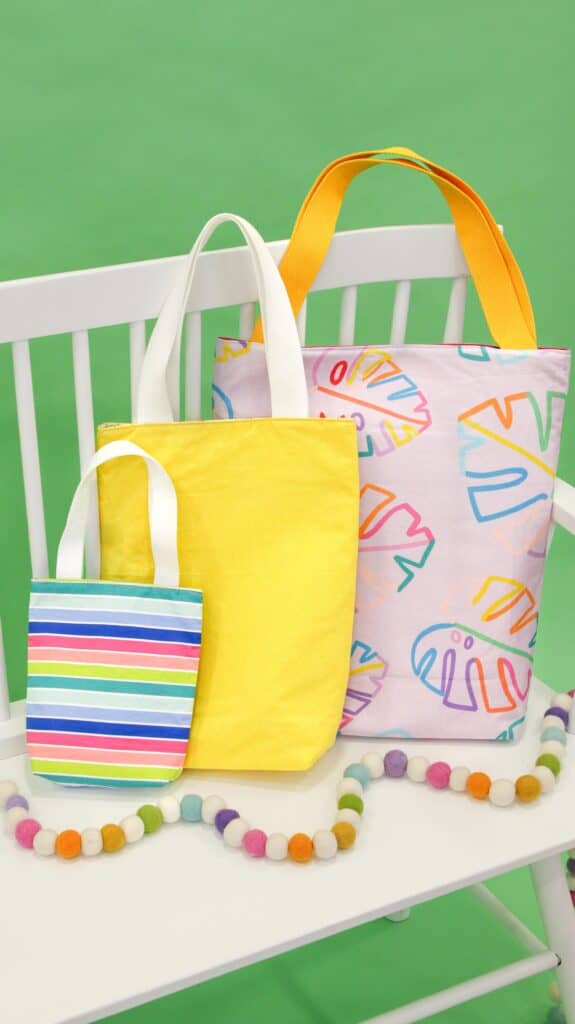
The sewing pattern download includes the tote bag pattern in 5 different sizes, from XS to XL. That way, you can choose the right size for what you'll be packing in your tote bag!
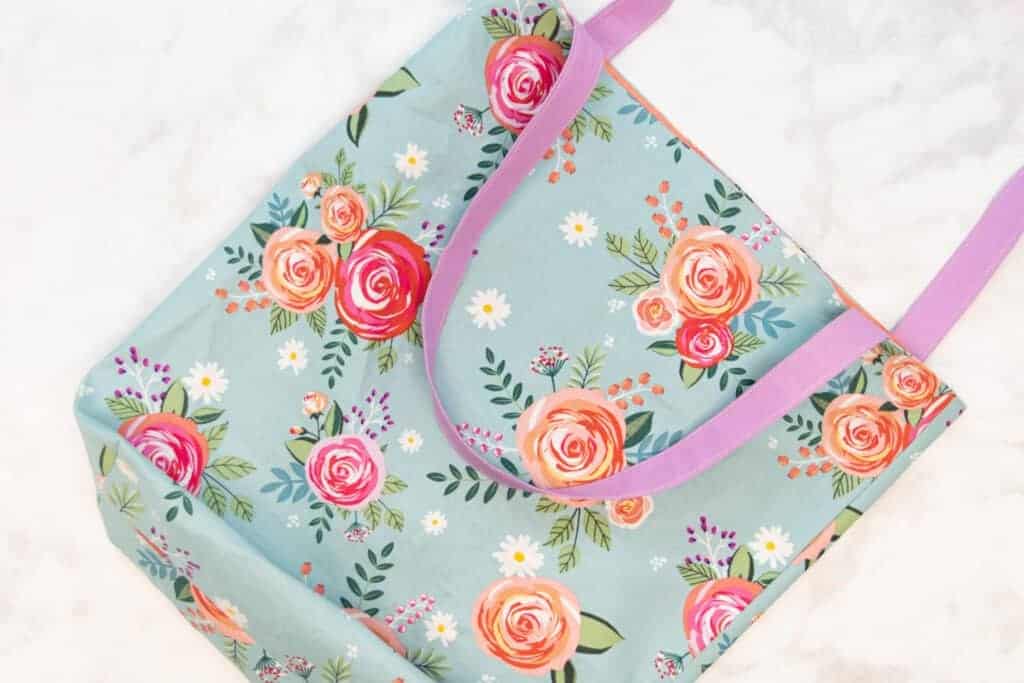
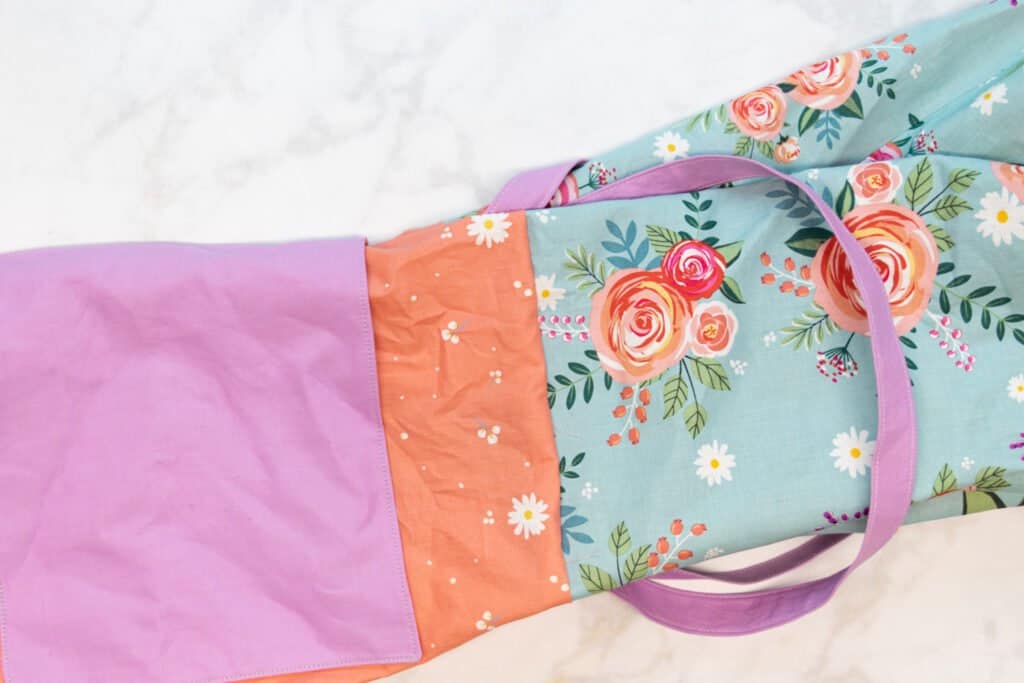
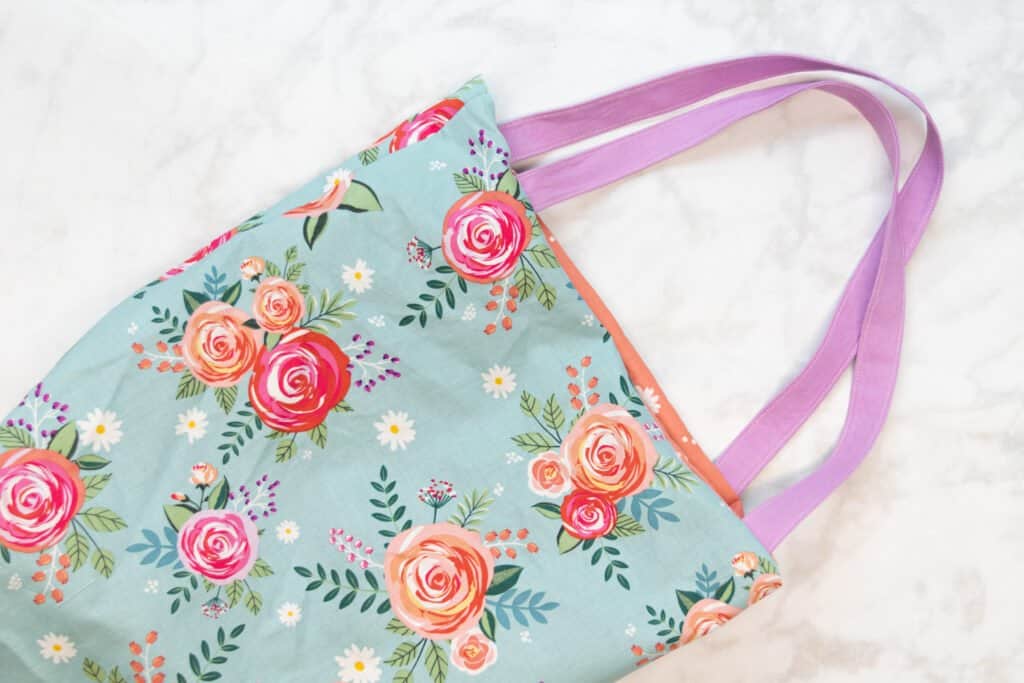
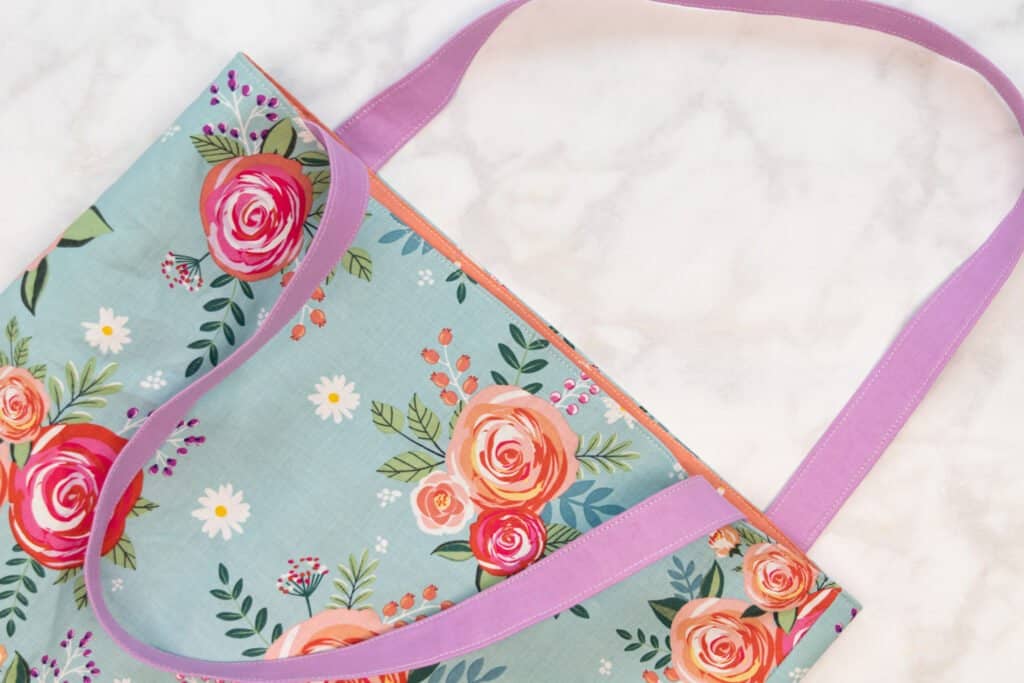
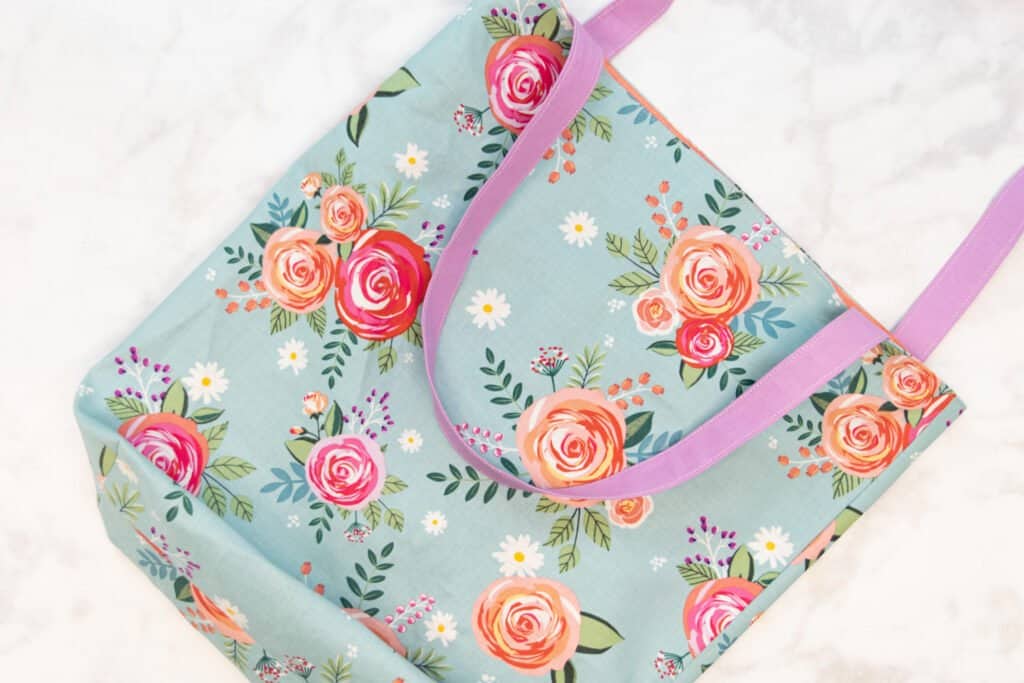
This bag is fully lined and features gorgeous boxed corners, making it easy to fit whatever you need to tote around! Plus, there's a roomy pocket on the inside for those items that you want to keep easily accessible.

The download includes a pattern for fabric straps. This means you can make the straps to match the body or lining of the bag - or choose a contrasting fabric! If you'd rather use cotton webbing and skip making the straps, I've included instructions within the tutorial on how to use webbing straps instead.
Finished Measurements for the 5 Tote Bag Sizes
Here are the dimensions of the 5 different tote bag sizes.
- XS: 7" x 8.5"
- S: 11" x 14"
- M: 15" x 15.5"
- L: 18" x 18"
- XL: 20" x 20"
Want to learn how to make even MORE fabric bags?
Get 11 different bag patterns and gain access to a comprehensive collection of bag patterns and tutorials my All The Bags 150+ page Ebook by clicking here.

What Fabric to Use for Sewing a Tote Bag
You have a lot of options when it comes to choosing fabric for your tote bag. Really, any mid-weight woven fabric will work well.
My favorite choices are quilting cotton and cotton canvas. You can get either of these types of fabric in many different colors and prints, which gives you endless style options for your tote bag!
Cotton canvas tends to be a bit heavier than quilting cotton, so is a better choice for a bag that will get a lot of heavy use. Another great option is to use canvas as the outer fabric and quilting cotton for the lining.
You will also need to use interfacing for your tote bag. Any medium-weight fusible interfacing will work great for this project.

Why Shop Through My Links?
When you shop through my affiliate links, it doesn't cost you anything extra, but it helps me out in a big way! I earn a small commission from those purchases, and that support allows me to continue creating and sharing free tutorials and patterns for you. Thank you so much for helping me keep this creative community going!
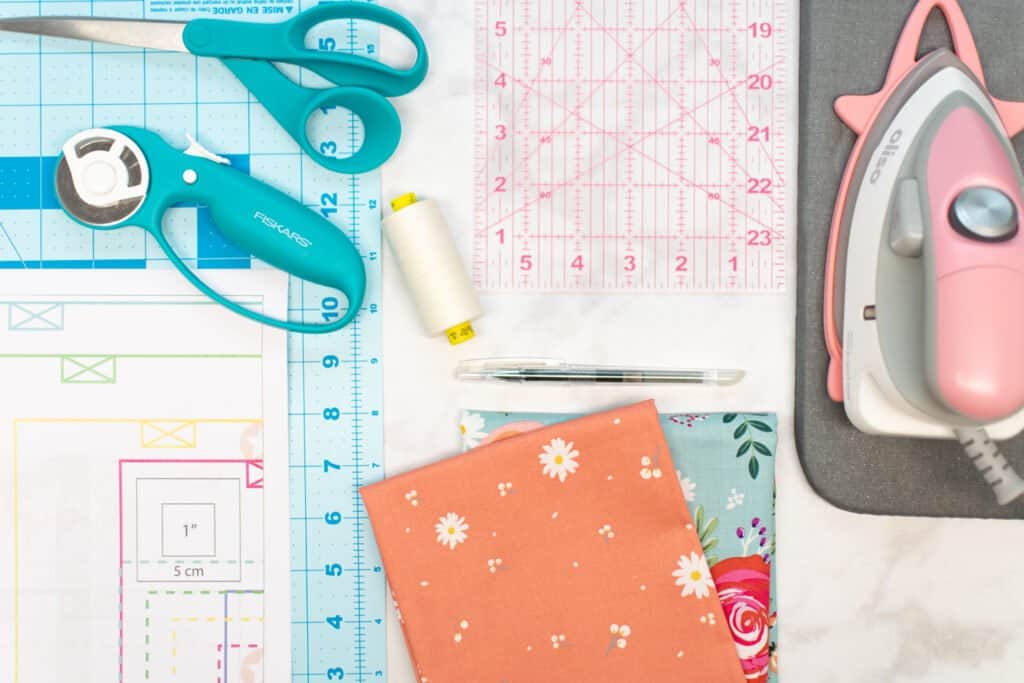
Supplies for Sewing a Tote Bag
Here are the supplies you'll need to sew your own adorable tote bag!
- .3 Yards - 1.3 Yards Mid-Weight Woven Fabric (Outer)
- .3 Yards - 1.3 Yards Mid-Weight Woven Fabric (Lining)
- .3 Yards - 1.3 Yards Medium Weight Interfacing
- The amount of fabric needed will depend on the size of the tote bag you are making.
- One Yard of 1" Wide Cotton Webbing for Straps (Optional)
- Scissors
- Rotary Cutter
- Rotary Cutting Mat
- Thread
- Pins or Clips
- Iron & Ironing Board
- Fabric Pen or Chalk
- Printer
- Printing Paper
- Tape
- Sewing Machine
- Acrylic Ruler
Shop my favorite sewing supplies HERE on Amazon!
Click Here to Download the Free Tote Bag Sewing Pattern
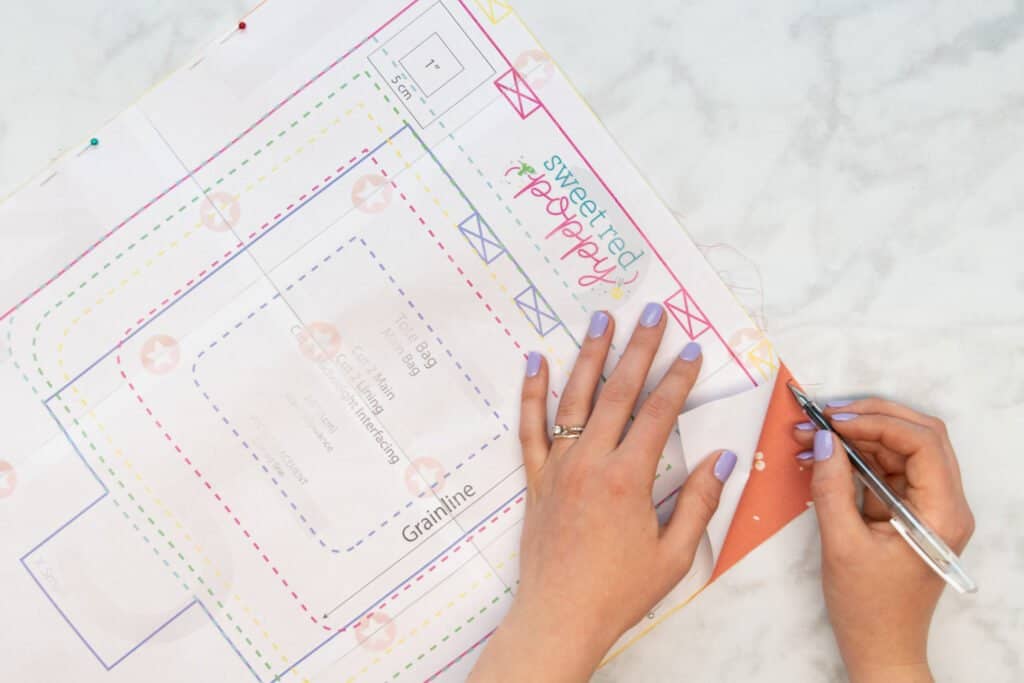
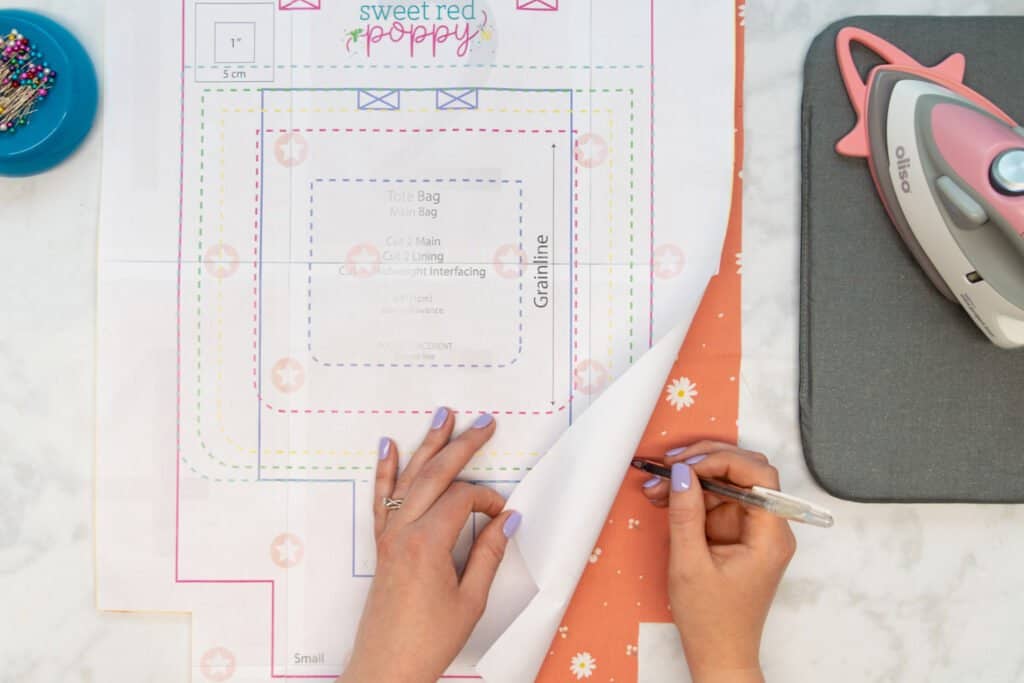
Step 1: Print and Assemble the Pattern
First, download the PDF pattern to your computer.
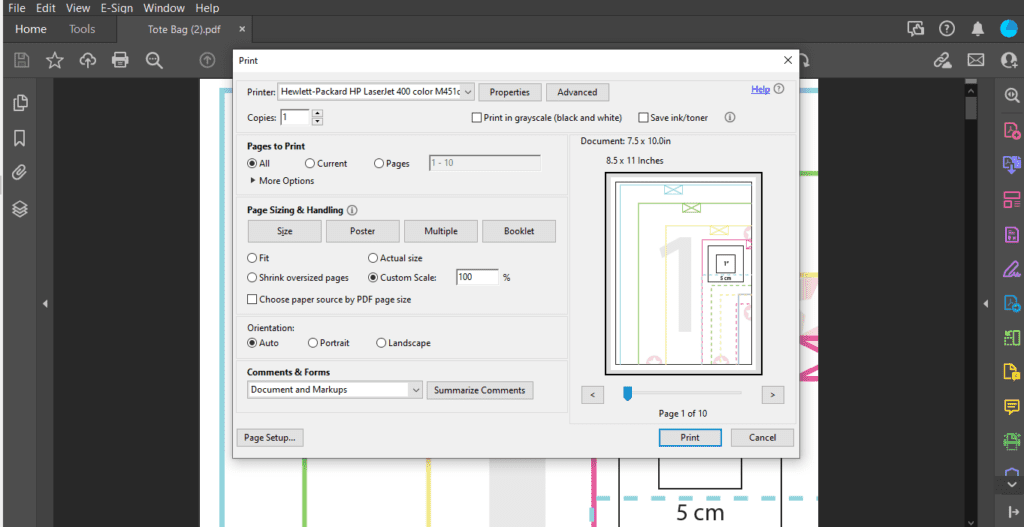
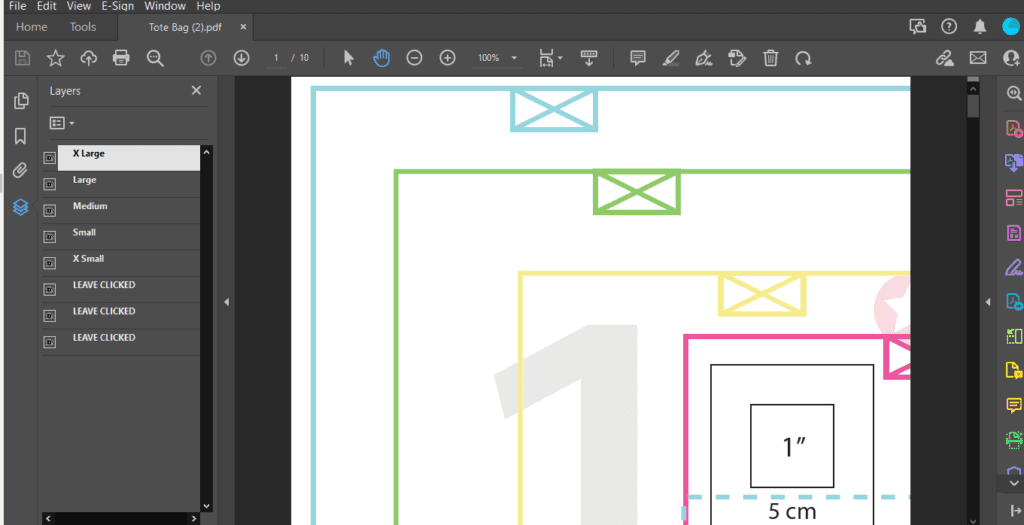
Open the pattern in Adobe Acrobat. This is important because if you open and print from the browser, the scaling can often be incorrect and the sizing of your tote will be off!
Next, click on "Print" - a print settings box will then pop up. In the print settings, change the scaling to "Actual Size" or "Custom Scaling: 100%".
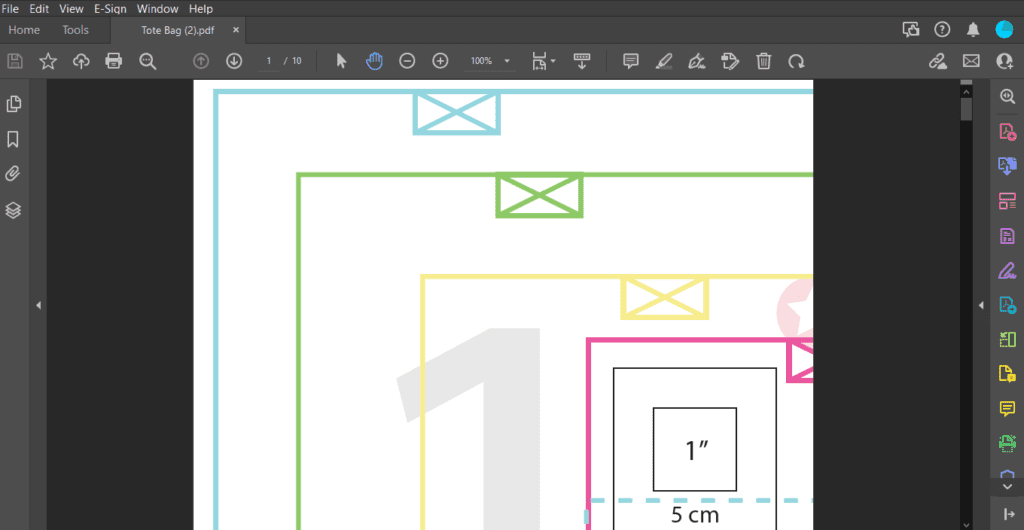
Print the first page of the pattern, which includes a 1" x 1" test square. Measure the test square. If it measures 1" x 1", go ahead and print the rest of the pattern. If it does not measure 1" x 1", you will need to check the scaling and reprint.
This tote bag pattern also includes layers for the different sizes to make printing easier. This means that if you only want to use one size - you can print only that size!
To use the layers option, click on the icon that looks like 3 stacked papers on the left-hand side of your screen. Then, deselect the "eye" icon next to the sizes you don't want to print.
Once you've printed the pattern, assemble and tape together the pages by aligning the pink stars and the lines of the pattern. The large, light-colored numbers in the center of each page are there to help you keep the pages in the right order.
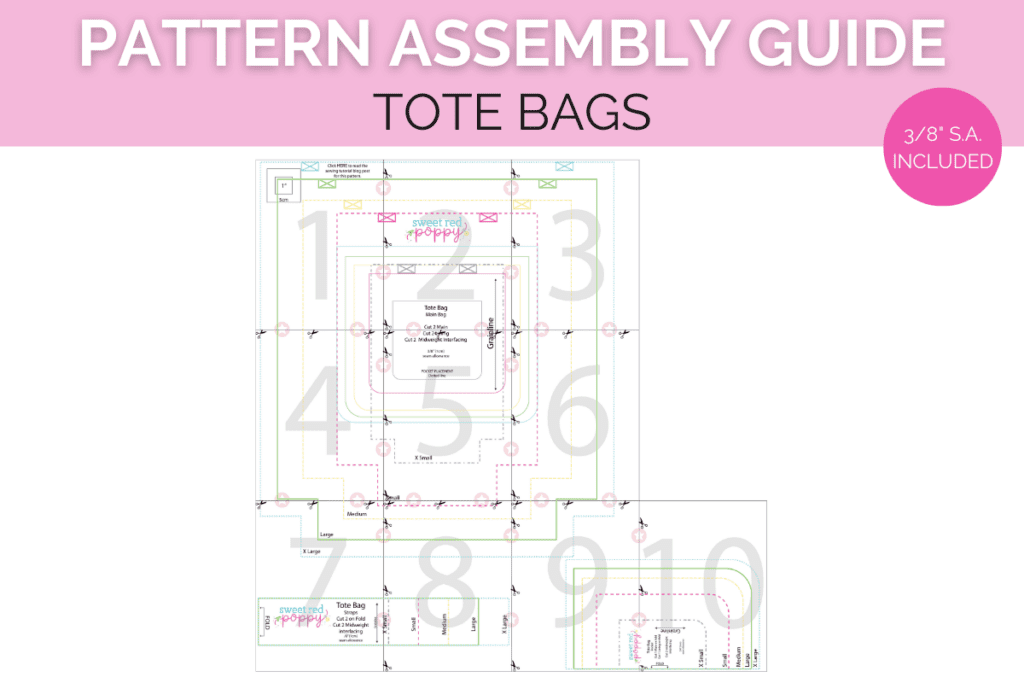
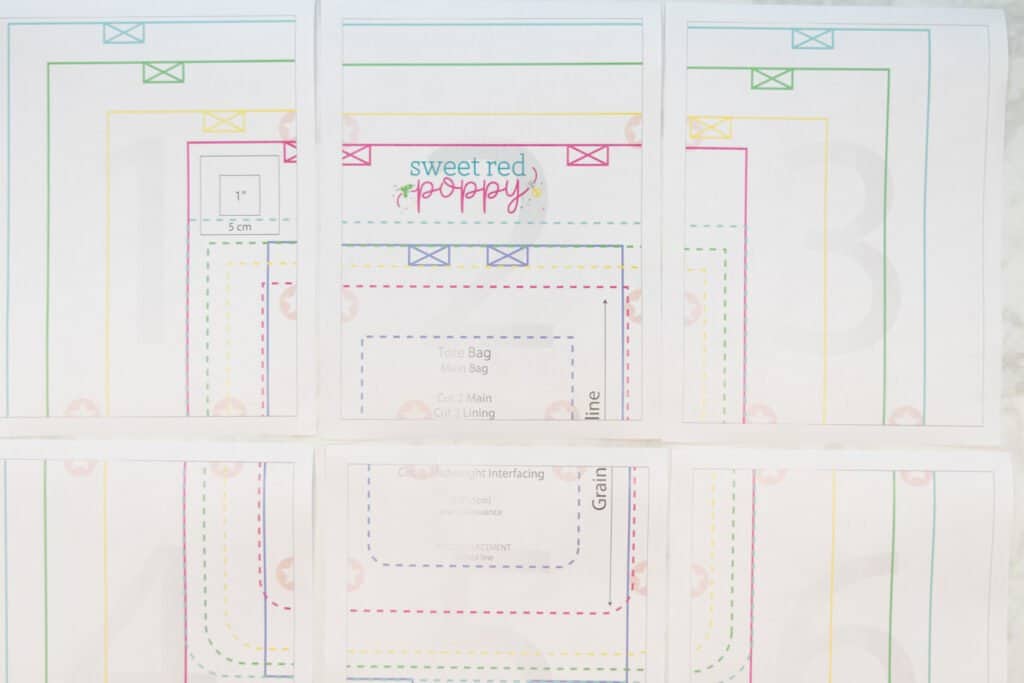
You can trim away the excess paper on the edges of the pages before aligning them, or simply overlap them. If you choose to overlap, it may help to hold the pages you are taping up to the light so you can see through the paper and make sure your lines and stars are properly lined up.
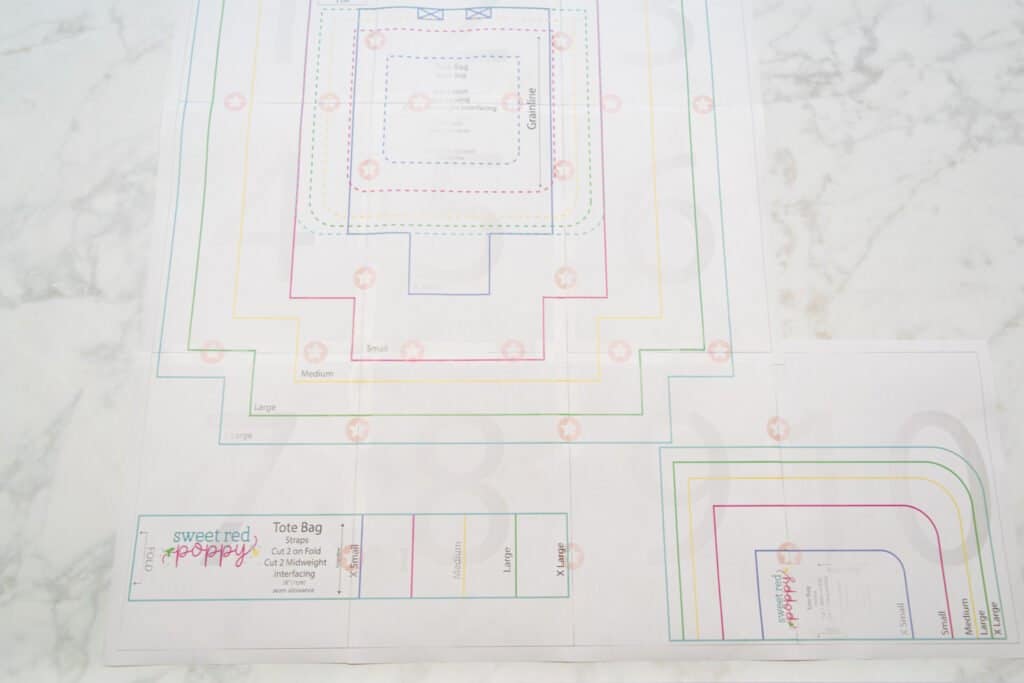
With the pattern assembled and taped, cut out the pattern pieces, following the lines corresponding to your preferred tote size.
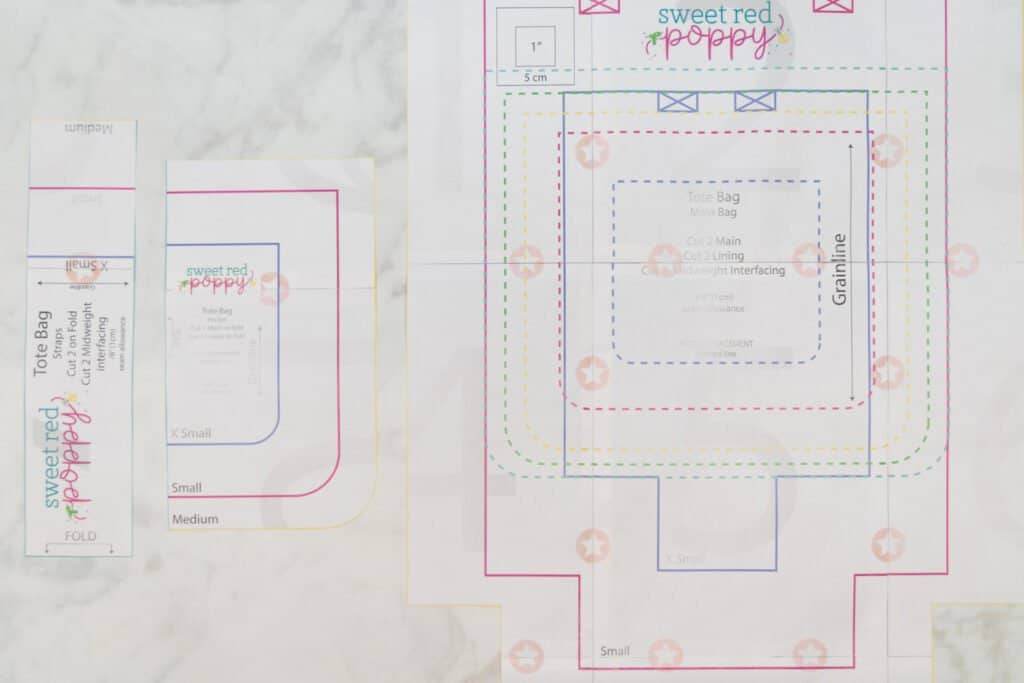
You should now have 3 pattern pieces: the strap, pocket, and main body of the bag.
If you plan on using cotton webbing, you can skip cutting out the steps. Instead cut the cotton webbing to the length of the strap pattern piece.
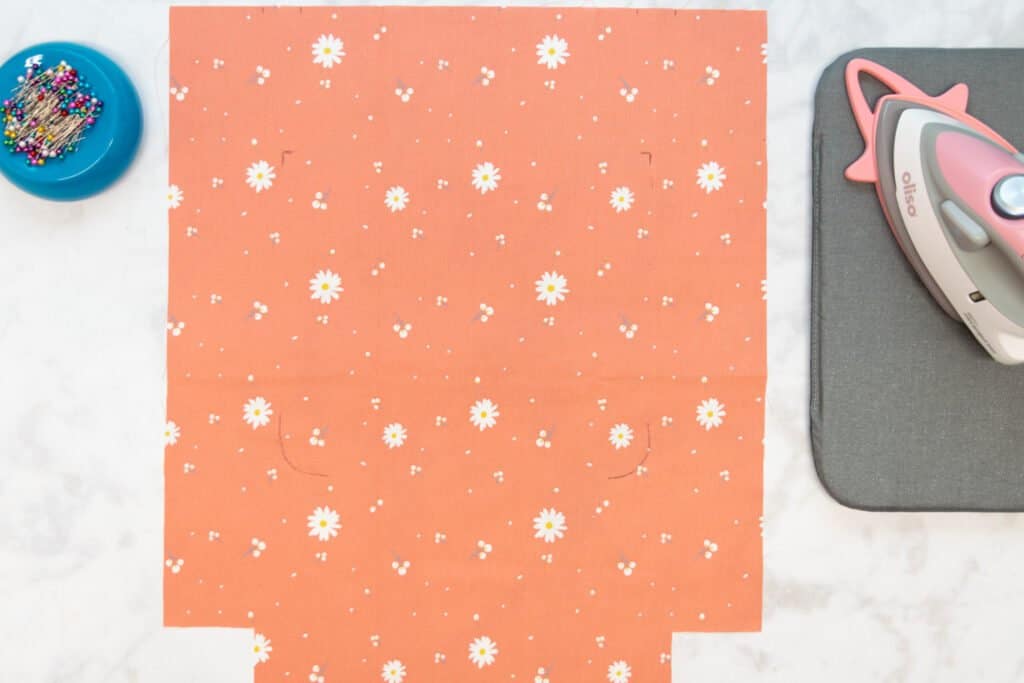
Step 2: Cut Out Your Fabric & Add Markings
Once your pattern is prepared, it's time to cut this tote bag out!
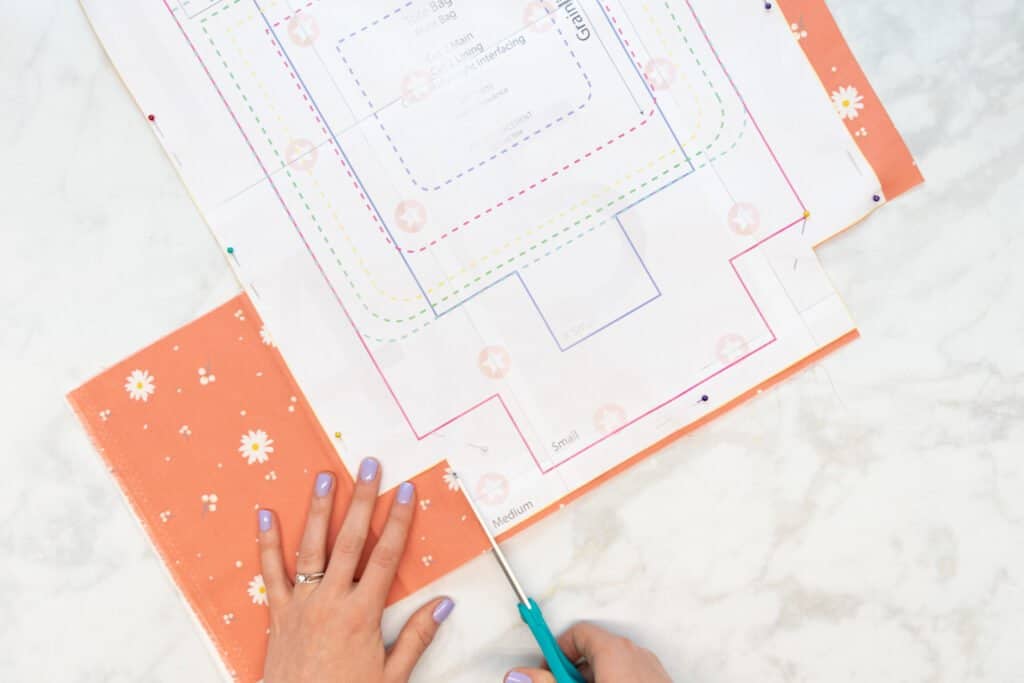
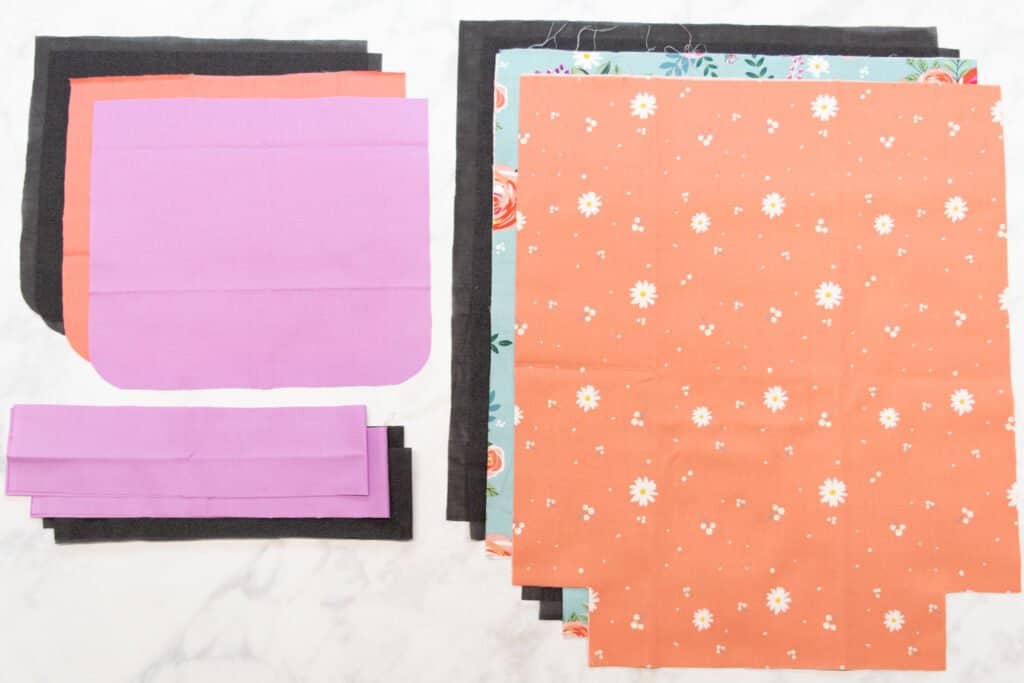
Cut the following number of pieces from your fabric, lining, and interfacing:
Fabric (Outer)
- Main: Cut 2
- Straps: Cut 2 on Fold
- Pocket: Cut 1 on Fold
Fabric (Lining)
- Main: Cut 2
- Pocket: Cut 1 on Fold
Interfacing
- Main: Cut 2
- Straps: Cut 2 on Fold
- Pocket: Cut 2 on Fold
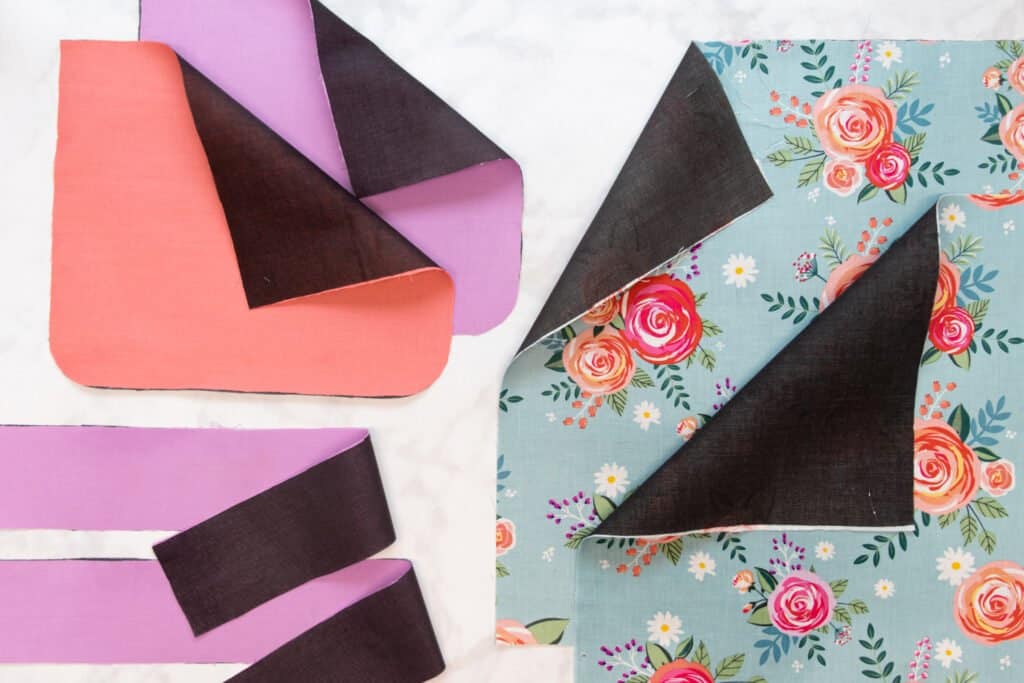
*Note: You can use a different fabric for the straps and/or pocket if you like. Feel free to mix and match colors and prints to your heart's content!
Once you have your pieces cut out, use a fabric pen to transfer the strap attachment markings from the main body pattern piece to the top edge of both lining pieces.
Next, apply your cut interfacing pieces to the wrong side of the outer main body pieces, both strap pieces, and both pocket pieces.
Step 3: Sew the Tote Bag Pockets
The fabric pieces are prepared, so it's time for the sewing! Let's start with the pockets.
Line up the two pocket pieces with right sides together.
Then, pin the pocket pieces together around all 4 sides.
Stitch the two pocket pieces together with a 3/8 inch seam allowance, leaving a 2-inch opening in the top edge of the pocket. Don't forget to backstitch at the beginning and end!
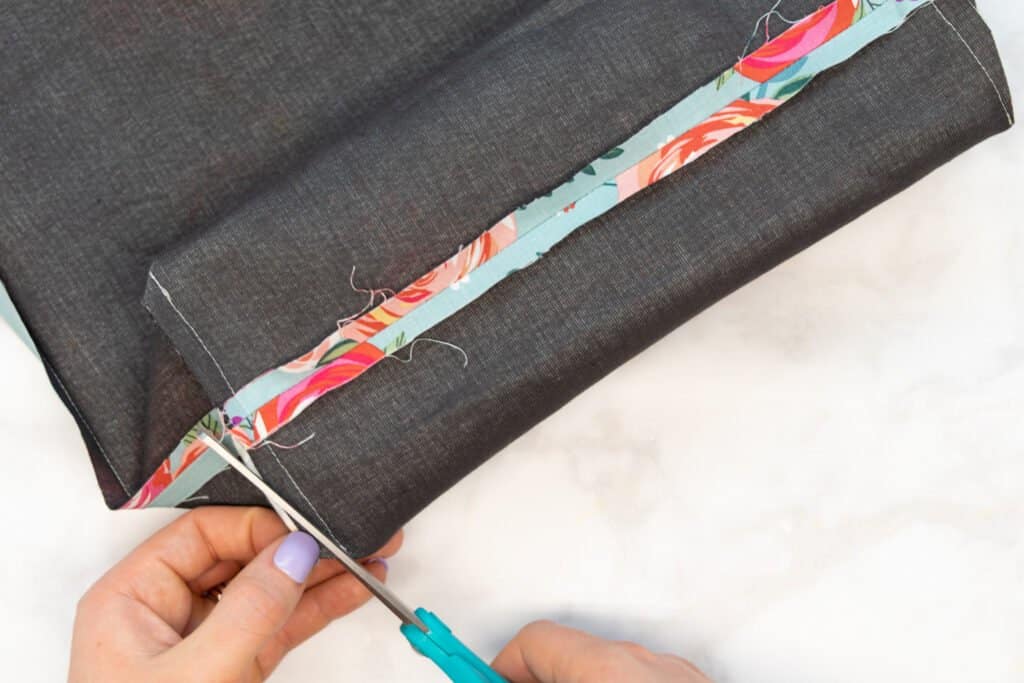
Next, trim the seam allowance down by half.
To help the pocket lay flatter once turned right sides out, clip into the seam allowance around the curved lower corners. Clip close to but not through the stitching.
Clip across the seam allowance at the sharp upper corners of the pocket in order to reduce bulk.
Then, turn the pocket right sides out through the opening in the top.
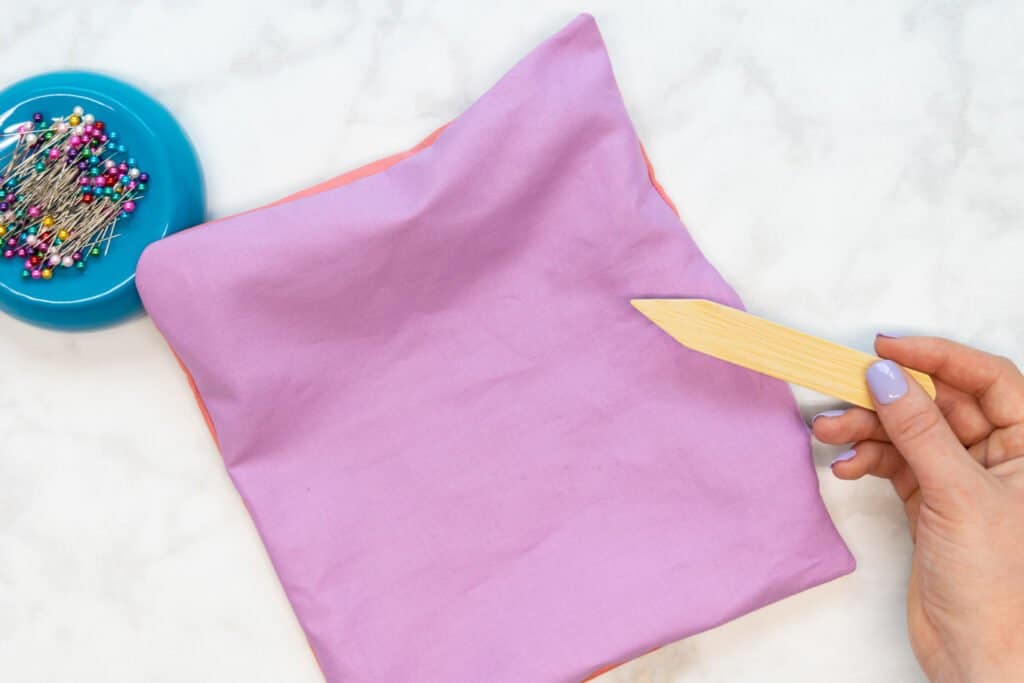
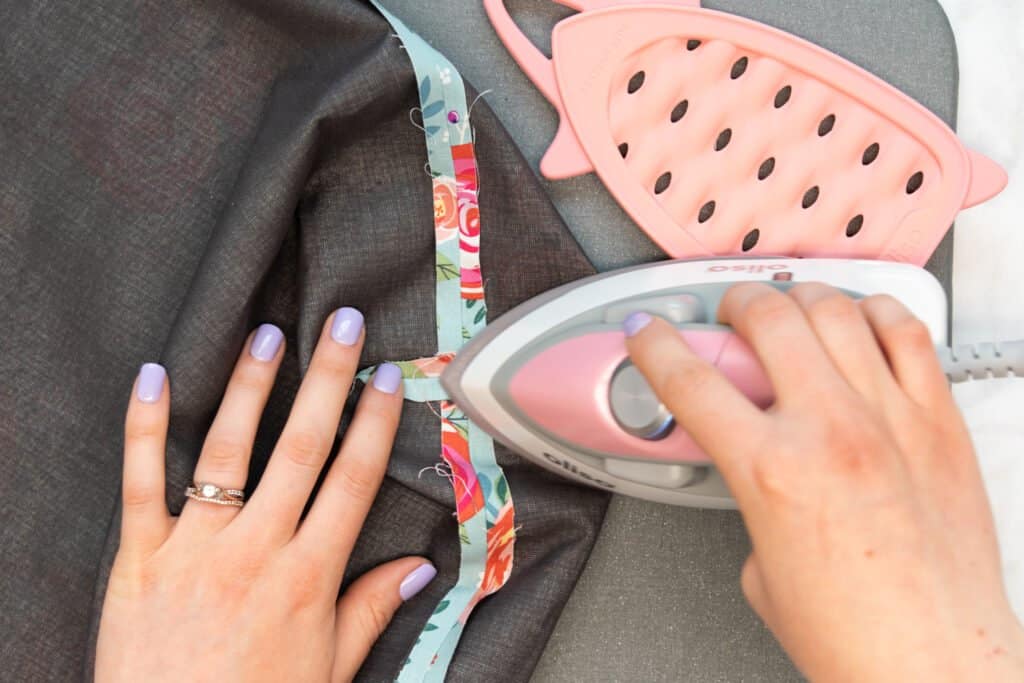
Push out the corners of the pocket with a pencil or a point turner so you can get nice, crisp corners.
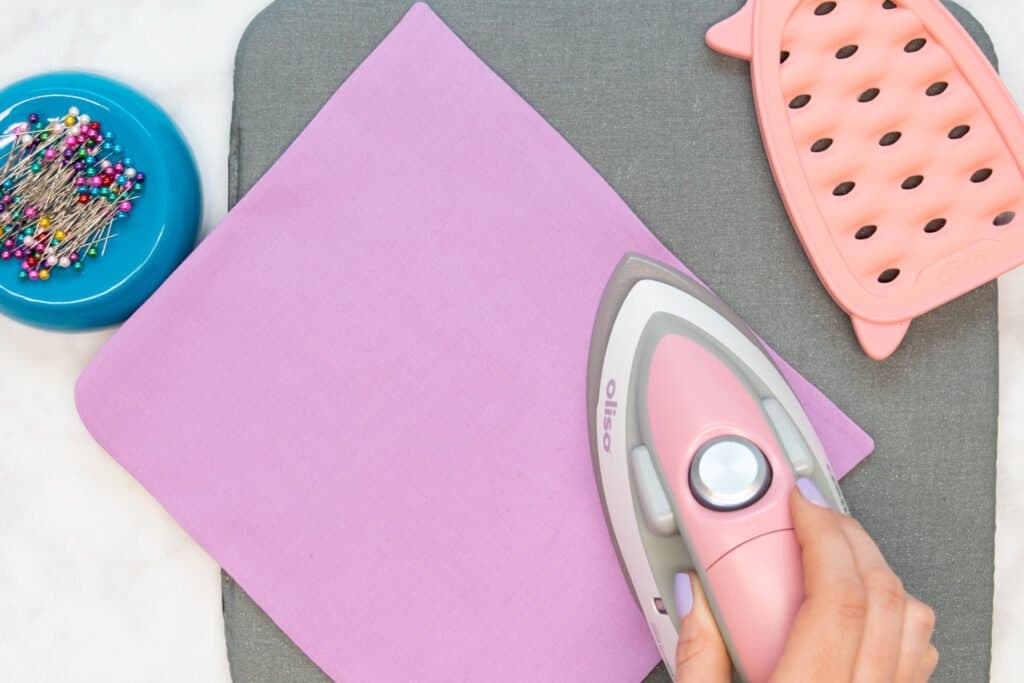
Press the pocket flat with your iron, making sure to press the edges of the opening to the inside of the pocket.
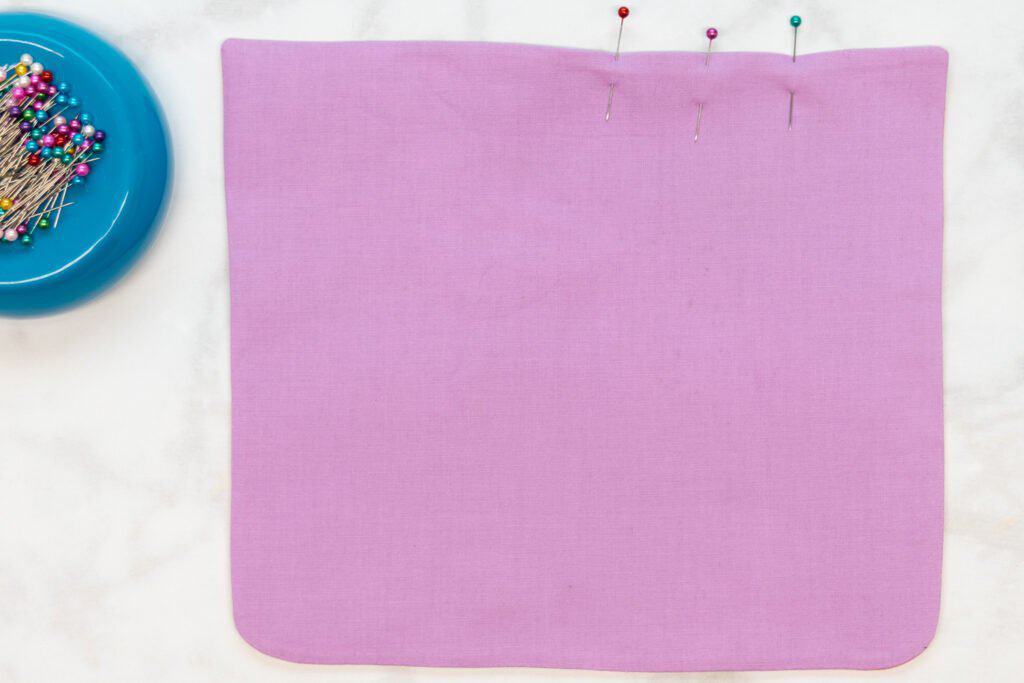
Pin the opening closed, making sure the top edge is straight and even.
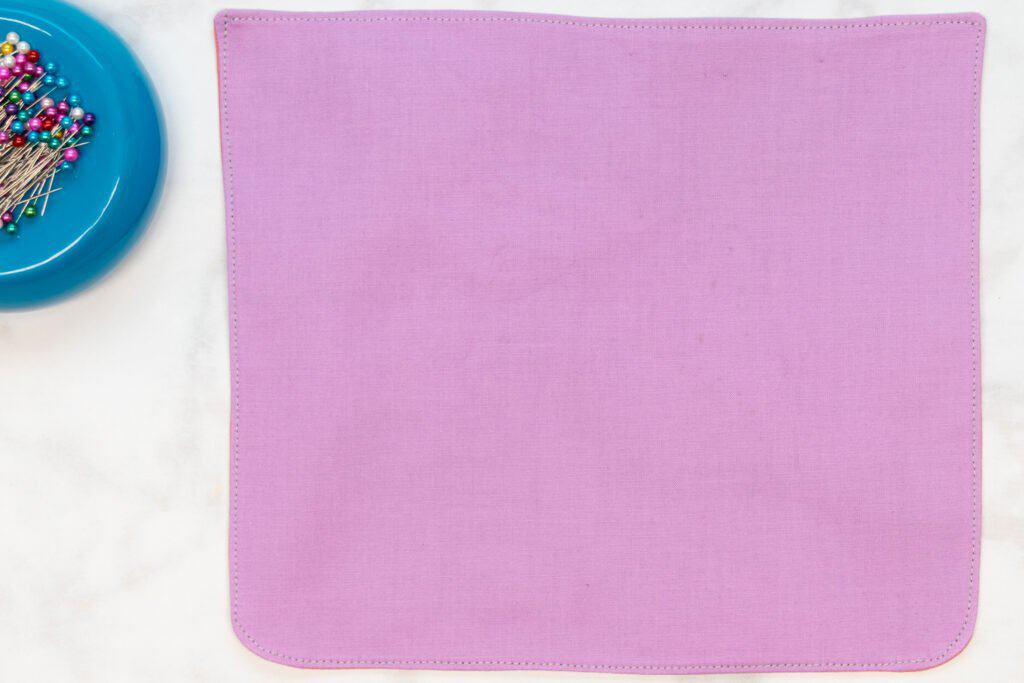
Then, topstitch around all 4 sides of the pocket, stitching 1/8 inch from the finished edge. This stitching will close the opening left in the top of the pocket.
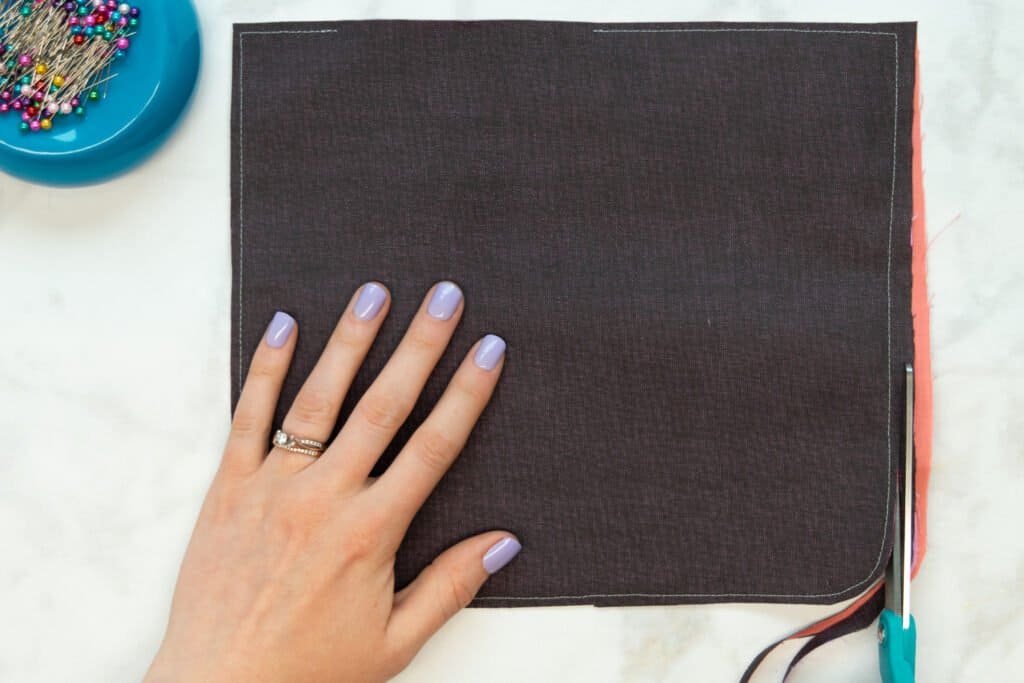
Pick out one of the main body lining pieces - it doesn't matter which one - and place it right sides up on the table. Mark the 4 corners of the pocket placement with a fabric pen, using the main body pattern piece as a guide.
Place the pocket, wrong side down, onto the right side of the lining piece. Align the corners of the pocket with the 4 pocket placement marks, then pin the pocket in place.
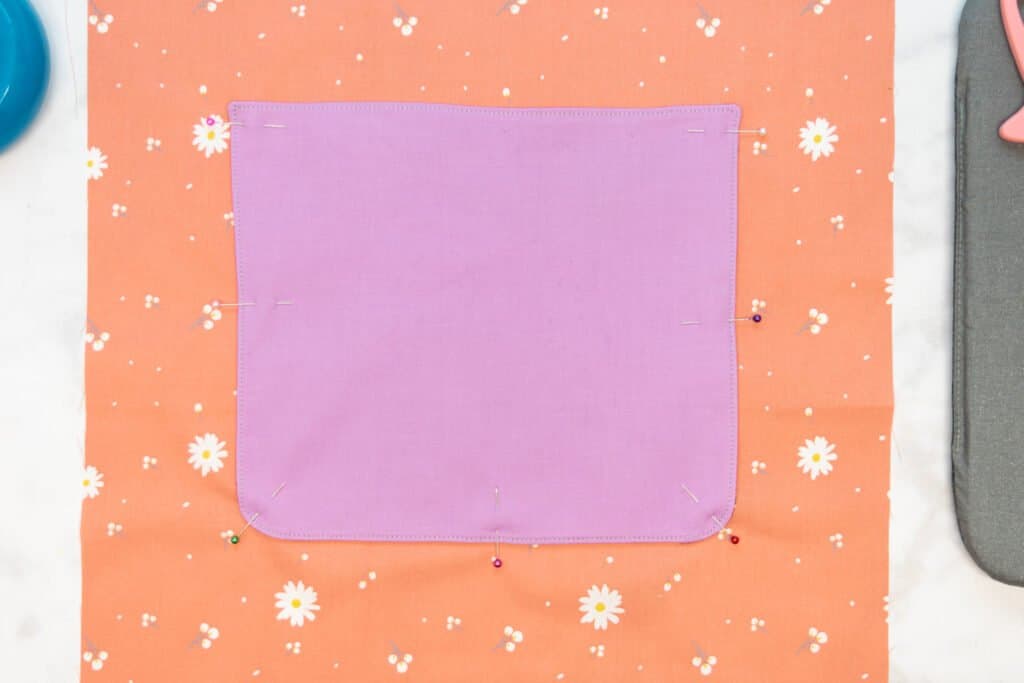
Topstitch around the sides and bottom of the pocket, stitching 1/8 from the edge within the previous topstitching. Make sure to leave the top of the pocket open!
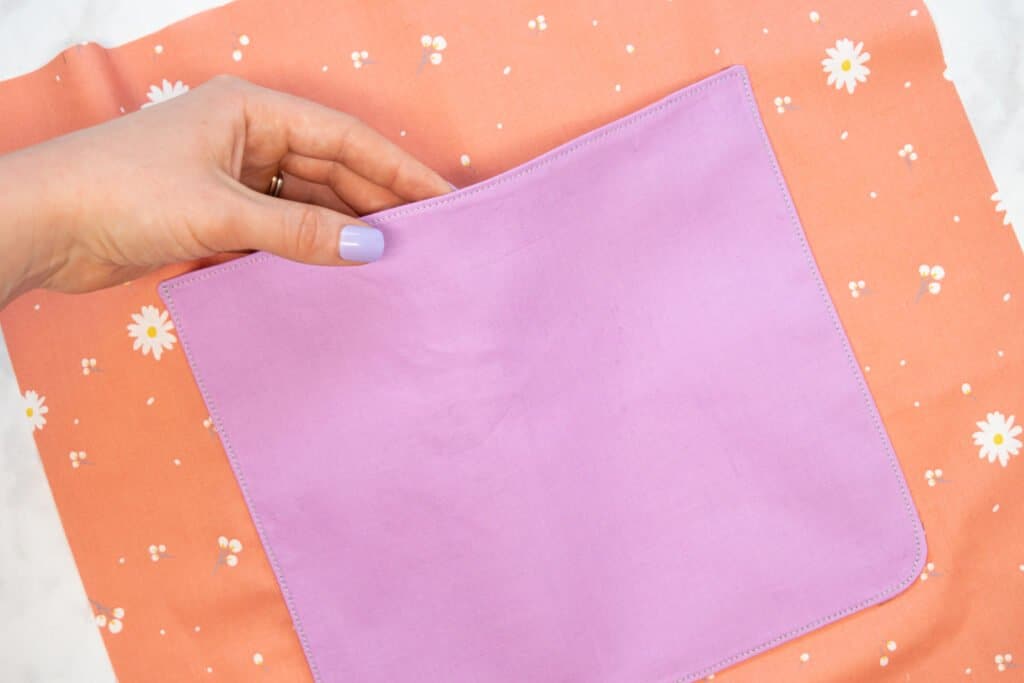
Your pocket is now done!
Step 4: Sew the Tote Bag Straps
Let's move on to sewing the tote bag straps. If you are using webbing instead of making fabric straps, simply cut the webbing to the length of the strap pattern piece and move on to Step 5.
To sew your straps, start by folding the straps in half lengthwise with right sides together.
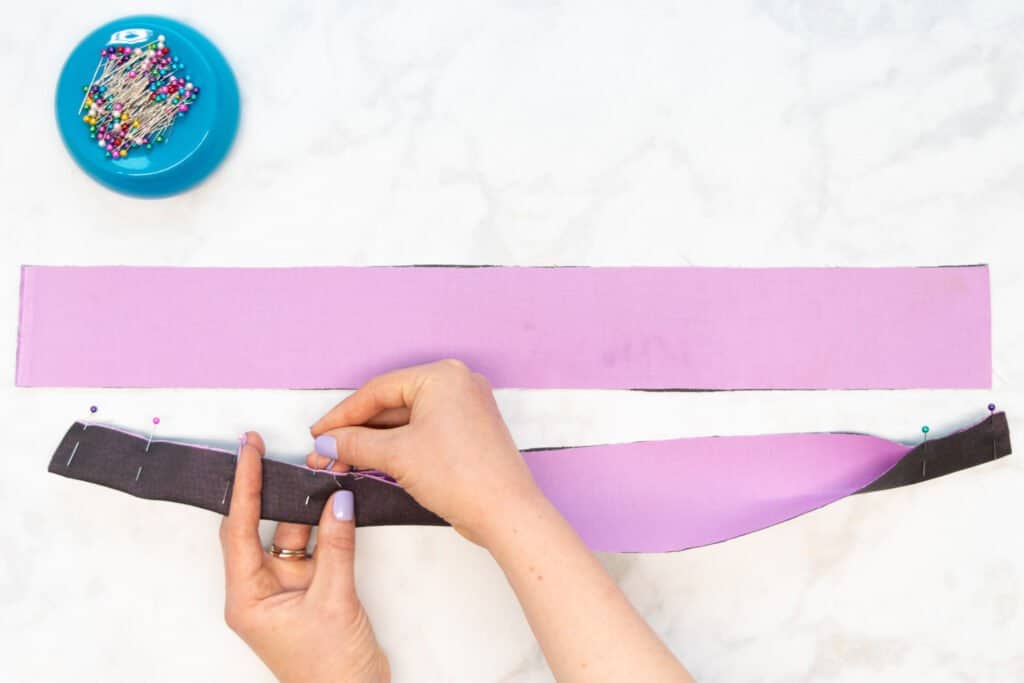
Then, pin them along the long edge.
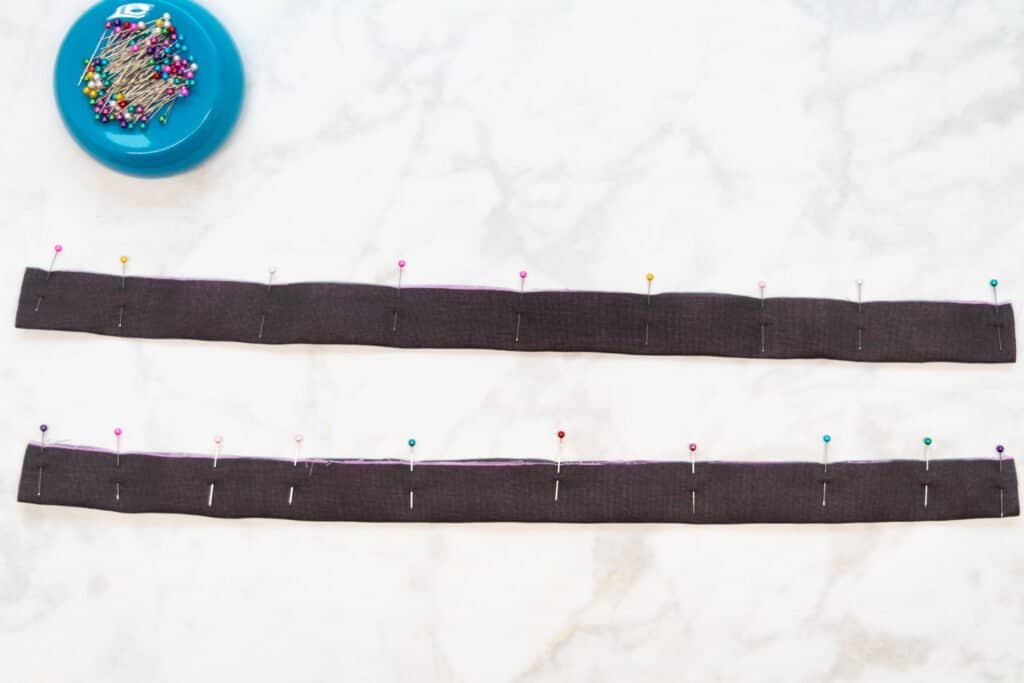
Stitch the long pinned edge of both straps with a 3/8 inch seam allowance.
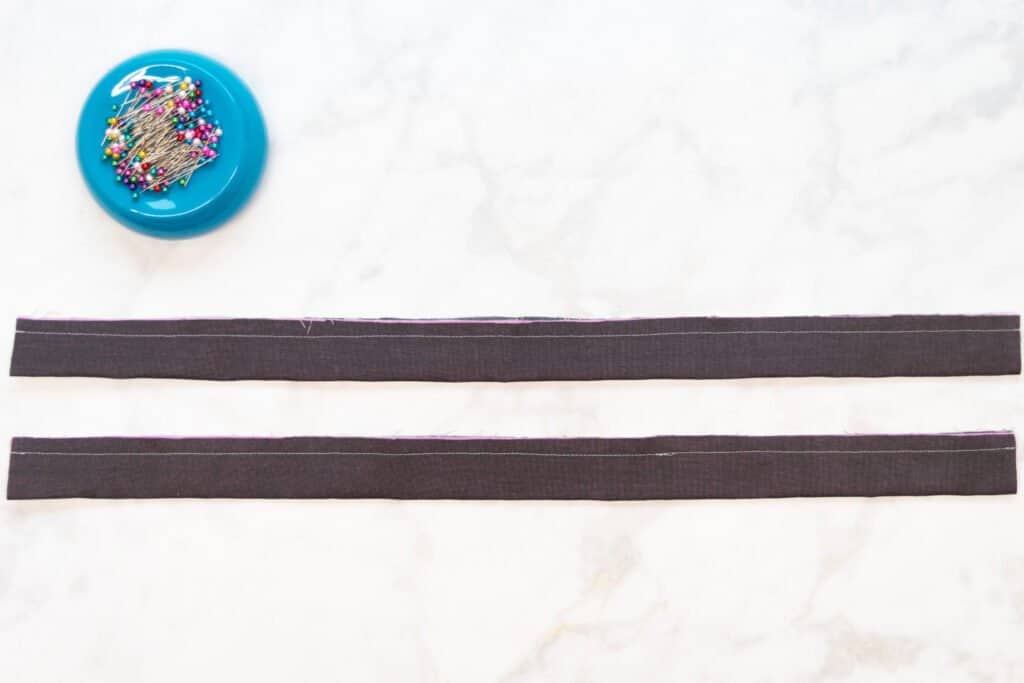
Trim the seam allowance down by half to reduce bulk.
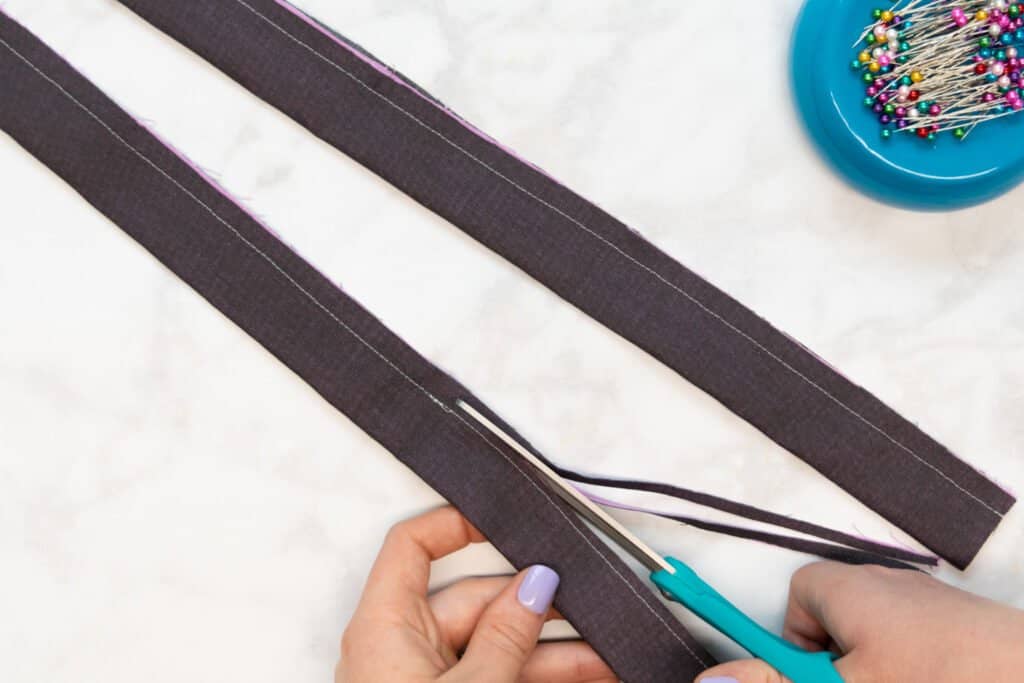
Next, turn the straps right sides out. I like to use my loop turner for this - I simply push the loop turner through one end of the strap, hook the other end, then pull it through the strap.
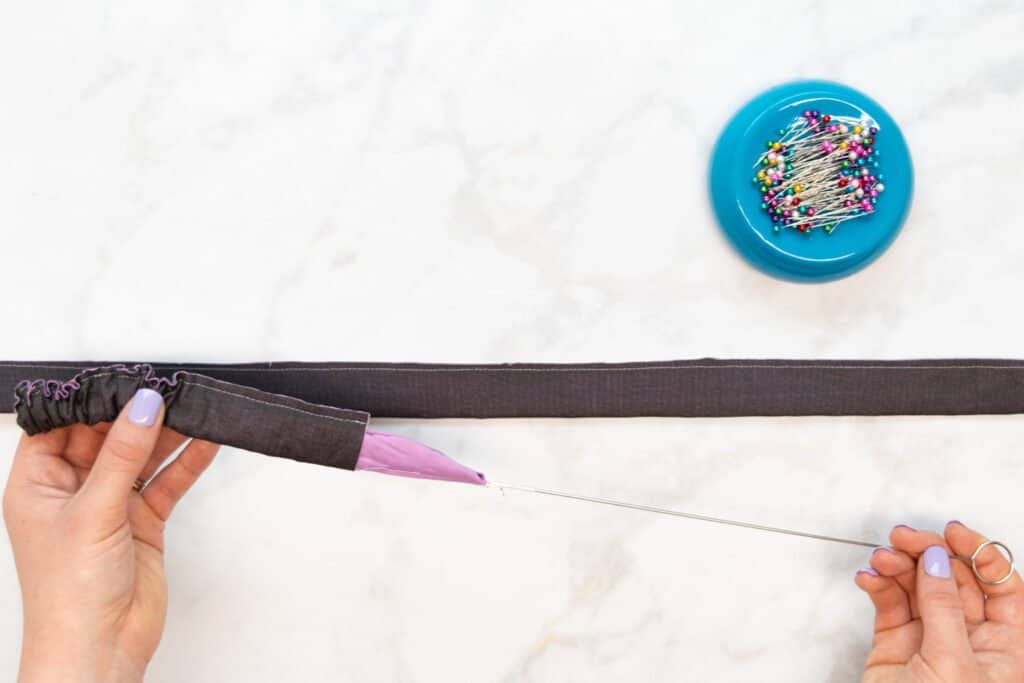
If you don't have a loop turner, you can use a safety pin instead. Hook the safety pin to one end, then push it through the strap to turn it right sides out.
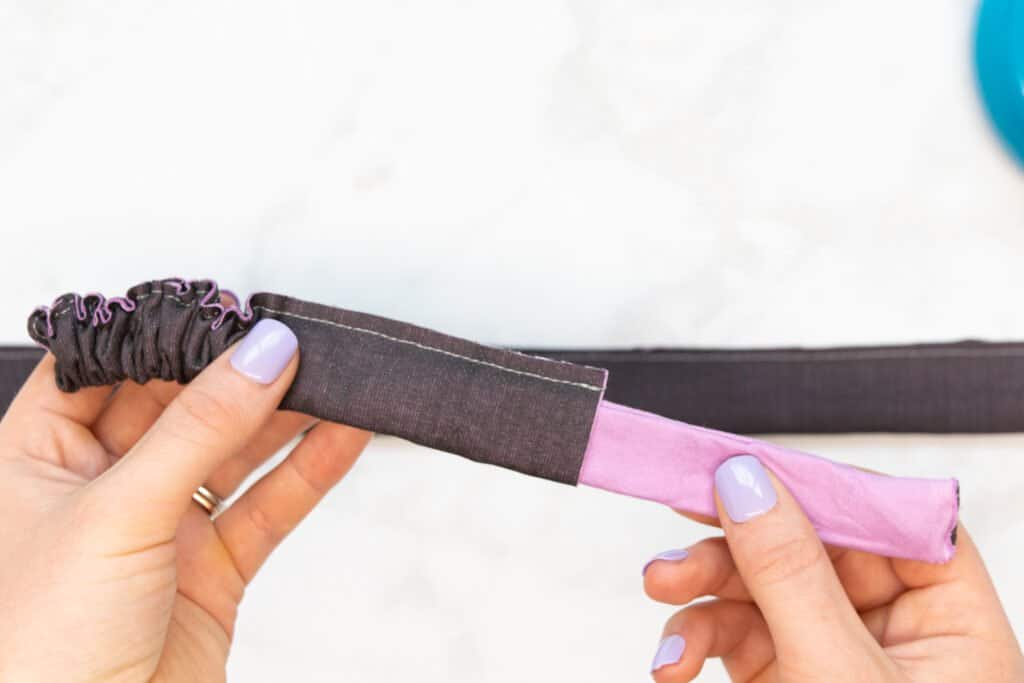
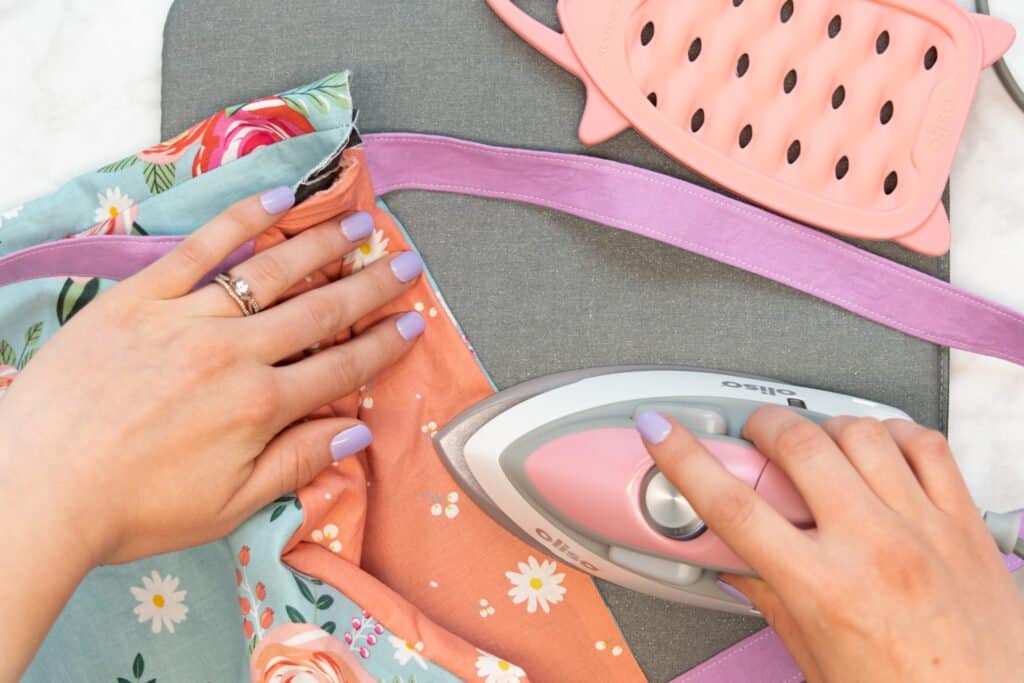
Once your straps are turned, press them flat with your iron. Press the seamed edge to either the top or bottom.
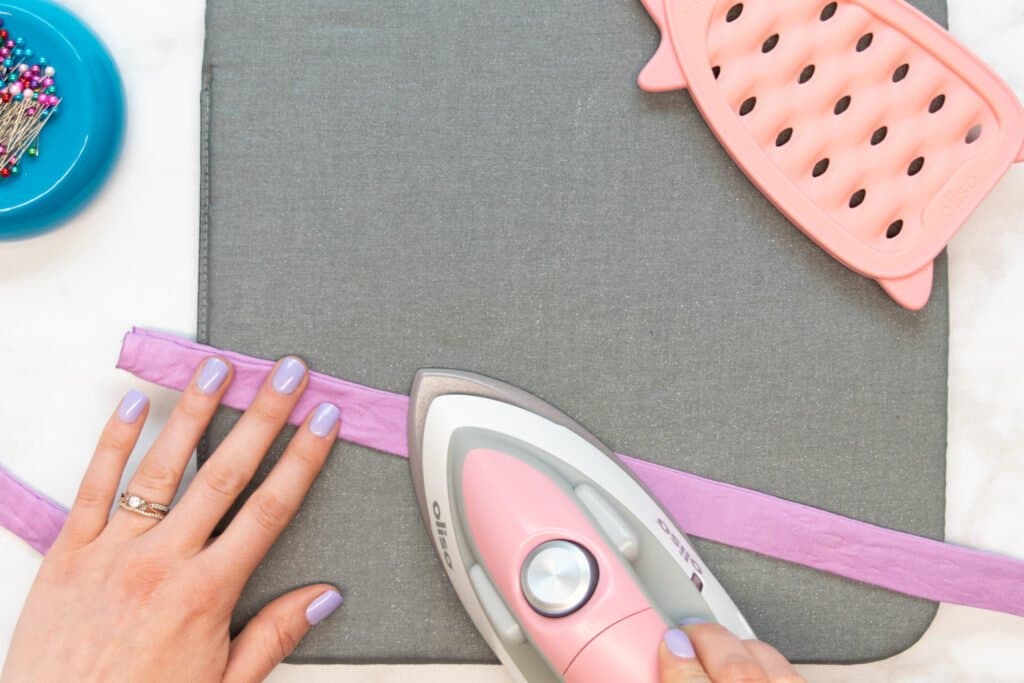
Finally, topstitch along both long sides of the straps, sewing 1/8 inch from the edges.
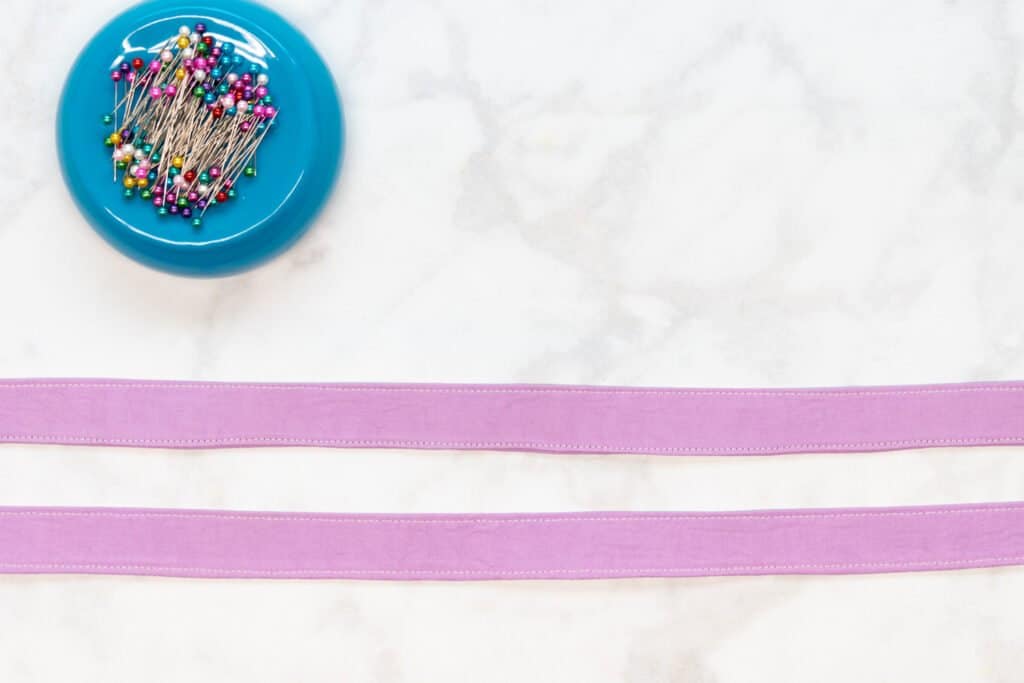
Set the straps aside for now.
Step 5: Sew the Main Body of the Tote Bag
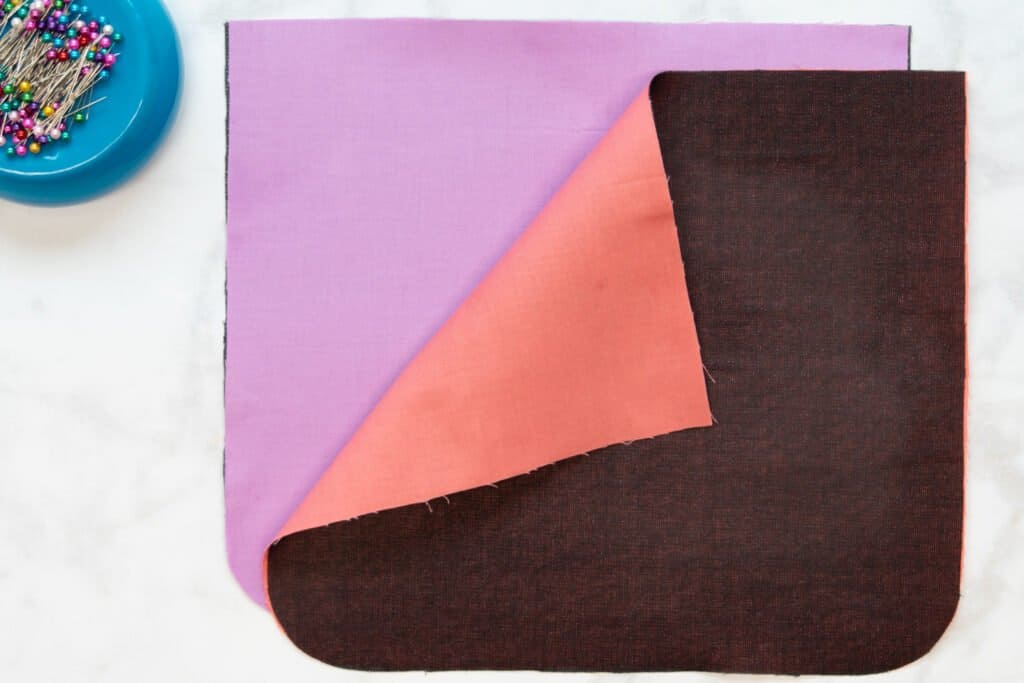
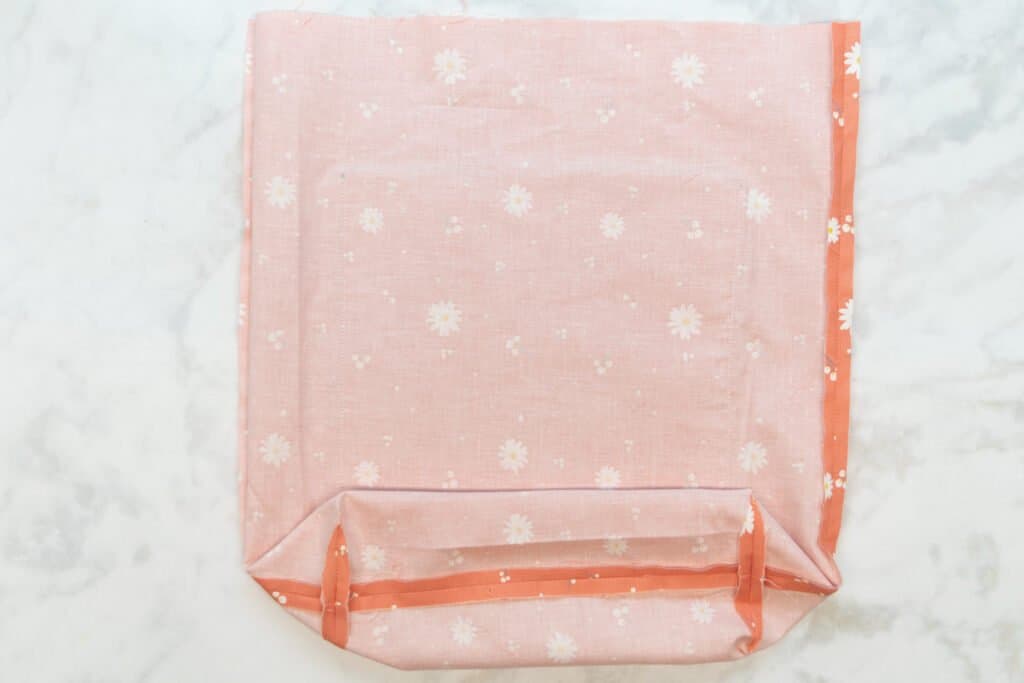
To sew the main body of the tote bag, align the two outer main pieces with right sides together.
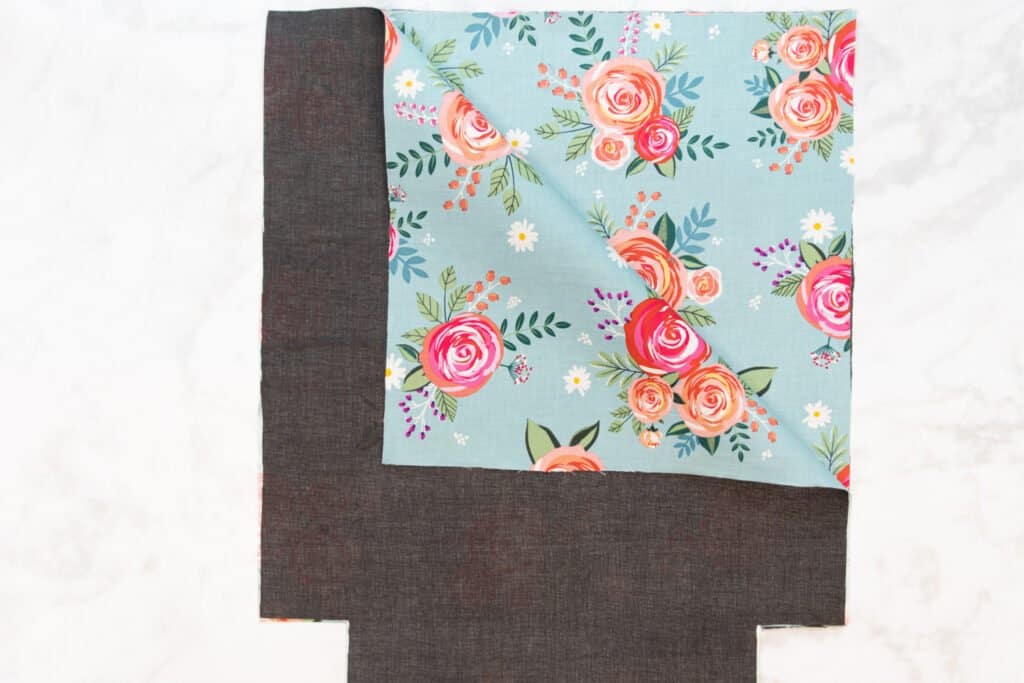
Pin them along the straight edges at the sides and bottom. Don't worry about the cut-out corners for now.

Stitch the outer tote bag pieces together along the pinned sides and bottom with a 3/8 inch seam allowance.
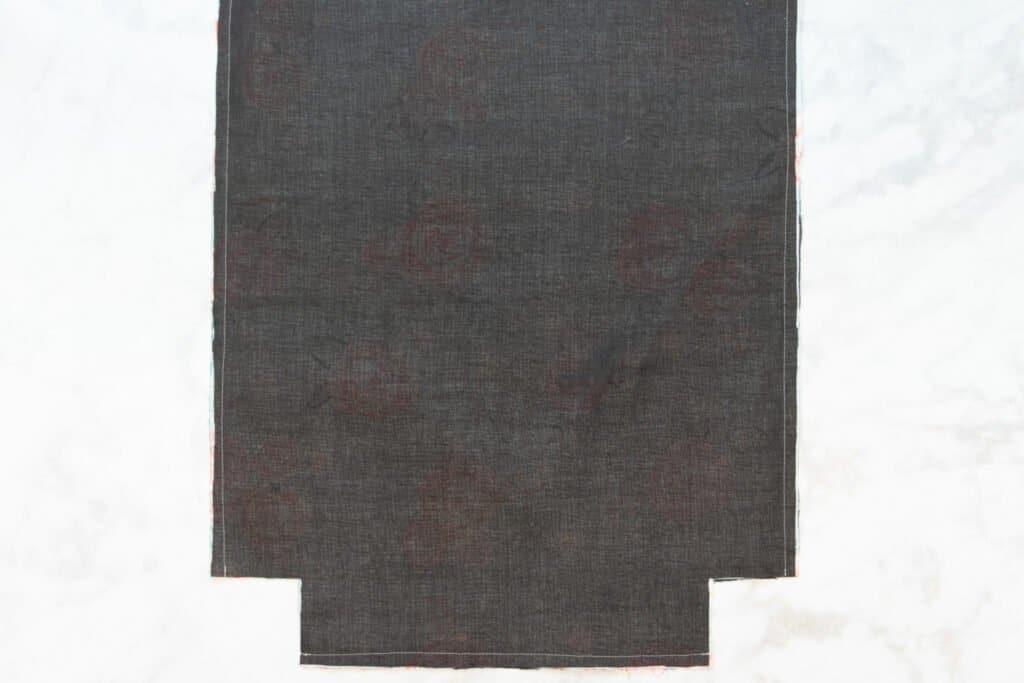
Then, press the seam allowances open.
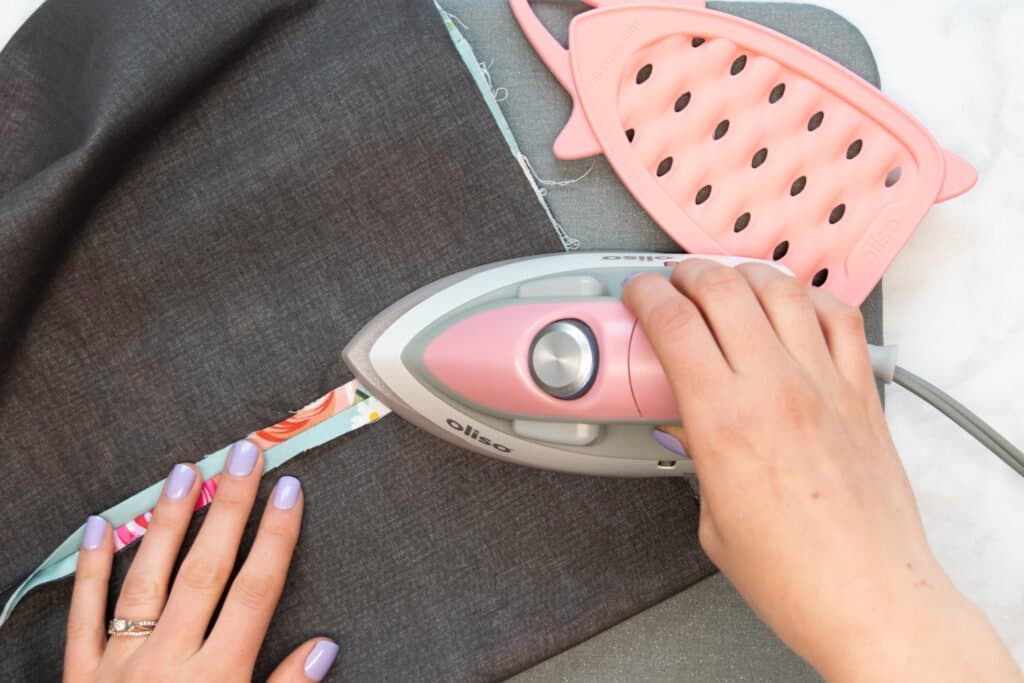
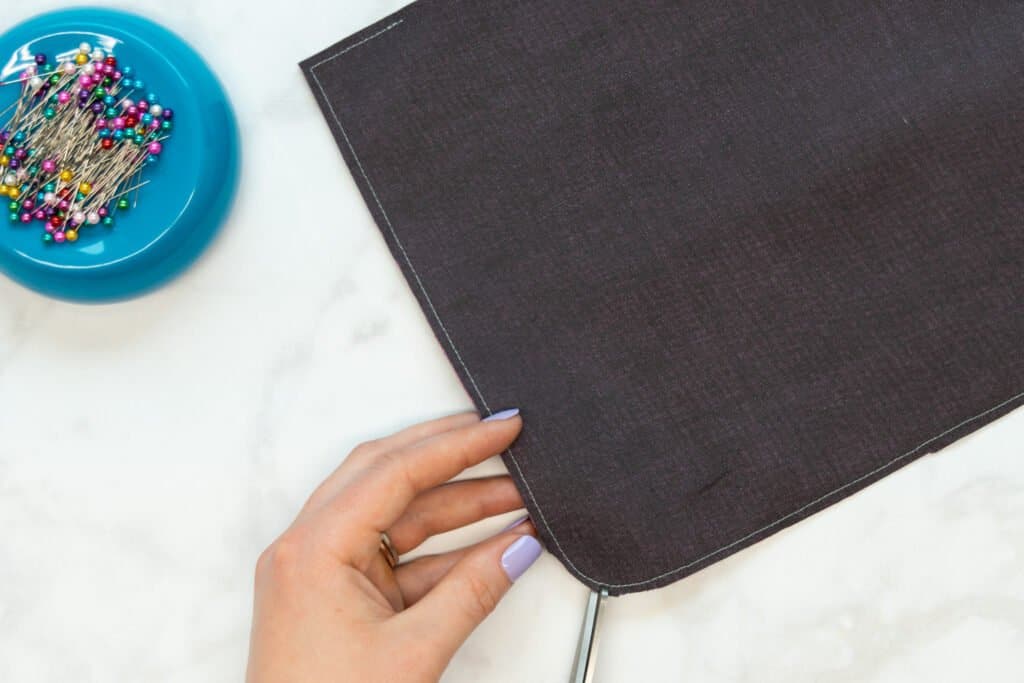
Next, grab the fabric at one of the open, lower corners of the tote bag. Align the seams at the center of the corner.

Pin across the raw edges of the corner. Double check that the seams are lined up exactly - this will help you get professional results!
Then repeat this process with the other corner.

Stitch across each corner with a 3/8 inch seam allowance.
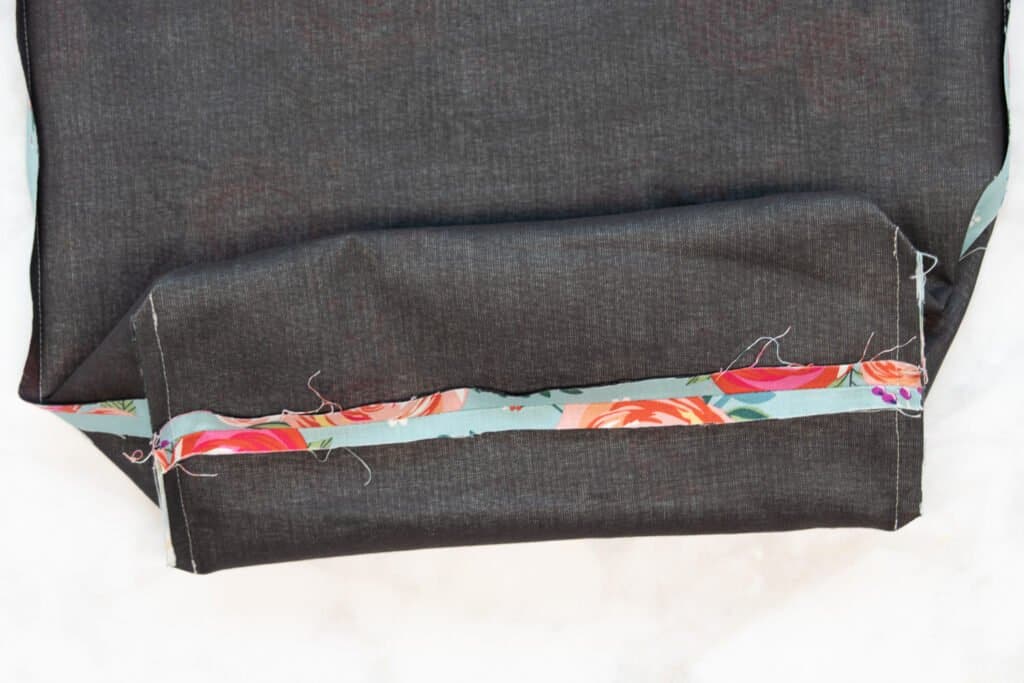
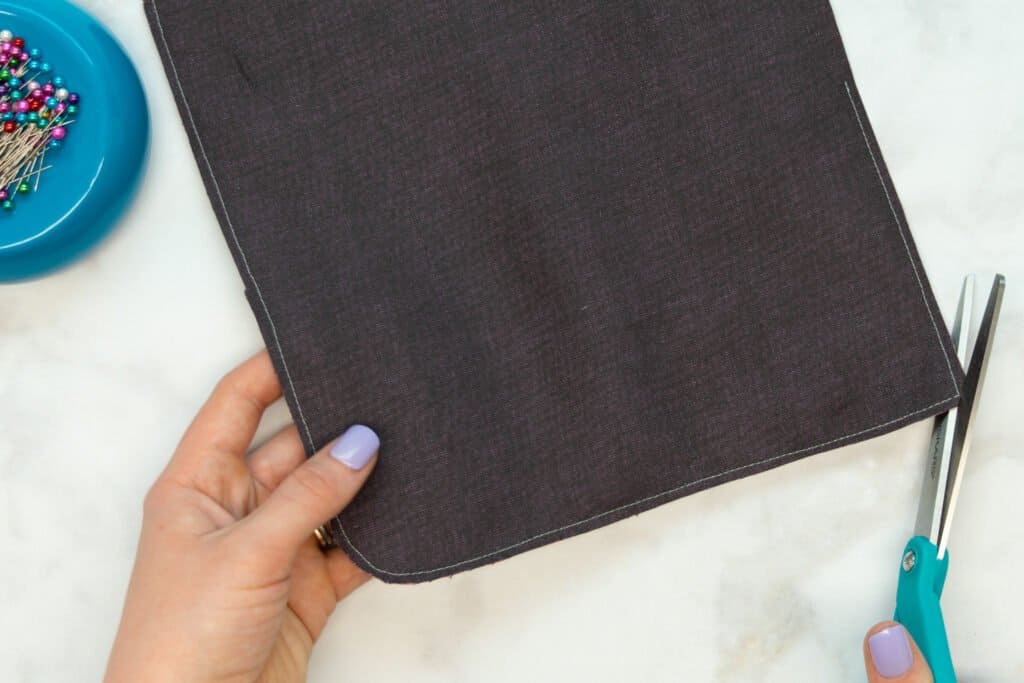
Trim the seam allowance away from either end of each corner in order to reduce bulk. Be especially careful not to accidentally cut into your stitching!
Press the seam allowances open.
Finally, repeat this process to sew the two main lining pieces together.
Step 6: Line and Finish the Tote Bag
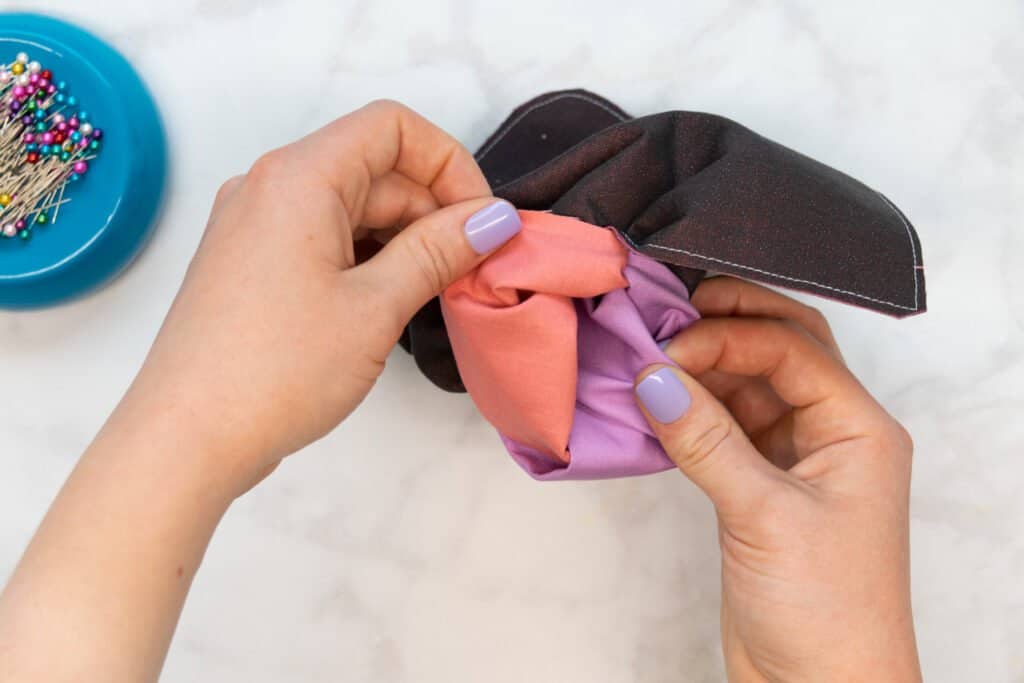
You've now got what looks like two strapless bags! It's time to put everything together to finish off the tote!
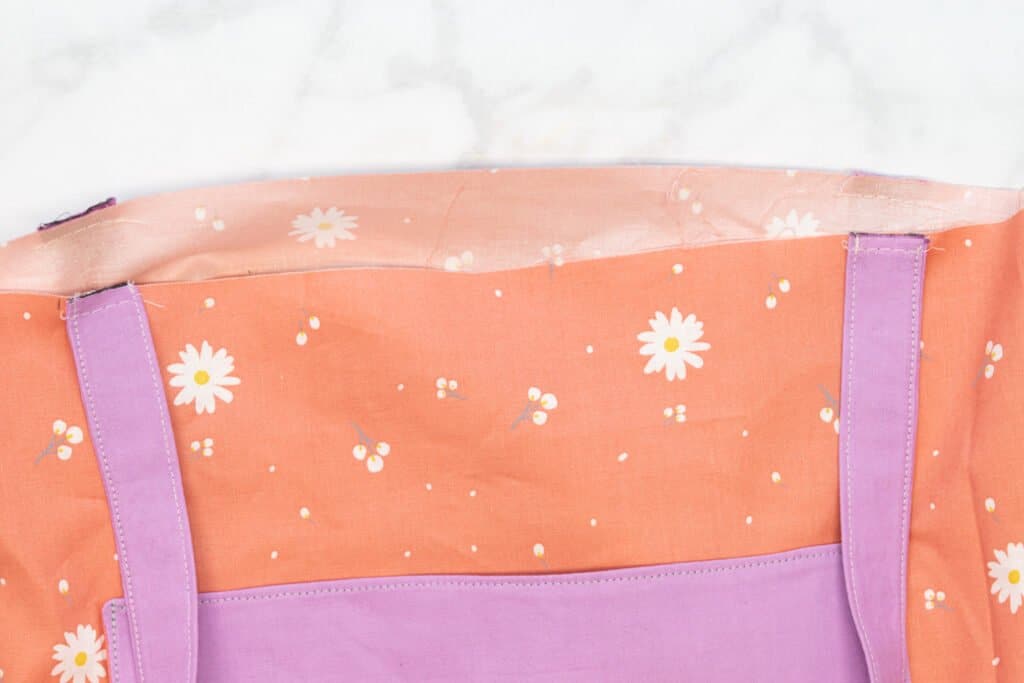
Pin one strap to each side of the lining bag, aligning the ends of the straps with the markings along the top edge. The raw edge of the strap ends should line up with the raw edge of the top of the bag. Before sewing them on, make sure there are no twists in your straps - you don't want to have to seam rip and redo them!
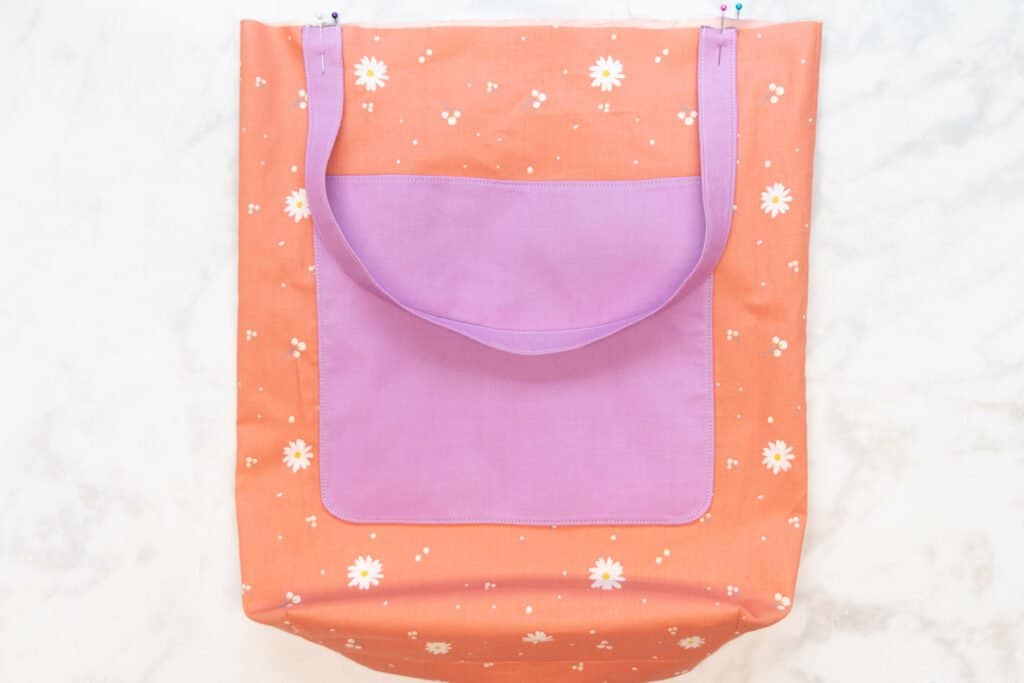
Once you're happy with the strap placement, use a long basting stitch to secure them to the lining, sewing 1/4 inch down from the edge.
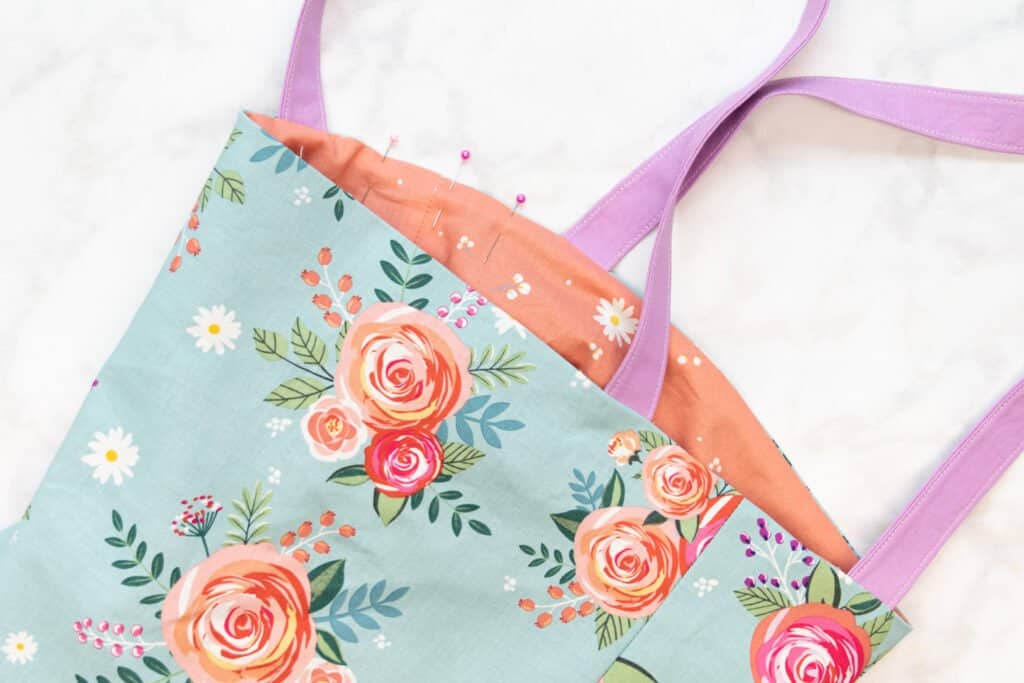
Then, make sure that the outer fabric bag is inside out and the lining bag is right sides out.
Insert the lining bag into the outer fabric bag so that they are right sides together.
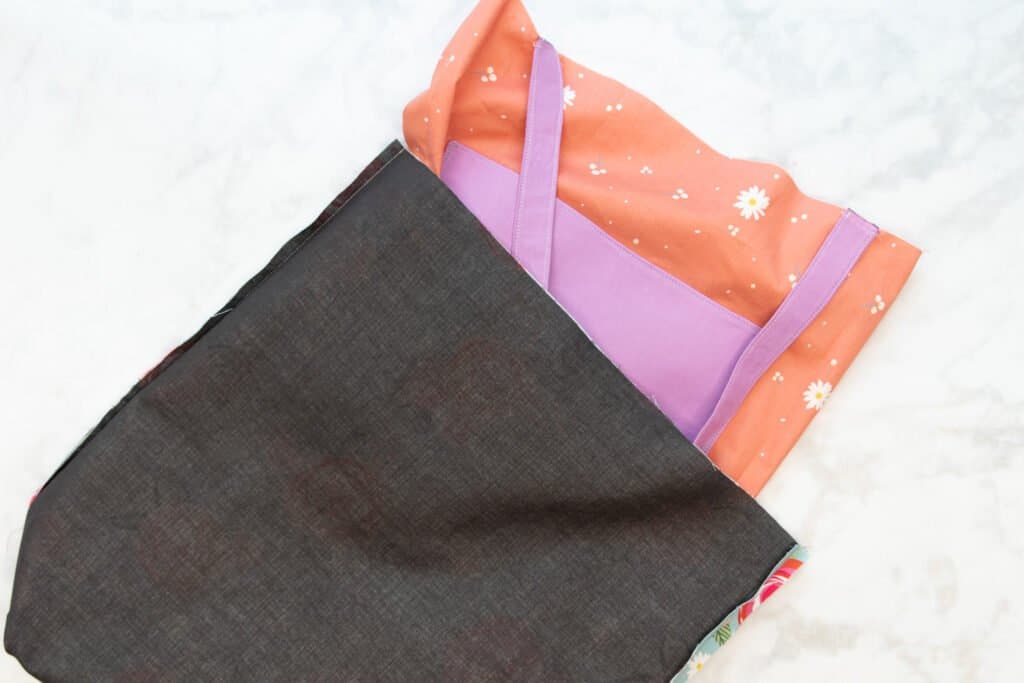
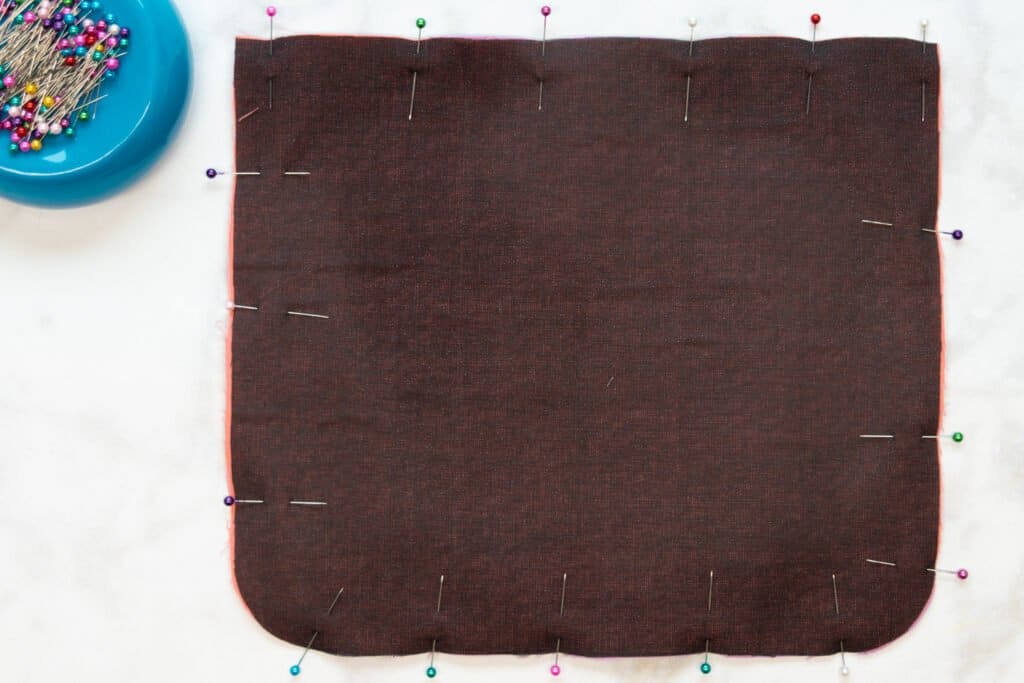
Line up and pin the top raw edges, carefully aligning the side seams.

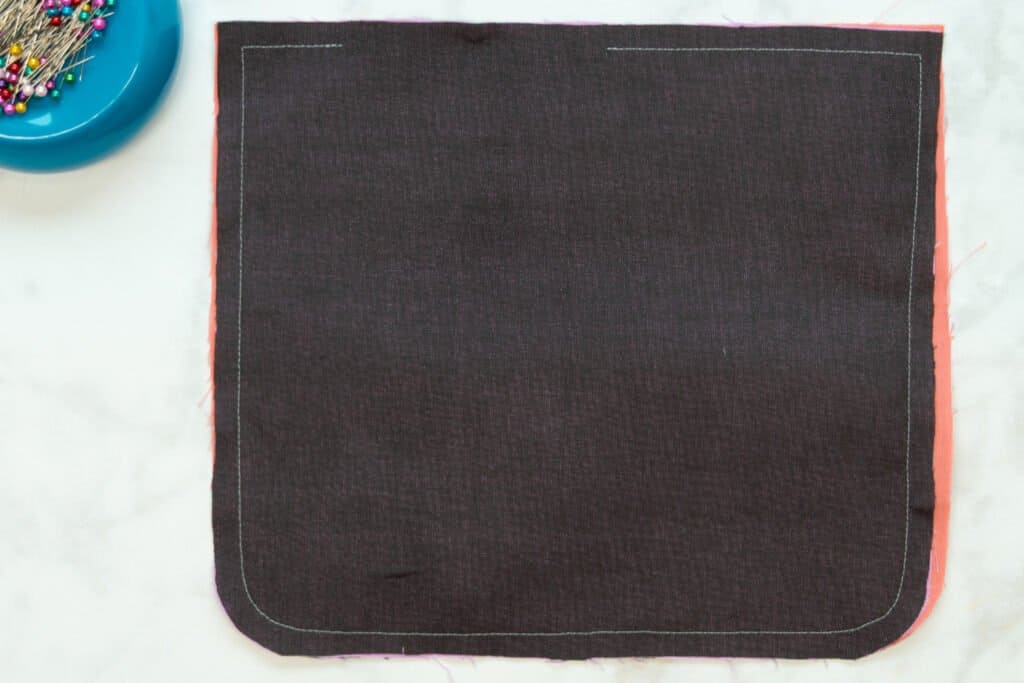
Stitch around the top pinned edge of the bag with a 3/8 inch seam allowance, leaving a 2 to 3 inch opening. Make sure to backstitch at the beginning and end of your stitching.
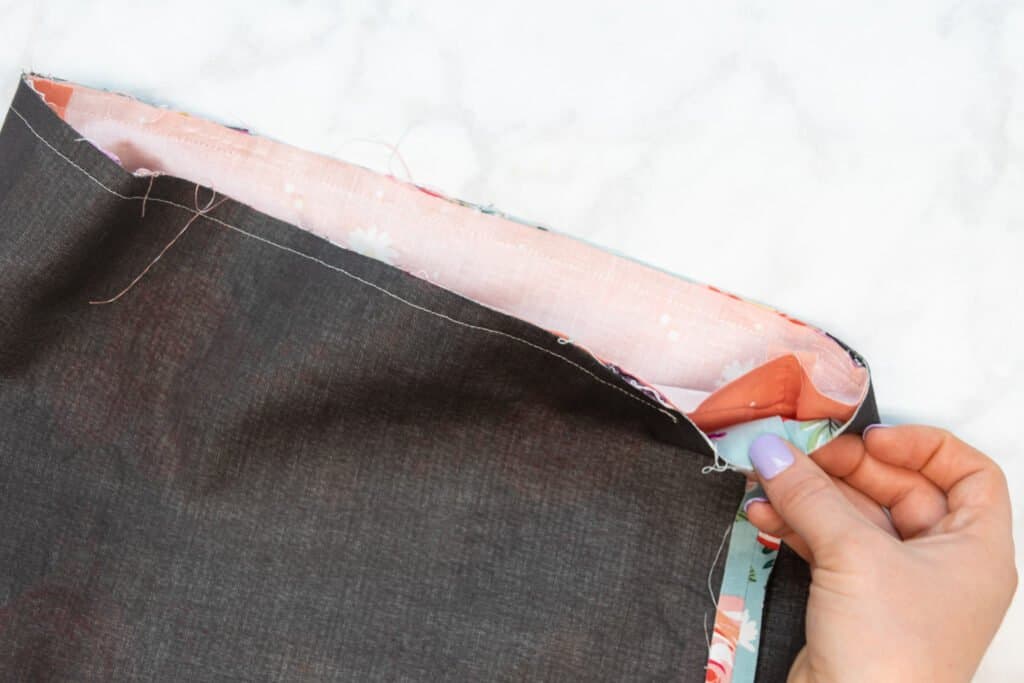
Turn the bag right sides out through the opening.
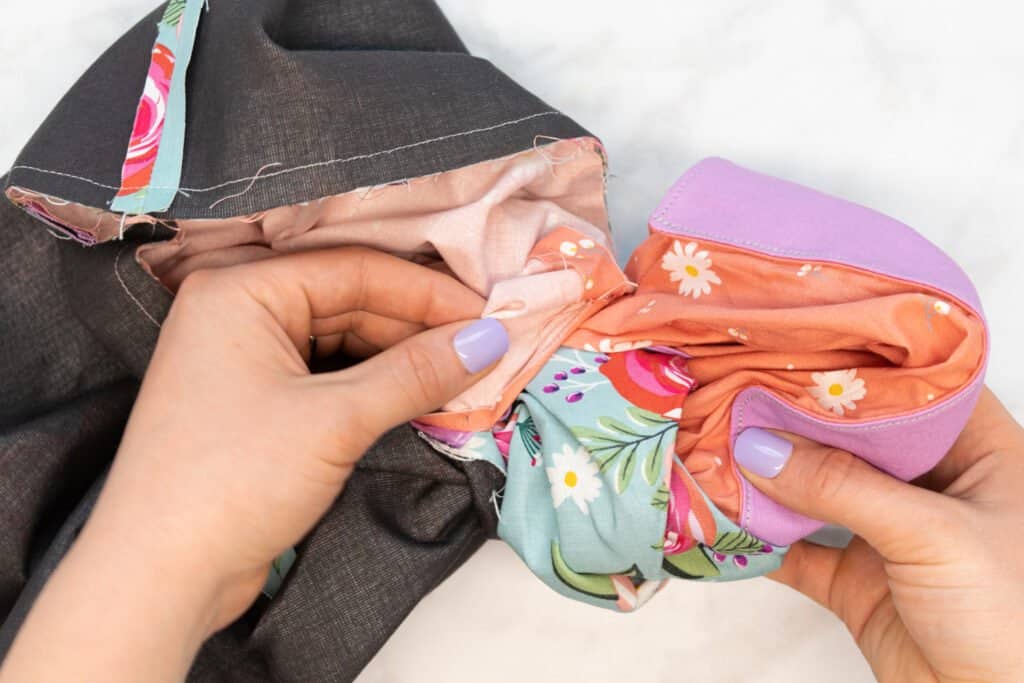
Push the lining down into the outer bag.
Press the entire tote flat, especially focusing on the top edge. Try to press the top so that the lining does not show from the outside of the bag.
Pin the opening in the top edge of the bag closed, making sure the raw edges are folded to the inside.
Finally, topstitch around the entire top edge of the bag, stitching 1/8 inch down from the top edge. This last row of topstitching will close up the opening left in the top seam of the bag.
Then give everything a final pressing with lots of steam and you're done!
Enjoy your beautiful new tote bag!
Looking for more bag sewing patterns and tutorials? Click the links below!
Did you try this pattern out? Post a picture on Instagram with the hashtag #sweetredpoppy - I would love to see how it turned out!
Don't forget to join my Facebook group where you can show us what you're making, ask questions, and learn from others
Don't want to forget about this project? Click here to pin this project to Pinterest.
Lol, I had to look again, but there is a download/link just after [he ad following] the supply list.
Do with how many ads and how many downloads you have to see before you can even find the download for the bags. I used to enjoy this website but not anymore.
Can you make a projector or A0 version of this?
nice..me already do it..thank you for the free pattern
Kimberly, thank you for the free bag pattern in multiple sizes and excellent directions. I enjoy making bags as gifts. I’m thinking of making sets of several sizes as Christmas gifts this year. Here in NJ we must bring our own bags when shopping. You are so generous with your talent.
Thank you. I am going to give it a try. Is there a video for this one?
I'm making a tote bag now, and I'm struggling a bit with the ads overlapping the pictures. If/when I sign up for a course, will I still have the ads? Thank you.
I love this pattern! It seems so easy! Is it possible to get a printable version however? I am NOT a computer person and would much rather have paper lol! I was going to print this but it's like 50+ pages. Thanks!
There is a download/link just after [the ad following] the supply list.
https://sweetredpoppy.ck.page/d009e15194
Leider zeigt auch dieser Link bei mir nur eine leere Seite. Ich versuche es schon seit Tagen, aber es ändert sich nichts daran.LG Nähoma
Is there a prinatble version of this, it is hard to follow along with the directions with a slow computer.
There is a download/link just after [the ad following] the supply list.
is it possible to get written instructions without the pictures to print?
Very nice bag, but after all of that work (not to mention the amount of fabric used) it would be a shame if the handles ripped out the first time you used it. I would strongly recommend adding at least one more row of stitching to reinforce where the straps attach. Ideally I would make each of the straps 2 inches longer and position them with an inch overhanging the edge of the bag at each end when attaching them to the lining. This way when you turn everything right sides out that extra inch will be hidden away between the lining and outer layers of fabric and will allow you to secure all of the layers together with a stitched square with a diagonal cross as well. Don't worry if you aren't too good at sewing neat squares, just get a few rows of stitching in place. What this does is places the weight of the contents of the bag (when full) onto both layers of fabric rather than just one row of stitches and top-stitching. Believe me, I have made literally hundreds of tote bags, and extending those straps inside the structure of the bag and stitching well in place really is the way to go! Hope this helps y'all!
Oh, and if you look at the pattern you will see that you need 2 pieces for the bag (2 each for the lining and the outer) which you then join together in the middle to form one long piece. The seam where you join the pieces is going to be running across the centre of the base of your bag. This could rip open with a reasonable amount of weight, so if your fabric allows it I would suggest cutting the pieces - one outer and one lining - in one long piece. This way you don't run the same risk of the stitches giving way under strain. Also, you get to save a little bit of fabric as you don't need the seam allowances where you have done away with sewing the 2 pieces together. I hope this makes sense - take the pattern pieces for the outer and lining which look like a square/oblong with squares cut out of the bottom corners and cut off the 3/8" seam allowance from the edge in between the cut-outs. Then cut on folded fabric with the place where you removed the seam allowance being where the fold is. You will end up with an oblong of fabric with a smaller oblong missing in the middle of either side. Then just skip the bit where you sew the bases together. If this is a bit confusing try it with paper before using fabric. It really does work out the same and gives a much stronger bag!
Leider zeigt mir der Download nur eine leere Seite. Ich versuche es seit Tagen immer wieder, aber es ändert sich nichts.
To make a simple tote bag you just need to have an idea of what size you would like it then make sure you have enough fabric. That would mean twice the longest length each of the outer and the lining. You will be losing a little as a seam allowance so you can add that on if you need it a specific size. Easy peasy - 2 long thin rectangles. For the straps you can either make these yourself or use some kind of webbing. To make them start with a rectangle of fabric which is 4 times as wide as you want the straps to be and as long as you want them, plus a couple of inches (5cm). Fold the fabric in 4 by folding in half to make a long shape which is now even thinner (only half as wide as it started out) but the same length, give it an iron then open up again and fold the 2 raw edges in to the ironed line. Fold it back along the ironed line which will give you a 4-layer thick piece of fabric, get it all nice and neat then iron those creases in place. Feel free to use pins to keep it all in place, or rope someone in to help hold it while you iron it. All you need to do then is sew down each of the long sides. No need to sew the short ends. Instructions to make it above.