Learn How to Sew an Easy Apron With This Free Printable PDF Sewing Pattern, Tutorial, and Video.
Have you ever wanted to have matching aprons with your kids but they never had the fabric or sizes you needed?
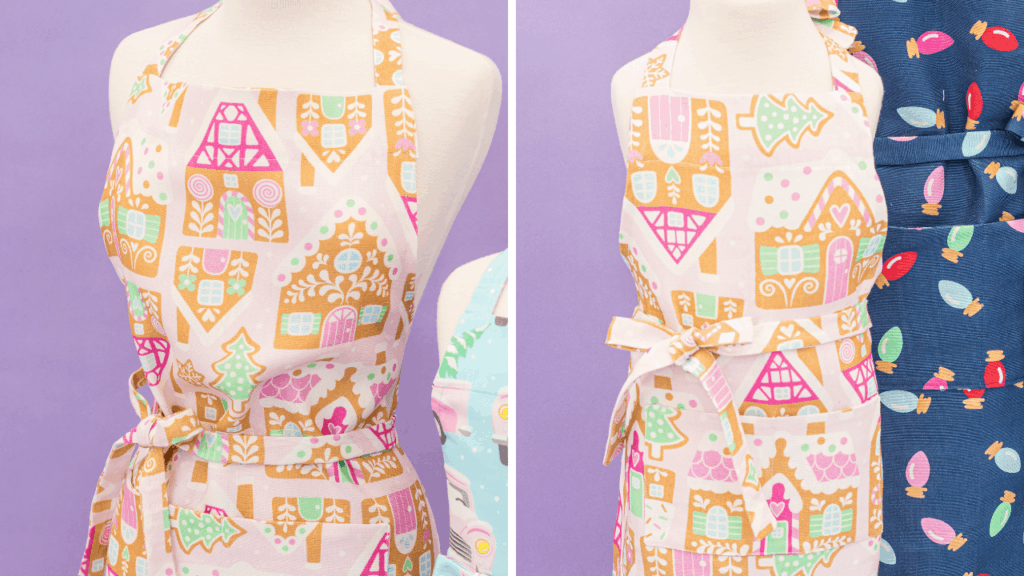
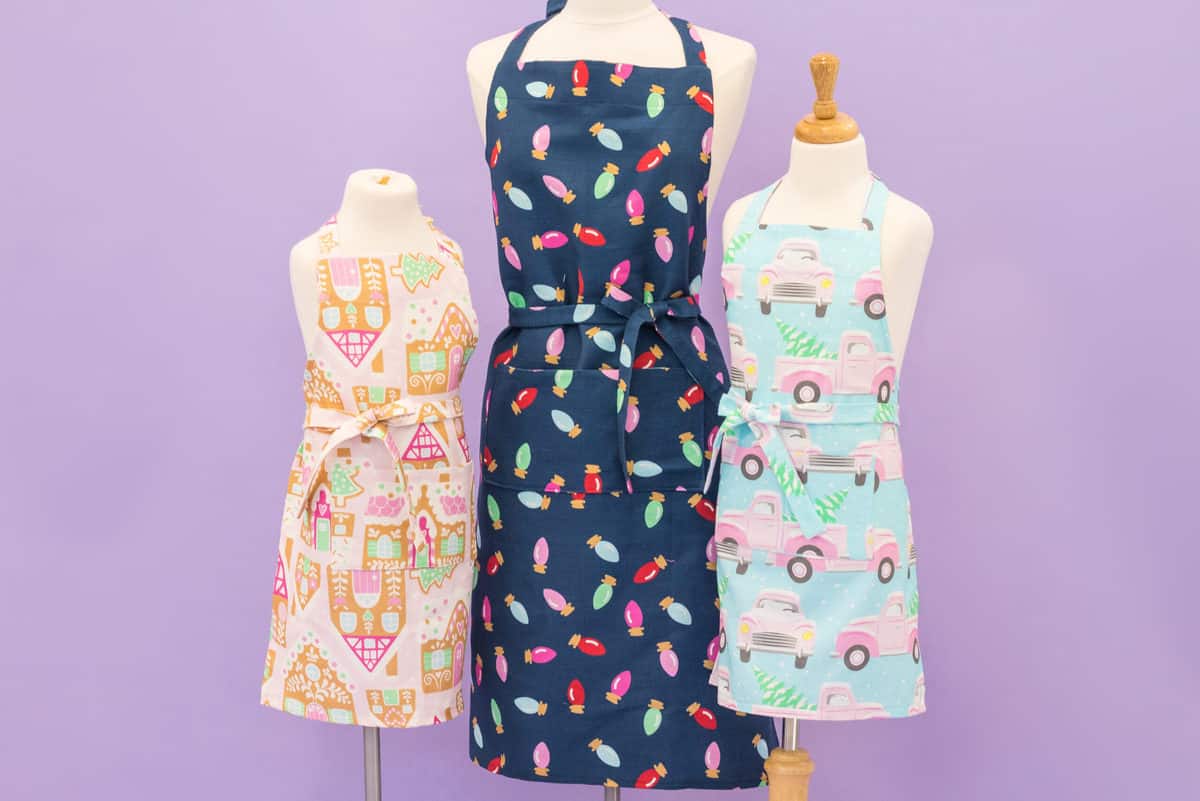
Look no further because this is the Perfect Free Apron Pattern for you! You'll love making matching aprons for the whole family with this Free Easy Apron Pattern!

My daughters and I love to bake and cook together in the kitchen but there has always been something missing, we have never found the perfect matching aprons for all of us! After countless outfits dirtied by messy ingredients I decided to take matters into my own hands.
The best part is that my whole family has adorable aprons to use while we cook and bake together.
Looking for more kitchen-friendly sewing patterns? Get my free oven mitt pattern here or my hot pad pattern here.
This pattern is SO much fun to make and it is the perfect apron for everyone! Whether you are sewing this apron for yourself or your family, an apron always comes in handy in the kitchen and even in the craft room!
You can even sew one of these aprons as a gift! Your friends and family will love having such a fun and useful apron to use year-round.
Now, let’s talk about all of the details of this Apron sewing pattern!
Apron Sewing Pattern Includes
Professionally drafted, graded, and color-coded sewing patterns. Step-by-step detailed photos and written instructions are also included.
You can refer to the video tutorial for extra help if you get stuck on any steps.
Scroll down to the supply list to download the printable pattern. Keep scrolling for my step-by-step tutorial.
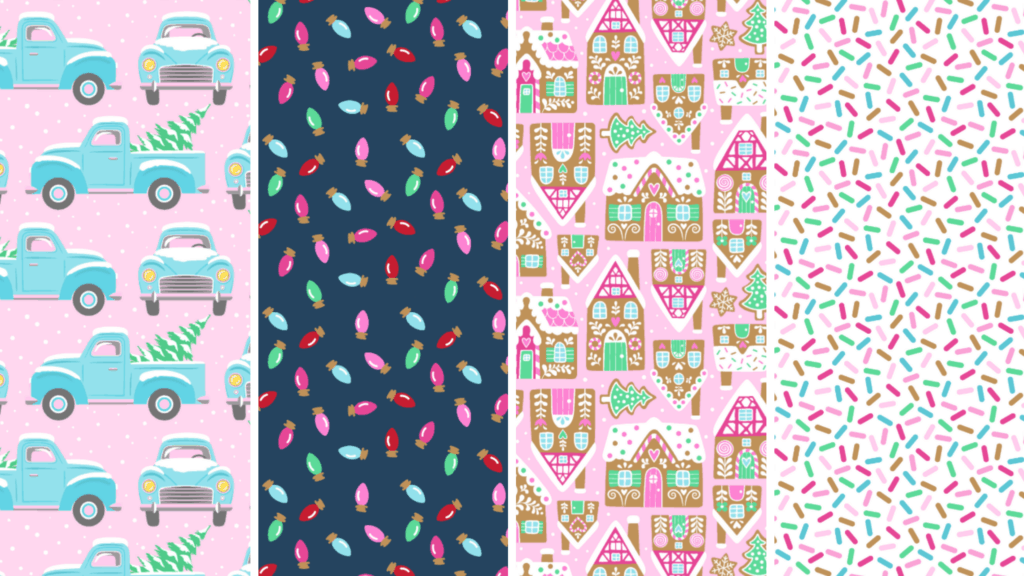
Fabric Requirements
1 Yard of quilting cotton or canvas is recommended for making this pattern.
Supplies
Click here to shop my favorite sewing supplies here!
- 1 Yard Fabric
- Sewing Machine
- Scissors or Rotary Cutter & Mat
- Thread
- Pins
- Iron & Ironing Board
- Hemming Tool
- Printed Pattern
- Tape
When you shop through my affiliate links, it doesn't cost you anything extra, but it helps me out in a big way! I earn a small commission from those purchases, and that support allows me to continue creating and sharing free tutorials and patterns for you. Thank you so much for helping me keep this creative community going!
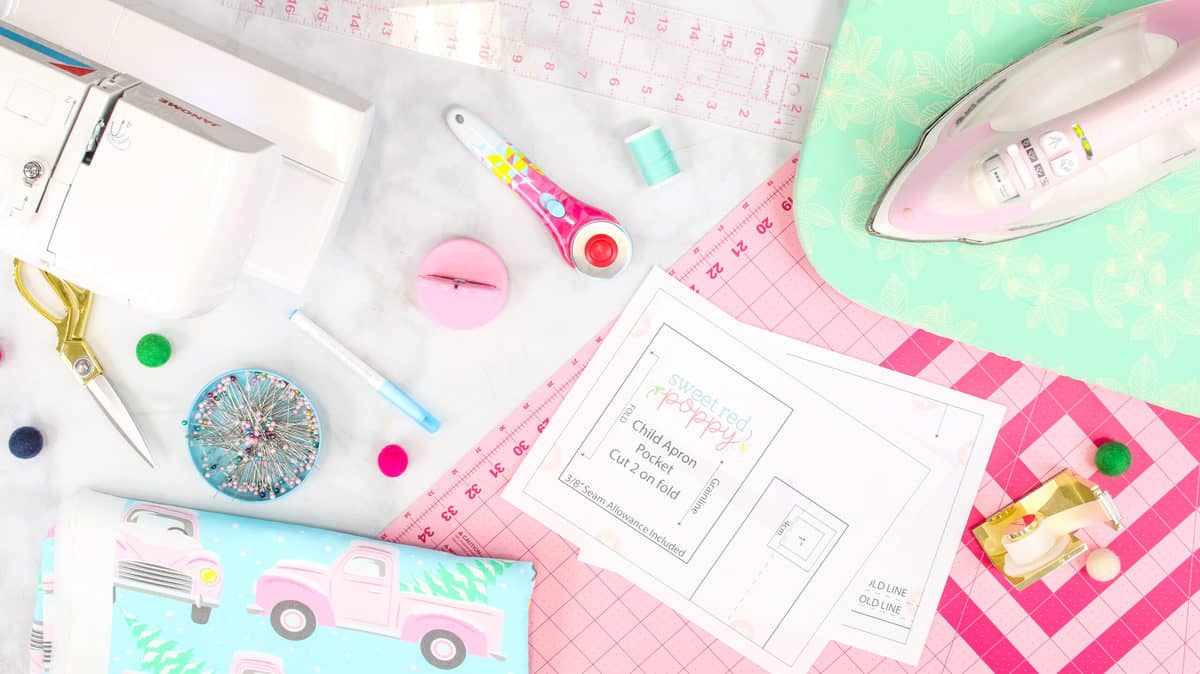
Table of Contents
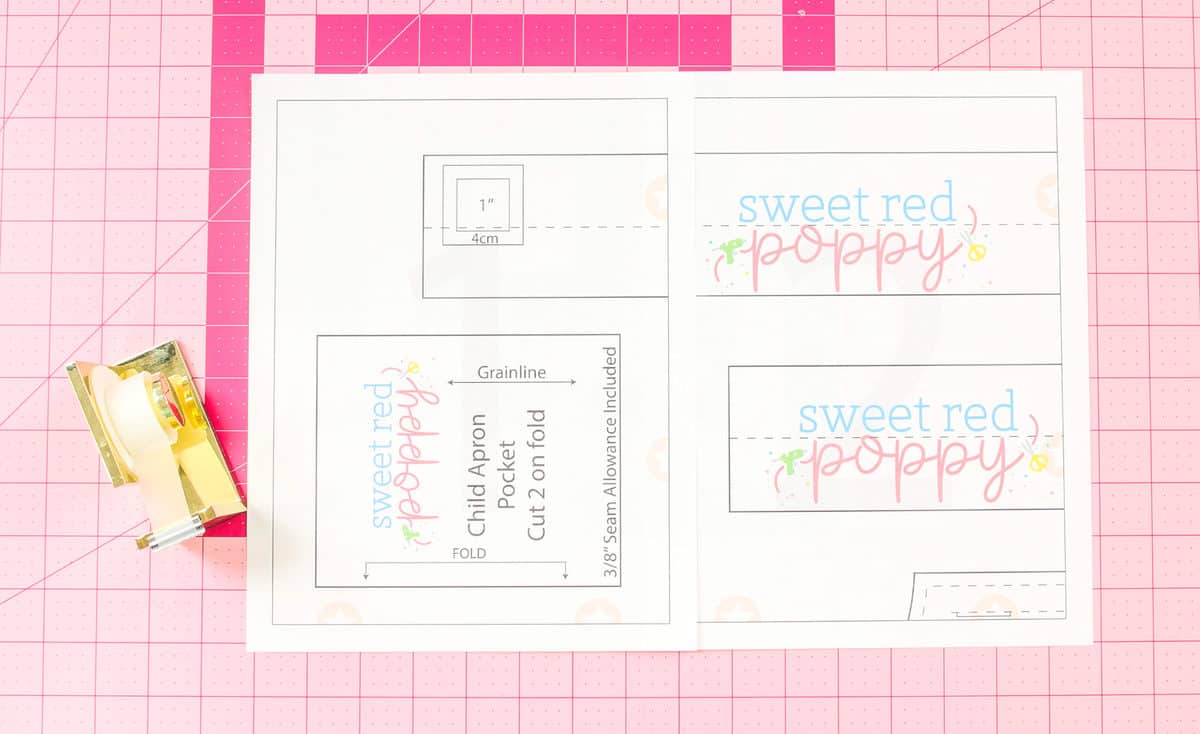
STEP 1: Print Apron PDF Pattern & Assemble
Download the pattern to your computer and print the pattern at 100% with no scaling.
Immediately check the 1” x 1” square to ensure the pattern has printed off correctly. If the 1" square measures larger or smaller, the pattern will need to be reprinted for accuracy.
Align the circles and black lines together as you are piecing the pattern together. You can connect the pieces of paper with tape or a glue stick.
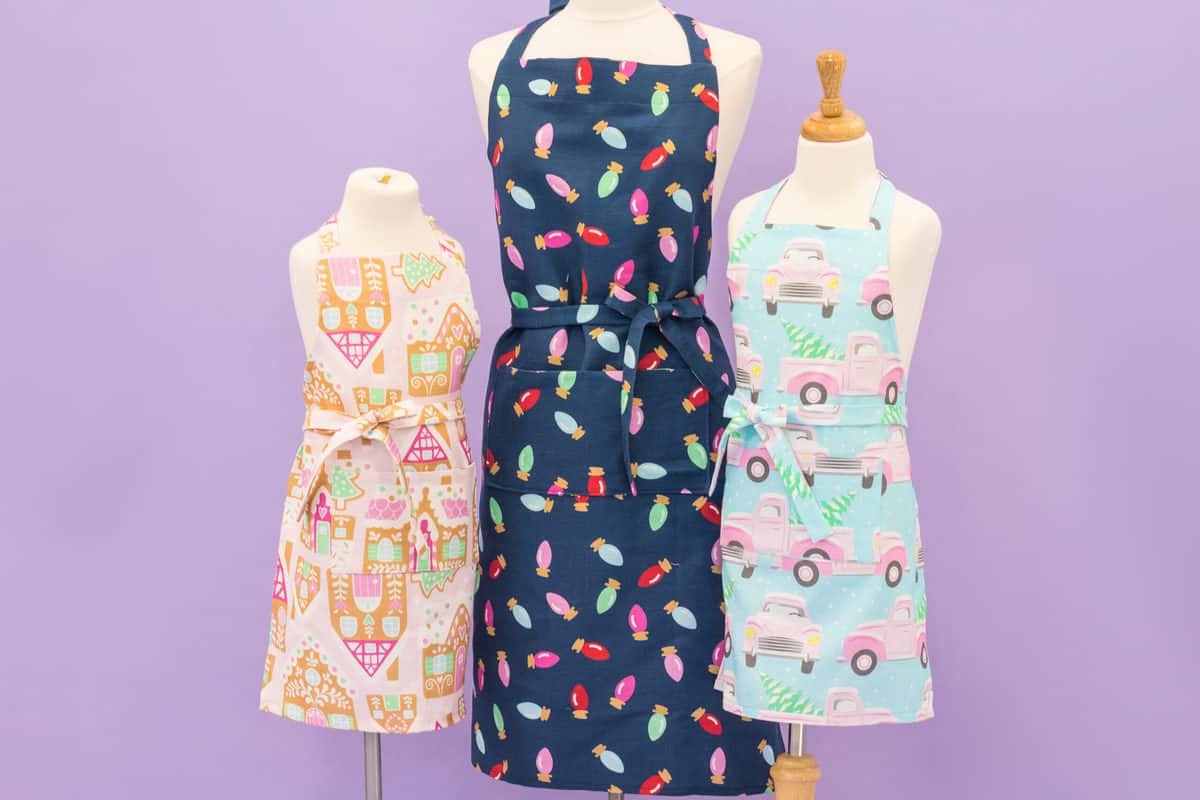
STEP 2: Choosing The Correct Size
You can use either the adult or the child-sized apron. I recommend using the adult-sized apron for teenagers and older and the child-sized apron for anyone younger than that.
STEP 3: Cut Out Fabric & Transfer Markings
*PRO TIP: Make sure to iron your fabric before cutting it out to ensure the best results. This will ensure that your fabric cuts out evenly without any wrinkles or folds.
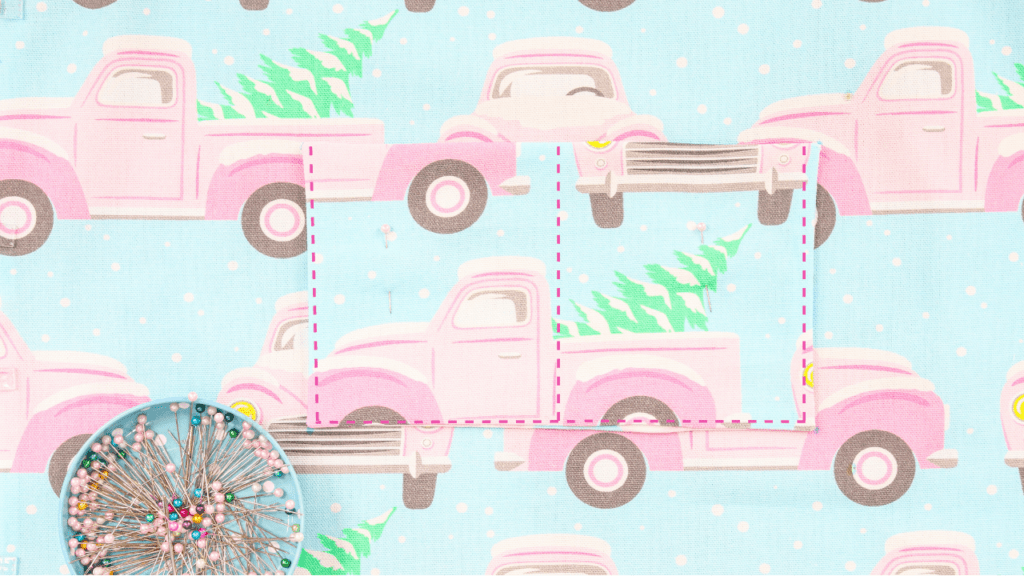
Fold the fabric in half with wrong sides together, aligning the selvages together. Lay the apron bodice pattern piece on top of the fabric and align the fold line with the fold of the fabric. Lay the neckband, waistband, and pocket pattern pieces on the fabric as well. Pin the fabric in place and cut around the outside of the pattern pieces.
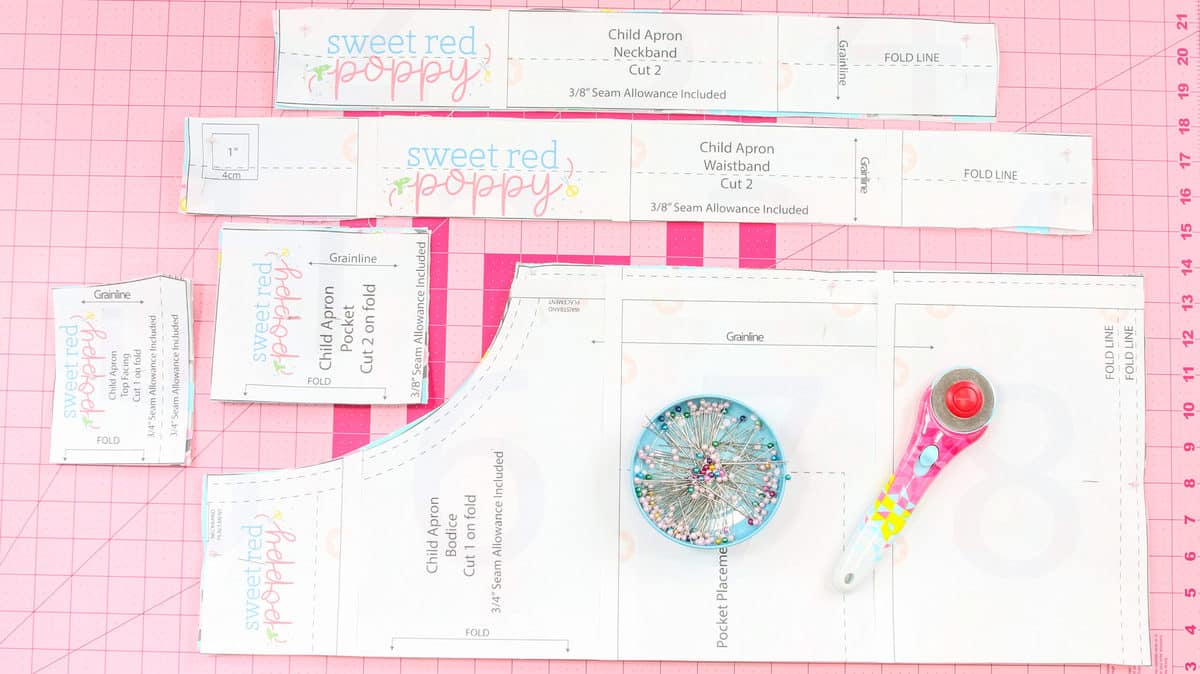
Before removing the paper pattern from the fabric, transfer all markings using a fabric pen or chalk.
- (X1) Apron Bodice
- (X1) Top Apron Facing
- (X2) Pocket Pieces
- (X2) Waistband Ties
- (X2) Neckband Ties
You should have a total of 8 pieces to complete the Apron.
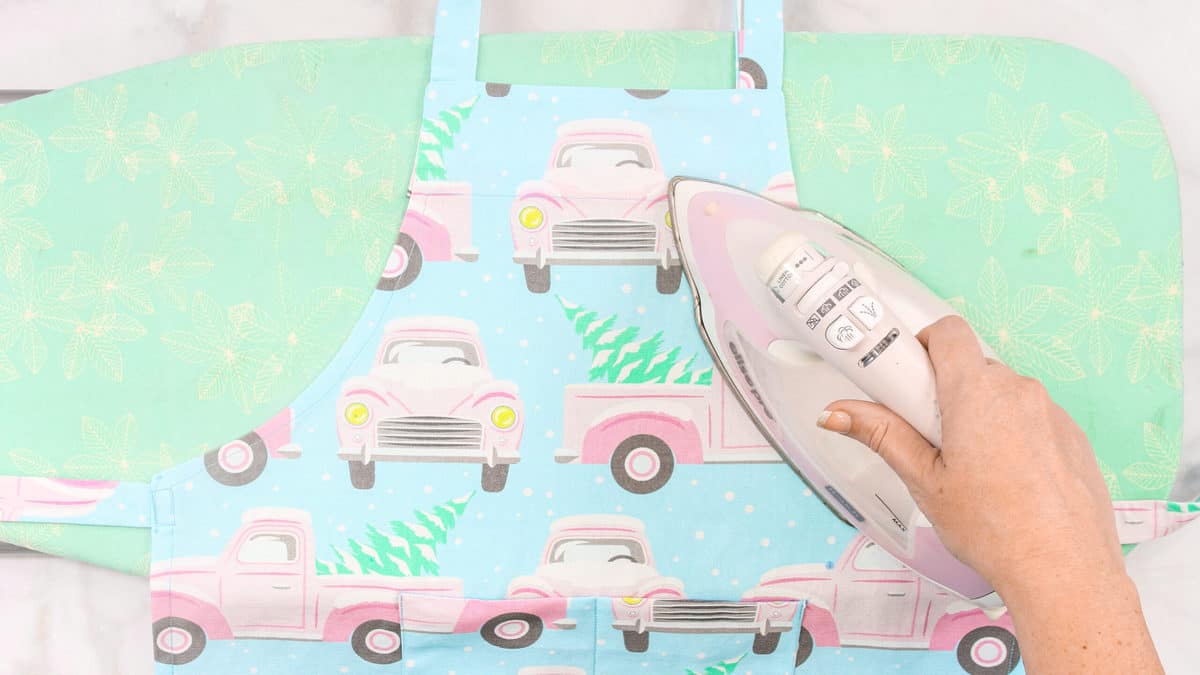
STEP 4: Press Hem
Take the apron wrong side up and fold the sides and the bottom 1/4" and press in place. Fold the sides and the bottom another 1/2" towards the wrong side and press in place.
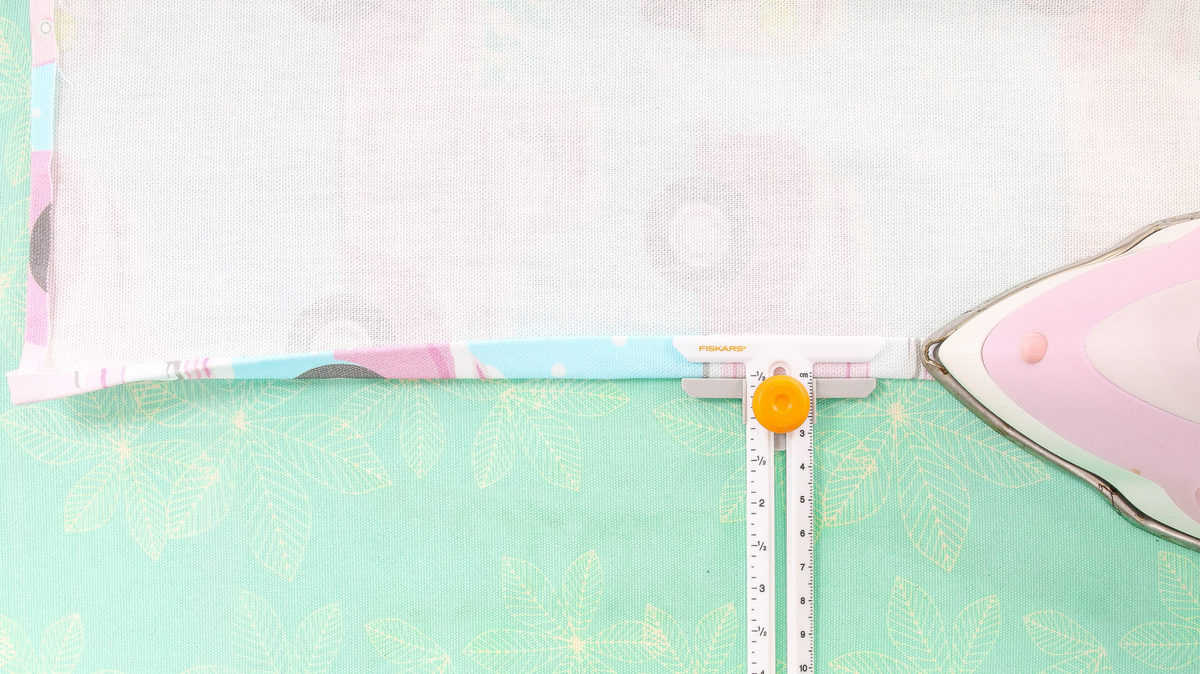
Make sure to use plenty of steam to really set those creases in place. Pin or clip the hem and set the apron bodice aside for now.
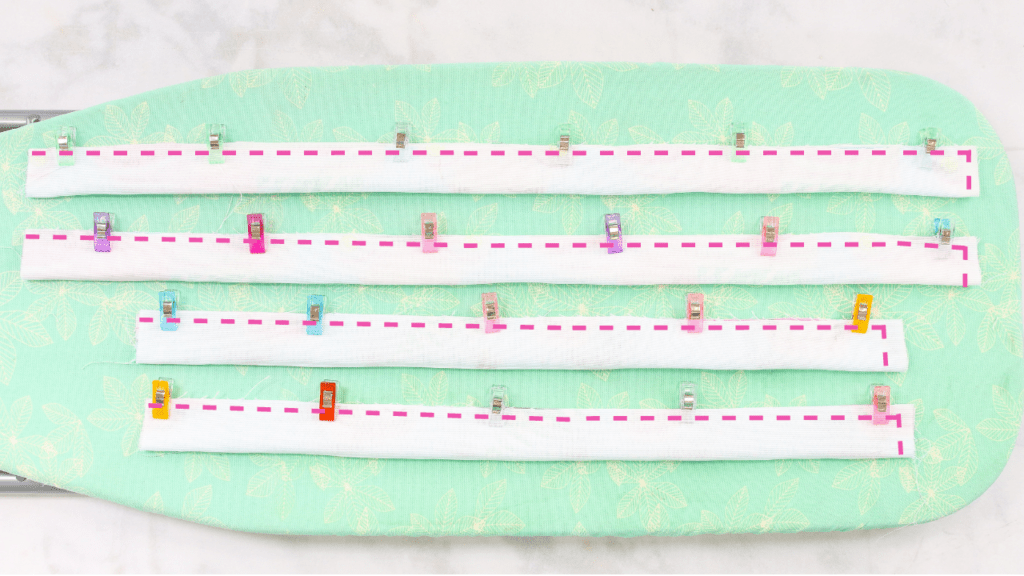
STEP 5: Make Waistband & Neckband Ties
Lay the waistband and neckband ties right side up, fold them all in half longways placing the right sides together. Place some pins or clips along the raw edge to keep everything in place.
Take a tie and start at one of the short ends, sew the short side using a 3/8" seam allowance.
Pivot at the corner by putting your needle in the down position then lift the sewing foot pivoting the fabric and then lowering the foot. Sew all the way down the long edge using a 3/8" seam allowance, backstitch at both the beginning and the end of your seam.
Be sure to leave on end open for turning.
Trim the corners of the straps getting as close to the seam without cutting through it, this helps to cut down on bulkiness.

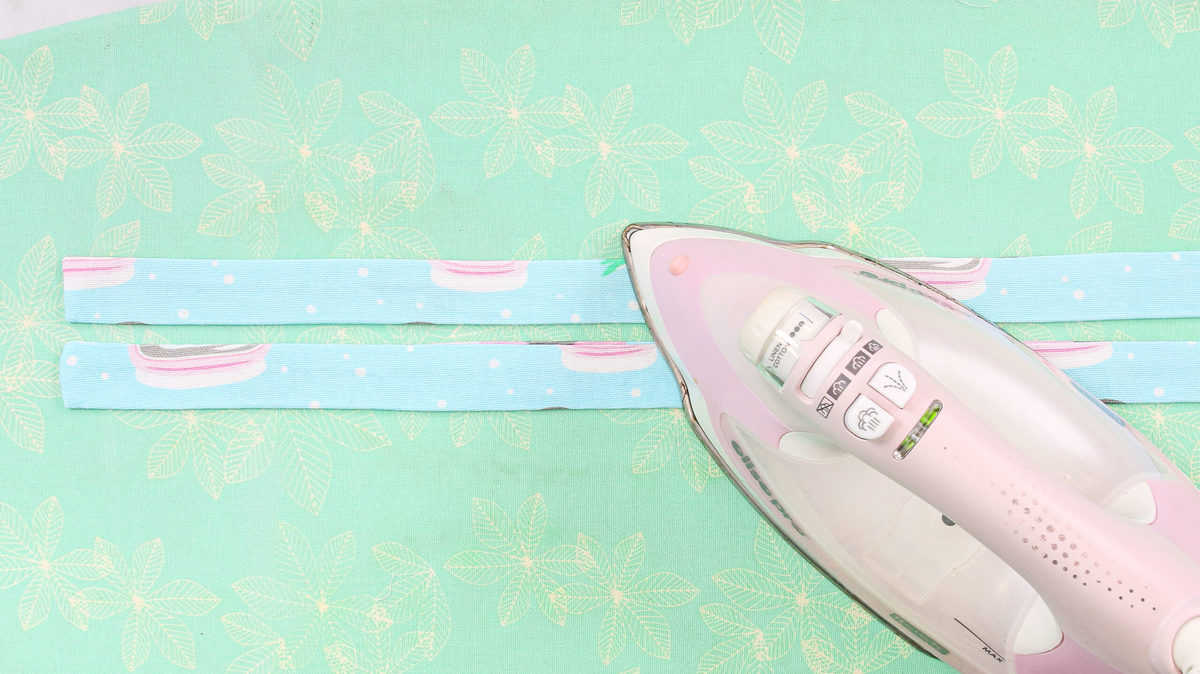
Turn the waistband ties right side out.
Take a needle and thread and sew through the corner gently tugging on the fabric to release the corner giving you a nice sharp edge (refer to the video for an example of this). Remove the needle and thread and press the bands flat with plenty of steam.
STEP 6: Sew the Pocket
Place the two pocket pieces right sides together, aligning all the edges, and pin or clip them in place.
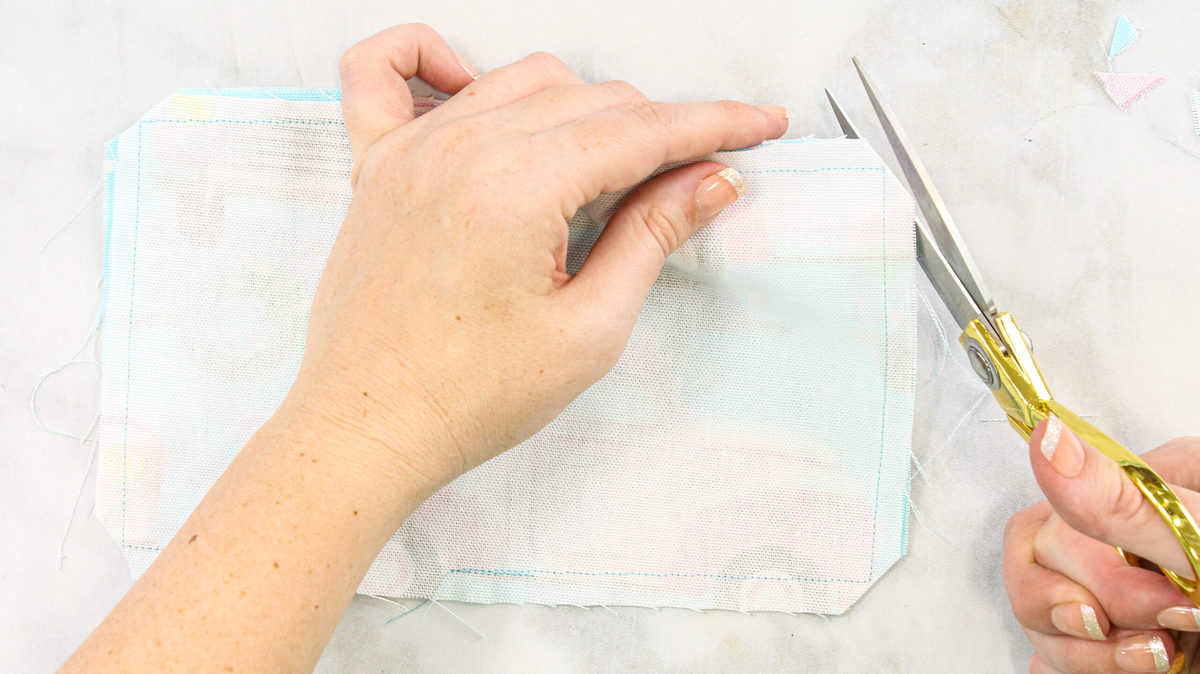
Sew around the pocket leaving a 2-3" opening on one of the long sides of the pocket. Make sure to pivot at each corner to make nice corners.
Clip all four corners to remove any excess material, this helps to cut down on bulkiness.
Turn the pocket right side out and use a needle and thread to gently tug on the corners of the fabric to release the fabric giving you a sharp corner. Remove the needle and thread.
Press the pocket with plenty of steam.
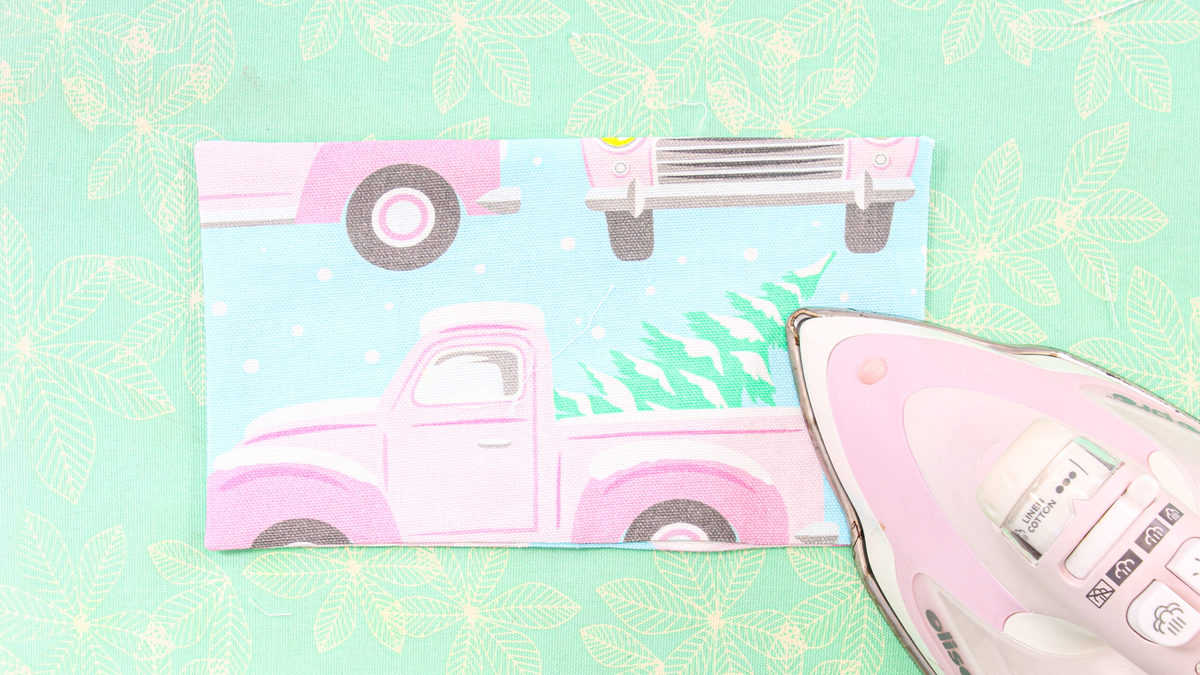
Fold the pocket in half lining the short sides up, press well to make a crease down the middle of the pocket.
Place the pocket on the apron bodice lining up the corners with the markings, make sure the 2" opening is facing the hem of the apron so that it will be topstitched closed.
Sew along the sides and bottom of the pocket using a 1/8" seam allowance, sew along the crease in the middle to make two pockets.
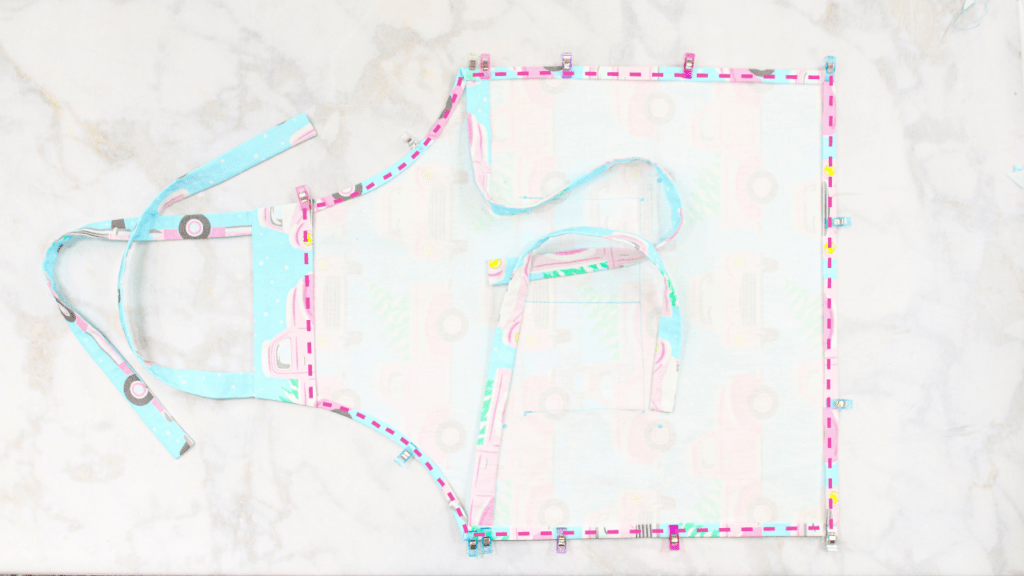
STEP 7: Apron Facing & Neckband
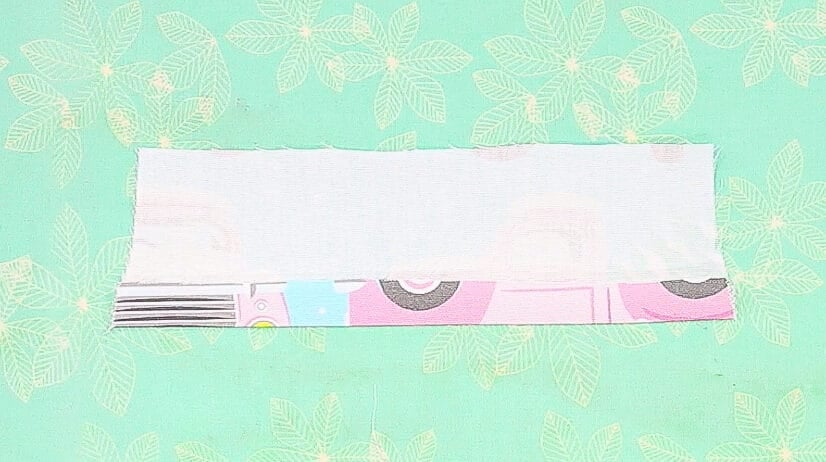
Lay the apron facing right side down, fold the longest side which will be the bottom 3/4" up towards the wrong side, and press well.
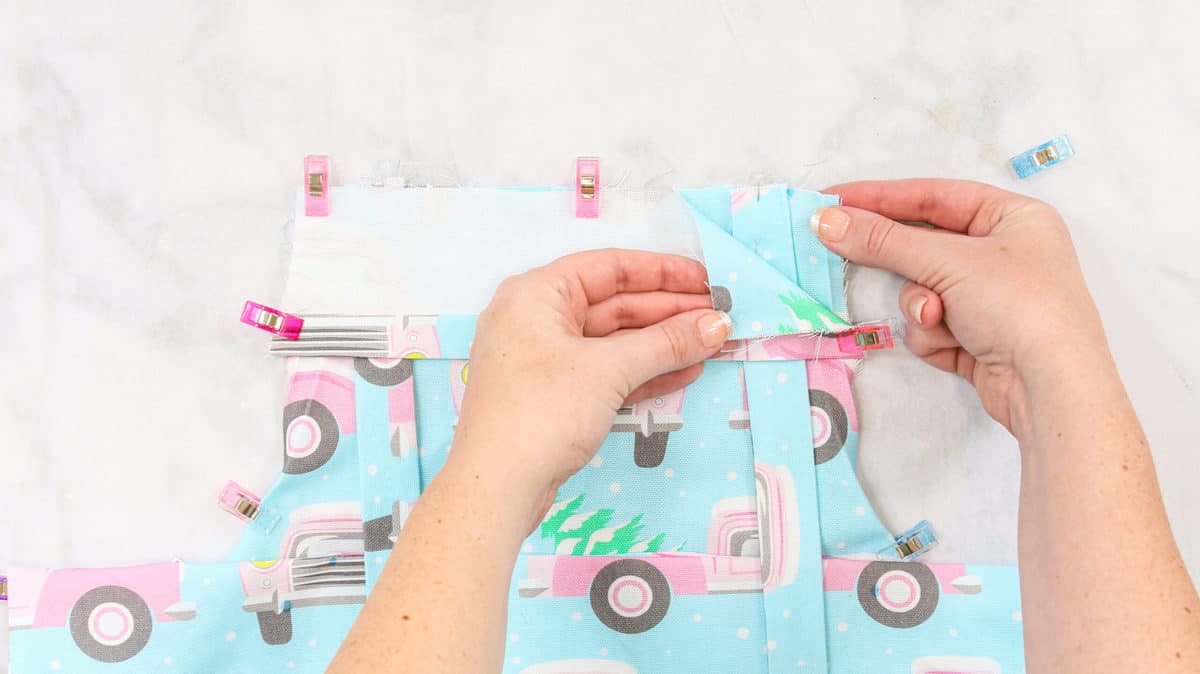
Put the apron bodice down with the right side up, align the open end of the neckband ties with the markings.
Place the facing right sides together on the apron bodice, unclip the sides so the corners on the apron and the facing match up, and clip in place.
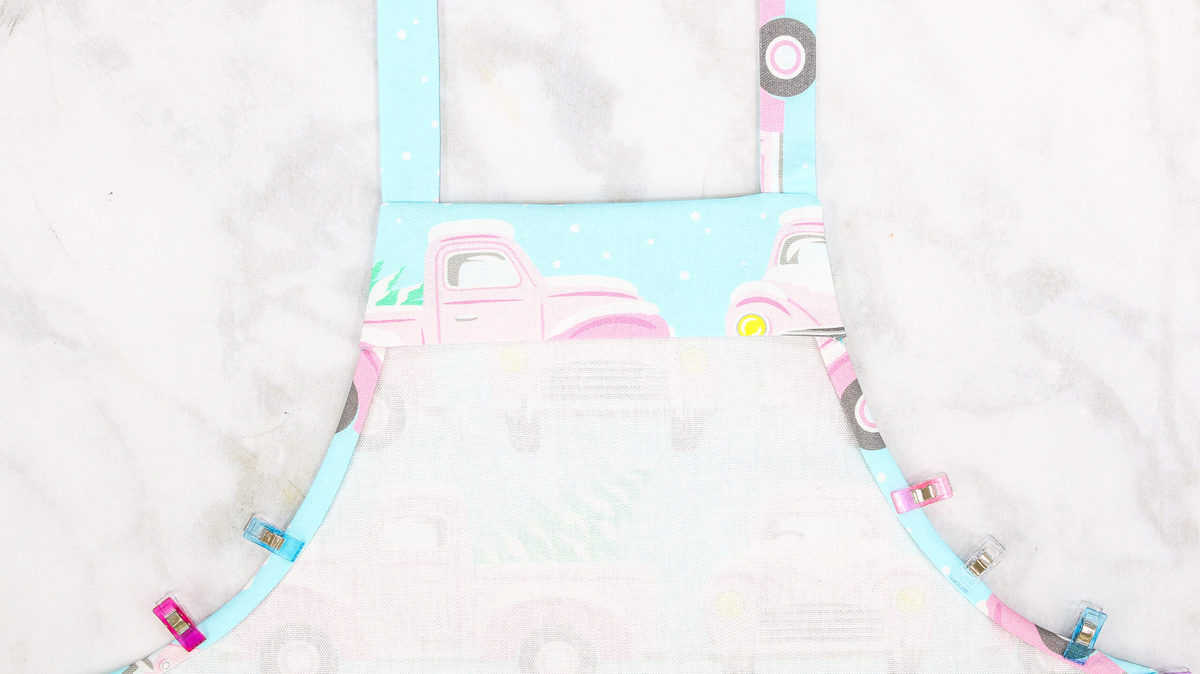
Sew the sides and the top of the facing with 3/8" seam allowance, backstitch at the beginning and the end as well as over the neckband ties.
Trim the excess off all four corners and turn the facing right side out, gently push the corners out, and press well.
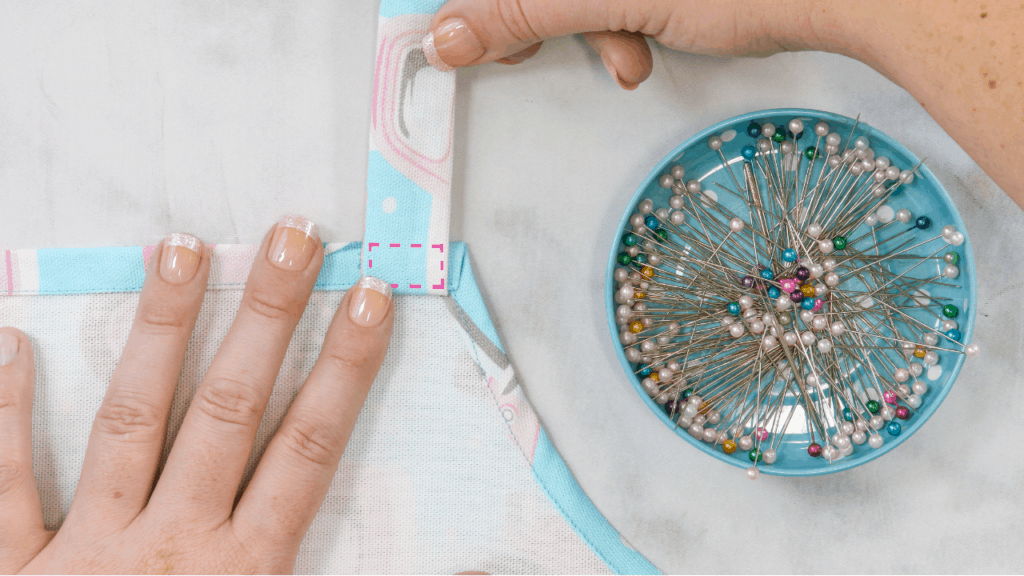
STEP 8: Attach Waistband Ties
Place the open end of the waistband ties under the hem on the apron bodice aligning the waistband ties with the markings on the apron bodice, pin the waistband ties in place.
Starting at one side of the bottom of the apron facing, sew all the way around the apron, sewing down the hem and edges.
Place the apron right side down, fold the waistband ties flat over the hem and sew in place by sewing a box.
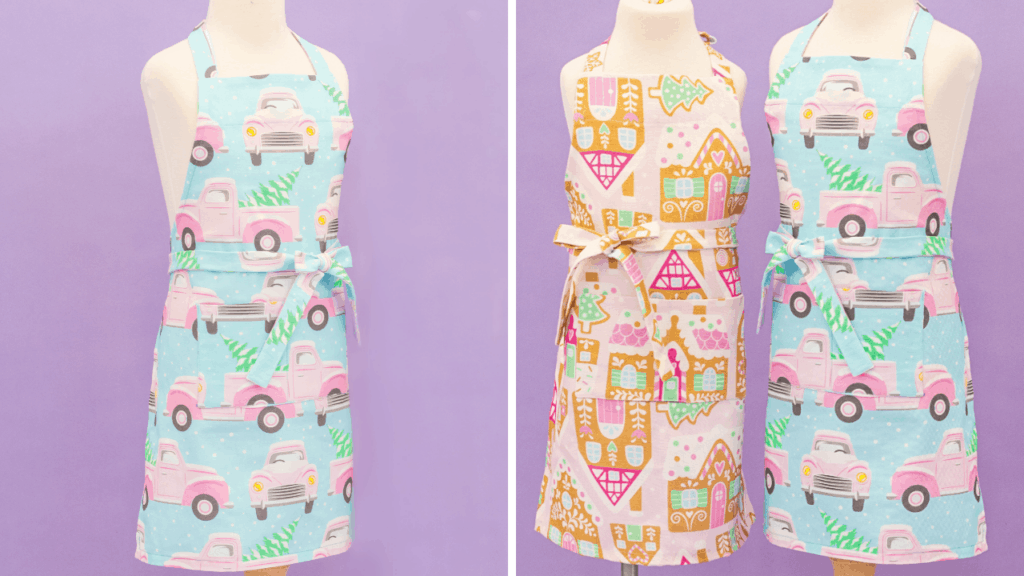
Press the entire apron with plenty of steam and then you're finished!
Now you have an adorable Apron!
Did you enjoy this tutorial? I’d love to see what you’ve made with it!
Save this project for later! Click here to save this project on Pinterest.
Join my crafting and sewing Facebook group where you can show us what you’re making, ask questions, and learn from others!
Follow me on Instagram for daily crafting inspiration and a look behind the scenes.
Do you have any questions about this Apron sewing pattern? Let me know in a comment below!
I love these..
Do you have a pattern for one that has large pockets with the straps that come over the shoulder and criss-cross in the back and ties at the waist? Old style... and one for children too?
Thank you
Did you get a reply to your questions? Or am I doing something wrong? would love to know answers
Omg! So cute. Now I know what to make for my cousins and their daughters this Christmas!
Can I ask what type of fabric is good for aprons in general?
I used a canvas fabric on this pattern which gives it a bit more weight. Quilting cotton would work as well. It just depends on how much body you want the apron to have.
How much material do I need to buy to make aprons.
Thank you so much for the pattern
You're welcome! I hope you have fun making some aprons!
Is there a printable format for the instructions?
Unfortunately, I don't have printed instructions for this pattern yet.
But it says there is a printable tutorial! I can only find a printable pattern.
Sorry about that, that was a typo. Thanks for catching it! I do plan on doing a printed tutorial, I just haven't gotten to it yet.
This is a great pattern Thank you. I did have a question about quantity of fabric. It says 1 yard. I assume that is for an adult apron, what about a child apron how much fabric?
Thank-you for sharing. You have inspired me again to pull out my sewing machine. I hope to make some for gifts for Christmas. 🙂
You're welcome! I hope you enjoy making some aprons! Be sure to share a picture with me on Facebook or Instagram @sweetredpoppy so I can see your finished aprons!
Jo Ann fabrics has a whole line of printed canvas that is perfect for these and other aprons! Another had posted to inquire about other styles of aprons. I personally have trouble wearing the type that goes around the neck like this style.
Hi Rosie the riveter,
I also have trouble with around the neck aprons. So I held up my old apron and had my family help me measure a strap length that would work for me. I ended up making the neck straps 29 inch long. Then I crossed them across the back and sewed them to the waist straps a few inches from the side of the apron. After I made a few aprons I realized I don't need to finish either end of the neck straps because I now wrap the end of the neck strap under when I sew it to the waist strap. I'm sorry I don't know how to add a photo.
Wow, thank you very much. This is super cute and looks easy enough to make.
You're welcome! I hope you enjoy the pattern.
Is there a printable version of the instructions? Thank you for the free-b!
I don't currently have a printed version of this apron pattern. But, I do have another apron pattern with printed instructions in my shop - https://sweetredpoppy.shop/products/mommy-and-me-apron-sewing-pattern
Just made a batman apron for my grandson who loves to help his mama in the kitchen. It looks real cute black fabric with the yellow trademark batwing all over it. I used bright yellow thread to sew it up and added extra stitching along the ties to punch the stitching up. It looks cute, and he says it awesome. Wanted to put it on and make something right away.
That's amazing! I'm so glad that you enjoyed my pattern!
I need a smaller version of the child’s apron to fit a younger child. Would it work to print the pattern on a smaller scale instead of at 100%? Or would that mess it up? She’s a small 2 year old that loves to help in the kitchen and I want to make this for her.
Hi Nancy! If you scale the pattern down, be careful that the straps don't get too small. I have not tried scaling it down myself, so I'm not sure how it would work.
If you do try this, let me know how it works!
Is there an assembly chart for the pattern? The video says there is, but I am unable to locate it. Also, thank you for all of your videos and tutorials! They are the best!!
Made adult apron. We could not get it all the cut out in a yard of fabric. We made it shorter. Would need 1 1/4yard to get the pocket probably 1 1/2 to get full length and everything else
Thank you for the pattern and video tutorials. Can't wait to get started on these for my gran-girls.
Hello, and thank you for the pattern!
My grand-daughter will soon be 7 .. but is tall & into a size 8/10 in some clothes and 10/12 for length of pants etc in others. (tall & slender).
I purchased a child's apron (guide) from Michael's and it was really too small for her.
I read your instructions ... make adult for teenager/child for anyone younger than that.
What do I do in her case? Will "your" child pattern be too small ..
Please help/suggest.
Thank you!
I recently found your site and am excited to make the aprons for my 5year old twin great granddaughters.
That sounds like a great idea! We'd love to see the finished product!
Is there a guide for how to put the adult pattern together? It's very confusing to piece together without one!
Hi Brea! Sorry, you're having trouble! Are you referring to piecing together the paper pattern? For the printed pattern, Download the pattern to your computer and print the pattern at 100% with no scaling. Immediately check the 1” x 1” square to ensure the pattern has printed off correctly. If the 1" square measures larger or smaller, the pattern will need to be reprinted for accuracy. Align the circles and black lines together as you are piecing the pattern together. You can connect the pieces of paper with tape or a glue stick. There's a photo in the blog post of the completed paper pattern pieces. Hope this helps!
Thank you for this amazing apron pattern. I customized one of Joann’s custom choices and used canvas as my material. I was very pleased with it. I’m making two adult aprons and ordered 2 yds. This wasn’t quite enough so I had to shorten it and piece together the waist tie. I agree with Jasmine above that another 1/4 to 1/2 yd would work out better. I have used some of your other patterns (twirly dress was a hit!) and appreciate how they are unique and the instructions/videos are easy to follow.
I love this pattern. I've just made the apron for a friend as a gift. The instructions are so easy to understand and it turned out amazing.
I've posted photos in Sweet Red Poppy's cricut, crafting and sewing group...link below
https://www.facebook.com/groups/2128534807407840/?ref=share
Looks so great!
Very disappointed. I purchased 1 1/4 yard of fabric and it is not nearly enough to fit all the pattern pieces for the adult apron. I even double checked the one inch square to be sure I printed everything correctly and it did all print correctly. I can no longer get the fabric I was planning on using, so unfortunately this project isn't going to happen. It's too bad because I watched the video ahead of time and the instructions seemed very clear and easy to follow.
Thank you
Rebecca Hanson, will this adult pattern fit a man ?? I want to know also if 1 yard is enough ?
Thank you for the patterns !!
Will this adult pattern fit a man ?? Also is one yard enough ? Love you videos !!
Is it possible to purchase any of the fabrics you used in your demo patterns? I love the pink truck fabric? It fits me.
Instructions should be printed...too hard to follow without. Why?
where can i find or buy the Christmas fabric for the aprons that looks like gingerbread houses? please reply! <3
You mention a video, but I don't see where to find it. My granddaughter is new to sewing and she also wants to teach my great-granddaughter. I think they could benefit from the video.
Thanks for the pattern it is cute and looks easy.
The video is about halfway through Step 7. It’s not super obvious, but there’s a play button on it.
Hi. Just came across this pattern. Thank you for sharing. I am having trouble on step 7 - attaching the facing to the bodice. When I sew 3/8” around the 2 sides and top it doesn’t match up with the 3/4” I’ve turned all around the bodice. So when I turn it right side out it ‘wonky’. It’s 3/8” off (6/8”-3/8”). What am I doing wrong? Thank you very much!
I’m having the same problem. The facing does not match up with the bodice. It’s not clear to me. The facing is not wide enough to go all the way across the bodice. I’ve sewn since I’ve been sewing for about 60 years. Something is not right.
Thank you so much for this lovely pattern. I have been wanting to make something for my niece and her husband for Christmas and these would be perfect.
You’ll need at least 2 yards of fabric if you plan on making the adult size. I only had a yard and a half and didn’t have enough fabric for the waistband ties, so I just crossed the neckband ties across the back and added buttons as the closures.
Hi Kim- I have just begun an adult apron & totally agree with other writers that 1 yard of fabric is not enough to accommodate the length of the adult pattern. I’m really disappointed about this as I bought some cool Charley Harper fabric online for my adult daughters Christmas gifts. One yard would work for the kid version. I encourage you to amend your fabric requirement in the instructions. Another quarter yard would help but still be a real tight squeeze so how about another 3/8”, please! Thank you!
Thank you for all four patterns which i have just down loaded. I look forward to sewing them when my wrist has mended.
Cute pattern, but I think you skipped a step in the written instructions. Or did I miss it?
How much are we folding in the sides to form the hem?
Thank you!
Never mind! It's the first step. DUH 😀
I am having trouble figuring out how the printed pages go together. Please help!
Rene, I have been having this issue also and am trying to instruct my sewing students. I just finally took the parts that looked right, matched as best I could, and taped. There are some very skinny pieces I couldn't figure out how to fit.
OK. I wish I read these reviews and tried to make one before we committed to offering this as a project for the women in my church and telling them we only need one yard. I bought 1.25 yards of 44/45" cotton canvas fabric and it is only enough to cut the main piece out on the fold. You could always cut the ties against the grain but still not enough to cut two pockets and the facing on a fold. UGH!
I made these for my granddaughters for Christmas. I gave them their own rubber spatula and they loved them. Now I'm constantly being asked when we are going to bake again.
Can I bet better instructions on piecing the pattern together? I’m not able to print color and I think that is what making it confusing to me. Also I am very new to seeing.
Made two adult aprons from a vintage tablecloth for my sister and I. They are way too large in the bib part and kind of fold up on the top area. I’m going to take them apart and use a bib of a proper fitting apron as a pattern. Disappointing!
Darling pattern. What I most enjoyed about this video is seeing the gadget you used to turn out the ties. Where did you get it? It is brilliant!!!
Thank you for the patterns. The way you have the pieces laid out on the cutting mat is the way they should be on the fabric too? Even though the straps are on the cross grain instead of the lengthwise grain?
Also, how do I get the video that is mentioned? I scrolled through twice but don't see a link to it. Thank you.
I never received my child's and adult free apron patterns. I submitted twice and they are no where. Is there a chance you can email them to me. Thank you
Thank you for the free pattern. A yard of fabric is not enough though.
I just wanna cry… I can’t even figure out how the pattern is to be taped together. I really wish there was a graphic or something to reference. I guess I’m moving into something else. Very disappointed.
This is a really cool page. One of the best posts I've found in quite a while. I hope to see more content like this.
I have sold hundreds of aprons like such and using just a yard of fabric that is so much easier than this one. I do about 6-10 at a time from the cutting, pressing and sewing to done.
Do you have an apron pattern for a Japanese style apron that the straps crisscross, has pockets and you don't have to tie it on? I have arthritis and have a hard time with the apron strings. Thanks so much!
I can't find how to access the video. I went back to step 7 and do not see a link. Please advise.
To put the pattern together: My pattern printed with a very light large number on each page, like a watermark. The pages then laid out 1, 2, 3 on one line, 4, 5, 6 on next line, 7, 8, 9 on next line and so on. Even without the numbers, that should help. Just place and tape pages three across.
I definitely agree 1 yard is nowhere near enough to make the adult pattern. I wanted to make the pockets, waist straps and shoulder straps out of a different pattern. I still needed another yard to place those pattern pieces on the material. Even if I had wanted to make the adult size in the same color, I would have needed 2 yards of the same color/material.
Thank you for the free pattern. I appreciate it!!! I'm teaching 3 of my grand daughters how to use a sewing machine and this will be their second project.
Hi there! I teach a sewing class to some homeschool students (usually no more than seven or so), and I'd love to use this pattern for the fall semester. Please let me know if I may copy this pattern for the girls. When I print a syllabus, I always credit designers and websites. Would be happy to do that for you, too. 🙂
Hi Kimberly, thank you for the opportunity to ask a question.
You mention in the beginning when downloading the pattern to check the 1x1 inch or 5cm squares. Mine is not correct. It measures about three quarters of an inch and 4.2 cm.
How do I correct it? Thank you.