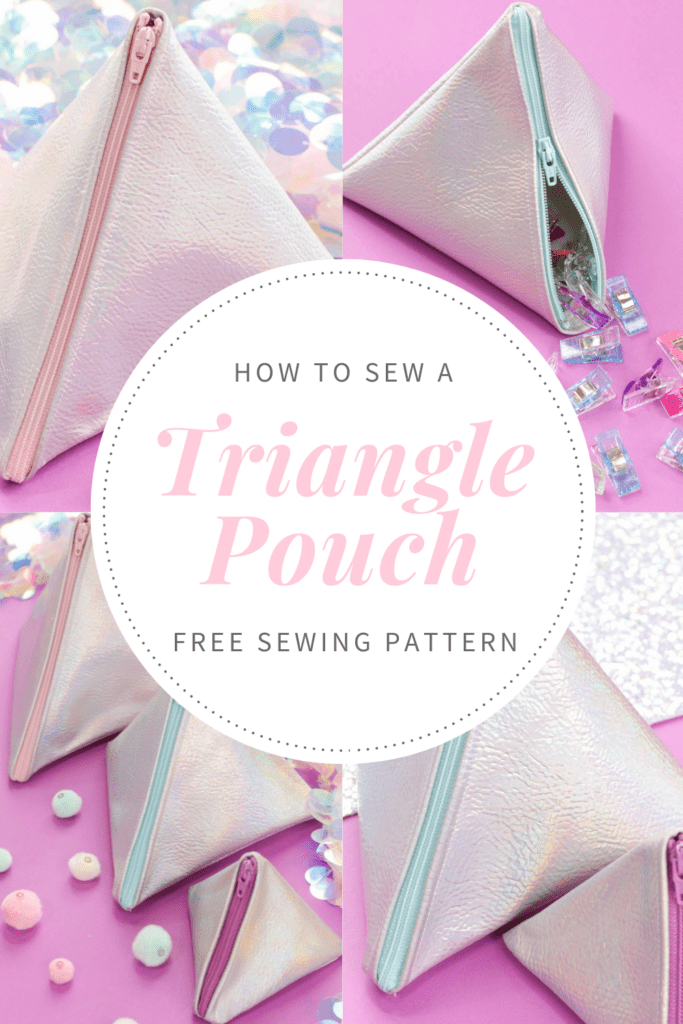
Sew a Faux Leather Triangle Zipper Pouch With This Step-By-Step Photo Tutorial, Free Pattern, and Video.
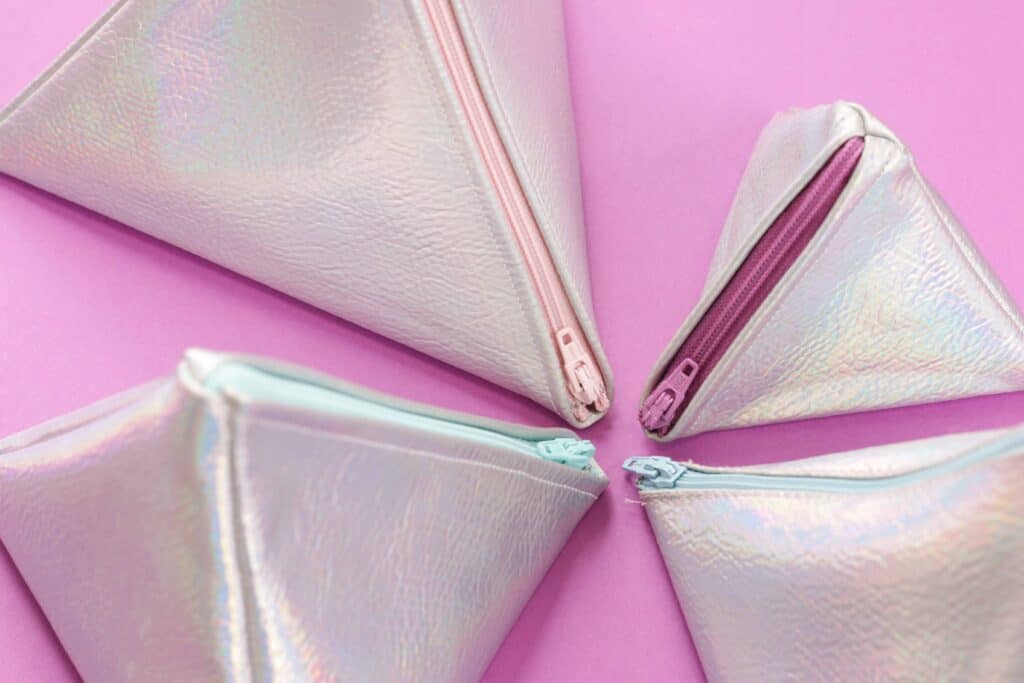
Today, I'm sharing this pouch with you in three different sizes. I don't know about you, but I can never have enough pouches and small bags! I love them for organizing small accessories, traveling with toiletries, and giving them as gifts.


This triangle pouch is the perfect scrap buster and only takes 1/3 of a yard. It also fits perfectly on a fat quarter.
This triangle zipper pouch is such a fun and unique shape and paired with this faux leather fabric it's just too cute!
Fabric Recommendations
To sew this triangle zipper pouch, you'll want to use a fabric that doesn't unravel and has some weight to it so it will stand up on its own. I'll be using faux leather for this project. Vinyl fabric would also be a great choice.
Don’t want to forget about this pattern? Save this project for later! Click here to save this project on Pinterest.
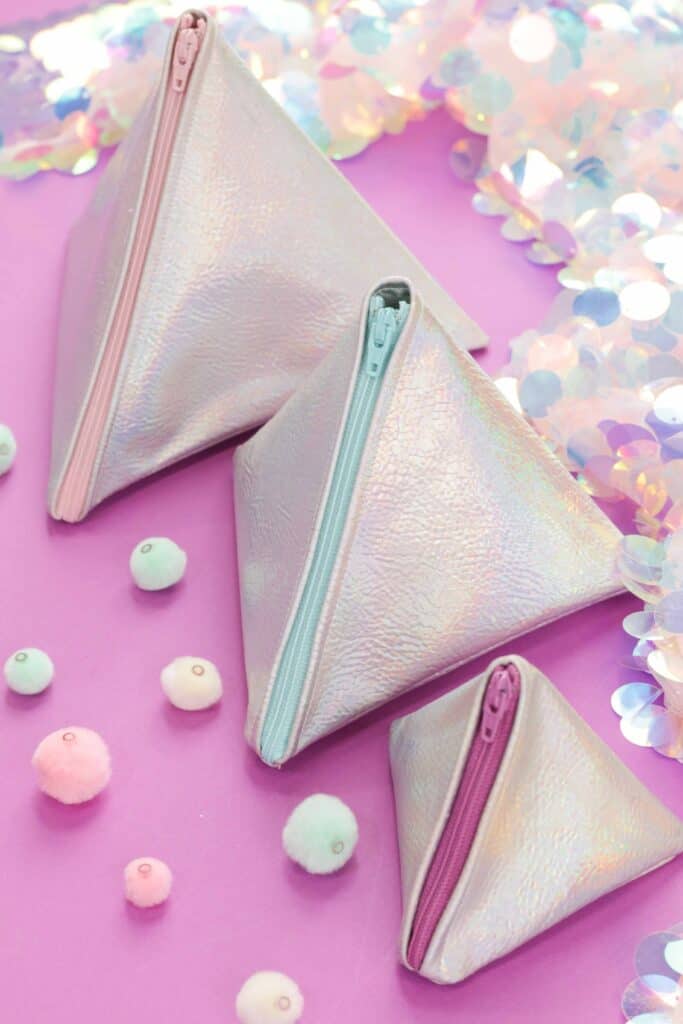
Table of Contents
Want to learn how to make even MORE fabric bags?
Get 11 different bag patterns and gain access to a comprehensive collection of bag patterns and tutorials my All The Bags 150+ page Ebook by clicking here.

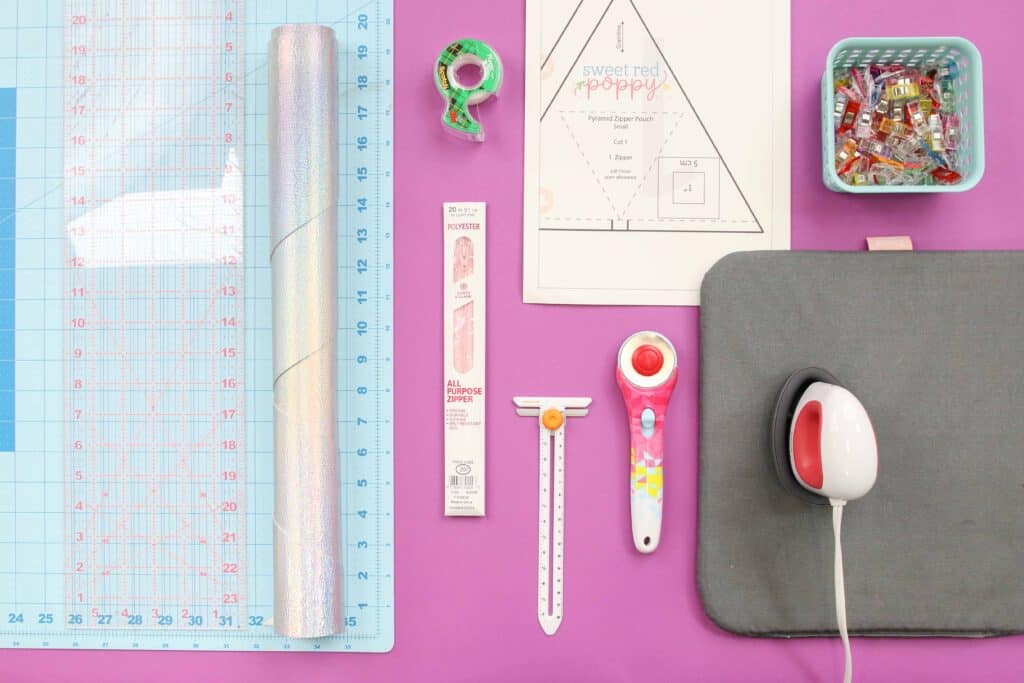
Triangle Zipper Pouch Supplies
Shop my favorite sewing supplies here!
- 1/3 Yard Faux Leather or Vinyl (the product linked is similar)
- All Purpose Zipper ( I like using a zipper between 16" - 20")
- Sewing Machine
- Scissors or Rotary Cutter & Mat
- (Optional) Electric Scissors
- Thread
- Pins or Clips
- Iron & Ironing Board
- Sewing Machine Needle
- Fabric Pen or Chalk
- Tape
- Printer
- Printing Paper
Why Shop Through My Links?
When you shop through my affiliate links, it doesn't cost you anything extra, but it helps me out in a big way! I earn a small commission from those purchases, and that support allows me to continue creating and sharing free tutorials and patterns for you. Thank you so much for helping me keep this creative community going!
Click Here to Download the Free Triangle Zipper Pouch Pattern

Step 1: Print the Zipper Pouch Pattern
Download the pattern to your computer and print the pattern at 100% with no scaling.
Immediately check the 1” x 1” square to ensure the pattern has printed off correctly. If the 1" square measures larger or smaller the pattern will need to be reprinted for accuracy.
Lay the pages out in numerical order. When you come to a paper without stars on the right-hand side (page 3) you’ve reached the end of a row. Place the next paper below the first row and continue piecing the papers together.
Align the stars of each page and the black lines and tape them in place.
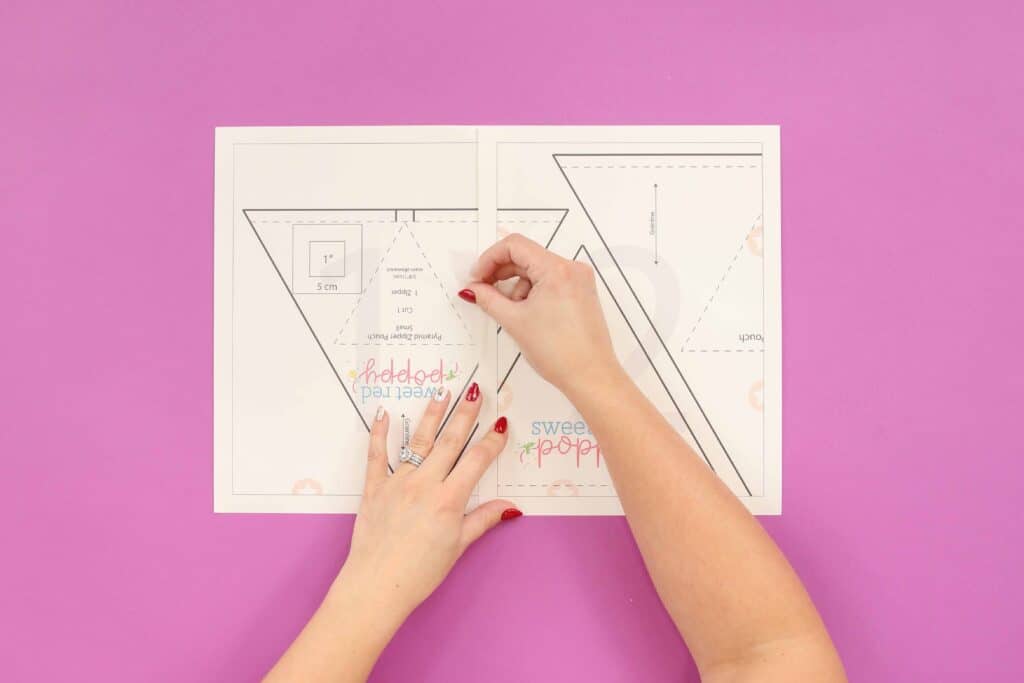
Then, cut out the pattern in your desired size.
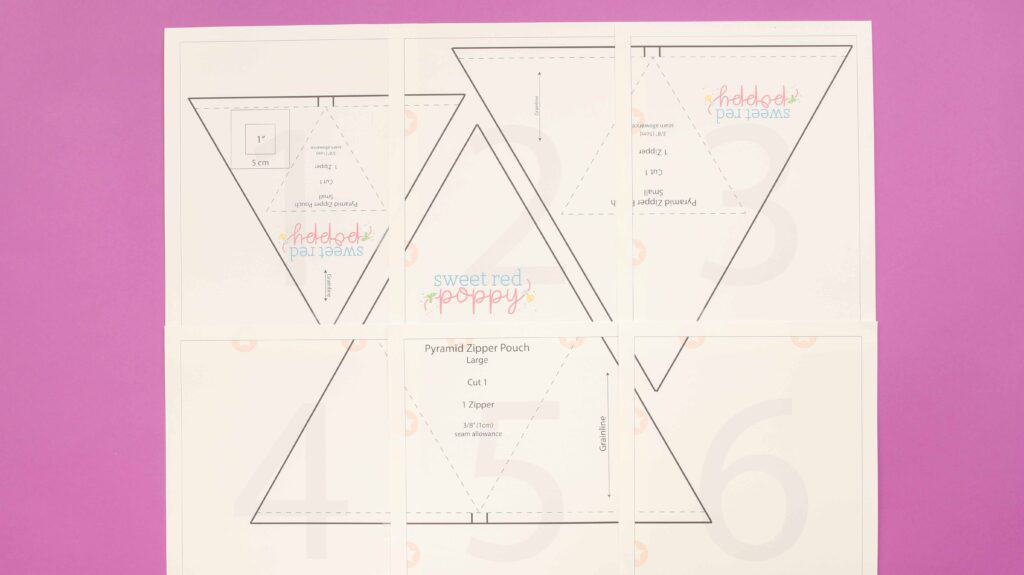
* PRO TIP - Print off the pattern on cardstock so that it will last for multiples uses.
Step 2: Cut Pattern and Fabric
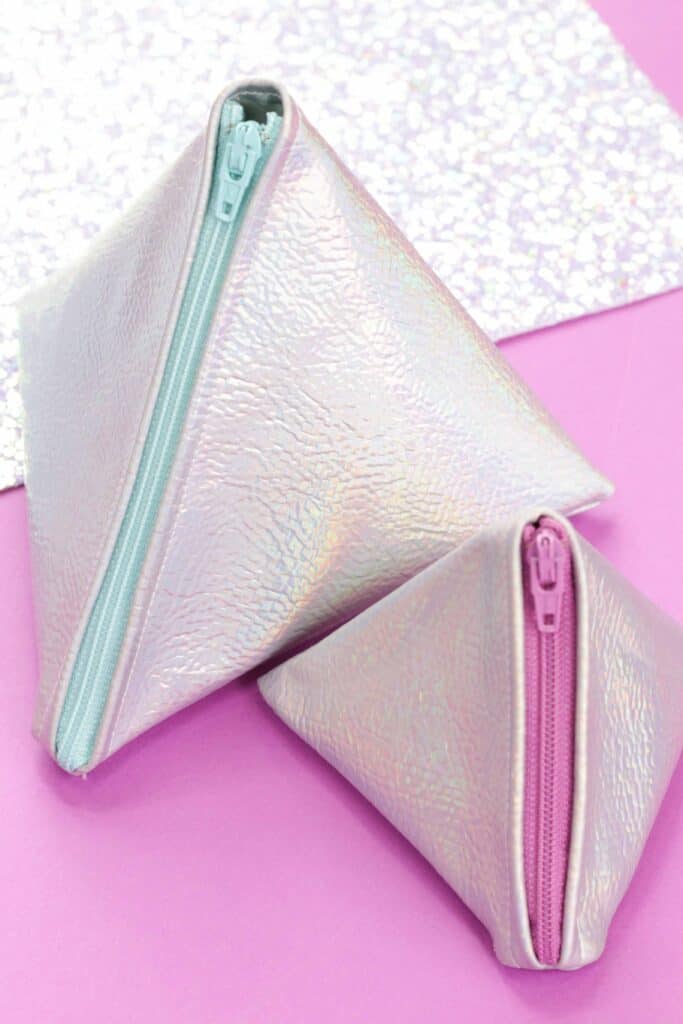
The triangle zipper pouch features 3 different sizes.
- The small is perfect for coins, rings, headphones, and jewelry.
- The medium-sized pouch fits hairbands, lipgloss, makeup, and snacks.
- The large can easily fit pens, pencils, markers, and more!
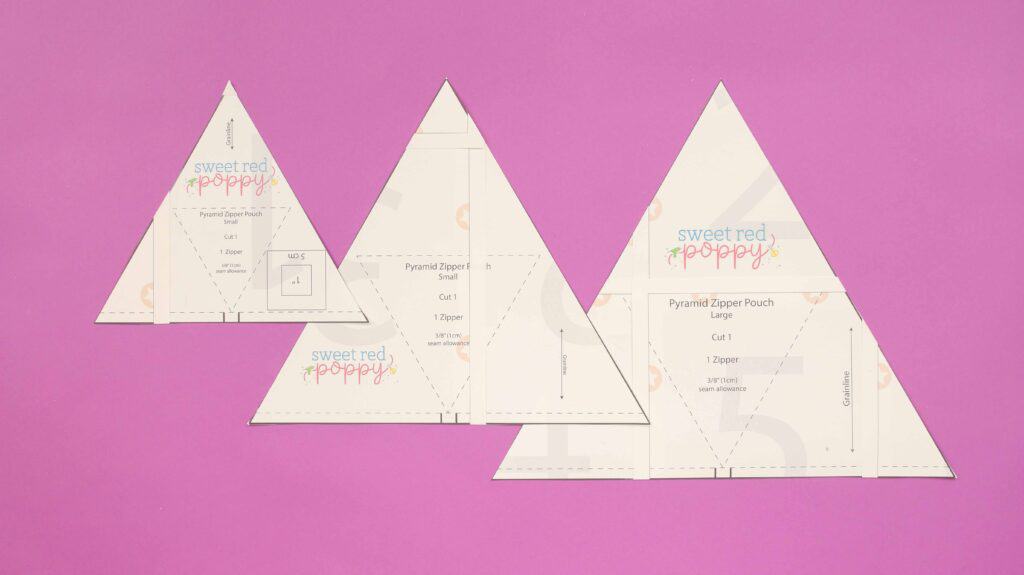
Cut out your pouch pattern in your desired size.
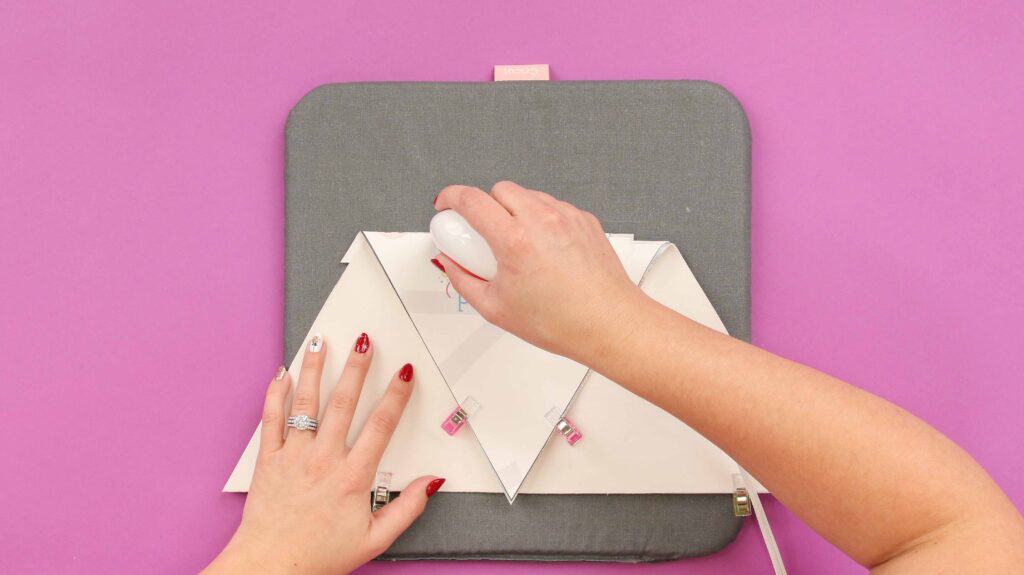
Lay the fabric out on a flat surface. Pin or clip the pattern in place and cut around the outside of the pattern pieces.
Main - Cut 1 of Faux Leather
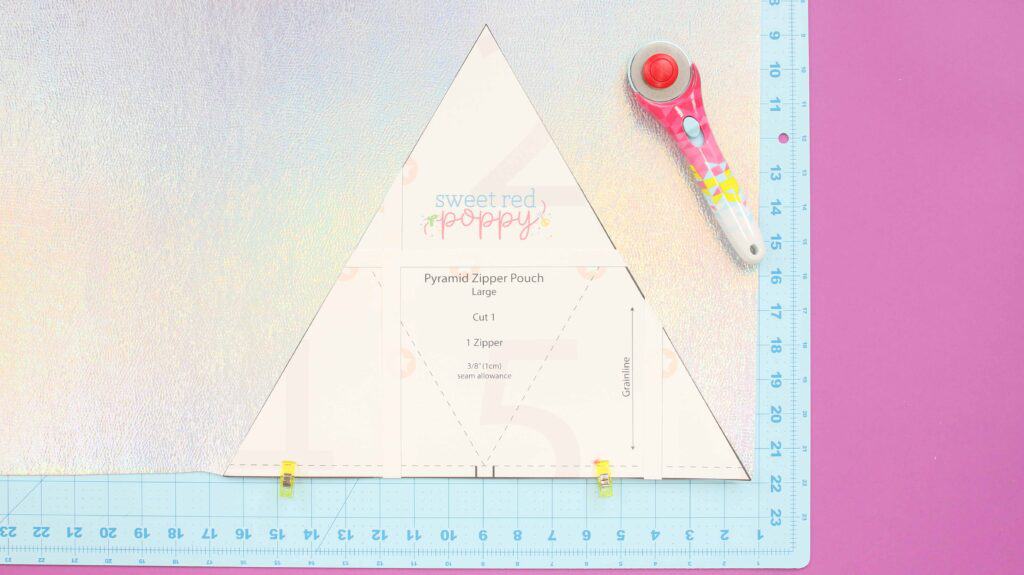
Before removing the paper pattern from the fabric mark all notches using a fabric pen or chalk. The notches are marked on the pattern pieces with a straight line and will help you to correctly align the zipper in the following steps.
*Optional - Finish all three edges of the triangle with a serger or zig zag stitch if you are using a fabric that will unravel.
If you are using a lightweight fabric that's not as stiff as faux leather you can apply a layer of fusible fleece to the backside of the fabric to help it hold its shape.
Step 3: Press Pattern Markings
Press the marked edge of the triangle fabric under 3/8” towards the wrong side.
If you are using faux leather, place a pressing cloth over the fabric to prevent it from getting damaged and use low to medium heat.
Press the triangle along the pressing lines.
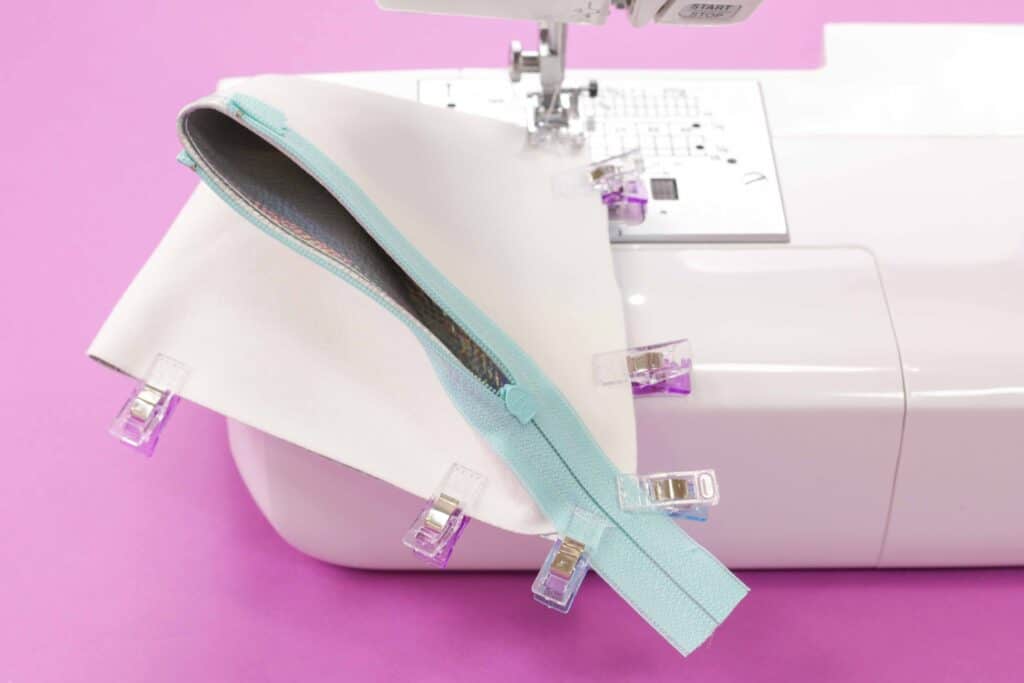
Step 4: Attach the Zipper
Place the triangle facing right side upwards on the table in front of you.
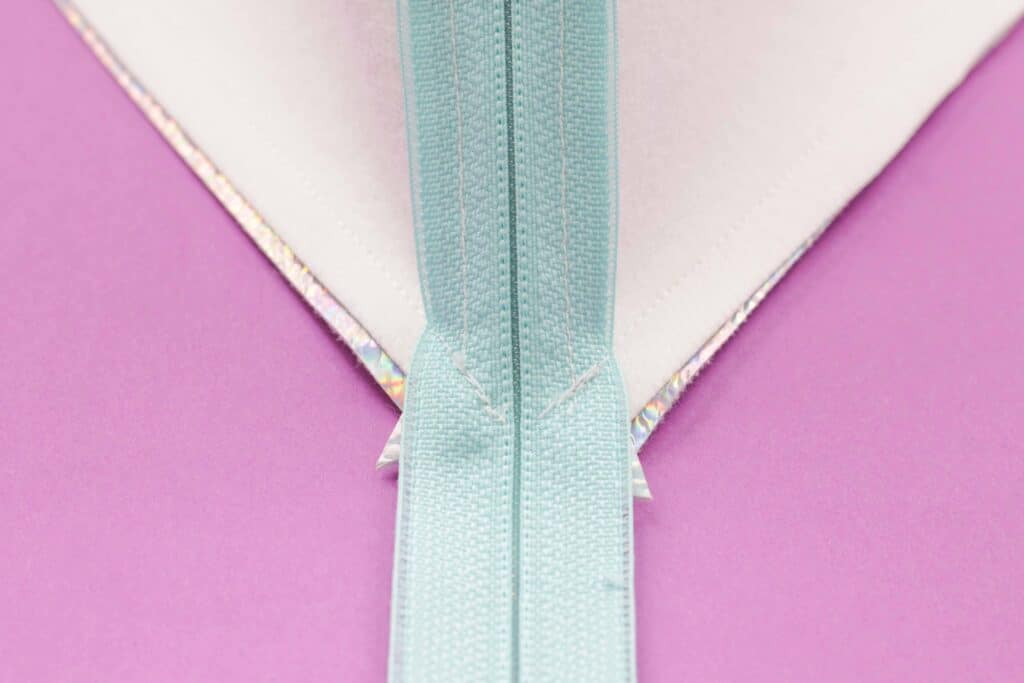
Slide the zipper under the folded edge aligning the top of the zipper tape with the marking. The metal stop of the zipper should be aligned with the marking.
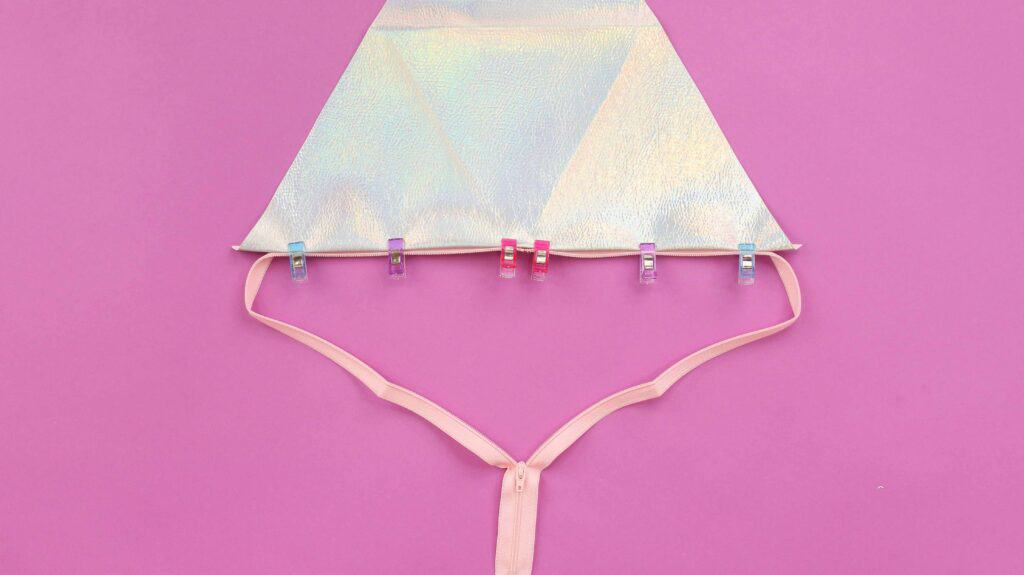
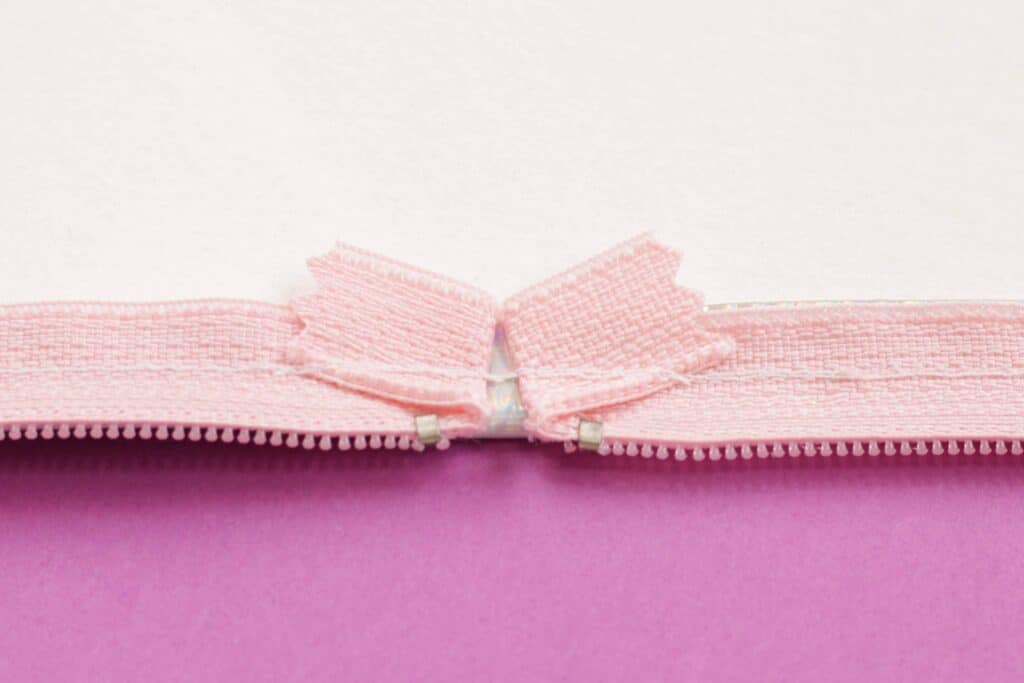
Fold the top of the zipper tape back towards the zipper and clip it in place. The photo below show what the excess zipper tape should look like.
Unzip the zipper and align the opposite side of the zipper to the remaining part of the folded edge.
I like to use a zipper that's larger than needed so I can open the zipper all the way, and sew both sides. Once I've finished I can trim the excess zipper.
If desired, add in a strap by pinning both ends on top of each other in the opening between the zippers.
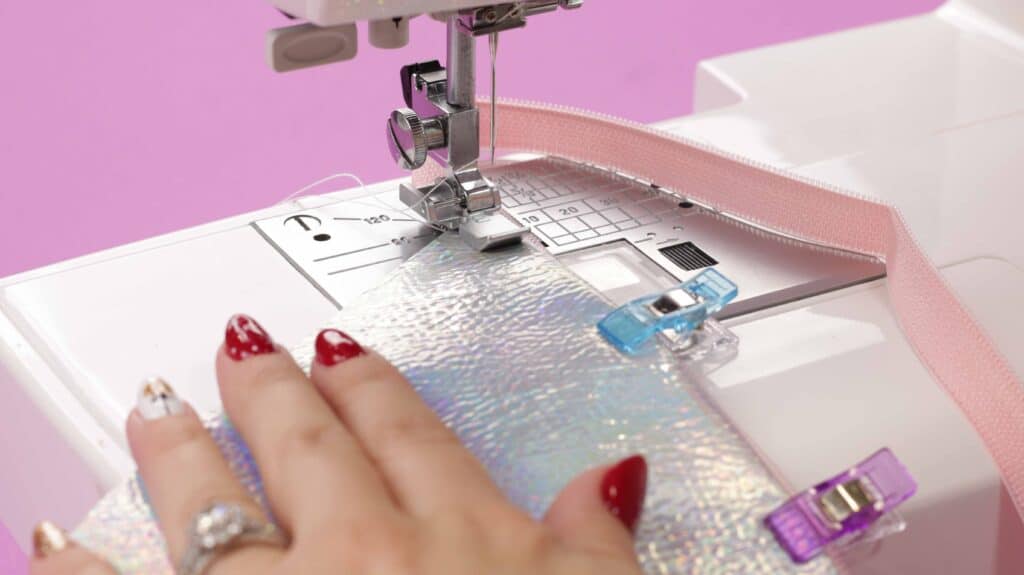
Sew along the edge of the fold with a zipper foot.
Step 5: Sew the Side Seams
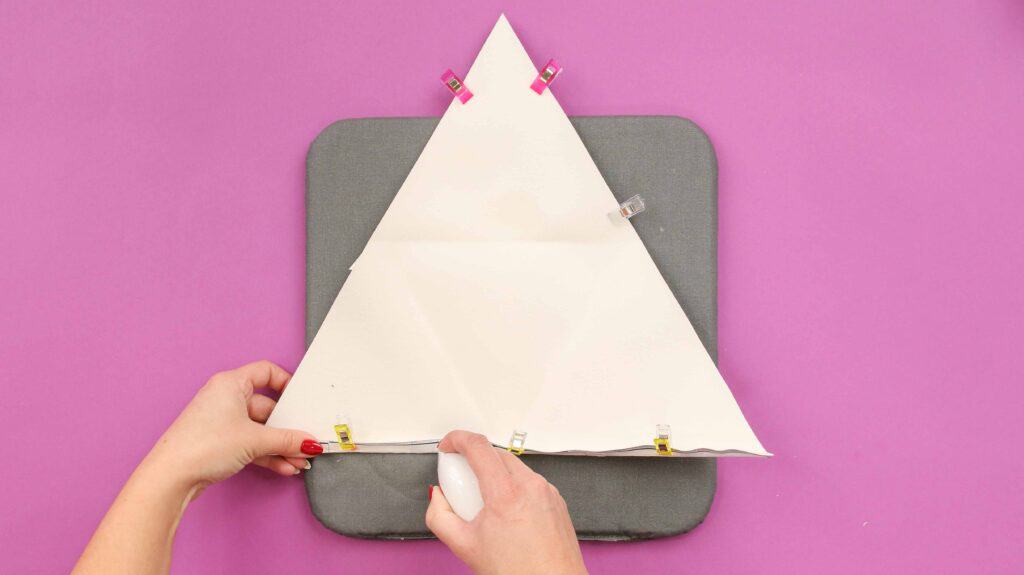
Turn the bag inside out and align the side seams together to form the triangle.
The tip of the triangle should be aligned with the zipper.
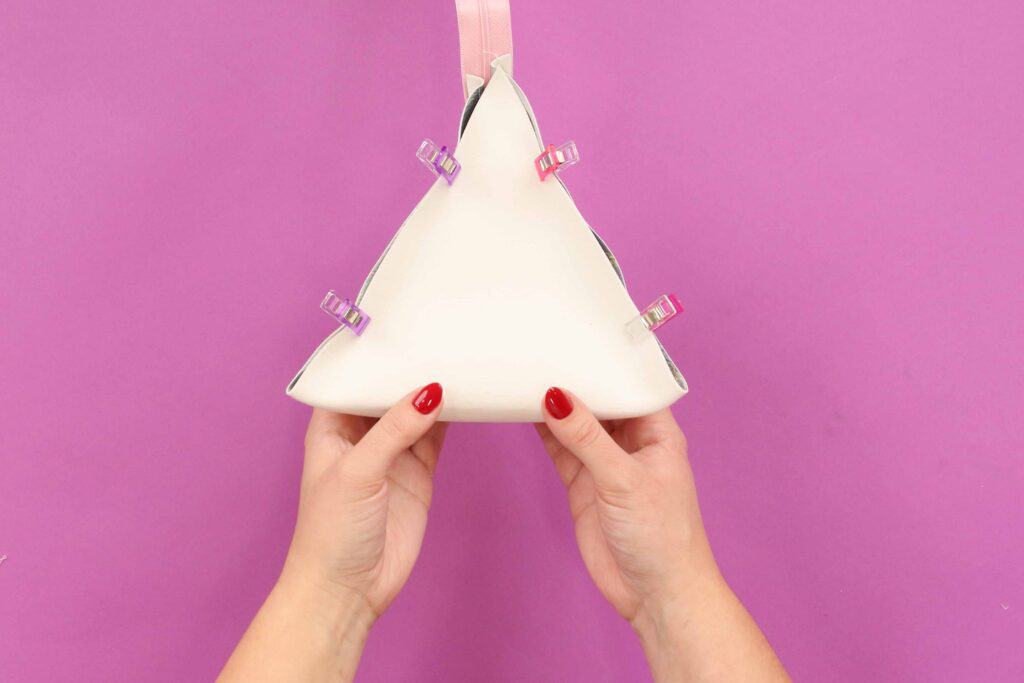
Pin or clip the sides in place and sew them with a 3/8” seam allowance.
Leave a small unsewn portion at the very tip of the bag. This will make it easier to create a sharp point once the bag is turned right side out.
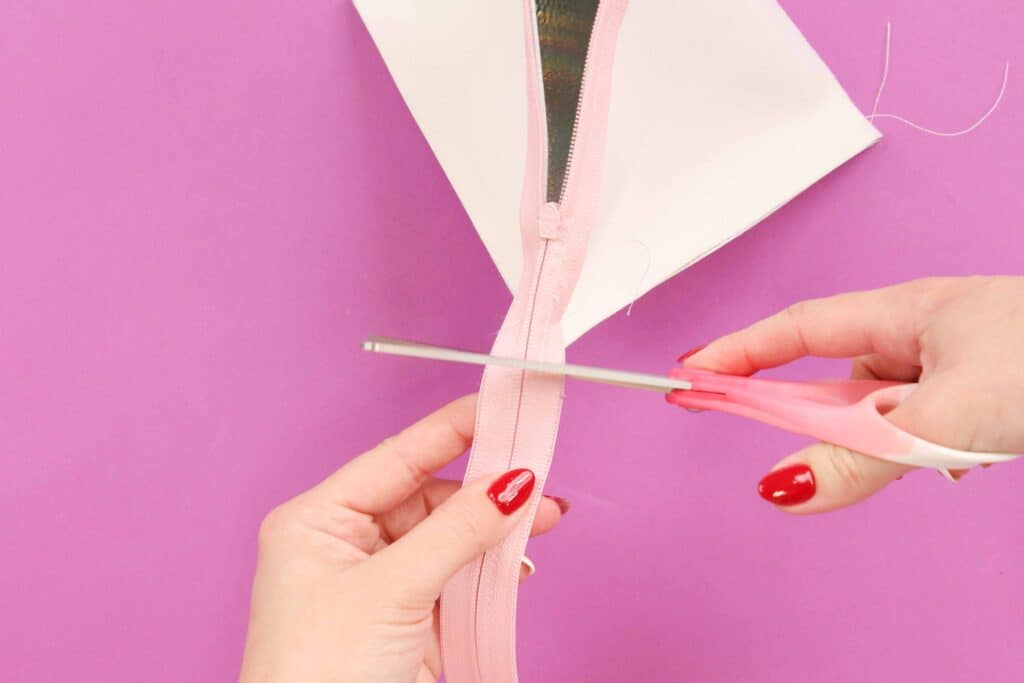
Trim away the excess zipper tape once the side seams have been sewn.
Turn the triangle pouch right side out.
Press the seams with a pressing cloth and a warm iron. Repress along the fold lines that you created in step #3.
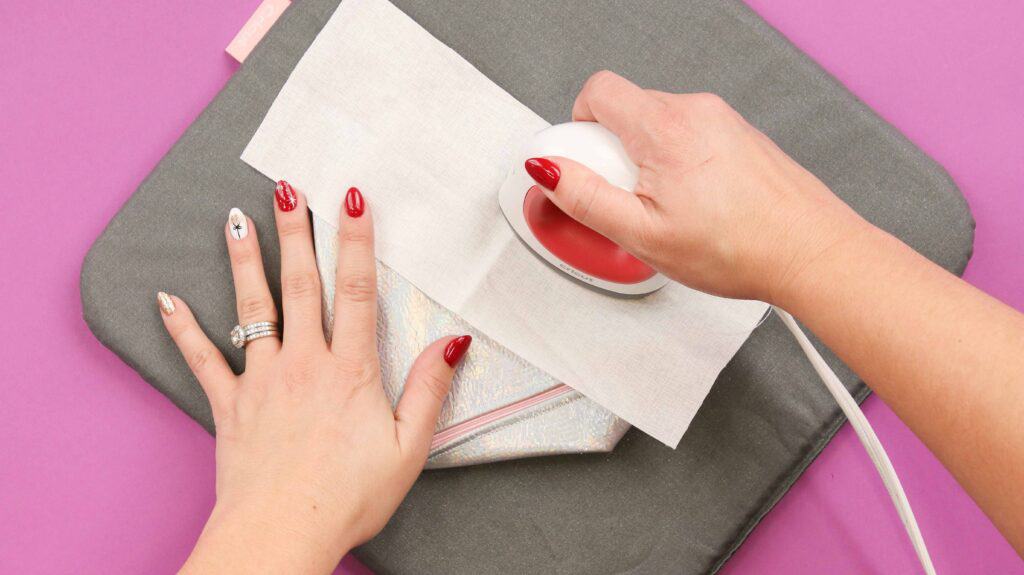
Now you have your finished triangle zipper pouch! You can make this pouch in three different sizes. Try out different fabrics for a customized look or add vinyl to the pouch to personalize it.
Join my crafting and sewing Facebook group where you can show us what you’re making, ask questions, and learn from others!

Follow Sweet Red Poppy on Instagram to get a look behind the scenes, find out about new patterns and enter our giveaways.

Don't forget to post your finished zipper triangle pouch on Instagram and use the hashtag #sweetredpoppy to be featured in our Instagram stories.
Don’t want to forget about this pattern? Save this project for later! Click here to save this project on Pinterest.
How can I print a pattern instructions without ads
If you go to the middle of the page, there is a link where you can download the pattern. Just click on it and enter your email address and the pattern will download automatically and you will also receive a copy of it by email.
the download gives me the printable pattern pieces, but not the sewing instructions. Don't want to print dozens of pages with all the ads
Is it possible to line the triangle pouch so the seam allowance is not seen.