Free Baby, Toddler, and Kids Leggings Pattern. Sew a Pair of Stretchy Knit Leggings with this Beginner Friendly Printable PDF Sewing Pattern Photo Tutorial and Video.
Have you ever wondered how to make leggings? You won't believe how easy it is to sew leggings with this step-by-step tutorial and video. This project is perfect for a beginner, and you can make these leggings on a sewing machine or a serger.
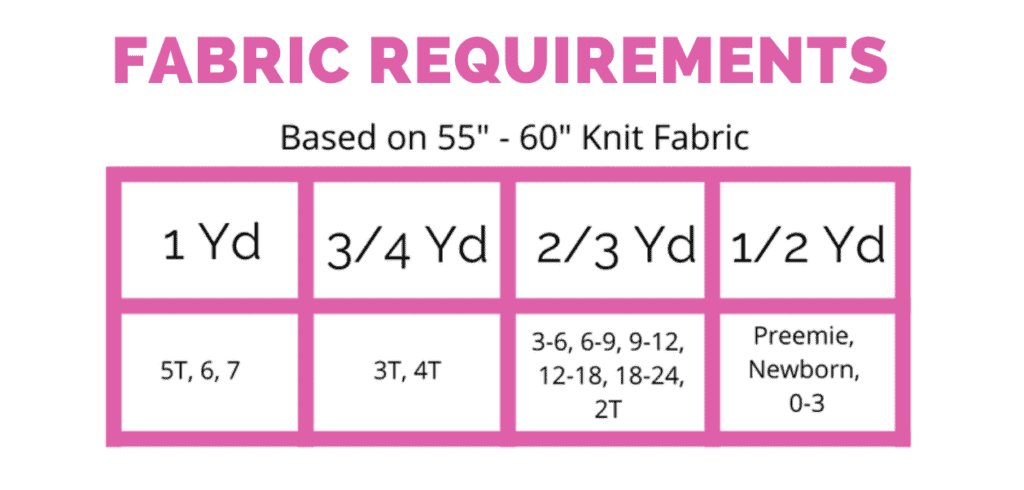
This pattern is available in baby sizes, including Preemie, Newborn, 0-3 Months, 3-6 Months, 6-9 Months, 9-12 Months, 12-18 Months, and 18-24 Months. It's also available in sizes 2T through size 16.
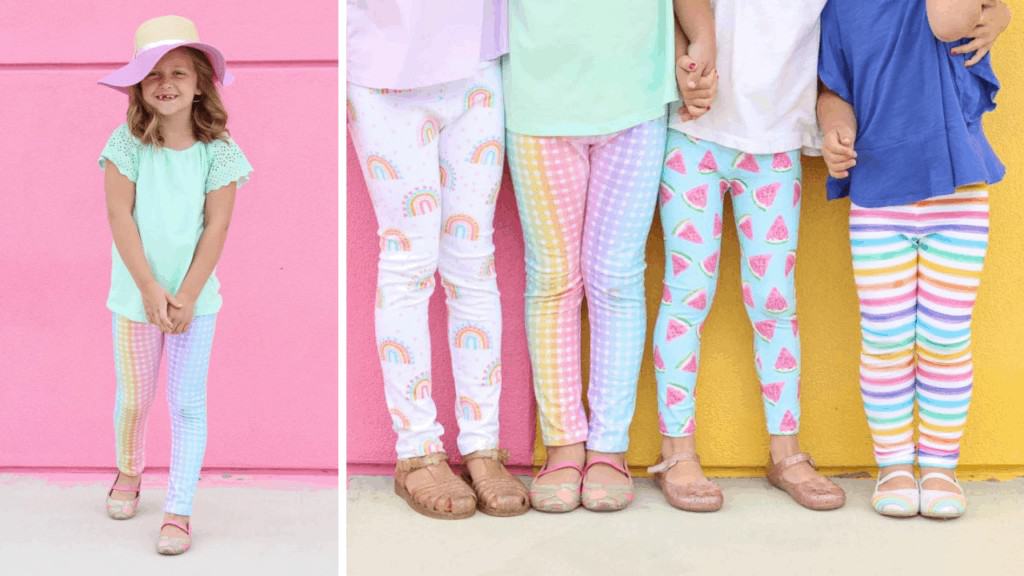
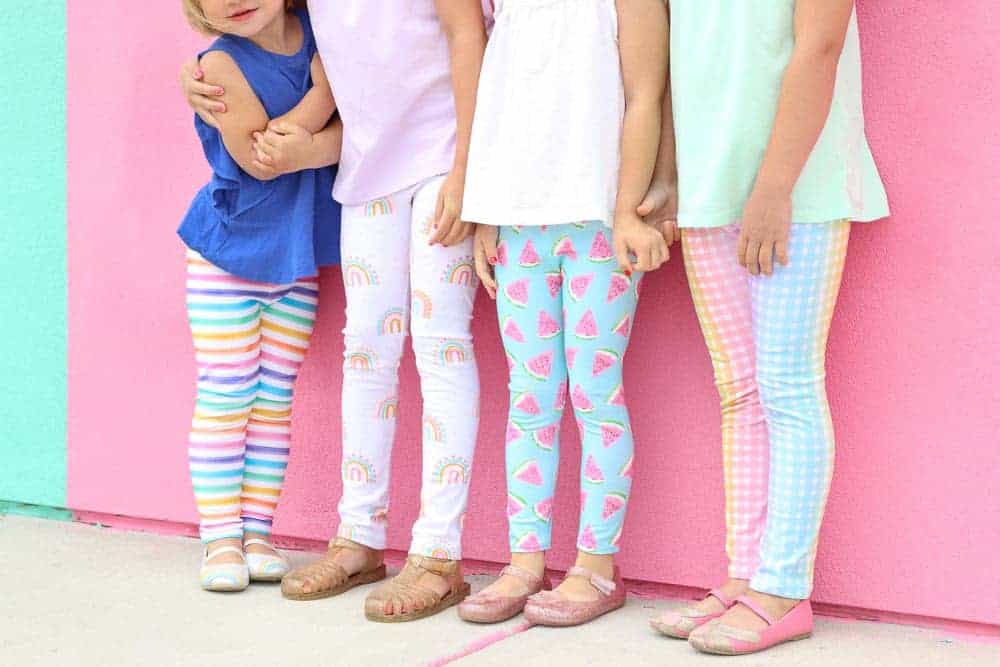
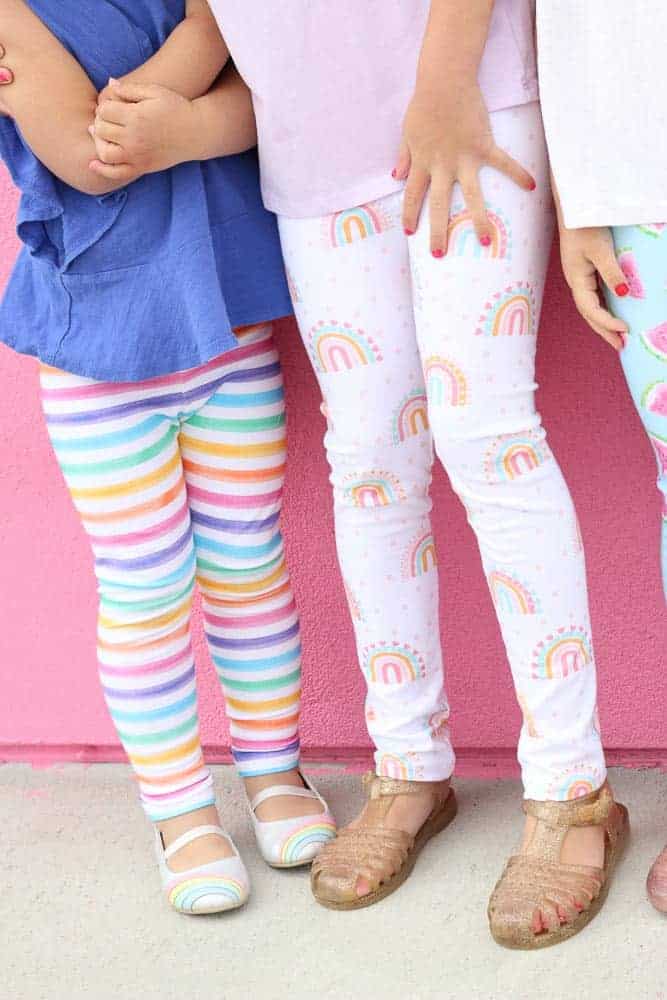
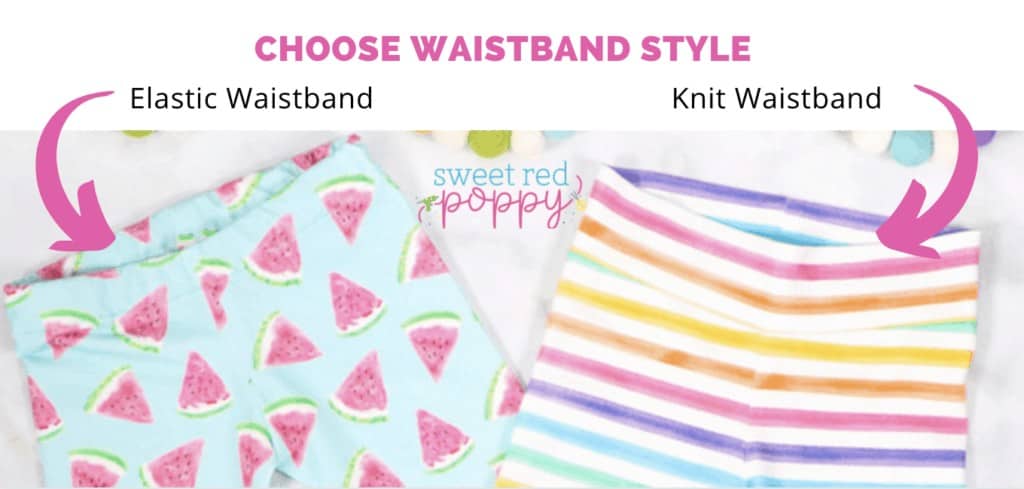
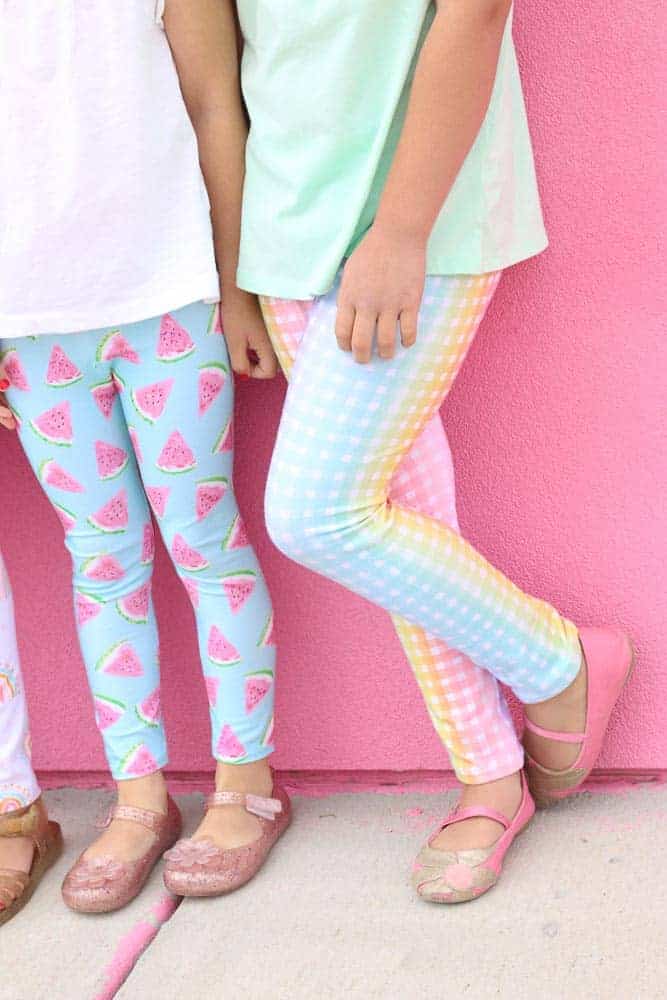
These extra stretchy, easy to pull-on leggings with an elastic waistband are sure to be an everyday favorite!
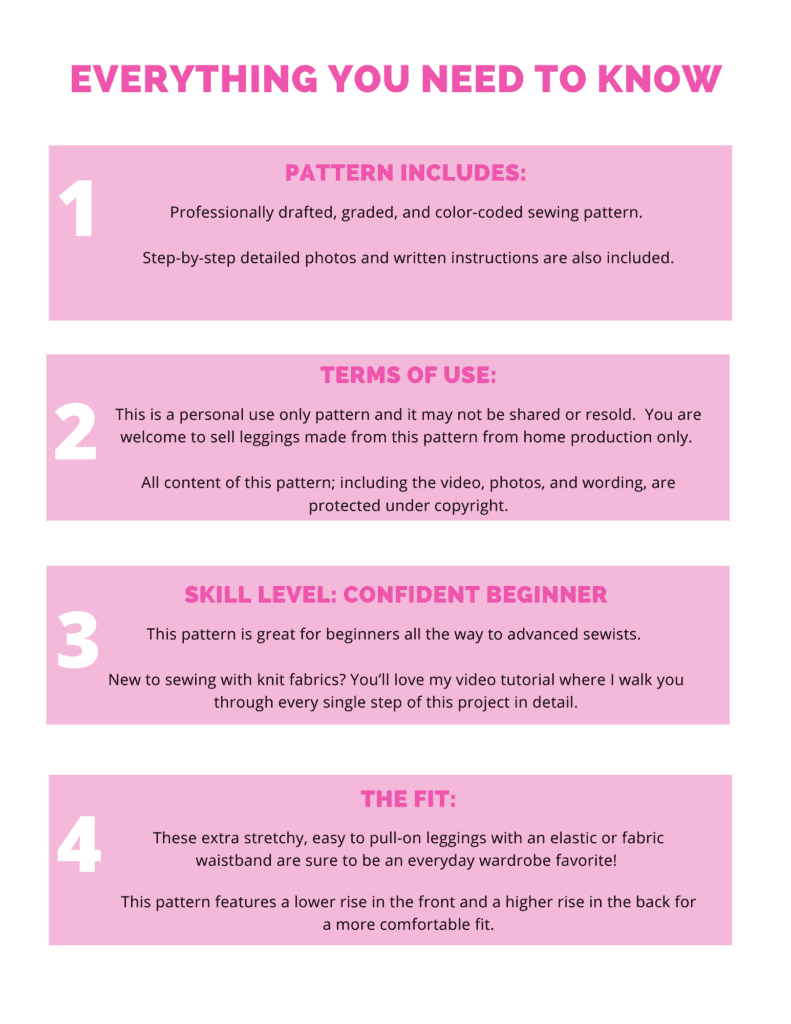
Included in this pattern is a professionally drafted and graded color-coded pattern. Use the 1x1 inch printing guide to ensure accuracy and quickly put this pattern together with its no-trim pieces.
Step-by-step detailed photo and written instructions are also included.
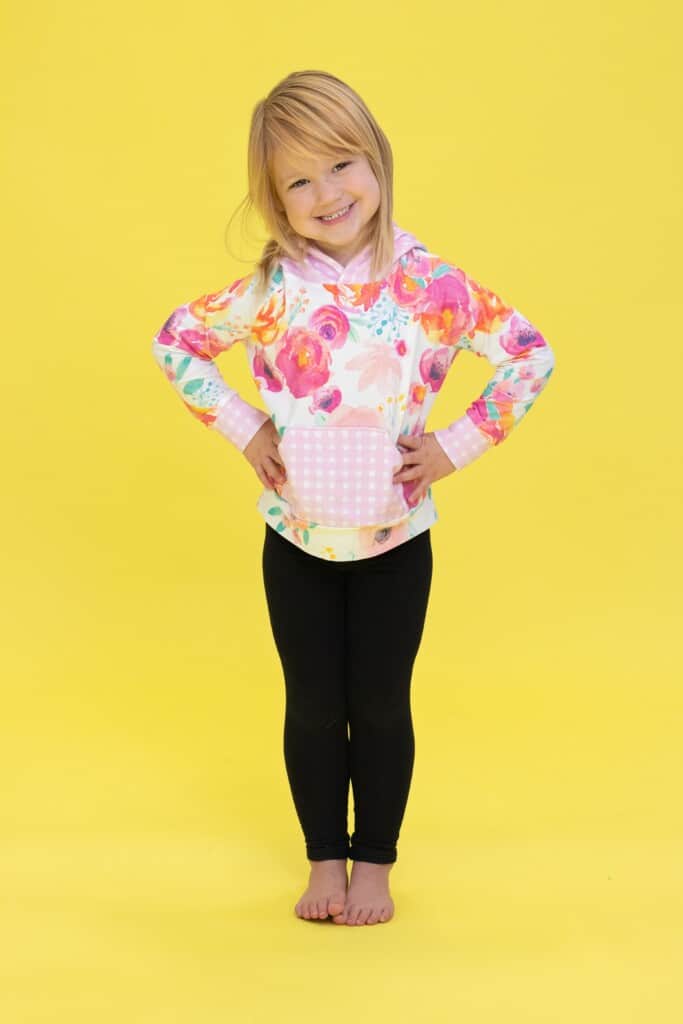
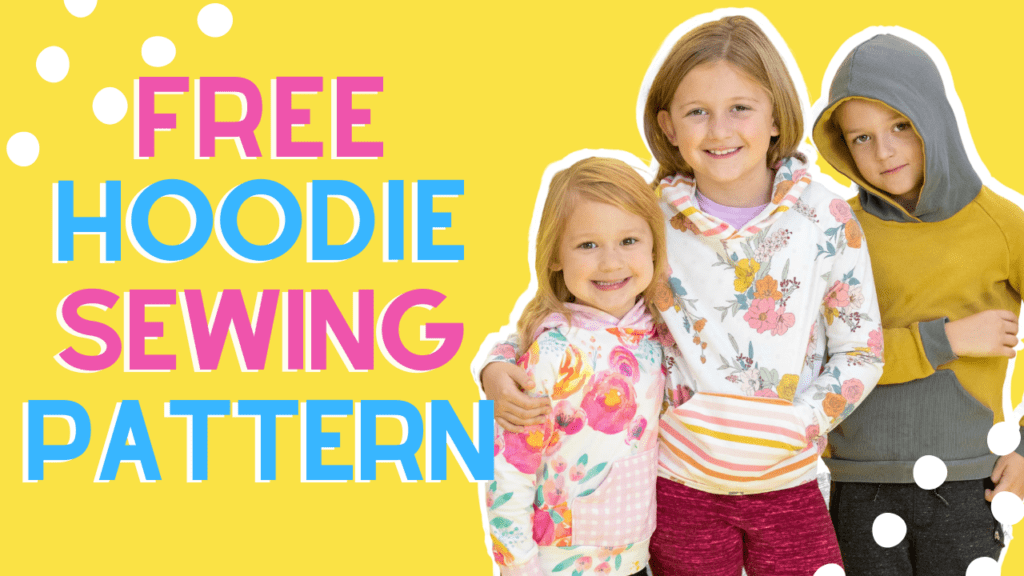
Looking for a FREE hoodie pattern to go with these leggings? Click here!
I also have a free pajama pant pattern for the entire family.
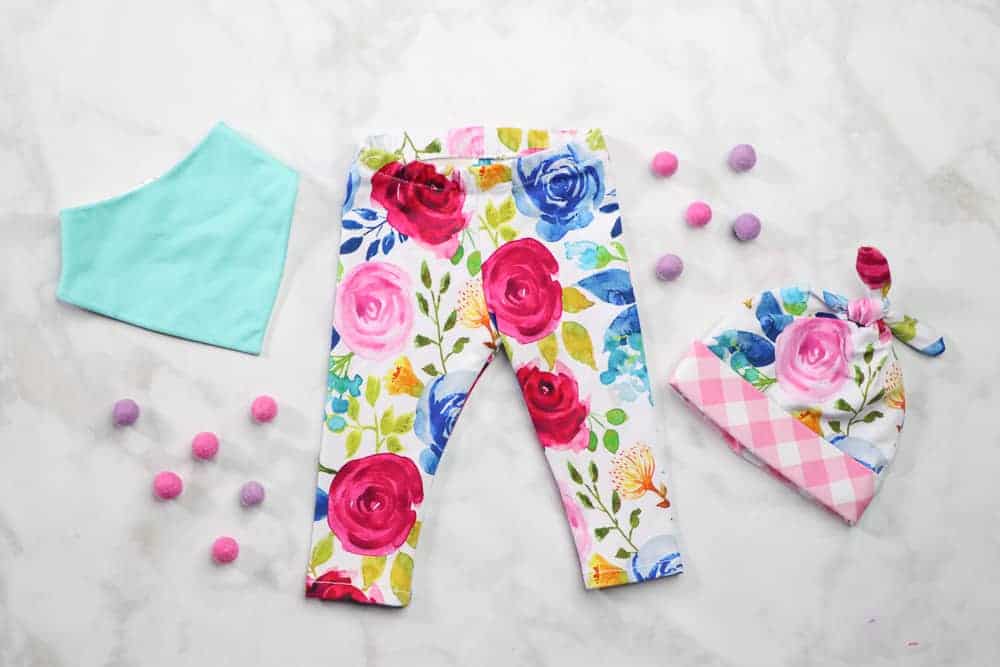
Pair these FREE Leggings with my FREE Top Knot Baby Hat and Bandana Bib for the perfect baby outfit!
Check out my FREE Girl's Madeline Dress Sewing Pattern.
New to sewing with knit fabrics? You’ll love my video tutorial where I walk you through every single step of this project in detail.
I'm sharing all of my tips and tricks for sewing leggings with knit fabric.
This pattern features a lower rise in the front and a higher rise in the back for an extra great fit.
Looking for even more FREE Sewing Patterns? Click HERE!
Baby, Toddler, and Kids Leggings Pattern
Medium Weight 4-Way Stretch Knit Fabric
For this pattern, I recommend using a medium-weight knit fabric with a content of 95% Cotton, 5% Lycra/Spandex. Having at least 5% Lycra or Spandex allows the fabric to have elasticity and bounce back to its original shape without getting stretched out over time.
Other suitable fabrics for this pattern are Double Brushed Polyester, French Terry, and Rayon Spandex
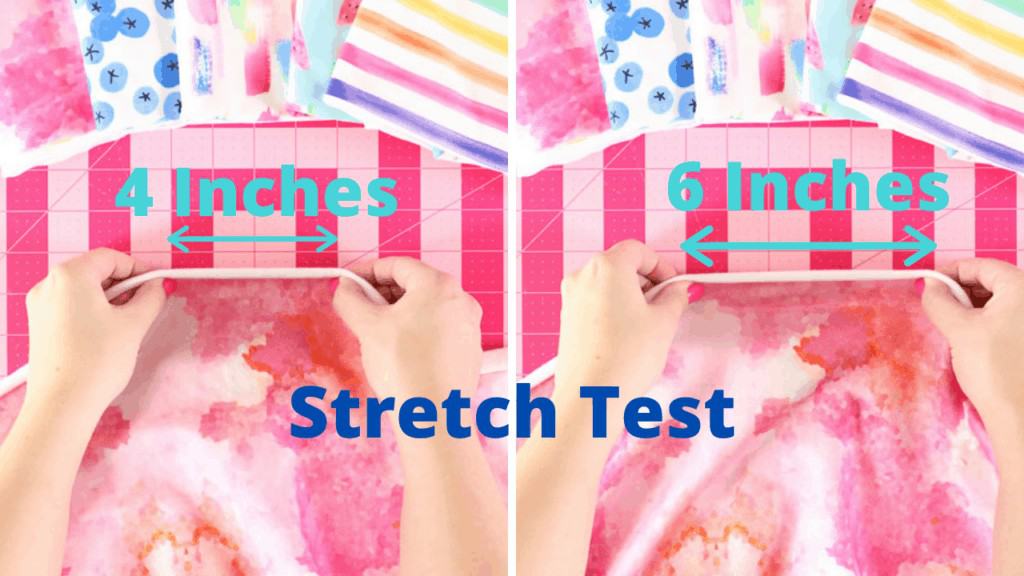
It’s essential to use a fabric with at least 50% stretch. Not sure what that means? A 4" piece of fabric should stretch to at least 6". Fabric must have stretch both horizontally and vertically. Look for fabrics labeled as a 4-way stretch.
Make sure to prewash and dry your knit fabric before cutting and sewing it! This will prevent your fabric from shrinking after you've sewn it.
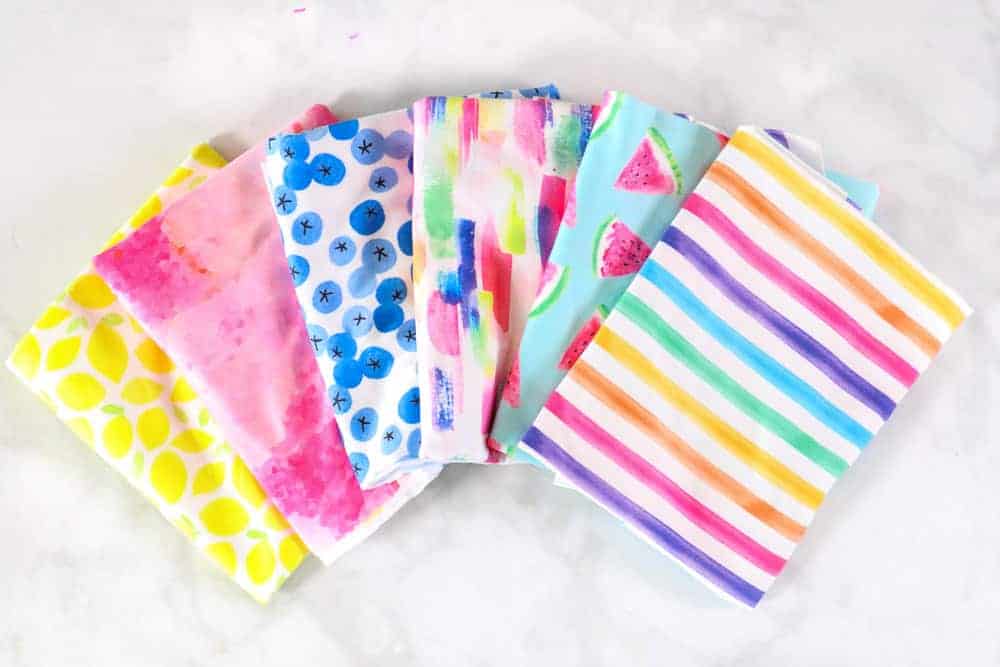
I recommend shopping for knit fabric from Raspberry Creek Fabrics. This is my one-stop shop for high-quality knit fabric with the cutest prints!
*Be sure to double-check the type of fabric in the drop-down menu on the fabric listing.
This pattern works best with a four-way stretch fabric. That means it has stretch in both directions and will be ideal for creating a comfortable fitting baby hat.
The following FOUR-WAY STRETCH fabrics from Raspberry Creek Fabrics are ideal for this pattern.
- Cotton Spandex Jersey
- Cotton Spandex French Terry
- Organic Cotton Spandex Jersey
- Bamboo Cotton Spandex Jersey
- Double Brushed Polyester
- Athletic Performance Knit
Avoid the following fabrics
- Quilting Cotton (this is not a stretchy fabric)
- Cotton Interlock (this is typically a two way stretch fabric)
- Ponte De Roma (this fabric doesn’t have enough stretch and it’s too structured)
- Tri-Blend Jersey (two-way stretch)
Finishing Techniques
When sewing this pattern you can use a variety of different techniques to finish the seams.
First, you can use the stretch stitch on your sewing machine. This looks like a lightning bolt and allows seams to have more give, so the stitches don’t pop when stretched out.
If you don't have this option, use a zig-zag stitch and narrow the width of the stitch.
The final option is to finish the seams with a serger. The serger creates a seam that is cut and finished in one step. This option creates a more professional-looking finish.
Supply List
Shop my favorite sewing supplies here!
- 1 Yard 4-Way Stretch Knit Fabric (This links to my favorite knit fabric shop)
- Sewing Machine
- Scissors or Rotary Cutter & Mat
- Thread (Optional Eloflex)
- Pins
- Iron & Ironing Board
- Ballpoint Needle
- Ruler
- Printer Paper
- Tape
- Heat N Bond Soft Stretch Lite (optional)
- 1-Inch Elastic (optional)
Why Shop Through My Links?
When you shop through my affiliate links, it doesn't cost you anything extra, but it helps me out in a big way! I earn a small commission from those purchases, and that support allows me to continue creating and sharing free tutorials and patterns for you. Thank you so much for helping me keep this creative community going!
DOWNLOAD THE FREE LEGGINGS PATTERN HERE!
Print the Girl's Leggings Sewing Pattern
Download the pattern to your computer and print the pattern at 100% with no scaling.
Immediately check the 1” x 1” square to ensure the pattern has printed correctly.
How to Assemble This Pattern
The pattern is numbered 1-15. Align the circles and black lines together as you are piecing the pattern together.

Refer to the image below when piecing this pattern together.

Feel free to trim off the excess from each piece of the pattern or hold the pieces up to the light and align them together without trimming.
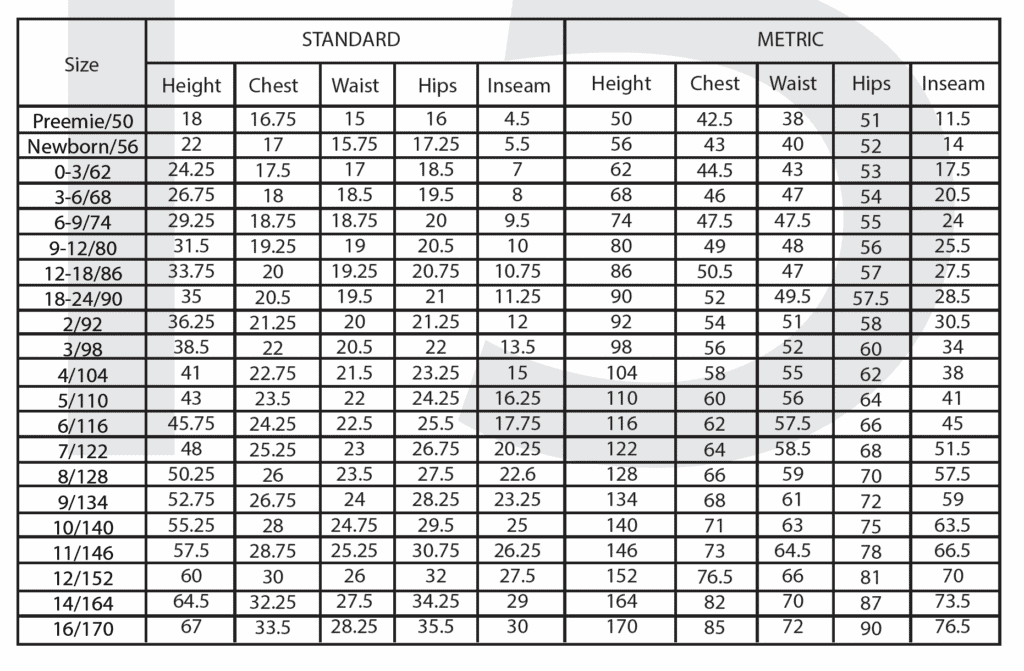
Choosing the Correct Size
Measure Waist, Hips, and Height this will give you an idea of which size will fit best.
Base the size off of the waist measurement and shorten or lengthen the pattern based off of the height.
If in-between sizes, size up for the best fit.
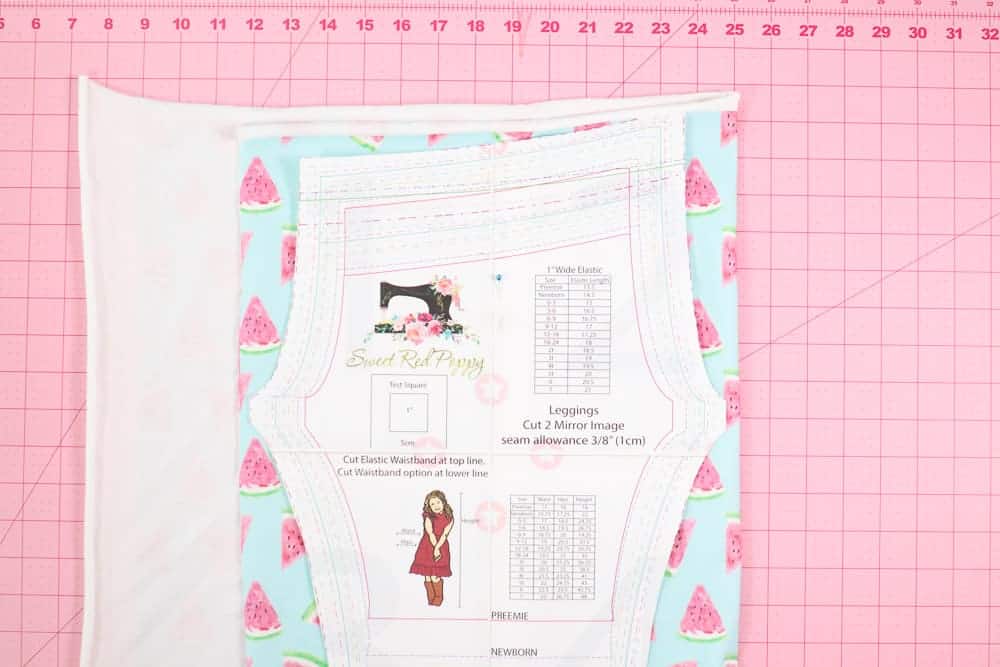
Place the Leggings Pattern on the Fabric
Lay the fabric out in front of you and fold it in half to align the selvage edges.
If you are using a larger size you may want to cut each leg out individually making sure to cut mirror images.
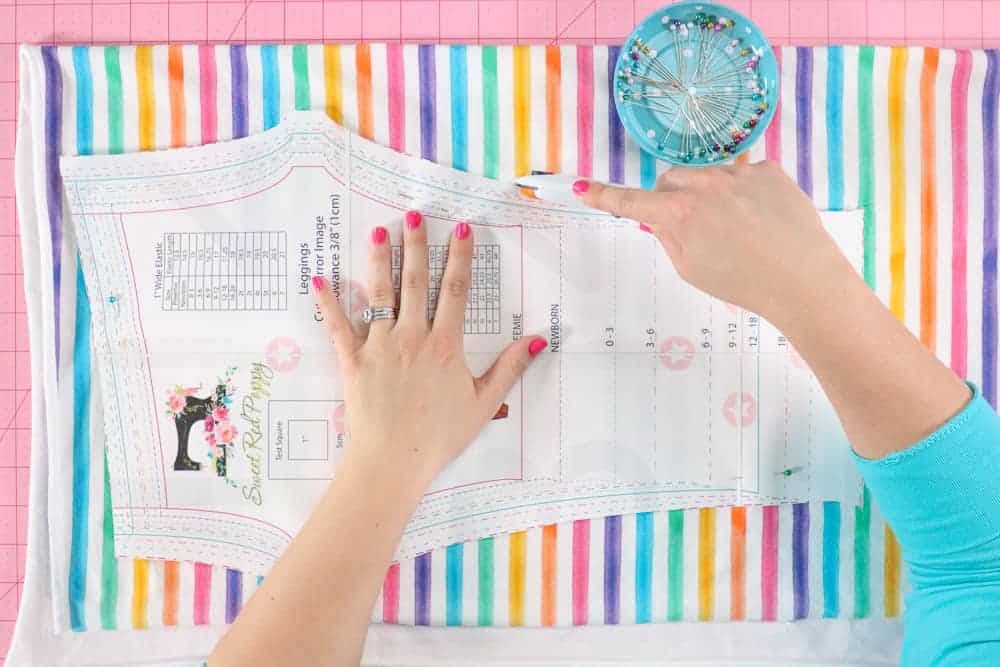
The selvage edges should run vertically along the fabric. The greatest amount of stretch should be going horizontally across the pattern.
Place the pattern piece on top of the fabric and pin it in place.
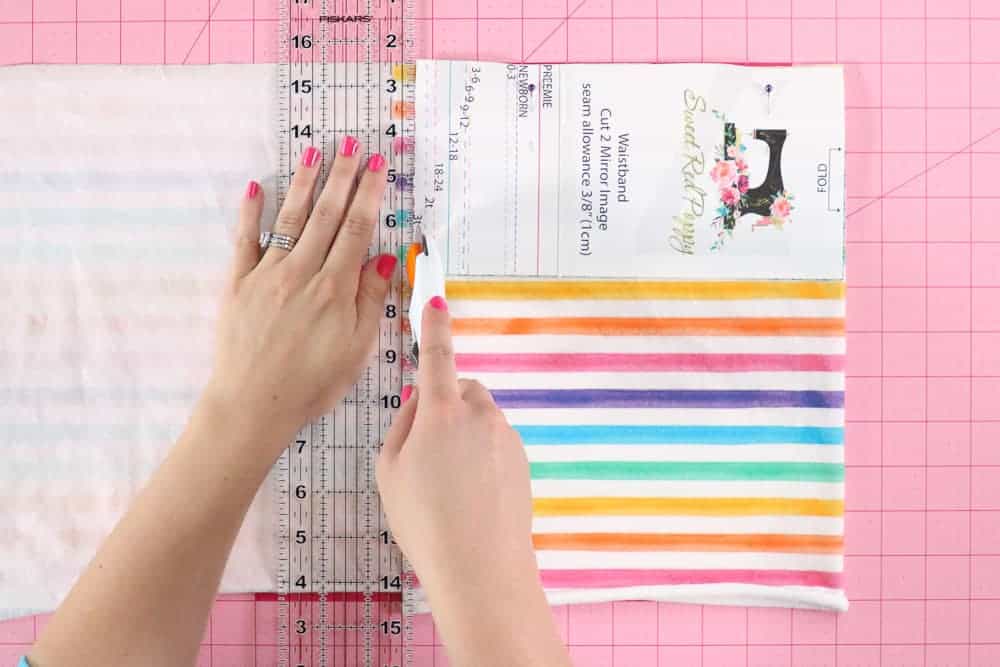
Cut out the Leggings Pattern Pieces
Using scissors or a rotary cutter, cut around the entire pattern.
I like to cut two pieces of fabric at a time to speed up the cutting process.
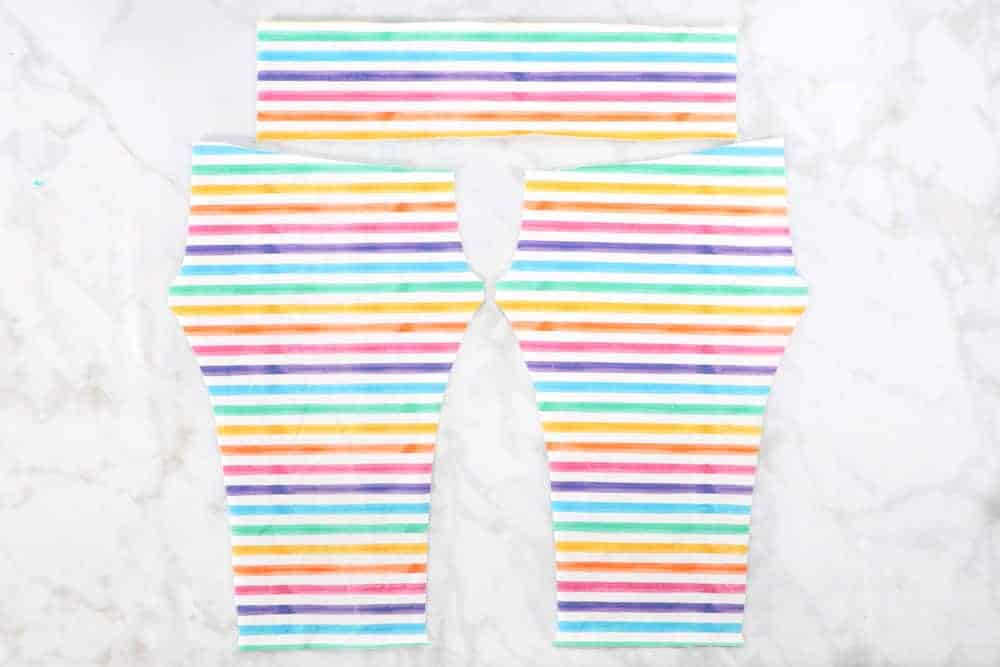
Check the Leggings Pieces
Lay all three pieces of fabric out in front of you.
If you are creating the elastic waistband, you should have a piece of elastic in place of the waistband pattern piece.
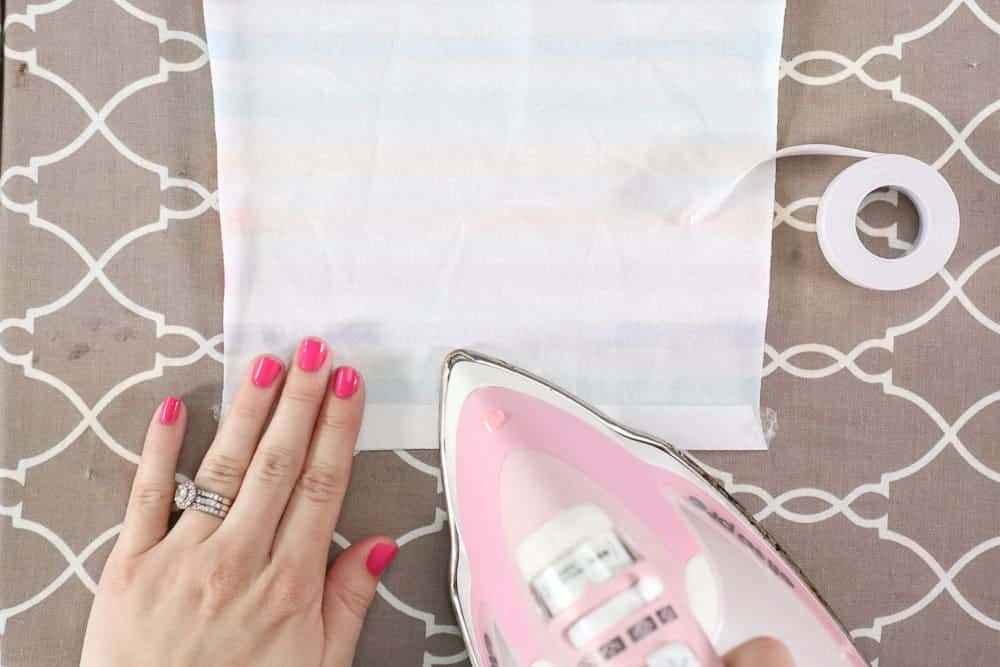
Apply Heat-N-Bond Soft Stretch Lite (Optional)
Using a hot iron without steam, apply Soft Stretch Lite to the wrong side of each legging hem. Peel away the paper liner once the adhesive has cooled.
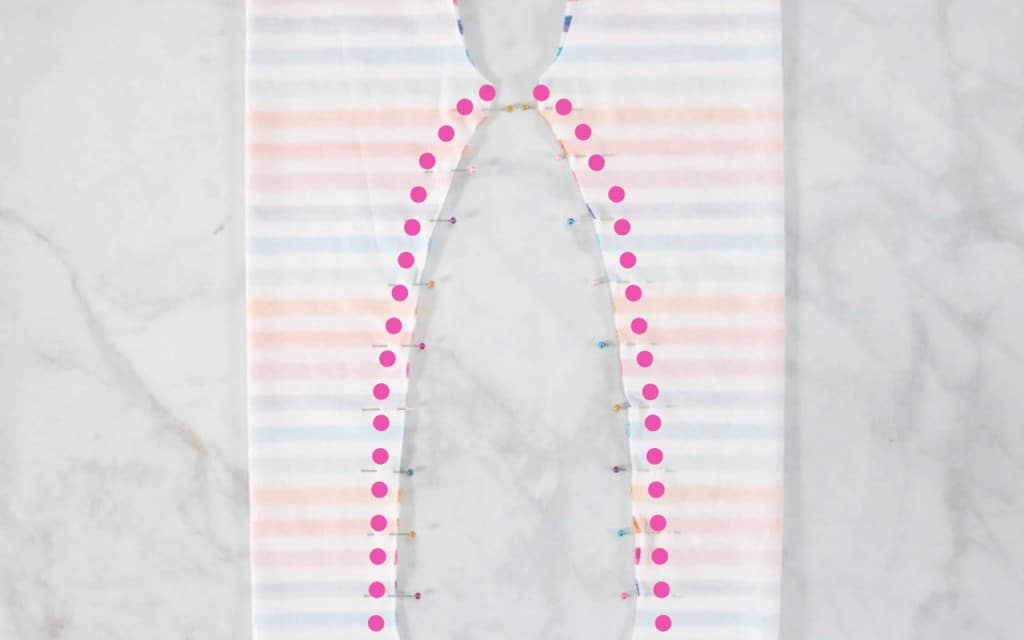
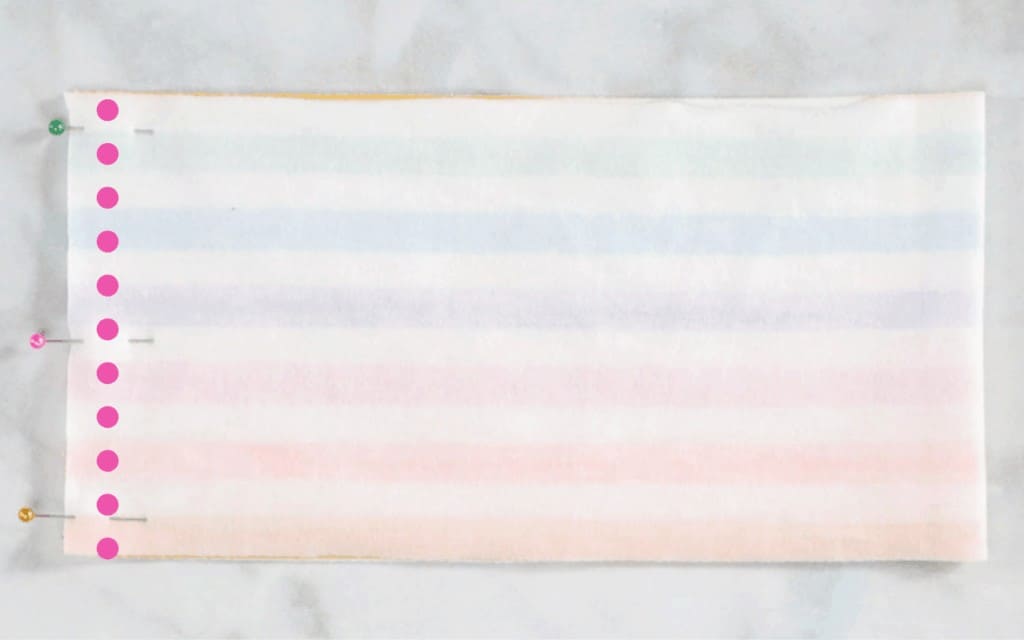
Pin Leggings & Sew the Inseam
Lift one side of the leggings and bring it to the opposite side, so the raw edges are aligned and the right sides are facing each other.
Start at the top of one leg, sew (3/8" S.A.) all the way down to the ankle. Repeat this process on the opposite leg.
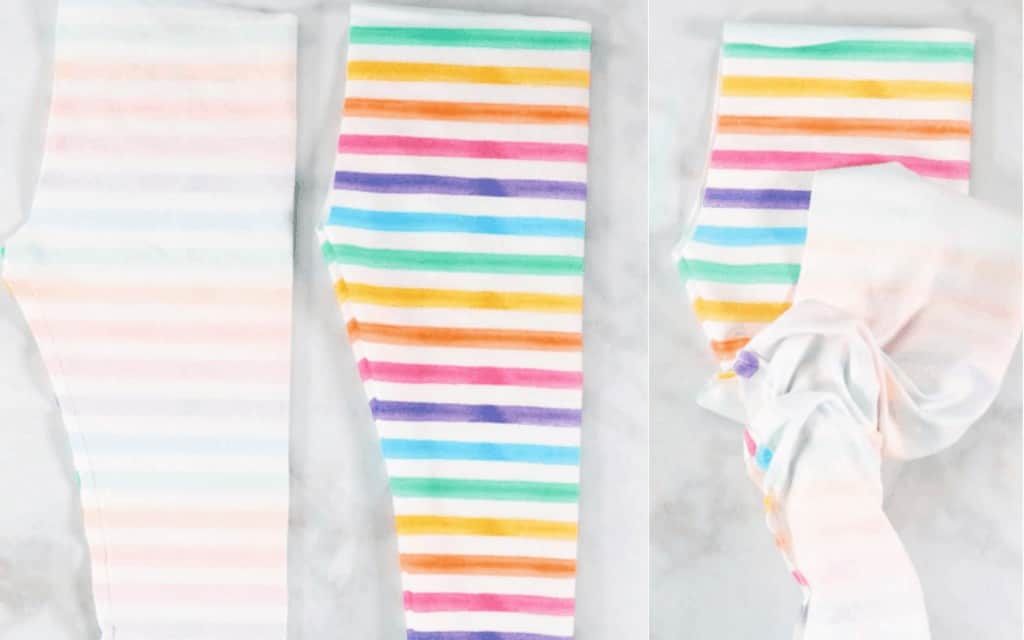
Match up the Crotch Seams
Turn one leg right side out, and slide it inside of the other leg.
The right sides of the fabric should be facing each other.
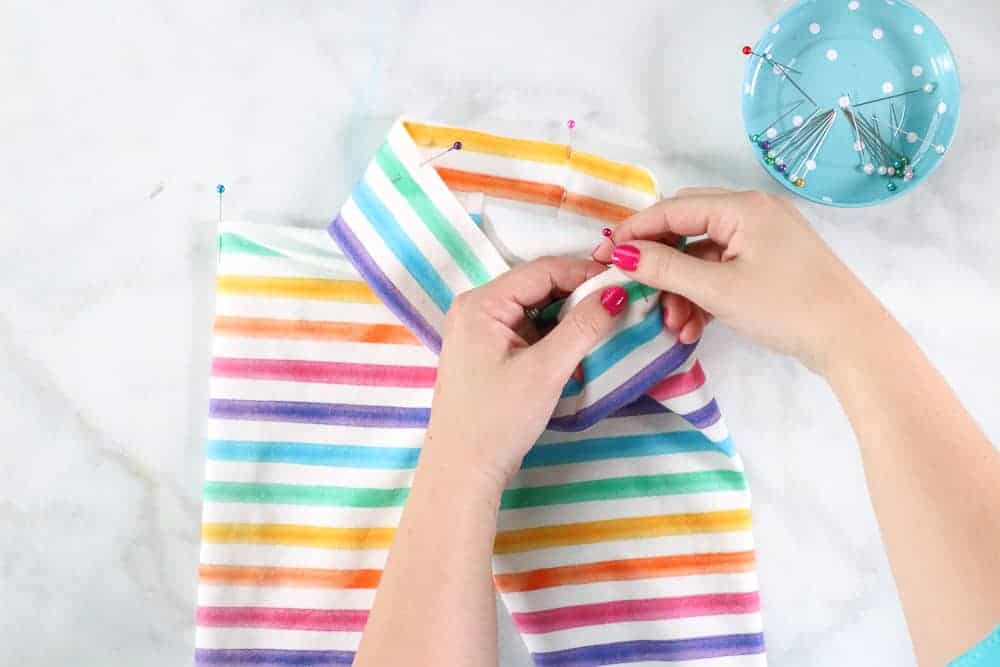
Sew the Crotch Seams
Pin the leggings together along the crotch, making sure to line up the leg seams with each other. Sew along the crotch.
Foldover Waistband
*Scroll down below for Elastic Waistband instructions
Fold the Waistband in Half
Fold the waistband in half, with right sides together, aligning the short ends.
Pin along the short edge.
Sew the Waistband
Sew a seam along the short edge of the waistband with a 3/8 inch seam allowance.
Fold the Waistband in half
Turn the waistband right side out.
Next, fold the waistband onto itself so wrong sides are facing each other.
Press.

Divide into quarters
Divide the raw edge of the waistband and pants into quarters with your sewing pins.
The waistband seam should be aligned with the center back seam.
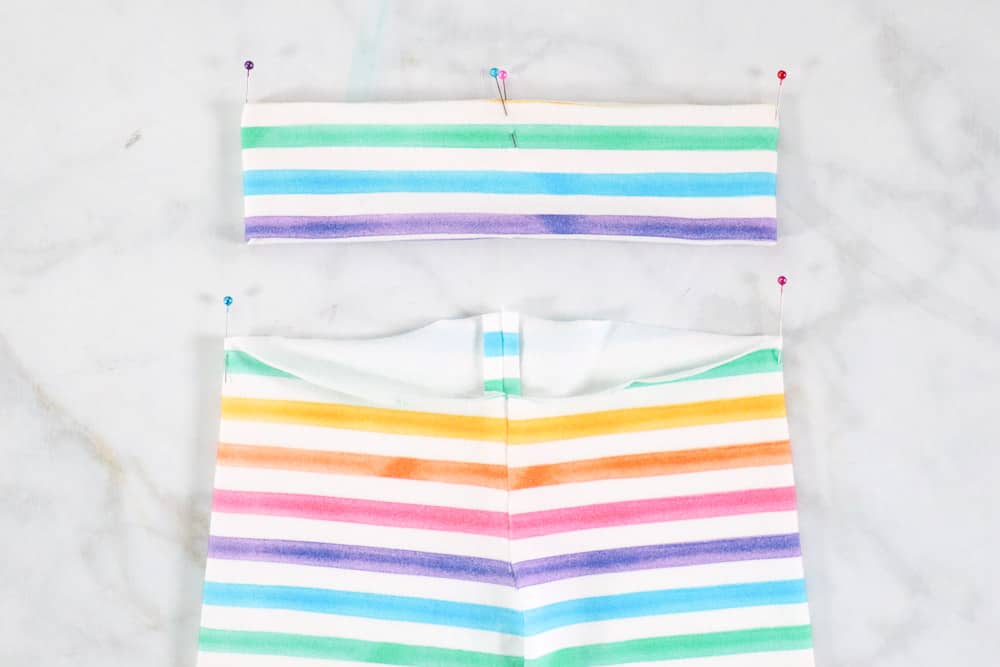
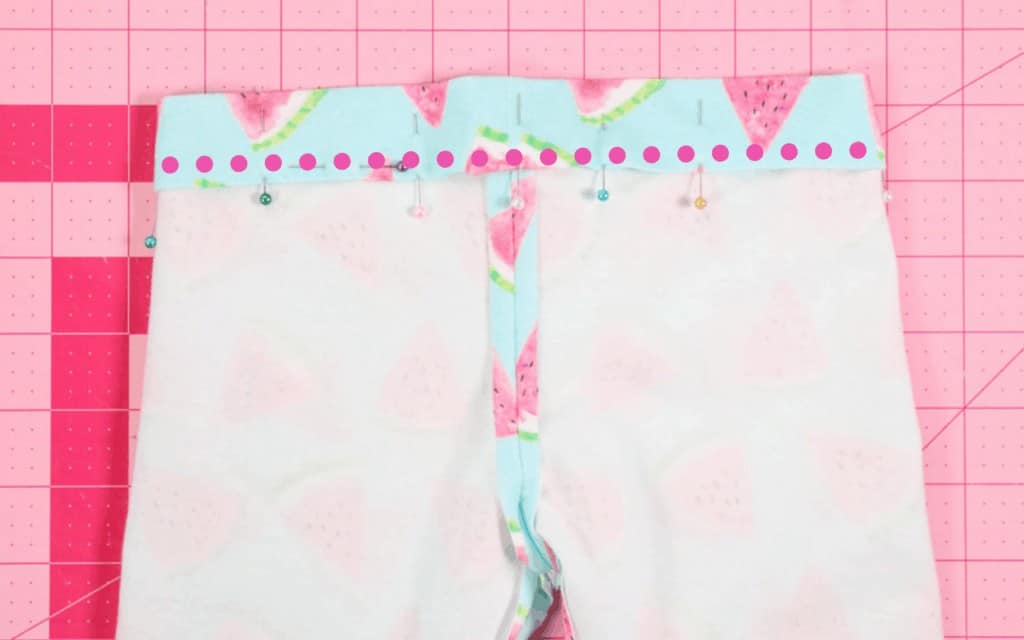
Align Waistband & Leggings
Slide the waistband around the pants aligning all three raw edges together. Using the sewing pins, line up the waistband pins with the pants pins and seams.
This will give you a guide to evenly distribute the fabric because the waistband is slightly smaller than the pants.
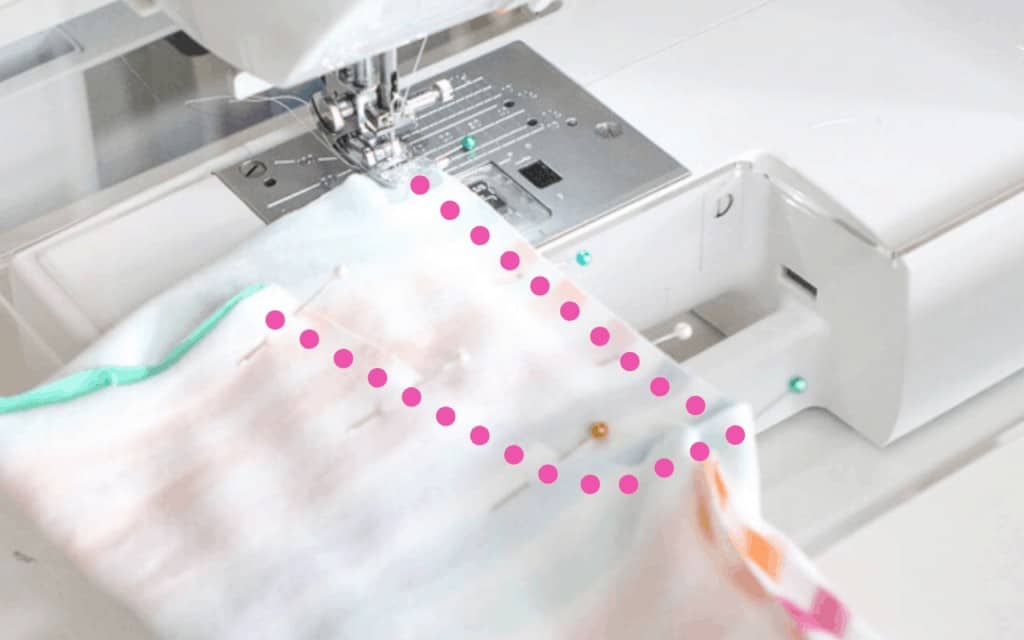
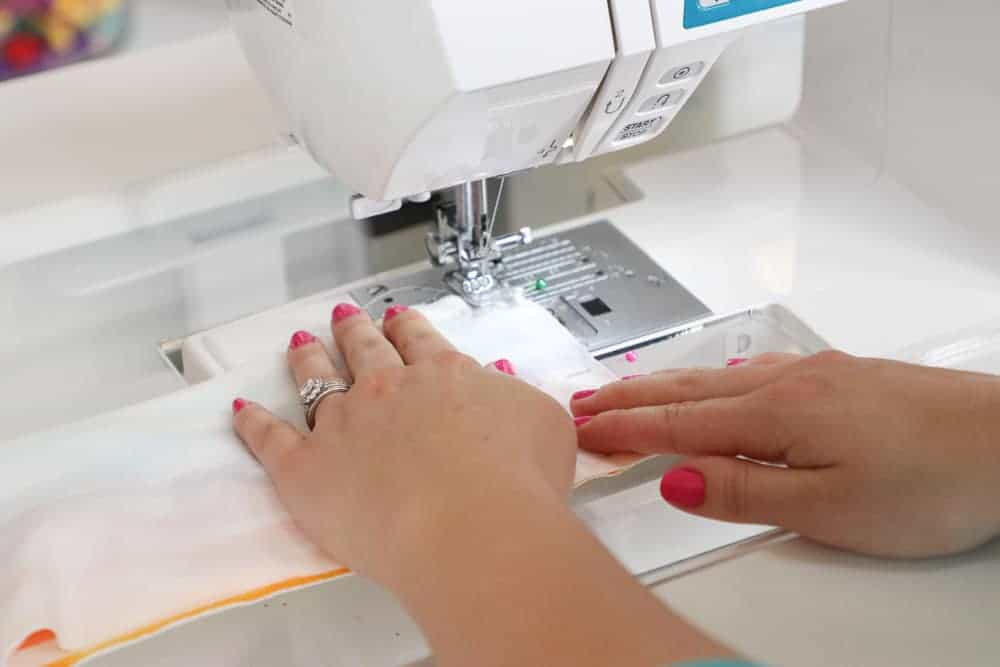
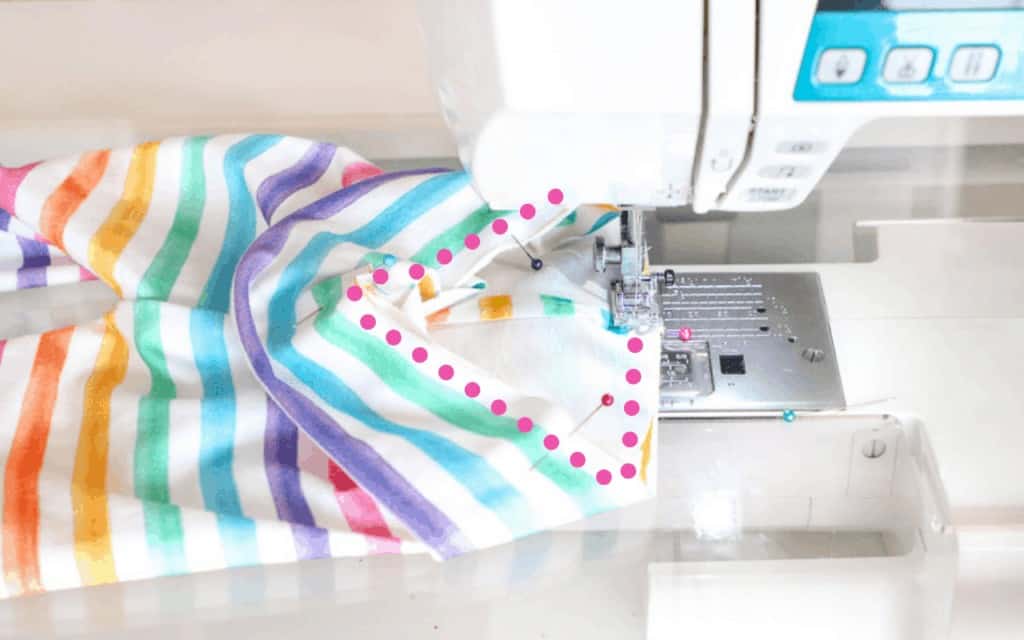
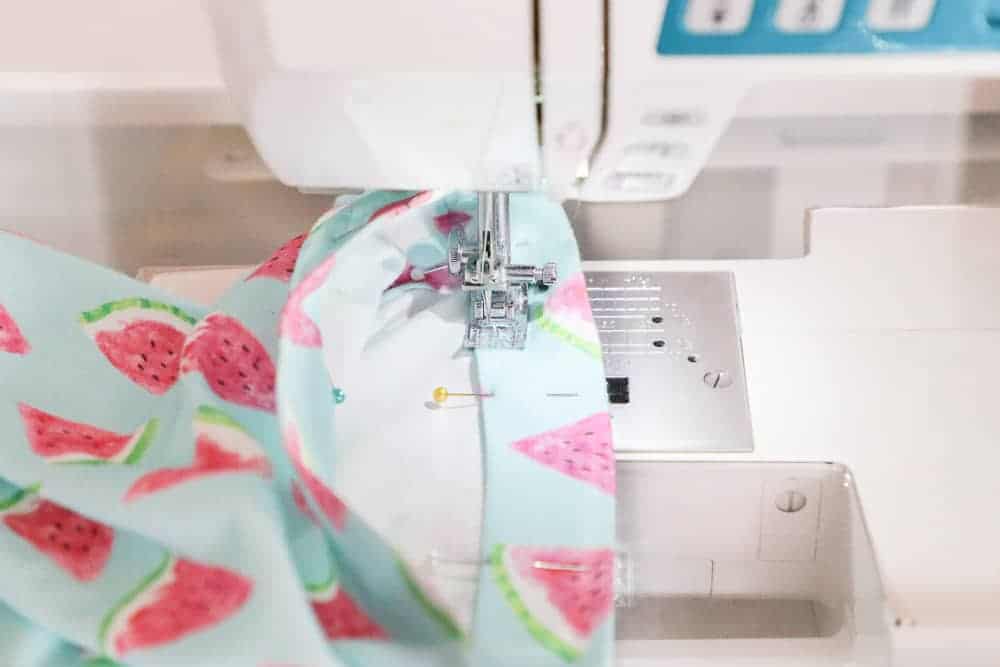
Sew the Waistband
Slide the three layers of fabric underneath the sewing foot. You’ll need to gently pull on the waistband fabric as you sew to match it to the size of the pants.
Sew all the way around the waistband. Don't forget to backstitch!
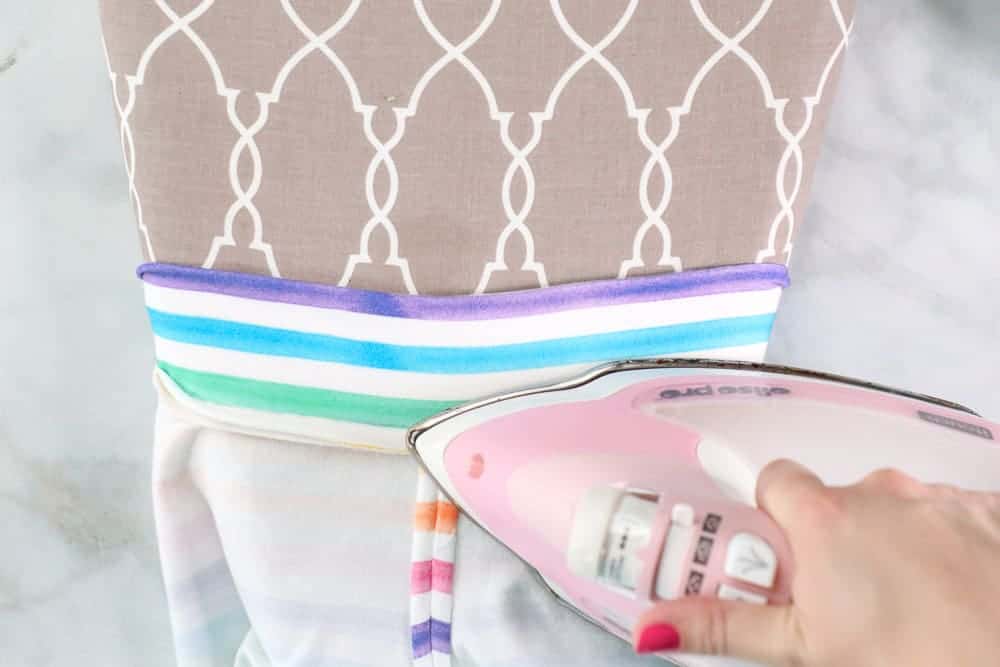
Iron the Waist Seam
Fold the waistband upwards and press the seam downwards with a hot iron and plenty of steam.
Elastic Waist Band
Cut the pattern out using the elastic waistband line; this is higher than the normal cut line. Cut 1" elastic according to the chart located on the pattern.
Fold & Press the Waistband
After sewing together the crotch seams, fold the waistband over 1/4" so that the wrong sides of the fabric are facing each other. Press the fabric.
Fold the fabric over an additional 1.25" and pin in place.
Create the Elastic Casing
Sew along the folded edge of the fabric to create the elastic casing. Leave a 2" opening along the back of the leggings to feed the elastic through.
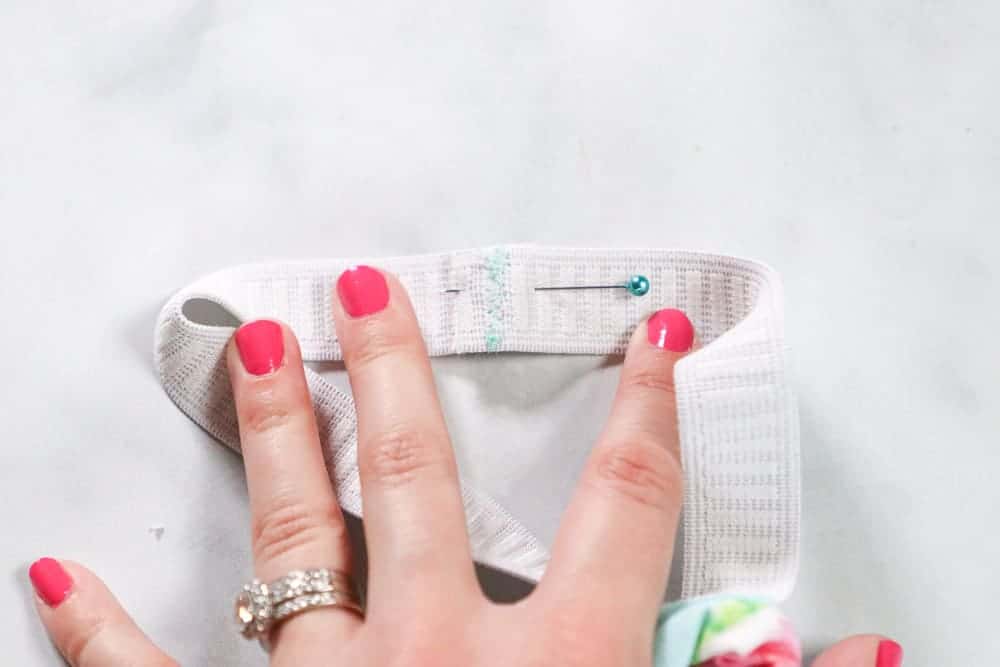
Sew the Elastic
Feed the elastic through the casing using a safety pin attached to one end of the elastic.
Pull on both ends of the elastic and overlap them by 1". Sew a zig-zag stitch along the overlap to connect them.
Redistribute the elastic within the casing. Sew the opening closed.
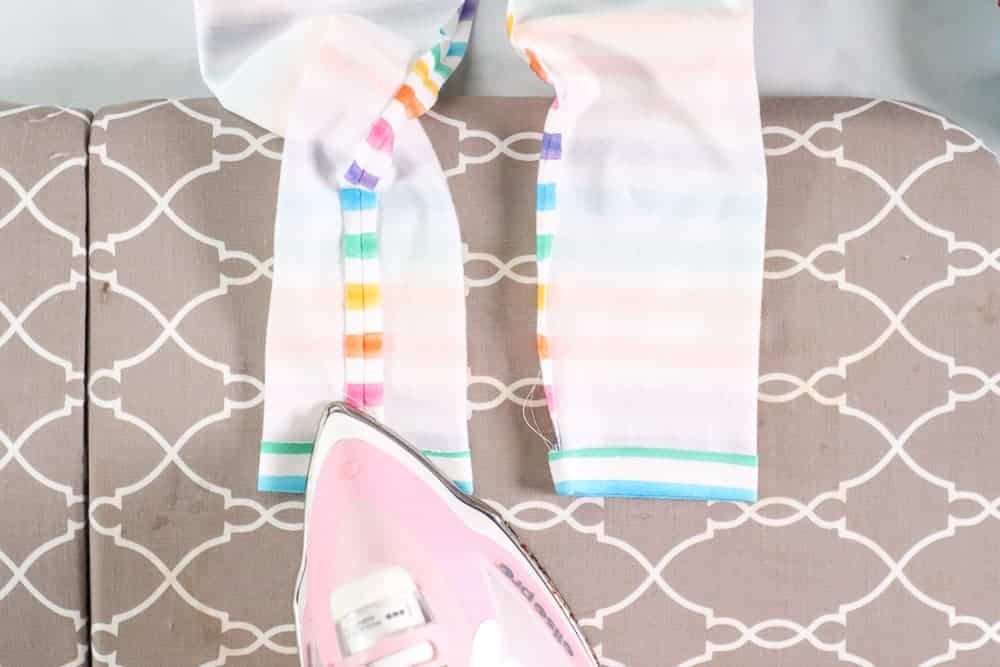
Iron Legging Hem
Turn the leggings inside out and press the hem upwards 1/2 inch.
If you are not using Soft Stretch Lite, use pins to keep the hem in place.
Turn the leggings right side out.
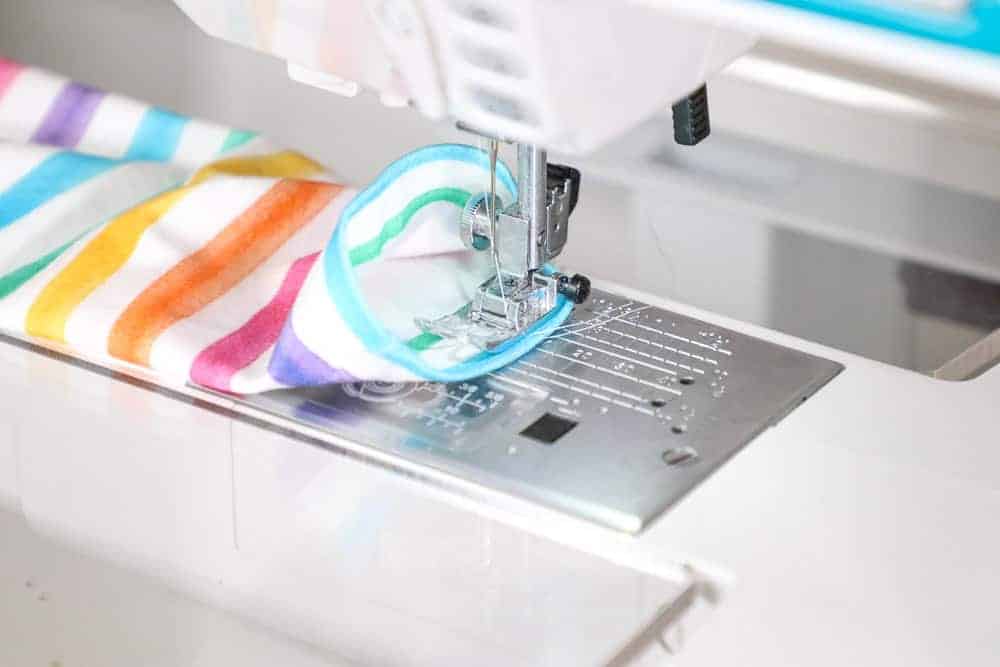
Sew Hem in the Round
Slide the hem under the presser foot and sew the hem in the round.
Iron Legging Hem
Don’t forget to press all of your seams!
DOWNLOAD THE FREE LEGGINGS PATTERN HERE!
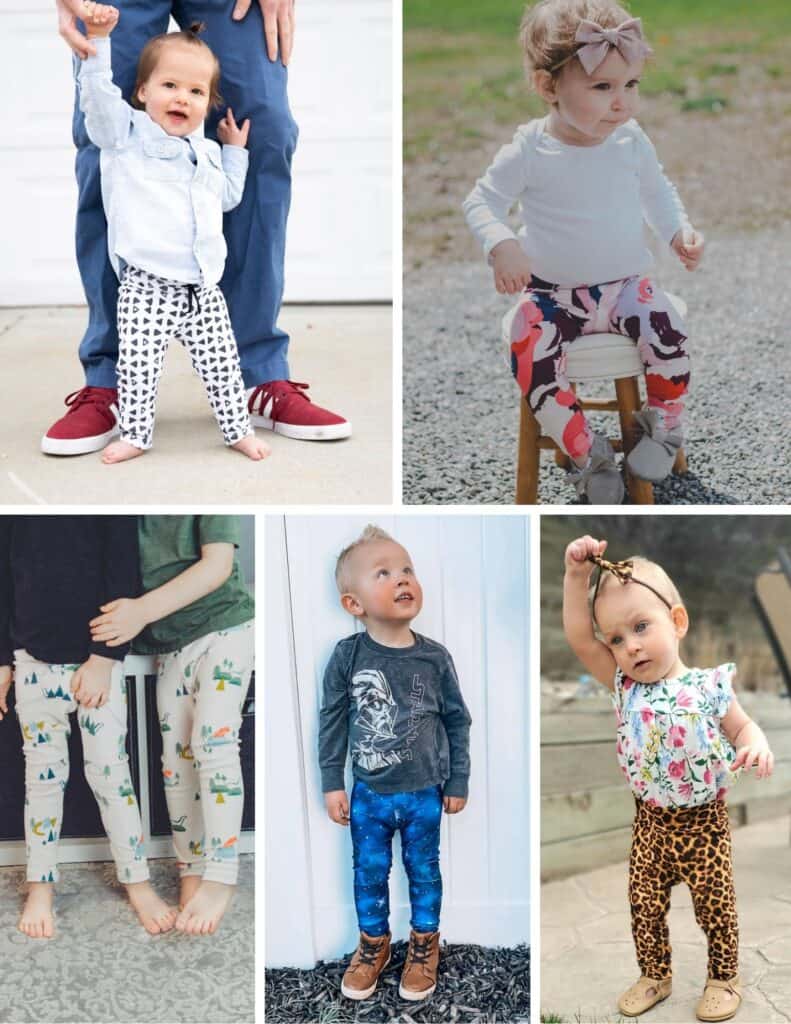
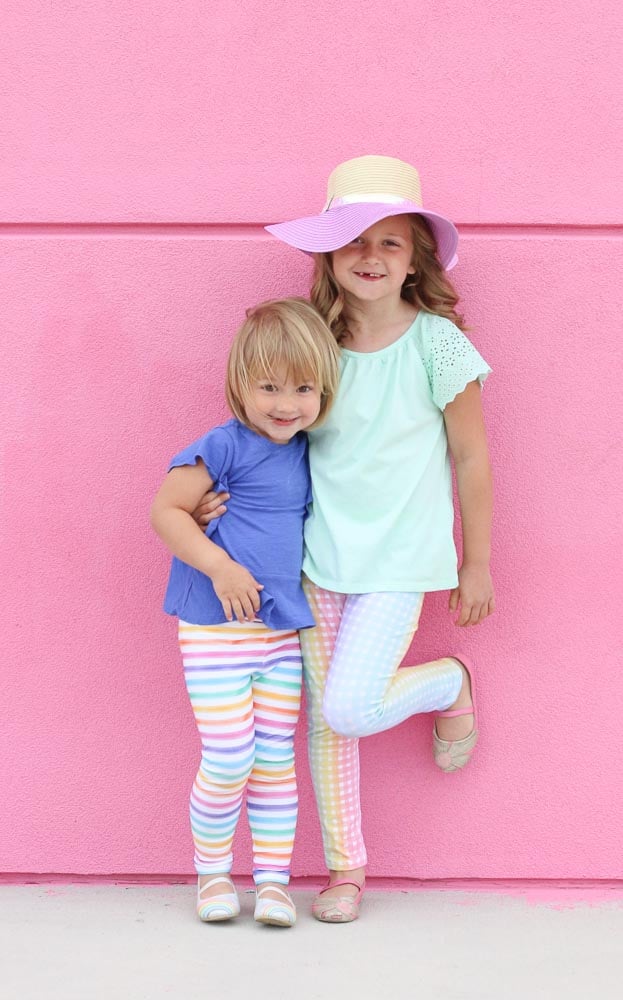
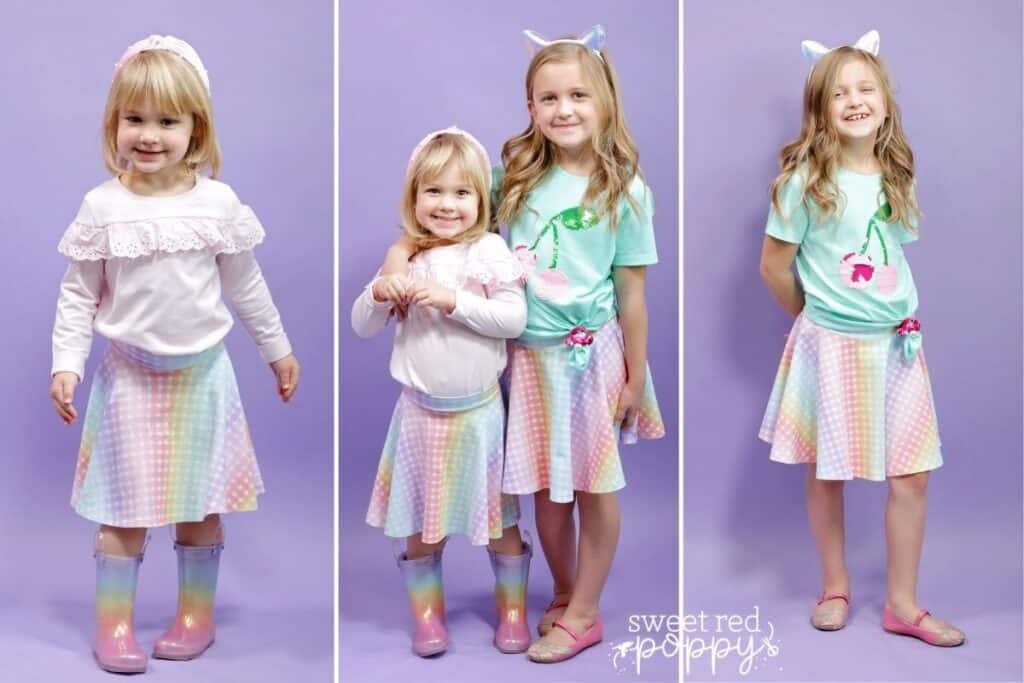
Enjoy your brand new hand-made leggings! Here are some photos from our amazing testers! I just can't get enough of this pattern.
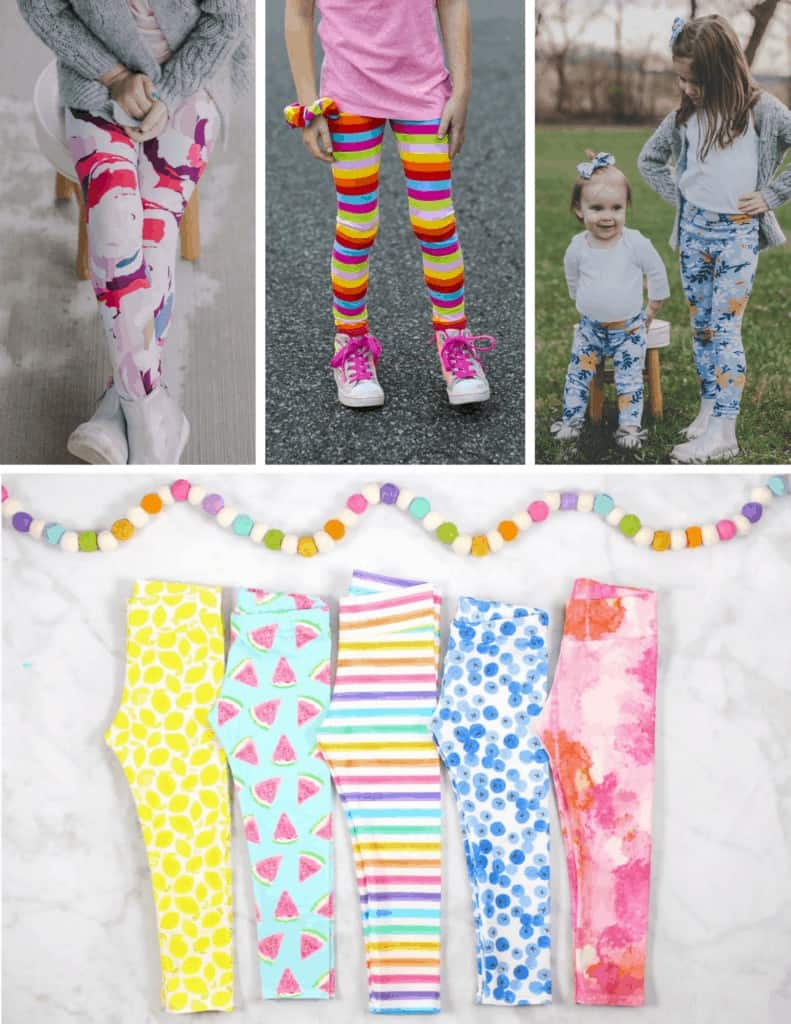
Do you love your Leggings? Share your finished Leggings with us in the Sweet Red Poppy Crafting & Sewing Group!
These leggings pair perfectly with our hoodie pattern! Click here to get the FREE pattern.
Looking for more FREE Sewing Patterns? Check out our Circle Skirt!
Don’t want to forget about this free template? Save this project for later! Click here to save this project on Pinterest.
Do you have any questions about this leggings pattern? Let me know in a comment below!
Hello. Am not able to pull your pattern up to print off, I like the leggings. For a 2t
Not able to get the leggings pattern up to print.
Hi, I just started this but having a bit of an issue. The pattern contains one piece for the outer waistband and one piece for the inner waistband. I assume, by looking at the instructions that it should be cut on fold? But it’s not written anywhere? And looking at the piece, the grainline doesn’t align perfectly with either side?! I’m confused… am I missing something here?
did you find ways to finish it? I am facing the same issue and no information so far.
I can pull the pattern up to print but when I printed one page it has a the pattern teeney-tiny in the upper right corner of the page.. I've never had this with other patterns of yours. HELP! I want to make these to donate to abused women and children shelters.
I had no problem downloading or printing the patterns and instructions.
Thanks so much!
Hola tienes este patrón que me ayudes a conseguirlo ?
Ni***********@***il.com
Is there any way to get this pattern for our older and taller girls? I’m not sure how to adjust the pattern for longer length.
I'm not able to print the pattern either. If you can email it to me, that would be great. Or let me know if the issue is resolved and I'll try to go back again.
Buenas tardes tampoco puedo imprimir el patrón, podrían enviarlo a mi correo por favor,
Hi, I can’t get inside leg seam to align. Printed pattern to 5cm scale ok.
I also cannot get it line up. It looks like it lines up perfectly in the tutorial!
My pattern when sent to me has the patter all on one page.
I am not able to download the pattern for printing correctly. Adobe reader dialog box pops up with "An error exists on this page. Acrobat may not display the page correctly. Please contact the person who created the PDF document to correct the problem."
Can this be corrected?
When one tries to download, it does not finish the action. Please inform your provider that it is unsuccessful so that we may download please. it is such a nice pattern
Have you considered making a leggings pattern like this for teens/adults? If not, do you know of one (a simple one like this) that is available elsewhere? I made this pattern for my granddaughter however she is too big for it now and my daughter-in-law loves the way these leggings fit Sophie when they fit her -- she would also like a pair 🙂
I if I could print the pattern, only that the page with the number 9 does not fit well with the number 6, does not that happen to you?
I had the same problem. Number 9 does not match up!
Hello, thank you for sharing the pattern! It's not clear to me how to create the fabric waist band? It's not clearly delineated in the pattern.
So in video you said we iron 3/87 inch on the bottom of leggings hem but not in instruction and then instructions says fold 1/2 and iron then sew. So do we iron 3/8 and then fold it again 1/2?
Hi Oxana. Sorry for the confusion. You just need to fold 1/2" under, iron, and sew for the leg hem.
Where do you buy your fabric ?
Thank you so much for the leggins pattern 🙂
Page 6 sizes 8-14 Is something off here? So drastically different from other sizes and not lining up
Please tell me which side is the back and which side is the front. Is the high side the front.
I am unable to get the pattern to line up, 4-9 wont line up.
Hi! I printed out the pattern at 100% for size 7. When printing, everything shifted to the left, leaving a large margin on the right and not enough of the pattern on the right. I started to try again and when I went to print, I could see in the preview that the pattern was shifted to the left off of the paper. Any ideas?
Making these leggings and getting ready to cut the pattern out. You mention for an elastic waistband to "cut the top line" but not sure what that means as the paper is full of lines above my size. No line says it is the top or the lower line. The upmost top line on the pattern sheet is for size 16. I am cutting for size 12-18months. I have noticed in your tutorials your pattern page looks different from mine. Should I just cut my top part of the 12-18mo 2 inches higher to the Size 8 line? That will give me room to fold down for the casing.
Thank you so much for offering these patterns and tutorials.
You cut out the size you are working with. You can take off all the other lines in Adobe when you print it out. For the elastic waist, cut at the top line for your specific size. Ignore the other size lines. Hope this helps
Hi, where can I find the bigger sizes, my download only goes to 7T?
The üattern has been updated,but the tutorial unfortunately not. Now Idont know how tosew tge new Yoga waist band, and there is no pattern for the oldknit waistband. Could you please help? Thanks in advance
I made the elastic band one first and it went great but trying to make the yoga one the band is very confusing. It shows cutting 4 different pieces on the pattern but in the instructions it’s only using one, and none of the 4 separate pieces are not big enough to be used as the one in the picture so I’m stuck with too short of a rise to use with the elastic and not knowing how to make these yoga waistbands work. I guess I’m going to sew the edges together at the ends and just have more seams than necessary and an extra two cuts that I won’t need to use…
I, too, found the rise to be too low for a young child based on the above istructions, however ai made it work. Here's what I did:
Because I had already sewn it on, I removed the yoga waistband that was described in the instructions and used the other two parts that come on the pattern. (there are no isnstructions for all those pieces, as far as I can see.) If you haven't sewn this part yet, follow from here.
Place the inside and outside pieces right side together, and then place the power mesh on top of that.
Sew these 3 pieces together at the top seam.
Now, open it with the seam ingoing across the middle and fold the short ends together. Sew this seam.
Fold wrong sides together, and now go back to the "Align the Waistband" section and attach as per her instructions. I added a top-stitch seam to the outside of the pant to further secure the waistband seam down. I used my coverstitch machine, but you can use a regular machine with a triple straight stretch sticth. Hope this helps! They came out so much nicer better using this method.
Update: She calls for 1/4" elastic, but instructions for that are not included, so here's what I did for that: after I sewed the top seam of the waistband, I sewed 3/8" down from the top seam, leaving a 1" opening, formig a casing. Threaded the elastic through, sewed the elastic ends together, and closed the opening. I continued on with sewing the waistband on the pants as I explained above.
I made the elastic band one first and it went great but trying to make the yoga one the band is very confusing. It shows cutting 4 different pieces on the pattern but in the instructions it’s only using one, and none of the 4 separate pieces are big enough to be used as the one in the picture so I’m stuck with too short of a rise to use with the elastic and not knowing how to make these yoga waistbands work. I guess I’m going to sew the edges together at the ends and just have more seams than necessary and an extra two cuts that I won’t need to use…
Just finished the pants and I am officially not a fan of the yoga option. Not only the waistband on the pattern is confusing and doesn’t work with the instructions but then it’s also way too short once I fold it in half after sewing the edges of the two pattern pieces together(which was only one in the instructions, and for some reason 4 on the pattern). And the rise my goodness. I know it says low rise but I would consider it extremely low rise. I did the 5yr for my daughter who is 3 and it’s still way too low for her. I know it’s a free pattern but it was nice fabric so it’s probably worth paying for a pattern if you’re looking for a proper yoga pant with fold over waistband. I think I did the elastic band one before and it worked better than this so maybe just skip the yoga and do the elastic like I wish I had done.
After reading the comments about the yoga band that I already cut, I think I will seam the 2 pieces, then seam inside to outside and make that my rise rather than folding over. Not sure about using the 1/4” so I will put in a casing but try them on her first. I wish I hadn’t cut the yoga line.
I love the free patterns, but I have learned that it’s important to read all the comments before printing out the pattern, buying the fabric, laying out the pattern or making the first cut. In many cases, the tips you read from others help you buy the right amount of fabric, lay out the pattern correctly and sew the pieces together correctly. Sometimes you need to think it through and use common sense.
I downloaded this pattern to try for comparison with the pattern I bought elsewhere. I am shocked at the size differences listed here. My granddaughter is 16 months and wears 12-18 Mo clothes and yet in this pattern she requires a 2T which would be way too long and still need adjustment for diaper wearing. Obviously, I can adjust the length easy enough, but the pattern I bought is just as simple as this and is more true to size. There is no point for me to keep this pattern, I'm going to stick with the pattern I bought since I already adjusted it through the seat for a perfect fit for my granddaughter, but for those without a pattern, this is still a viable option, make sure you are referencing measurements for which size to use and for baby/toddler sizes at least, you are going to need to adjust the length.
I tried several patterns before settling on this one. It just fit my granddaughter perfectly. The only adjustment is to lengthen the legs by 2 sizes because she's long/tall for her waist. At 12 months of age I made her the 9-12 month size adding 2 inches to the length. These fit her until she was 18 months. At that point I made her the 12-18 size using the 2T length. Now she's almost 2 1/2 years old, and I'm about to make her the 18-24 size. I guess it just depends on the child. Store-bought pants are always falling off of her waist while showing her ankles. I really love this pattern for her!
Hi,
Your video shows a different layout when putting the pattern together. (1-2, then 3-4) vs what is shown as three papers in row. I feel like the one I printed is huge compared to the video. Why is this?