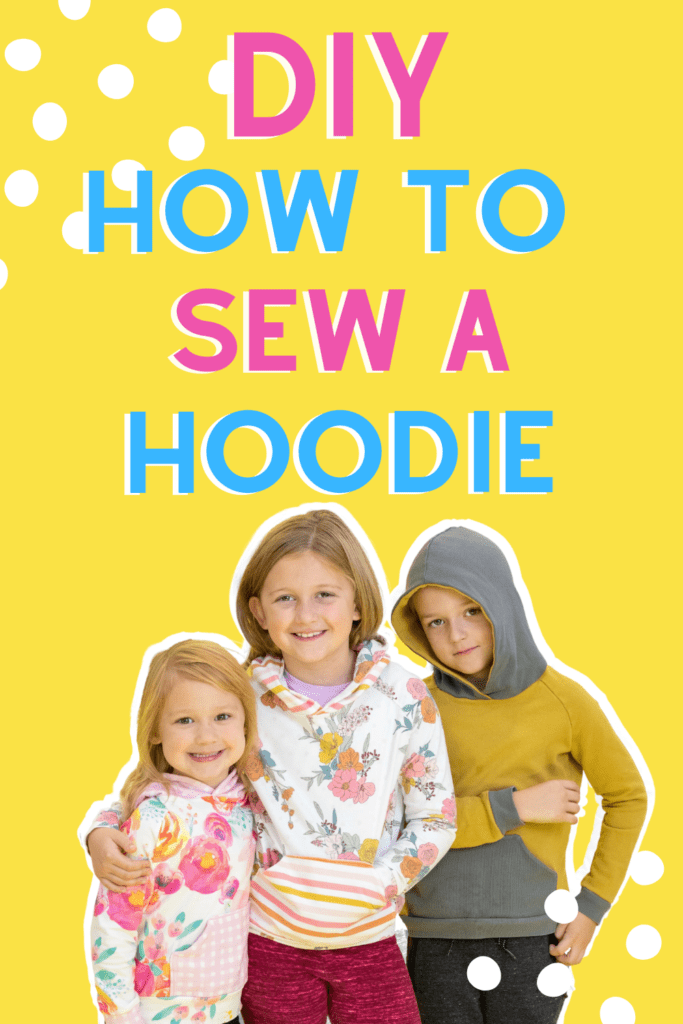
Learn How to Sew a Hoodie Sweater for Babies, Toddlers, Kids, and Preteens Using Knit Fabric and a Free Sweet Red Poppy PDF Sewing Pattern.
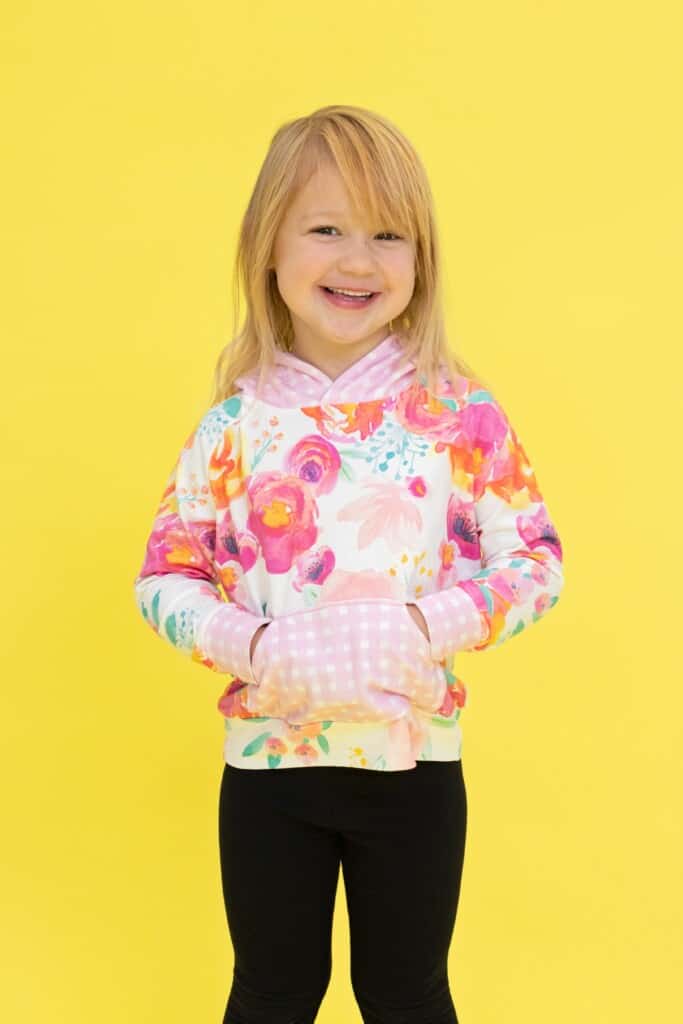
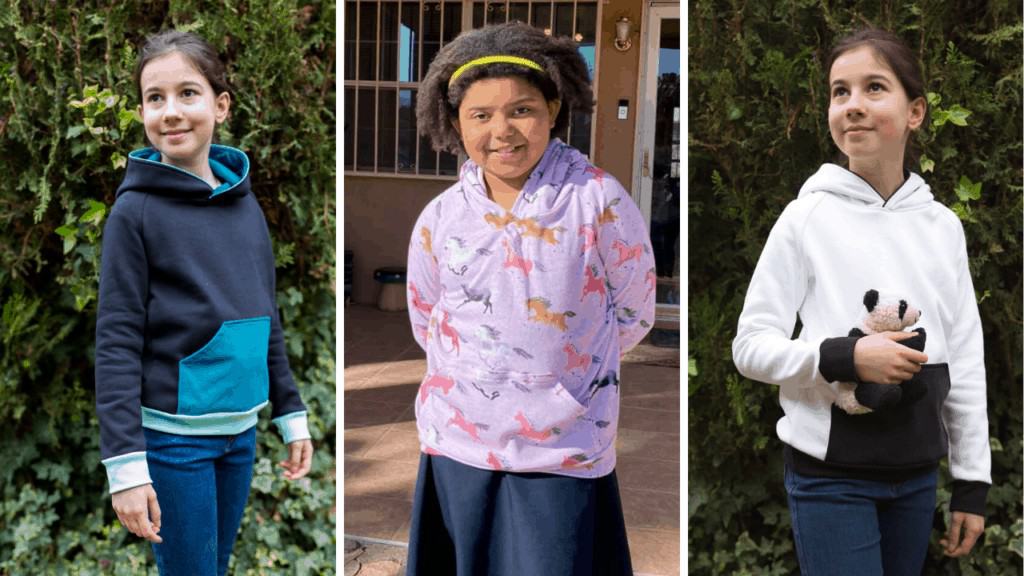
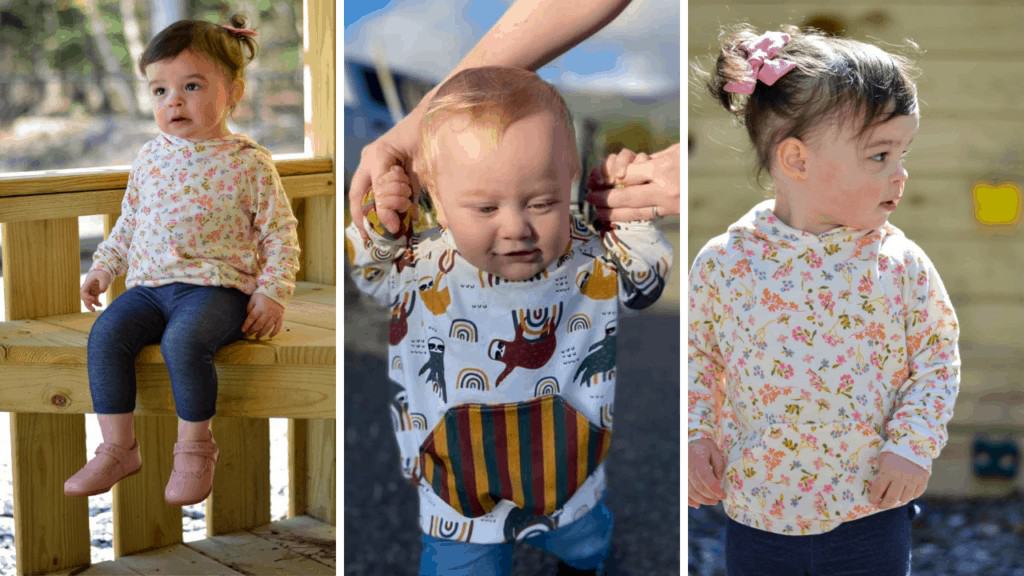
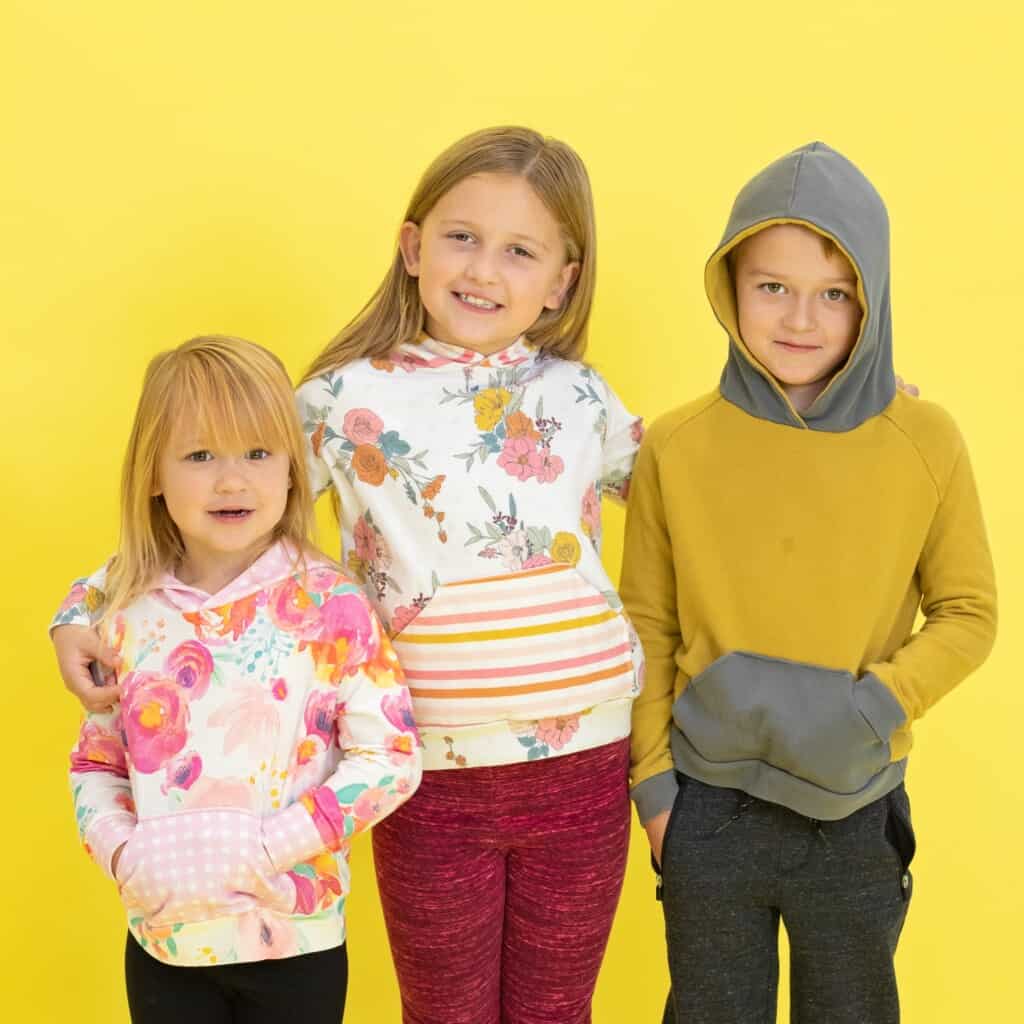
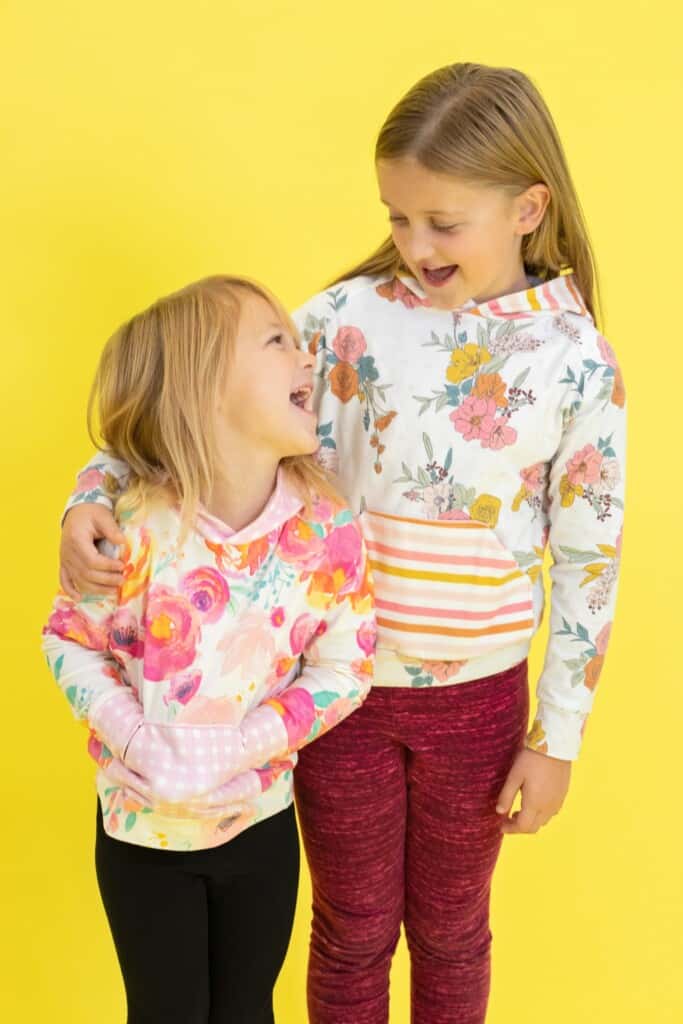
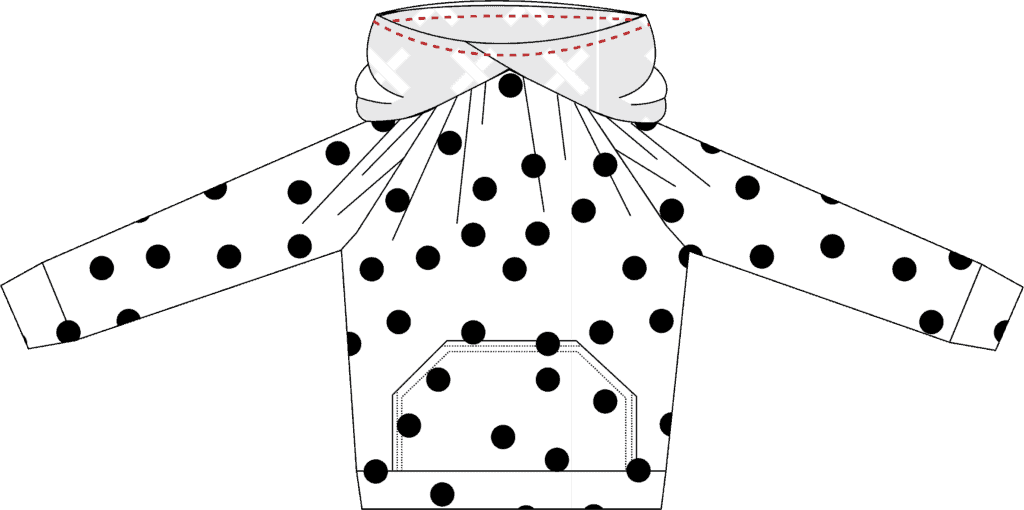
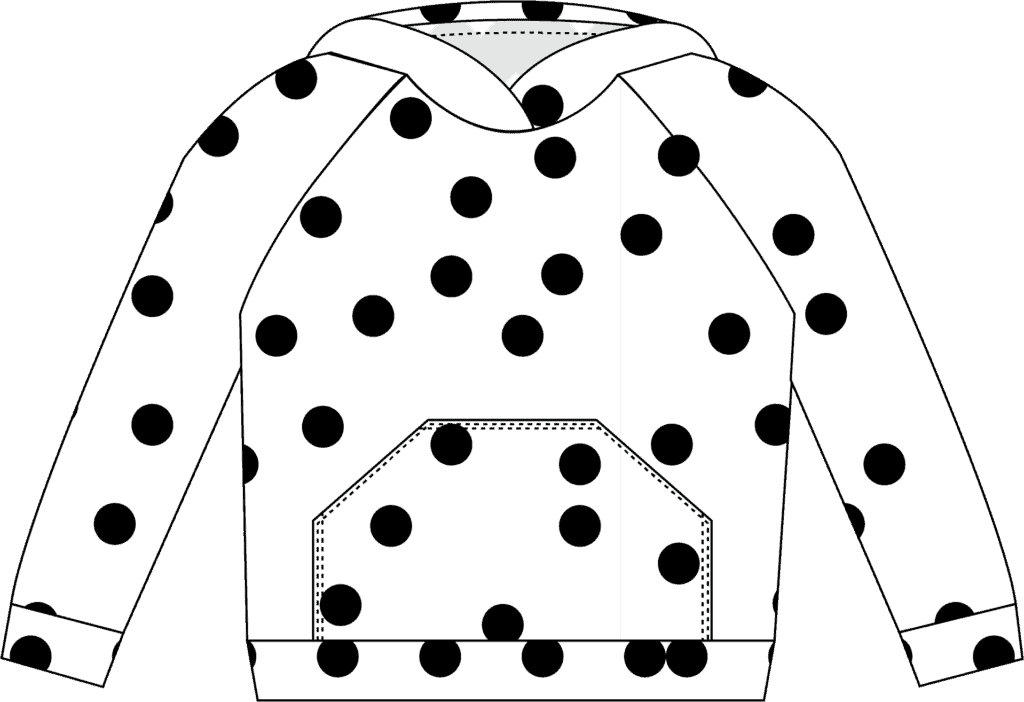
One of my favorite things to sew for my kids has always been hoodies! I'm finally sharing my hoodie pattern with you for FREE! This hoodie features a cute pocket, an adorable hood that overlaps at the front, raglan sleeves, and contrasting cuffs and waistbands.
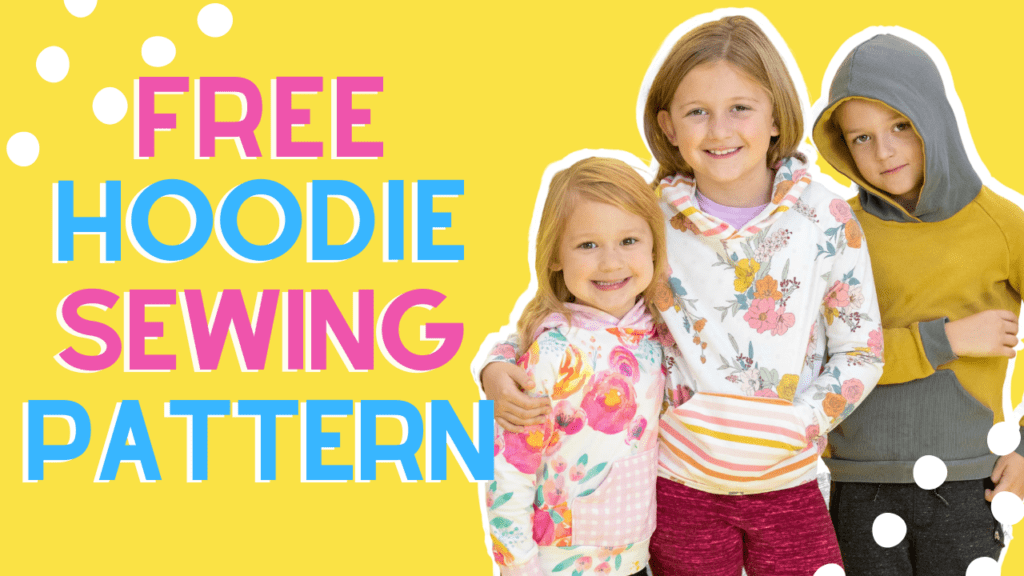
This hoodie is one of my favorite things to make for my kids and they love wearing it because they get to choose the fabrics and it’s extra soft.
Looking for the matching leggings pattern? Click here! I also have a FREE Pajama pant pattern for the entire family that you'll love!
The best part? It's easy enough to make that even a beginner can sew it!
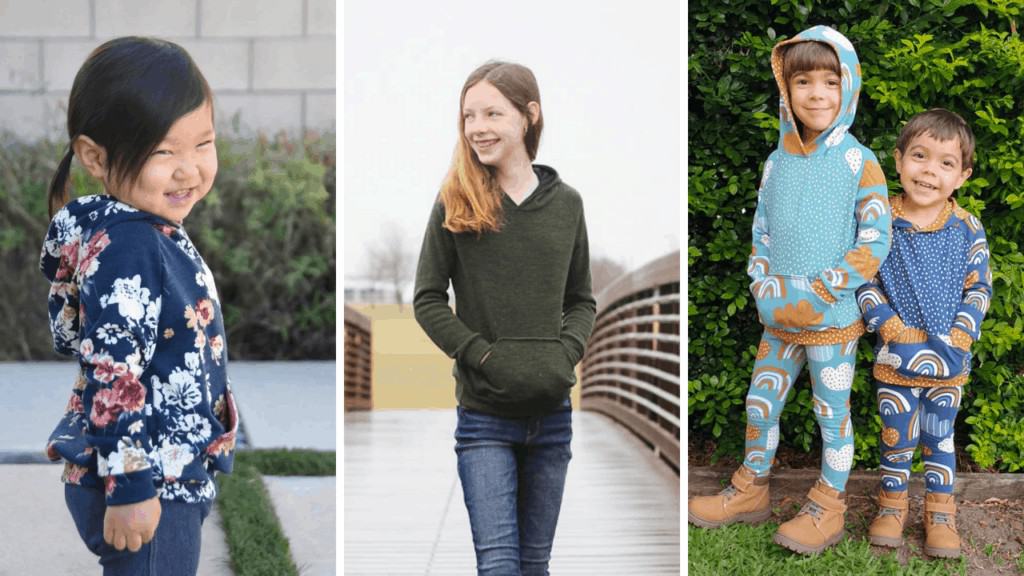
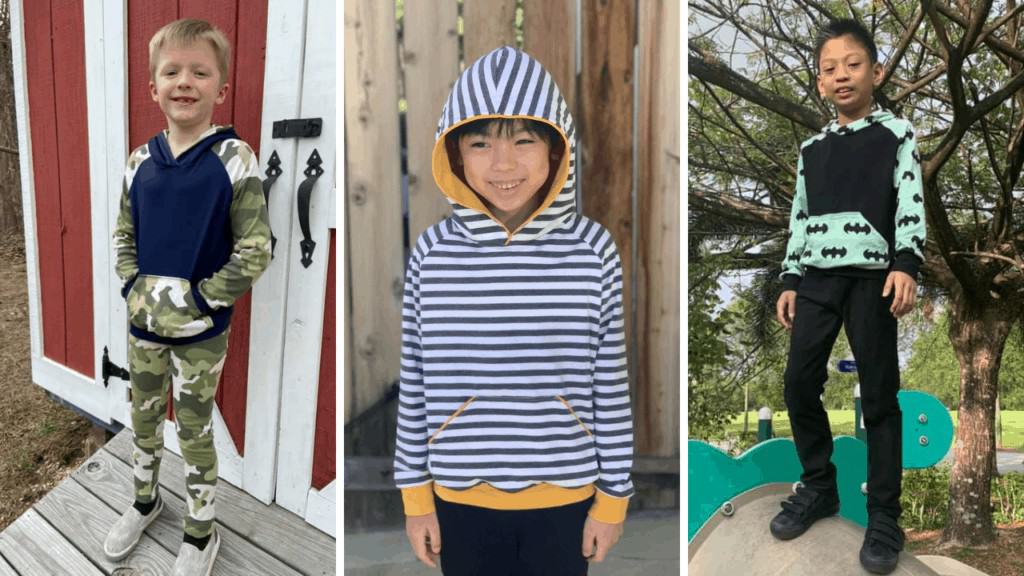
It comes in sizes Preemie all the way through a size 16 so you're sure to get tons of use out of this pattern for years to come!
Medium to Heavy 4-Way Stretch Fabric
For this pattern, I recommend using a medium to heavyweight fabric such as:
It’s essential to use a fabric with at least 20% stretch. Not sure what that means? A 4" piece of fabric should stretch to at least 4.75". Fabric must have stretch both horizontally and vertically. Look for fabrics labeled as 4-way stretch.
Make sure to prewash and dry your knit fabric before cutting and sewing it! This will prevent your fabric from shrinking after you've sewn it.
Finishing Techniques
When sewing this pattern you can use a variety of different techniques to finish the seams.
First, you can use the stretch stitch on your sewing machine. This looks like a lightning bolt and allows seams to have more give so the stitches don’t pop when stretched out.
My personal favorite way to sew with knit fabric on a sewing machine is using Eloflex thread which is specifically designed for sewing with knit fabric. This results in a seam that will not pop when it is pulled on.
The final option is to finish the seams with a serger. The serger creates a seam that is cut and finished in one step. This option creates a more professional-looking finish.
Not sure how to use your serger machine? Check out my online course Ready, Set, Sew! Serger Edition.
Fabric Requirements & Layout Chart
Fabric requirements are based on 58"-60" width fabric.
- Sizes P - 12/18 you will need 1 yard of fabric.
- Sizes 18/24 - 6 you will need 1 1/4 yard of fabric
- Sizes 7-16 you will need 2 yards of fabric.
Print the Pattern
Download the pattern to your computer and print the pattern at 100% with no scaling.
Immediately check the 1” x 1” square to ensure the pattern has printed off correctly. If the 1" square measures larger or smaller the pattern will need to be reprinted for accuracy.
Layers Option
To use the layers option, click on the "paper" icon on the left-hand side of the pdf. Deselect the sizes you don't want to print leaving only the size you wish to print selected.
Why Shop Through My Links?
When you shop through my affiliate links, it doesn't cost you anything extra, but it helps me out in a big way! I earn a small commission from those purchases, and that support allows me to continue creating and sharing free tutorials and patterns for you. Thank you so much for helping me keep this creative community going!
Supply List
- 1-2 Yards 4-Way Stretch Knit Fabric
- Sewing Machine or Serger
- Scissors or Rotary Cutter & Mat
- Thread (Optional Eloflex)
- Acrylic ruler
- Pins
- Iron & Ironing Board
- Ballpoint Needle
- Printer Paper
- Tape
Shop my favorite sewing supplies here!
Need extra help with your hoodie? Be sure to watch the step-by-step video!
Table of Contents
DOWNLOAD THE PRINTABLE PDF HOODIE SEWING PATTERN HERE.

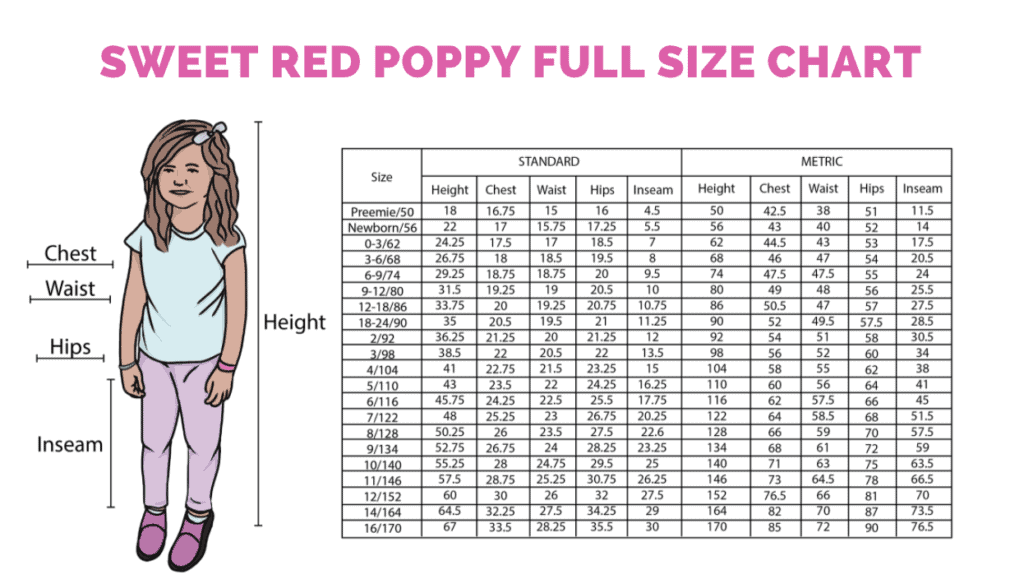
Size Chart
Measure Chest and Height. This will give you an idea of which size will fit best.
You'll want to base the size on the chest measurement and shorten or lengthen the pattern based on the height. *Instructions for shortening or lengthening are shown below.
If your measurements are in-between sizes, size up for the best fit.
Use the measurement chart and not normal ready-to-wear sizing for the best fit!
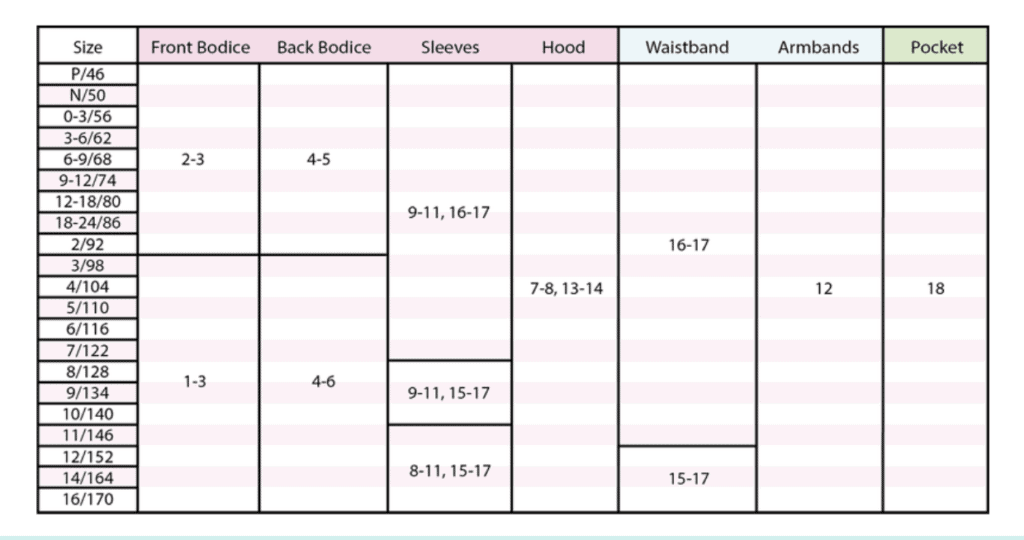
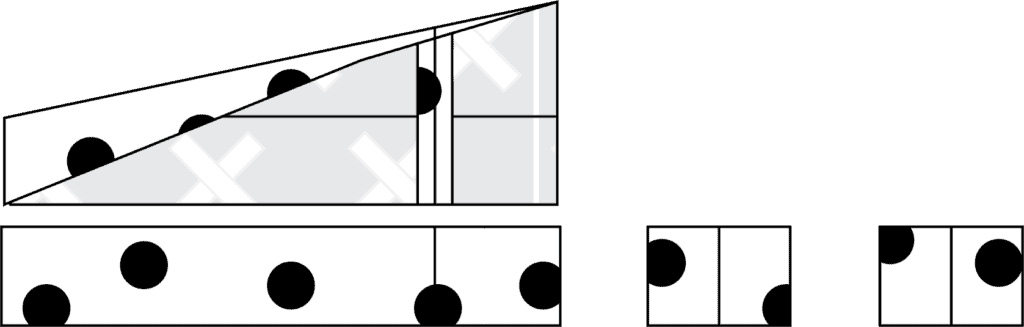
Hoodie Print Guide
Use this guide to save paper and ink by printing off only the pages that you need for your specific size and style.
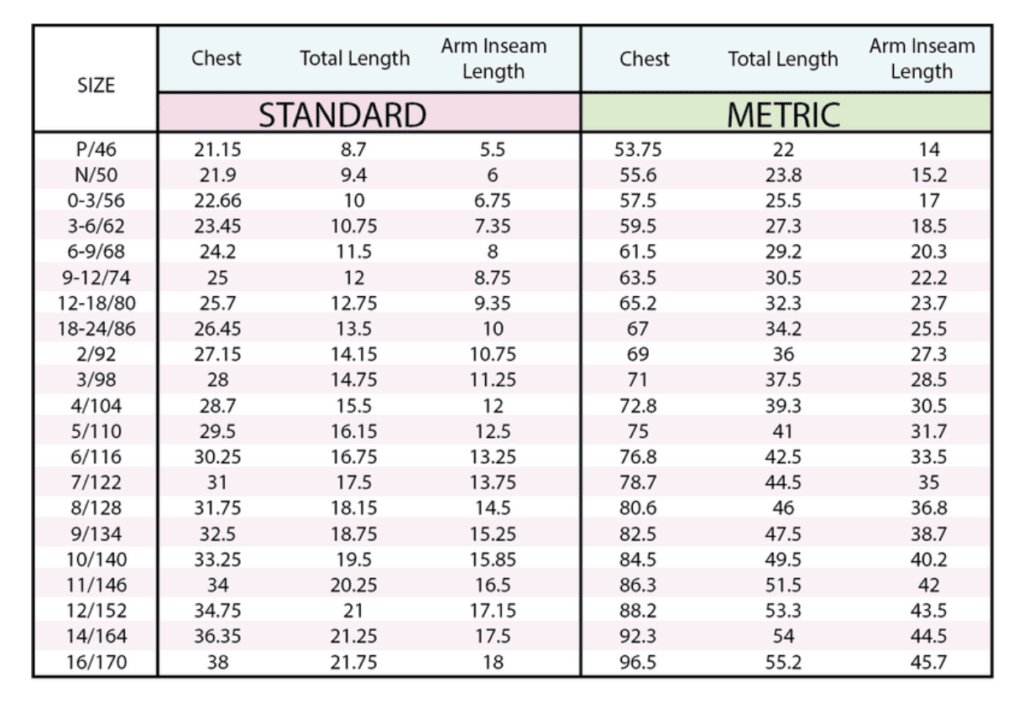
Finished Measurements
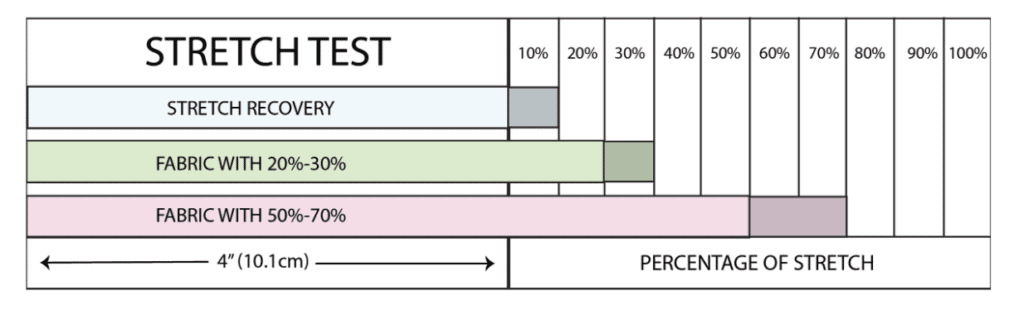
Stretch Test
How to do the Stretch Test
To test a piece of fabric for stretch take a 4-inch piece of fabric and stretch it to see how far it stretches. If it stretches to 4.75" it has at least 20% stretch. If it stretches to 8" it has 100% stretch.
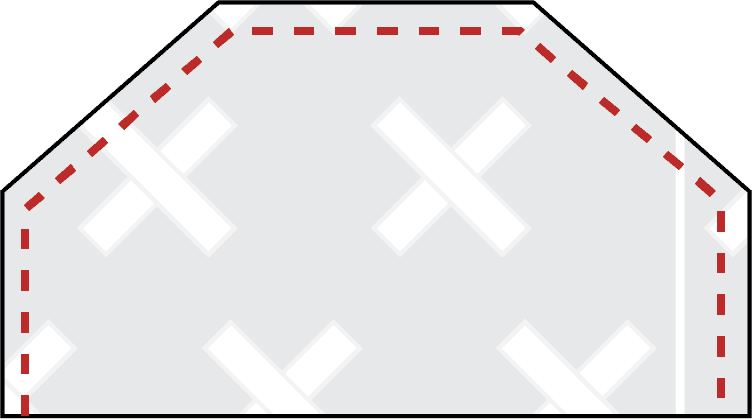
Seam Allowance
This pattern is sewn with a 3/8" (1cm) seam allowance unless noted otherwise.
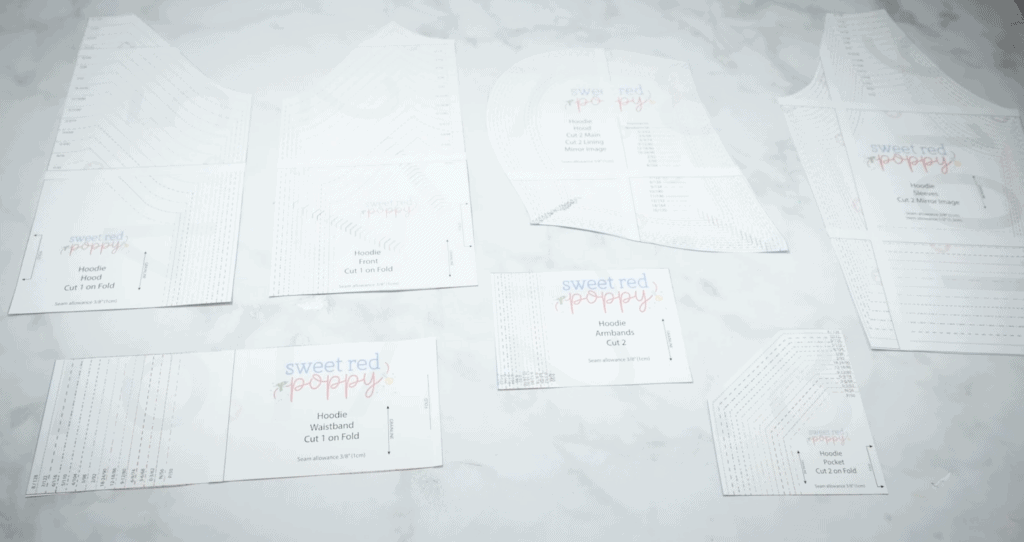
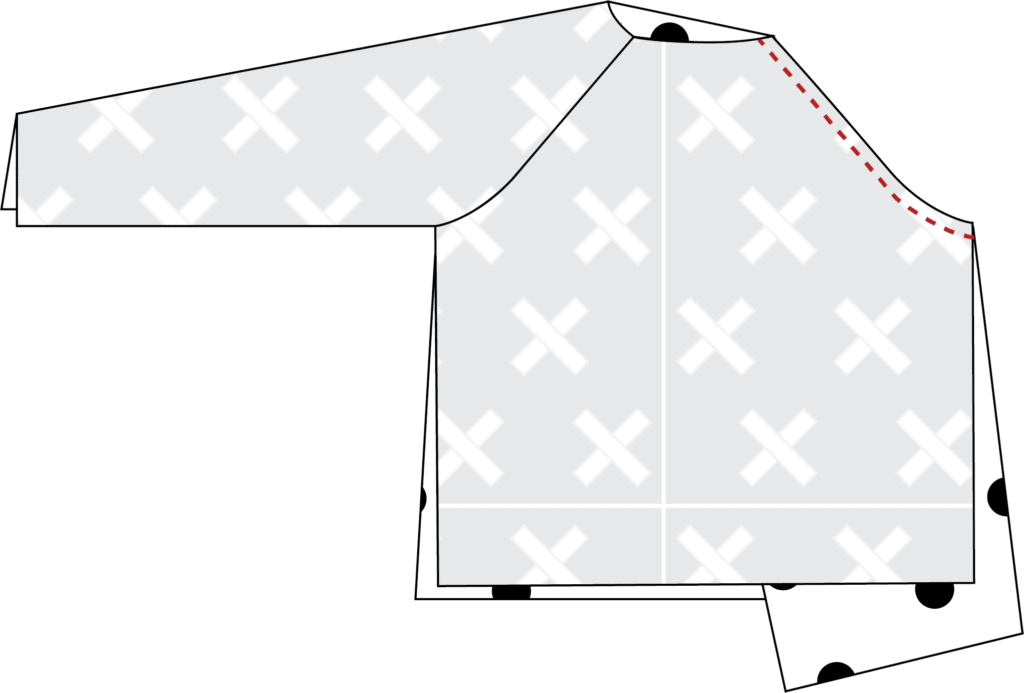
Raglan Hoodie Pattern Assembly
How to Assemble This Pattern
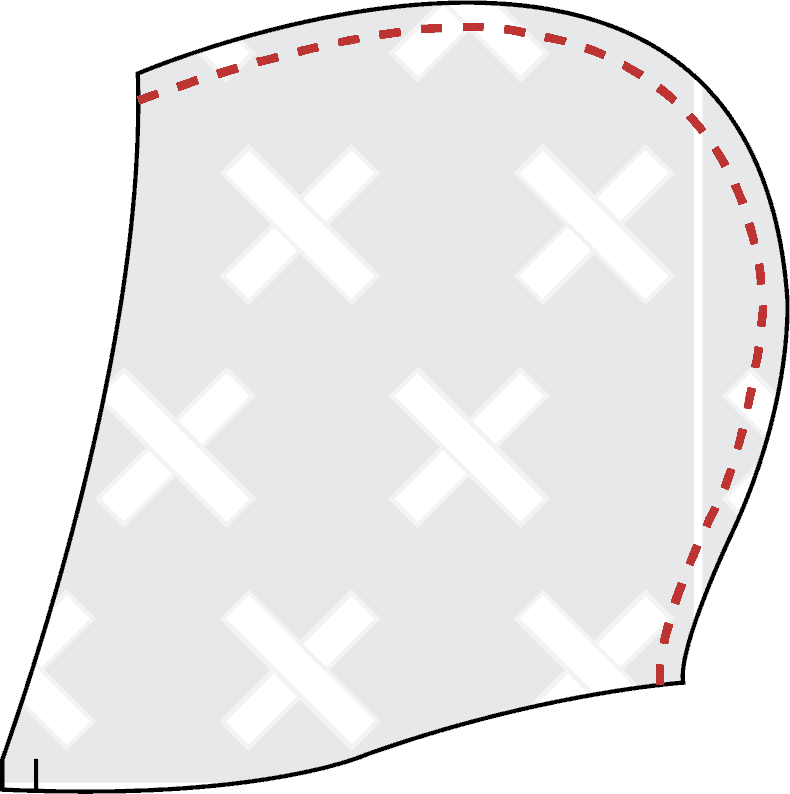
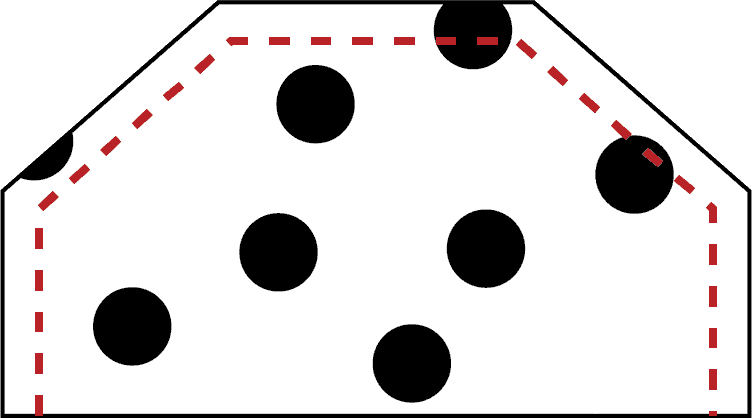
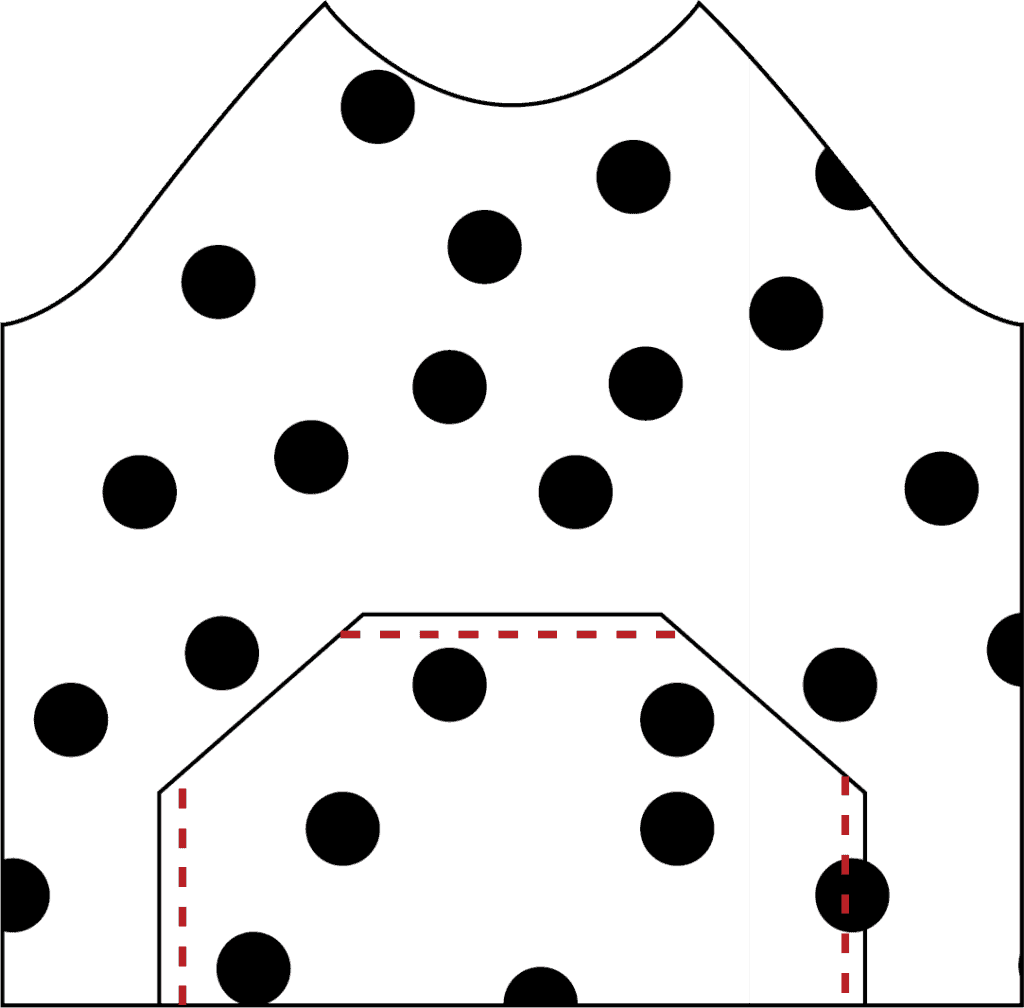
The Hoodie pattern is numbered 1-18. Align the circles and black lines together as you are piecing the pattern together. You can connect the pieces of paper with tape or a glue stick.
Feel free to trim off the excess from each piece of the pattern or hold the pieces up to the light and align them together without trimming.
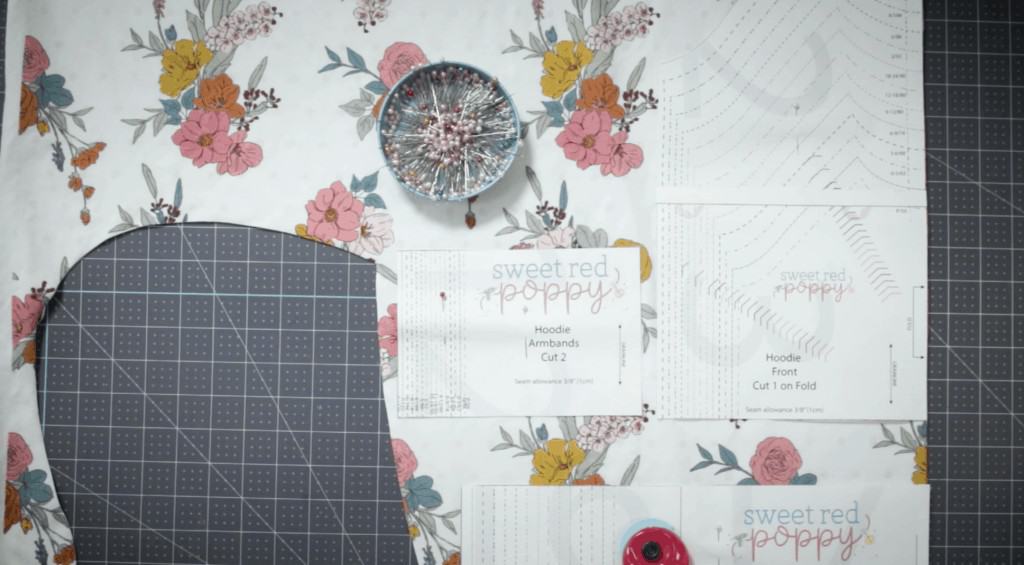
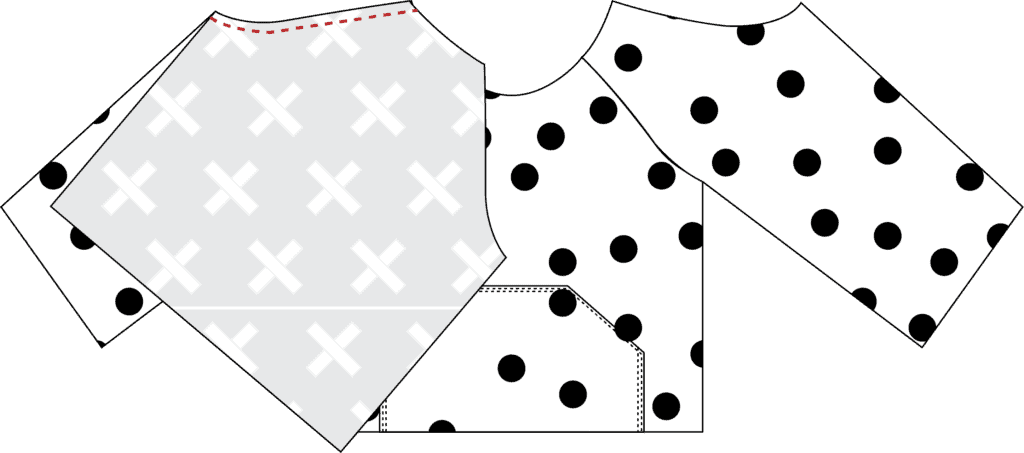
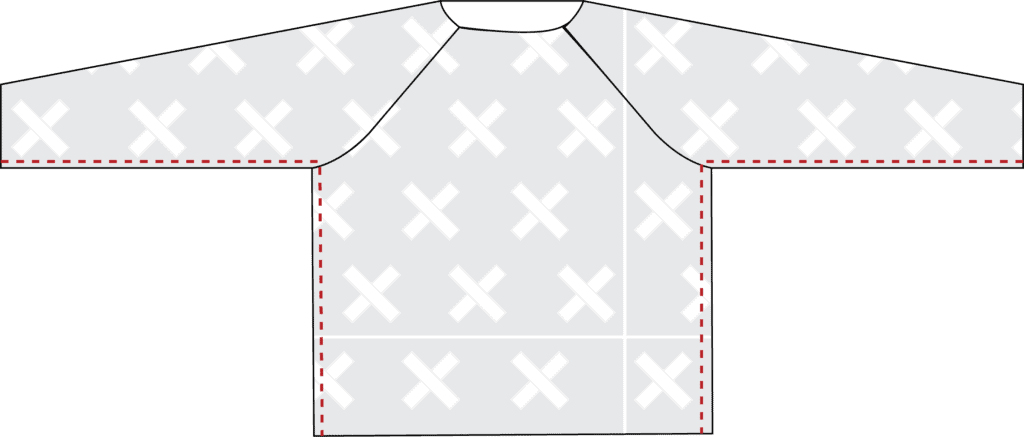
Place the Pattern on the Fabric
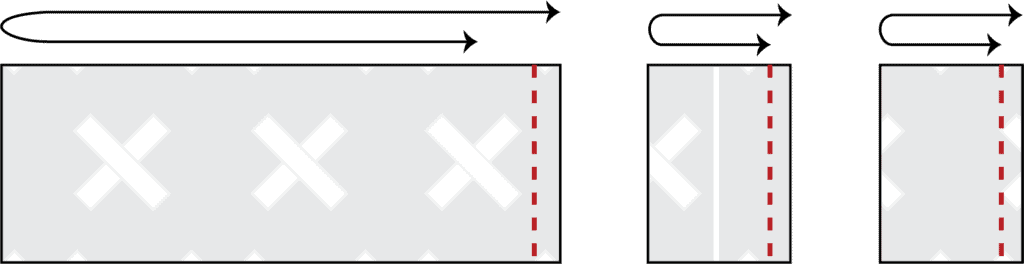
Lay the fabric out in front of you and fold it in half to align the selvage edges.
The selvage edges run vertically along the fabric. The greatest amount of stretch should be going horizontally across the pattern.
Place the pattern piece on top of the fabric and pin it in place.
Cut out the Hoodie
Using scissors or a rotary cutter, cut around each pattern piece. If a pattern piece says "cut on the fold," be sure to align it with the fabric's folded edge.
Check the Pieces
Lay all pieces of fabric out in front of you.
Check the direction of the fabric on each piece and that you've cut out all the pieces you need.
Prepping Hoodie Cuffs & Waistband
Press Cuffs & Waistband
Fold all cuffs in half longways, wrong sides together, and press well.
Unfold.
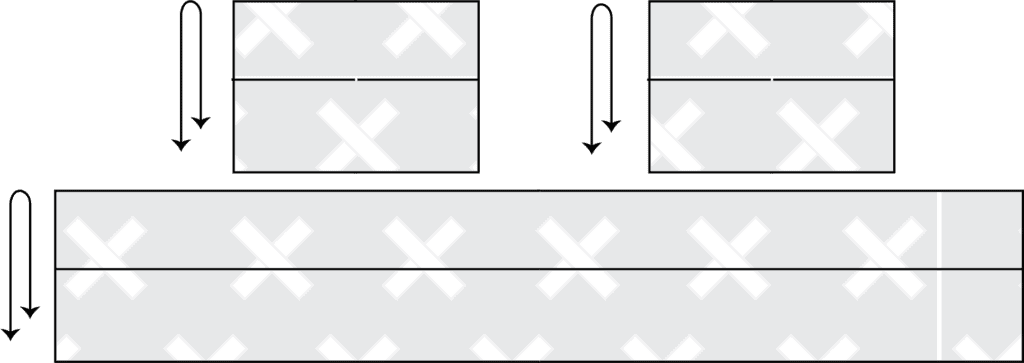
Sew Sides of Cuffs & Waistband
Fold cuffs in half width-wise, right sides together. Match the raw ends and sew the sides with a 3/8" (1cm) seam allowance.
Fold Cuffs and Waistband
Press seams open. Fold cuffs in half, wrong sides together, aligning the raw ends. Press again. Set aside.

Prepping Hood
Make Markings
Using the pattern piece, mark the wrong side of the fabric with the front mid mark on all 4 pieces.
Place the two main pieces right sides together. Align edges and sew the back seam.
Repeat with the lining.
Sew Hood
Open both hoods. Place right sides together and align the front edges.
Sew along the front edge. Turn right side out and press well. Set aside.
Prepping Pocket
Sew Pockets Together
Place pocket pieces right sides together. Sew along the sides, slants, and top.
Leave the BOTTOM OPEN. Turn right side out and press well.
Topstitch Pocket
Topstitch pocket 1/2" (1.3cm) from the edge.
Sew Pocket to Front Bodice
Using markings, place the pocket to the front of the bodice.
Sew the two side edges and the top with a 1/4" (.6cm) seam allowance. Make sure to backstitch both sides.
Make sure to leave pocket openings open!
Sewing Sleeves to Bodice
Sew First Sleeve
Start with the front bodice.
Double-check that you have the correct side of the sleeve aligning with the front.
Align the front sleeve line to the bodice.
The sleeve curves slightly differently than the bodice, so there will be some slight bunching. Pin the curve.
Sew. Fold the sleeve away from the bodice and press the seam upward.

Sew Second Sleeve
Repeat the same steps with the second sleeve.

Sew Back to Sleeves
First Back Sleeve
Align the back to the back sleeve curve. Pin and sew in place. Make sure to pull the sleeve out and press up well.
Last Sleeve
Fold the bodice and align the sleeve to the back bodice. Pin in place.
This side won't be as easy to press open. Move the bodice around so you can press the seam up.
Sew Hoodie Side Seams, Armbands & Waistband
Sew Bodice and Sleeve Sides
Align bodice right sides together making sure the sides of the bodice and sleeves match up.
Pin in place and sew.
Turn the hoodie right side out for the next step.
Sewing Armbands and Waistband
Mark the middle of the armbands and sleeves.
Align the side seam of the armband to the seam on the sleeve. Put sleeve inside of the armband and align the raw ends.
Distribute the fabric evenly and sew the armband in place. Repeat with the other armband.
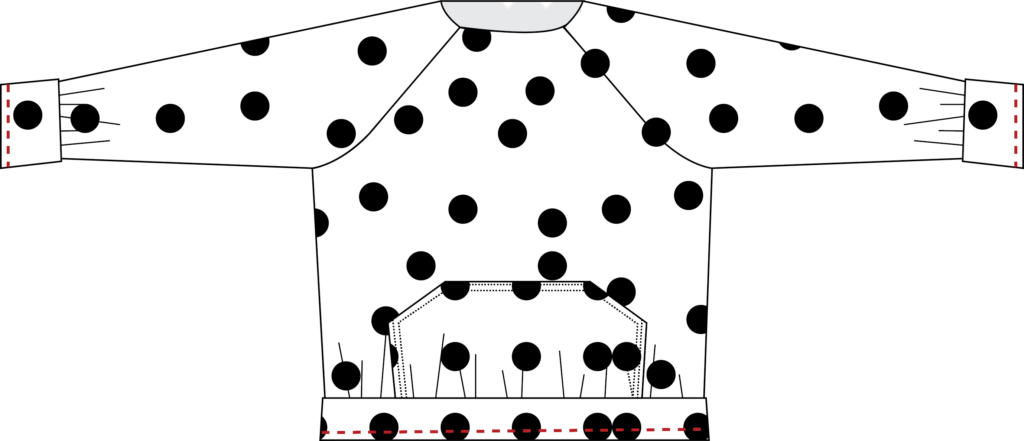
Mark the middle of the waistband. Align the waistband seam with the side seam of the bodice and pin the middle mark of the waistband with the other side seam of the bodice.
Distribute the fabric evenly and sew the waistband in place.
Fold the waistband down and press the seam.
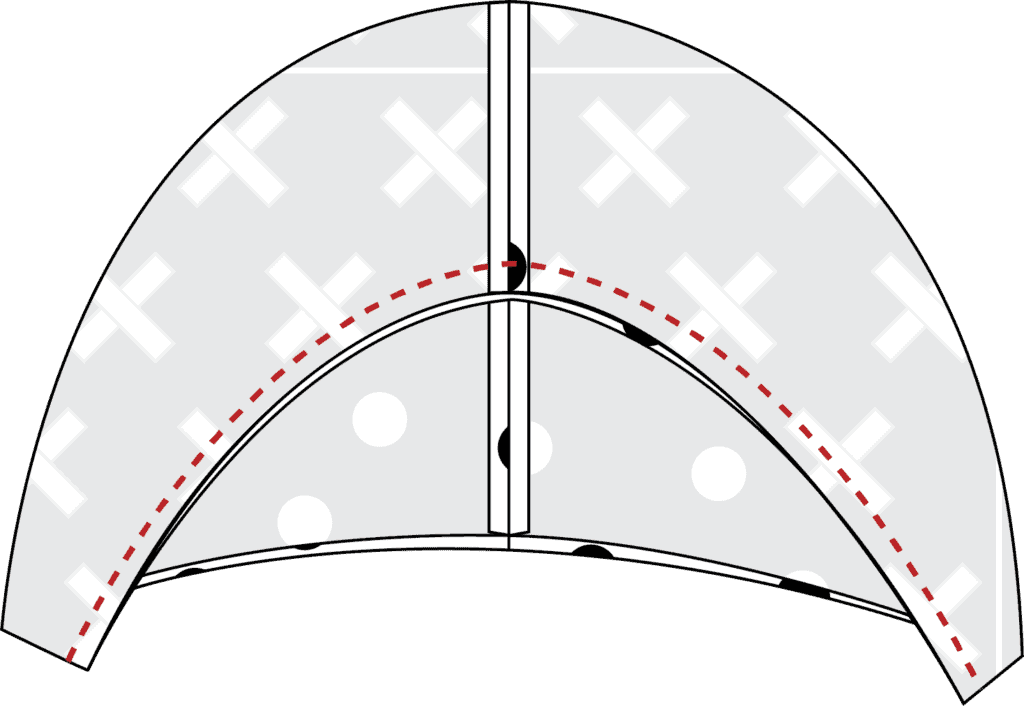
Sewing on the Hood
Align Hood
Using the markings, align the hood to the neckline right sides together. You should have the outer hood fabric facing right sides together with the bodice.
Align hood markings to the middle of the front bodice. There should be a 1" (2.5cm) cross-over at the front.
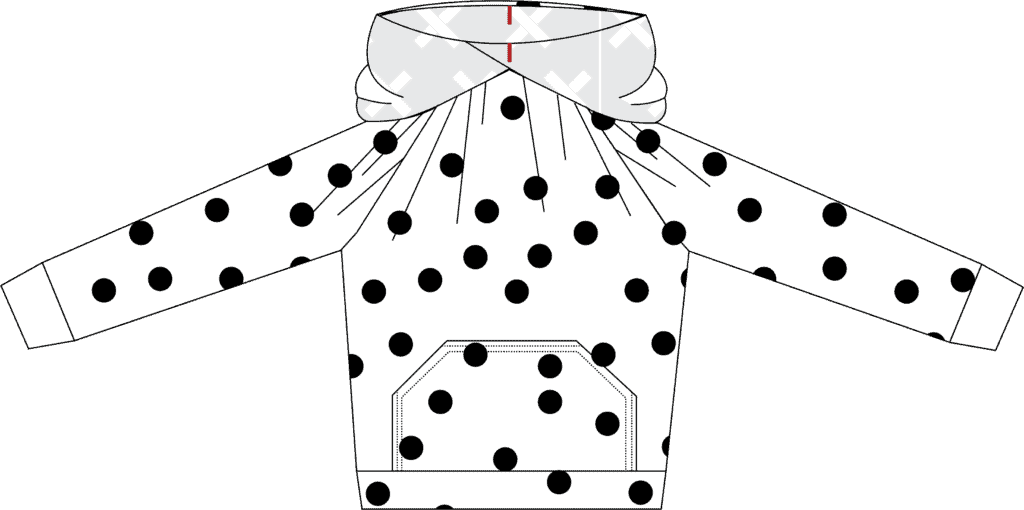
Sew Hood
Pin the hood in place, then sew all the way around.
Pull the hood up and press the seam downward towards the bodice.
Finishing Hoodie
Press all Seams
Pull the hoodie right side out. Press all seams again really well.
Do you love your Sweet Red Poppy Hoodie? Share your finished hoodies with us in the Sweet Red Poppy Crafting & Sewing Group!
Don’t want to forget about this free template? Save this project for later! Click here to save this project on Pinterest.
Looking for more FREE Sewing Patterns? Check out our Kids Circle Skirt or Kids Leggings Patterns.
Terms of Use:
This is a personal use-only pattern and it may not be shared or resold. You are welcome to sell hoodies made from this pattern from home production only.
All content of this pattern including video, photos, and wording are protected under copyright.
Do you have any questions about this hoodie sewing pattern? Let me know in a comment below!
Thank you for the free pattern and video! Can’t wait to make these for my kiddos!
Thank you so much for sharing! I’m a beginner w/no desire to use a serger (for now) so I’m teaching myself on an older model Janome. Your attention to details is wonderfully helpful! I am actually going to attempt using this pattern thanks to your explanations! I have no idea even about fabric, thread etc. So again thank you!!
Thank you for the pattern. Can't wait to get started on these for my gran-girls.
Sooo excited!! Cannot wait to make this for my girls!!
If we are doing 2 colors like you have done, how much of each fabric is needed? Thanks!
I've inherited some material but its only 2 way stretch, would it still work if i sized up perhaps? Or do you have any other patterns that you can recommend to use the material? Thanks!
Where do I get the printable pattern?!?!?!?!
in the middle of this post, you click the download here and it will download to your computer and also send you a copy to your email address.
Best Winter Gear for Kids (the coats we swear by cherrycrumble and the sweatshirts for the kids’ are amazing)
Merhaba cok aradigim bir modeldi çok teşekkür ederim. Turkiyeden sevgiler
I am trying to make this, but the cuffs seem too small to sew onto the sweater, any tips?
I've made 2 of your patterns now....really easy to follow, with clear instructions and easy to follow pictures. I am an experienced sewer but these would be ideal for a beginner.
The fit is also excellent . I made the 9-12m version, but so lovely to have all the different sizes.
Thank you so very much for such an amazing video. So easy to follow and you've included everything necessary even for beginners. A huge thank you also for this adorable free pattern!!! I can't wait to make some for my grandkids!
With a couple small additions I used this pattern to make a Halloween costume for my 2-year-old. He is a doggy this year. I added some ears on the hood and the tail on the back and then instead of a pocket I did some applique spots all over. Thanks for the super awesome tutorial and pattern!!
Thanks so much for this pattern, I’m planning to sew it for my three granddaughters. I hope to print only the sheets I need, I can’t use adobe as I have Apple devices, but can I ask , if you say to print 7-9, does that mean 7, 8 and 9 or 7 and 9.
I see where it says instructions for lengthening or shortening are below, but I can't find those instructions anywhere. All of my kids need it lengthened. If anybody know where to find those tips, please let me know. 🙂 This is a great pattern, and so generous to give it for free. Merry Christmas kiddos. <3
Hi! I hope you’re enjoying your day. I had a question about the eloflex thread. Im guessing if you use that you would need a bobbin wound with it as well, right?
Thanks,
Virginia
Do you have a pattern that is identical to this for adults? We have an upcoming event that we are supposed to match for and I cant find any adult patterns with the same arm attachments.
Thank you so much this will help me sew some hoodies for my baby 🙂
I am already thinking about Christmas 2024 and have decided to make this pattern for each of my grandchildren. If I want to make the pocket and hoodie lining from coordinating fabric, how much of the 1-2 yards will that take? Thank you!
Hi, excellent pattern, I have access to a printer for A0 paper, is there any way to get the full pattern so i do not need to assemble?
Hello! Thanks you very much for sharing this amazing pattern.
I will do it for my son.
Can you please clarify if the seam allowance is already inclued in the pattern or if we must add the 1cm seam allowance to the pattern when cutting the fabric?
Thanks you very much!
Hi! Thank you for the great pattern, especially the ability to print the sizes individually. So many online patterns don't have that feature. I am making 3 sizes for my granddaughters this Christmas. They will love them! Is there a way to print the instructions to go with it?