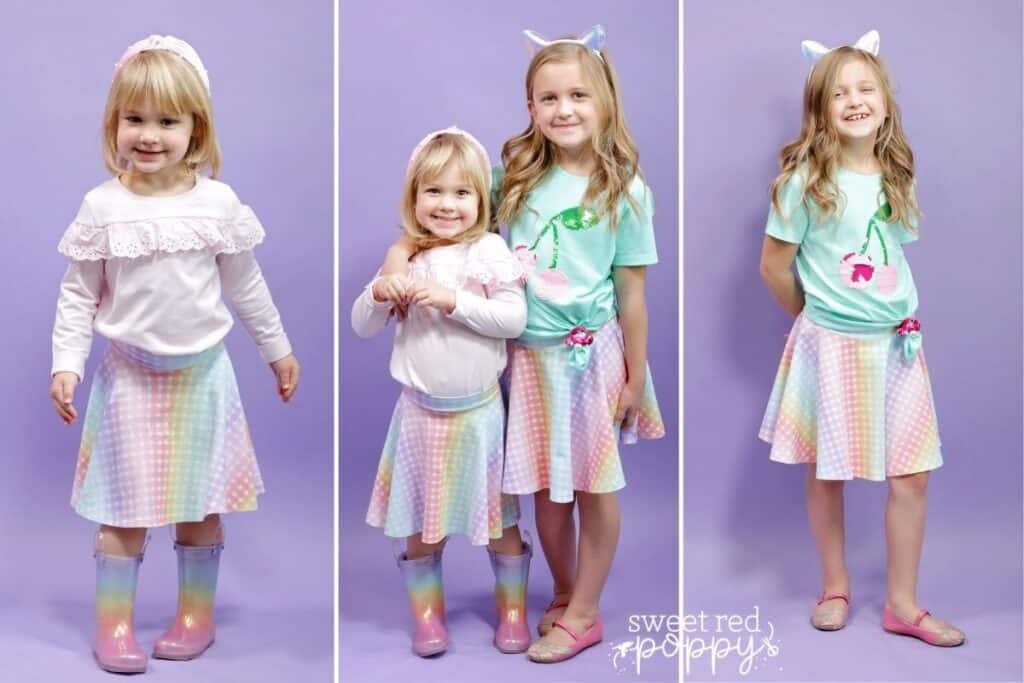
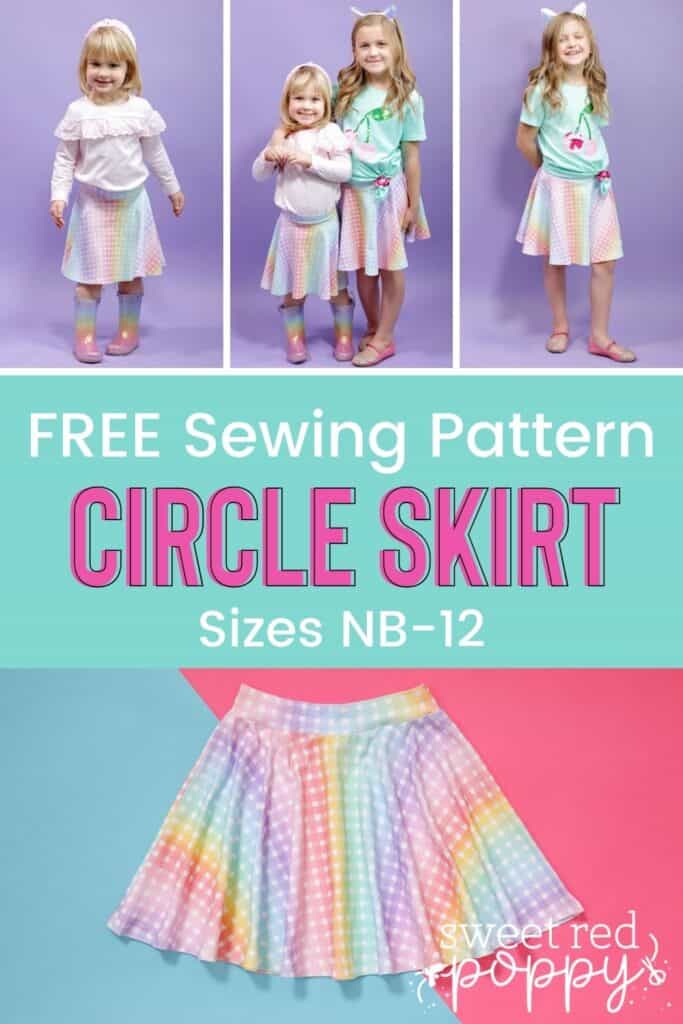
Have you ever wondered how to make a circle skirt? I have the perfect, quick, and easy tutorial to help you make a circle skirt! Plus, you'll love my FREE Circle Skirt Pattern and printable instructions!
CIRCLE SKIRT SEWING TUTORIAL
If you’ve been looking for an easy knit sewing tutorial then this adorable Circle Skirt is perfect for you! I’ll walk you through this tutorial step by step and share some of my favorite tips and tricks for working with knit fabric. This FREE pattern is available in sizes Preemie through size 12.
I teamed up with Janome to bring you this tutorial featuring my favorite sewing machine the Sewist 740DC. Read more about the machine here or purchase it here.
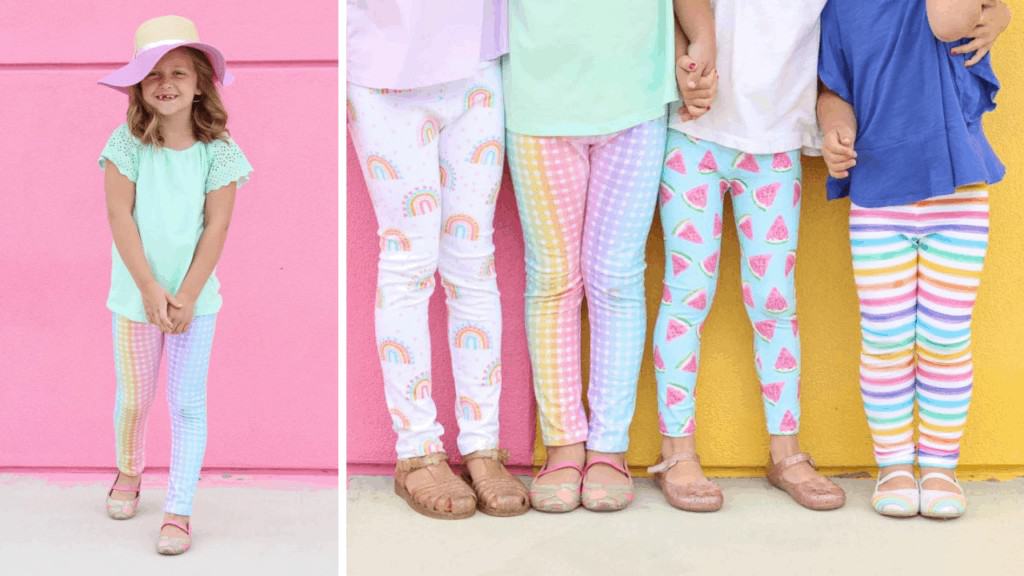
Do you want even more FREE sewing patterns for knit fabric? You'll love our leggings pattern!! Click here!
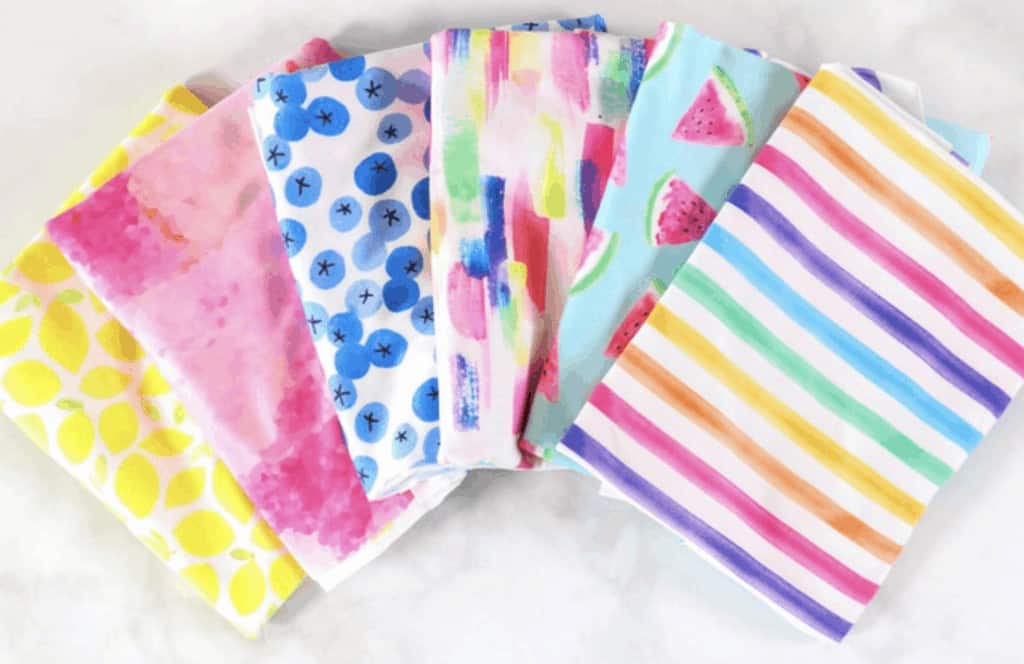
FABRIC RECOMMENDATIONS
For this pattern, I recommend using a medium-weight knit fabric with a content of 95% Cotton, 5% Lycra/Spandex. Having at least 5% Lycra or Spandex allows the fabric to have elasticity and bounce back to its original shape without getting stretched out over time.
Other suitable fabrics for this pattern are Double Brushed Polyester, French Terry, and Rayon Spandex
It’s essential that you use a fabric with at least 50% stretch especially on the waistband. Not sure what that means? A 4" piece of fabric should stretch to at least 6".
Let’s talk about how much fabric you will need for this project. These recommendations are based off of using a 58” - 60” wide knit fabric.
For sizes Preemie through 0-3 you will need ½ yard fabric. For 3-6 months through size 4 you’ll need one yard of fabric. For sizes 5 - 12 you will need 1.5 yards of fabric.
Make sure to prewash and dry your knit fabric before cutting and sewing it! This will prevent your fabric from shrinking after you've sewn it.
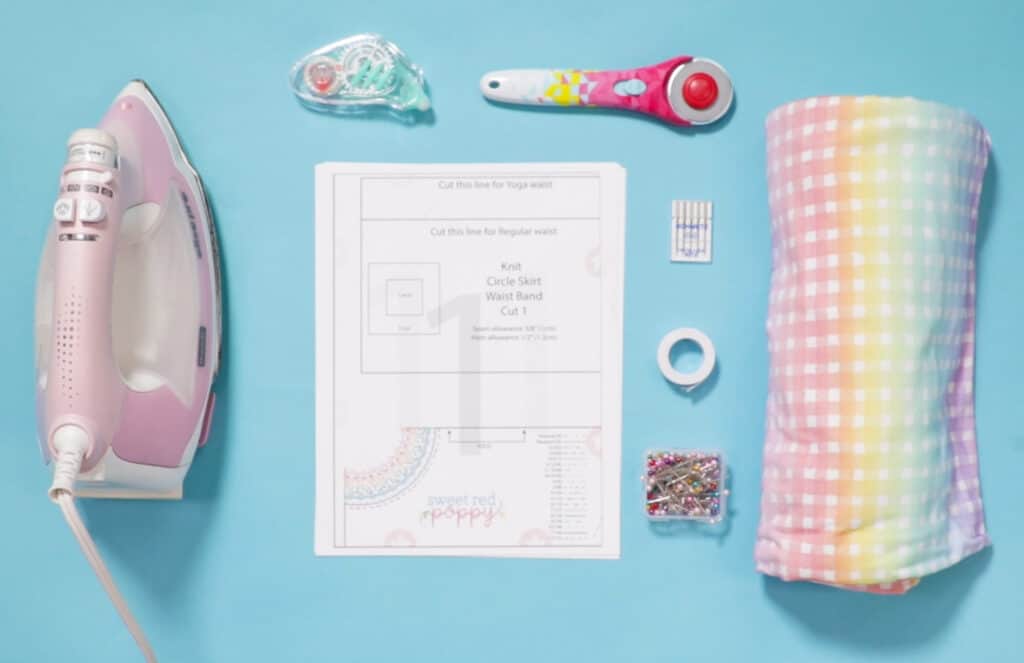
CIRCLE SKIRT SUPPLIES
- .5 - 1.5 Yard 4-Way Stretch Knit Fabric
- Sewing Machine (Sewist 740DC)
- Scissors or Rotary Cutter & Mat
- Thread (Optional Eloflex)
- Pins
- Iron & Ironing Board
- Ballpoint Needle
- Printer Paper
- Tape
- Heat N Bond Soft Stretch Lite (optional)
- 1-Inch Elastic
Shop my favorite sewing supplies here!
Why Shop Through My Links?
When you shop through my affiliate links, it doesn't cost you anything extra, but it helps me out in a big way! I earn a small commission from those purchases, and that support allows me to continue creating and sharing free tutorials and patterns for you. Thank you so much for helping me keep this creative community going! 💕
GET THE FREE PRINTABLE PATTERN DOWNLOAD AND TUTORIAL HERE.

STEP ONE: PRINT CIRCLE SKIRT SEWING PATTERN
Open the pattern in your PDF reader, I recommend using Adobe Acrobat Reader.
You can download the free version here: https://get.adobe.com/reader/
Avoid printing the pattern from your browser as it can cause the scaling to be off and the border lines to print incorrectly.
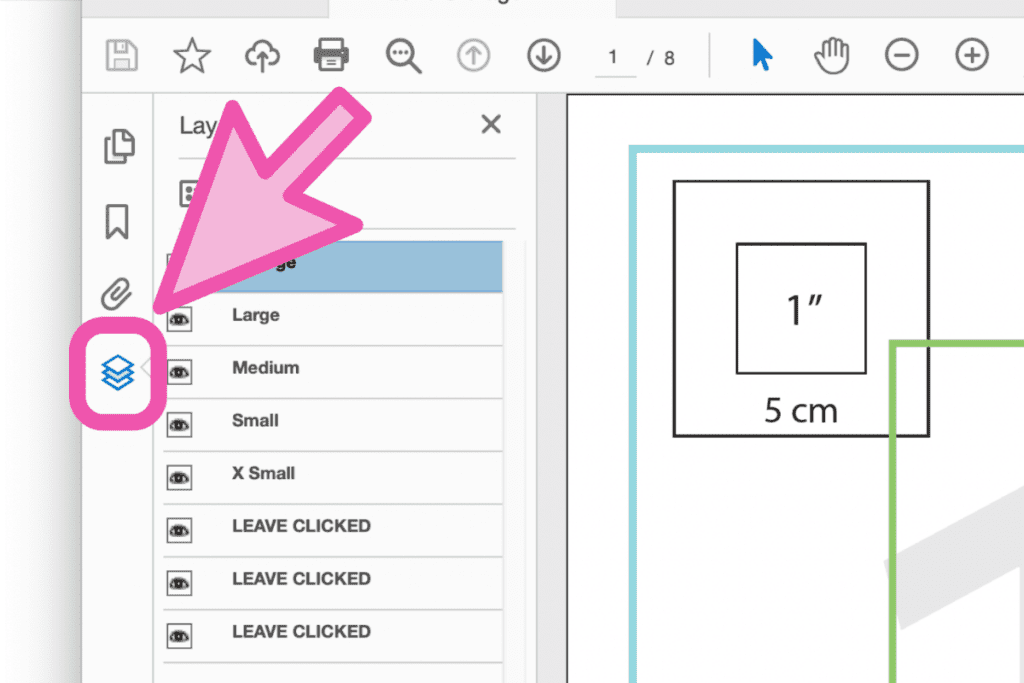
This pattern features layers for each size to make printing easier. You can print only the size(s) you want to sew! This makes the pattern easier to cut out and saves ink and paper.
To use the layers options, click on the icon that looks like 3 stacked papers on the left-hand side of the screen. Then, deselect the "eye" next to each size that you don't want to print.
Next, click on "Print" to open the print settings box. In the print settings, make sure the scaling is set to "Actual Size" or "Custom Scaling: 100%."
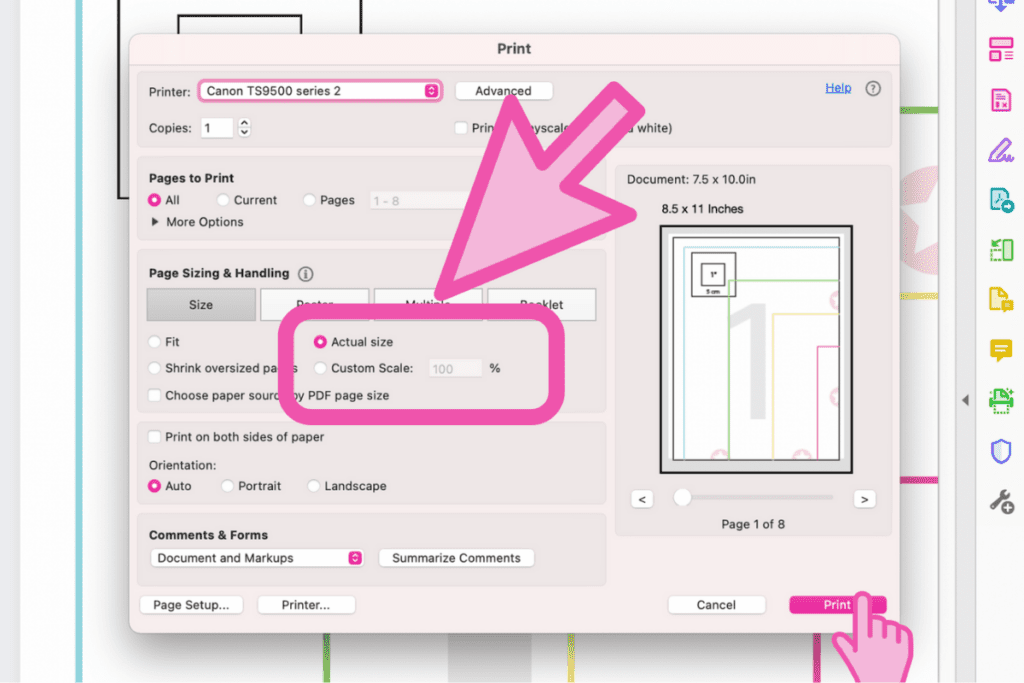
Then, print just the first page of the pattern. This page contains a 1" test square that you can measure to check that the scaling is correct
Once the first page prints, measure the test square. If it measures 1" x 1", print the remaining pages of the pattern.
If it does not measure 1" x 1", you will need to recheck your print settings before printing the rest of the pattern.
STEP TWO: ASSEMBLE CIRCLE SKIRT PATTERN
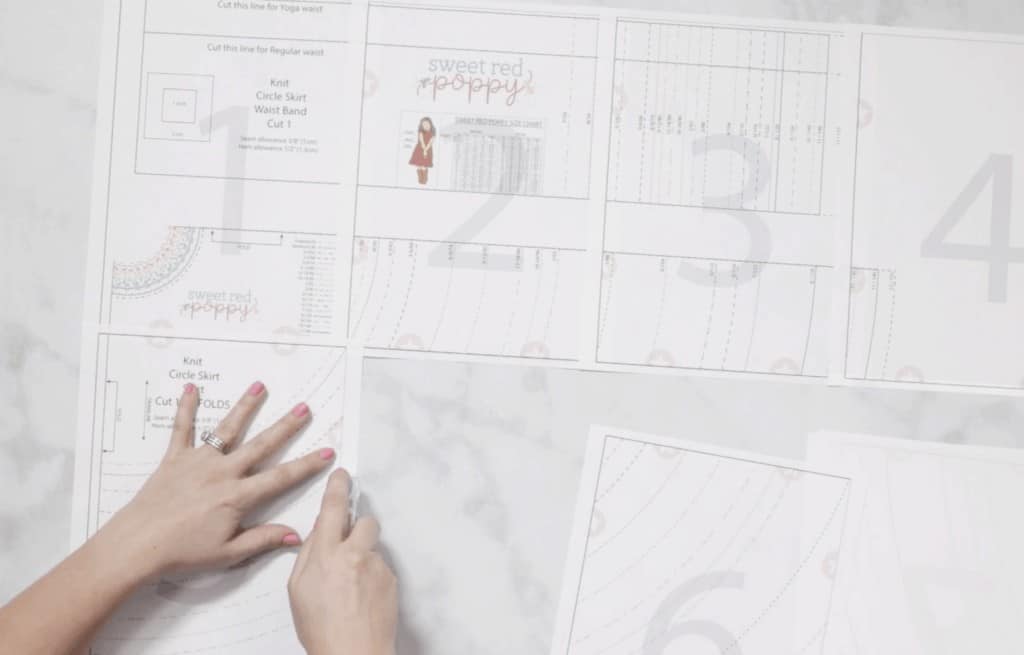
This pattern features numbered pages, a border around each page with scissors, and star guides to help you assemble the pattern.
Trim away the excess paper on the sides (along the scissor guide) before taping the pages together.
You can also choose to overlap the papers. Holding the pages up to a light can help you to see through the paper and align the pattern lines correctly.
On a flat surface place page one out in front of you. Overlap page two, aligning the black border and pink circles with stars. Tape or glue the pages together. Continue this process until you reach a page without stars on the right-hand side. This means the row is complete. Begin assembling the next row below the first row.
Finally, connect the rows by aligning the black outline and circles together.
STEP THREE: CHOOSING THE CORRECT SIZE
Measure the waist and hips of the person you are sewing this skirt for before selecting a size. This is going to ensure you get the very best fit possible.
Because this pattern will sit at the waist, the waist measurement is the most important. If you fall in between sizes I recommend you size up for the best fit.
*Refer to the pattern for the size chart.
STEP FOUR: CUT OUT CIRCLE SKIRT PATTERN
Now, let’s cut out the pattern. You can see that each size has it’s own color as well as a unique line type to help you differentiate between the different sizes. I’m going to cut out the size 3, so I’ll be following along the green line dashed line.
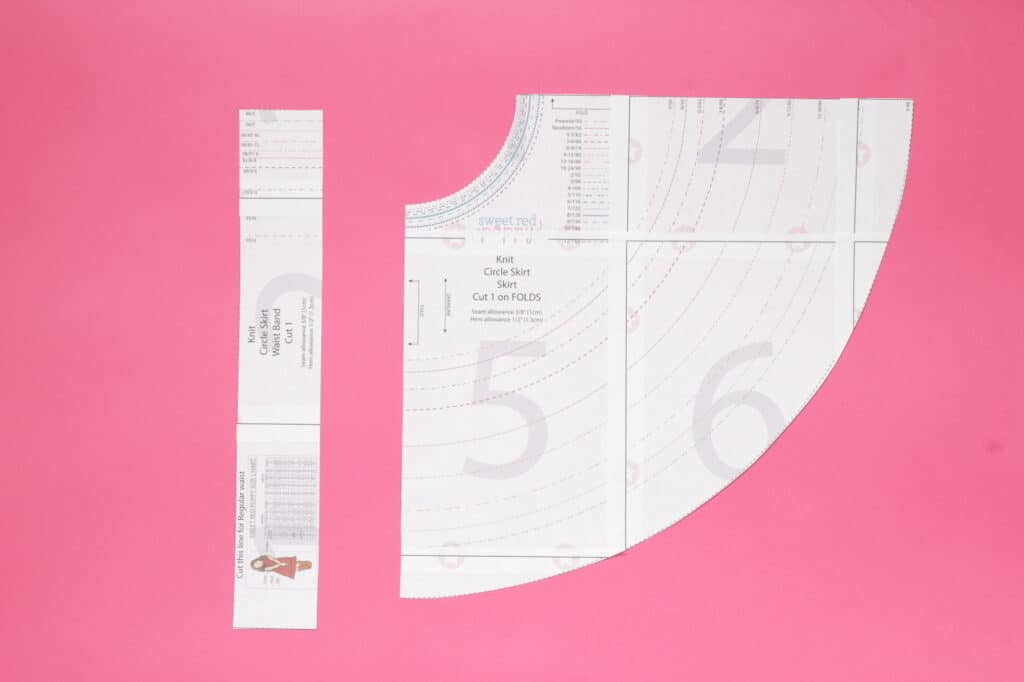
Make sure to cut out both the skirt and the waistband. When cutting out the waistband you can select from the normal waistband or a slightly larger yoga waistband that can be folded over.
STEP FIVE: CUT FABRIC
Now it’s time to cut out your fabric! Start by placing a cutting mat on the table in front of you. Next, Lay the fabric out in front of you. You’ll want to fold the selvage edge of the fabric inwards. If you’re working with the larger sizes of this pattern you can fold the fabric so the selvage edges are aligned.
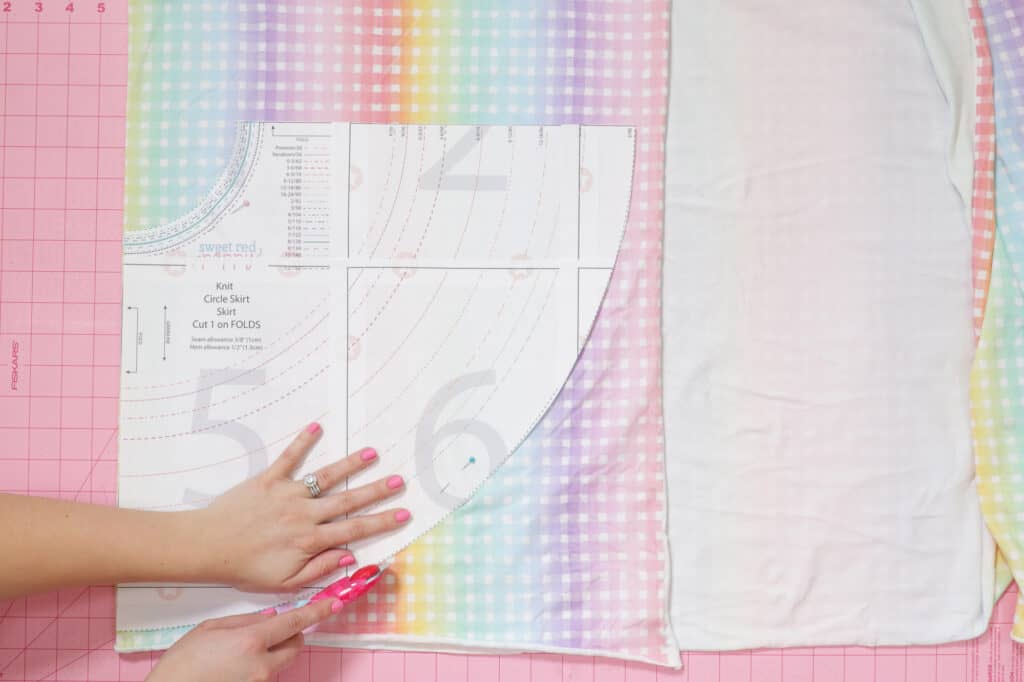
Now place the sewing pattern on top of the fabric. The edge of the pattern should be aligned with the fold of the fabric. Use a few pins to secure the sewing pattern to the fabric so it doesn’t move around while cutting it. Using a rotary blade or a pair of scissors, you can carefully cut around the pattern. Repeat this process to create both a front and back.
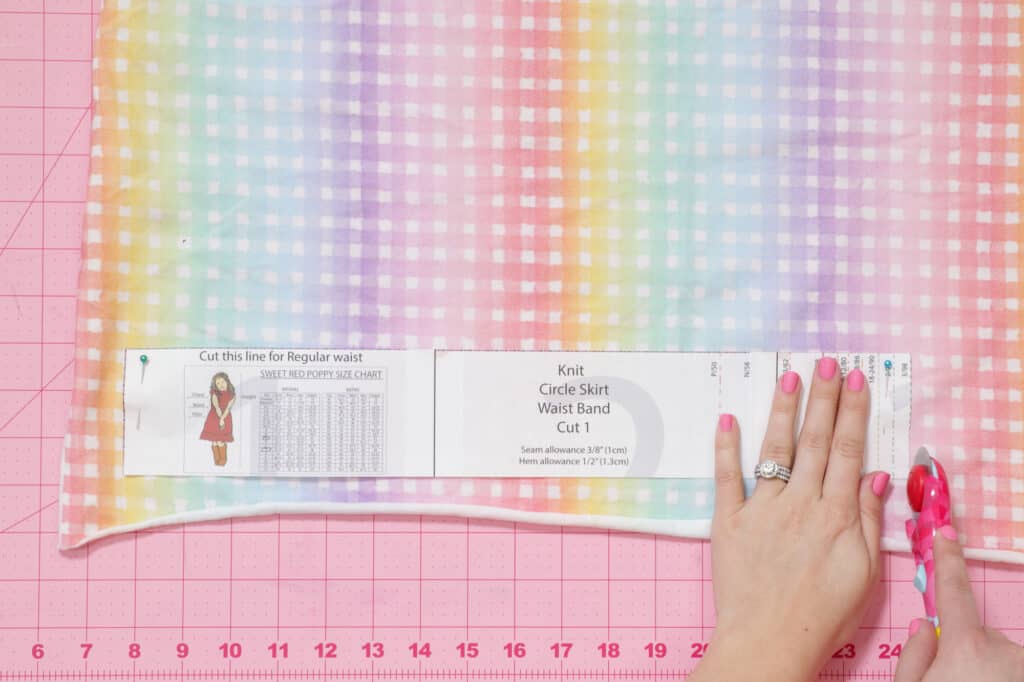
Now, it’s time to cut out the waistband. It’s really important that the waistband is cut with the greatest amount of stretch going across the waistband. Pin it in place and then cut around it.
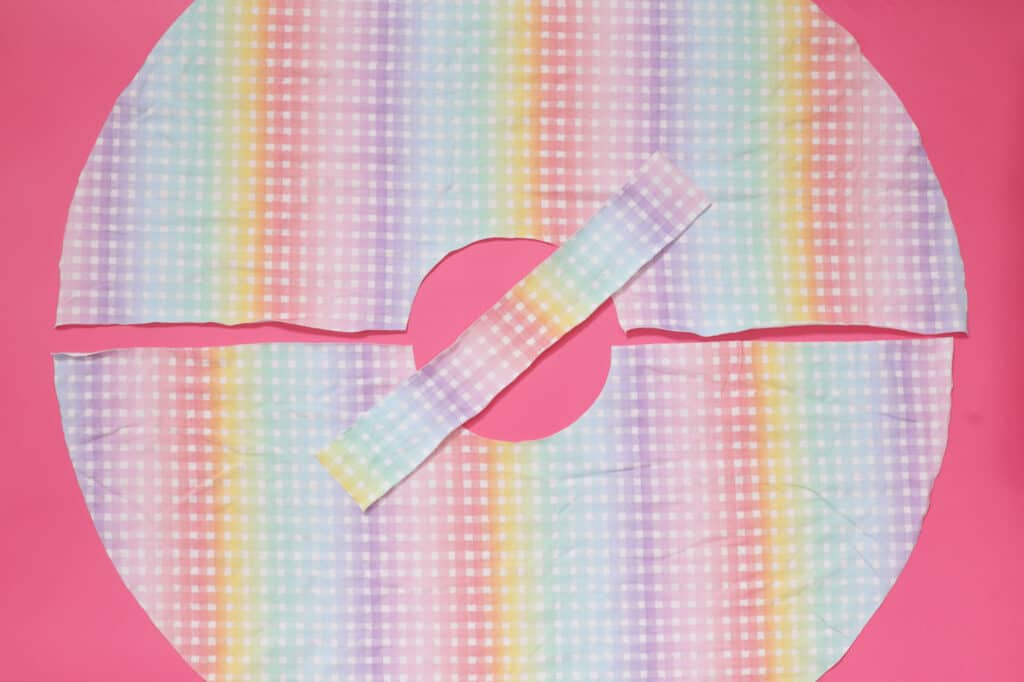
You should now have three different pieces of fabric to create the Circle Skirt.
SEWING TIPS
Use a stretch stitch. This is a stitch that allows the fabric to have a small amount of stretch so that the thread doesn’t break after while it’s being worn or stretched.
Use lots of pins to line everything together and sew slowly.
Don’t forget to use a Jersey or ballpoint needle for the best results.
If you have a fabric that rolls, spray it with starch to make it stiffer and less likely to roll.
STEP SIX: PIN SKIRT AND WAISTBAND
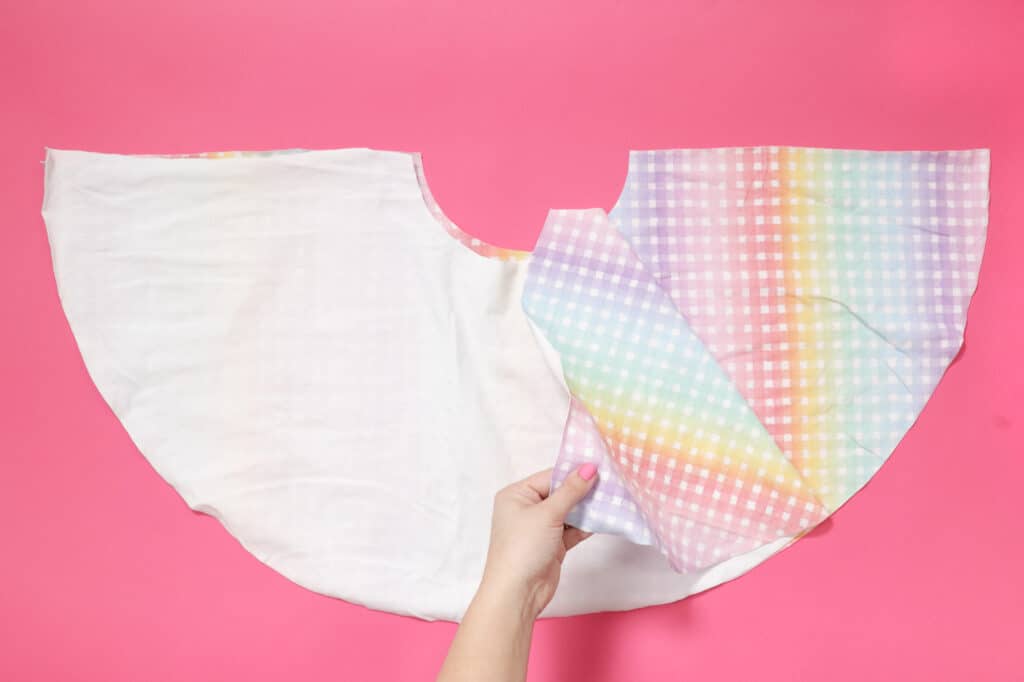
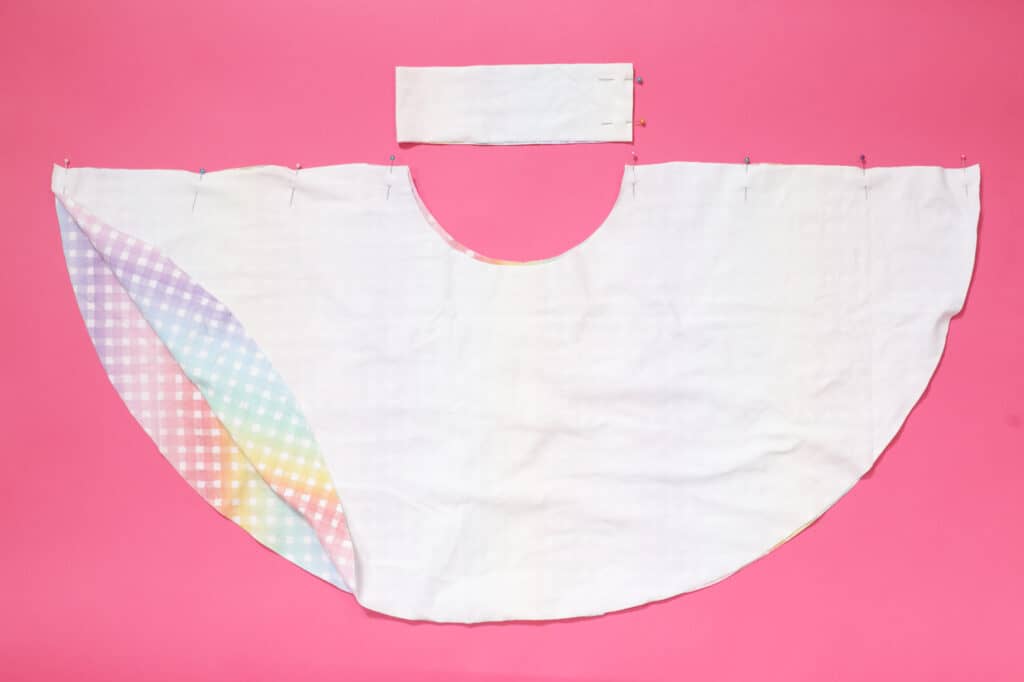
Lay one skirt piece out on the table in front of you. Take the second the skirt and place it on top with right sides together. Now you can pin the skirt front and back together along the sides leaving the top opening unpinned.
Fold the waistband in half aligning the short ends together. The right sides of the fabric should be facing each other.
STEP SEVEN: SEW SKIRT SIDE SEAMS AND WAISTBAND
Using a stretch stitch (it looks like a lightning bolt) sew both sides of the skirt using a 3/8th-inch seam allowance. Sew the waistband together along the short end.
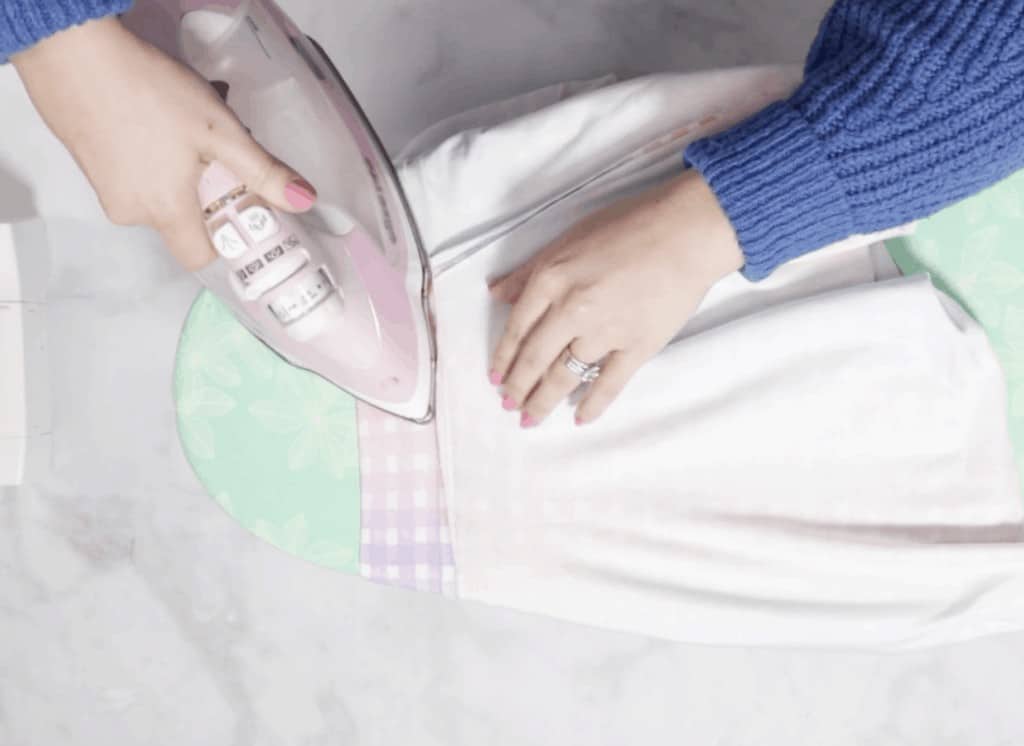
STEP EIGHT: PRESS SEAMS & QUARTER WAISTBAND
Take a few minutes to press all of your seams open. This is an easy step to skip, but it really gives your project a professional look and helps you to avoid having any bulky seam allowances. When working with knit fabric make sure to use plenty of steam to really set your ironing in place.
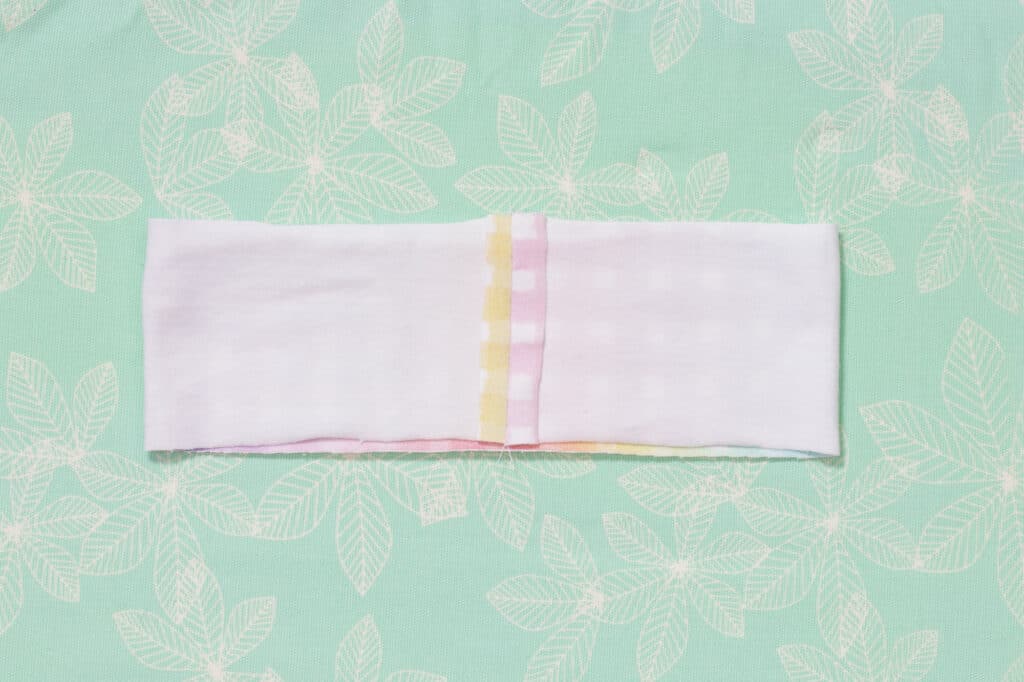
Take the waistband and press the seams open. Then fold the waistband in half with the wrong sides facing each other. Using the iron, quarter the waistband by folding it in half and pressing it. This will make it easier to distribute it evenly when pinning it to the skirt. Press the side seams of the skirt open as well. Use the iron to also mark the center front and back of the skirt.
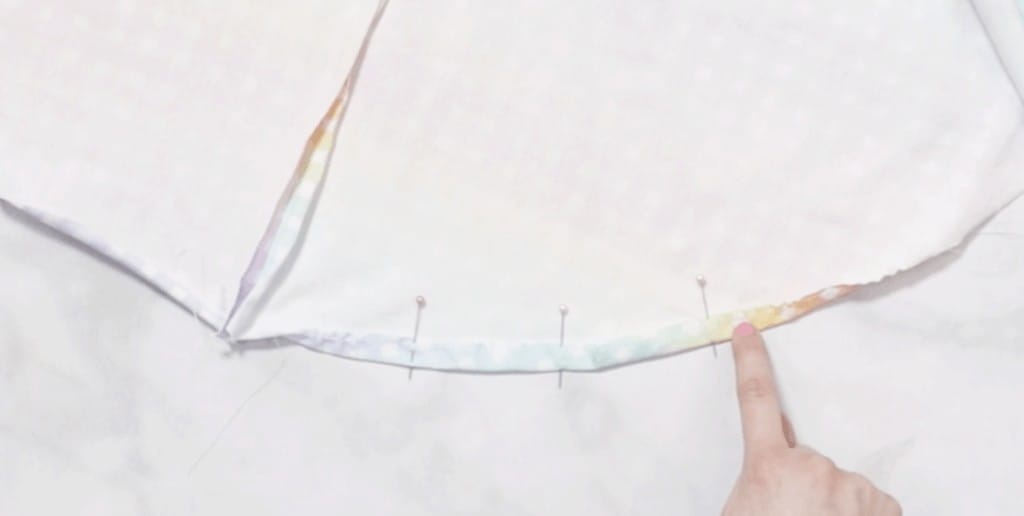
STEP NINE: PIN SKIRT AND WAISTBAND TOGETHER
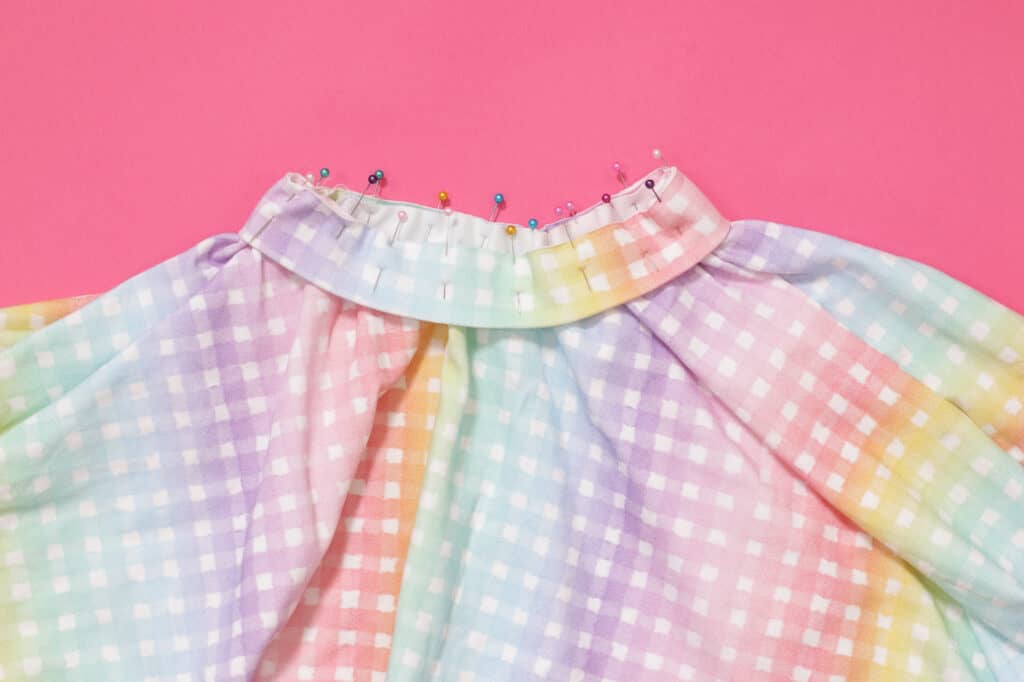
Align the side seam of the skirt and the seam of the waistband together with the raw edges aligned at the top. Use a pin to secure the waistband to the skirt. Repeat this process around the entire skirt by aligning the markings of the skirt and waistband together.
Gently pull on the waistband and skirt to align the raw edges and ease in the skirt fabric. Place a pin in the middle of the fabric to secure the waistband and skirt together. Repeat this process around the entire waistband. The more pinning you do on this step the more evenly distributed the fabric will be giving you a clean and professional looking finish.
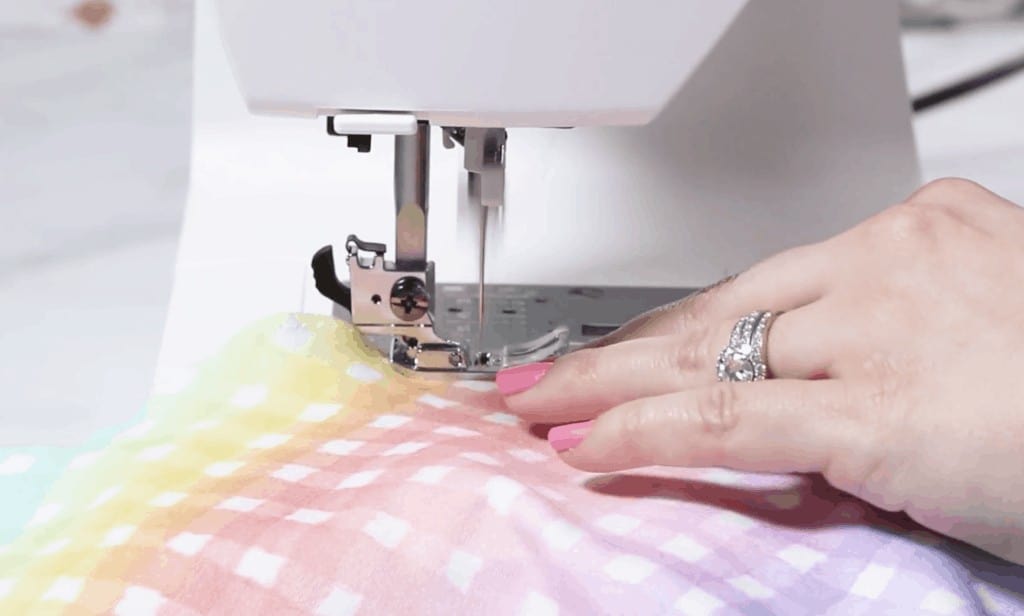
STEP TEN: SEW THE WAISTBAND
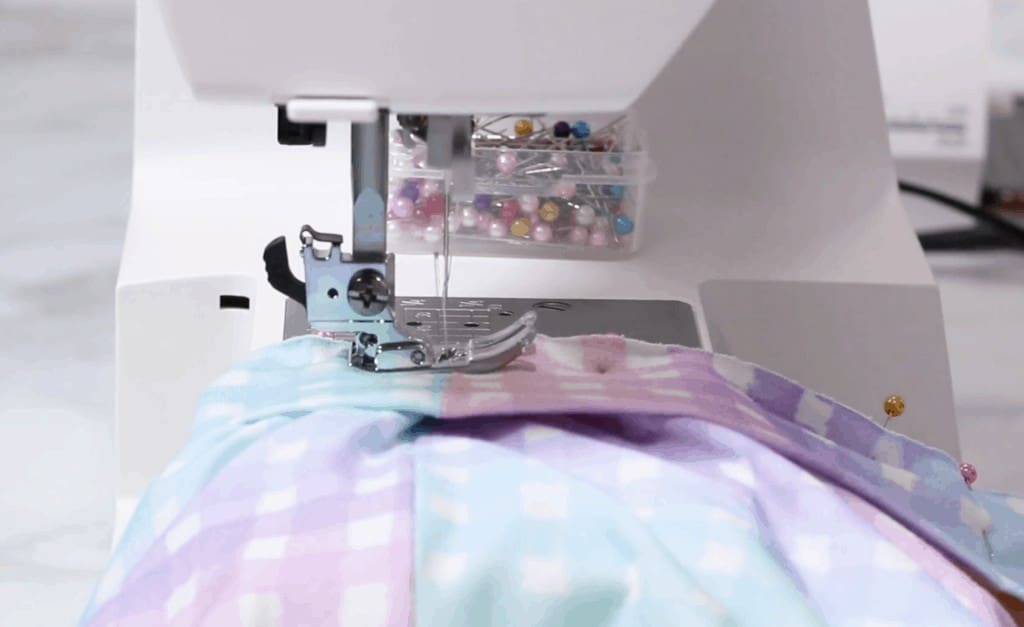
Now it’s time to sew the waistband and skirt together. For this next step remove the accessory box from your machine so that you can slip the waistband around the machine. The waistband should be facing upwards.
Use your left hand to gently pull on the fabric while guiding the fabric with your right hand. Don’t forget to remove the pins as you are sewing. Sew around the entire waistband using a stretch stitch. Go slowly to avoid creating any accidental puckers while sewing.
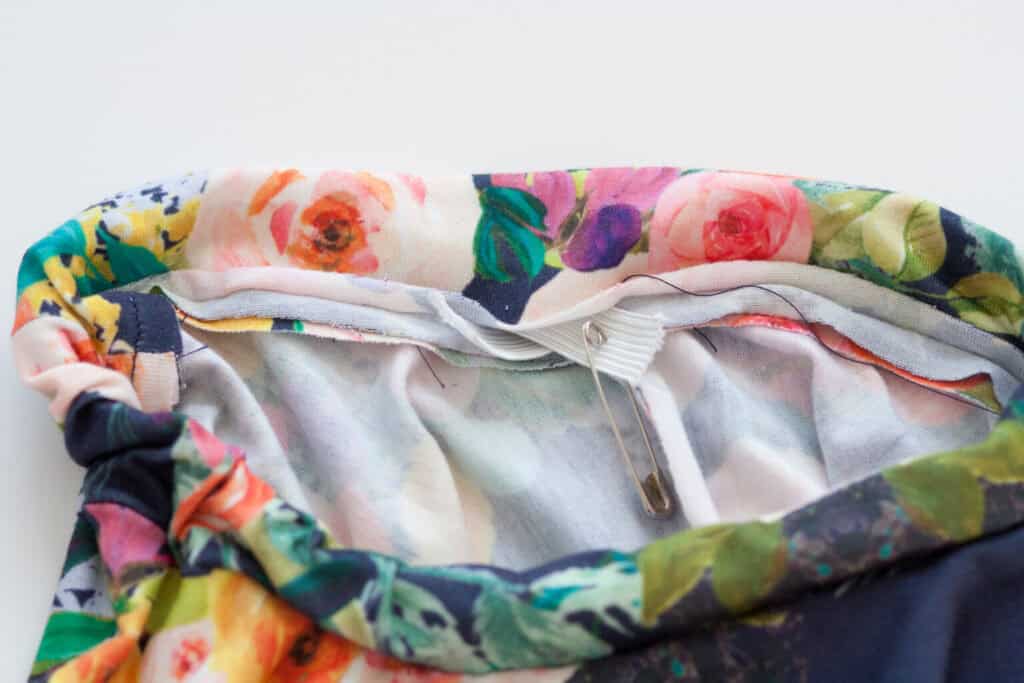
How to Add an Elastic Waistband: Cut the 1" elastic to measure 1" shorter than the waistband pattern piece. Sew together the waistband and skirt, leaving a 2-inch gap to insert the elastic. Thread the elastic through the waistband using a safety pin to guide it through.
Pull both ends out and overlap the ends of the elastic by one inch, sew together with a zig zag stitch. Sew the waistband opening closed.
STEP ELEVEN: PRESS WAISTBAND SEAMS
Now, it’s time to press the waistband seam with a hot iron. Flip the skirt inside out and press the waistband facing downwards towards the skirt.
STEP TWELVE: HEM SKIRT
Now, you can move on to hemming the skirt. There are two different methods that you can choose from.
OPTION #1 BASE AND GATHER
For the first method, increase the stitch length to the highest setting the sewing machine will allow.
Sew a basting stitch 1/4 inch from the raw edge of the hem all the way around the skirt.
Carefully pull the bottom thread to slightly gather the edge of the fabric. The hem should begin to curl up as it eases in the fullness.
Pin the hem up 5/8th inches evenly and then sew it from the front side using a 1/2 inch from the edge.
OPTION #2 APPLY SOFT STRETCH LITE
For the second method (my preferred method), use Thermoweb Heat N Bond Soft Stretch Lite to create a beautiful hem.
To do this turn the skirt inside out, unroll the tape, align it with the edge of the skirt and iron it in place. Gently pull on the tape to curve it around the rounded edge of the skirt.
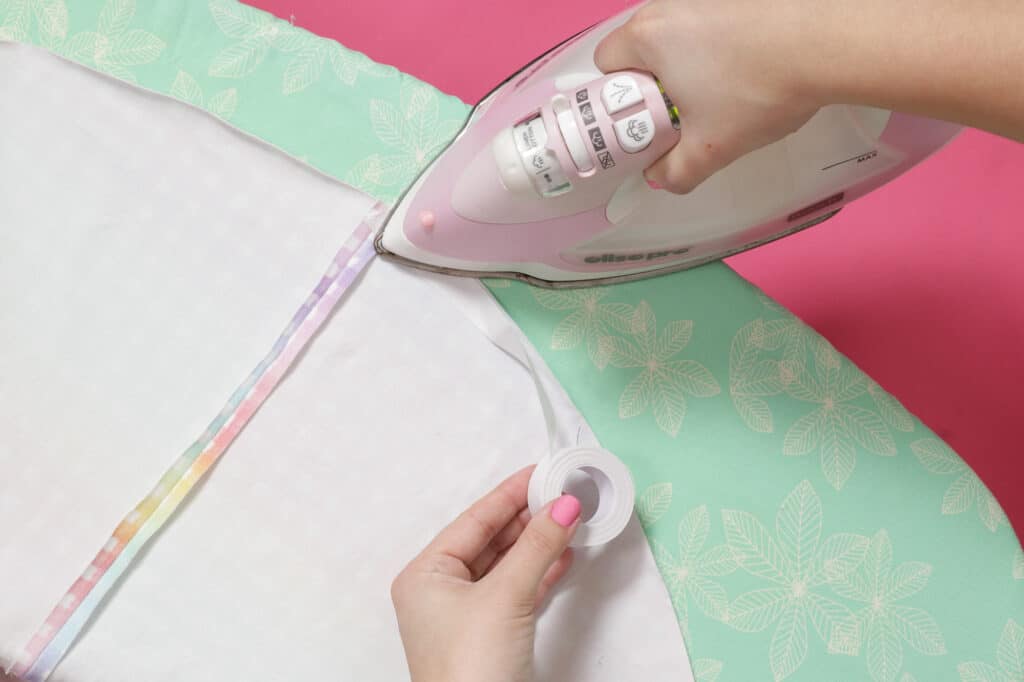
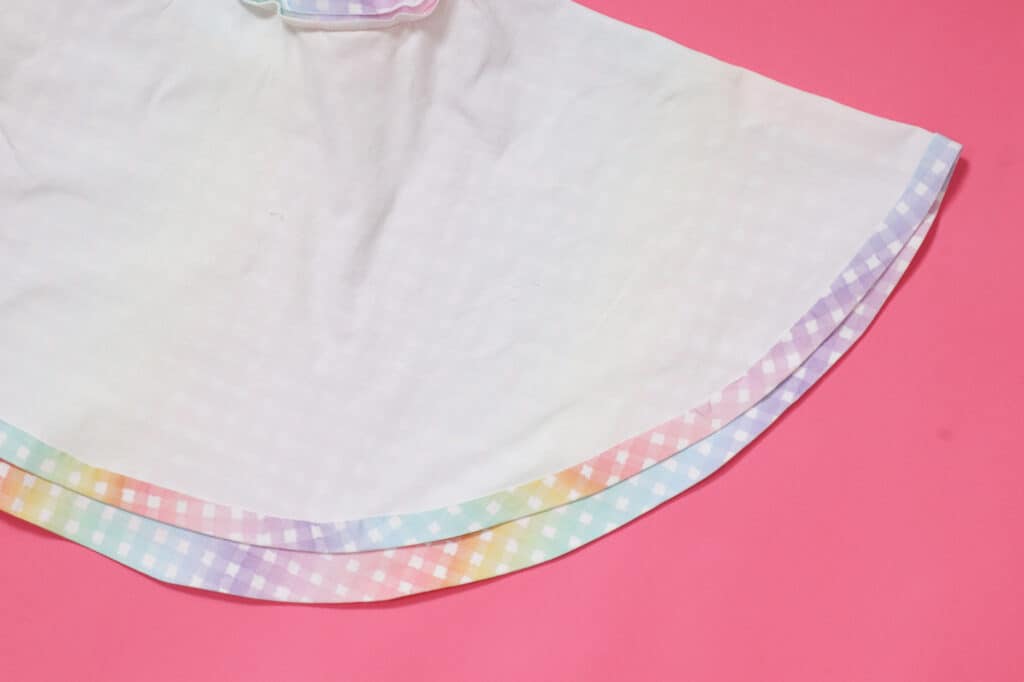
Fold the skirt over along the edge of the tape and press it in place to create the hemline.
Now, remove the paper liner from the hem tape from the entire. Press the hem of the skirt with the iron to activate the heat and adhere it to the fabric.
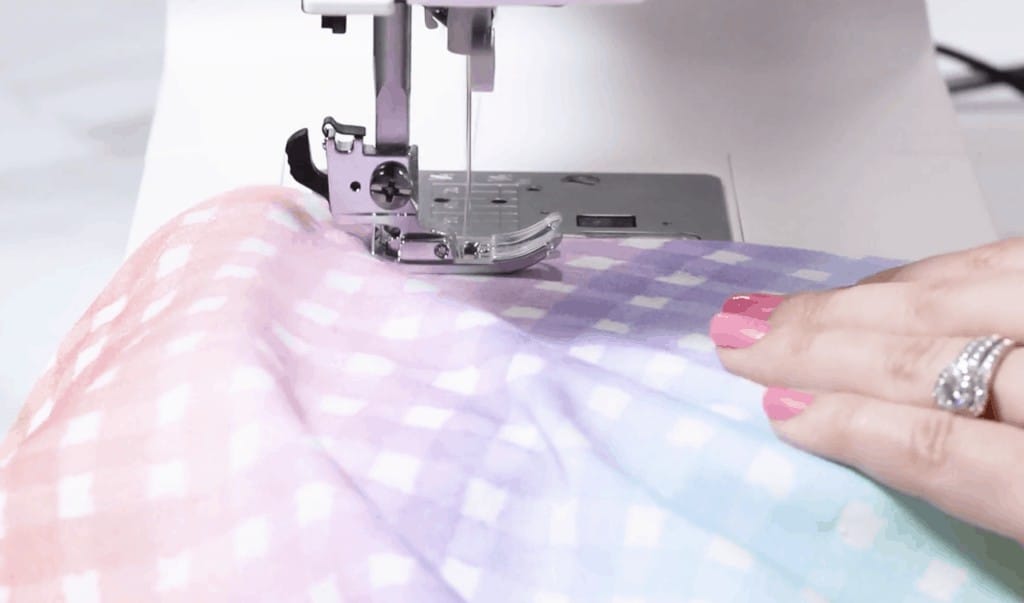
STEP THIRTEEN: SEW HEM
Once you’ve pressed the entire hem, sew around the skirt from the front side using a 1/2 inch from the edge.
Once you’ve finished sewing, make sure to press all seams well with plenty of steam. Now you have an adorable twirly circle skirt!
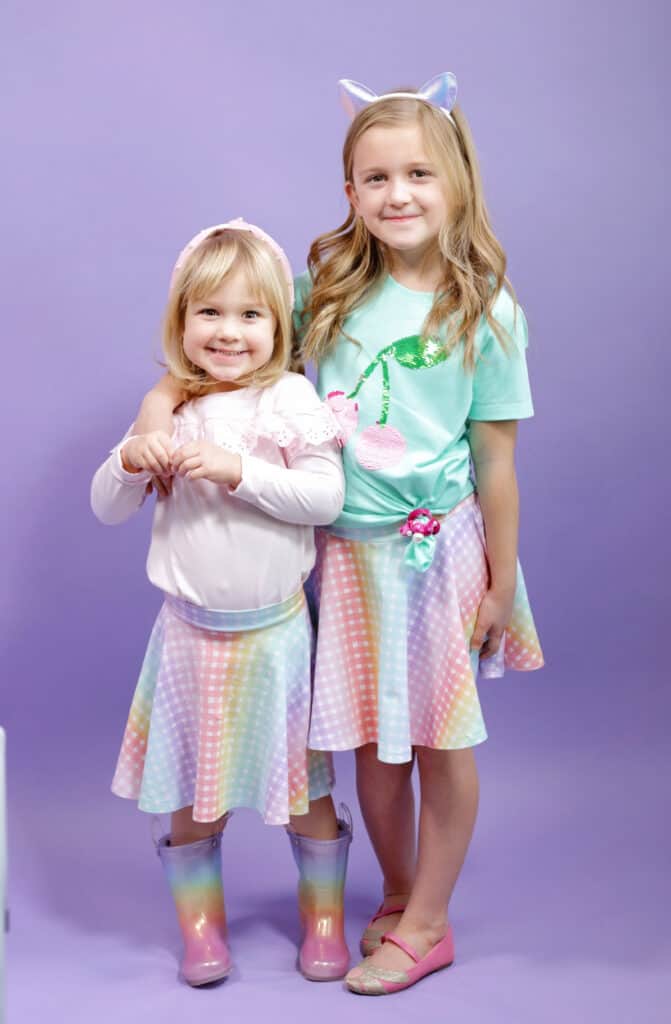
I hope you enjoyed this quick and easy circle skirt tutorial!
Don’t forget to join my crafting Facebook group where you can show us what you’re making, ask questions, and learn from others! Come follow me on Instagram for daily crafting inspiration and a look behind the scenes. If you use these files, be sure to tag @sweetredpoppy so I can see what you’re making and share your photos in my stories!
Have you made a circle skirt before? Let me know in a comment below!
Looking for more FREE sewing patterns? Check out our FREE leggings pattern here!
Wish this was Woman’s size.
Me too!!
Do you think there is any way to add pockets to this skirt? My granddaughter loves pockets!
you can add pockets to the side seams about 3/4 to 1 inch down from waistband edge of skirt. sew separate pocket pieces to front and back of skirt. sew up side seams to 2" above bottom of pocket begin side seam again about 1" from top of pocket to outer edge of side where waist band goes. next fold skirt out of the way and sew front and back of pocket pieces to each other stopping and starting at side seam..
This is exactly what I've been looking for, to make twirly skirts for my granddaughters! Perfect!
Hola. .. Buenas noches ! Cómo debo hacer para descargar los patrones?
Hola Kathleen! You can download the pattern for my Circle Skirt in this blog post just below the supply list!
What is the deal. I can't get the free pattern. Everything I click on takes me back to this page.
I can not print free circle pattern after numerous attempts. Thanks.
Wow, I love these skirts, what cute, lucky little girls. Thanks for sharing
If I wanted to make this skirt in a fabric with mermaid scales, would I have to do something different ( like cut quarters) in order to preserve the direction? I’m new to all this! Thank you.
I think this is an excellent idea. I will hopefully print the pattern,
And when I am able, make the pattern.
Thank You very much
Marilyn
I love how easy it is to read your patterns and follow along to your video. Can I adjust this so I can use cotton? The material I have doesn't stretch.
Shannon,
I haven't tried this pattern with cotton, but if you do, let me know how it goes. You'll need to add elastic to the waistband since your material doesn't have stretch.
The first circle skirt (navy flower one) uses elastic in the waist. The second one does not
have any instructions for elastic. Is it not used? It says 1" elastic in supplies.
Hi Barbara. There are two options for sewing the waistband. When cutting out the waistband you can select from the normal waistband, with elastic, or a slightly larger yoga waistband that can be folded over. So you can decide!
Love love love your patterns. So easy to follow along with the videos. Your fabrics are so pretty. Is there a special place you get your fabrics? Thank you
Thank you for sharing your knowledge! I’m very new to sewing and your videos are wonderful, easy to follow instructions and very clear step by step. I made this skirt working with this type of fabric for the first time and it was a breeze. Thank you!!
Wondering if this can be cut on the fold so only 1 seam in the skirt. My granddaughter wants a skater skirt so am thinking this could work but needs to be much shorter. Suggestions for shortening. Or do you have a skater skirt pattern.
She is 10 1/2 so about a size 10 or 12
Thank you
I am having trouble downloading the Circle Skirt pattern. I downloaded the Acrobat Reader. It is not in my email. I even checked my spam. The download is stuck at 50%.
What can I do to finish downloading the pattern. Thank you!
Excelente
Que bella me gustaría descargar los patrones