Learn how to make giant standing organza fabric flowers with this free step-by-step tutorial and printable PDF template that you can download down below!
Are you in search of the perfect jaw-dropping party decor that’s sure to impress your guests? You’re in the right place! I’m sharing all my secrets to making the giant standing organza fabric flowers you’ve seen on display at high-end parties.

Imagine this: towering blooms, each petal carefully crafted to perfection, standing tall and ready to steal the show at your next event. Sounds pretty amazing, right?
My journey to craft the perfect fabric flower started nearly four months ago after seeing a photo of these magical flowers. I started with a simple goal: sprucing up a birthday bash with some eye-catching decor.
But instead of finding a helpful guide, I ran into dead ends and frustration. It seemed like everyone who was making these stunning flowers was keeping their flower-making secrets under wraps, leaving DIY enthusiasts like me in the dark.
Sure, you can purchase these stunning flowers online, but they come with a hefty price tag which didn't work for my party on a budget.Giant Organza St
Fast forward through countless hours of trial and error and some not-so-gorgeous ideations, I'm thrilled to say I've finally cracked the code!🎉
In my step-by-step tutorial, I'll spill all the beans—from picking the perfect organza fabric to shaping petals and assembling your own gorgeous creations.

These stunning flowers aren't just for birthdays. They're perfect for weddings, bridal showers, baby showers, or jazzing up a storefront. The possibilities are endless!
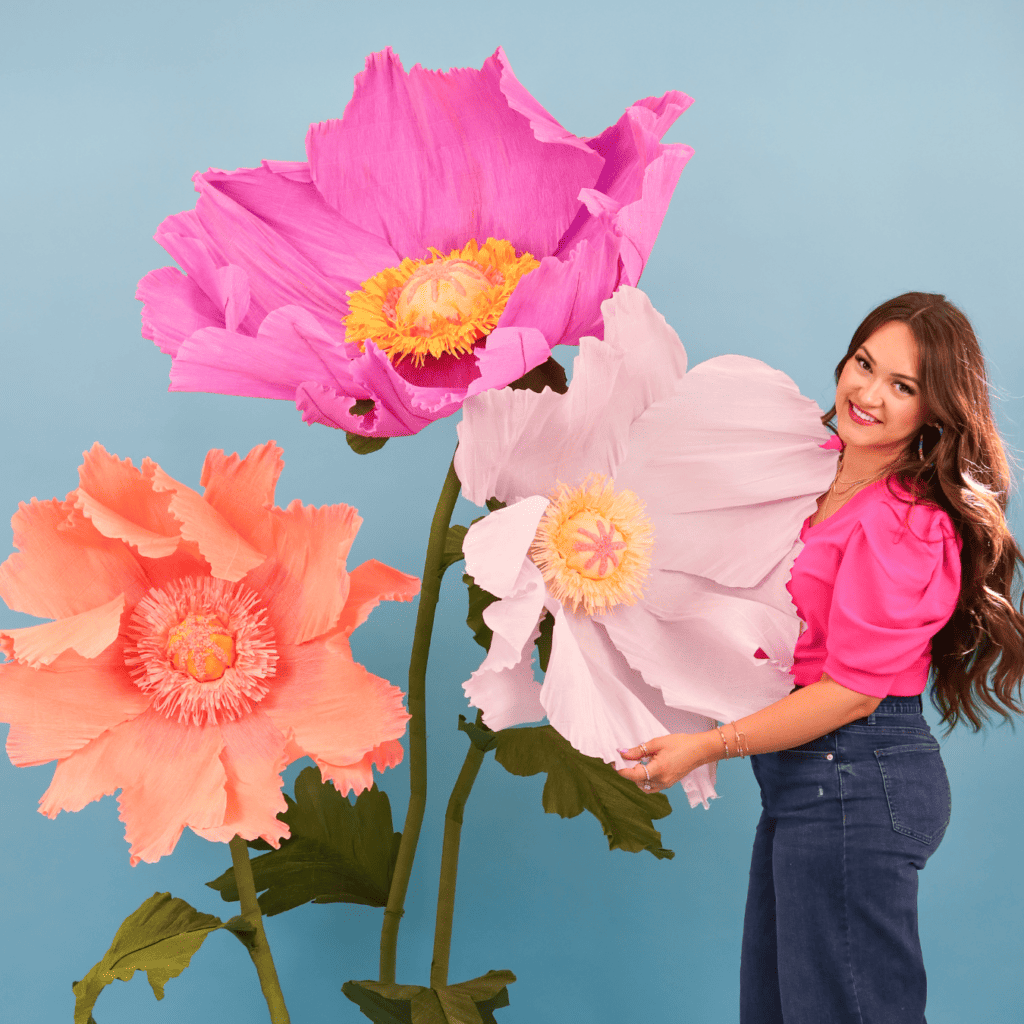
If you loved my Giant Standing Crepe Paper Flowers you're going to love these as well! These flowers look like they came straight out of a fairytale or magical realm.
Each flower is a labor of love, made with the utmost care and creativity. So, join me on this floral adventure, and let's unleash your inner floral artist together.
Get ready to wow your guests and make memories that'll last a lifetime—all with just a little fabric, a pinch of creativity, and a whole lot of heart.
In this tutorial, I’ll explain how I made the petals, center, and base of this flower and share tips and tricks along the way.
To learn how to make the stems and concrete base, be sure to refer to the end of THIS POST.
Looking for even more FREE flower tutorials? Click here to see all 12 of my tutorials!
Characteristics of Organza Fabric Flowers
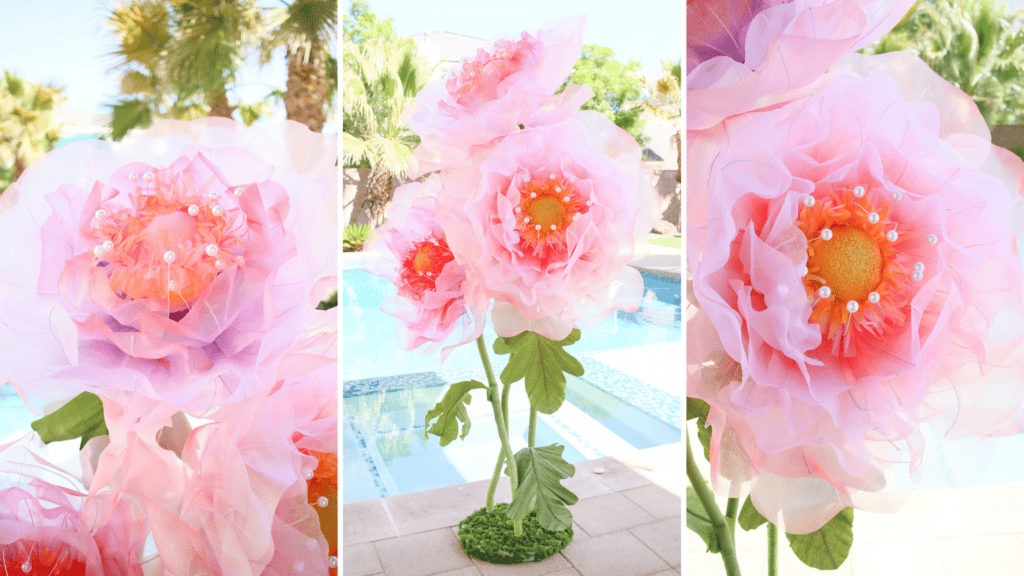
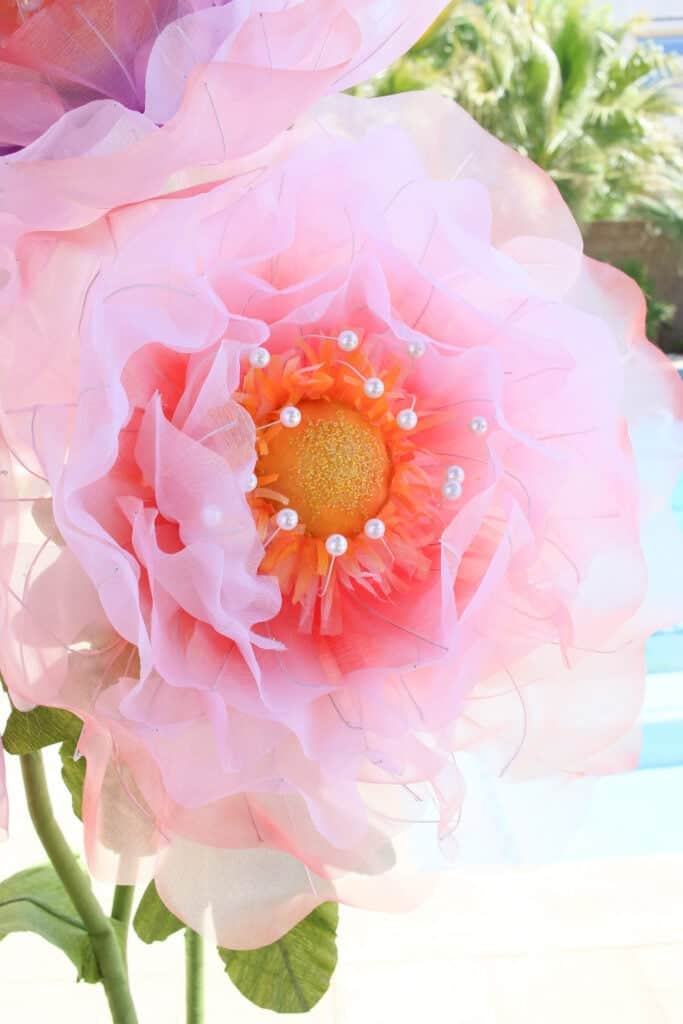
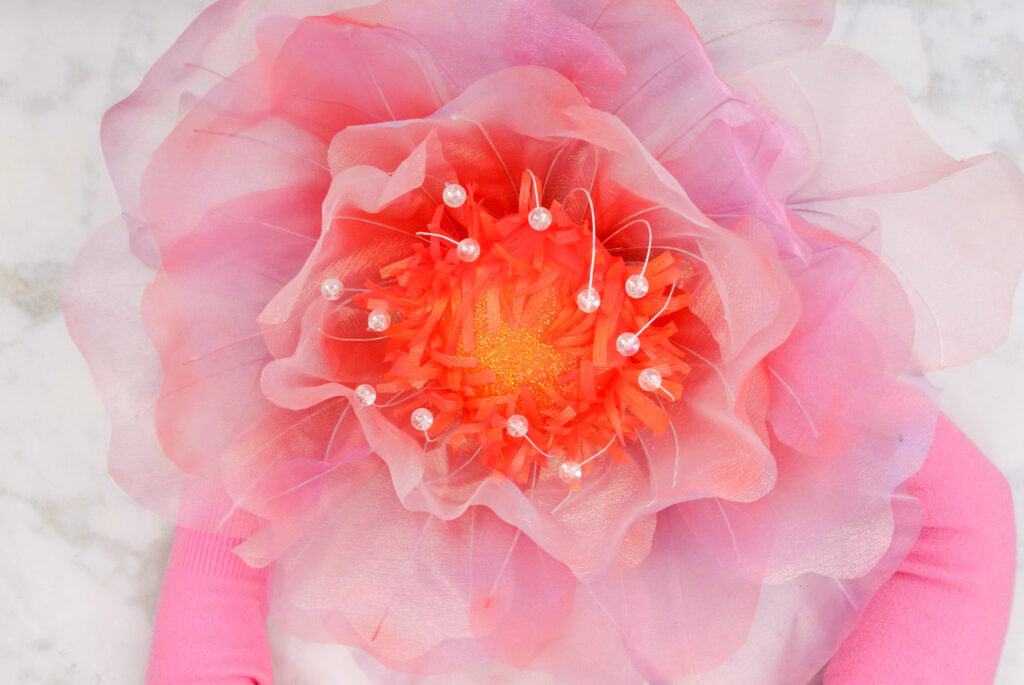
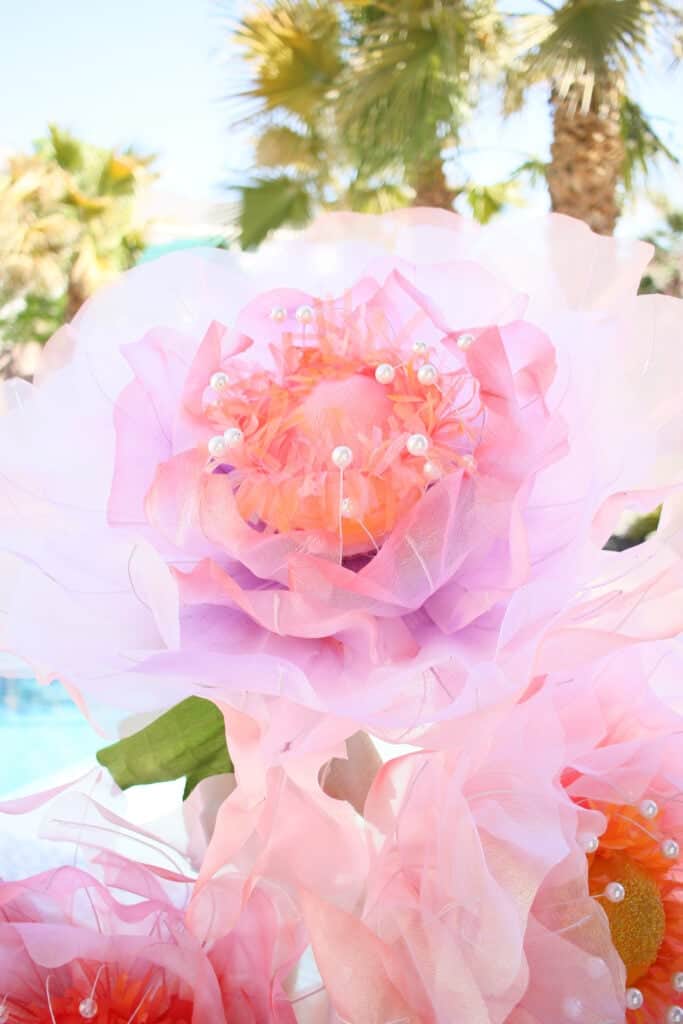
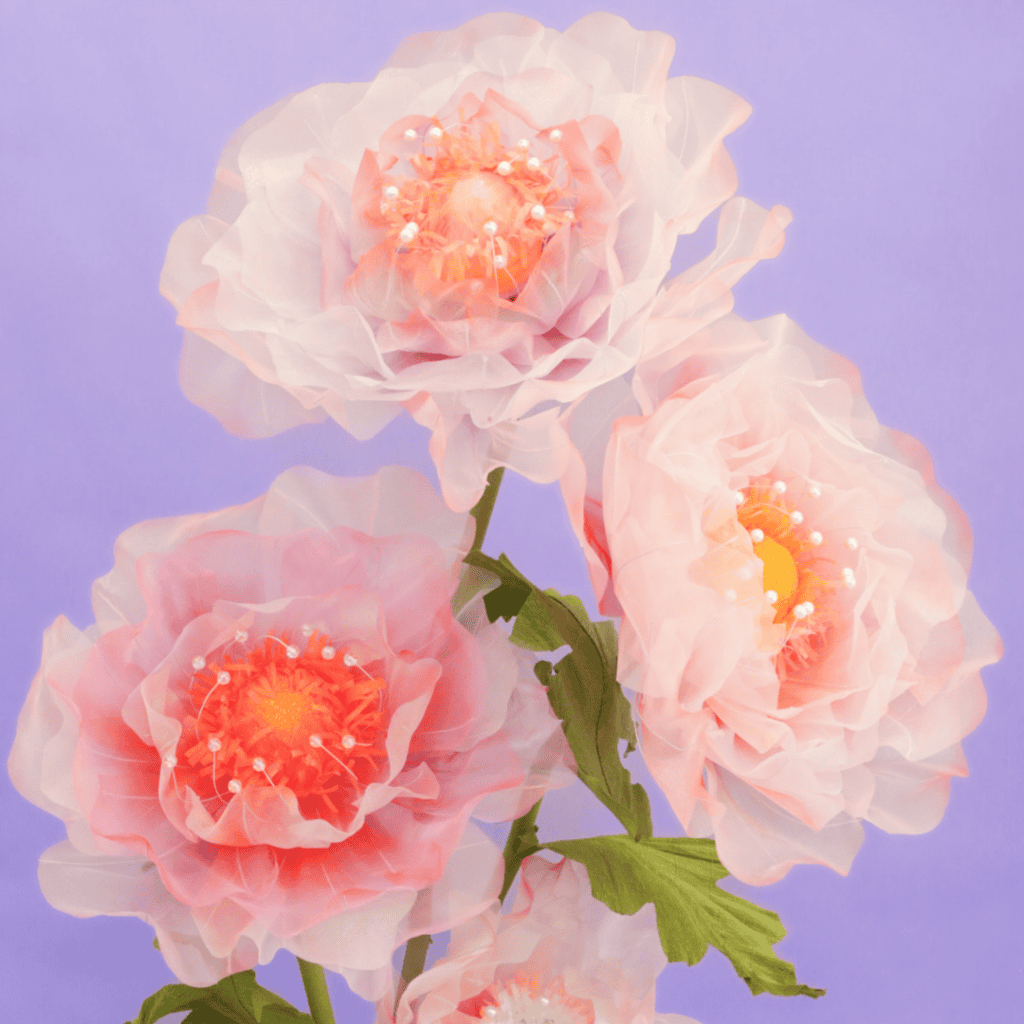
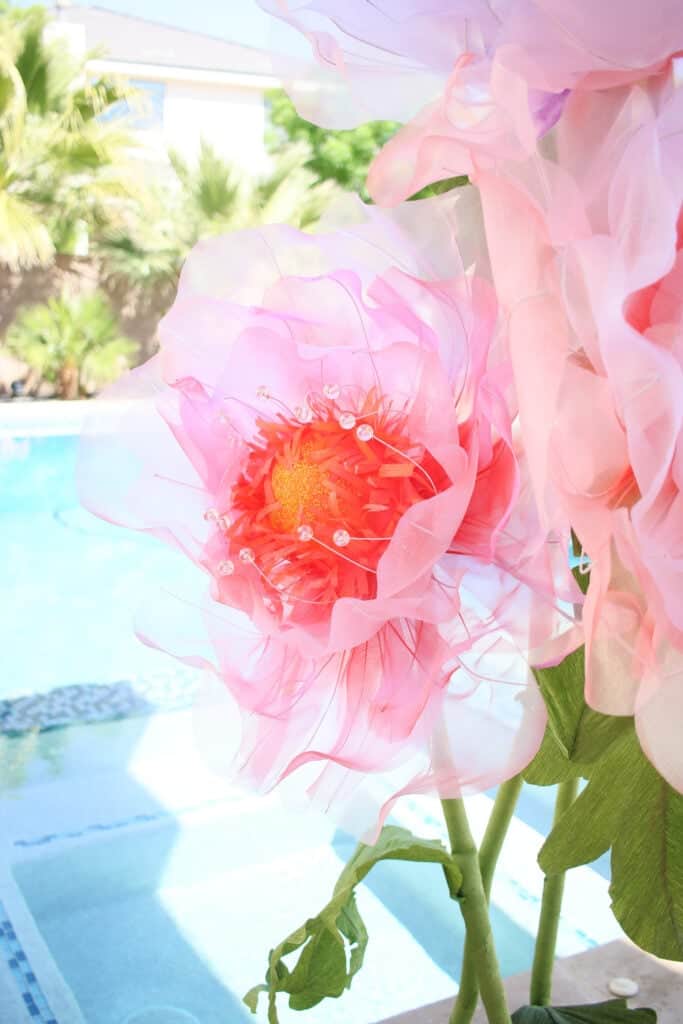
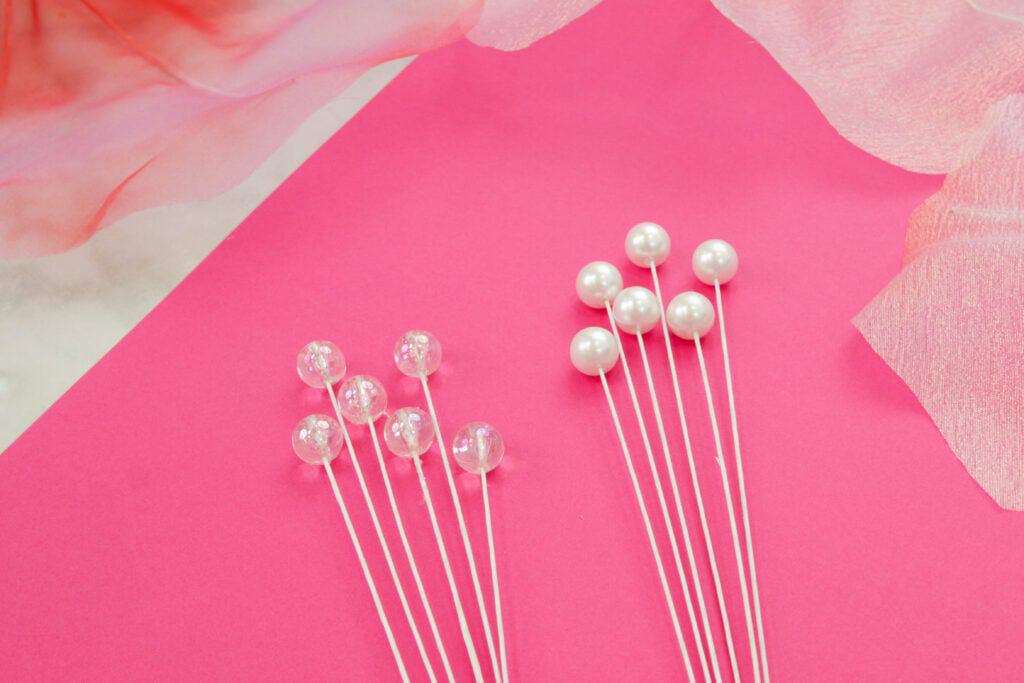
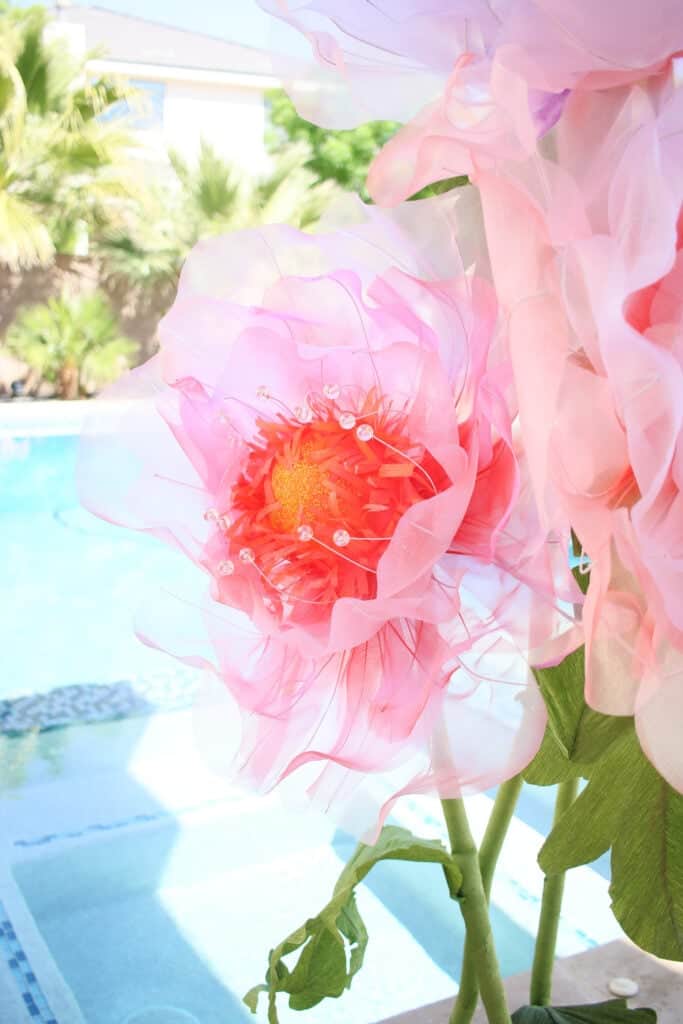
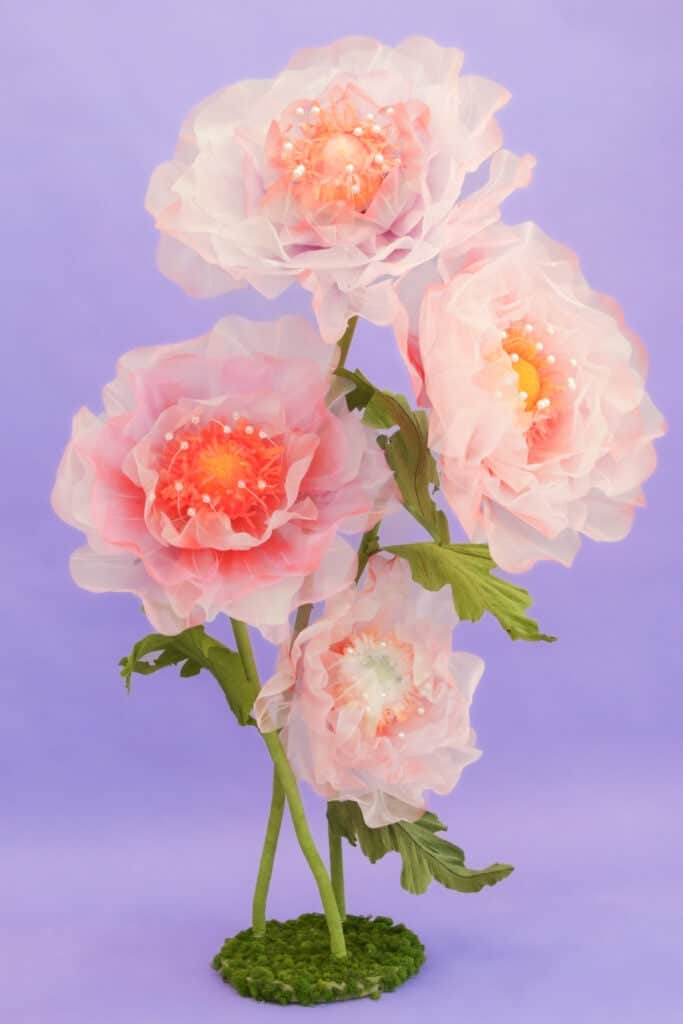
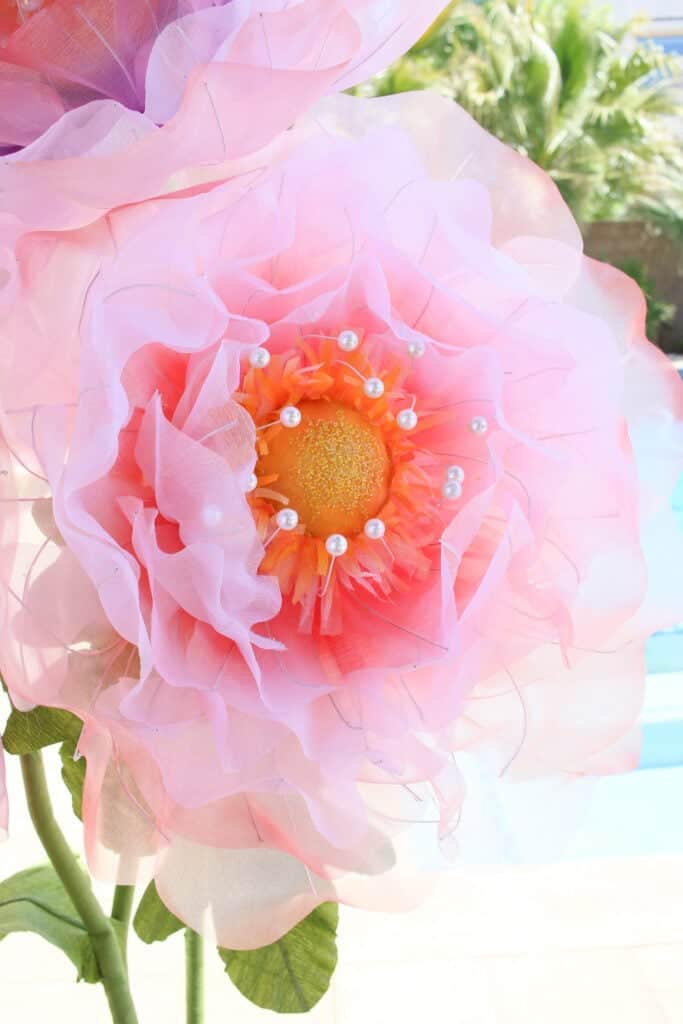
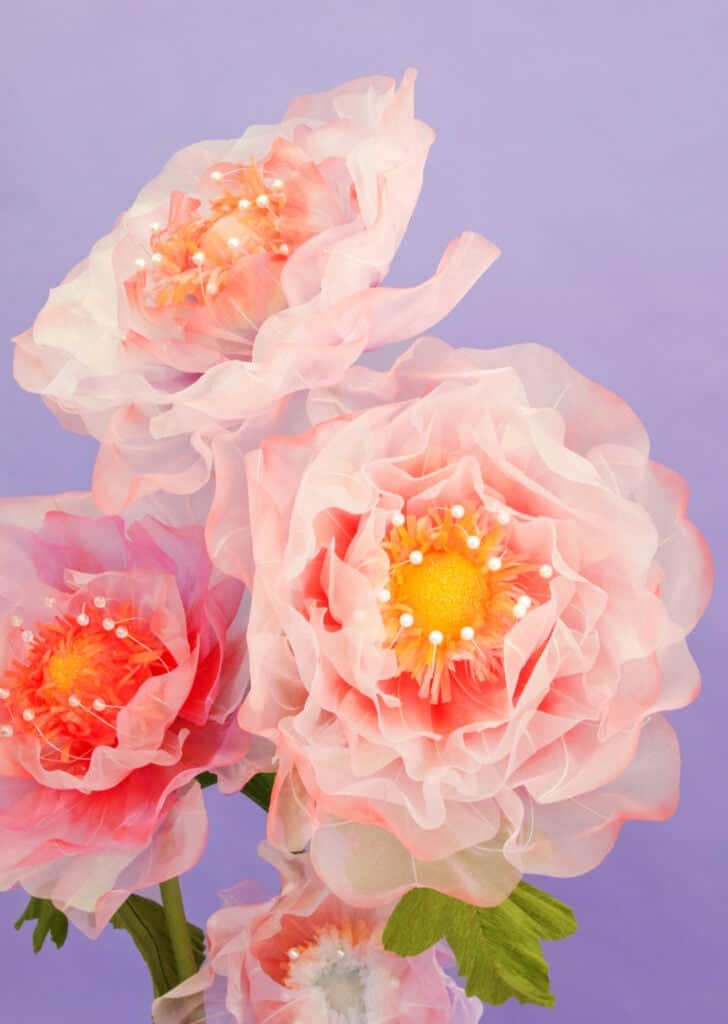
These beautiful standing giant fabric flowers consist of 3 layers of petals, a pistil with pearled wired stamens popping out, strips of fringed fabric surrounding the pistil, and a beaded center that resembles seeds.
Each petal layer consists of 8 petals, 24 altogether. There is one layer of small petals that encompasses the center of the flower and 2 layers of larger petals on the outside that are offset to create a full and layered effect without any gaping.
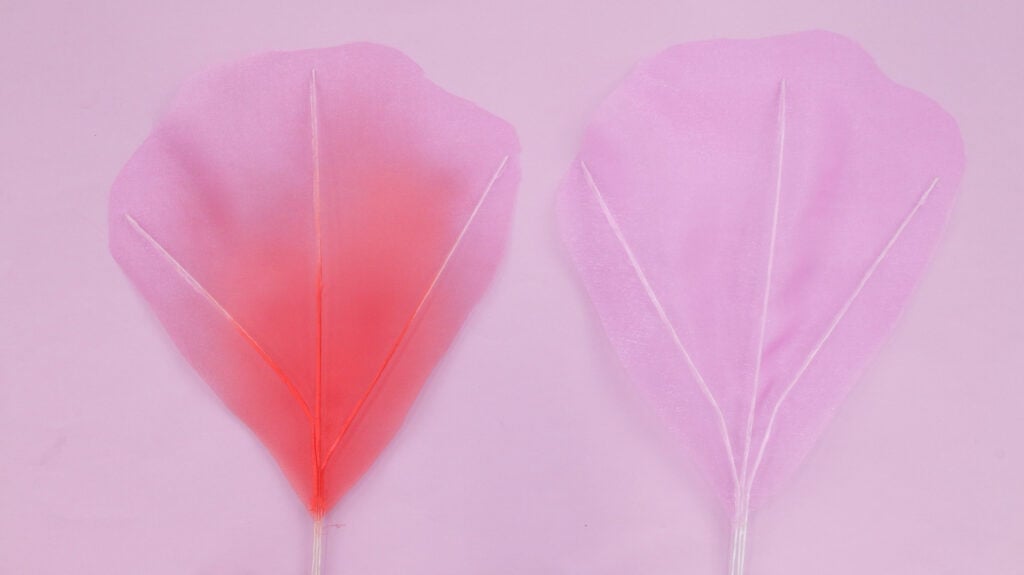
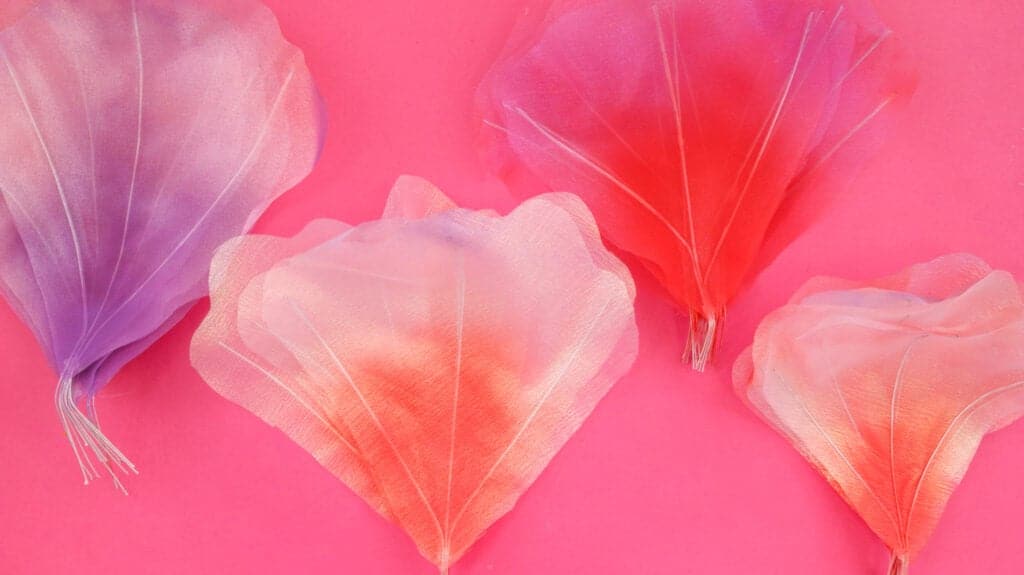
The petals have been sprayed with a light coat of spray paint which I highly recommend doing this because it adds depth and contrast to your petals.
In a way, it highlights the flowers, making them look magically more realistic and beautiful. Even with the spray paint, the shimmer from the fabric still shines through.
The Best Types of Fabric
Before we begin, let's talk a little bit about the type of fabric you should use for these flowers to get the best results. It's important to use a fabric that has the perfect balance between drape and stiffness.
After trial and error, I've found that chiffon is a bit too flowy and makes these petals difficult to construct, while tulle is too heavy of a fabric. Organza is the ideal fabric for these flowers. It has enough shape not to droop while still being light enough to be malleable. It's also slightly translucent, which adds to the magical look of the finished flower because it allows the light to pass through it.
If you want to create a flower with an extra touch of magic, select a fabric with a bit of sparkle or sheen. Search for iridescent organza, and you'll find a winner!
How Much Fabric Does Each Flower Require?
Each flower requires about 3-4 yards of fabric. Variables that affect this will be how wide the fabric measures (mine measured 44" wide), how closely you cut your petals, and whether you follow the grain or not. If you want to make a larger flower with an extra row of petals, add an additional yard to compensate for the extra petals.
Flower Measurements
The PDF Pattern includes a large petal (12.5 in x 15 in), a medium petal (10 in x 12.5 in), and a small petal (7.5 in x 10 in).
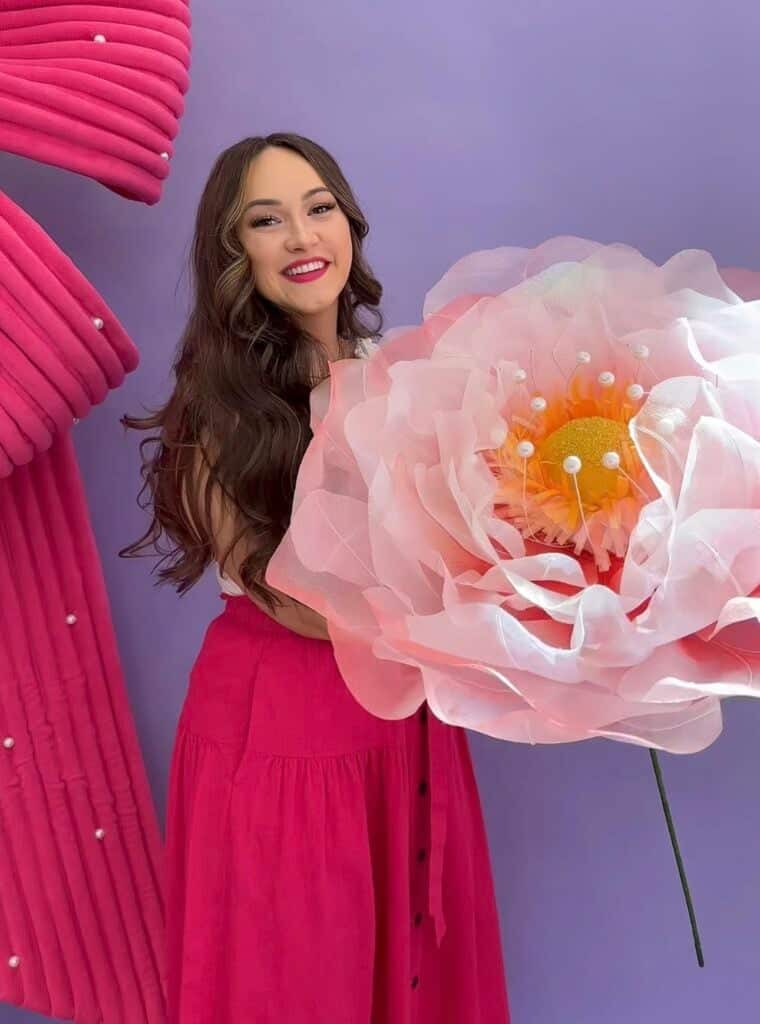
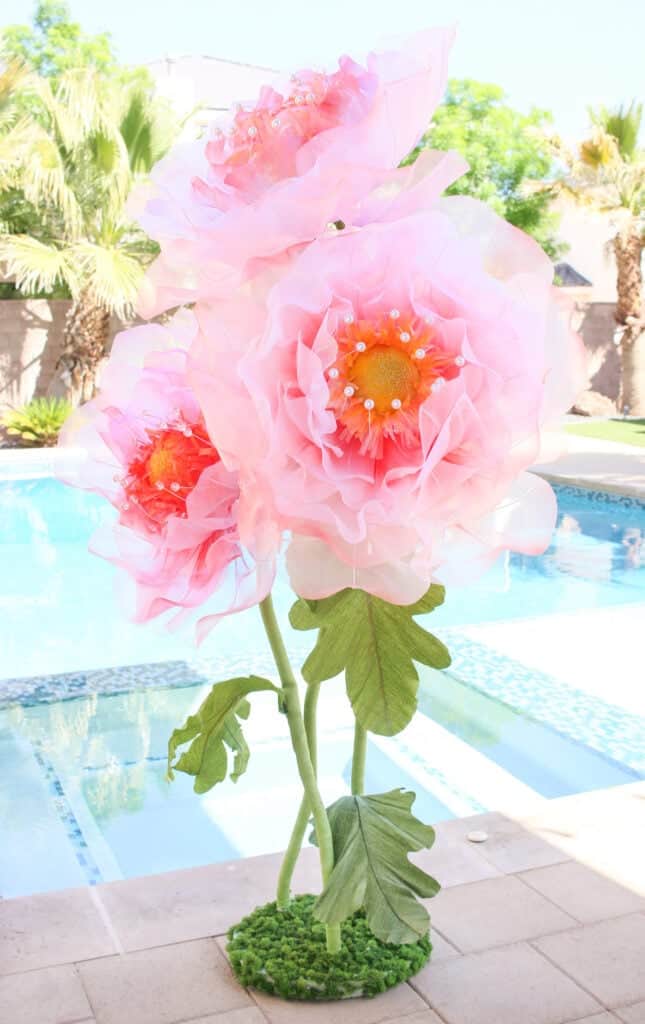
A fully assembled flower measures 28-30 inches in diameter.
If you'd like to make a larger flower, add an extra set of large petals to your foam ball. For a smaller flower, you can omit the largest petals.
Can I Cut this Flower Out of Paper?
This flower can be cut out of paper, but the smallest petal included in the PDF pattern measures 7.5 in x 10 in, so you will need a 12 in x 12 in piece of cardstock or bigger.
When it comes to shaping the paper, it can get a little tricky because of how stiff it can be. Depending on the weight of the cardstock you’re using, a scraper tool or wooden dowel are great tools to use to curl the edges of the petals. But, it would be very difficult to achieve the same results with paper. If you're dead set on using paper to create a giant flower, I'd recommend you use THIS tutorial instead.
What Type of Glue Should I Use?
I used a hot glue gun with a fine-tip for the petals and a regular tip (thicker hot glue stick) hot glue gun for the rest of my flower pieces when assembling.
An alternative adhesive you could use is Tacky Glue- the drying process just takes longer (about half-an-hour).
If using hot glue, you can use a low or high-temperature glue gun. I recommend using a fine-point tip hot glue gun when gluing on wires to petals this makes the hot glue much less noticeable (which I will go over later in this blog post), and using a regular-tip glue gun when gluing petals to the center of the flower.
Before we start assembling, remember that the quantity of petals and pieces I make is just a suggestion. You can make however many pieces you think would look best with your flower. This tutorial should be used as a guide but shouldn't limit your creativity! Feel free to explore and make your own variations to fit your needs best!
Floral Wire
So, let me tell you about my first attempt at making these fabulous flowers – it was a bit of a disaster! I thought using 28 gauge wire would do the trick, but boy, was I wrong. It was flimsy and couldn't hold the fabric together the way I wanted. I was so frustrated by it, I nearly gave up on the whole project!
But you know me, I'm not one to back down from a challenge. After some trial and error, I found the perfect solution: 18 gauge white floral wire, each piece measures 16 inches. It's strong enough to keep everything in place but still thin and subtle so it doesn't draw attention. Trust me, it's a game-changer!
You'll need quite a few wires for each flower – around 100, because each petal requires three wires and the stamen requires about 12 or so. So, I'd recommend grabbing a couple of 50-packs to cover your bases.
Oh, and let me talk about this wire – it's made from white plastic-coated aluminum. Not only does it provide the strength needed for larger projects, but it's also light enough for those delicate touches.
Believe me, finding the right wire makes all the difference in creating these stunning flowers.
*Pro Tip - Wire is gauged by diameter, with a simple rule: the higher the gauge, the finer and easier to handle the wire becomes.
How Much Does This Flower Cost to Make
Here's a summary of what I spent on each individual flower and the entire standing arrangement. I already had spray paint and hot glue on hand as well as tools, so I didn't include those costs.
Supply Cost Breakdown Per INDIVIDUAL Flower
- $9 - Fabric
- $4 - Foam Ball
- $3 - Floral Tape
- $0.72 3/4” PVC Male Adapter
- $0.54 - PVC Coupling
- $3.15 - 5" PVC Pipe (Purchase the 10" length to make 2)
- $5 - 16mm Pearls (You'll have enough for multiple flowers)
- $8 - Wire
Total Per Individual Flower - $33.41
Here are some of the extra supplies you'll need in order to make the giant standing flower base.
- $14 - Crepe Paper
- $6 - Concrete Mix
- $2.50 - Plant Saucer
- $10 - Moss
Below is my cost to make a set of standing flowers with a concrete base, leaves, three PVC pipe stems, and four flowers.
Total Cost Overall - $134.54
Overall, I saved about $500 by making these flowers myself compared to the prices I saw on Etsy for purchasing them premade.
My recommendation for keeping supply costs down for these flowers is to shop around and purchase in bulk where possible to get the best deal on supplies that you will need multiples of!
I shopped at Amazon, Hobby Lobby, JOANN, and Lowe's to find all the supplies I needed for this project. If you're shopping at JOANN or Hobby Lobby be sure to use a coupon to save the most money possible.
Table of Contents
Supplies
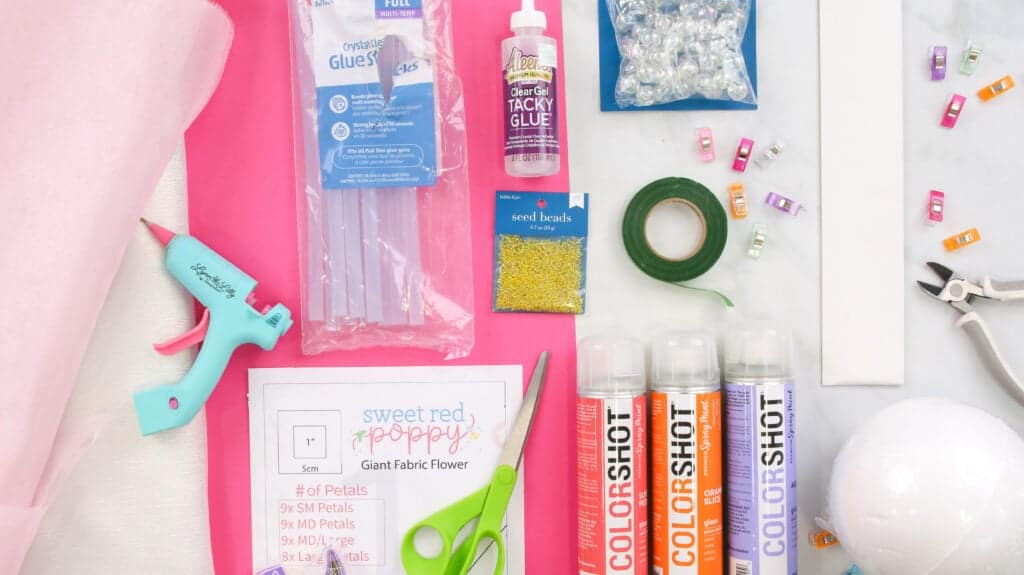
Shop the supplies on Amazon by clicking here!
Fabric Flower Supplies (Head only, scroll down for base and stems)
- Downloadable PDF Giant Fabric Flower Pattern
- Pearlized Sheer Organza Fabric White & Light Pink (this is the exact fabric I used, but I've linked to less expensive options on Amazon above)
- Hot Glue Gun- Fine-Tip & Regular Tip
- Hot Glue Sticks
- 2 50ct 16-inch 18 Gauge White Floral Wire (per flower)
- 1 6-Inch Styrofoam Ball (per flower)
- Spray Paint- Coral, Purple, & Yellow
- Pliers
- Scissors
- White Pearls
- Yellow Seed Beads
- Clear Tacky Glue
- SIlcone Finger Protectors
- Marker
- Paintbrush
- PVC Pipe- 3/4-in PVC Male Adapter
- Craft Knife
Cement Flower Base & PVC Pipe Stems
I recommend purchasing all of the following supplies from Lowe's. I've linked the exact products I used below. You can shop each link below and schedule the entire order for delivery or in-store pickup.
- 3/4” Schedule 40 PVC Coupling: You will need two per flower; I've linked to a bag of 10.
- 3/4" x 5ft PVC Pipe - 1 per flower You can also purchase longer lengths and cut them down to save $$. You will need between 3-5' of pipe for each flower stem.
- PVC Pipe Cutter
- Quickrete Concrete Miz 80 lb. Bag
- Paint Sticks (for mixing concrete)
- 5 Gal. Paint Bucket (to mix concrete in)
- 17" Clear Plant Saucer (to use a mold for the concrete base)
- Heat Gun Budget Option - High End Option (this is used to bend the PVC Pipe)
- Green Spray Paint
- 1-2 Rolls of Green Crepe Paper
*I earn commissions on qualifying purchases from Lowe's and Amazon. Thanks for shopping through my affiliate links and supporting my small business.
Refer to this tutorial to learn how to create the base for the standing flower
Download the Free Giant Fabric Flower Printable PDF Pattern Here!

Step One: Download & Assemble the Giant Fabric Flower Pattern
First, download the pattern and open it in your PDF reader. I use Adobe Acrobat as my PDF reader.
*It's important not to print the pattern directly from your internet browser. Doing this can result in the pattern printing with incorrect scaling or wonky border lines.
Next, click on the "Print" icon. This will open a print settings dialog box. In the box, update the scaling to "Actual Size" or "Custom: 100%".
The first page of this pattern contains a 1” x 1” square that needs to be measured using a measuring tape or ruler. Go ahead and print the first page of the pattern and measure the test square to make sure it measures 1” x 1”. If it does, print out the rest of the pattern.
If the test square doesn’t measure 1” x 1” check your print settings and reprint.
Once you’ve printed out the pattern, it’s time to assemble.
Feel free to cut off the margins of the pattern before arranging.
Arrange the pages according to the layout charts below. The pages are numbered 1-4 and have pink stars between the pages to help you align the pages accurately.
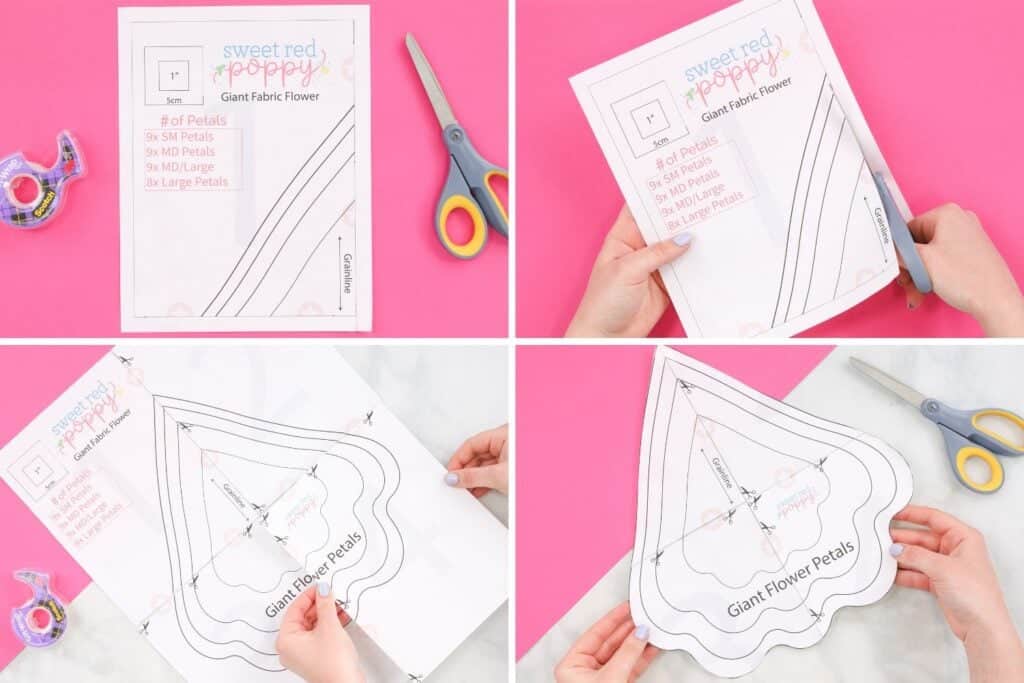
Line up the edges of the pages, aligning the stars, and tape them into place. Then, cut out the largest flower piece.
Now that the pattern has been cut out, it’s time to cut petals out of fabric.
Step Two: Cut Out the Fabric Petals
There are two different ways to cut out your fabric. You can cut each size out all at once or you can cut each petal individually. Cutting each petal individually will ensure you get the most out of your fabric, but it will take significantly longer. Cutting each size at once will save on time but may require more fabric.
Grab your rolls of fabric and lay it out onto the surface you’re working on. Fold the fabric and lay the pattern on top so that the width of the fold is the same width of the petal.
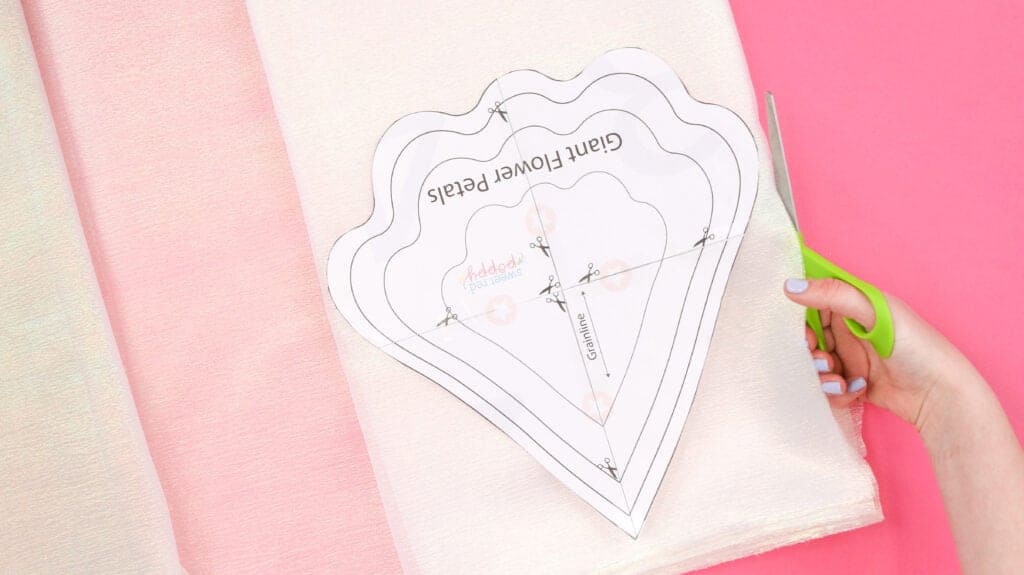
Fold the fabric 7 more times. Then, cut the folded edges so that you have 8 sheets of fabric (doing this is going to save time compared to cutting out 8 petals one at a time).
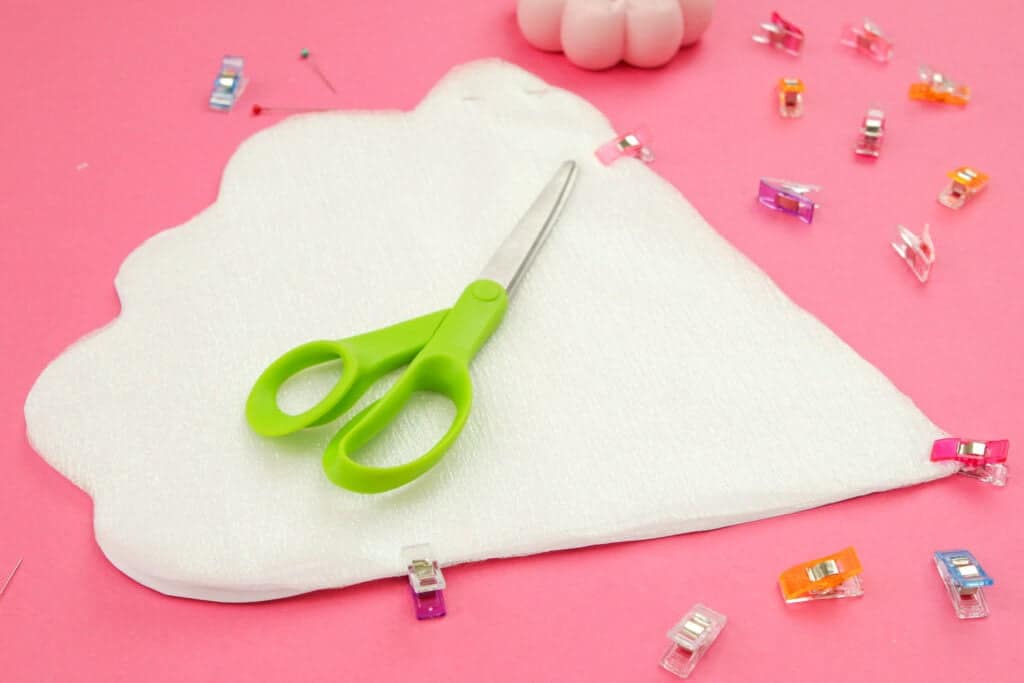
Pin or clip the petal pattern on top of the 8 sheets of fabric and start cutting around the pattern using a pair of fabric scissors.
Afterward, unpin the pattern piece, trim it down to the medium size, flip it, and place it above the spot you just cut. Pin the pattern in place and cut another 8 petals. You should now have 8 large and 8 medium-sized petals.
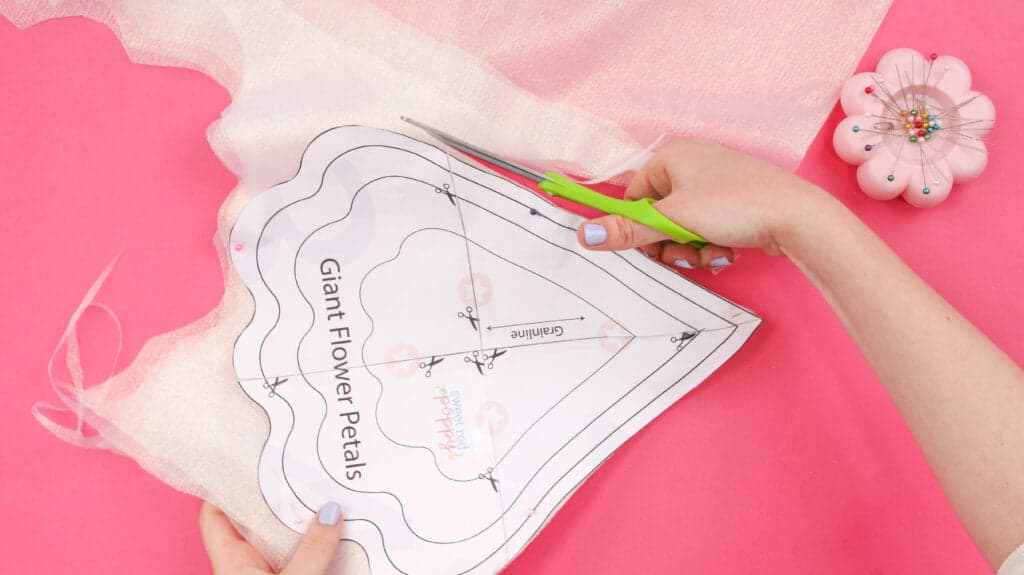
Next, cut out 8 small petals repeating the steps taken above.
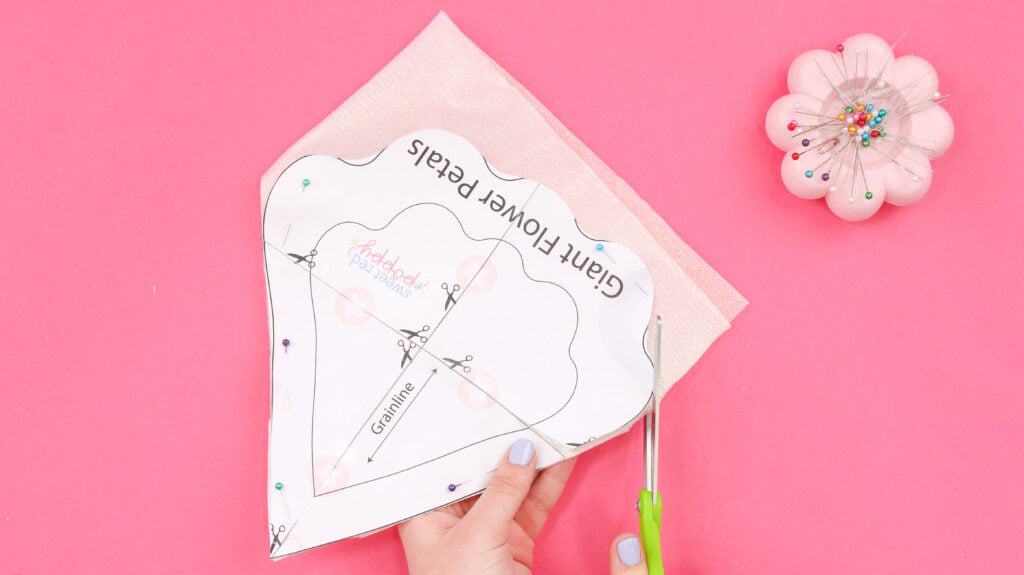
Step Three: Assemble the Petals
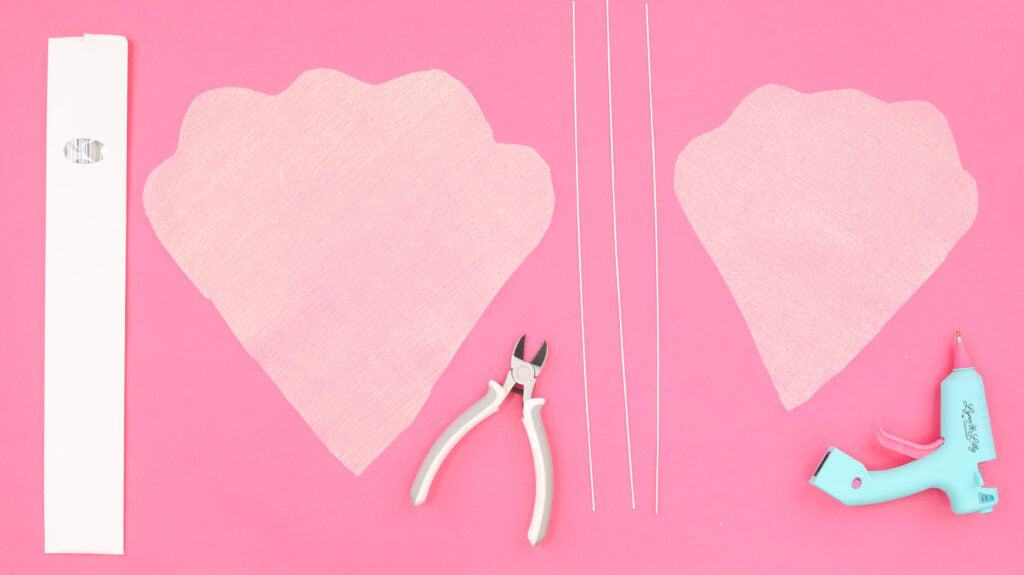
Once you have 8 petals of each size cut out, set the excess fabric to the side, and grab one stack of your petals, your 18 Gauge White Floral Wires, and a fine-tip hot glue gun.
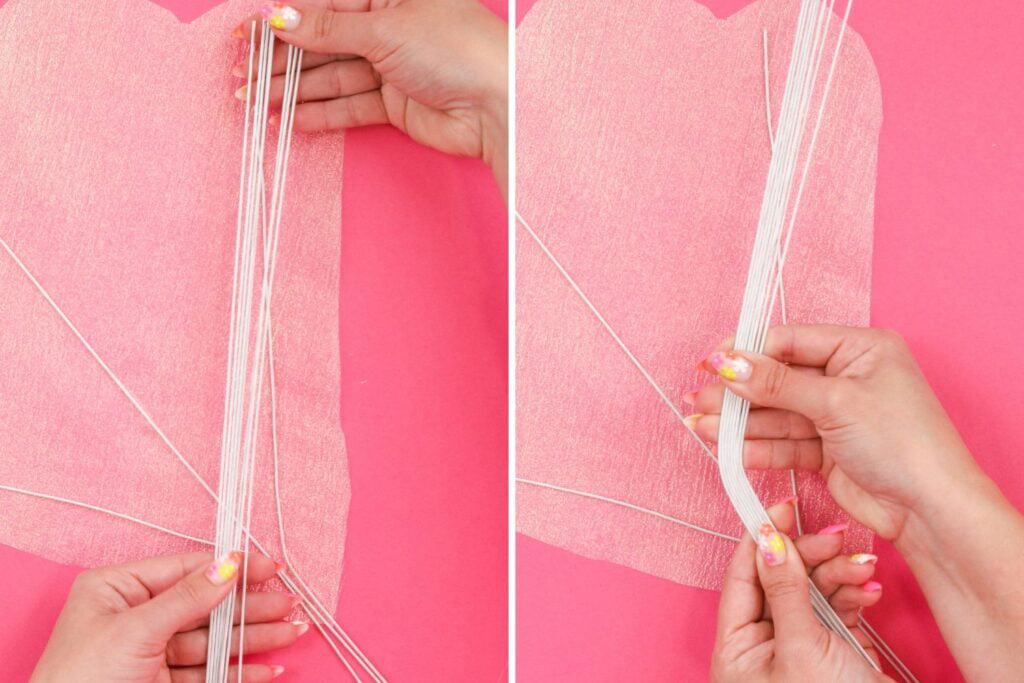
To save time and ensure consistency, grab 8 of the white floral wires and bend them all at once to create the side support. Repeat this with the opposite side as well.
The side wires should align with the center wire for about 1-2" before bending outward. Leave the other 8 wires unbent; these will be used as the center support.
Apply a dot of hot glue at the bottom of a petal and place one of the unbent wires along the center. The top of the wire should be about .5 inches from the top of the petal.
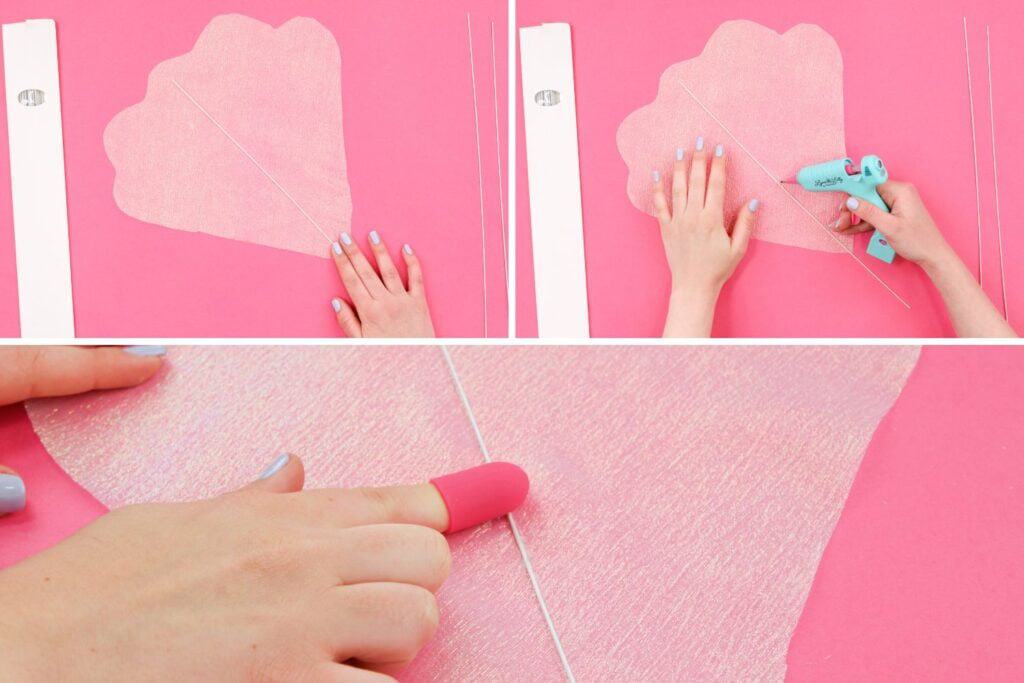
With the fine-tip hot glue gun, draw a thin line of glue along the side of the wire, and gently press the wire into the hot glue and let it cool completely.
* Pro Tip: Use silicone finger protectors to prevent burning yourself when using hot glue.
Next, place the curved side support wires on either side of the straight center wire aligning the base of the wire so they sit side by side. Add a dot of hot glue below and on top of the three wires at the bottom of the petal where all three wires meet to keep them in place.
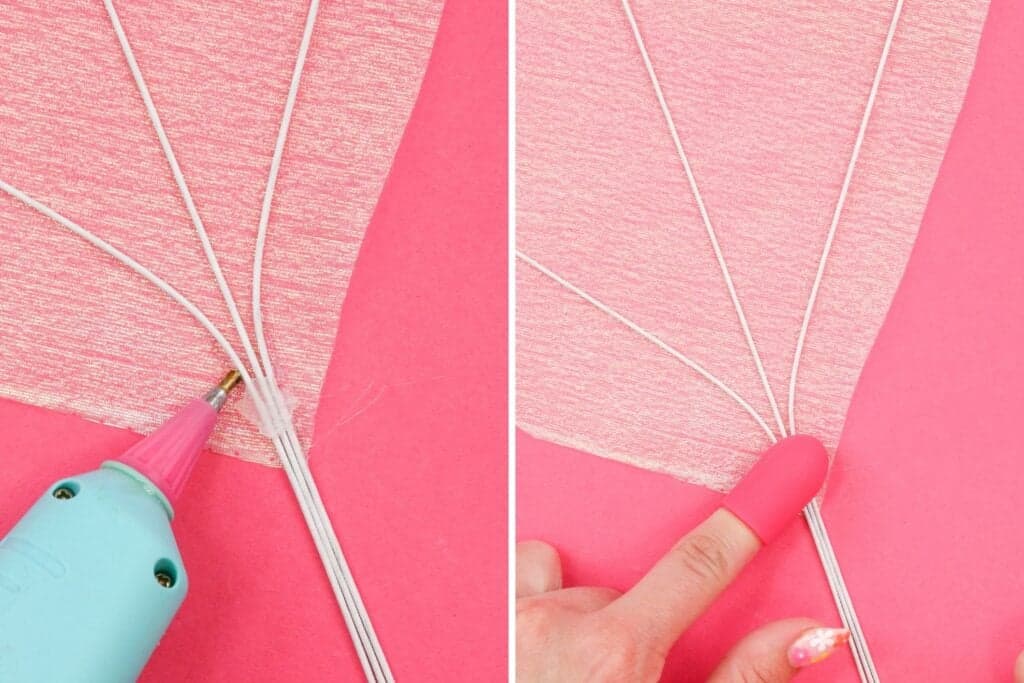
Run lines of hot glue along the 2 bent wires, gently push the wire into the hot glue and let them cool completely.
This process may take a few tries before you feel comfortable with it or achieve good looking results. Don't be afraid to pull the hot glue up (once it's cooled) and start again if you're not happy with the results.
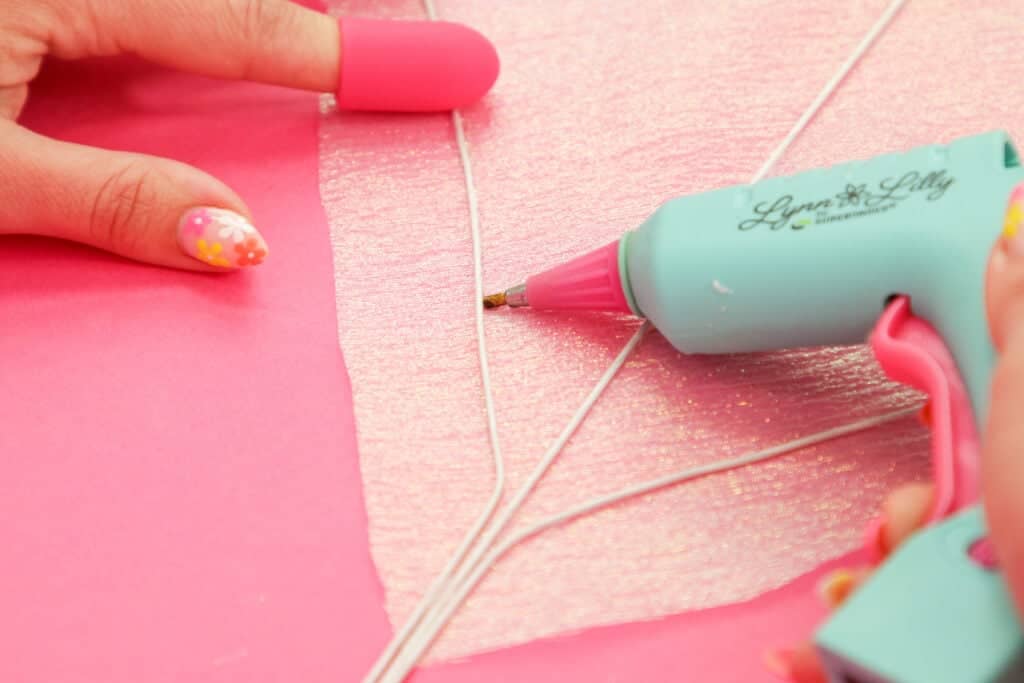
Once your petals have cooled completely, gently remove them from your surface, taking care not to bend them.
Repeat these steps with your other petals.
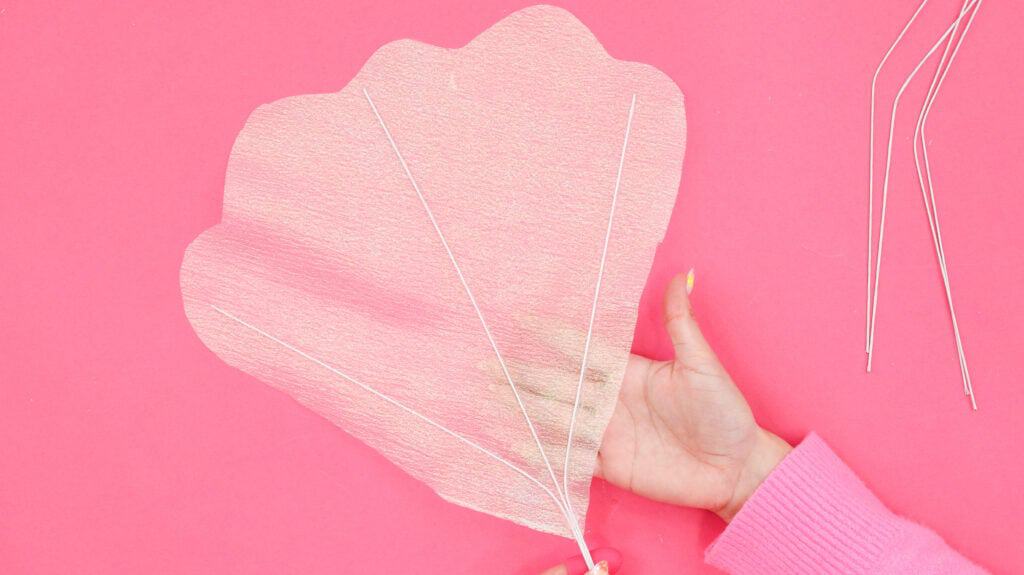
Step Four: Cut Stamen Strips
After assembling the petals, cut out 3 strips of fabric. Each one measuring 3-inches, 4-inches, and 5-inches in height. Their width should be slightly larger than the styrofoam ball you're planning on using.
*To create an extra fluffy stamen, you can cut double the number of strips.
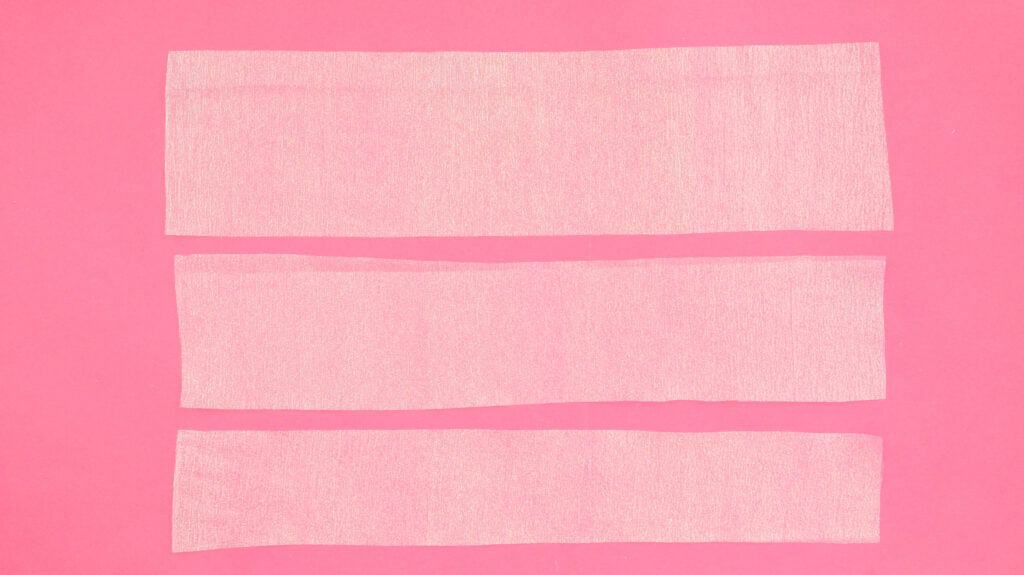
Layer the strips on top of each other with the raw edges aligned on one long side. Fold the strips together 3 times (hamburger style) and cut 2" into the fabric every 1/4 inch to create the fringe.
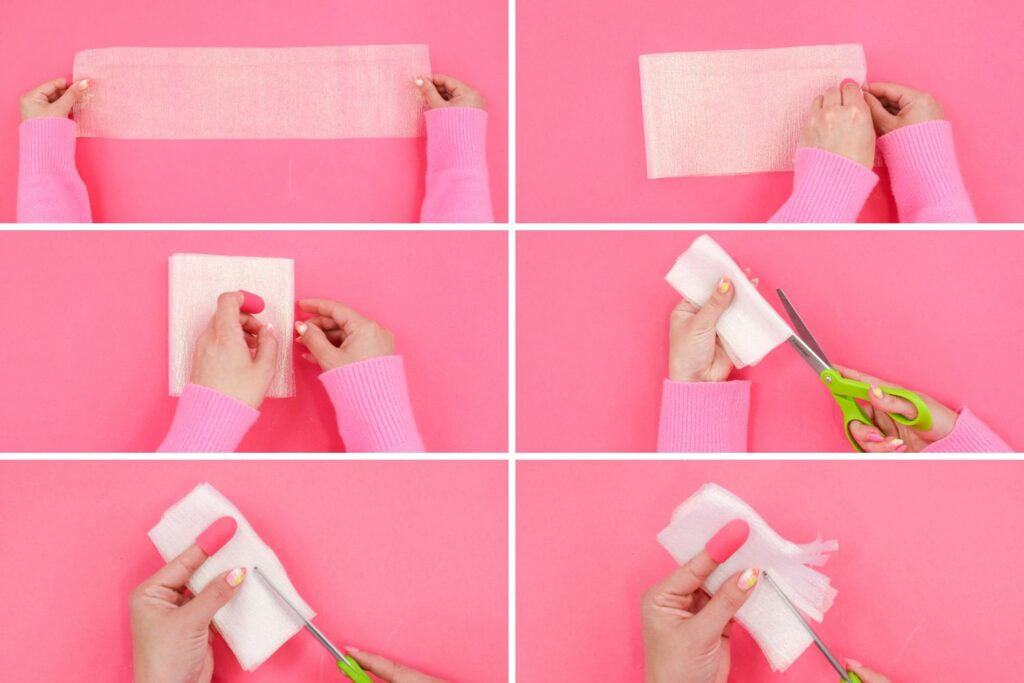
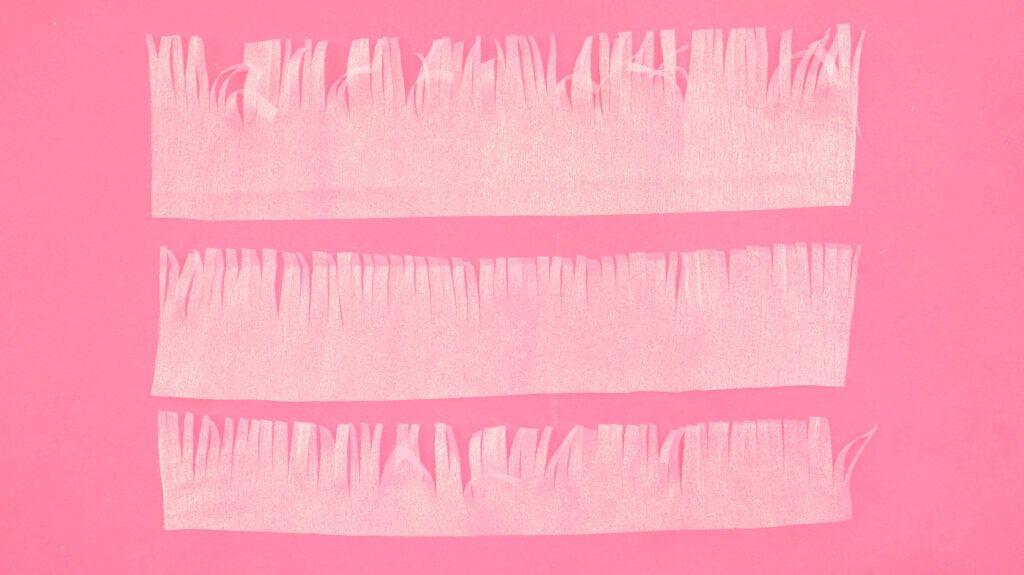
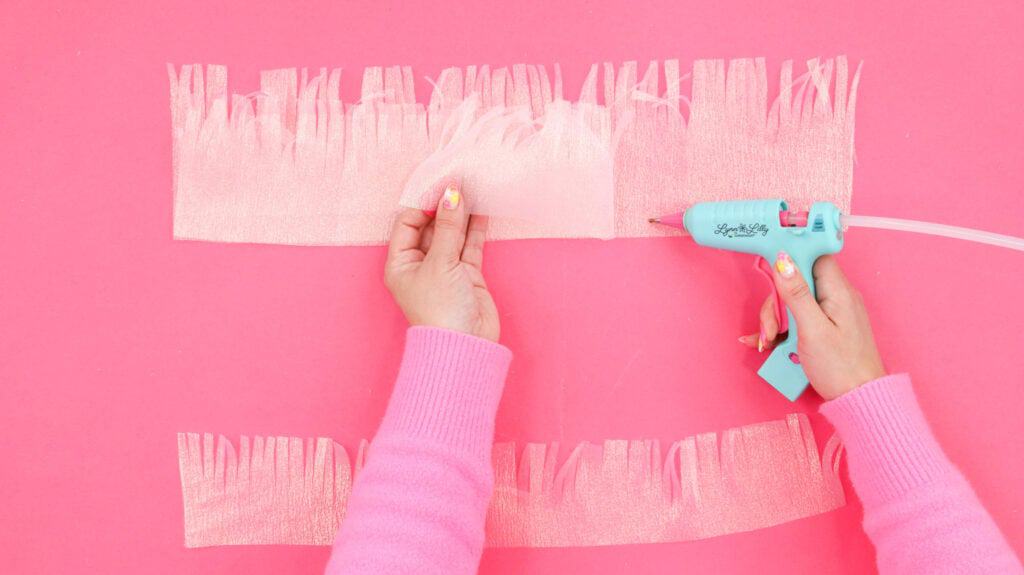
Layer the strips, aligning the uncut edges, and glue them along the length of the strip.
If you're making an extra fluffy stamen repeat this process and then hot glue the two finished strips with the longest sections facing back to back.
Step Five: Assemble Pistil
To assemble the pistil, grab a styrofoam ball, the same fabric you used to cut out the petals, a clear adhesive, paint brush, and seed beads.
Place your Styrofoam ball in the center of a square piece of fabric. The square should be large enough to cover the ball completely. Then, trim the square piece of fabric down to a circle. This will eliminate excess fabric and cut down on bulk.
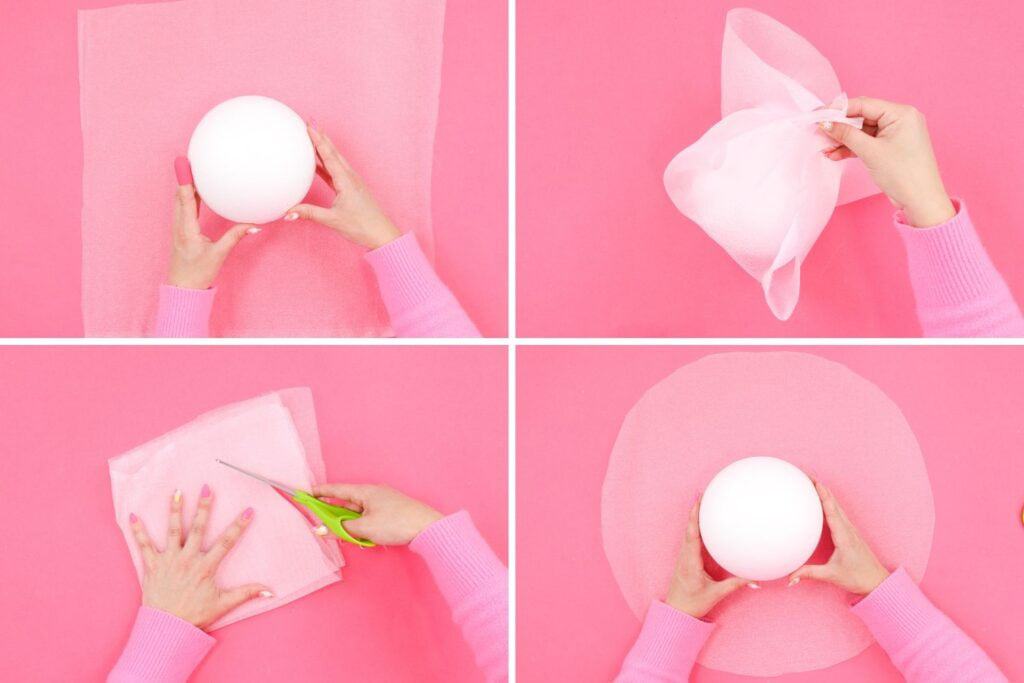
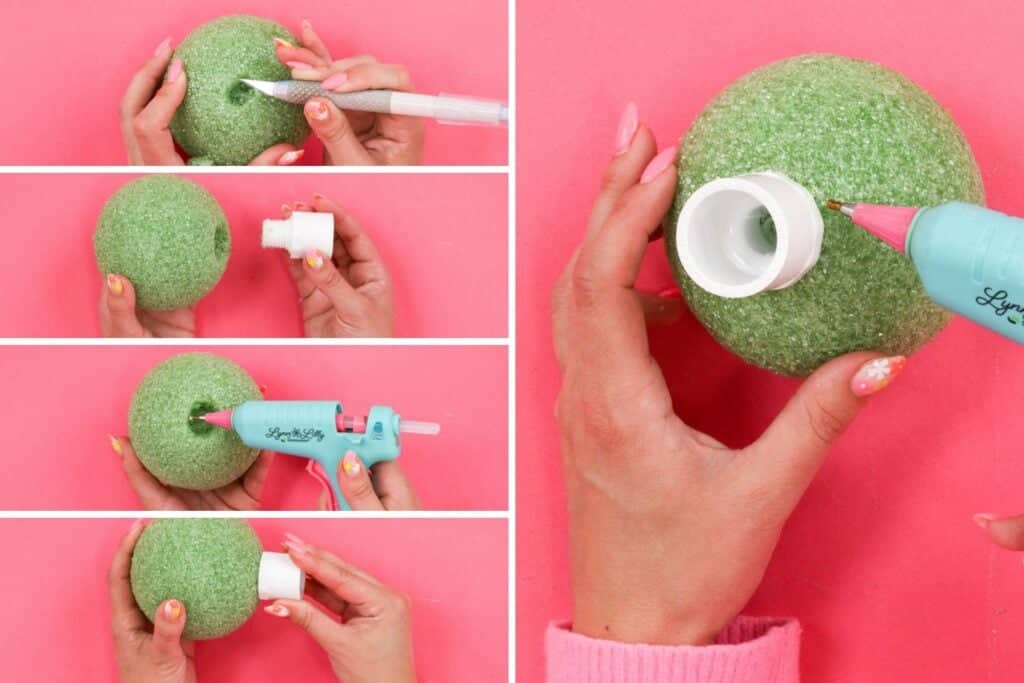
If you are making standing flowers, take a craft knife and cut a hole slightly smaller than a 3/4-inch threaded PVC Pipe coupler.
Once you've cut a hole big enough into the bottom of a styrofoam ball, squeeze hot glue into the hole, and slide your coupler into place. Run a line of hot glue around the perimeter of the coupler to secure it to the ball from the outside as well.
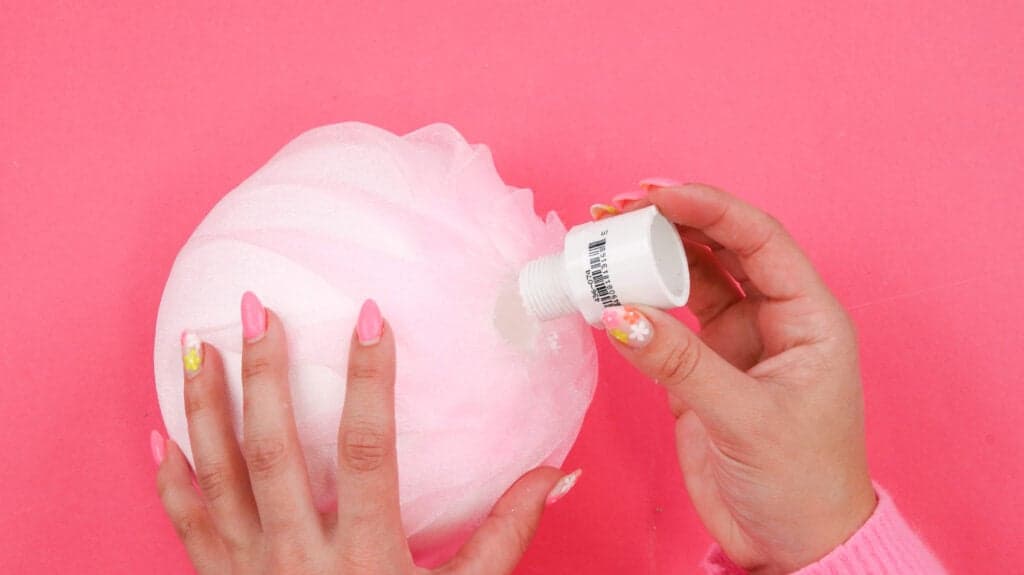
Next, glue quarters of the fabric to the styrofoam ball, scrunching the fabric to fit as you go. Cut any excess fabric away once it's all been glued into place and completely dried.
You could also secure the fabric around the coupler using a hair elastic.

Step 6: Add Stamen Strips to Pistil
After gluing the fabric onto the styrofoam ball, grab your stamen strips, and wrap them around the pistil securing them with glue. The uncut edge of the stamen strips should be glued just below the midpoint of the ball.

Step 7: Spray Paint Petals & Pistil
Finally, it's time to spray paint the flower pieces before putting everything together! These next steps really bring the fabric flowers to life and fill them with some much-needed vibrancy!

I grabbed a foam block (from Lowe's) and stuck each petal into the foam block to prepare them for paint.
I'm using 4 Colorshot spray paint colors: yellow, orange, purple, and coral. You can use any color you'd like to fit your theme best!
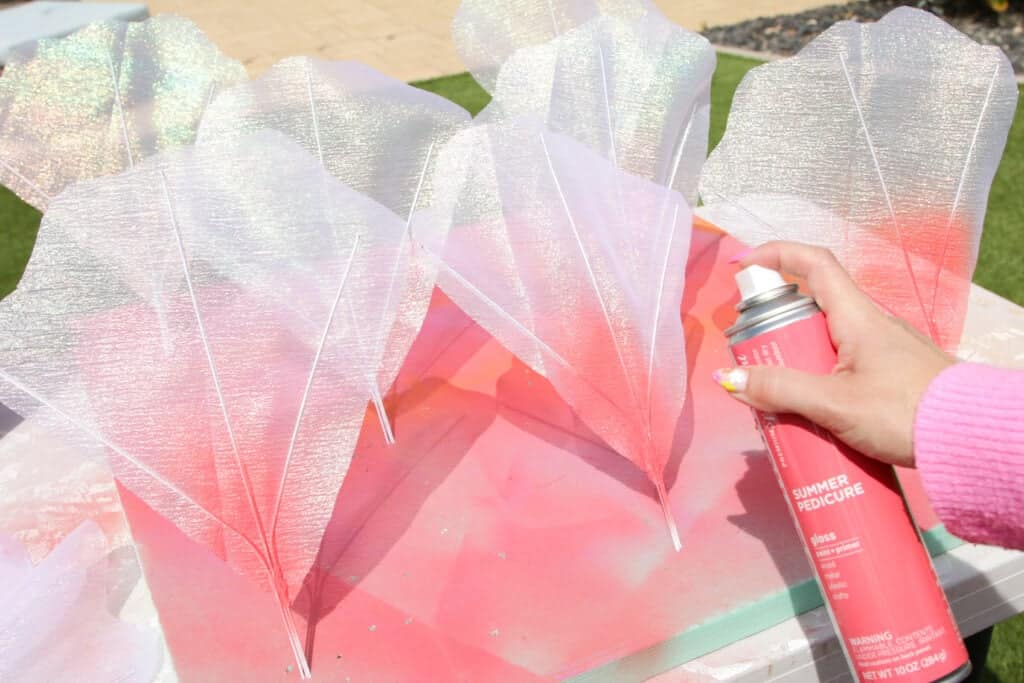
I sprayed the base of my petals (sizes medium and small) and the tips with coral. For the larger size I added in some purple.
I find it best to spray the base of each petal from the back and front. Before spraying your petals, test your spray paint on a scrap to ensure the paint comes out smoothly. If it comes out splotchy, try cleaning the nozzle.
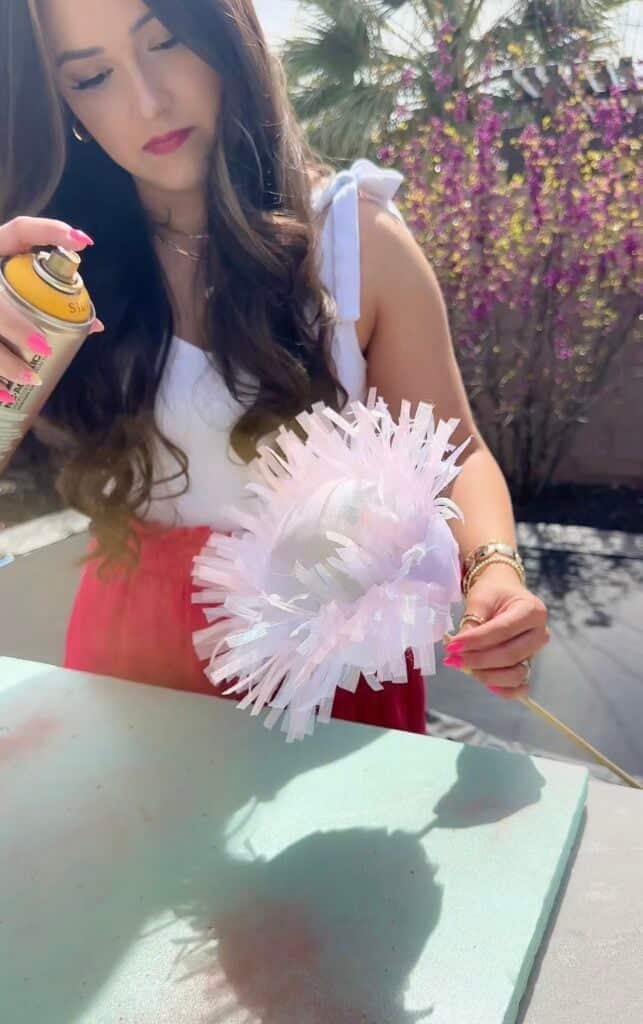
*Pro Tip: A little paint goes a long way! You won't need much paint to add color to this translucent fabric, so don't overdo it. You can always add more paint if you're not satisfied with the color.
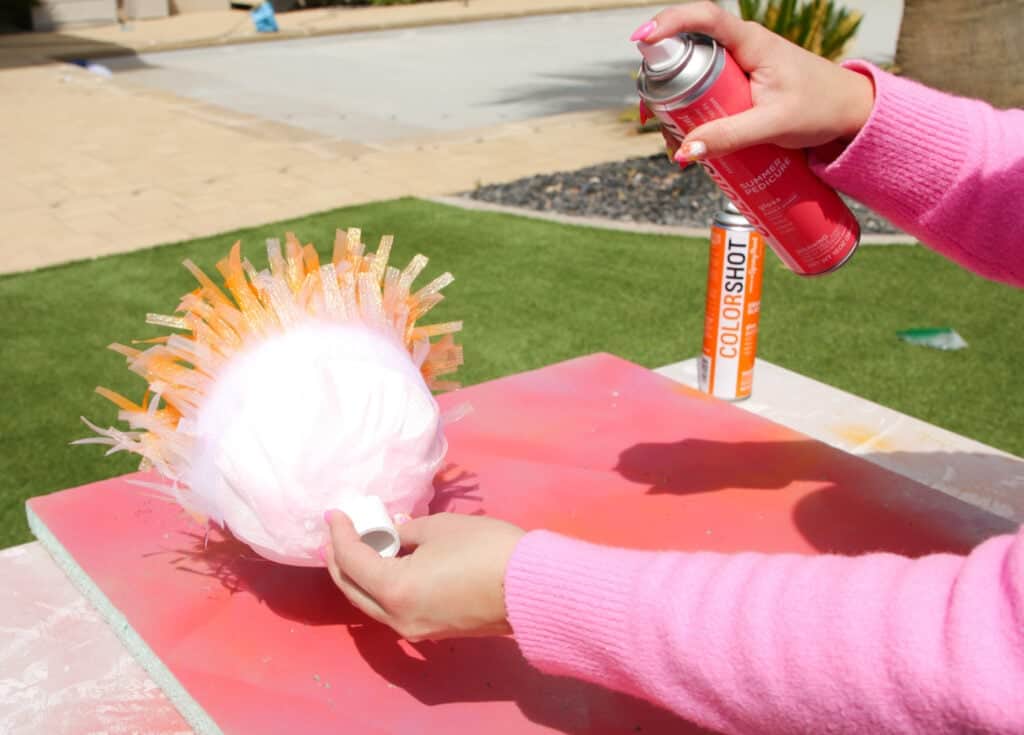
I folded back my stamen fringe and sprayed the center pistil with a combination of orange and yellow.
I used orange and yellow along the center of my pistil and coral around the outside.
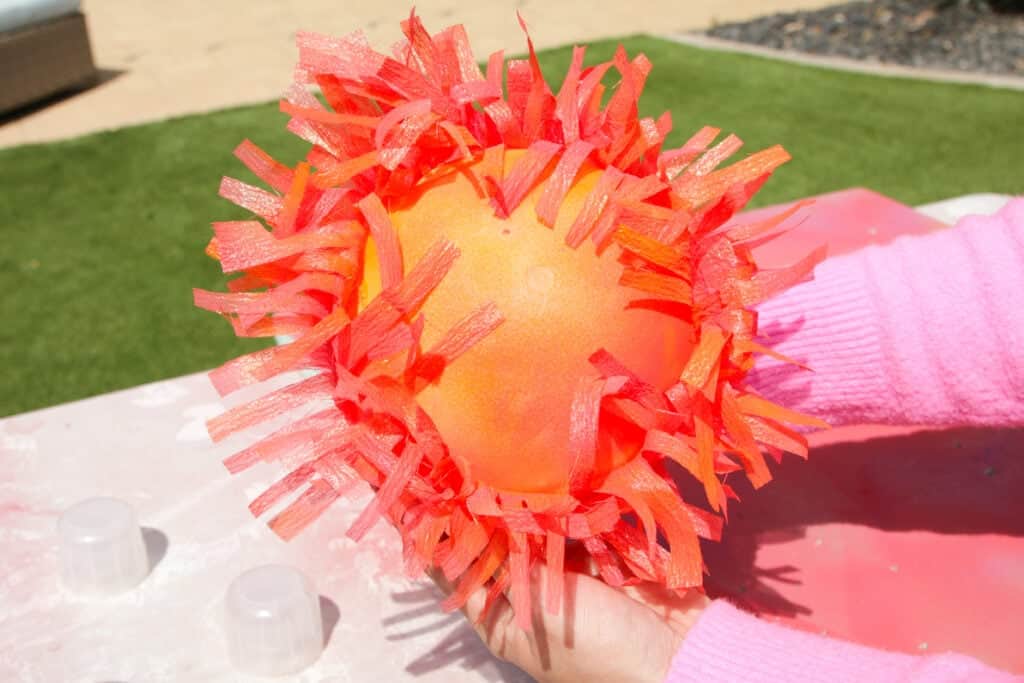
Below is an example of where I added a lot less spray paint and opted for a more natural look to let the fabric take the spotlight.
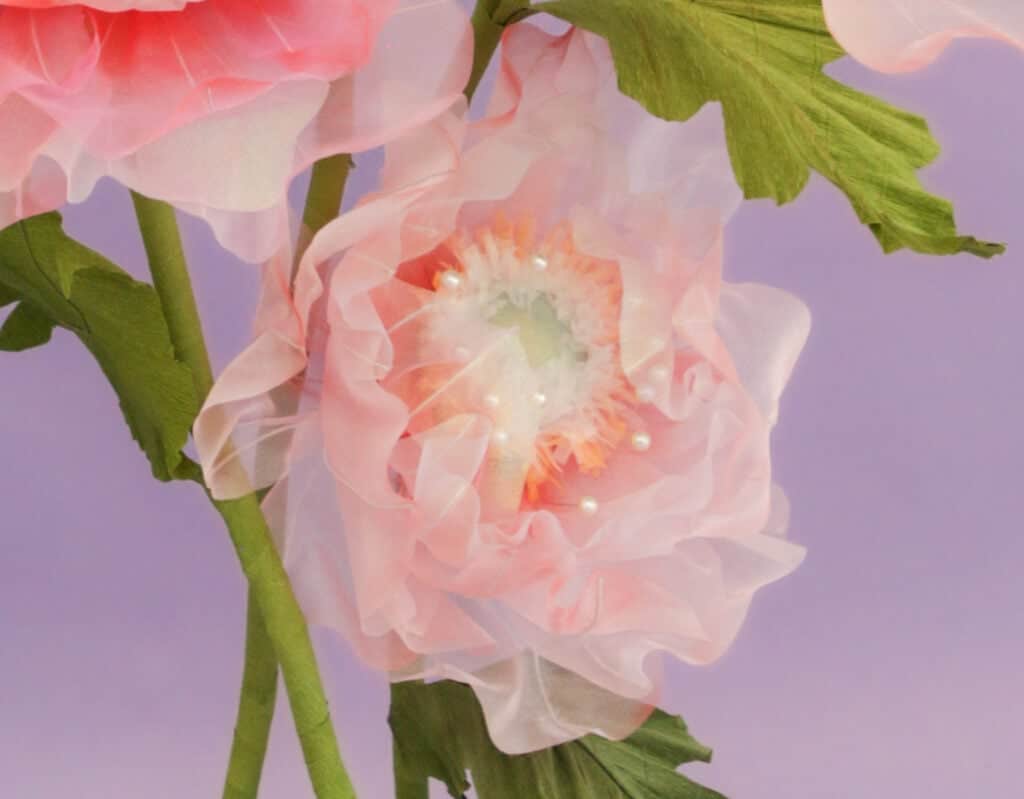
Let all your flower pieces dry completely before removing onto the the next step.
Step 8: Add Beads and Stamen
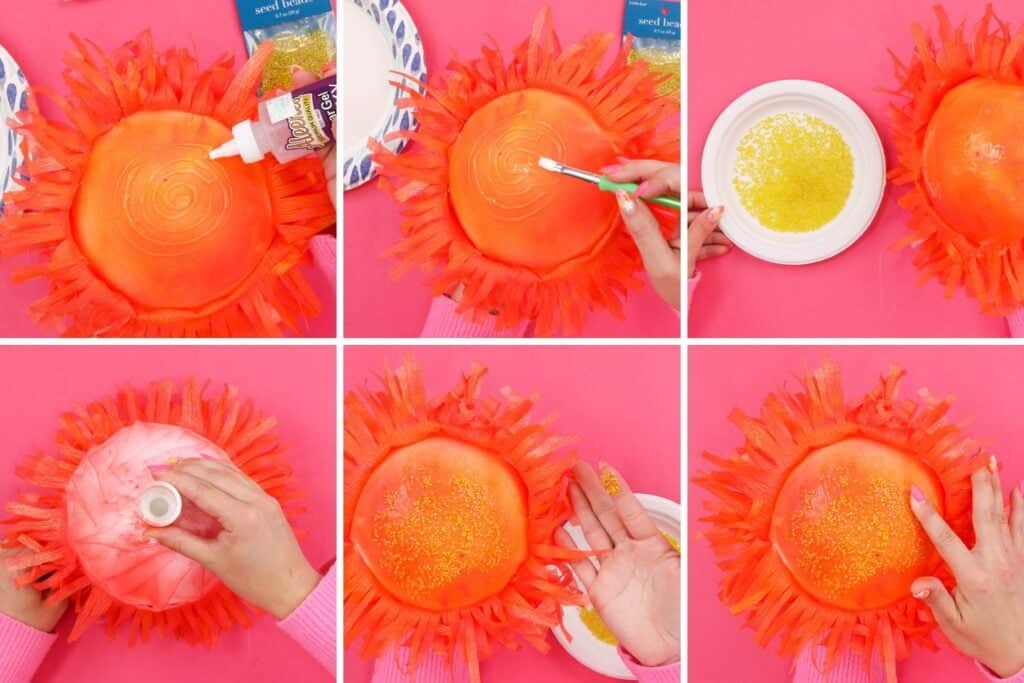
After drying, I added seed beads to my pistil by brushing clear tacky glue onto the center with a paintbrush and dipping the ball into a plate of seed beads. I applied more seed beads with my finger to areas I thought were lacking beads. This step is optional but it adds a fun touch to the finished flower.

Assemble Wire Stamen Pieces
To create the stamen pieces that pop out of the flower, grab a fine-tip hot glue gun, 12 or more pearl beads, and 16-inch 18-gauge white floral wire.
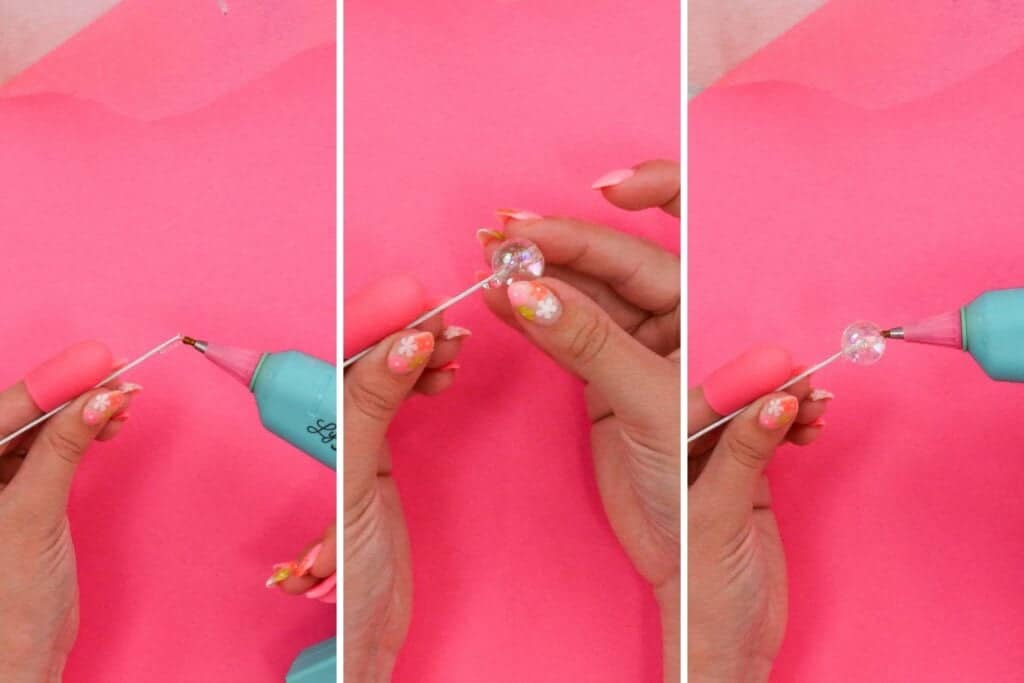
With a fine-point glue gun, coat the tip of a wire with a small dot of hot glue. Slide the plastic bead onto the wire so the end of the wire is flush with the top of the bead. Fill the bead's cavity with hot glue to secure the bead in place. Hold the bead in place until the hot glue cools completely.
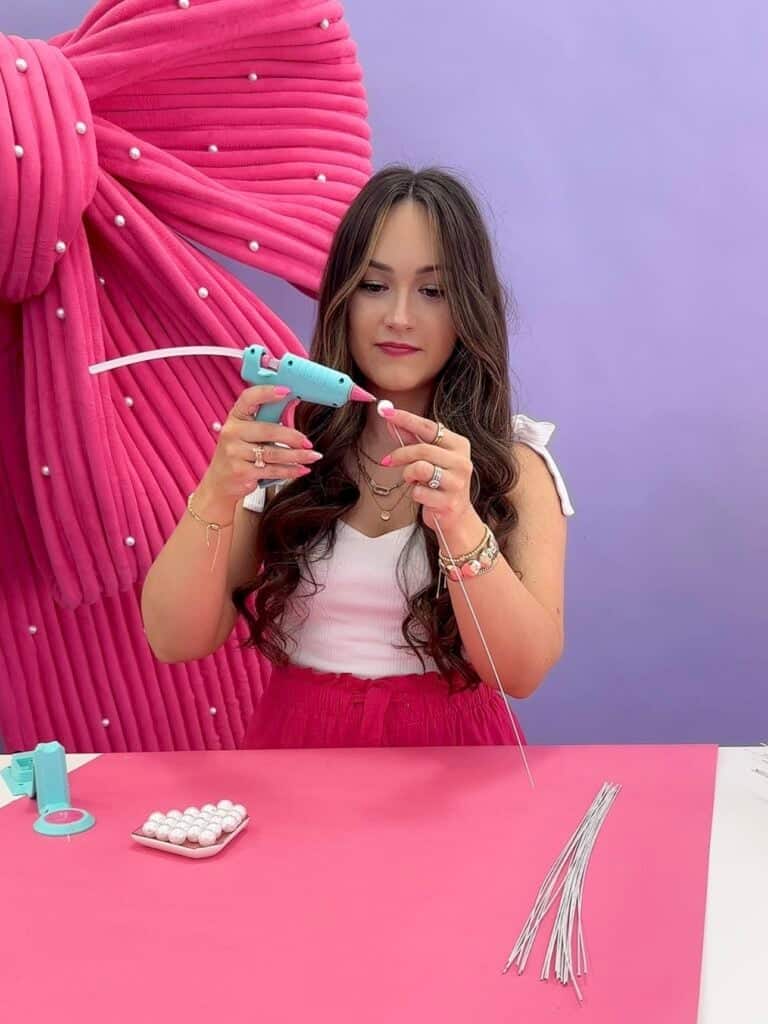
*Pro Tip - This works best with a fine tip hot glue gun as you'll need to be precise with the hot glue!
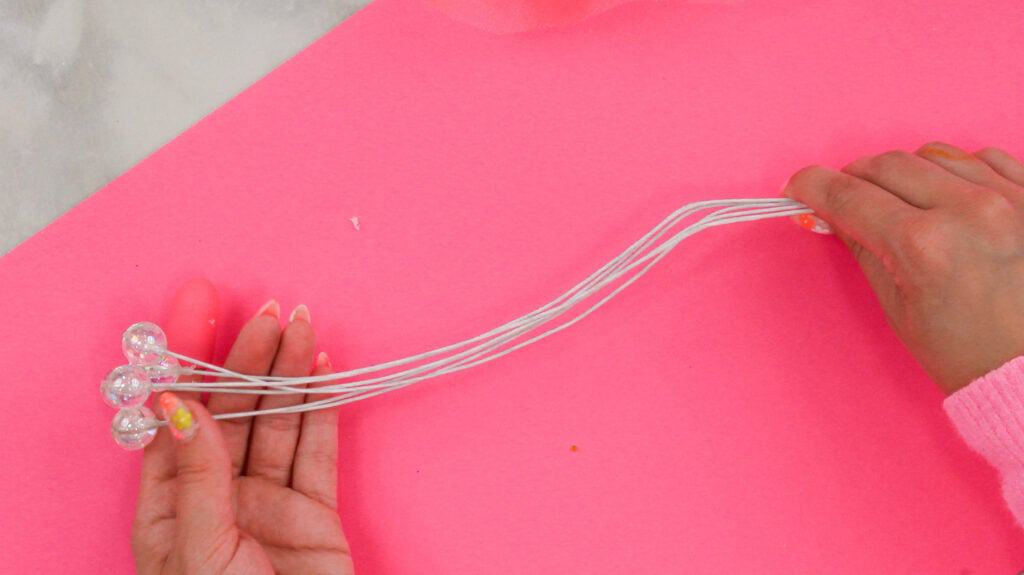
Curve the wire to make it easier to add them to the flower. You'll want the beads to extend about 3" above the foam ball.
Step 9: Shape Petals
Once all your petals have been spray painted and dried, stack a set of the same-sized petals together. The smallest size petals should have the wire facing upward, while the piles of medium and large petals should have the wires facing downward.
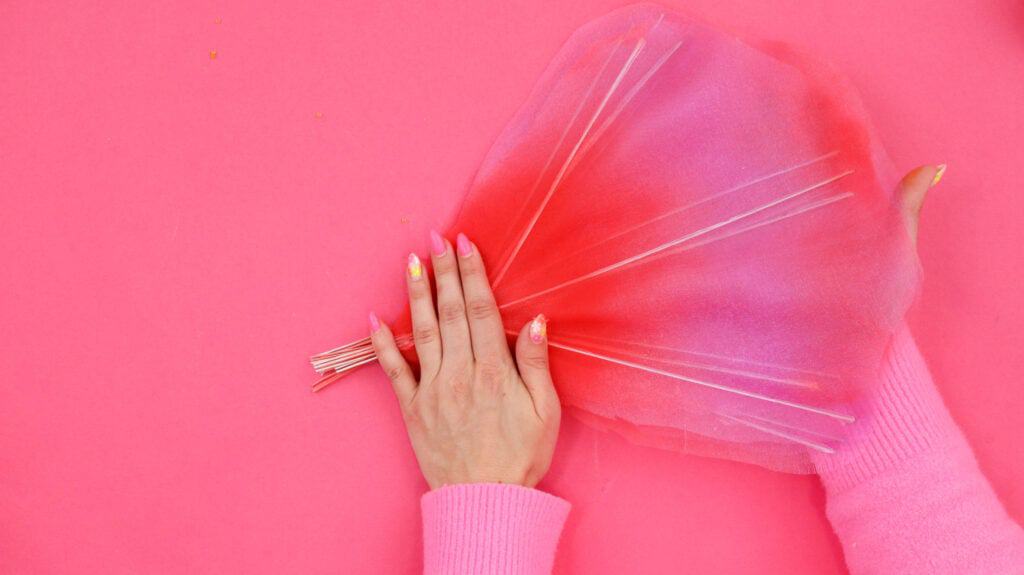
Place your left hand on top of the stack near the base of the petals. Place your right hand underneath the petals, and lightly bend the petals up to create a more realistic-looking shape. The smallest petals should curl inward the most to mimic a real flower, while the large petals will be more open. Take care to gently bend the tips of the wires (at the top of the petal) as well so they don't look unrealistically straight.
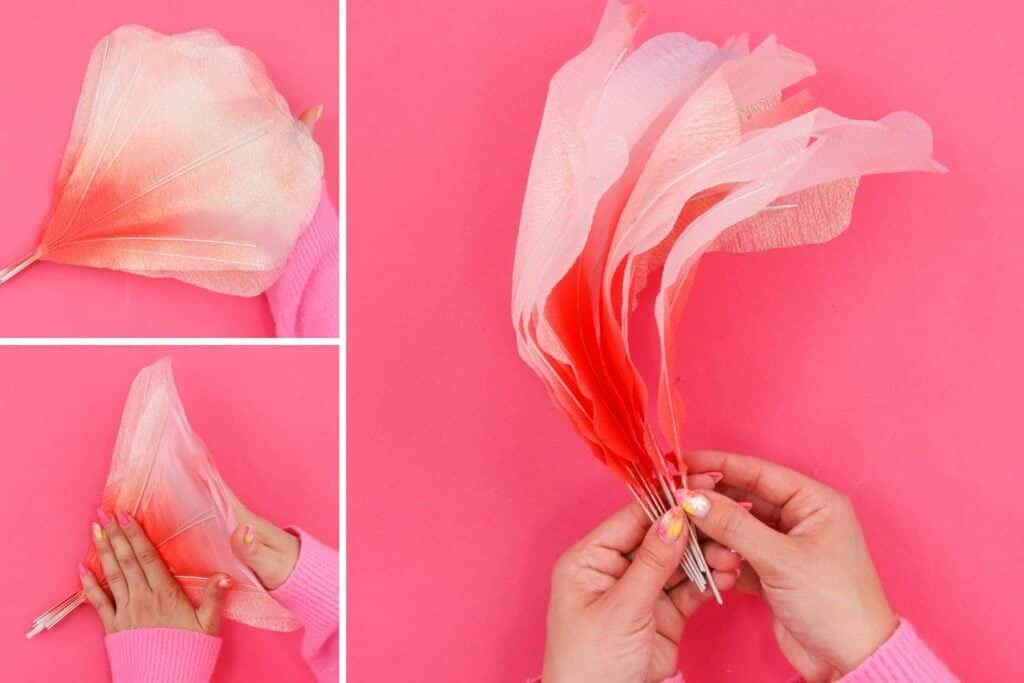
After shaping the petals, you can trim the excess wires that extend past the fabric so they are flush with the PVC pipe.
You should now have a few stacks of petals ready to be assembled.
Step 10: Bring it all Together
Now, it's finally time to bring all of the pieces together!
*If you are adding pearl bead stamens to your flower, begin by gluing them in place just below the coupler; they should curve around and then extend a few inches beyond the foam ball. If you haven't already, cut down the excess wire so it doesn't extend past the coupler. It's easiest to do this before adding the petals.
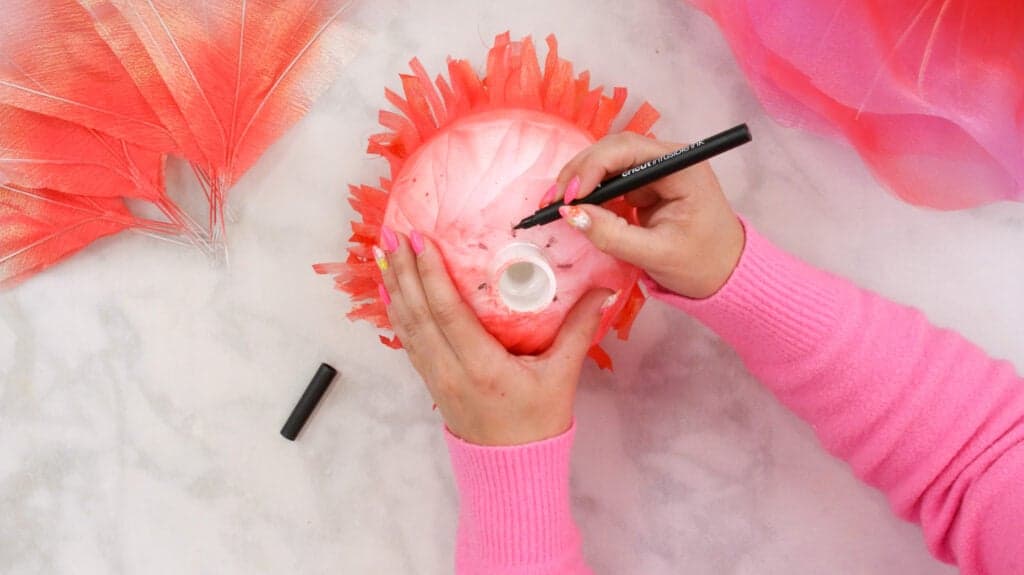
*Pro Tip: Mark where you would like to place the petals with a marker instead of free-handing it so you have an idea of where you're going to be gluing them. This will help you get a consistent finish with full coverage without any gaping.
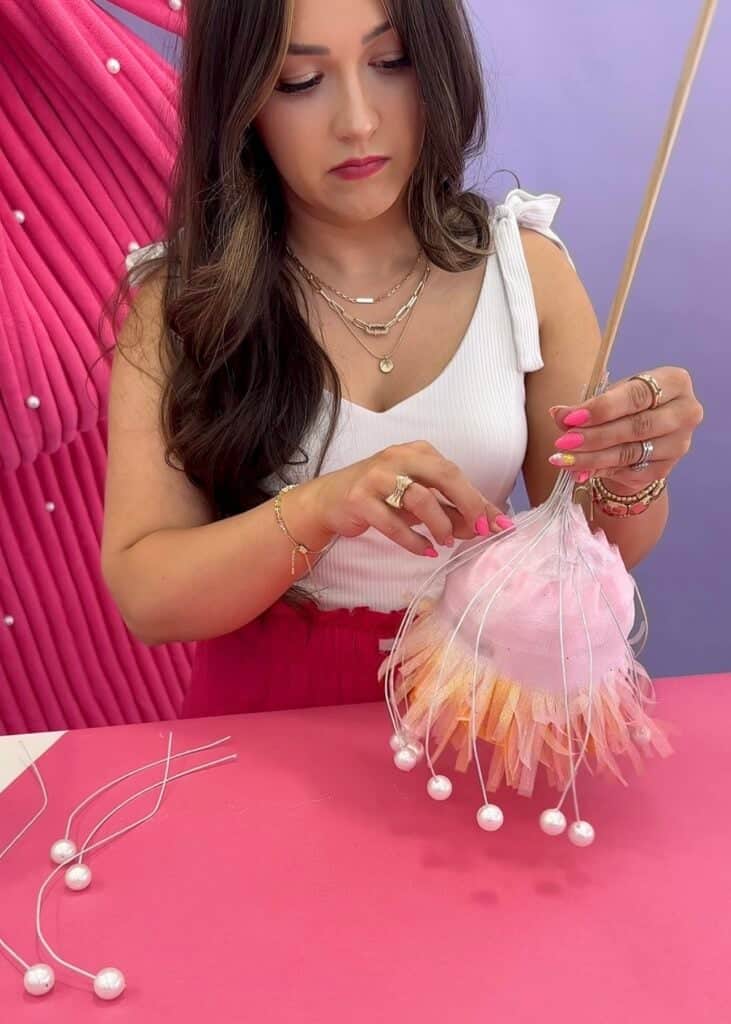
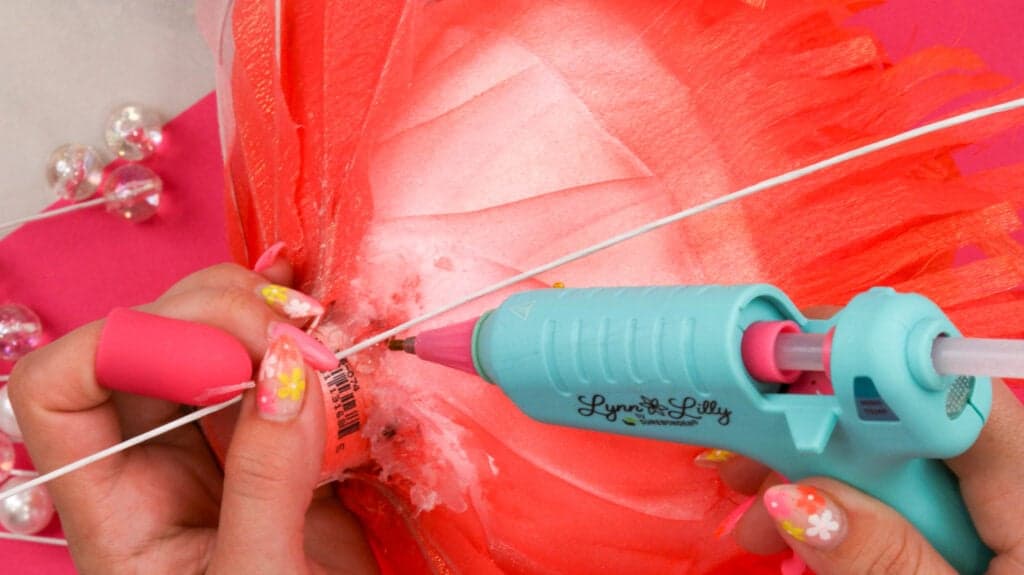
Start by gluing the smallest petals just below the PVC coupler so they curve around the foam ball. Each petal should be layered on top of the one next to it. It's best to use a larger glue gun for this part since you'll need a fair amount of glue to secure each petal fully.
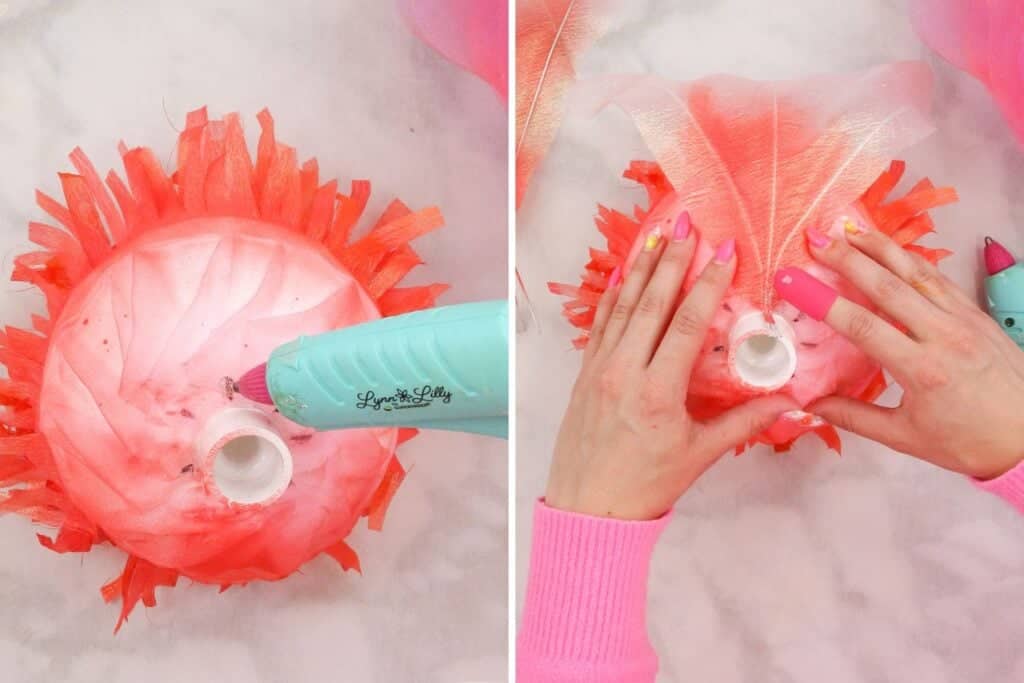
After gluing the small petals, move on to gluing your medium and then large petals.
*To make your flower larger, you can move the petals outward away from the PVC pipe.
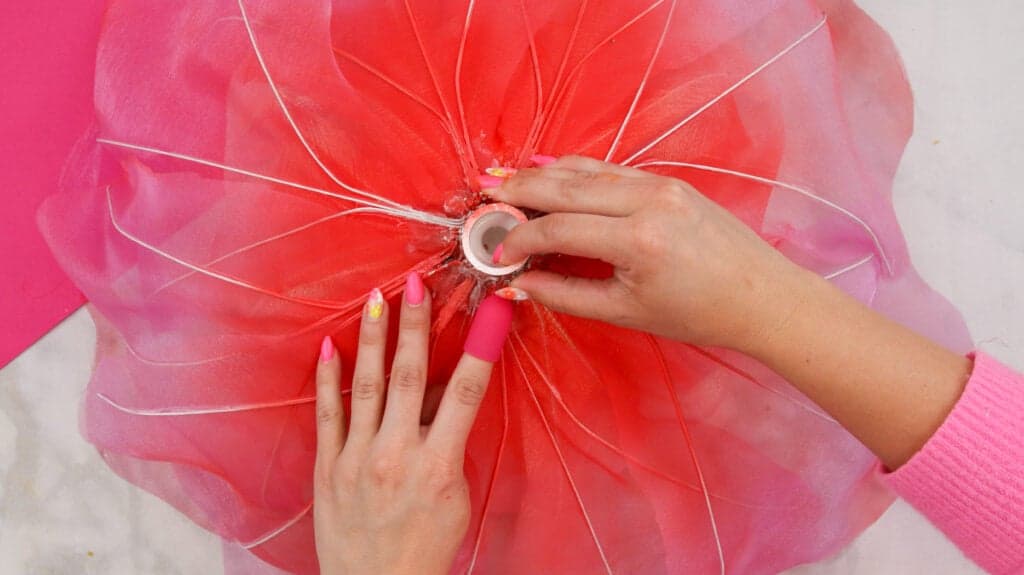
When gluing the petals remember to offset them- Check your flower from the front and add petals wherever you see a gap.

To make sure everything is secure (if you didn't cut down all of your floral wire) take a floral wire and wrap it around the PVC pipe over the wires and secure it with glue.
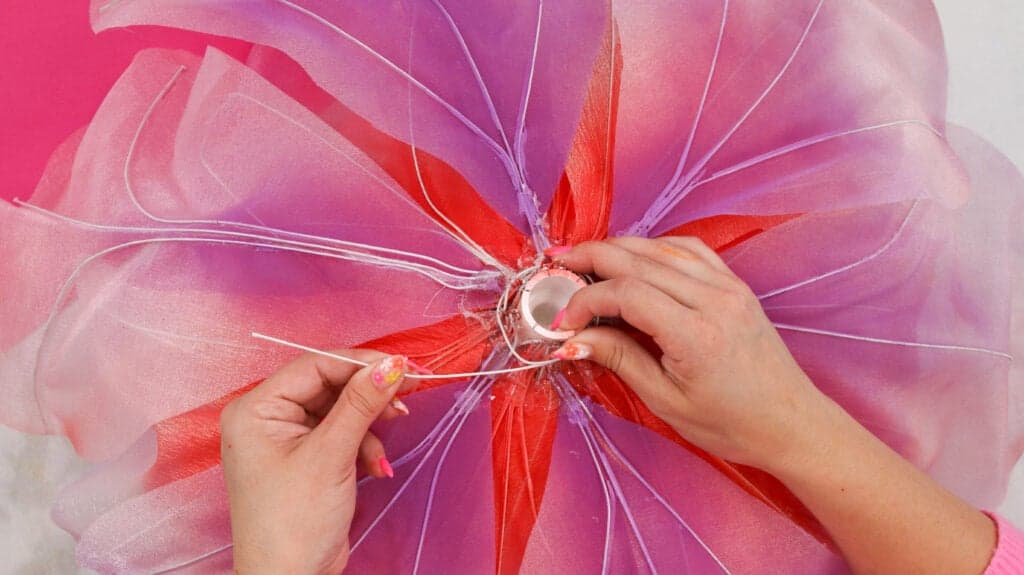
Finally, wrap green floral tape around the PVC Pipe and wires. I like to use hot glue to secure my tape in place. You could also use crepe paper for this or add a few leaves to the back to cover up the wires using THIS template.
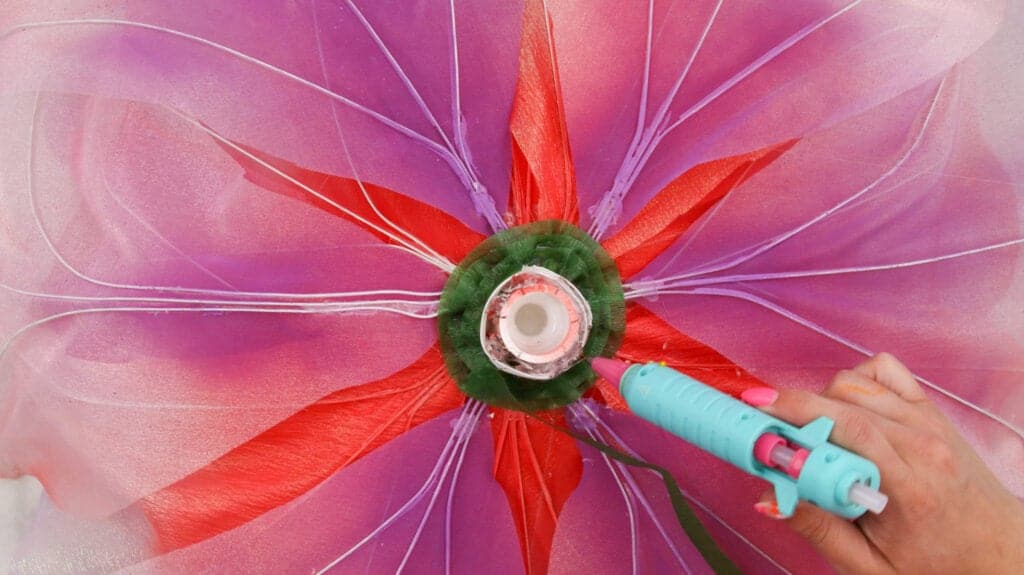
Now, you have a beautiful giant fabric flower!
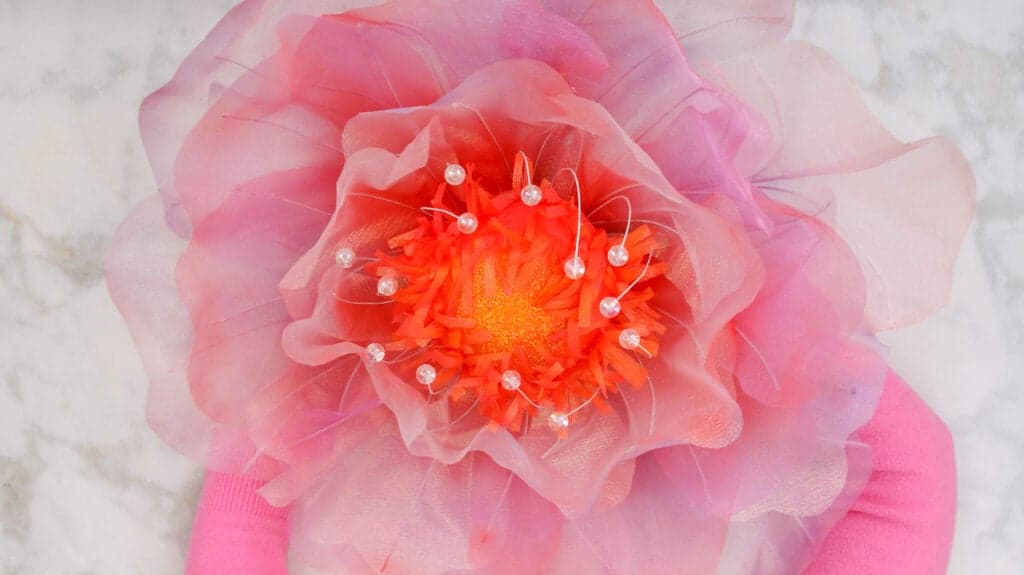
Ready for the next step to create your standing base?
Assembling Concrete Base for Standing Flowers
To make the concrete base, I bought quickset concrete mix, a 17-inch plastic plant saucer tray, three 3/4" x 5 ft. PVC pipes, three 3/4" PVC Coupling Adaptors, Green Colorshot acrylic spray paint, and preserved deer moss.
Prepare the concrete mixture according to the instructions, pour it into a plastic plant saucer tray (I used 17-inch diameter), and place 3 coupling adaptors into the concrete to hold your flowers. Let the concrete dry for 24-48 hours before removing the plastic plant saucer.
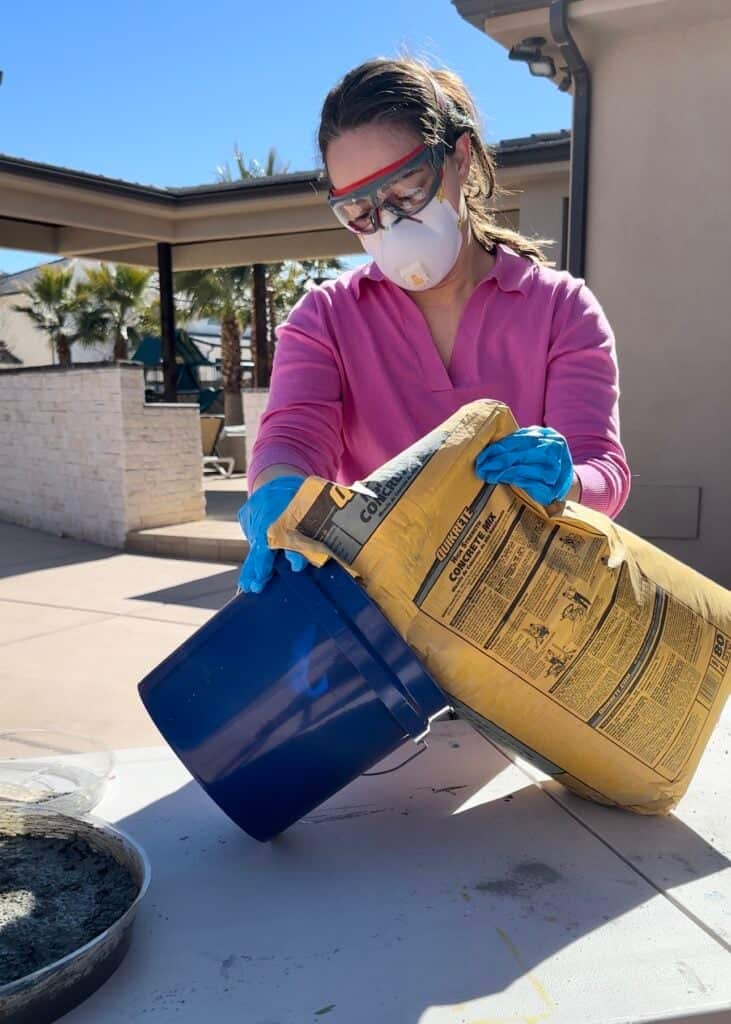
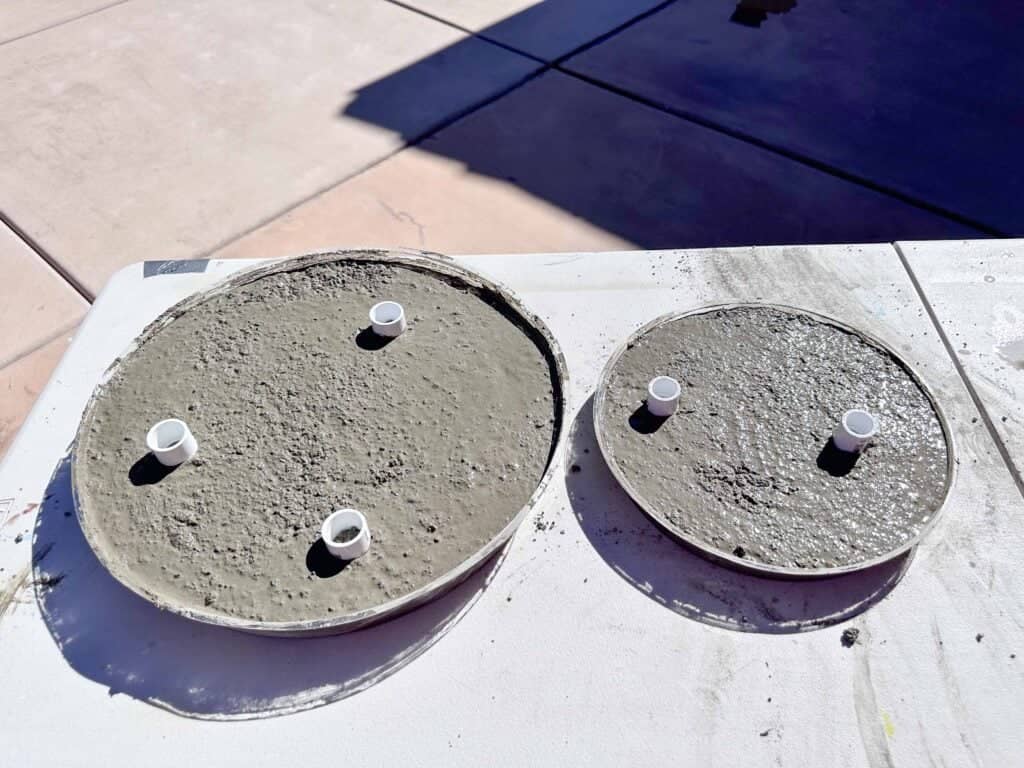
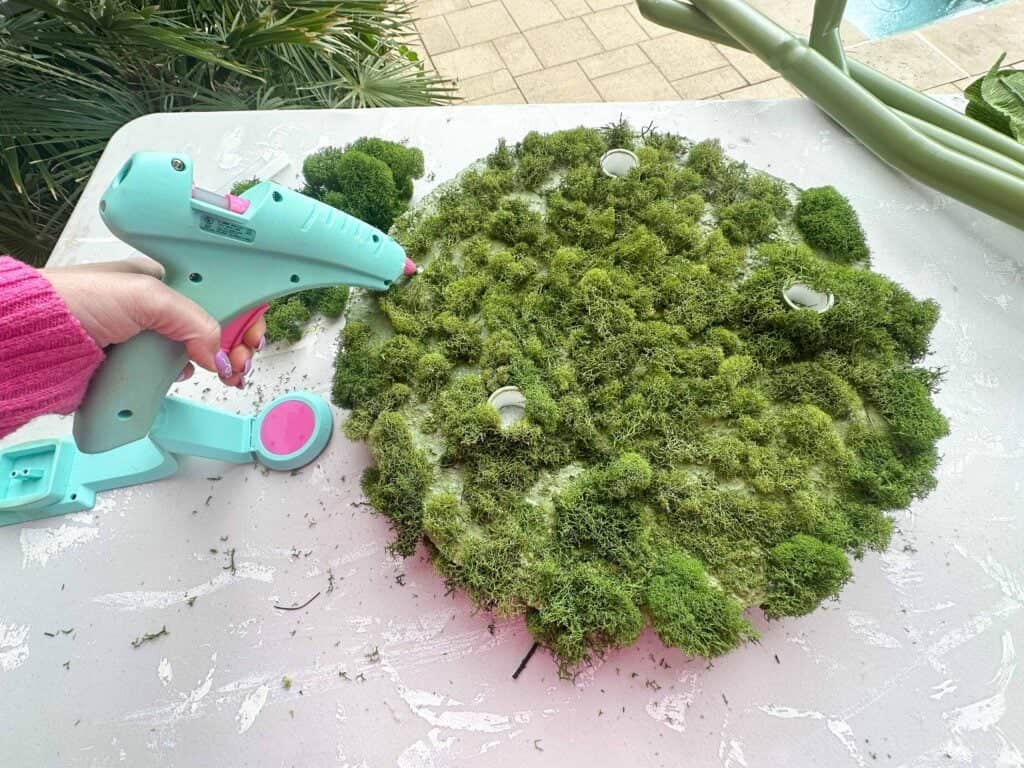
Once the concrete dries, spray paint it green, brush Mod Podge onto the surface or use hot glue to add in the moss. Adding preserved moss to the concrete base adds a natural, organic touch that softens the harshness of the concrete.
How to Create the Giant Stems and Shape PVC Pipe
Now, it's time to tackle the stem for our huge crepe paper poppy! For this part of the flower, you will need three pieces of 3/4" Schedule 40 PVC pipe. To create a more organic-looking flower display, you'll want to vary the heights of the stems. This will offset the flowers and create visual interest.
Use a PVC cutter to cut the pipe it into various lengths. I left the first one at 5 feet, then snipped the others down to 4 feet and 3 feet.
Next up, it’s time to shape our PVC pipe.
I recommend doing this next part of the project outside on a flat surface where you have good ventilation. If you have heat-resistant gloves and safety goggles, go ahead and grab those as well!

Hold the heat gun about 3-5 inches away from the area of the PVC pipe that you would like to bend. Slowly heat the pipe along a 3” length on all sides. Be careful not to overheat the PVC as it will start to burn.
Once it starts to soften, you can begin to bend the pipe. Any shaping you make to the pipe should be subtle. Bend the PVC pipe while it’s warm against the edge of a table and hold it in place until it cools.
I find it's best to add a slight curve to the very top of the PVC pipe so that the flower is completely visible from the front once you secure it place. If you leave the pipe straight, the flower will point upward at the sky instead.
Once your PVC pipes have cooled completely, you can coat them with a layer of green paint to match the base.

Not sure how to shape your PVC pipes? I found it was helpful to test it all out by adding in my flowers to see if the angles and heights of my pipes was right.

Wrap the PVC Pipe in Crepe Paper
This next step is optional, but it really adds to the look of the finished flower!
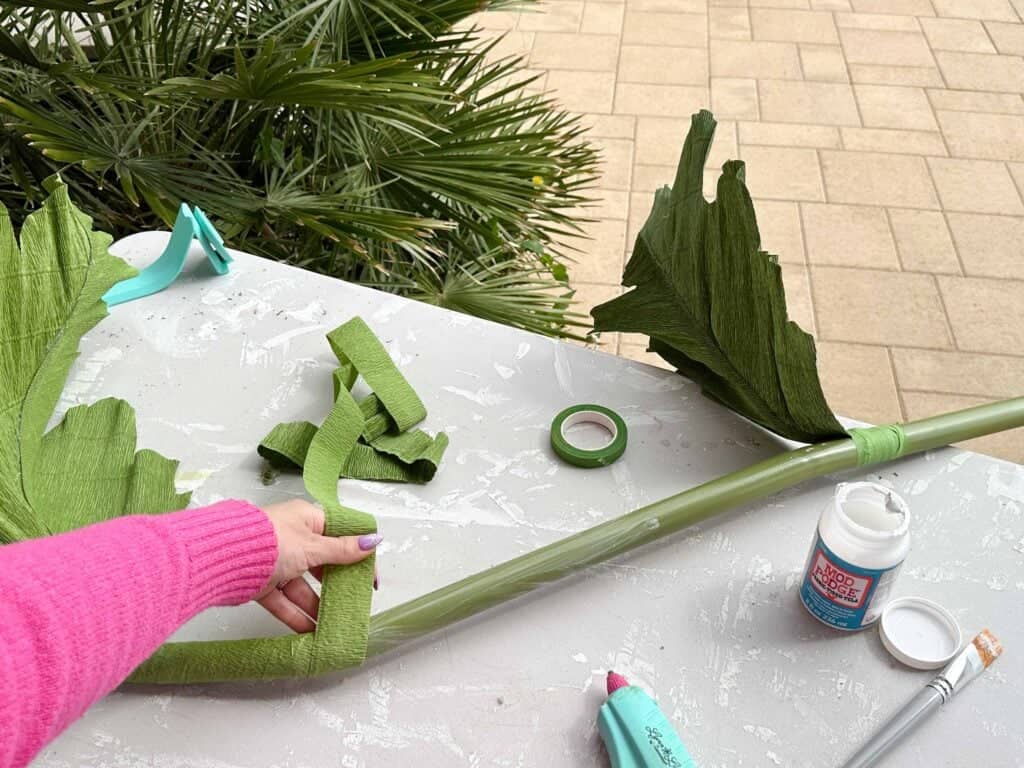
Cut 1-2" strips of crepe paper along the length of the roll. Stretch the paper to get the most length out of each strip.
If you made leaves, now is the time to attach them to your PVC pipe. Trim the wire that extends from the base of the leaf to about 5". Use hot glue or floral tape to secure the base of the leaf to the PVC pipe.
Starting from the top of the PVC pipe stem, coat it with Mod Podge in 12" sections as you work.

Wrap the crepe paper around the PVC pipe and slightly overlap the edges. If needed, secure the ends of the crepe paper with hot glue for extra security.
Allow the stems 24 hours to dry completely.
Assemble the Giant Paper Flower Pieces
We're in the final home run of this project, and the end is finally in sight! Whoo-hoo! Go ahead and pat yourself on the back for making it this far!
Grab your concrete base, stems, and crepe paper flowers. Secure the stems by placing them into the couplers in the concrete base. Now, you can secure the flowers by sliding them onto the PVC pipe stems.
You might find you need to change around or reposition your stems/flower until it looks just right.
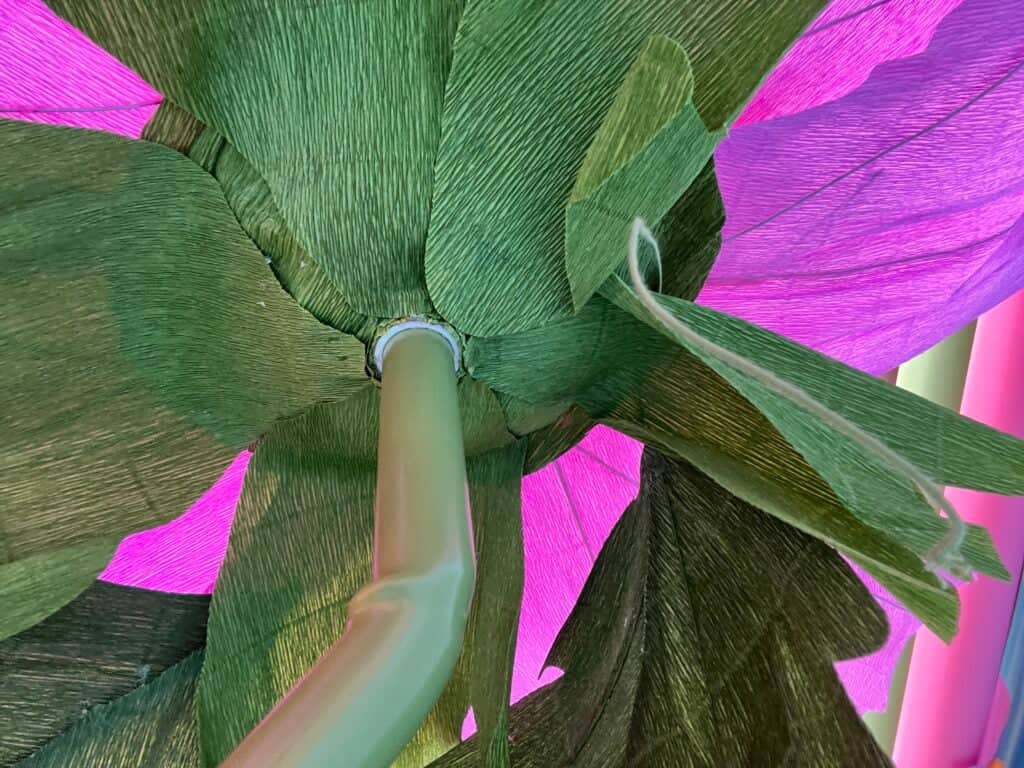
Now you have a finished giant fabric flower!
As you begin creating your own giant organza flowers, remember that it's more than okay to make mistakes! In fact, they are an important part of the creative journey.
While I've outlined some steps for you to follow, don't hesitate to experiment and discover your own unique approach to these flowers. Let your imagination roam free and embrace the process.
Whether you follow my instructions step-by-step or blaze your own trail, the most important thing is that you express yourself and infuse your personal style into your creation!
Looking for more flower projects? Click here!
Join my crafting and sewing Facebook group where you can show us what you’re making, ask questions, and learn from others!
Want to save this project for later? Save it to your favorite Pinterest board! Click here to save it to Pinterest.

Amazing and beautiful! Thank you!!
These flowers are gorgeous, Kim! I would love to put them on my front porch! They are the pop of color I need in front of my deep red brick home.
That would be gorgeous! Share a photo if you end up making them! 🙂
Wow... These are stunning. Thanks for the beautiful pattern and links. I have just ordered everything for them and cant wait to make them.
Can't wait to see what you make!
These flowers are beautiful, what a lot of time you have taken with all these instructions.
Thank you for sharing