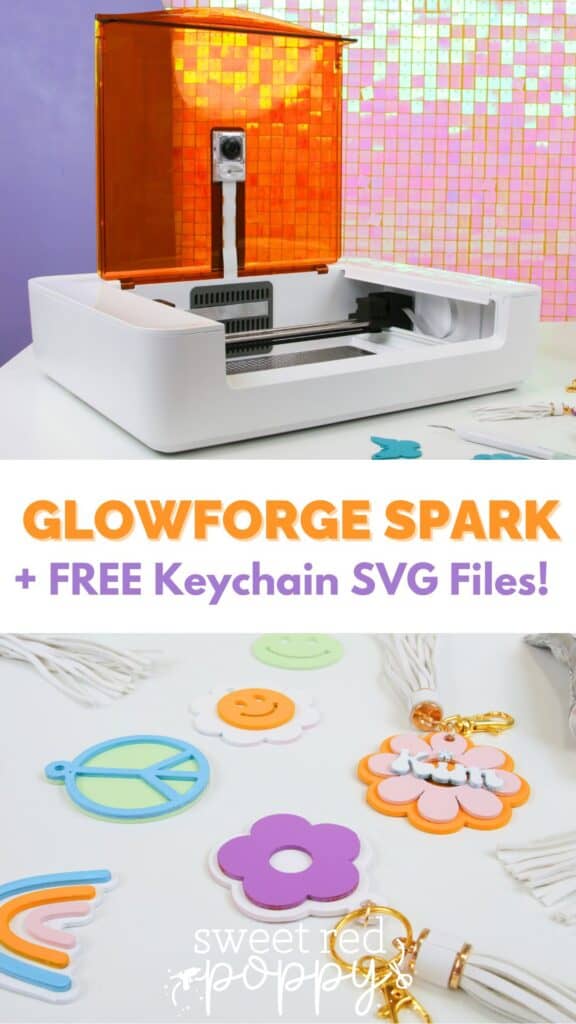
Glowforge Came Out with a New Laser Machine, Spark! Learn How to Make Custom Keychains using this New Machine, Step-by-Step Tutorial, and FREE SVG Files.
This is a sponsored post written in partnership with Glowforge®. Glowforge provided me with this machine to review it. All thoughts and opinions are my own.
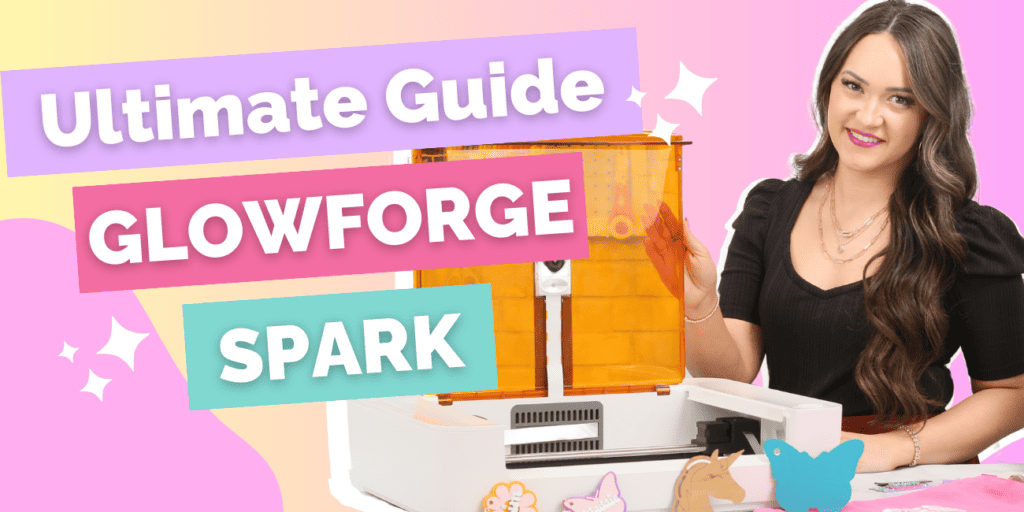
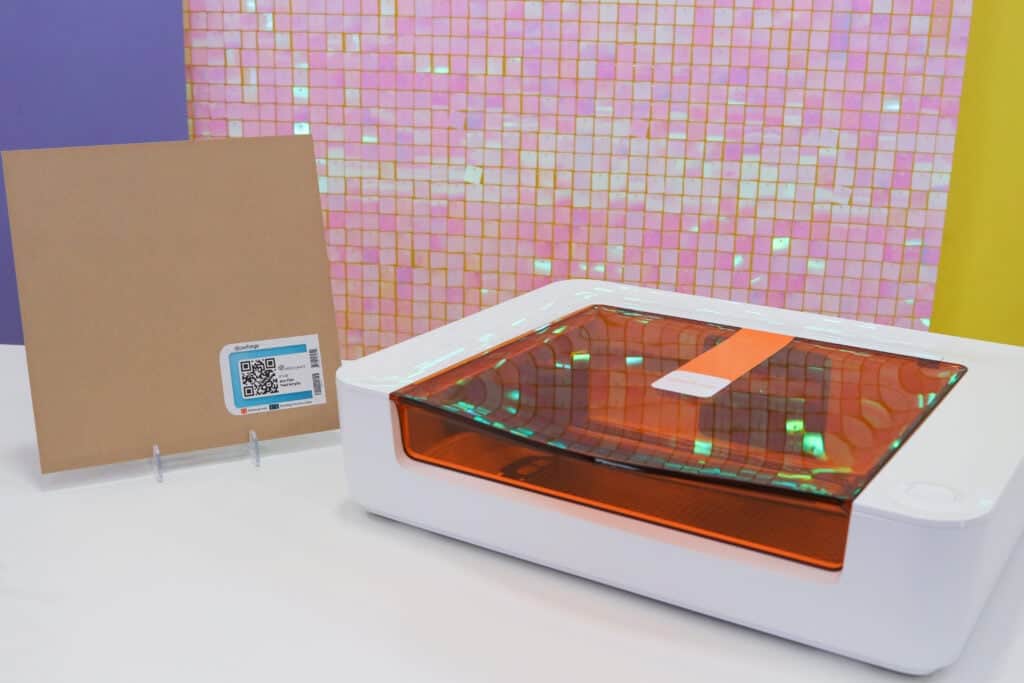
I'm thrilled to share the latest crafting technology innovation - the Glowforge Spark™!
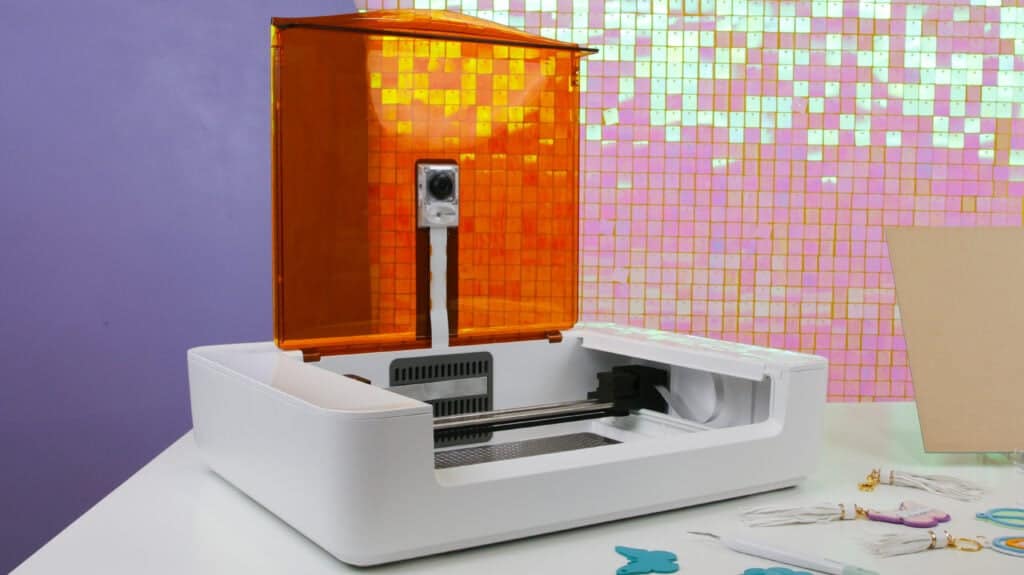
It looks small, but it sure is mighty. The laser’s look and characteristics are almost identical to those of the Glowforge Aura™.
The biggest difference? Size and speed.
But the burning question remains: is the Glowforge Spark the right machine for you? Well, let's dive in and find out together!

Scroll down to the bottom of this post to create a custom Keychain! Read more about the Spark Machine and Download the FREE SVG Files Down Below!
Characteristics & Features of Glowforge Spark
Let's start with the basics. The Glowforge Spark is a versatile machine that can cut, score, and engrave a wide range of materials.
When it comes to cutting, the Spark's laser can effortlessly slice through materials up to 1/4" thick.
Next up, scoring! Think of it as drawing with a pencil, but with the precision of a laser. It leaves behind a beautifully delicate line on your material.
And finally, engraving! Whether it's intricate designs, logos, or even photographs, the Glowforge Spark can carve away layers from materials up to 3/4" thick, adding depth and contrast to your projects.
And here's the best part - no blade replacements or mats required! Just plug it in, and you're ready to start creating.
Speaking of easy, the Spark features a simple and intuitive design system, making it perfect for crafters of all skill levels. Whether you're a seasoned pro or a complete beginner, you'll feel right at home with the Glowforge Spark.
The bed size cutting area of the Glowforge Spark is similar to the size of a sheet of paper and can cut 8 1/2 by 11”, but it can still fit a 12” x 12” piece of material. However, unlike the Glowforge Aura, Spark does not have a pass-through slot. Glowforge Spark weighs 11 lbs and measures 21” deep x 18” wide

Glowforge Spark Camera
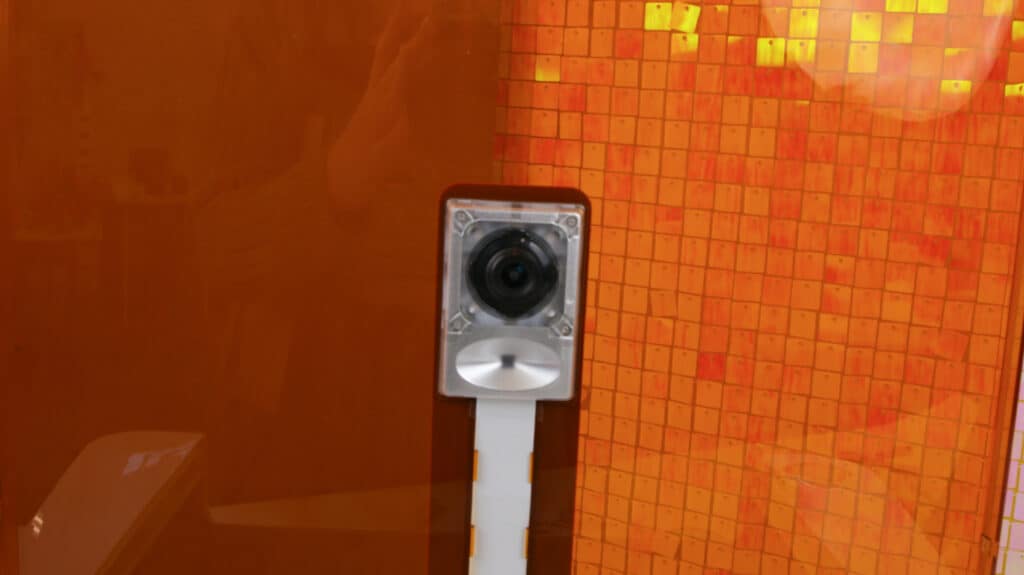
Thanks to AuraVision™- the machine's 8-megapixel camera that's mounted on the lid of the Glowforge Spark- allows you to see a live camera preview of your cut on the Glowforge web software.
Lighting Features
There is High Fidelity LED Lighting inside the machine that will illuminate your work.
Temperature
The machine's operating temperature is 60F-75F.
What Can it do?
Similar to the Aura, the Spark can Cut, Score, and Engrave.
- Cut: Cuts through the material.
- Score: Similar to drawing on a material with a pencil.
- Engrave: Carves away the material to create contrast and depth.
- 3D Engrave: Create a 3D engrave with a grayscale image.
In a separate blog post, I will compare the Glowforge Aura & spark: the differences in characteristics, features, what they can do and other comparisons.
Another cool feature the Spark has is that it can automatically scan handwriting or drawings and print them.
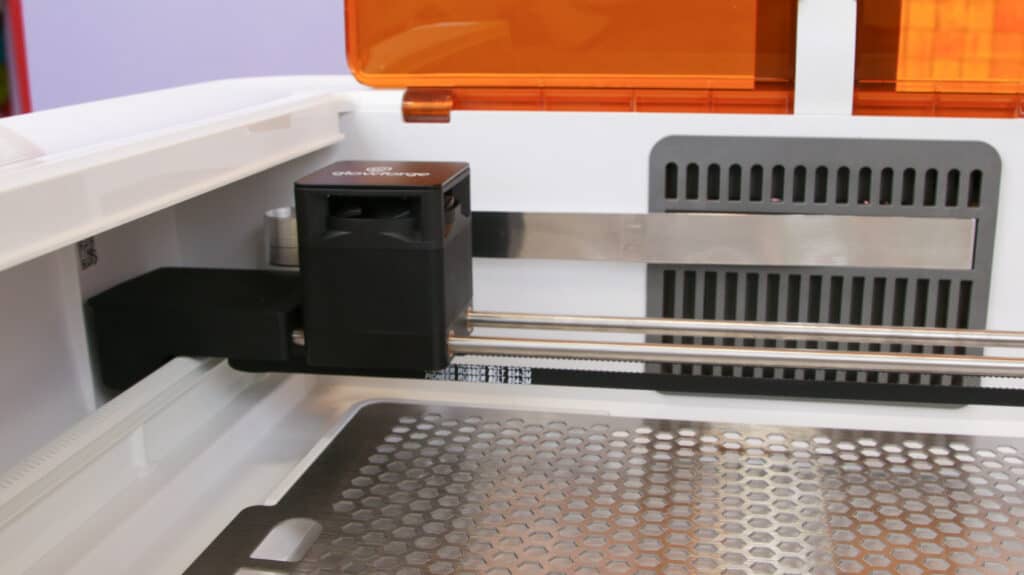
Laser Head Characteristics & Features
This Glowforge machine is a Craft Laser™. It's a Class 1 laser containing an embedded Class 4 laser.
The laser is a 6W Diode Laser (identical to the Aura)- it's a bright blue and powerful laser that contains P-type and N-type materials that make it a semiconductor. When these materials collide it will form a junction that will then emit a laser.
The laser head is equipped with a Macro camera for Auto-Focus and a fan for cooling.
- Wavelength: 450nm (metric unit) CW
- Internal laser power: less than 6000 milliwatts peak
- Beam diameter: 0.1mm
- Original laser beam is .2 mm
- Beam divergence: 9mRad
The laser beam is thinner than a hair and more powerful than a typical blade, moving along an x and y axis. It can cut up to 1/4" thick materials and even more when engraving!
Unboxing- What's Inside?
Once your box containing your Glowforge has arrived, it's time to unbox and set up your machine! Here's a list of supplies that are included:
- Protective Foam Packaging
- Glowforge Spark
- Laserhead
- Power Cable
- Vent Hose
- Crumb Tray- Inside a Cardboard Sleeve
- Samples of Material
Setting Up Glowforge Spark
The Glowforge Spark is simple to set up. All you need to do is head over to Glowforge.com and follow the step-by-step set-up instructions provided on their website once your machine has arrived.
- Place your Glowforge onto a stable surface near a window and outlet.
- Open the lid and carefully unpack everything that's inside.
- Install the crumb tray.
- Snap the Laser head into place onto the square magnetic plate.
- Connect the vent hose to the back of the Spark.
- Plug the power cable into your Glowforge machine and nearest outlet.
- Connect to Wifi.
What Materials are Compatible with Glowforge Spark?
So, what materials can you work with using the Glowforge Spark? Well, the list is extensive!
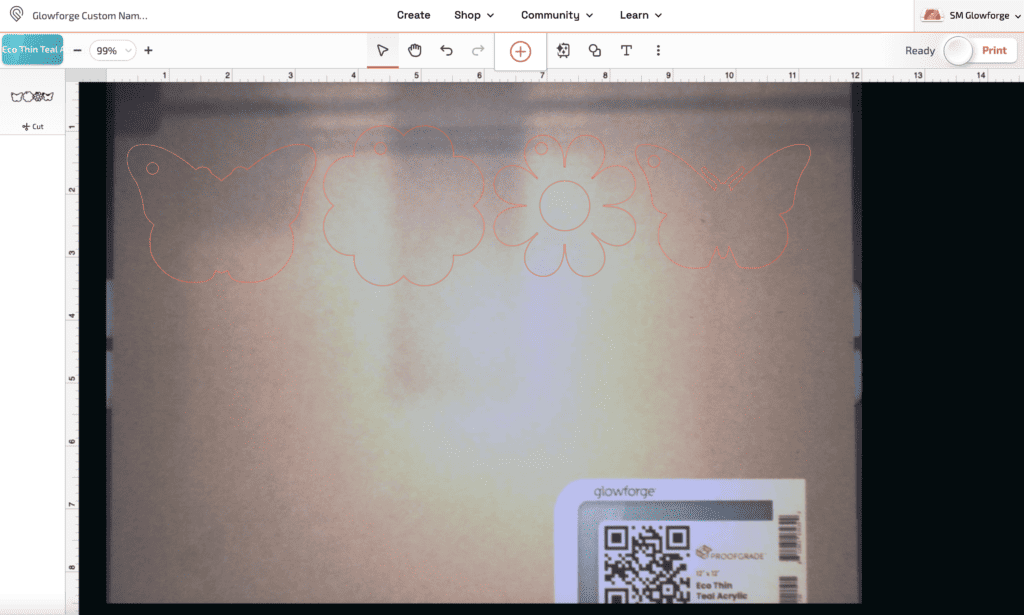
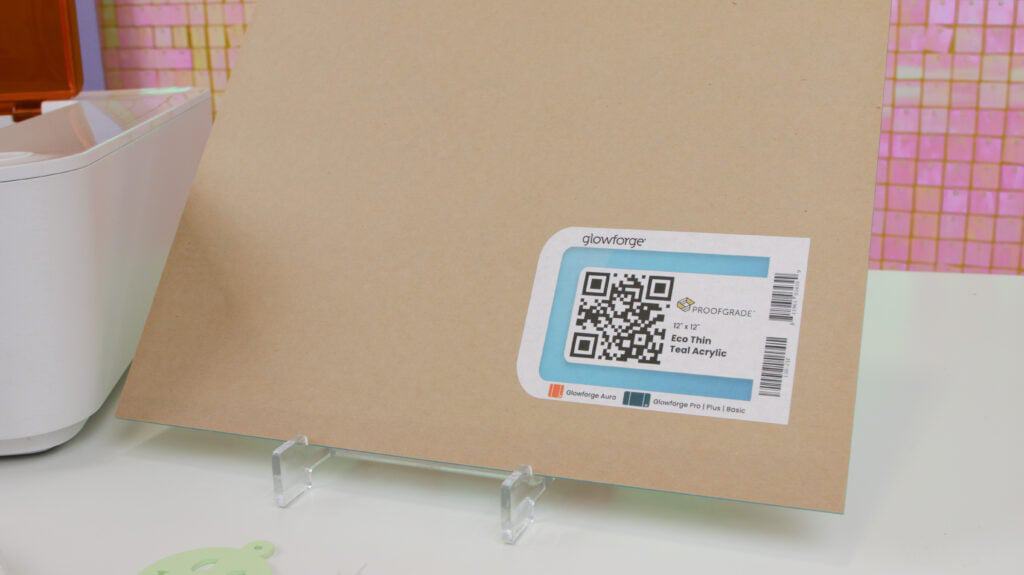
Glowforge provides Proofgrade® materials, specially designed for seamless compatibility with the Spark. These materials come in convenient 12" x 12" sizes and are laser-ready, thanks to a clever QR code placed on the front.
The magic happens when you place a Proofgrade material into the machine with the QR code facing up. The Glowforge Spark reads this code using Auravision, its 8-megapixel camera, and automatically adjusts the settings for perfect results every time.
And here's a bonus – Proofgrade materials come with protective masking that keeps your projects clean and free from burnt marks. Want to remove the masking effortlessly? Glowforge suggests using duct tape to lift it off the laser-cut pieces – a handy pro tip!
Now, let's talk about the other materials you can work with.
The list includes acrylic (non-translucent), thin natural leather, iron-on materials, and various types of wood such as hardwoods, plywoods, and veneers.
How Much Does the Glowforge Spark Cost?
March 5 - April 4, you can get the Glowforge Spark machine for just $599 during Glowforge's presale campaign.
Its everyday price thereafter will be $699.
Click here to purchase your Glowforge Spark!
Glowforge App
The Glowforge app is a web browser app that you can use to upload your designs or use the designs from the Glowforge Catalog where you can find thousands of designs to choose from.
To get the Glowforge app type app.glowforge.com or click here!
Check out the Glowforge Catalog here!
Table of Contents
Requirements
To run a Glowforge Spark machine you will need a good wifi connection, ventilation (Use the Glowforge Personal Filter™ or vent out a window within 8ft of your machine), an outlet (110/220 Vac, 50 or 60 Hz outlet), and 84W peak power consumption.
Warranty
The Glowforge Spark machine has a 12-month Comprehensive Warrant. Click here to read the full Glowforge Warranty Information!
Safety
The machine has built-in sensors that will alert you in case of bumps, overheating, or any changes concerning the fan. Learn more about Safety here!
Ready to See the Glowforge Spark in Action?
I'm sharing the free files I designed for my first project with Glowforge Spark below!
Custom Keychains
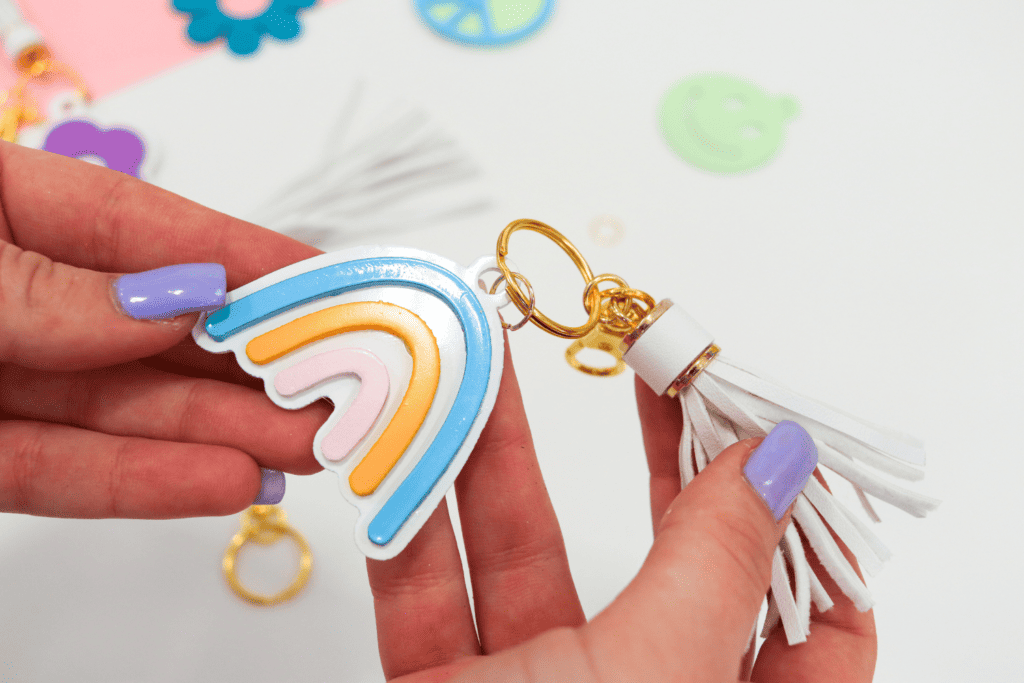
To show you what this machine can do, I made these custom nameplate designs that can be made into adorable retro keychains.
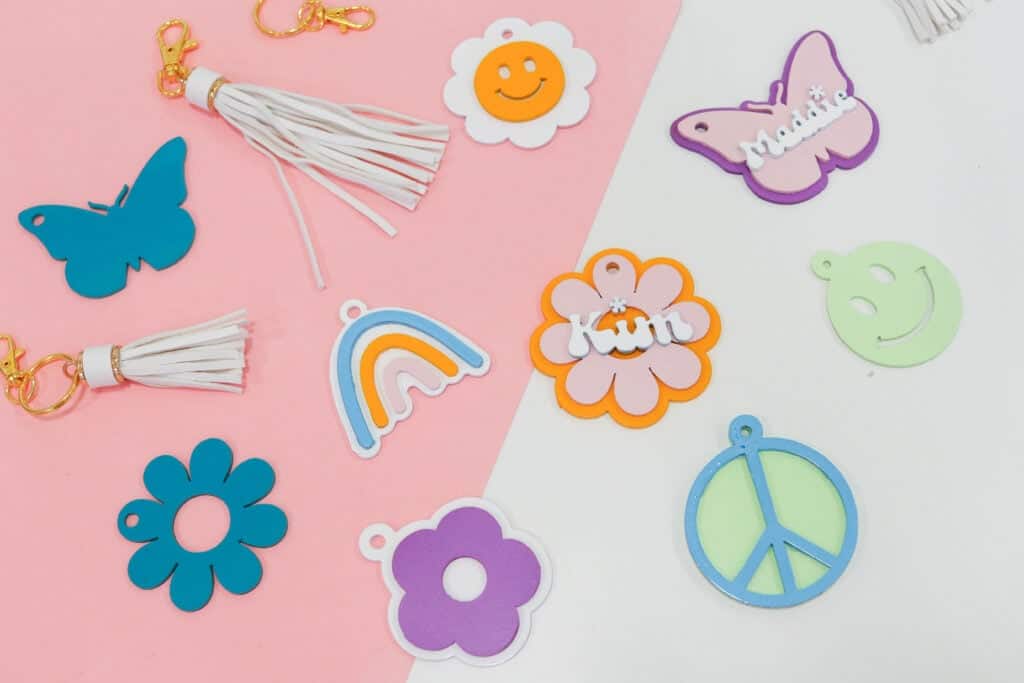
There are 7 designs to choose from:
- Butterfly: 4” x 2.92”
- Rainbow: 3” x 2.82”
- Smiley Flower: 3” x3”
- Flower: 3” x 3.31”
- Smiley Face: 2.5” x 2.96”
- Peace Sign: 3” x 3.33”
- Daisy: 3.4” x 3.4”
All of the designs consist of two layers except the smiley face design. The smiley face design is a single-layer cut.
If you’re a fan of the retro aesthetic or know someone who does, then this project is for you!
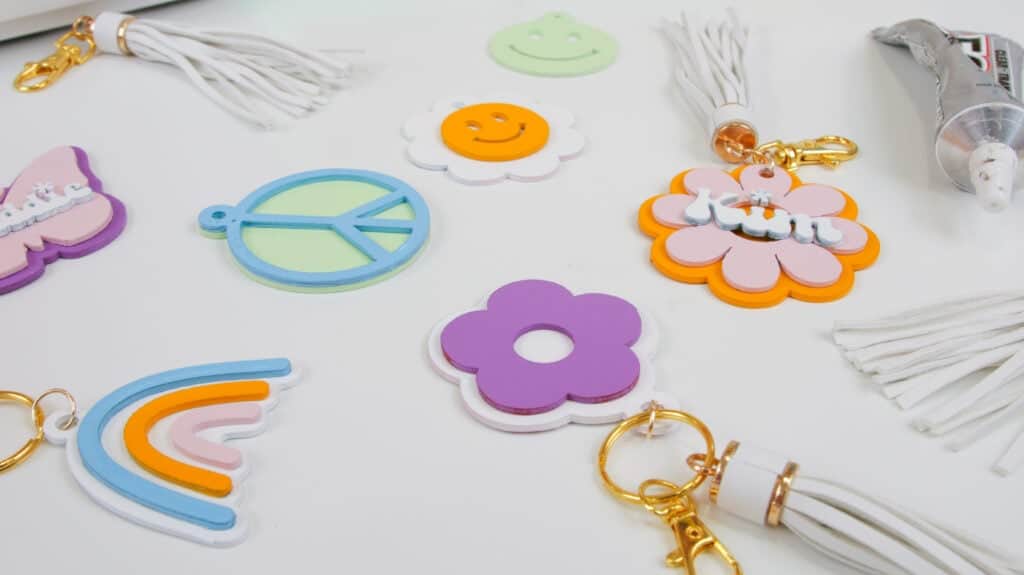
Supplies Needed
- Glowforge Machine
- SVG Files (Download down below)
- Proofgrade Eco Thin Acrylic
- Spray Paint- Variety of retro colors
- E6000 Clear Craft Adhesive
- Split Key Ring
- Keychain
Open the lid of your Glowforge Spark machine and let's get to laser printing!
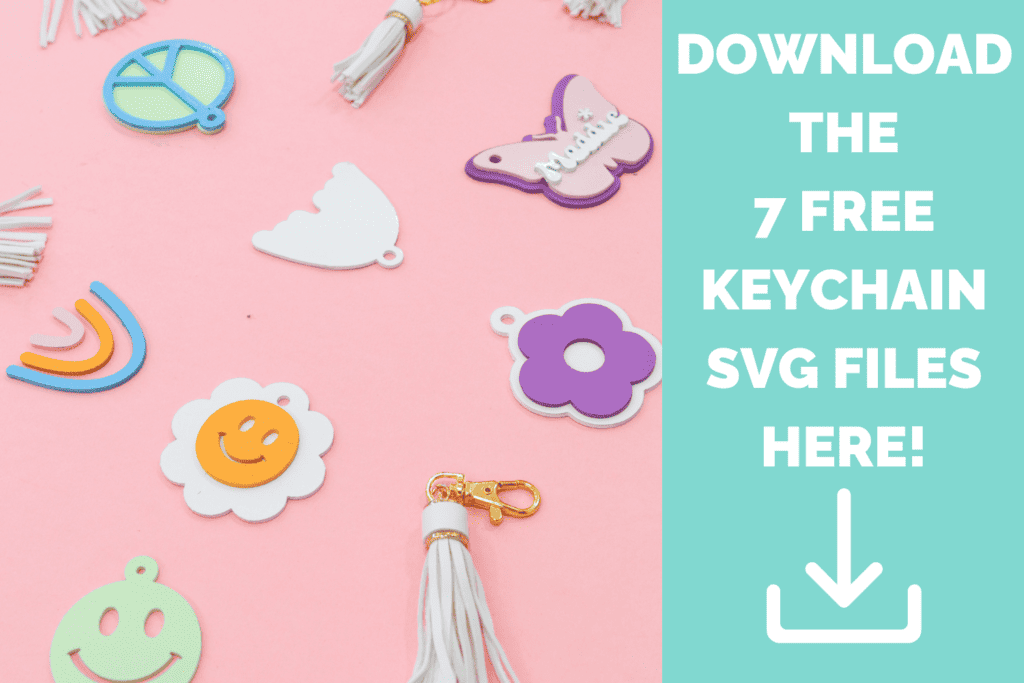
Download the FREE Custom Keychains File Here!
Step 1: Upload File to Glowforge App
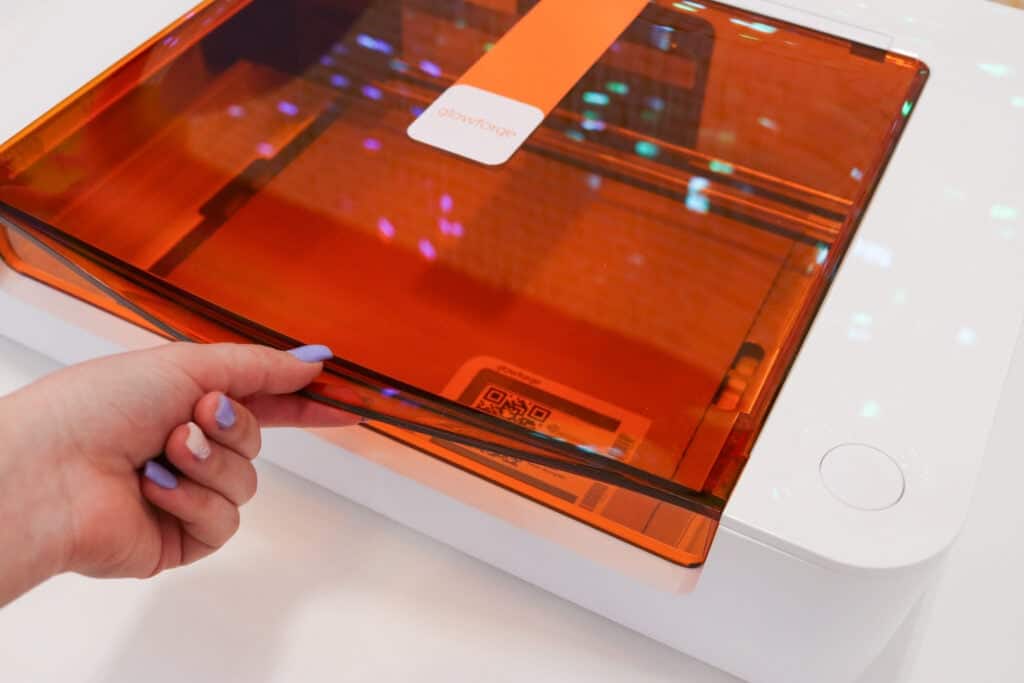
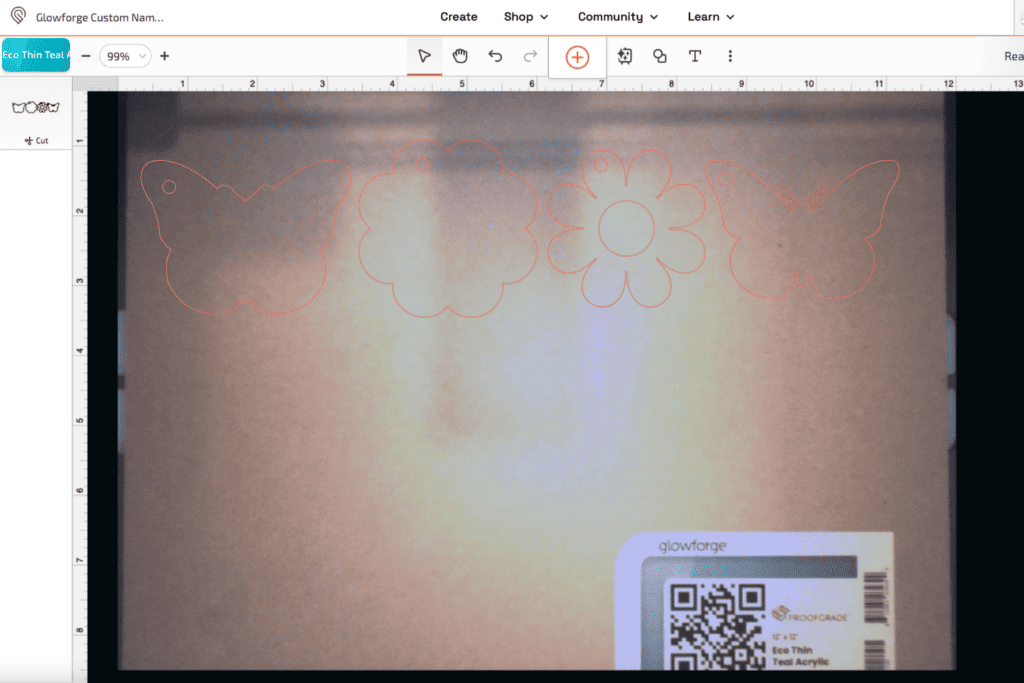
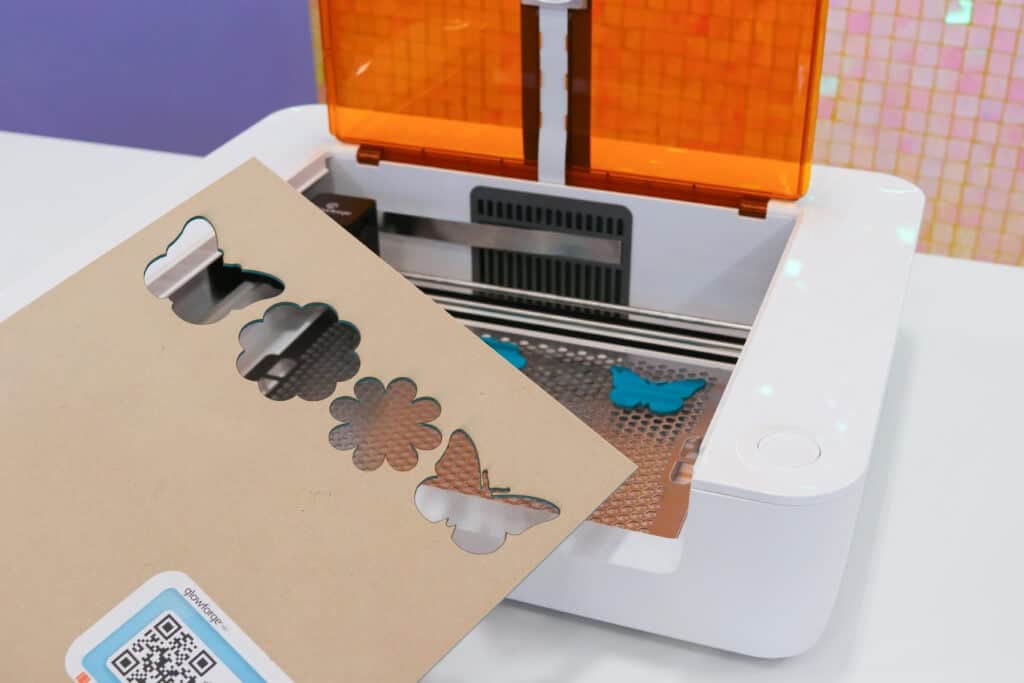
First, open the lid of your Glowforge and place your material into the machine flat onto the cutting tray (QR code facing up).
I’m going to be using Proofgrade Eco Thin Teal Acrylic which I’m going to spray paint once cut.
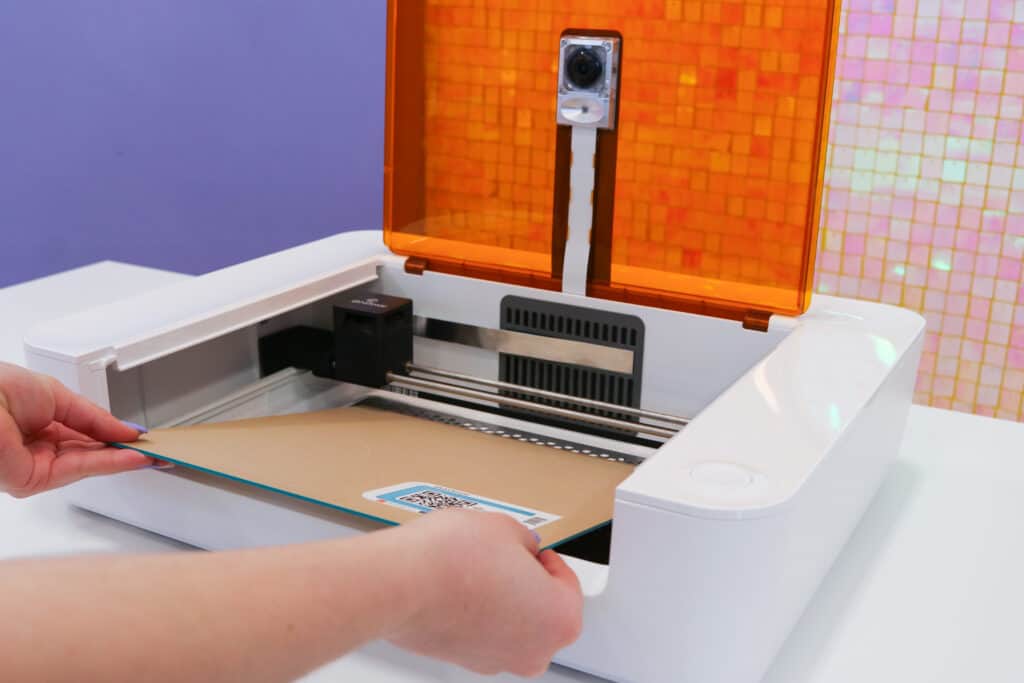
Once the material has been placed inside the Glowforge on top of the cutting tray, close the lid. Now, let's take a look at the Glowforge app.
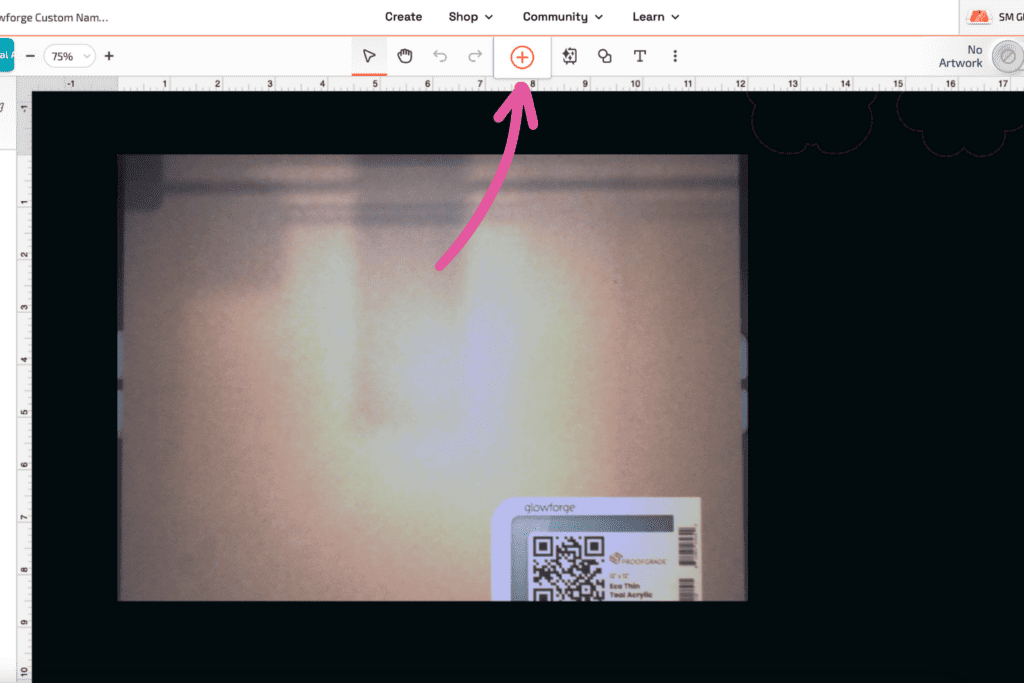
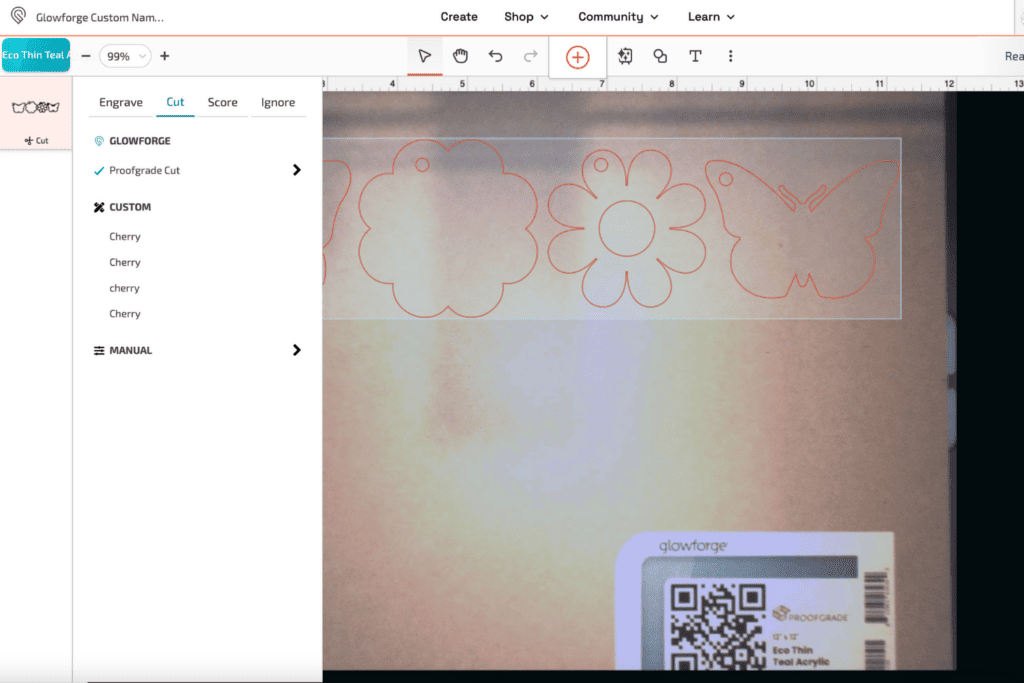
Click on the download link above, then upload it to the Glowforge app (app.glowforge.com) by clicking the “+”.
Pro Tip: If you’re not using Proofgrade materials, you may want to do some test cuts and experiment with the cut settings with the material you are using before moving forward with projects.
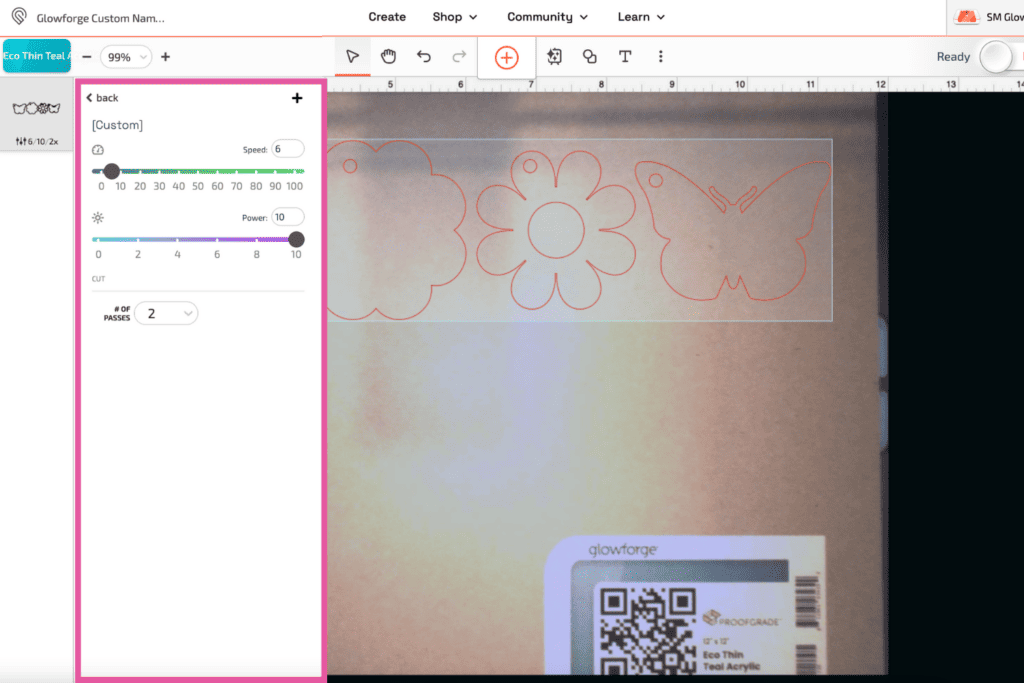
My Glowforge automatically adjusted its cut settings to this for the Proofgrade Eco Thin Teal Acrylic material I'm Using:
- Speed: 6
- Power: 10
- # of Passes: 2
Once the files have been uploaded to the Glowforge App’s workspace, click on the design, ungroup them (Mac: Shift>CMD>G or Windows: Shift>CTRL>G), and drag them wherever you want on the workspace.
Then, select the designs you want to cut and make sure to ungroup and separate the layers.
On the left-hand side of the workspace, make sure it’s set to “Cut” not Engrave or Score.
Step 2: Cut out Name Plates
When you’re ready, select “Print” in the top right corner of the screen.
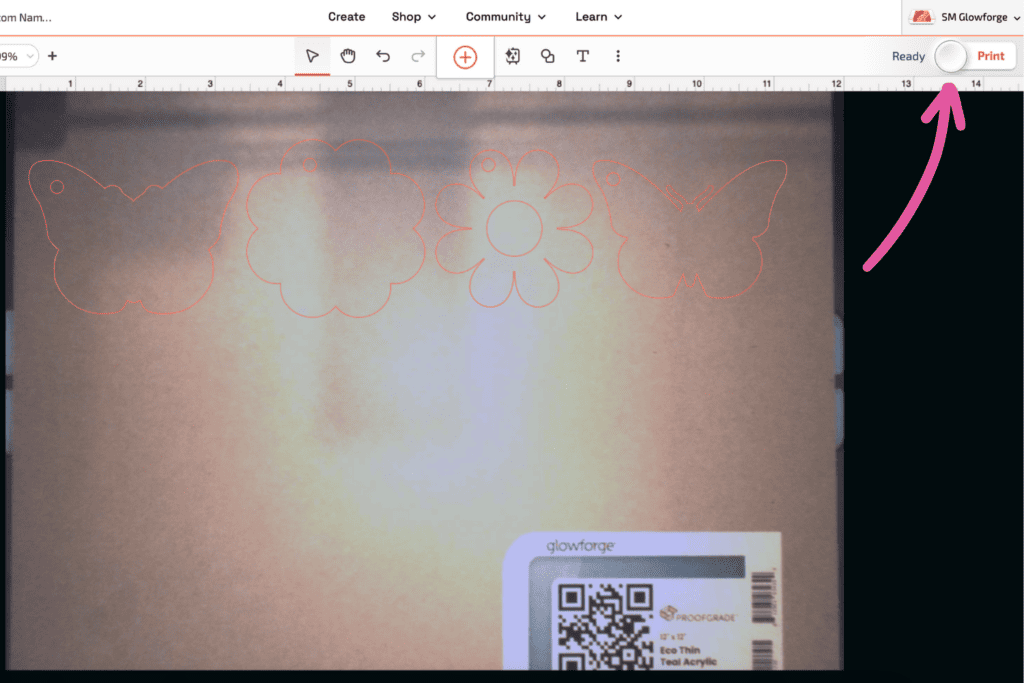
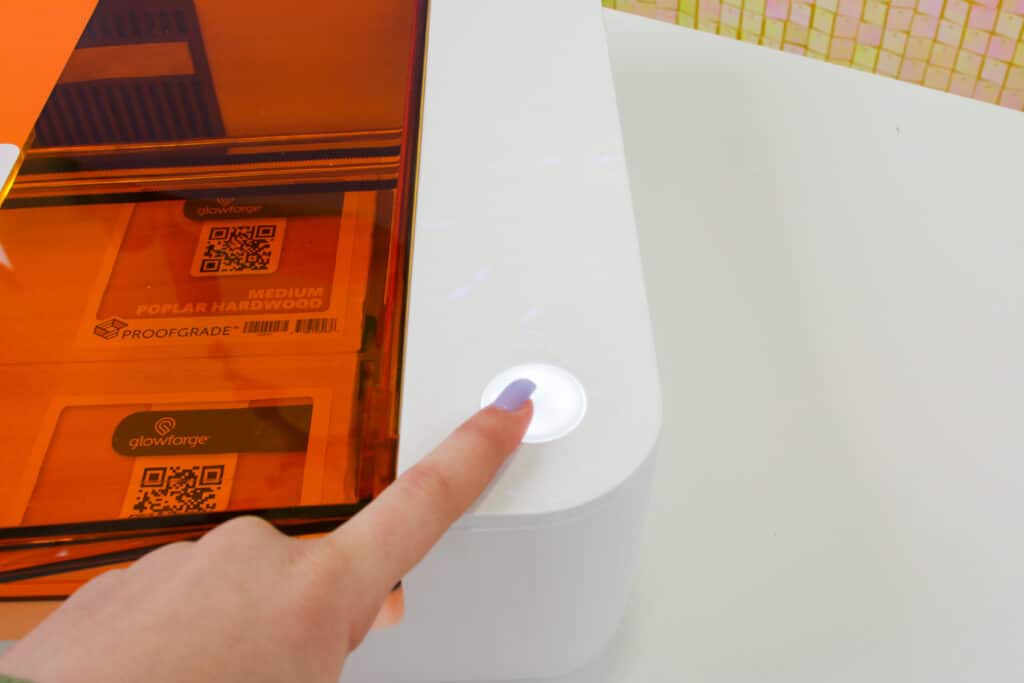
Wait for the estimated time it will take to print before pressing the blinking blue button on your machine.
* Before pressing Print, make sure to plug in your Glowforge Personal Air Filter™ or attach your exhaust hose and vent it outside of a window.
When the print is done, wait a few minutes for the fumes to go down. Open the lid and take out the material.
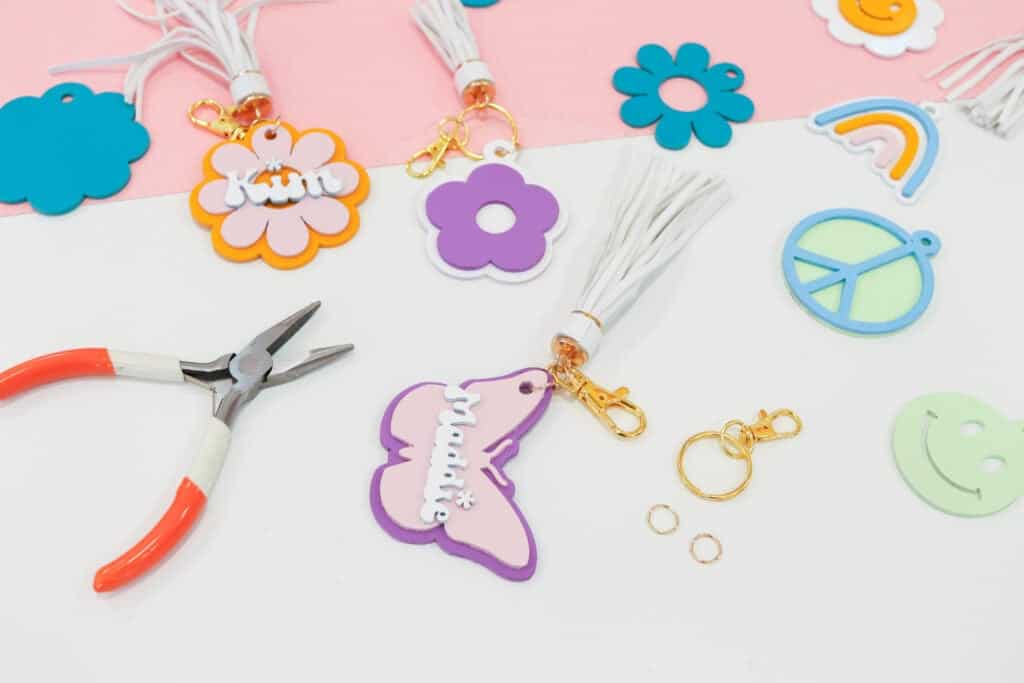
Step 3: Assemble Name Plates
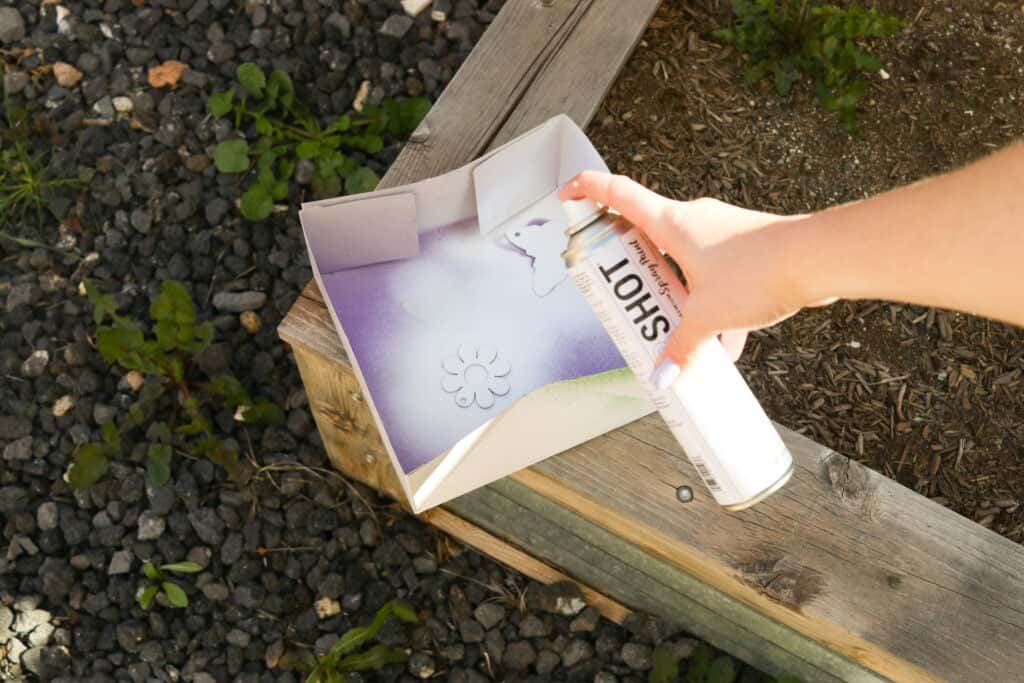
Pro Tip: Take off the masking of the Proofgrade materials using a piece of duct tape or a weeder tool and peel it off at a 45-degree angle.
Now it’s time to paint! I grabbed some spray paint that I thought were retro-y colors, took my cut pieces outside in a cardboard box, and did a couple of layers of spray paint.
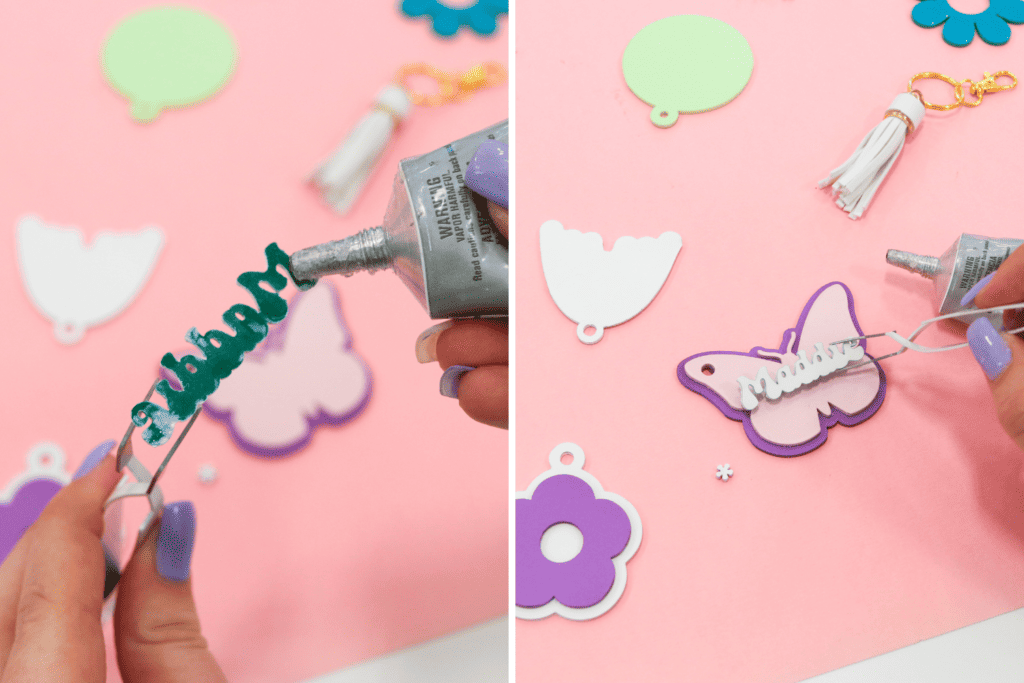
When all your pieces are dried, it’s time to assemble the keychains. To attach the pieces, I used E6000 craft adhesive- which I found is best for acrylic materials- and a pair of tweezers to help glue the smaller pieces into place.
Finally, add the keychain by using a pair of needle-nose pliers and grab a split key ring and keychain.

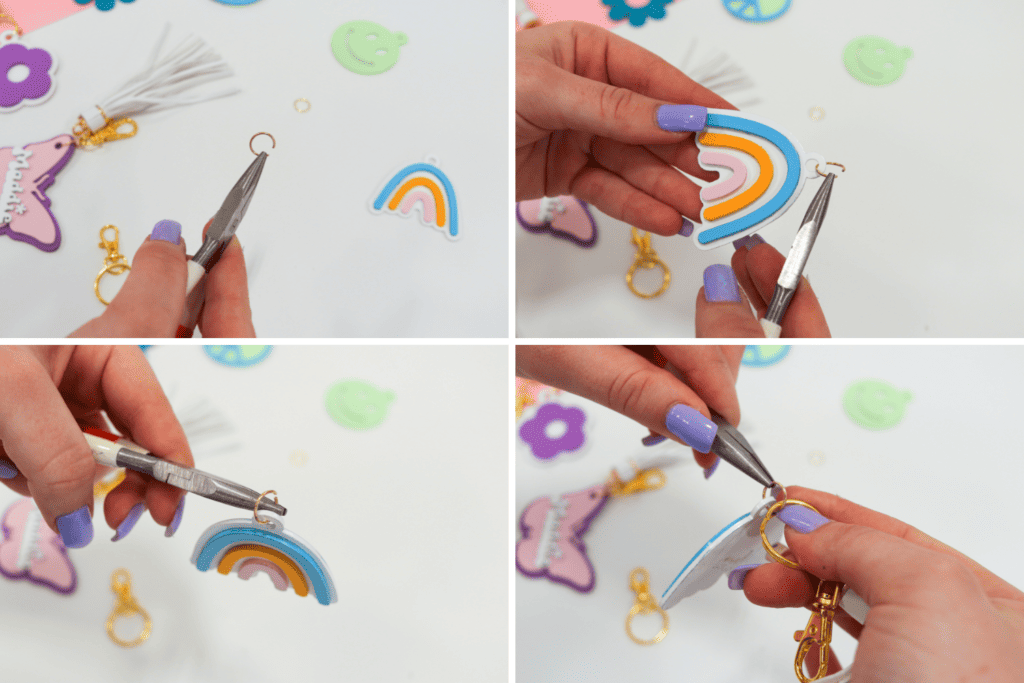
There you have it. An adorable retro keychain!
Check out more of my Glowforge Projects Here!
Check out Glowforge's website here to learn more about their machines and visit the community posts.
Save this blog post to your favorite board on Pinterest Here.
Leave a Reply