Sew a Curved Zipper Pouch That’s Fully Lined With This Step-By-Step Photo Tutorial, Free Pattern, and Video.
We're big Crayola fans in our home! So it should come as no surprise that every time we make a craft run we always make a point to stop on the kids crafting aisle and pick up something fun.
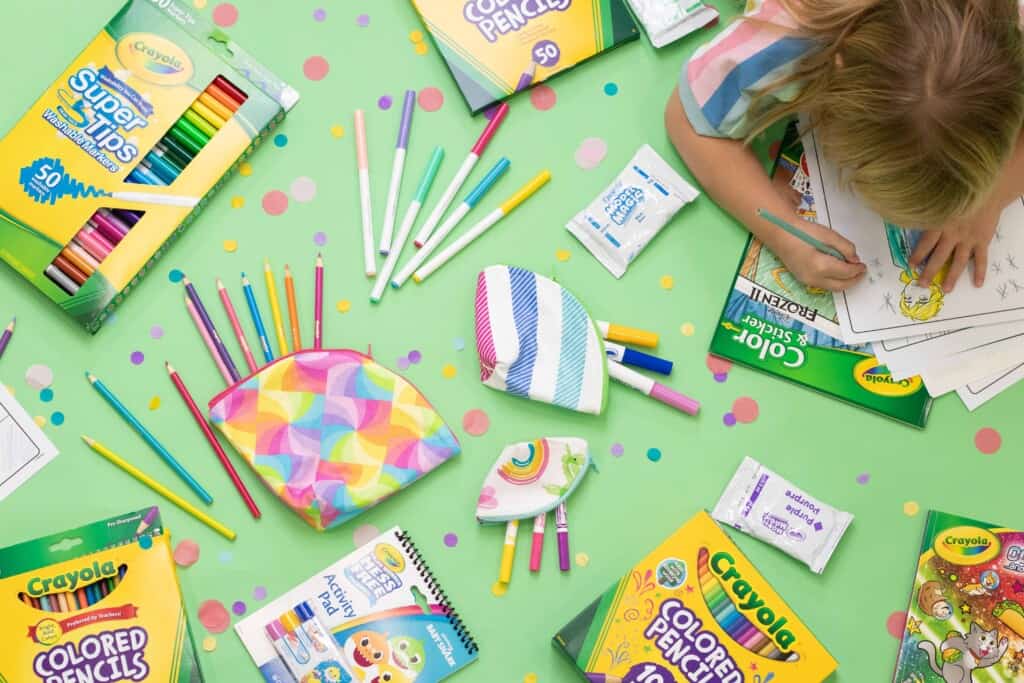
As a mother, I'm a big believer in supporting my children's creativity, and Crayola products are the perfect way to do that. We keep a craft room well stocked with crayons, markers, coloring pencils, paints, and modeling clay.
We spend more than our fair share of time driving from one place to another with three little kids. One of my kid's favorite car ride activities is coloring. They each keep a coloring book and markers or crayons in the car.
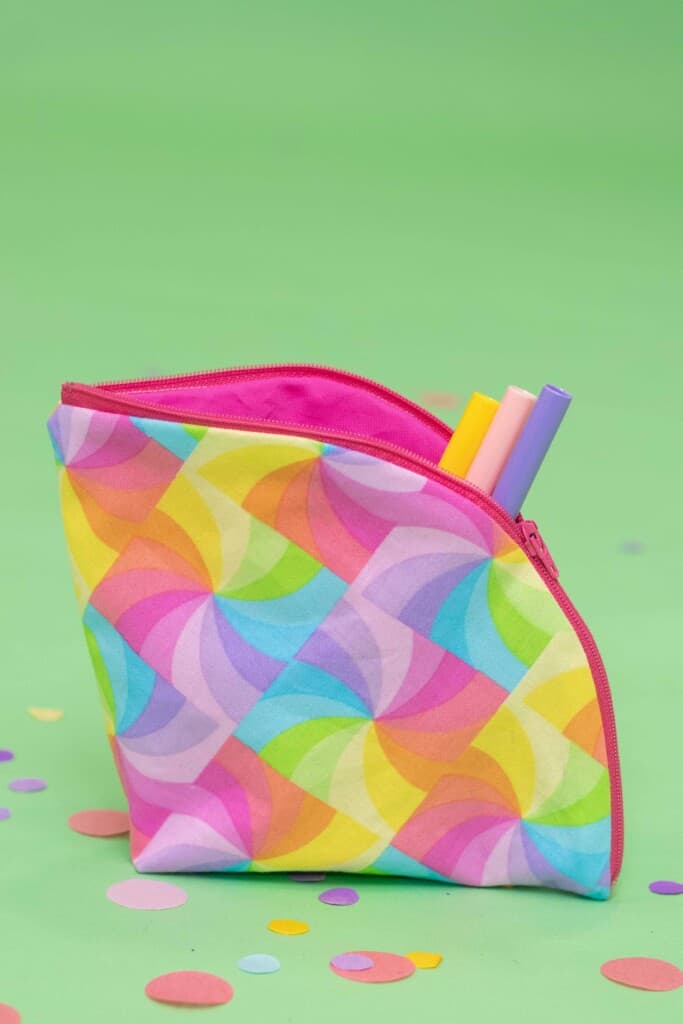
After a few too many crayons ended up on the floor where they were getting stepped on and broken, I decided to make a cute little pouch to store them.
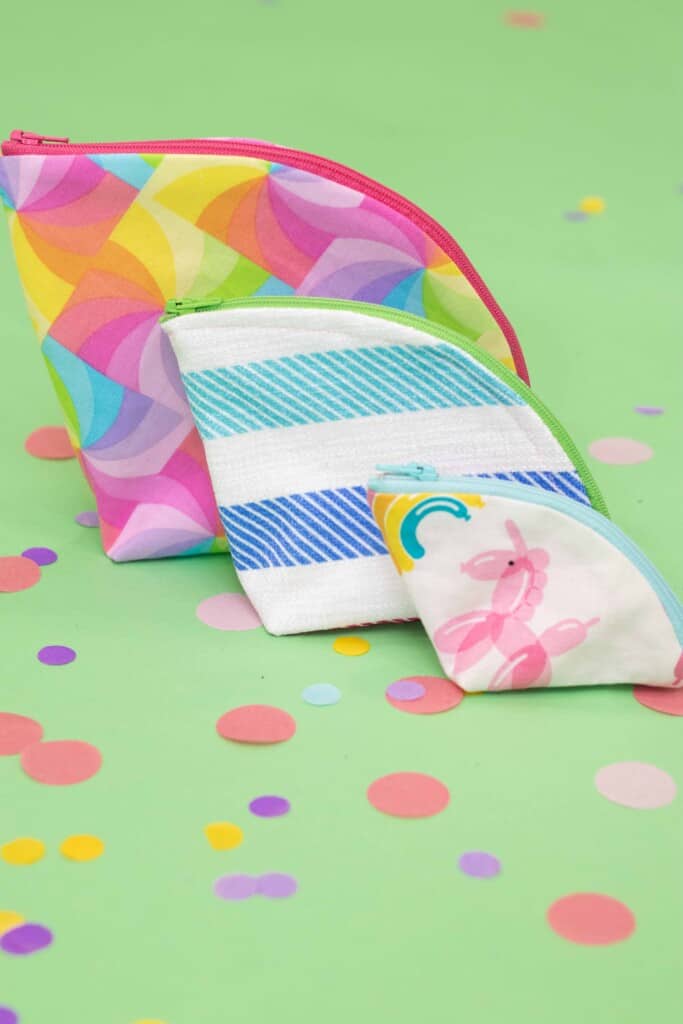
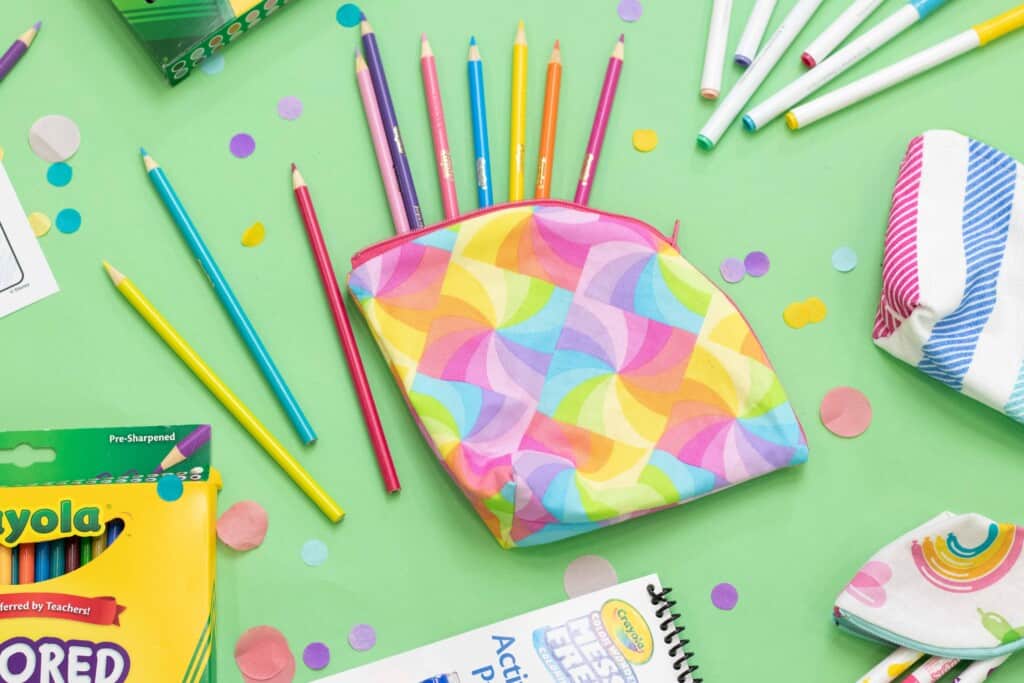
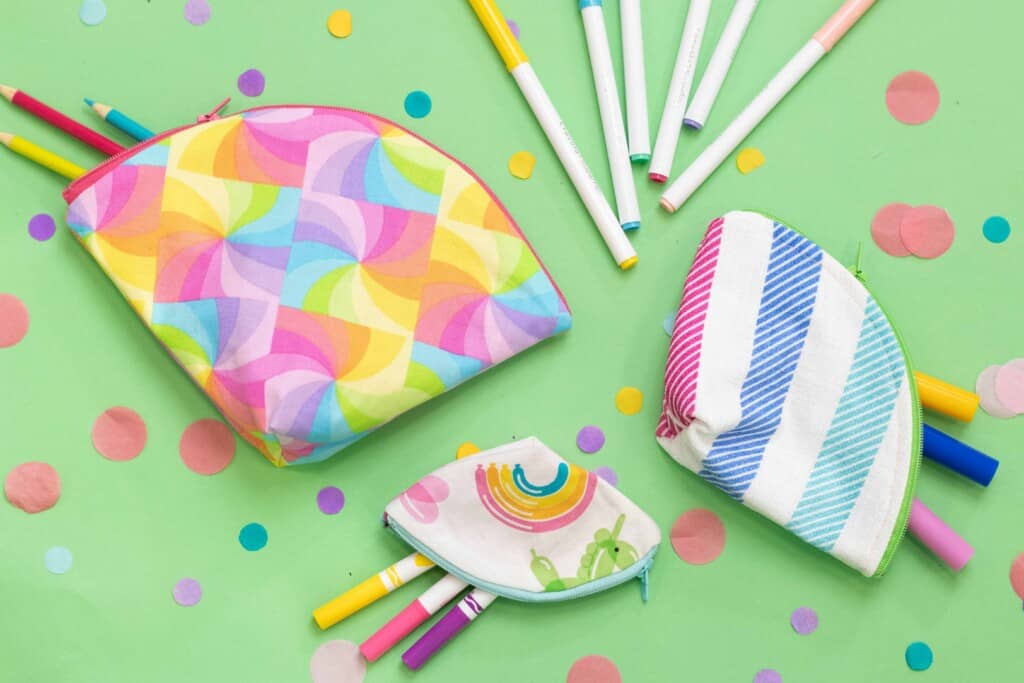
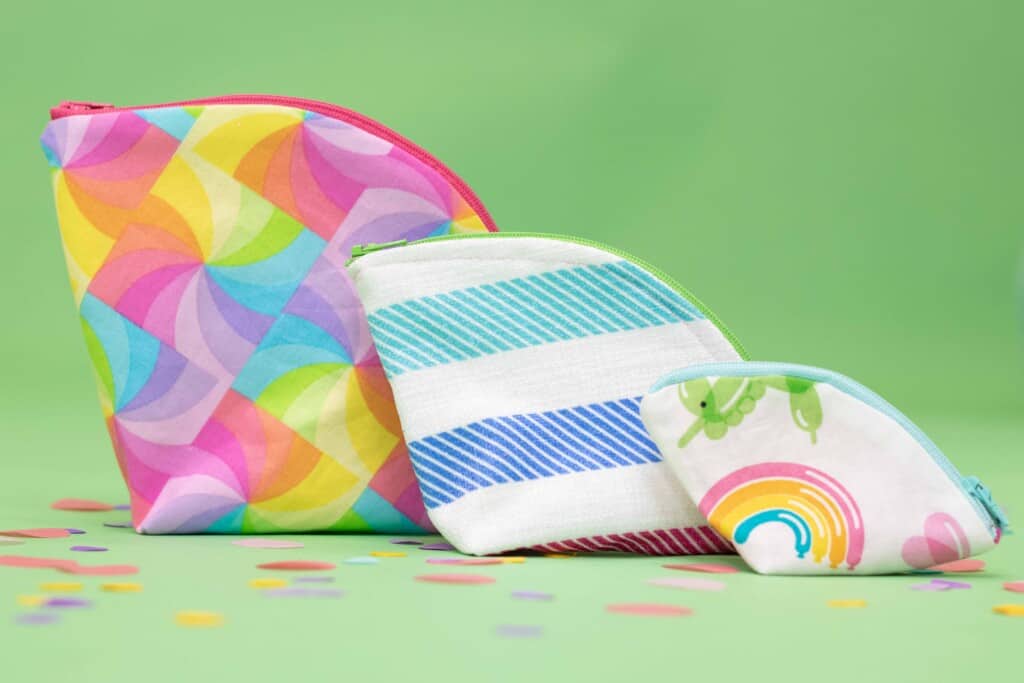
Today, I'm sharing this pouch with you in five different sizes to store all of your crayons, markers, coloring pencils, and more! It's perfect for transporting coloring supplies or for keeping them organized at home.
They also make great gifts! Sew it in your child's favorite character print for a bag they are sure to love!
This curved pouch is the perfect scrap buster and only takes 1/3 of a yard. It also fits perfectly on a fat quarter.
If you're looking for some great Crayola crafting supplies, click here!
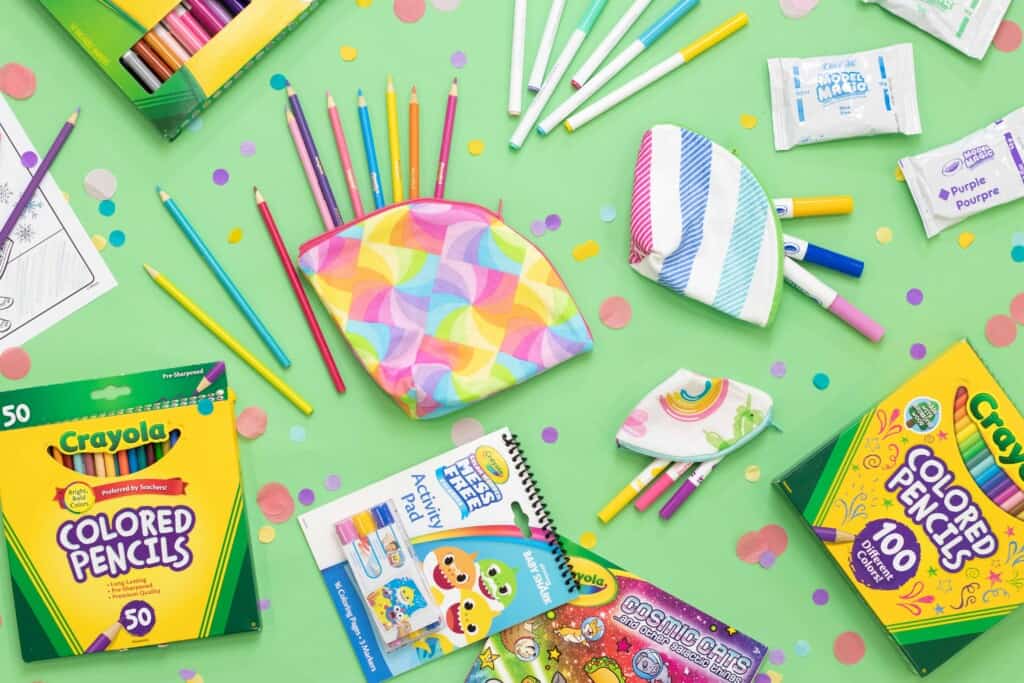
Table of Contents
Want to learn how to make even MORE fabric bags?
Get 11 different bag patterns and gain access to a comprehensive collection of bag patterns and tutorials my All The Bags 150+ page Ebook by clicking here.
Curved Zipper Pouch Supplies
Shop my favorite sewing supplies here!
- 1/3 Yard Woven Fabric for Main Fabric
- 1/3 yard Woven Fabric (Lining)
- 1/3 Yard Interfacing
- 12" Zipper (12", 9" or 6" depending on pouch size)
- Sewing Machine
- Scissors or Rotary Cutter & Mat
- Thread
- Pins
- Iron & Ironing Board
- Sewing Machine Needle
- Fabric Pen or Chalk
- Printer
- Printing Paper
- Tape
Why Shop Through My Links?
When you shop through my affiliate links, it doesn't cost you anything extra, but it helps me out in a big way! I earn a small commission from those purchases, and that support allows me to continue creating and sharing free tutorials and patterns for you. Thank you so much for helping me keep this creative community going!
Click Here to Download the Free Curved Zipper Pouch Pattern

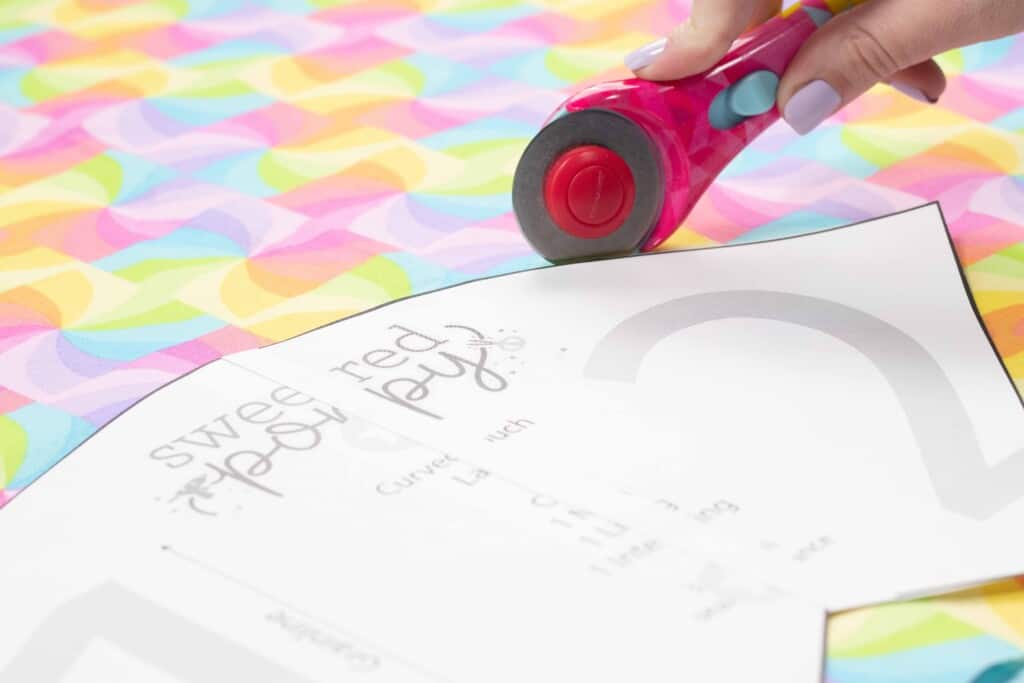
Step #1: Print the Curved Zipper Pouch Pattern
Download the pattern to your computer and print the pattern at 100% with no scaling.
Download the curved coin purse pattern and print it out.
Print off the pattern on cardstock so that it will last for multiples uses.
Step #2: Cut Pattern and Fabric
The curved zipper pouch features five different sizes.
The X-small is perfect for coins, rings, headphones, and jewelry. The small and medium are great for bathroom necessities, lip gloss, and travel-sized toiletries. The large and x-large easily fit pens, pencils, markers, and more!
Cut out your pouch pattern in your desired size.
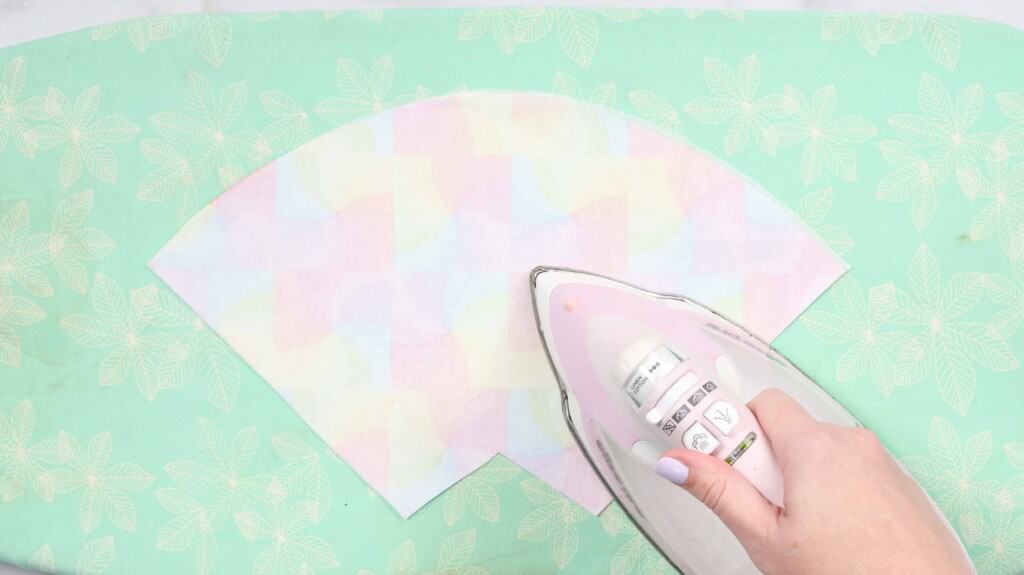
Iron the fabric that you will be using for your pouch.
Lay it out on a flat surface and fold the fabric in half to create two layers.
Place the pattern piece on top of the fabric aligning the grainline marking with the grainline of the fabric. The grainline runs parallel to the selvage (the finished edge) of the fabric.
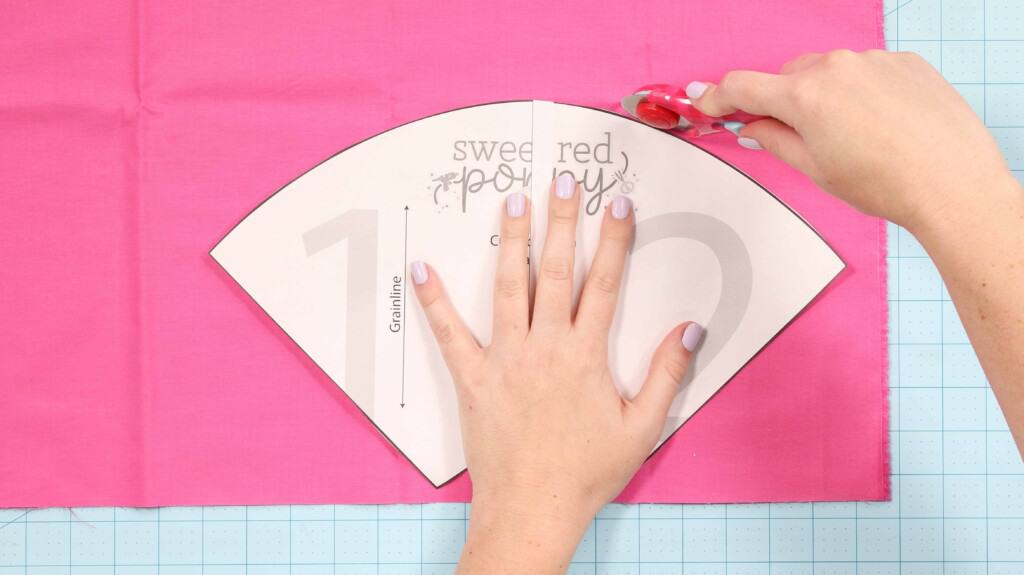
Pin the fabric in place and cut around the outside of the pattern pieces.
Main - Cut 2 of Woven Fabric
Lining - Cut 2 of Woven Fabric
Interfacing - Cut 2 Interfacing

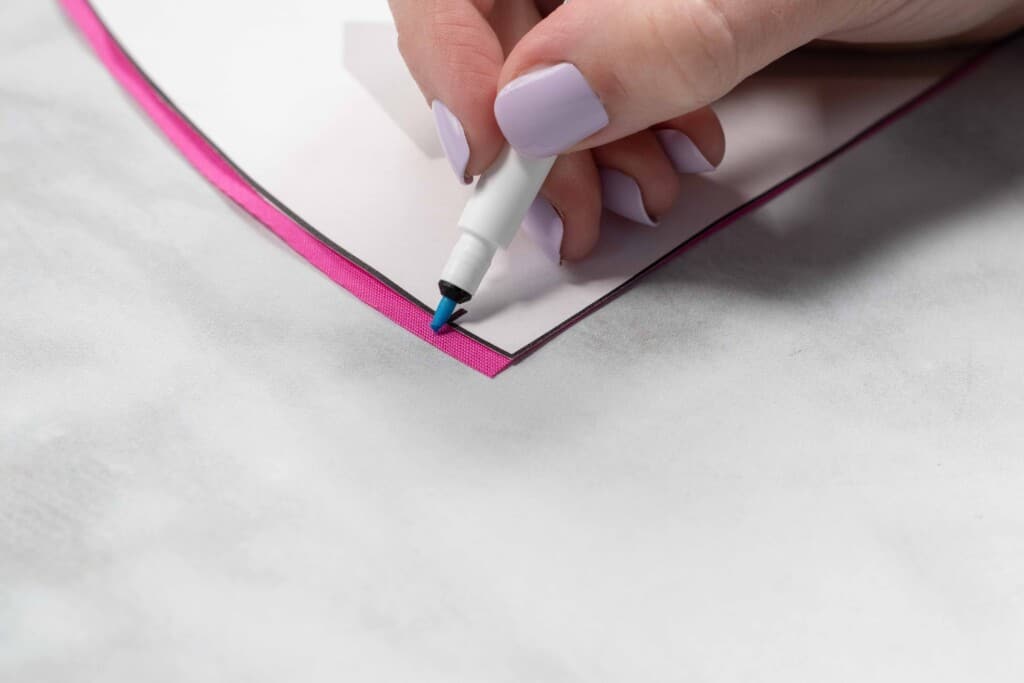
Before removing the paper pattern from the fabric mark all notches using a fabric pen or chalk. The notches are marked on the pattern pieces with a straight line and will help you to correctly align the zipper in the following steps.
Step #3: Attach Interfacing to Main Fabric
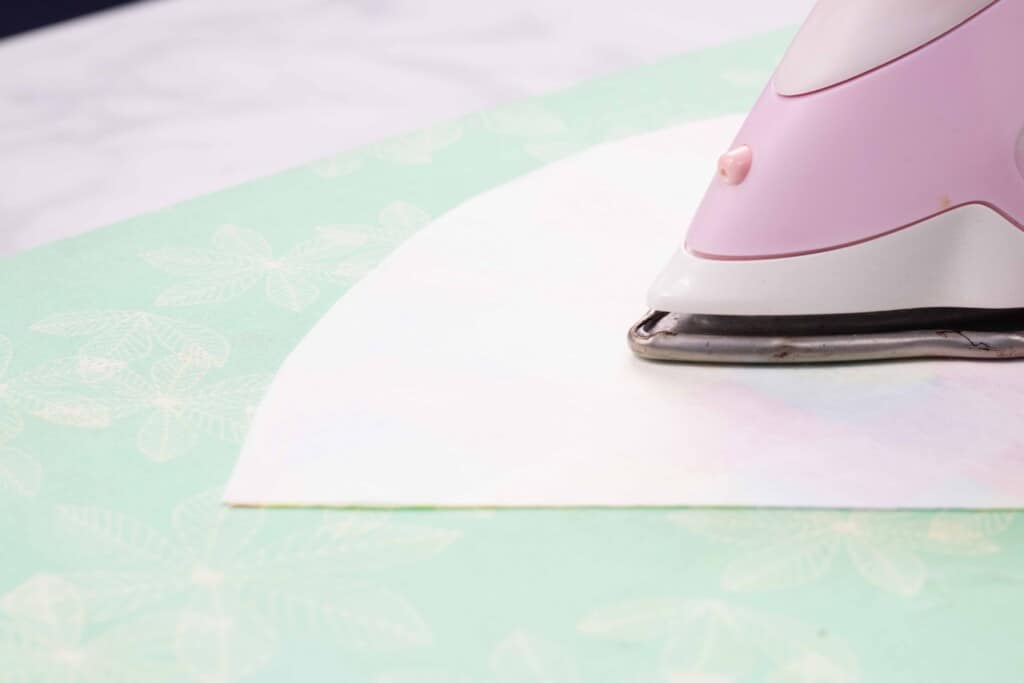
Take main curved zipper pouch pieces and iron-on interfacing to the wrong side of both pieces. You'll want to refer to the instructions that come with your interfacing for this step to make sure it's applied correctly.
Make sure to turn off the steam on your iron for the very best results!
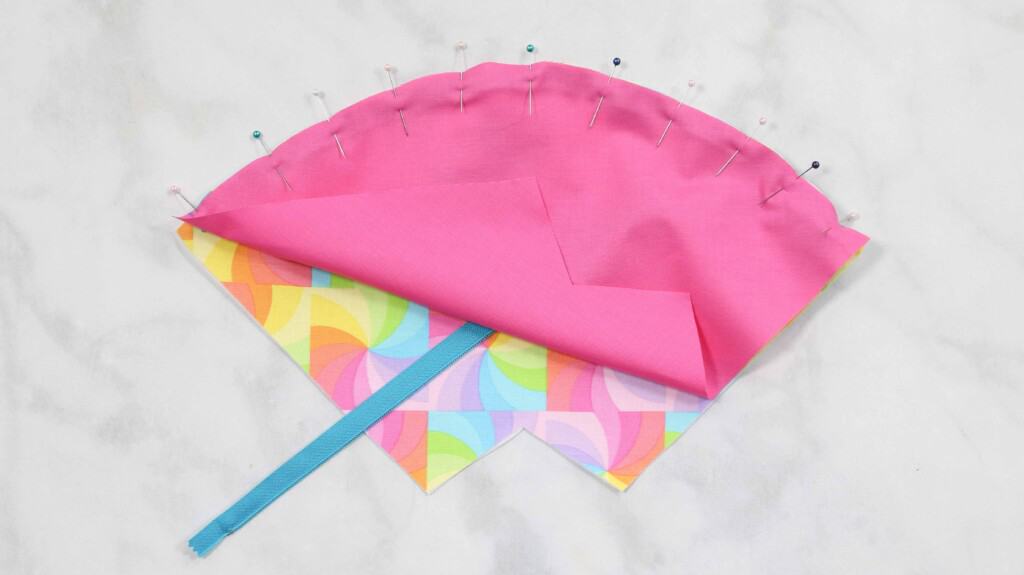
Step #4: Attach Zipper to Main and Lining
Lay one main fabric piece out in front of you on a flat surface with the right side facing upwards. Align the zipper stop to the left mark you made. The right side of the zipper should be facing the right side of the fabric.
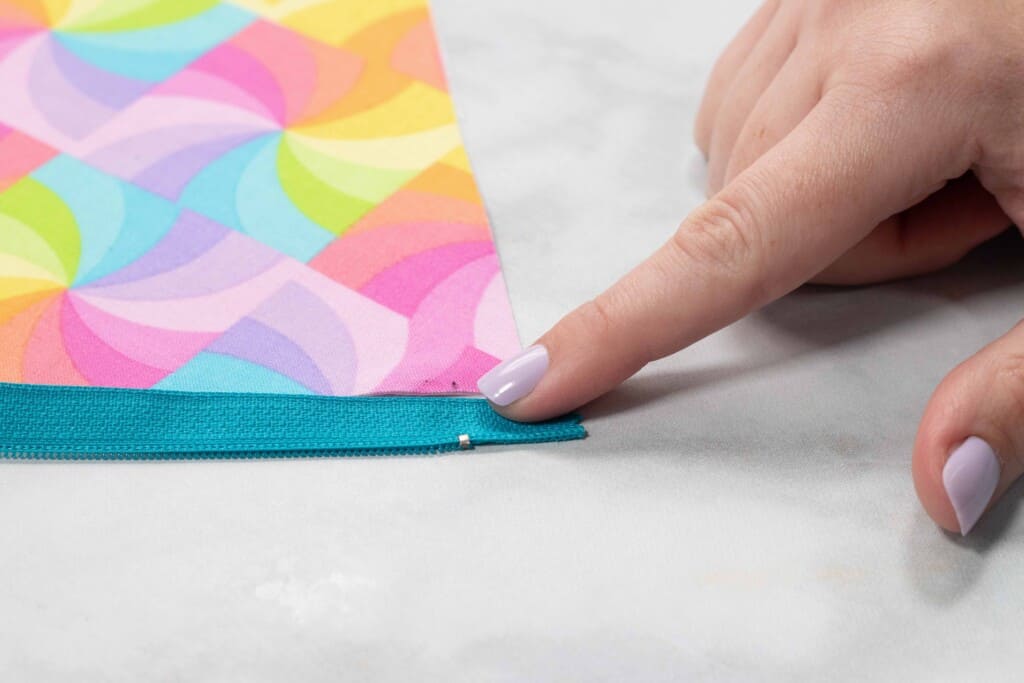
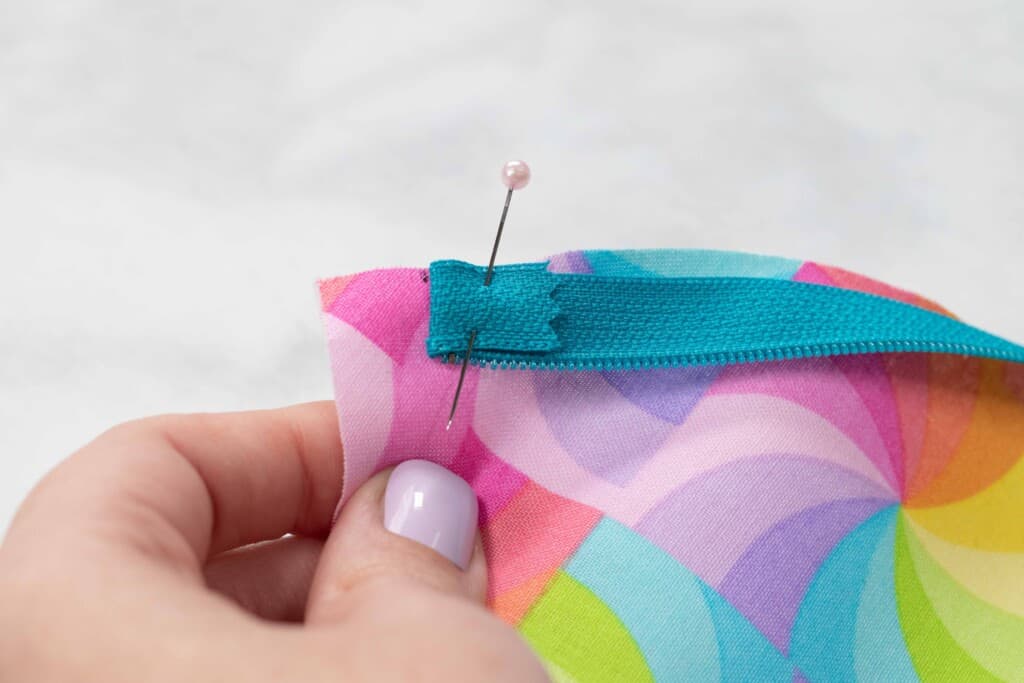
Fold the top of the zipper (above the zipper stop) over and pin in place.
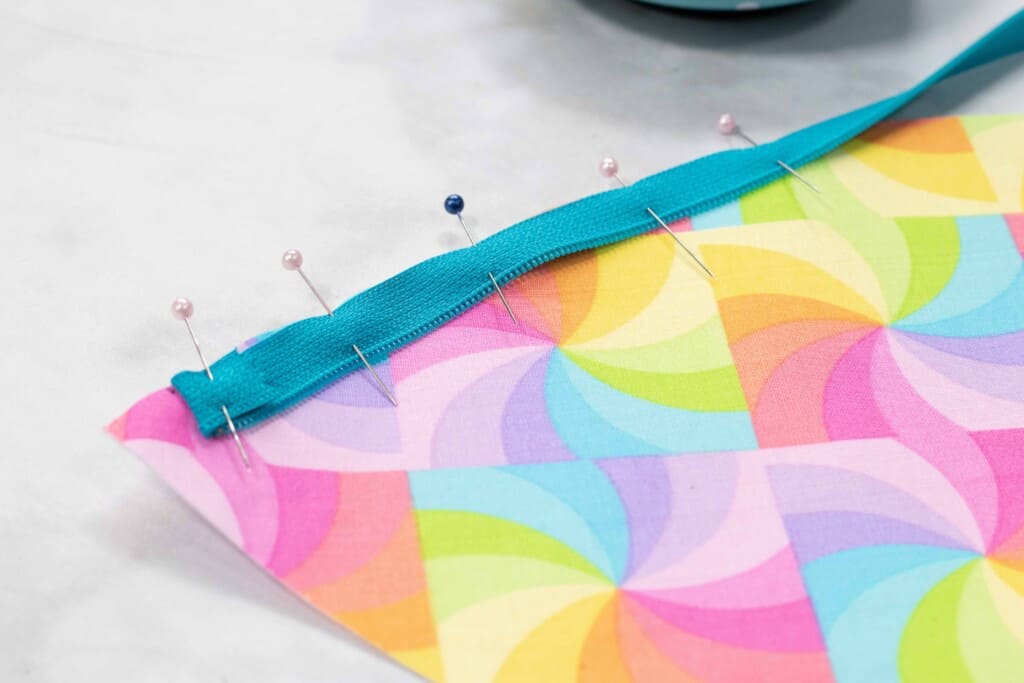
Follow the curve of the pouch, pinning the zipper as you go.
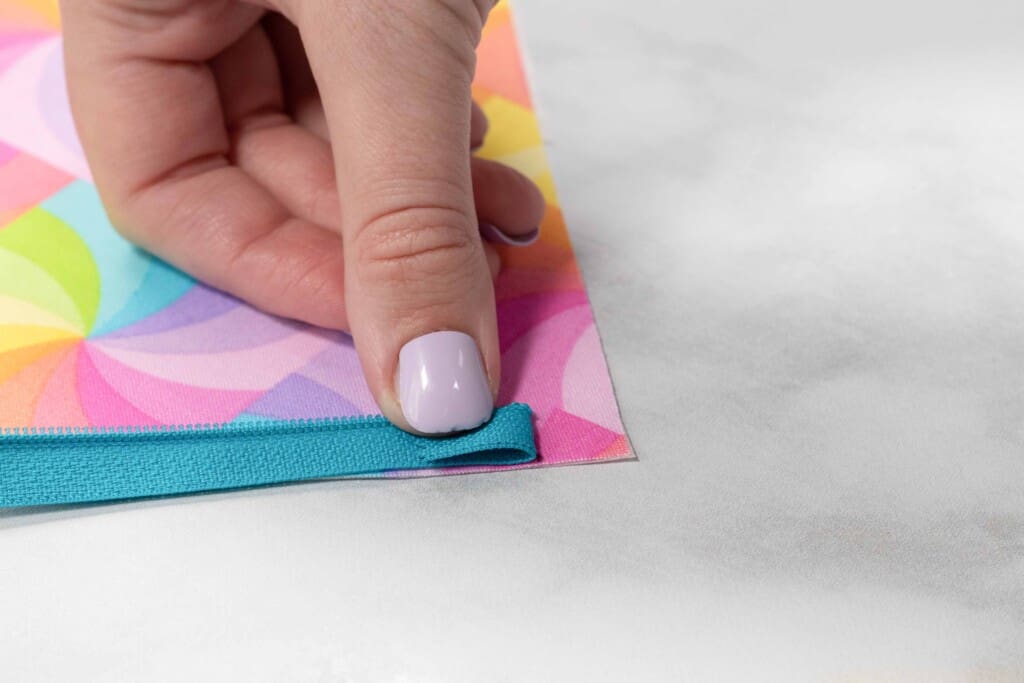
When you get to the other mark, fold the zipper over and pin in place. Folding the zipper will reduce the bulk along the seam allowance.
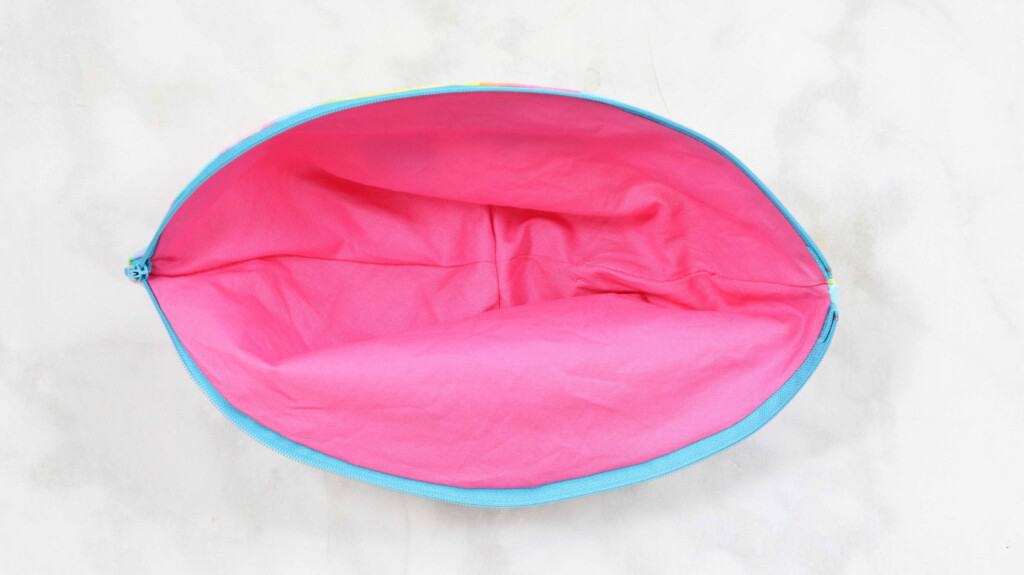
Lay lining right side down on top of the main fabric sandwiching the zipper in between the main and lining.
Carefully pin the lining to the main and zipper making sure the raw edges are aligned.

Step #5: Sew Zipper
Using a 3/8"(1cm) seam allowance and using a zipper foot, sew the zipper along the curved edge.
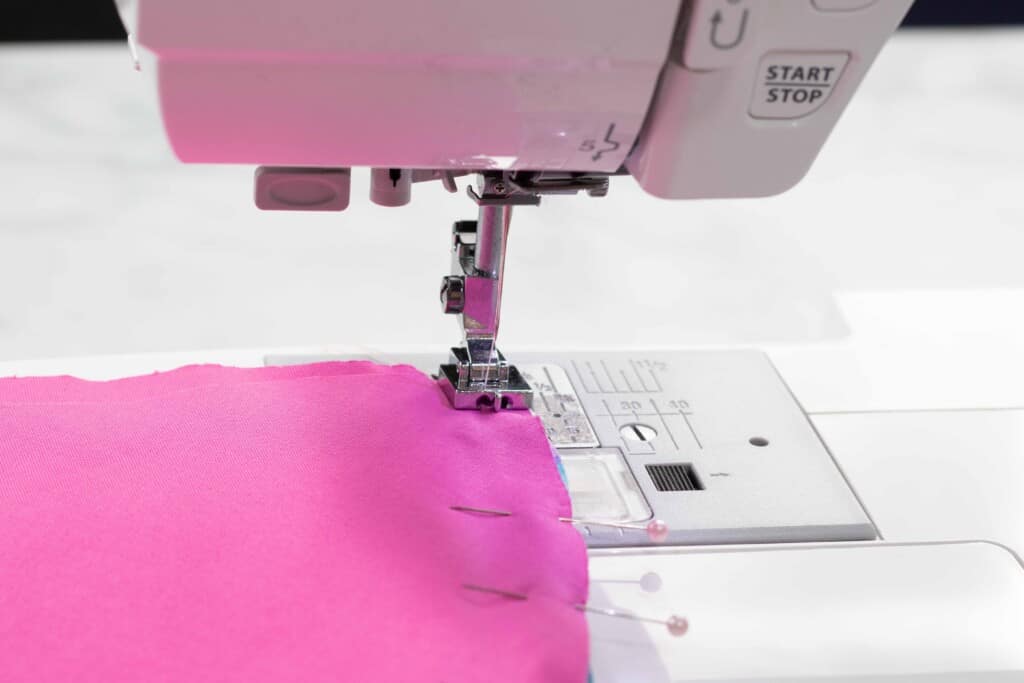
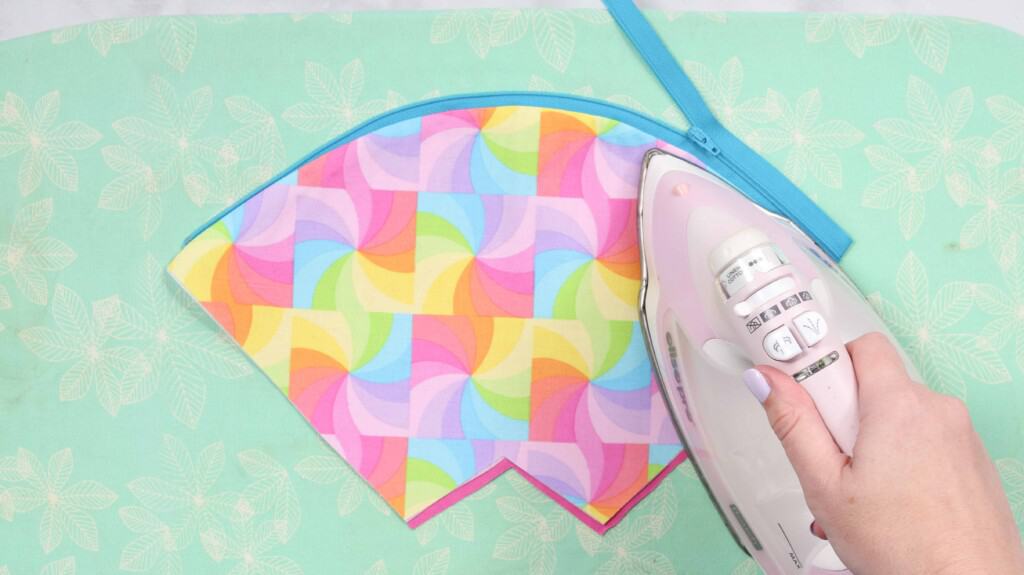
Turn the pouch right side out and press the zipper seam.
Repeat this process by placing the zipper on the other main and lining making sure to put the zipper start on the opposite side of the main so that when you zip it closed, the main will be with main and lining with lining.
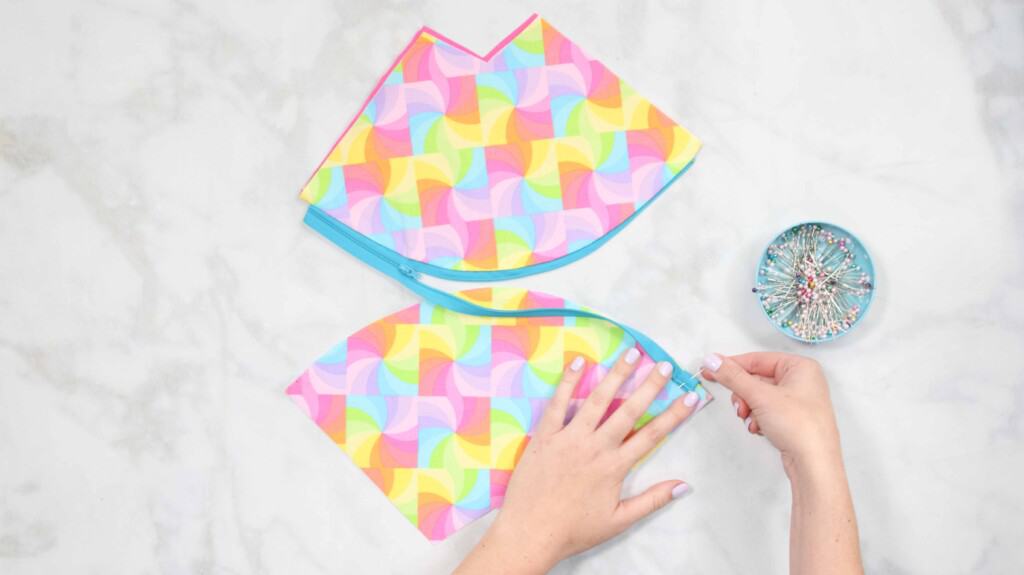
Sew the zipper.

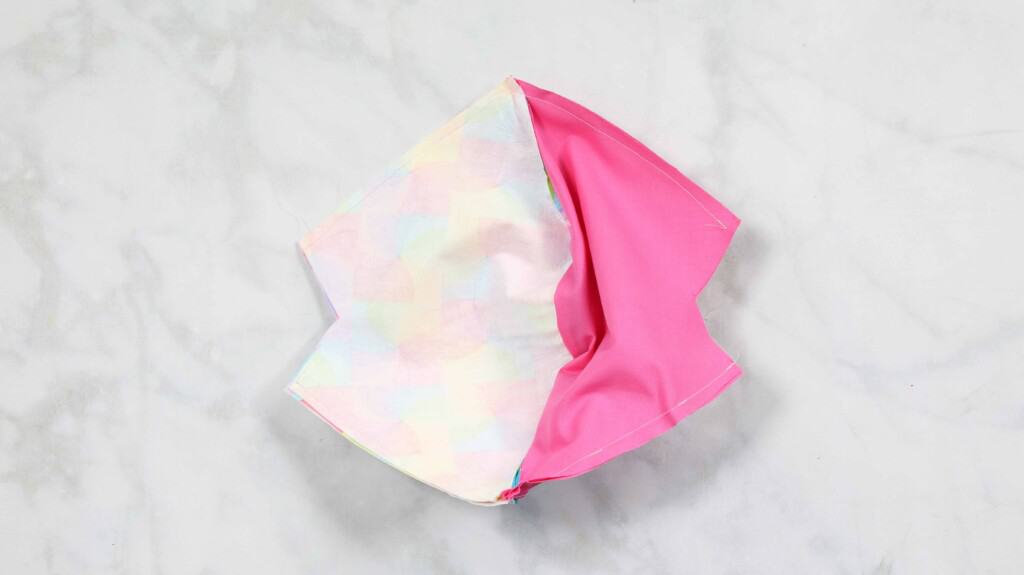
Step #6: Sew Sides of Pouch
Leave the zipper open and lay the pouch out in front of you with the right sides facing upward.
With plenty of steam, iron along the seam allowances.

Fold the zipper pouch in half to align the main right sides together. Pull the lining away from the main fabric and align the right sides of the lining fabric together.

Pin the long edges together (don't pin the short sides) leaving a 2" opening along the lining for turning.
Sew the pouch along the pinned seams.
Step #7: Sew Box Seams
Push the box seams together and pin them in place. This seam will give the pouch a boxy effect so it can stand on it's own.
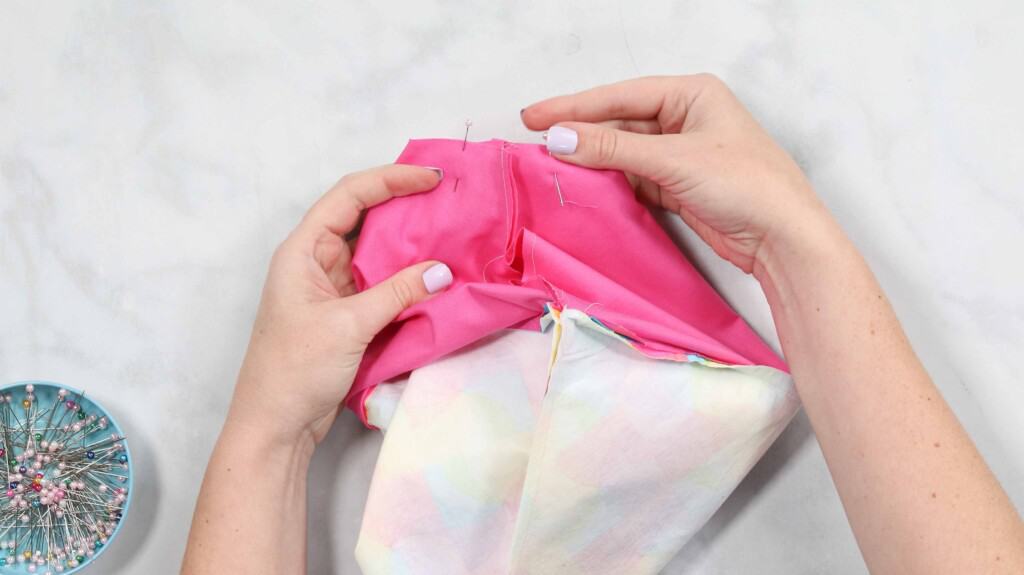
Sew the seams using a 3/8"(1cm) seam allowance.
Repeat this step with the other box seam.
Turn the pouch right side out through the opening in the lining.
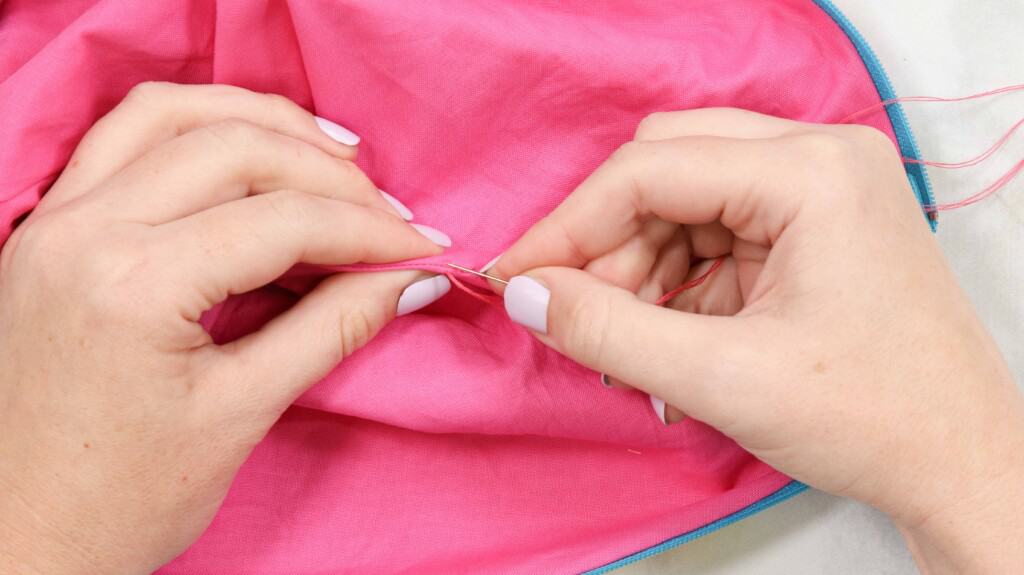
Step #8: Slip Stitch Opening Closed
Using a needle and thread, slip stitch the opening closed.
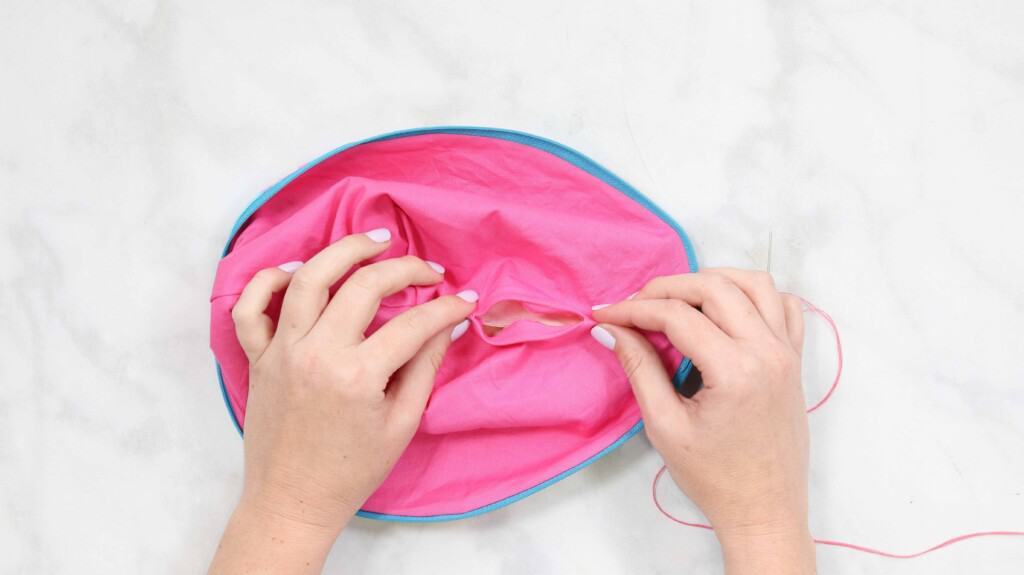
Push the lining fabric into the main and pull the zipper closed!
Give the pouch a good pressing with plenty of steam.
You're finished!
Don't forget to order or pick up all of the supplies for this tutorial from your local craft store.
Join my crafting and sewing Facebook group where you can show us what you’re making, ask questions, and learn from others!
Looking for even more FREE sewing patterns?
Check out my Zippered Pouch, Foldover Clutch, and Laminated Zipper Pouch.
Służysz społeczności blogowej, pięknie przy tym składasz frazy, przyjmij najszczersze wdzięczności moich wyrazy 🙂
http://accessbridgepharmacy.com/# AccessBridge
AccessBridge: AccessBridge - AccessBridge
AccessBridge Pharmacy: AccessBridge Pharmacy - AccessBridge
best online ed treatment [url=https://edmedscoupon.com/#]Ed Meds Coupon[/url] us pharmacy no prescription
pharmacy websites https://pharmrate.shop/# foreign online pharmacy
erectile dysfunction drugs online: Ed Meds Coupon - online pharmacy discount code
pet prescriptions online [url=https://petcanadadirect.com/#]online pet pharmacy[/url] Pet Canada Direct
medicine online order https://petcanadadirect.com/# Pet Canada Direct
Pharm Rate: Pharm Rate - buy drugs online
pills for erectile dysfunction online: Ed Meds Coupon - online pharmacy no rx
reputable online pharmacy no prescription https://petcanadadirect.shop/# Pet Canada Direct
where to buy erectile dysfunction pills [url=https://edmedscoupon.shop/#]cheap ed medicine[/url] best online pharmacy no prescription
Your article helped me a lot, is there any more related content? Thanks! https://www.binance.com/sl/register?ref=GQ1JXNRE
online erectile dysfunction medication: Ed Meds Coupon - best rx pharmacy online
online pharmacy discount code https://pharmrate.com/# Pharm Rate
Pharm Rate: legal online pharmacies in the us - Pharm Rate
overseas online pharmacy [url=https://pharmrate.shop/#]online pharmacy no rx[/url] medicine online order
buy ed meds: Ed Meds Coupon - best rx pharmacy online
no prescription needed pharmacy https://pharmrate.com/# Pharm Rate
vet pharmacy: Pet Canada Direct - online pet pharmacy
best rx pharmacy online: Pharm Rate - shop medicine online
online vet pharmacy [url=http://petcanadadirect.com/#]Pet Canada Direct[/url] Pet Canada Direct
online pharmacies https://petcanadadirect.shop/# Pet Canada Direct
low cost ed pills: Ed Meds Coupon - buy online medicine
http://edmedscoupon.com/# cheapest ed treatment
worldwide pharmacy: worldwide pharmacy online - Pharm Rate
discount pet meds [url=https://petcanadadirect.com/#]Pet Canada Direct[/url] Pet Canada Direct
online pharmacy without scripts http://edmedscoupon.com/# online ed treatments
pet pharmacy online: Pet Canada Direct - online pet pharmacy
online pharmacies http://pharmrate.com/# online pharmacies
best online ed treatment: cheapest ed treatment - best online pharmacy no prescription
antibiotics cheap [url=https://antibiotics.cheap/#]otc medicine[/url] over the counter antibiotics
prescription antibiotic: antibiotics cheap - get antibiotics quickly
https://stromectol.reviews/# stromectol reviews
get antibiotics without seeing a doctor [url=https://antibiotics.cheap/#]antibiotics cheap[/url] antibiotics cheap
stromectol ivermectin tablets: stromectol reviews - stromectol tablets for humans
https://semaglutide.life/# rybelsus vs tirzepatide
semaglutide covered by insurance: semaglutide life - medicine online order
semaglutide tablets price [url=https://semaglutide.life/#]semaglutide life[/url] how to take rybelsus 14 mg
https://antibiotics.cheap/# antibiotics cheap
stromectol reviews: stromectol reviews - ivermectin buy online
https://semaglutide.life/# list of foods to eat while on semaglutide
stromectol reviews [url=https://stromectol.reviews/#]stromectol over the counter[/url] ivermectin lice
stromectol reviews: stromectol online canada - ivermectin 12
can you get rybelsus over the counter: taking rybelsus every other day - international pharmacy
https://semaglutide.life/# semaglutide and pregnancy
rybelsus mexico precio: does semaglutide suppress appetite immediately - online pharmacy no rx
who makes rybelsus [url=https://semaglutide.life/#]max dose semaglutide[/url] rybelsus walmart
https://antibiotics.cheap/# antibiotics cheap
antibiotics drugs: antibiotics cheap - over the counter antibiotics
semaglutide vs dulaglutide [url=https://semaglutide.life/#]semaglutide life[/url] does rybelsus cause constipation
https://antibiotics.cheap/# antibiotics cheap
rybelsus 3: semaglutide life - reputable online pharmacy no prescription
https://stromectol.reviews/# stromectol reviews
how long do rybelsus side effects last: semaglutide life - top online pharmacy
over the counter antibiotics [url=https://antibiotics.cheap/#]over the counter antibiotics[/url] antibiotics cheap
https://antibiotics.cheap/# over the counter antibiotics
over the counter antibiotics: over the counter antibiotics - over the counter antibiotics