• Skip to primary navigation
  • Skip to main content
  • Skip to primary sidebar
Sweet Red Poppy logo
  • Cricut
    • Free SVG Files
    • Paper Flowers
    • Mandala
    • Iron-On
    • Vinyl
    • Maker
    • Explore Air 2
    • Joy
  • Sewing
    • Baby
    • Kids
    • Accessories
    • Christmas
    • Blankets
    • Womens
    • Learn to Sew Tips & Tricks
    • Face Masks
  • DIY Crafting
    • Paint
    • Paper
    • Food
    • Kids
  • Holiday Crafts
    • Valentine’s Day
    • Easter
    • 4th of July
    • Halloween
    • Thanksgiving
    • Christmas
  • Books
    • Cricut Printed Book
    • Cricut E-Book
    • Cricut Joy Printed Book
    • Cricut Joy E-Book
    • Sewing Printed Book
    • Sewing E-Book
    • Face Mask E-Book
    • Mandala E-Book Bundle
    • Mandala E-Book - Inkscape
    • Mandala E-Book - Adobe Illustrator
    • Mandala Printed Book - Inkscape
    • Mandala Printed Book - Adobe Illustrator
    • Baby Pattern E-Book
  • Courses
    • Cricut Course
    • Sewing Course
    • Serger Course
  • Shop
    • E-Books
    • Printed Books
    • Sewing Patterns
    • SVG Files
    • Baby Patterns
    • Subscribe to Emails
  • Search

Top Knot Headband Sewing Tutorial

Written by Kimberly Coffin · This post may contain affiliate links · 15 Comments

67.6K shares

If I haven't already told you, I'm a bit hair bow obsessed. If you need further proof just look here, here, here or here. Did I prove my point? 😉


Top Knot Headband Sewing Tutorial featured by top US sewing blog, Sweet Red Poppy
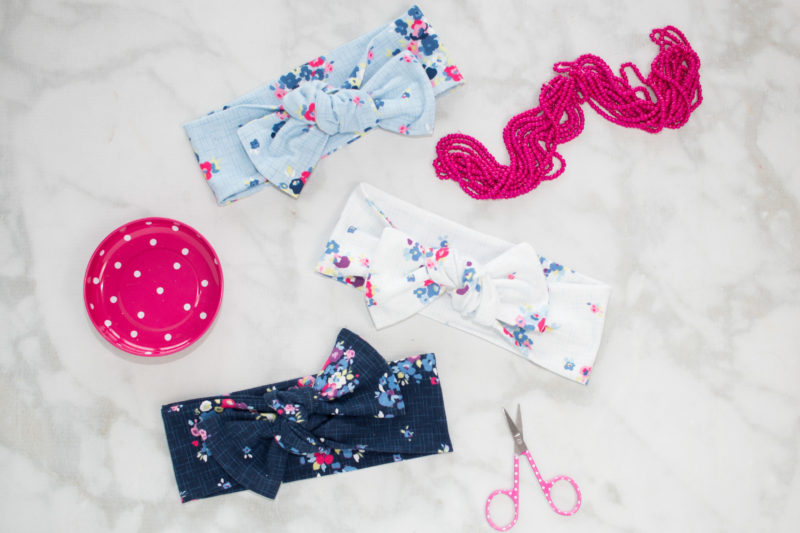
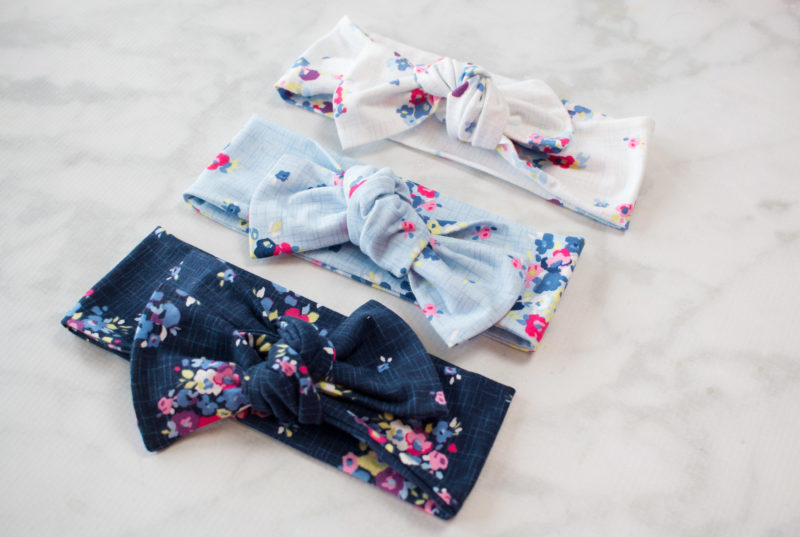
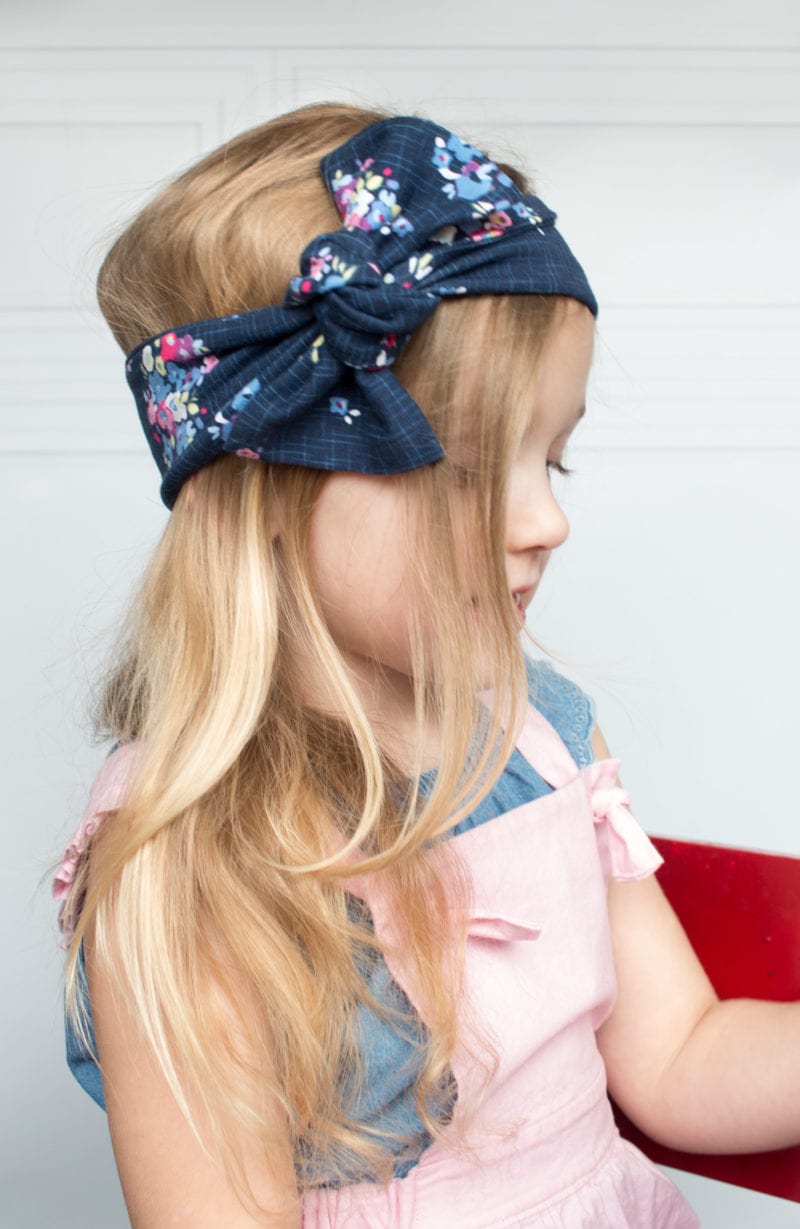
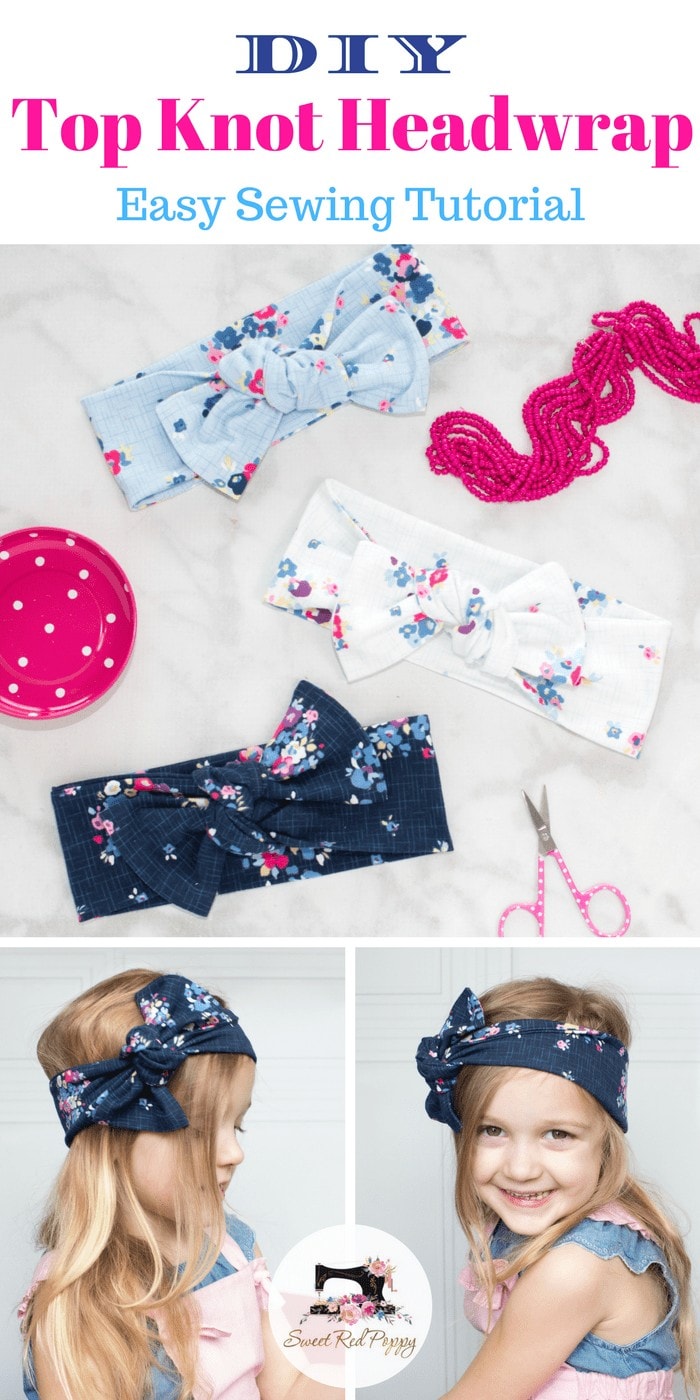
Well, since I'm on the bow train right now I figured, why not add another one to the mix? This Top Knot Headband is made of knit fabric. It's stretchy and can be made to fit a baby, child or adult.

I wear mine on days when I don't feel like doing my hair or I've gone one (or 3) too many days without rinsing my hair.

Top Knot Headband Sewing Tutorial featured by top US sewing blog, Sweet Red Poppy

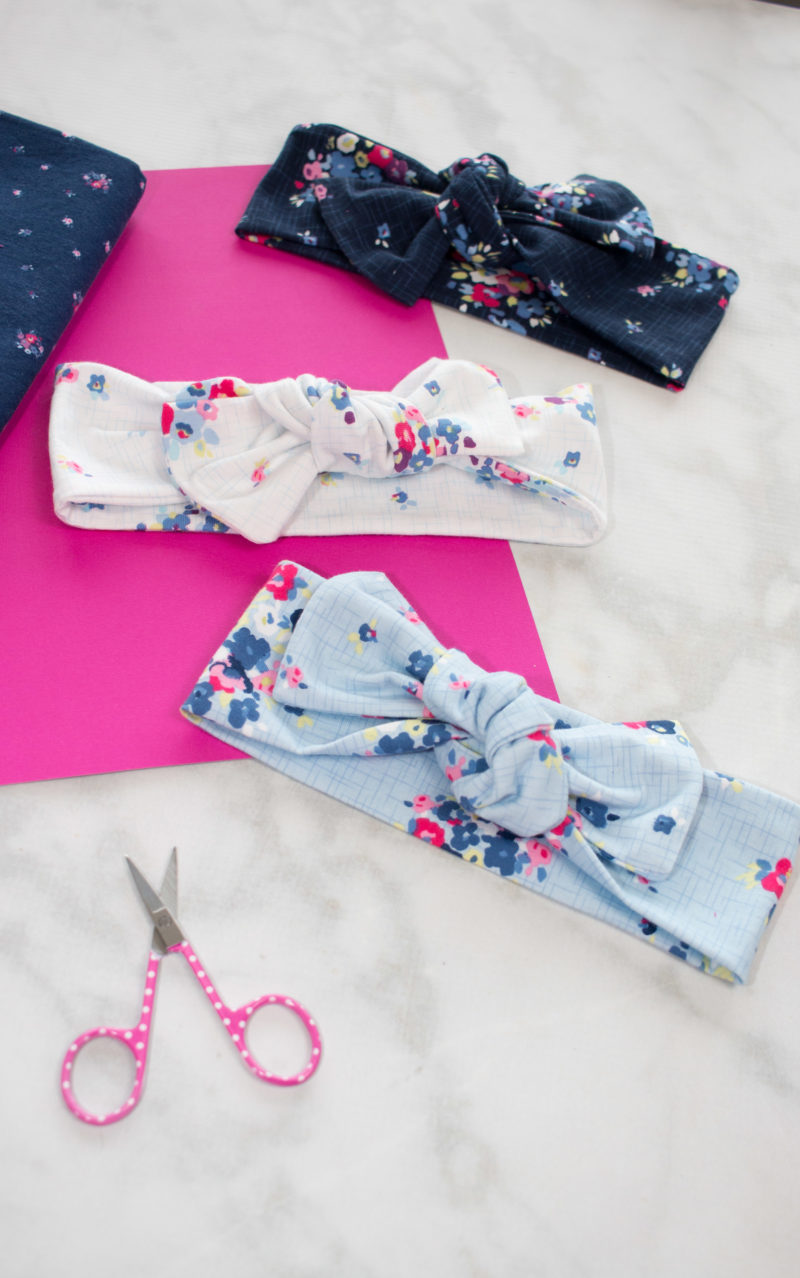
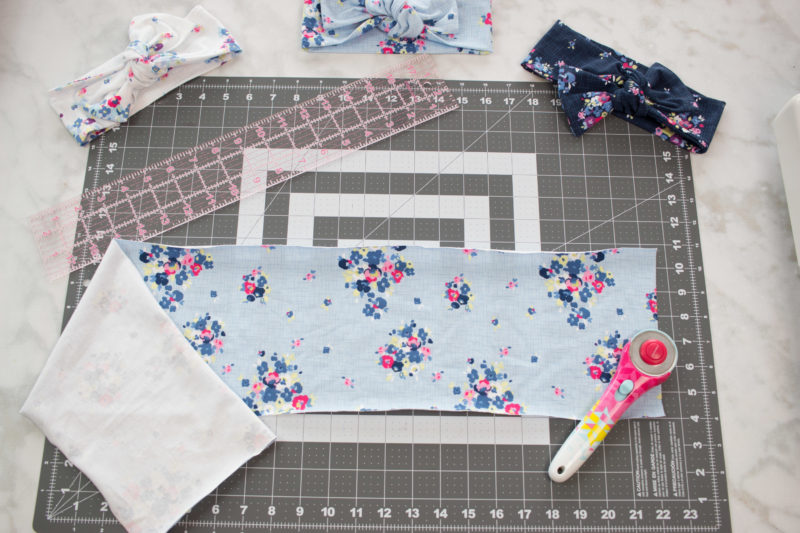
Blue Carolina is hands down my favorite fabric line I've ever sewn with, so you can only imagine my excitement when I saw that Riley Blake Designs had decided to print it on knit fabric!! It's like all my dreams suddenly came true! It took me all of two days before I cut into these beauties!

Supplies Needed for your Top Knot Headband:

1/4 Yard Knit Fabric
Thread
Sewing Machine
Thermoweb Heat N Bond Soft Stretch Lite
Scissors
 Top Knot Headband Sewing Tutorial featured by top US sewing blog, Sweet Red Poppy

Cutting Chart for your Top Knot Headband:

Infant 30" x 6"
Child 31" x 7"
Adult 32" x 7"
Top Knot Headband Sewing Tutorial featured by top US sewing blog, Sweet Red Poppy
Let's get started!

Cut the fabric with the greatest stretch going along the length of the fabric.
Fold the fabric in half with right sides together and pin or clip it in place

Top Knot Headband Sewing Tutorial featured by top US sewing blog, Sweet Red Poppy

Using a 1/2" seam allowance sew along the long edge, stop 1/2" from the end.
Raise the presser foot with the needle in the down position and pivot 90 degrees. Sew along the short end making sure to backstitch.


Top Knot Headband Sewing Tutorial featured by top US sewing blog, Sweet Red Poppy

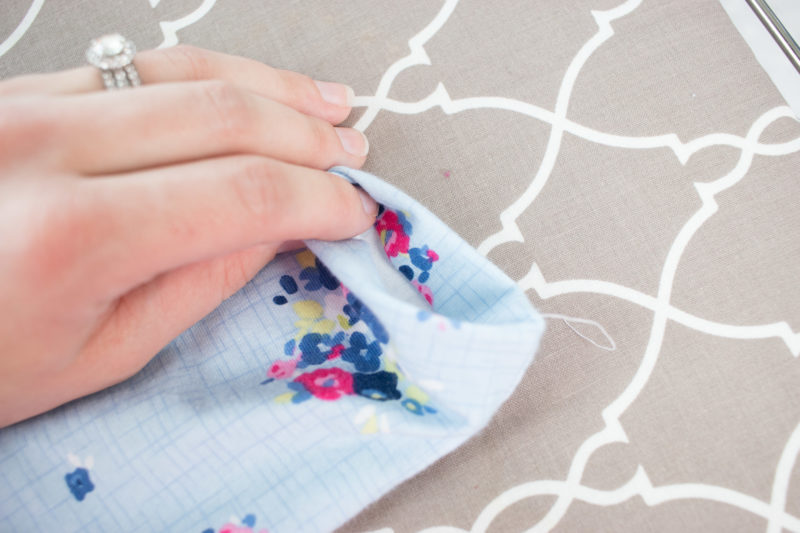
Turn the fabric right side out. Poke the corners out with a turning tool.

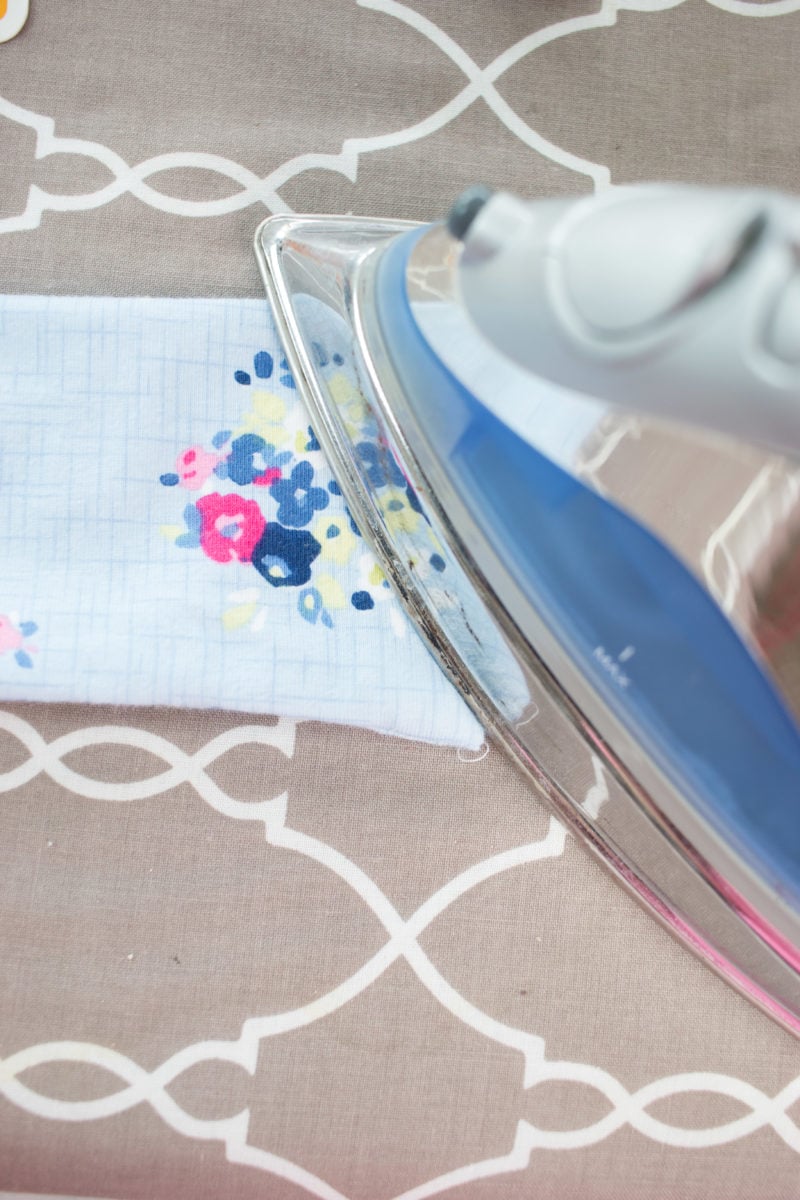
Press along the edges of the wrap.

I like to use the tips of my finger to roll the seam allowance back and forth until it comes all the way out.


Top Knot Headband Sewing Tutorial featured by top US sewing blog, Sweet Red Poppy

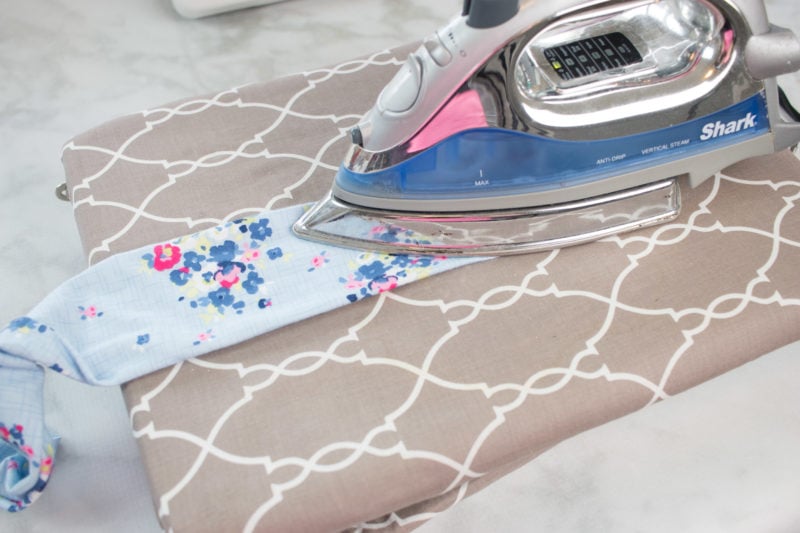
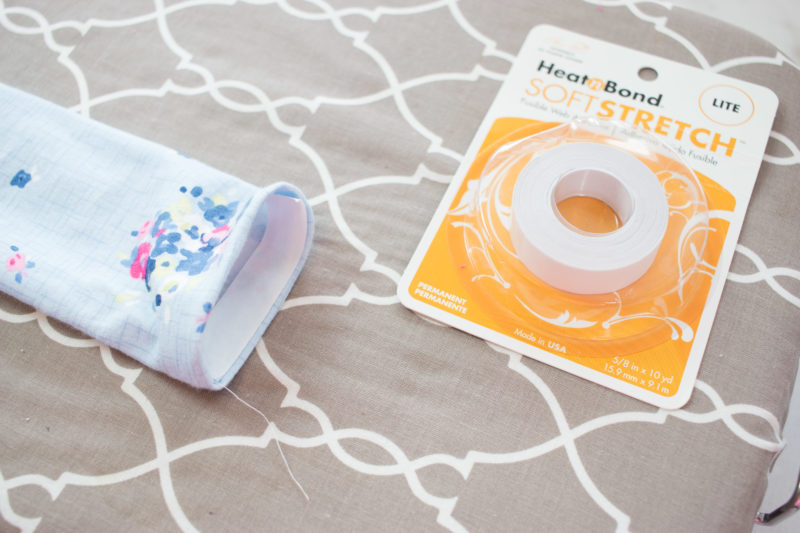
Turn under the raw edge 1/2 inch and press.

Top Knot Headband Sewing Tutorial featured by top US sewing blog, Sweet Red Poppy
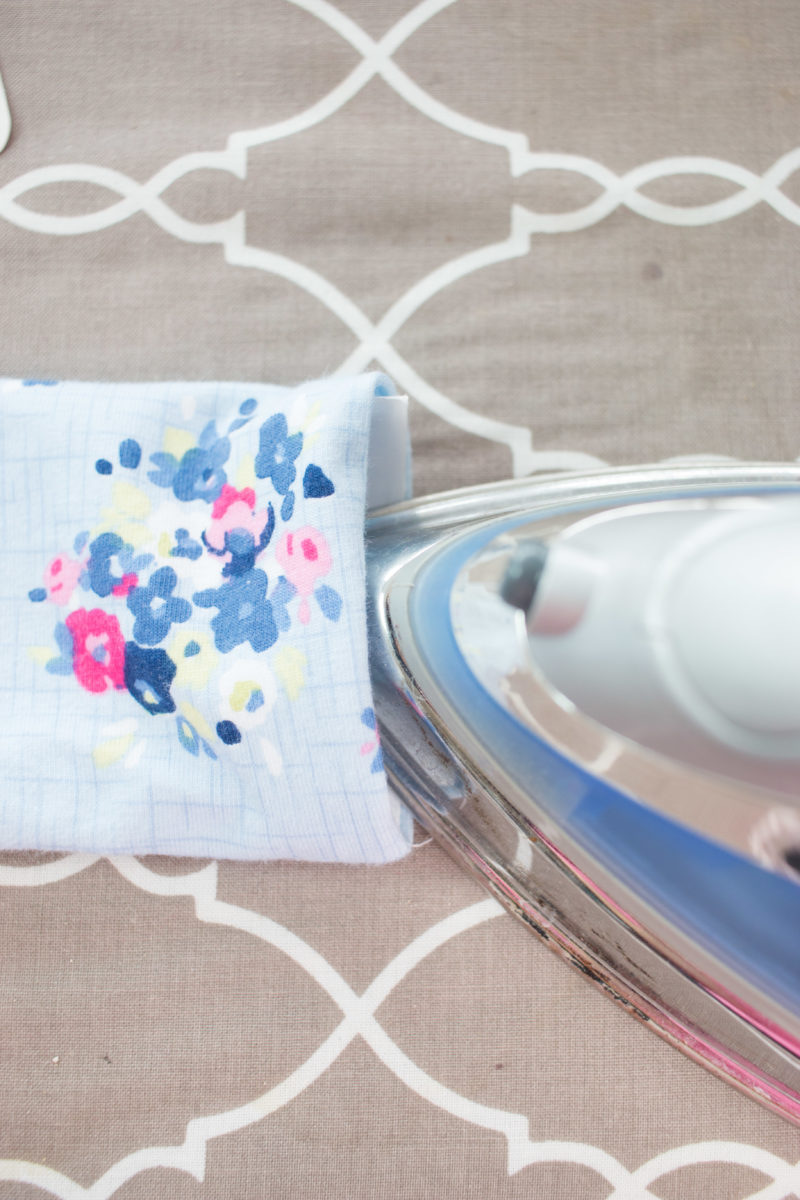
Cut a 6-inch piece of Soft Stretch Lite and place it on the inside of the wrap. Apply heat for 30 seconds and allow to cool.

Top Knot Headband Sewing Tutorial featured by top US sewing blog, Sweet Red Poppy

Top Knot Headband Sewing Tutorial featured by top US sewing blog, Sweet Red Poppy
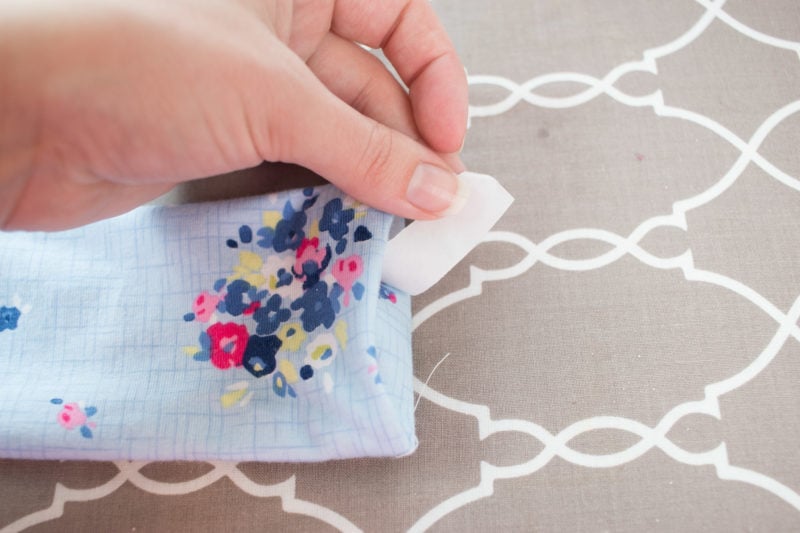
Gently peel back the liner to reveal the glue. Line up the edges of the fabric and press from the top of the wrap.


Top Knot Headband Sewing Tutorial featured by top US sewing blog, Sweet Red Poppy Top Knot Headband Sewing Tutorial featured by top US sewing blog, Sweet Red Poppy

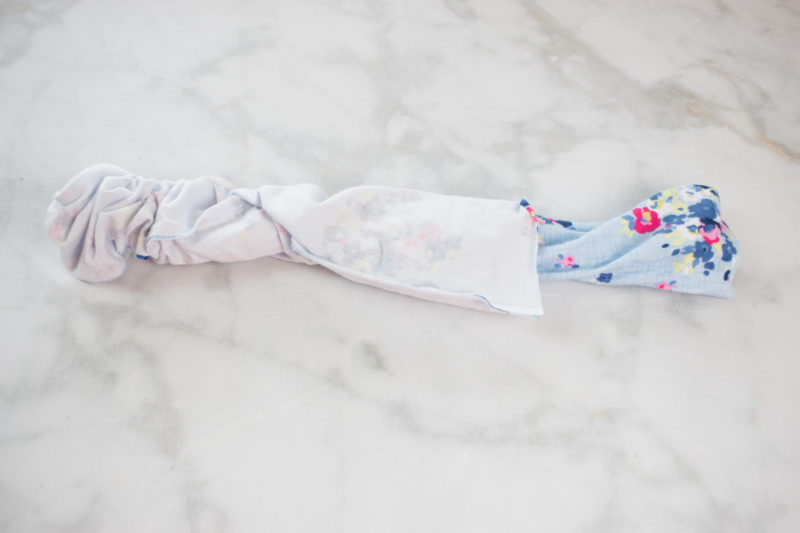
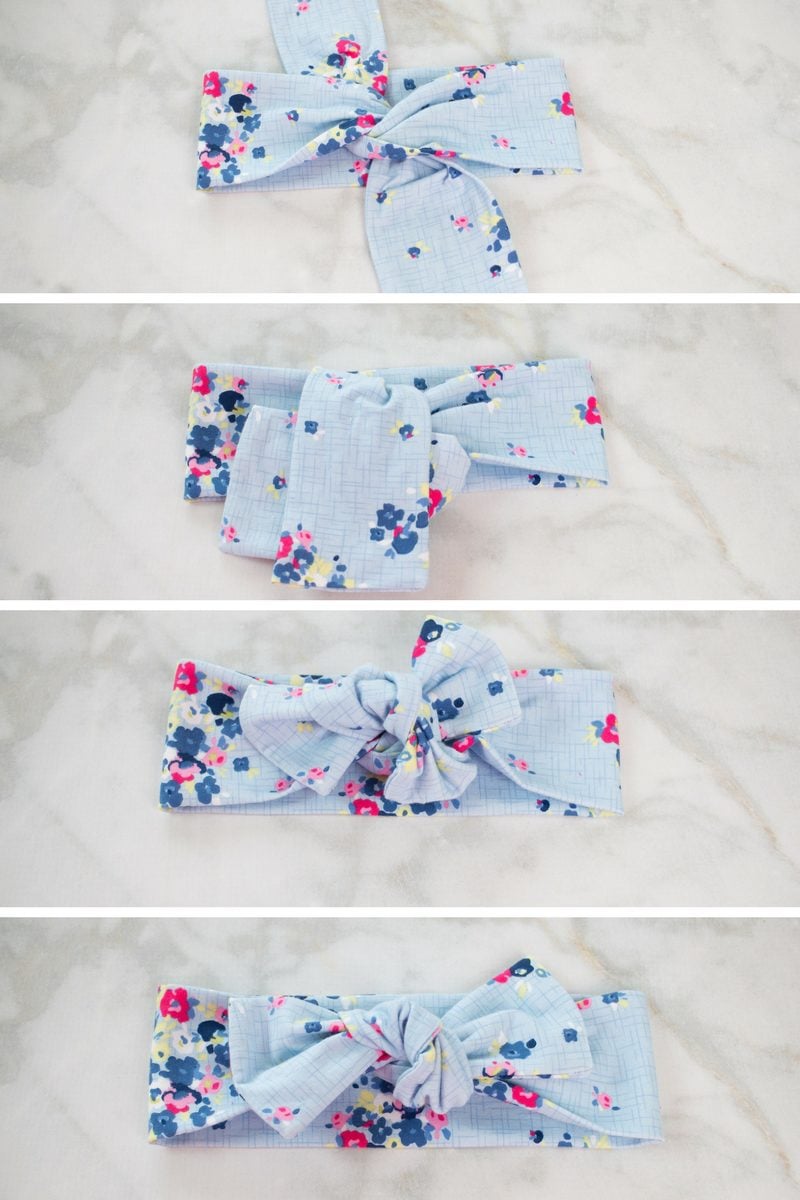
Now it's time to tie the bow! The photos below will take you through each step of this double knot.

Top Knot Headband Sewing Tutorial featured by top US sewing blog, Sweet Red Poppy

Now, go make a million more!! Just don't blame me for your new addiction!

Top Knot Headband Sewing Tutorial featured by top US sewing blog, Sweet Red Poppy

Don't forget to pin this top knot headband to Pinterest so you can come back to this tutorial later!

Top Knot Headband Sewing Tutorial featured by top US sewing blog, Sweet Red Poppy

If you enjoyed this top knot headband tutorial, you might also like these bow tutorials:

https://sweetredpoppy.com/hairbow/

https://sweetredpoppy.com/diy-girls-skinny-hair-bows/

https://sweetredpoppy.com/no-sew-girls-fabric-hair-bows/

« Girls Flat Front Skirt Sewing Tutorial
FREE Kids Leggings and Hoodie Sewing Patterns »

Reader Interactions

Comments

  1. Stephanie ReadsWell says

    February 09, 2018 at 7:28 am

    I can't stress enough how much I loved reading this tutorial. I just showed it to my daughter and we really enjoyed the video as well.

    Reply
  2. Amy says

    May 24, 2020 at 12:22 am

    Do you know if the Blue Carolina line is still available??? I absolutely adore all the things you’ve made with it.

    Reply
  3. Bailey says

    June 26, 2020 at 12:51 am

    What type of stitch did you use? LOVE THE VIDEO!

    Reply
  4. Jodi Lynn Russell says

    July 12, 2020 at 3:53 pm

    I love this. I want to make some for me and my granddaughter
    Can you print the instructions? I couldn't find that

    Reply
    • Jill Manley says

      February 08, 2021 at 7:26 pm

      Hi Jodi,
      I dont know if you ever got an answer to your question. I eventually found the instructions for this headband here:
      https://sweetredpoppy.com/top-knot-headband-sewing-tutorial
      It says to cut 30 inches of fabric.
      Measurements - Cutting Chart for your Top Knot Headband:
      Infant 30″ x 6″
      Child 31″ x 7″
      Adult 32″ x 7″
      Good luck
      Jill

      Reply
  5. vicky says

    July 22, 2020 at 8:16 pm

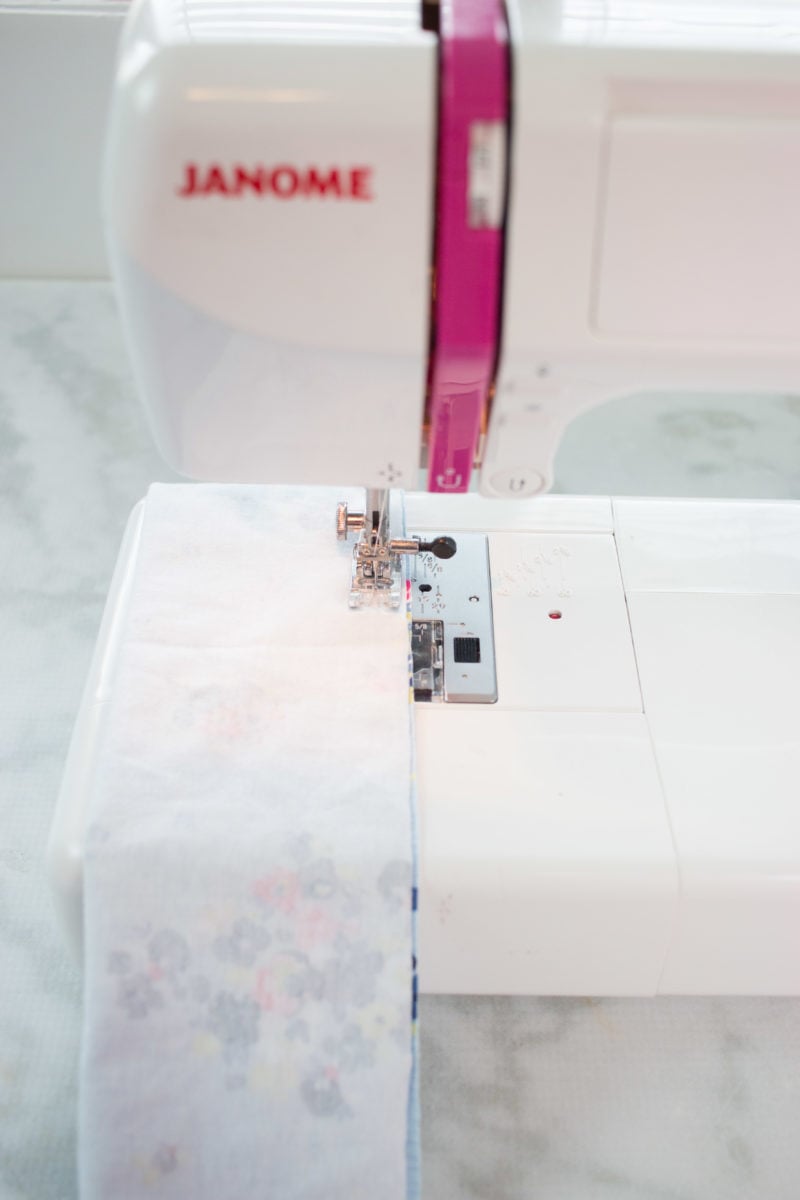
    did you use a zig zag stitch or regular, thanks

    Reply
    • Allie says

      May 28, 2021 at 3:59 pm

      It depends on the fabric you decide to use if it is really stretchy use the stretch stitch but if it isn’t use the zig zag stitch.

      Hope that answered your question!

      Reply
  6. Marilena Sampaio says

    August 01, 2020 at 3:34 pm

    Belo trabalho.Obrigada pelo passo a passo.

    Reply
  7. Kelli Connelly says

    August 21, 2020 at 11:14 am

    love your videos and how to make things. But I have questions that others have also asked before and they never get answered. like others have asked what stitch did you use? Im finding the same frustration with instagram. I understand your busy but replies would be fantastic to all your viewers.
    Cheers

    Reply
    • Julie says

      January 11, 2021 at 8:04 am

      I'm guessing she used zig zag stitch or stretch stitch as this would be needed with stretch fabric

      Reply
  8. Jan Wheat says

    October 19, 2020 at 3:00 pm

    You should make the instructions 'printable'. Sure would help.

    Reply
    • Katrina Chapman says

      January 20, 2021 at 6:25 am

      I use a Google Brower Extension Called Friendly PDF and You Can Right Click any Page An Make It A Printable PDF. Hope This Helps! 🙂

      Reply
      • Jill Manley says

        February 08, 2021 at 7:18 pm

        Thanks for that tip about the printer friendly PDF pattern printing. I didn't know about it.

        Reply
  9. Ashley says

    February 28, 2021 at 8:11 pm

    This pattern is super cute! Would I use my traditional straight stitch or a zig zag stitch to sew?

    Reply
  10. Melissa says

    July 01, 2022 at 11:57 pm

    I want to make some for my grandbabies, they are premies, and I’m not sure how long to make my fabric strips, to be the adorable knot. They measure 31cm or approx 12”.

    Reply

Leave a Reply Cancel reply

Your email address will not be published. Required fields are marked *

This site uses Akismet to reduce spam. Learn how your comment data is processed.

Primary Sidebar

Ready, Set, Sew! An online sewing course for beginners by top US sewing blogger, Sweet Red Poppy.

Hello, I’m Kimberly, the creator of Sweet Red Poppy!

I’m a wife, mother to 3, seamstress, and lover of all things crafty! Sweet Red Poppy is my creative outlet where I find and create inspiration. It’s a place where I can share my never-ending sewing projects and my love of learning!

Read more about me →

The Latest

  • Computer that says, Where to find fonts online
    Where to Find Fonts Online
  • Kim holding ipad talking about fonts
    How to Add Fonts to Adobe Illustrator on iPad
  • Rolled Paper Flower Wreath
    Free Rolled Paper Flower Wreath Template
  • 5 Useful Tools to Help You Organize After the Holidays with JOANN
  • How to Make Christmas Gift Tags with Your Cricut Machine
  • How to Make Sock Gnomes

Footer

↑ back to top

Legal

  • Privacy Policy
  • Disclosure

Newsletter

  • Sign Up! For Emails and Updates

About

  • Contact
  • About
  • Home

Copyright © 2022 Sweet Red Poppy