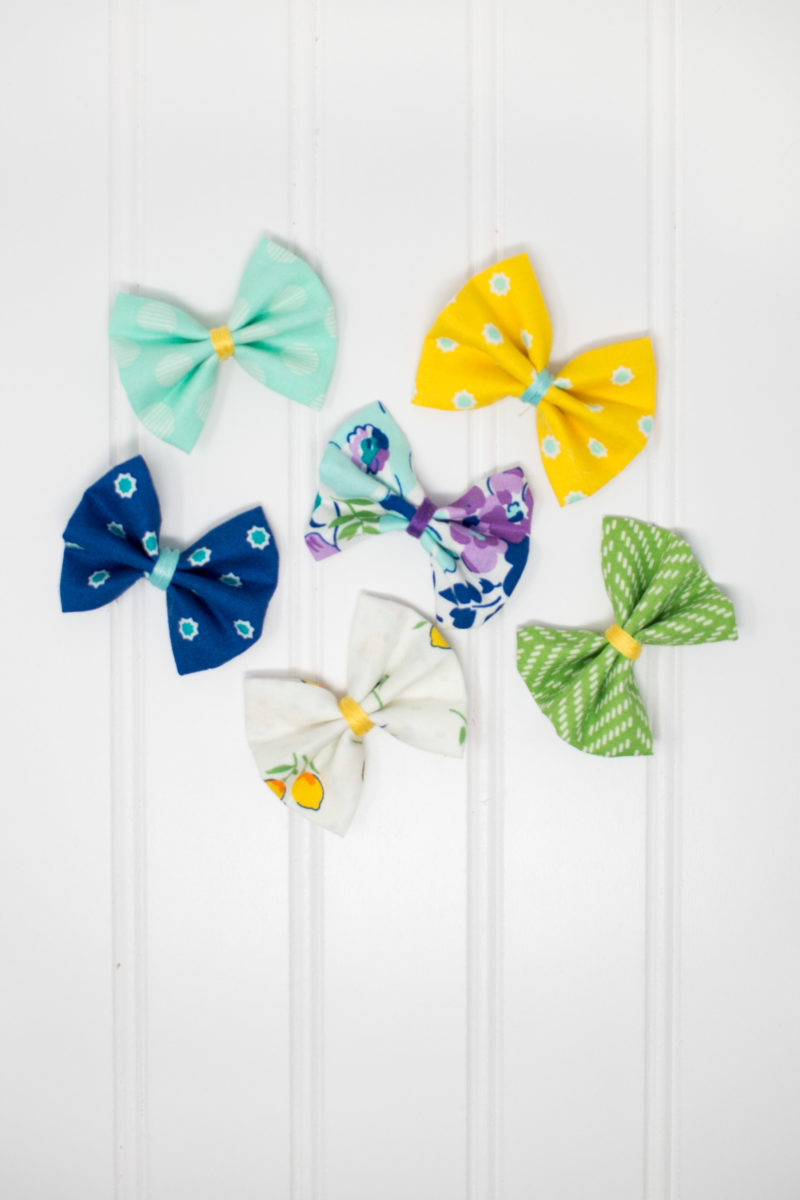
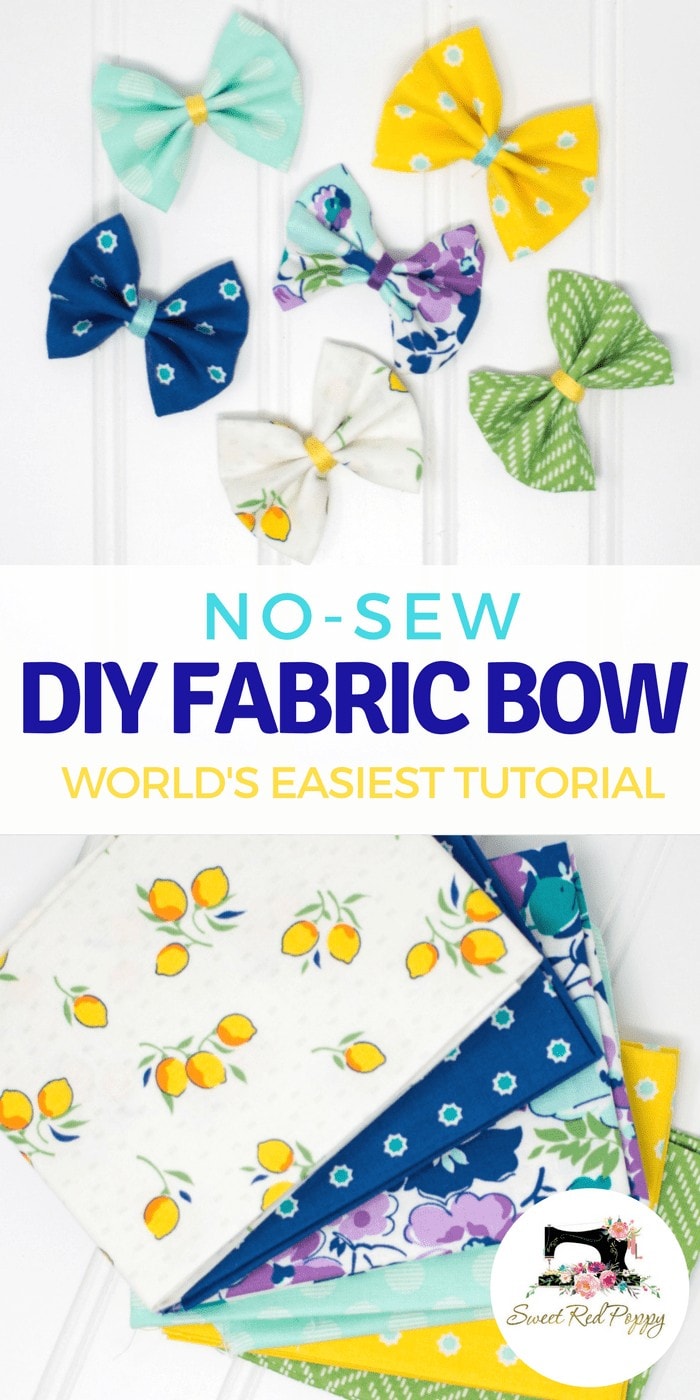
DIY Hair Bows: No Sew Fabric Hair Bows Tutorial
I'm so excited to share this tutorial with you today. I get asked all the time for no-sew hair bow tutorials and this one is about as easy as it gets!
If you don't sew or you're just looking for a quick and easy craft, this is for you! I even have a video below to walk you through every single step of the hair bow!
Since this project doesn't require a sewing machine or hot glue ( we will be using fabric tape) it's the perfect craft for long road trips, bus rides or just sitting by the fireplace without having to set up the entire craft room!
Why Shop Through My Links?
When you shop through my affiliate links, it doesn't cost you anything extra, but it helps me out in a big way! I earn a small commission from those purchases, and that support allows me to continue creating and sharing free tutorials and patterns for you. Thank you so much for helping me keep this creative community going! 💕
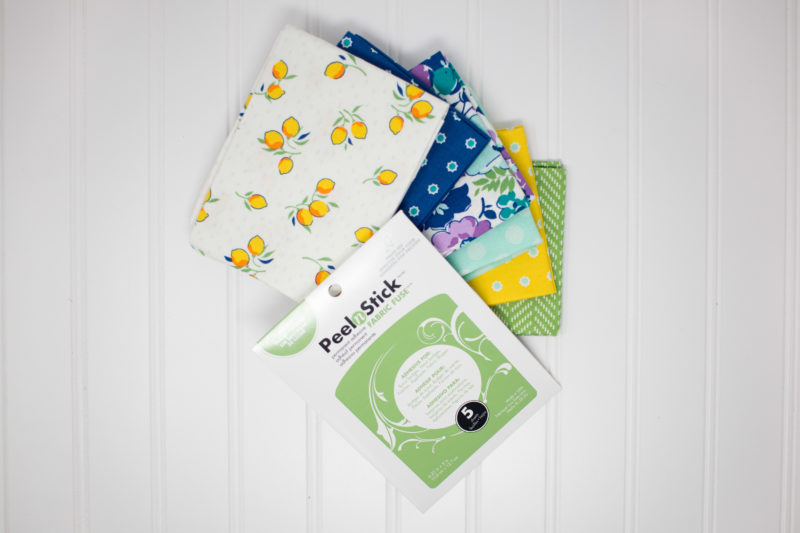
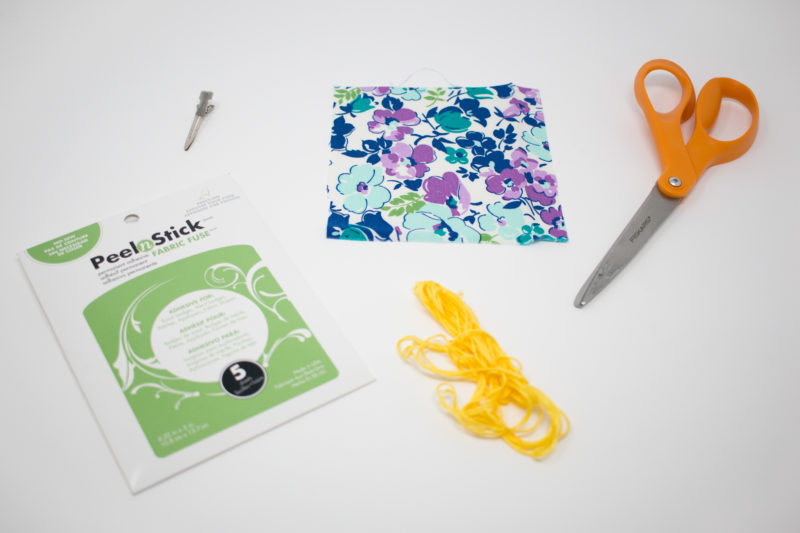
Supplies Needed for your Fabric Hair Bows
Shop my favorite sewing supplies here!

Girls No-Sew Hairbow Tutorial
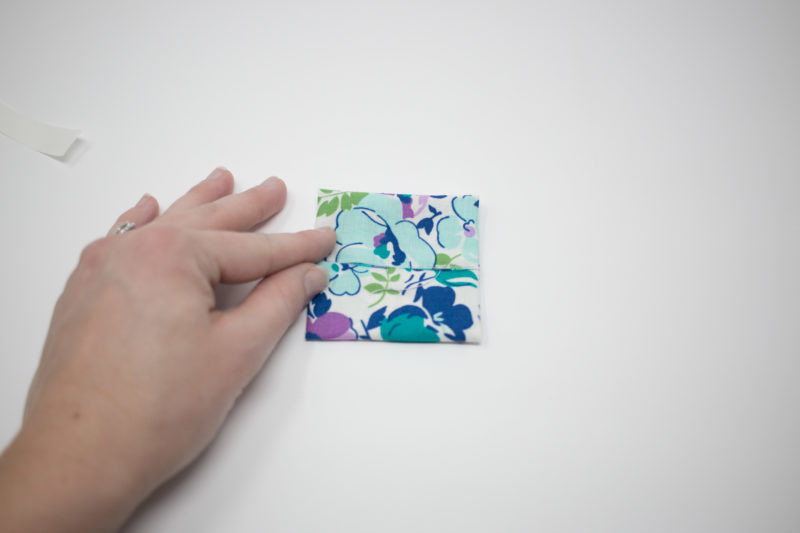
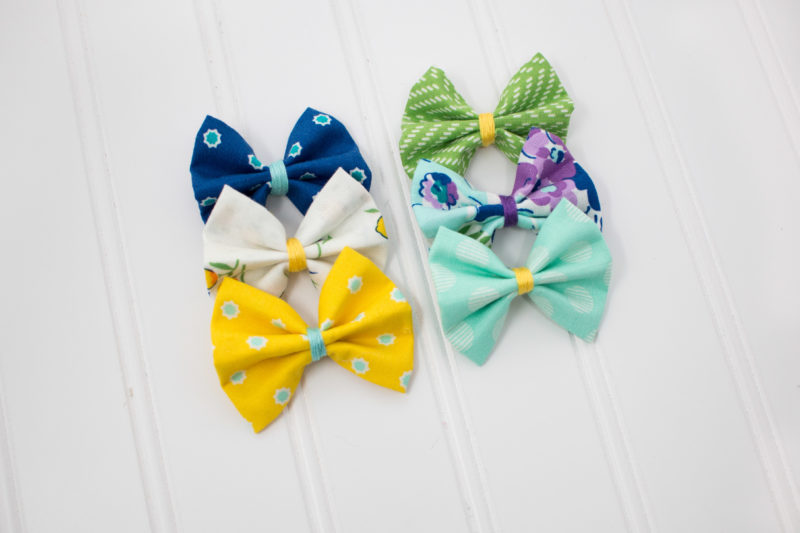
1. Begin by cutting a 5 x 5-inch square. Fold the fabric in half and gently make a crease to mark the center of the bow.
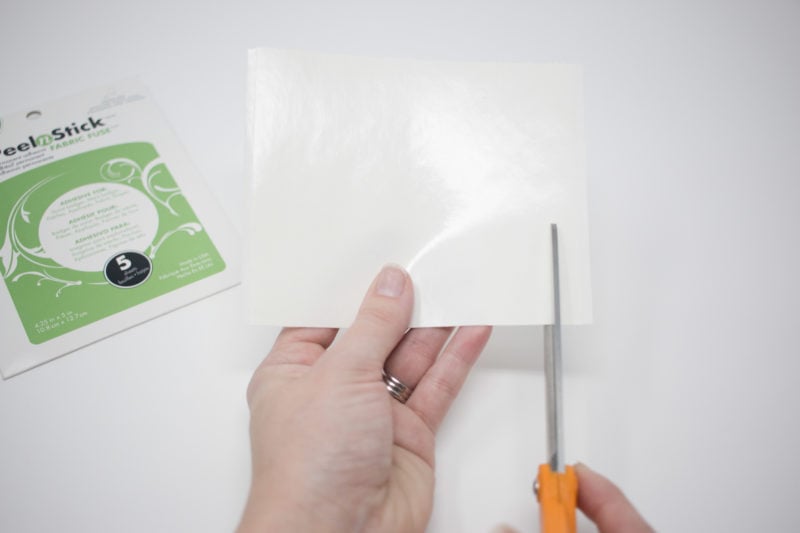
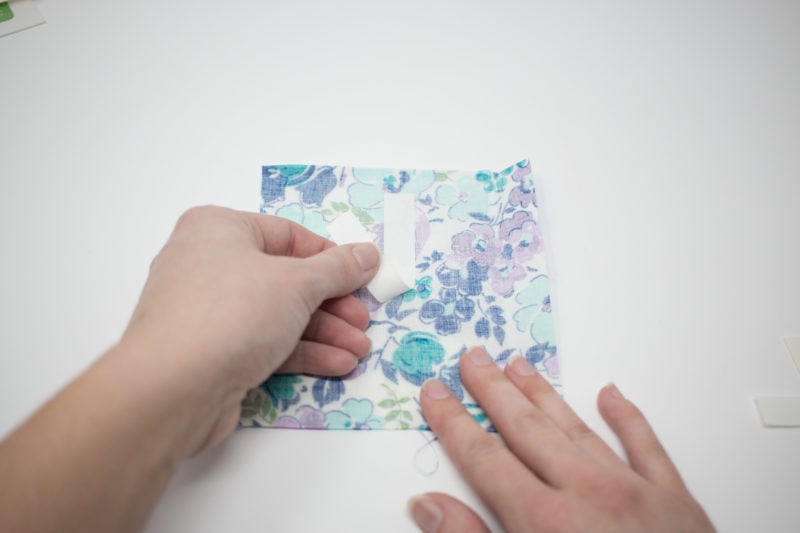
2. Cut a strip of Peel N Stick Fabric Fuse Tape 5 inches long by 1/2 inch wide. Peel back the liner and place the piece of tape directly over the crease along the wrong side of the fabric.
Peel back the second liner and fold each edge of the bow into the middle. Press down firmly to apply it to the adhesive.
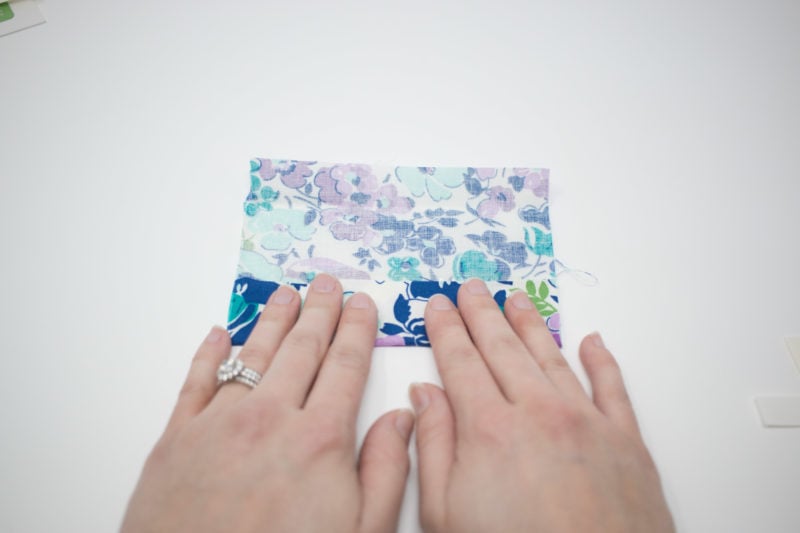
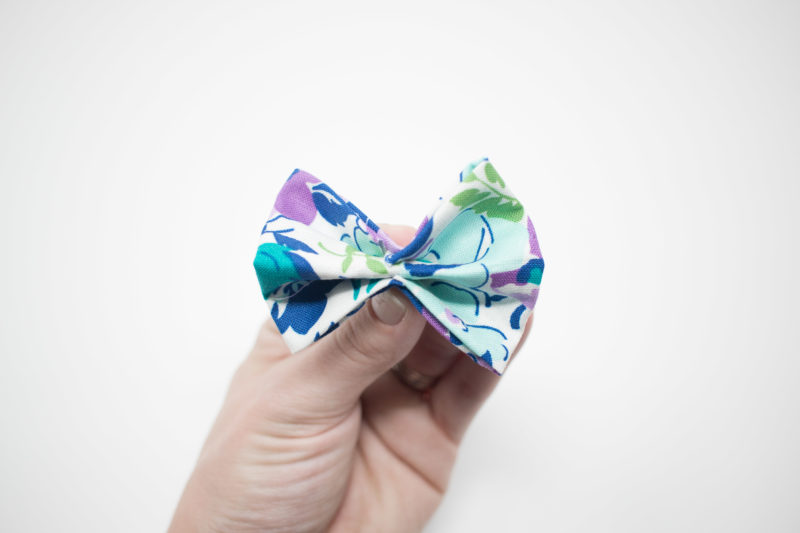
3. Turn the bow 90 degrees. Place a piece of Fabric Fuse Tape in the very center and bring the outsides of the bow to the center.
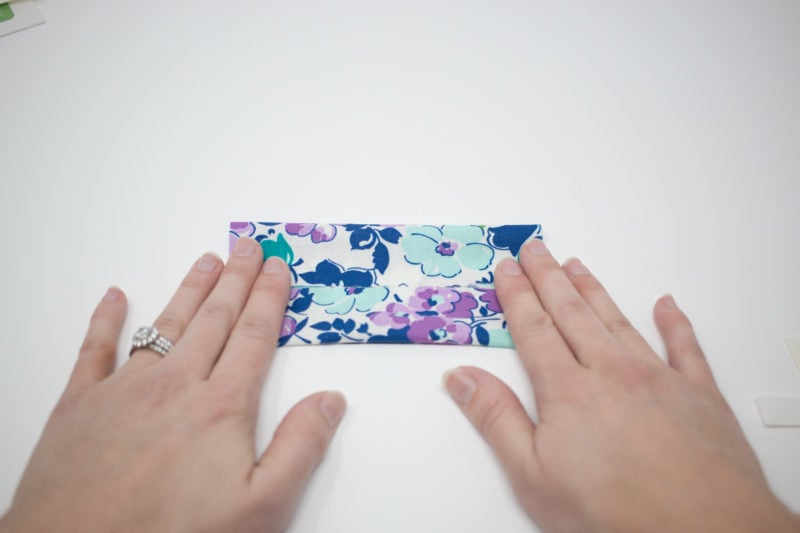
4. Now, fold the bow in half as demonstrated in the photo. You'll be folding it accordion style.
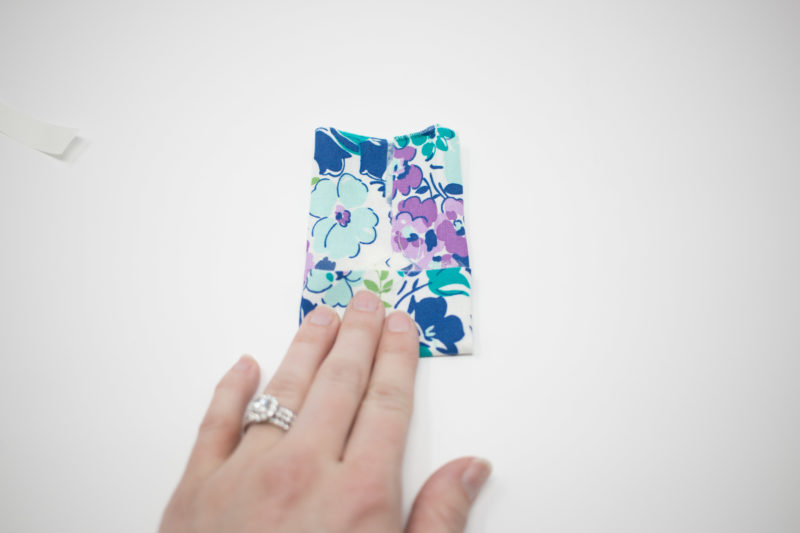
5. Pinch the bow with your left hand while you wrap the center of the bow with embroidery floss with your right hand. Wrap it around the center 5-7 times making sure to cover up the raw edges.
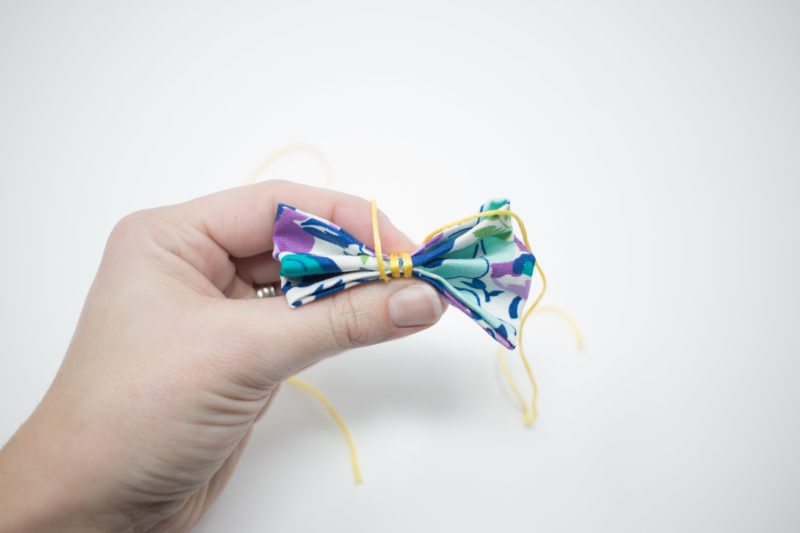
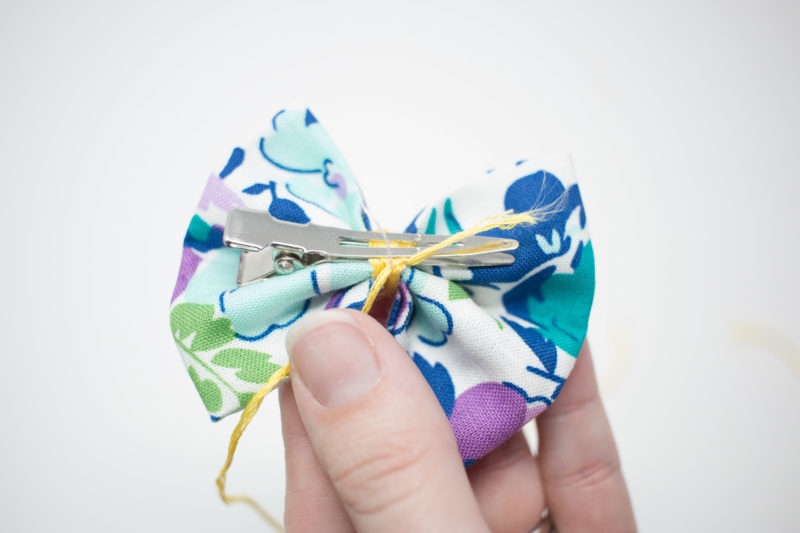
6. Place the bow on the table in front of you and pull the thread so it's snug. Tie a double knot on the back of the bow and slide a hair clip under the thread. Trim any loose threads.
I told you it was easy!!! Now go make 10 more because you know your little girl is going to want ALL the hair bows! 😉
Now, if you're wondering, "Why use fabric tape instead of hot glue?" I have an answer for you!
I tried this tutorial with a few different types of glue and here's what I found; It's hard to get a consistent line of hot glue which means you might be left with some bumpy lumpy spots on your bow which result in a less than pretty frontside. On a larger sized bow this might not be such an issue but for this size, it makes a big difference. Hot glue also isn't very bendable once it's dried so it can end up looking a bit stiff and adding a lot of unnecessary bulk.
The fabric tape is lightweight and doesn't add much bulk to the bow and it's easy to bend which makes it the ideal choice for this project. It is a washable, double-sided press-on adhesive specifically designed for fabric!
I can't wait to see what you make! Be sure to share photos of your fabric hair bows on my Sweet Red Poppy Facebook page or tag me on Instagram!
You might also enjoy these posts:
Which fabric you have used
read it
your website/blogspot/ whatever is so full of crap and popups it is not only unreadable but miserable to try to scroll down.
I must agree...it's awful. can't even read it or see pictures..way way way too many ads and pop ups! Ridiculous!
Just a friendly reminder that all of the content on my blog is provided to you free of charge. On average I spend I spend about 40 hours on each blog post. That includes researching the topic, writing the blog post, photographing, editing, creating a video, and designing a free file.
Ads are a way that I'm able to make money from my content to cover the time it takes me to provide you with this content for free.
I can't justify putting that kind of time and effort into my blog without it being able to provide for my family.
It sure is!! TERRIBLE!!!!
the adds you can click away. I thank you for the patterns. I apriciate it !
Muito obrigada por compartilhar seus conhecimentos! Com certeza vou fazer.. Um beijo do Brasil
When I clicked the link for the fabric it took me to Etsy where it said it is unavailable. Can you tell me if it is knit fabric or a woven like cotton?
Is there a pdf file for this bow or a way to print it?
Some people are just tacky just ignore them.