Bring Some Holiday Cheer To Your Quilting With My Free Christmas Themed Foundation Paper Pieced Quilting Patterns Along With A Step-By-Step Tutorial.
If you've never tried foundation paper piecing (FPP), it might seem a little scary - but it's actually much simpler than it looks! Foundation paper piecing makes it possible - and even easy - to piece complicated quilt designs.
Today I'm bringing you four absolutely adorable Christmas-themed paper pieced quilting patterns. Plus, if you're new to FPP, I've got a step-by-step tutorial below to make your first experience with foundation paper piecing easy and fun!
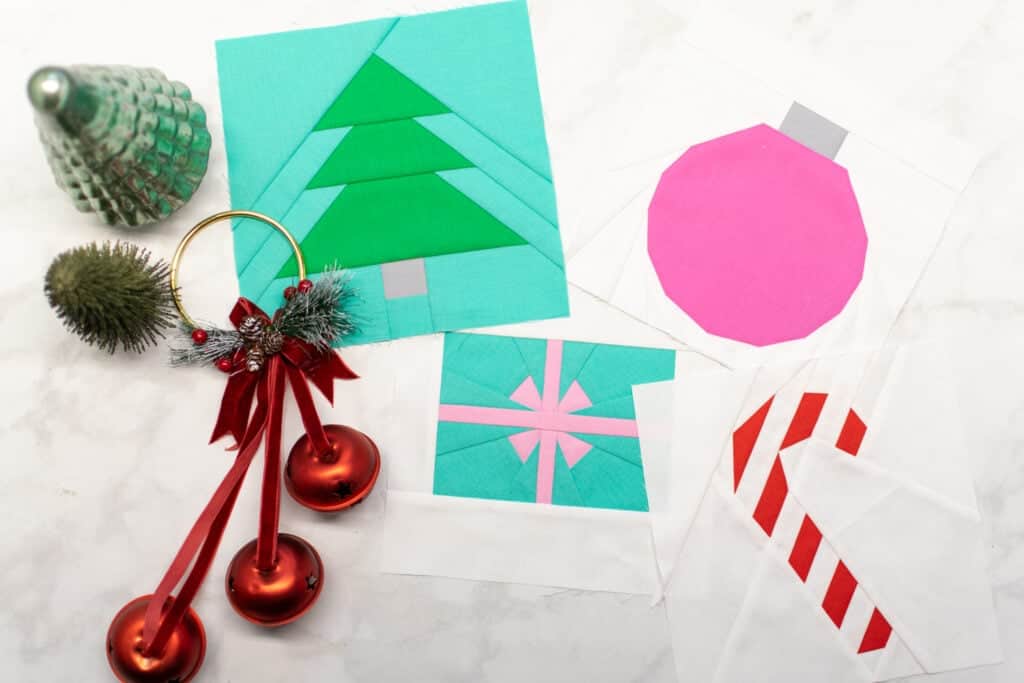
Table of Contents
What is Foundation Paper Piecing?
With foundation paper piecing, a quilting design is printed on paper. Then, pieces of fabric are sewn to the back of the paper, using the lines of the design as a stitching guide.
FPP is usually used for intricate patterns, where the design is made up of many small pieces of fabric sewn at odd angles. The lines on the paper make it possible to get extremely precise stitching on this type of design. In addition, the paper acts as a bit of a stabilizer, which makes sewing small, fiddly pieces of fabric easier.
How Does Foundation Paper Piecing Work?
Here is the basic process of piecing a block with FPP. You can find a more detailed tutorial specific to my Christmas paper pieced quilting patterns (and the pattern download) in the second half of this blog post.
To piece a quilt block with foundation paper piecing, first you'll need to print out the FPP template.

Next, prepare a piece of fabric for each numbered section in the template. Each piece of fabric should be large enough to cover its section and extend about half an inch beyond the lines on all sides.

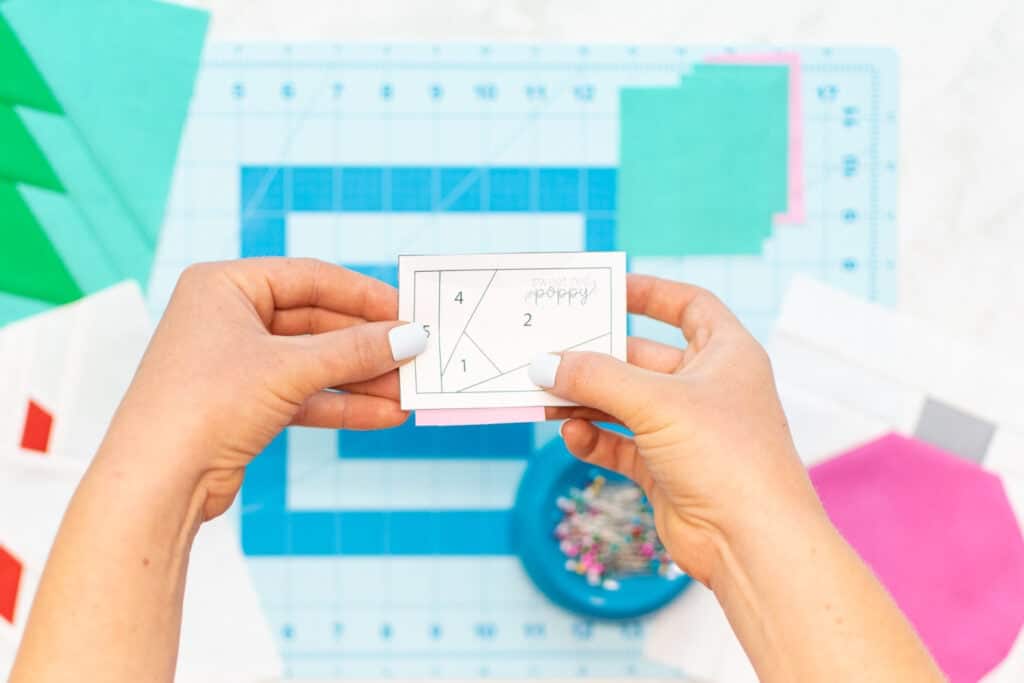
Place the first piece of fabric on the back of the paper, approximately centering it on the #1 section. You can hold the fabric up to a light to ensure that you're aligning the fabric properly.

Then, take the fabric for the #2 section and place it on top of the first fabric. Line it up so that it extends at least 1/4" past the stitching line between #1 and #2.
Keep in mind that once the fabric is stitched and folded, it should be large enough to fully cover section #2.

Pin both pieces of fabric to the paper, then stitch along the stitching line between #1 and #2.

Fold the paper back and trim the seam allowance down to approximately 1/4".
Then, fold the two pieces of fabric away from each other and press the seam. The #2 fabric should now cover the #2 section on the template and extend past the edges by half an inch or so.
Repeat this process to add the #3 fabric to section #3, the #4 fabric to section #4, and so on until the design is finished.

This process is deceptively simple! And, once you get going, it gets easier and easier with each seam you sew.
Just remember - it's VERY important to sew the fabric pieces in order based on the numbers printed on the template. If you accidentally stitch them out of order, the next pieces might not come together correctly.
Looking for even more detailed instructions on FPP? Be sure to read THIS post!
About the Christmas Paper Pieced Quilting Patterns
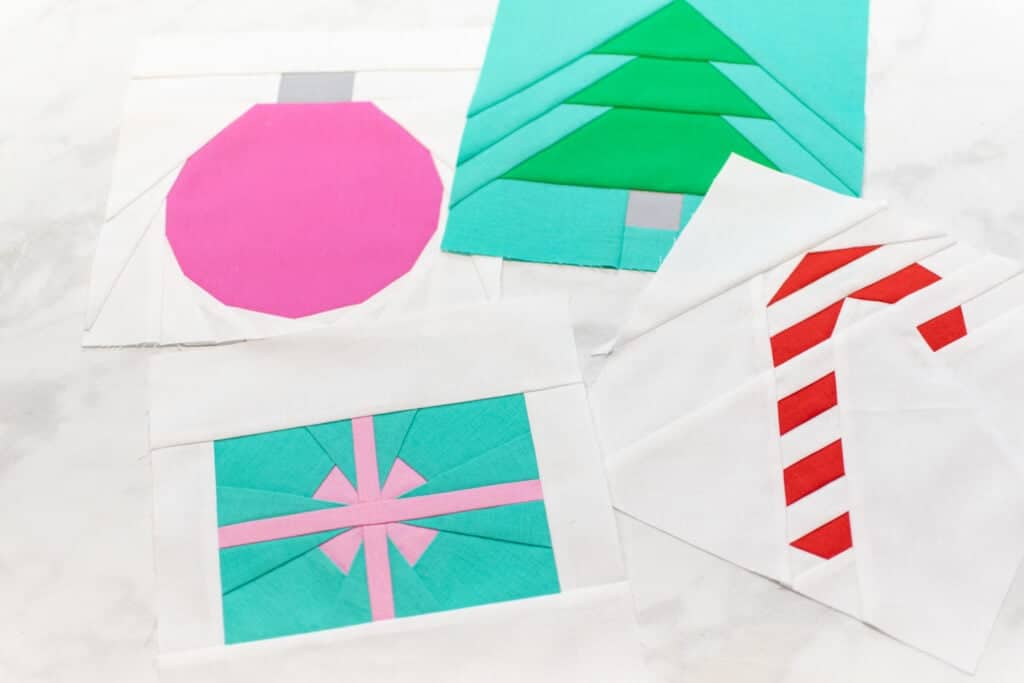
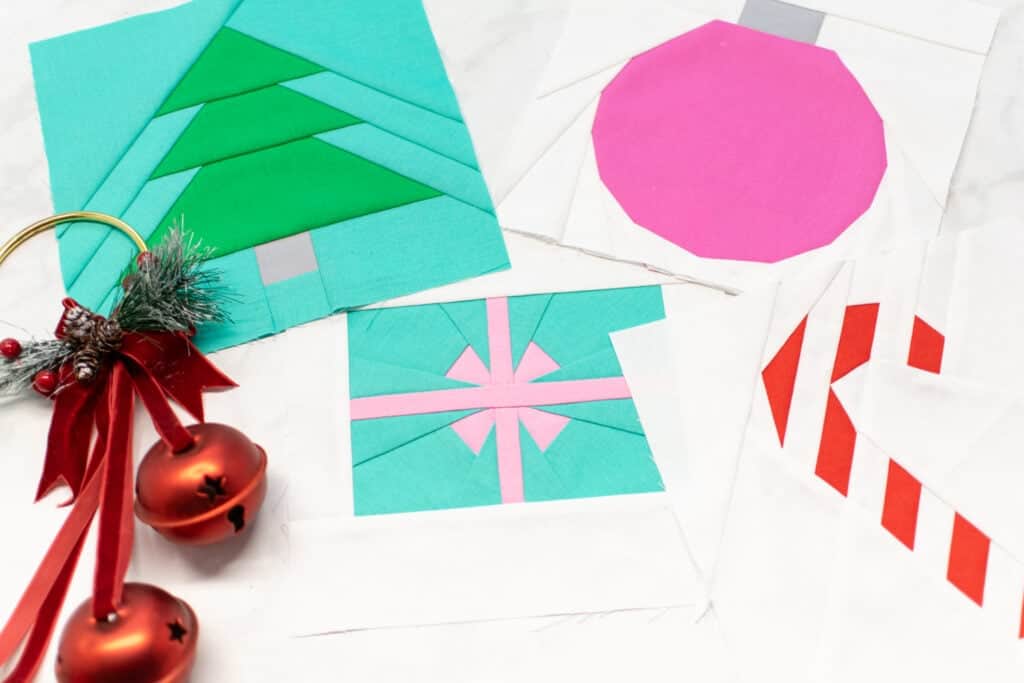
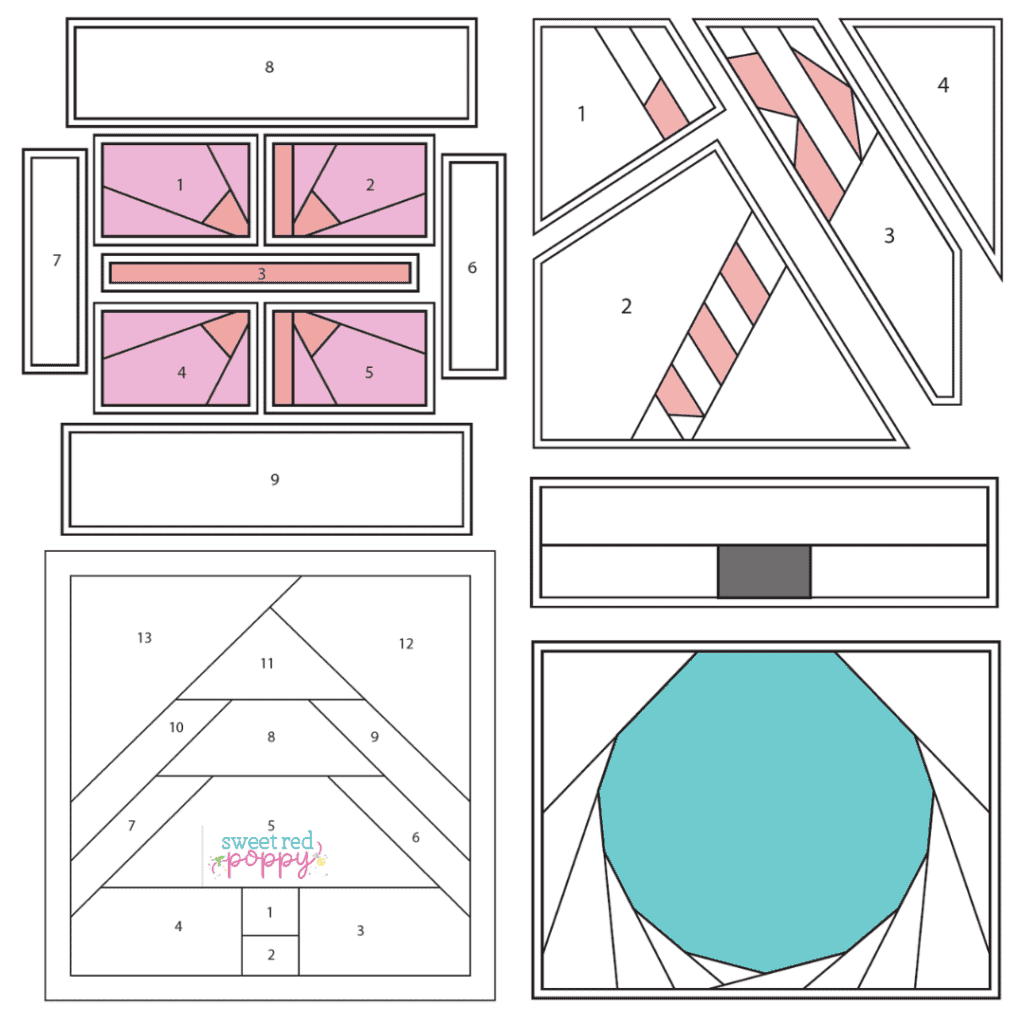
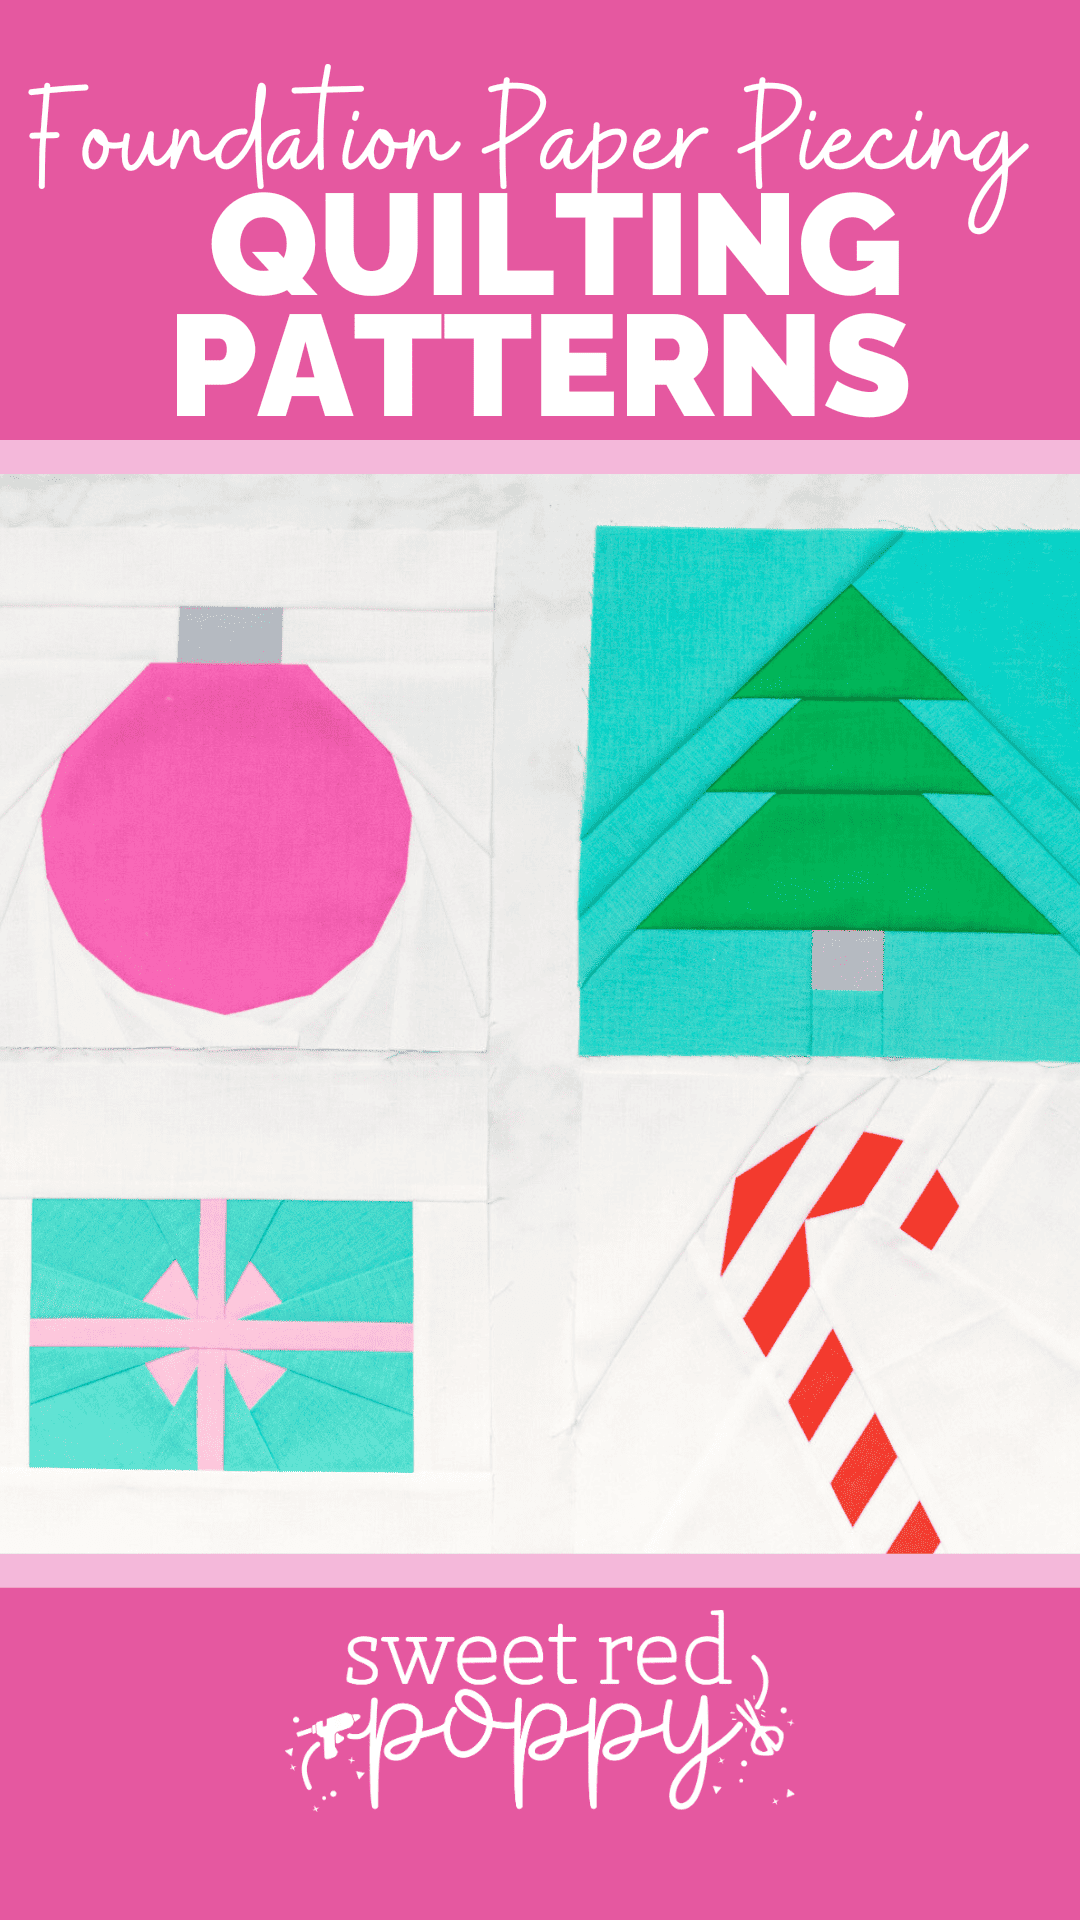
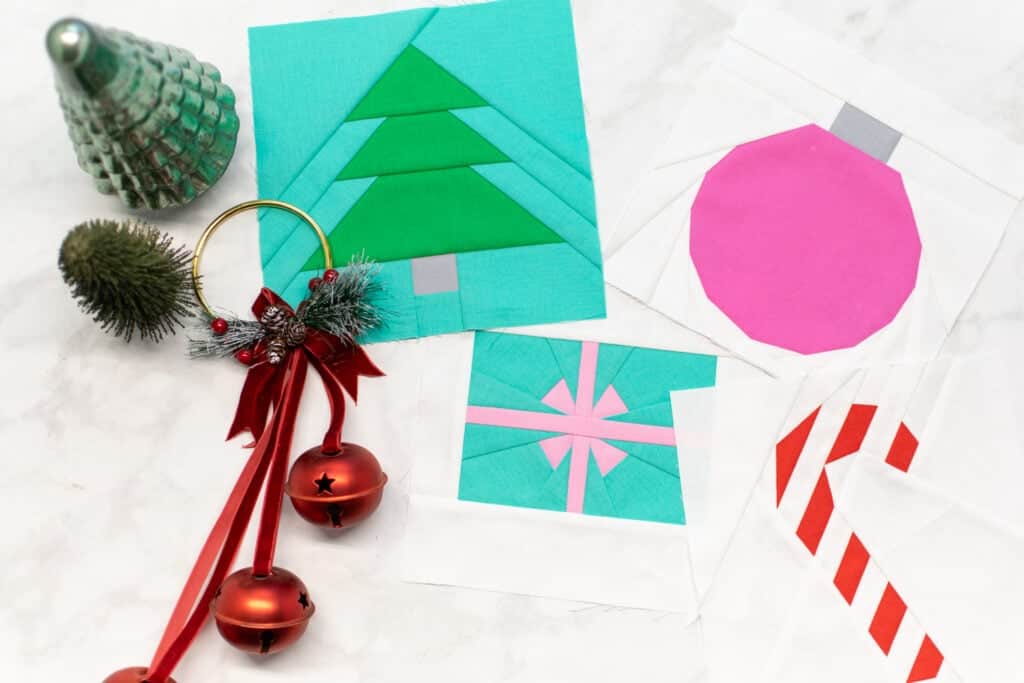
I'm bringing you 4 Christmas-themed foundation paper piecing patterns - a Christmas tree, an ornament, a gift, and a candy cane.
For each design, I've included a template for a 5-inch block, a 6-inch block, an 8-inch block, and a 10-inch block. This makes the patterns versatile so that you can use them in all sorts of different projects!
For example, you might use one of the smaller blocks to make a mug rug. Or make some larger blocks to use in a baby quilt or throw pillow cover.
If you're unsure about FPP, I'd recommend starting with the Christmas tree design. It is the simplest of the 4 paper pieced quilting patterns and comes together very quickly without many tiny, fiddly pieces of fabric.
If you're looking for a challenge, try the candy cane design. It's the most complicated of the 4 patterns, but pays off with an adorable finished block!
Keep in mind that this is a more advanced quilting technique so it may take some practice before you get the hang of it. If you're just starting out, I recommend starting with my heart mug rug pattern.
Supplies to Sew the Christmas Paper Pieced Quilting Patterns
Here are the supplies you'll need to sew up these adorable Christmas FPP blocks. Click on the links below to shop all of the supplies.
- Free Christmas Paper Pieced Quilting Patterns
- Quilting Cotton Scraps in Different Colors (amounts depend on the design and size you choose) I like to use Kona Cotton.
- Scissors
- Rotary Cutter
- Rotary Cutting Mat
- Thread
- Sewing Pins
- Iron
- Ironing Board
- Sewing Machine
- Sewing Machine Needle
- Printer
- Printing Paper
- Tape
- Optional - Cricut Bright Pad (this makes it extra easy to see the lines and make sure all of your fabric is aligned perfectly before sewing it)

Click Here to Download the FREE Paper Pieced Quilting Patterns

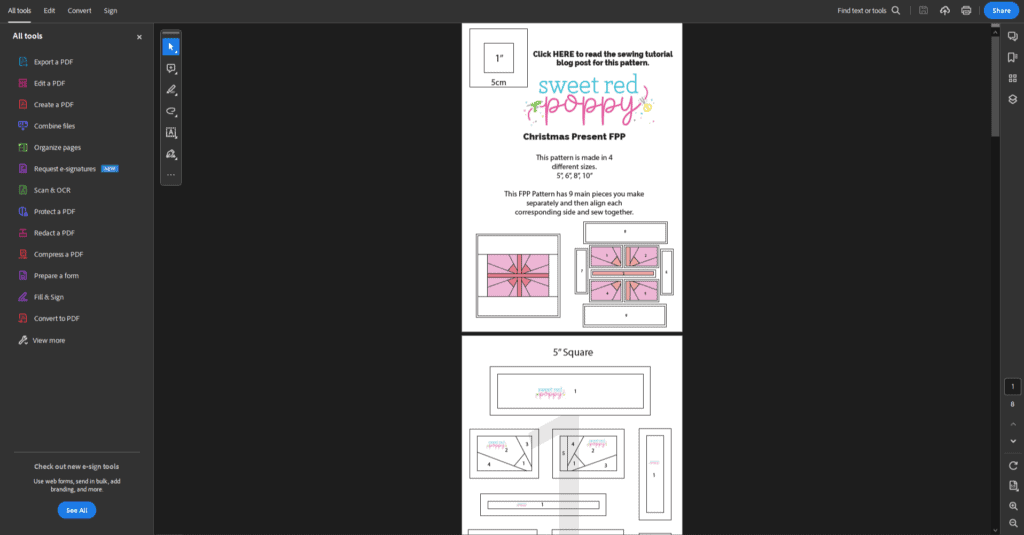
Step 1: Download and Assemble the Paper Pieced Quilting Pattern
First, download the free pattern and open it in your PDF browser. I highly recommend Adobe Acrobat.
It's important not to print the pattern directly from your browser. That can cause incorrect scaling and wonky border lines.
Next, click on "Print" to open the print settings dialog box. In the print settings, update the scaling to either "Actual Size" or "Custom: 100%".
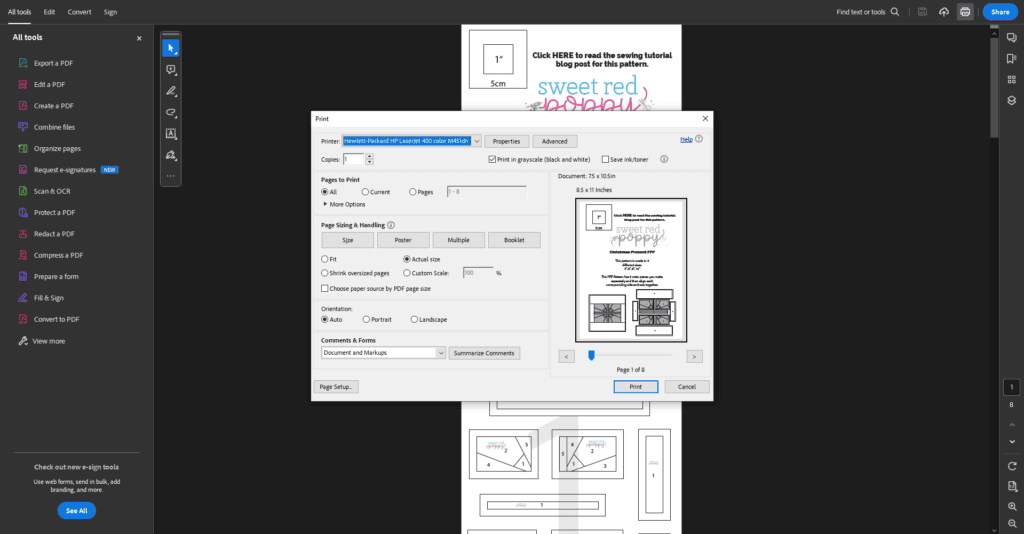
Then, print the first page of the pattern. This page has a 1" x 1" test square. Measure the test square.
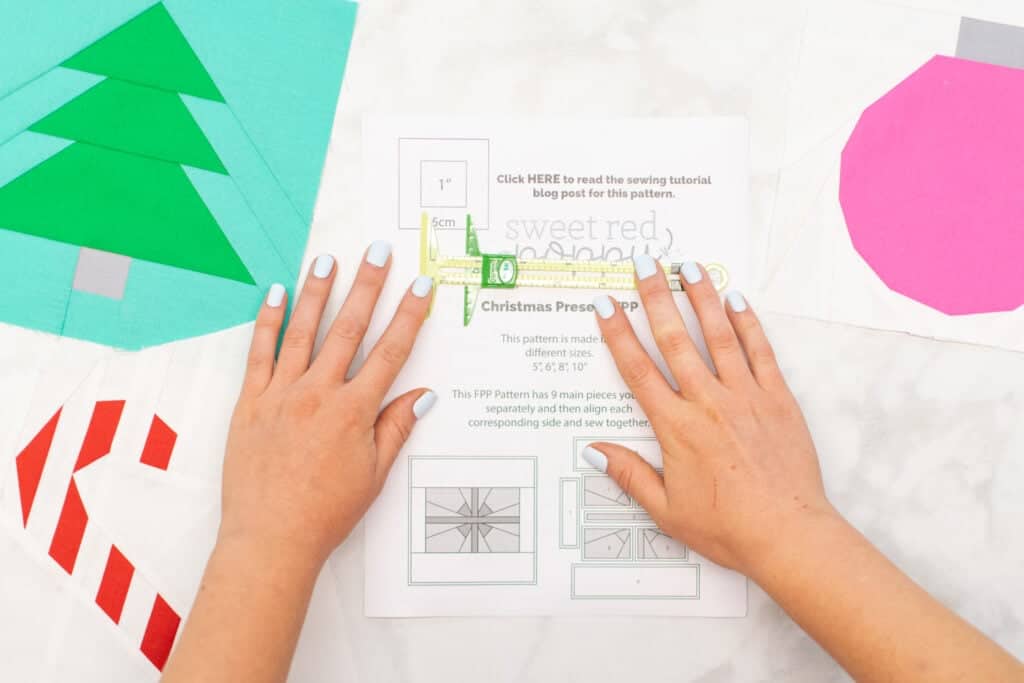
If it measures 1" x 1", you're good to go! Go ahead and print the rest of the pattern. If it does not measure 1" x 1", you'll need to recheck your print settings and try printing again.
Once the pattern has been printed, it's time to assemble the pages according to the layout chart in the pattern.
Each page has a large number printed in the center to help you line up the papers in the right order.
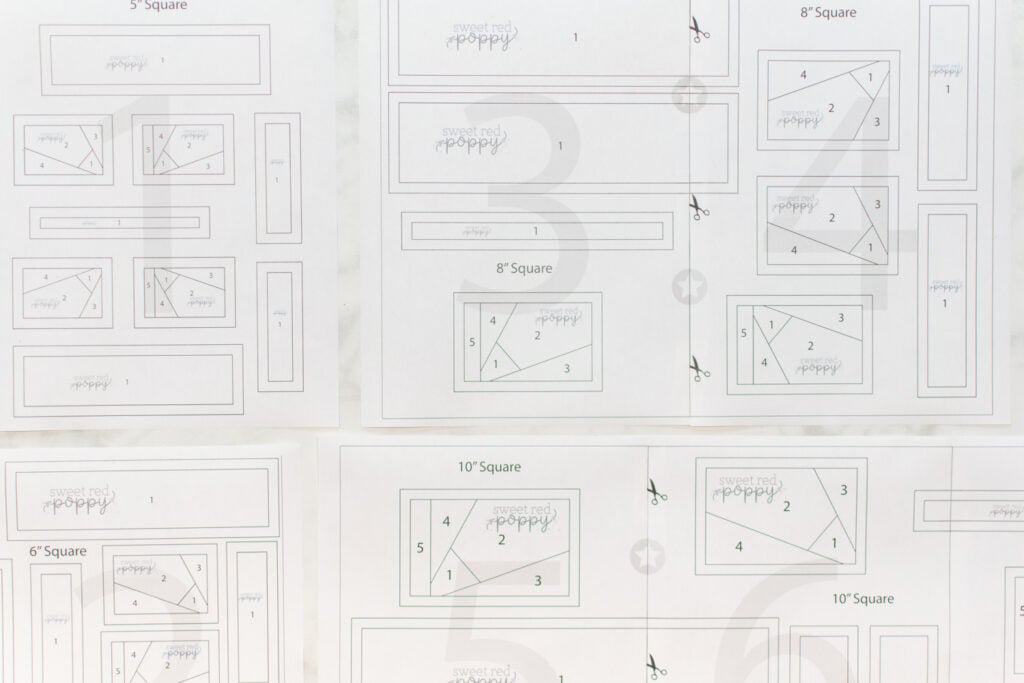
When lining up the pages, you may want to trim away the excess paper along the border lines before taping them together. Alternatively, you can simply overlap the paper margins. If you decide to overlap the edges, holding the pages up to a light can help you see through the paper and align the pattern lines correctly.
With the pattern assembled, cut out the template for each unit of the design you plan to sew. Make sure to choose the pieces corresponding to the size of the finished block you want to make.

The Christmas tree pattern will have only 1 unit to cut. The ornament will have 2 units to cut. The gift will have 9 units to cut. The candy cane will have 4 units to cut.
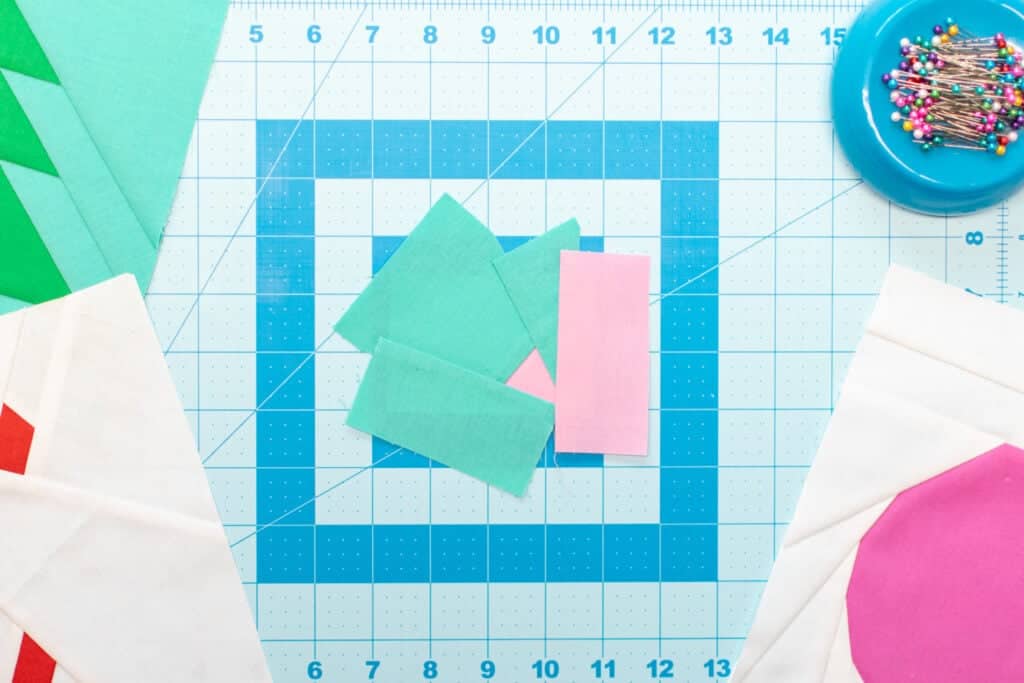
Step 2: Prepare the Fabric Pieces
Next, it's time to prepare the fabric for our design.
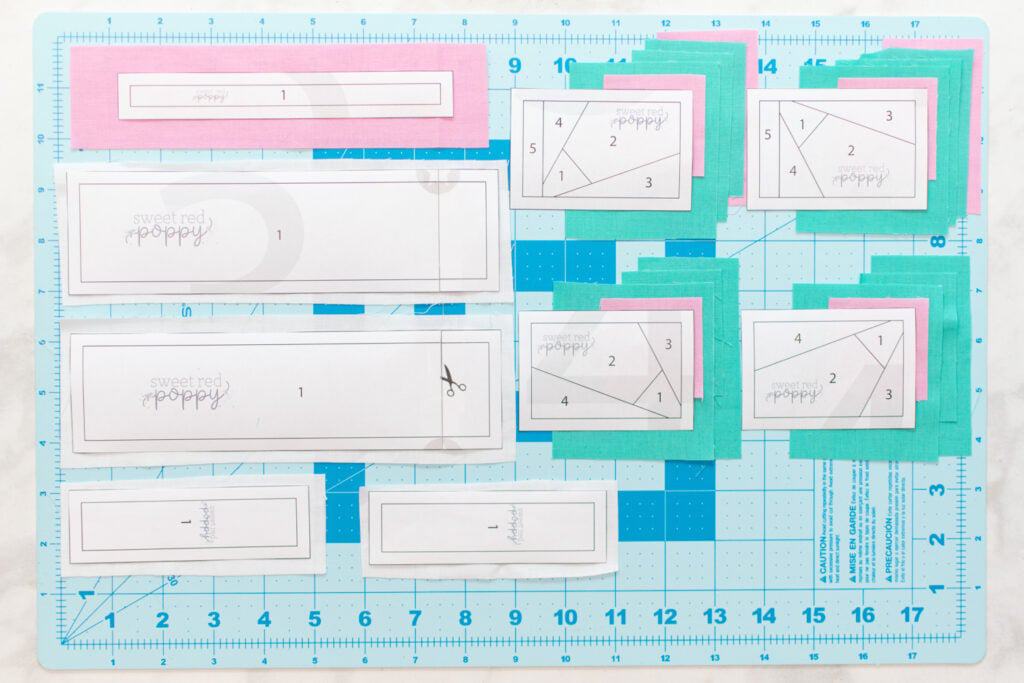
Cut a scrap of fabric for each section in the design that is large enough to cover that section as well as extend beyond the lines by approximately 1/2 - 1 inch.
I prefer to err on the side of caution when cutting out my sections to ensure I never end up with a piece of fabric that's too small.
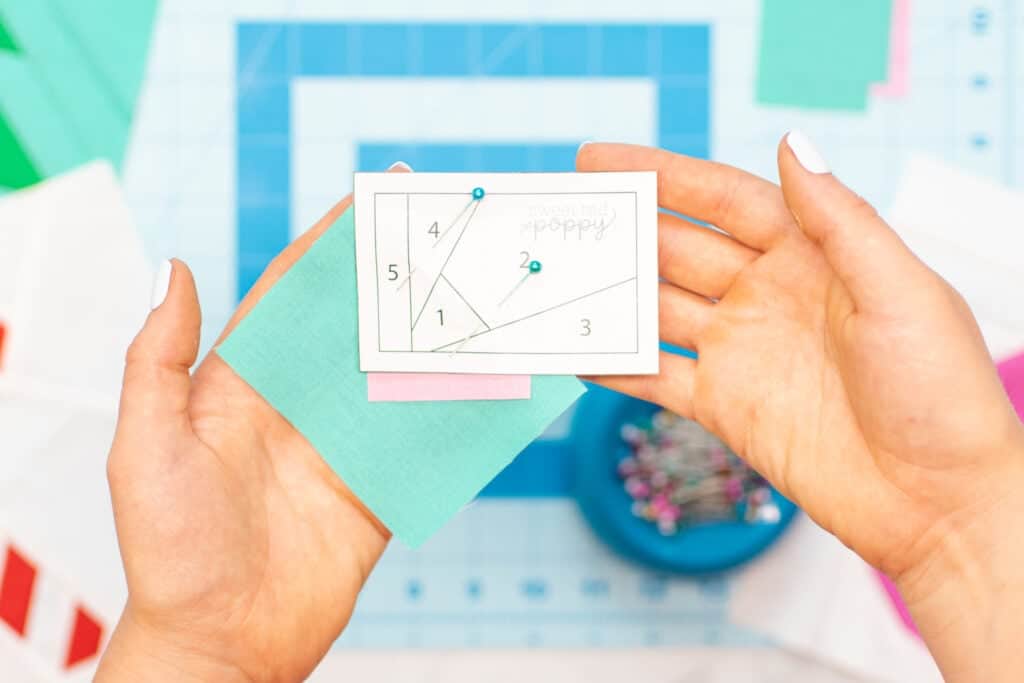
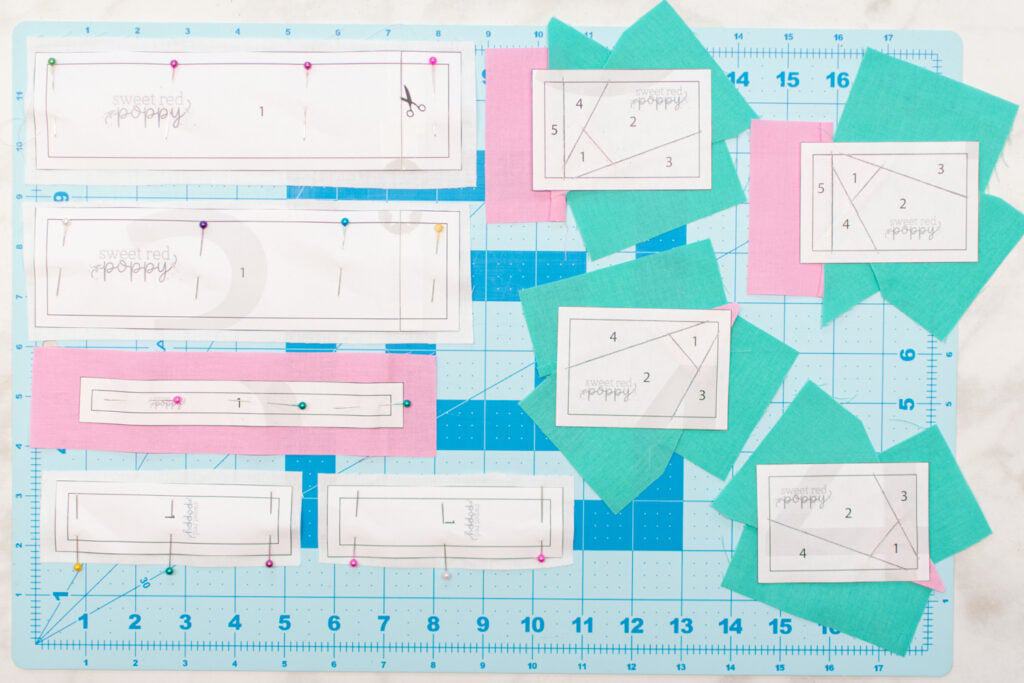
I like to cut all my fabric in advance and make a pile of fabric pieces in order - starting with the piece for section #1, then #2, and so on.

If the design has more than one unit, then I will make a stack of fabric pieces for each unit. Then, I place the correct stack of fabric pieces with the paper template that it corresponds to until I'm ready to sew that unit. This really helps me to keep all my fabric scraps organized.
If organizing all those fabric scraps isn't for you and you'd rather just cut each fabric piece as you go, that method can work as well. You can also use scraps for these patterns and pull from what you already have on hand.
Step 3: Set Your Machine
We're now ready to start sewing! Let's set up the sewing machine.
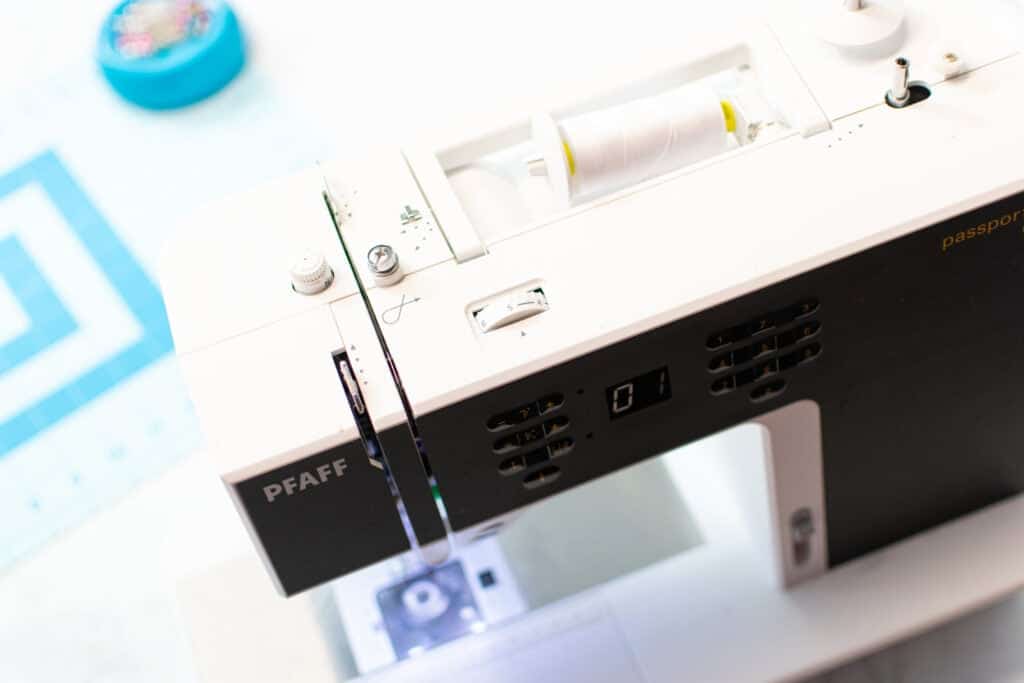
Thread your machine with a good neutral color that goes well with most of the colors in your design.
Next, reduce the stitch length to 1.0 mm.
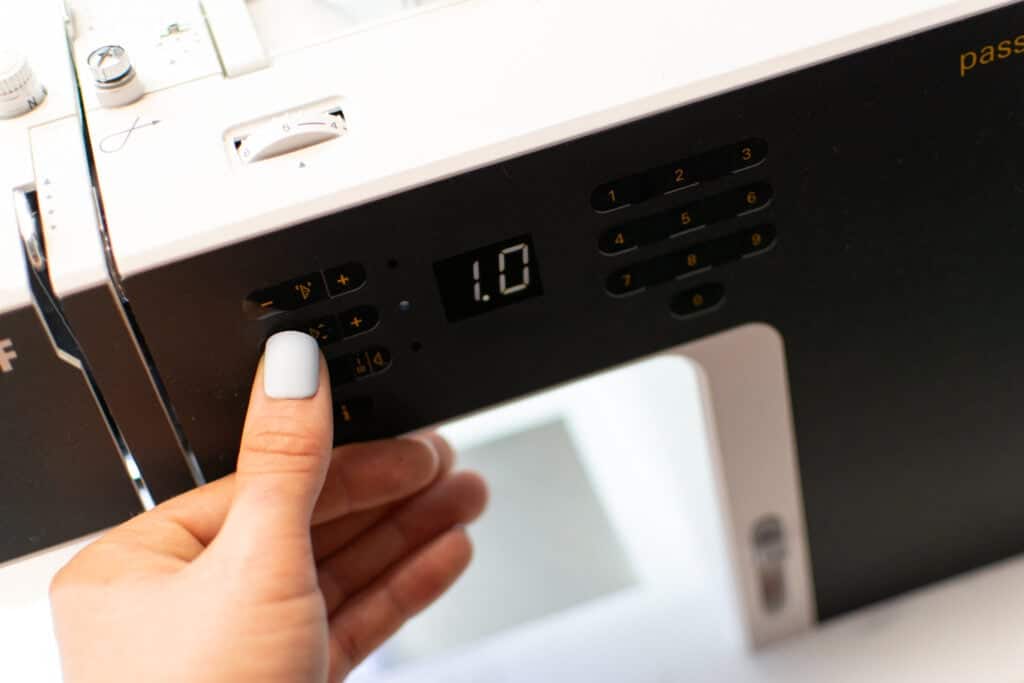
*PRO TIP: I like to use a very short stitch length for foundation paper piecing projects. This is because it is much easier to cleanly remove the paper template at the end with stitching lines made up of tiny stitches. In addition, the smaller stitches keep those small pieces of fabric secure in the finished block.
Step 4: Sew the First 2 Sections
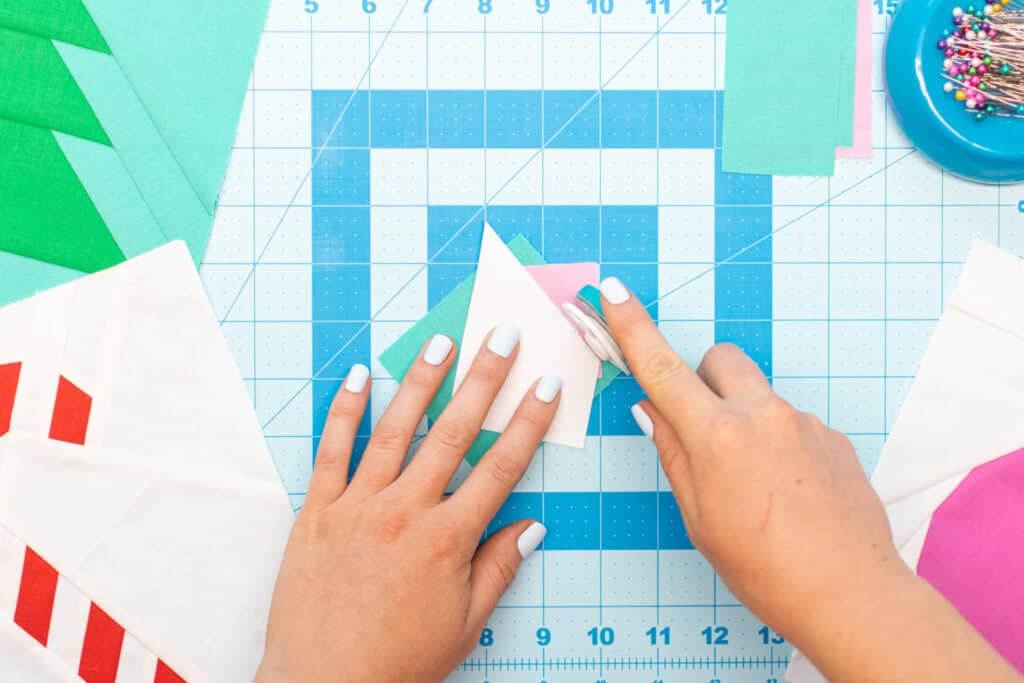
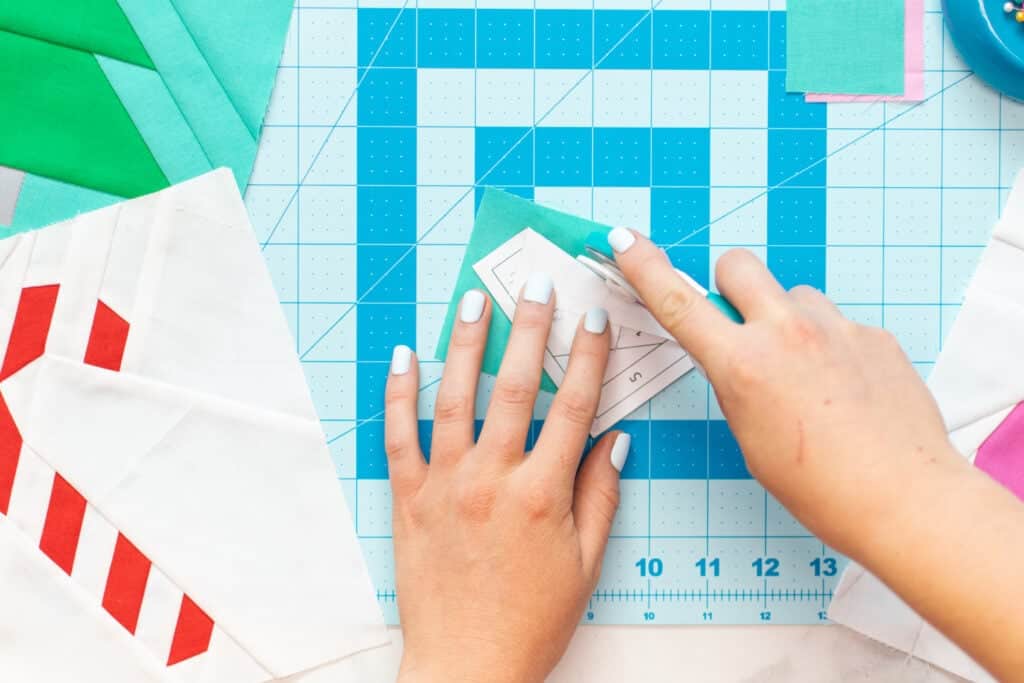
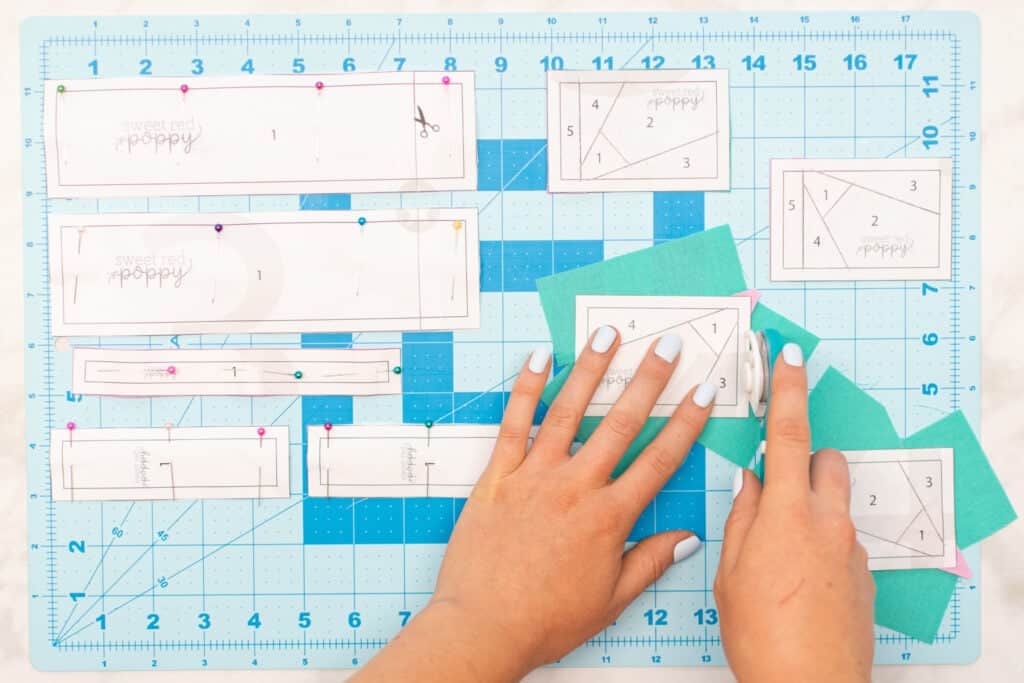
Place the first fabric piece on the back of the paper template, approximately centering it under section #1. You can hold the template up to a light to help you see through it and line up the fabric properly. Make sure that the right side of the fabric is facing out away from the paper.
Pin this first fabric piece to the paper template. If it is a small piece, just 1 pin will probably do the trick. If it's a larger piece of fabric, as in the Ornament pattern, you may need 2 or 3 pins to hold it in place.
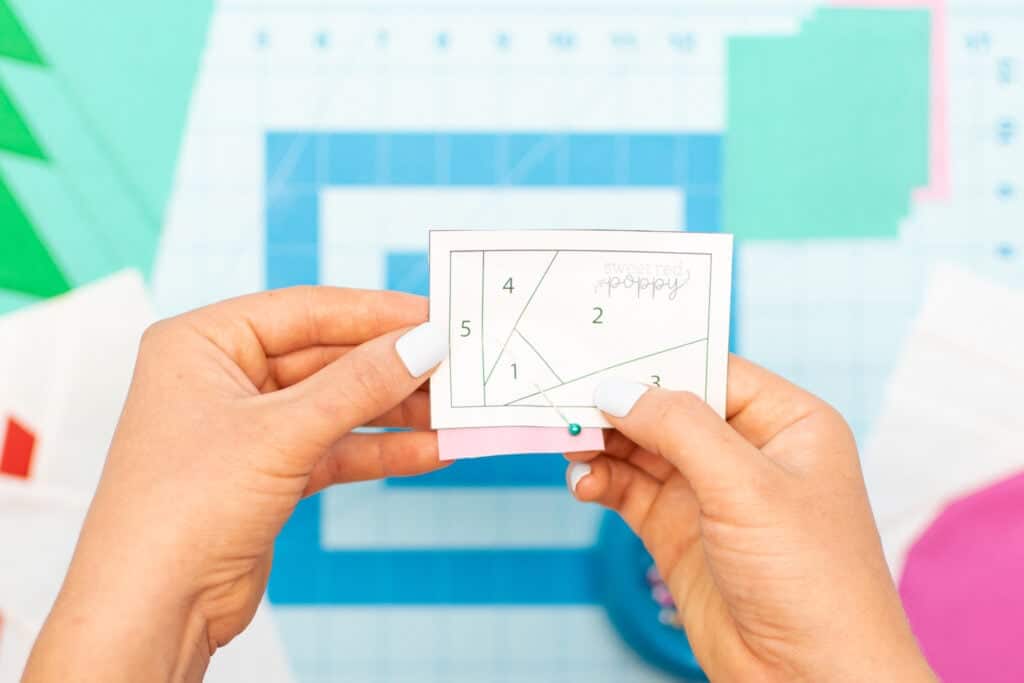
Next, place the fabric for section #2 over the fabric for section #1. Make sure that the right side of the fabric is down towards the right side of the other fabric. Align this second fabric so that its edge extends at least 1/4" into section #2, over the line between sections #1 and #2.
*PRO TIP: It might be tempting to place the fabric directly over section #2 - but that won't work. It needs to be placed over section #1, extending beyond the stitching line into section #2. Then, after the two fabrics are stitched together, the second fabric can be flipped over and it will then cover section #2.
Once you're happy with the placement of fabric #2, pin it in place.
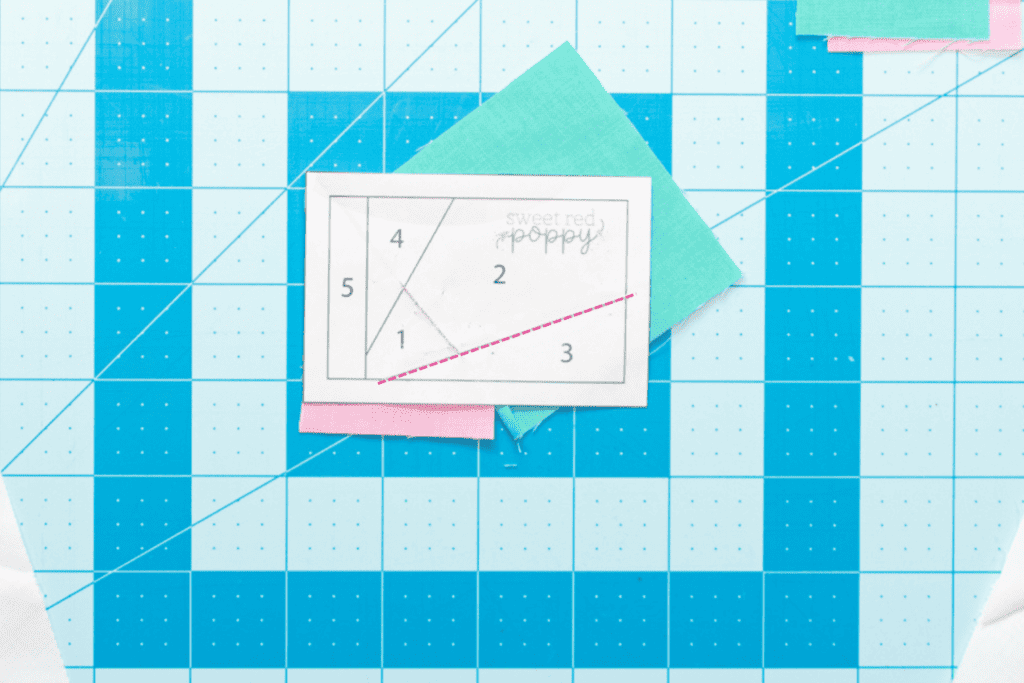
Next, flip the template over so that the paper side is facing up. Stitch along the line marked between sections #1 and #2. I like to start and stop stitching a few stitches beyond where the marked line ends, making sure to backstitch as well.
After stitching, lay the template on your cutting mat, paper side up. Fold the paper back along the seam line to expose the untrimmed seam allowances. Trim the seam allowances down to approximately 1/4" beyond the stitching line.
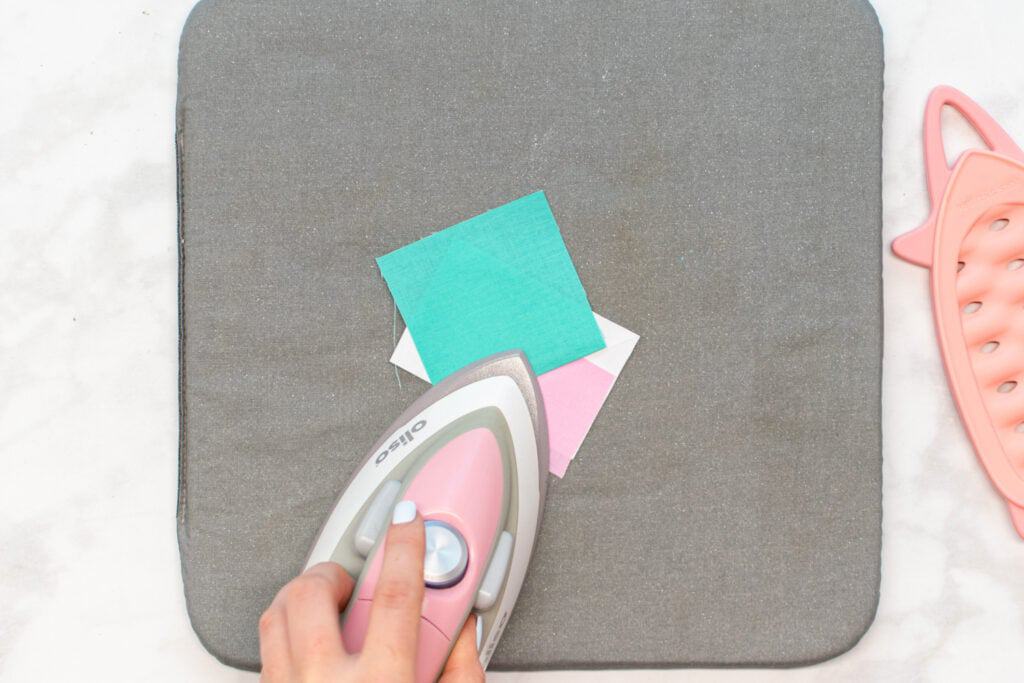
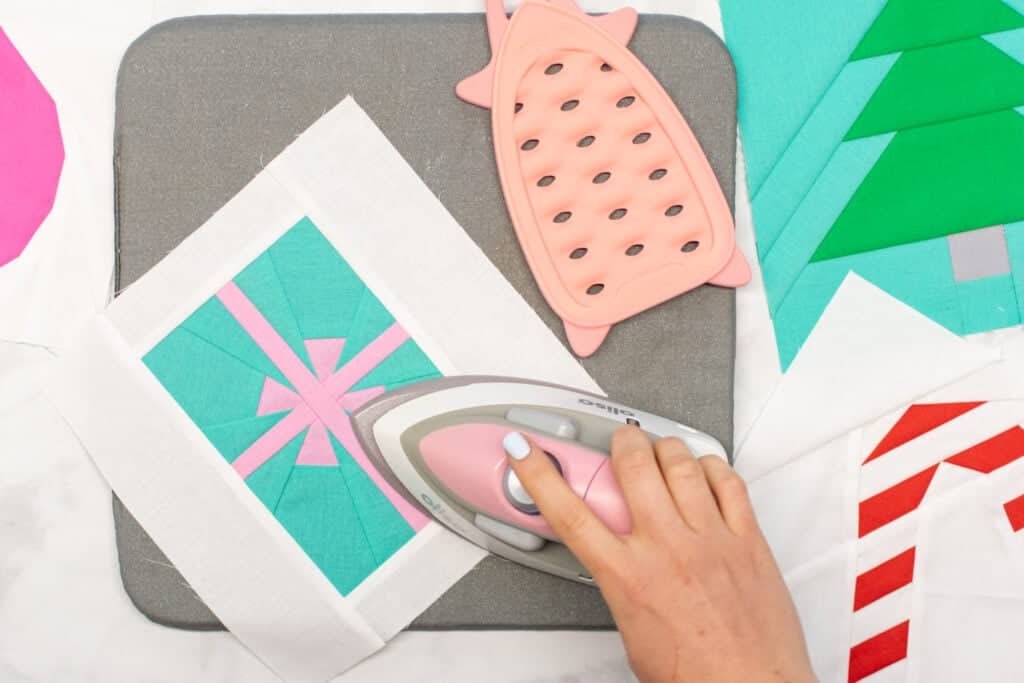
Flip the second fabric away from the first fabric so that it now covers section #2 on the template. Press the seam flat with a dry iron.
Step 5: Add the Remaining Fabric Pieces
Next, place the 3rd fabric down on the other fabrics with the right side facing down. Make sure it extends at least 1/4" into section #3 along the stitching line between sections #2 and #3. Pin this fabric in place.

Stitch along the marked line between sections #2 and #3.
Fold back the paper along the seam line and trim the seam allowances down to about 1/4".
Fold fabric #3 out away from the other fabrics and into section #3 on the template. Press the seam flat.

Repeat this process to add fabric to section #4, then section #5, and so on until all the fabrics have been sewn to the template.

It's very important to stitch each section in order - if you don't, the next fabrics may not fit correctly.
If the design you are piecing has more than one unit, repeat this process to stitch all the fabrics to each unit's template.
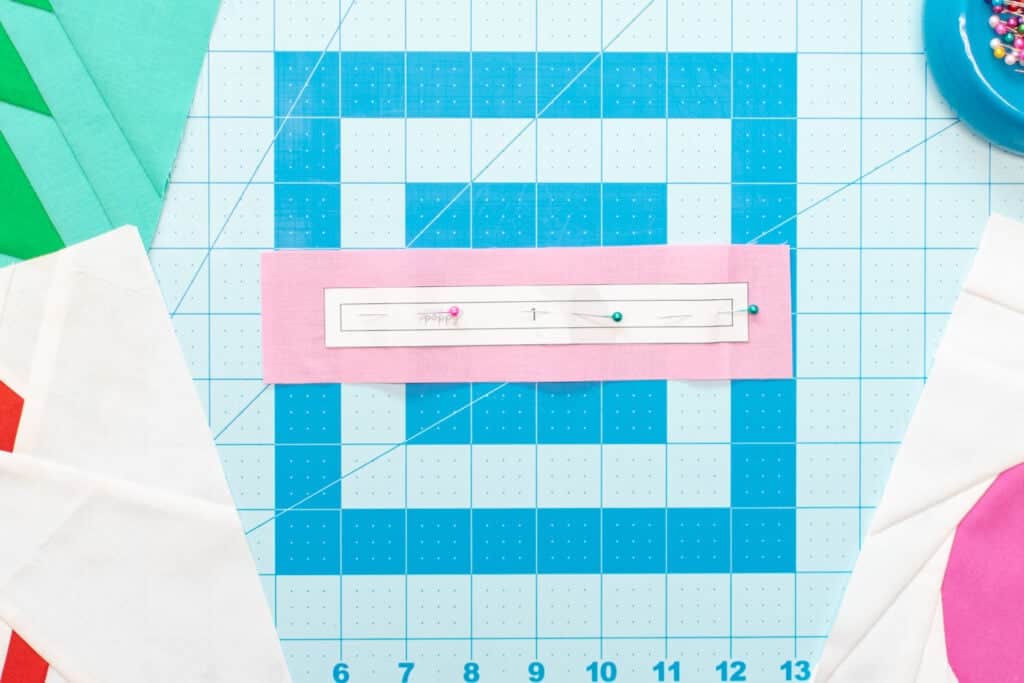
For units that only have one section, such as the outer border pieces around the gift design, simply pin a piece of fabric to the back of that template.
Step 6: Sew the Blocks Together
You've pieced together all those little, fiddly bits of fabric! Now it's time to sew the units together to complete the block.
If you've chosen the Christmas tree pattern, which has only one unit - you can skip this step entirely. For the other designs, you'll need to stitch more than one unit together to form the complete block.
First, trim the excess fabric in each unit down so that it matches up with the edges of the template.
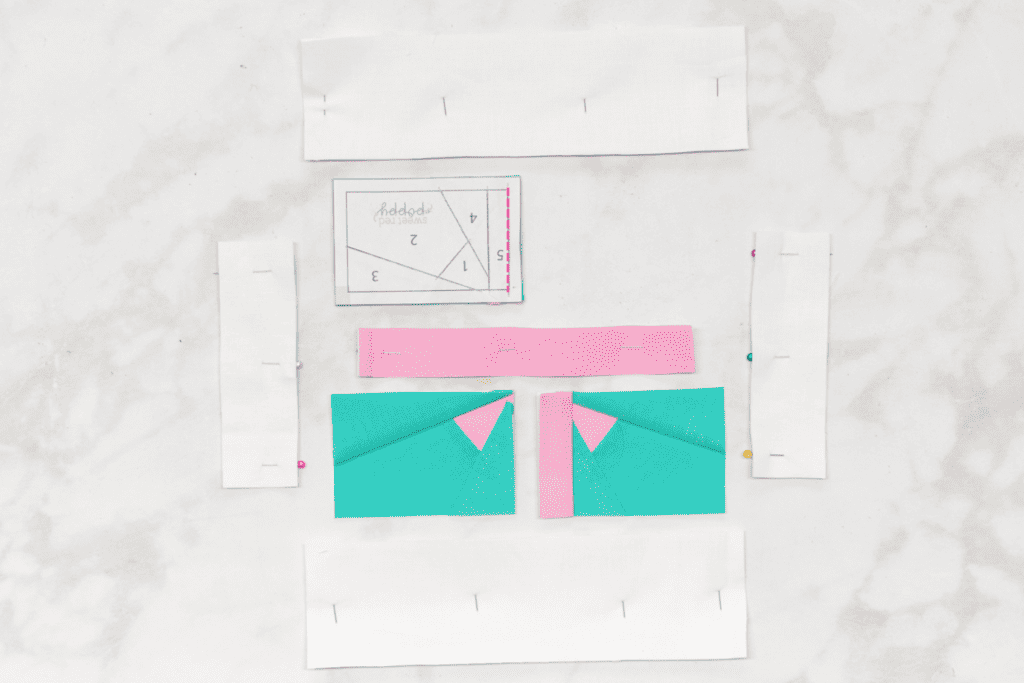
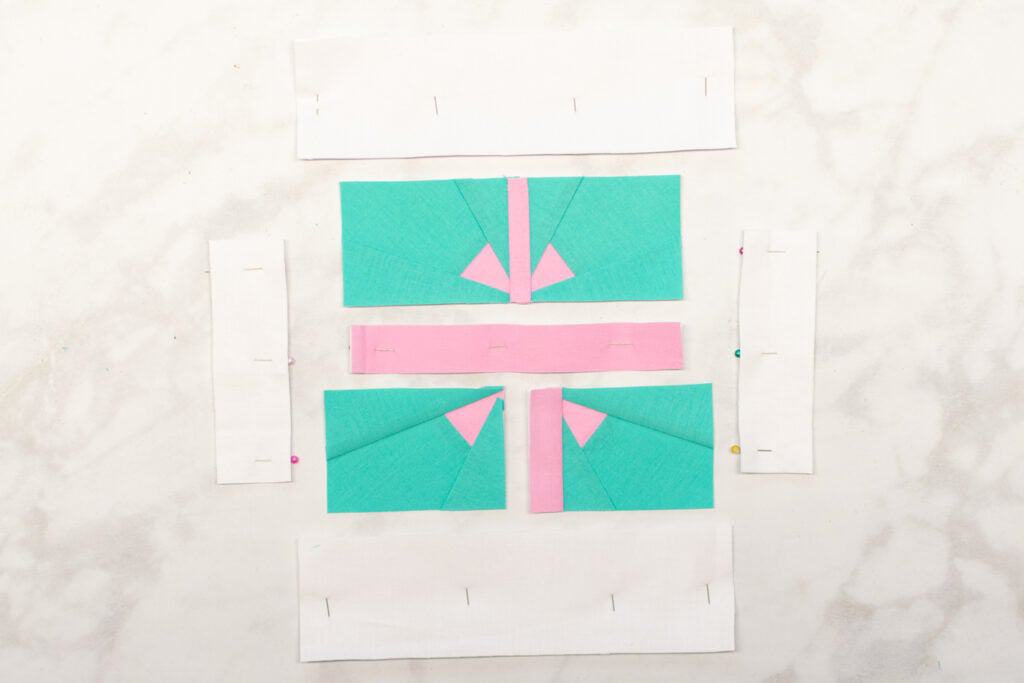
Next, lay out your units on your table, arranging them as they will be in the finished block.
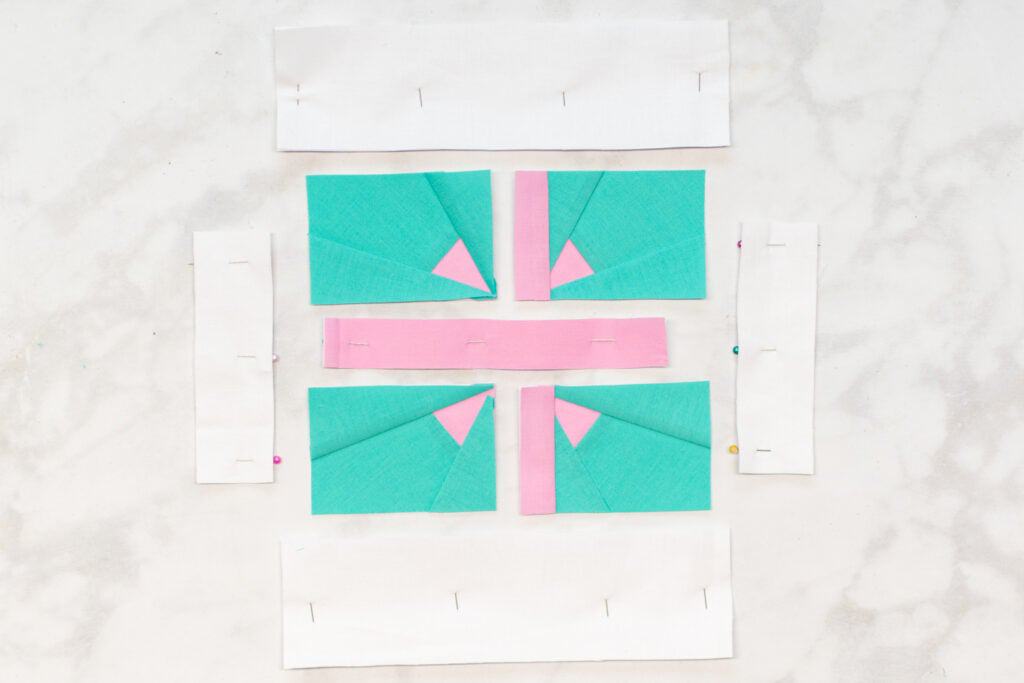
Note the order that the units need to be stitched together in. The diagrams below show what order to sew the units together for each pattern. Just like when you were piecing, it's important to stitch the units together in the correct order. Start by stitching unit #1 to unit #2, then add unit #3, and so on.
First, place unit #1 fabric sides together with unit #2, lining up the edges of the templates along the side that needs to be joined. Align the unit edges carefully and pin them together.
*PRO TIP - Double-check that you've pinned everything correctly before sewing. The fabric should be facing each other with the paper pattern on the outside.

*PRO TIP: I find that it can help to push a pin through the corner at one end of the seam and make sure it comes out within the corner on the other template. This ensures that the two templates are lined up properly with each other.
Next, stitch the two units together, sewing within the stitching line marked on the templates.
Check that the two pieces are properly aligned, then press the seam flat.
Repeat this process to add the remaining units to the block.
Step 7: Remove the Paper Backing
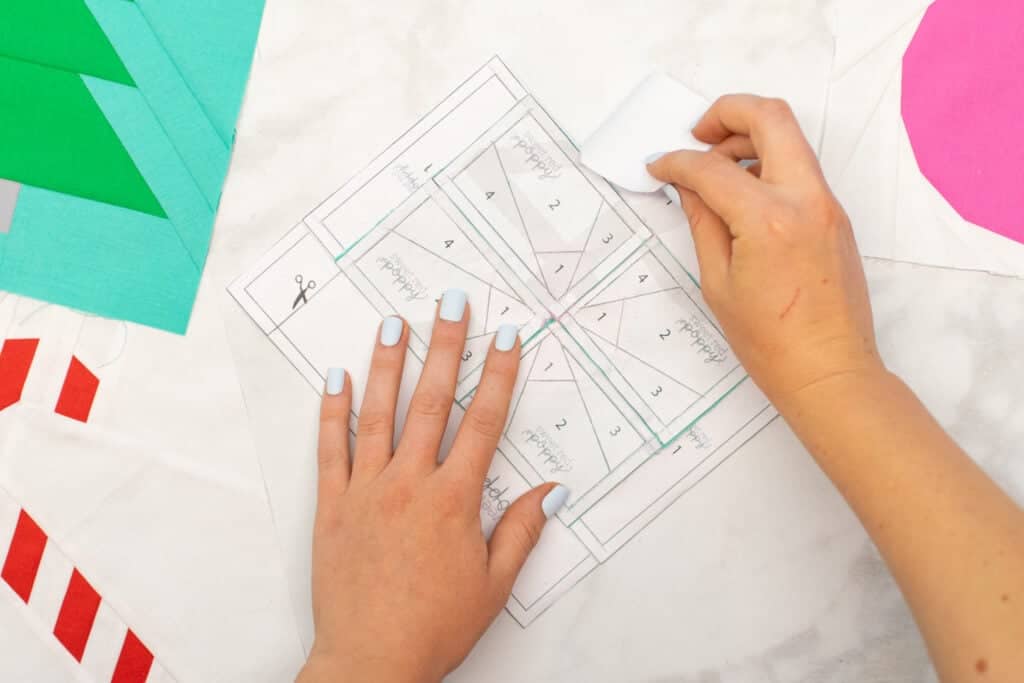
Finally, with the design entirely pieced, all that's left is to remove the paper backing.
I have to admit - this process can get a bit tedious, but it's so worth it for the finished result!
To remove the paper, simply tear it away from the seams in each section. Try to tear the paper gently so that you don't pull on the stitches too much.
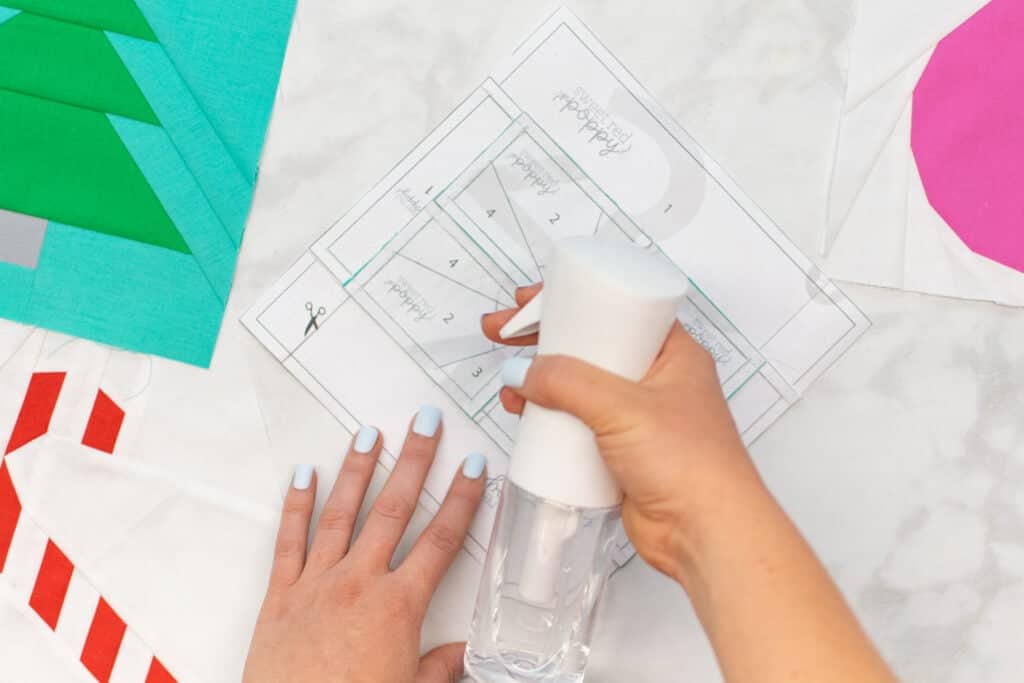
If you're having difficulty removing the paper, it can help to dampen the paper with a spritz of water to make it softer.
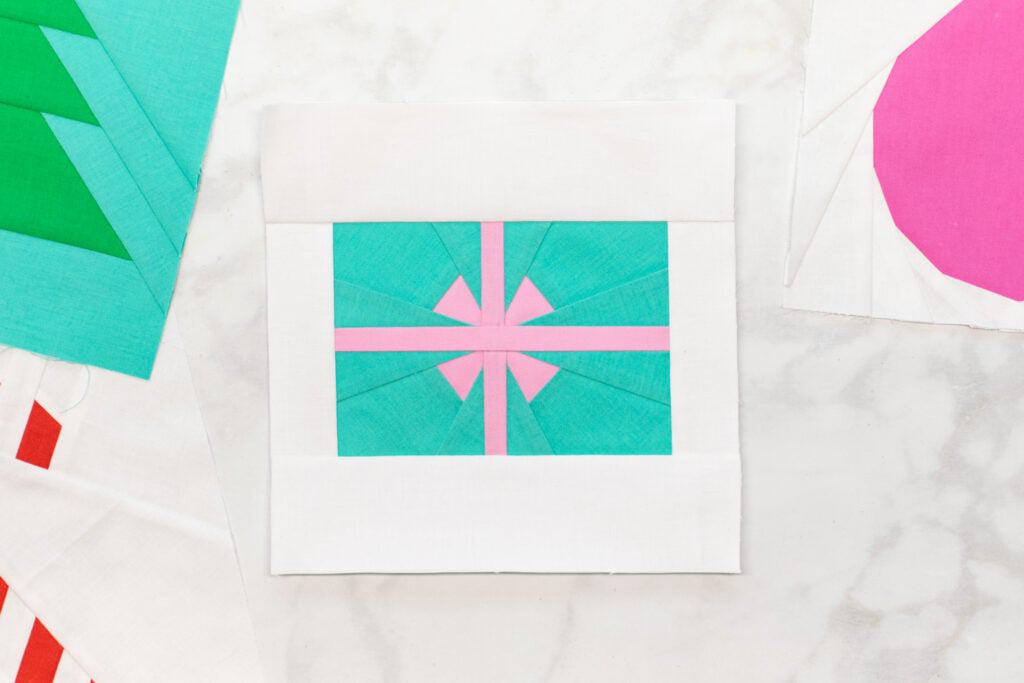
After removing all the paper, give your adorable Christmas quilt block a good pressing!
Hooray! You're finished!
I hope you enjoy my free Christmas paper pieced quilting patterns. I can't wait to see what you make with them!
Don’t want to forget about this pattern? Save this project for later! Save it to your favorite board on Pinterest here.
Having difficulties with pattern numbers and direction numbers
Are not consistent
On the present
These patterns would make the cutest table runner for the holidays! Thank you!
Love all of your projects! Hoping for the Glowforge in your drawing! I want to take my crafting to the next level!!
Thank you Sweet Red Poppy for all your holiday tips and tricks!!
I would love to learn how to do this and all your step by steps help so much. Thank you
Gonna try this once I'm comfortable with quilting
I've decided I want to try this so I can use the finished piece blocks as the front Cover of some Christmas Junk Journals I'm making for some friends! ~~
Great instructions.
Cute
Love it!
Thank you for sharing this
Thanks for the holiday tips and tricks, makes it so much easier.
Adorable, I could imagine this as a wonderful Christmas blanket keepsake for a child. I love how clear the instructions are.
Great technique. Thanks for sharing.
Thanks so much for the great blocks!
Interesting - might actually finally try quilting with this procedure. Thanks for sharing
Amazing!!
Stunning
I’m starting to not enjoy fpp and thanks to your tips it has been so much easier to jump into more intricate patterns. Thank you
Looks so easy , even for a novice like me!
Nothing to say
This is a great idea.
So festive love it! ❤️
I have a love/hate for FPP. I sometimes enjoy doing it, but still have difficulties with it.
Thanks for the easy to understand tutorial with clear graphics
These are all wonderful patterns. Thanks for sharing
FPP always looks so neat!
love it
Awesome
Obsessed with these!
If I try this one day this is the post I'll refer back to. You did a great job explaining and I love the abundance of visual aids.
My aunt is a big quilter. She'd love this.
This is amazing not sure if I can do it but can try.
I can’t wait to try this for Christmas cards this year!
Thinking about starting to quilt. I love these patterns.
that's crazy.
great post, thanks!
Thank you for this!
Great patterns! Thanks!
Unlimited ideas! Thank you!
Such an awesome idea
Love it!!
I've already made all my Christmas cards for the year, but this is quite a nice idea.
These are so cute...especially the tree. Thanks
I used to be apprehensive about doing this but you make it look so easy. Thanks.
I love this technique
I have never tried this technique. Thank you for the instructions.
love it
That is a better way. Thank you.
you make this look easy
Thanks for the free patterns and they will be on the list for next year's gift giving.
Beautiful patterns! Thanks for sharing how to do this.
These are adorable. Would make a cute table runner.
Adorable
These Christmas quilt patters can be used for so many prodjects so thank you
Pretty. Wish I could do more of this
So amazing! You’re so talented!
Patterns downloaded - thank you! Hoping to get a chance to try paper pattern piecing in the upcoming year. I always love to learn new things and your tutorial is easy to follow!
Nice pattern. Easy instructions.
Need to try these would be nice In quilt
I want to try this!
Wonderful tutorial as always!
Has no idea this kind of "paper" existed. Great tutorial!
What an interesting project! Love it!
I have a friend who would love these patterns. She love to sew, espically quilts.
I would really have to concentrate! No interruptions!
I have such a hard time with intricate pieces this will help so much!!
quilting seems so intimidating but you make is seem like I can tackle this project
I can see using the larger blocks for a tgable runner and add smaller blocks for coasters. Thank you for sharing.
Thank you for the patterns. Now to rummage through my fabric stash...
Awesome! Thanks
Cute!
Oh, I might be able to do this. Thanks for sharing.
Love all the different patterns. I have lots of fabric I can try this with. Thanks for sharing!
Cute patterns.
Love! Great tutorial!
Thank you; I have been wantint to learn paper piecing.
Love it!!!!
I have never heard of this technique before
Love!
Love this layout paper, makes this kind of work much easier.
These designs are so sweet I'm going to save this post to make some Christmas quilts for my kids!
Adorable!
So talented! Thank you for sharing ❤️
Awesome!
Love this!
Sewing machine ✔
Material ✔
Paper ✔
Sewing skills ♀️
Great patterns and tutorial. Thank you!
Definitely learned something new today!
FPP is on my list of crafts to try in 2024
I recently inherited my grandmas husqvarna machine and I’m very scared to start on it. This is a great easy first step to learning quilting in honor of her. Thanks so much for your great ideas and tips. These are so cute. I can’t wait to put them all together and give a very special gift to my mom. She’s gonna be very proud.
I gave up quilting after making T-shirt Quilts for my daughter. 1 for HS Graduation, 1 for Undergrad Graduation, and 1 for Ph.D-Sports Medicine Graduation. I'm glad she finished her Education!
This looks like so much fun!
I can't wait to try this! Thank you so much!
Im planning to make a few of these and use as small quilted pillows for my closest girlfriends as a little extra somethin’ somethin’ - Can’t wait to get started.
I love the colors you chose for this project!
Very nice
great ideas
I would make the present one first
great- thanks for sharing!
Excellent tutorial!
So many crafts to try ♀️
Winner, winner, chicken, dinner
I have never tried quilting before but I do like crafting.
I've never seen that before. Thank you
Obsessed
Oh no...another new hobby I need to start!!!
not sure I am ready for this
Can't wait to try these!
They look easy enough.
Being a novice sewer = I really like how you step by step this. I think I could follow it even. Thanks
Entering
Thank you for sharing!