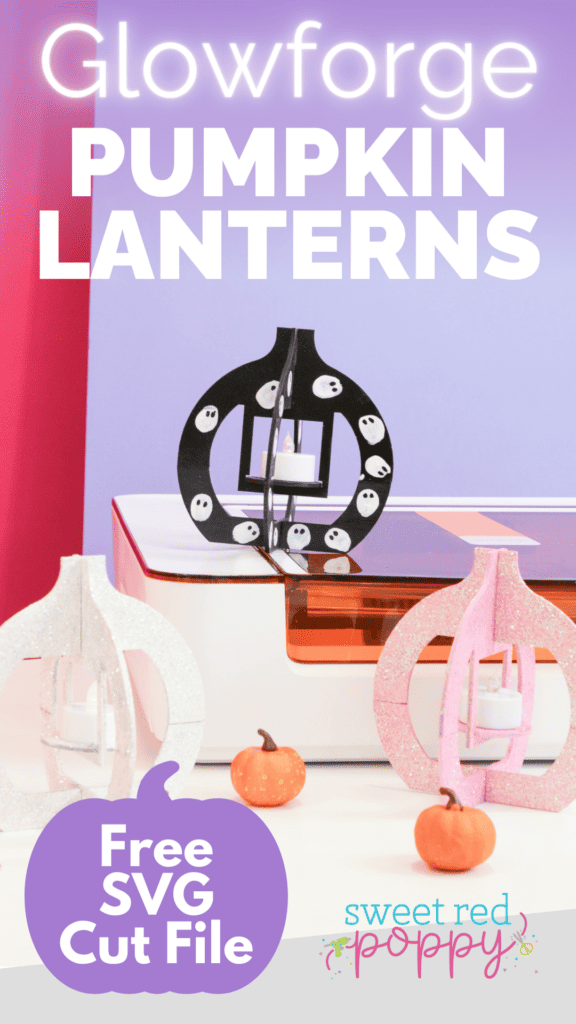
Follow this tutorial to make your pumpkin lantern using the Glowforge Aura machine, downloadable SVG file, and step-by-step instructions.
This post is sponsored by Glowforge®. All thoughts and opinions are my own.
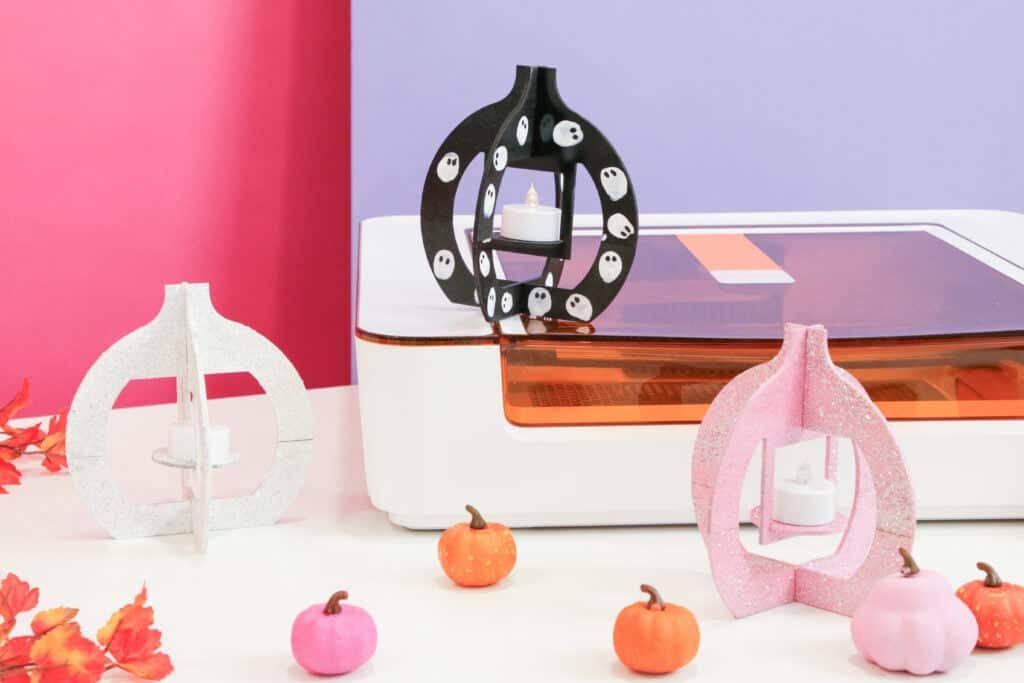
Pumpkin lanterns are trending this year, to stay on top of the trend, I decided to make pumpkin lanterns using the Glowforge Aura™.
With the help of the Glowforge Aura™, I have precise and intricate designs, resulting in beautiful and high-quality pumpkin lanterns.
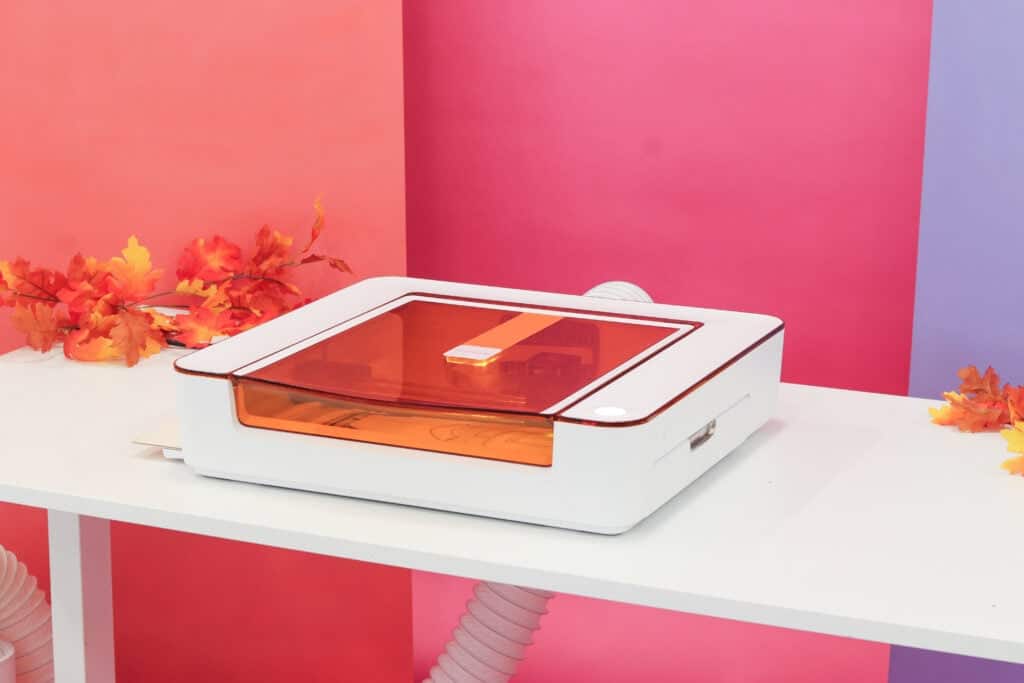
The Glowforge Aura machine is a laser cutter that can cut through Proofgrade® materials such as wood, acrylic, and more! If you would like to learn more about the Aura, click here.
In this tutorial, I will go through what the SVG includes, the supplies needed to make this Pumpkin Lantern, and how to assemble it. Plus, share some tips and ideas along the way!
Table of Contents
What does the SVG Include?
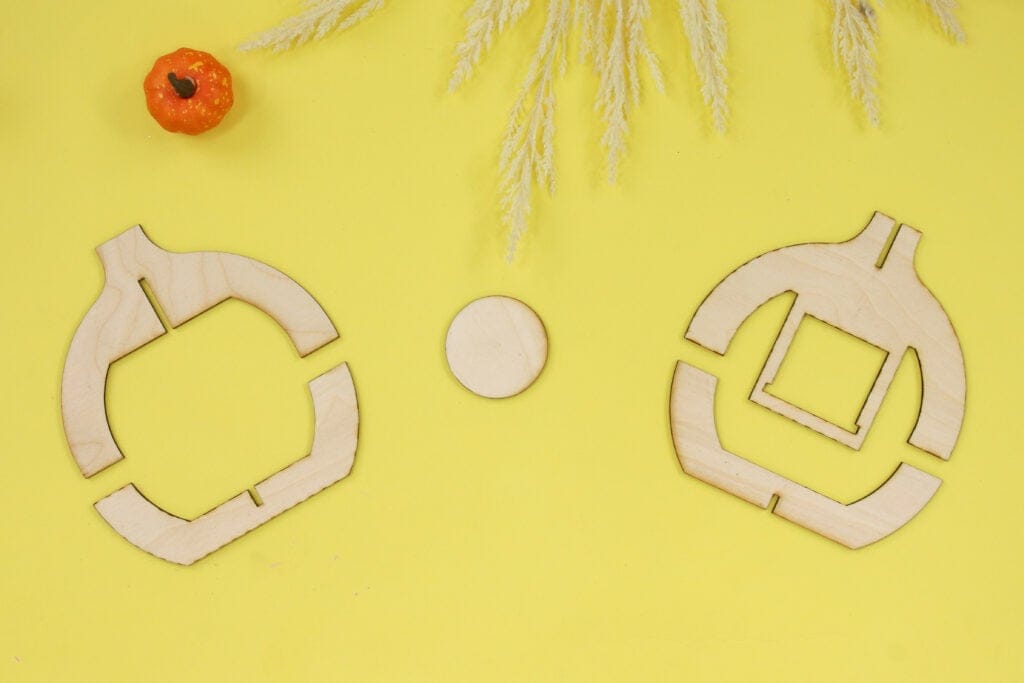
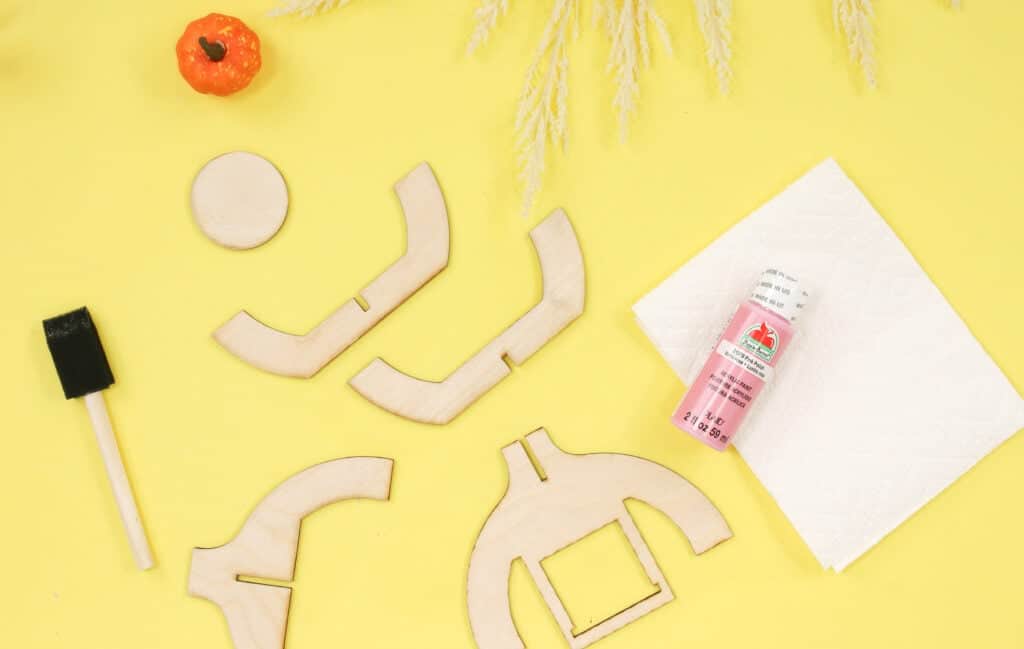
- 4 Pumpkin-Shaped Pieces
- 1 Circle piece
The SVG design features split two pumpkin-shaped pieces (a top half and bottom half) and a circle piece that serves as a platform for a candle of choice.
Download the FREE SVG File Here!

Supplies Needed
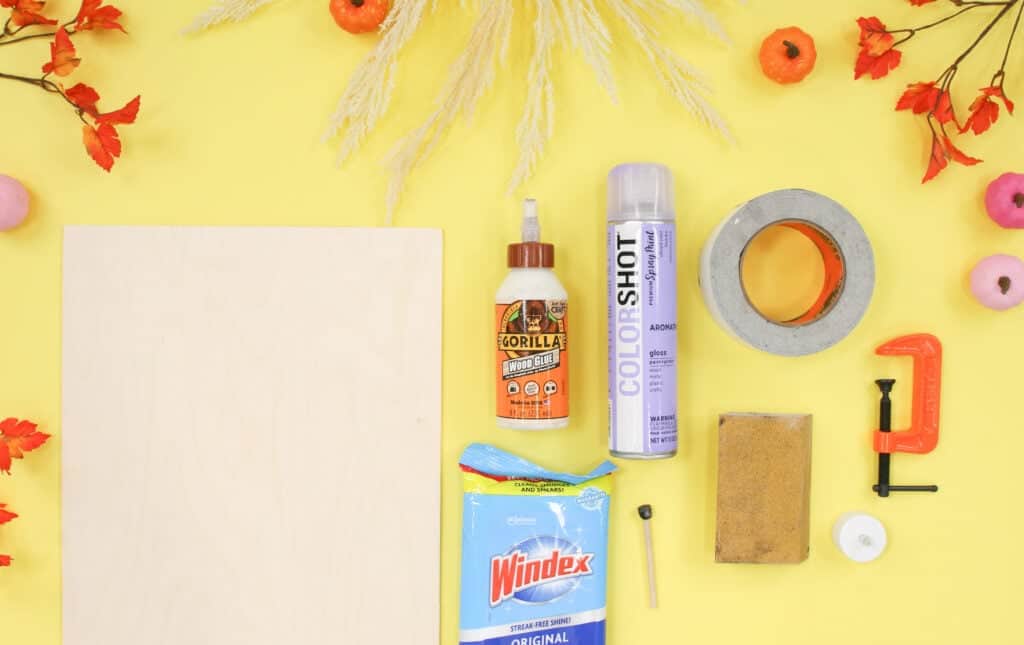
- Glowforge Aura
- Proofgrade® Maple Plywood
- Gorilla Wood Glue
- Gorilla Tape
- Colorshot Spray Paint or Acrylic Paint
- LED Tealight Candle
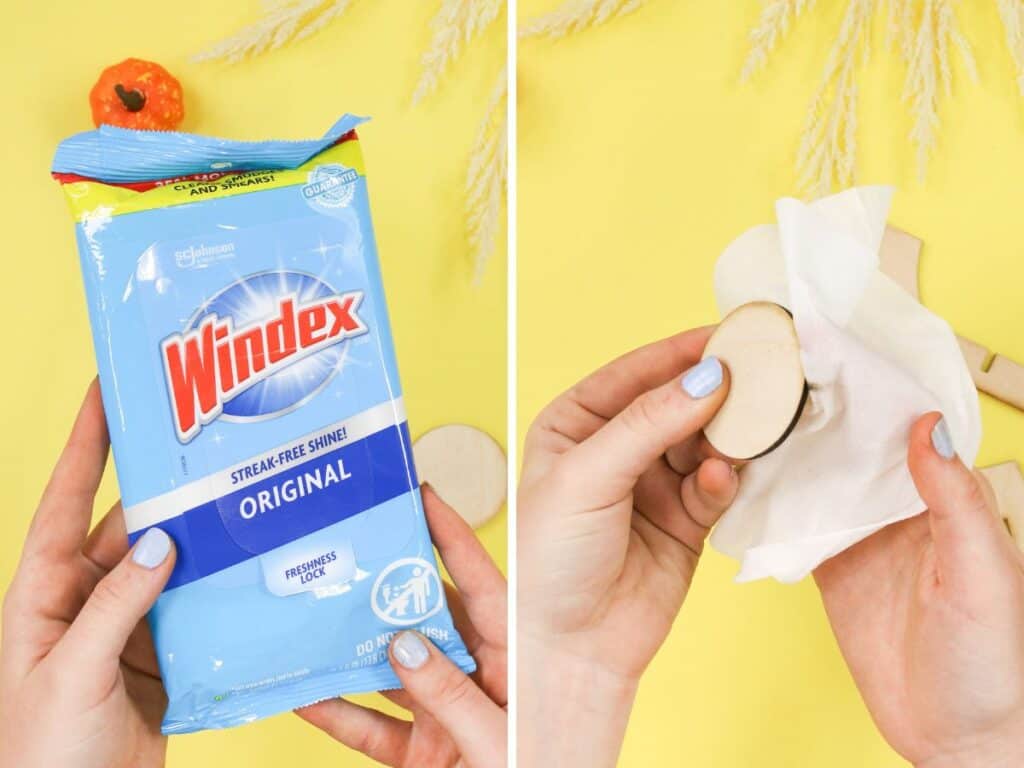
- Cleaning Wipes- I recommend Windex wipes.
- Foam Brush- I used a 1" foam brush and a Foam Spouncer
Optional:
- Glitter
- Mod Podge
Uploading to Glowforge
First, download the SVG file, then pull up the Glowforge app by typing app.glowforge.com into your web browser and sign in.
Once signed in, click Create a New Design in the top left-hand corner, and from the dropdown menu, select Upload a File, choose the Pumpkin Lantern SVG file, and upload.

You can also import artwork by clicking the + above the work area.

When the design has been uploaded, hold down Cmd->Shift->G to ungroup the pieces.
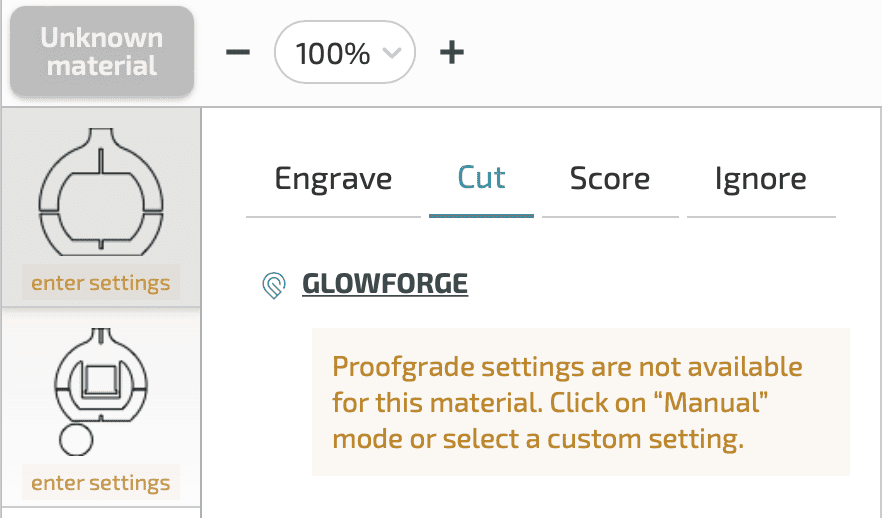
Change the layer types from Engrave to Cut on the left-hand side of the Glowforge workspace.
Place your material into the Glowforge Aura machine (I used Medium Maple Plywood), close the lid, click on the three dots above the workspace on your screen, and select Refresh Bed Image. Your material should now be visible on your screen.
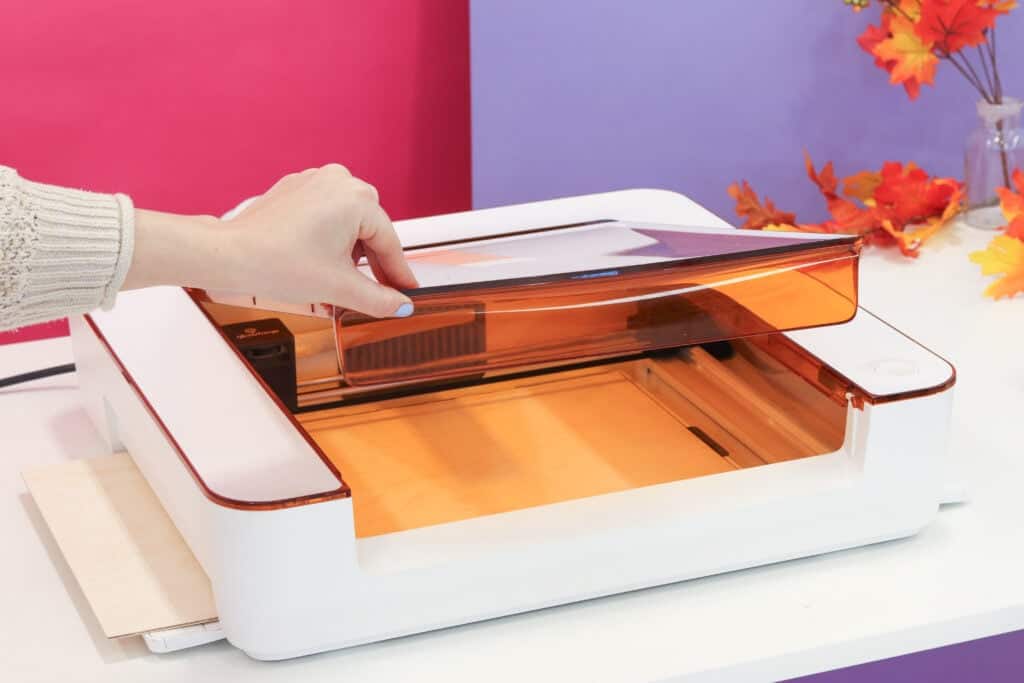
Move the designs wherever there is a free space. I'm using a new piece of wood, but I'm going to move everything to the upper right-hand side of the screen so that I don't waste any material.
Cut out Pumpkin Lantern Pieces
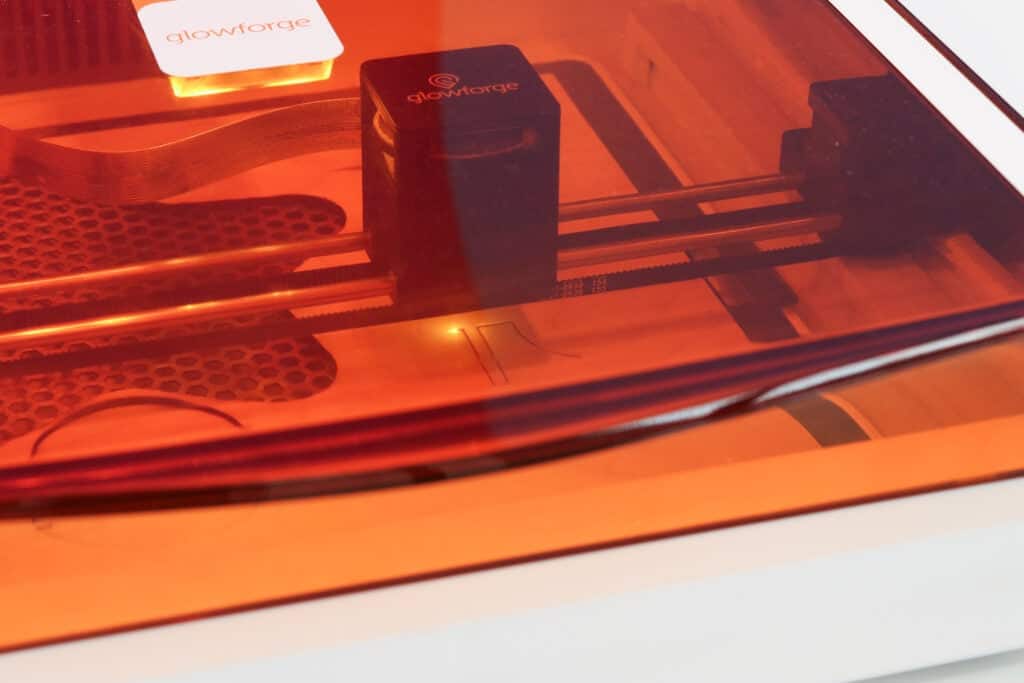
Once ready, click Print in the top right corner of the app and wait for your Glowforge machine to connect.
A blue light will start flashing on your Glowforge Aura machine.

Press the button and let your Glowforge Aura do the work!
After it has finished cutting, wait a couple of minutes before opening the lid to let the fumes go down.
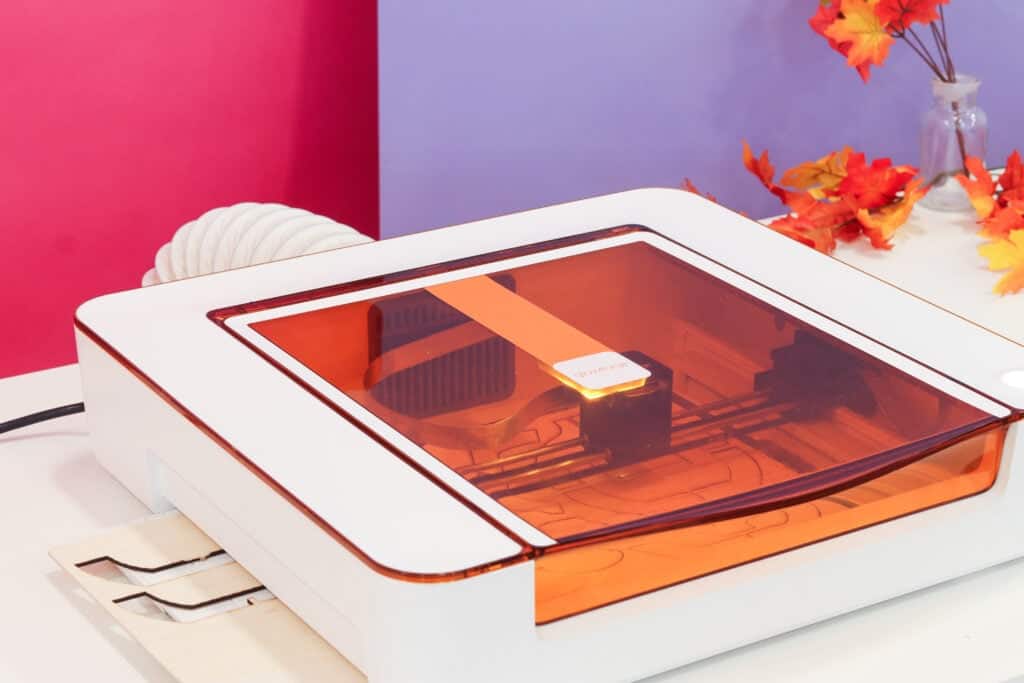
After that time, remove the material from the machine and lay your pieces onto your work surface.
Next, we need to take off the masking.
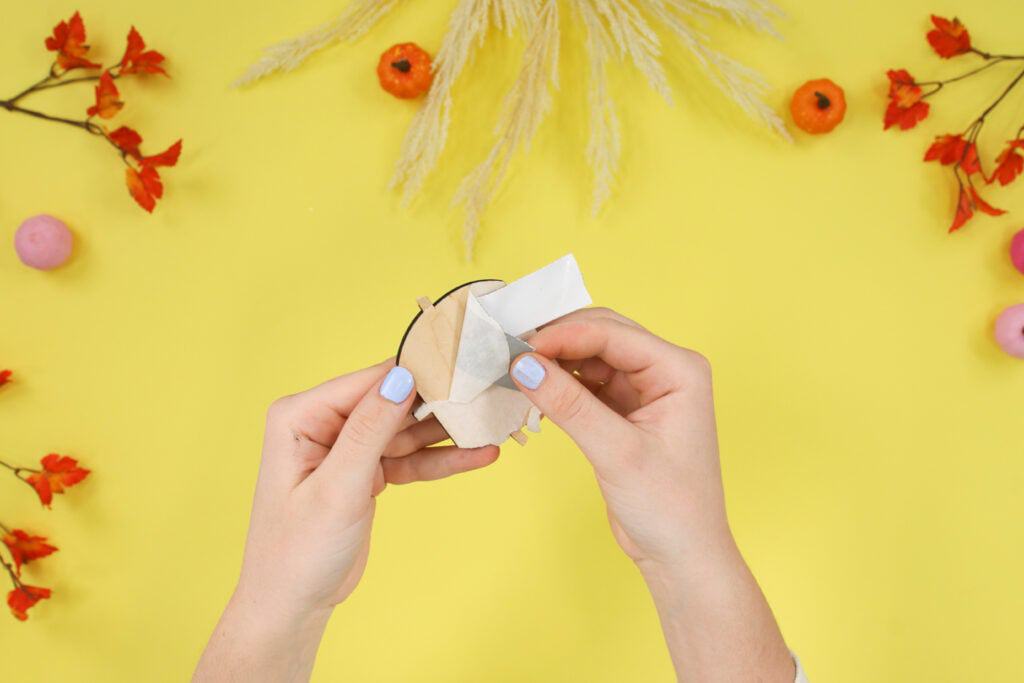
Pro Tip: A helpful tip Glowforge provided is to use duct tape to peel off the masking. Place a piece of duct tape (I used Gorilla tape) onto one of the cut pieces and slowly peel the masking away from the material.
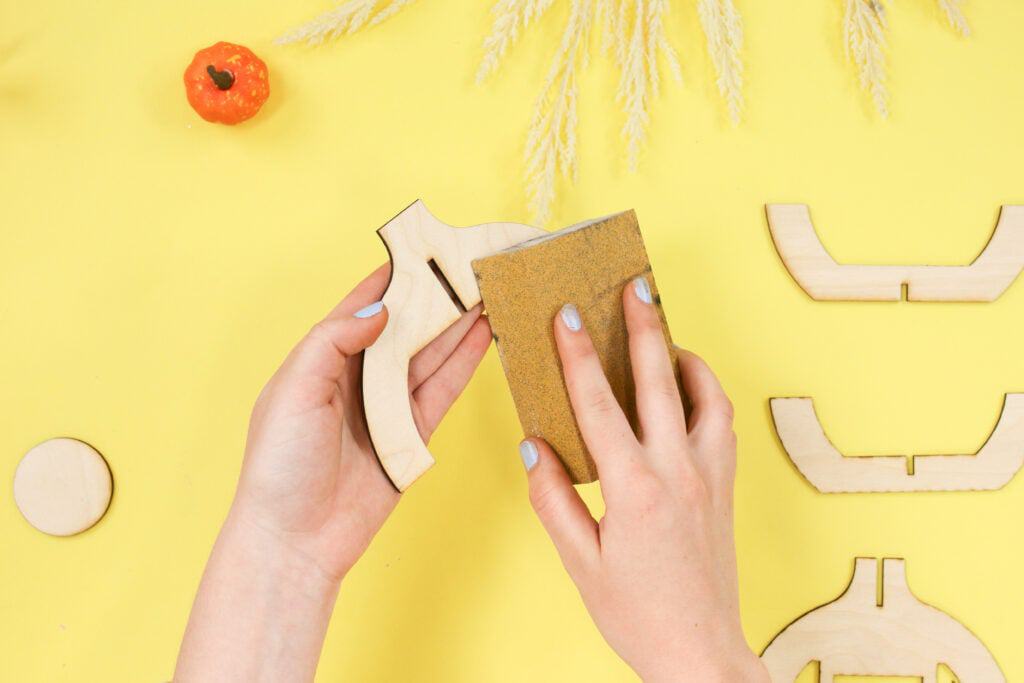
Afterward, sand down your material if needed until there is no longer a sticky shine. Doing this will help prepare the area for the painting application.
Pro Tip: Use baby wipes to wipe away the burn marks. You can also use a liquid soap and a brush to remove the the burn marks.
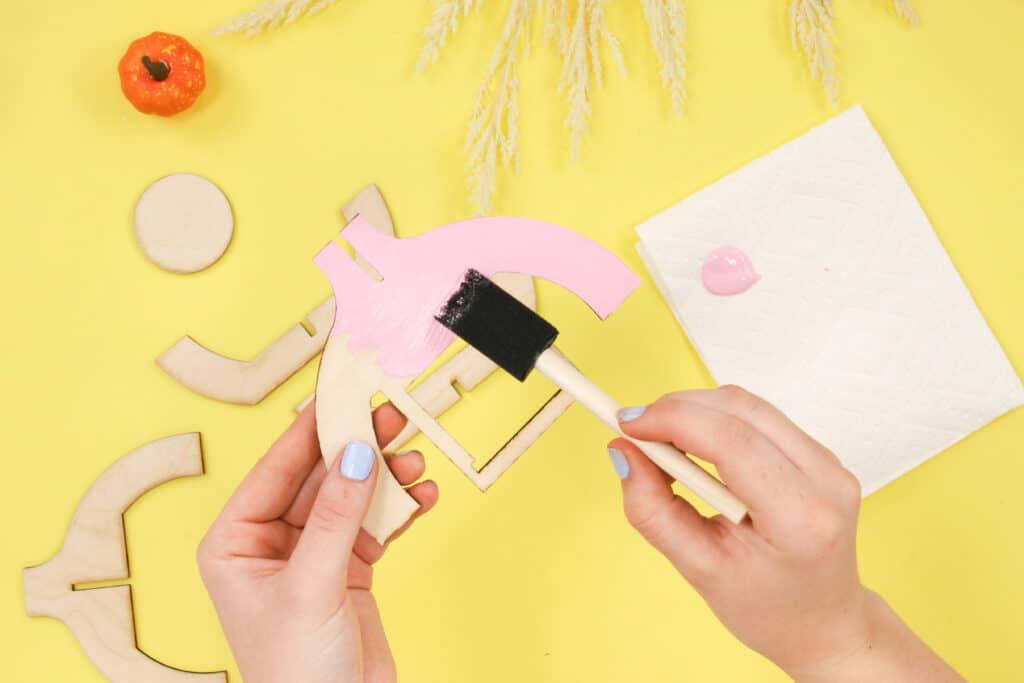
Time to Paint!
I recommend painting the cut pieces before assembling the project because it helps with an even application. I use this method, but do what works best for you.
I’m hand-painting my pumpkin using acrylic craft paint in Baby Pink, but feel free to spray paint yours.
Pro Tip: When spray painting: Hold your spray can 10-12 inches away from the surface and lay down thin layers, letting it dry completely between each layer.
When you start applying your paint, paint in thin layers. After your first or second layer, go ahead and buff the surface to make a smoother surface, and then apply another coat.
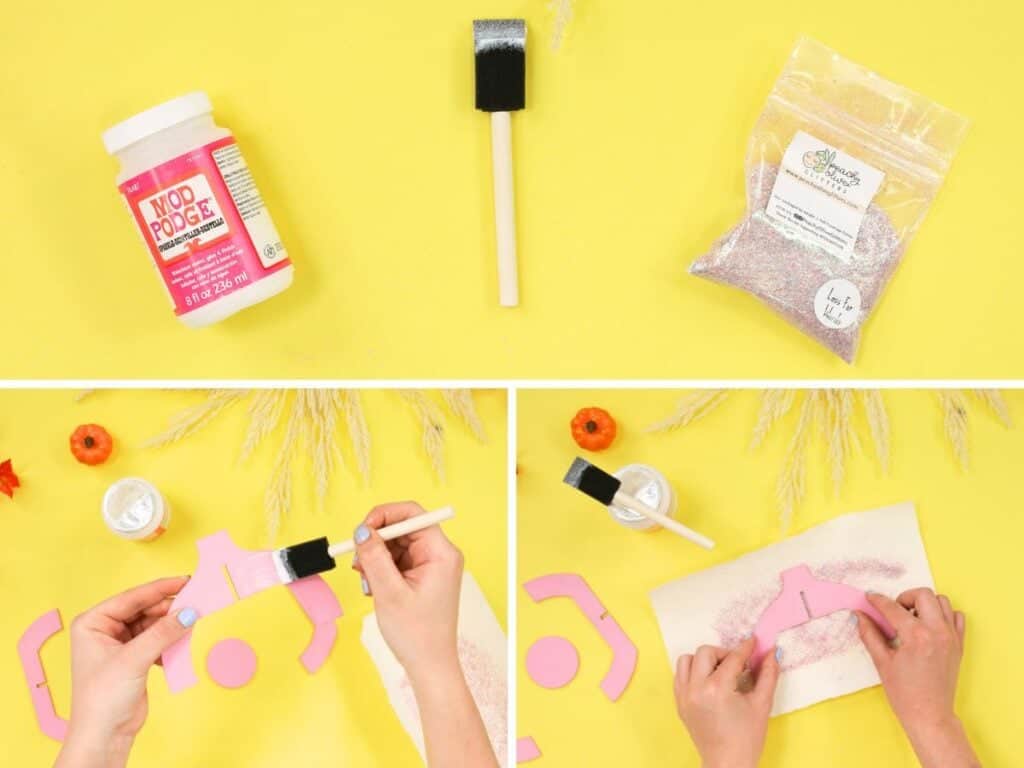
Add any other detail to the pieces. You can add glitter (like I did) or apply paint with a paintbrush or paint markers to paint cute ghosts or patterns.
After I applied my paint, I stroked Mod Podge onto my pieces, laid out a paper towel with glitter on it, dipped my pieces into the glitter, and let them completely dry.
Assemble Pumpkin Lantern
Finally, it’s time to assemble your pumpkin lantern.
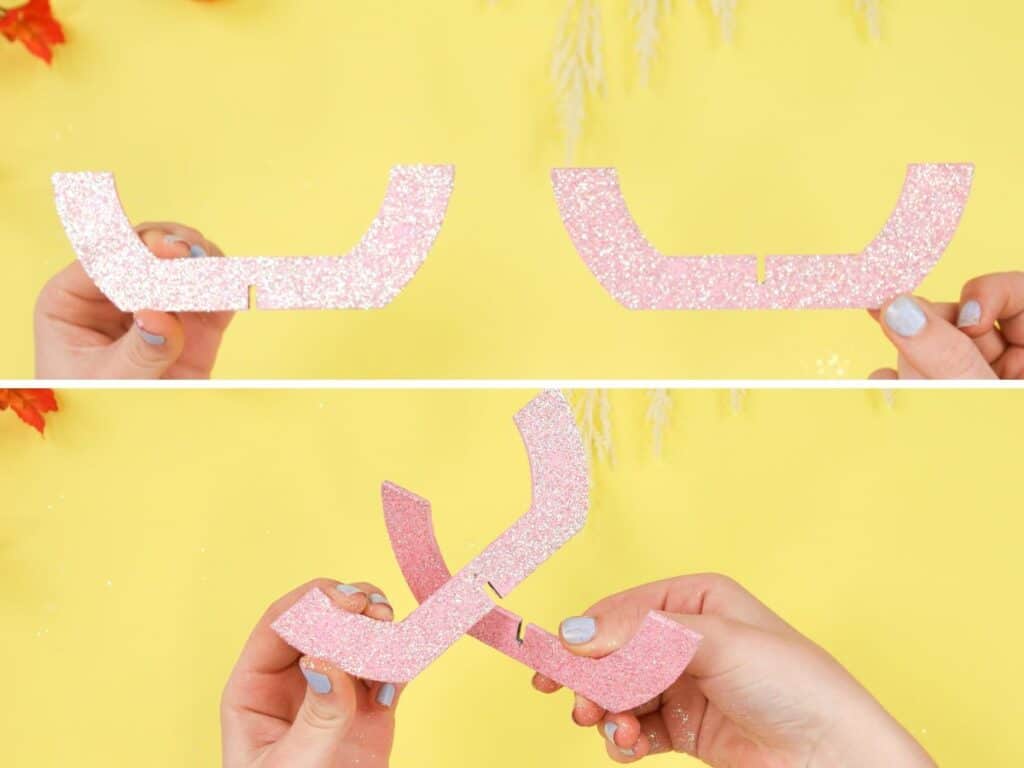
Grab the two bottom halves of the pumpkin pieces and connect them by lining up the slots and sliding them together (the bottom slot slides into the top).
Set the assembled bottom portion of the pumpkin aside, pick up the circle piece, and the top piece with a rectangular cutout in the middle.
Slide the circle into the slots of the rectangular piece attached to the top portion. Now there's a platform for your candle! I recommend using a wood glue to hold it in place.

Grab the two top halves of the pumpkin. Connect the top slot to the bottom (the piece with a rectangle).
With the top and bottom portions of the pumpkin assembled, it's time to bring it all together.
Lastly, with some wood glue or adhesive on hand, apply glue to the arms of the pumpkin.

Align the top and bottom assembled pumpkin pieces, attach them, and hold them all in place for a couple of minutes or until it dries completely.
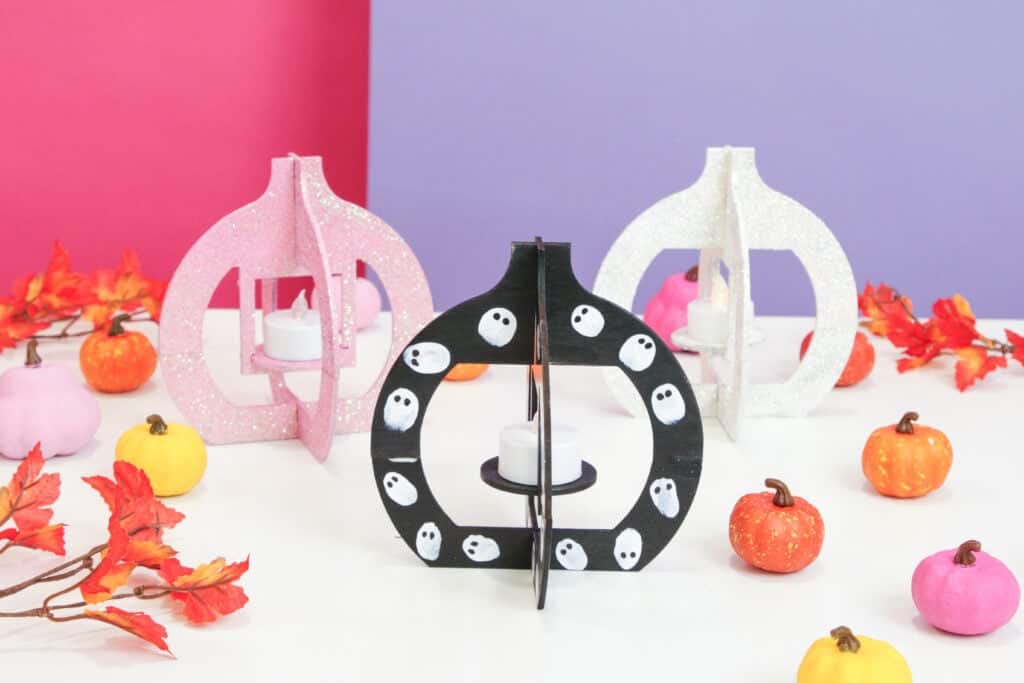
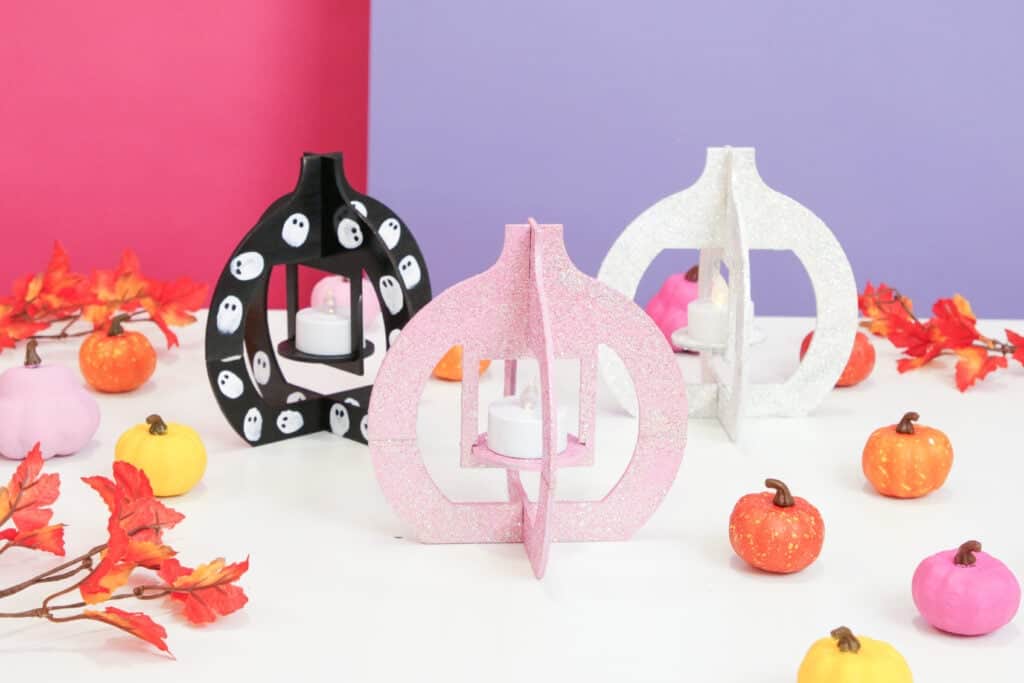
Finished Pumpkin Lantern
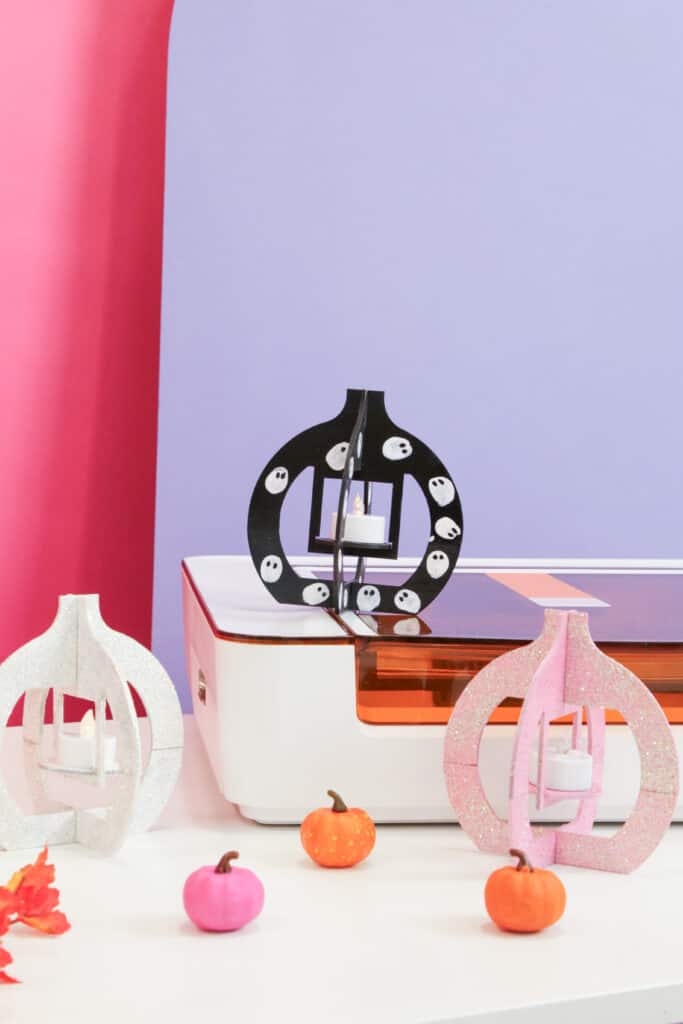
Now, you have your own Pumpkin Lantern! Make it in a variety of sizes, colors, and styles.
Styling Ideas
You can paint and style this pumpkin in so many ways. A couple of ideas to make this an aesthetic Halloween pumpkin would be to:
- Create a color block pumpkin by painting the portions in different, contrasting colors. The color-blocking technique adds a modern and stylish touch to the traditional pumpkin lantern, making it a perfect addition to any fall decor.
- Apply glitter or spray paint the stem a metallic color.
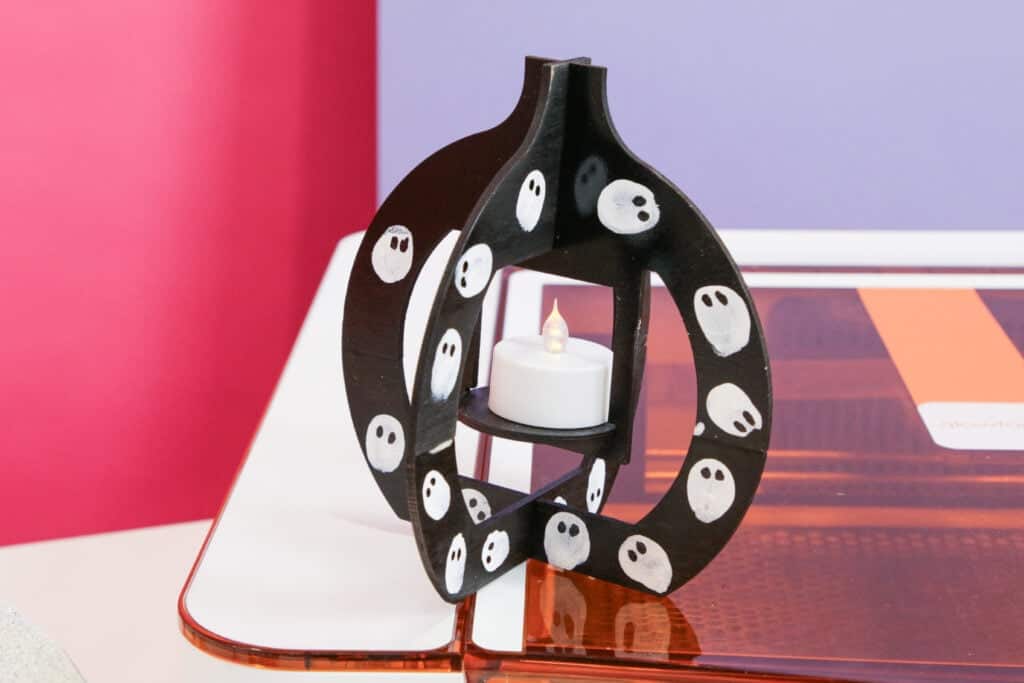
- Paint ghosts onto your pumpkin. I dipped my finger into some white paint and impressed it onto the pumpkin pieces, then added black two dots on each fingerprint using a sharpie.
Want to know more about the Glowforge Aura? Click here.
Looking for more fall projects? Click the links below!
- Take a look at all the best Halloween Crafts
- Pair this pumpkin lantern with these new adorable Halloween Witch Gnomes
Did you enjoy this tutorial? I’d love to see what you’ve made with it!
Join my crafting and sewing Facebook group where you can show us what you’re making, ask questions, and learn from others!
Don’t want to forget about this template? Save this project for later! Click here to save this project on Pinterest.
These would be great as centerpieces or even as little party favors for guests.
I love to craft and find you so inspiring! I would love the Glowforge in your giveaway!
So many amazing things can bebmade!
These are So Cute! I never realized just how many awesome things you could do with Glowforge until recently! Halloween is my Favorite Time of Year & my Favorite Theme for Crafting. I cannot believe I've never thought of simply dipping my finger is white paint to create the body of a Ghostie & then using black on the end of a paint brush to give them eyes!!! What a BRILLIANT Idea!!! ~~
Seems like I'm gonna need a Glowforge soon lol
So cute. Very informative.
Great idea
So much creativity!
Cute and fun to make
Love it, so creative.
Adorable! They remind me of Japanese wooden puzzles I had growing up. Adding paint & glitter added the right amount of holiday sparkle!
Really nice
Makes me want a glowforge
Love these! The possibilities are endless!
These are nice. I’m going to attempt to make paper ones.
I can see a lot of possibilities for these little laterns - different holidays or occasions. Even if only done in solid color with accents glued on
Nice! Do you recommend the glowforge?
Cute design options too to make them unique!!
awesome
Gives me so much inspiration
Kim,
I just love how creative you are. Always finding new ways to inspire us.
Next level creative idea using an innovative device.
Love this idea!
Cute idea
This machine is amazing!
These are so cute, thanks for sharing all these wonderful ideas
Would love to win a Cricut Maker 3. Thank you for all the new ideas for Cricut crafts.
Such wonderful directions!
too cute
So cute
I love this!
This was neat. I love the glitter.
These are super cute.
Love this amazing.
I need to head to the library next year and try this on their glowforge!
i would love one of these for my shop!
I love the Halloween ghost pumpkin it is too cute!!!!!
that's crazy
love this!
Thank you!
Loving all these great idea!
Cute Lanterns!
These are so beautiful
How cute! And they won't burn down my house 🙂
So cute!
What a great idea.
Wow, thank you for the very detailed instructions.
they are very nice
So cute.
I think I need to take a laser class so I can learn about laser cutters. I have to see things and have hands on for anything I need to learn.
nice
What a great centerpiece. Put some greenery around
So Pretty
Thank you so much for showing us how to make these lanterns
These are amazing
Another great project with the Glowforge! Love it!
Love this! These can be decorated for just about any holiday! Thank you!
So so cute! Would love to add this baby to my collection❤️
Oh how I want one for my husband!
So creative, love these!
So much talent
Awesome
This came out really nice!
I am gonna be a Glowforge master one day. Step 1: Afford one!
Lovely ideas. Your context is always so simple and concise!!! I would love to get my hands on an Aura cutting machine!
That looks like so much fun. I love learning new crafts.
Very cute, amazing what this mach8ne can do!
What a fun decorating craft idea for kids.
I love how you added the glitter to it! Great project!!!
Everything you make with the Glowforge is fantastic.
I really like your project of the Pumpkin Lanterns.
Another wonderful glowforge project. These would make beautiful gifts!
Fun!
great idea for all year long!!
These are so cute and can be customized for any decor
So creative! The Glowforge is an awesome piece of equipment.
Love this project!
I love all the things you can do with a Glowforge.
Those are just great.
so cute
These are super cute.
These look easy to make. But I just need to buy a glue forge. Thanks for sharing
I like these.
I love anything related to the fall or Halloween. Thanks.
Awesome
These are a nice idea, my mom would love these if I made them for her.
So clever!!!
I am amazed at what you can do with this, all different materials.
Wish I had one
You make incredible projects!!
You make incredible projects!! I wish only be half as good.
Super cute ideas@
I need one of these!
I enjoyed watching as she made the pumpkin lanterns with the glowforge!
Love this! ❤️
This is so creative! Thank you for sharing it with us! ❤️
Would love a glowforge!
Love this!
Gonna have to give this a whirl next Halloween!
Very cool!
I love the glitter.
I love these super cute
Awesome project, turned out sparklelicious!
Love to have a Glow Forge!!
This is such a fun alternative to Pumpkins!!
Love how these can be decorated for all occasions!
Another great idea!
Very cute
Pretty project!
Such an adorable project!
that's amazing
Makes me want a glowforge!
Too cute
Adorable project! They would be so cute used in a table scape at each place setting.
These cute little lanterns would be great for any season. Thanks for sharing. ❤️
Nice project
that machine would be fun so many great ideas
Thank you for a chance to win and possibly make this 1 day
Can I really do this?
I like the sparkly pink one the best
Nice project to try
It would be great to have.
wow! that's so cool and interesting! i can't wait to try it out myself!!!!!!
Awesome tutorial. I need one of these Machines!
Winner winner chicken dinner!!!
OMG, this is awesome. I'd love to have one.
Love it
Such a wonderful idea!
twinkle twinkle
These are perfect for autumn!
Pretty amazing the abilities these machines can do nowadays.
Killer hope to win
Awesome giveaway. Thank you
I love that machine
Absoluetly love this!
this is great!
Love this machine. Hope to win for my newly retired husband!
So many possibilities! I love this! I love that this is right in your own home!
Very cute!
the touch of glitter is perfect!
Love this
3 little pumpkins
I have a million ideas running through my head to use these for.
This would be beautiful as part of my fall decor.
Cute
This is awesome!
These look so easy to make and it looks so ADORABLE! Thank you for the idea!
Such a great craft idea. I'd make this well before Oct so I could have it ready to go!
Can't wait to see more of your crafts
I love this! Such a great idea to try.
I love it!!!! I made a pumpkin out of paper but It didn't hold up very well!!! Wood is so much better!!!
Wood projects will last longer than my paper projects.
Love it so much
They are adorable!
Great crafts always like watching your videos
I love how it turned out! I can't wait to have a Glowforge in my craft room one day:)
I would love to have a Glowforge to make projects like this!
Could you make Christmas tree ones?
So obsessed
love these!!!
Would love to try this with the kids
Amazing! Thank you for creating and sharing this incredible lantern.
Very nice
such an amazing idea
Great project
so cool!
I'll be doing a whole bunch of lanterns for every season and each holiday. I really adore these!
Nice lanterns.
I love your cool ideas!
These would be great decorations for a party. I'm definitely going to be using this template in the future. Thanks for a great tutorial.
Beautiful lanterns!
The glow forge is amazing!
amazing work!!
I would love an Aura.