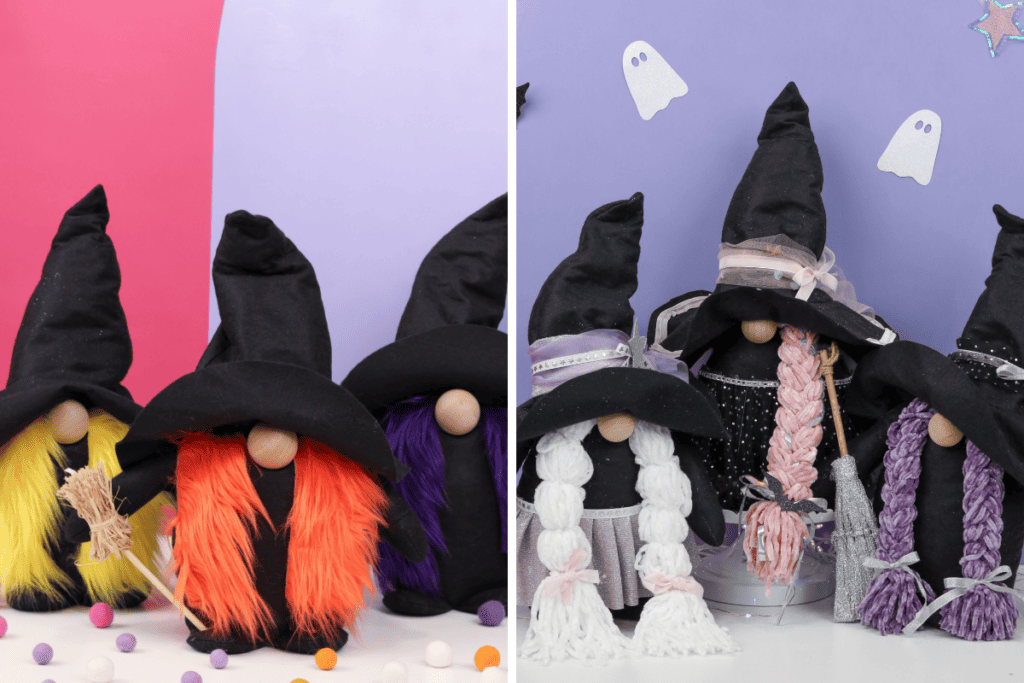
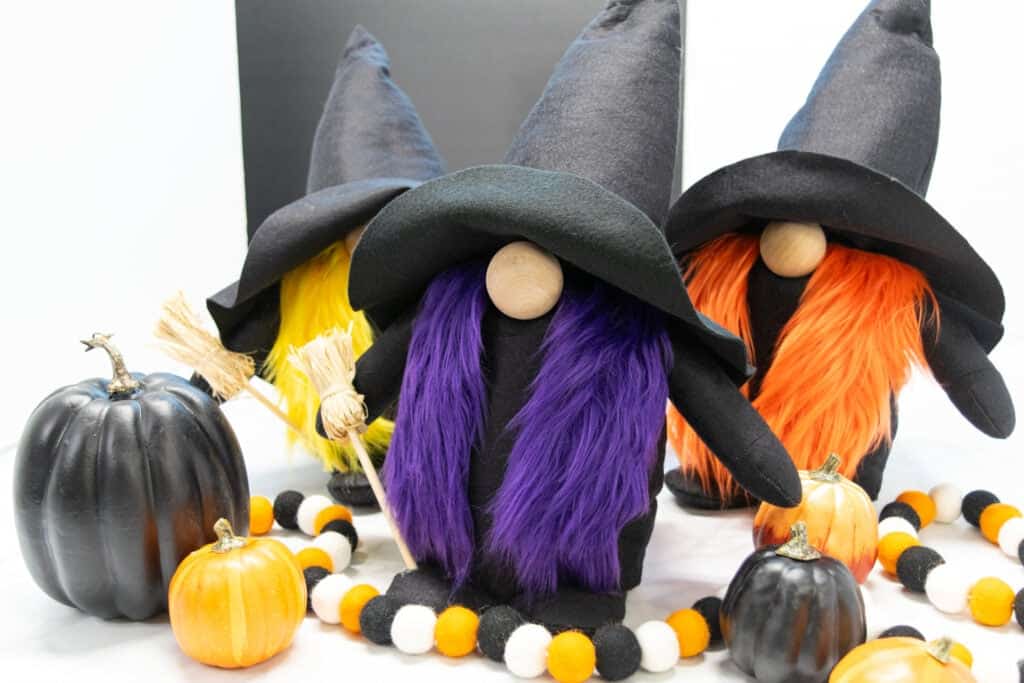
Make These Adorable Sanderson Sisters Witch Gnomes For Halloween With My Free Sewing Pattern and Step-By-Step Tutorial.
I love everything Hocus Pocus - and what better way to bring some Hocus Pocus to my Halloween decor than with these adorable Sanderson Sisters witch gnomes!
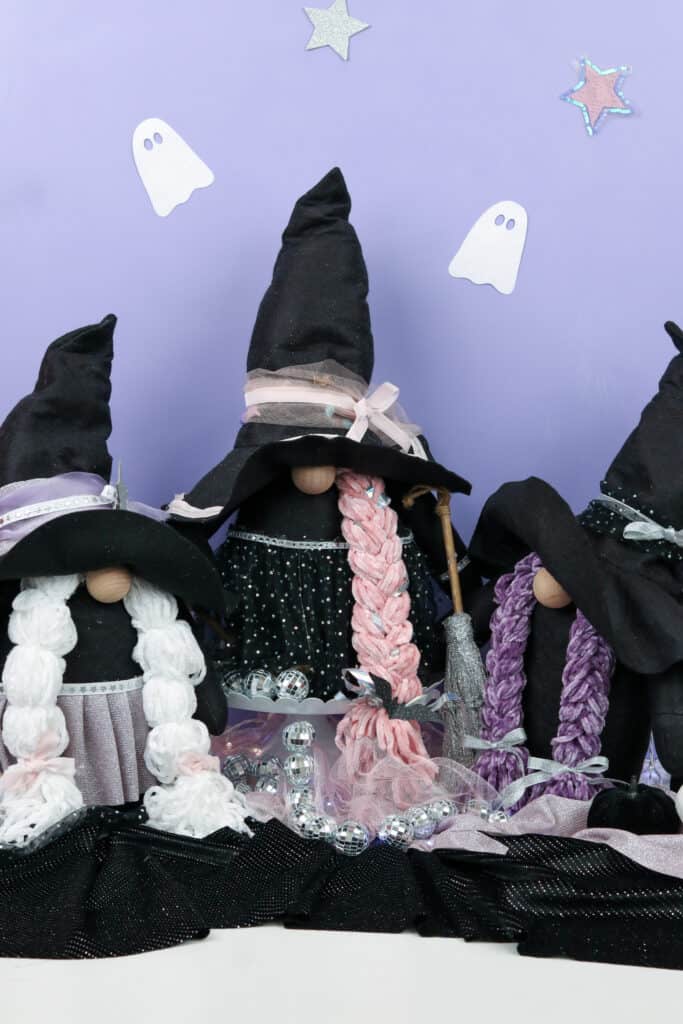
If Hocus Pocus isn't your thing, you can sew up a gnome and decorate it using your own personal style. Using the same pattern as a base, I added in a few fun trims, ribbons, and scraps of fabric to give them a totally different feel.
Grab my free sewing pattern and follow along with the step-by-step tutorial below to make your own spooky little gnomes!
Table of Contents
About the Gnome Pattern
This gnome pattern was initially used to create my DIY Christmas Gnomes. It includes 2 sizes of gnomes - Small and Large. Both gnomes are about 20 inches tall. The small gnome's body is approximately 6 inches across, while the larger gnome measures about 8 inches across.
This Christmas gnome pattern can easily be turned into Halloween Sanderson Sisters Gnomes with different fabric choices, a cute little broom, and a big brim to turn the Santa hat into a witch hat.
In this tutorial, I'll show you step-by-step how to make these adorable Sanderson Sisters Witch Gnomes!
Supplies to Make Sanderson Sisters Witch Gnomes
- 3/4 Yard Black Felt
- 1/4 Yard Faux Fur (for Hair)
- Wood Ball Knob (1.5" for Small, 2" for Large)
- 5.5" Bamboo Skewers
- Bundle of Raffia Paper Ribbon
- 32 oz Bag of Poly-fil
- 4 Cups of Poly Pellets
- 18 Gauge Aluminum Wire
- Hot Glue Gun
- Glue Sticks
- Sewing Machine
- Thread
- Sewing Pins
- Sewing Machine Needle
- Scissors
- Rotary Cutter
- Cutting Mat
- Iron
- Ironing Board
- Seam Ripper
- Tape
- Printer
- Printing Paper
- FREE Gnome Pattern
- FREE Witches' Hat Brim Pattern
Click Here to Download the FREE Gnome Pattern

Step One: Download and Cut Out the Gnome Pattern
First download both the gnome pattern and the witches' hat brim pattern and open them in your PDF reader. I highly recommend using Adobe Acrobat.
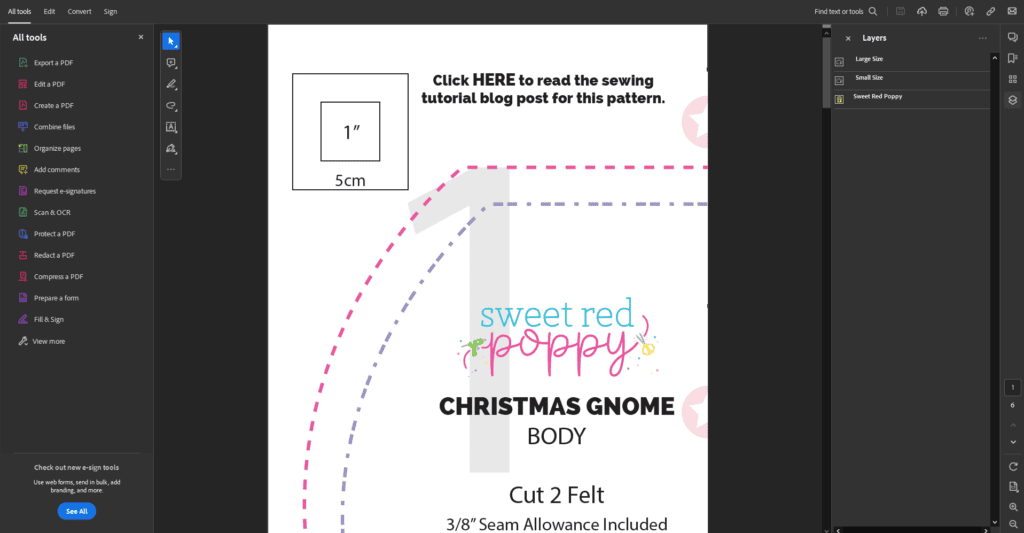
It's important not to print the patterns directly from your browser. This can result in wonky border lines and incorrect pattern scaling.
Next, click on "Print" to open the print settings dialog box. Set the scaling to "Actual Size" or "Custom Scaling: 100%".
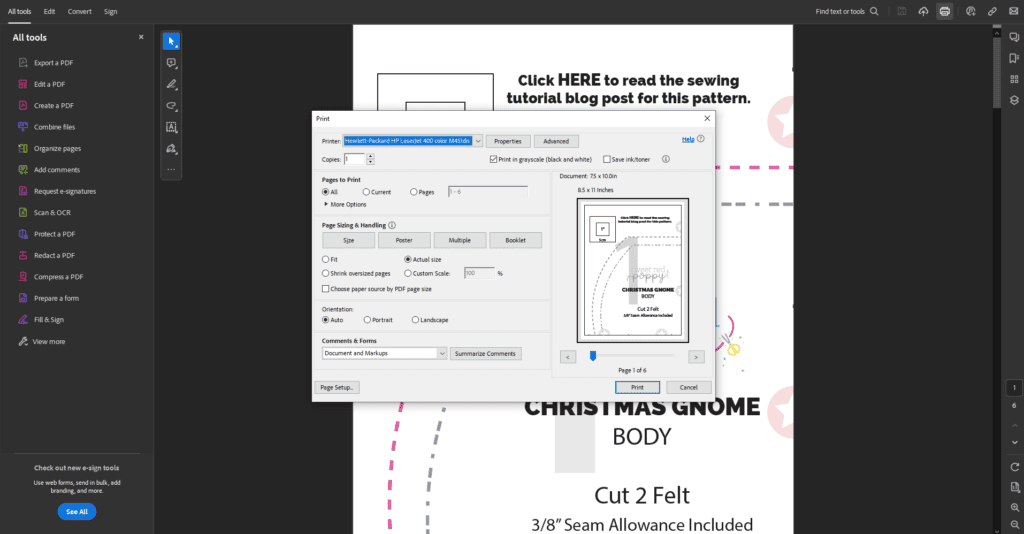
Print the first page of the pattern. This page contains a 1" x 1" test square. Measure the square with a tape measure or seam gauge.
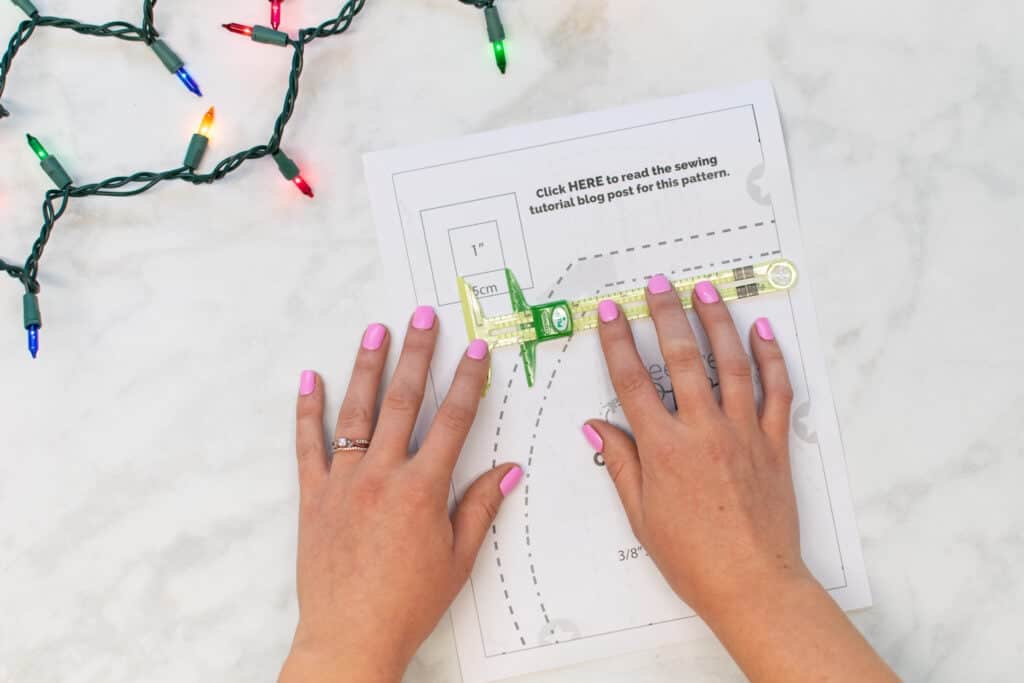
If the square measures 1" x 1", your scaling is set correctly - go ahead and print the rest of the pattern. If the square does not measure 1" x 1", you'll need to double check the print scaling settings and reprint the pattern.
PRO TIP: This pattern features layers for each size to make printing easier. This means you can print only the size you want to sew!
To use the layers options, click on the 3 stacked papers icon along the side of the screen. Then, click on the "eye" next to the size that you don't want to print to deselect it.

Once the pattern has been printed, assemble and tape the pages of the pattern together.
Line up the pink stars and lines of the pattern and tape each page together according to the layout chart below. There are large numbers in the center of each page to help you keep the papers in order.
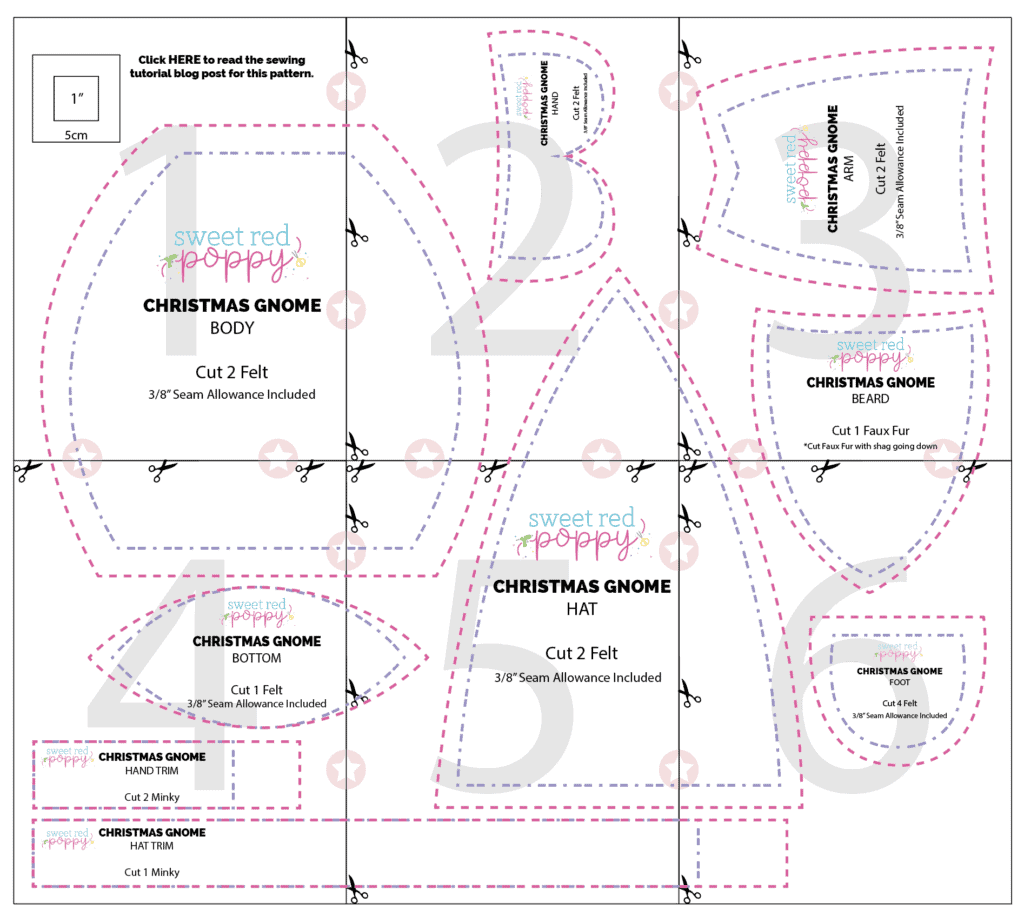
You can trim away the excess paper along the border lines before taping the pages of the pattern together if you like. Or, you can simply overlap the paper margins. If you decide to overlap the edges, holding the pages up to a light can help you see through the paper and align the pattern lines correctly.
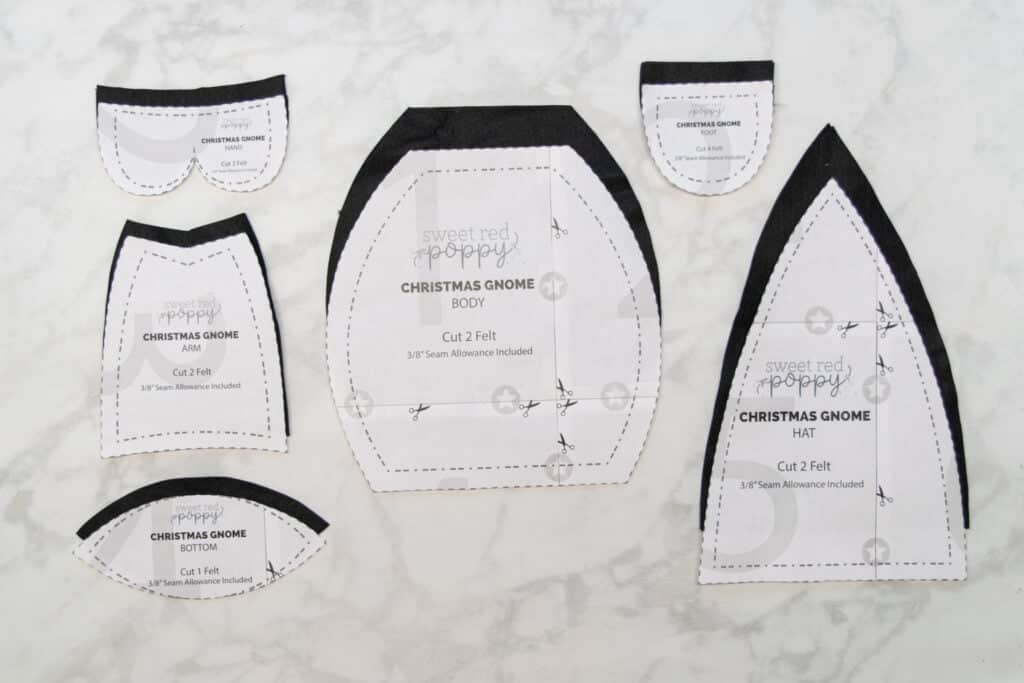
Finally, cut out each pattern piece, following the lines corresponding to the size you want to sew.
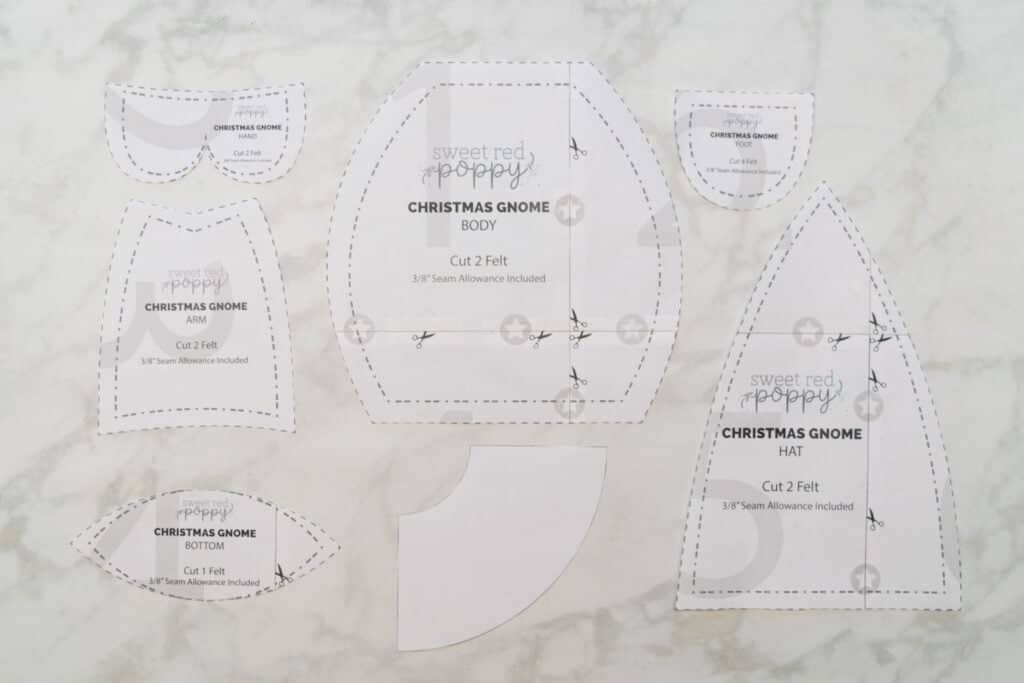
To make the Sanderson Sisters Witch Gnomes, you will need the following pattern pieces:
- Body
- Bottom
- Hand
- Arm
- Foot
- Hat
- Hat Brim
You can set aside the Beard, Hand Trim, and Hat Trim pattern pieces.
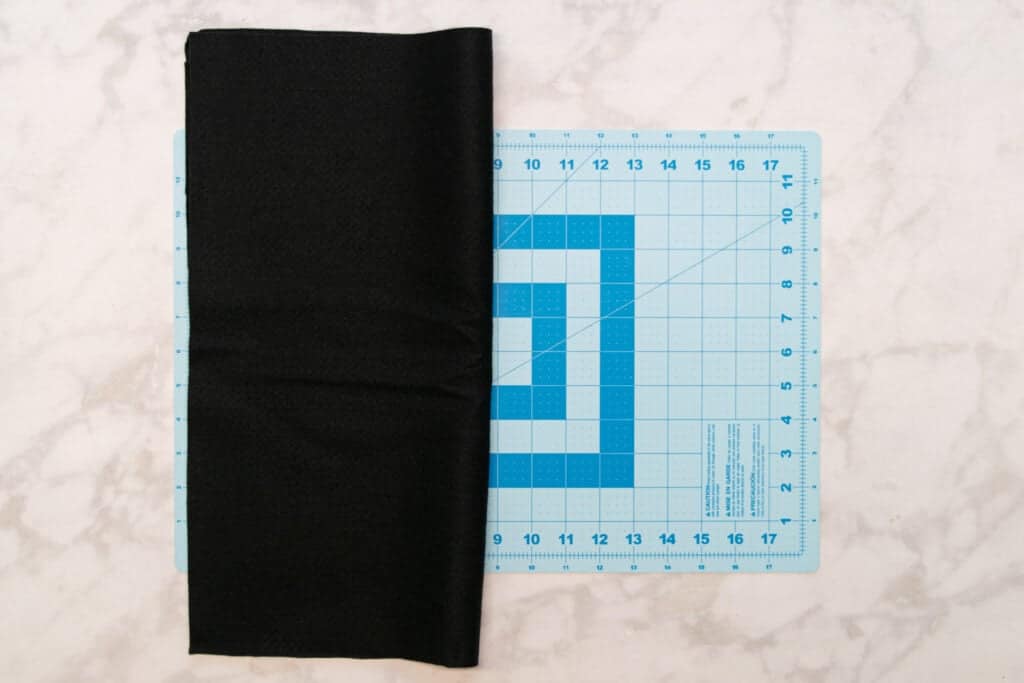
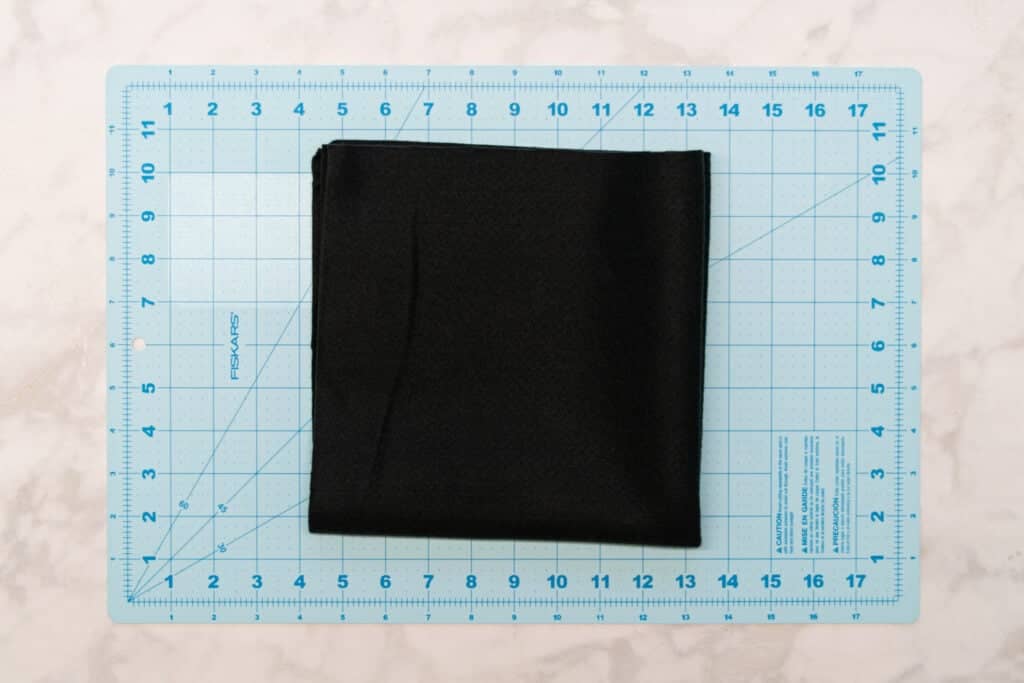
Step Two: Cut the Materials
Next, it's time to start cutting the felt for your gnome!
From black felt, cut the following pieces for your witch gnome:
- 2 Body pieces
- 1 Bottom piece
- 2 Hand pieces
- 2 Arm pieces
- 4 Foot pieces
- 2 Hat pieces
- 1 Hat Brim piece
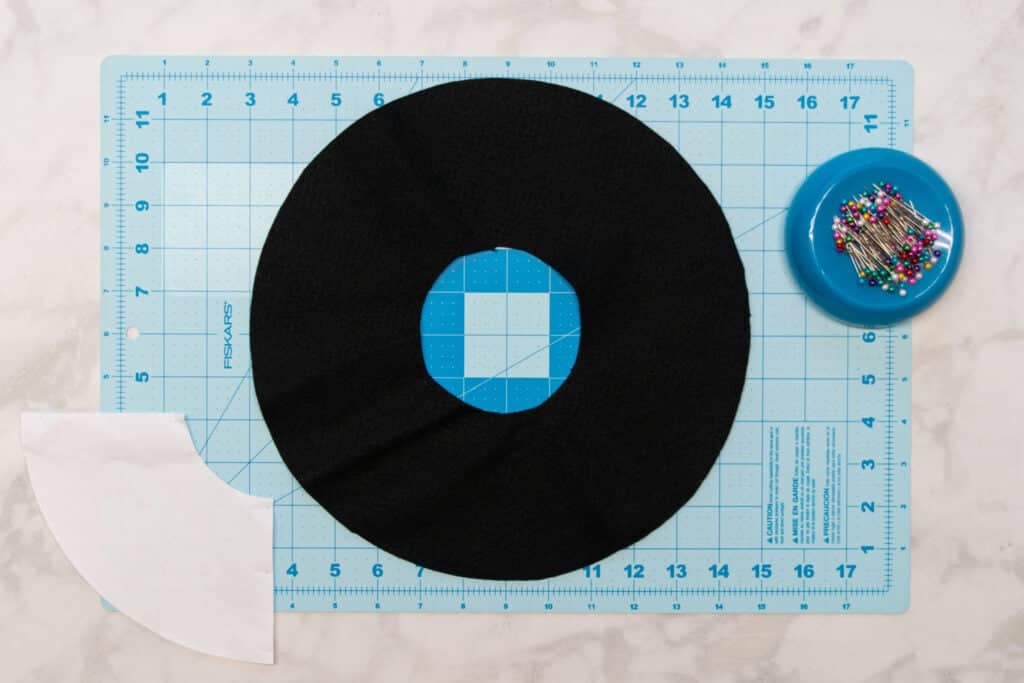
Cutting the Hat Brim is a little different than the other pattern pieces - it requires a bit of extra folding. It's a lot like cutting a tiny circle skirt!
Start by folding your felt in half lengthwise.
Then fold it in half again in the opposite direction.
Next, place the Hat Brim pattern piece on the folded fabric with one of the straight edges against each of the folded edges of the fabric.

Pin the pattern piece in place, then cut along the 2 curved edges.
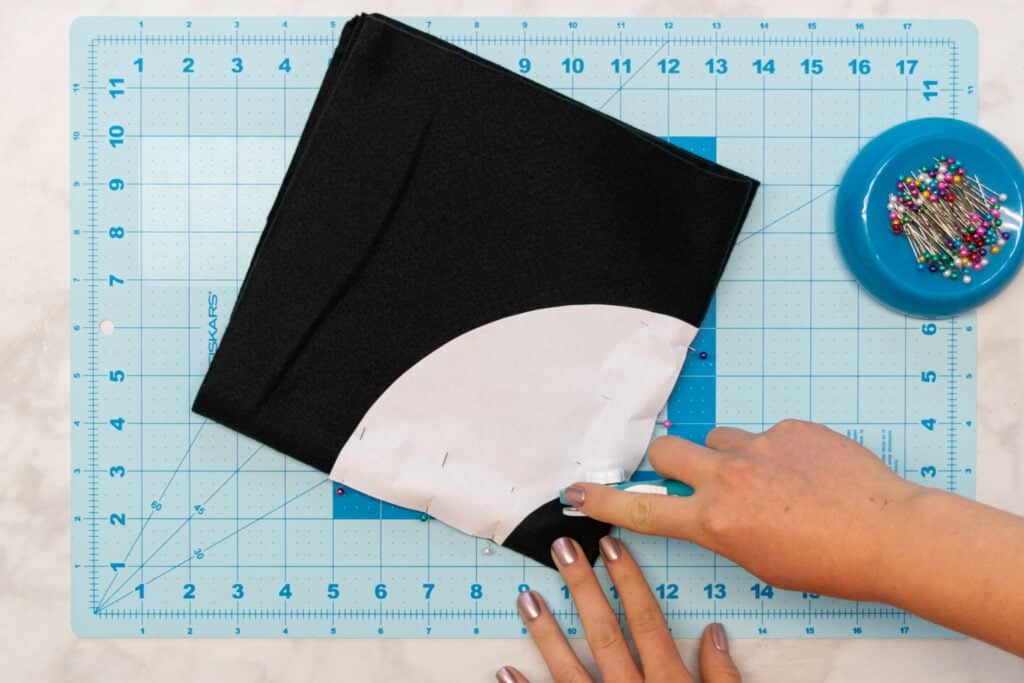
Once cut, unpin and remove the pattern piece from the fabric. Then, when you unfold the felt, you'll have a full hat brim all in one piece!
From colored faux fur, cut 2 rectangles that are each 2.5" x 6.5".

Step Three: Assemble the Gnome Body
With all the pieces cut for your gnome, start by putting together the body of the gnome.
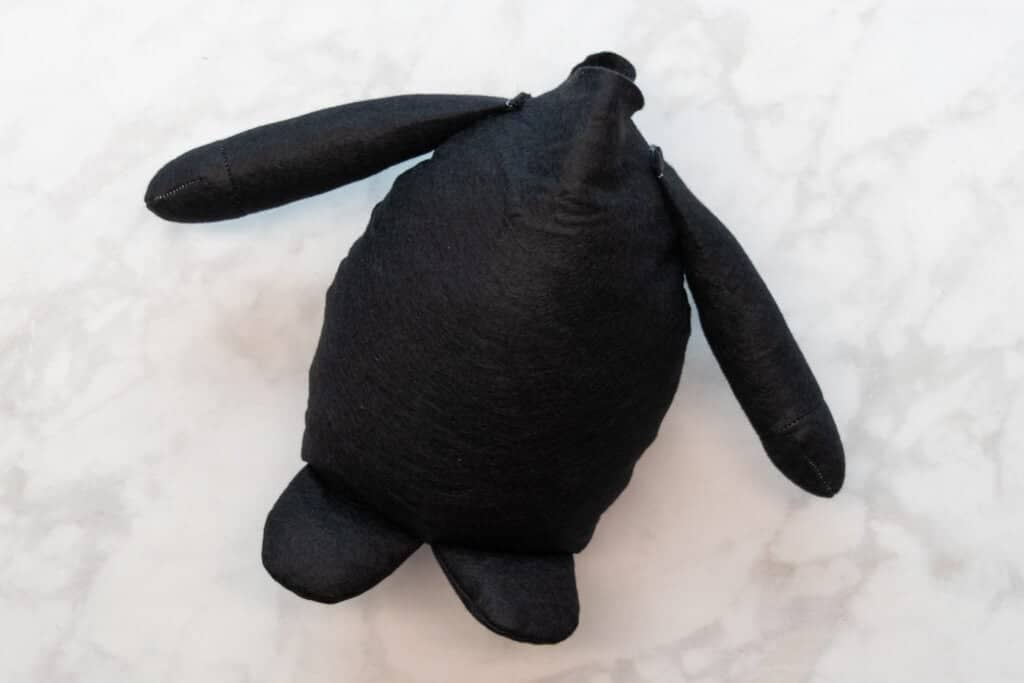
This includes stitching and stuffing the arms, feet, and body of the gnome.
Head to the Christmas Gnome tutorial for full instructions on putting together the gnome body.
Next, we'll work on all the details that make this gnome a witch!
Step Four: Make the Witch Hat
Let's start by putting together the witch hat for our Sanderson sister gnome.
First, place the two hat pieces with right sides together. Pin them together along the two long edges.
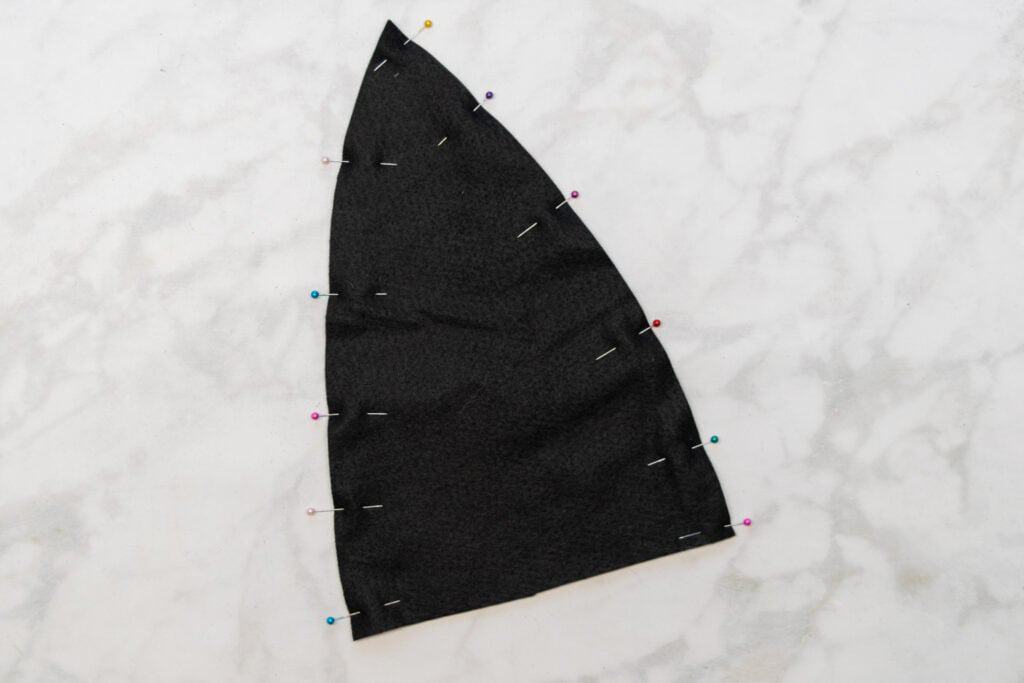
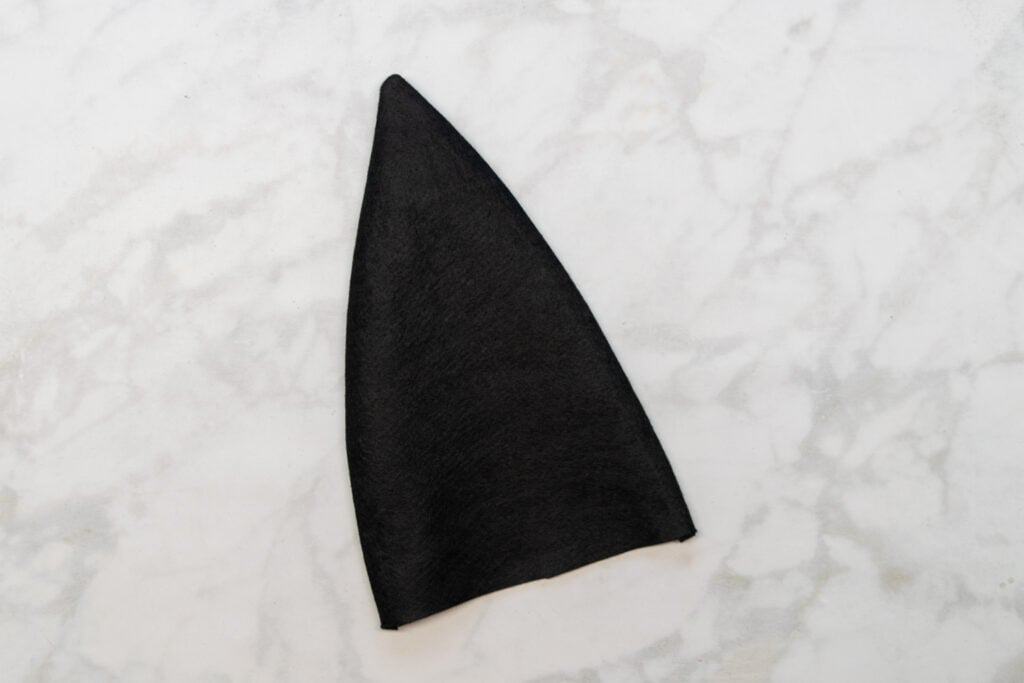
Stitch the two hat pieces together along the long edges, rotating at the point.
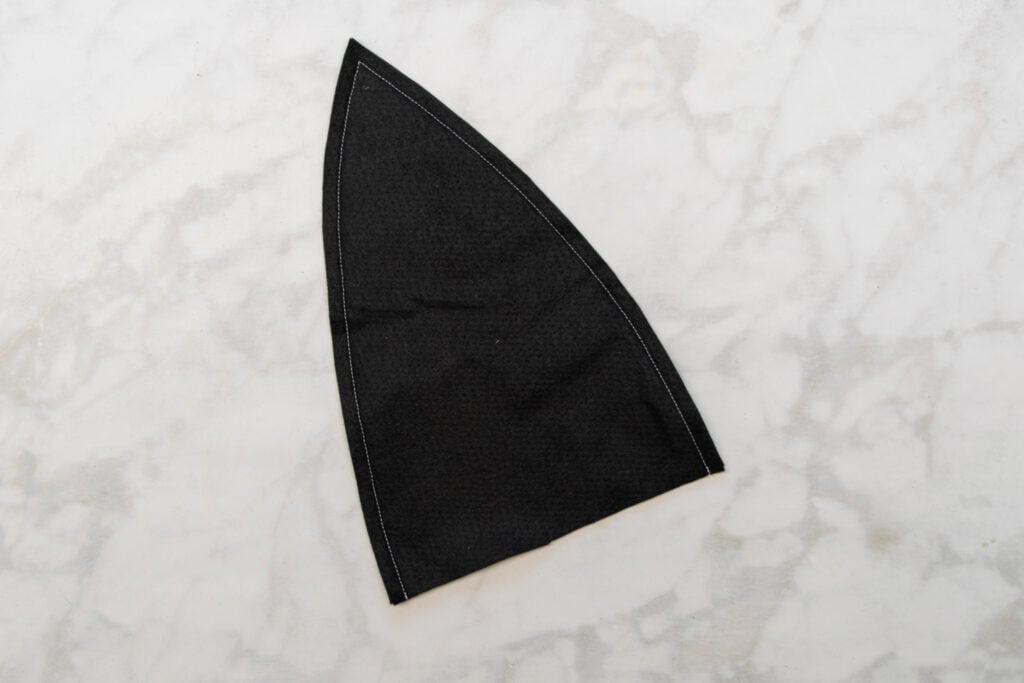
Next, trim the seam allowance straight across right above the point at the top of the hat.
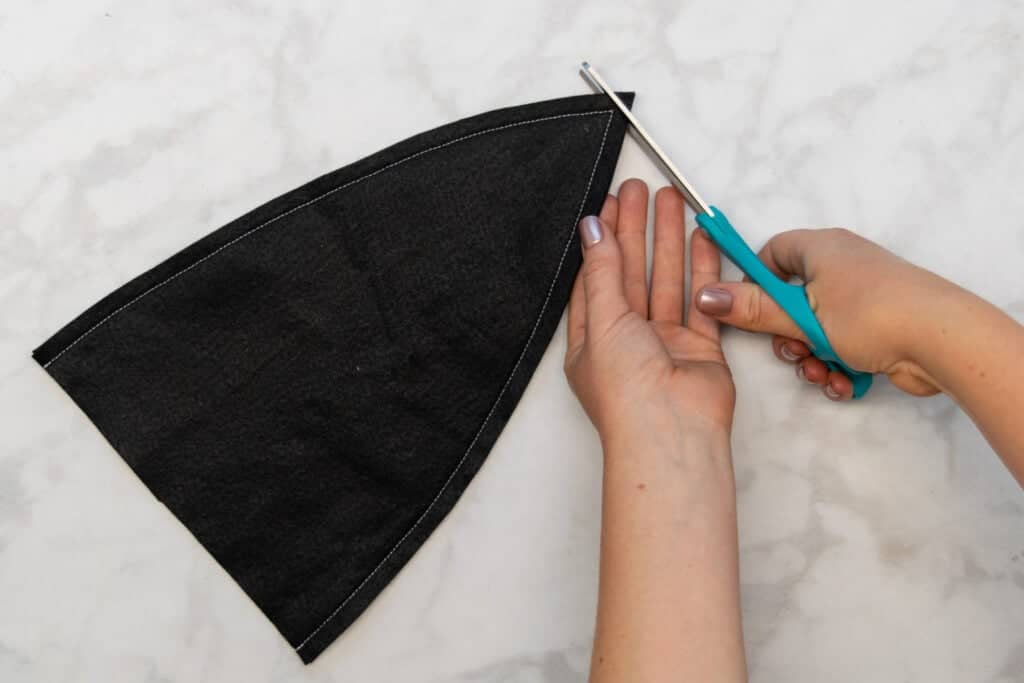
Turn the hat right sides out and press the hat flat.
Pin the inner circle of the hat brim to the bottom edge of the hat with right sides together.
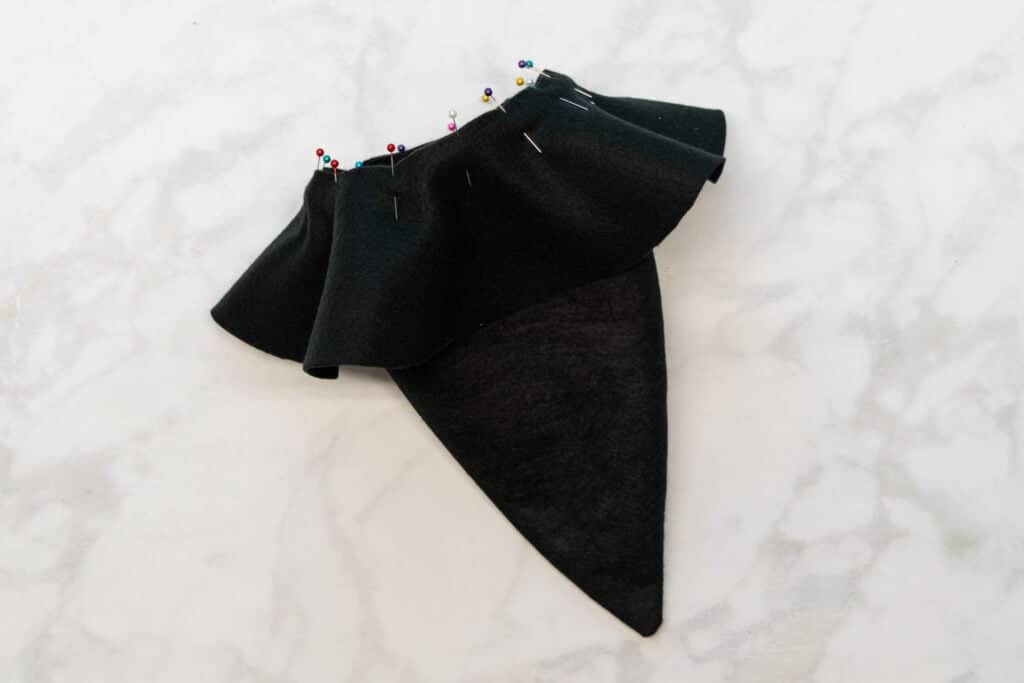
*PRO TIP: Make sure to use lots of pins! Pinning the curved edge to the straight edge can be a little bit challenging, but with lots of pins, you shouldn't have any trouble!
Next, stitch the brim to the hat with a 3/8 inch seam allowance.
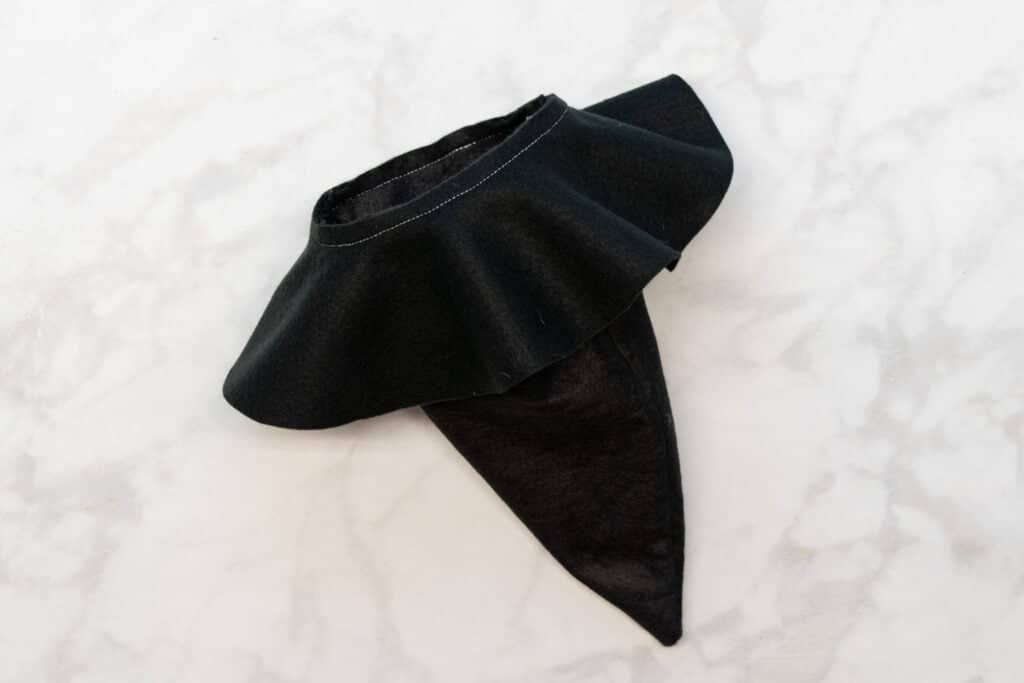
Once you've finished stitching, pull the brim down and finger press the seam allowance up towards the hat.

Step Five: Attach the Nose and Hat
With the hat put together, we're now ready to make this gnome into a witch!
Grab your piece of wire and bend the top 1/2" or so down to round the wire end.
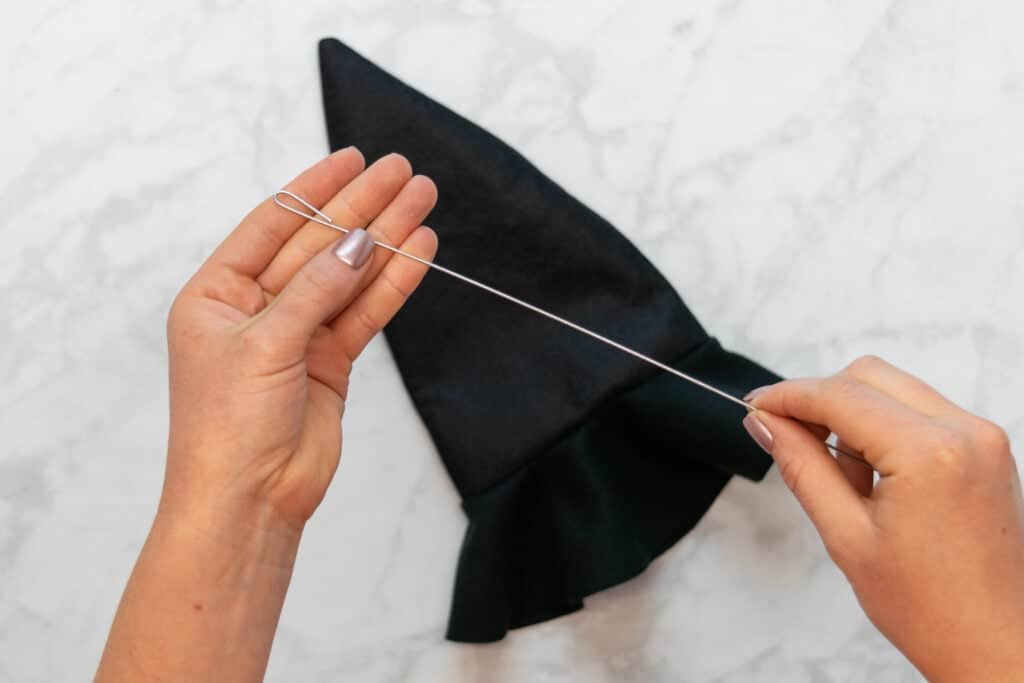
Dot a bit of hot glue onto the bent end of the wire, then glue it into the hat at the very top of the point.
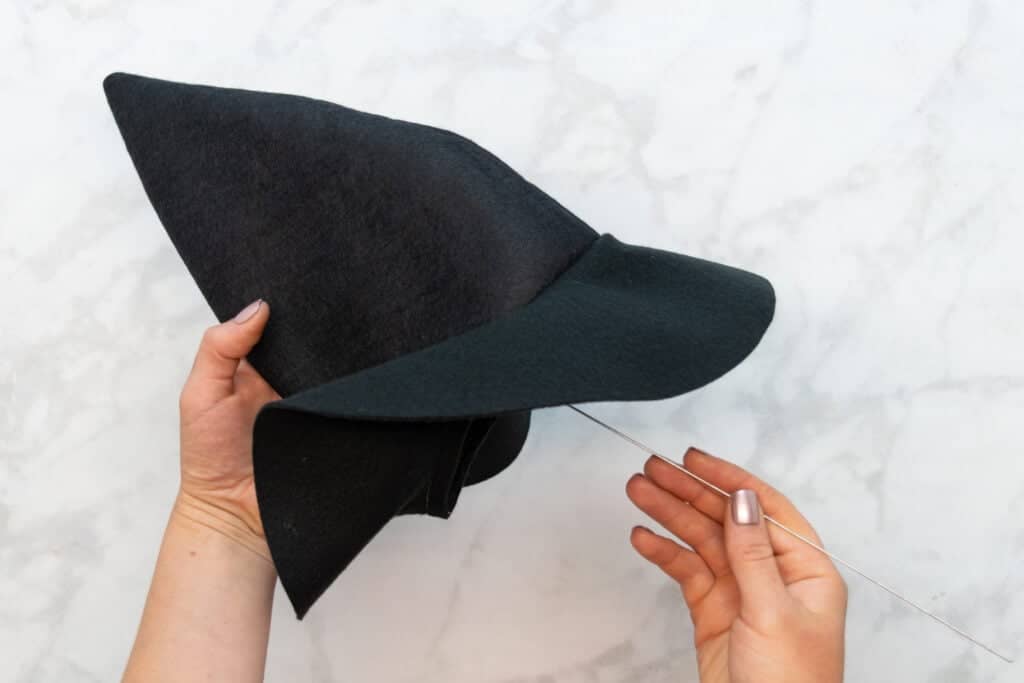
Next, lightly stuff the hat with some poly-fil. You don't want to overstuff the hat, just add enough poly-fil to give the hat a bit of body.
Place the hat on the gnome, inserting the wire down into the stuffing. Push the hat so that it is sitting slightly towards the back of the gnome. That way the big brim won't hide the nose and hair of the gnome!
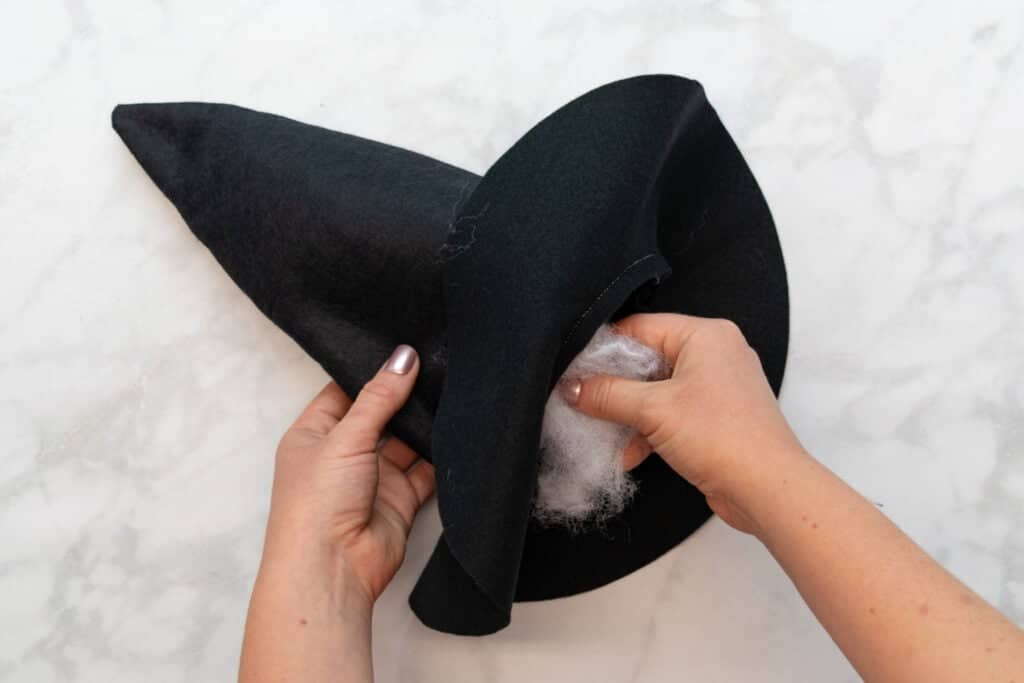
Use your hot glue gun to glue the brim of the hat to the tops of the arms. This will help to hold the hat firmly in place on the gnome.
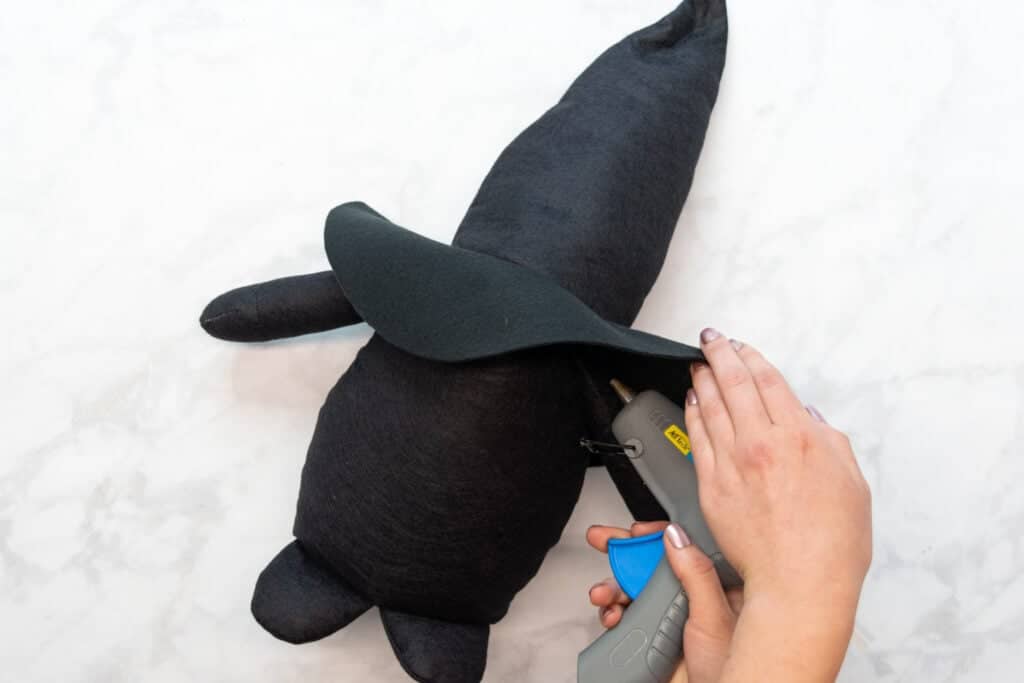
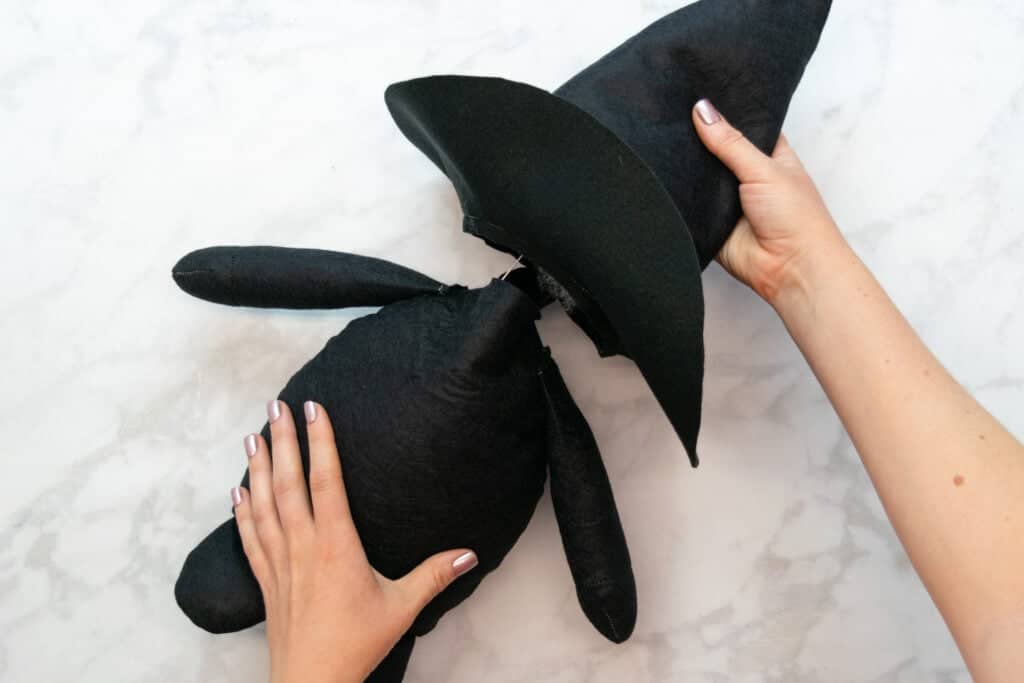
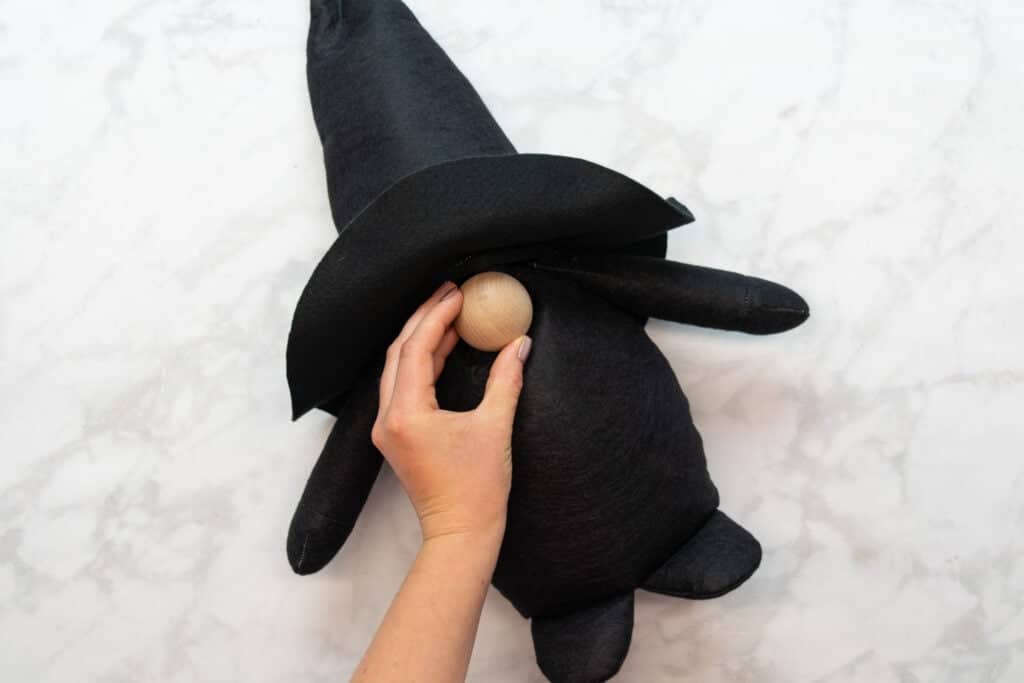
Next, glue the wooden nose to the gnome's body just below the hat. Then, glue the front of the hat to the top of the nose.
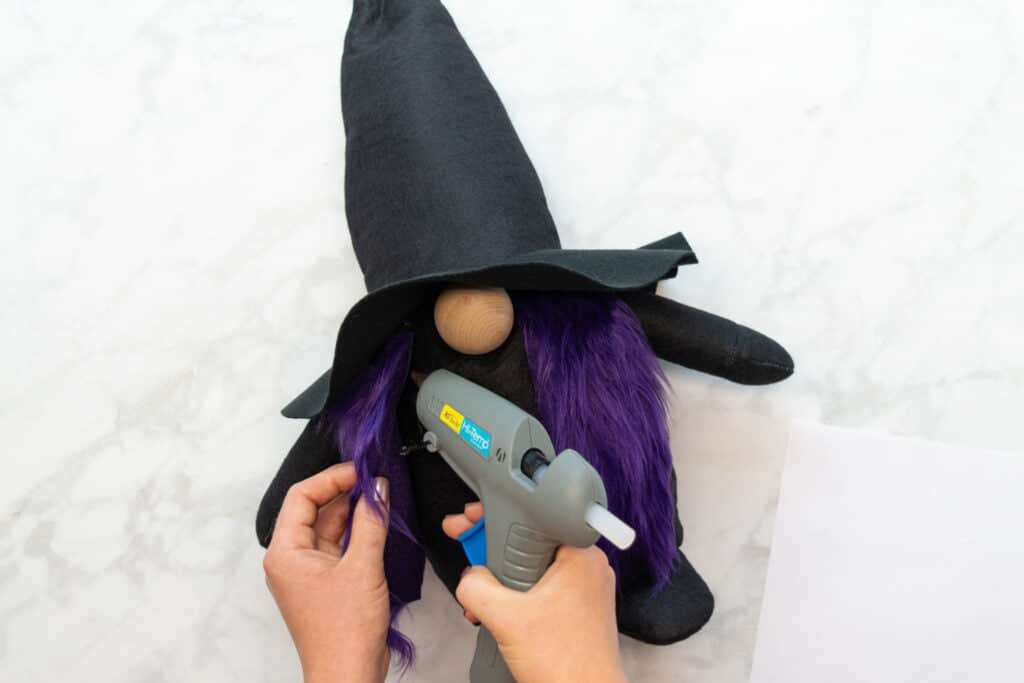
Step Six: Attach the Hair
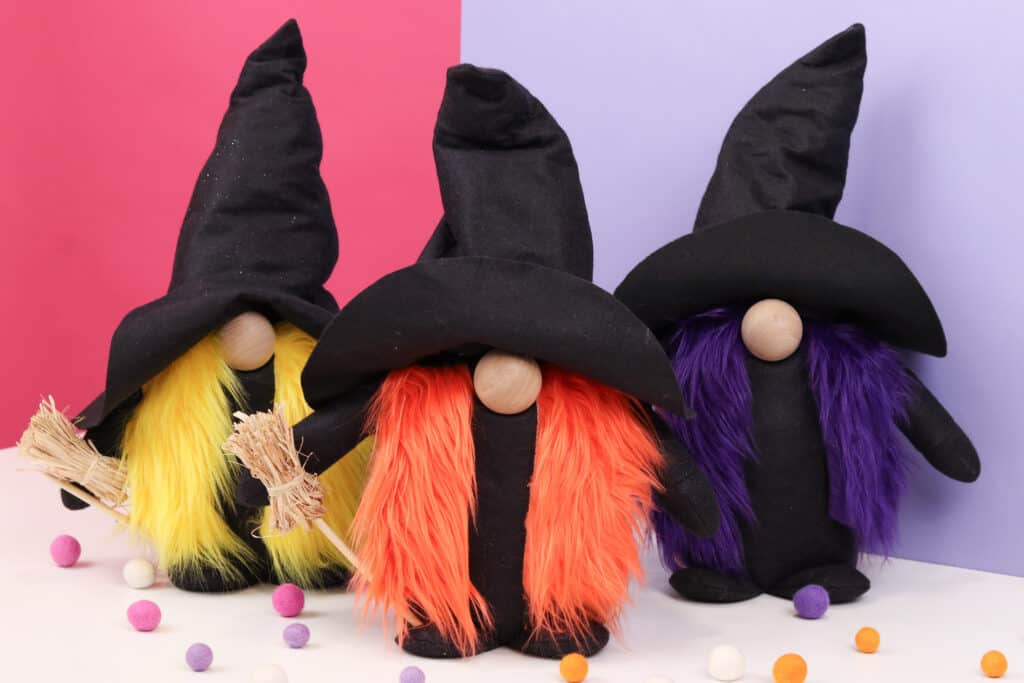
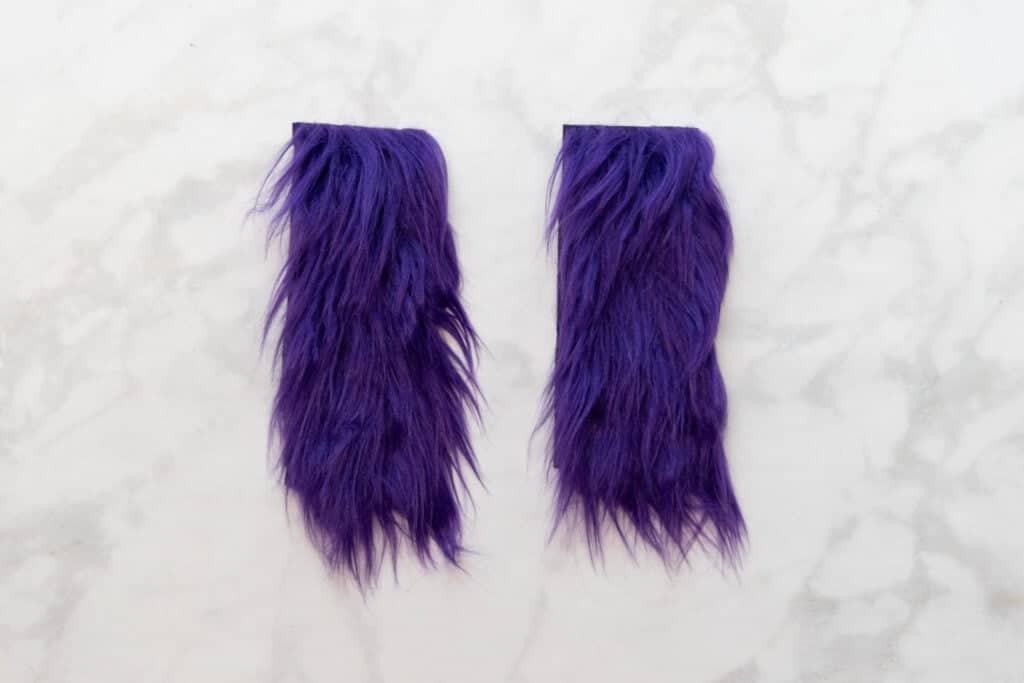
We're now ready to attach the colorful hair to the witch gnome! To make the 3 Sanderson Sisters Witch Gnomes, you'll need orange, purple, and yellow faux fur to make each sister.
You should have two 2.5" x 6.5" pieces of faux fur cut for each gnome.
Take some time to brush the hair towards one of the short ends on each cut piece of faux fur.
Glue one piece of fur to the gnome's body on each side of the nose. Make sure that the hair is brushed towards the bottom of the gnome.
Step Seven: Assemble the Witches' Broom
Finally, we need to put together the adorable little witch broom for our gnome!
Start by folding a bundle of raffia in half.
While holding the raffia in one hand, use a pair of scissors to cut the loose ends of the raffia down to about 3 inches from the folded end.
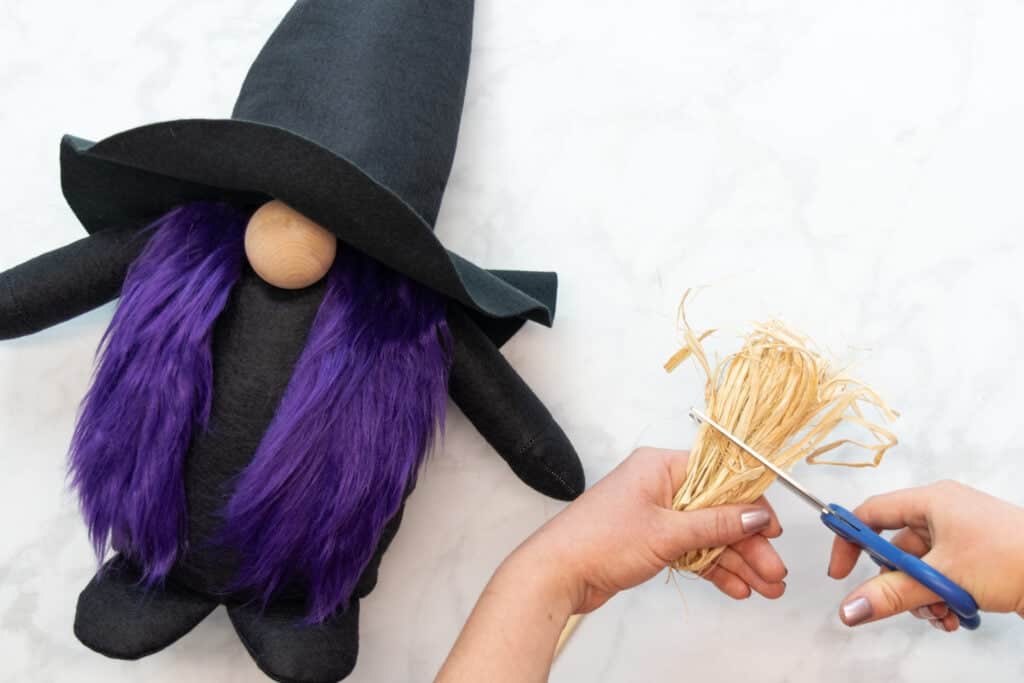
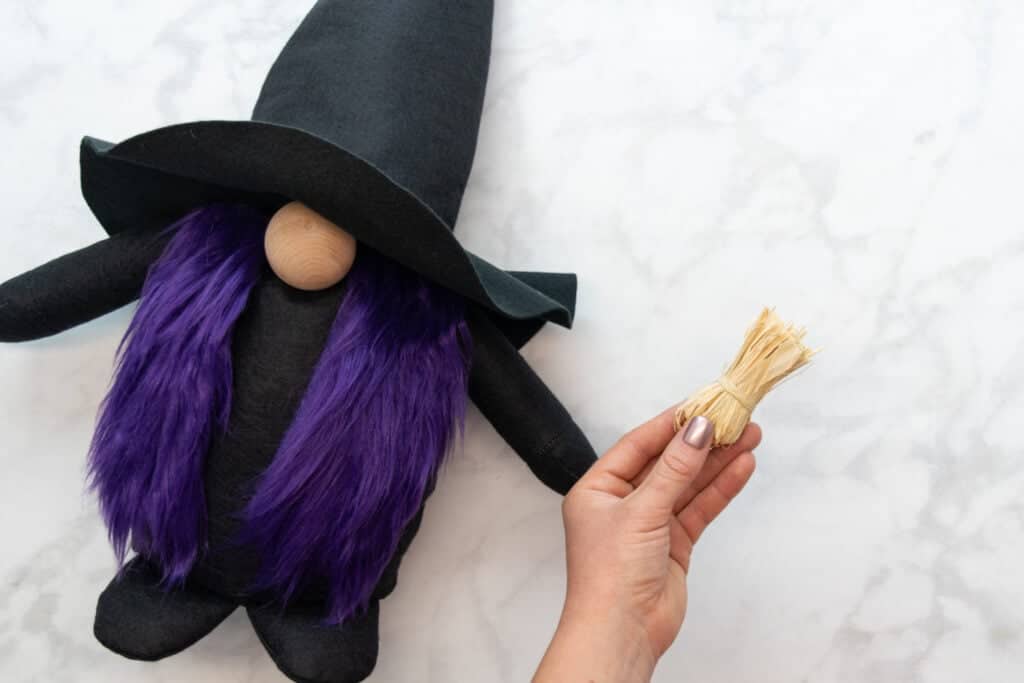
Wrap a single piece of raffia around the bundle, about 1 inch up from the fold. Tie it in place and trim the ends close to the knot.
Finally, push the pointed end of a wooden skewer into the center of the folded side of the raffia bundle. You now have a cute, tiny broom!
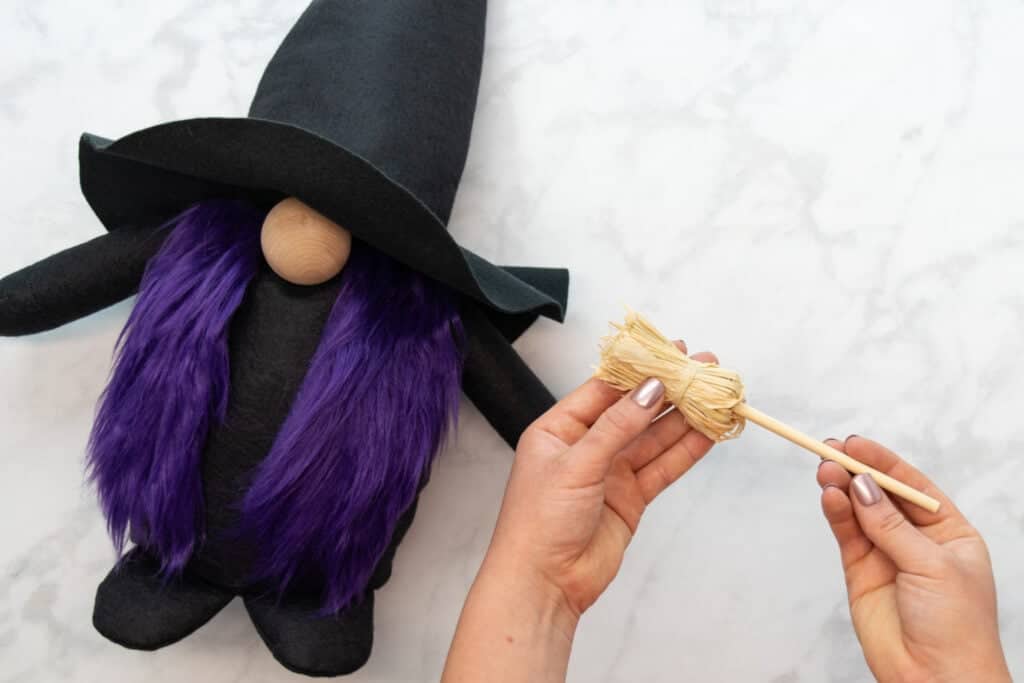
Glue the broom to the hand and foot of the witch gnome.

You've finished your absolutely adorable and super spooky Sanderson Sister witch gnomes!
Looking for even more FREE Halloween sewing patterns? Click the links below!
Did you enjoy this tutorial? I’d love to see what you’ve made with it!

Join my crafting and sewing Facebook group where you can show us what you’re making, ask questions, and learn from others!
Don’t want to forget about this pattern? Save this project for later to Pinterest!

Do you have any questions about this Halloween Witch Gnome sewing pattern? Let me know in a comment below!
Is there a link to print the tutorial to avoid pop-ups? Its so annoying and I love making these gnomes!
Thank you!
how can I get the pattern for the brim of the witche's hat?
I love the witches with the braids and the added trims to them. Do you have instructions on how to do this with the witch gnome?
What are the supplies and directions for the braids and skirt?
Never received the free pattern in my mail box or as a pdf.
Super cute gnomes. Thought you might want to know that when clicking on the pattern link the message "This site can’t be reached" comes up.
You are very creative and your creations are adorable.
I can download the directions, but the file won't open. What is wrong?
Pat Ciesla