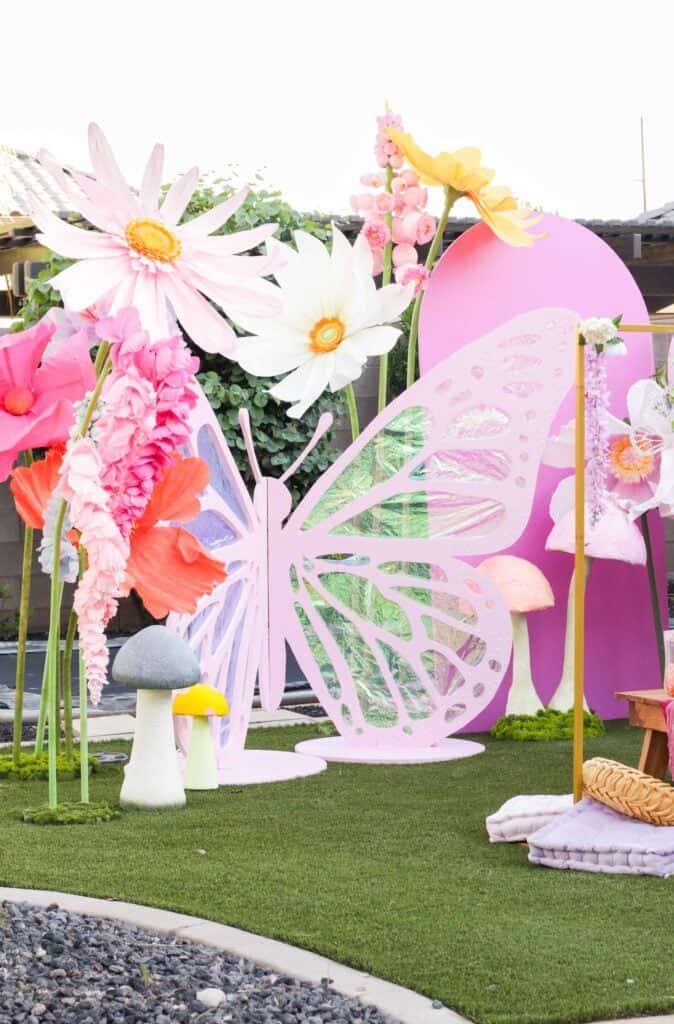
Looking for show-stopping decor that you can make yourself? Well, look no further! In today's blog post, I'm sharing all my secrets for making giant wooden butterflies that are perfect for birthday party decor.
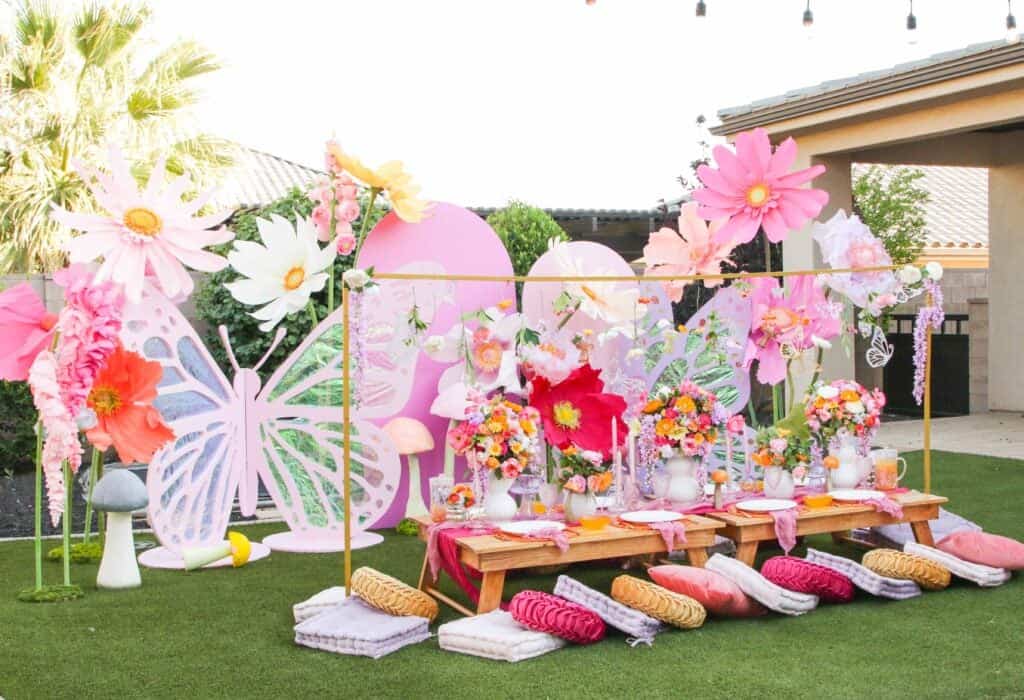
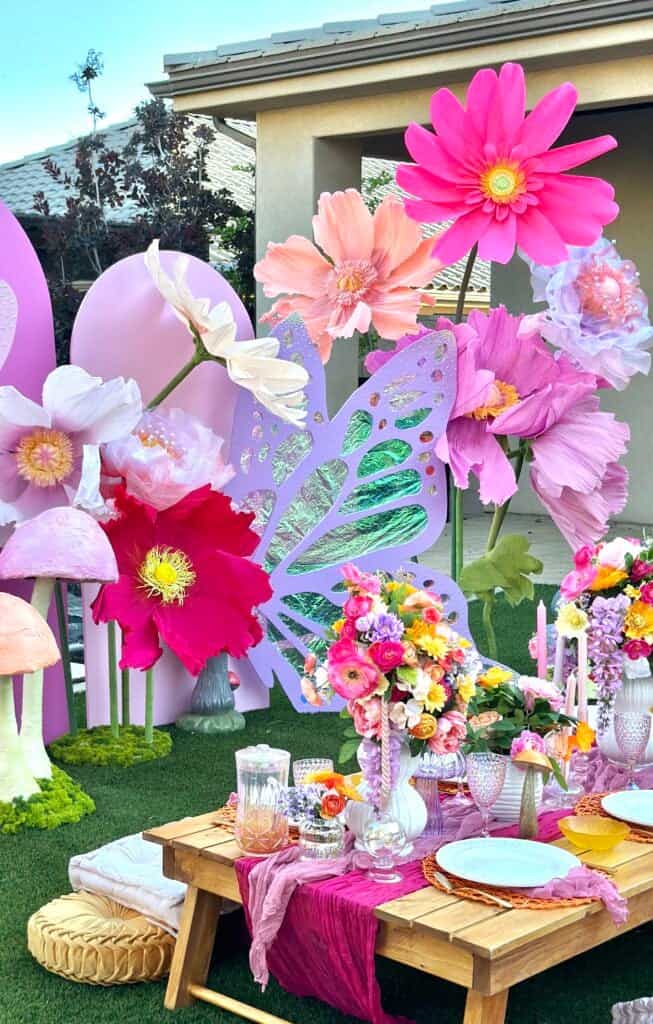
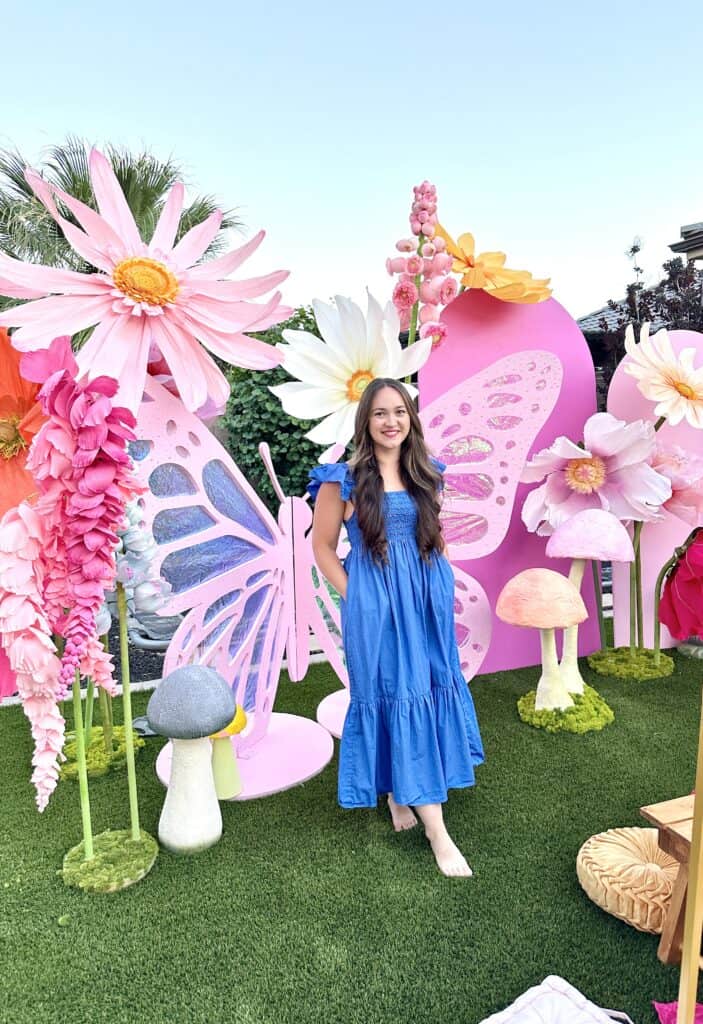
My daughter requested a magical garden party for her birthday, and I was SO excited to take on the challenge. The only caveat was that she wanted all of the decor to be giant-sized. After talking her down from gigantic Disneyland-inspired teacups, we finally settled on butterflies and flowers.🤣
When I set out to make the butterflies, I had no idea what I was doing. I had never worked with a power tool before in my life. After looking for a tutorial on these butterflies and striking out, I figured I'd have to make my own tutorial and share the process with my readers!
If you want to make the giant flowers from this party, click here!
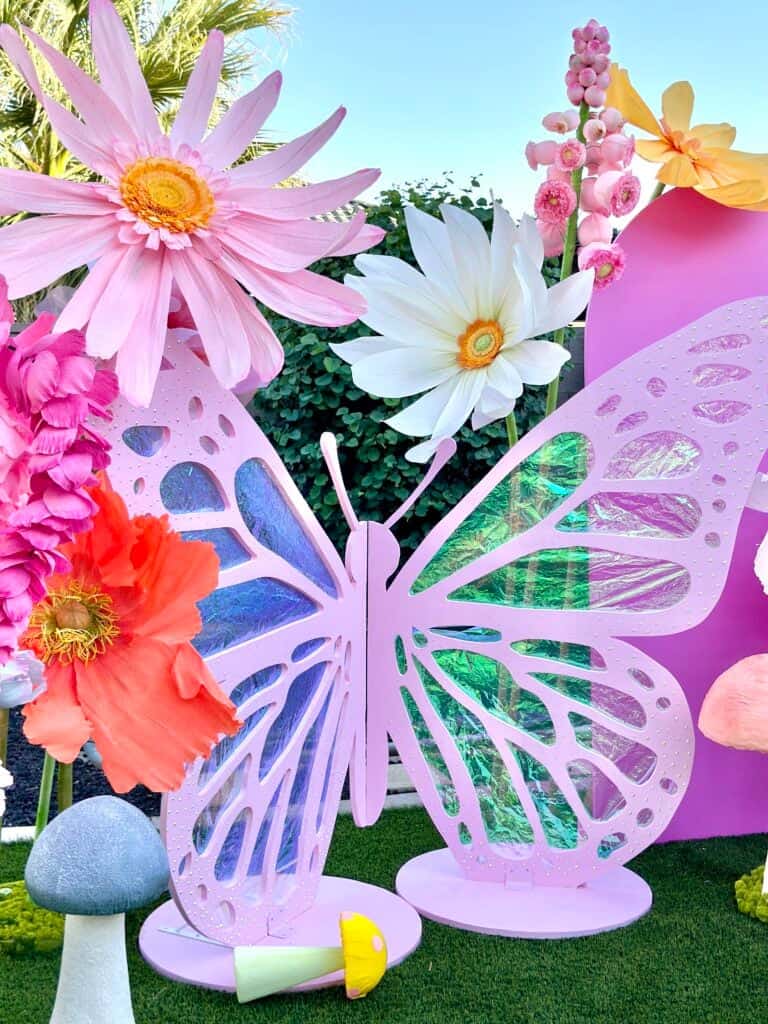
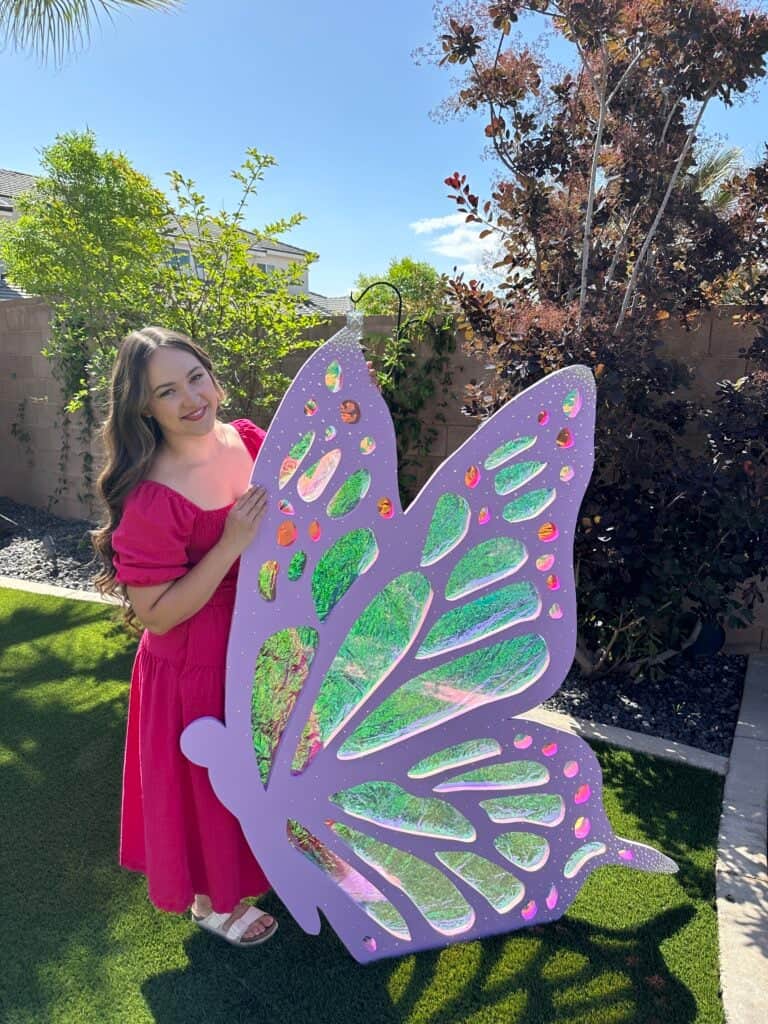
This tutorial contains two different downloads. The first is for the pink butterfly with two wings. The second is a side view of a butterfly with a more detailed tail.
***Please read the entire post before ordering supplies for this project!! There are several things you'll need to decide on before ordering supplies.***
Table of Contents
Wooden Butterfly Supplies
- 4"x8" Plywood (per wing)
- I used 23/32-in x 4-ft x 8-ft Douglas Fir Sanded Plywood. This wood is nice and heavy for a solid butterfly and comes with one side that's presanded which makes this project much smoother! You could opt for a thinner piece or a less expensive one. You'll need one piece per butterfly wing.
- Jigsaw
- I used a DEWALT XR 20-volt Max Brushless Variable Keyless Cordless Jigsaw
- Jigsaw Blades (Don't use regular blades!! Only use these double-sided ones!)
- Drill
- 1" Hex Shank Spade Drill Bit
- 2-3 Sawhorses or Table
- 2-4 Clamps
- Plastic Wood
- Putty Knife
- Orbital Sander or Sanding Paper
- Shelf Brace
- 1 Quart of Primer
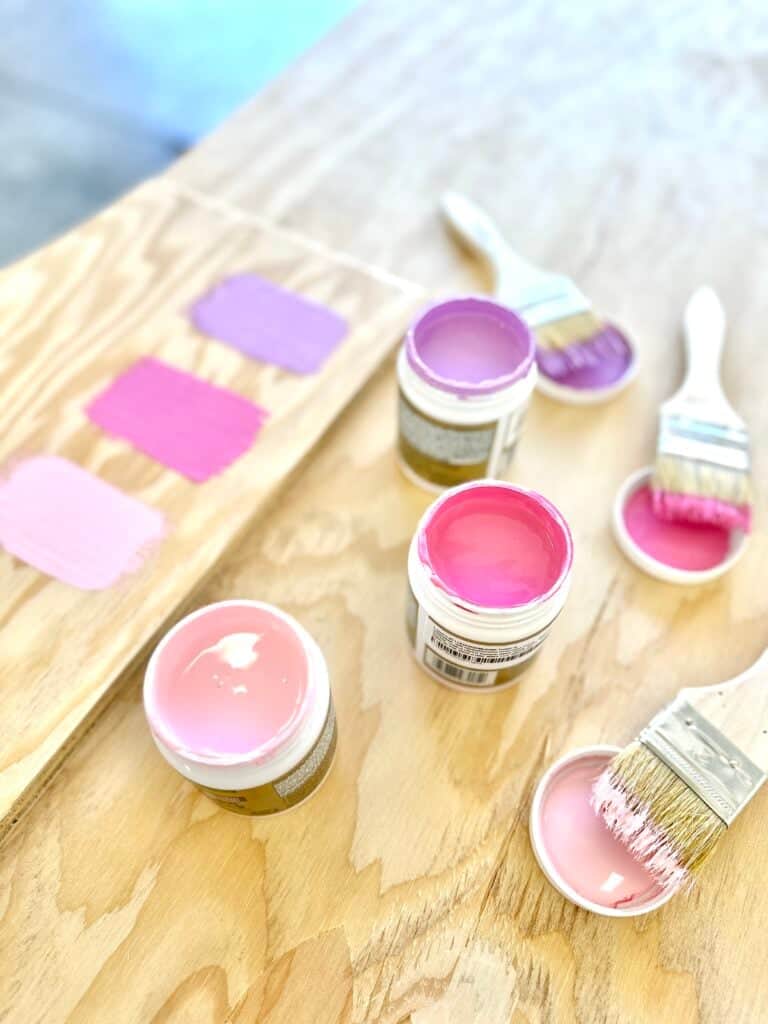
- 1 Quart of Paint
- I used Purple Gala 4002-10A and Pink Quartz 1002-2B
- Paintbrush
- Paper
- Printer
- Tape
Optional
- Rotary Cutter
- Cutting Mat
- Gyro Cut Tool
- Cellophane
- Staple Gun to attach Cellophane
- Rhinestones (I used SS40, SS30, & SS16)
- Rhinestone Glue
- Rhinestone Picker
DOWNLOAD THE FREE PRINTABLE TEMPLATE HERE

If you want to see the process of making these butterflies, you can watch the Instagram videos by clicking the links below.

Step One: Print, Assemble and Cut out The Butterfly Template
First, download the pattern and open it in your PDF reader. I use Adobe Acrobat as my PDF reader.
*It's important not to print the pattern directly from your internet browser. Doing this can result in the pattern printing with incorrect scaling or incorrect border lines.
Next, click on the "Print" icon. This will open a print settings dialog box. In the box, update the scaling to "Actual Size" or "Custom: 100%".
The first page of this pattern contains a 1” x 1” square that needs to be measured using a measuring tape or ruler. Go ahead and print the first page of the pattern and measure the test square to make sure it measures 1” x 1”. If it does, print out the rest of the pattern.
If the test square doesn’t measure 1” x 1” check your print settings and reprint.
Once you’ve printed out the pattern, it’s time to assemble.
Feel free to cut off the margins of the pattern before arranging.
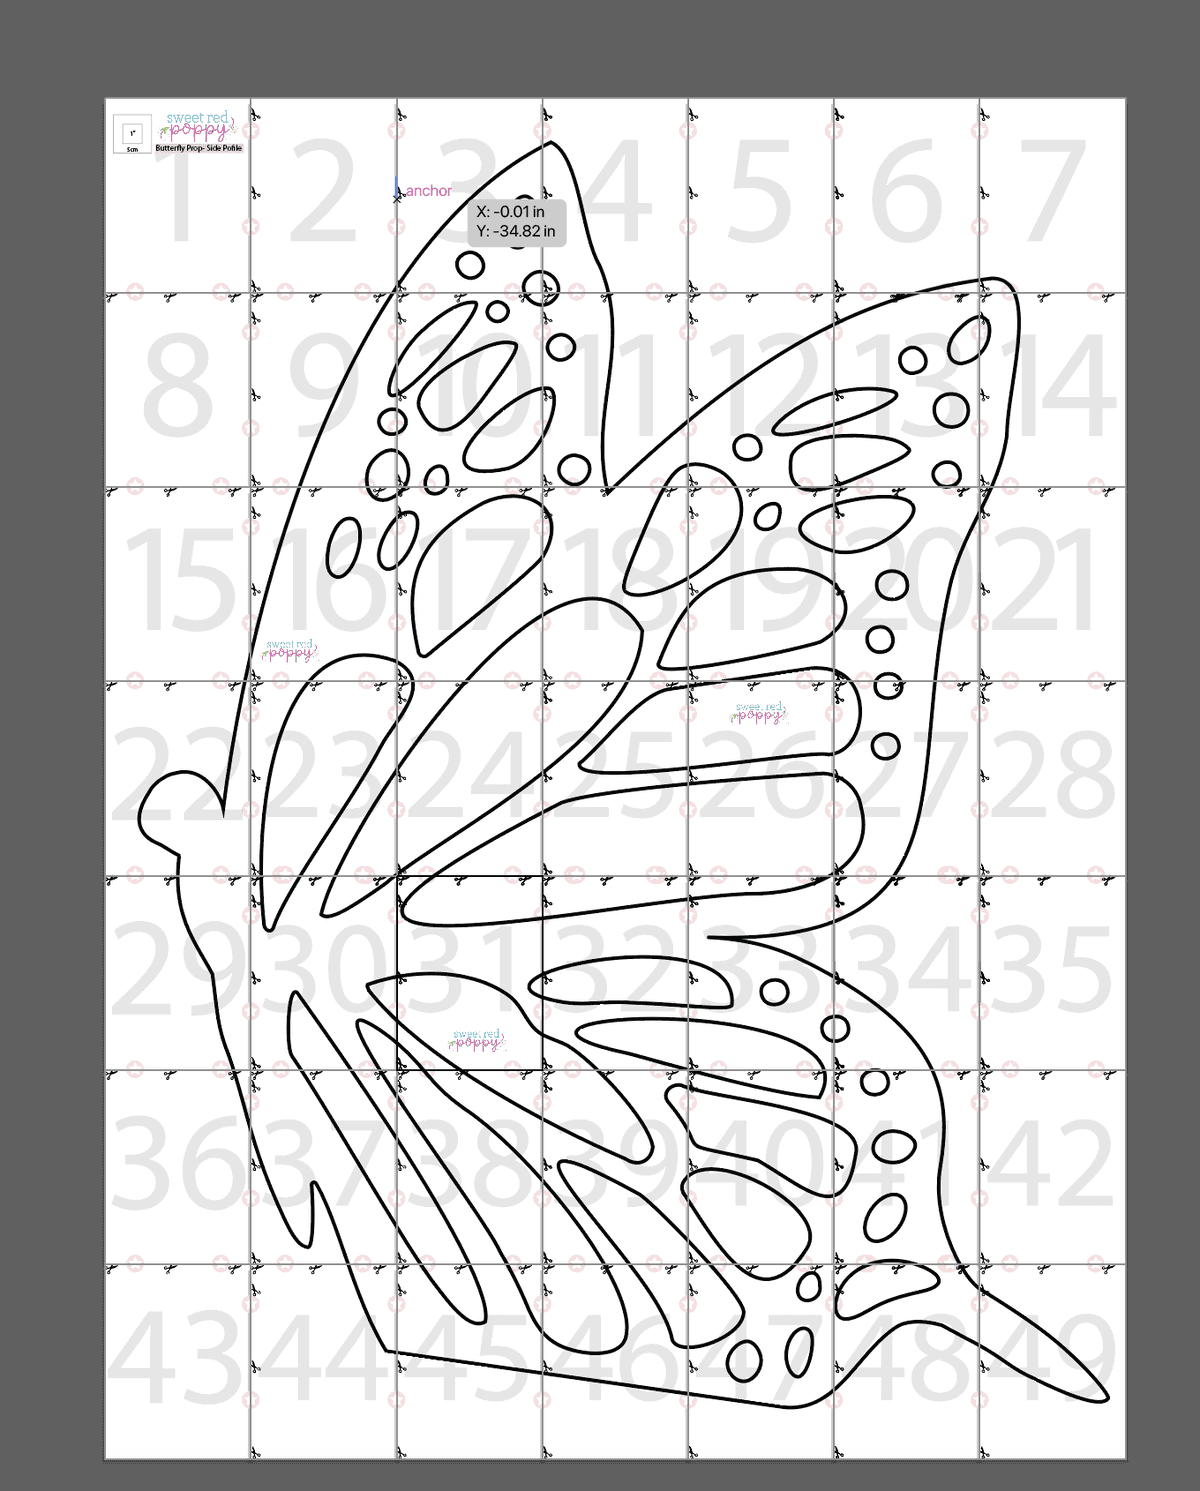
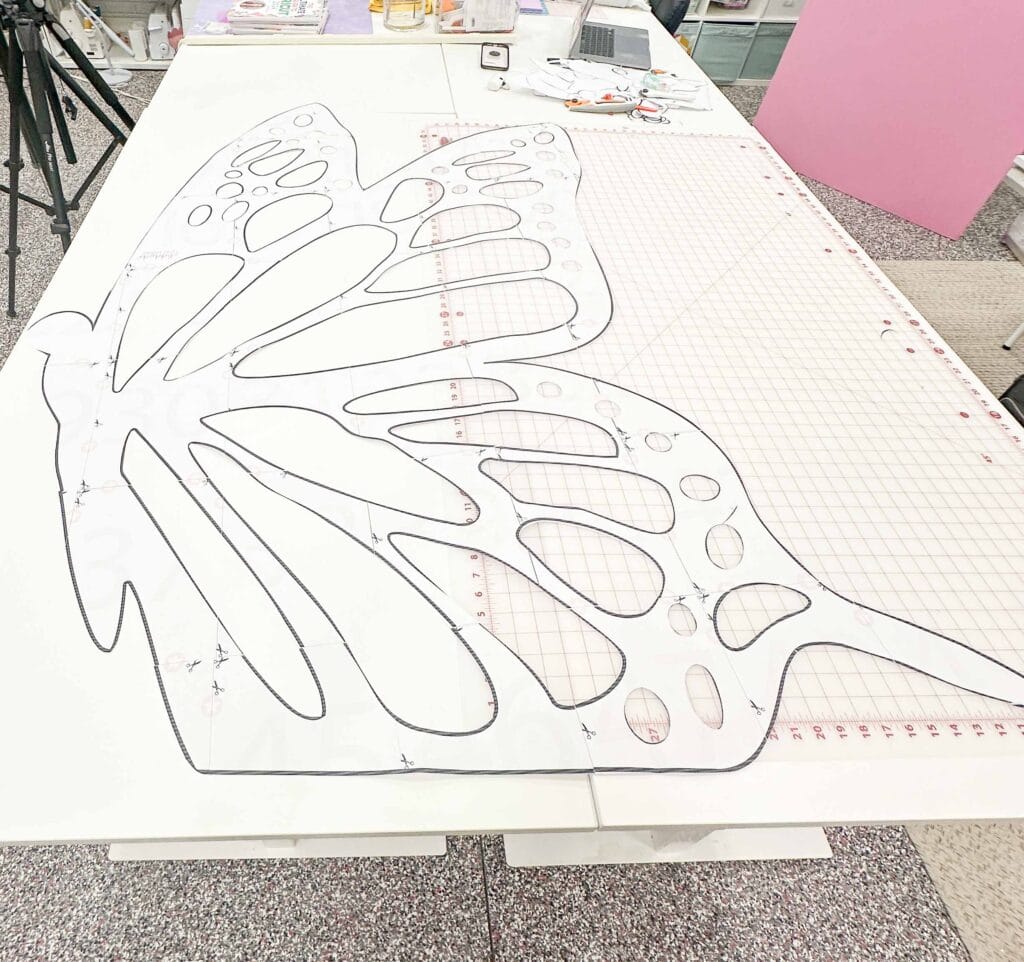
Arrange the pages according to the layout charts below. The pages are numbered 1-49 (side view) and 1-42 (front view) and have pink stars and scissors between the pages to help you align the pages accurately.

Line up the edges of the pages and tape them together, ensuring the pattern lines match up correctly.
If you like, you can trim off the margins of each page before taping them together. Or, if you prefer, overlap the margins of the papers.
Once the pattern is assembled, cut along the outermost black line around the butterfly. Then, cut away the negative pieces from the template.
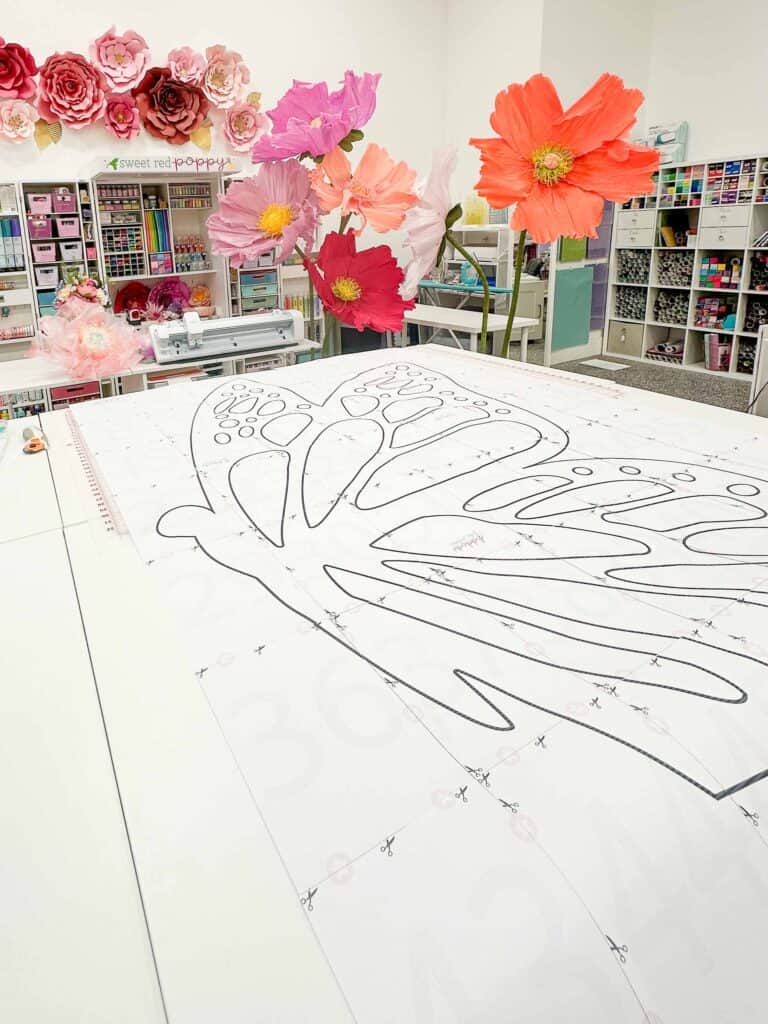
I like to use a rotary cutter and cutting mat to speed up this process, but a pair of scissors works well, too! For the smallest circles, I use a Gyro Cut, which is a 45-degree blade with a 360-degree rotating head. It's great for intricate circles.
If you'd like to make a circular base for your butterfly, add a 1" tall rectangular extension to the bottom of the butterfly template. This will allow the butterfly to slide into the circular base.

Step Two: Prepare Your Work Surface
Begin by setting up your 4" x 8" piece of plywood on a sturdy surface. You can use a table for this or a set of sawhorses to support the wood. If you have clamps, clamp your wood to your cutting surface. This will prevent it from moving around while you're cutting.
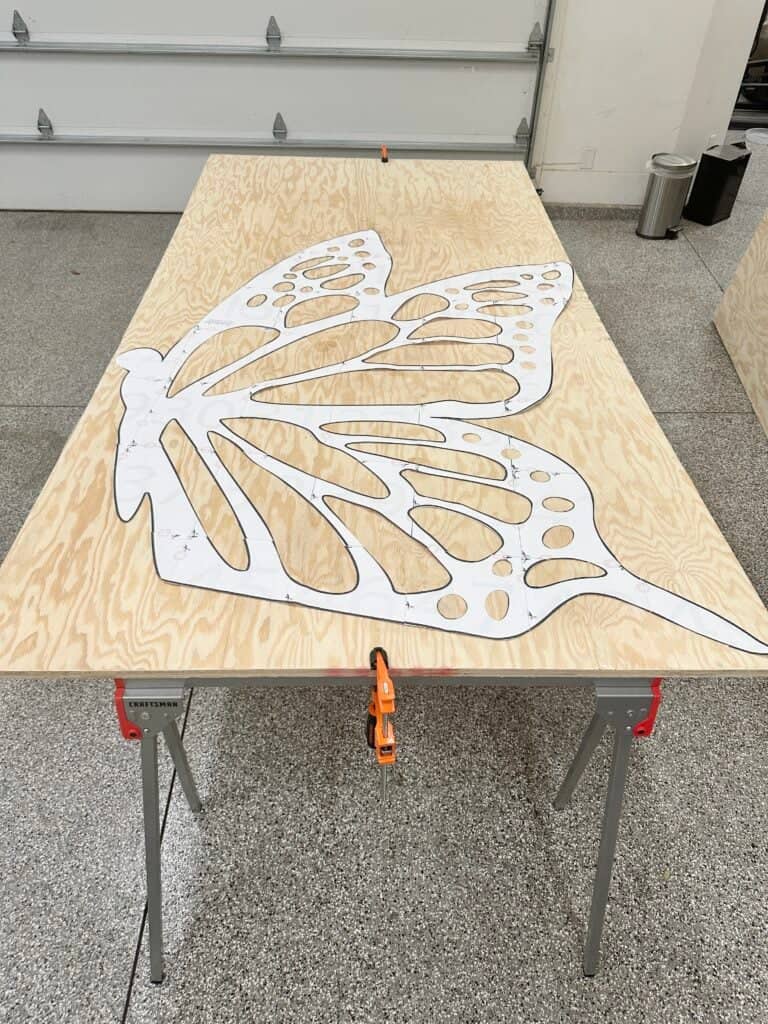
Step Three: Transfer Butterfly Template to Plywood
Lay out the butterfly template on top of your plywood, ensure that your wood is facing with the right side upward. This should be the smoother of the two sides.
Using painter's tape to secure it so it doesn't shift. Then, use a carpenter's pencil to outline the template.
Remember that this template is just a guide! Feel free to make any changes to your butterfly to best suit your needs.
*If your template doesn't fit, try rotating it until you get the full butterfly onto your sheet. If your print came out larger than normal you might have to chop off a small piece of your wing to make it fit.
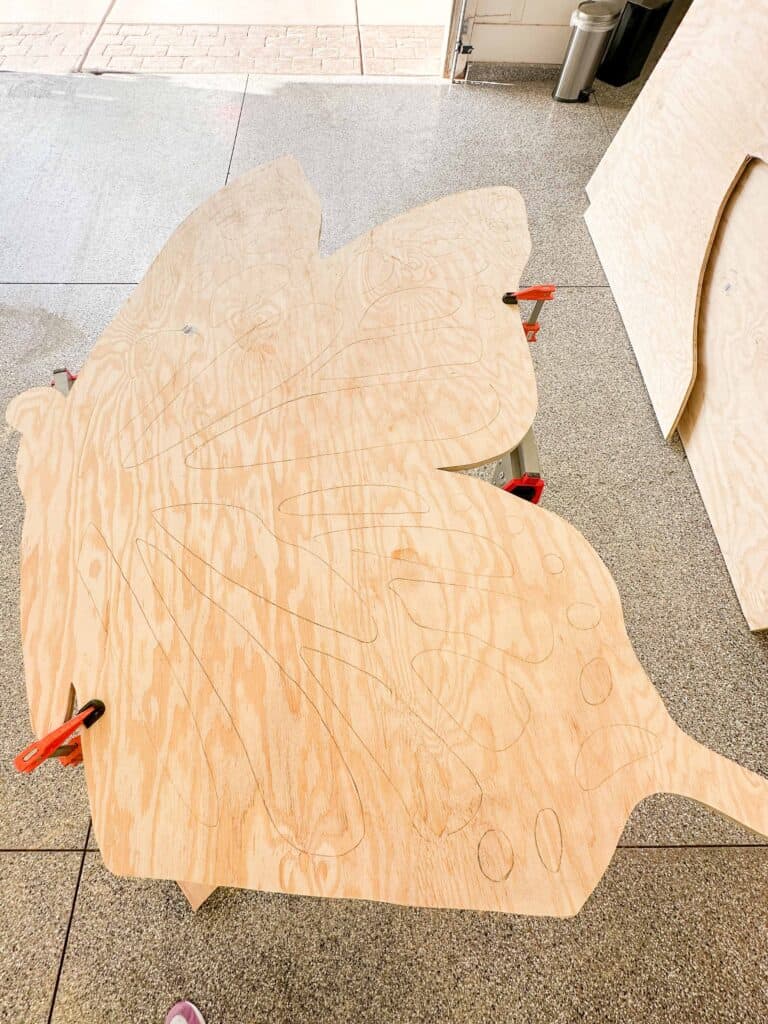
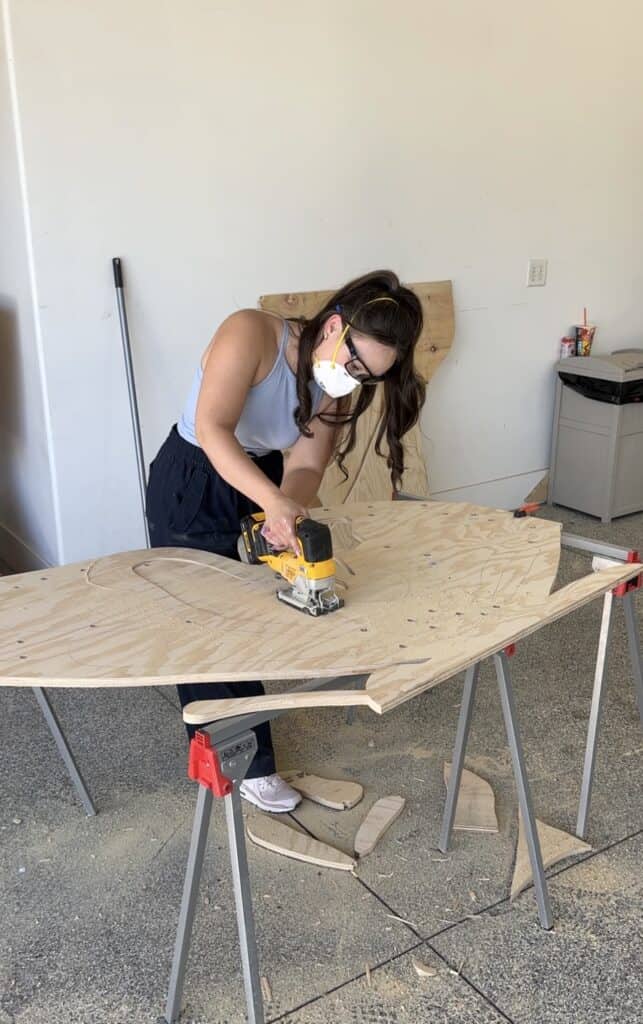
Step Four: Cut Butterfly Outline
Using a Jigsaw, cut along the outline of the butterfly. Once you've cut out the outline, resecure your plywood so it doesn't shift.
Tips and Tricks for Using a Jigsaw
Do NOT use the orbital setting if you want a smooth and accurate cut. Enabling the Orbital setting will make the blade move in a circular movement, which is a more aggressive motion, and it will result in a less smooth cut. I like to keep my jigsaw set to zero to prevent any orbital movement, which gives me the most cutting control. This means my blade only moves up and down instead of moving forward.
Gear Up for Safety: It's important to make sure you're dressed for the occasion. The dress code for this project calls for safety goggles or glasses to shield your eyes from flying debris. You might also want to consider using ear protection if you'd like to muffle out the noise of the Jigsaw machine. As far as clothing goes, put on an outfit that's snug fitting and covers the majority of your body. Loose clothing can get caught in the saw. You'll want to wear a pair of closed-toed shoes and pull your hair back into a ponytail.
Secure Your Workpiece: Clamp your sheet of plywood down tight onto a solid or sturdy surface. You won't want it moving around while you're cutting it. I really like using a few sawhorses to prop up my material in combination with a set of Bar Clamps to really secure the wood in place.
Blade Size Matters: Double-check that you have the right blade for the job. Be sure to double check your blade before cutting. If it’s damaged, you’ll need to replace it! For this specific project, you’ll want a high TPI (Teeth Per Inch) for the best smooth cut. I prefer a double-sided blade for the bed results. Don’t forget to remove the power source before you change the blade!!
Mark Your Cut Lines: Before you start cutting, it’s really important to mark your cutting line clearly on your material. This will keep your cuts straight and help you to stay on track. I’ve included a free printable butterfly template, so you know exactly where to cut! I use a carpenter’s pencil for this. It’s a large, flat pencil, so it won’t roll off of your surface. You can sharpen it using a utility knife to shave away the wood until you have a sharp point.
Ease into It: with both hands on your Jigsaw, start off nice and slow, then gradually ramp up the speed. Once you’ve reached your top speed, you can make contact with your piece of wood.
Hands Off: Keep your hands clear of the cutting zone. You want to make sure not to reach underneath the plywood while the jigsaw's running. Hold your tool with both hands to stabilize the power tool.
Stay Focused: Stay in the zone and stay focused while you're cutting. I know this seems silly to say, but it’s important to stay alert while you’re cutting. This is a slow process, and distractions can lead to big mistakes.
Mind the Overhangs: Be extra careful when you're cutting material that hangs off over the edge of your work surface. You'll want to support it (with a sawhorse or table) to avoid any mishaps.
Wait for the Blade to Stop Completely: Once you've finished your cut, it’s important to wait for the blade to come to a complete stop before you pull it away from the cut. Once it’s stopped, go ahead and switch the safety on. I actually turn on the safety in between every single cut. It’s a great habit to get into to prevent any accidents.
Slow Down: Don’t be afraid to go nice and slow around the curves! There’s no need to rush the cuts, and your Jigsaw will perform best on tight curves if you slow down. If you’re applying to much pressure/pushing on the Jigsaw, you’ll start to feel the tool kickback. I notice this the most when I’m cutting a curve. If this happens, slow down and don’t put as much forward pressure on your tool. Moving forward too quickly can cause tear-out, blade damage, and splintering.
Step Five: Cut Butterfly Wing Details
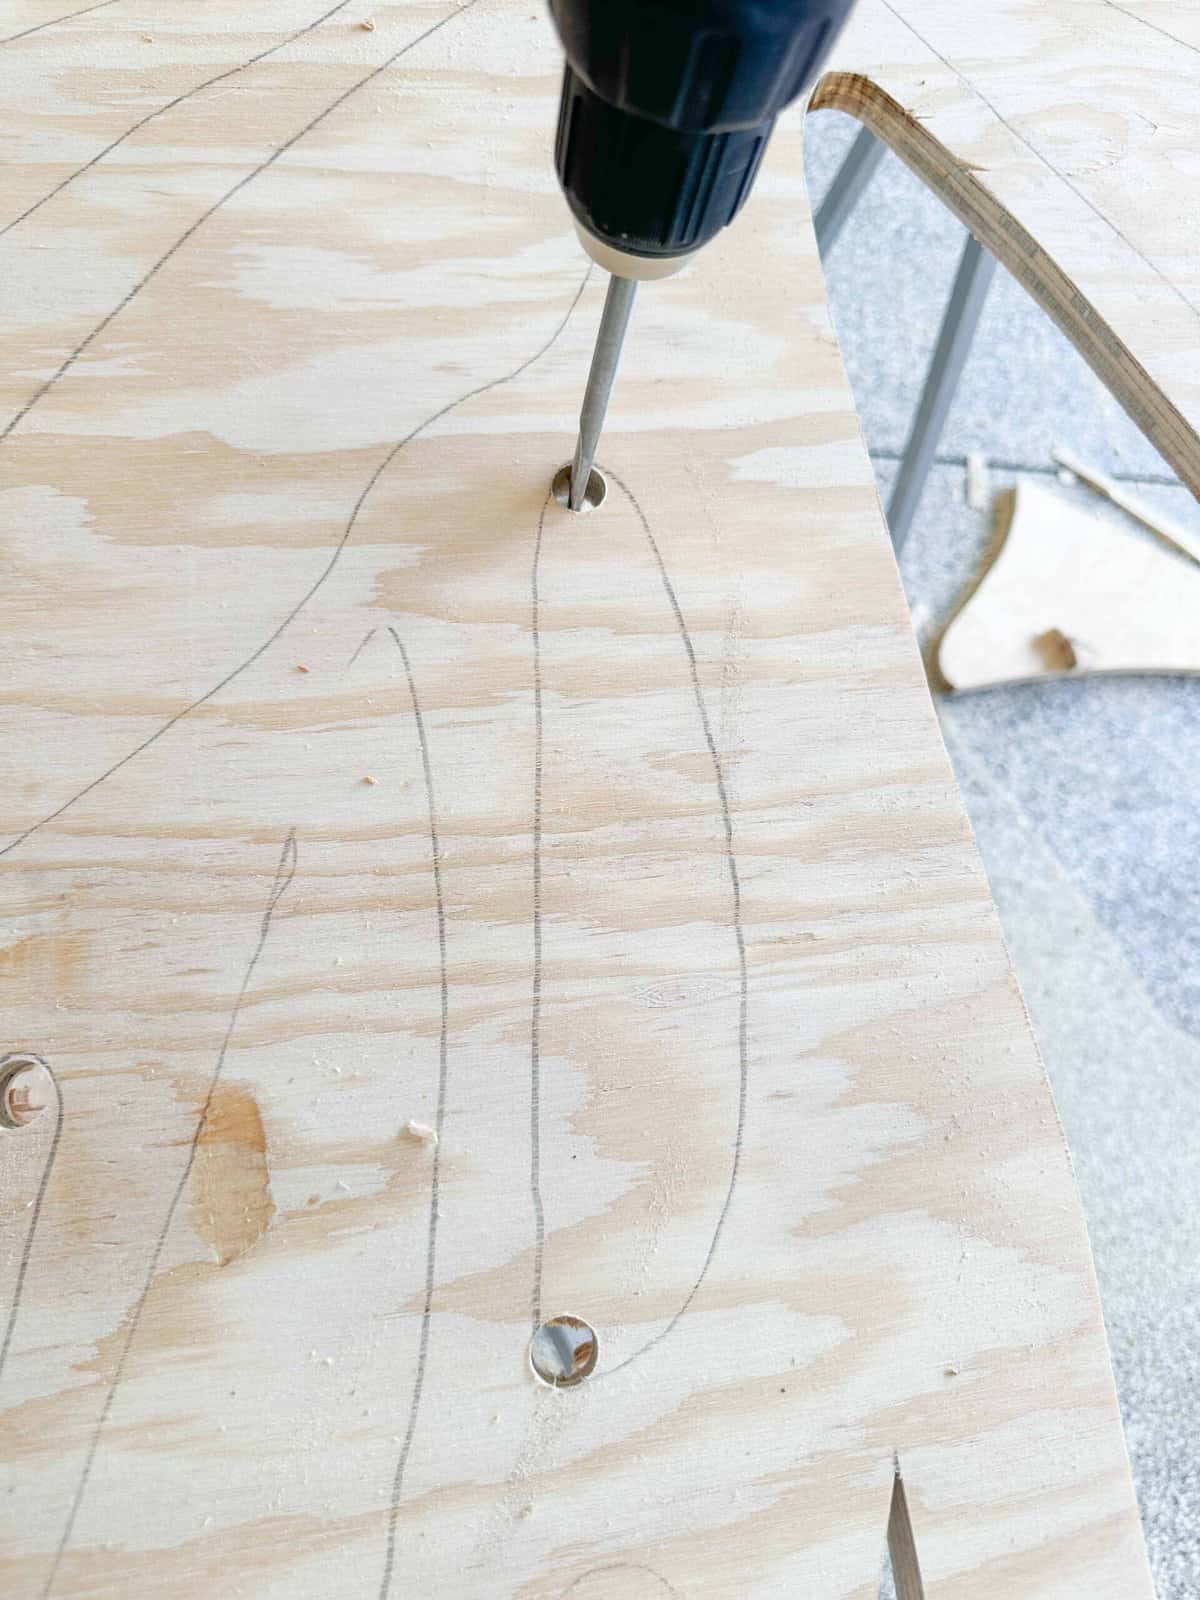
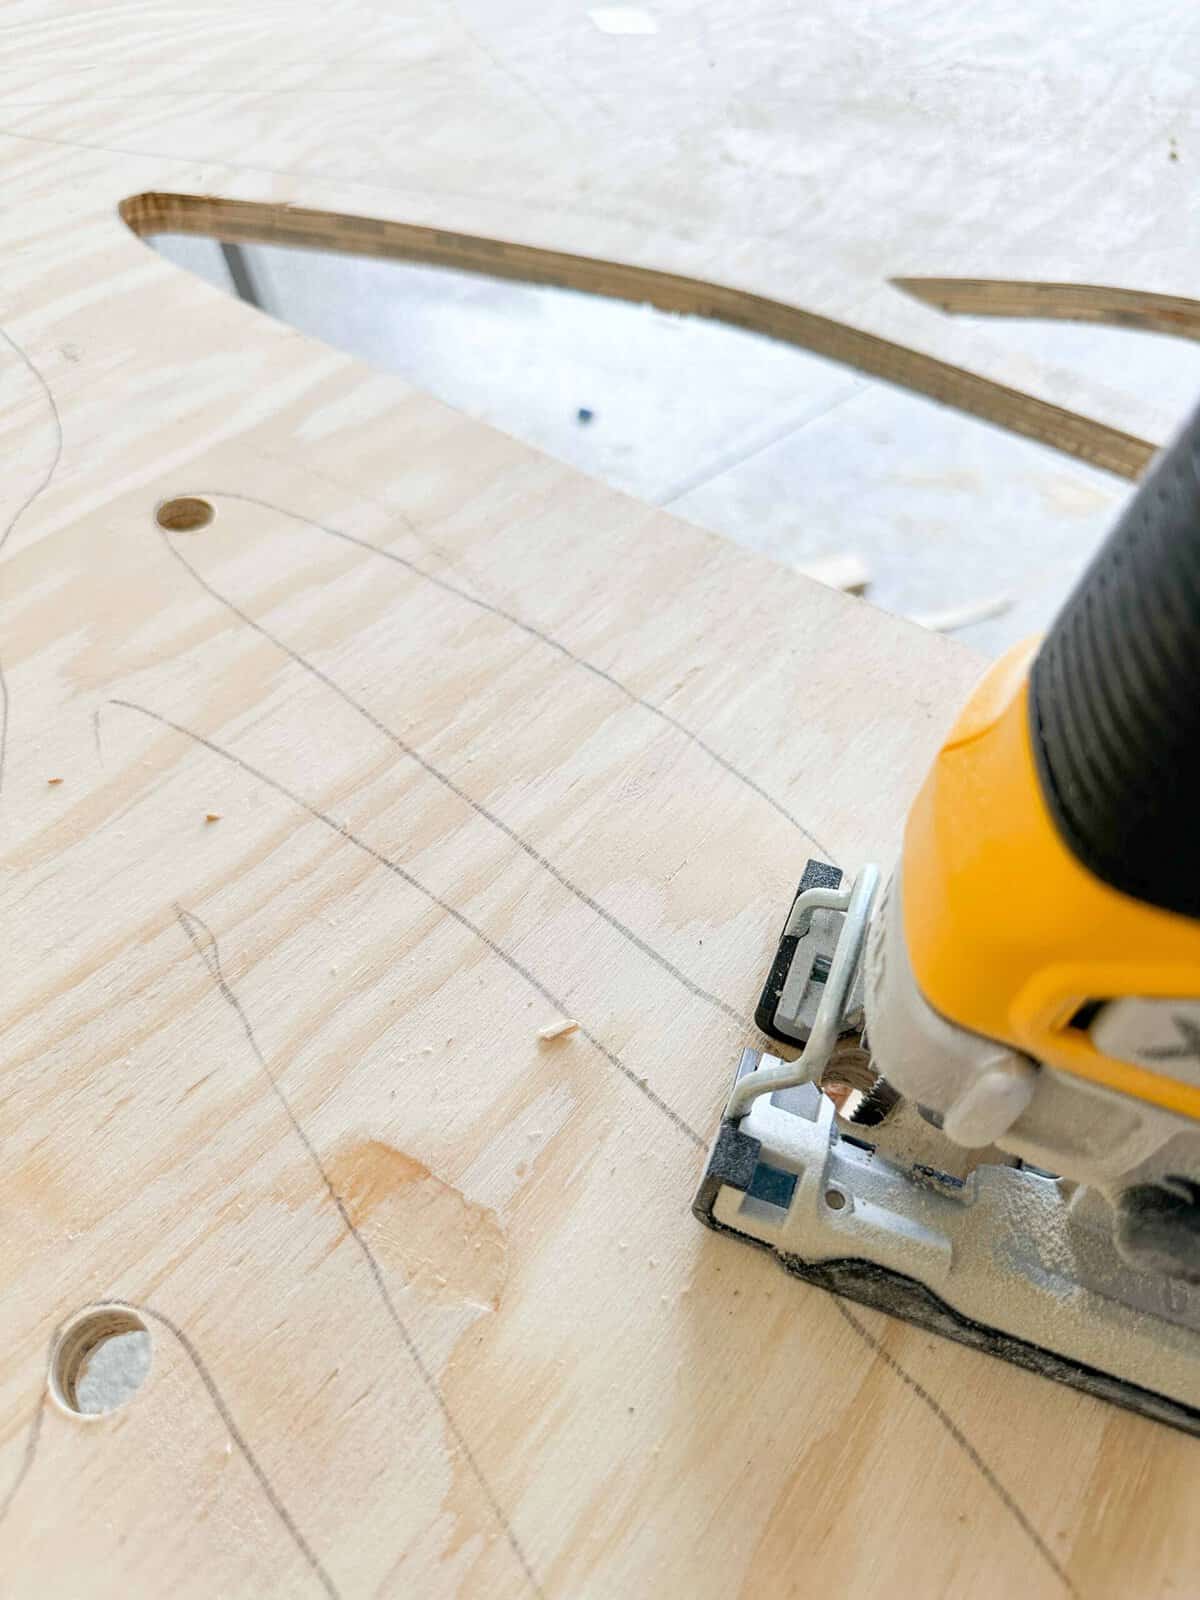
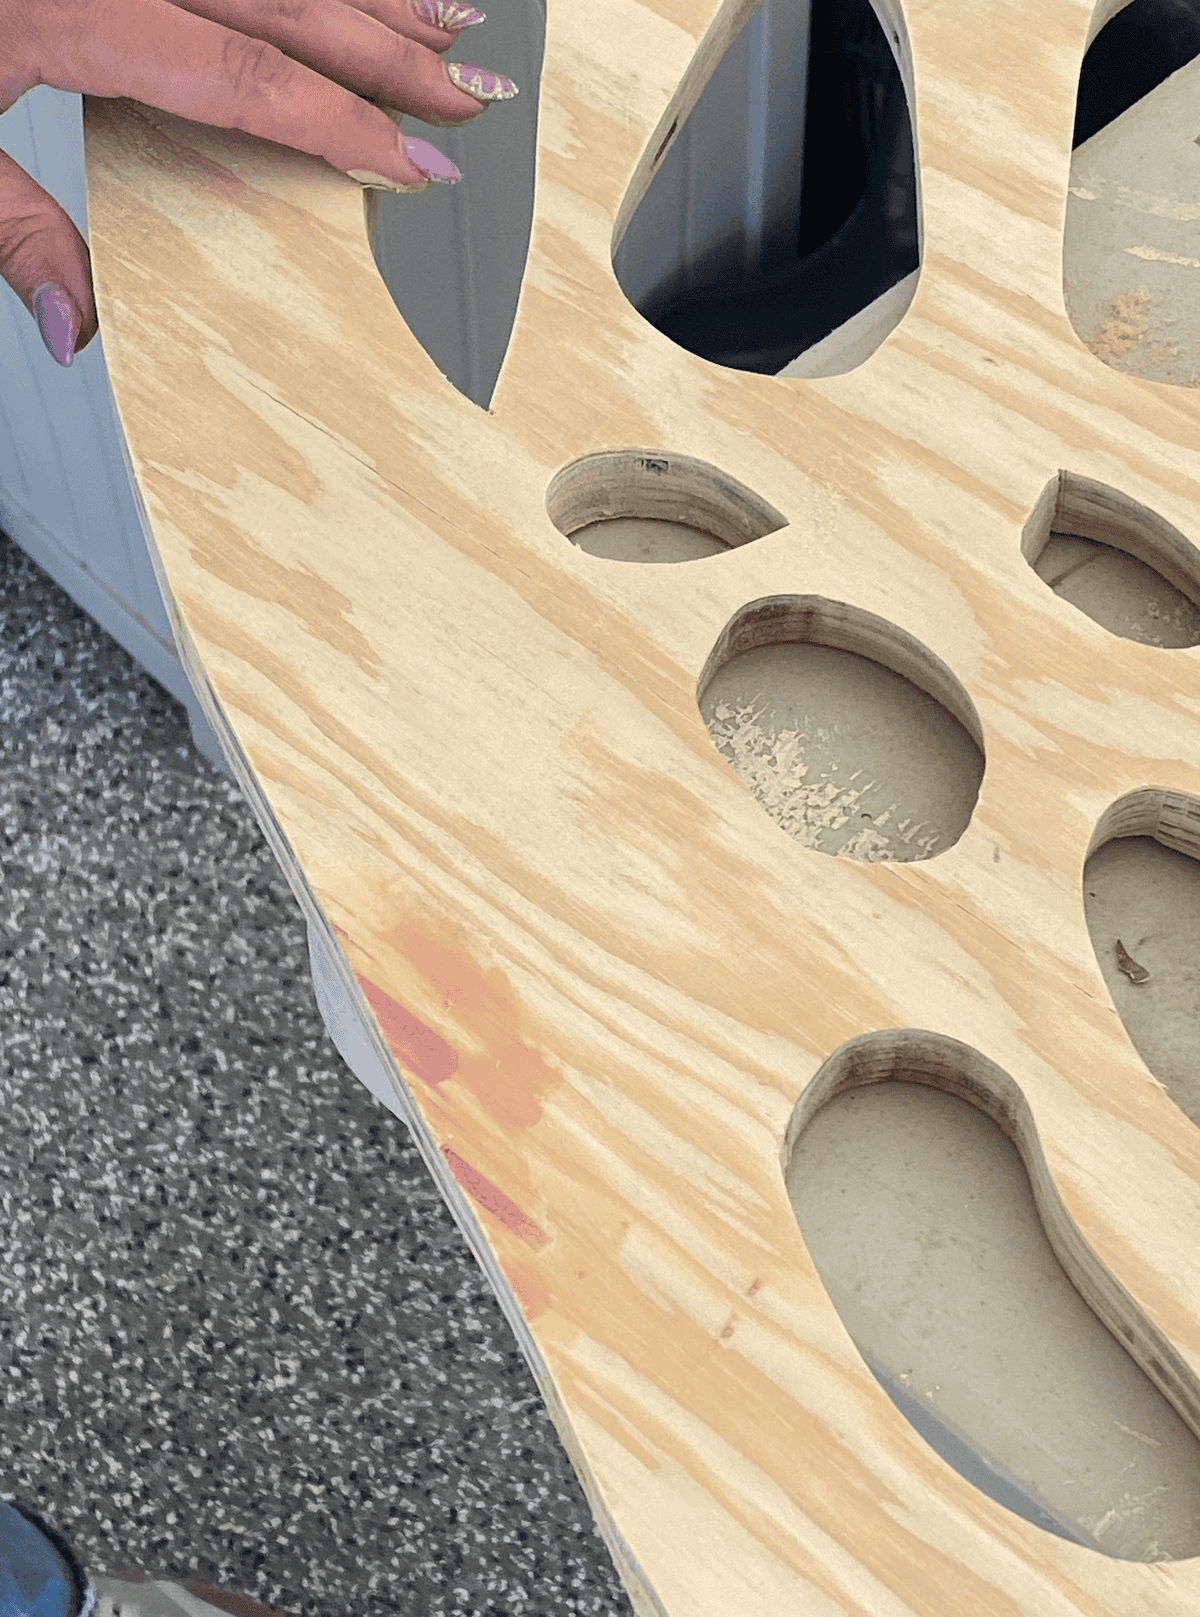
Cutting into the middle of a piece of plywood with a jigsaw can be a bit tricky; it's possible, but I prefer to make a hole with a drill and then insert my jigsaw blade into the hole.
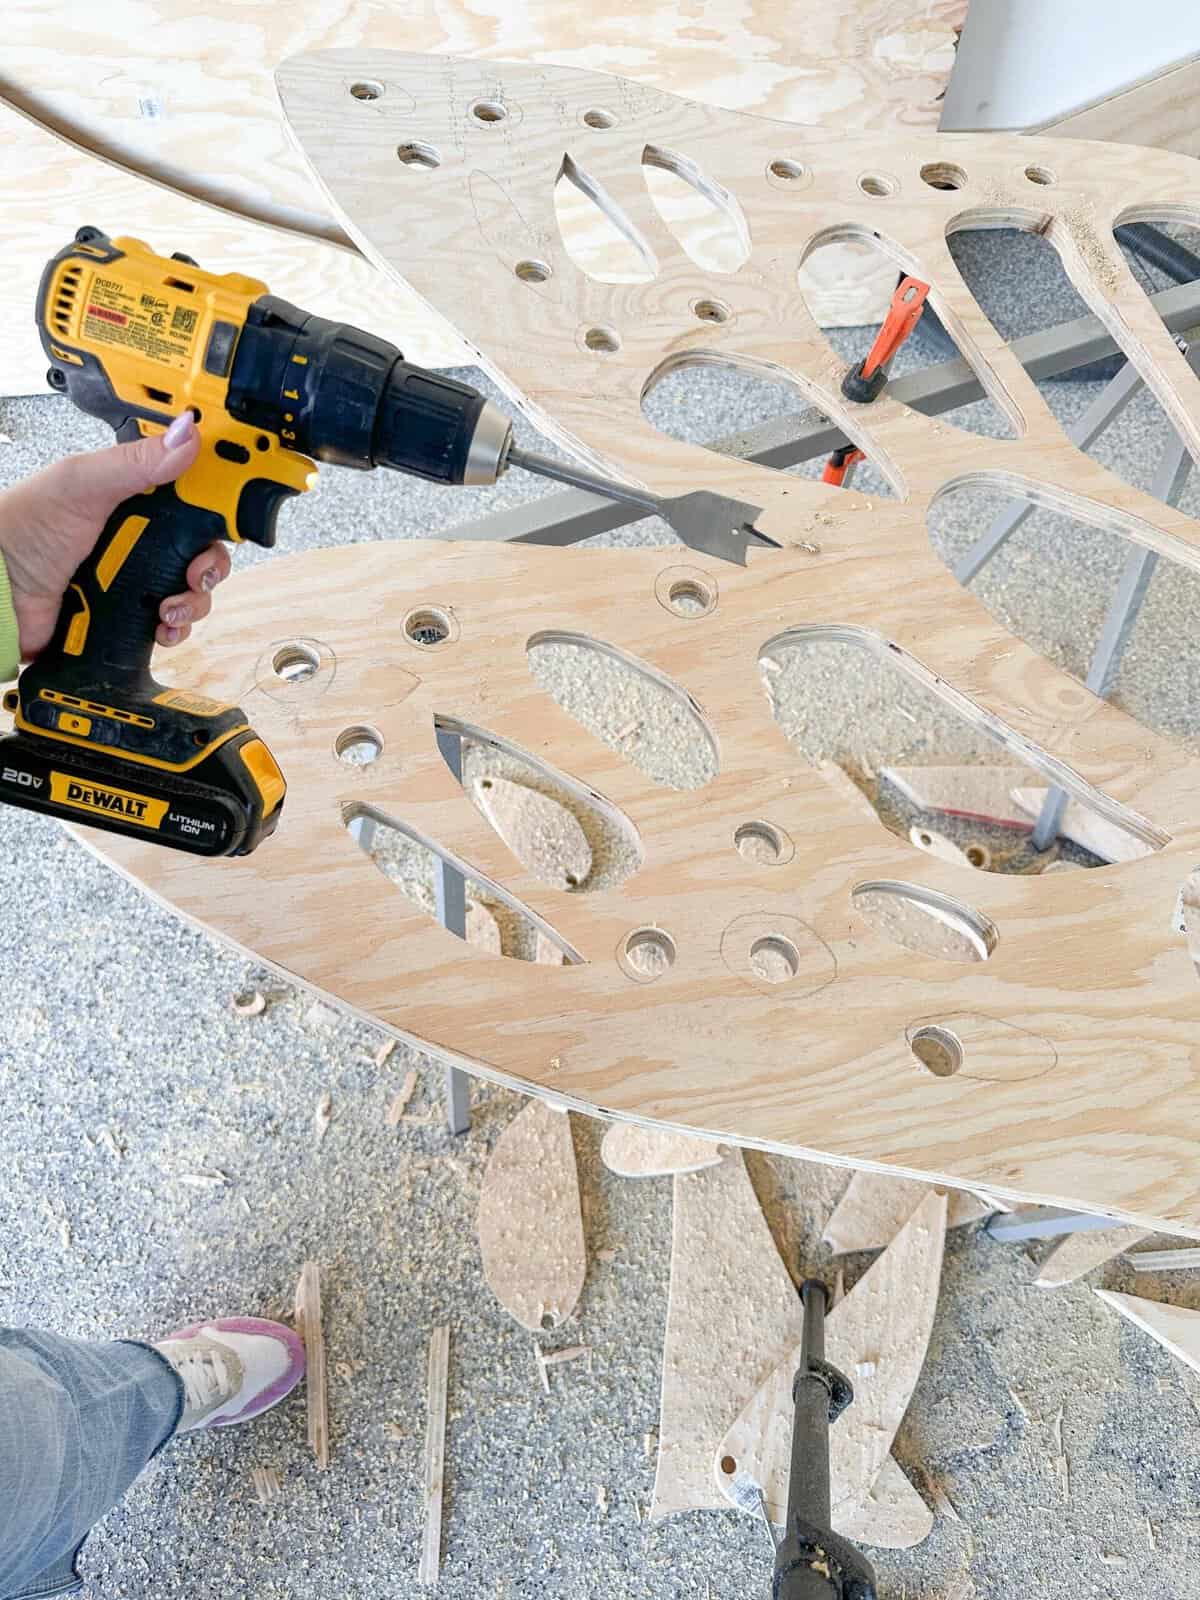
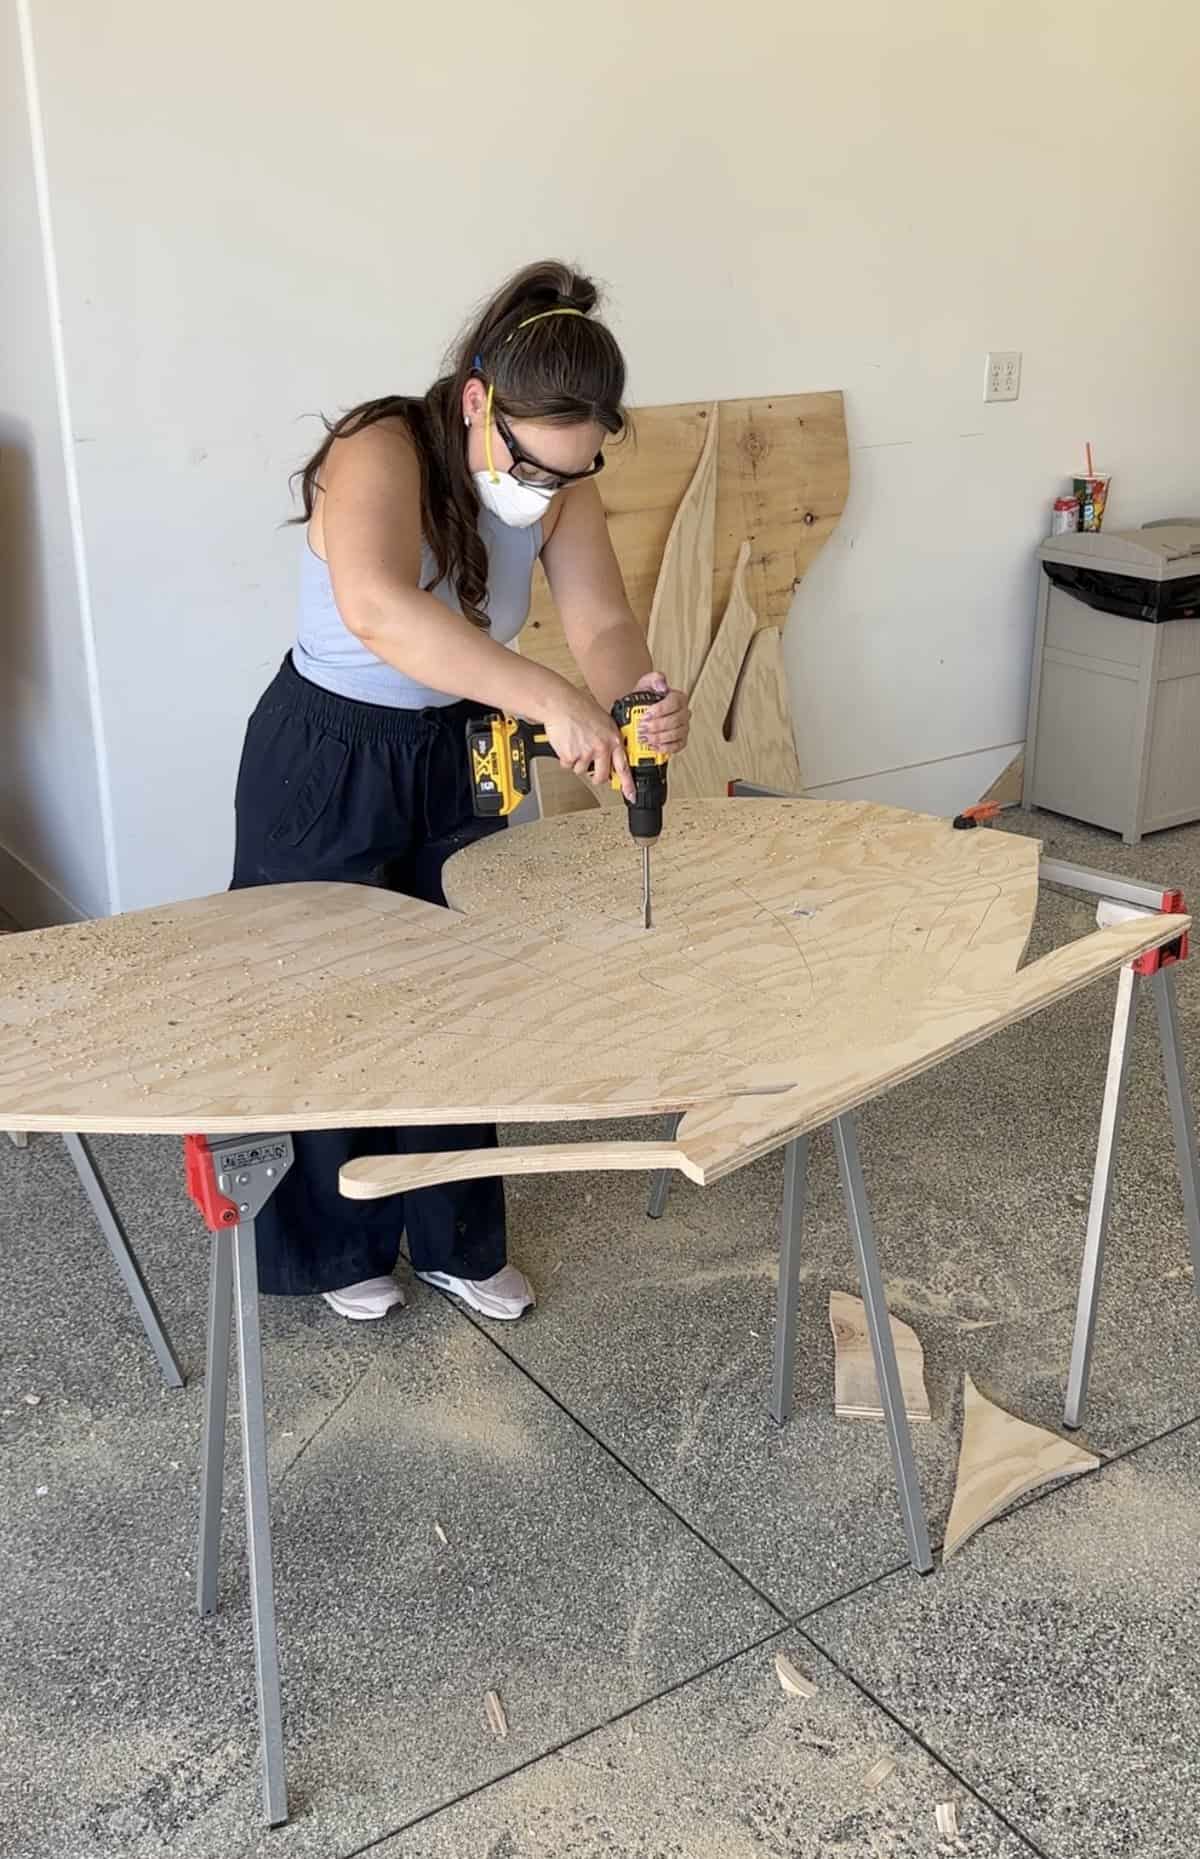
I use a 1" Hex Shank Spade Drill Bit with my drill to create a circle along the sharpest curve of the butterfly wing cutouts. Then, I insert my jigsaw blade into the circle and start cutting.
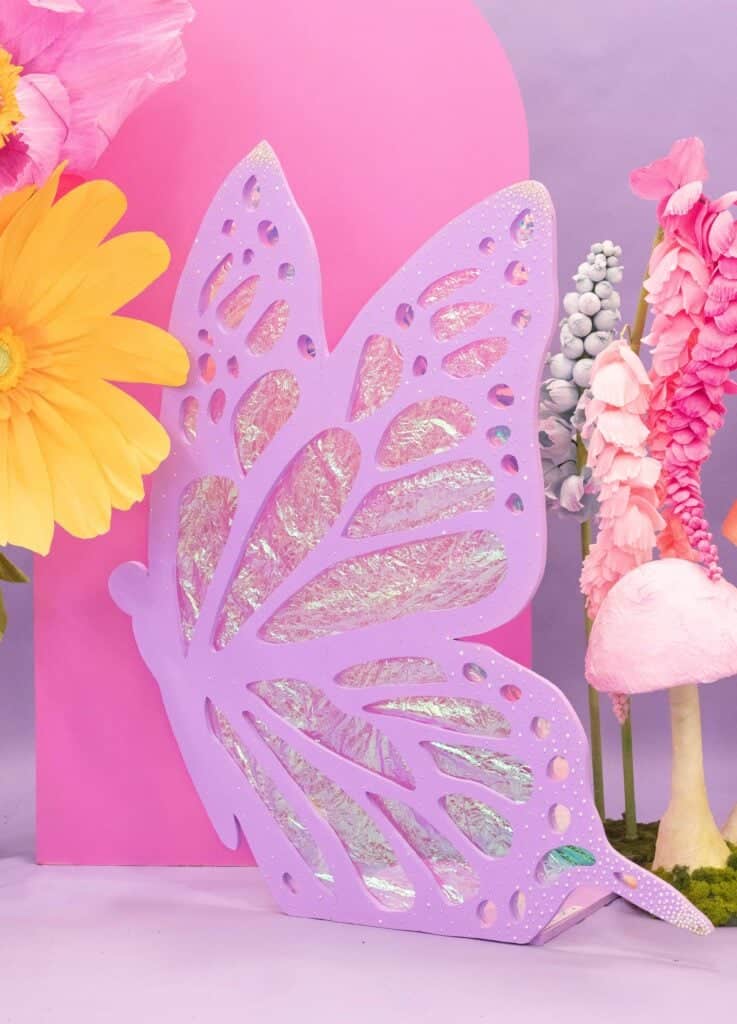
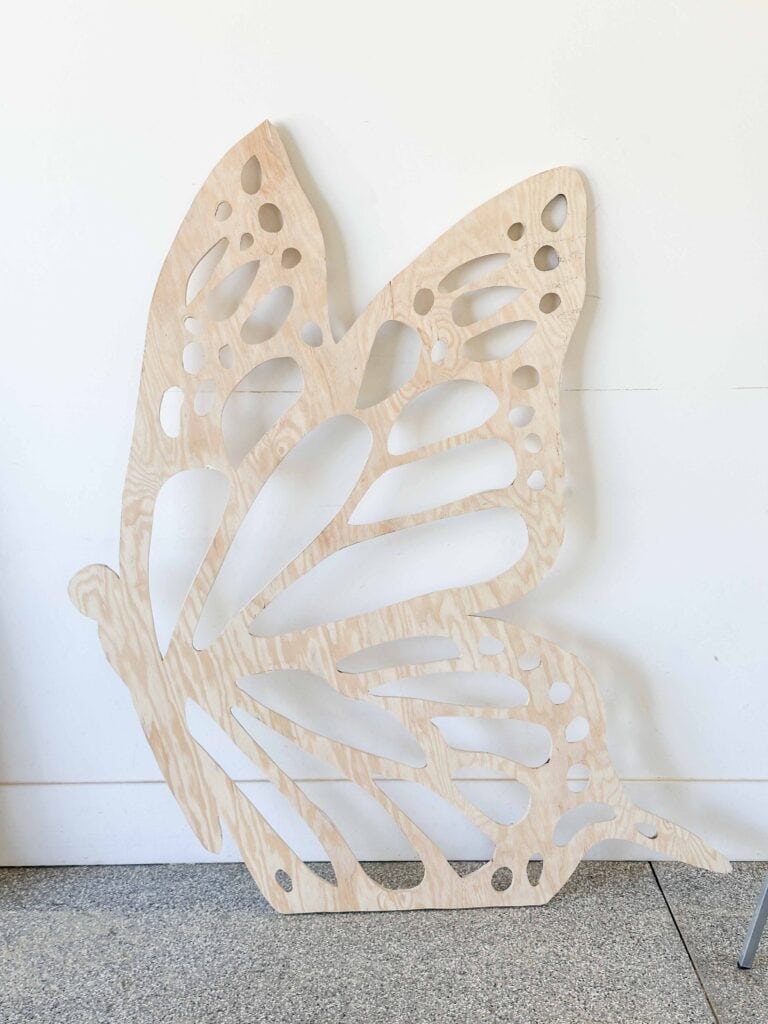
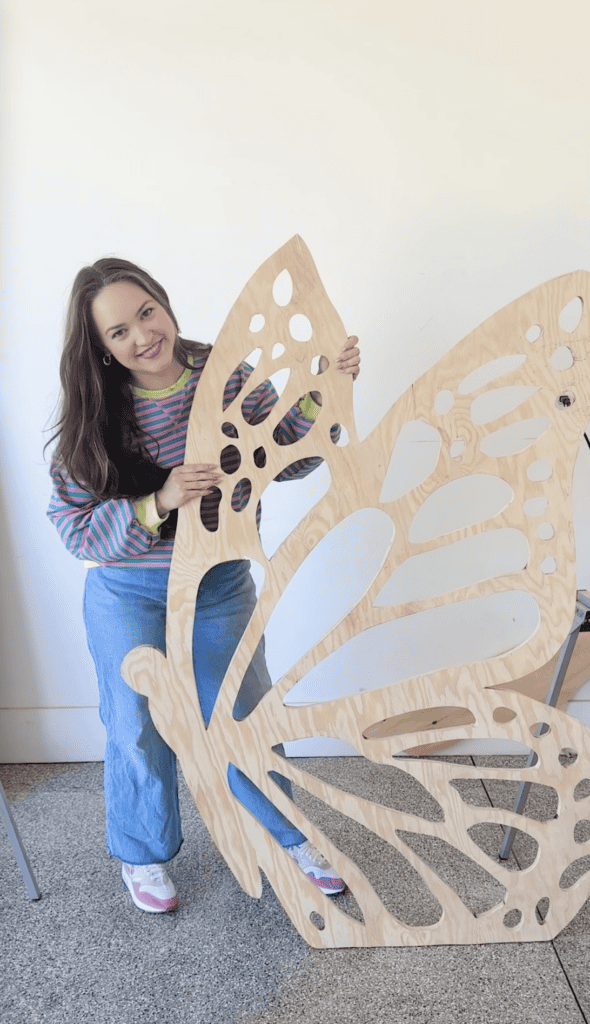
Here's what the side-view butterfly looks like once cut out.
*OPTIONAL BASE
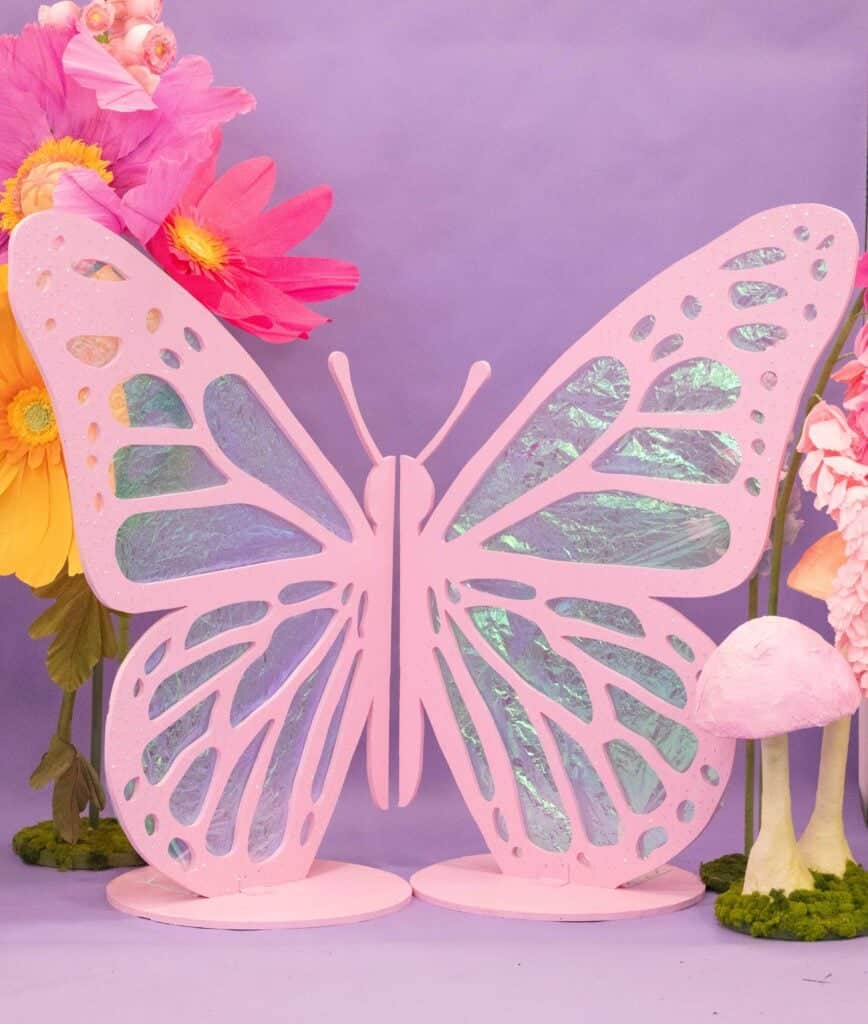
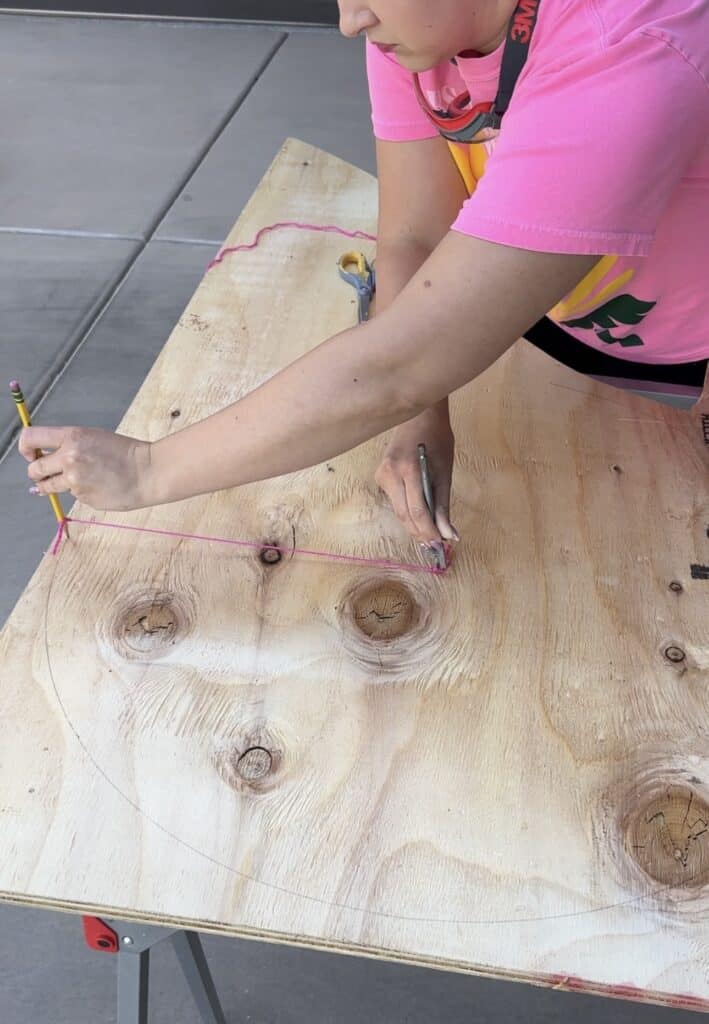
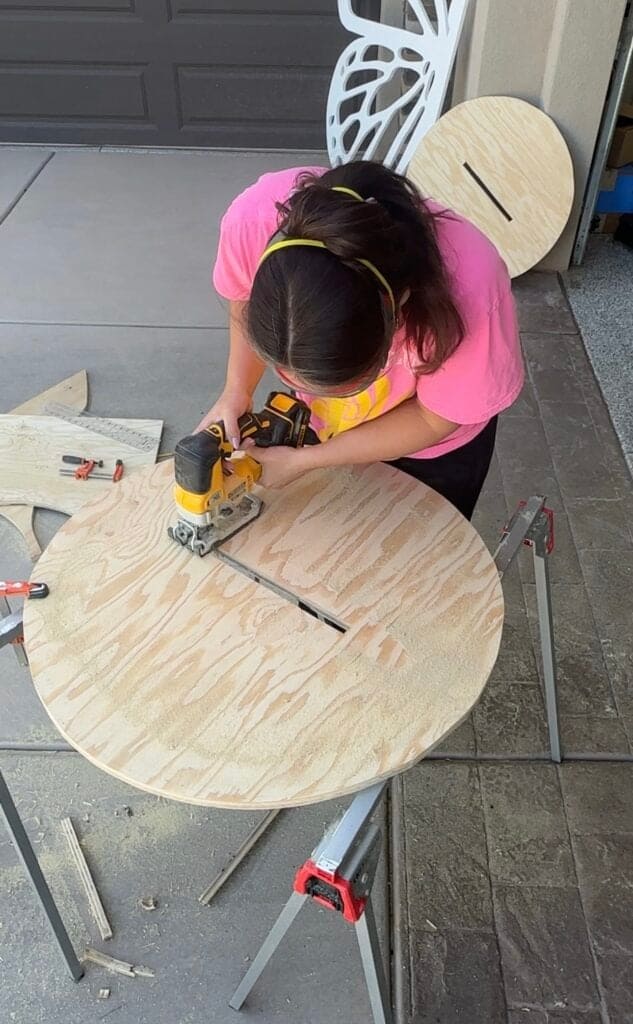
For the pink butterflies, I created two circular bases with a slot in the middle that the butterfly could slide into. I used the leftover piece of plywood to create this base.
I cut a piece of string to about 19" and tied it to a drill bit, then tied the opposite side to a pencil and inserted the drill bit into the center of the wood and drew a circle.
Along the center of the circle, I marked a rectangle that was just a hair wider than my wood's thickness and a tiny bit longer than the length of the bottom of the butterfly. You'll want to account for the multiple layers of paint that your butterfly will have at the end of this project.
Be sure to square off your butterfly along the bottom so it has perfectly square corners so it will slide right into the base if you choose this option.
Double-check the fit by inserting the butterfly into the circular base before moving on to the next step.
Step Six: Patch and Sand
Once you've finished cutting everything out, it's important to patch and sand your work for the smoothest results. I use DAP Plastic Wood-x All Purpose Wood Filler to go over areas where I have splintering or wood imperfections.
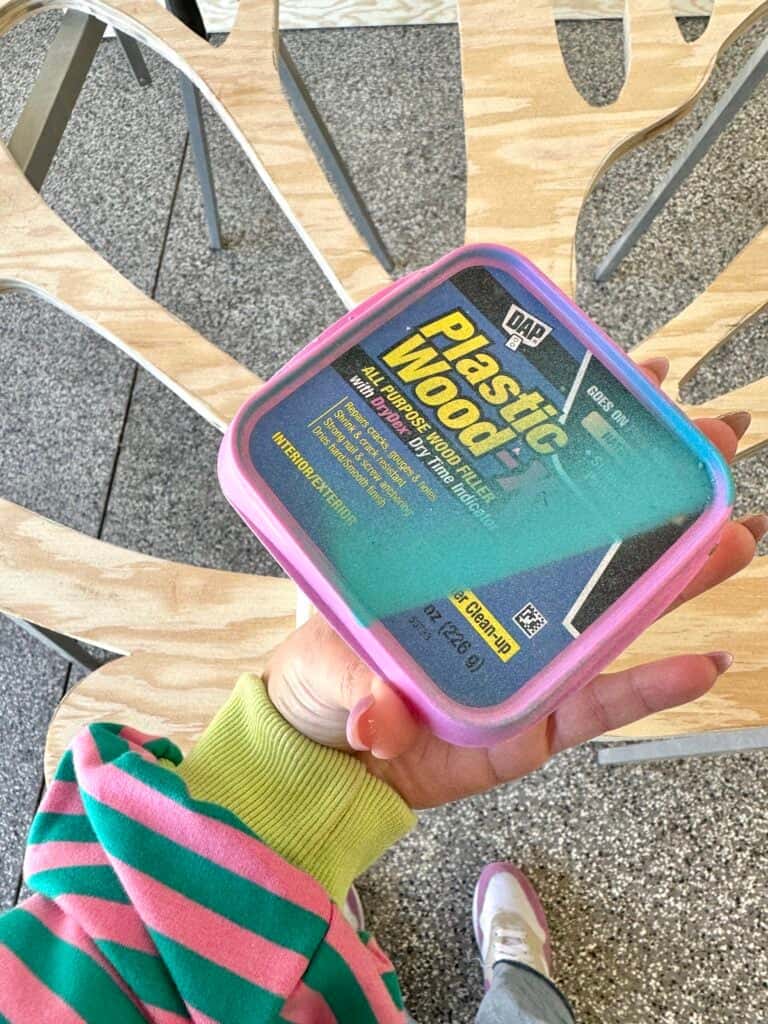
This specific filler starts pink when you apply it and turns a natural color once it dries, indicating it's ready to be sanded down. It can be applied with a putty knife. Don't worry about making it perfectly smooth, as you can easily sand it down later.

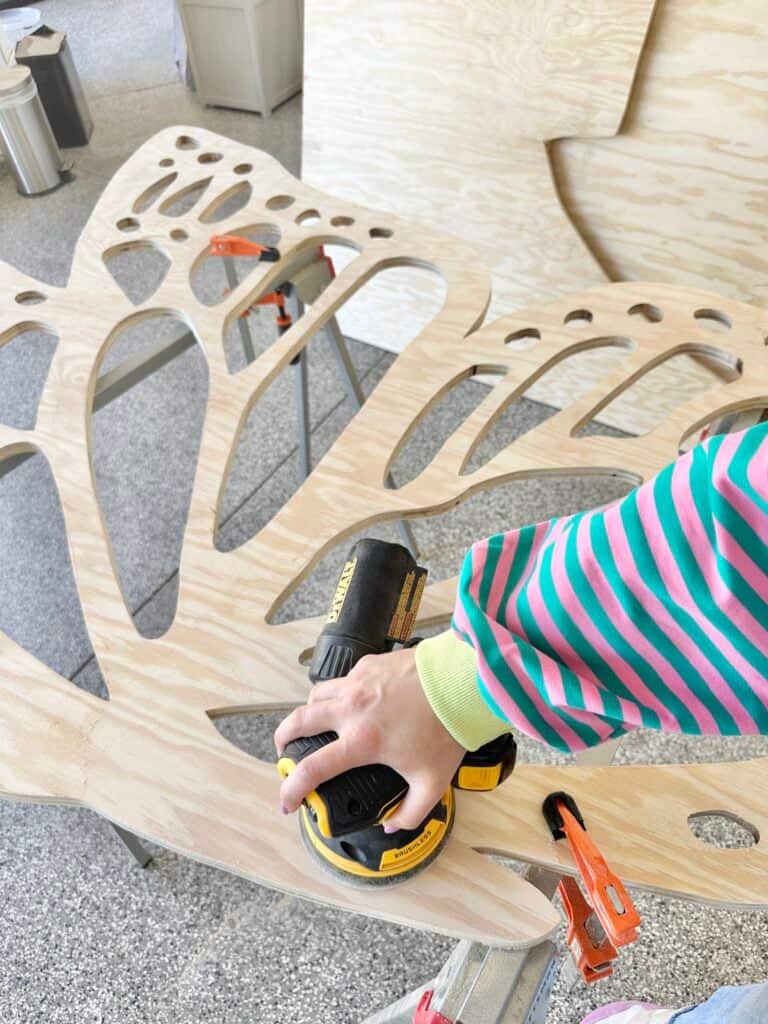
Once your wood filler has dried completely, sand down the entire front surface of the butterfly cut-out. If you have any rough edges from your jigsaw, you can sand them as well.
Don't forget to wear your mask while sanding, as wood dust particles can be hazardous to your health!
I recommend starting with a lower fine grit, such as 80 or 100 when sanding. (The lower the grit number, the more aggressive the sanding will be.) Once you've sanded the entire surface, you can go over it again with a higher grit, like 100 or 120. This will smooth out any scratches that the lower grit may have caused.
I prefer using an orbital sander when working on a project as big as this one. An orbital sander has a sanding pad that moves in a circular motion and side to side. It significantly reduces the amount of time you would spend sanding if you were to do it by hand.
What's nice about the one I'm using is that it has a spot for dust collection, so you aren't left with a huge mess after you've sanded down your project.
Once you've sanded everything, you can wipe down the butterfly with a damp microfiber cloth, sponge, or tack cloth. If you forget to wipe down your wood, the particles left over from sanding will show through your paint.
Step Seven: Paint Wooden Butterfly
Now it's finally time to paint our wooden butterfly! We've almost made it to the finish line!
Grab your paint and a paintbrush, and let's get started painting. If you're using MDF or wood that might swell, you'll want to start by coating your entire butterfly with a primer. I know this might seem like an unnecessary step, but it will protect your cut-out from future damage in case it comes into contact with moisture.
I recommend using a paint that’s specifically formulated for outdoor use. This type of paint will be more durable and ideal if you use this prop for multiple events.
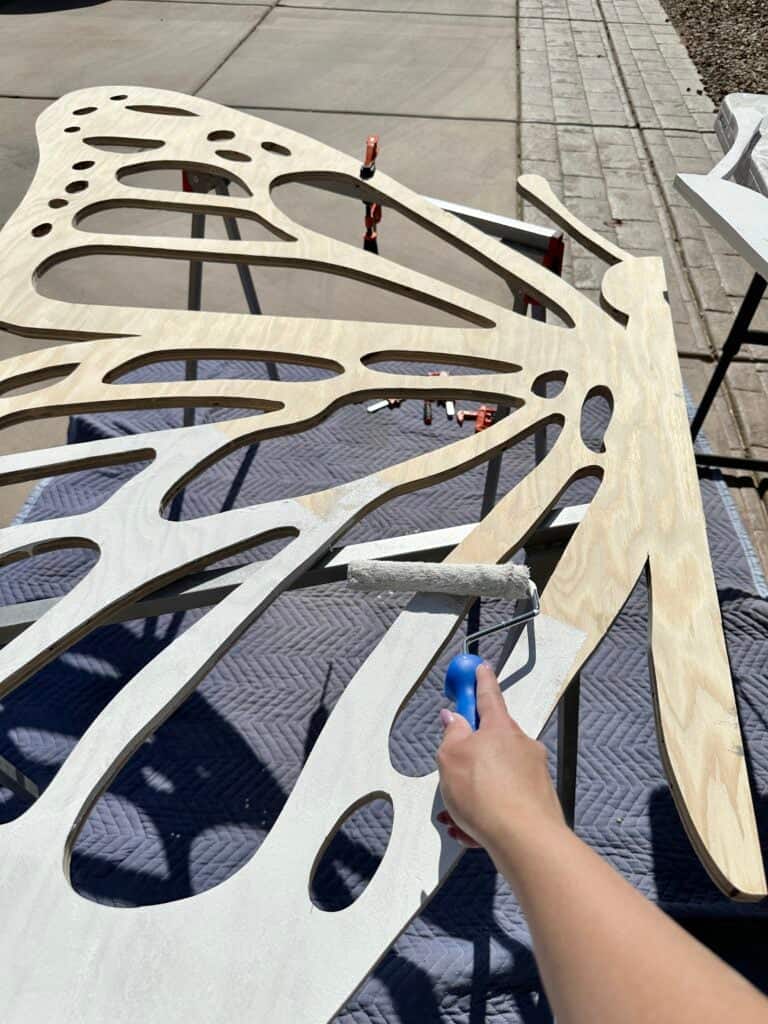
Use a paintbrush or a roller to apply a thin layer of paint to the entire surface of the butterfly. It’s important to start with a thin coat with even strokes. Once this coat dries completely, you can go over it again if it needs additional coverage. Working with thin layers will ensure the best results!

If you have any imperfections from a coat of paint, don’t be afraid to sand down the paint in between coats. To do this, use a high-grit sandpaper such as 220 to lightly hit the problem areas. Be sure to clean away any dust before adding the next layer of paint.
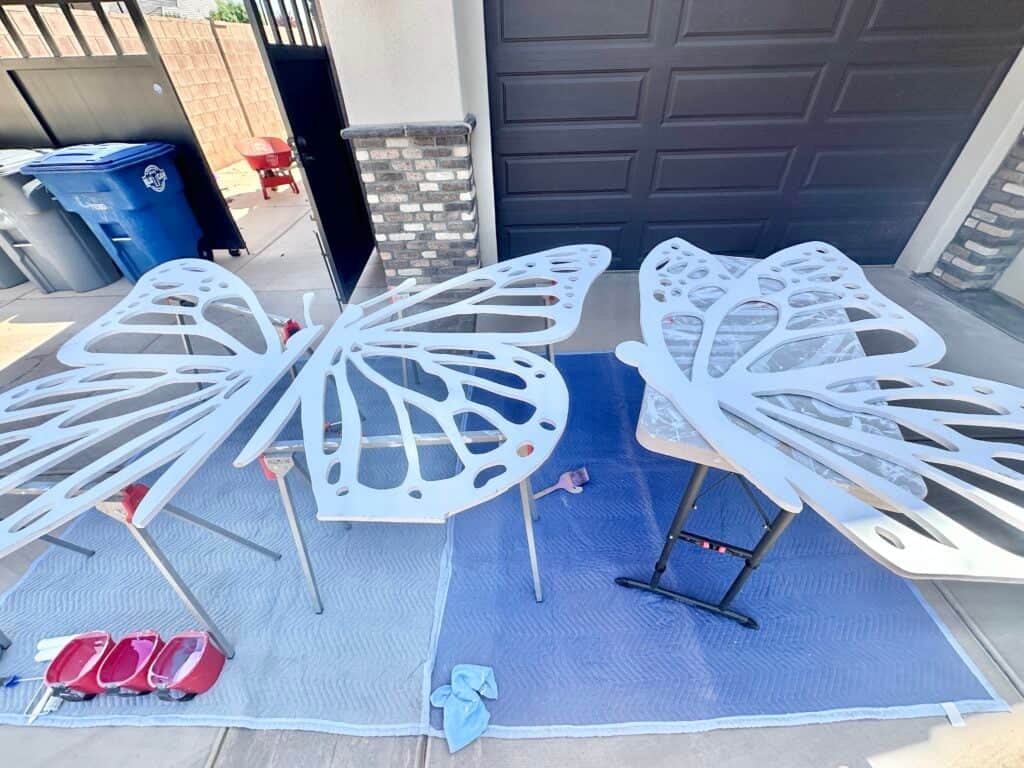
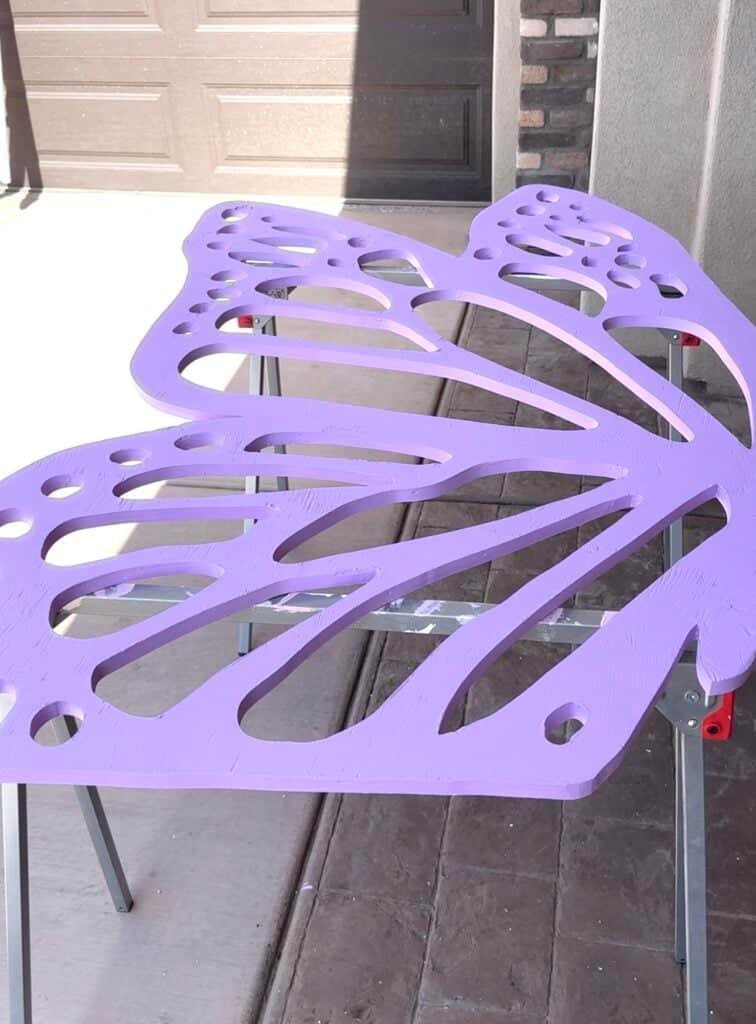
Once your primer has dried completely, you can start painting with your real paint. You'll likely need two coats for the best result. It's helpful to use a small foam brush to paint the crevices of the butterfly details.
Seal your butterfly with a clear topcoat or sealer for the best long-term results. This can help to protect it from the elements if you plan on renting this prop out for parties.
Allow the butterfly enough time to dry complexly before handling it.
Step Eight: Personalize Your Butterfly
Now comes the fun part: you can personalize the butterfly however you'd like to best fit your theme!
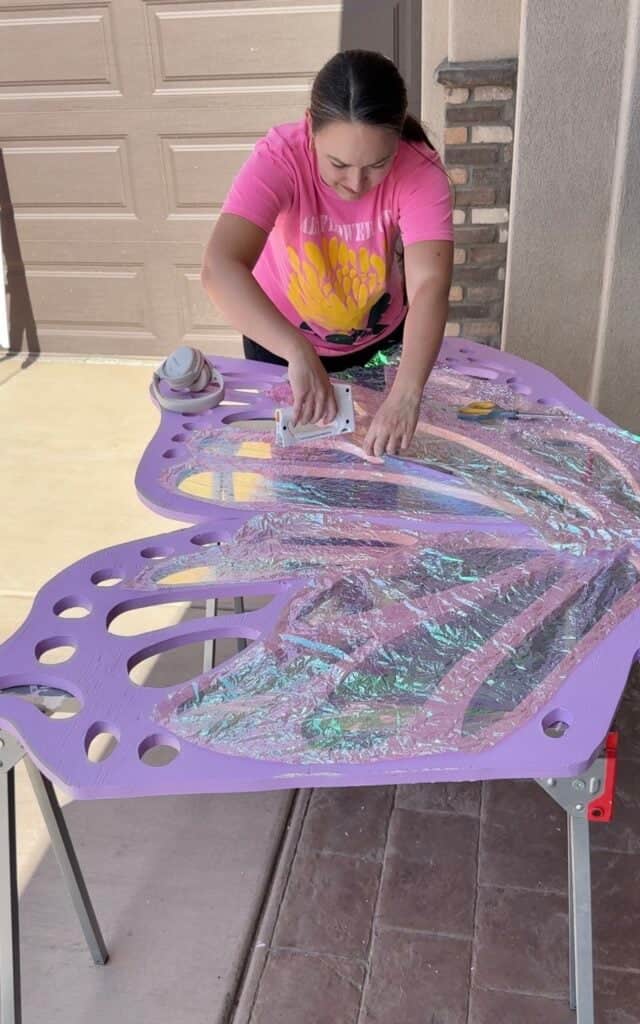
Cellophane - I added crinkled-up cellophane along the entire backside of my butterfly wings to give it a fun pop of color. It looks gorgeous in the sun!
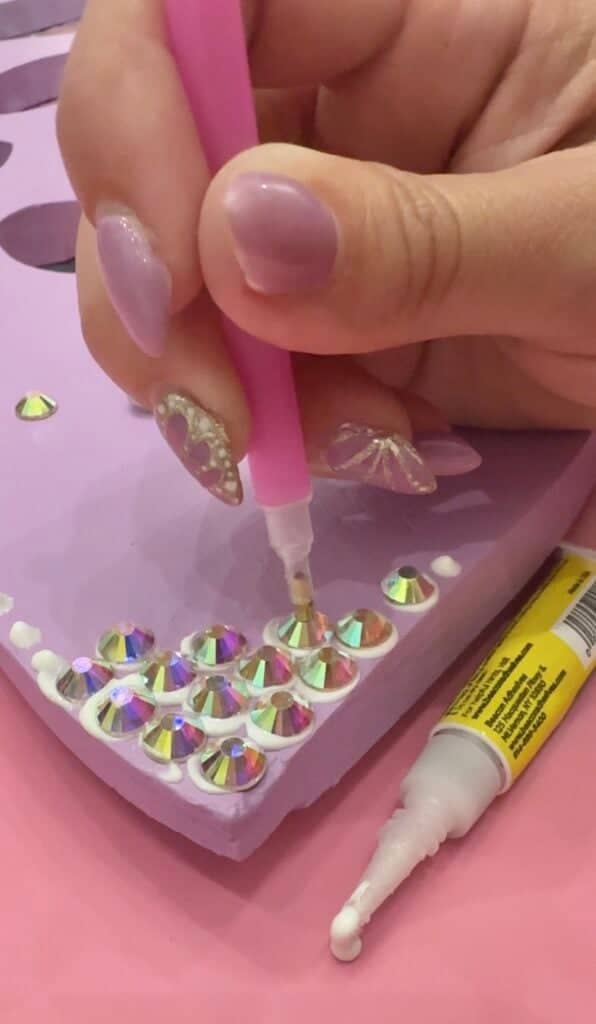
Rhinestones - I also added rhinestones along the front side of my butterfly so it would sparkle in the sun.
Neon Rope Lights - You could add neon rope lights along the back to light up the butterfly for a fun nighttime effect.
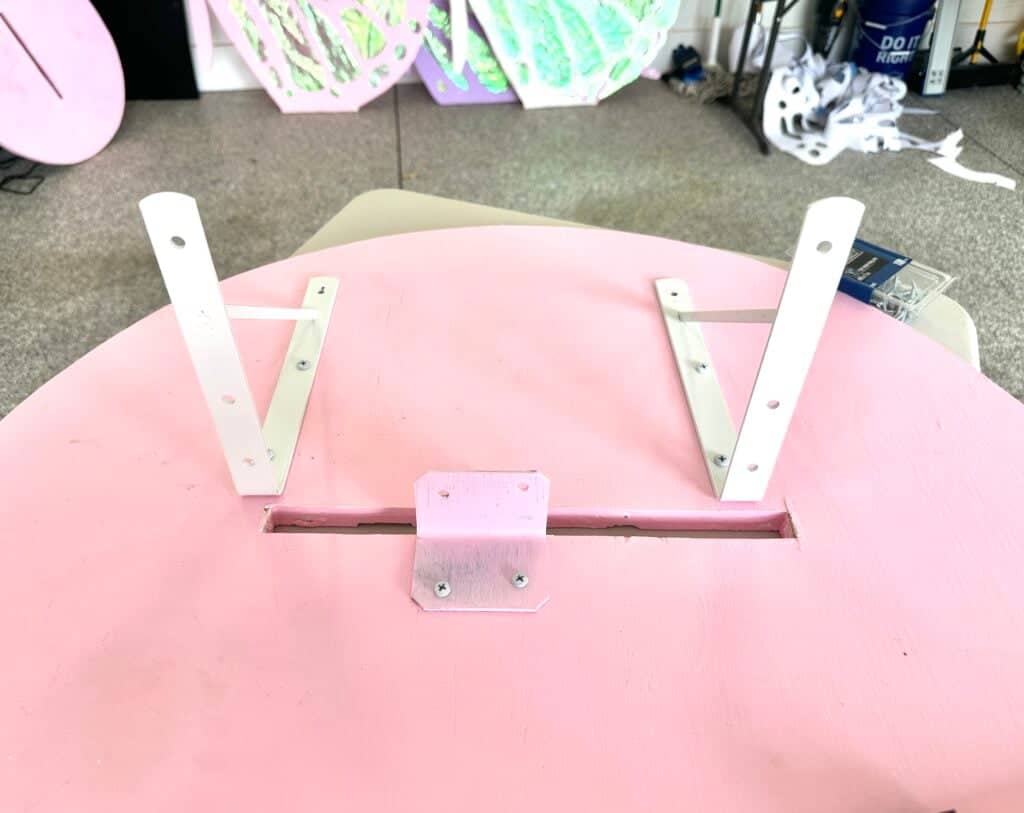
Step Nine: Attach Hardware to Butterfly
The final step to making your giant butterfly is to secure it to the base so it stands upright.
There are so many different ways to do this, and you can select an option that best fits your needs! If you plan on renting this butterfly out for events you may want to opt for a collapsible option.
I tried out two different base options. One that was collapsible and one that wasn't.
For the pink butterflies, I used a set of shelf brackets along the backside to support them and hold them upright. On the front side, I added a galvanized steel angle that I painted pink to blend in with the butterfly. The support from the back and front ensured that the butterfly was fully supported and stayed upright even when a breeze came through.
Be sure to drill a pilot hole before drilling your screws into the wood.
A pilot hole is a small hole that’s drilled before the screw that prevents the wood from splitting or shredding.
Once your pilot hole is drilled, you can go ahead and use your wood screws to attach the brackets to the wood.
Now, you can place your wooden butterfly into the slot. If it doesn't fit, you can always sand down the sides!
Now you have a finished giant wooden butterfly! Do you have questions about this process? Be sure to leave them in the comments below so I can answer them!

Looking for more party decor? Check out these posts!
Hi! Is there another way to access this PDF? Everytime I try, it says that the website is invalid.
What are the actual dimensions of the butterfly with open wings? H & W?