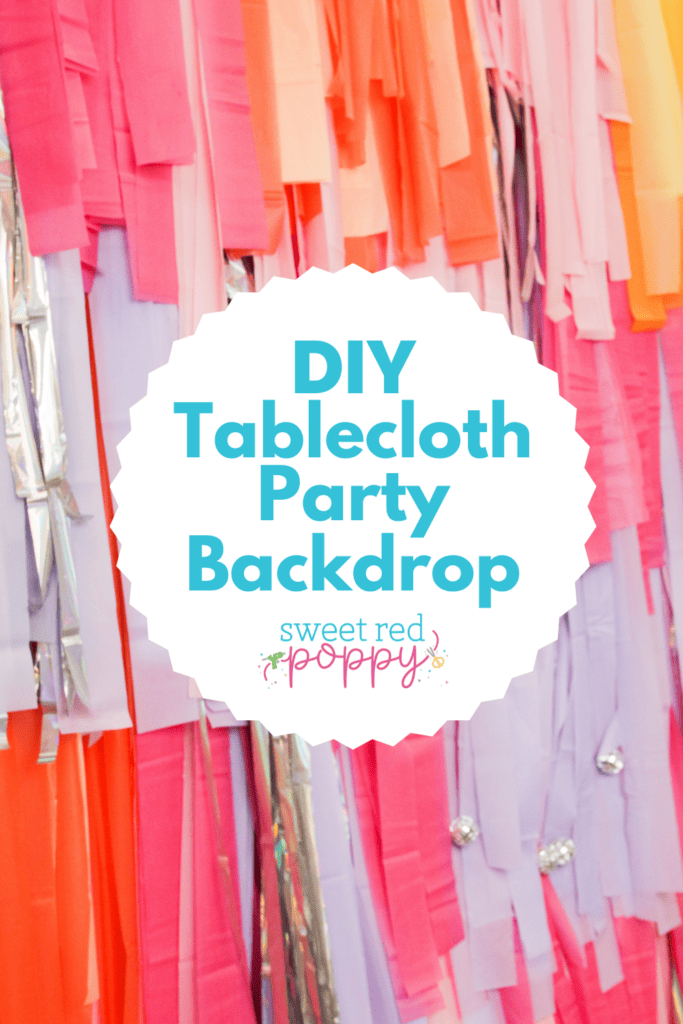
Learn How to Make a DIY Tablecloth Party Backdrop With This Step-By-Step Photo and Video Tutorial!
Tablecloth backdrops are all the rage right now for parties. They are budget-friendly and inexpensive to make.
You can easily customize your tablecloth backdrop to match any party theme or color palette. Add in different patterns and textures for a truly one-of-a-kind decor statement.
Because these backdrops are so popular, you can even rent out your party backdrop once it’s made and you’ve used it at your own party.
They are perfect for birthday parties, bachelorette parties, baby showers, prom, or graduation celebrations!
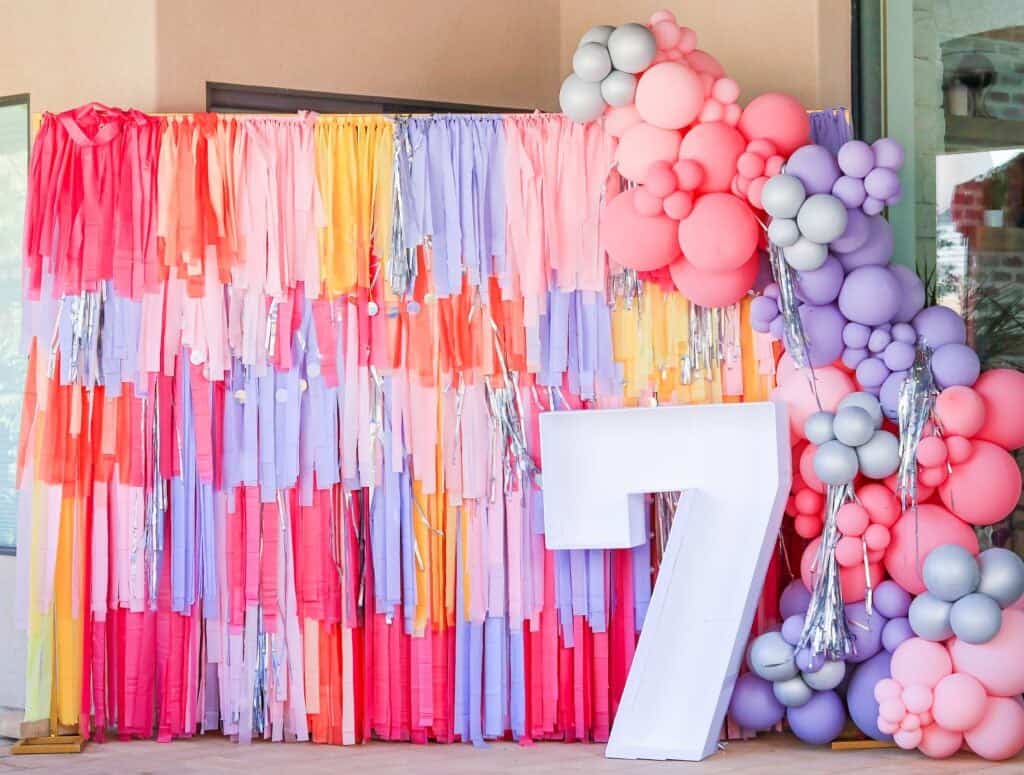
You can coordinate this backdrop with the Giant Foam Board Marquee Numbers Tutorial I recently posted. They look great together and will add a bit of pizazz to any party, especially if you add a balloon arch like I did.

How Long Does it Take to Make the Backdrop?
Depending on the size of your backdrop, it is a 1-2 day project, but I'll share some tips and tricks along the way to make the process go by faster.
My backdrop measures 10 feet wide by 7 feet tall and took about 14 hours from start to finish to make. This was my first time making this type of backdrop, so it definitely took a bit longer as I tried to figure out the best method.

What Supplies Were Used to Make the Backdrop?
For the backdrop, I used mesh fencing, a backdrop stand, and zip ties to tie it all together.
I bought most of my supplies from my local hardware store (Lowes) and grabbed a variety of tablecloths from Dollar Tree & Amazon (dark and light pink, orange, yellow, purple, and metallic silver).
How Many Tablecloths and Rolls of Mesh Fencing Do I Need?
The amount you need depends on the size of your backdrop. I had a 10 ft x 10 ft backdrop stand and only used a small part one roll of mesh fencing and around 42 tablecloths.
What Can I Use Other Than a Backdrop Stand?
If you don't have a backdrop stand, some alternatives would be to use mesh fencing but hang it from command hooks; Or, zip-tie the fencing to a curtain rod. Another way would be to use string or a large paper backdrop and some double-sided tape to attach the strips of tablecloths. Do whatever works for you!
I think the mesh fencing worked out great because of the easy placement and I was able to keep track of my progress and know exactly where to put the tablecloth strips.
Which Backdrop Stands Do You Recommend?
I purchased a gold 10’ x 10’ backdrop stand on Amazon. I removed one set of square tubes to shorten it down to 7 feet high by 10 feet wide. Below are links to similar backdrop stands.
How Much Did This Project Cost?
I spent just over $50 on tablecloths for this project. I also purchased a roll of 3'x25' chicken fencing for $24. I only ended up using 10 feet of it, so I'm counting that cost as $9.60 since I'll use the remaining fencing on other projects.
BASIC SUPPLIES
- 42 Tablecloths $52
- Mesh Fencing $9.60
Total $61.60
Now, let's talk about the "Extras". These are things I purchased that are NOT necessary for making this backdrop that I chose to add to mine because...well, I'm extra. 🤣
EXTRA SUPPLIES
- 10’ x 10’ Metal Stand $119
- Mini Disco Balls $27.99
- Iridescent Circle Garlands $12.80
"Extras" Total $159.79
Grand Total $221.39
I was quoted over $700 to have this backdrop made by a vendor. That cost would have only covered the tablecloths and fencing. Meaning I would have had to spend the additional $159 on the extras and to have a stand to hang it on.
I saved over $600 by making this project myself, and I have already found someone who wants to rent this backdrop for an upcoming party which will completely offset my costs!🎉
Let's Get Started!
For this tutorial, I'm making a small prototype of the big tablecloth backdrop I made using mesh fencing.
Why Shop Through My Links?
When you shop through my affiliate links, it doesn't cost you anything extra, but it helps me out in a big way! I earn a small commission from those purchases, and that support allows me to continue creating and sharing free tutorials and patterns for you. Thank you so much for helping me keep this creative community going! 💕
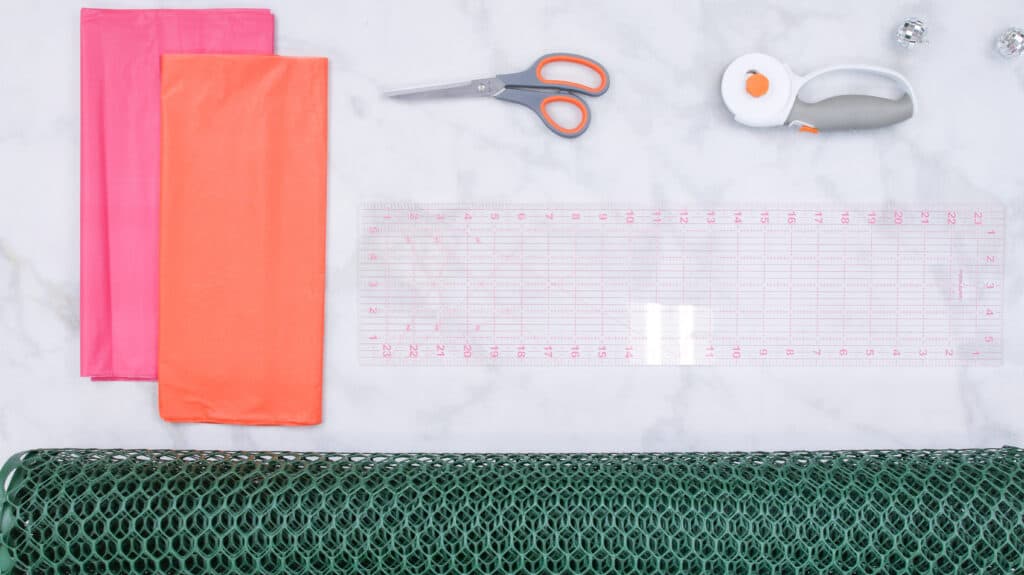
Tablecloth Backdrop Supplies
- Tablecloth- A variety of colors from Dollar Tree
- Mesh Fencing- Bought mine from a local hardware store (Lowes)
- Rotary Cutter
- Scissors
- Acrylic Ruler
- Self Healing Mat
- Zip Ties - To attach to the backdrop stand
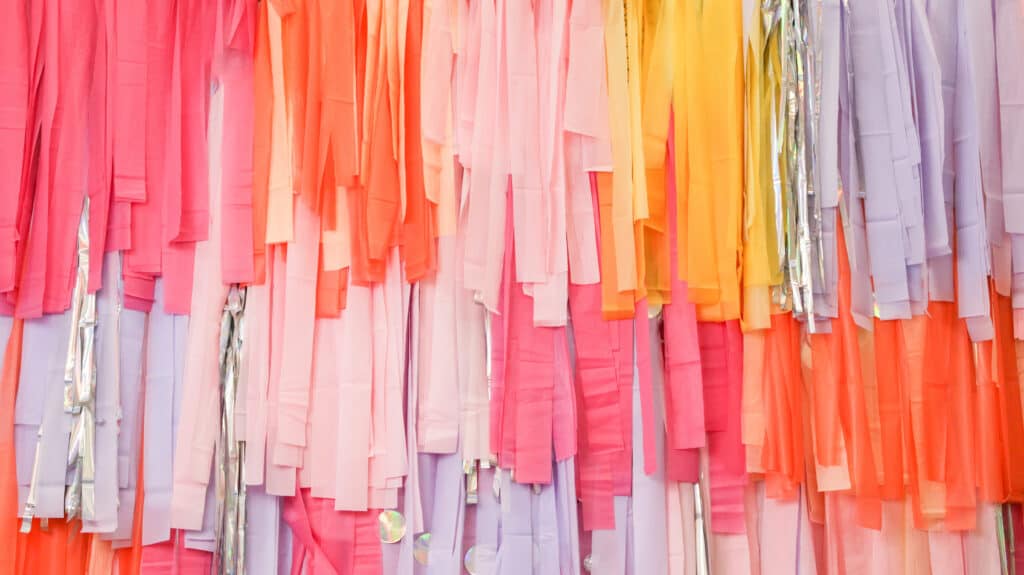
- Here's a breakdown of the tablecloths I used
- 10 Dark Pink
- 10 Light Pink
- 8 Lavender (I had to source this color from Amazon)
- 3 Silver Iridescence
- 3 Yellow
- 3 Light Yellow
- 3 Orange
- 2 Light Orange/Peach
Optional Supplies
Assembling Tablecloth Backdrop
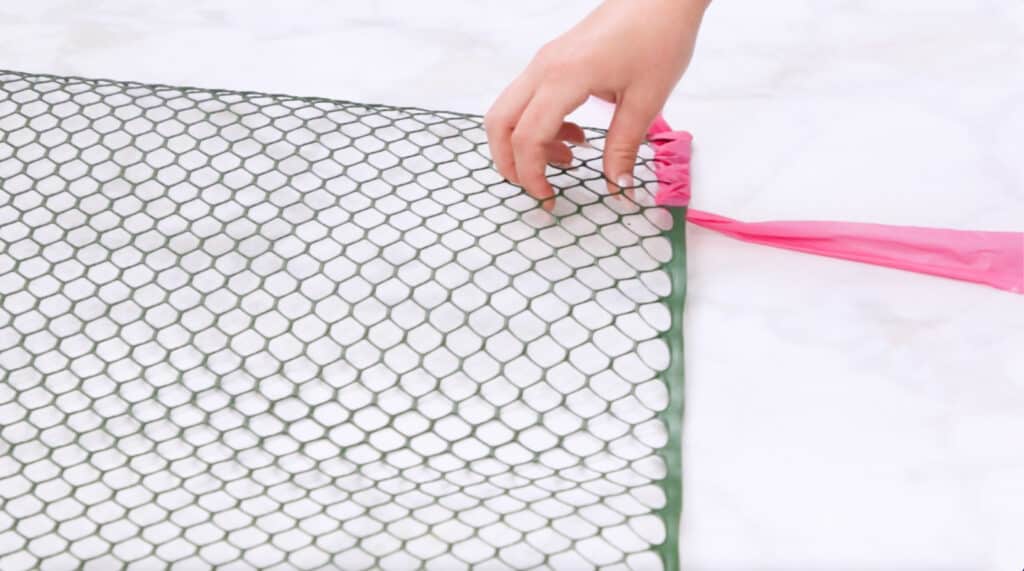
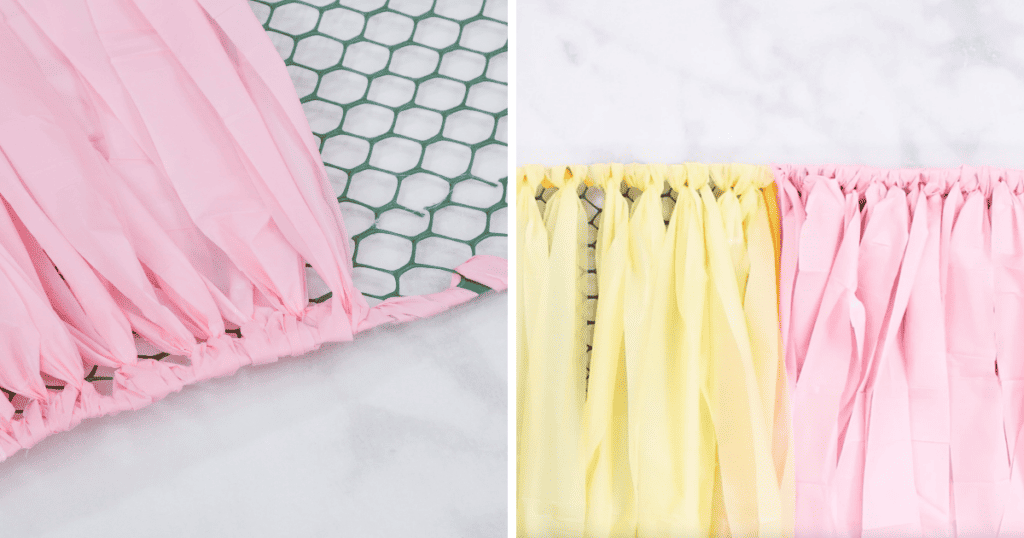
The first step I took to make this backdrop, was to tie the mesh fencing to my backdrop stand using zip ties and balloon strips (it works!). Also, I made sure the mesh ends (thick wax layers) were at the top and bottom of the stand.
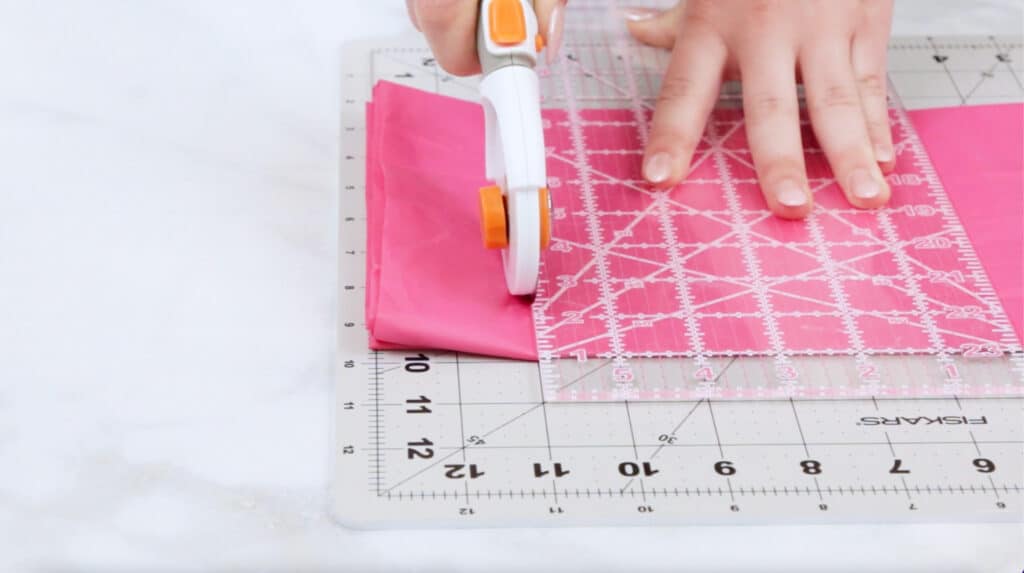
Next, I cut 1 1/2-2 inch strips from each of my tablecloths. When I did this, I took the tablecloth out of the package and left it unfolded. With my acrylic ruler and rotary cutter, I made my cuts every 1 1/2-2 inches. This saved time, and I was able to cut 8 strips out of one piece of tablecloth.
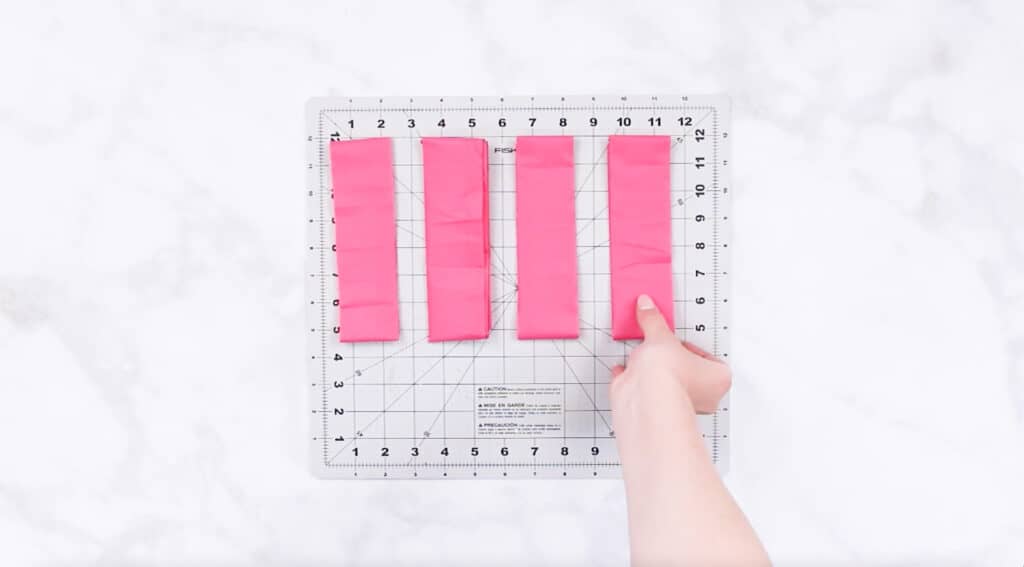
Note: Not all strips have to be the same size, it's okay to have a variety of sizes to add to the backdrop.
*Pro Tip: When making your cuts, use an acrylic ruler and rotary cutter to get clean, straight lines.
Continue cutting the rest of your colors, and set them aside.
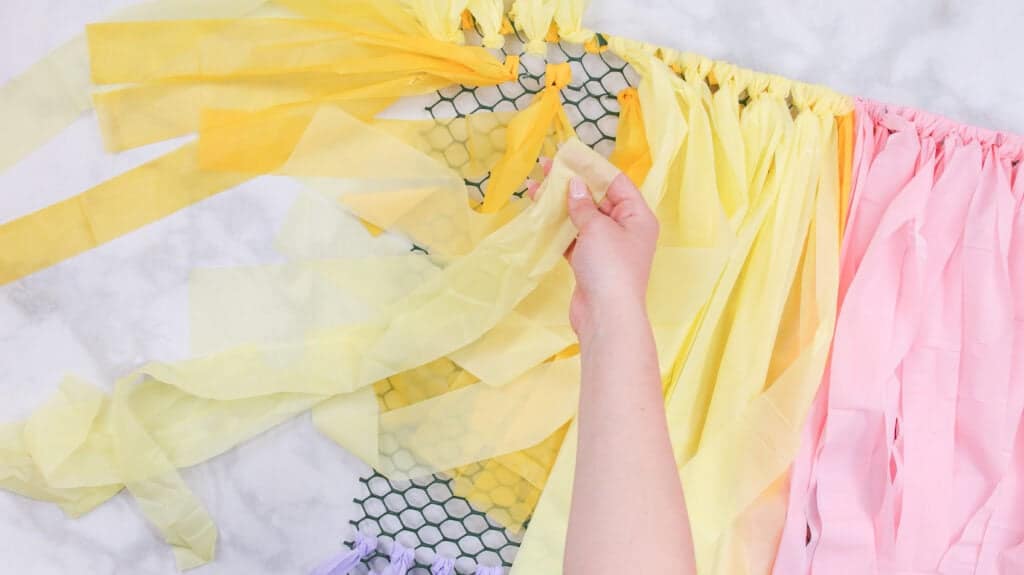
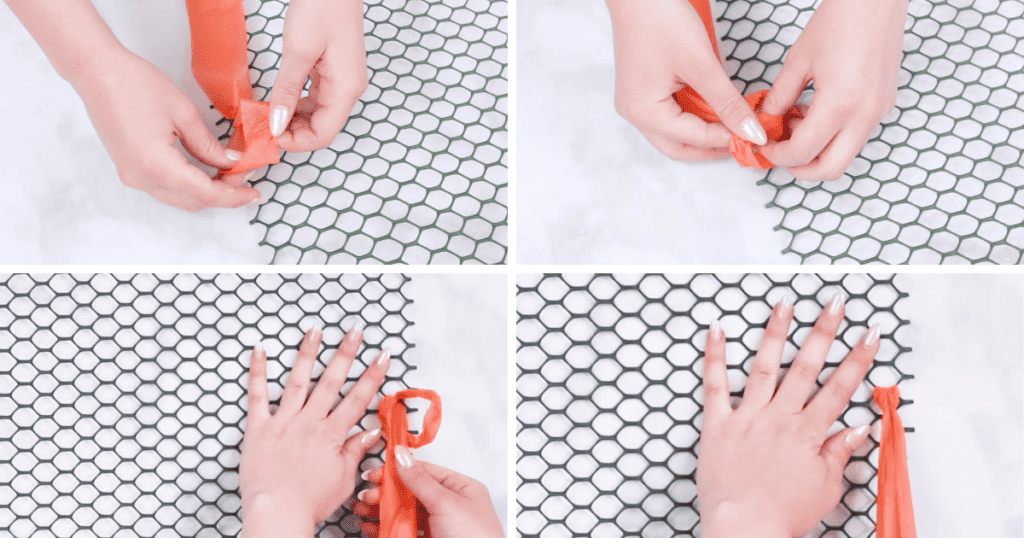
Adding Strips to Mesh Fencing
Now it's time to add the strips to the fencing starting from the bottom and making our way to the top. For extra coverage, grab a strip of the color you're about to tie and wrap it around every loop at the bottom and top of the fencing to cover the green wax strip.
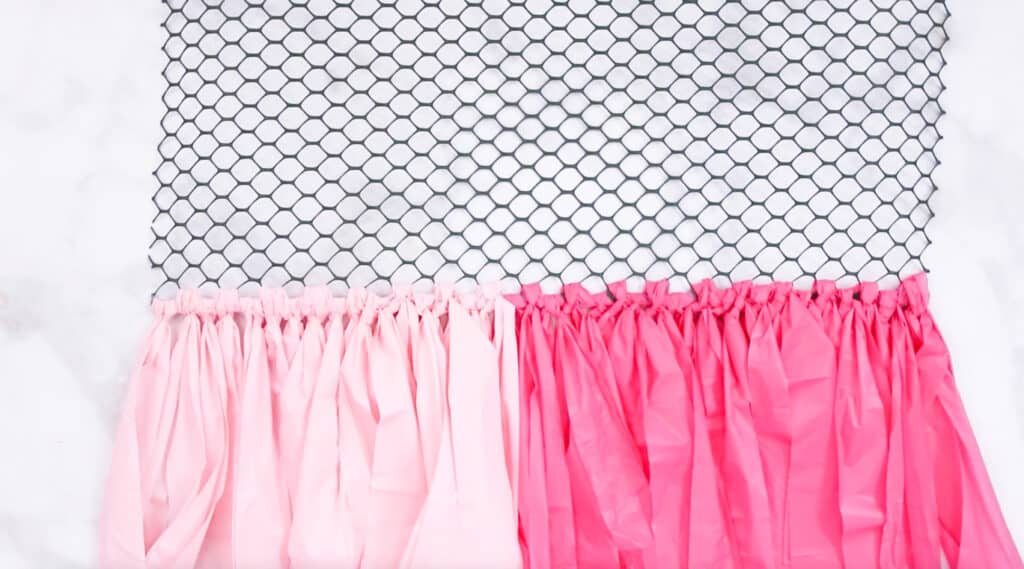
Bottom Layer
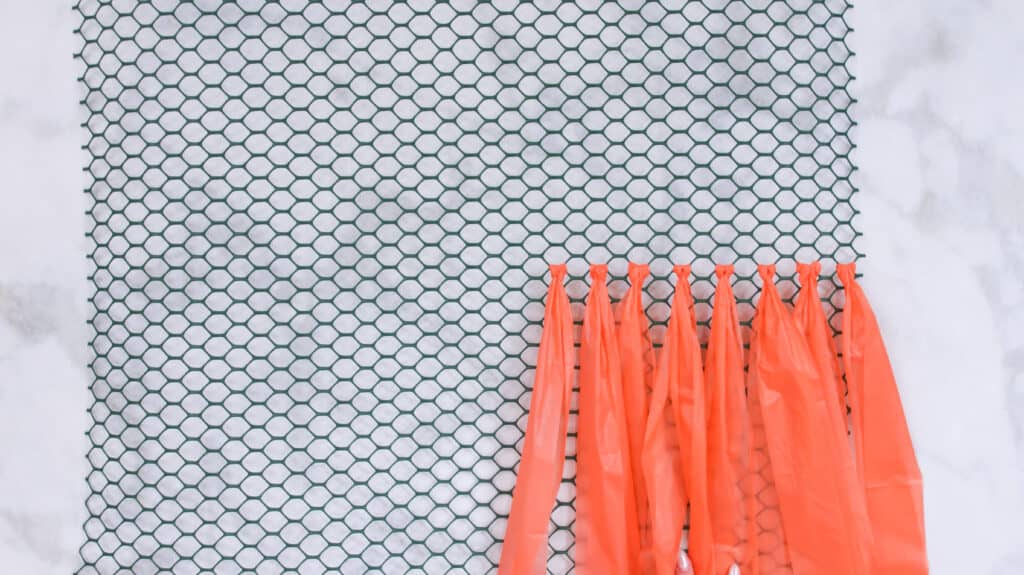
Layer two pieces of a tablecloth on top of one another and loop-tie the tablecloth strips to each hole of the mesh fence. I tied a strip of a tablecloth to every hole along the bottom and used a different color for the other half of the bottom layer.
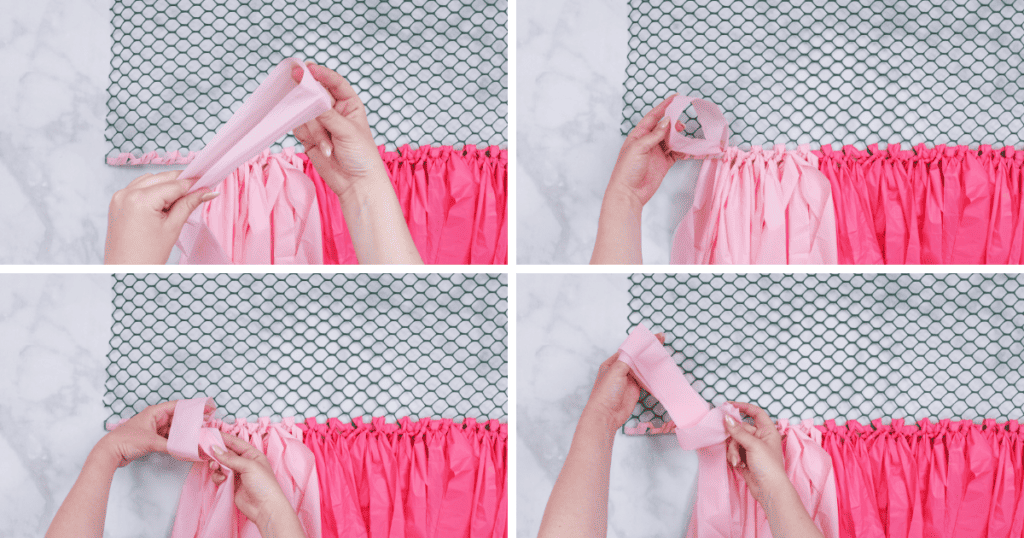
To tie this knot, fold your tablecloth strip in half, grab the looped end, and pull it through a hole in the fence.
Then, take the strip's ends and pull it through the loop's hole.
*Pro Tip: Don't pull your knot too tight or it will stretch the piece of tablecloth.
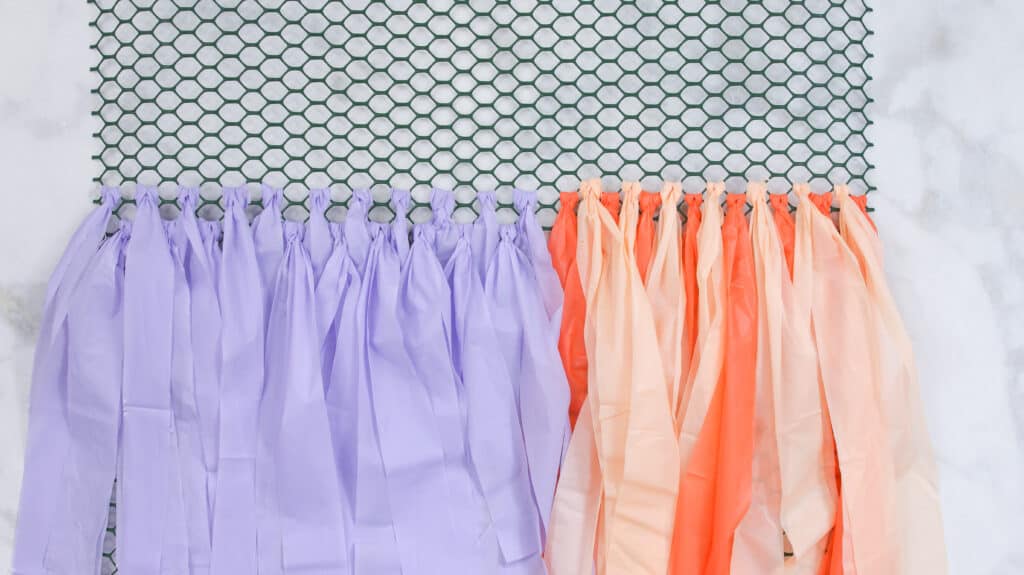
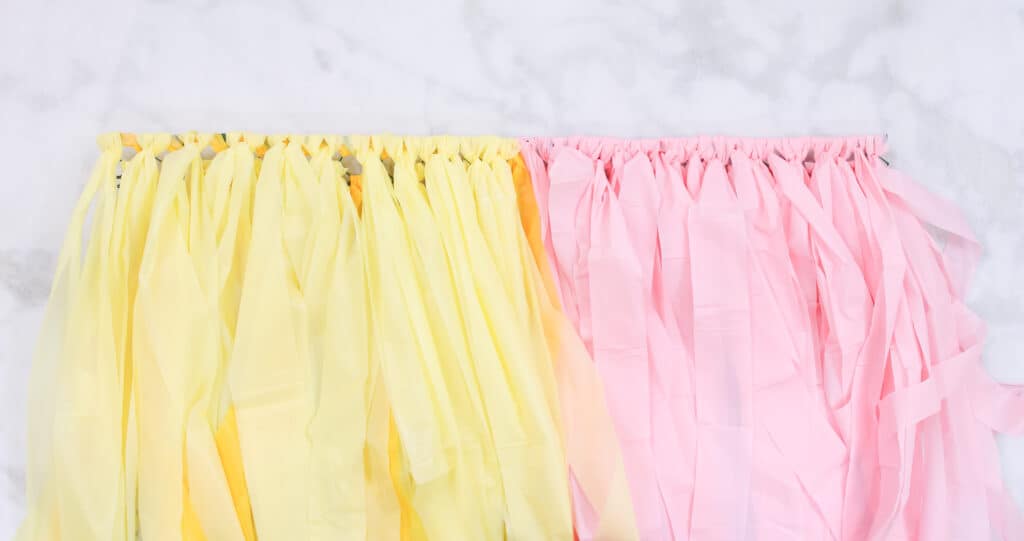
Middle Layers
For the middle layers, you're using the same tying technique, but this time loop-tie the strips to every other hole of the fence instead of every hole.
You want your middle layers to partially cover the bottom layer because there is less chance of gapping between the layers.
If you have a contrasting color (light and dark), layer the light colors between the darker colors and tie the strips just above using the same tying technique.
Grab a different color and continue tying your middle layers until all the gaps have been filled between the bottom and top layers.
Top Layer
Moving on from the middle layers to the top layer. The top layer repeats the process we used to make the bottom layer.
Tie a strip to every hole instead of every other one for more coverage.
For the yellow, I added a dark yellow beneath the light for contrast, and it also helped with coverage.
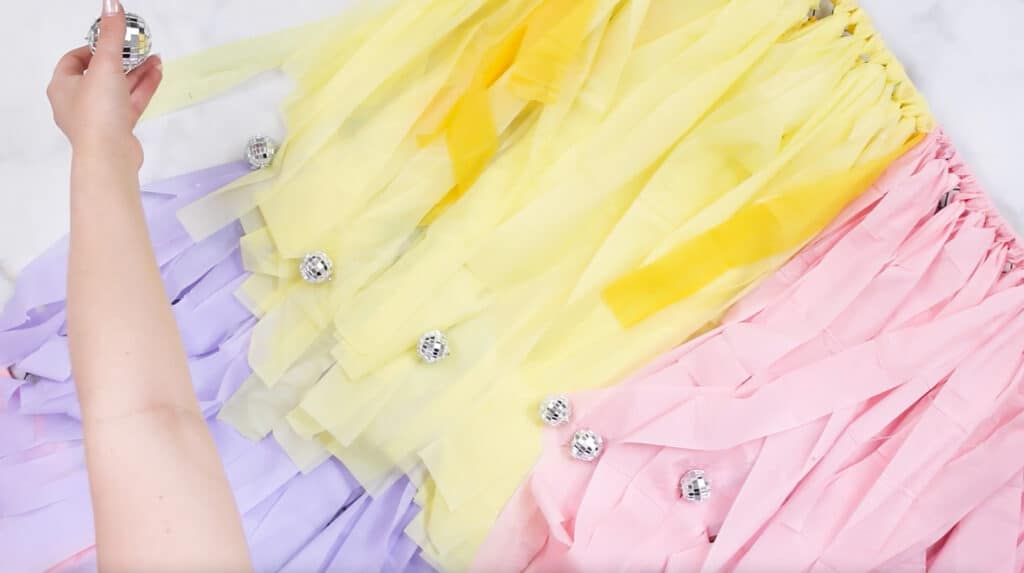
Finished Tablecloth Backdrop
Finally, add the final details. I attached a string of disco balls and thinner strips of a silver metallic tablecloth to my backdrop.
Don't forget to have fun with this! Put on your favorite movie or music playlist, and grab a snack!

Don't want to forget about this project? Save it for later! Click here to save it on Pinterest.
interesting idea
This is too cute
Wow, I am always amazed at the skill and inventiveness of DIY Crafts Experts!
This is amazing!
Kind of different
I really love this. Thanks for the know how!
Beautiful backdrop! So festive!
cool
cool starbuck cup
Hi! About how long were the strips. When I cut my table cloth the way that you demonstrate the strips are very long.
That's so cute!
Oh what a cute idea. I will try but not really good at this sort of thing. I can do it!
what a cute idea!
Great idea
Cute idea!
super cute
great idea
That's pretty cool
Such a cool idea!
What an inexpensive, fun idea!
Just wow! Not for me though, don't have the energy, time or extra cash for this.
Make a great backdrop with favorite team colors
Hello. I am form South Africa. Thanks for Sharing your wonderful ideas.
the instructions very very easy to follow - the only thing was the video did not show the length of each strip but that is easy to figure out - I think with imagination and depending on the party that this can be a great addition
That's a fun idea
Amazing! This is an amazing idea for event photos.
great backdrop for any occasion!
Stunning and fabulous!
This idea is amazing but would sure take alot of time to make.
Soo amazing! I love making backdrops for my kids birthdays, but I’ve never used a stand! Game changer!
Hello- Do you use varying length strips? How do you know when and where to use different lengths?
I love this. Beautiful! Did I understand correctly you doubled up the strips for the bottom of the backdrop but used a single strip for the tying of the rest?