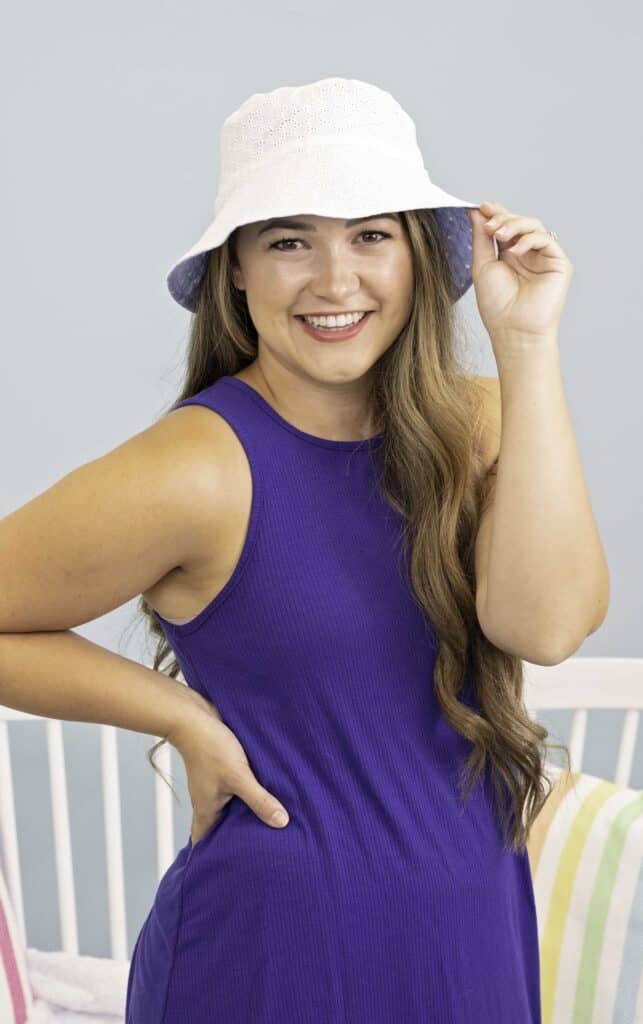
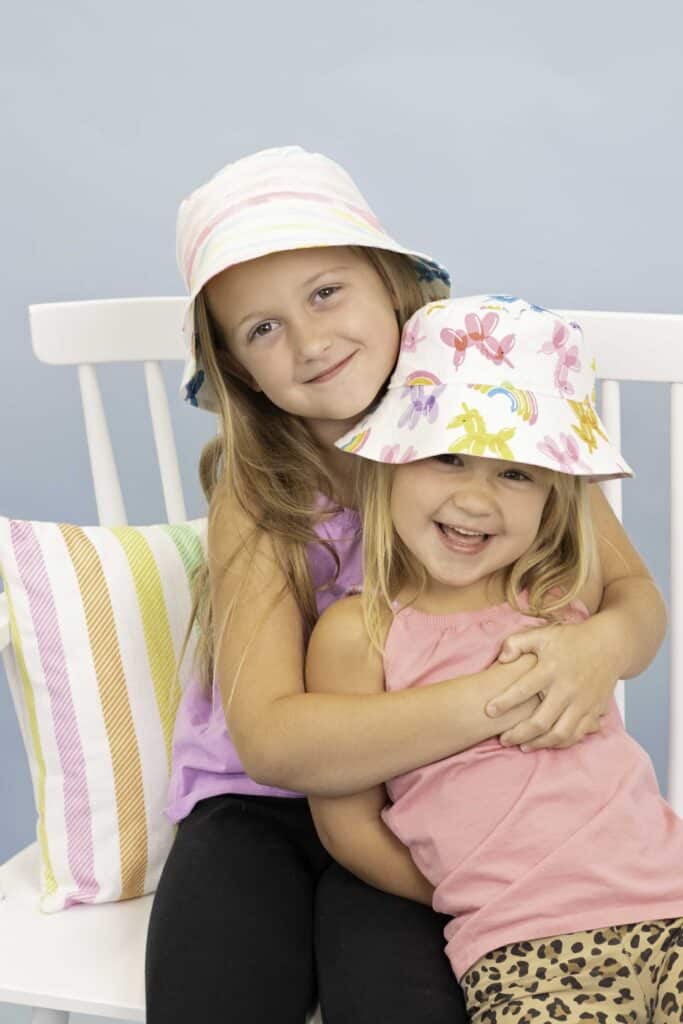
Learn How to Sew a Bucket Hat With This Free PDF Printable Bucket Hat Sewing Pattern and Tutorial in Sizes Adult, Child, Toddler, and Baby.
Bucket hats are all the rage right now! I have to admit, it took me a minute to come around to this trend because it feels SO 90's but once I put one on my head I was totally sold.

Warning, once you make one you won't be able to stop! Lucky for you, I'm sharing this pattern in every size so you can make them for your whole family!
Looking for even more FREE sewing patterns? Click the links below!

Bucket hats are great for a day at the beach, or for playing outside. The brim gives a little extra protection to your neck, ears, and face and I'm all for safe sun exposure!
Now, let’s talk about all of the details of this Bucket Hat sewing pattern.
Bucket Hat Sewing Pattern
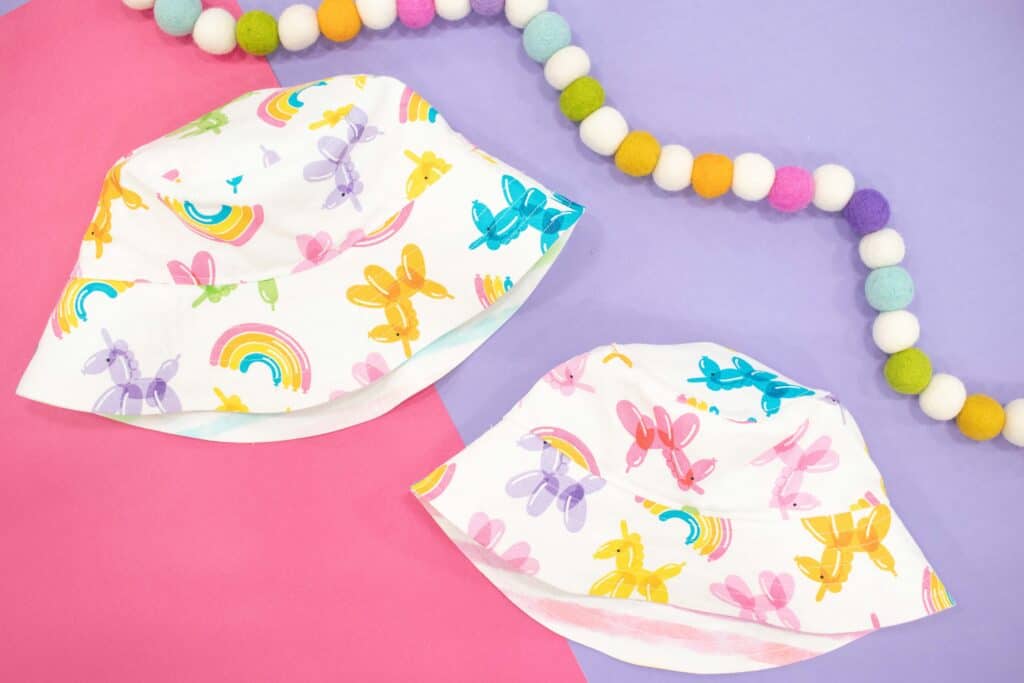
This sewing pattern download includes a professionally drafted Bucket Hat pattern. There are four sizes: Adult, Child, Toddler, and Baby. This Bucket Hat sewing pattern features instructions for a fully lined reversible bucket hat.
You can also refer to the video tutorial for extra help if you get stuck on any steps.

FABRIC REQUIREMENTS
This hat pattern is perfect for using up scrap fabric as it doesn’t take very much fabric to sew!
To start, you’ll want to use cotton fabric. This pattern works best with a light to medium weight fabric. In this tutorial, I’ll be using quilting cotton.
Why Shop Through My Links?
When you shop through my affiliate links, it doesn't cost you anything extra, but it helps me out in a big way! I earn a small commission from those purchases, and that support allows me to continue creating and sharing free tutorials and patterns for you. Thank you so much for helping me keep this creative community going! 💕
SUPPLIES
Click here to shop all of these supplies on Amazon!
- 1 Yard Woven Fabric for Main Fabric (1/2 Yard for Main and 1/2 Yard for Lining)
- Shop the fabric here (Similar)
- 1/2 Yard Interfacing
- Sewing Machine
- Scissors or Rotary Cutter & Mat
- Thread
- Pins
- Iron & Ironing Board
- Sewing Machine Needle
- Fabric Pen or Chalk
- Printer
- Printing Paper
- Tape
- Pinking Shears
Click here to shop all my favorite sewing supplies here!
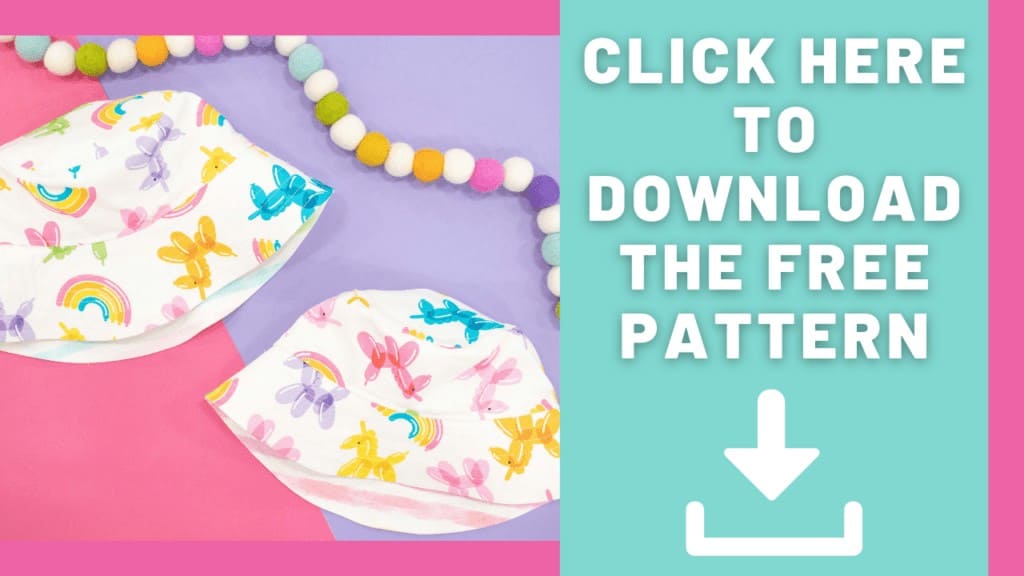
Download the Free Bucket Hat Sewing Pattern Here!
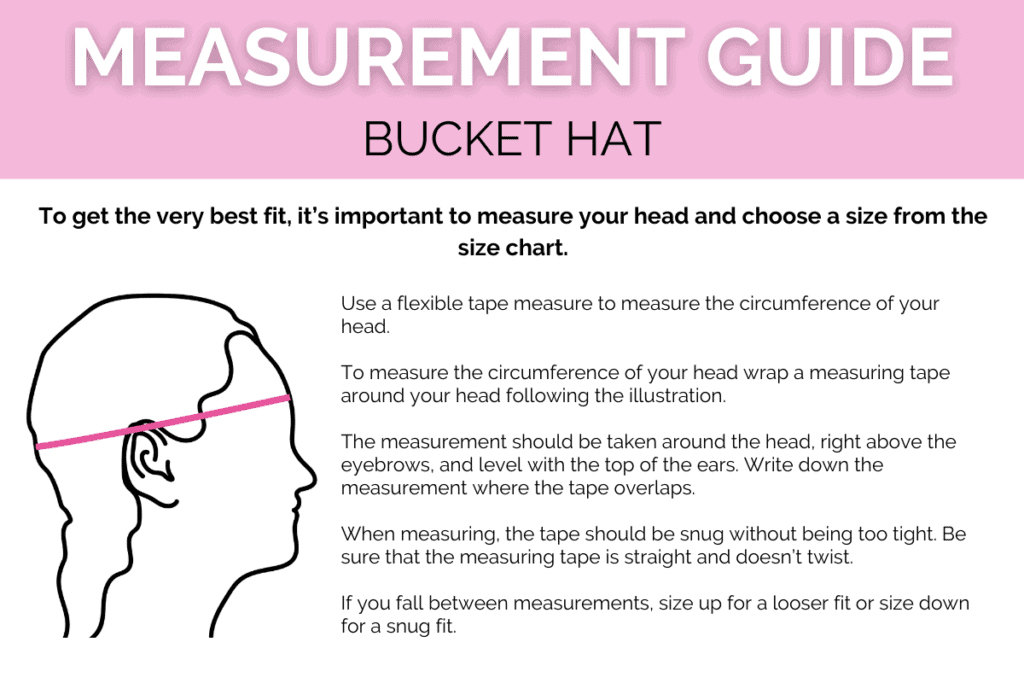
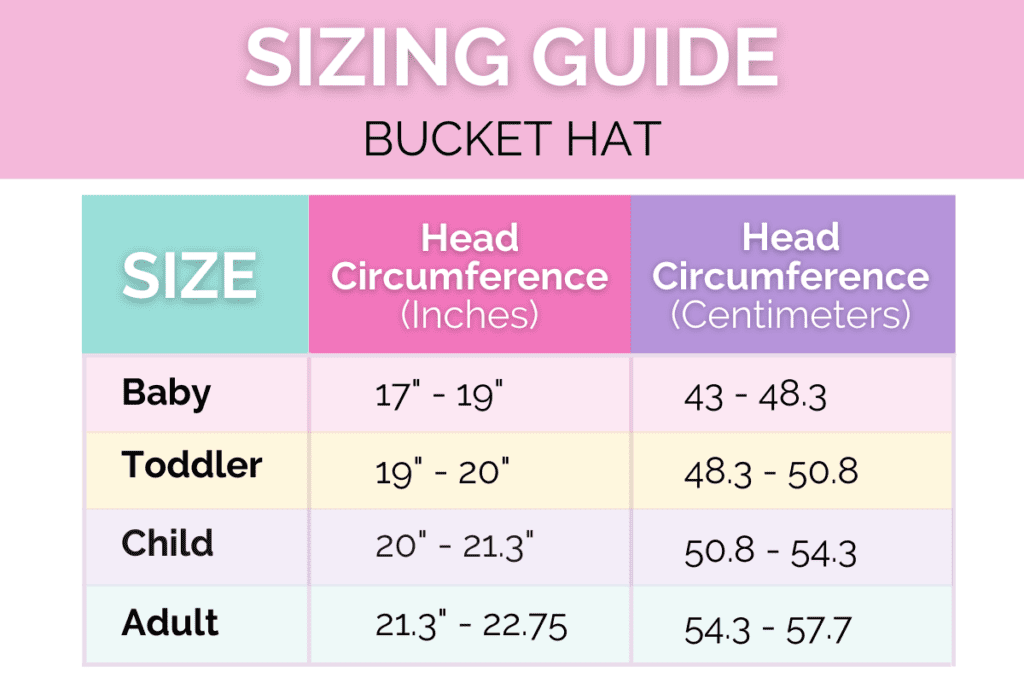
Measure Head and Select Correct Size
To get the very best fit, it’s important to measure your head and choose a size from the size chart.
Use a flexible tape measure to measure the circumference of your head.
To measure the circumference of your head wrap a measuring tape around your head following the illustration below.
The measurement should be taken around the head, right above the eyebrows, and level with the top of the ears. Write down the measurement where the tape overlaps.
When measuring, the tape should be snug without being too tight. Be sure that the measuring tape is straight and doesn’t twist.
If you fall between measurements, size up for a looser fit or size down for a snug fit.
STEP 1: PRINT BUCKET HAT PATTERN & ASSEMBLE
Download the pattern to your computer and print the pattern at 100% with no scaling.
Trim one side and the bottoms edge using a paper cutter or scissors.
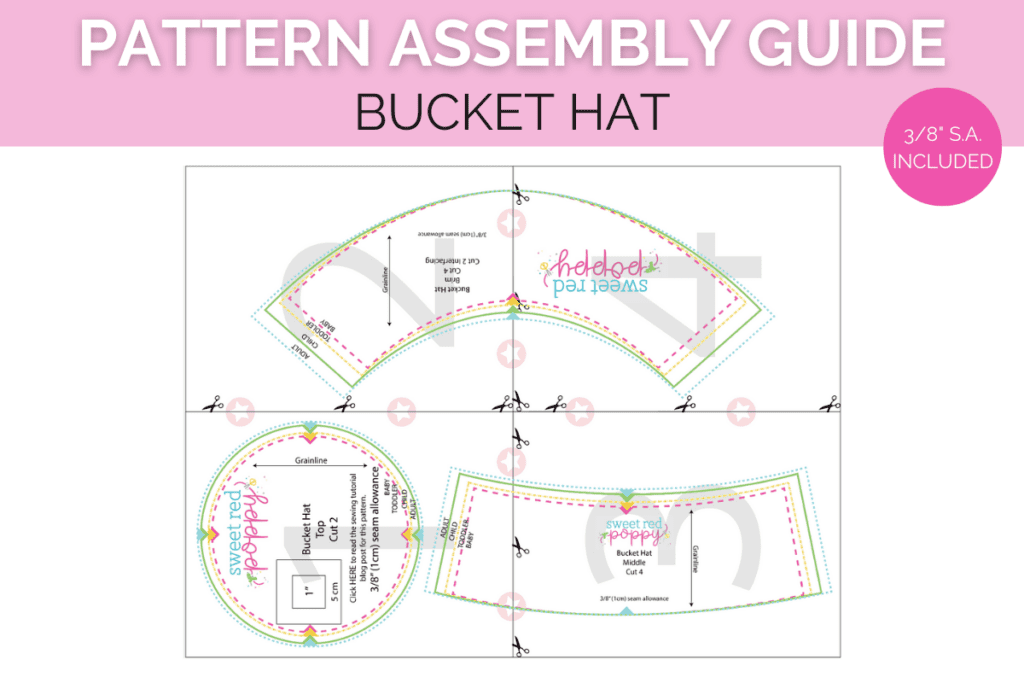
Align stars of each page and tape in place. Then, cut out the pattern in your desired size.

STEP 2: CUT OUT FABRIC & MARK NOTCHES
*PRO TIP: Make sure to iron your fabric before cutting it out to ensure the best results. This will ensure that your fabric cuts out evenly without any wrinkles or folds.
You can refer to the cutting chart below for a visual guide.
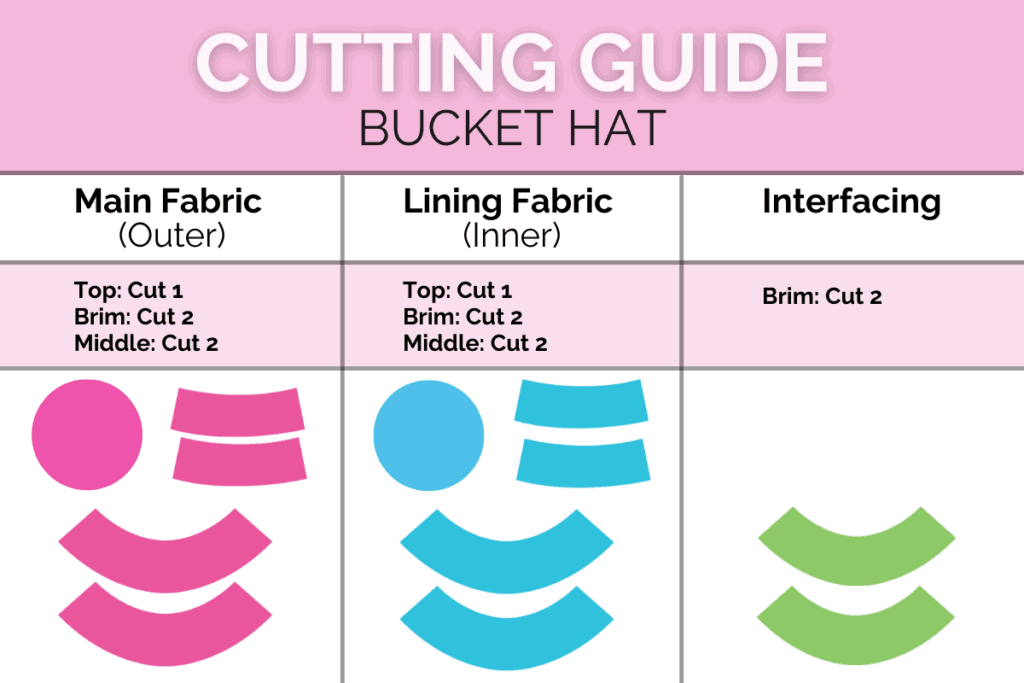
- (X1) Bucket Hat Top
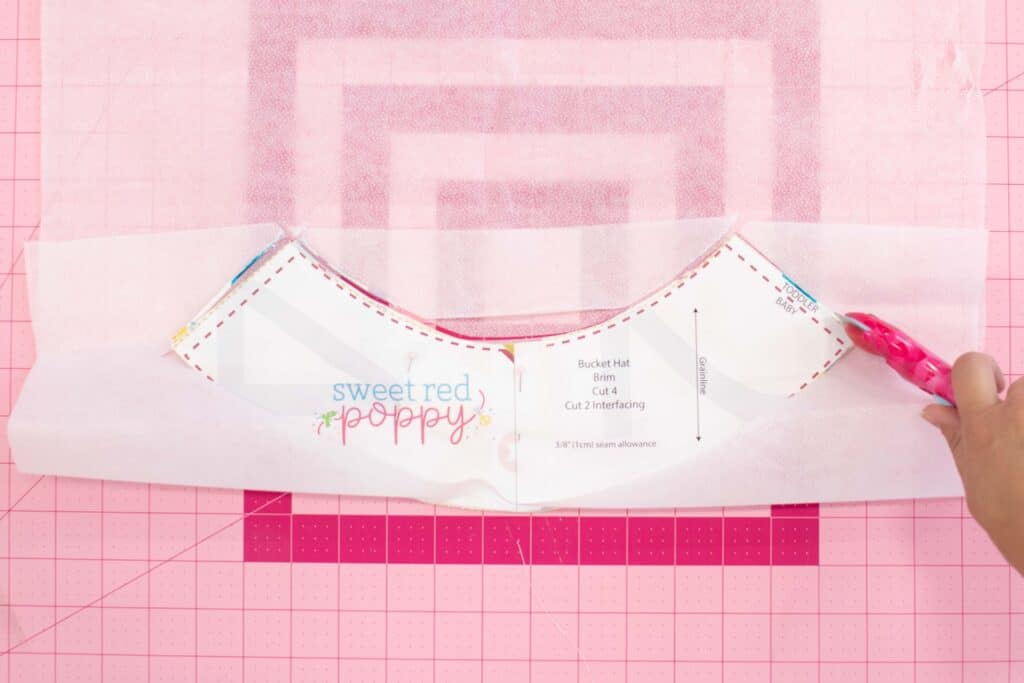
- (X2) Bucket Hat Brim
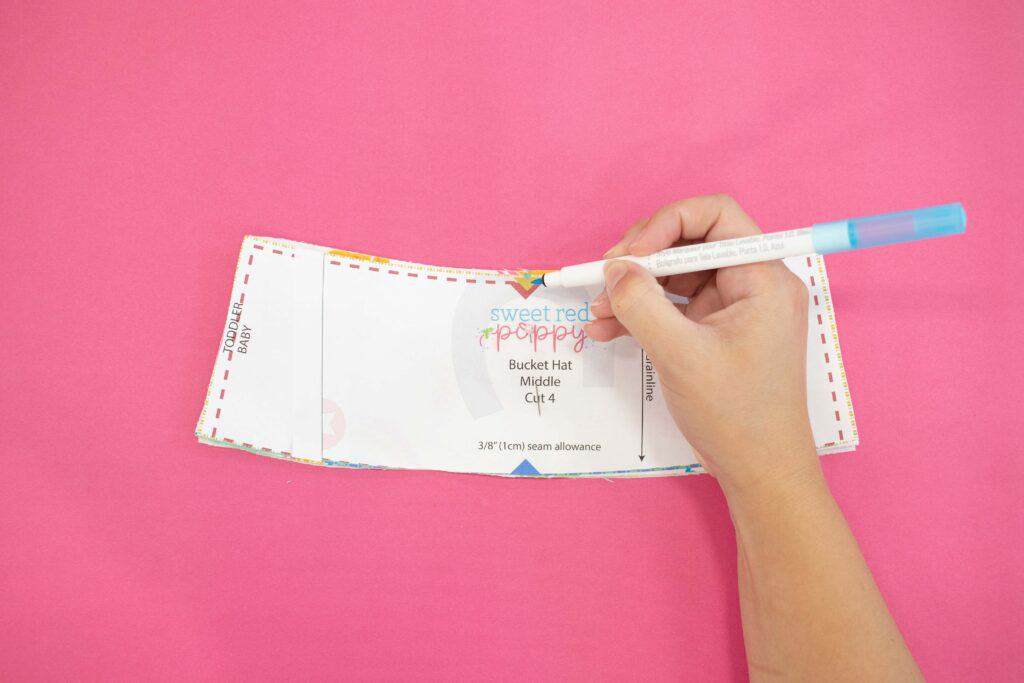
- (X2) Bucket Hat Middle
- (X1) Bucket Hat Top Lining
- (X2) Bucket Hat Brim Lining
- (X2) Bucket Hat Middle Lining
- (X2) Bucket Hat Brim Interfacing
You should have a total of 12 pieces to complete the bucket hat.
Lay the fabric out in front of you on a flat surface and fold the selvage edge of the fabric inwards to create a folded edge. This will allow you to cut two mirrored images at once.
Lay the patterns on the fabric taking care to align the grainline marking so they are running parallel to the selvage edge of the fabric. Pin the fabric in place and cut around the outside of the pattern pieces.
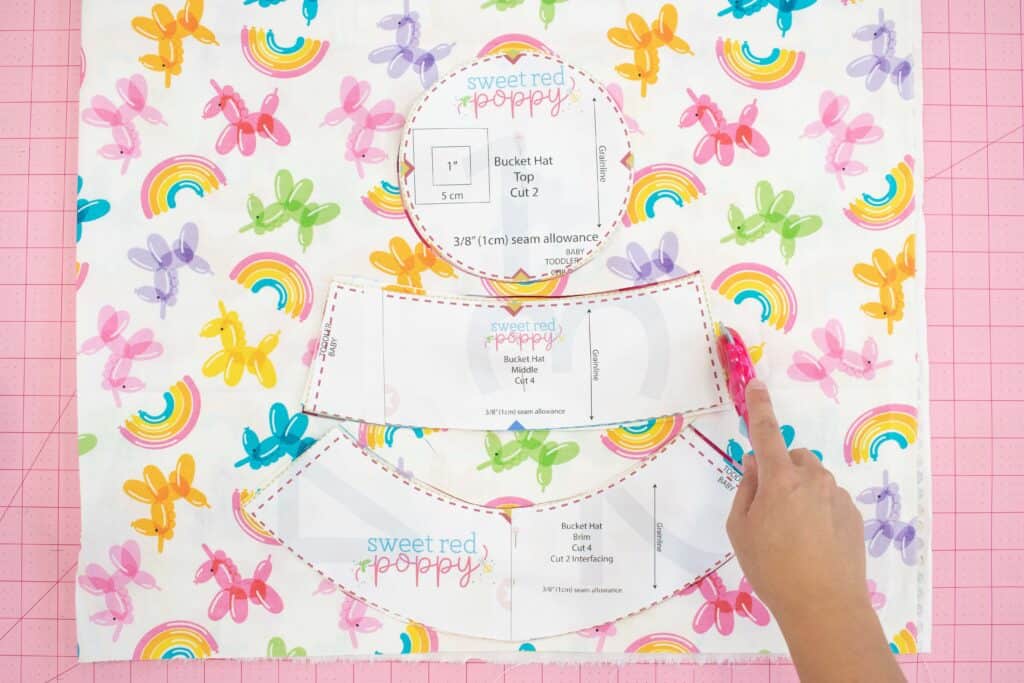
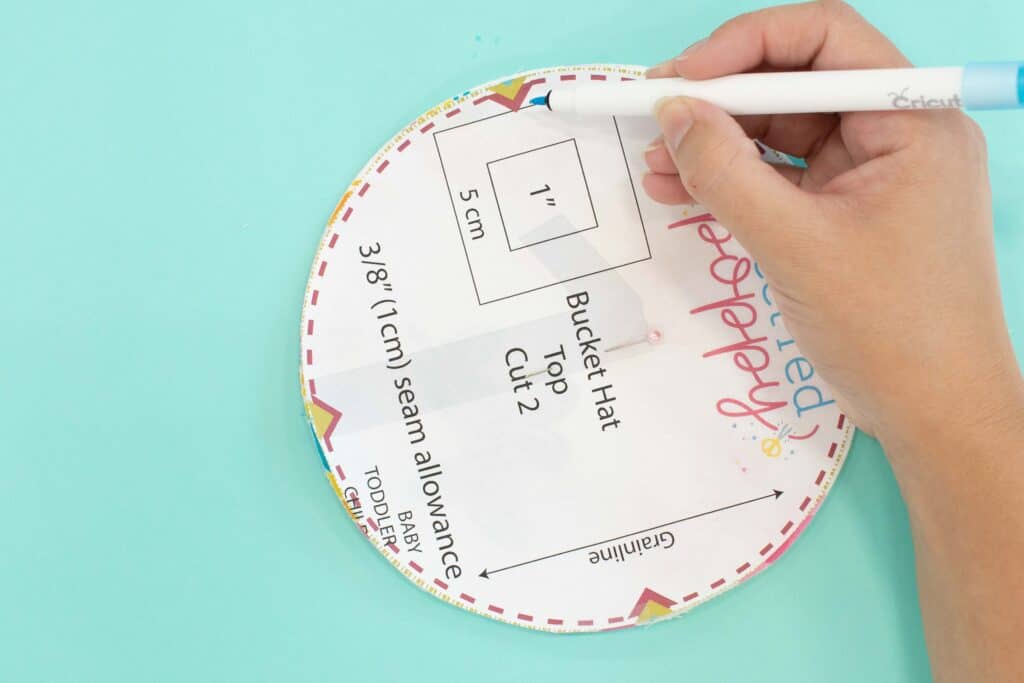
Before removing the paper pattern from the fabric mark all notches using a fabric pen or chalk. The notches are marked on the pattern pieces with a triangle and will help you to correctly align the fabric in the following steps.
Repeat the cutting and marking process with your lining fabric as well.
Now it’s time to cut out your interfacing for the Bucket Hat Brim. If you are using a very lightweight fabric you can add interfacing to the entire hat to give it more structure.
STEP 3: ATTACH INTERFACING
Take main bucket hat brim and iron on interfacing to the wrong side of both pieces. You'll want to refer to the instructions that come with your interfacing for this step to make sure it's applied correctly.
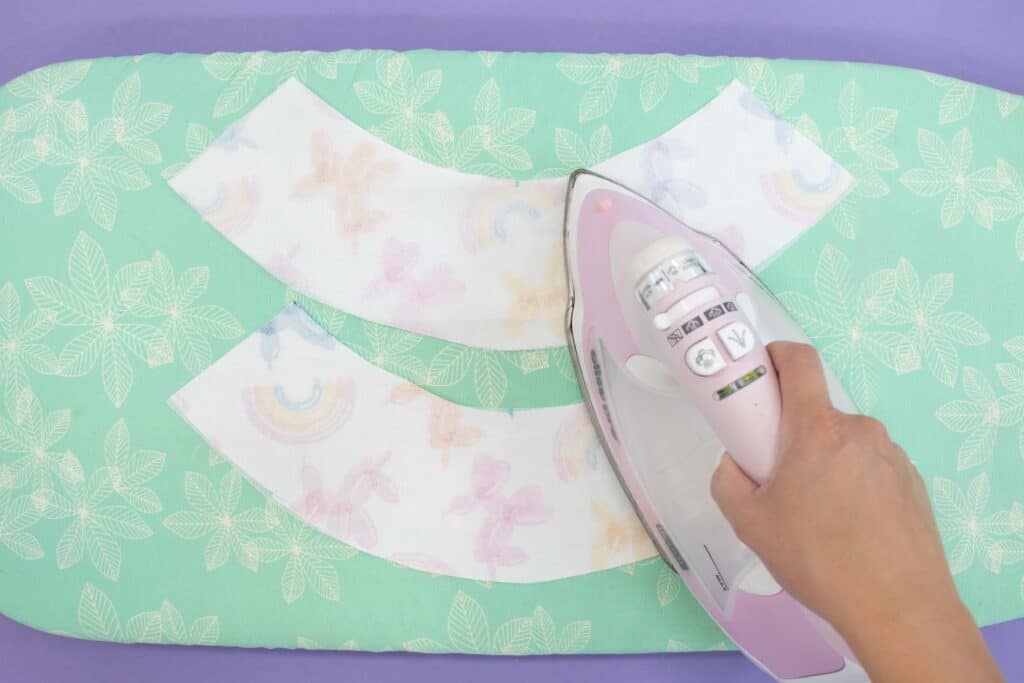
Make sure to turn off the steam on your iron for the very best results!
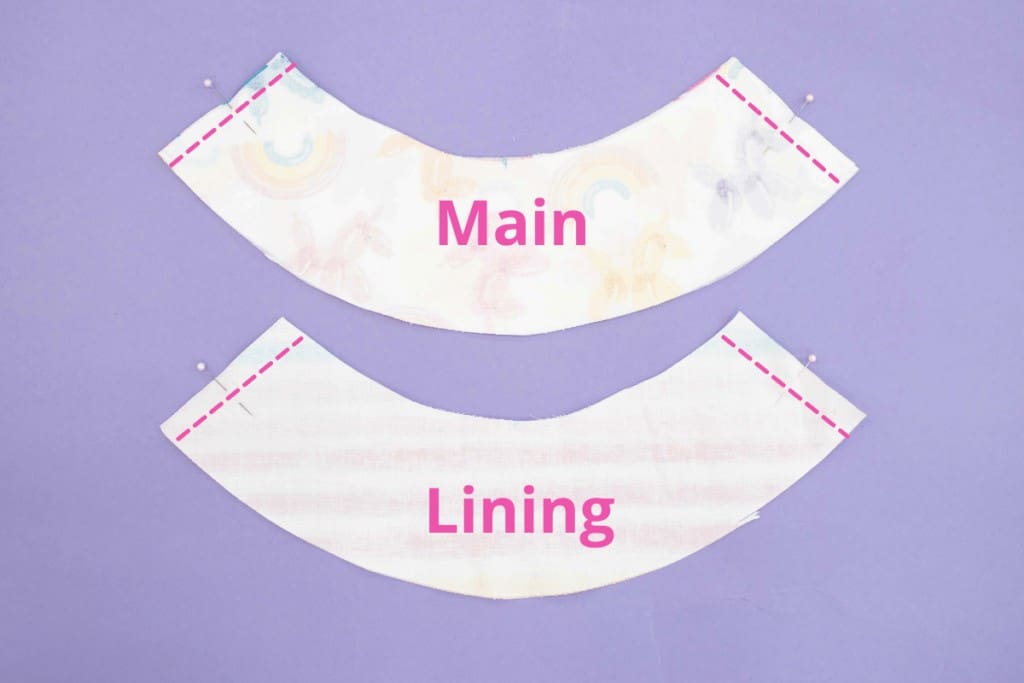
STEP 4: SEW BRIM SIDES AND BOTTOM
Place the main bucket hat brim pieces (the ones with the interfacing) right sides together and pin them together. Sew the side seams with a 3/8" (1cm) seam allowance. Place lining bucket hat brim pieces together and sew side seams.
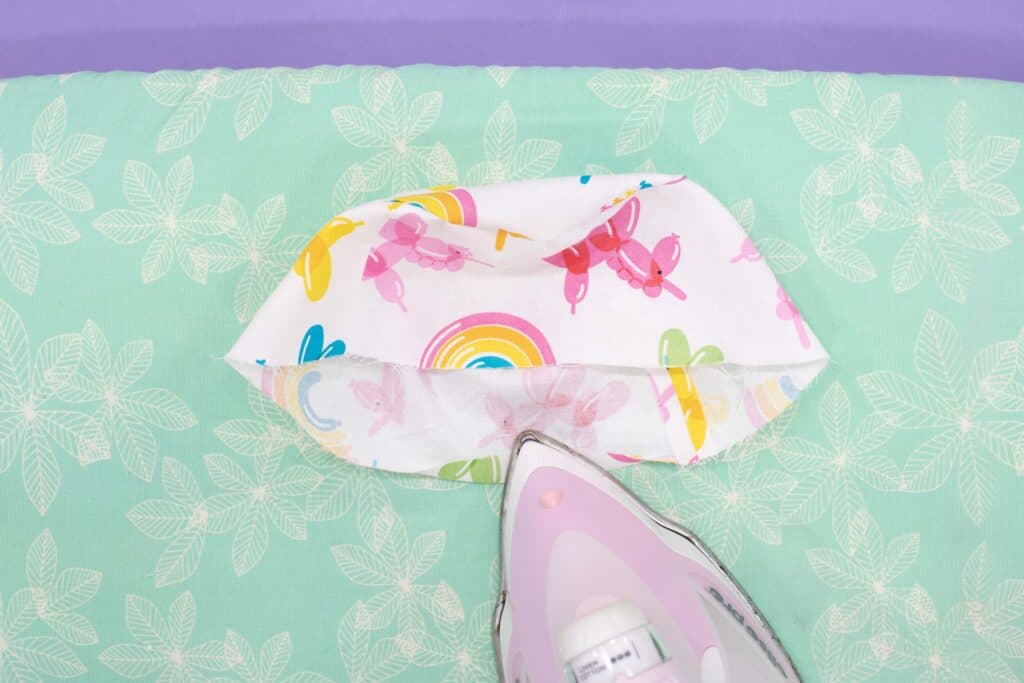
Iron the seams open.
*Optional: sew the seam allowance in place using 1/8" seam allowance on either side of the seam.
Place lining brim on main brim with right sides together, lining up the side seams. Pin the brims together.
Sew along the bottom outside edge all the way around using 3/8" (1cm) seam allowance.
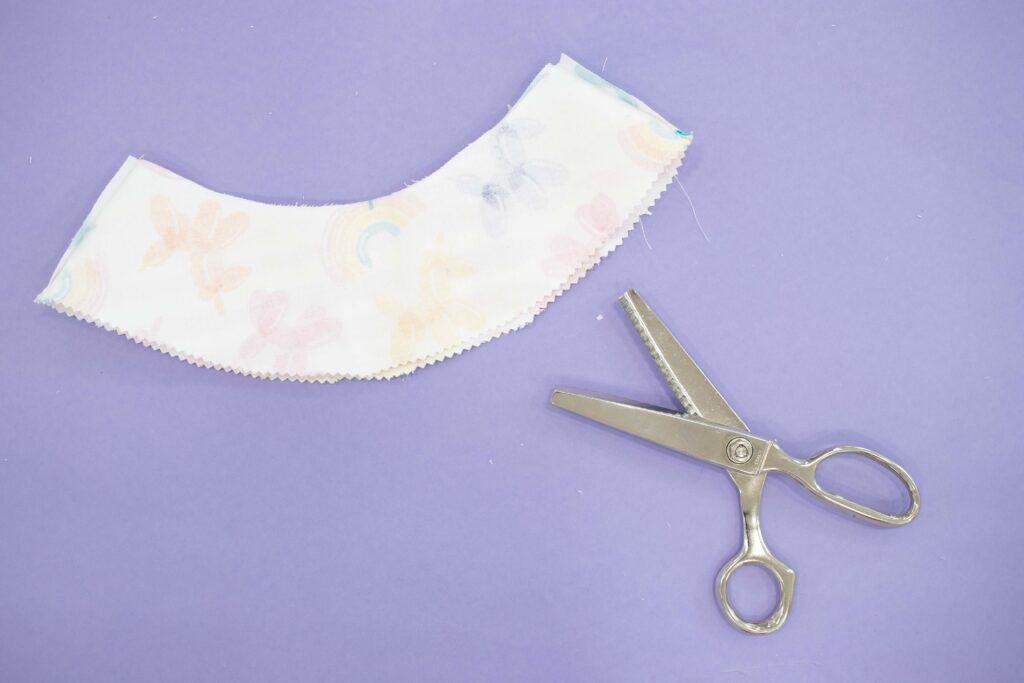
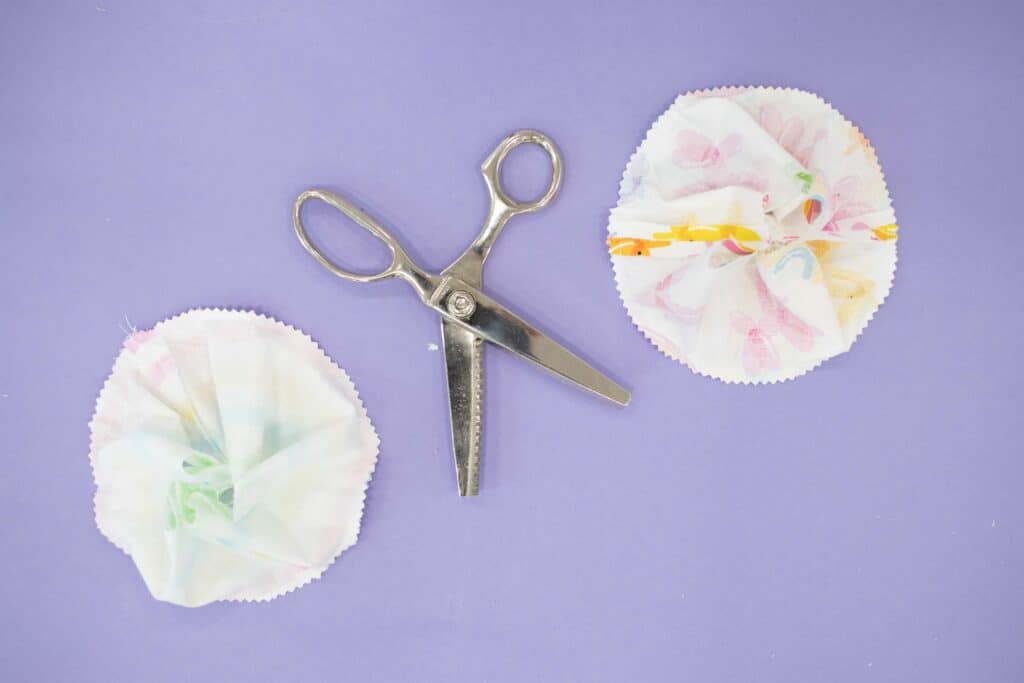
Trim the seam allowance with pinking shears to minimize the bulkiness of the seam.
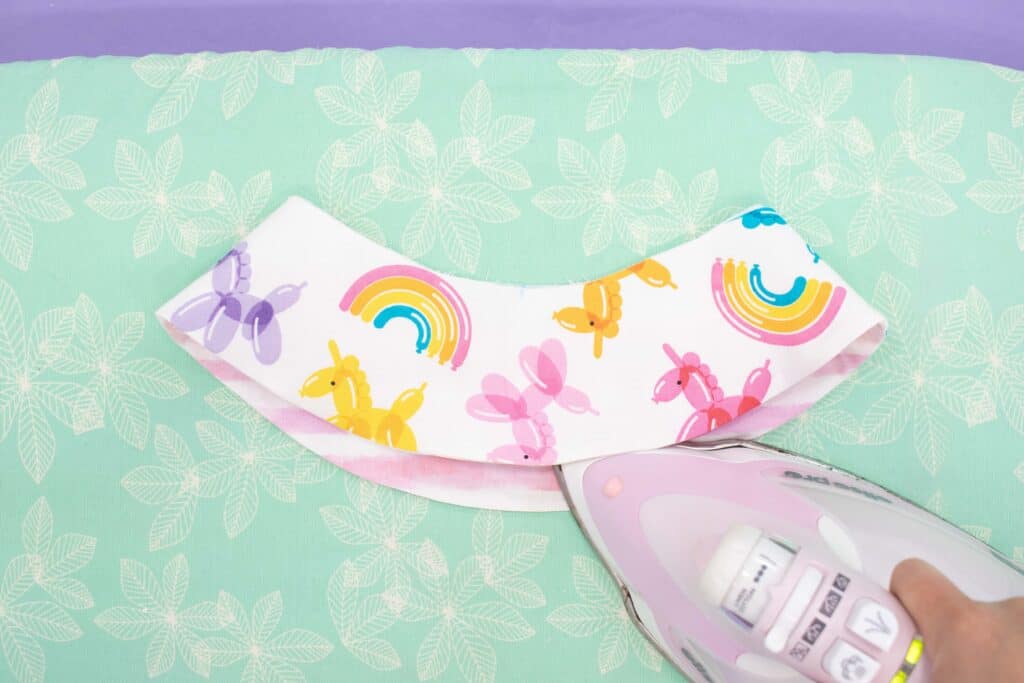
Turn right side out and press the steam with plenty of steam to set it in place.
*PRO TIP: Taking the time to iron in between each step, helps you to achieve professional-looking end results. I recommend setting up your iron near your sewing machine so it's easy to access.
Increase your stitch length slightly for this next part. Starting 3/9" from the outside of the brim sew a stitch all the way around. Repeat sewing all the way around the brim every 3/8" to the top.
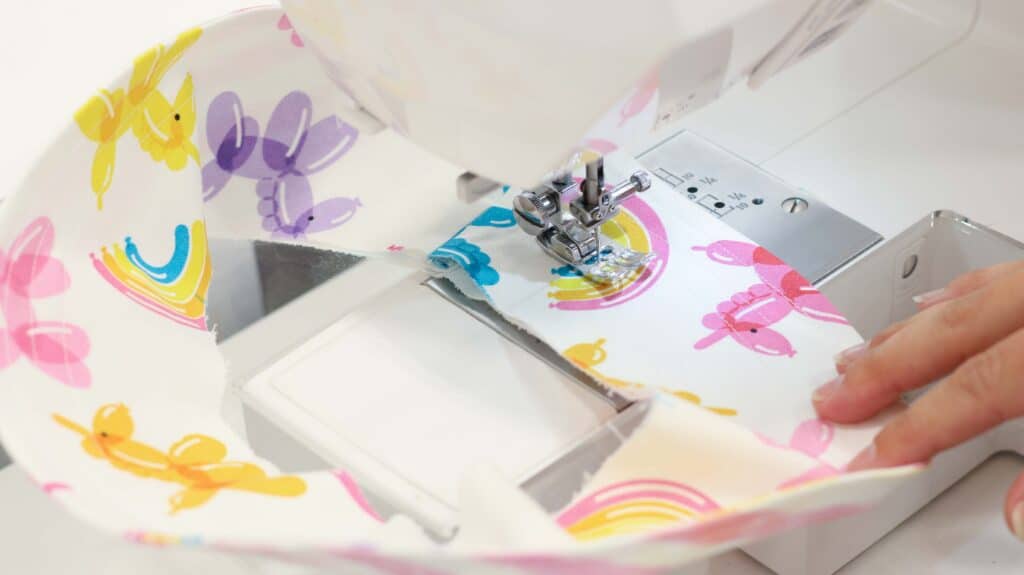
This gives the hat extra structure and makes it look more professional. Set the brim aside for now.
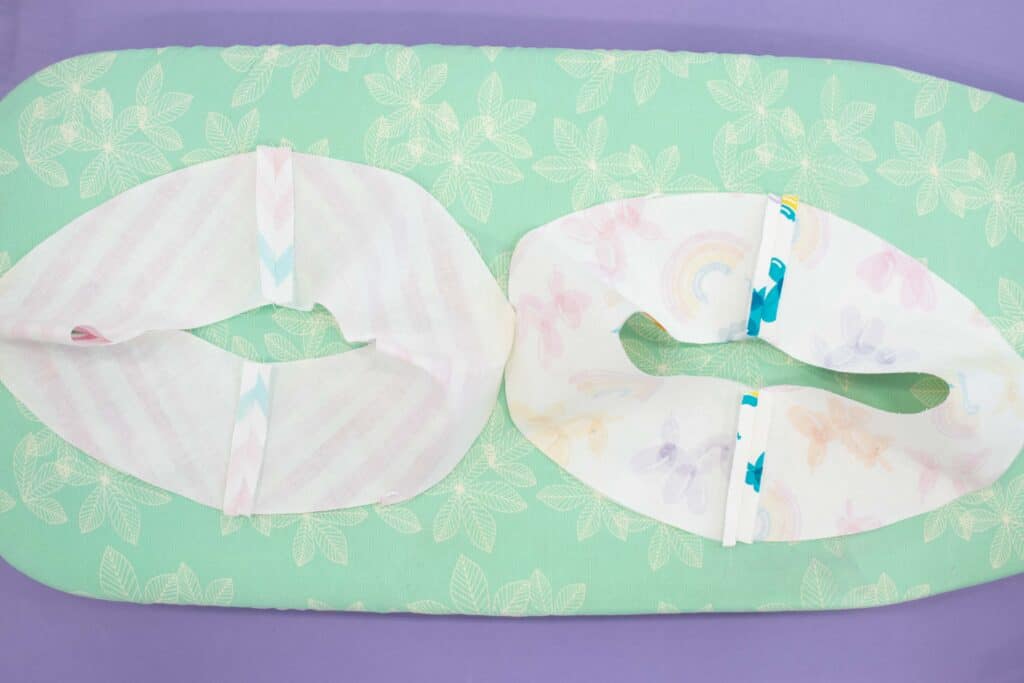
STEP 5: SEW MIDDLE PIECES
Place the main middle pieces right sides together, pin, and sew the two side seams.
Next, place the lining middle pieces right sides together, pin, and sew the side seams.
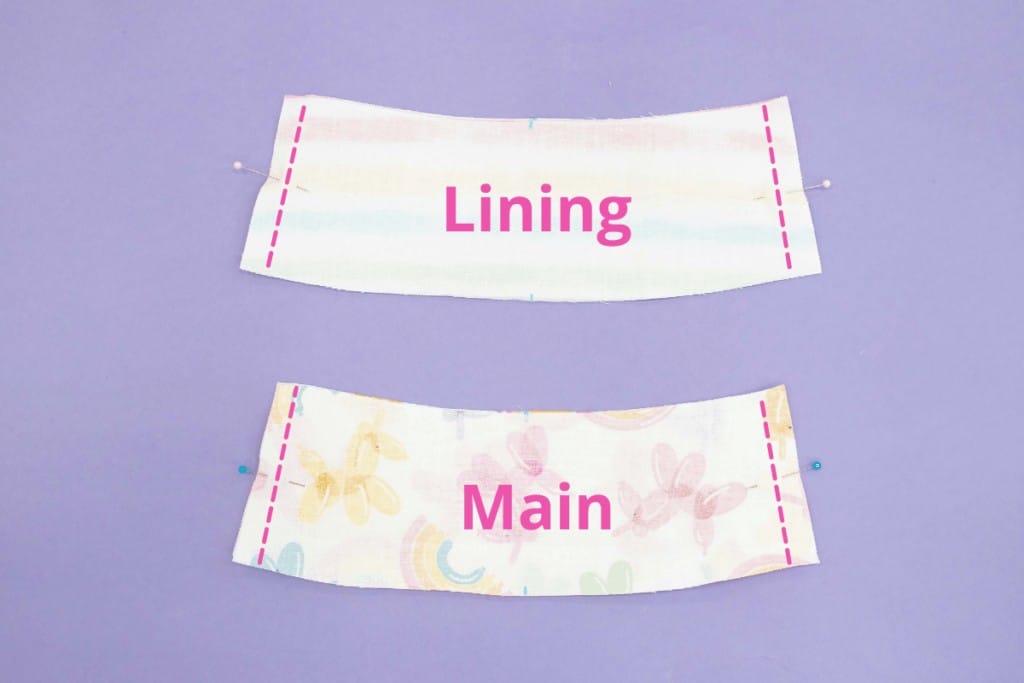
*Optional: Topstitch the seam allowance down using a 1/8" seam allowance on either side of the seam.
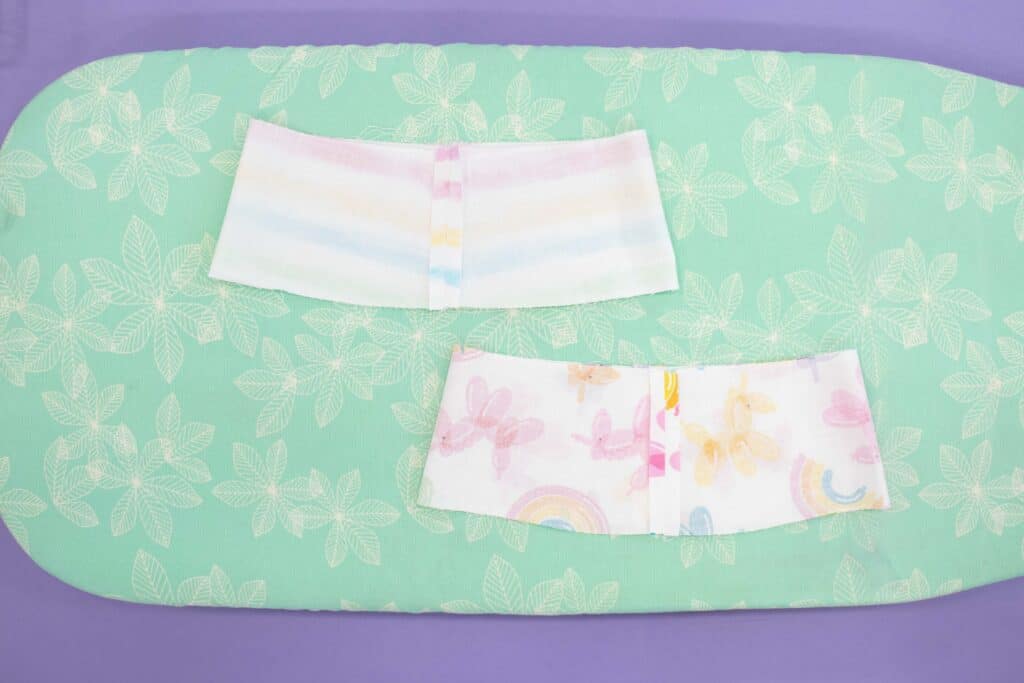
Press the seams open.
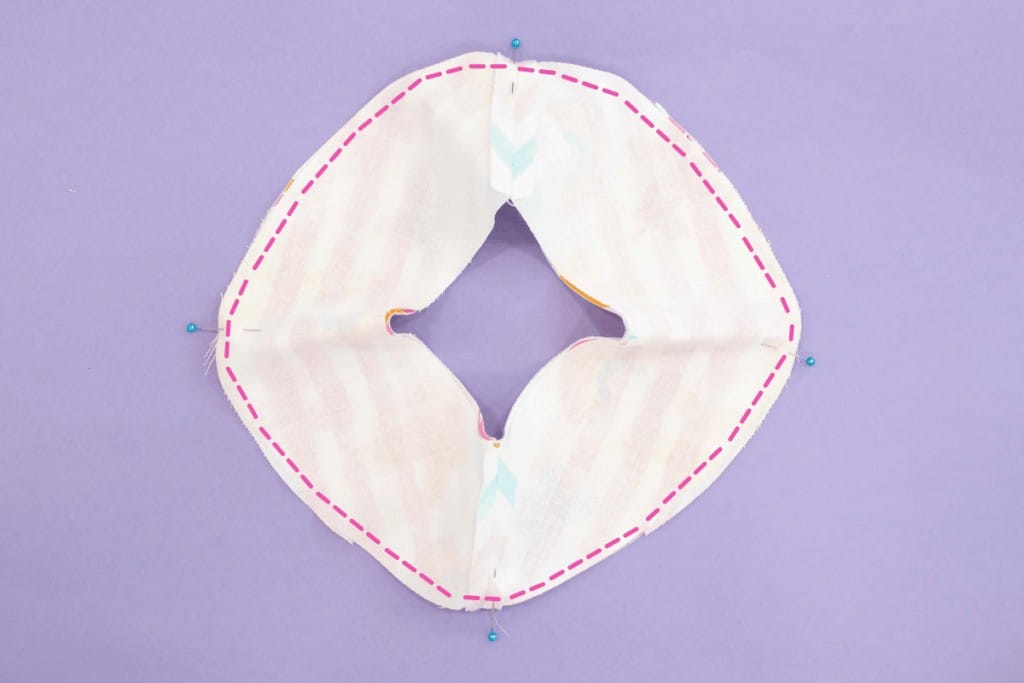
STEP 6: SEW MAIN CIRCLE TOP AND LINING
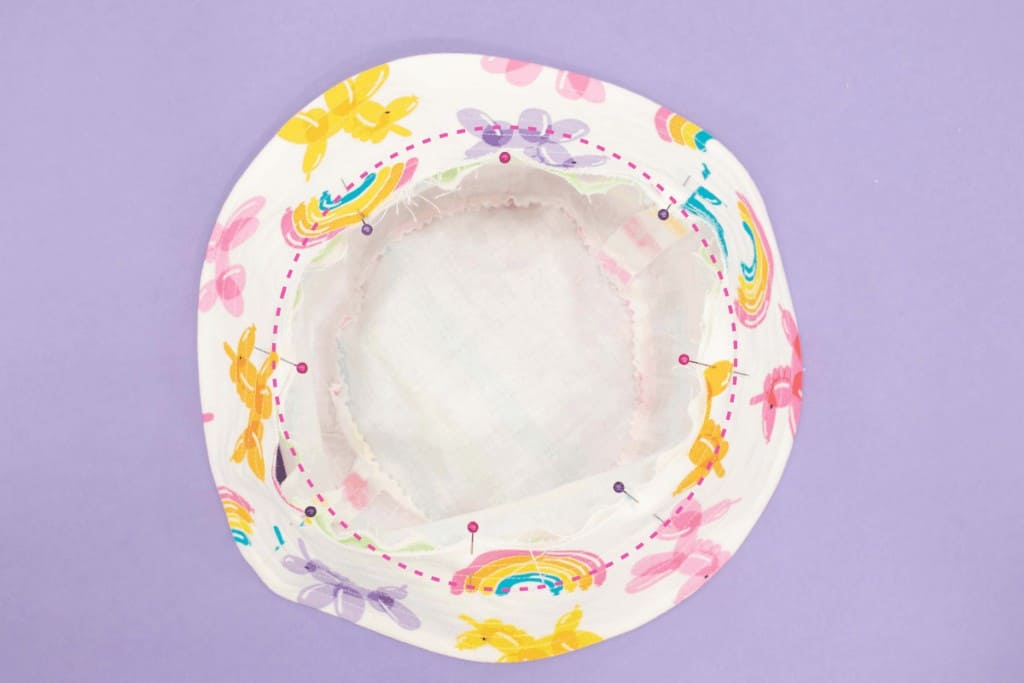
Take the main bucket hat (circle) and align the notches with the middle notch of each middle main and side seams. The fabrics should be facing right sides together. Pin the fabric in place. You'll want to use plenty of pins for this step to really line everything up.
Use the markings to easily align and evenly distribute the fabrics.

In this step, you are matching a concave curve to a convex curve. This can be a bit tricky and requires more pins than a normal seam to make sure you avoid making any tucks or gathers.
The middle piece is slightly smaller than the top so you'll want to ease the top in as you sew the pieces together. You can do this by gently stretching the fabric. I find it's easiest to sew these two pieces together with the circle piece facing downward.
Repeat this step with the lining.
*PRO TIP - If you have a pair of pinking shears, trim around the seam allowance to reduce the bulk of the seam. This will help the fabric to lay flat once it's turned inside out without puckering.
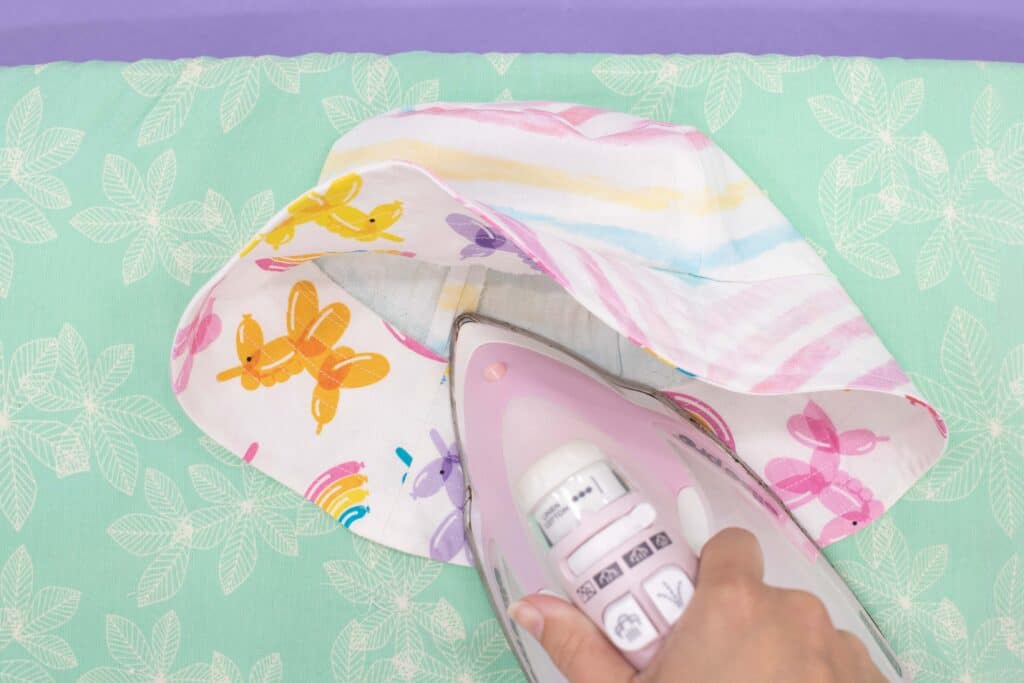
Press the seams inwards towards the top of the hat.
Press a 2" long piece of the edge of the hat (main) under 3/8". This will create a nice crisp folded edge for one of the next steps.
*Optional: Topstitch the seam allowance down using a 1/8" seam allowance.
STEP 7: ATTACH MAIN TO BRIM AND TOPSTITCH
Align the lining top hat side seams with brim side seams (make sure you having lining sides facing right sides together). Pin in place and sew all the way around.
Press well with plenty of steam.
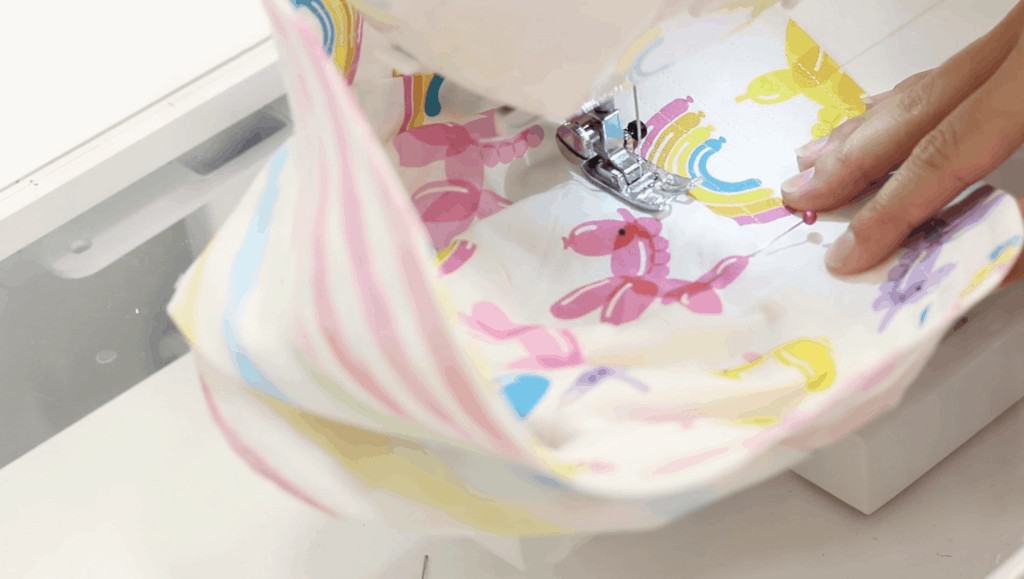
Align the main bucket hat with the main bucket hat middle with right sides facing each other and pin around the hat. Sew around the hat leaving a 1" - 2" opening for turning.
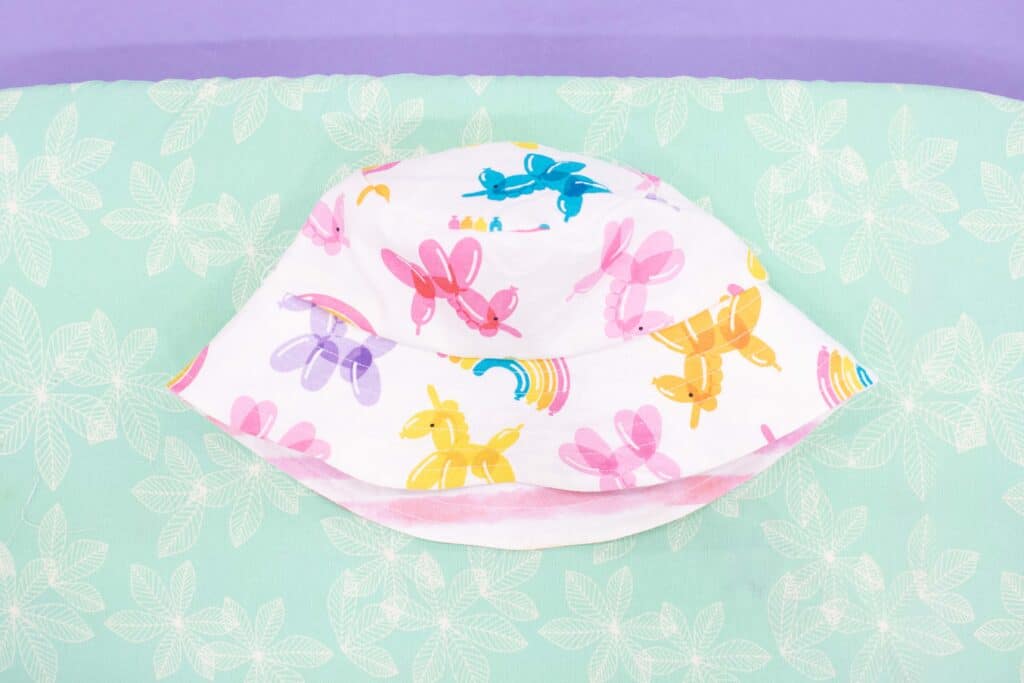
Turn the hat right side out and press the seams with plenty of steam.
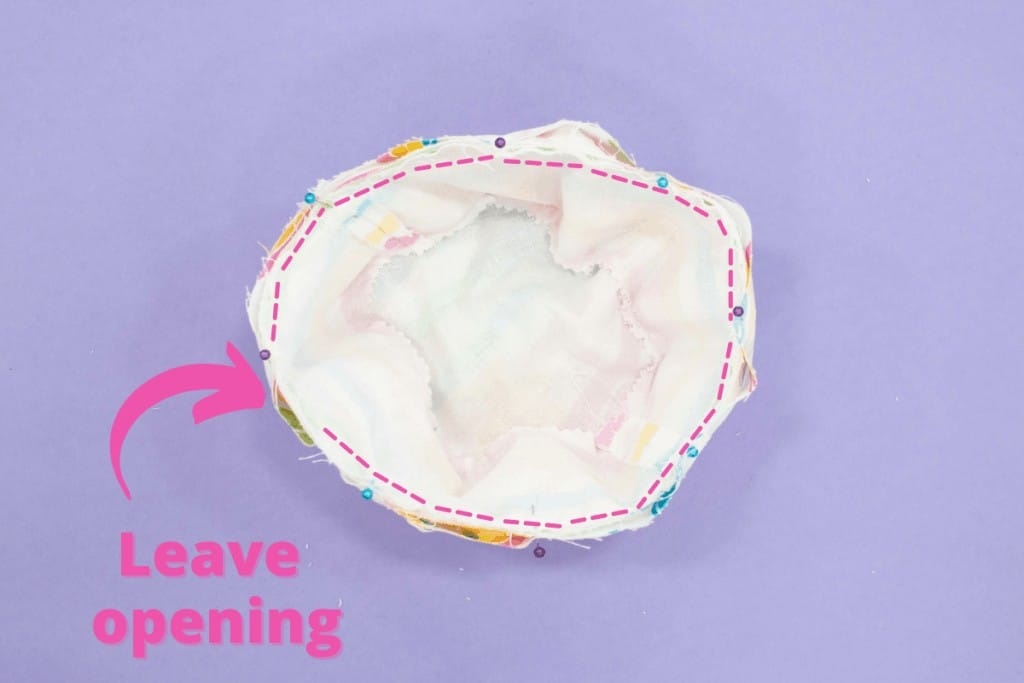
Top stitch along the seam to close the opening.
Now you have an adorable bucket hat!
Looking for even more FREE sewing patterns? Click the links below!
Did you enjoy this tutorial? I’d love to see what you’ve made with it!
Join my crafting and sewing Facebook group where you can show us what you’re making, ask questions, and learn from others!
Don’t want to forget about this pattern? Save this project for later! Click here to save this project on Pinterest.
Do you have any questions about this bucket hat sewing pattern? Let me know in a comment below!
I love all of what you do.
Paper crafting, sewing,, cricutting remodeling your house 🙂
Kind eegards from Costa Rica. ❤
Thank you SO much! 🙂 I'm glad you are enjoying it!
I am in Australia and with two little grand daughters and two little grand sons I am just loving your patterns, thank you so much. The little bow turban is adorable, my daughter loves it for new baby girl. Looking fwd to more patterns.
I'm so glad you are enjoying it! I have a few more sewing patterns coming out soon so stay tuned!
Hey, thanks for the tutorial. It wasvery clear. Im very pleased that it comes out looking really good and is very easy work. One problem though... The sizes are crazy. (I double checked that i printed the right paper size) i made a toddler size and it fits me! And my head is larger than average... So my 10mo boy is going to wait a few years before he fits in this hat... Can you downsize your pattern? I would like to make him a fitting hat..
Oh, my goodness, I had the same problem! I love the pattern, but not sure how to figure out what size I need to use to make them for my grands...
I found the same with the sizes I made the toddler size for my 18 month old Grandson who has quite a big head for his age I've now made the baby one which is fine
I wish I saw this comment before making it, I made the baby size and it is positively MASSIVE!
I have made 3 now all different sizes and the BABY pattern fits my kids 8-12 year olds and the CHILD pattern fits most adults. The ADULT pattern is VERY large. Adjust accordingly. They came out very cute.
Thank you so much for the lovely bucket hat pattern. I also live in Australia and have 1 grandson and another one on the way in December. I love all of your patterns and tutorials and I would like to have a go at making a few of these hats and other items from you.
Thank you, Jill! I hope you enjoy this pattern. Congrats on the grandchild on the way!
Awesome . Thanks so much. This is a great see hat .
You're welcome! I hope you enjoy the pattern.
Can’t wait to try this pattern. We’ve got a heatwave in Scotland right now so it will come in very handy. Thank you.
You're welcome! I hope this pattern helps!
Love the hat & I am going to make some more to match clothes I have made!
So happy to hear this!
Just a question - what are the inches for the circumference on the baby, toodler, and infant??
Thank you for the wonderful pattern, I can’t wait to make it!
You're welcome! I hope you love it! Be sure to let me know how it turns out!
Not sure what I am doing wrong. When I try to sew the brim to the bucket there seems to be like an inch or more fabric on the bucket. Can't ease or stretch that in. Any pointers?
Amy did u work this out! I’ve just tried it today & the same has happened to me
I believe you are sewing the wrong edge of the brim to the middle section. You want to attach the widest edge to the brim, with the smaller edge attached to the crown.
my granddaughter just made one in Kenya, She used old jeans for one side and some scrap fabric for the other.
How fun! I would love to see a picture. If you have one, tag me on Instagram or Facebook so I can see!
Absolutely love this! know what I will be doing this weekend.
Thanks!
You're welcome! How did the hat turn out?
I’ve made several of these hats and find it easier to join the middle pieces to the top/crown, then sew the bottom band/brim to that, trimming and pressing as you go. Make the whole outside that way, then the whole lining/inside the same. Join the right sides together and stitch around the bottom edge, leaving an opening for turning right side out. Then you can top stitch the bottom as many times around as you please!
Thank you. I'll have to try that out.
This is how I do hats too. If you make the lining and hat separately completely and then join them at the brim and leave an opening for turning, then press and topstitch, they join together better and the bonus is they will be completely reversible.
Is there a printable version of the instructions? I am going to try to make this soon but would really appreciate a hard copy of the instructions.
Currently, the printable, ad-free instructions are only available to purchase in my shop. If you'd like to get it, you can find it here: https://sweetredpoppy.shop/collections/sewing-patterns/products/reversible-bucket-hat-sewing-pattern
I would also like a printable version of the instructions. Could you possibly include a link?
Hey Diane! Currently, the printable, ad-free instructions are only available to purchase in my shop. If you'd like to get it, you can find it here: https://sweetredpoppy.shop/collections/sewing-patterns/products/reversible-bucket-hat-sewing-pattern
Hi, thanks so much for the free pattern, I’m planning to give it a go today. When I clicked on the “interfacing” link, it opens to Wrap n Zap, but I’m thinking you meant to use Pellon 101?
Love this HAT!! I printed the pattern, but there are no instructions with the pattern. Is there a way to print your instructions??
Where do you print the instructions to the bucket hat? I just downloaded it.
Love this pattern idea and will be great for summer here in Australia for my godchildren. Would love a printable pattern as well if possible.
The pattern when I tried to print it is cut up on different pages! Also when I tried to see the instructions it prints without the colored pages. It only has words! I need the visuals also, Please
Thanks for the pattern and tutorial. Excited to give it a try!
You're welcome! I hope you enjoy the pattern!
Hi! When connecting the pattern pieces should the edges of the paper just touch or should the colored lines touch? Should the stars match up in the complete star shape or will they appear distorted?? I don't want my pattern pieces to be off. Thanks for the pattern!
You should end up with a perfect star. 🙂
Do you know what size head equates to each size? Thank you!
In inches?
Thank you! I am enjoying this pattern but would love suggestions for making a larger one for my husband and son. The adult size is too small but I’m thinking of printing it at 110% and trying that. Does that sound reasonable or does anyone have a better suggestion?
Heather, I haven't tried that, but if you try it out, be sure to let us know how it works!
Enjoyed making myself this hat this afternoon. I change the method slightly and turned it into a reversible hat.
I’m confused. I cut out toddler pattern and the middle seems to big to go around the hat top help lol
I am wondering if the pattern pieces for brim and middle are marked incorrectly? In the photos the hat gets bigger as it goes to the brim, but the pattern pieces have the brim marked as the smallest in length.
Hi Kim
I sent you an email as I need some help with the bucket hat pattern. I have not had a response. could you please respond. thankyou
lorie
Great pattern, but I am lost in one of the last steps. You have said their is a video, but I can't find it.
Where can I find it please?
Here is the video! https://www.youtube.com/watch?v=fgPrbMt13lw
Let me know if you still get stuck!
Hi there, Would also love a printable step by step if possible? 🙂
Is there a printable version? it is very difficult to follow with all of the ads. Thank you
Greetings from Ireland,
Thank you so much for bucket hat pattern. I’ve just completed it for my grandson. The tutorial on it was perfect and once I started sewing, it only took a few hours. Brilliant!
Val
I'm so glad to hear that you loved it! Thank you!
I have the same issue with excess fabric around the middle. Also the child hat brim seems extremely small for my 14 month old.
The same thing happened to me. I realized I had put the pattern together incorrectly. Utilize the stars on the pdf.
I want to make this hat for a three year old. Would you use the toddler size or the child size?
It just depends on the size of their head, but I would say the child would probably fit best!
Love this hat! Grandsons love wearing my husbands’s purchased bucket hat. He tried to find ones like his but it’s a summer item and they were out. So I made two using their fabric for their favorite teams !
Thank you for the pattern.
You're welcome! I'm so glad you enjoyed it!
Hi. Thankyou for pattern!
I'm a visual person and would love a video to watch construction of your patterns as well as photos.
Thanks
You're welcome! I have a short video of the Bucket Hat pattern on my youtube channel. But, I have full length tutorials of other patterns on my channel! https://www.youtube.com/watch?v=fgPrbMt13lw
Beautiful hat pattern, I made one for my son but want to make one for my nephew, does the paid for pattern include head measurements to go with the sizing? Wanting actual inches for each size instead of just baby-adult.
Thank you
Made the baby size for a 6 month old. Turned out well but was way too big. Would it work if I just reduced the whole pattern to about 80%?
thank you so much for the bucket hat pattern and instructions, i plan to make 9 of these for grandchildren for Christmas. i made an adult practice one for myself, and it turned out great. however it's too big. now i'm nervous about the sizing for the grandies. is there any way we can measure their heads against the pattern so they fit snug? thank you once again for the pattern
Hi Kate, Hard to know with different head sizes, but it should work!
Hello ... I had to reduce the scale size on my printer to get it to match the 1" square provided on the Bucket Hat Top pattern. Took a few tries but finally worked. Reducing the scale of the printed pattern may work for you. All the best.
I'm having an issue with the last step with the bucket hat when adding the last main lining. I do not understand how to attach. From the fast paced video, it looks like it encloses the main brim of the hat and then you turn everything right side out. Please explain further how to attach. Thank you, Lynn
Hi Lynn, you are going to align the main bucket hat with the main bucket hat middle with right sides facing each other and pin around the hat. Sew around the hat leaving a 1" - 2" opening for turning. Hope this helps!
I love the bucket hat pattern. I have made two for my grandchildren. I will be making many more. Do you have the pattern in an svg file so I can cut out on the Cricut machine?
Hi Ann, so happy you love the pattern! Right now we only have this pattern formatted as a PDF, but we appreciate the feedback and will consider making it in SVG for the future!
yo lady, 3/9 isnt a fraction - its 1/3
Hello ... When attaching the stitched, lined and interfaced brim(s) to the completed middle portion, is the interfaced side of the piece on the upper (exposed, visible) side or is it on the underside? Thank you
2 questions:
1) Is it lined OR reversible? The email/blog post says reversible but the materials list calls for fabric for the lining (instead of "fabric 2" or other verbiage). In my mind, they are different and am curious if I'll end up with two hats or one.
2) You are so great at listing the sewing ability level required for your projects but this one doesn't show it. I don't want to be a "confident beginner" (or "sucky average") and attempt an advanced or expert pattern. What level is this?
Thanks!
I have made several bucket hat patterns and now everyone I know wants ones, especially children, they love them. They are also super easy to make but I do have one question.
The Markings on the pattern show adult, child and etc. ; it would be great to know the circumference of each size in actual inches to be able to get the best fit per hat. My family have head sizes from 19" to 24" and I end up with them too small or large.
Do you have a solution for this: I would sure appreciate it as it would be easier for this 83 year old great grandmother. Loved you mask pattern also! I do use Joann's fabrics.
I would like the same thing. Made the adult size and its a bit too small for me. And I don't have a big head. Before I make any more, I'd love to know the measurements so I can adjust accordingly. Video is great, written instructions are a bit confusing. Especially where you say "Align the main bucket hat with the main bucket hat middle with right sides facing each other and pin around the hat. Sew around the hat leaving a 1" - 2" opening for turning" in Step 7. I found it very confusing. Most of your patterns have been so easy to understand, not sure what happened with this one! The hat still turned out ok, too bad its too small.
Hi, can I ask have you made the hat for the person with a 24" circ head yet? What size did you make and did it fit?! My husbands head is this size and I'm wondering what to do....
TIA
I have tried to download teh bucket hat pattern but i cannot connect tot eh page and cannot see why. Can you help?
https://sweetredpoppy.shop/collections/sewing-patterns/products/reversible-bucket-hat-sewing-pattern
Do you have a finished circumference for each size hat? this would help with picking the best size to make. thank you.
Awesome pattern and so easy to follow. thank you!!! Just made one for my grandbaby.
Only one sewing tip, I use this to attach the binding to quilts.
The last step is to sew the opening closed by stitching all the way around the hat, use a little bit of "Elmer's Glue" (any school glue) to glue the open area down. Iron it and this will dry the glue. No pins are needed, just sew around the hat.
I have downloaded the pattern, but how do I copy the instructions without the ads, etc.?
https://sweetredpoppy.shop/collections/sewing-patterns/products/reversible-bucket-hat-sewing-pattern
I just keep my computer open and sew along as I scroll. After you have made a few it goes really fast. Saves paper and ink.
Just made this - my first attempt at a hat. I measured the test square, but it does come up big - might be too big for my 5 year old little girl, but we'll find out in the morning lol!
I found most of the instructions easy to follow, but I did struggle with the last bit, but after playing around, my brain finally made sense of it (I struggle sometime how to visualise how to turn things out). I've not been seeing too long, but I'm not sure I like sewing circle shaped things it's tricky, but does look nice. Thanks
Thank you for sharing this pattern, I have made several of these hats and they are lovely to make. I have a table outside my house and ask for donations for hand made textile goods and these are proving to be very popular.
I recently purchased the written instructions for your bucket hat pattern. The charge went through on my card, but I never received and email link to the download, I saw it on my phone, tried to print it, it didn’t work, now it has disappeared! Could very well be my fault, but do you have any suggestions? I’ve tried contacting you through other sources and haven’t gotten a response.
Thank you for this pattern. I have made about 20 of them so far. I am sewing girls sundresses for a charity that my church supports and whenever there is enough fabric left, I have made a bucket hat to go with it. Have also made several for grandchildren. Have embroidered favorite sports teams or other designs on the middle and that has worked well. Have about three for myself and love them. Thanks.
Hi Kimberly,
You stated this was best to use cotton fabric. I would like to make this bucket hat using a swimsuit type or nylon fabric that can get wet and dry quick while swimming. Would I need to make adjustments for this type fabric?
Thank you!
I am making the toddler size and have struggled trying to ease the middle section to the top of the hat. The instructions say that the middle piece should be smaller than the circumference of the hat so I measured the pattern pieces along the seamlines with a circular ruler and came out with the middle being 1-1/2" larger along the seamline than the top of the hat. I guess I will be taking apart the brims and cutting them down. Haven't double checked the other sizes yet. Love the hat but I think some re-drafting is in order.
Hi,
I want to make your Bucket hat but, I don't understand the dot dot skip dot dot line. Is that what I cut my fabric on then the solid line is sew line? I'm making an adult size. Thank you,
Anita
Thank you so much for the free pattern on the reversible bucket hat. It is perfect ( I looked for a long time before finding your patter that has the absolute best model)! It is so much fun making them. Now I only have one problem.. how do I stop, he he ? The whole family, also the extended one, has one. I made two for myself..
Please post the measurements for all hats. The adult size is too small. Thank you.
I made the adult hat and it was HUGE. Too big for even my hubby. I followed the seam allowance. I will adjust using the child one next.
I still love the style. Pattern was easy to follow
Jeannie D
Thank you so much for the pattern and instructions. It's sooo cute! Is there anyway I could download the instructions and photos on how to make the hat? I would like to print it out along with the pattern so that I could make it.
Thanks
Wow, I've been dying to try the bucket hat and just finished my first one. It was a bit tedious, but the first attempt at anything is usually a scrimmage! It is quite big for a toddler, and I cannot get the top stitching at the end to cooperate. I do plan on making more---love reversible items!! The instructions are so good!!
Complete instruction!!!!!!!!!!!!!!!!!Written, pictures, video. If I can't master this project with your powerful directions, then..................................................
Thanks for your generosity. Love it all. Very beautifully done.
Hi, thank you for the pattern for the bucket hat. I have tried twice to make it and the middle piece and brim have been reversed on the pattern (mis-marked). Either way, the pieces don't fit together, even if I switch them around. Am I doing something wrong? I have cut out the largest size for all 3 pieces. Please help! Thanks!
I made a reversible bucket hat in the largest size and it is wayyyy too small. I used The little 1” square to make sure the pattern was enlarged properly but was disappointed that I couldn’t give it to a friend as a birthday gift. Guess I’ll have to play around with the sizing. If you feel that you could send me a full size pattern, I would pay for it.
I love this pattern and am having fun putting it together. However, I got all the way through to the last step, but I am confused now on how to attach the brim + middle section to the main top. The photos are a bit confusing and I would suggest making the two fabrics in different colors - say, one yellow and one blue, so it is clear in the photo which is the main fabric and which is the lining.
Hi,
I love this pattern and have made 2 adult size hats! Is there supposed to be extra fabric on the inside (when it’s turned to the main fabric side? I think I must be doing something wrong so I tried again and followed the directions and made sure my seam allowances were right! Any suggestions?
Hi, my husbands head is 61.5cm but according to the instructions the adult hat wont fit. Could you confirm this and if so how do I overcome this? shall I just print bigger? and if so how much bigger would you recommend?
TIA
Chelby
Cute. Is there an easy way to print out the actual instructions?
Following where is the written instructions
I just finished making this bucket hat for my Granddaughter for Christmas. Its sunflowers on 1 side and cow print on the other. Very easy pattern. Thank you!
Thankyou for the free pattern.
I downloaded the hat pattern, but cannot see where I can download the instructions. Am I missing something?
Thank you
Downloaded the pattern at 100%, no scaling and made the baby hat which turned out to be a 22 inch circumference, which of course fit my 9 year old, haha. I used 3/8 seams, what did I do wrong? Help!
What type of interfacing do you recommend in general for the bucket hat? I don't want my hat too droopy.
I too am struggling with the last instruction. I am missing something. If you are sewing right sides together on the main middle section to the right sides of the brim --it does not go together==what am I doing wrong?
Up to this last step everything was going along just fine. But this step is not making sense at all to me. I am an experienced seamstress. Maybe overthinking
Super fun, super cute hat! Thank you thank you for your wonderful multi-sized pattern and FABULOUS instructions!
Am I the only person who is struggling to pin the middle piece to the top of the hat? When I try to pin I together the middle ends up being to big and does not fit the edge of the top.
I had this problem. The middle band is smaller on one side. Make sure you are trying to sew the smaller “hole” to the circle. I ripped it out three times before I figured out the middle band was upside down.
i need patternn for this as i would make a few of these
how do i load the free pattern for the microwave bowls and bucket hats?
Hello! Thank you for the pattern! I am wondering if it is available as a cutting file for cricut machine? Thank you!
Is there a way that I can print out the instructions for bucket hat? Please and thank you!!
The bucket hat pattern is not sending to my email. On the site it shows it will go to 50% complete but that's as far as it gets to being sent. Any suggestions? Thank you!
Just made this today and loved it! A super fun and versatile pattern with clear instructions. I will be making this again but I might try a method suggested by one of the other commenters, in which you sew all parts of the lining together, and all parts of the outer fabric together (so you have two complete hat structures) and then sew them together at what ends up being the rim of the hat. I think it would be much easier to do the top stitching neatly this way!
How can I print out the instructions please. Thank you
Hello,
The free bucket hat pattern isn't working for me to download. Is there any way you could email or send it to me.
Thanks.
Came out great!! In the video tutorial you should put the words “turning gap” in there at some point cause i was very confused for a sec. Beside that thank you love it.
I have made at least 5 of these now, starting 2 years ago for my niece (she’s now 3). My most recent creation was filled with Halloween Embroidery and found that turning up the stitch length a few clicks when sewing the top circle to the middle, like a semi-basting stitch was so much easier . I went around again at regular stitch length and was pleased how it turned out.
Great pattern but way too big bitterly disappointed as posting overseas for Xmas made baby pattern and nearly fits me would be useful to know how to scale down Rosemary New Zealand
I’m new to sewing and have never made a hat before, but this was very easy to follow along. The hat is really cute and was fun to make.
However, I think the size guide needs adjusting… I measured me 18 month olds head at 49cm (she has a big melon) and made the toddler size as she’s in that size range.
I’ve double checked the pattern, I’ve done everything right. Yet, the hat is about 2inches too big and fits my big old noggin.
Love the hat, just wish I’d made the smaller one so she could actually wear it.
I just made one. I did put interfacing on the outside side pieces because I wanted it a little stiffer. I think the side piece is too big for the top piece. It was very hard to sew both the lining and the outside. I pinned/clipped a bunch , went slow, but I still had trouble and had a couple of gathers. It came out pretty cute though. Thanks for the pattern.