If you're looking for a professional finish with a touch of fun, look no further than bias tape! It's is a great way to finish an edge with a beautiful contrasting binding or a bright pop of color.
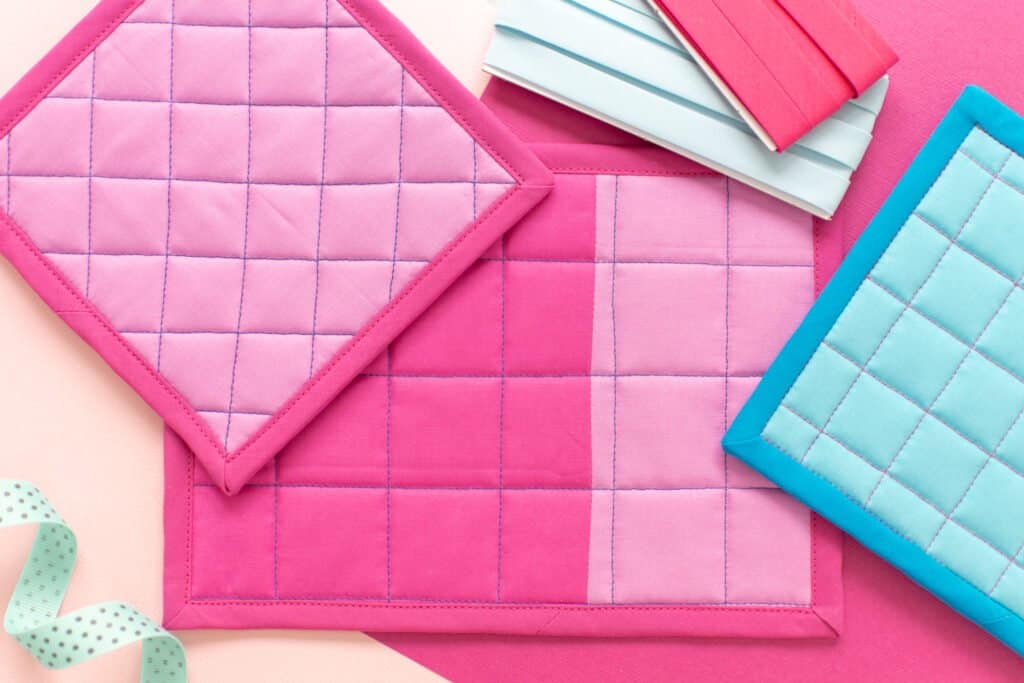
But how do you bind something square without getting weird, bulky corners? The answer - mitered corners!
Table of Contents
What is a Mitered Corner?
A mitered corner is a 90-degree corner formed by joining two edges at a 45-degree angle.
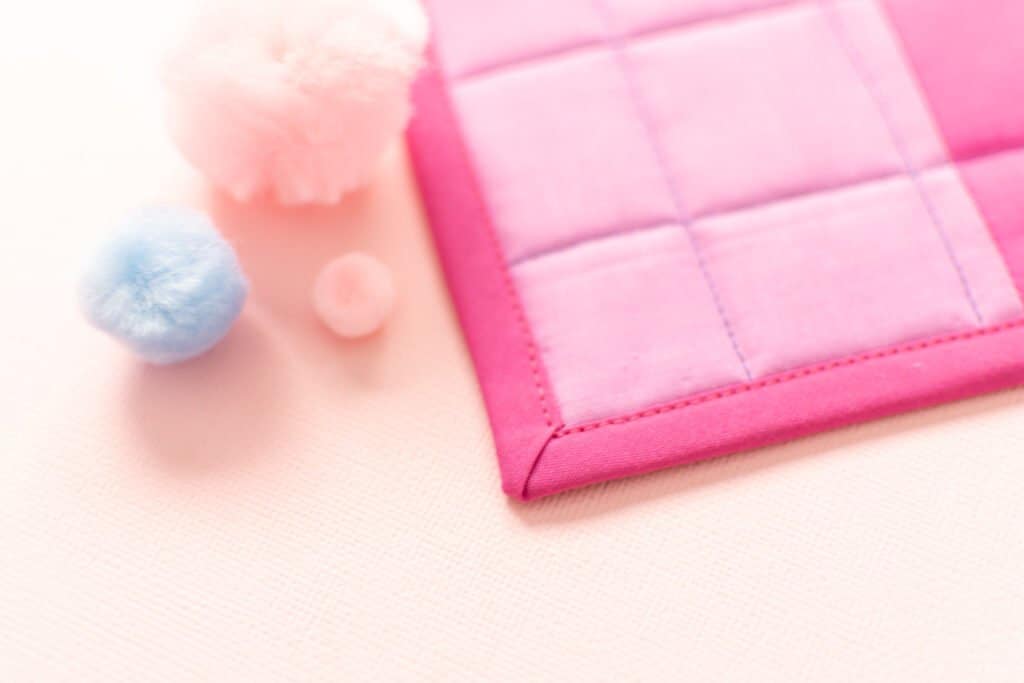
This 45-degree joining point can be created either by folding the corner and topstitching or by cutting and stitching the actual corner at a 45-degree angle. The folding method is the easiest and most common - this is the method I'll be sharing with you today.
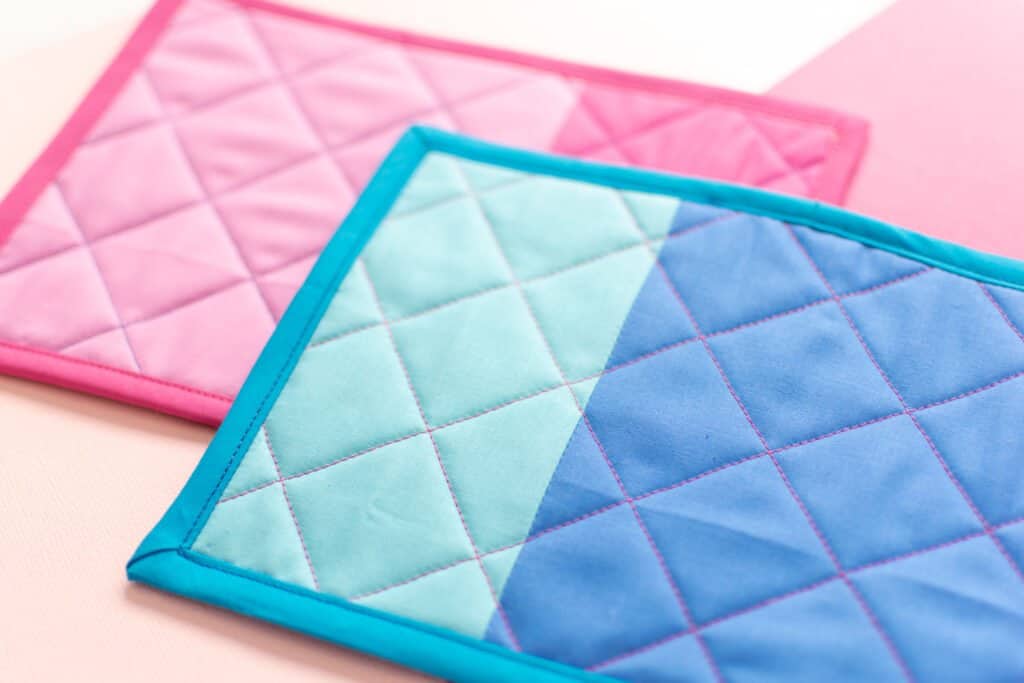
Mitered corners make it possible to form binding around a 90-degree corner in a way that looks professional and reduces unnecessary bulk.
When Will You Need to Use a Mitered Corner with Bias Tape?
You will need to use a mitered corner any time you're using bias tape to bind an edge with a 90-degree corner. This is extremely useful for binding square or rectangular items such as potholders, pillowcases, or quilts.
Why Use a Mitered Corner with Bias Tape?
Without a mitered corner, you won't be able to achieve crisp, flat, professional-looking binding around a 90-degree corner. You will likely have a wonky-looking corner that's bulkier than the rest of the binding.
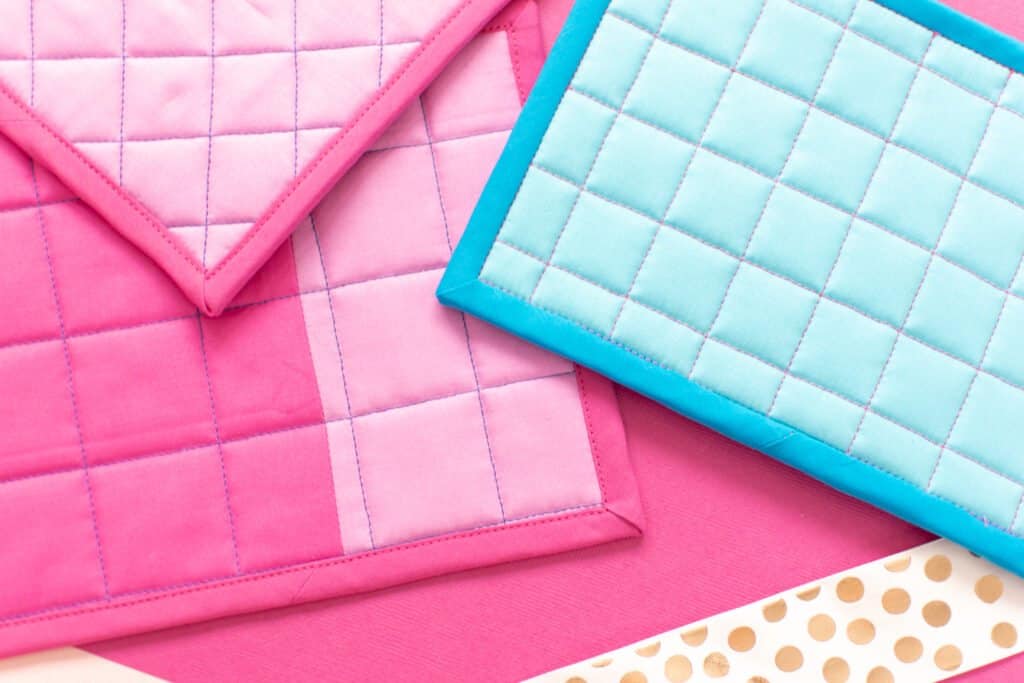
That's why it's important to either round off your corners or learn how to sew some gorgeous (and easy) mitered corners!
Supplies
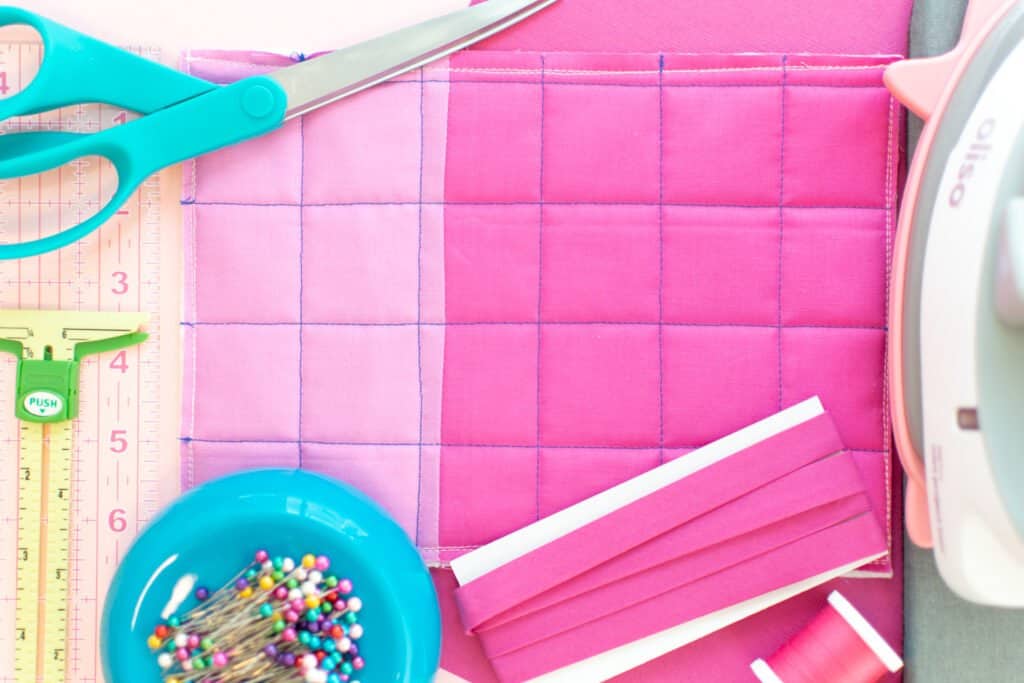
Here's what you'll need to sew mitered corners with bias tape.
- Item with square corners that you want to bind
- Double Fold Bias Tape (make your own here)
- Rotary Cutter
- Rotary Cutting Mat
- Pins
- Thread
- Sewing Machine Needle
- Sewing Machine
- Iron
- Ironing Mat
- Fabric Pen
- Seam Gauge
How to Sew Mitered Corners with Bias Tape Tutorial
As with anything in sewing, there are a few different approaches that you can use to sew mitered corners with bias tape. Today I'll be sharing my favorite method with you.
I promise, those pretty corners aren't as difficult to achieve as they look!
Step 1: Unfold Your Bias Tape and Pin
First, measure the distance from one of the raw edges of your bias tape to the first fold. This is your seam allowance.
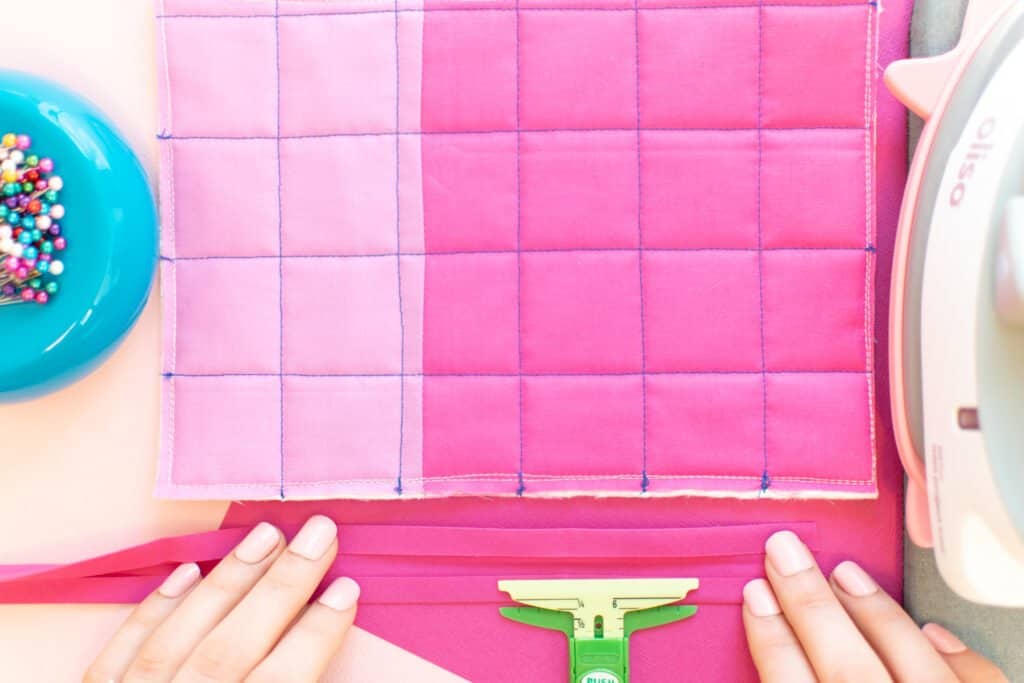
Next, unfold your double fold bias tape. Place your project on a flat surface in front of you with the front of the project facing upwards. Pin the bias tape's raw edge along your project's raw edge with right sides together.
Start pinning near the center of the longest edge of your project and make sure to leave a good 4 or 5 inch tail to make joining the ends easier later.
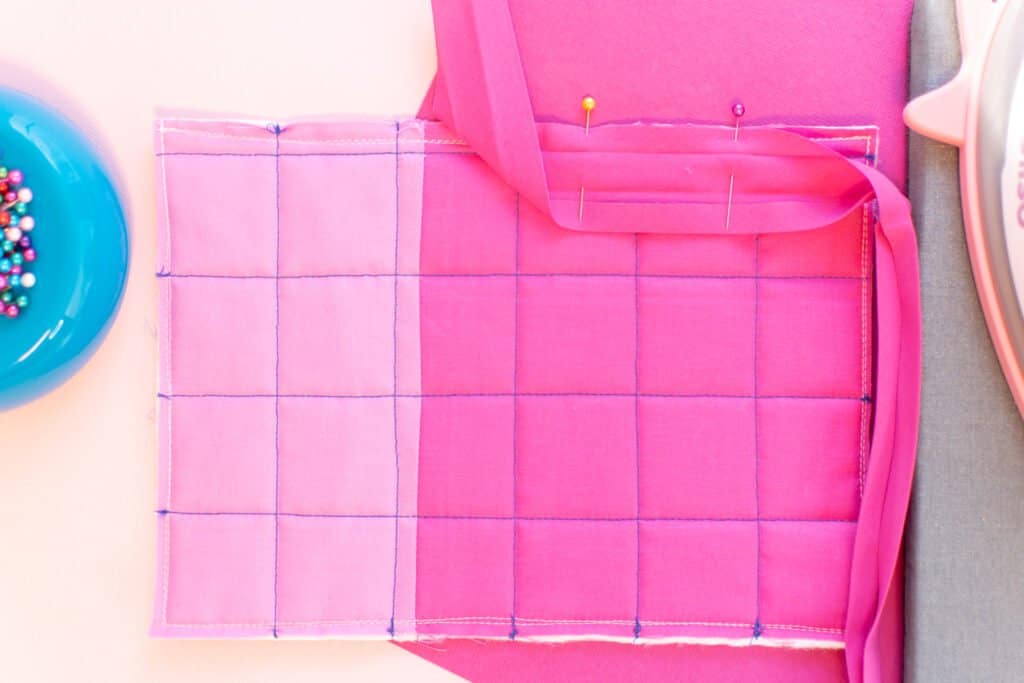
Continue pinning the edge of the bias tape to your project until you near the first corner. Stop pinning the distance of your seam allowance away from the first corner. I find it helpful to put the last pin near the corner in at an approximately 45-degree angle.
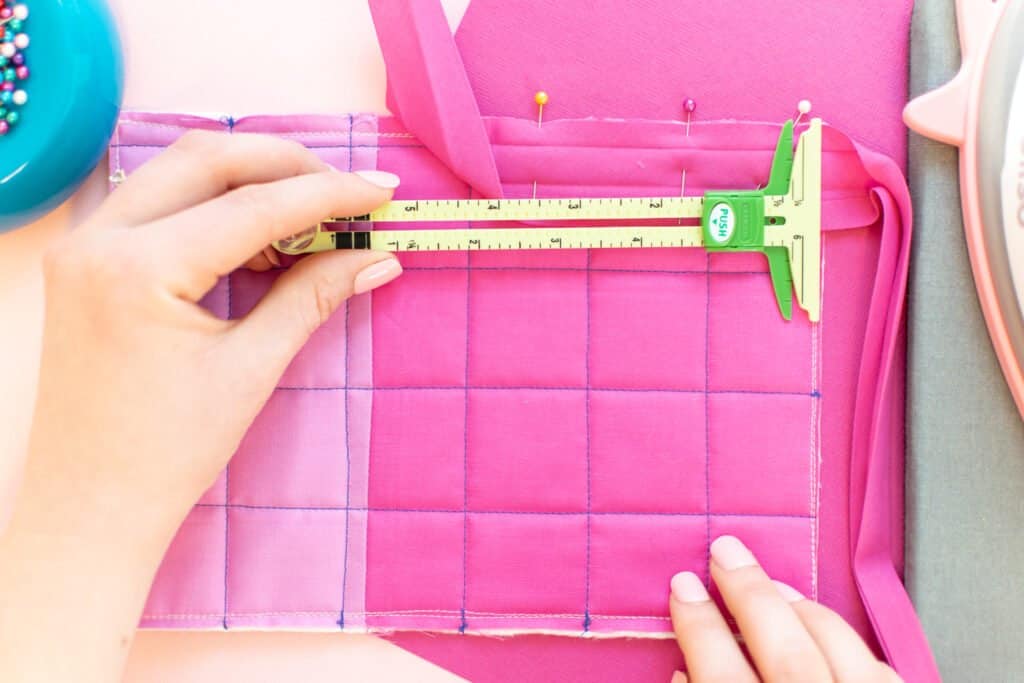
Then, fold the bias tape upwards away from your project to form a 45-degree angle at your last pin.
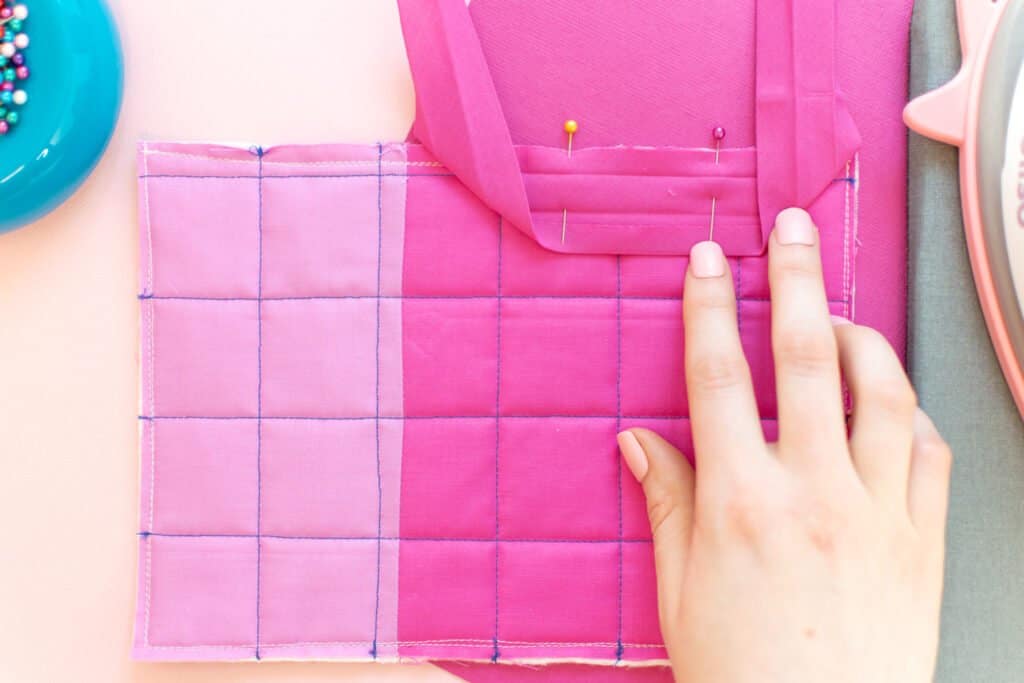
*PRO TIP: If living on the edge and freehanding this angle isn't for you, use a quilting ruler to make sure you have it folded at 45-degrees from the edge of your project.
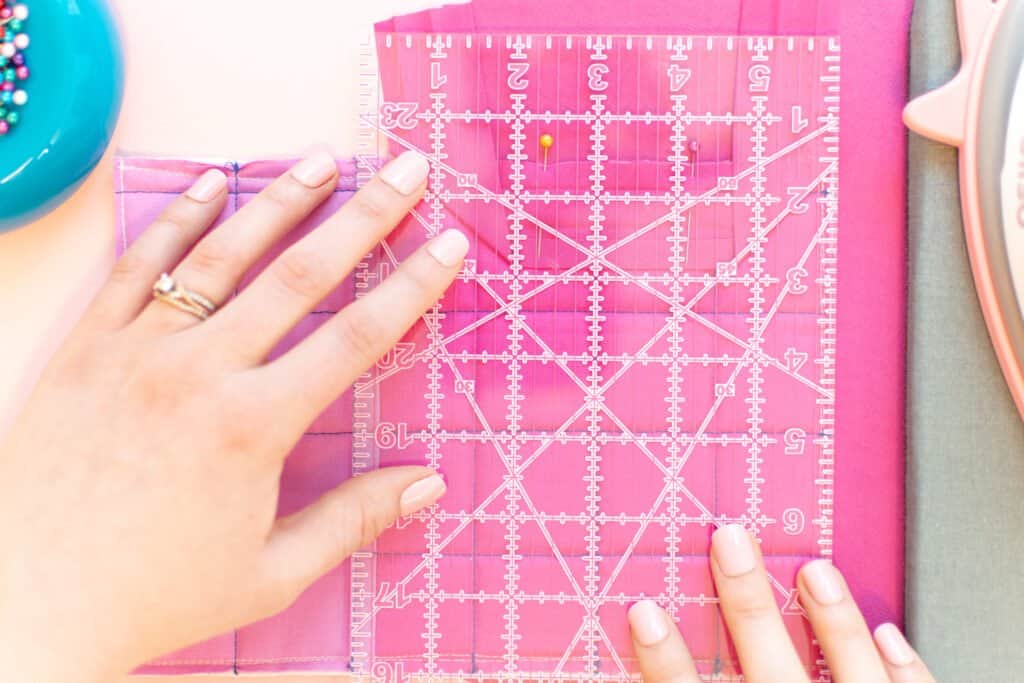
Fold the bias tape back down again. Line up the fold in the tape along the top raw edge of the fabric and align the bias tape edge along the next straight side of your project.
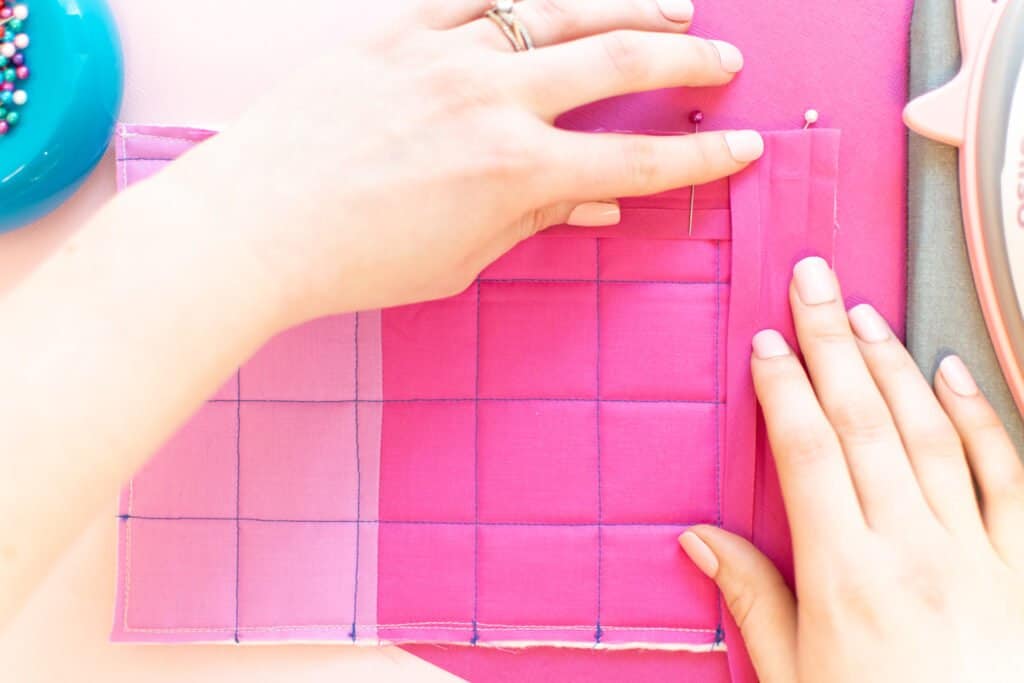
Pin this folded corner in place, then continue pinning down the next side, stopping the width of your bias tape away from the next corner.
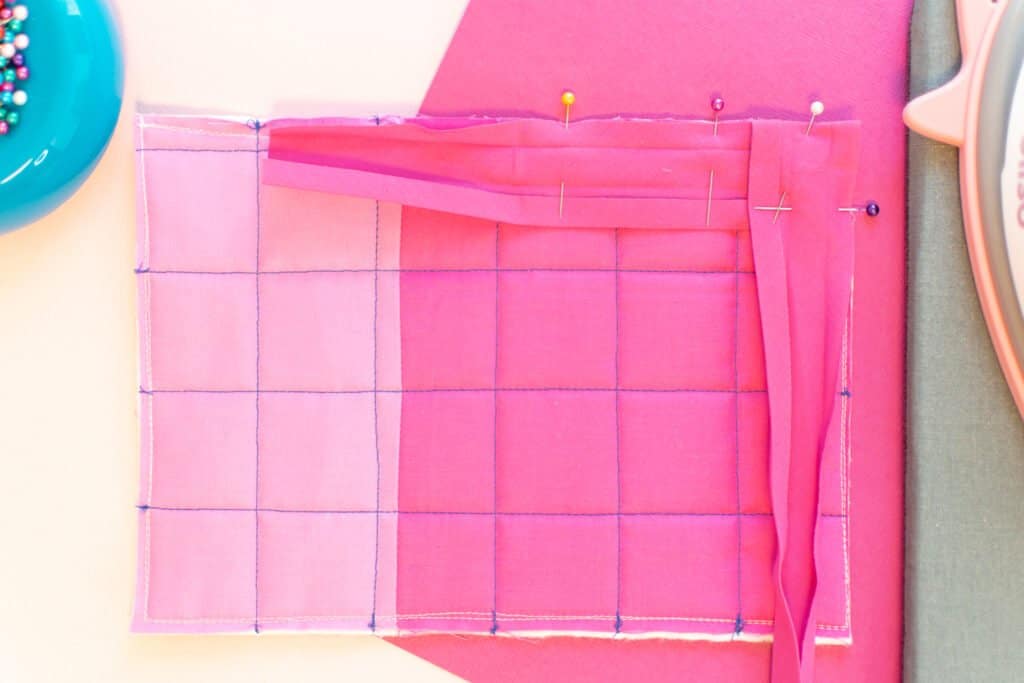
Repeat that same folding and pinning process with each of the remaining corners until your bias tape is pinned around all 4 edges of your project.
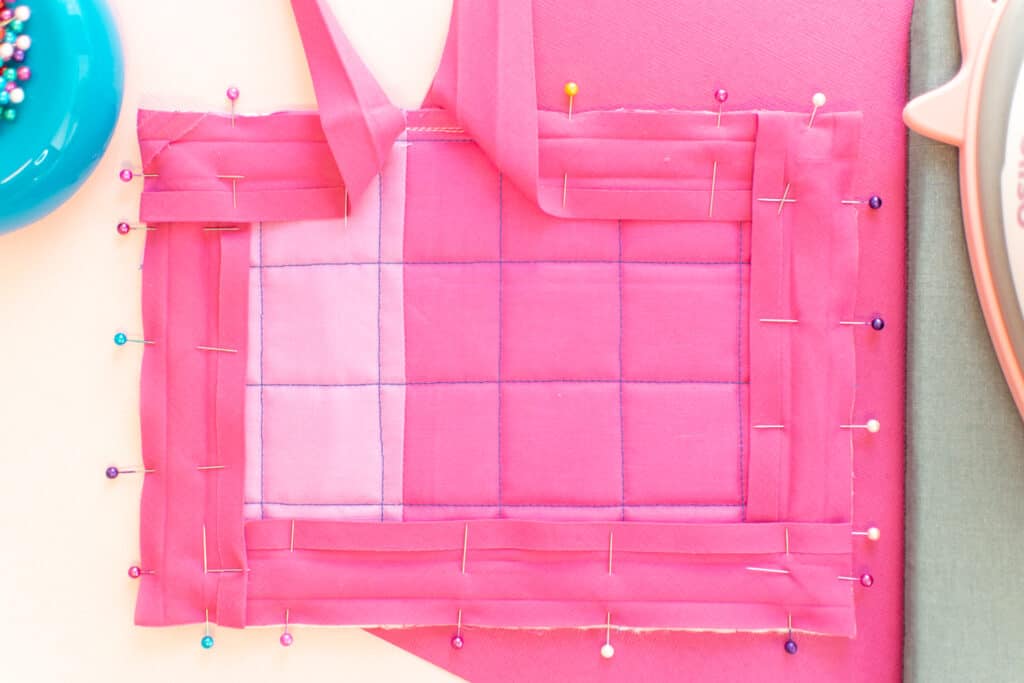
*PRO TIP: At this point, you can join the bias tape ends with a diagonal seam so that you don't have to do it at the end. Click here to read the full step-by-step tutorial on joining bias tape ends.
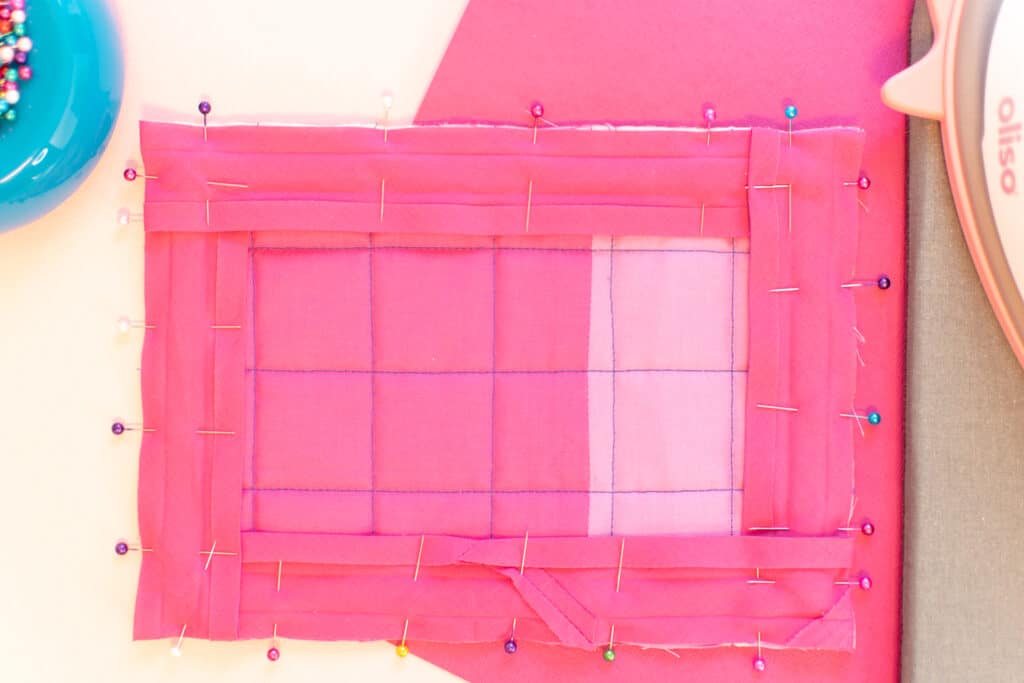
Step 2: Sew Between the Corners
Once your bias tape is pinned to your project, start sewing along one of the straight edges, sewing in the first fold of the bias tape.
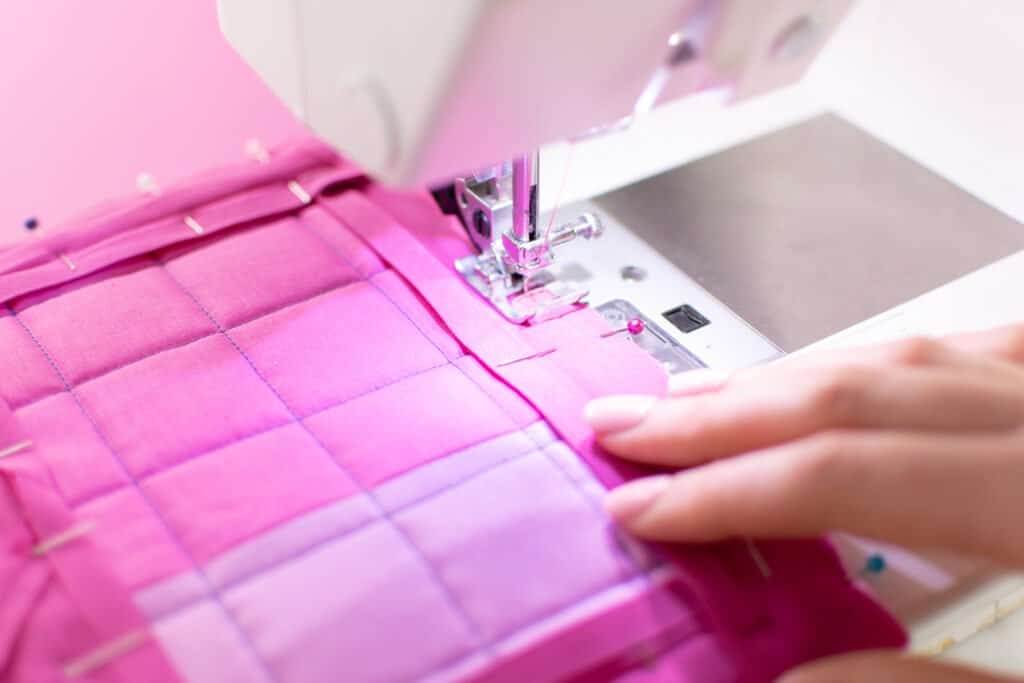
Stop sewing the width of your bias tape (also the width of your seam allowance) away from the far edge of the first corner. Make sure to push the folded fabric back out of the way if needed - you don't want to sew down the excess fabric at the corner. Backstitch to secure your stitching.
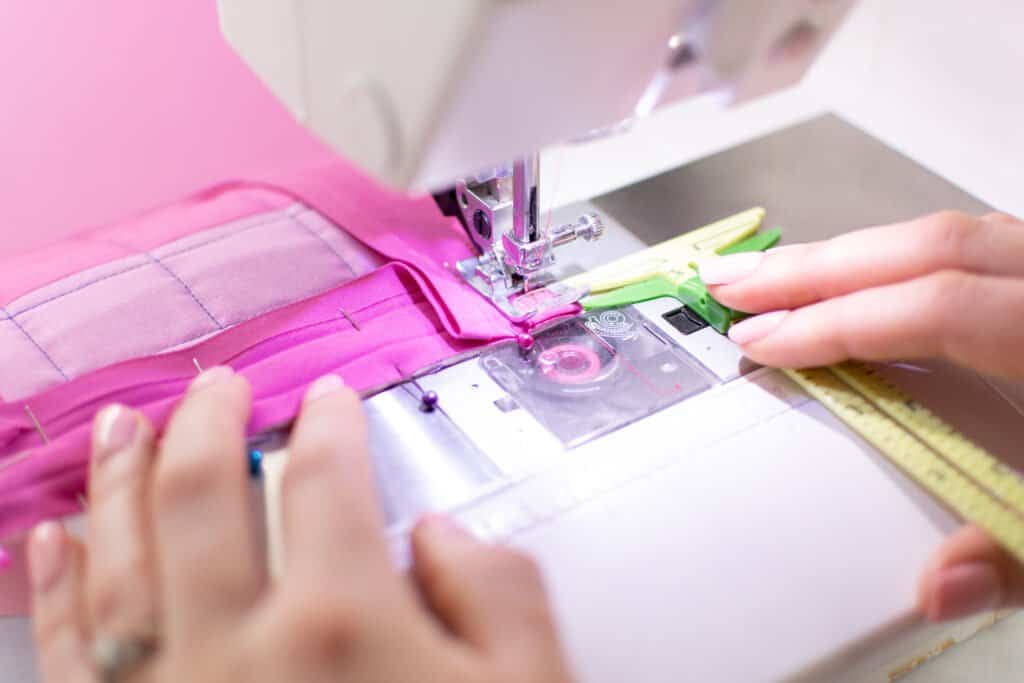
Next, lift the presser foot and needle and turn the fabric so that the next edge is in front of the needle. Push the excess fabric of the corner back away from the needle.
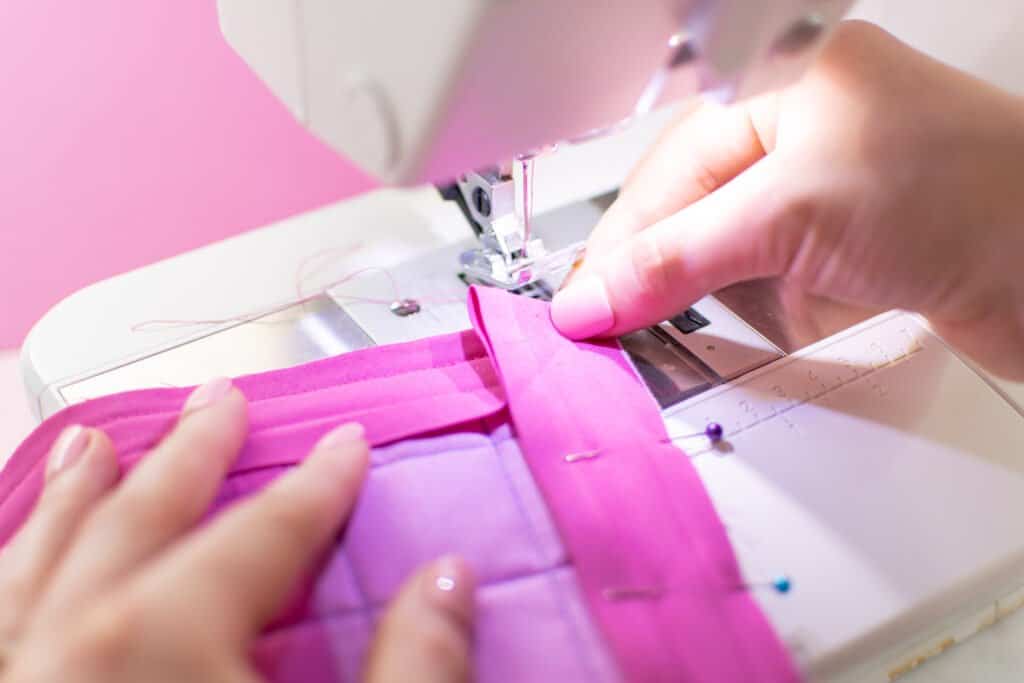
Start sewing a bias tape width in from the edge of the corner. Don't forget to backstitch to secure your stitches!
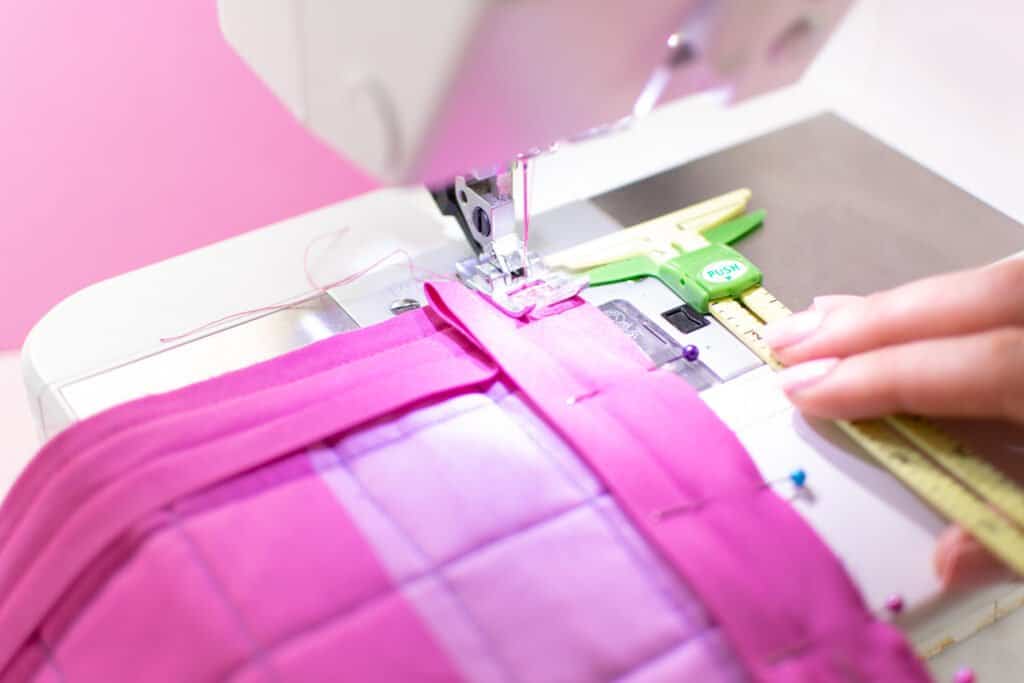
Continue sewing the next straight stretch.
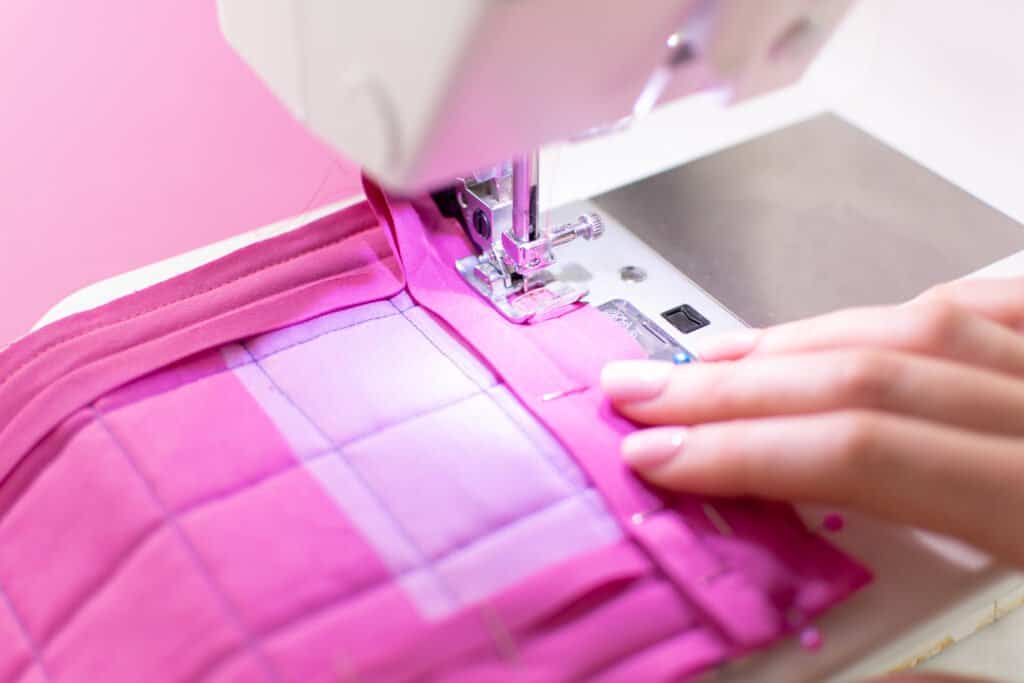
Repeat the stopping, turning, and restarting process at each corner until your bias tape is fully attached to the edge of your project (except the very center of the corners).
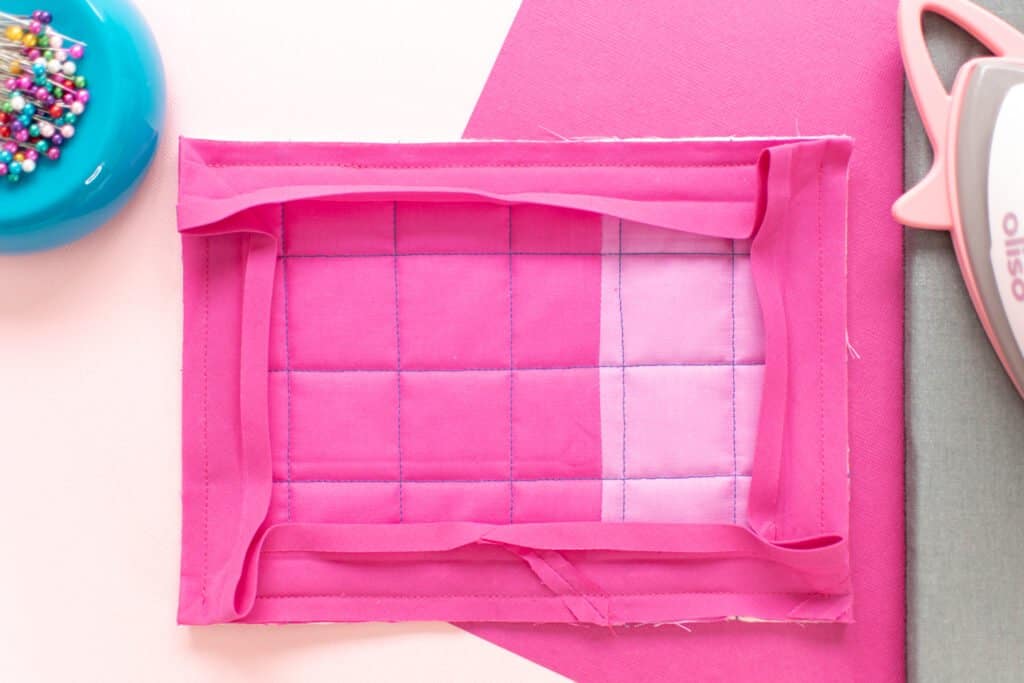
Step 3: Flip the Bias Tape to the Wrong Side
Next, flip the bias tape to the wrong side of your project.
Fold the outer edge of the bias tape in along the pre-formed crease, then fold the tape in again along the next crease so that the edge of your project is sandwiched inside the bias tape.
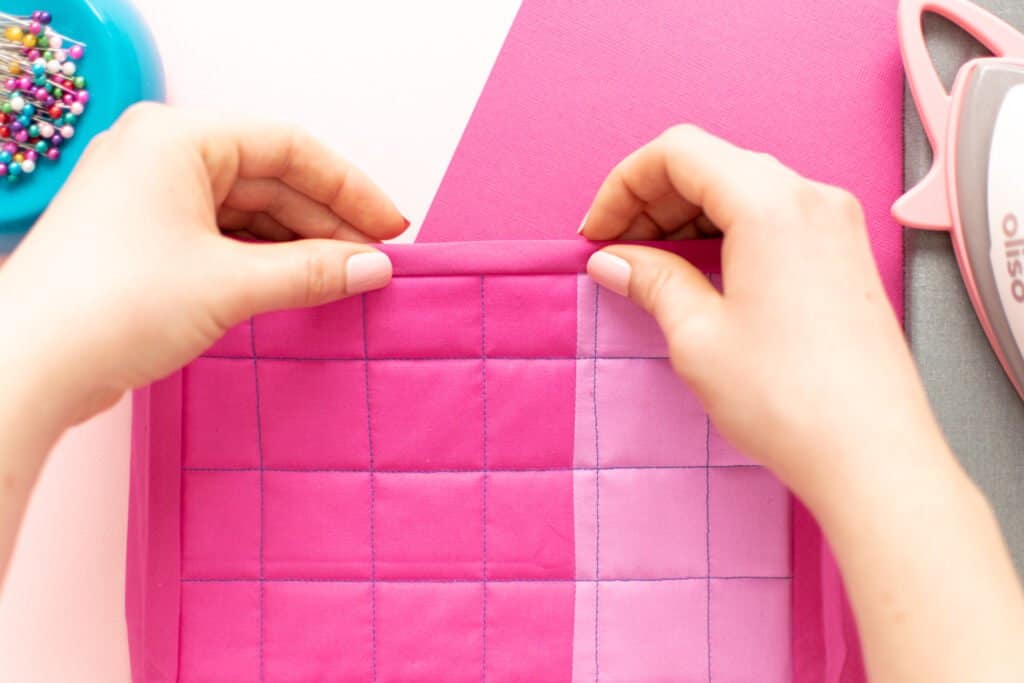
Step 4: Fold the Mitered Corners in Place
It's time to form those nice mitered corners!
Working from the wrong side at your first corner, press the fabric of the bias tape all the way to one side of the corner.
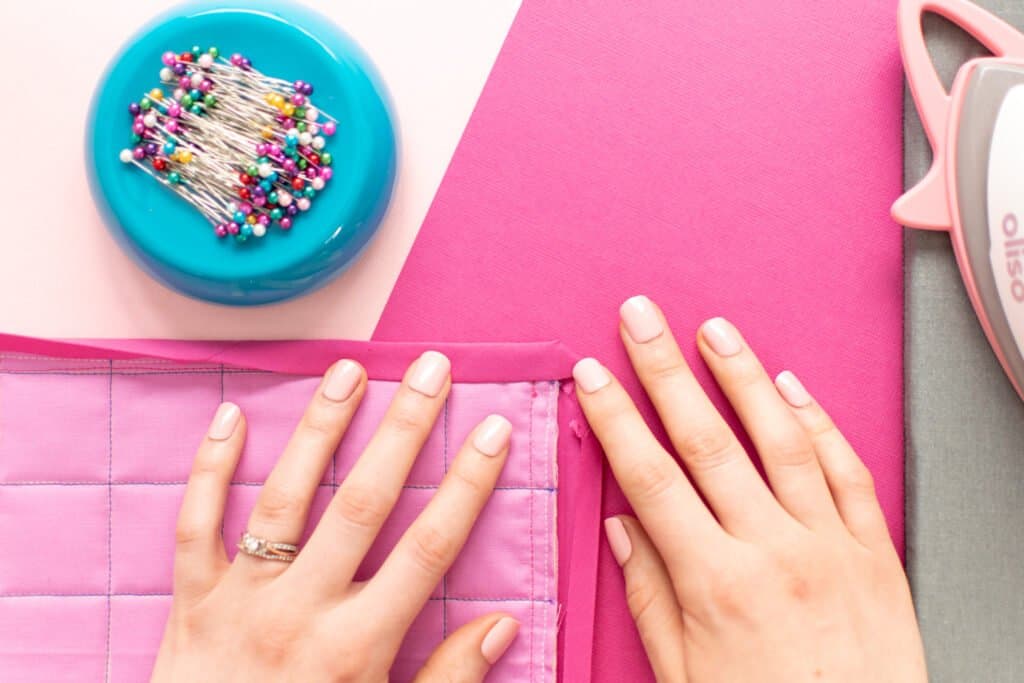
Then, fold the bias tape along the other edge of the corner down over it to form a nice 45-degree angle.
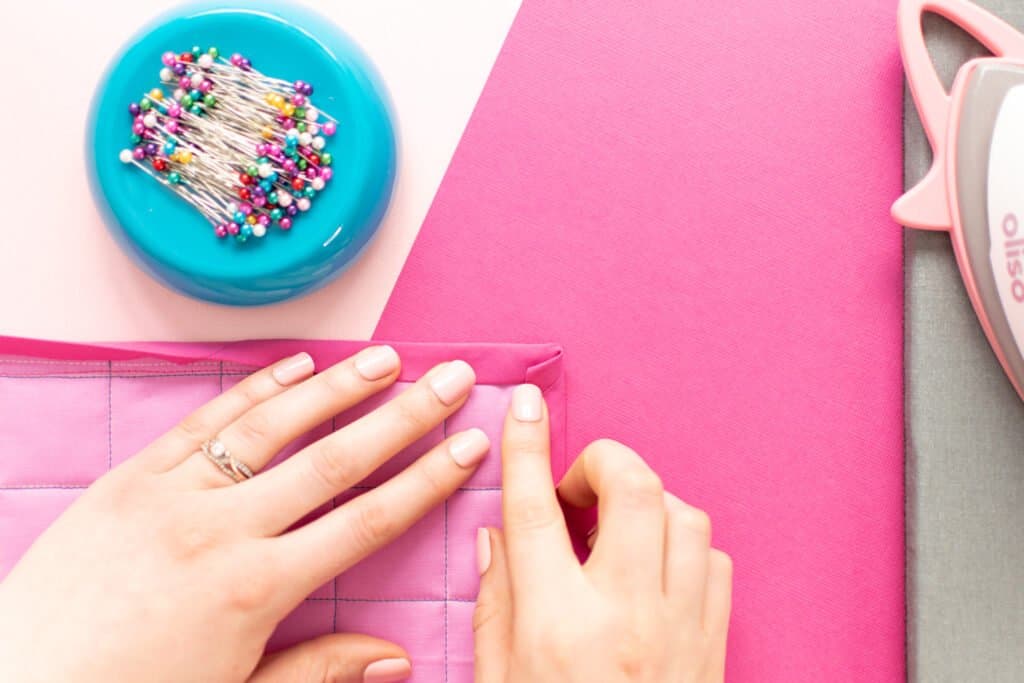
If needed, use a pin to help push the fabric into place so that the corner is nice and flat.
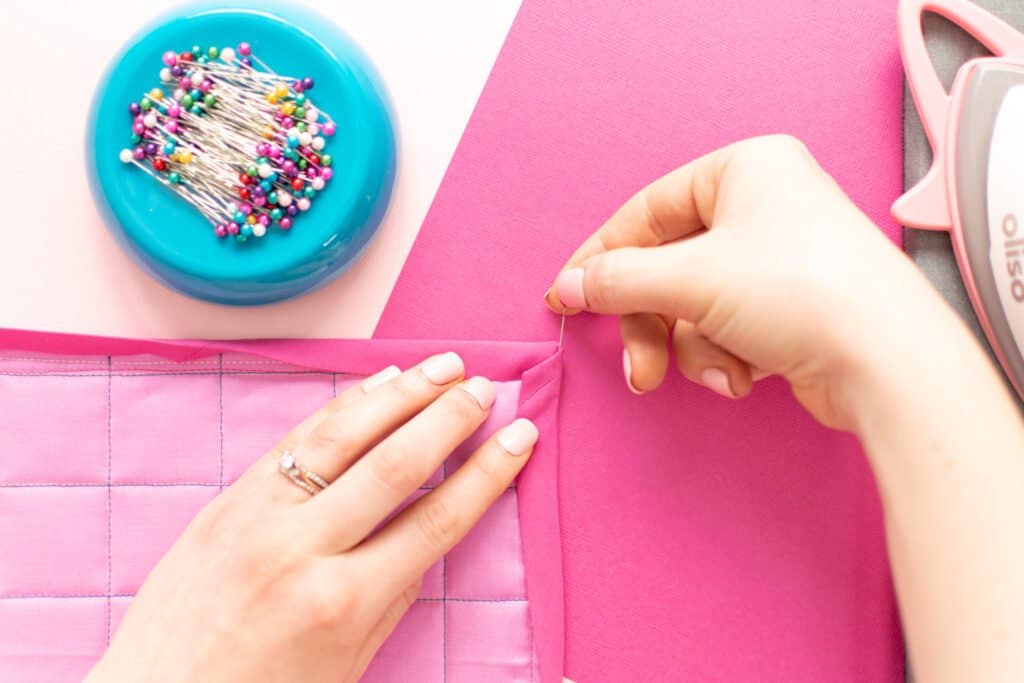
Finally, pin your first mitered corner in place.
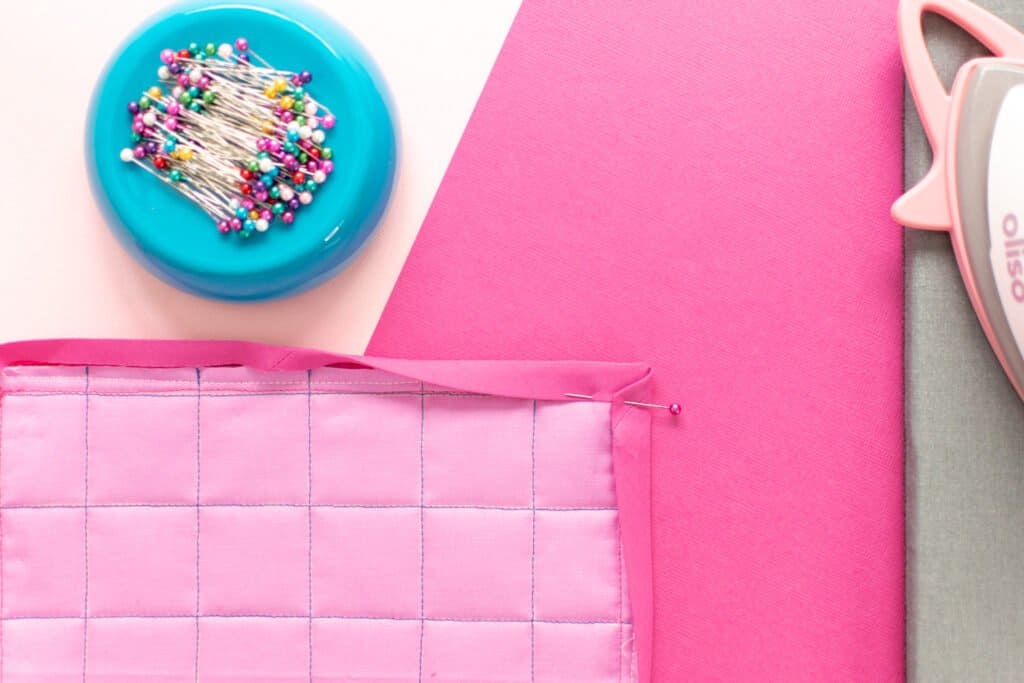
Flip the project over and repeat this on the right side of your project as well. Often the binding will fall into place while you are pinning it from the back, but other times it will need a bit of help.
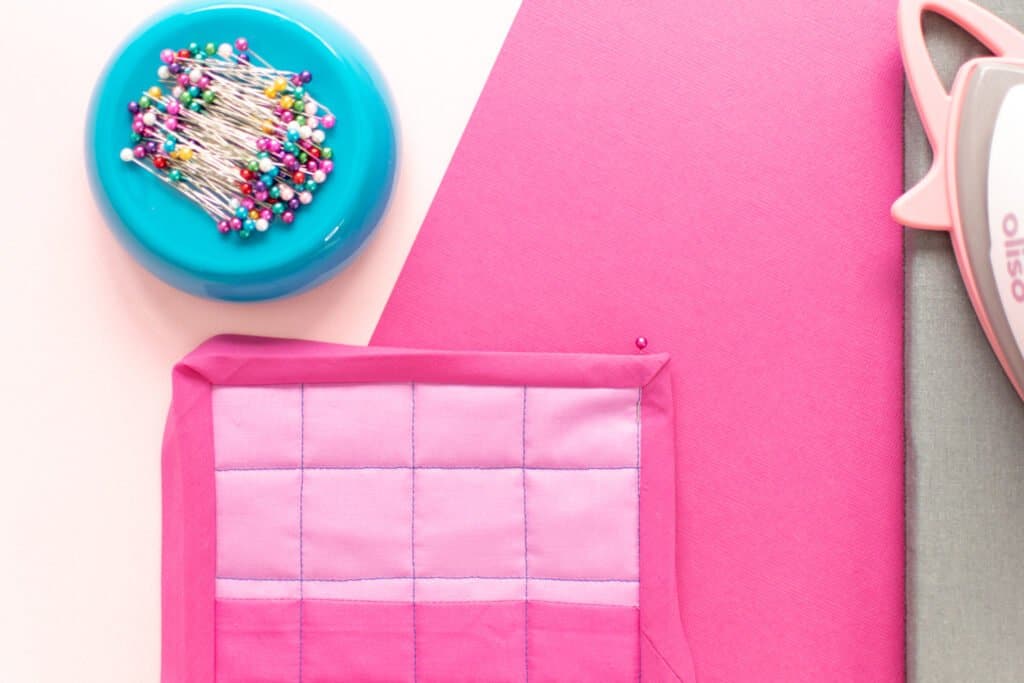
Repeat that process for the 3 remaining corners.
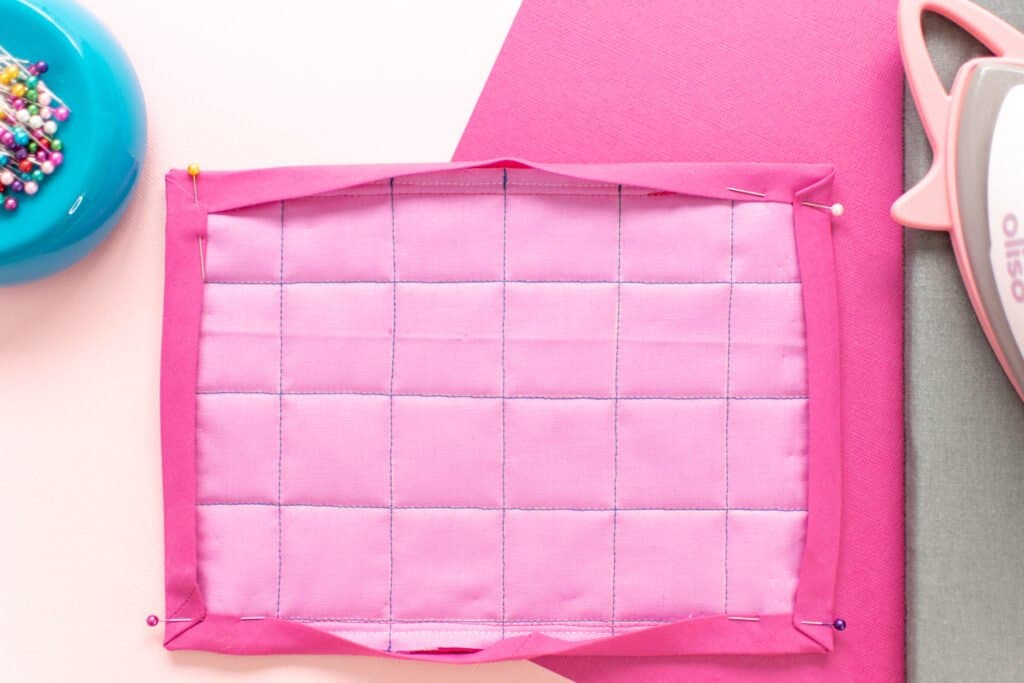
Lastly, pin the bias tape down along all 4 straight edges.
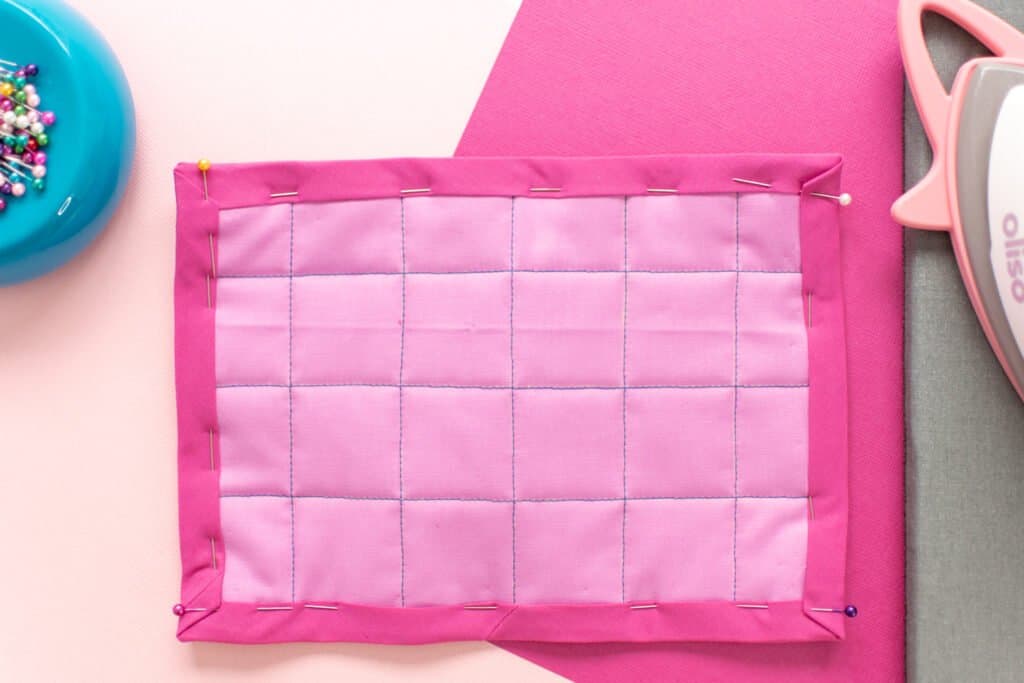
*PRO TIP: Pin the bias tape as evenly as possible. I like to stick my pin through the right side below the bias tape seam on the front, making sure it goes through the folded bias tape edge on the back.
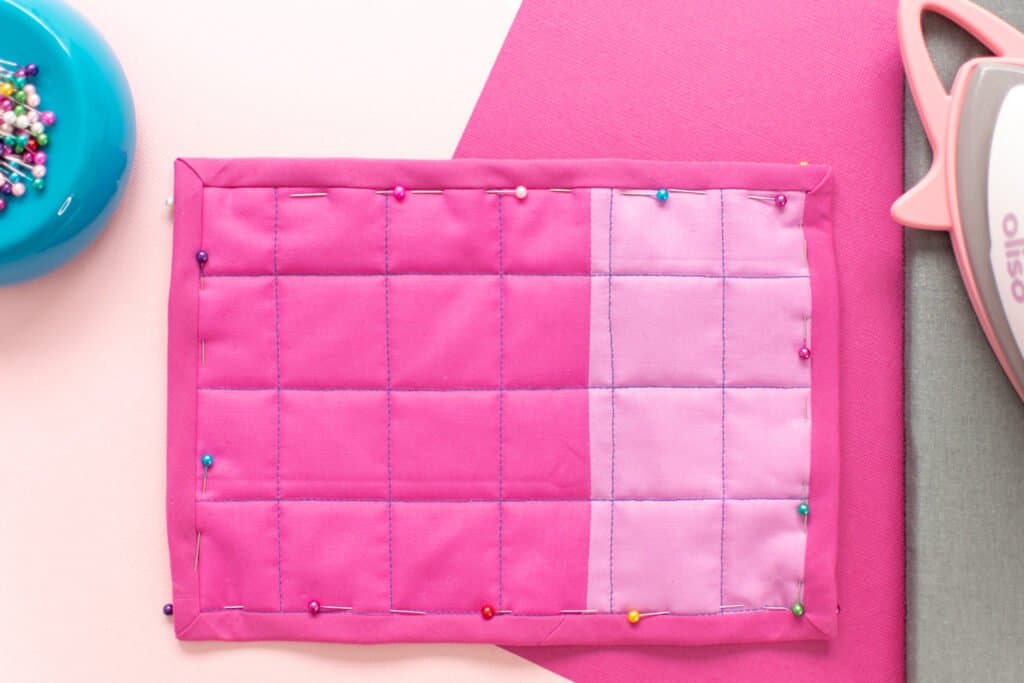
Step 5: Finish Stitching the Bias Tape
The final step is to stitch all that bias tape in place.
From the right side, topstitch right along the bias tape side of the seam or stitch in the ditch to secure your freshly mitered bias tape to your project.
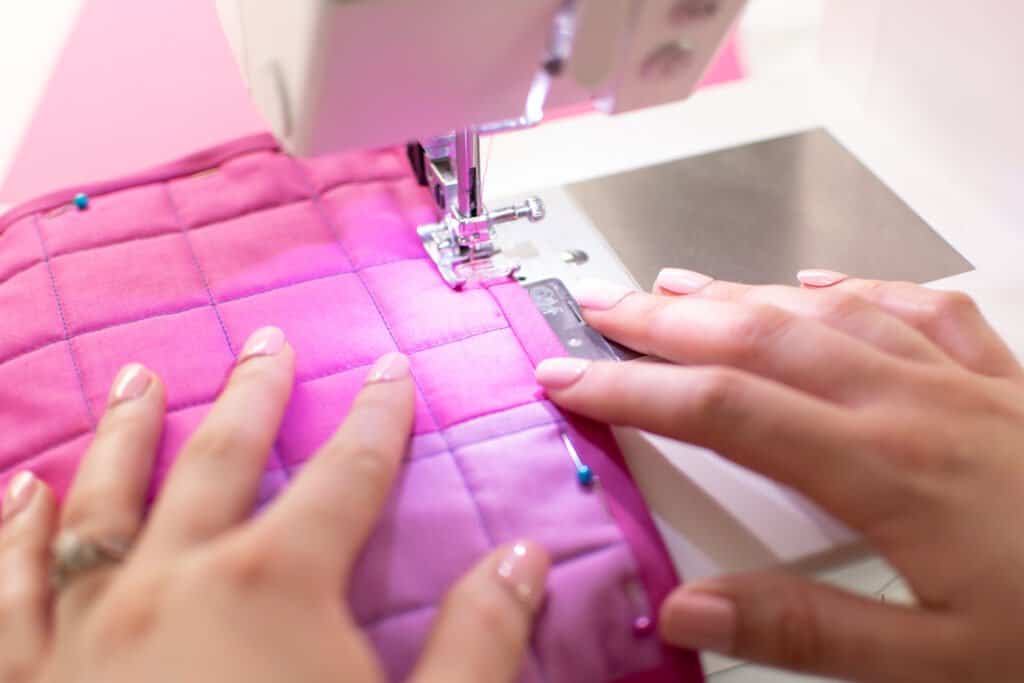
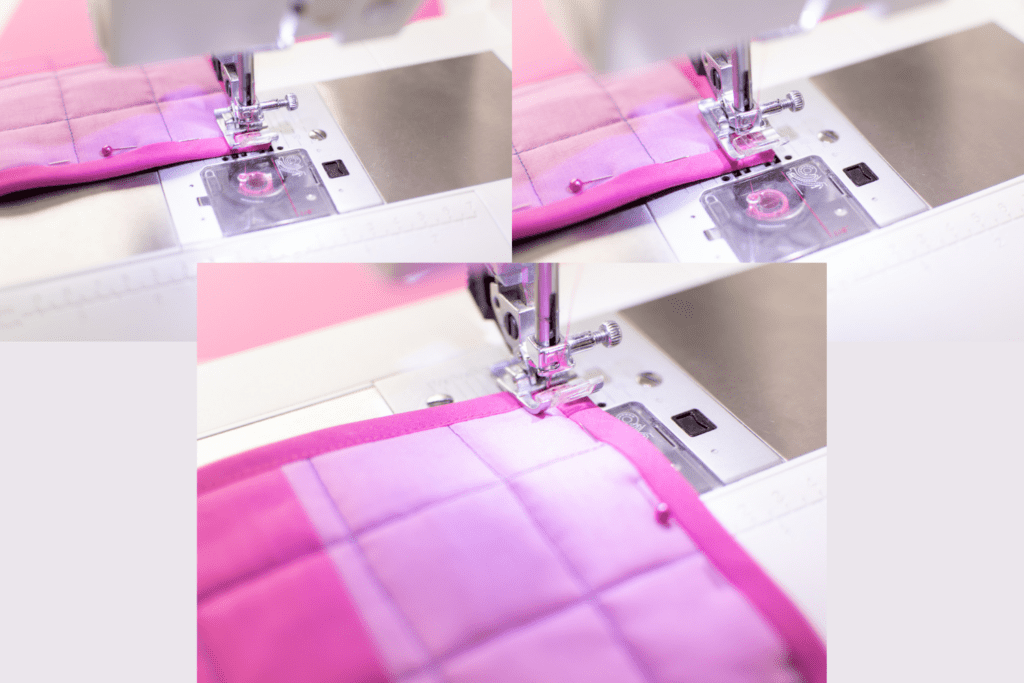
*PRO TIP: As you approach a corner, sew until you come to the center of the mitered corner, put your needle in the down position, lift your presser foot and pivot the fabric to align it with the next edge. Lower the presser foot and continue sewing. This will help you to achieve nice sharp corners with your stitching.
Once you've finished sewing, give your project a good pressing with plenty of steam and trim away any remaining threads.
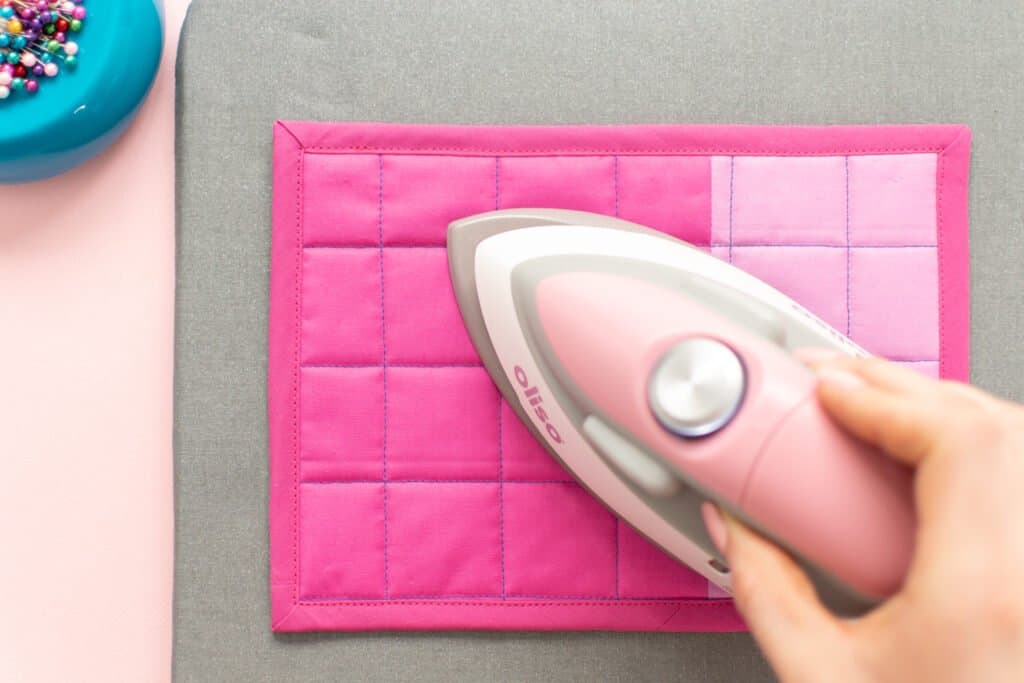
And that's how you can sew beautiful, and surprisingly easy, mitered corners with bias tape!

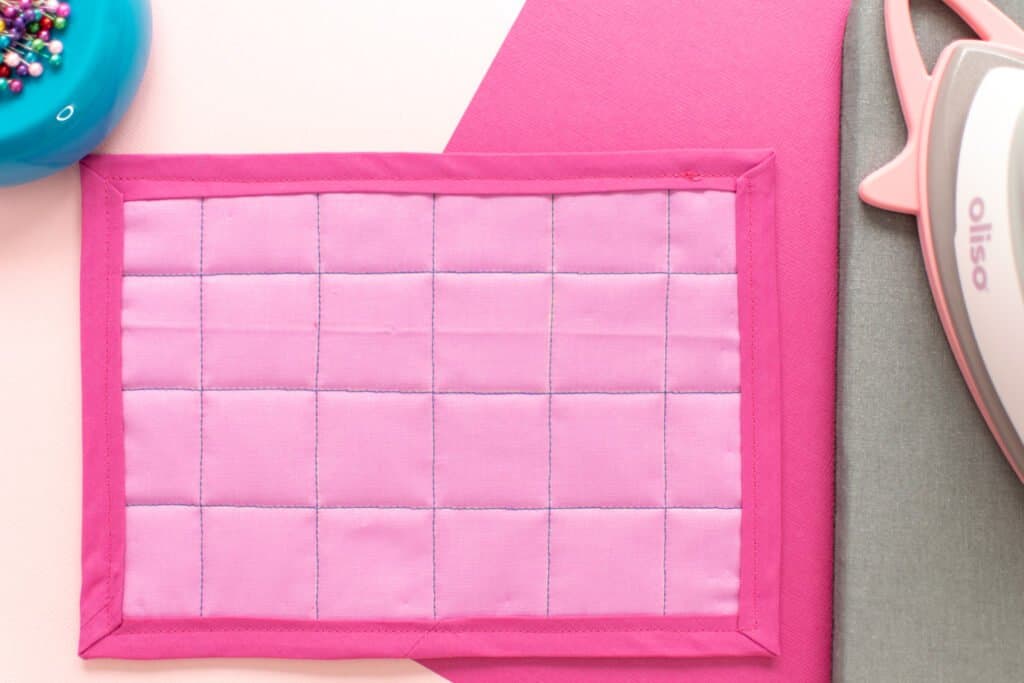
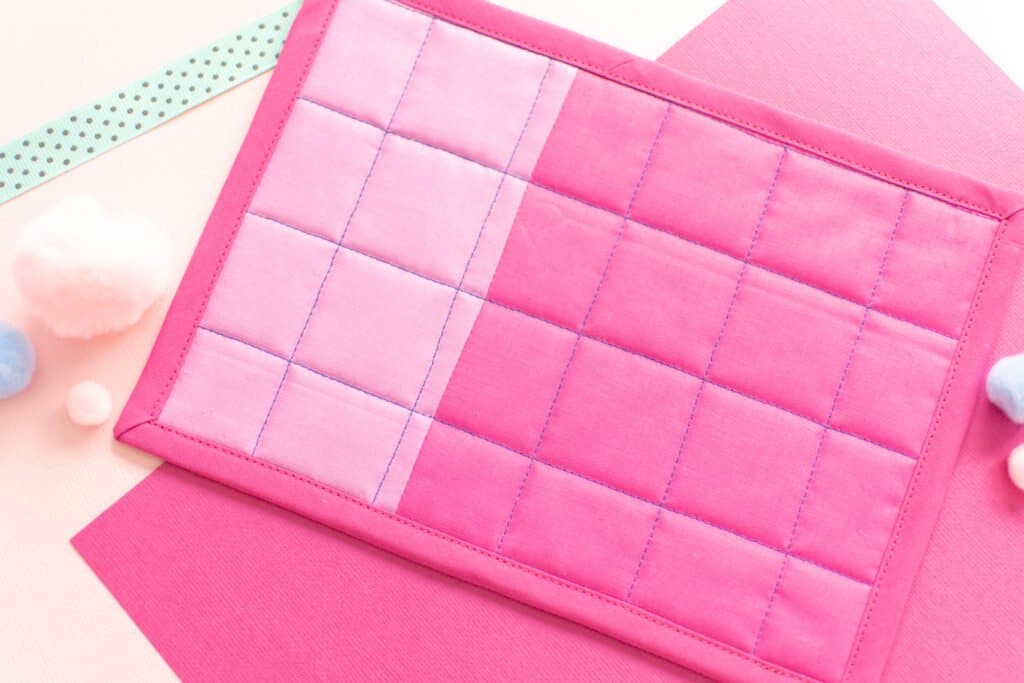
The project I sewed for this tutorial is a variation on my mug rug pattern - if you want to try this pattern for yourself, you can find it here.
I hope you're feeling confident and ready to tackle mitered corners with bias tape! If you have any questions, don't hesitate to leave your question in the comments section below so I can help you out!
How did your mitered corners turn out? Post a picture to Instagram with the hashtag #sweetredpoppy - I would love to see your project!

Looking for a fun sewing community? Don't forget to join my Facebook group where you can show us what you're making, ask questions, and learn from others!
Don’t want to forget about this tutorial? Save this post for later! Click here to save this project on Pinterest.

Leave a Reply