Make Bath Time Better With a Handmade Hair Towel Wrap Using This FREE Hair Wrap Pattern And Step-By-Step Tutorial.
If you're anything like me, wrapping your wet hair in a giant bath towel is a pain! It never stays in place and pulls uncomfortably on your scalp. That's where a hair towel wrap comes in!
This nifty little creation is made to easily wrap and dry your hair without adding too much weight. Also, this hair wrap will stay in place WAY better than a regular towel - even when you're moving around and getting things done while your hair dries.

Plus, it's a fun and quick sewing project! Perfect to relax with your sewing machine for an hour or two on a nice weeknight.
Ready to sew your own towel hair wrap? Grab my free sewing pattern and let's get started!
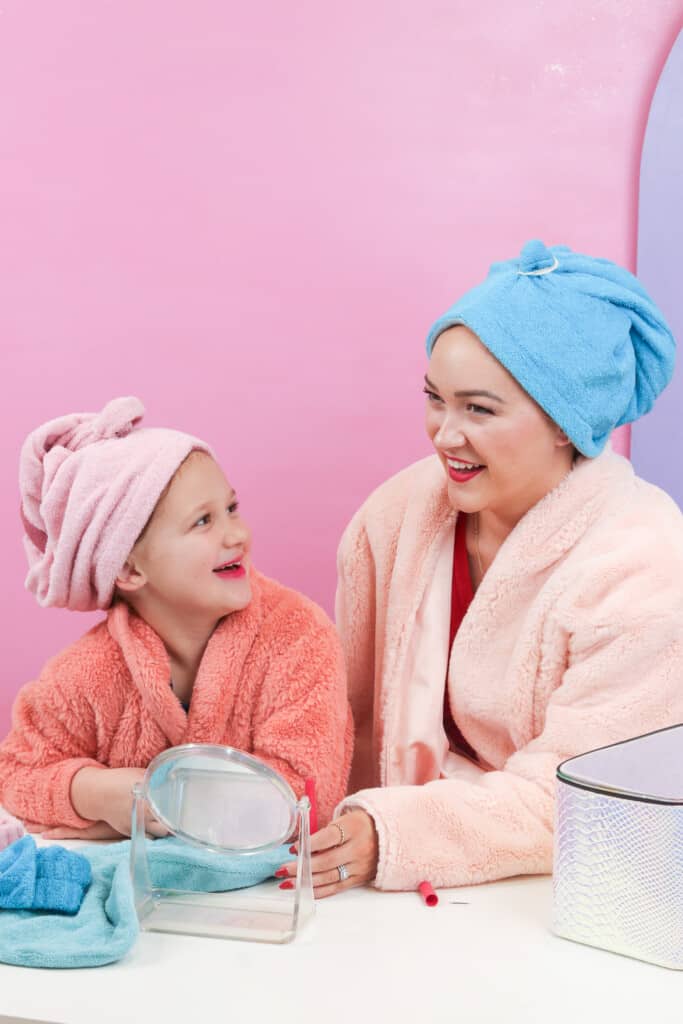
Table of Contents
What is a Hair Towel Wrap?
A hair towel wrap is an oblong, half-oval-shaped towel that has a small loop of elastic on the larger end. It's meant to allow you to easily and securely wrap all your hair on top your head while it's drying.
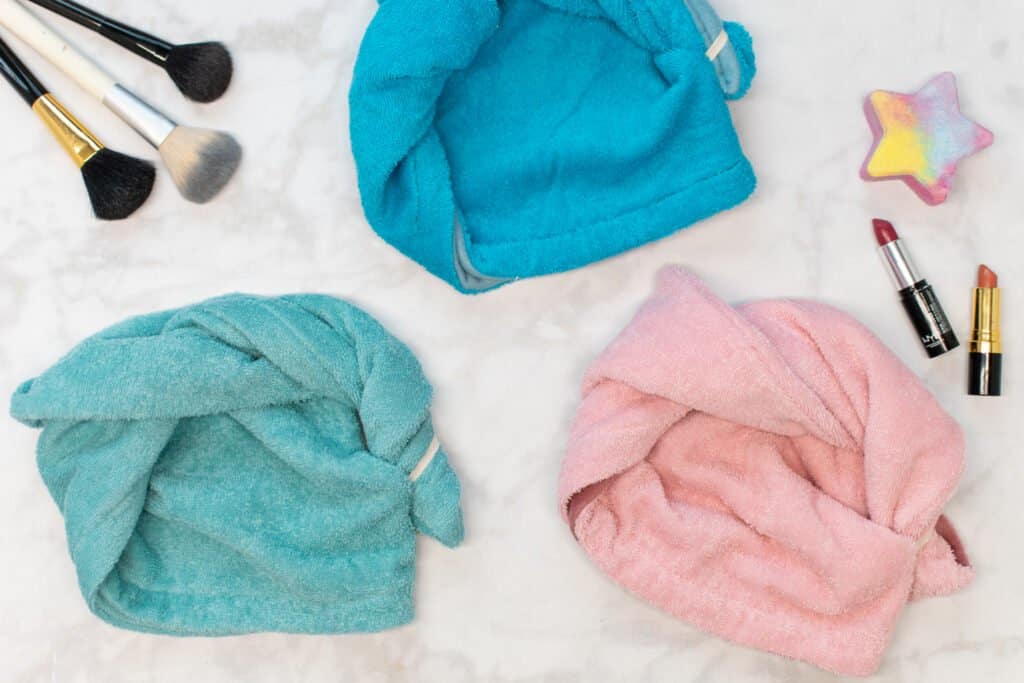
Typically, this type of hair wrap is made from terry cloth fabric - the same material that regular bath towels are made from. This helps you to gently wick moisture from your hair in the wrap, avoiding hair breakage that can occur when you rub your hair dry with a towel.
How to Use a Bath Towel Hair Wrap
If you've never used a hair towel wrap before, you may not know exactly how to wrap your hair into it and secure the wrap in place. Thankfully, it's a pretty simple process.
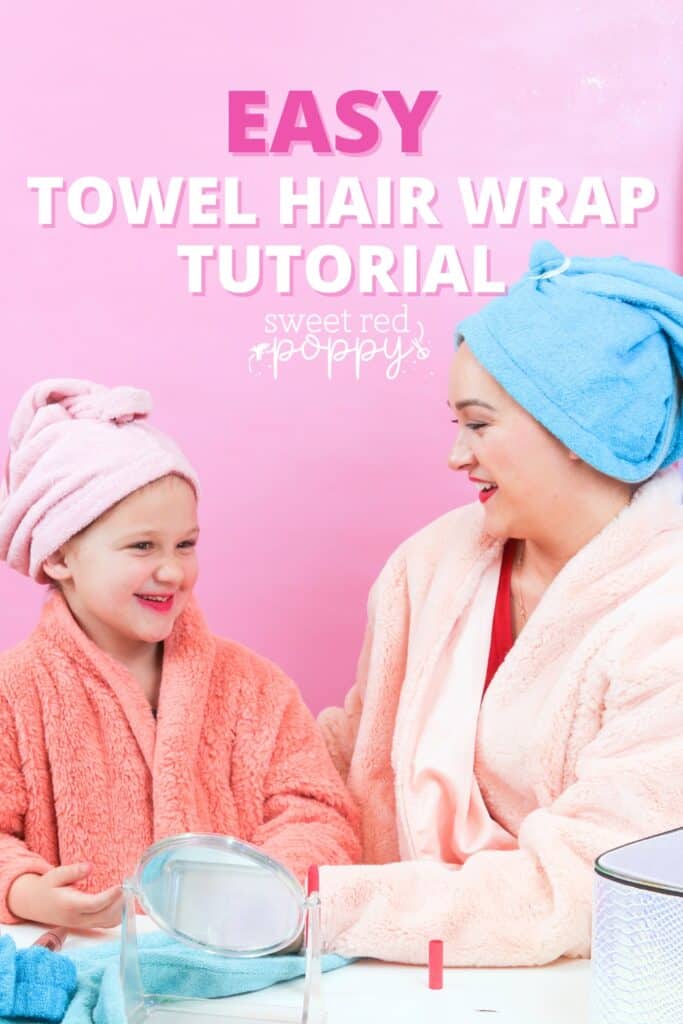
First, stand with your head down and your hair hanging towards the ground. Then, place the wider end of the hair wrap over the back of your head. Twirl the narrower end of the wrap, twirling your hair up into the fabric as you do. Finally, pull the wrapped narrower end up over the back of your head and tuck the end of it into the loop of elastic to secure it in place. That's it!

Fabric Requirements For the Hair Wrap
The most popular fabric choice for a towel hair wrap is cotton terry cloth fabric. This is the exact same material that most bath towels are made from. It has little thread loops on both sides that give the fabric a plush feel and help it to absorb moisture.
However, there are other types of fabrics you can use for your hair wrap if you don't like regular terry fabric. Microfiber terry is a great option if you like using microfiber towels. Cotton jersey, the fabric most often used to make t-shirts, is a good choice if you find that terry cloth is too rough on your hair.
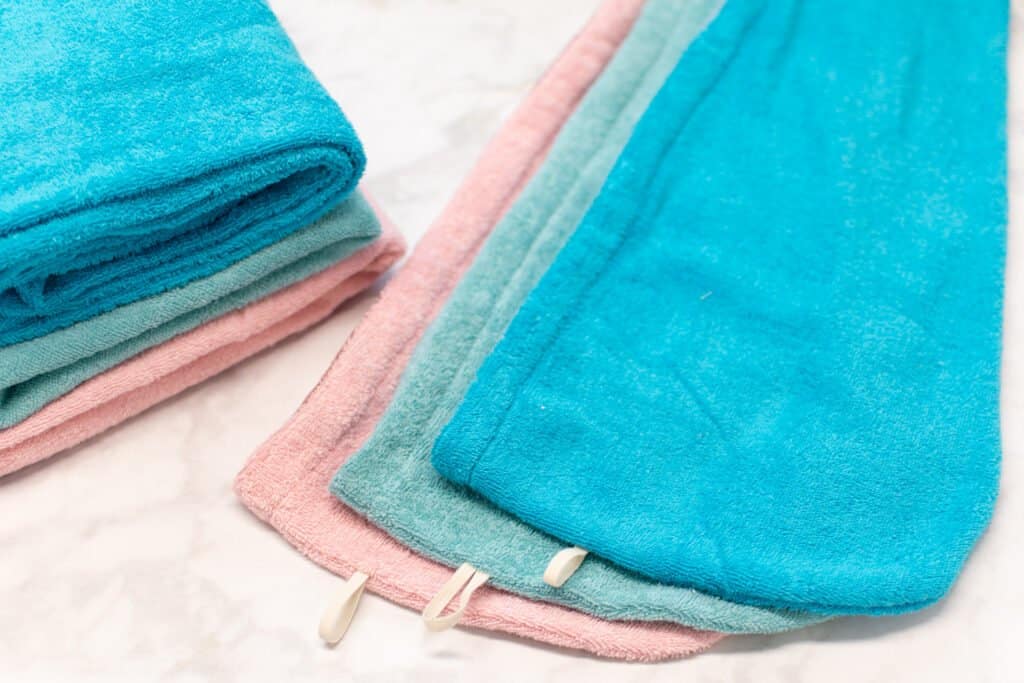
This hair wrap utilizes a strip of bias tape to finish the open edge of the wrap. I recommend using a soft fleece fabric with at least 25% stretch. This will give your hair wrap a cozy finish that's soft against your skin.
However, if you don't want to use fleece, you can use premade, non-stretch single fold bias tape from the store. Or make your own bias tape from a non-stretch fabric in your stash!
Supplies to Make a Hair Towel Wrap
- 1/2 Yard of Terry Cloth Fabric
- 1/4 Yard of Fleece Fabric or Bias Tape
- 1/4 Yard of 1/4" Elastic
- Matching Thread
- Scissors
- Rotary Cutter
- Cutting Mat
- Pins
- Iron
- Ironing Board
- Fabric Pen or Tailor's Chalk
- Sewing Machine
- Sewing Machine Needle
- Serger (Optional)
- Printer
- Printing Paper
- Tape
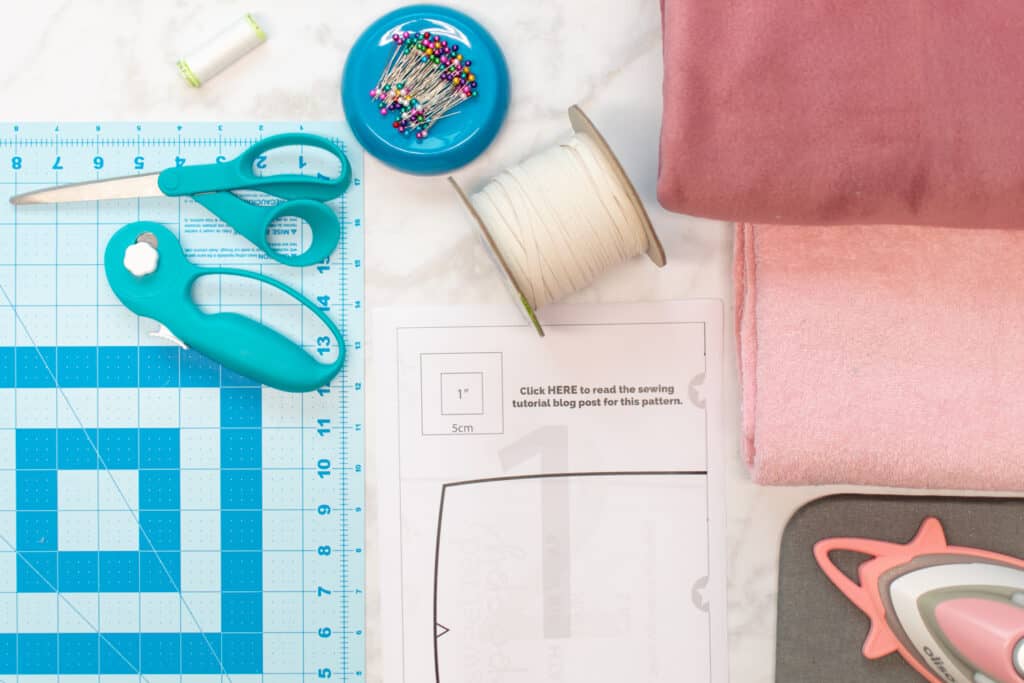
Click Here to Download the FREE Towel Hair Wrap Sewing Pattern

Step 1: Download and Cut Out the Pattern
First, download the FREE Hair Wrap pattern to your computer. Open the pattern in your PDF reader - I highly recommend using Adobe Acrobat.
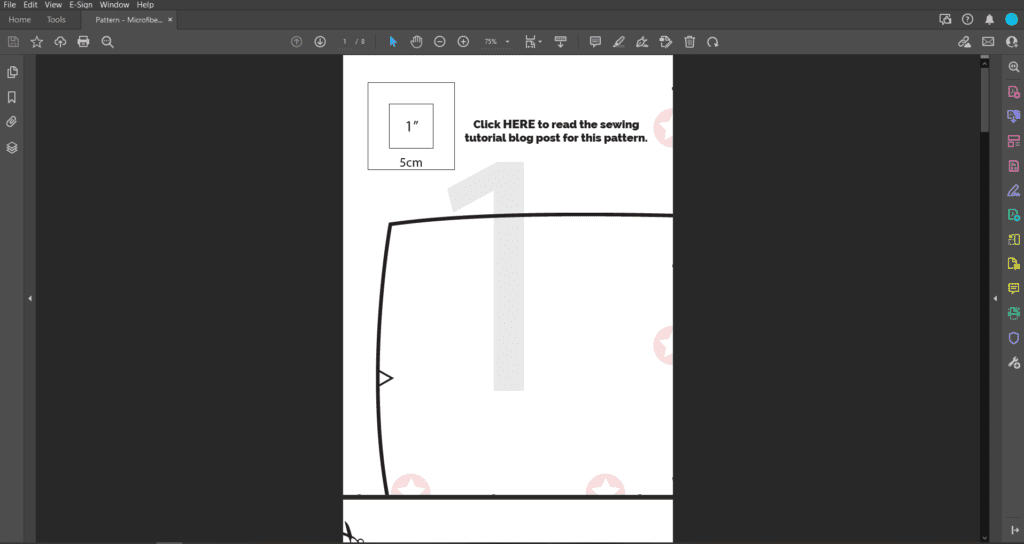
Make sure not to print the pattern directly from your browser. This can cause the pattern scaling and border lines to print incorrectly.
Once you've opened the pattern PDF, click on "Print". This will open a dialog box with print setting options. Set the scaling to "Actual Size" or "Custom Scaling: 100%".
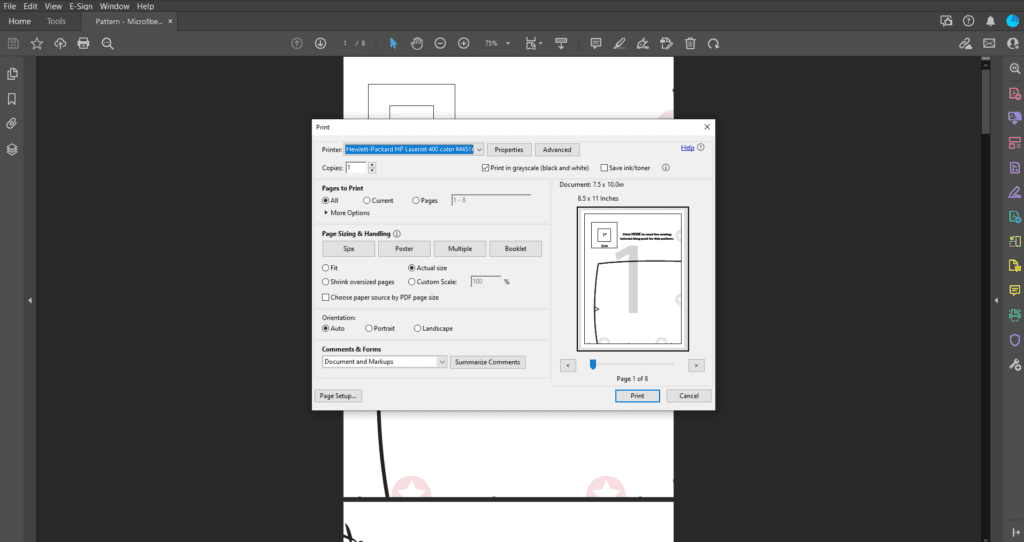
Then, print the first page of the pattern. This page contains a 1" x 1" test square. Measure the test square with a tape measure or seam gauge.
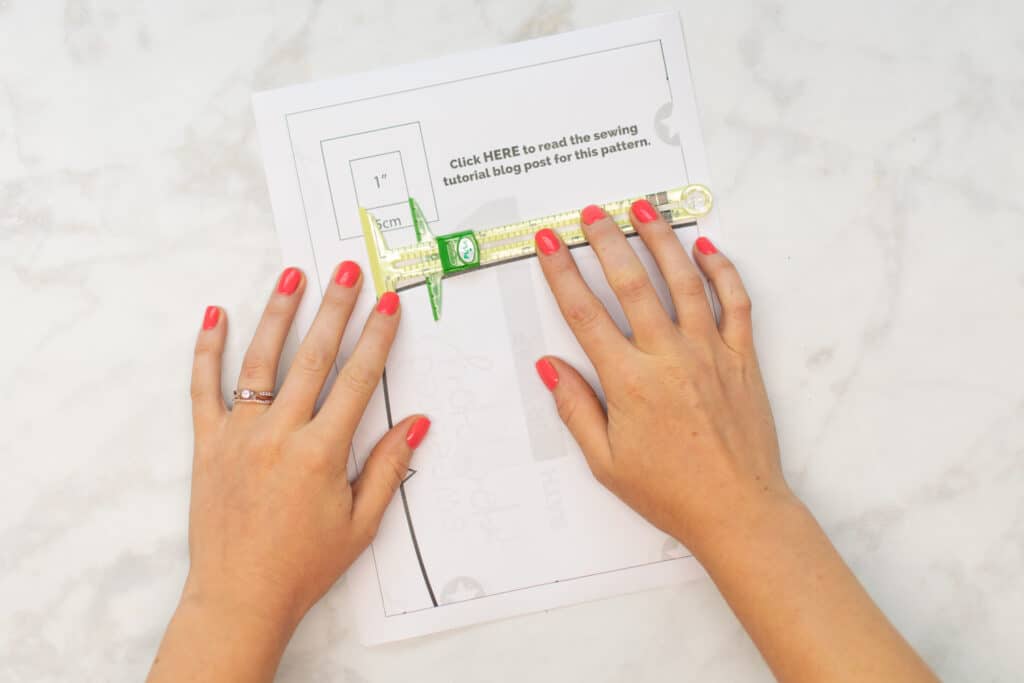
If the test square measures 1" x 1", go ahead and print the remaining pages of the pattern. However, if the test square does not measure 1" x 1", you'll need to check your print settings and reprint.
*PRO TIP: Try printing your pattern on cardstock so that it will hold up to multiple uses without tearing.
Once printed, assemble the pattern by lining up the stars and lines of the pattern and taping the pages together. There are large numbers at the center of each paper to help you keep the pages in order.
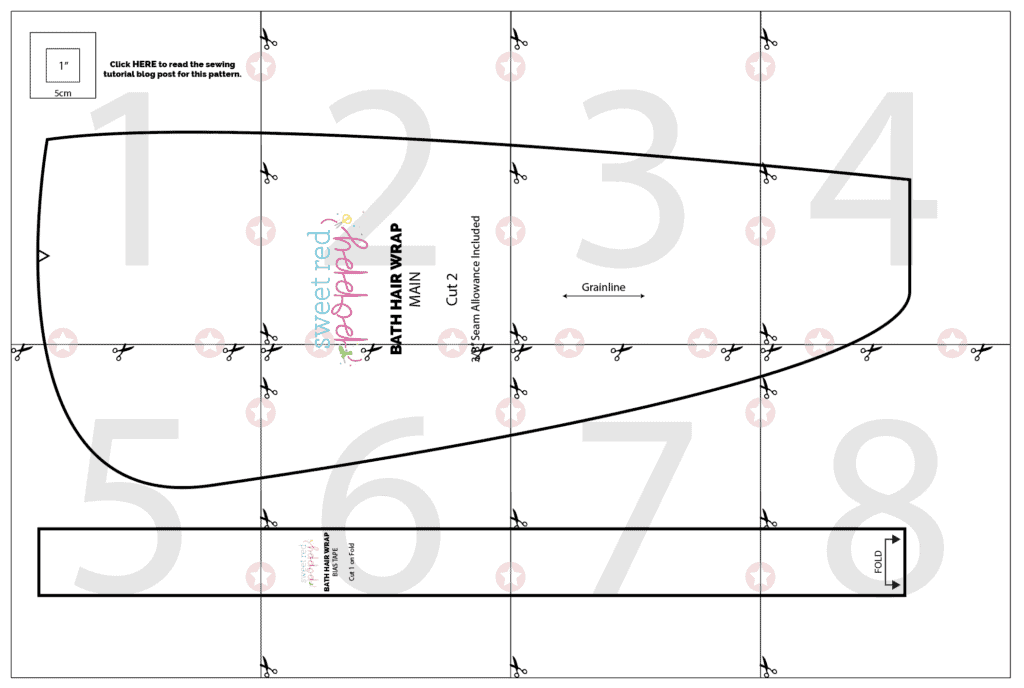
You can trim away the excess paper along the sides before taping the pages together or simply overlap the paper margins. If you decide to overlap the edges, holding the pages up to a light can help you see through the paper and align the pattern lines correctly.
Finally, cut out both pattern pieces with your paper scissors. You should have 2 pattern pieces: "Main" and "Bias Tape".
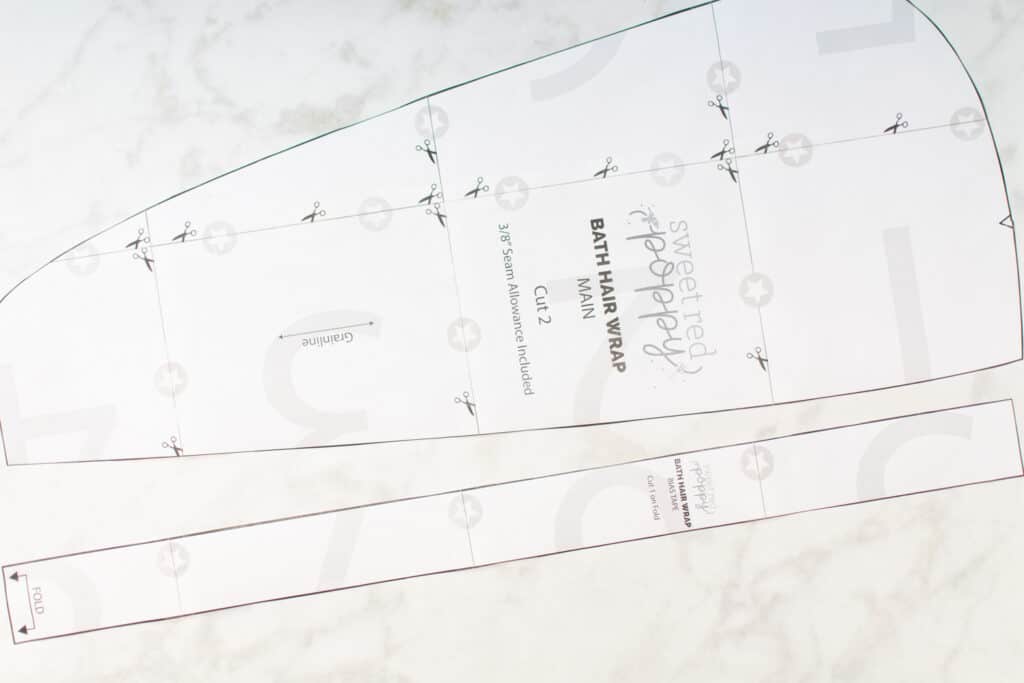
Step 2: Cut Out Your Hair Towel Wrap and Transfer Notches
With your pattern prepared, it's time to cut into that beautiful fabric!
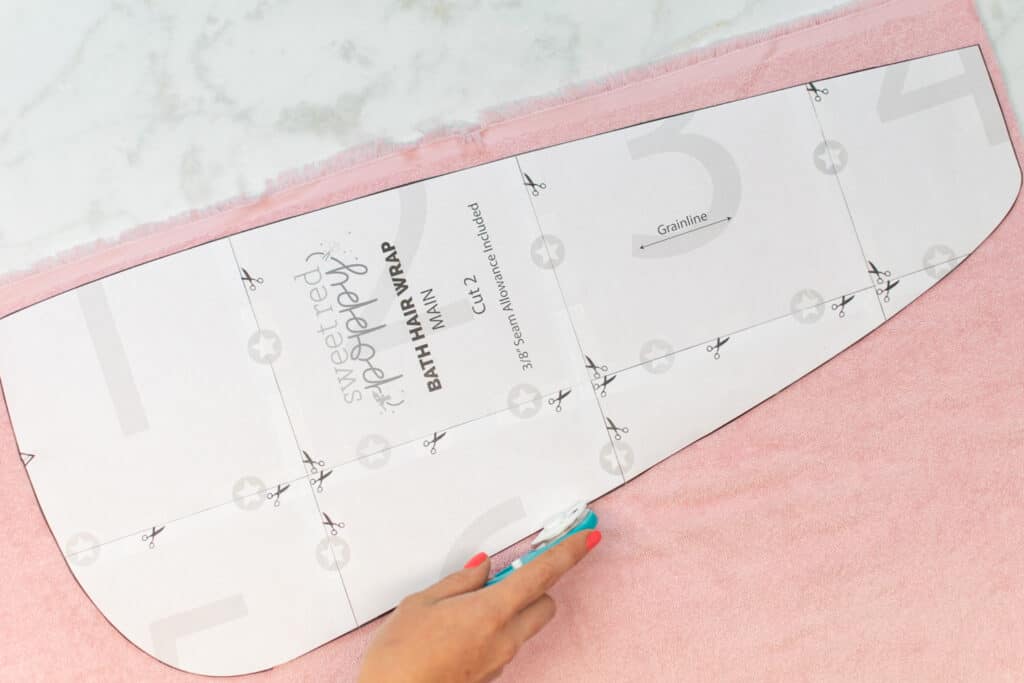
Cut out the following number of pieces from your 1/4" elastic, terry cloth, and fleece fabrics. If you will be using single fold bias tape instead of fleece, set aside the "Bias Tape" pattern piece and simply cut a length of bias tape to 52".
Terry Cloth Fabric
- Main: Cut 2 (Mirror Image)
Fleece Fabric
- Bias Tape: Cut 1 (On Fold)
1/4" Elastic
- Cut 1 4-Inch Piece
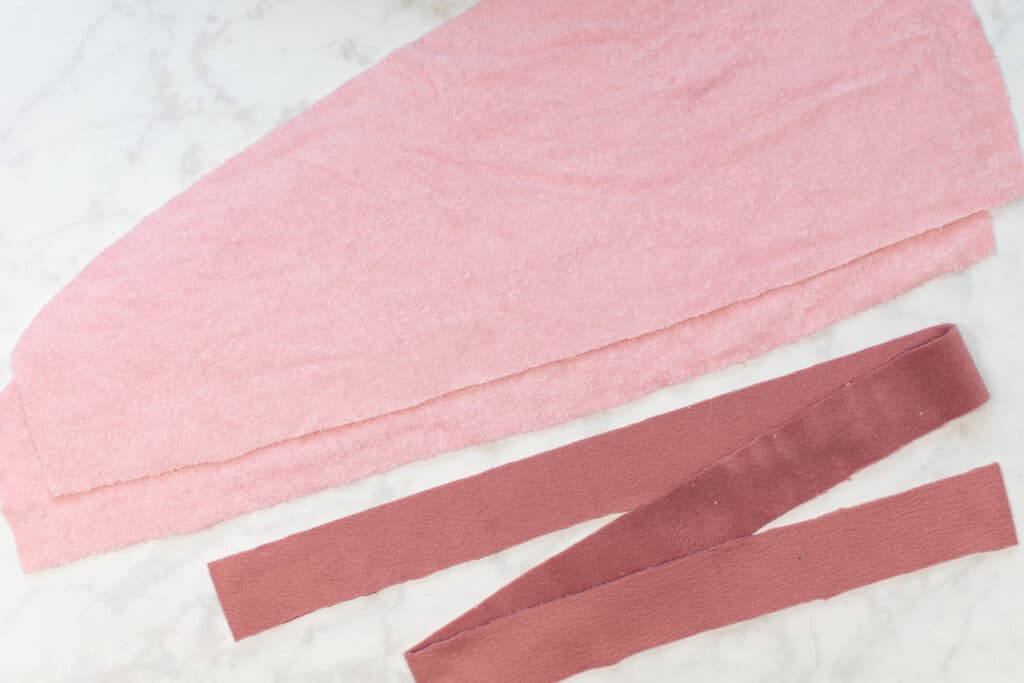
*PRO TIP: When cutting the Bias Tape from your fleece fabric, place the pattern piece so that the direction of greatest stretch (generally the cross-grain) is running longways across the pattern piece. You want your bias tape to stretch lengthwise, not widthwise.
If you are using regular bias tape, you might want to make your own from a fabric in your stash - check out my tutorial on how to make bias tape here.
Once your pieces have been cut, use your scissors to clip 1/4" into the Main pieces at the marked notch on the pattern.
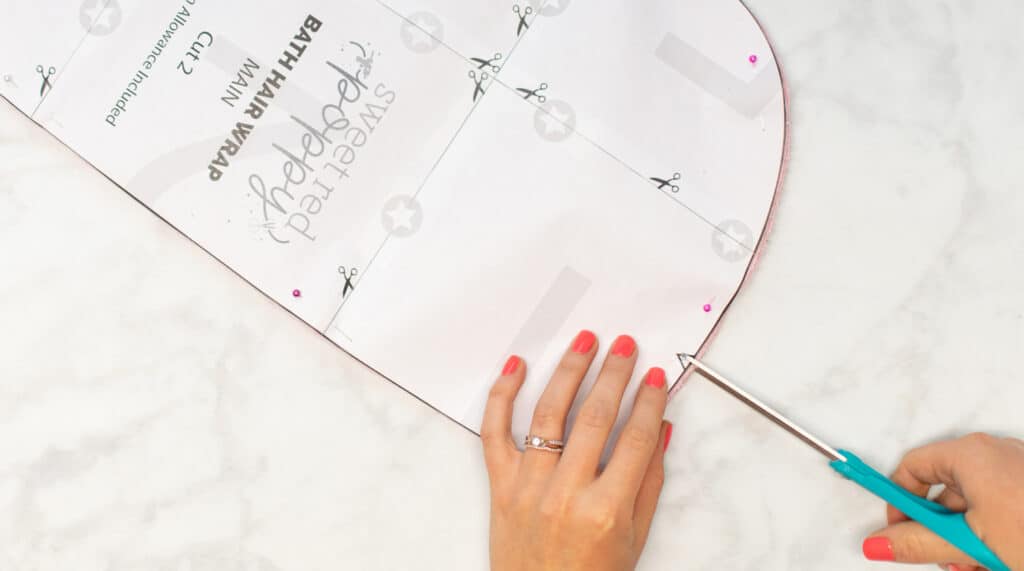
Step 3: Sew the Main Pieces Together
You're now ready to start putting together your fun new hair towel wrap!
Lay one of the Main pieces on your table with the right side facing up. Then, grab your 1/4 inch elastic piece and fold it in half, lining up the ends.
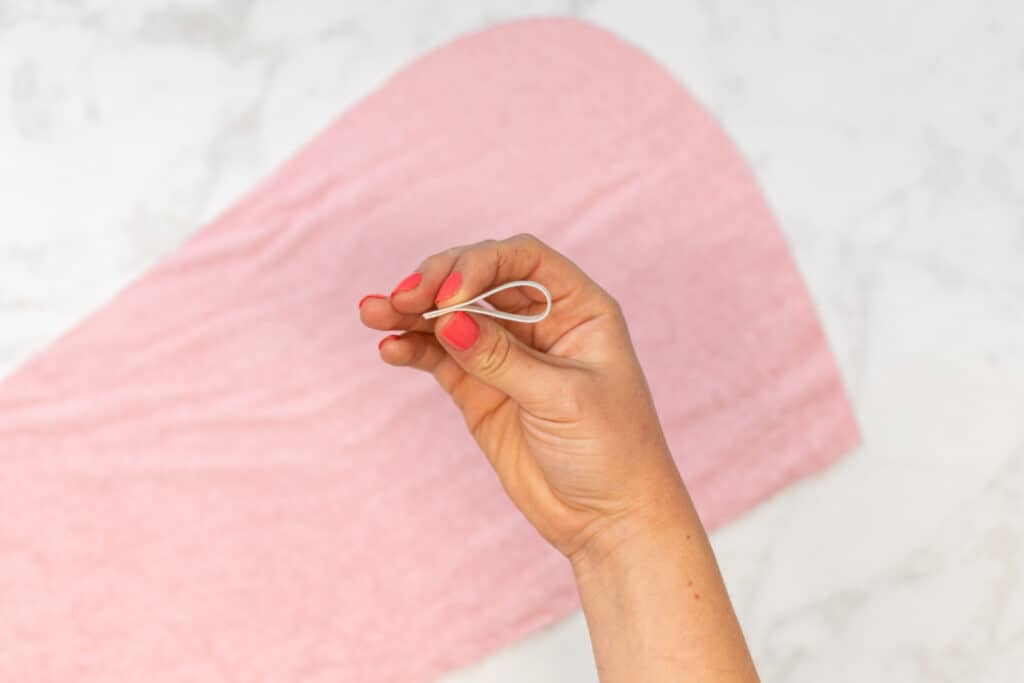
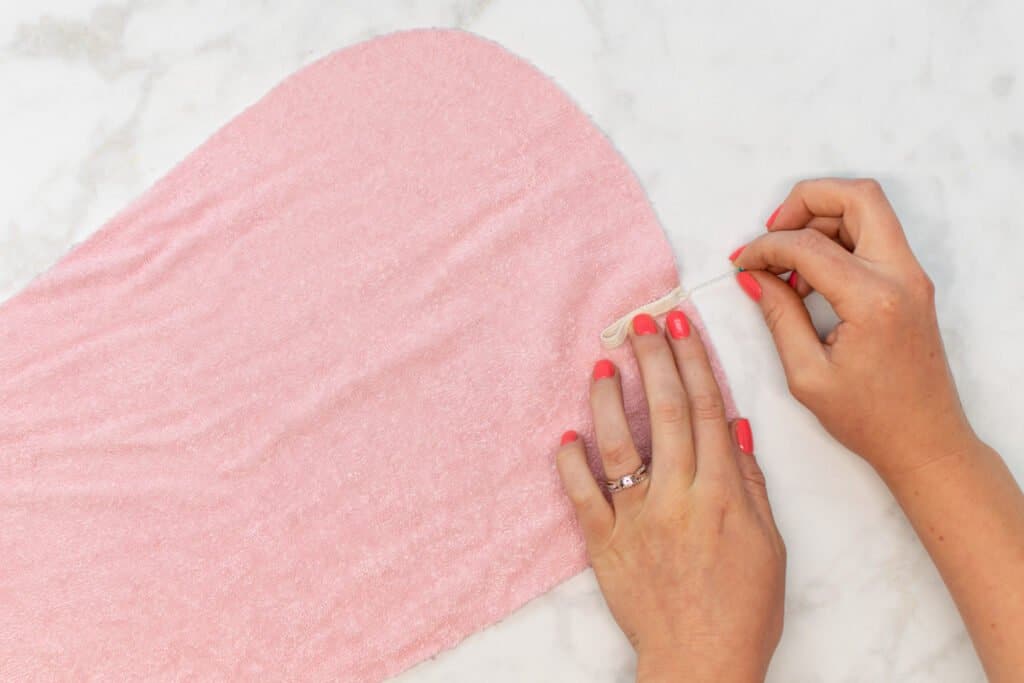
Place the elastic on the notch clipped into the Main piece, aligning the ends with the raw edge of the fabric. Pin the elastic in place.
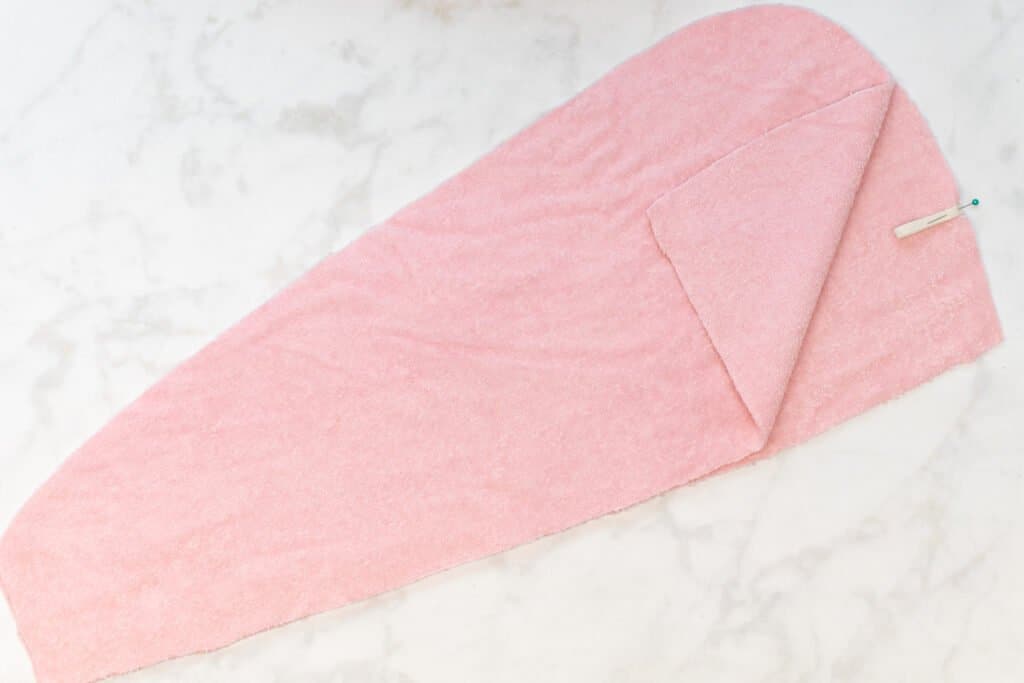
Next, lay your second Main piece on top of the first one with right sides together. This will sandwich the elastic between the 2 Main pieces.
Pin the Main pieces together along the long curved edge.
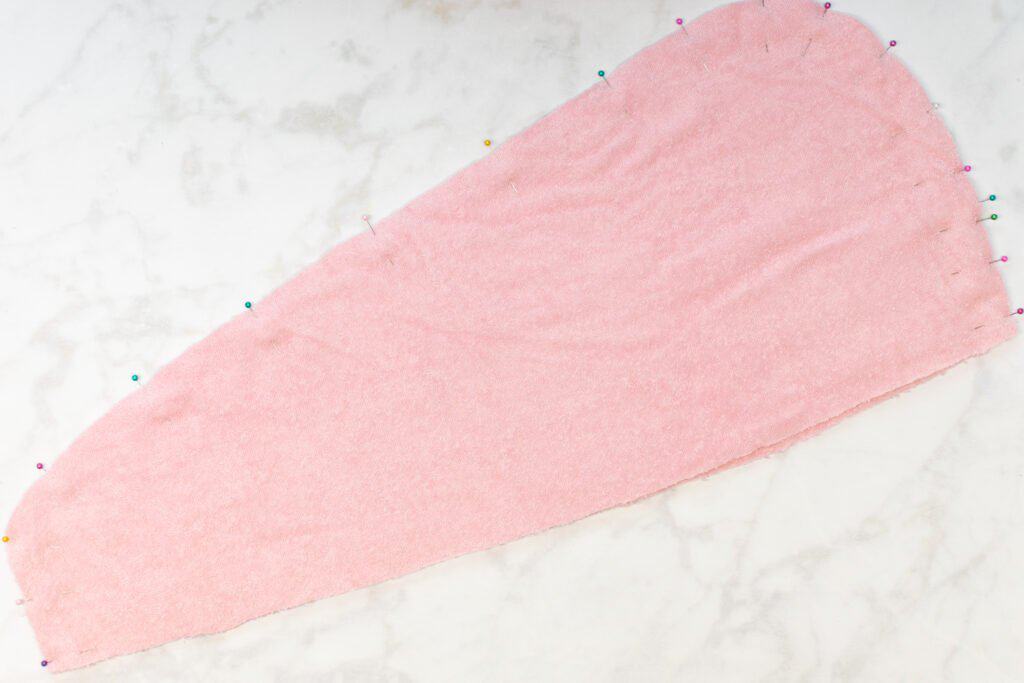
With a 3/8" seam allowance, sew around the curved edge, removing the pins as you go. Once stitched, finish the raw edges together with your serger or a zigzag stitch on your sewing machine.
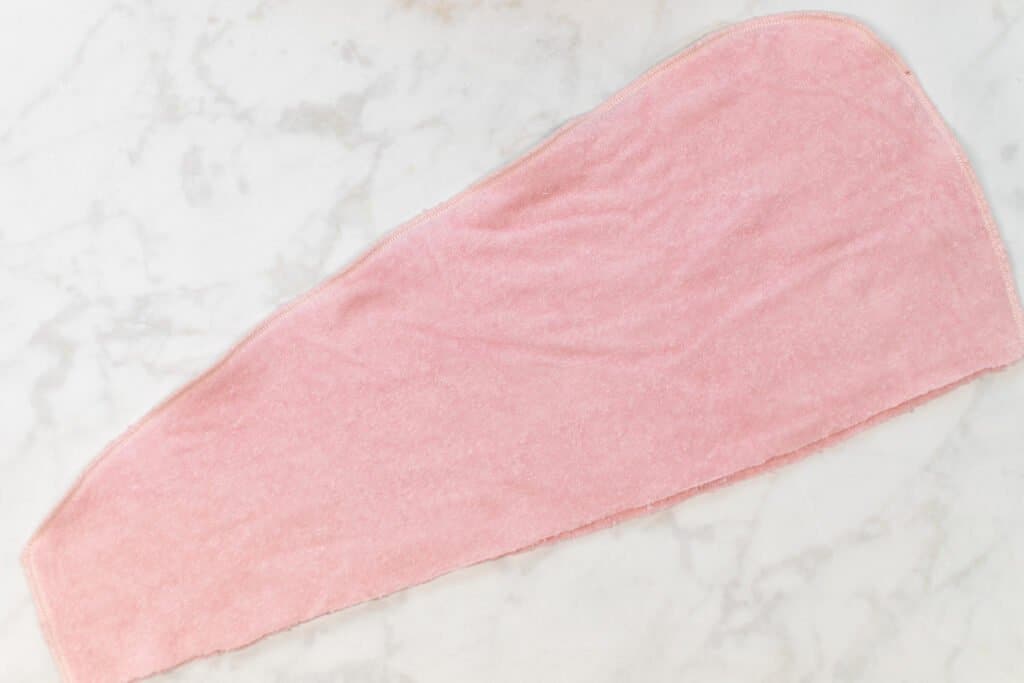
*PRO TIP: I like to use my serger to sew and finish this seam all in one step. Easy and fast!
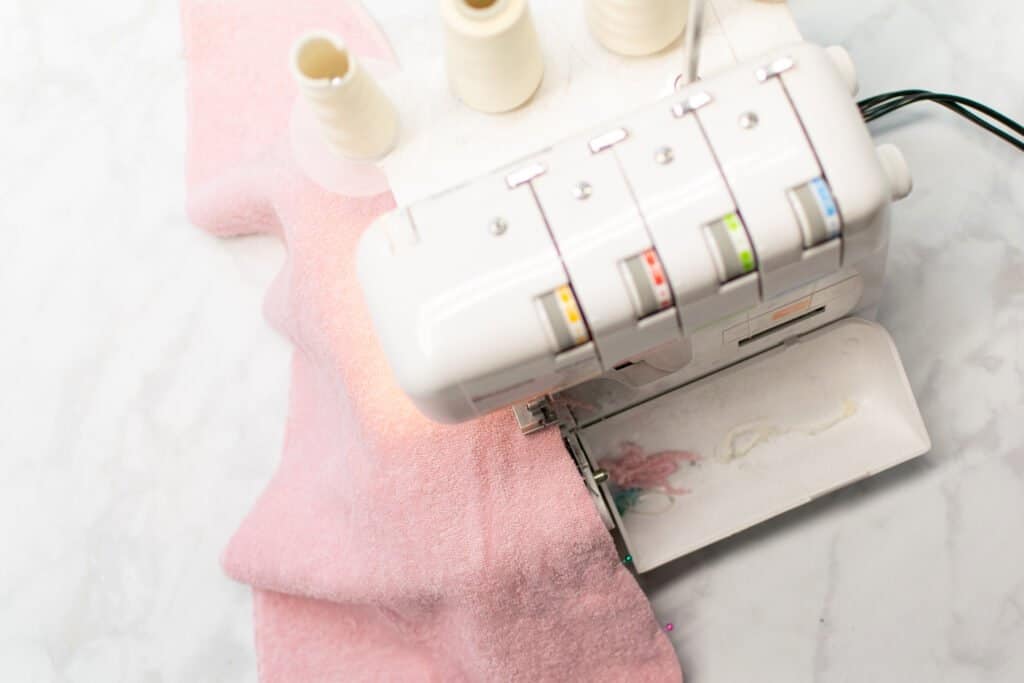
Next, turn the hair wrap right sides out and press it flat. Focus on pressing the seam right to the edge.
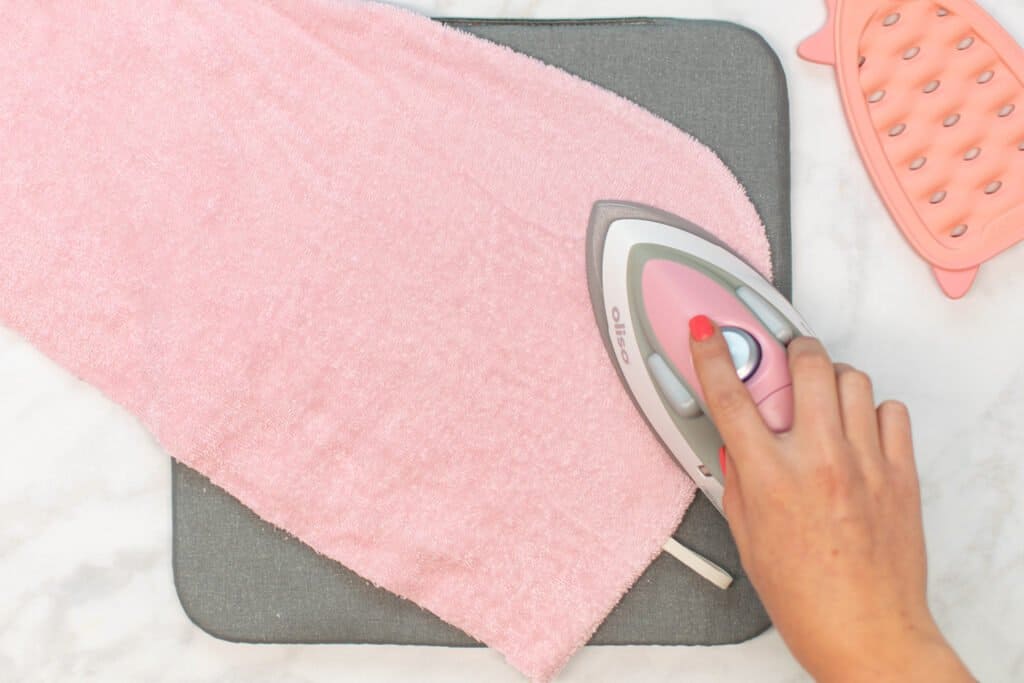
Step 4: Fold Your Bias Tape
We now need to fold and prepare the fleece Bias Tape piece. If you're using premade, already folded bias tape, just skip ahead to Step 5!
Fold the long edges of the bias tape to the wrong side so that they meet in the middle. Press well.
Note that fleece doesn't press very flat and crisp - and that's OK! As long as you can visibly see the creases in your bias tape well enough to use them as a stitching guide, you're good to go.
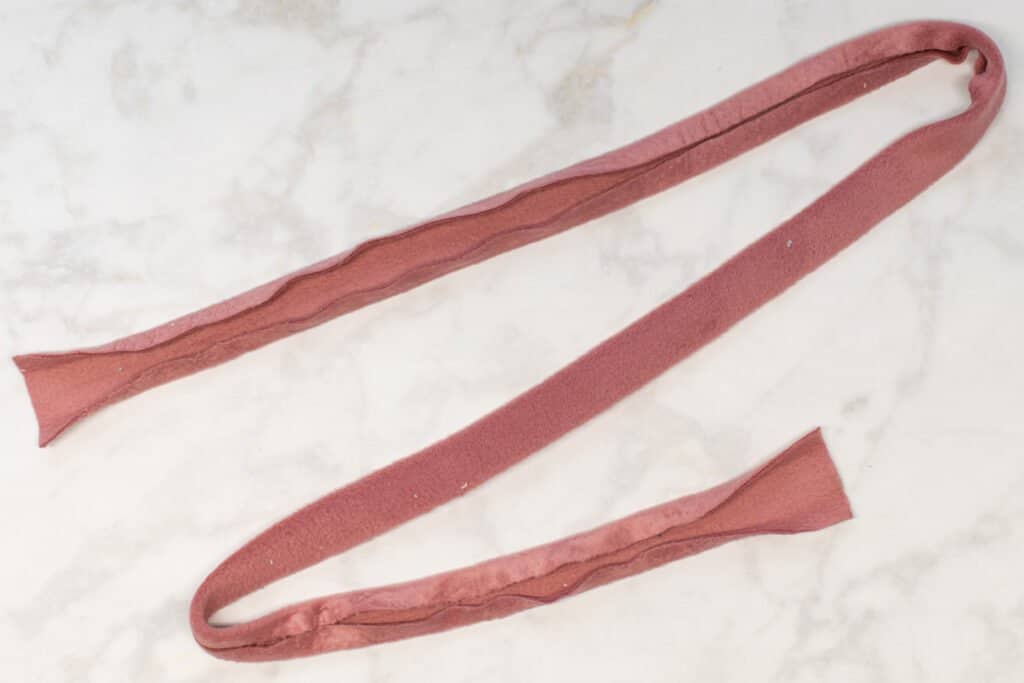
*PRO TIP: Follow the instructions below for my favorite easy way to fold and press single fold bias tape. No accidentally steaming your fingertips as you press with this method!
Start by folding a section of your bias tape near one end so that the edges meet at the center of the wrong side.
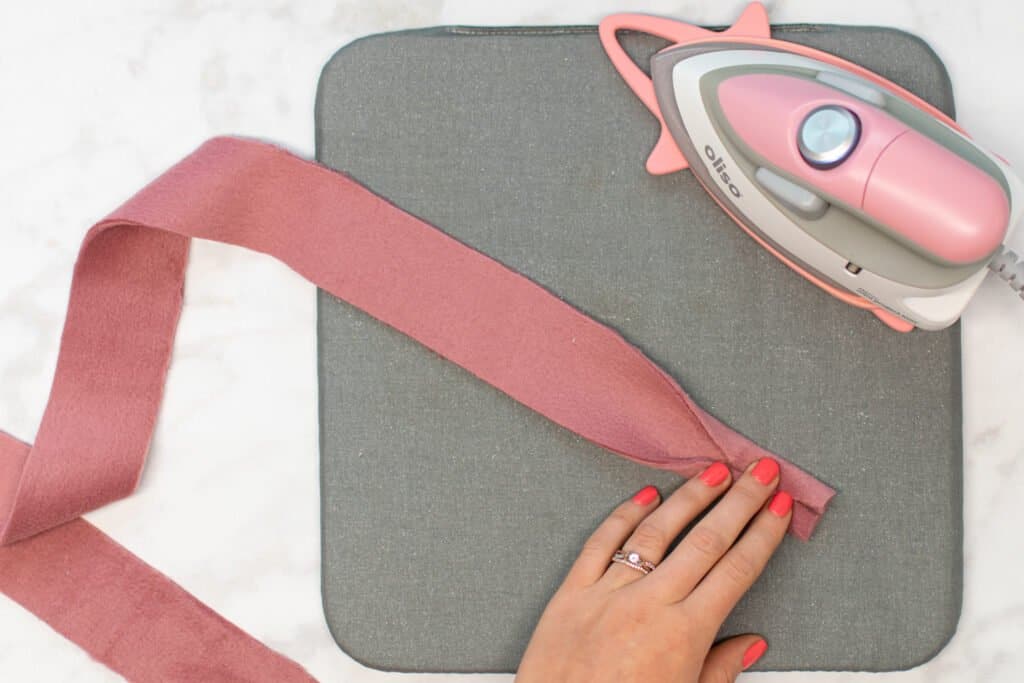
Insert a pin through your ironing board cover right next to the upper edge of your bias tape. Take the pin up and over your tape and insert the other end of the pin into the ironing board cover next to the lower edge of the bias tape.
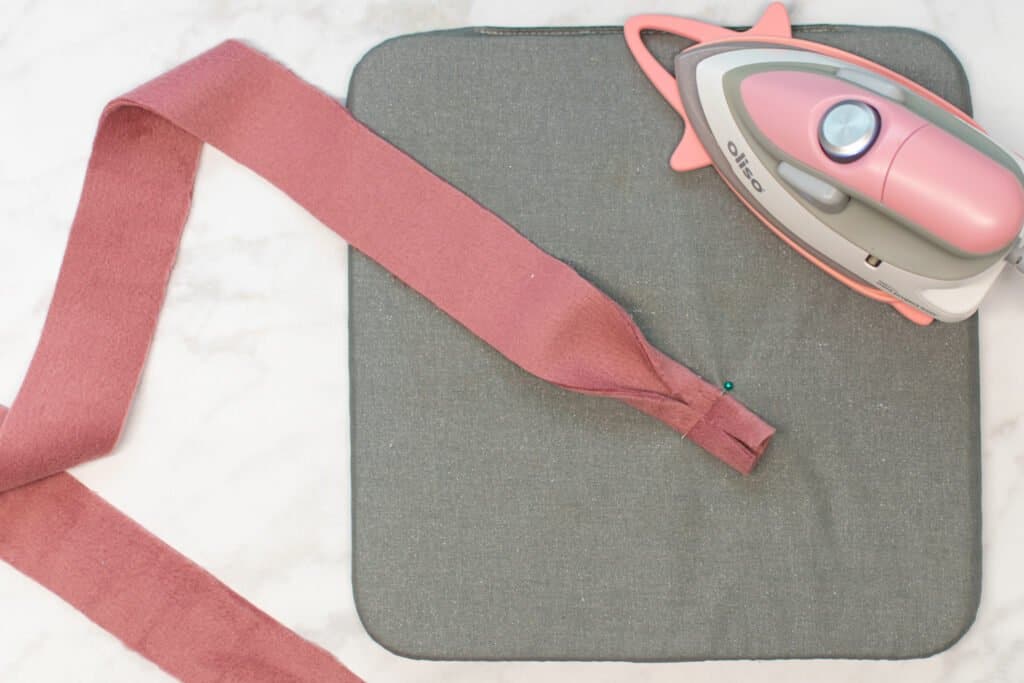
This will create a perfectly sized notch for the bias tape to pass under as you fold and press. Repeat this process with another pin about 2 inches further toward the center of the bias tape.
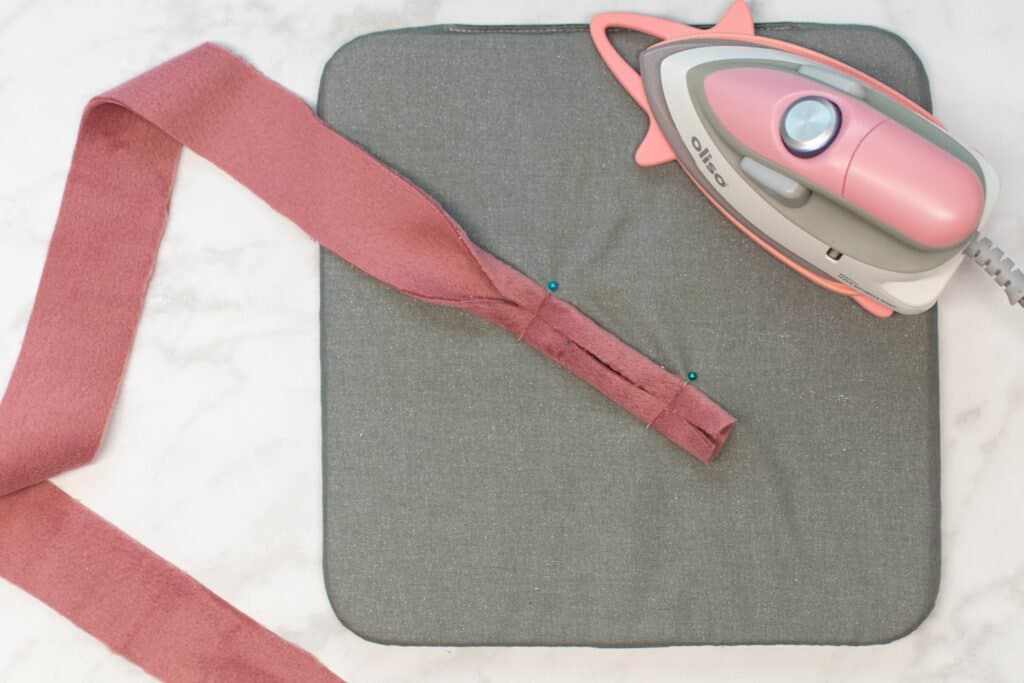
Next, gently pull the bias tape through the pins and press it flat with your iron right as it emerges from the outermost pin. The pin guides will create the folds in the fabric as you pull the tape through, and your iron will lock it all in place.
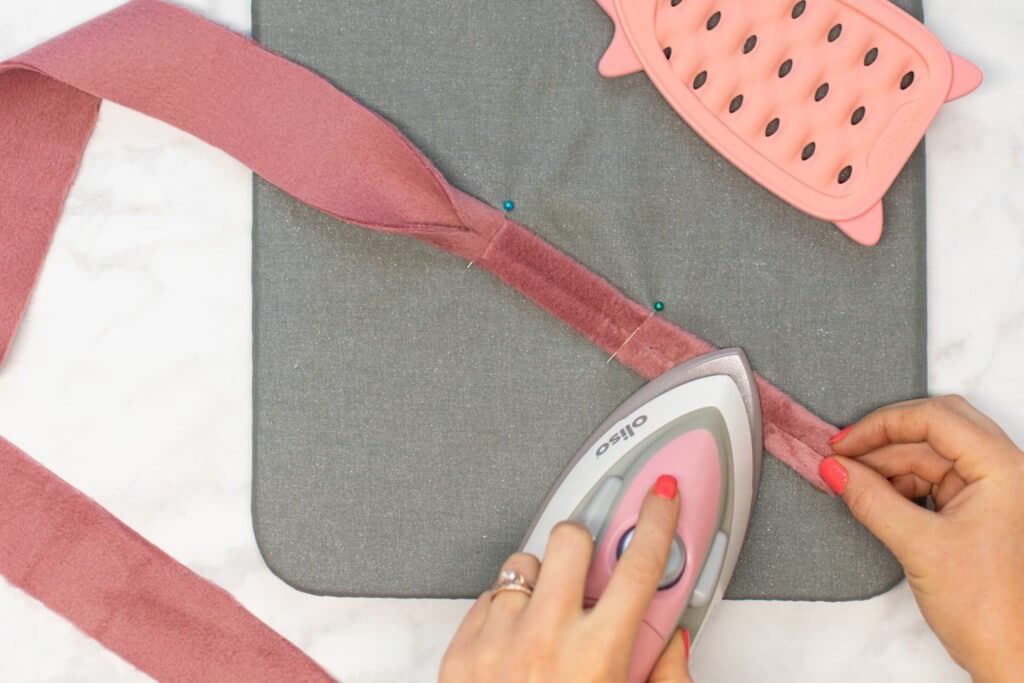
Step 5: Pin the Bias Tape
With your bias tape prepared, grab the hair wrap. It's time to finish the raw edge!
Unfold one side of the bias tape and line up the raw edge of the tape with the raw edge of your hair wrap with right sides together. Begin pinning the bias tape to the hair wrap.
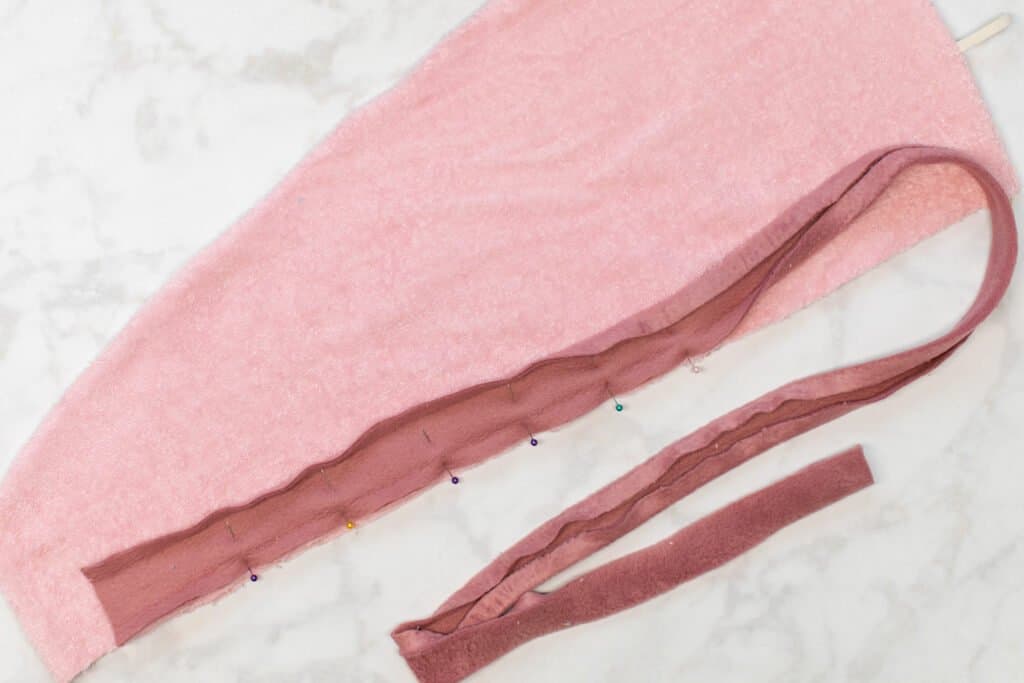
Continue pinning the bias tape to the edge of the hair wrap all the way around. Stop pinning approximately 3 inches before reaching your first pin.
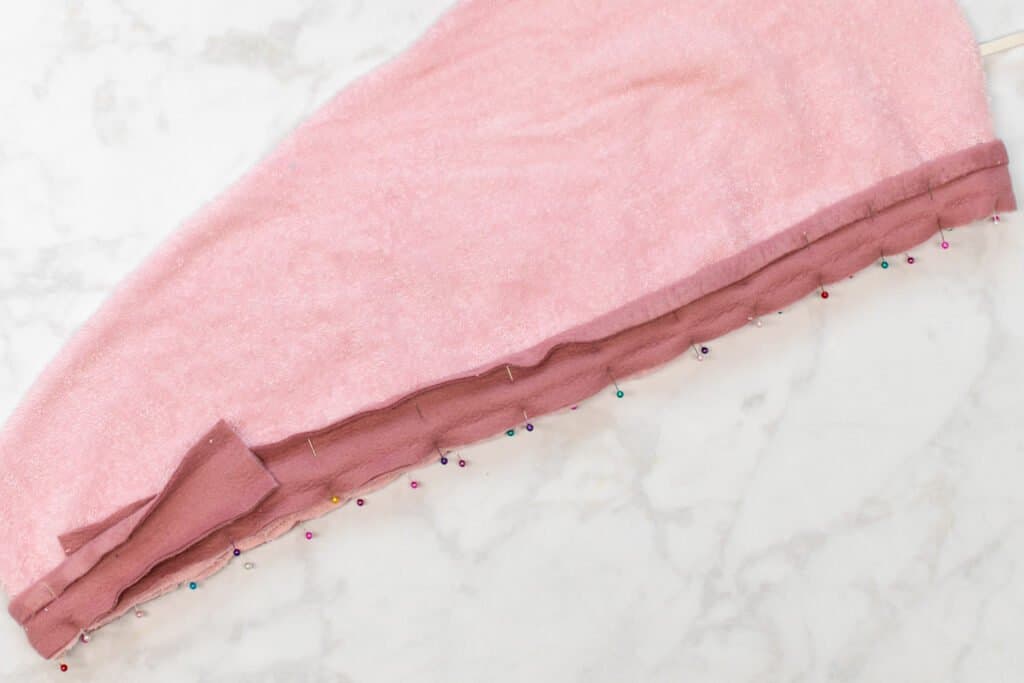
Step 6: Join the Bias Tape Ends
Overlap the ends of the bias tape along the 3-inch section between your first and last pins. Mark both bias tape tails with tailor's chalk at an overlapping point near the center of the gap between these pins.
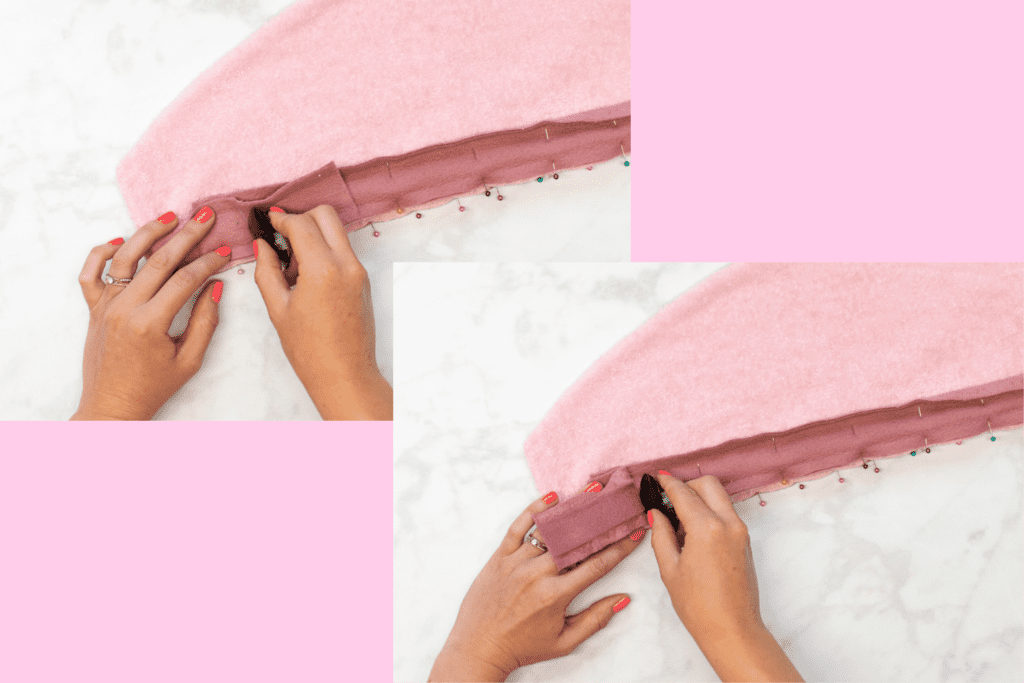
Place the marked bias tape tails right sides together, carefully matching up the markings on each tail. Pin the bias tape tails together.
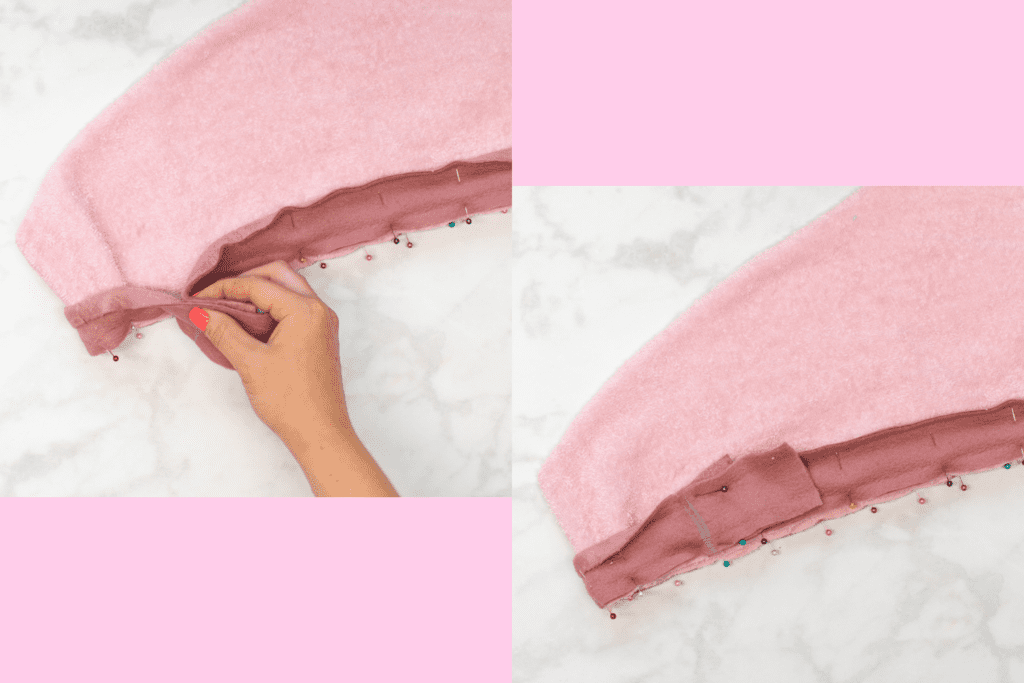
Pulling the fabric of your hair wrap out of the way, stitch the two ends of the bias tape together, sewing straight across them at the marking.
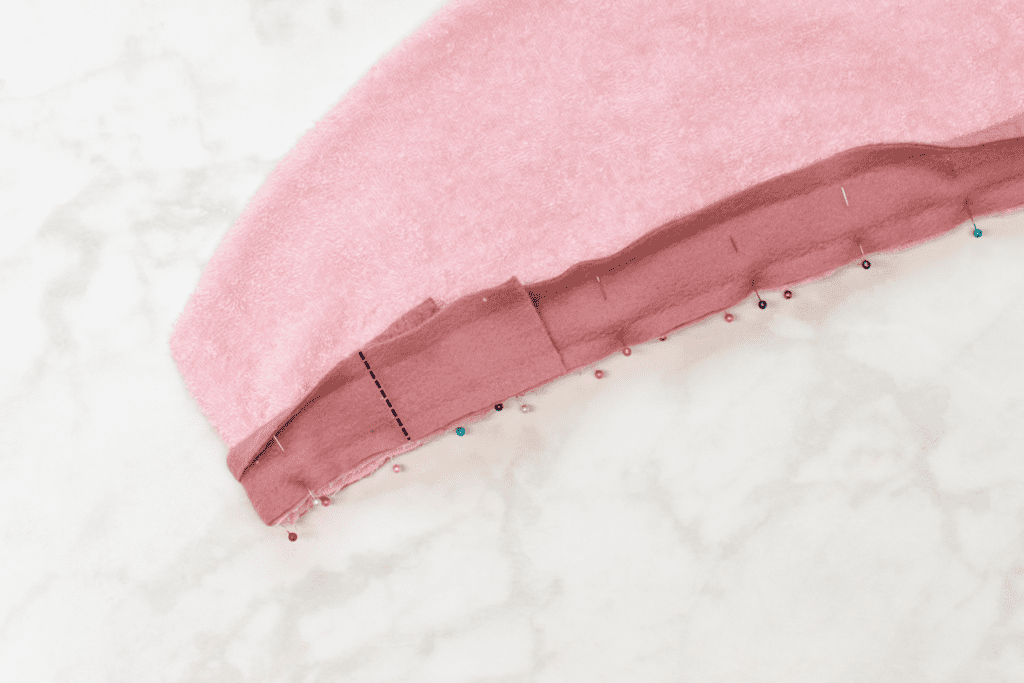
*PRO TIP: Before moving on to the next step, double-check that your seamed bias tape fits perfectly in the unpinned gap along the edge of your hair wrap. If it doesn't fit, you'll need to unpick the seam and resew it.
Next, trim the seam allowance down to ¼" and press the seam allowance open.
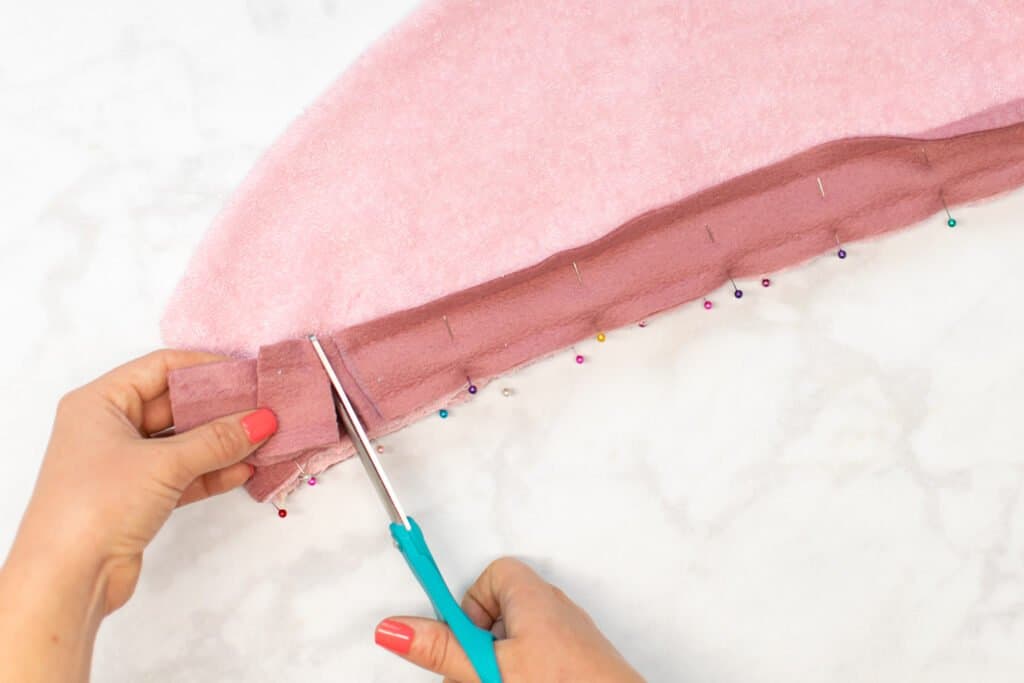
Finish pinning the bias tape to the hair wrap edge near the seam in the bias tape.
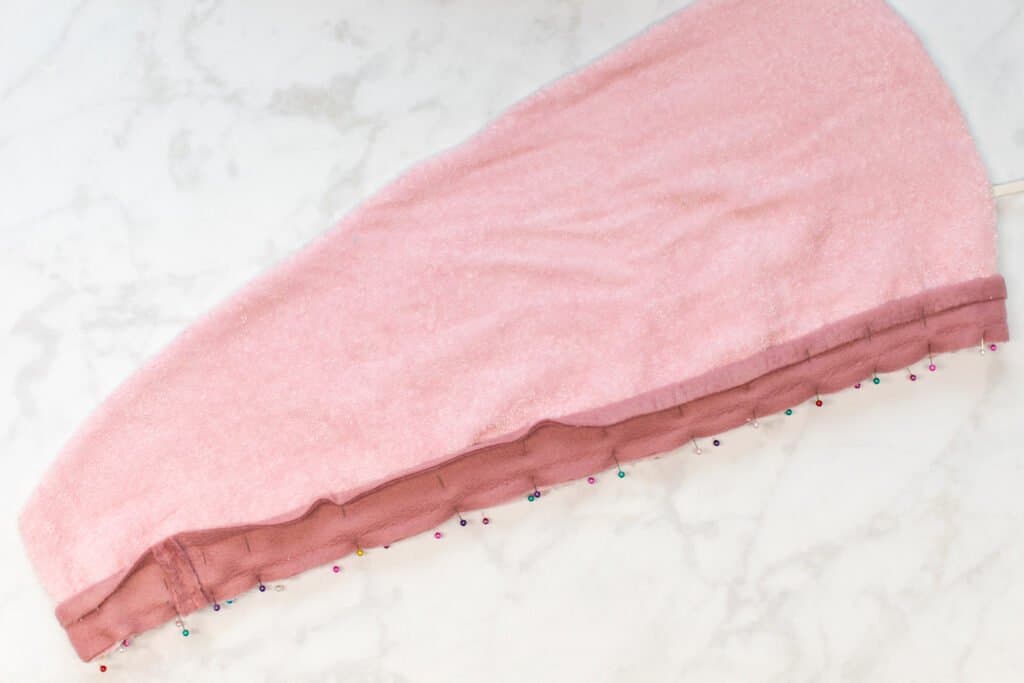
Step 7: Stitch the Bias Tape and Finish the Hair Wrap
Next, sew the bias tape to your hair wrap, sewing inside of the first crease of the bias tape all the way around.
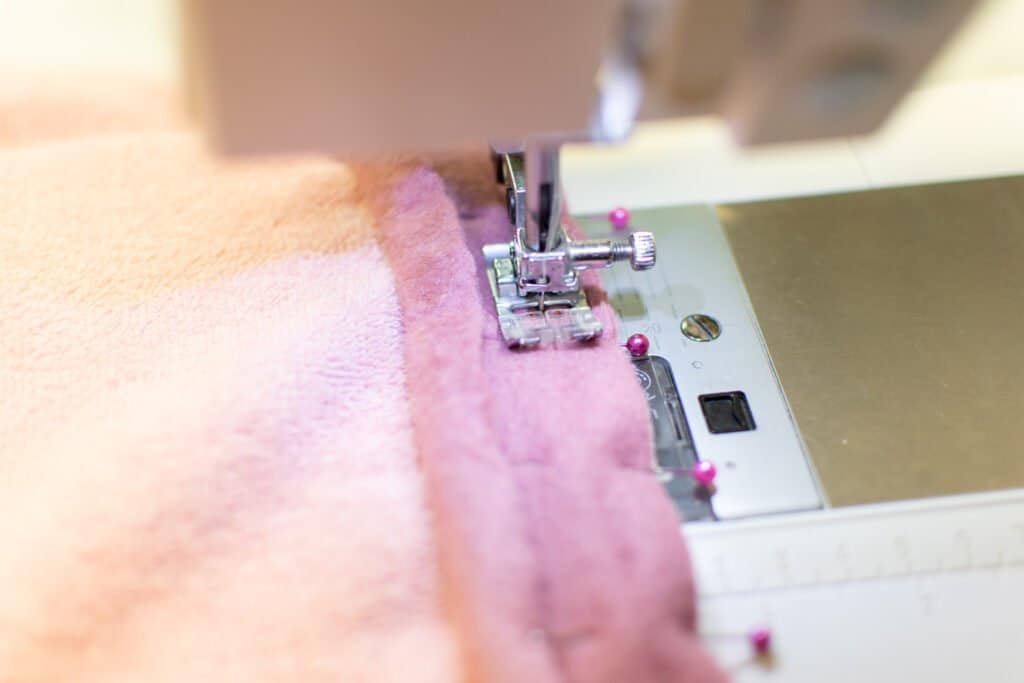
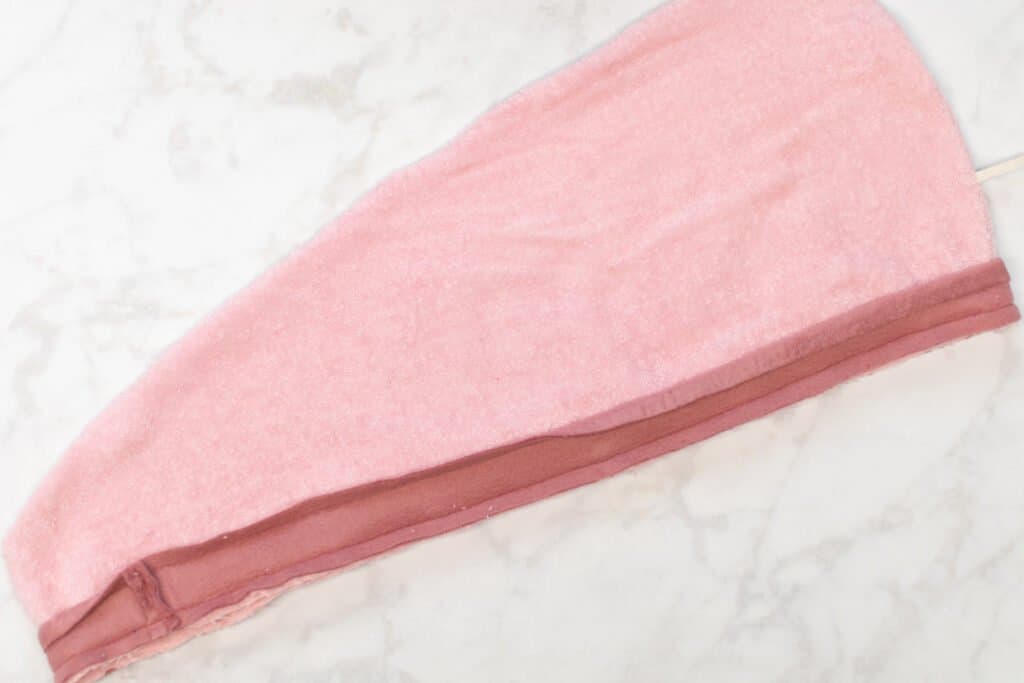
Grade the seam allowance by trimming down the seam allowance of the hair wrap only (not the bias tape), by half. This will reduce bulk and help the finished edge to lay flatter.
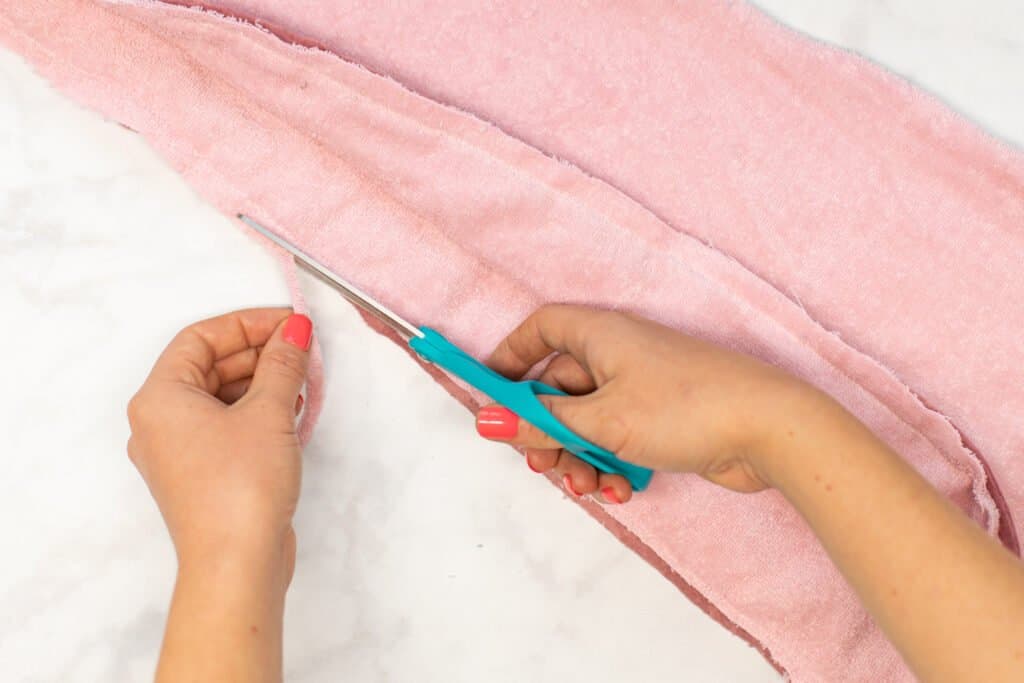
Press the bias tape up away from the fabric, pressing the seam allowances towards the bias tape.
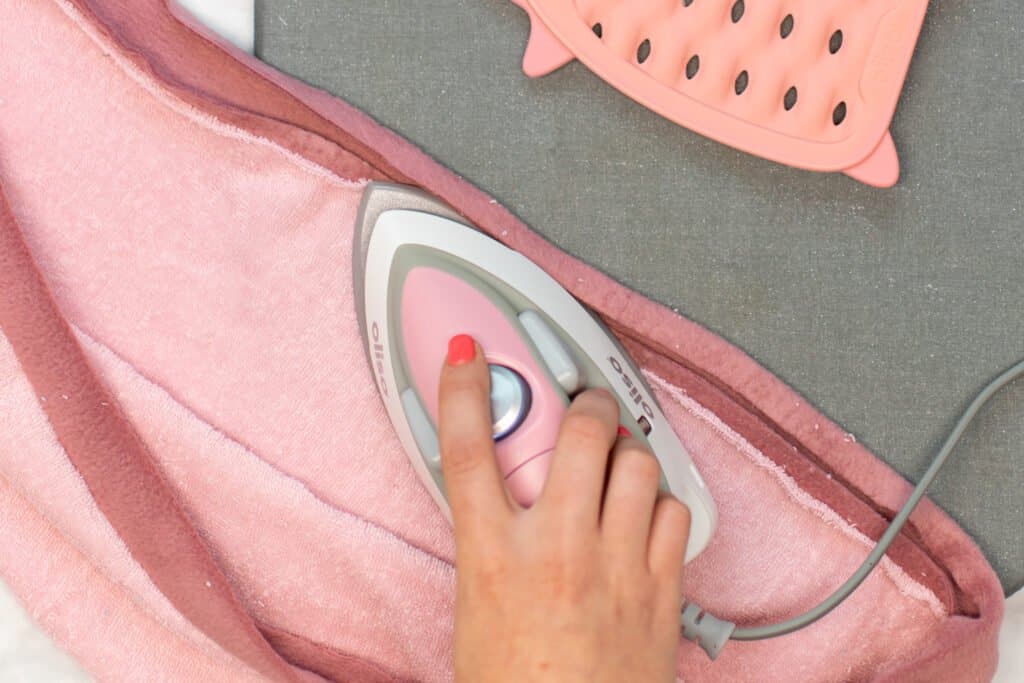
Then, fold the bias tape up and over the edge of the fabric, folding it all the way to the wrong side of your hair wrap.
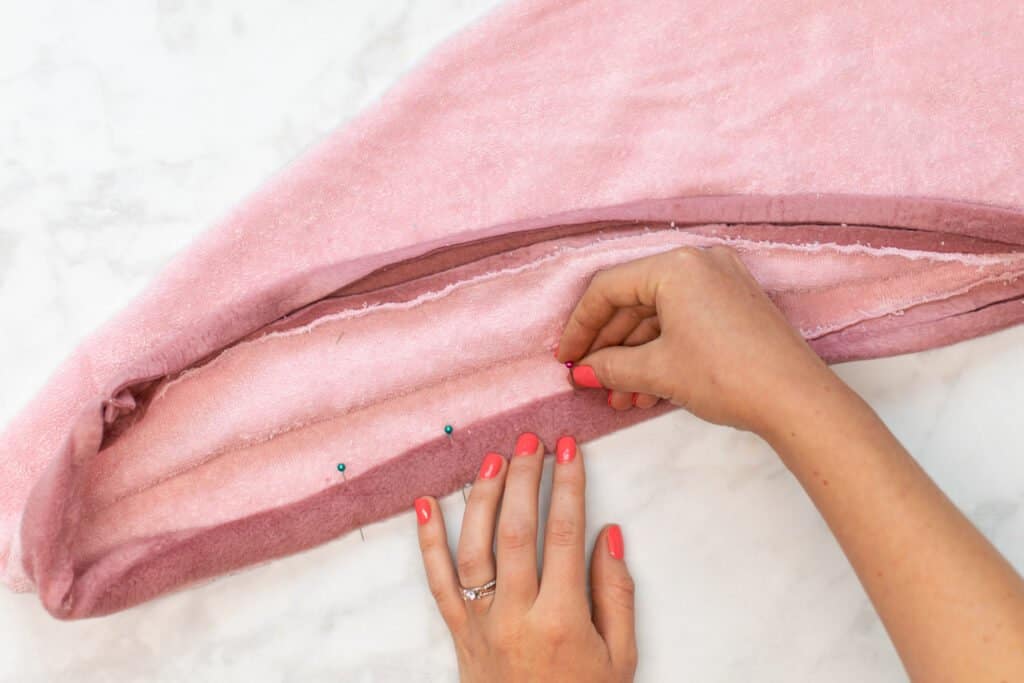
Press and pin the tape in place so that it is laying nice and flat and is not visible from the right side.
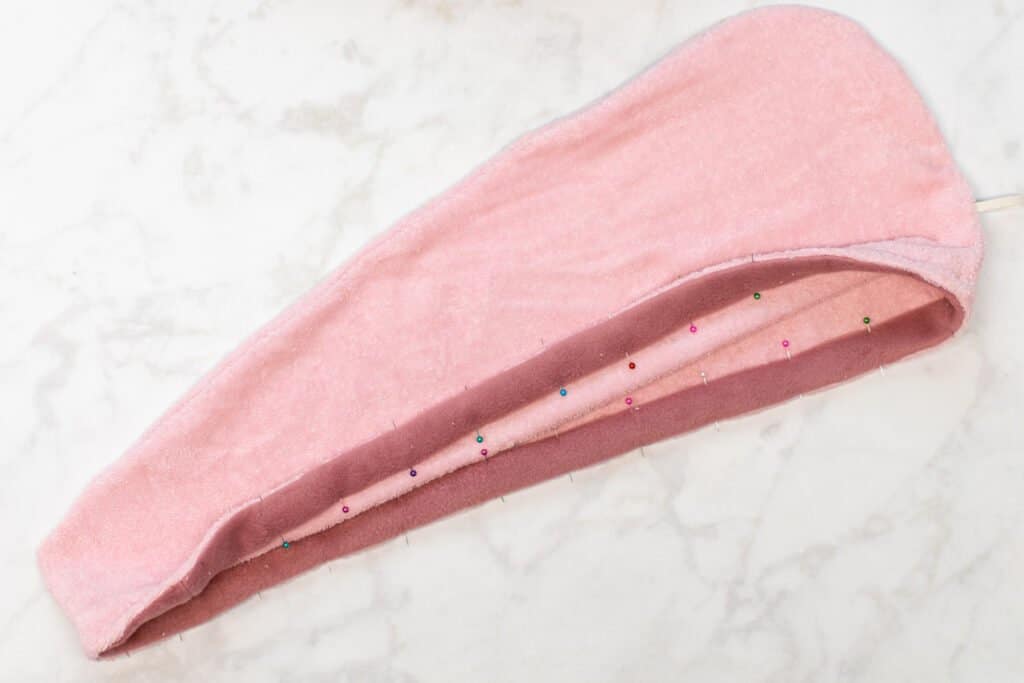
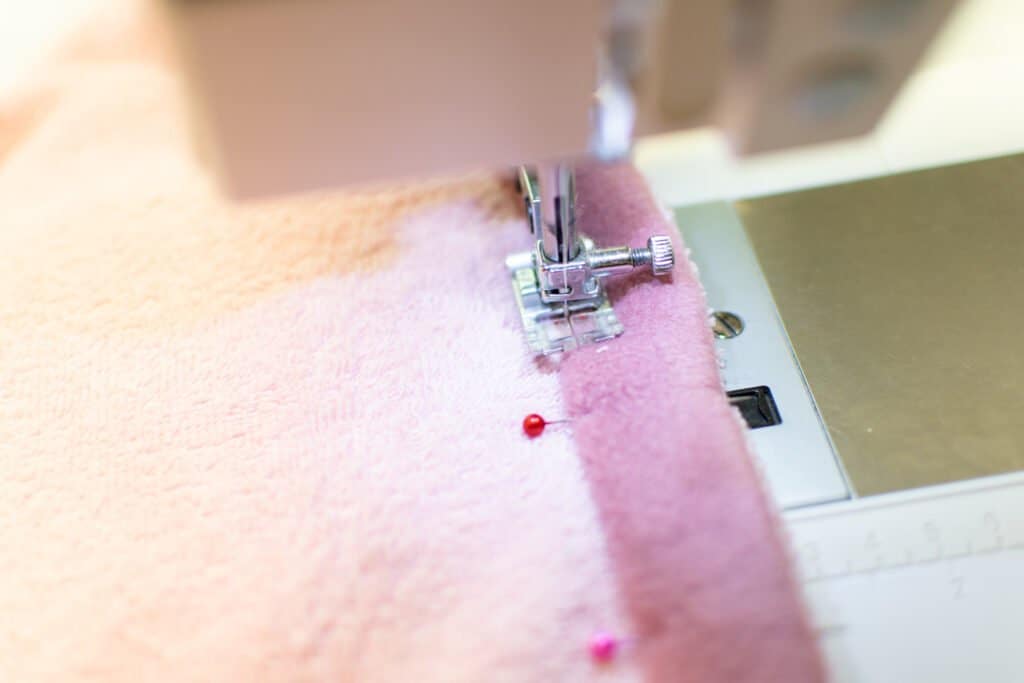
Finally, topstitch near the inner folded edge of the bias tape to secure it in place all the way around the hair wrap. This will hide all of the raw edges inside the fleece bias tape.
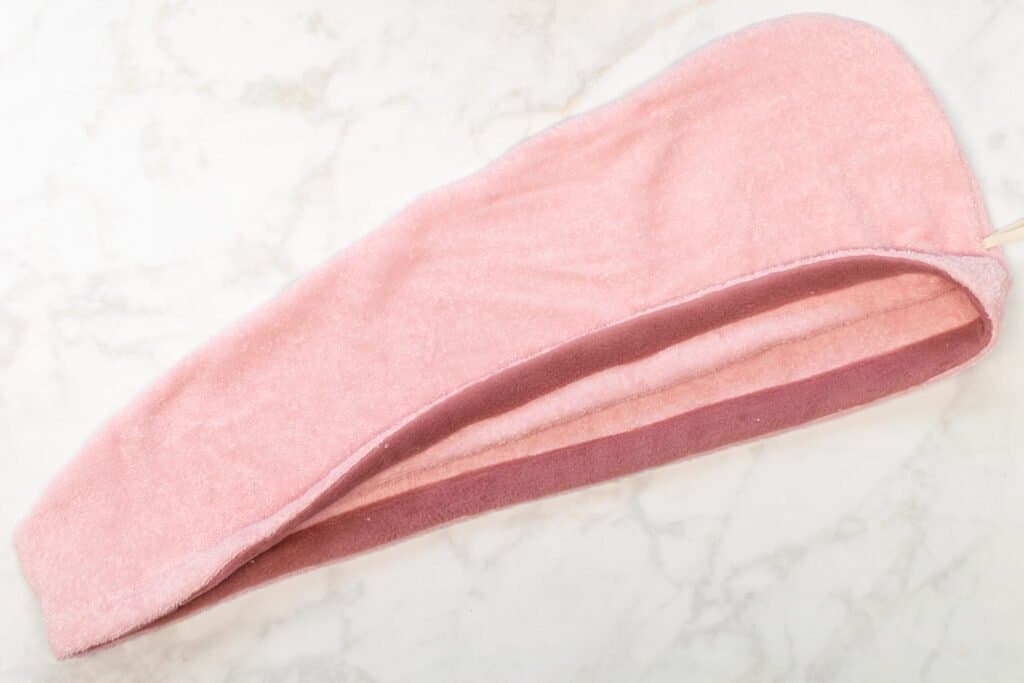
You have finished your awesome new hair towel wrap! No more messing with wrapping your hair up in a bulky towel after a bath or shower!
Looking for more awesome free sewing patterns and tutorials? Try one of the patterns below!
- How to Sew Fabric Storage Bins
- Tote Bag Sewing Pattern
- Free Reversible Bucket Hat Sewing Pattern
- How to Sew an Easy Dolman T-Shirt
Did you try this pattern out? Post a picture on Instagram with the hashtag #sweetredpoppy - I would love to see how it turned out!

Don't forget to join my Facebook group where you can show us what you're making, ask questions, and learn from others.
Save this post to your favorite board on Pinterest here.

This is a great gift idea for the gals in my family.