Learn How to Make a Gnome for Your Holiday Decor With My Free DIY Christmas Gnome Sewing Pattern and Simple Step-By-Step Tutorial.
I've been seeing adorable little Scandinavian Christmas gnomes all over the place lately! They're the cutest Christmas decor trend and I wanted to join in and add some whimsy to my (and your) home this holiday season with a charming DIY gnome!

That's why I'm bringing you my simple DIY Christmas gnome sewing pattern. You can sew up your very own personalized Christmas gnome and bring some magic to your home for the holidays!
Grab my free Christmas gnome sewing pattern, gather your sewing and crafting supplies, and follow along with my step-by-step tutorial below to make the cutest Christmas gnome you'll ever meet!
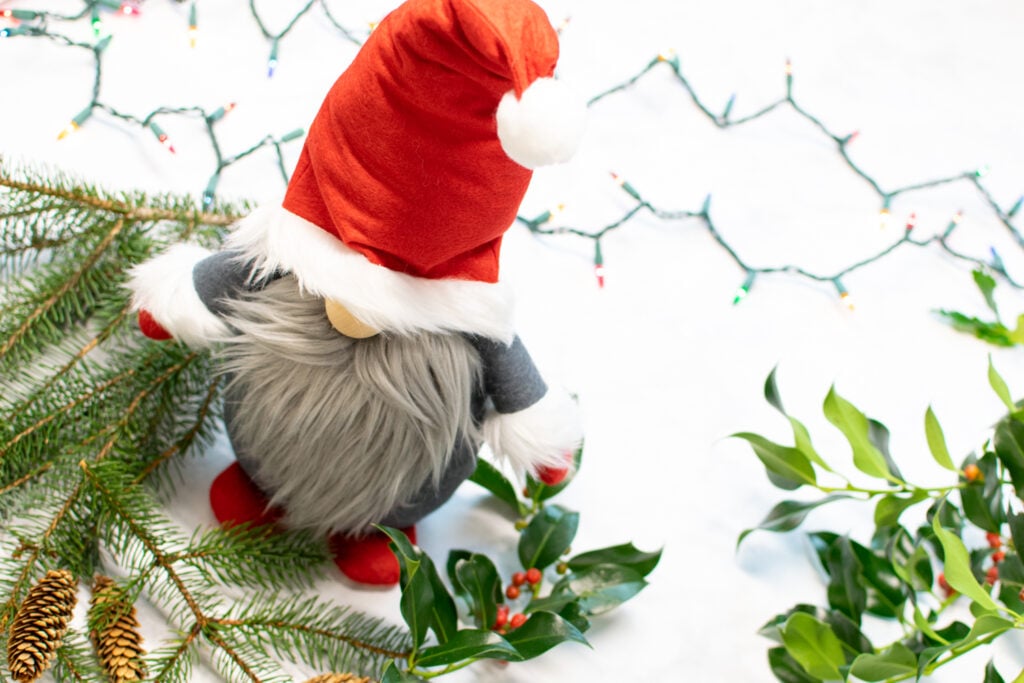
Table of Contents
What are Scandinavian Christmas Gnomes?
Stories and traditions surrounding gnomes are scattered throughout Scandinavian folklore. These tiny bearded creatures are thought to live in and protect homes and farm buildings in the countryside, often getting into mischief and playing pranks.

In Norway, gnomes are called "Nisse" and are described as resembling a very short elderly man with a thick, white beard. They wear a brightly colored hat and traditional 17th century Scandinavian clothing - belted, plain wool tunics over breeches and stockings. In Norway, Nisse bring gifts to the children of the household on Christmas eve.

Swedish gnomes are known as "Tomte" and are tiny creatures with a fluffy white beard that wear grey clothing. In Sweden, gnomes are thought to be always watching over the homestead and care needs to be taken not to upset the gnomes, which might provoke the Tomte to cause mischief. It is thought that you can only meet a Tomte around Christmas - and they might bring you gifts if you leave them a bowl of porridge and keep a clean and tidy home.
It's clear that gnomes bring an air of magic and whimsy around the holidays - something I think every home could use a little of!
About the Free Christmas Gnome Sewing Pattern
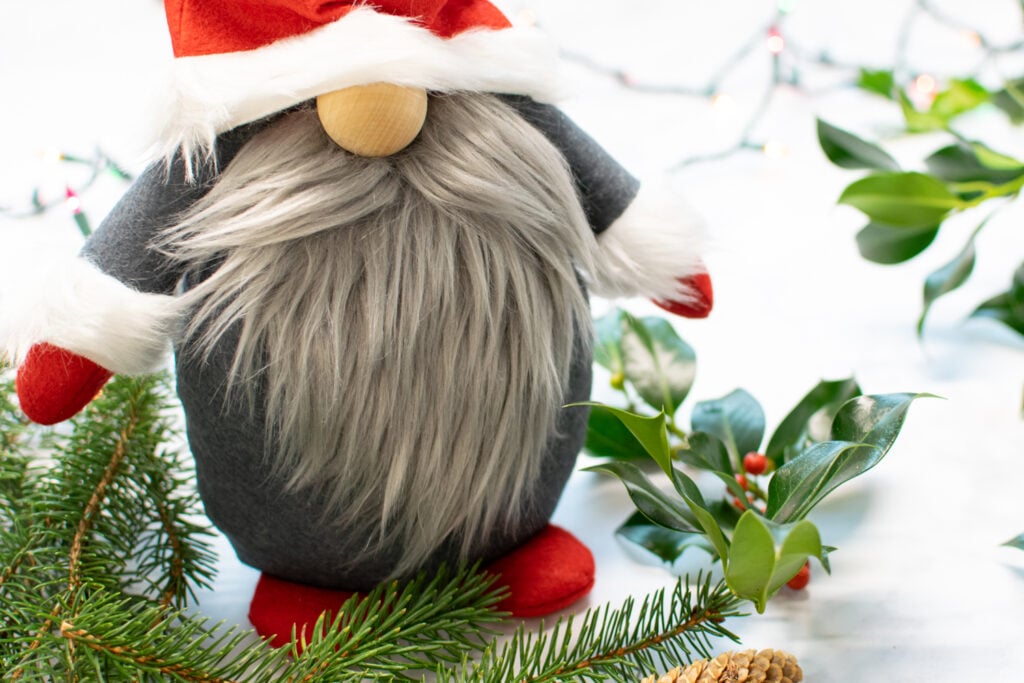
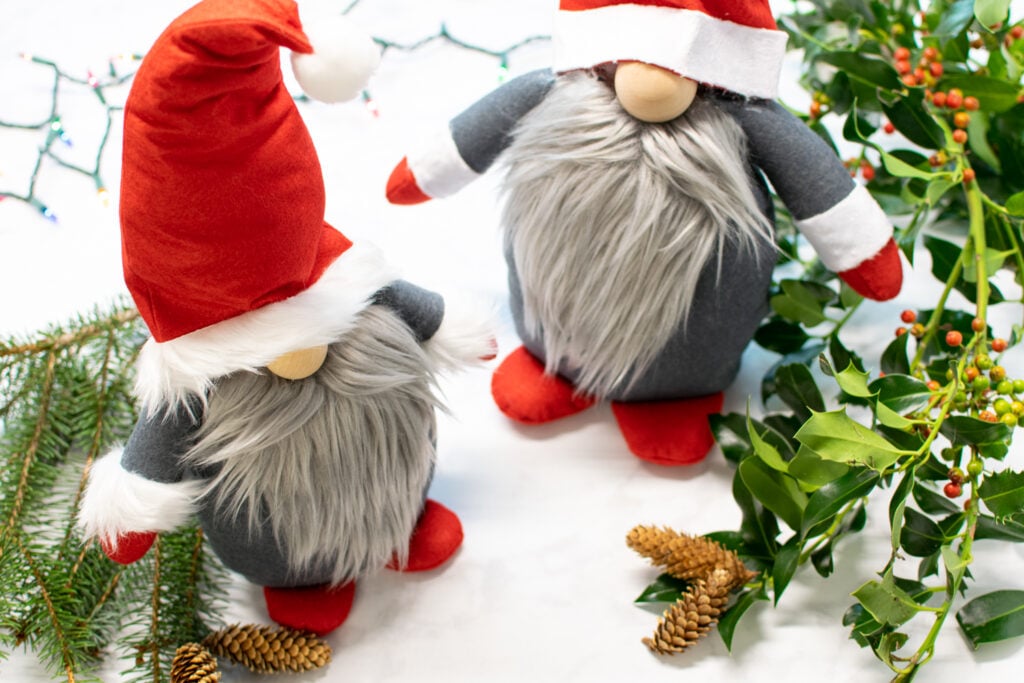
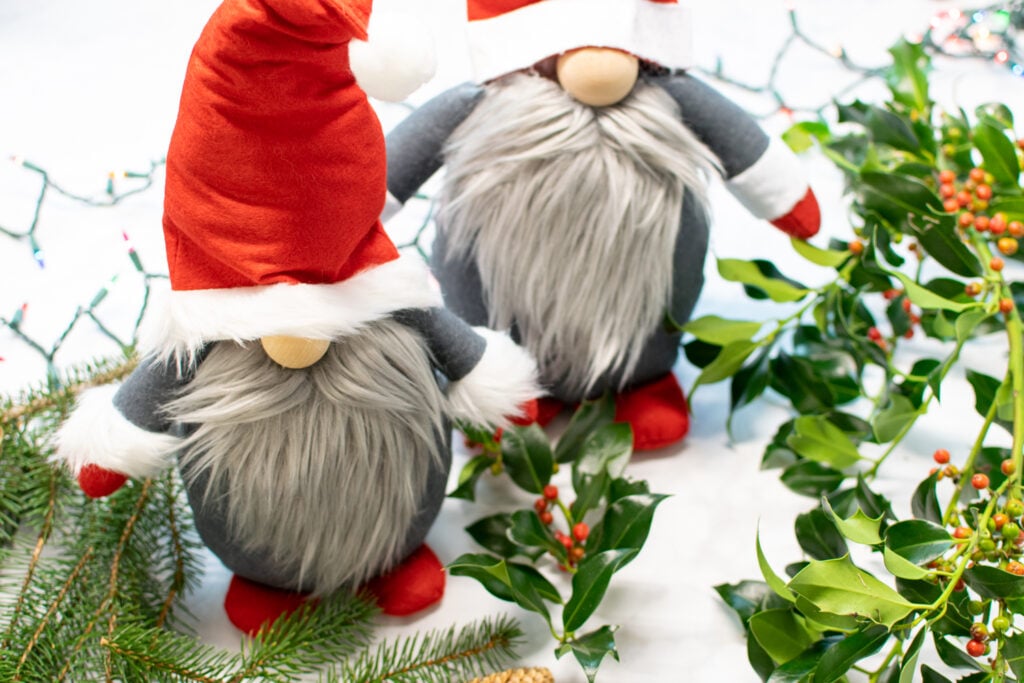
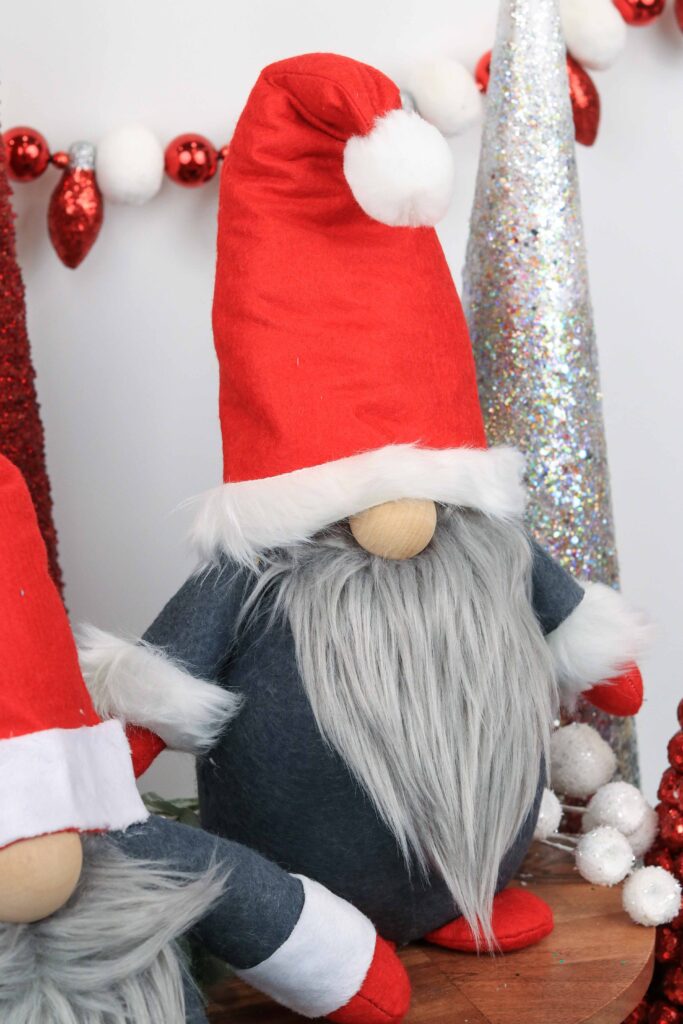
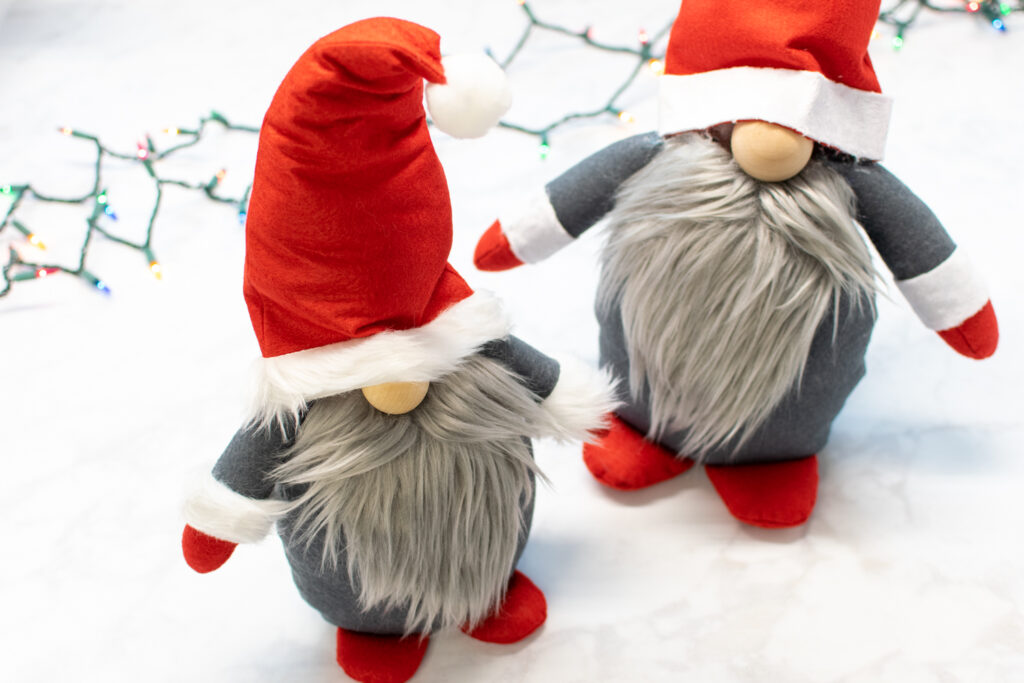
My Christmas gnome sewing pattern includes two sizes - Small and Large. The body of the small gnome measures approximately 6 inches across. The body of the finished large gnome is around 8 inches across. Both gnomes are between 16 and 20 inches tall, depending on how far down you bend the tip of the hat.

The gnome pattern includes a pointed, conical hat, a full beard, and Christmasy trim around the wrists. You can also personalize your Christmas gnome by using different colors for the body, feet, hands, and beard.
In my opinion, the best part about making this Christmas gnome is embellishing it with unique and fun details at the end. Think sparkly pinecones, holly, a tiny lantern, a Christmas sign, fir boughs, a candy cane - or whatever else your imagination comes up with!
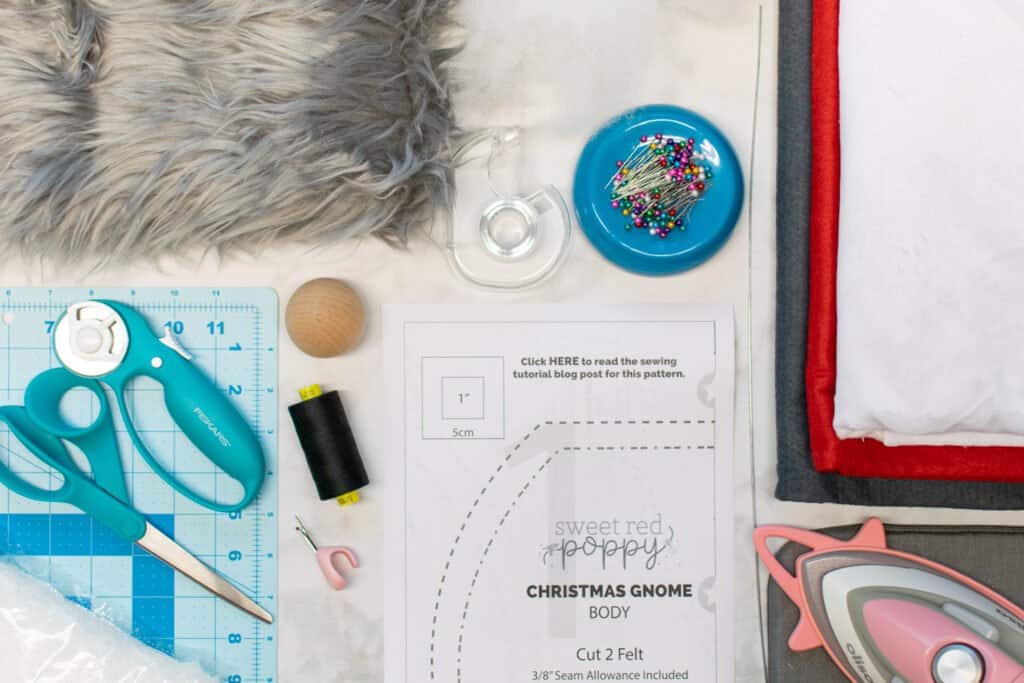
Supplies to Make a Gnome
When you shop through my affiliate links, it doesn't cost you anything extra, but it helps me out in a big way! I earn a small commission from those purchases, and that support allows me to continue creating and sharing free tutorials and patterns for you. Thank you so much for helping me keep this creative community going!
Click here to shop my curated Amazon List of supplies for this project.
- 1/2 Yard Gray Felt (for Body, Bottom and Arms)
- 1/4 Yard Red Felt (for Hands, Feet and Hat)
- 1/8 Yard White Minky or White Faux Fur Trim (for Hat and Arm Trim)
- 1/4 Yard Faux Fur (for Beard)
- Wood Ball Knob (1.5" for Small, 2" for Large)
- 32 oz Bag of Poly-fil
- 4 Cups of Poly Pellets
- 18 Gauge Aluminum Wire
- Hot Glue Gun/Glue Sticks
- Sewing Machine
- Thread
- Sewing Pins
- Sewing Machine Needle
- Scissors
- Rotary Cutter
- Cutting Mat
- Iron
- Ironing Board
- Seam Ripper
- Hairspray
- Tape
- Printer
- Printing Paper
- FREE Christmas Gnome Pattern
Shop my favorite sewing supplies here!
Click Here to Download the FREE DIY Christmas Gnome Sewing Pattern

Step 1: Download and Cut Out the Christmas Gnome Pattern
First, download the Christmas gnome sewing pattern to your computer and open it in your PDF reader. I highly recommend using Adobe Acrobat to open the PDF.

It's very important not to print the pattern directly from your browser. This can cause the pattern scaling to be off and the border lines to print incorrectly.
Next, click on the "Print" button to open a print settings dialog box. In this box, change the scaling to "Actual Size" or "Custom Scaling: 100%".
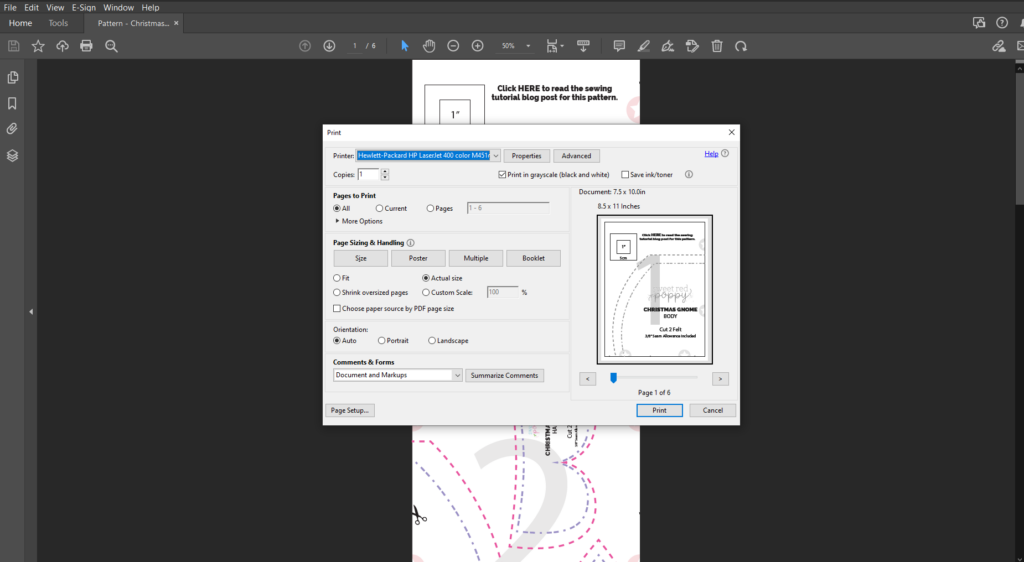
Print Page 1 of the Pattern. This page contains a 1" x 1" test square. Measure the square with a tape measure or seam gauge.
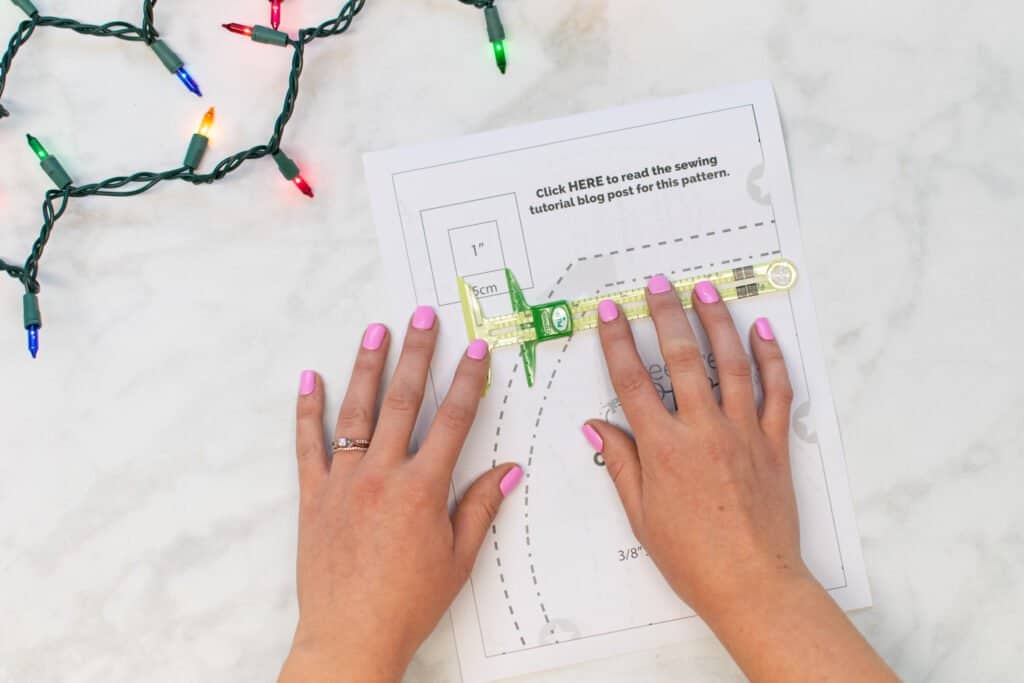
If the test square measures 1" x 1", you're good to go - print the rest of the pattern! If it does not measure 1" x 1", you'll need to recheck the print settings and reprint the pattern.
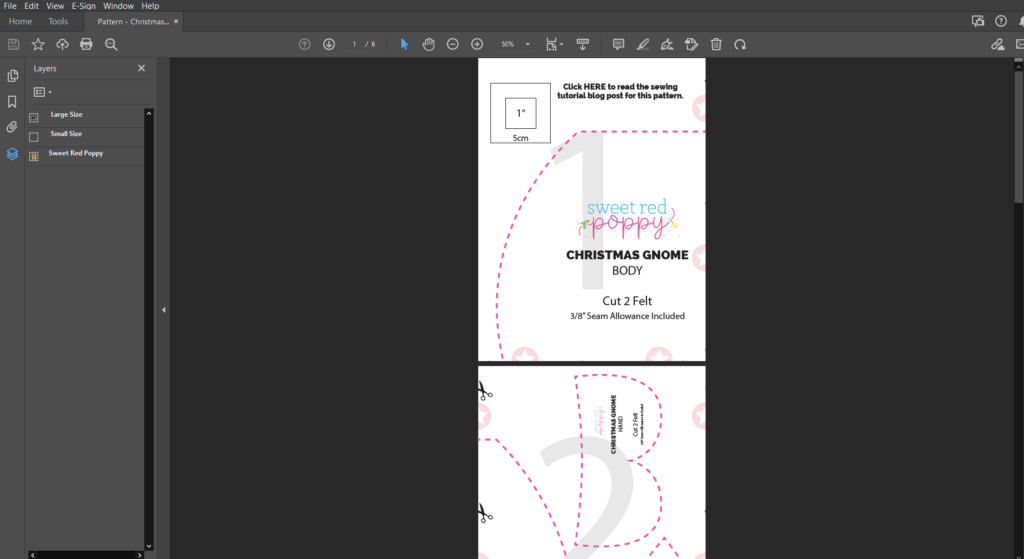
Also, this pattern features layers for each size to make printing easier. This means you can print only the size you want to sew!
To use the layers options, click on the 3 stacked papers icon on the left-hand side of the screen. Then, click on the "eye" next to the size that you don't want to print to deselect it.
Once the pattern has been printed, you'll need to assemble and tape the pages of the pattern together.
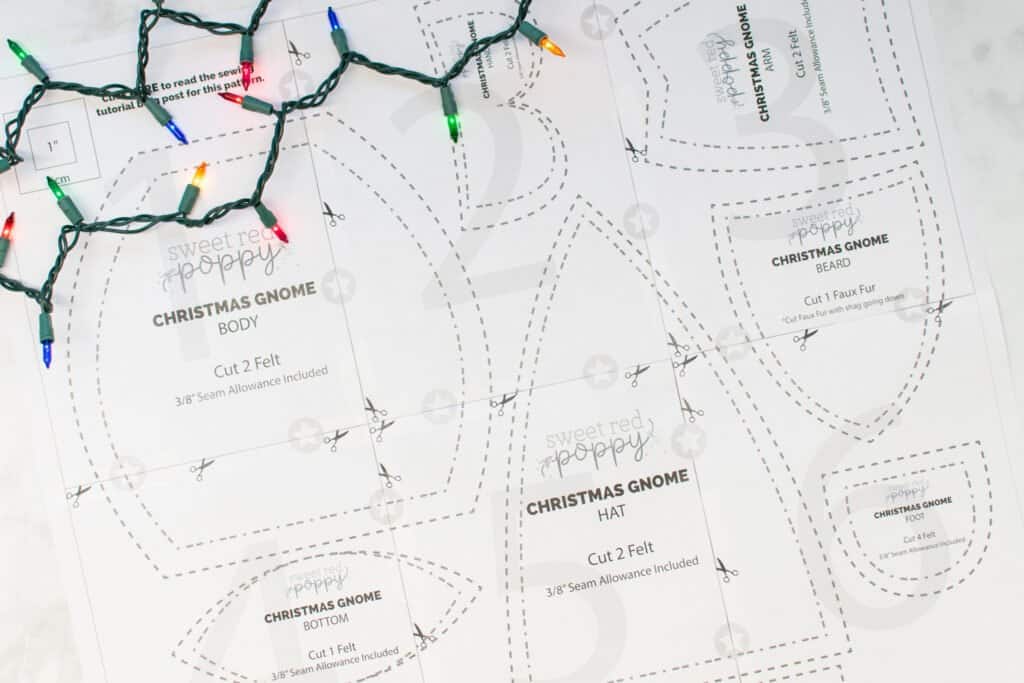
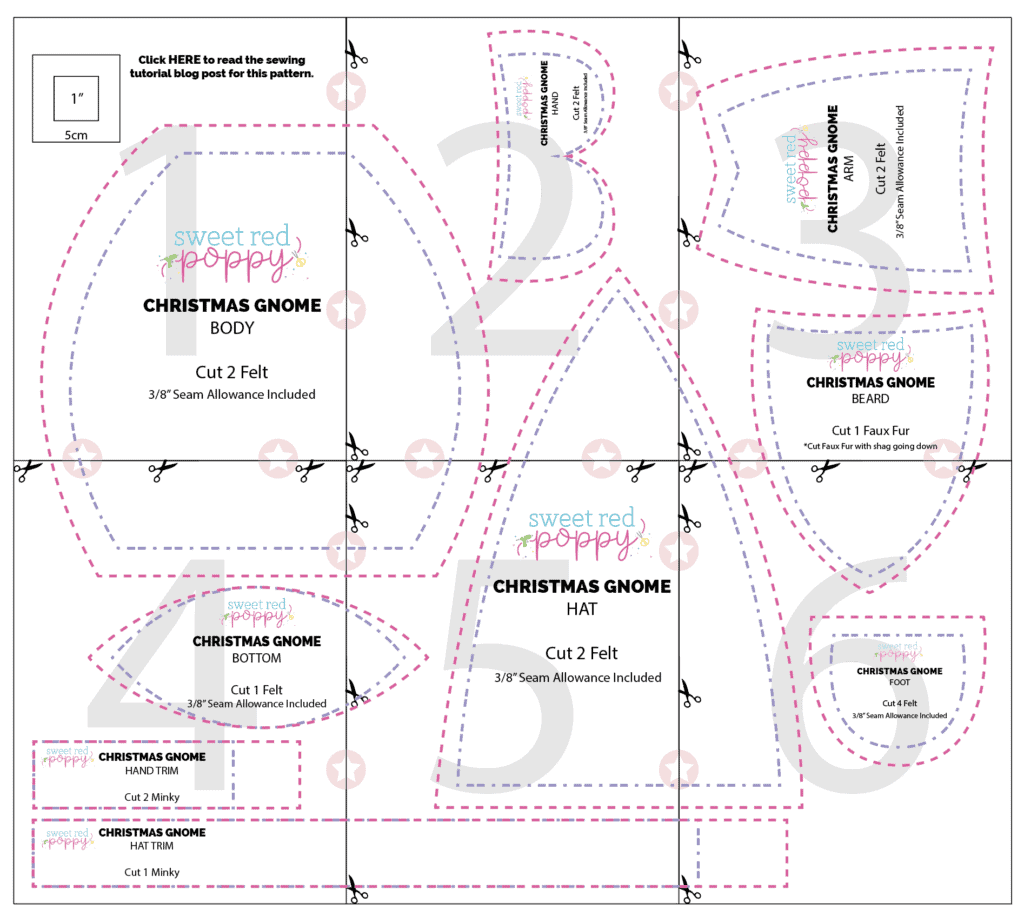
Line up the pink stars and lines of the pattern and tape each page together following the layout chart below. There are large numbers in the center of each page to help you keep the papers in order.
If you like, you can trim away the excess paper along the border lines before taping the pages of the pattern together. Or, you can simply overlap the paper margins. If you decide to overlap the edges, holding the pages up to a light can help you see through the paper and align the pattern lines correctly.
Finally, cut out each pattern piece, following the lines corresponding to the size you want to sew.
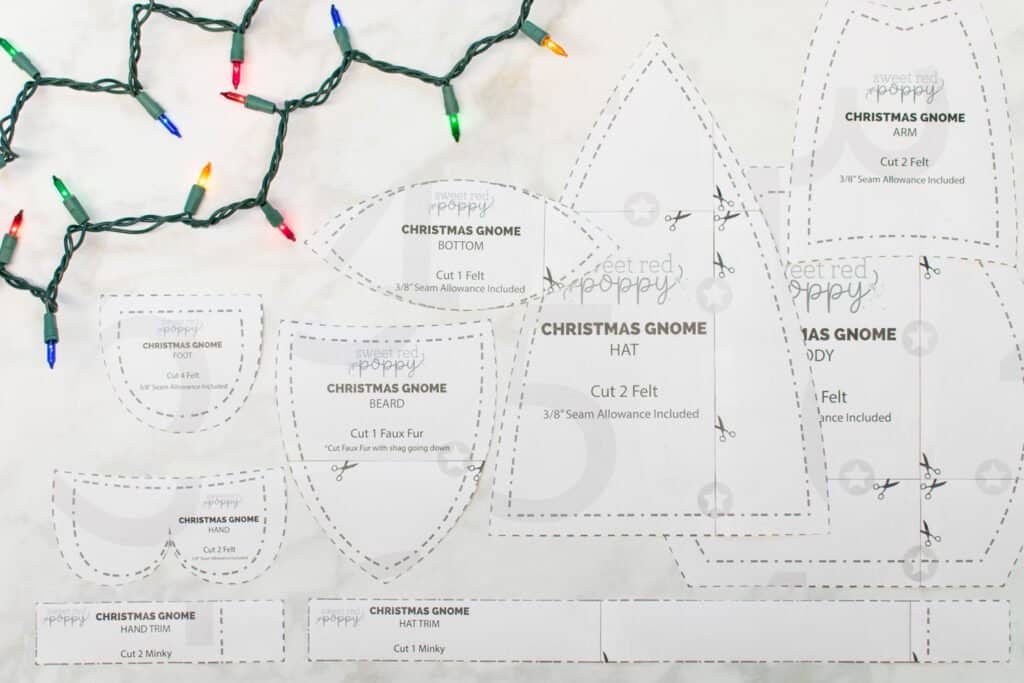
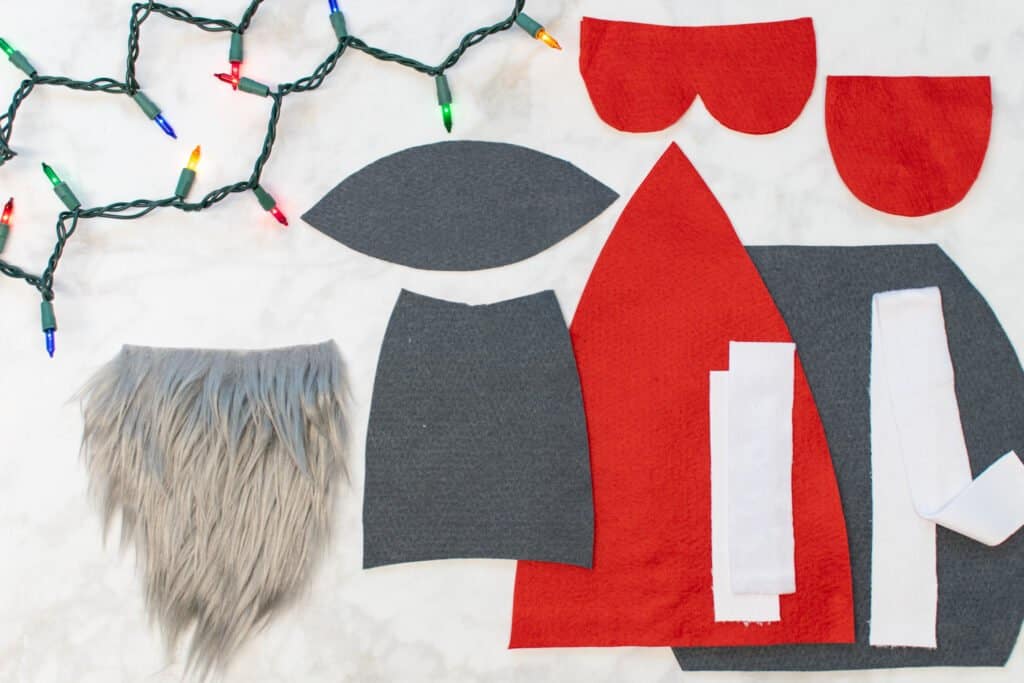
You will have 9 pattern pieces: the Body, Bottom, Arm, Hat, Hand, Foot, Beard, Hat Trim, and Hand Trim.
Step 2: Cut the Materials
Once the pattern pieces have been cut out, it's time to start cutting all the materials for your adorable Christmas gnome!
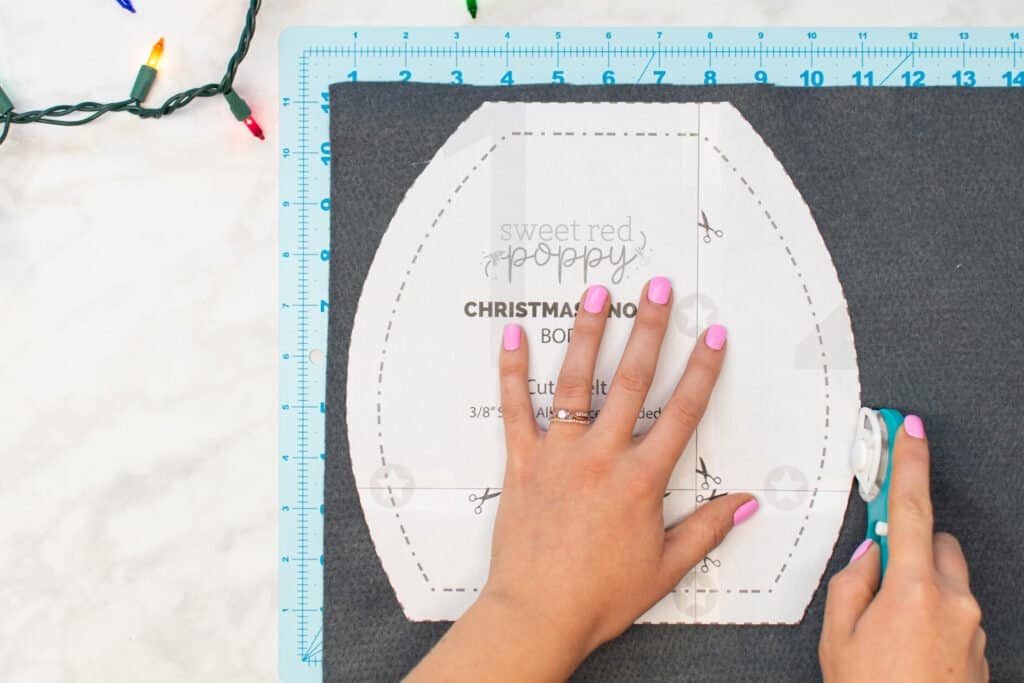
Cut out the following number of pieces from your grey felt, red felt, faux fur, and minky fabrics. And of course - feel free to use different colors of felt than the grey and red I'm using for my gnome!
Grey Felt
- Body: Cut 2
- Bottom: Cut 1
- Arm: Cut 2
Red Felt
- Hand: Cut 2
- Foot: Cut 4
- Hat: Cut 2
Faux Fur
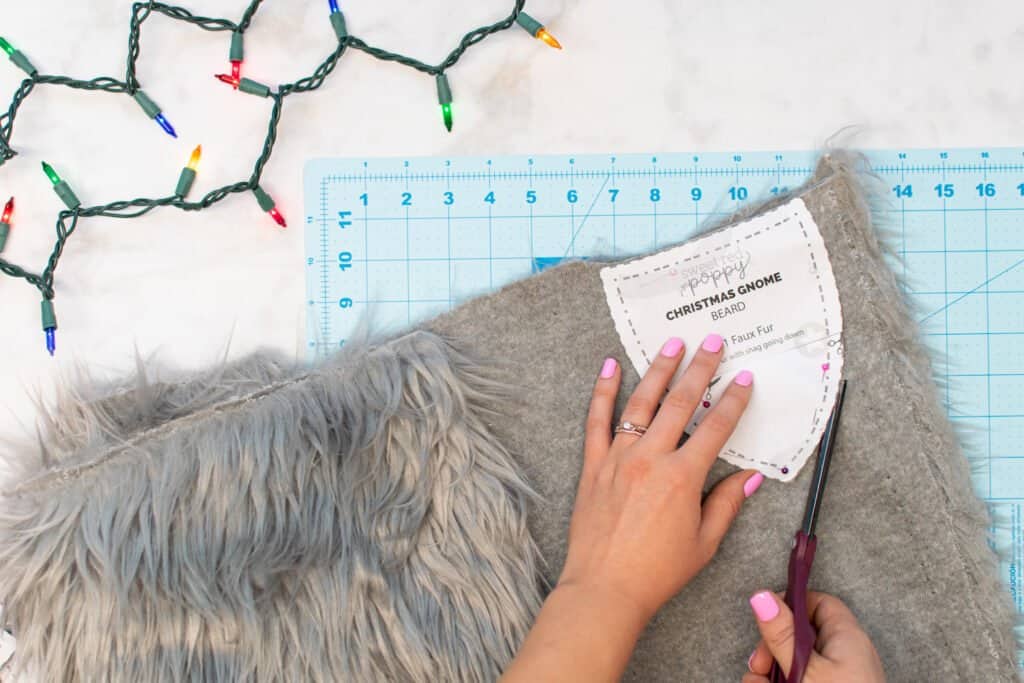
- Beard: Cut 1
Minky or White Faux Fur Trim
- Hat Trim: Cut 1
- Hand Trim: Cut 2
*PRO TIP: When cutting the beard from long faux fur, it works best to cut with the wrong side of the fabric facing up. Then, carefully cut around the pattern piece with scissors, cutting through the backing fabric only, not the fur. This will help you avoid unnatural cuts across the long, flowing fur.
With all the pieces cut, you're ready to move on to assembling and sewing the gnome!
Step 3: Assemble the Arms
Start by placing 1 Arm piece right sides up on your table.
Place 1 Hand piece on top of it with the right side down. Then, align the wider curved end of the Arm with the matching curved side of the Hand piece. Pin the Hand to the Arm along this curved edge.
Stitch the Hand to the Arm with a 3/8" seam allowance.
Flip the Hand away from the Arm and press the seam allowance towards the Hand.
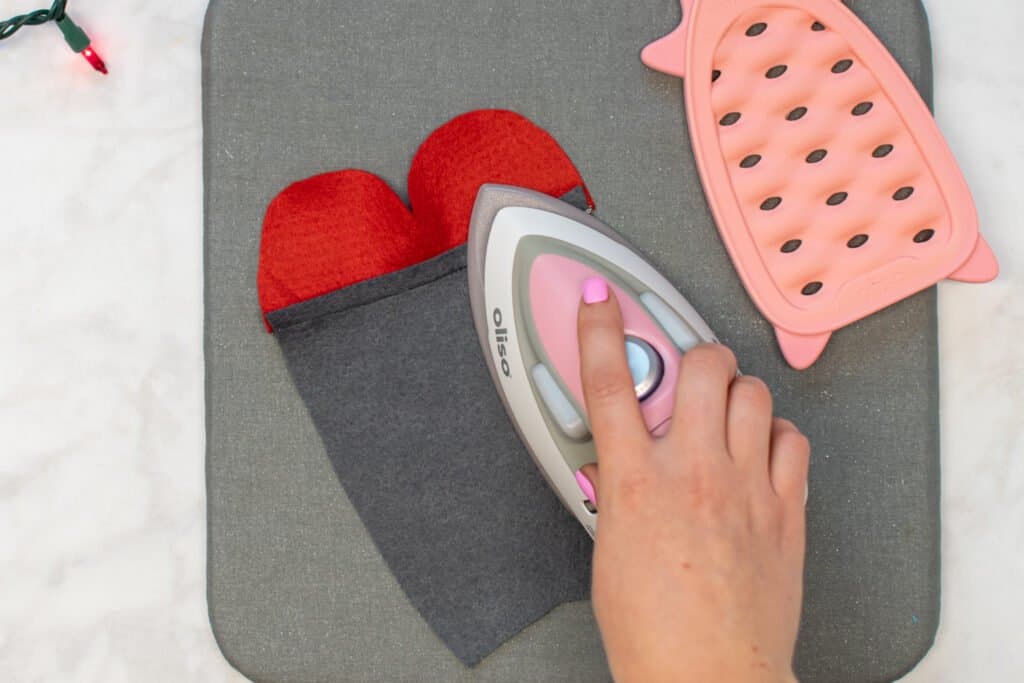
Next, fold the assembled Arm/Hand in half lengthwise with right sides together. Match up and pin the long curved edge, continuing your pins around the curve of the Hand.

With a 3/8" seam allowance, sew along the long curve and around the Hand, removing the pins as you go. Make sure to leave the end opposite the Hand open to turn it through later!

Trim the seam allowance down by half to remove bulk.
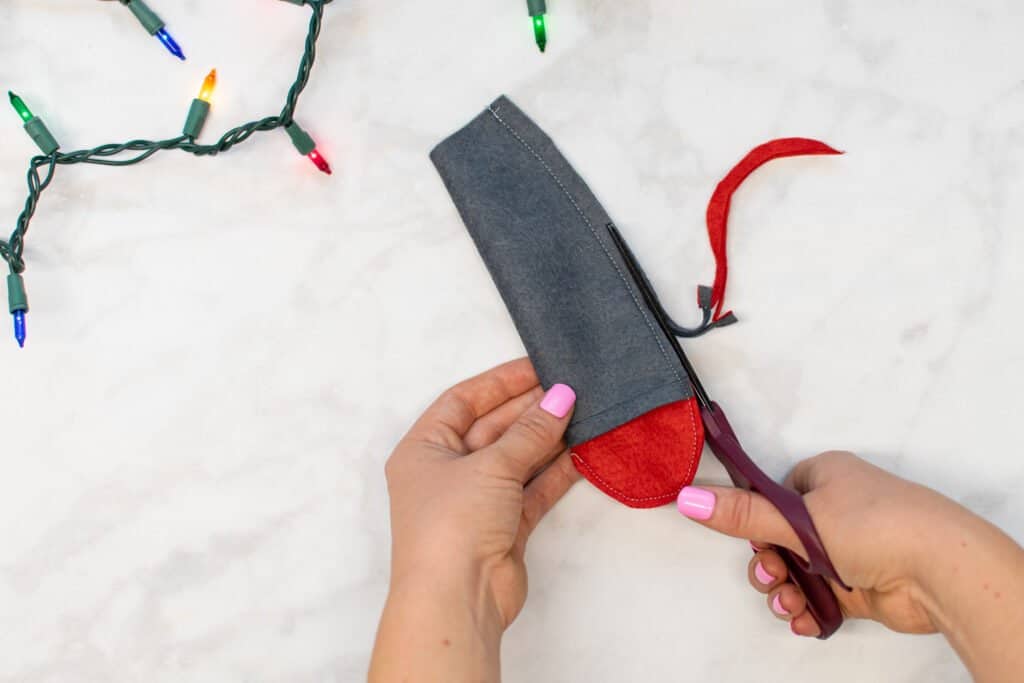
Then, turn the Arm right sides out.
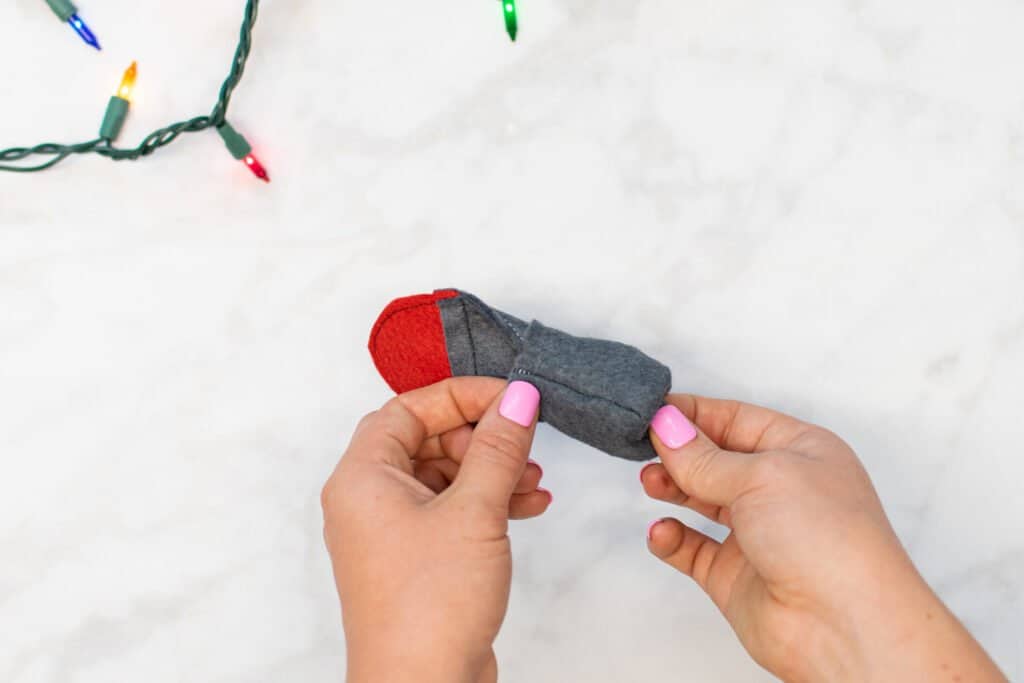
Stuff the Arm with Poly-fil, making sure to stuff the Poly-fil all the way down to the bottom of the Hand.
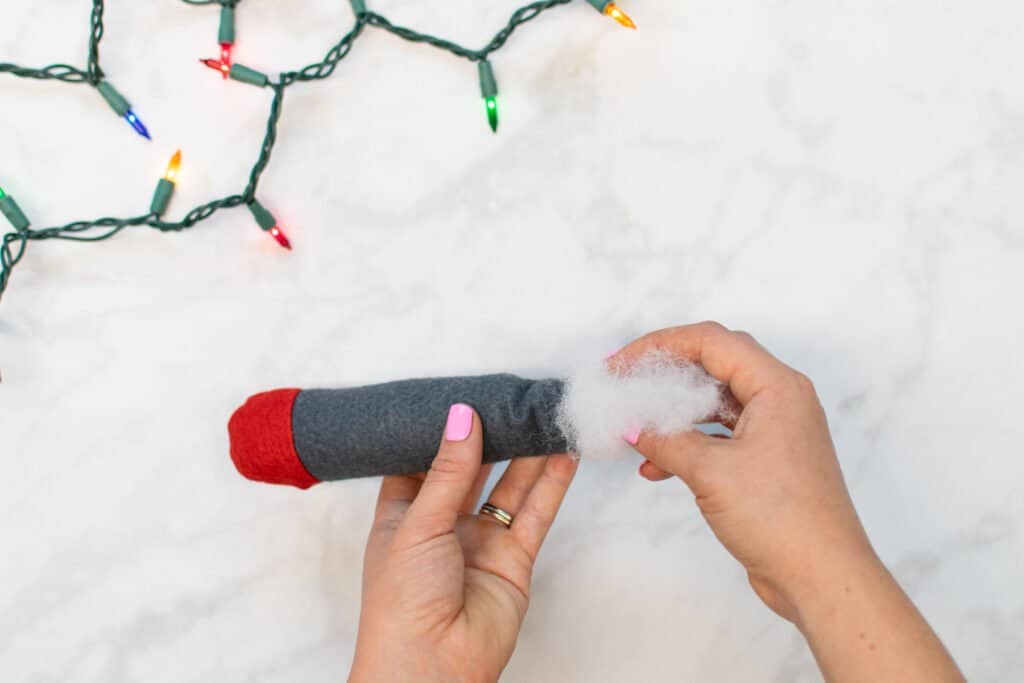
*PRO TIP: To help push the Poly-fil all the way down to the bottom of the Hand, try using the narrow end of a closed pair of scissors.
Next, pin the upper raw edges of the Arm together, with the seam to one side.
Stitch the raw edges at the top of the Arm together with a 1/4 inch seam allowance. You don't have to worry about turning under the raw edges - they'll be hidden in the hat later!
Finally, use a glue gun to attach a Hand Trim piece around the wrist of the Arm.
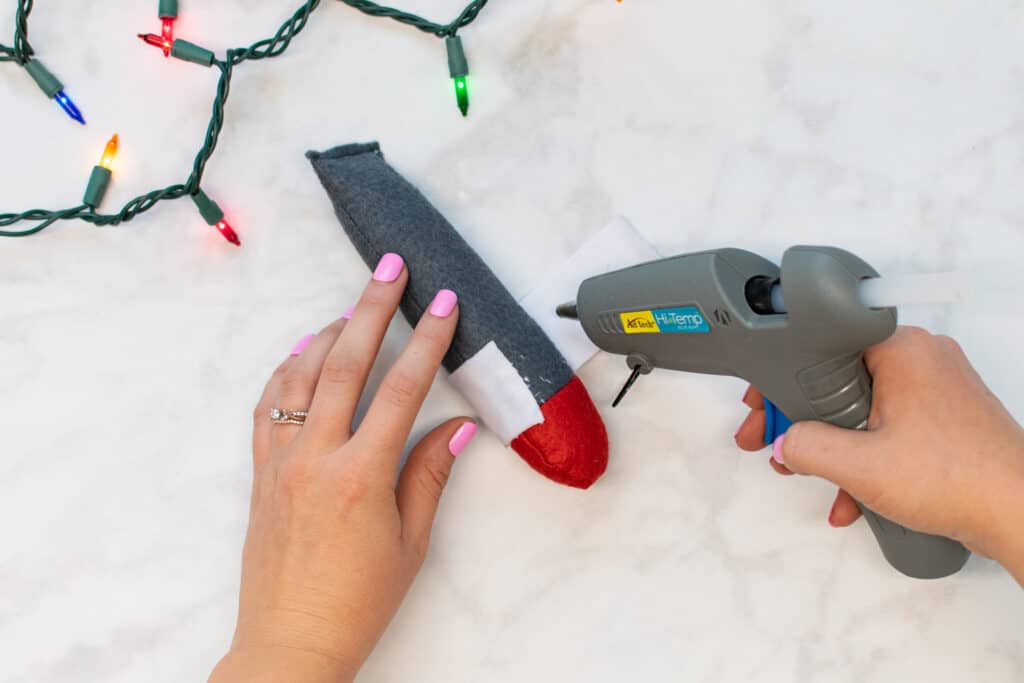
Repeat this entire process to assemble the other Arm and Hand.
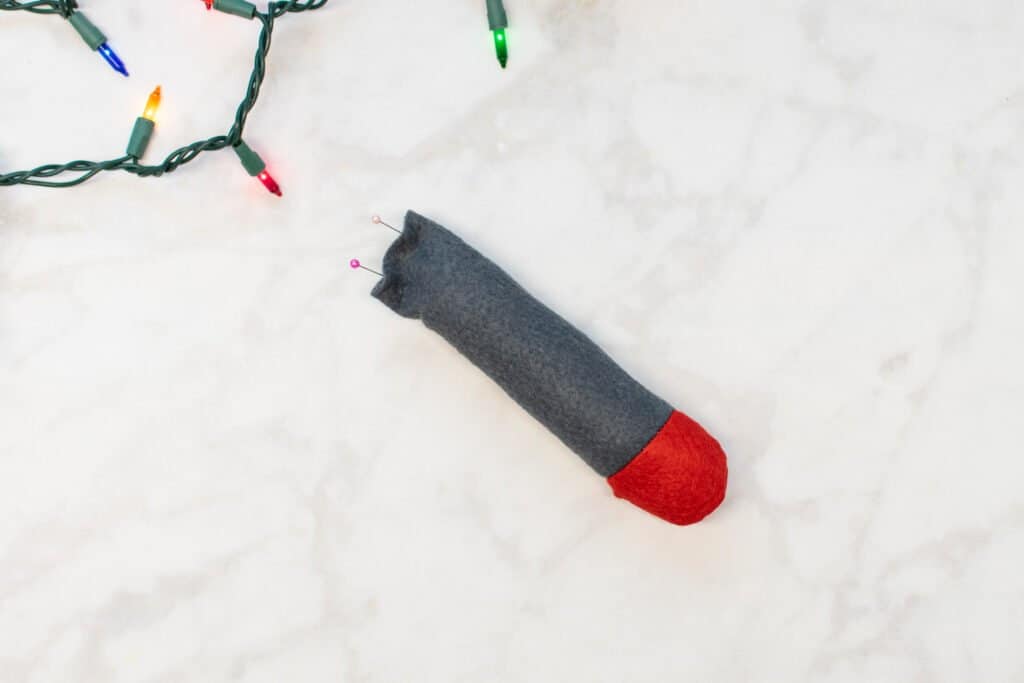
Step 4: Sew the Feet
It's time to move on to sewing the gnome's feet!
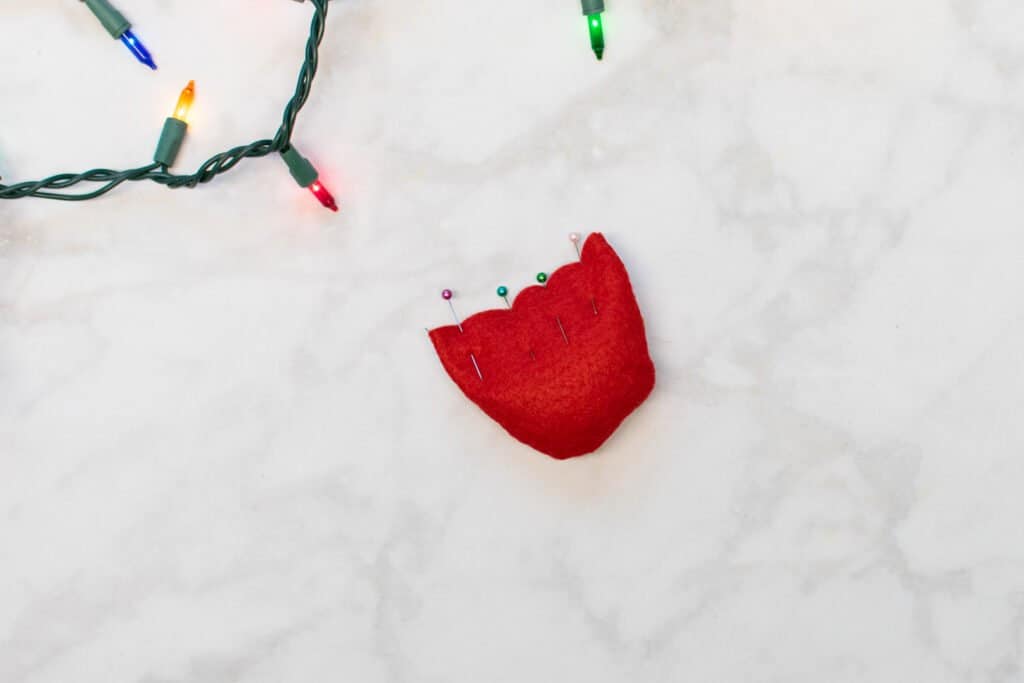
Start by placing two of the Foot pieces with right sides together and pin around the curve, leaving the straight edge open.
Then, sew around the curve of the Foot with a 3/8" seam allowance, making sure to backstitch at the beginning and end.
Trim the seam allowance down by half to reduce bulk.
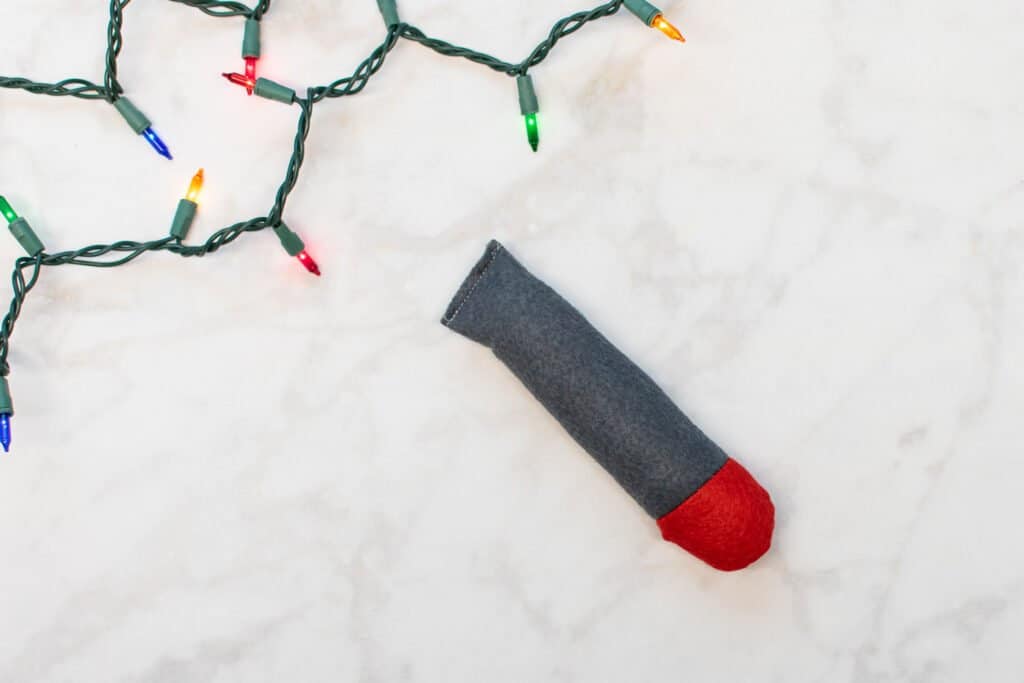
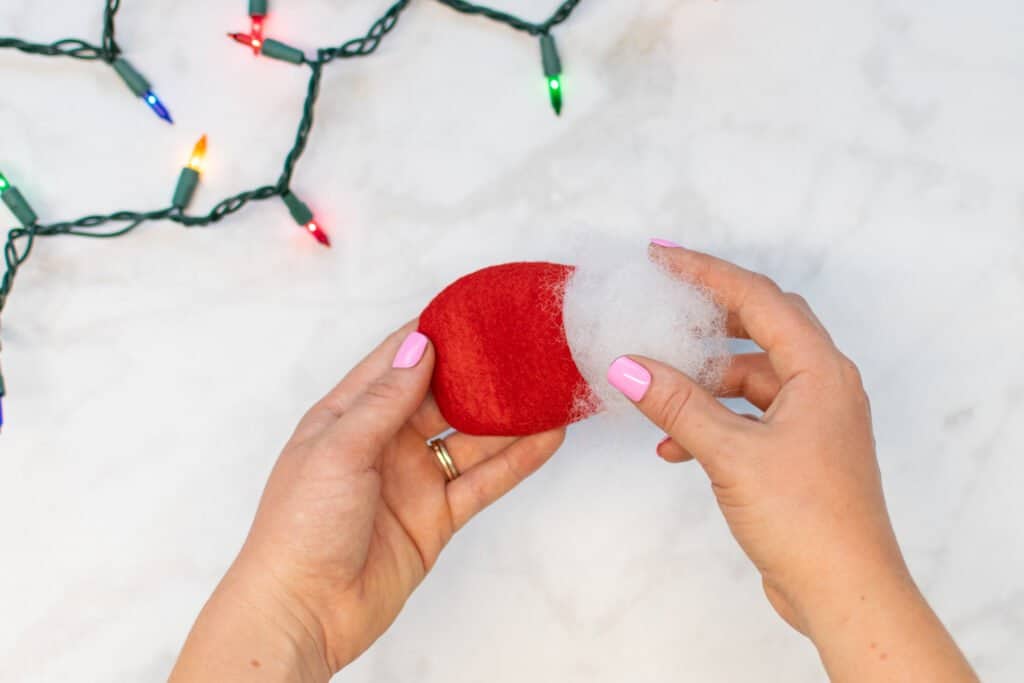
Next, turn the Foot right sides out through the opening in the flat end.
Lightly stuff the Foot with Poly-fil, leaving about 1.5 inches of the Foot unstuffed at the top. This is to ensure that there will be enough room to sew the upper edge of the Foot to the Body.
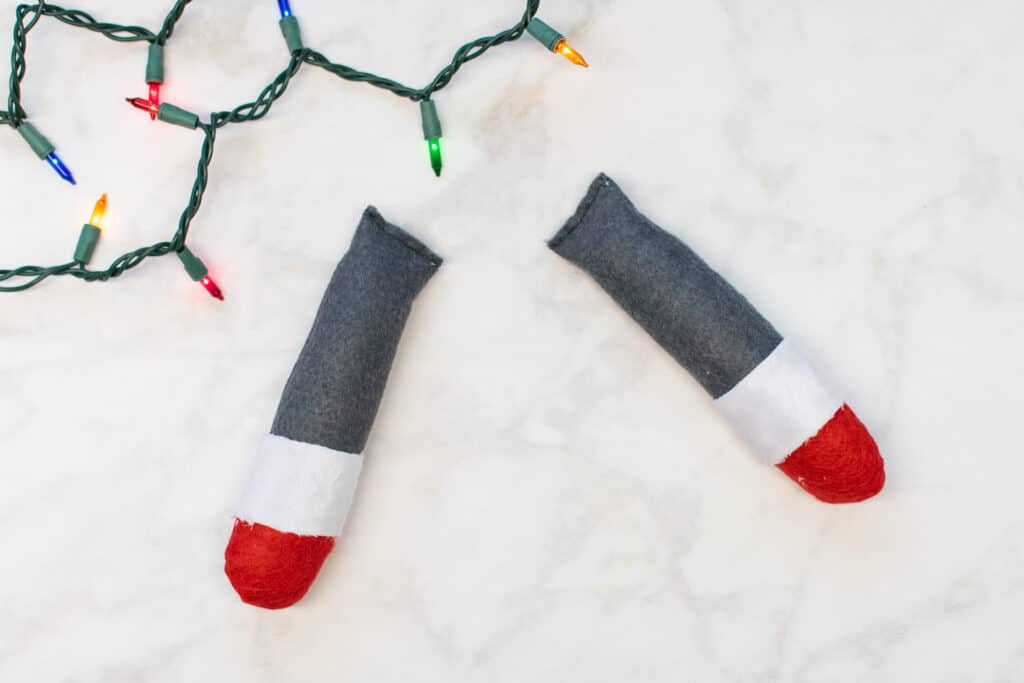
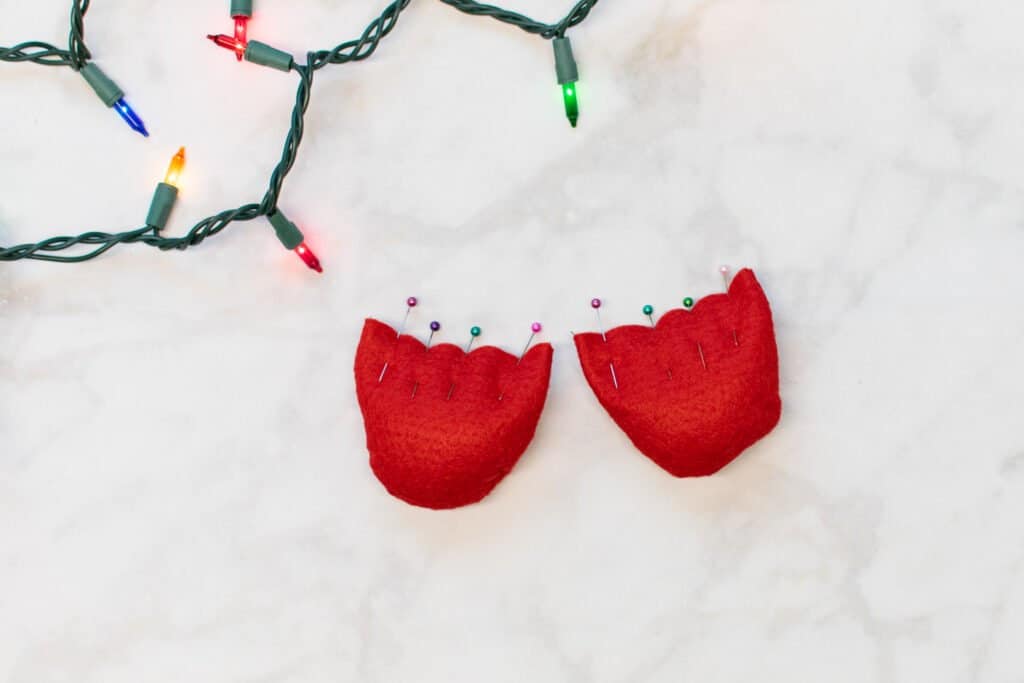
Next, pin the upper edge of the Foot closed.
Finally, repeat this process for other Foot.
Step 5: Attach the Feet to the Body
Once the feet have been prepared, you'll need to attach them to the Body of the gnome.
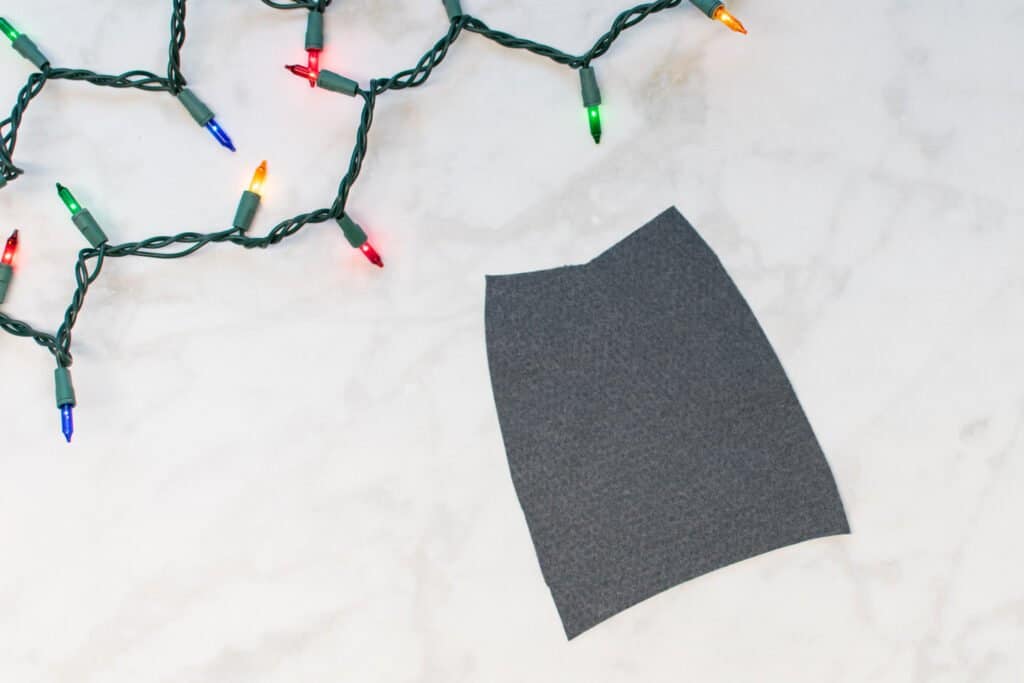
First, grab one Body piece and fold it in half long-ways.

Then, place a pin at the center fold along the bottom edge of the Body. This will mark the center of the Body and act as a guide for placing the feet.
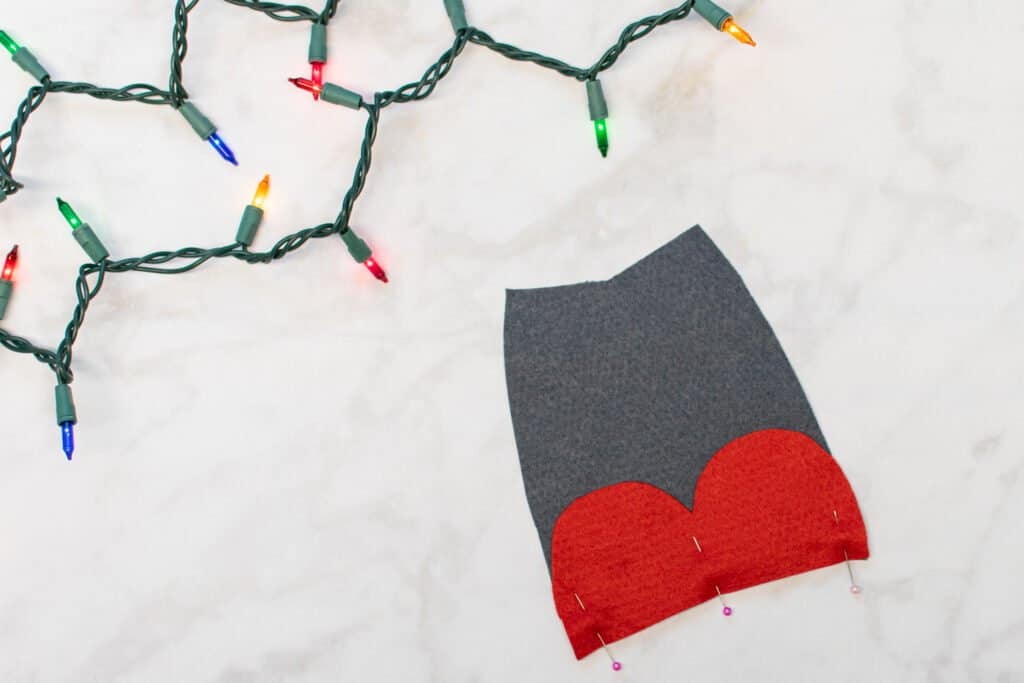
Working from the right side of the Body, measure 1/8" away from the pin on each side and make a mark.
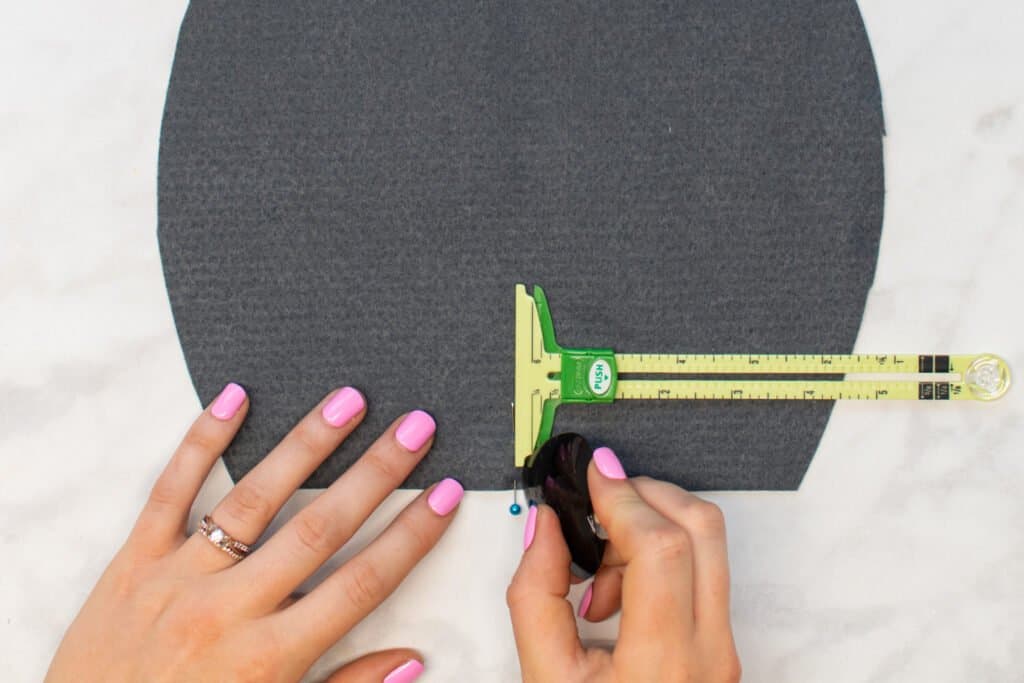
Pin one Foot to the Body on each side of the pin, lining up the side seam of each Foot with the 2 marks along the bottom edge of the Body. The raw edges of the feet should match up with the raw bottom edge of the Body.
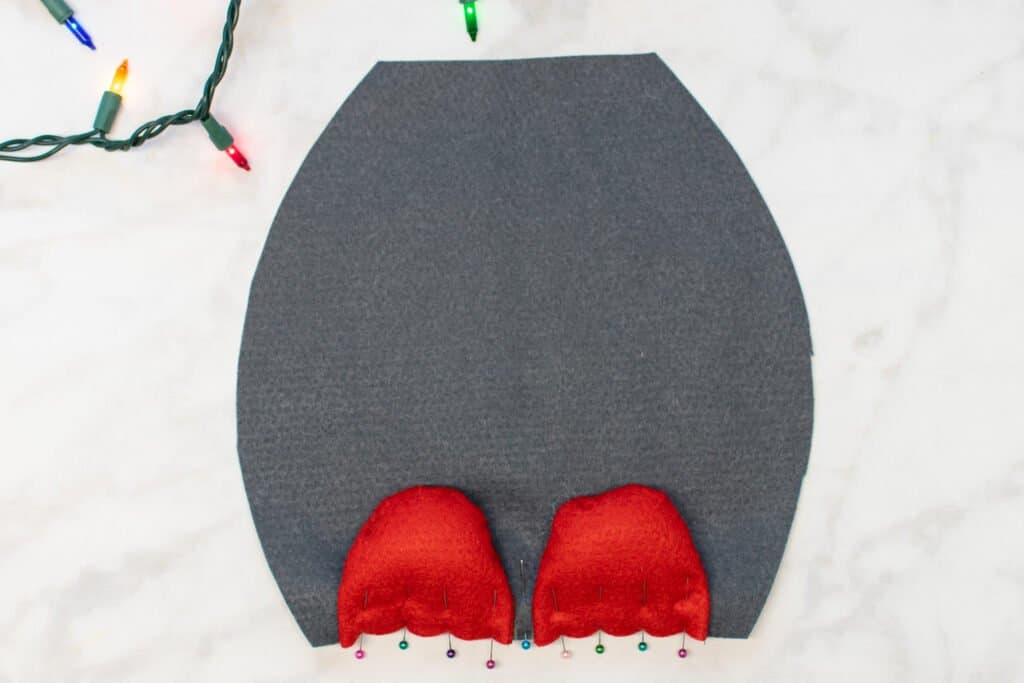
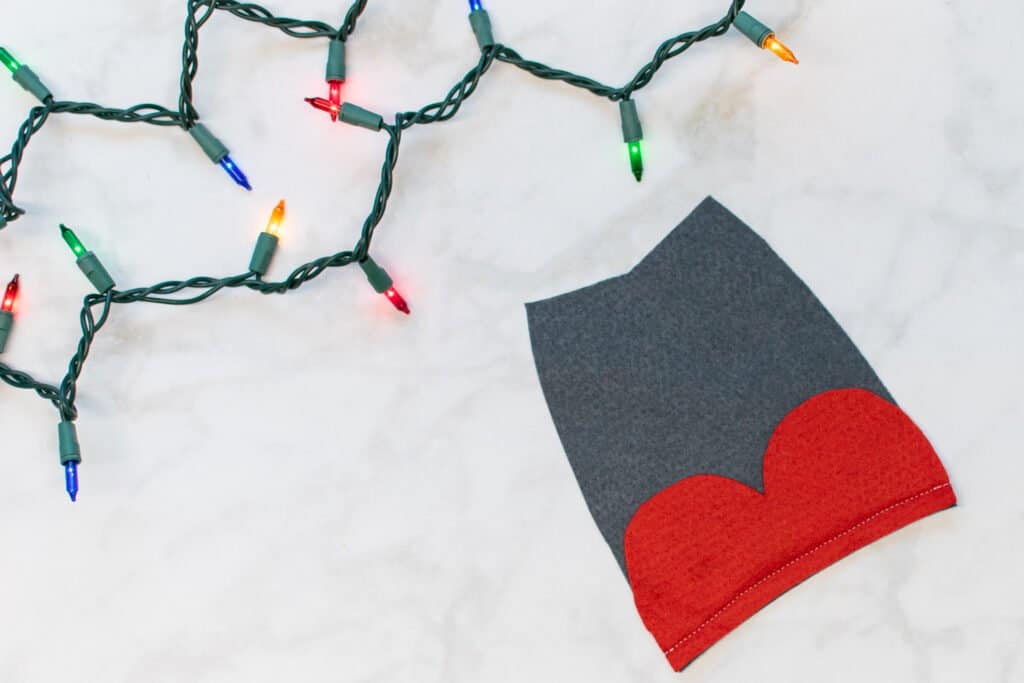
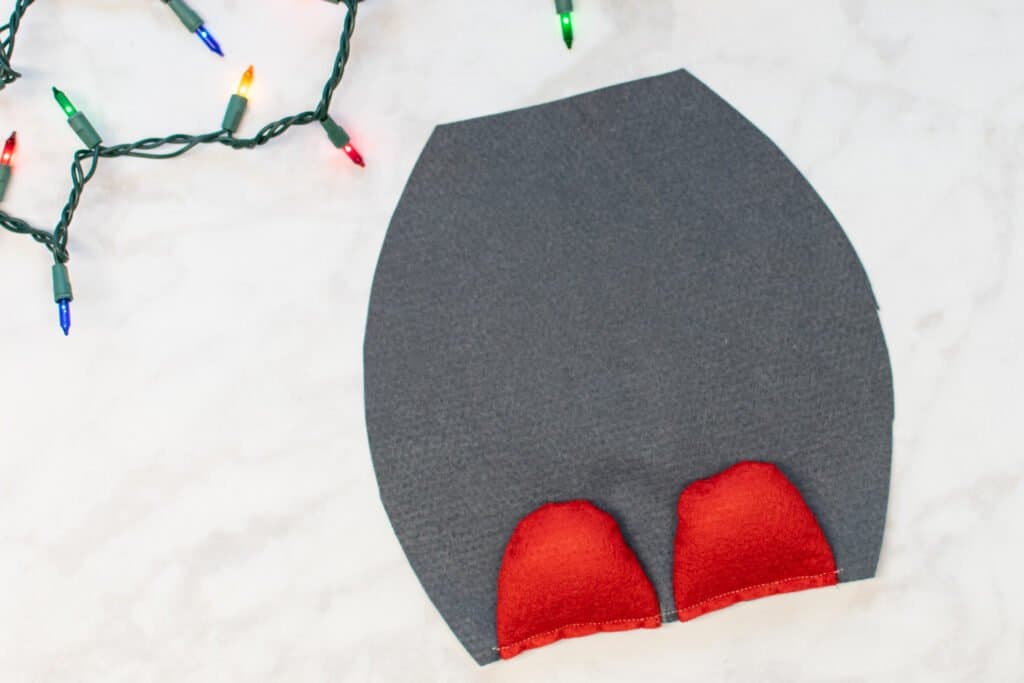
Stitch the feet to the Body with a 1/4" seam allowance.
Step 6: Sew the Gnome Body
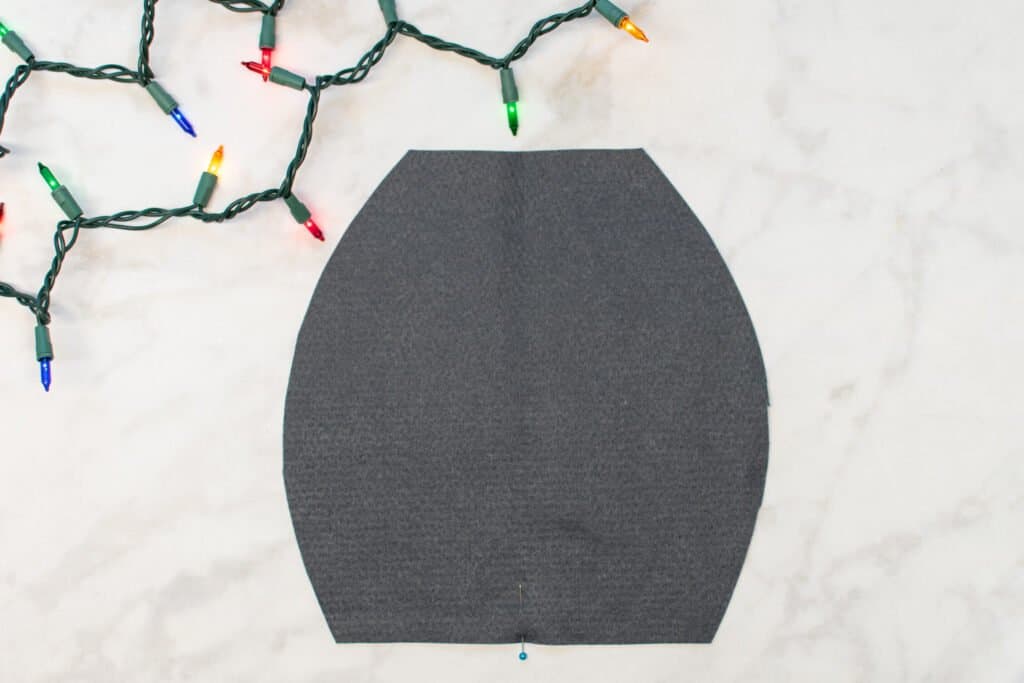
To put together the Body of your gnome, start by placing the Body piece with the feet attached right sides up on your table. Then, lay the other body piece on top of it with the right side facing down.
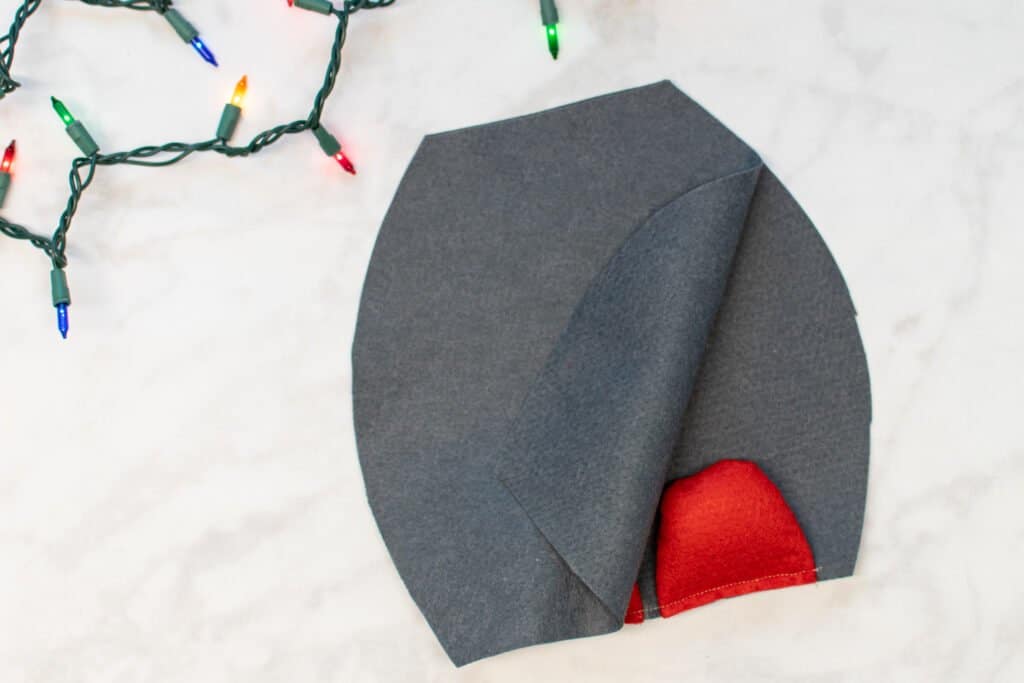
Pin them together along the two sides.

Next, sew each side of the Body with a 3/8" seam allowance.

Step 7: Attach the Bottom
We now need to attach the Bottom piece to the bottom of the Body. This is what gives the gnome a nice wide base to sit upright on.
First, make sure the Body is still wrong sides out.
Then, pin the Bottom piece to the edges of the oval-shaped opening at the base of the Body. Make sure your fabrics are right sides together. You will need to maneuver the Bottom piece so that each of the 2 points matches up with one of the side seams of the Body.
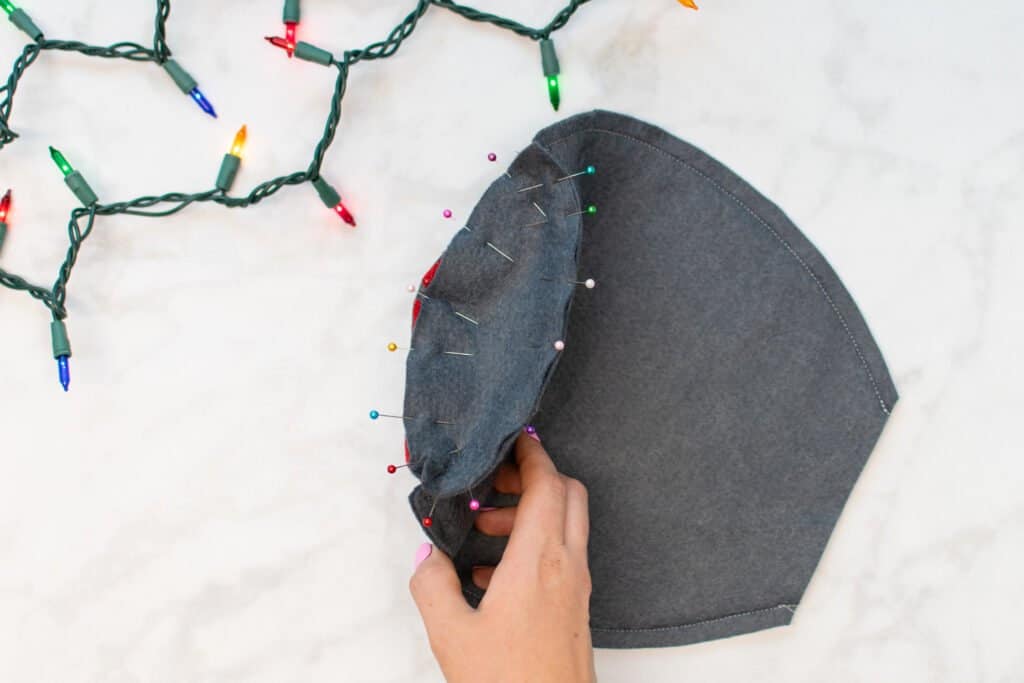
The feet of your gnome should be sandwiched between the fabric of the Body and the Bottom piece.
*PRO TIP: Pinning the Bottom to the Body can be difficult, but go slowly and use A LOT of pins!
While pinning the points, it helps to seam rip a small amout of each side seam open to get it to lay flat.
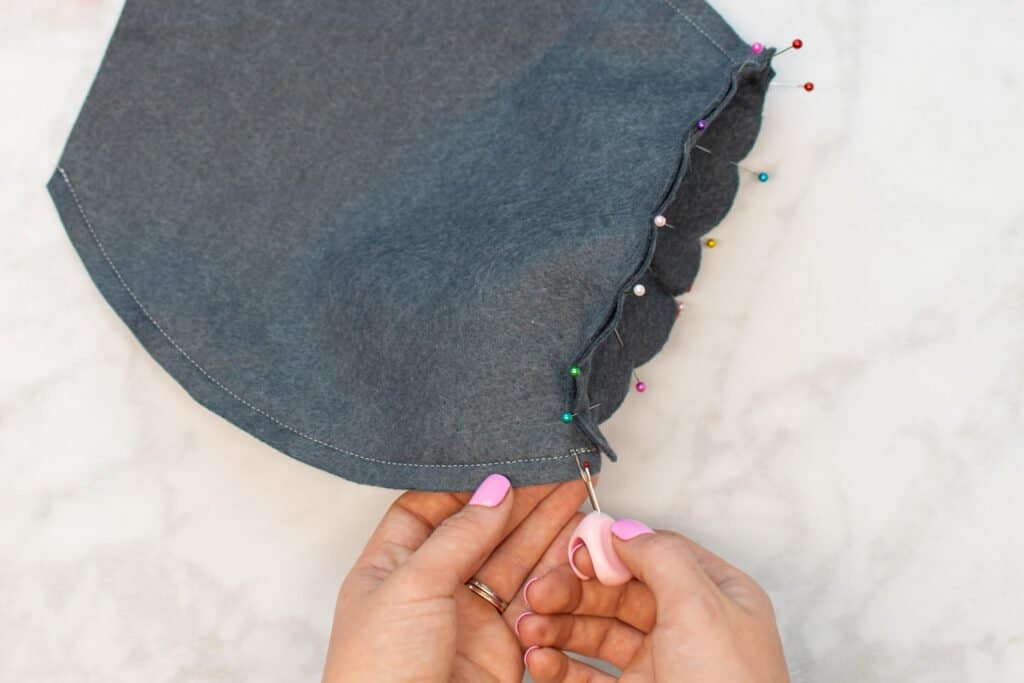
Then, sew a straight line across each point before going on to sewing the rest of the Bottom in place, making sure the allowances of the side seams are finger-pressed open. This helps to hold it in place before sewing the remainder of the seam.

Next, sew along the long curved sides of the bottom with a 3/8" seam allowance. Your stitching on each side should meet up at the side seams/points.
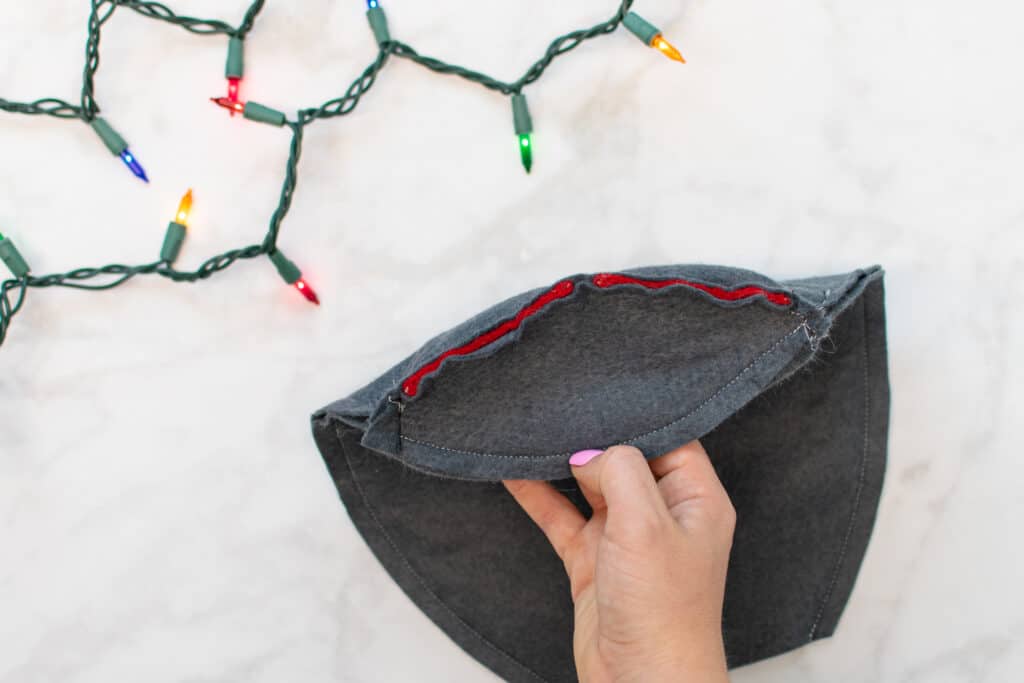
Trim the points away from the seam allowance at each side seam. This will help to reduce bulk and get a nicer finish once the gnome is turned right sides out.
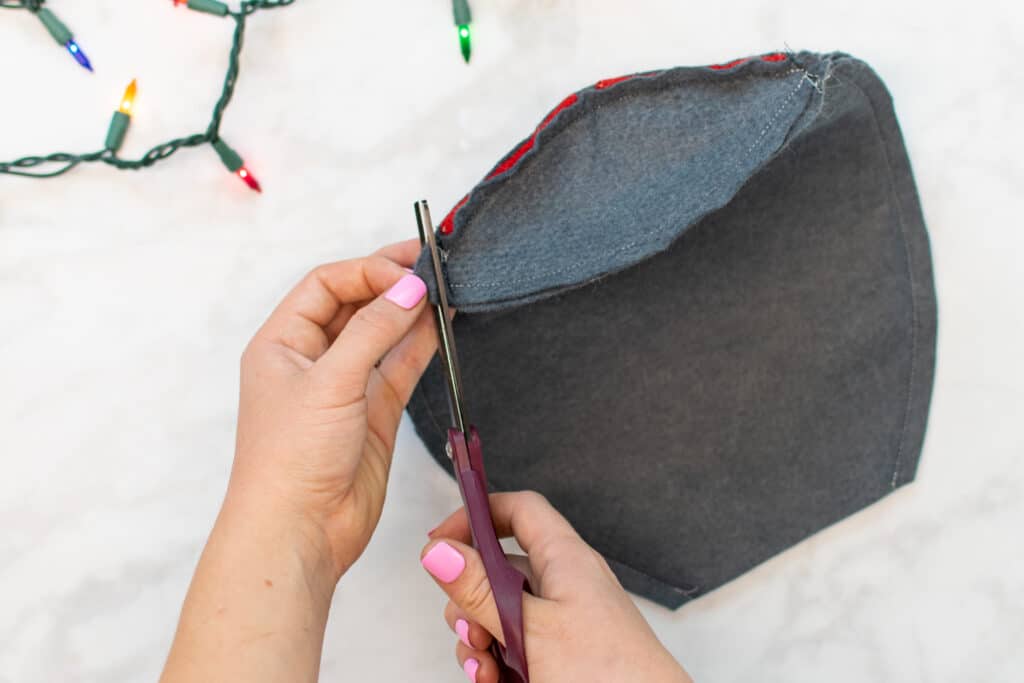
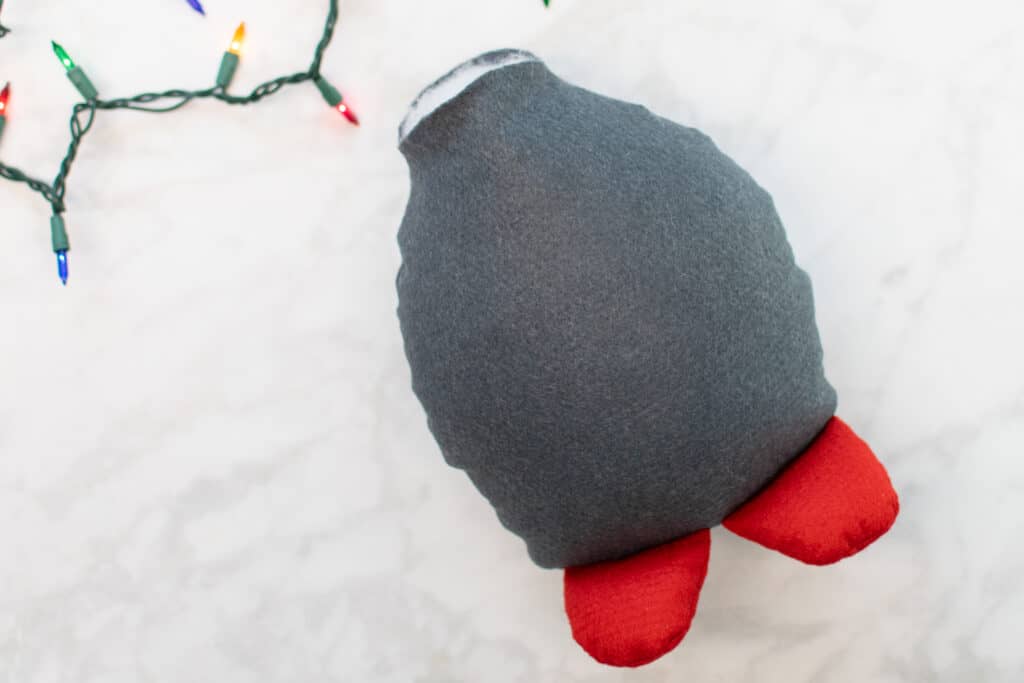
Finally, turn the gnome right sides out. The feet should be attached and stuffed!

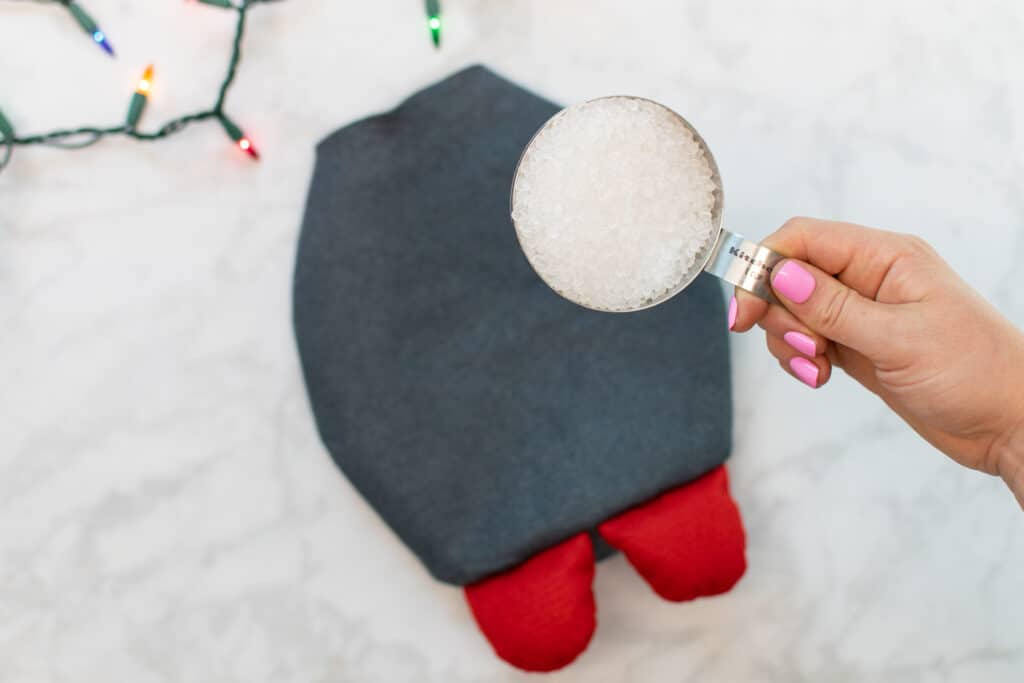
Step 8: Stuff the Gnome Body
Next, measure out and pour 4 cups of Poly Pellets into the bottom of the gnome Body.
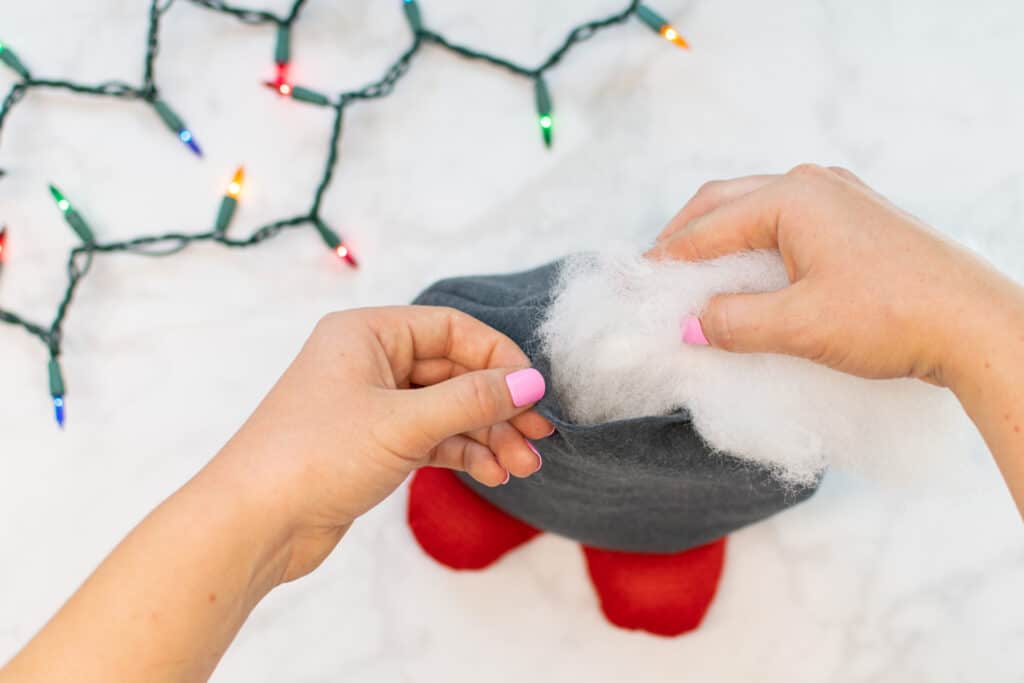
Then, stuff the rest of the body with Poly-fil. You can leave the top few inches of the neck unstuffed, this helps to keep the Poly-fil from showing under the hat later. Focus on trying to stuff the body of the gnome evenly, you don't want any weird lumps!
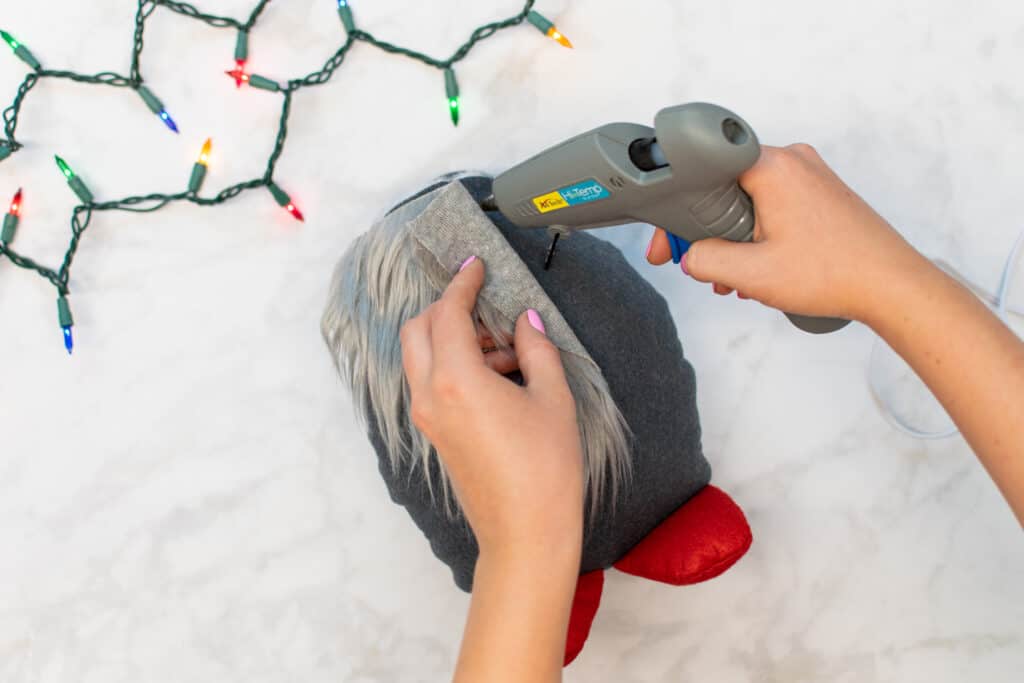
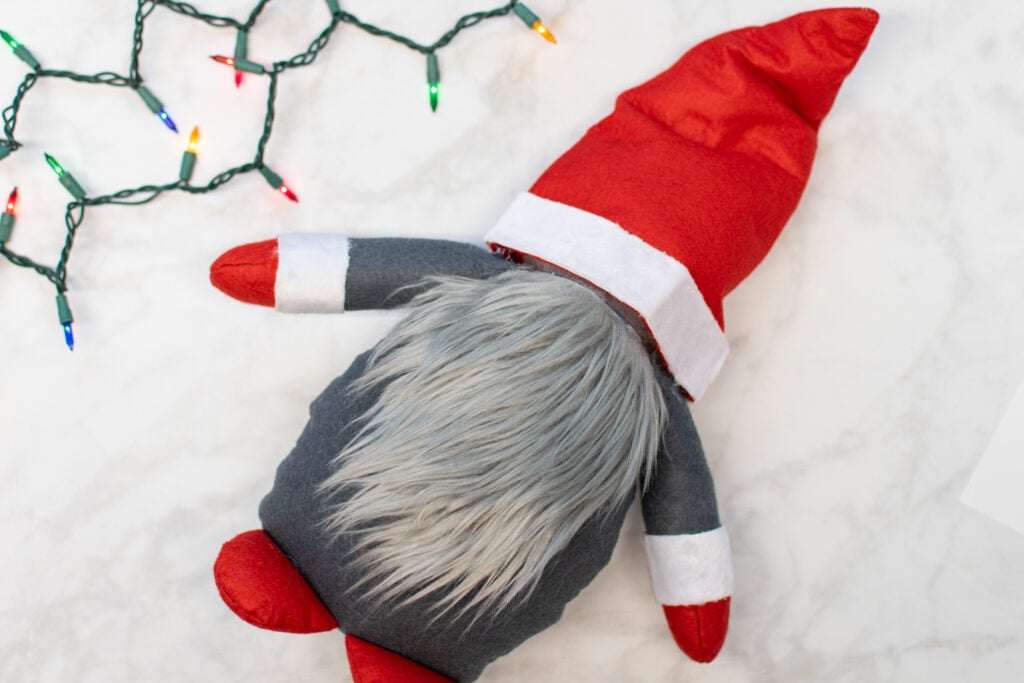
Step 9: Attach the Beard and Arms
Once the body of your Christmas gnome is put together, it's time to move on to attaching the Beard and Arms.
First, use a hot glue gun to glue the beard to the top of the stuffed body. Be careful not to glue the bottom half of the beard down as it is supposed to hang naturally.
Next, glue the upper few inches of the Arms to each side of the body. Place the Arms directly over the side seams of the gnome Body with the seam of the Arms facing towards the back.
Step 10: Make the Christmas Hat
Next, let's put together that adorable little gnome hat.
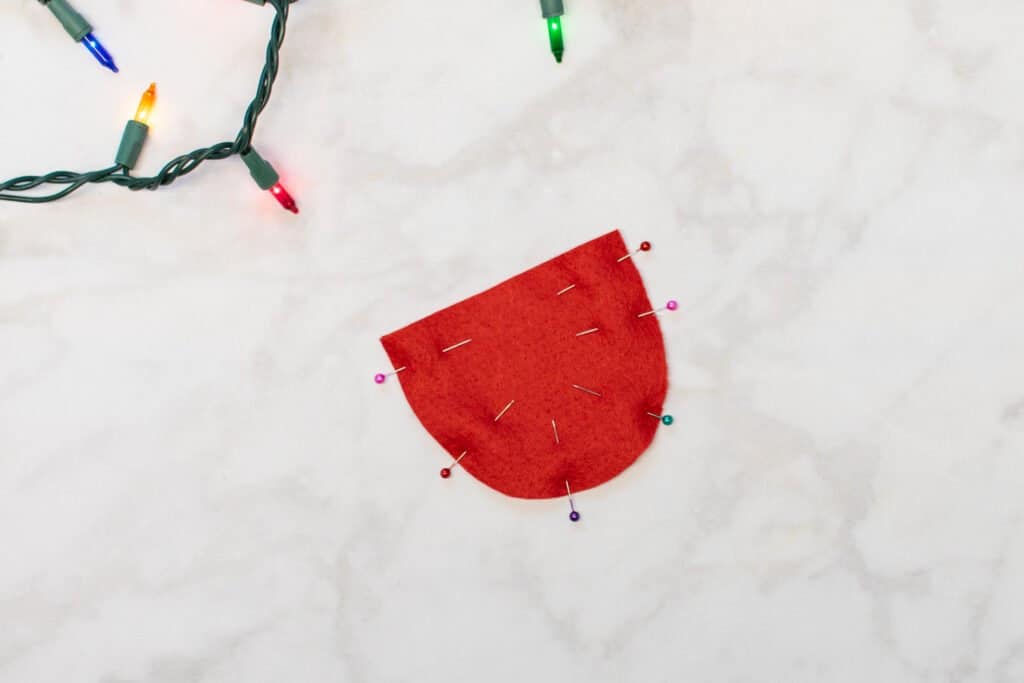
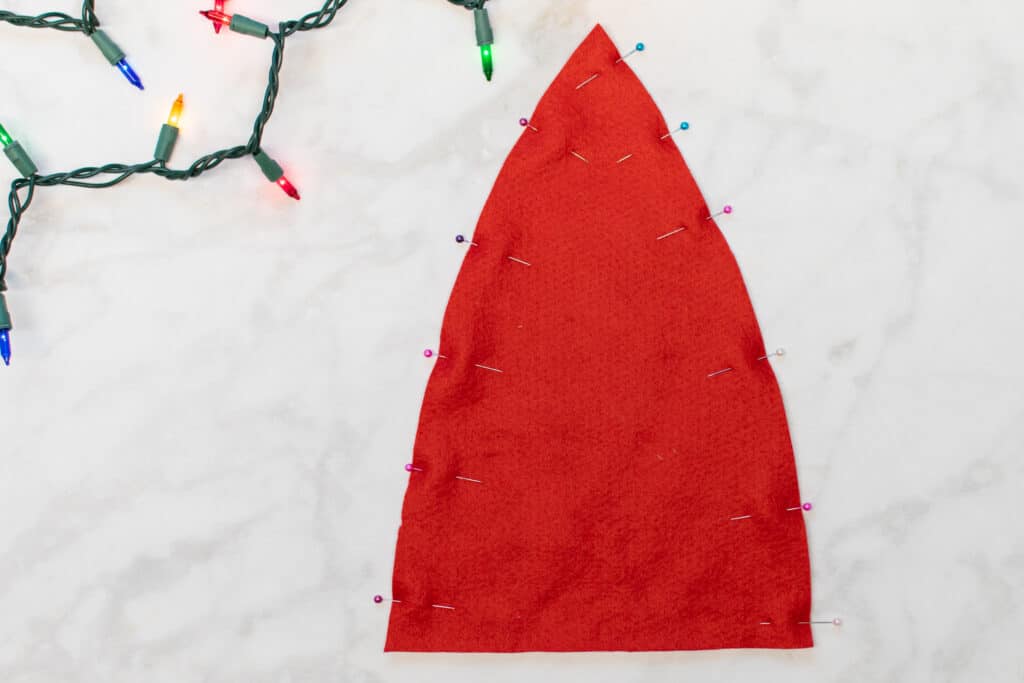
Start by placing the 2 Hat pieces with right sides together.

Align and pin the 2 long sides of the Hat pieces together.
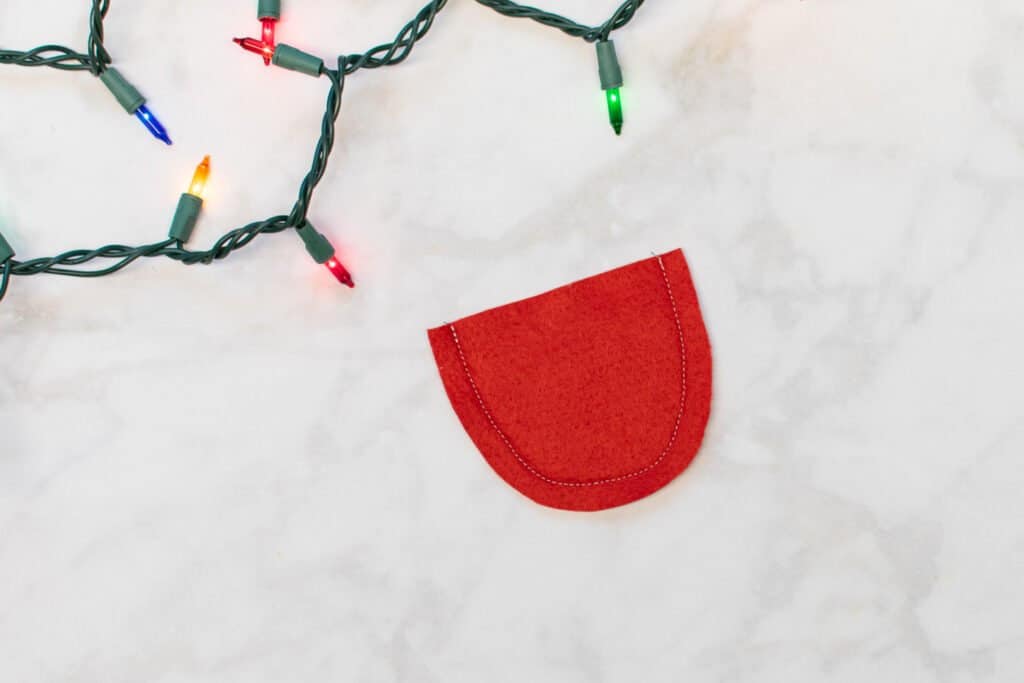
Then, sew each side seam of the Hat with a 3/8" seam allowance. Your two seams should match up just below the point at the top of the fabric.
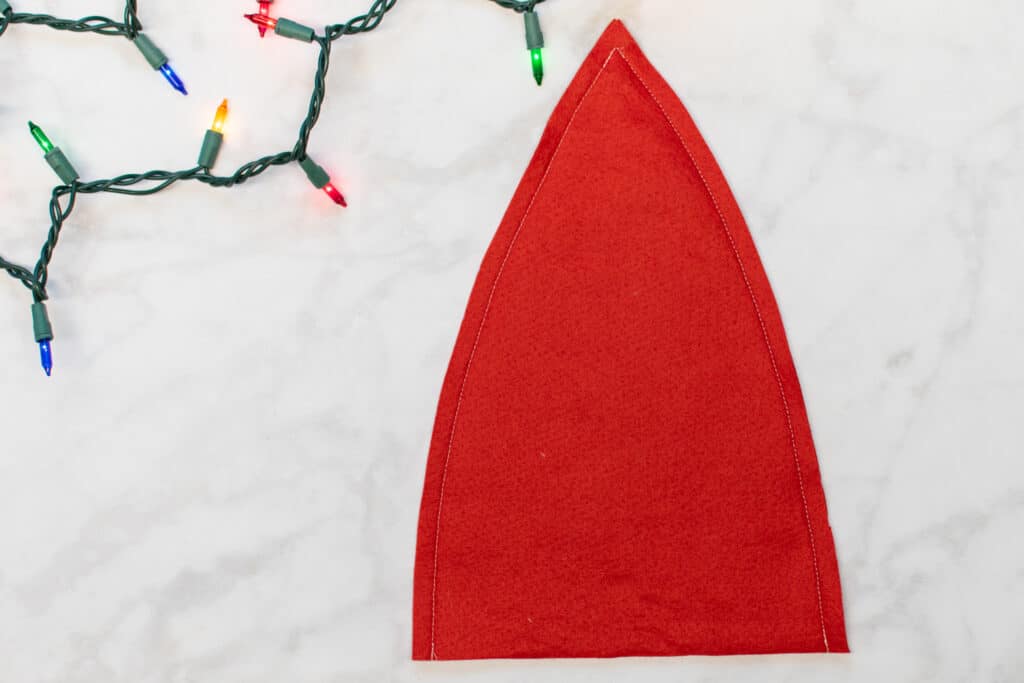
Trim the seam allowances down by half to reduce bulk.
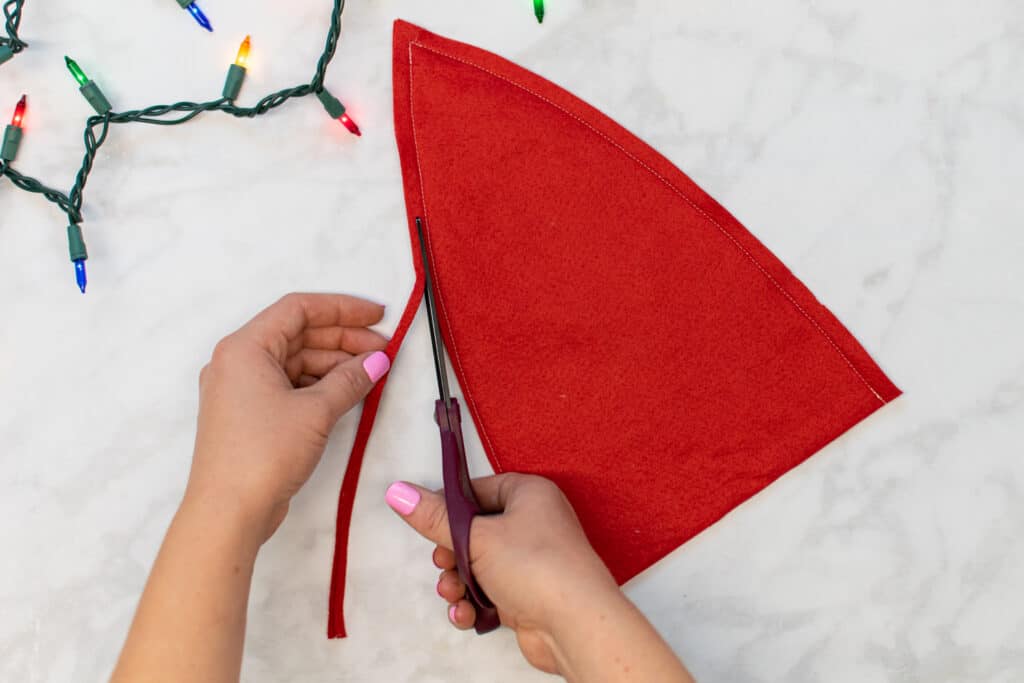
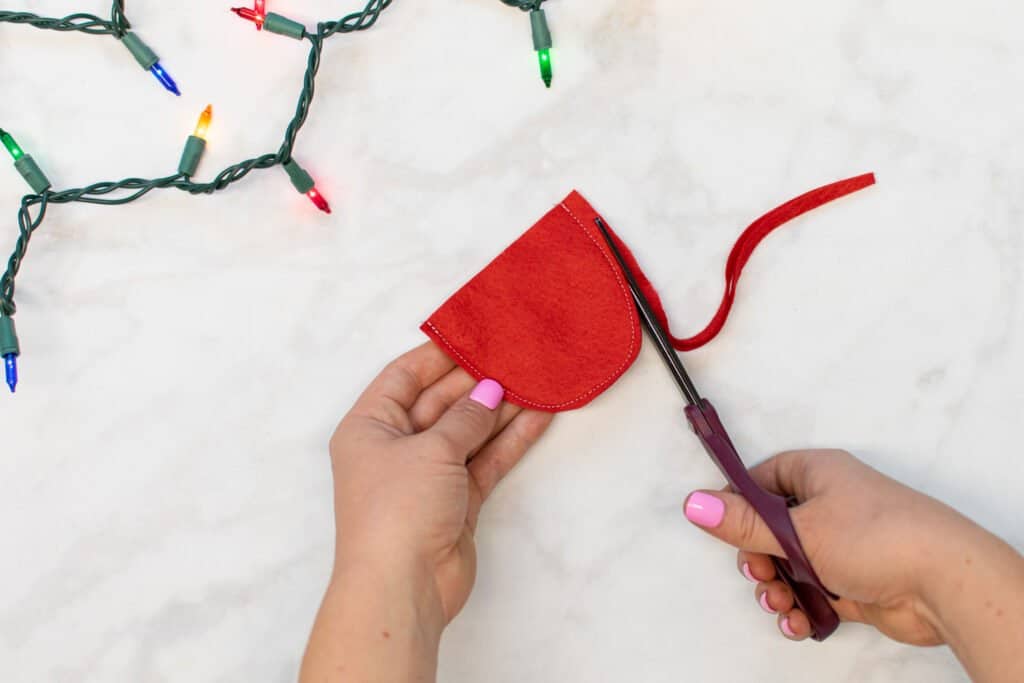
Then, trim the point away from the seam allowance at the top of the Hat. This will help you to get a nice, sharp point.
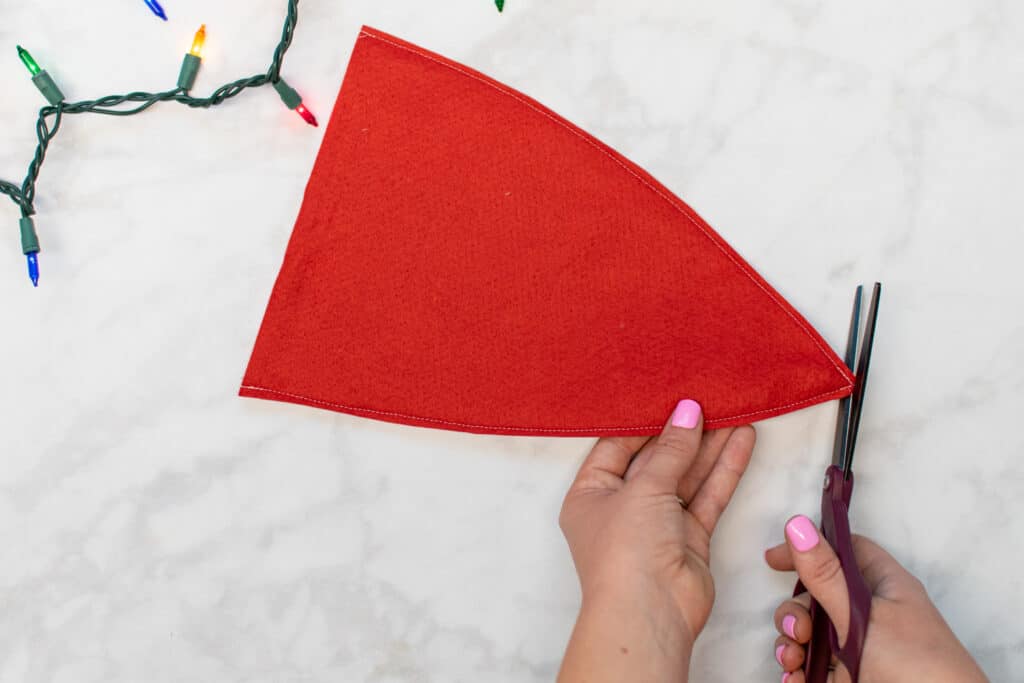
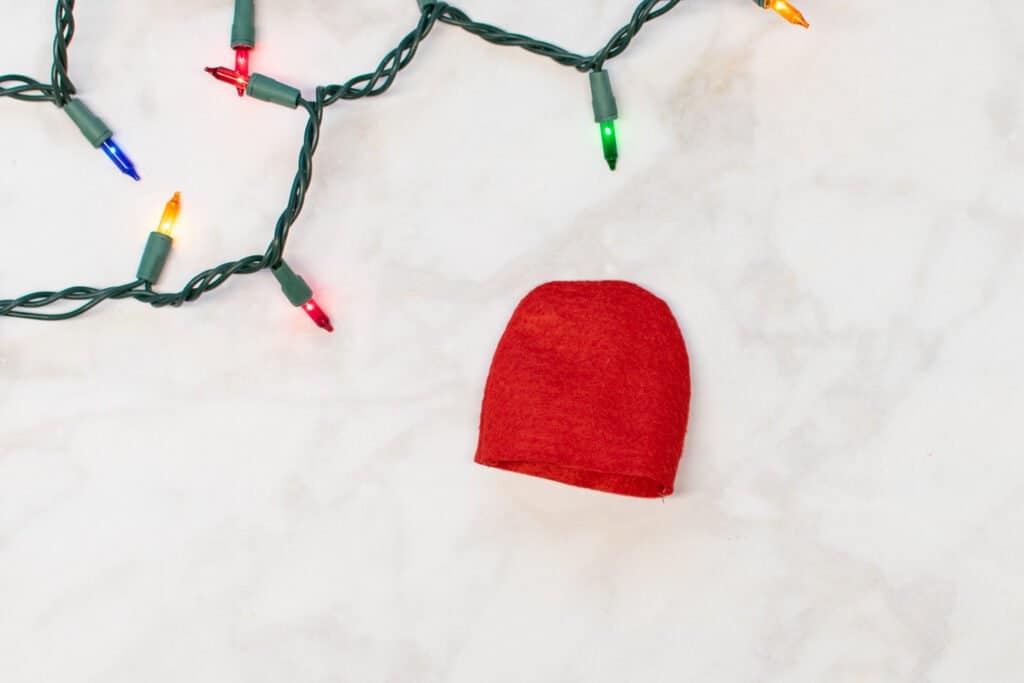
Turn the hat right sides out and press it flat.

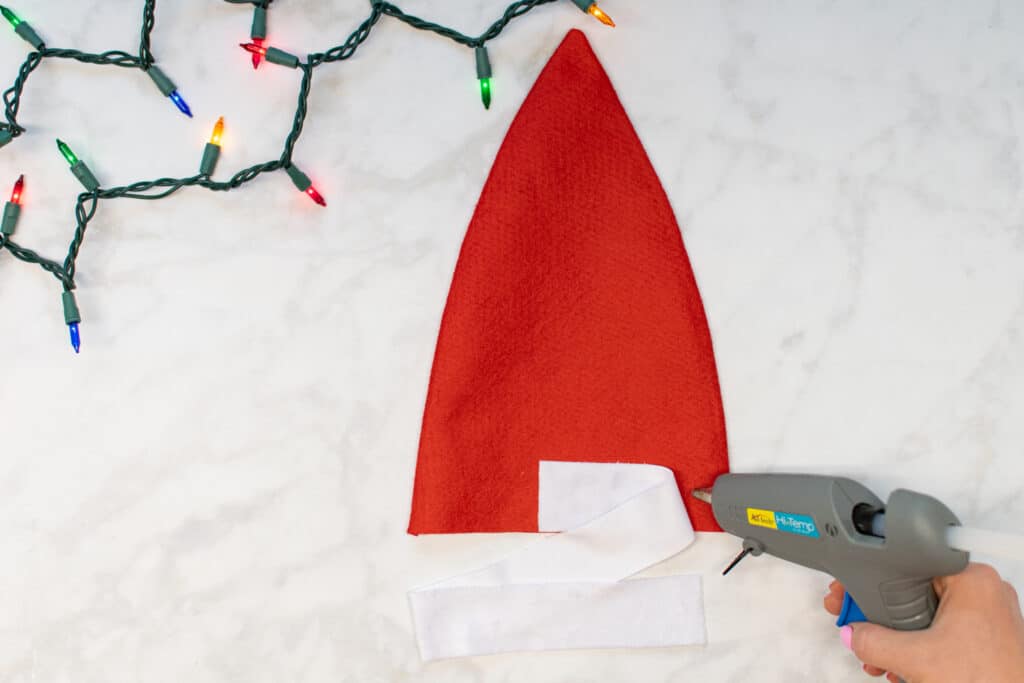
Next, glue the Hat Trim around the bottom of the hat with your glue gun. If you like, the trim can hang an inch or so below the bottom of the hat, which will hide any red felt peeking through at the bottom. Make sure it overlaps in the back - we don't want any gaps in the trim!
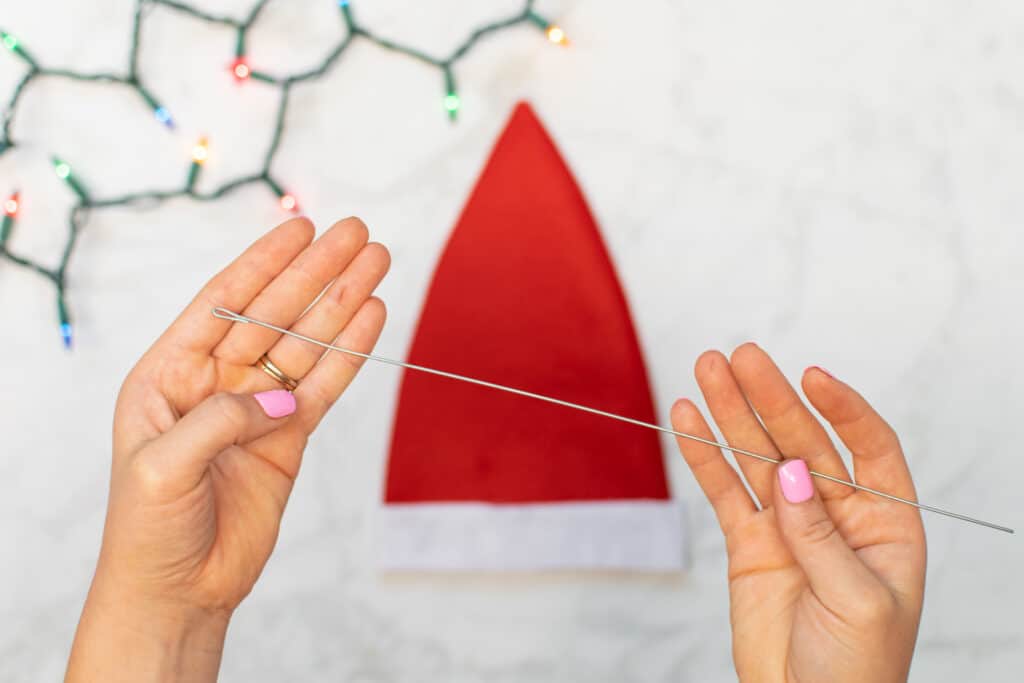
Cut a piece of 18 gauge wire to 13", then bend one end of the wire into a tiny loop. This is so the wire will not poke through the top of the Hat.
Place a dot of glue on the loop of the wire and insert it into the Hat. Push the loop all the way to the top of the Hat so that it is glued to the point of the Hat.
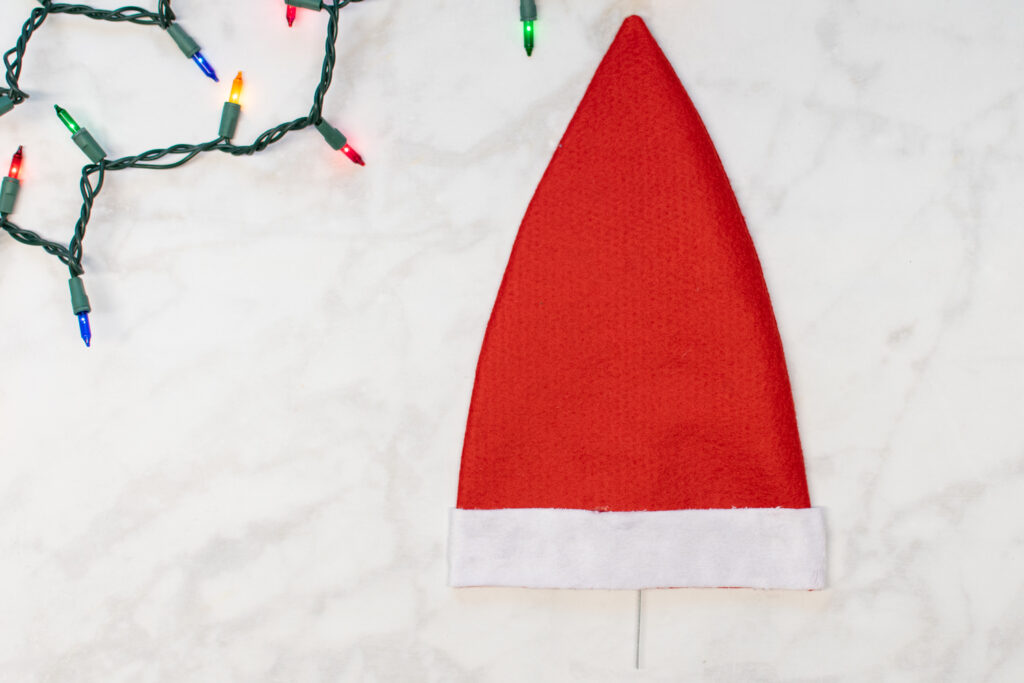
Next, stuff the Hat very lightly with Poly-fil. It should not feel stiff. You want it to still be soft and squishy so that you can bend it into a nice shape later.

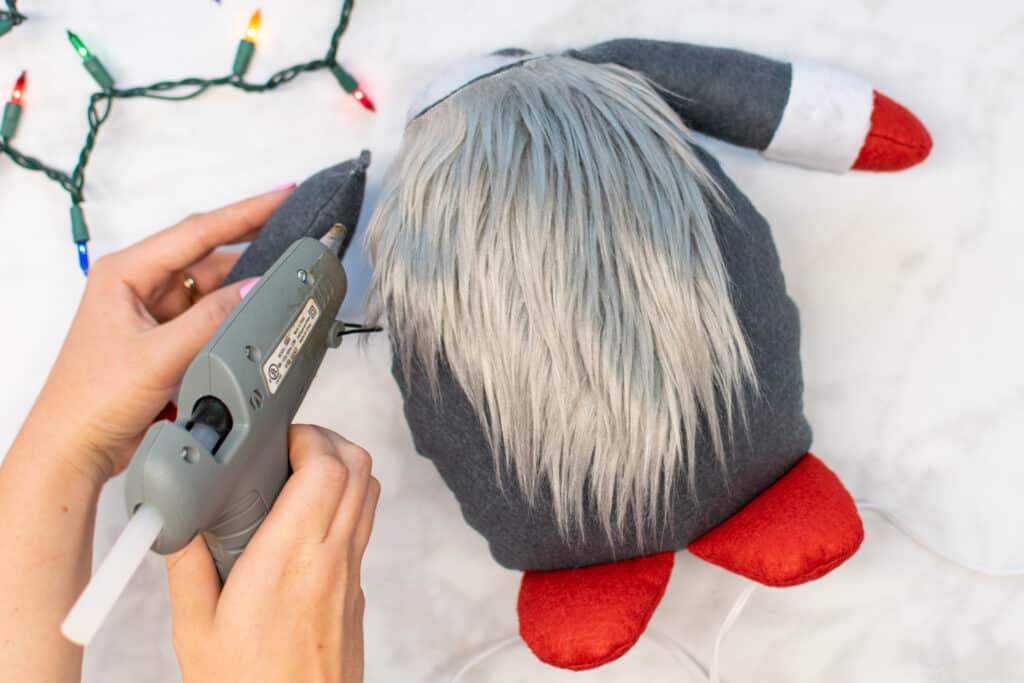
Step 11: Attach the Hat and Nose to the Gnome
The last step is to attach your gnome's Hat and Nose.
First, place the Hat on the gnome, inserting the wire into the Poly-fil in the Body. Make sure the side seams of the Hat match the side seams of the Body.
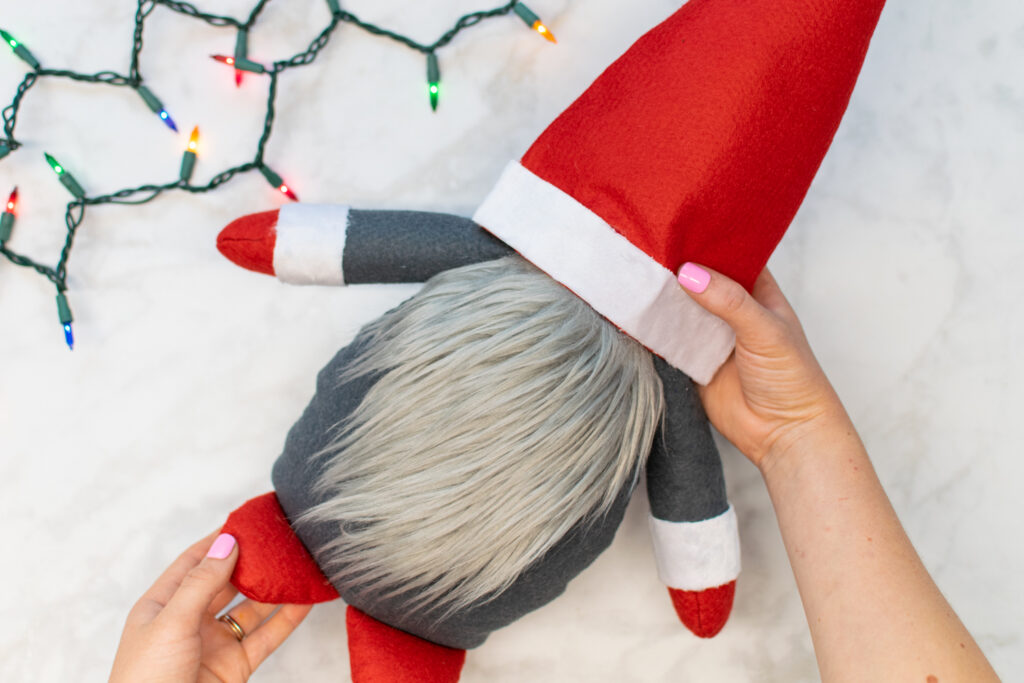
Place dots of glue around the sides and back of the Hat to secure it to the Body. Be careful not to glue the Hat to the front of the Body! Bend the tip of the hat forward into a shape that you like.
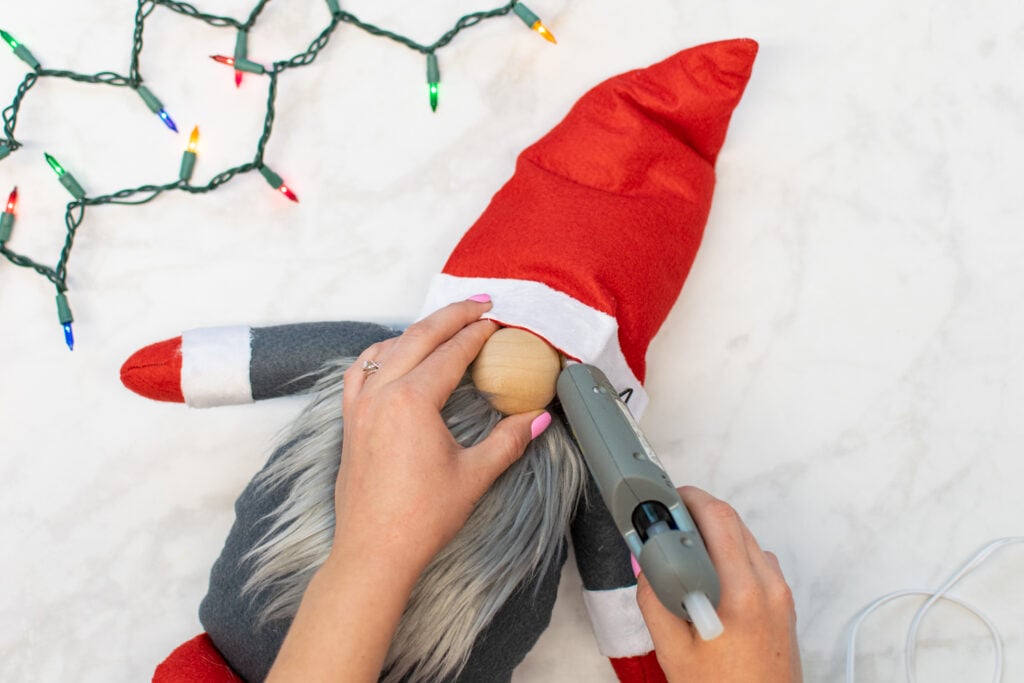
Next, we're on to the nose! Grab your wooden ball - I recommend a 1.5" ball for the Small gnome and a 2" ball for the Large gnome.
The trick to attaching the nose is to glue it to the Hat. Place dots of glue on the top of the nose and glue it to the inside rim of the hat. You can also place a dot of glue on the bottom so that it attaches to the beard.
Personalizing Your DIY Christmas Gnome (Optional)
Once you've stitched up and assembled your gnome, it's time to add all the little details to make it yours!
Here are a few things you might want to try to give your Christmas gnome a more fun and unique look.
- Hairspray the beard and shape the top of it into a mustache.
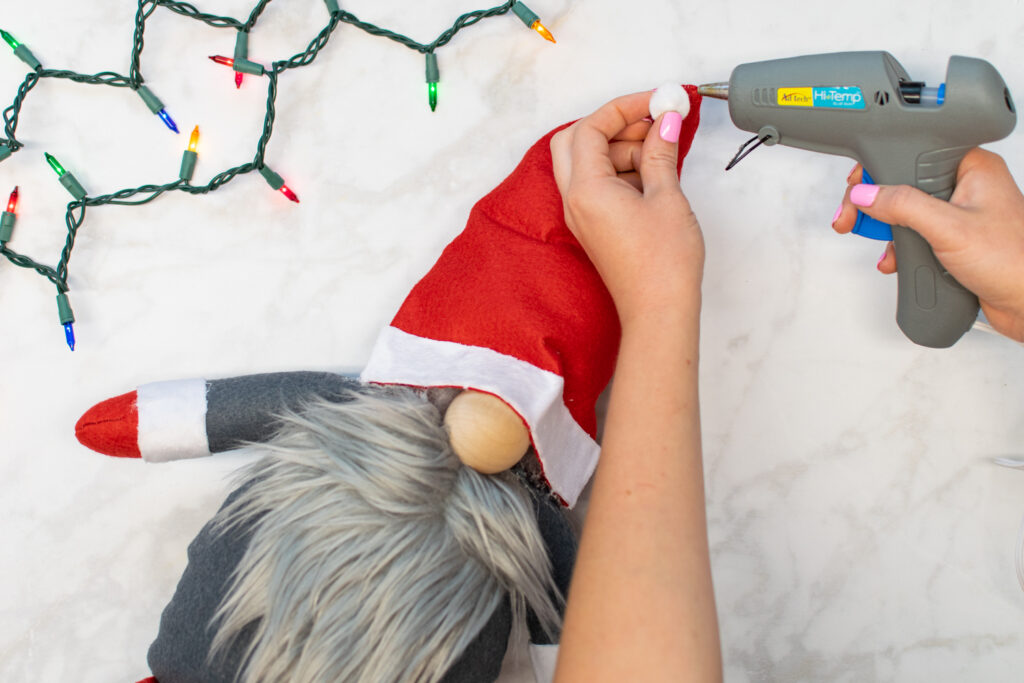
- Attach a pom pom or ornament to the point of the hat.
- Glue some small Christmas decor to the hands or trim to decorate your gnome for the holidays.

Looking for more awesome Christmas patterns and tutorials? Try one of the tutorials below!
- DIY Oven Mitt Sewing Tutorial
- How to Sew Pajama Pants
- Faux Fur Christmas Stocking Sewing Tutorial
- DIY Starbucks Snow Globe Tumbler
Did you make a cute Christmas gnome? Post a picture on Instagram with the hashtag #sweetredpoppy - I would love to see how it turned out!
Don't forget to join my Facebook group where you can show us what you're making, ask questions, and learn from others.

Absolutely the most adorable Gnome I've ever seen. I will definitely be making several of these!
Thank you for the pattern and tutorial.
Liz
How many gnomes can you get from 1 yard of felt?
I love your gnome.
I have made gnomes by the dozen for all the different holidays. I need to make your version.
Sent link to email several times, but doesn't show up on email. Really like this pattern. I have downloaded other patterns with no problem. Thank you!!
half way down the page, there is a button that says click to download pattern, this will bring you to a new page and you will be prompted to enter you name and email address. If you check your emails, you will a email that says click here to receive gift. click on this and the pattern will download for you.
Pattern is never sent. Not in spam, not in trash, not in inbox.
Have you checked your spam folder, in case it went in there
I Luv this pattern! Please send via email.
half way down the page, there is a button that says click to download pattern, this will bring you to a new page and you will be prompted to enter you name and email address. If you check your emails, you will a email that says click here to receive gift. click on this and the pattern will download for you.
i did that and never received the email
Have you checked your spam folder. That's where mine was.
I am not able to receive my pattern
half way down the page, there is a button that says click to download pattern, this will bring you to a new page and you will be prompted to enter you name and email address. If you check your emails, you will a email that says click here to receive gift. click on this and the pattern will download for you.
Can you forward the email to me since I didn't receive it? ma************@***il.com
Bonjour depuis ce matin impossible davoir le patron jai du entré au moins 6 fois mon adresse mail et rien du tout dommage
Love, love, love gnomes❣️
Definitely on my to do Xmas list.
Thank you for this pattern. I love gnomies of all sorts and yours are so cute!
Love this pattern. I made a few of them already, looking forward to make more.
They are adorable!!!!!
Thank you for the pattern.
I entered my email, but never received an email. I checked my spam and didn’t see it there.
Thank you so much for this pattern I made 3 yesterday with sublimation printed fabric and they came out so cute I would really like to send you the photos
Can fleece be used instead of felt?
Instructions printable?
Hello!! Just love your Christmas paper piecing patterns!!! I tried to download them but nothing came into my e-mail? Could you help me with this.
Love your gnome patterns too!!!
Thank you!!!
Pam Miller
I never received the pattern 🙁
I got the email for the pattern but couldn’t open it to print the oattern
Greatpatterns. Love them all
Thank you.
Is there a printable version of the instructions?
Hallo, wat ontzettend lief dat je dit patroon gratis verstuurd, TOPPER !