Learn how to hem jeans like a pro while preserving the original, faded hem with this step-by-step sewing tutorial.
Knowing how to hem jeans is a useful skill for anyone to have, whether you're into sewing or not. Being able to hem your own jeans is an absolute lifesaver (and money-saver) if you're short and can never find jeans that fit your legs properly. No more shopping for specialty jeans or spending money at a tailor!

But honestly, it's a great skill for anyone to learn, short or not! If you know how to easily hem jeans, you have more options while shopping for pants. Plus, if you have kids, you can hem their pants to fit perfectly and keep those hems from dragging in the dirt!
Table of Contents
Why Keep the Original Hem when Hemming Jeans?
The key to achieving a professional, it-looks-like-you-bought-them-this-way look when hemming jeans is to preserve the original hem.
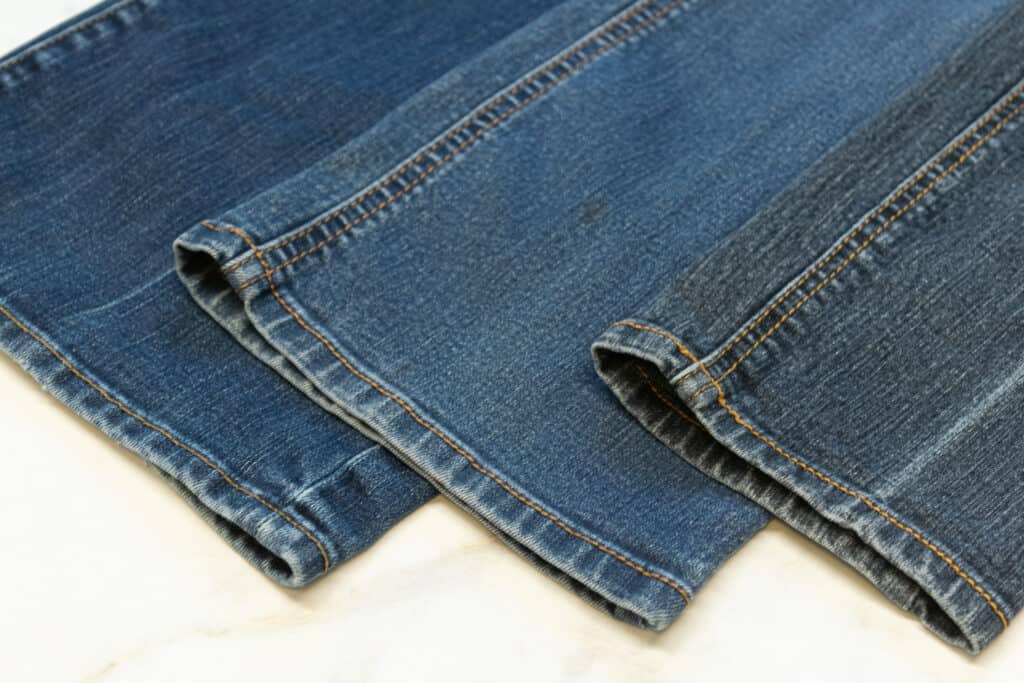
The hem of jeans is different from other pants because it usually has some fading and a worn, distressed look even when the jeans are brand new. Removing this unique feature of your jeans when shortening the pantlegs will make the jeans appear "off" and draw attention to your new hems.
In this tutorial, I'll be showing you how to professionally hem your jeans while maintaining the original hem.
The 3 Main Jean Leg Styles
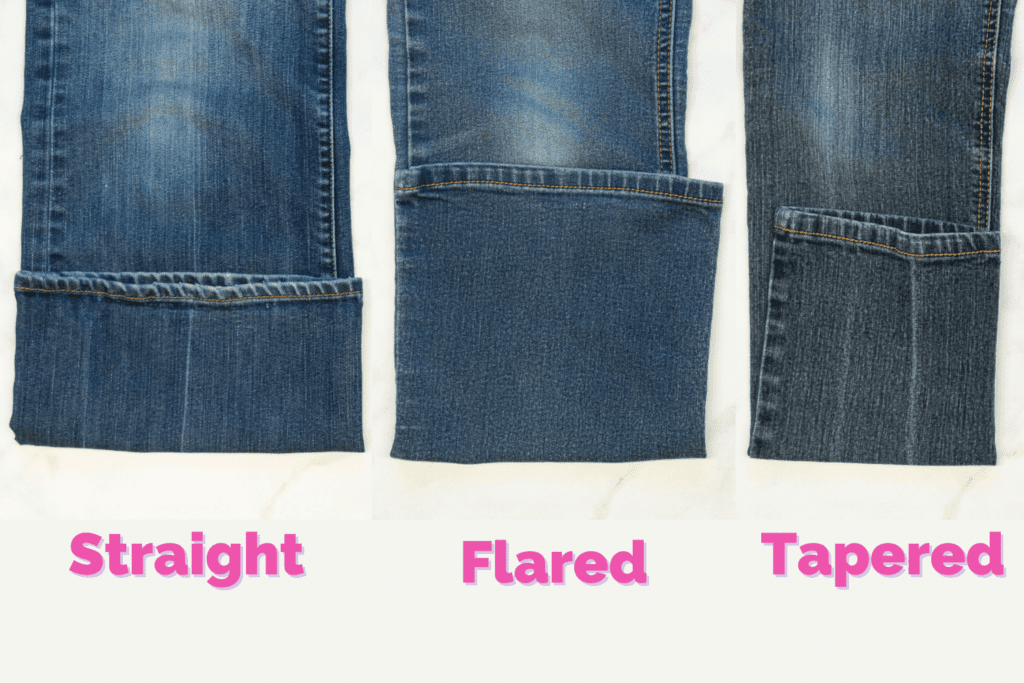
While it would be nice if all jeans could be hemmed using the exact same method, the different leg cuts make that impossible! These three primary leg styles each require a slightly different hemming technique:
- Straight leg jeans: In straight leg jeans, the width of the lower leg of the pants is the same all the way down (from the knee to the hem). This style includes standard straight leg pants and wide leg pants with a straight cut.
- Flared jeans: Flared jeans are wider at the hem than at the knee. The pantlegs of this style get gradually wider from the knee to the hem.
- Tapered jeans: Tapered jeans are just the opposite of flared jeans. The pantlegs get narrower from the knee to the hem, meaning that the hem is narrower than the width at the knee. Skinny jeans also fall into this category.
Below, I've separated Step 2 (Sewing the New Hem) into 3 sections, each corresponding to one of the 3 jean leg styles. Steps 1 (Marking the Hem) and 3 (Finishing the Raw Edges) are the same for all three styles.
Looking for tips on repairing ripped jeans? Be sure to check out this post, How to Fix a Hole in Pants Three Ways.

Why Shop Through My Links?
When you shop through my affiliate links, it doesn't cost you anything extra, but it helps me out in a big way! I earn a small commission from those purchases, and that support allows me to continue creating and sharing free tutorials and patterns for you. Thank you so much for helping me keep this creative community going!
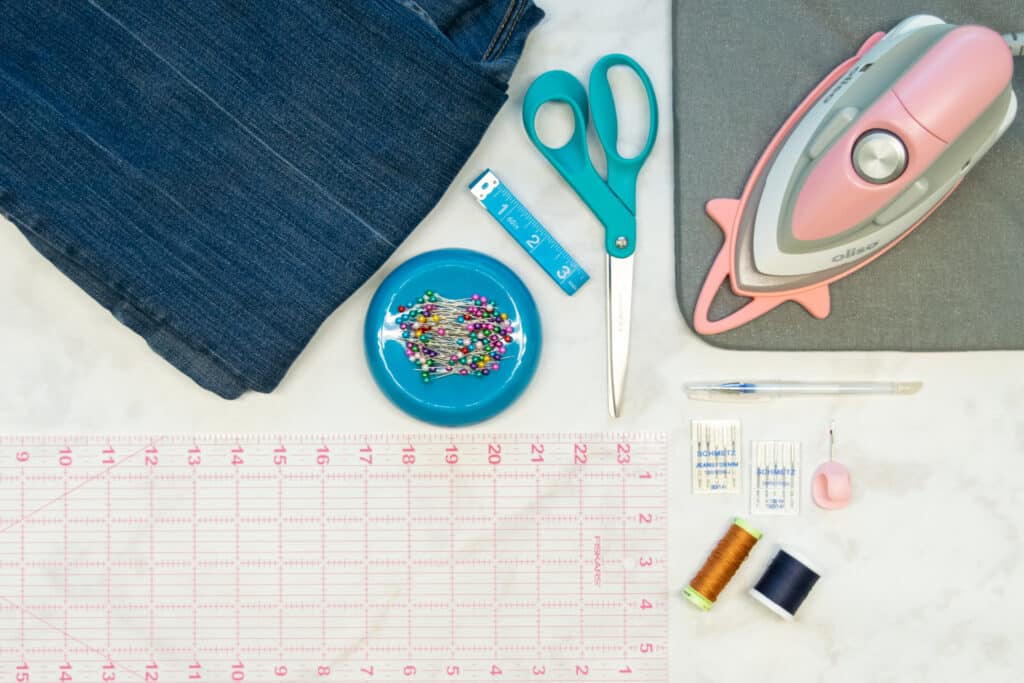
Supplies to Hem Jeans with Original Hem
First, here are the supplies you'll need to hem your jeans (regardless of the leg style).
- Jeans that Need Hemmed
- Scissors
- Quilting Ruler
- Fabric Pen or Marker
- All-Purpose Thread Matching the Color of Your Jeans
- Topstitching Thread Matching the Topstitching on Your Jeans
- Denim/Jeans Sewing Machine Needle
- Topstitching Sewing Machine Needle
- Seam Ripper
- Sewing Pins
- Iron & Ironing Board
- Tape Measure
Shop my favorite sewing supplies by clicking here!
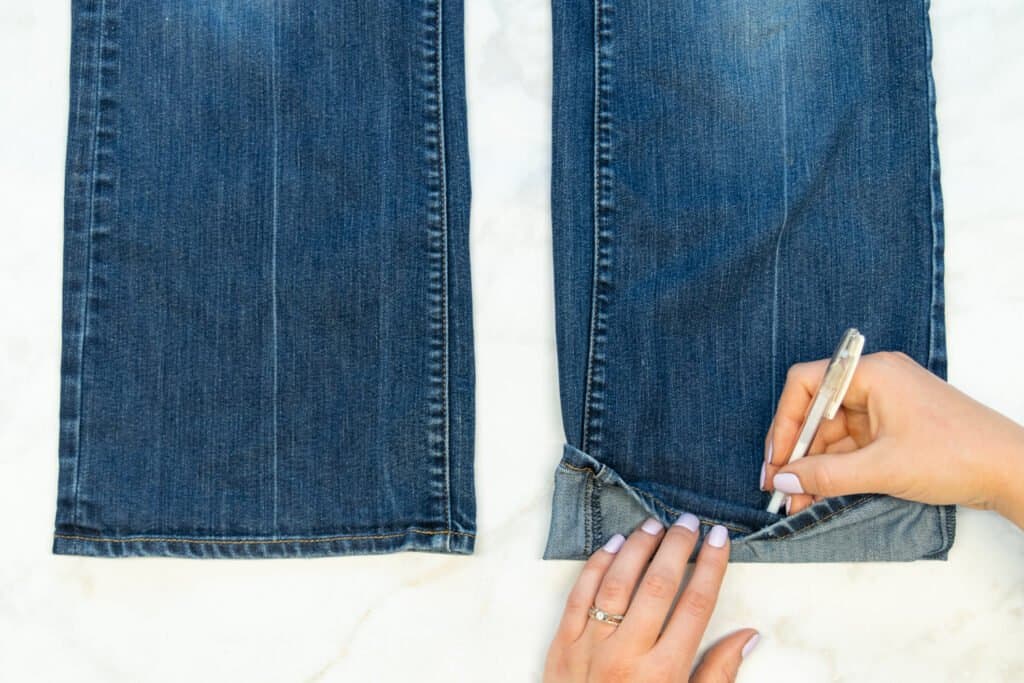
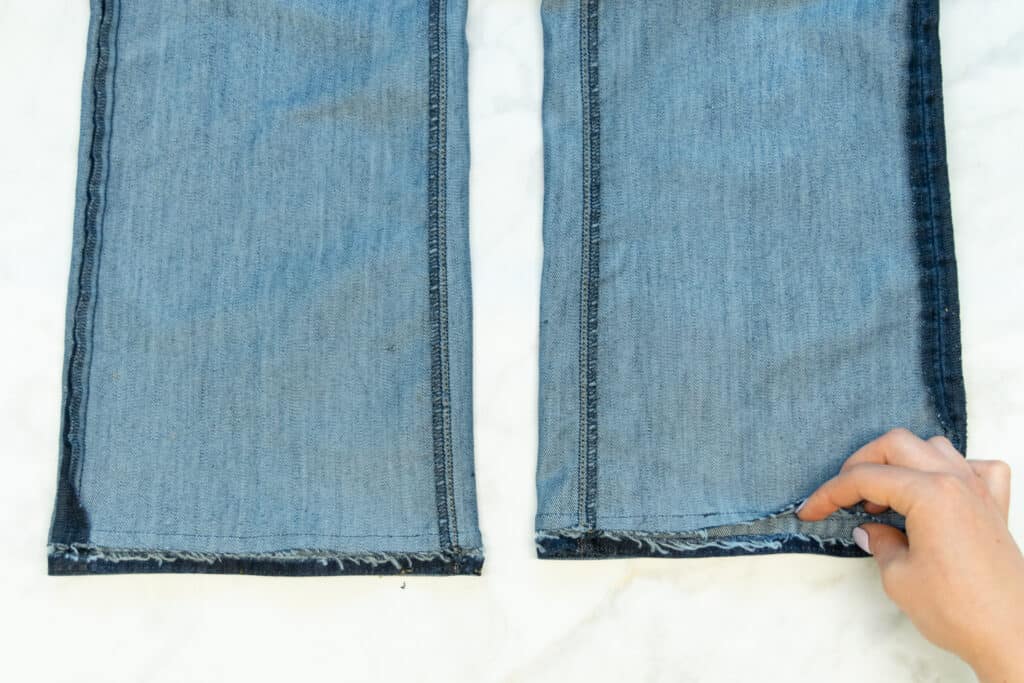
Step 1: Pin and Mark the New Hem
Start by trying on the jeans that you plan to hem. On one of the legs, fold the hem up to the right side to the height you want your finished hem at.
Make sure to stand up straight and evaluate the hem before deciding you're happy with it - the hem will look different when bent over than when you're standing straight!
Once you like the location of the folded hem, pin it in place with a couple of sewing pins. Then, take the pants off and bring them to your sewing table.
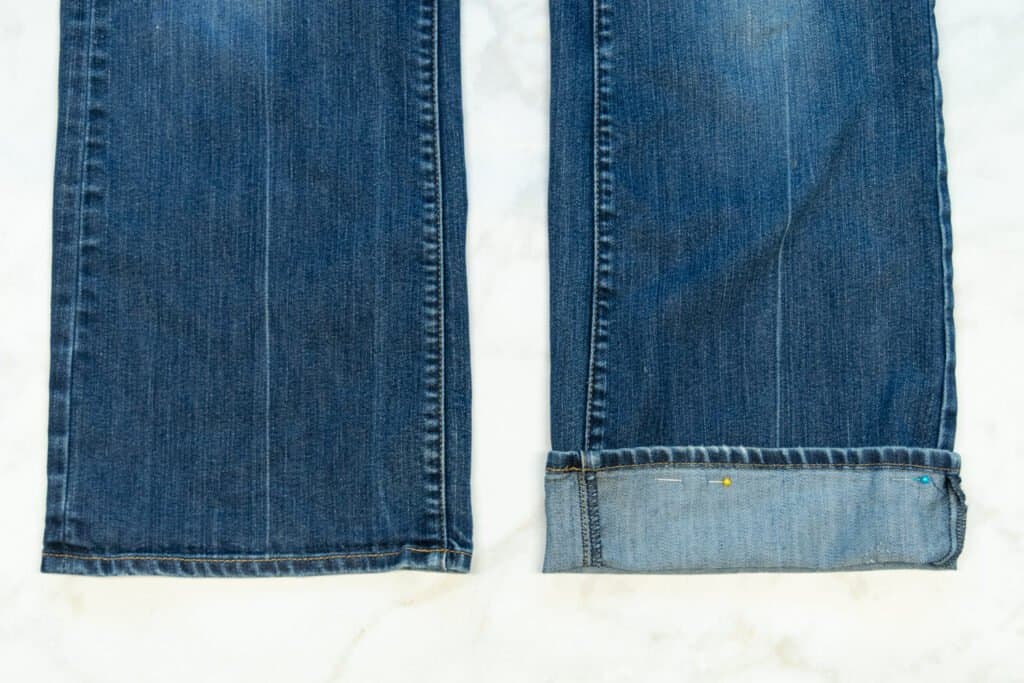
Using a fabric pen or chalk, mark the right side of the pantleg at the center of the fold. I find it easiest to simply make one mark near the center front of the pant.
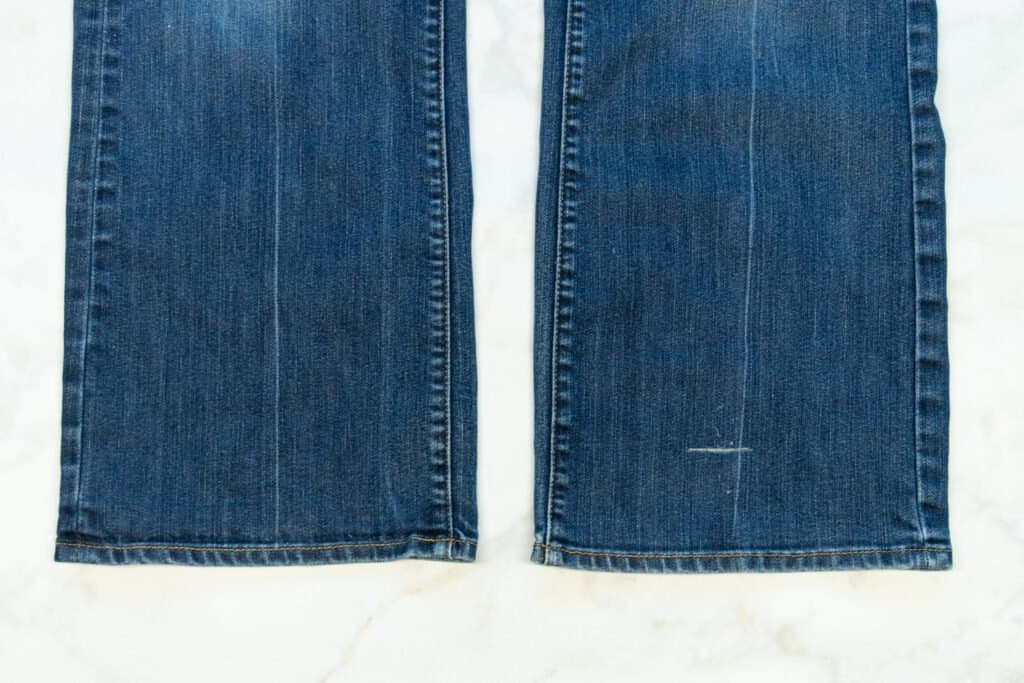
Next, lay the marked pantleg flat, carefully aligning the back and front hems and the side seams.
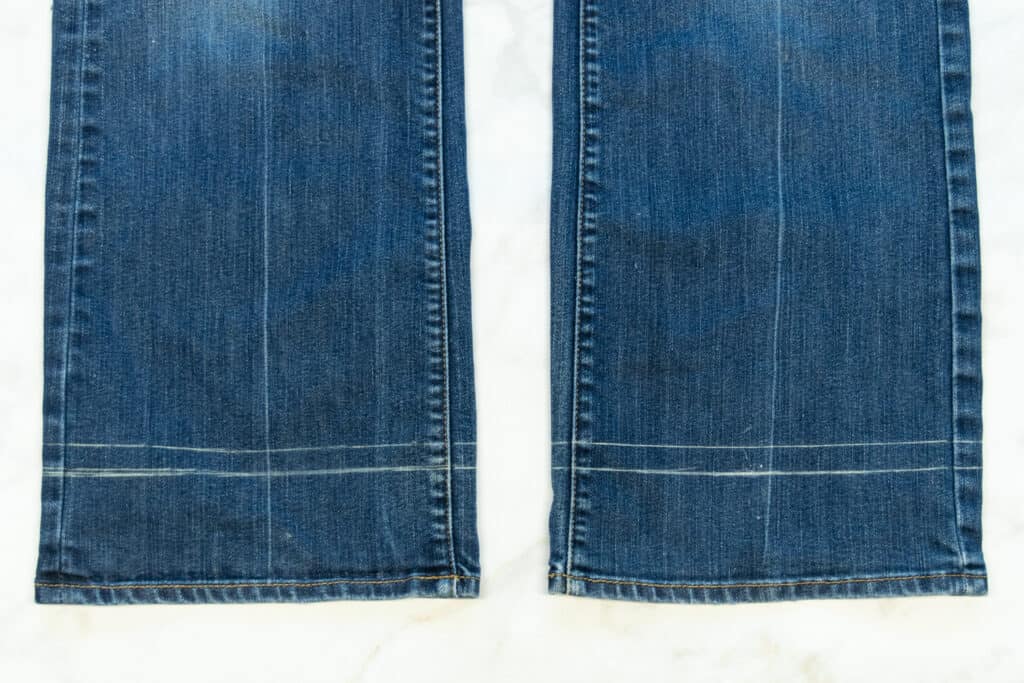
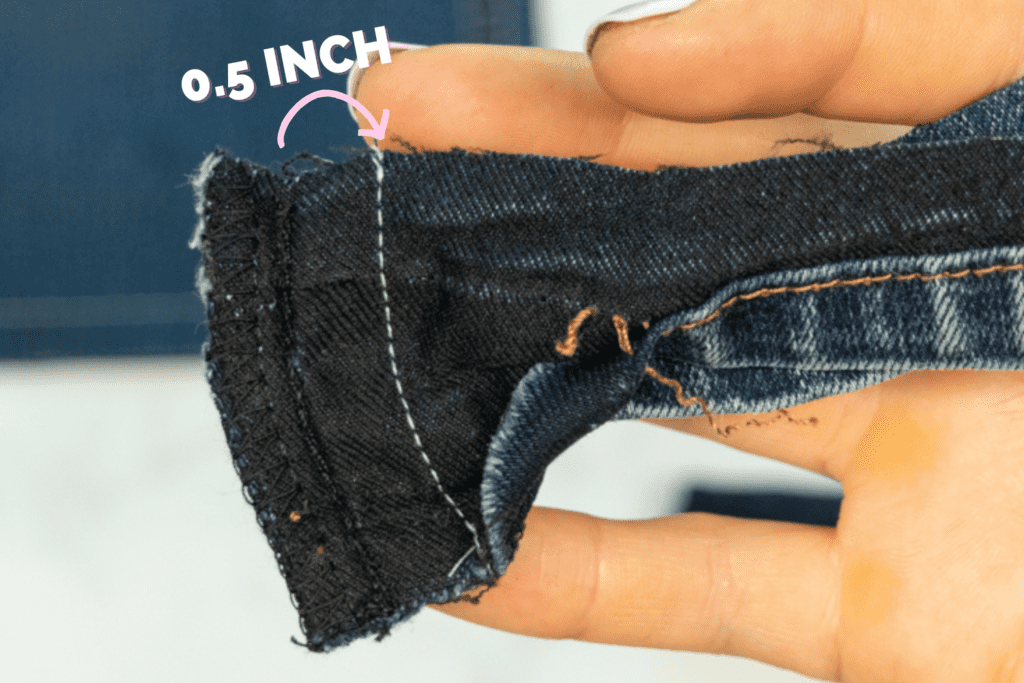
On the marked pantleg, measure how far up from the current hem your mark is at. Then, mark around the entire pantleg at that same height. Use your ruler to measure up from the hem to get your line at the right height.
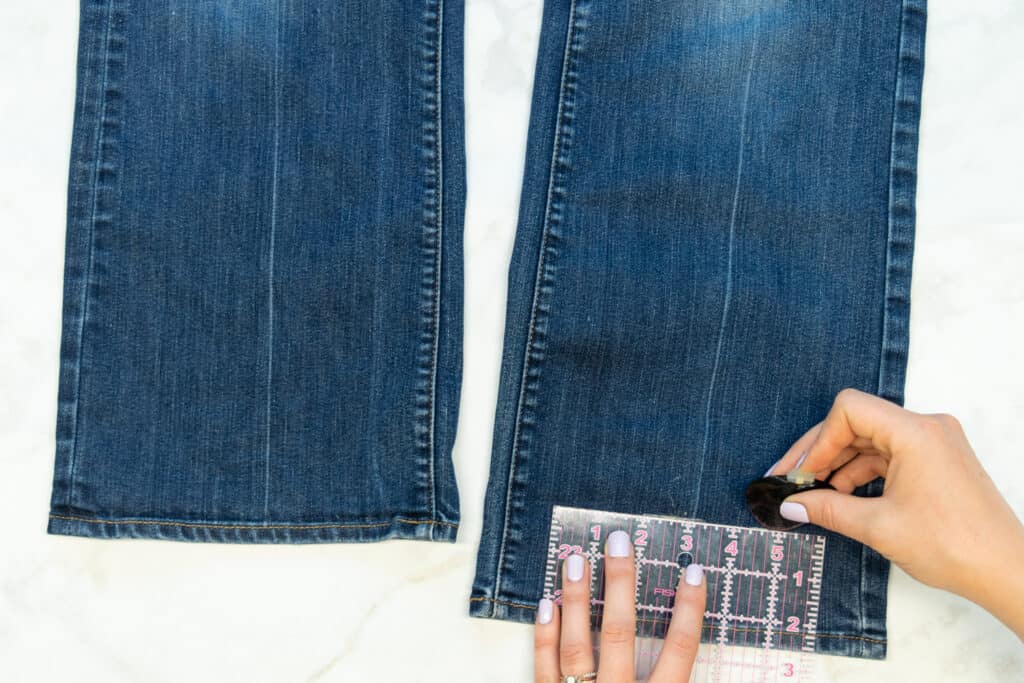
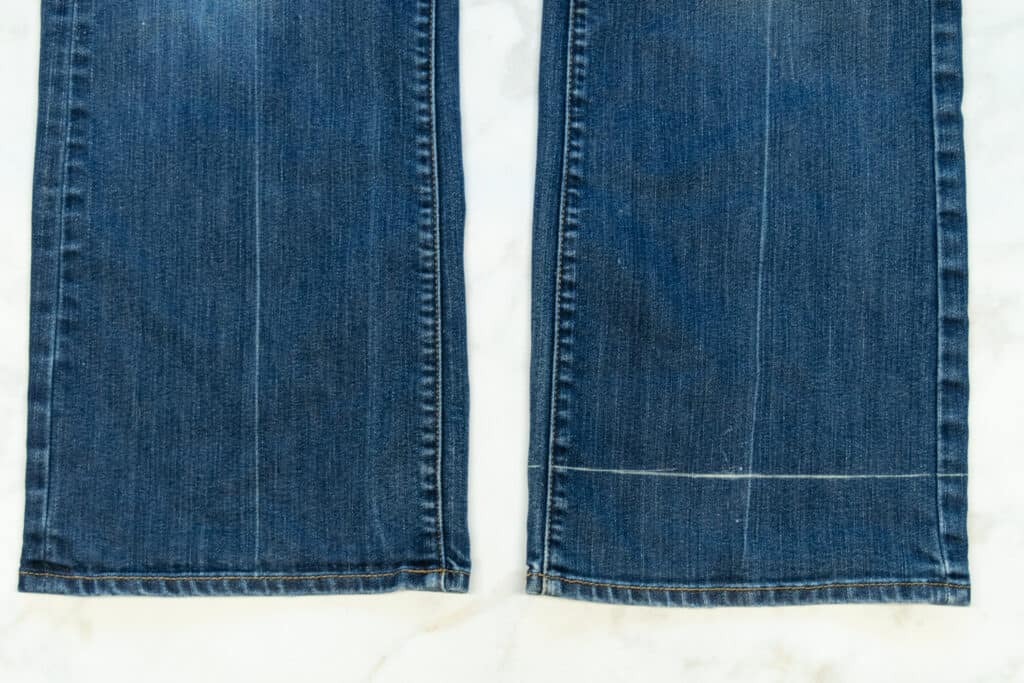
Next, draw another straight line around the pantleg 1/2 inch above your first line.
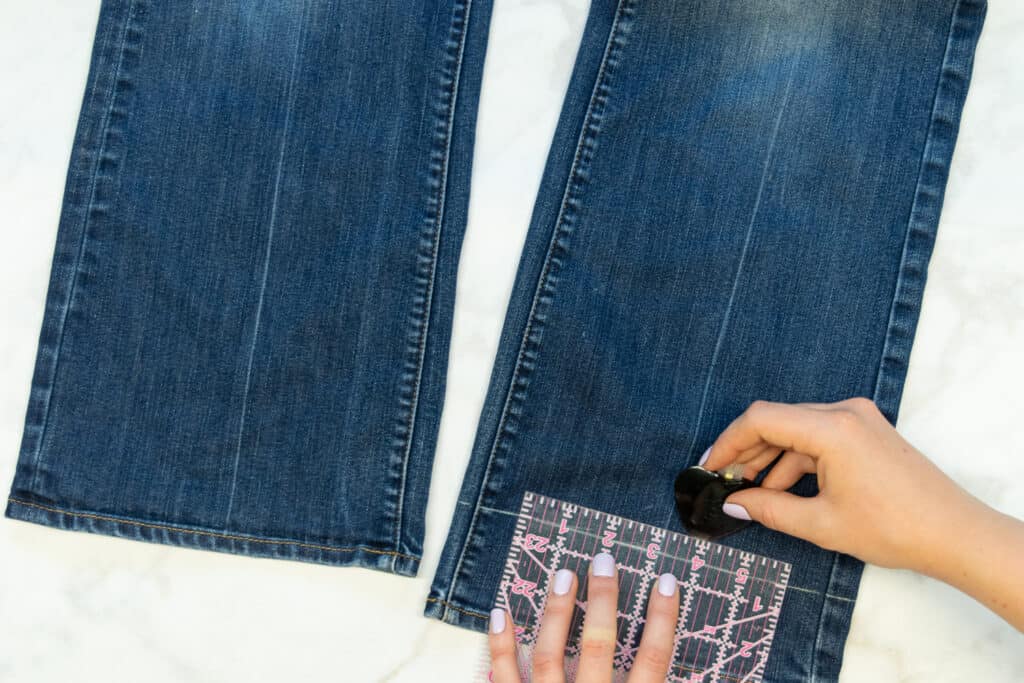
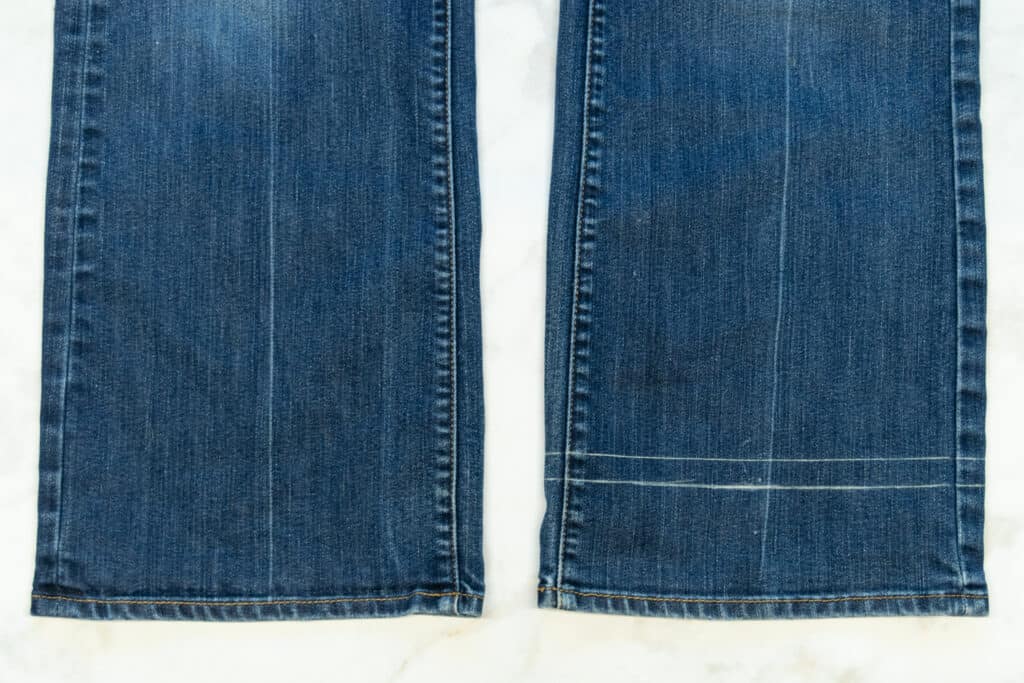
Use your ruler to draw in 2 lines on the second pantleg that are the exact same distance from the hem as the first pantleg. It's critical to make sure that these lines are identical - you don't want your two hems at different heights!
Step 2a: Stitch the New Hem (Straight Leg Jeans)
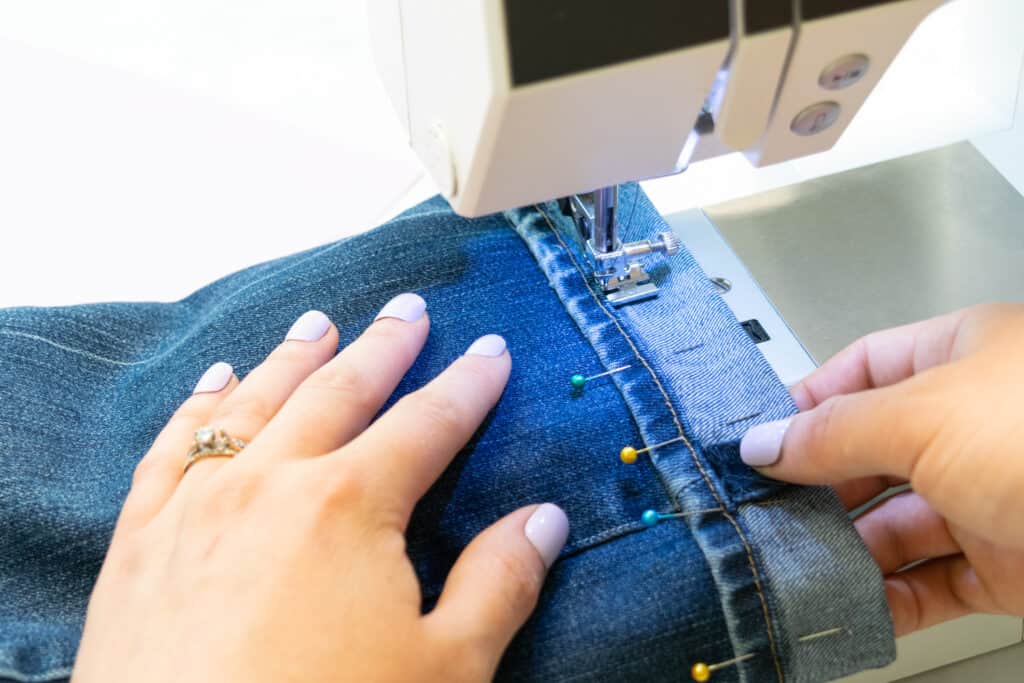
For straight leg jeans, start by folding the hem of each pantleg up to the right side, matching the folded topstitched edge of the hem with the upper marked line on the pant. Pin the hem in place on both pantlegs.
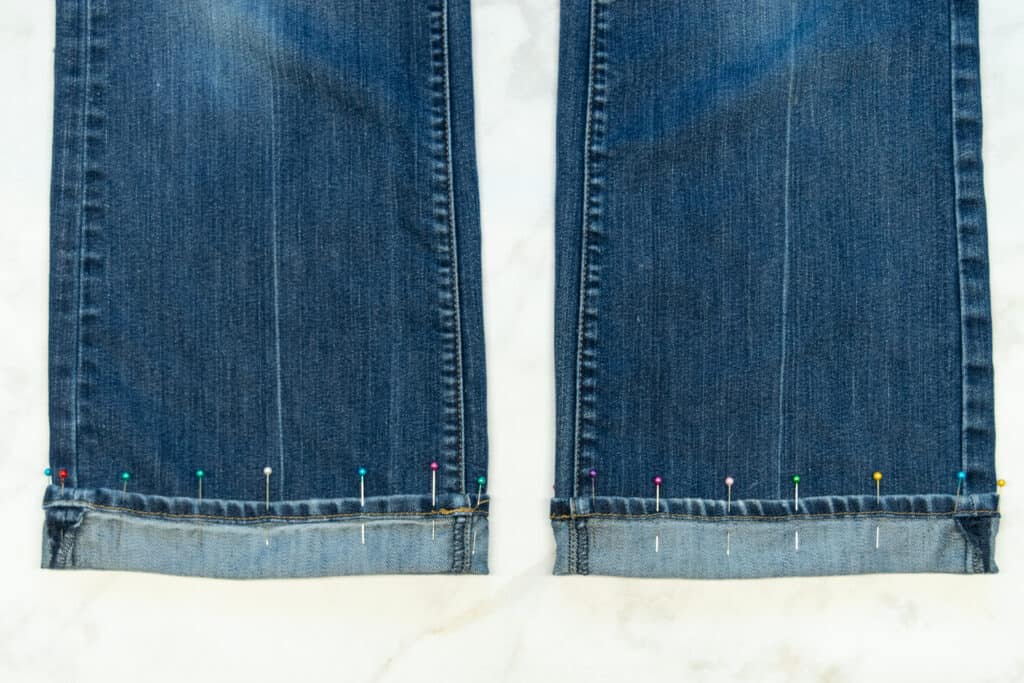
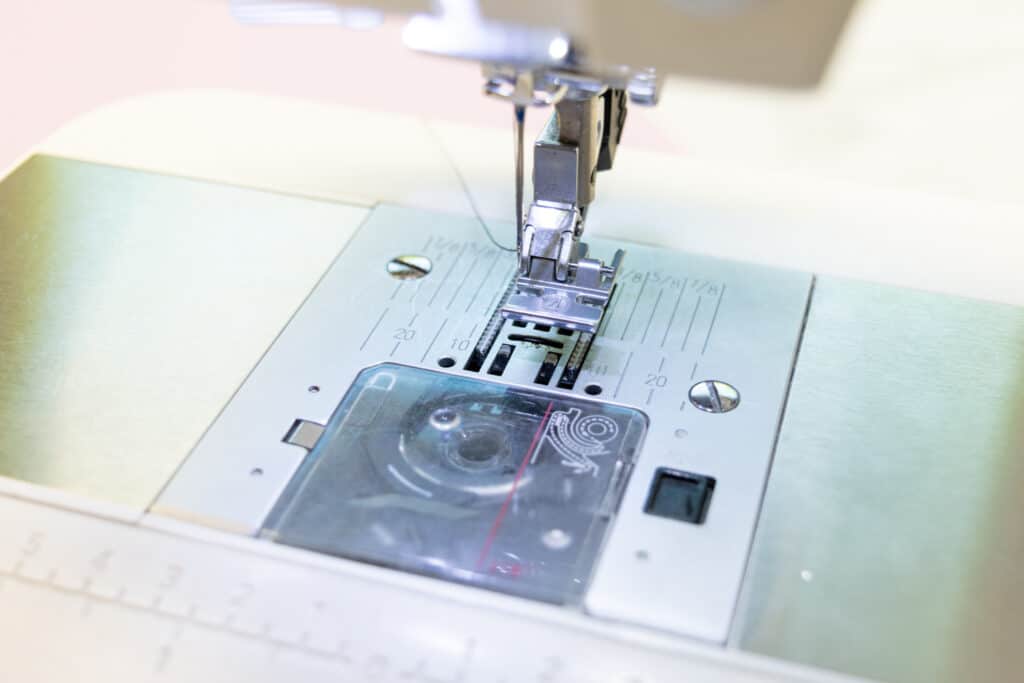
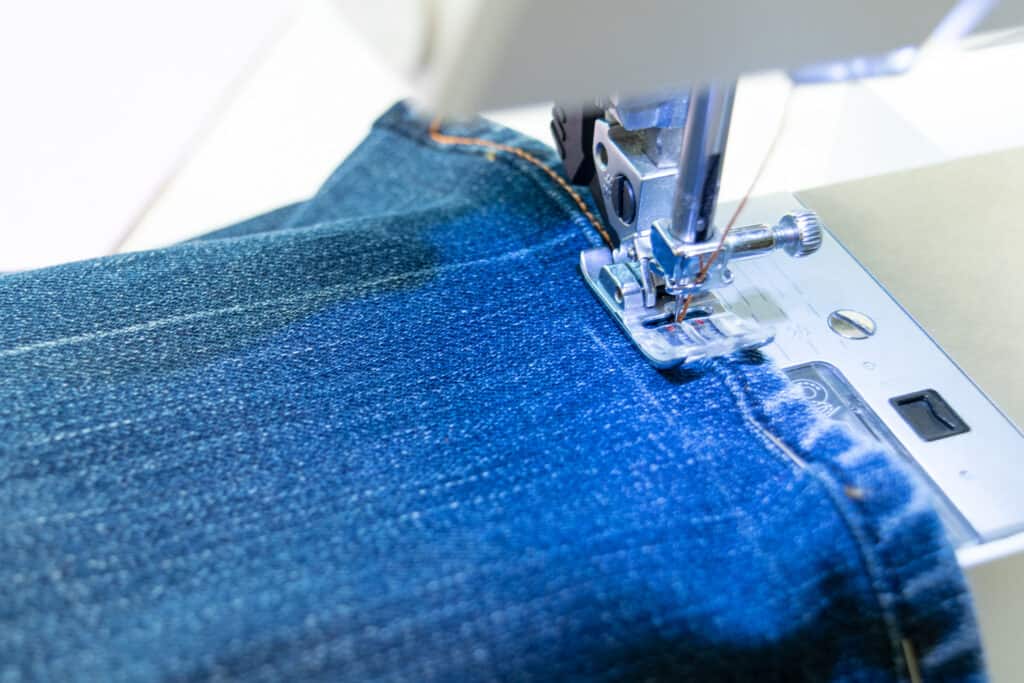
Now it's time to start sewing! Put a zipper foot on your sewing machine so that the needle is to the left of the foot. Thread your machine with all-purpose thread and use a denim needle.
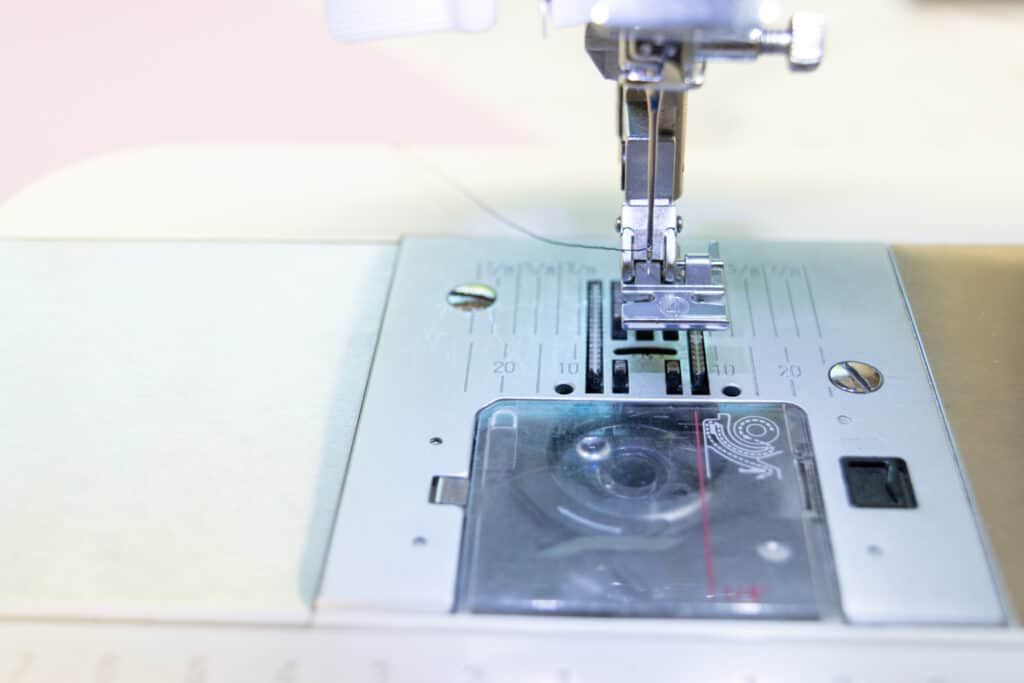
If your sewing machine has this capability, move the needle to the far left edge of the foot. The closer you can get the stitching to the original hem, the more professional your hem will look.
Next, place the first hem under the foot, lining up the original hem along the left edge of the zipper foot.
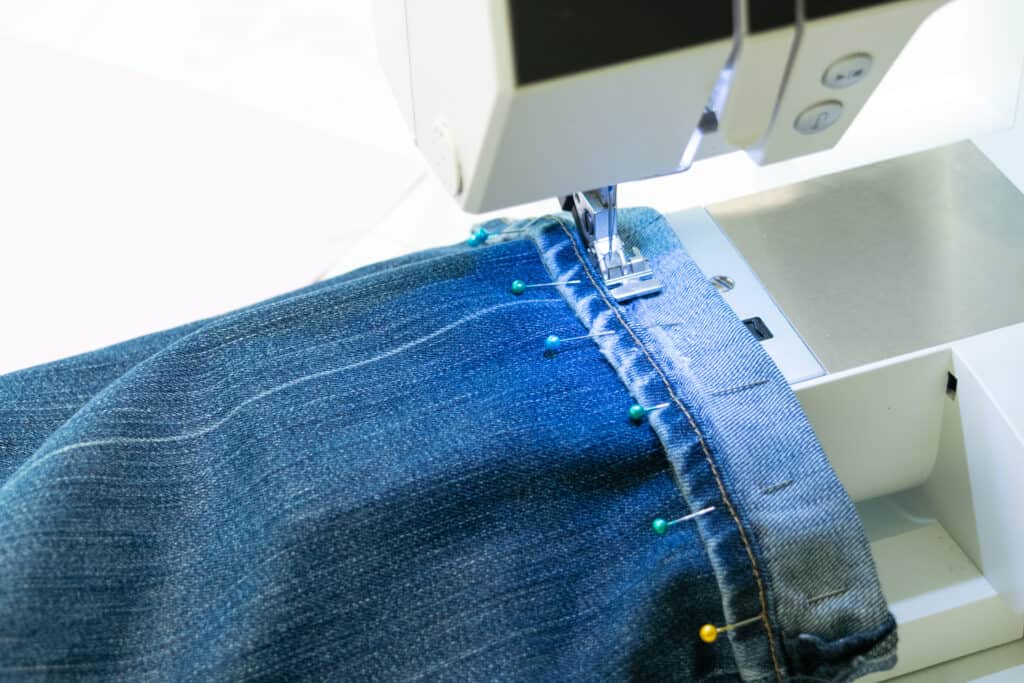
Sew around the entire hem, stitching as close to the original hem as possible and making sure to backstitch at the beginning and end.
Trim your thread tails, then repeat the process to sew the second hem in place.
*PRO TIP: If these jeans are for a child, I highly recommend that instead of trimming and finishing the excess fabric, leave it intact so it can be let out later. Press the excess fold of fabric up away from the hem, pin it in place, then hand sew the fold to the pantleg with a whipstitch. This allows you to easily release the hem to lengthen the jeans as your kid grows! Note that this only works for straight leg jeans.
However, if you prefer to get rid of the big folds of fabric inside the pantlegs, trim the excess fabric to 1/2 inch, then head on to Step 3!
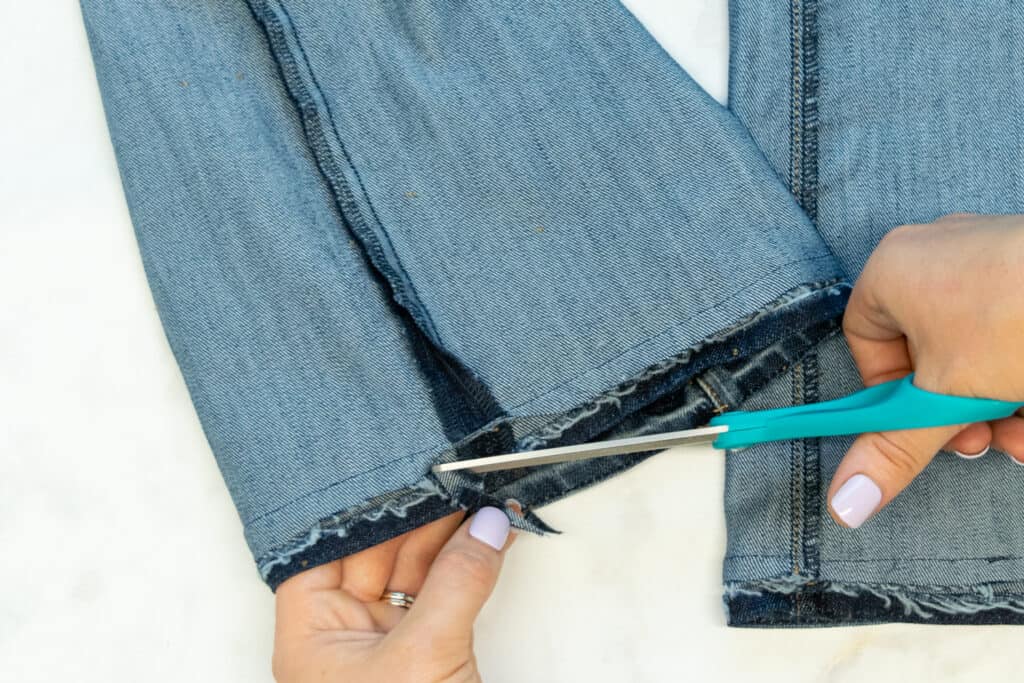
Step 2b: Stitch the New Hem (Flared Jeans)
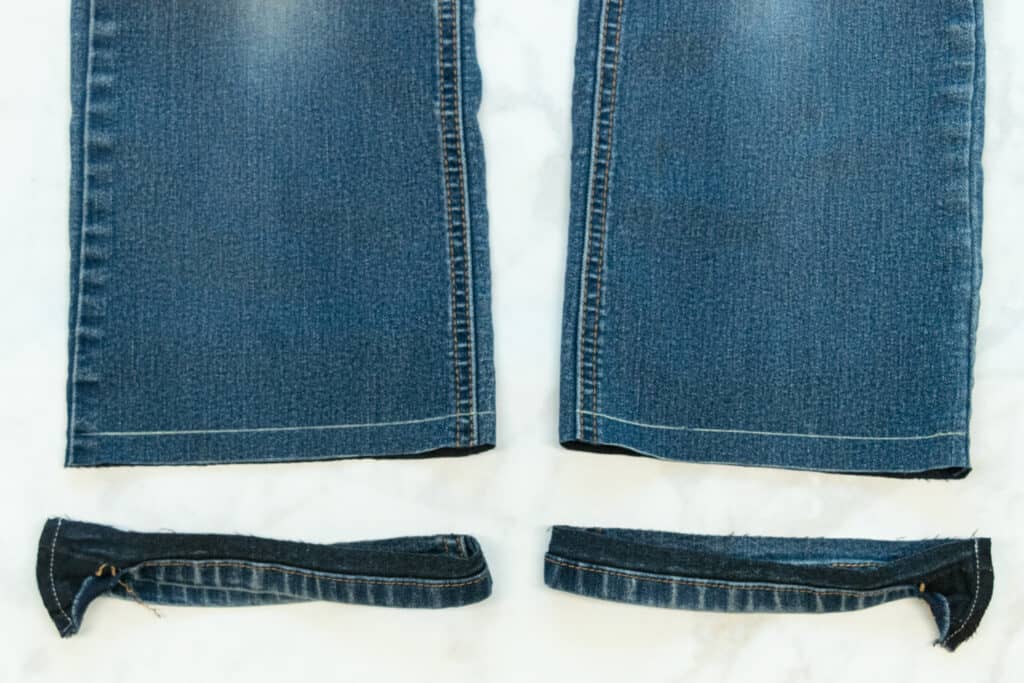
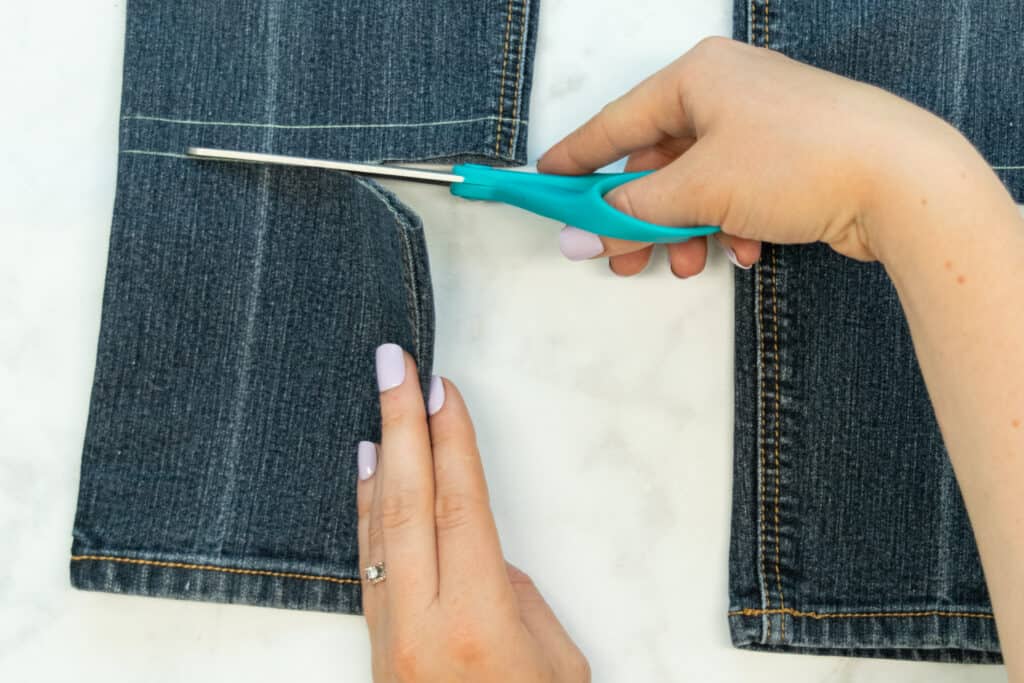
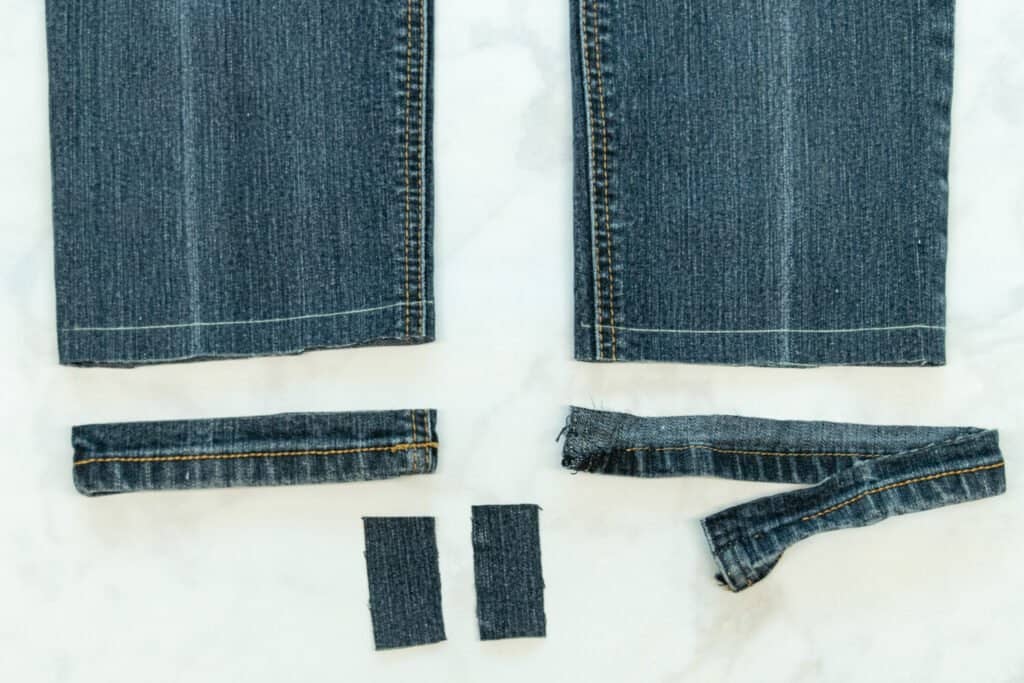
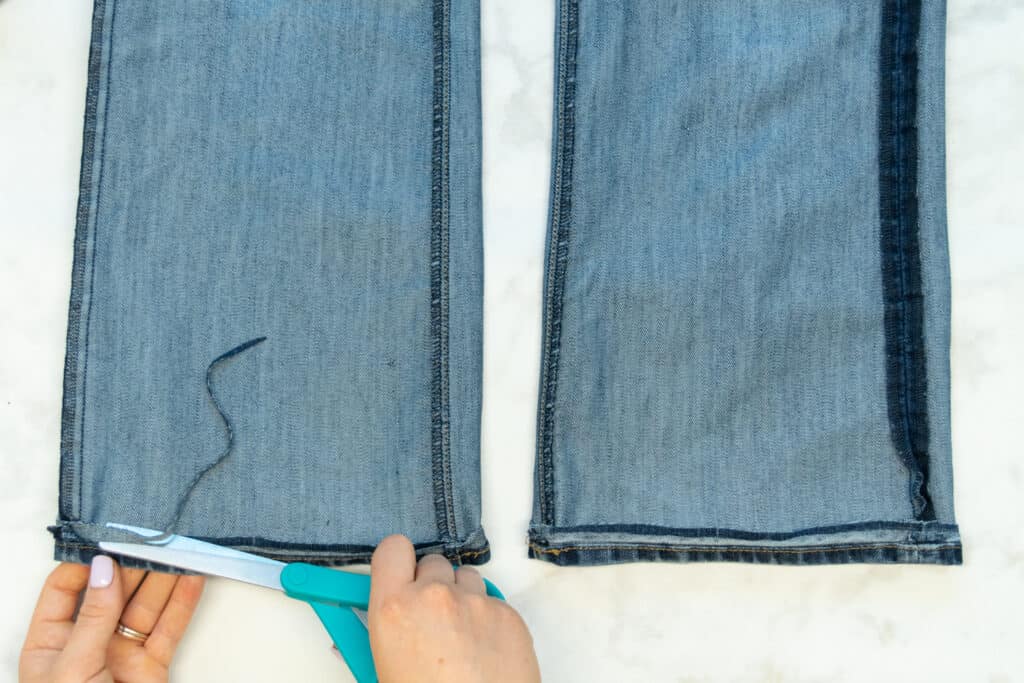
For flared leg jeans, start by cutting along the lower marked line on each pantleg to remove the lower portion of the legs.
Then, measure 1/2 inch above the top folded edge of the finished original hem and draw a straight line across each lower pantleg.
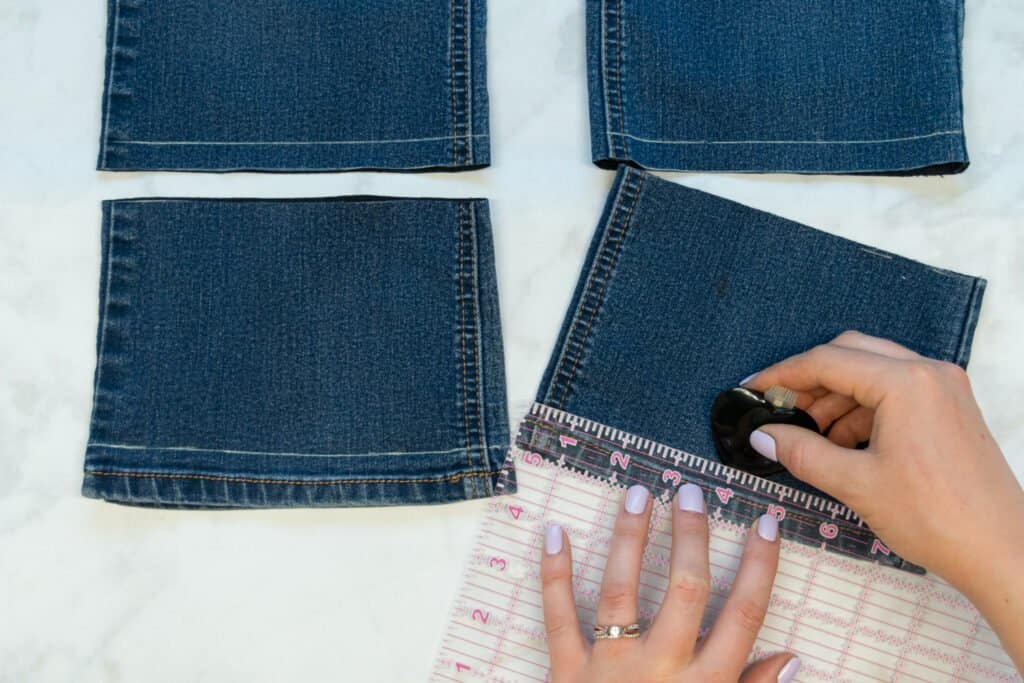
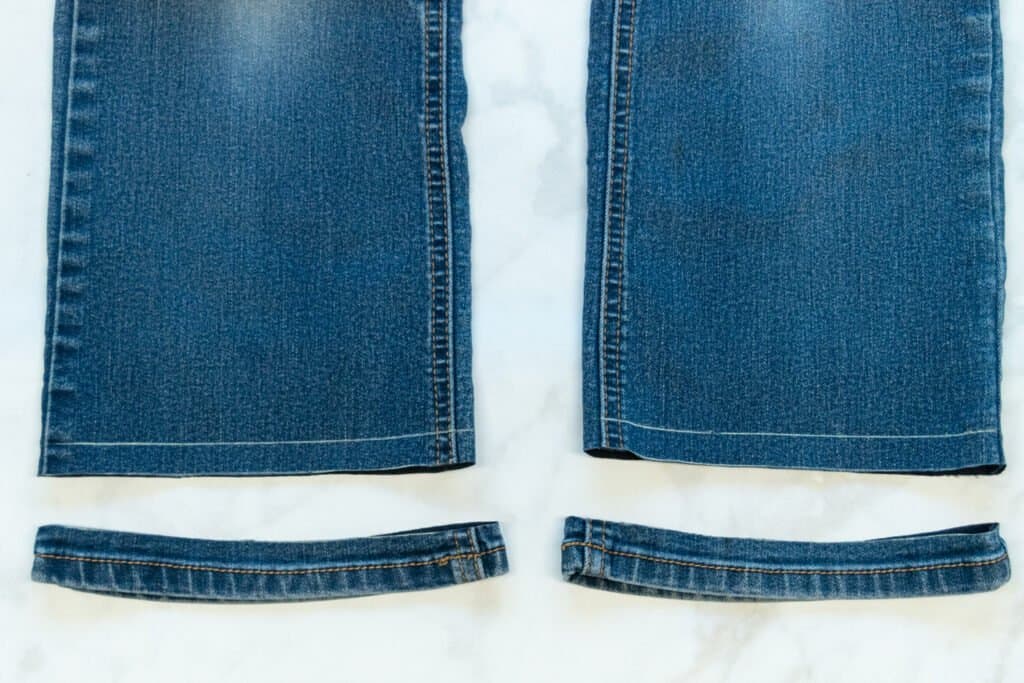
Cut the original hem off of each lower pantleg, cutting along the lines you just drew.
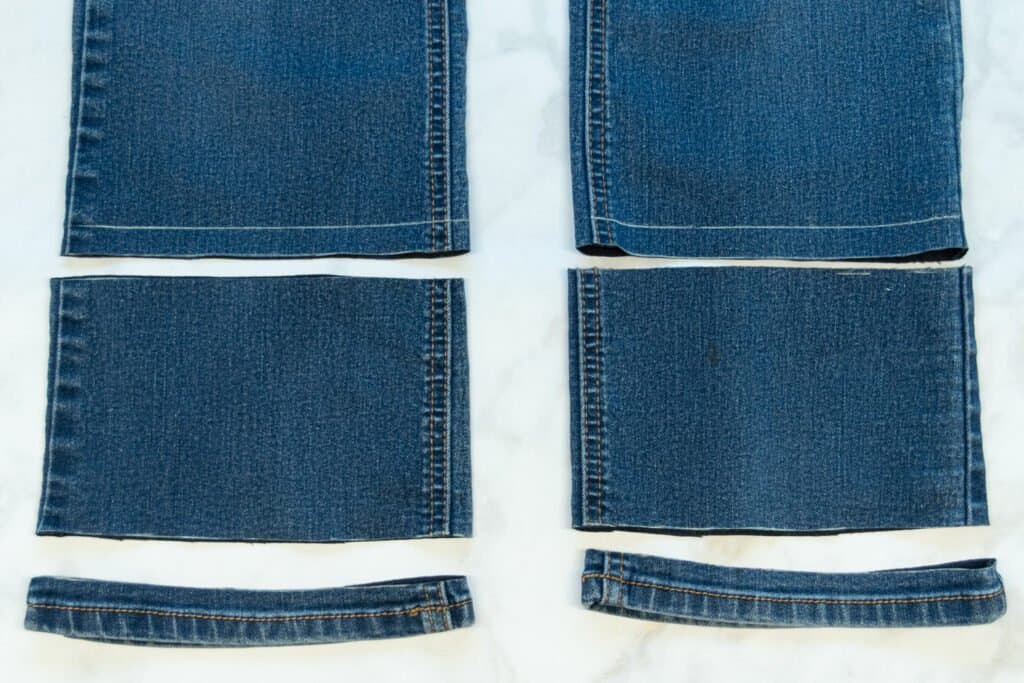
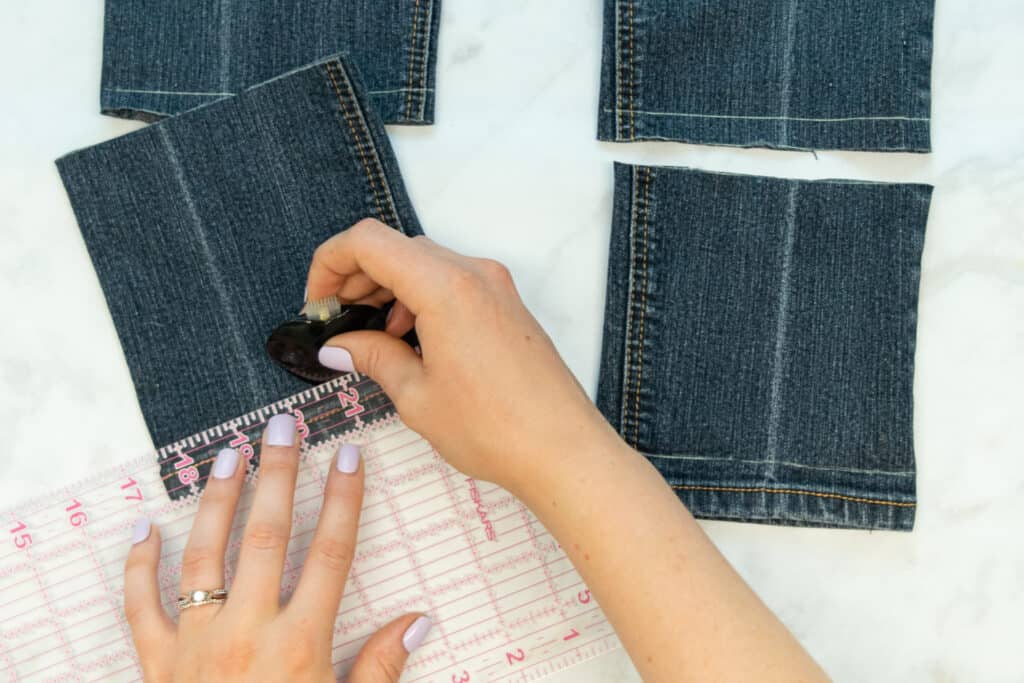
Set aside the middle piece that you cut out of each pantleg.
Measure the circumference of the original hem with a tape measure. In my case it was 16.5 inches.
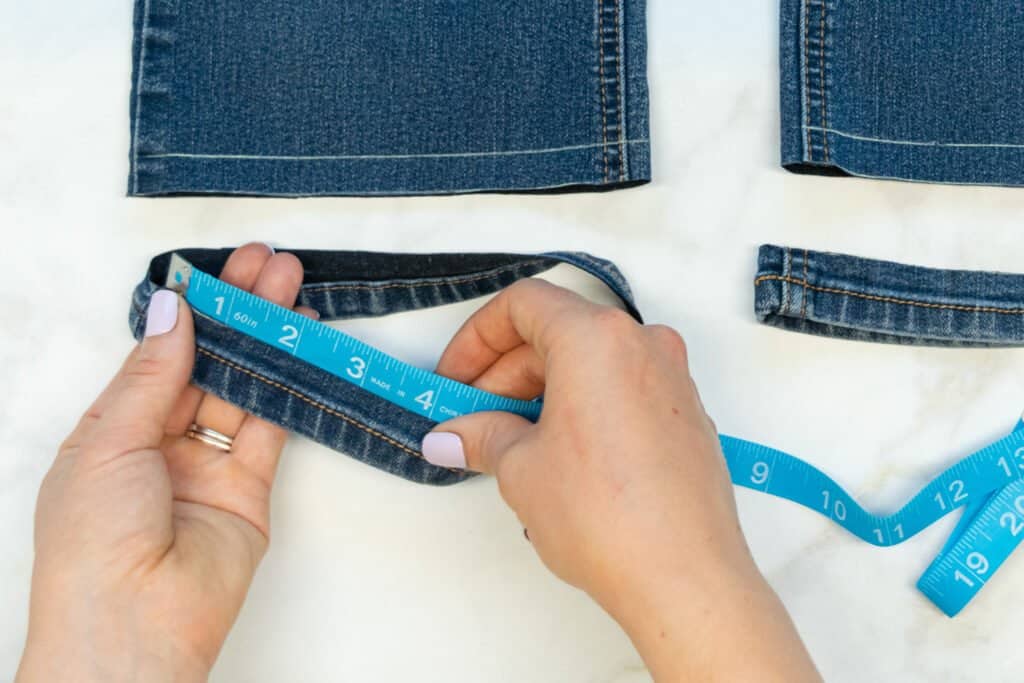
Then, measure the circumference of the cut bottom edge of the pantleg. Mine was 15.5 inches.
Find the difference between these two measurements by subtracting the circumference of the pantleg edge from the circumference of the original hem. For example, my hem is 1 inch wider than the pantleg that I need to attach it to.
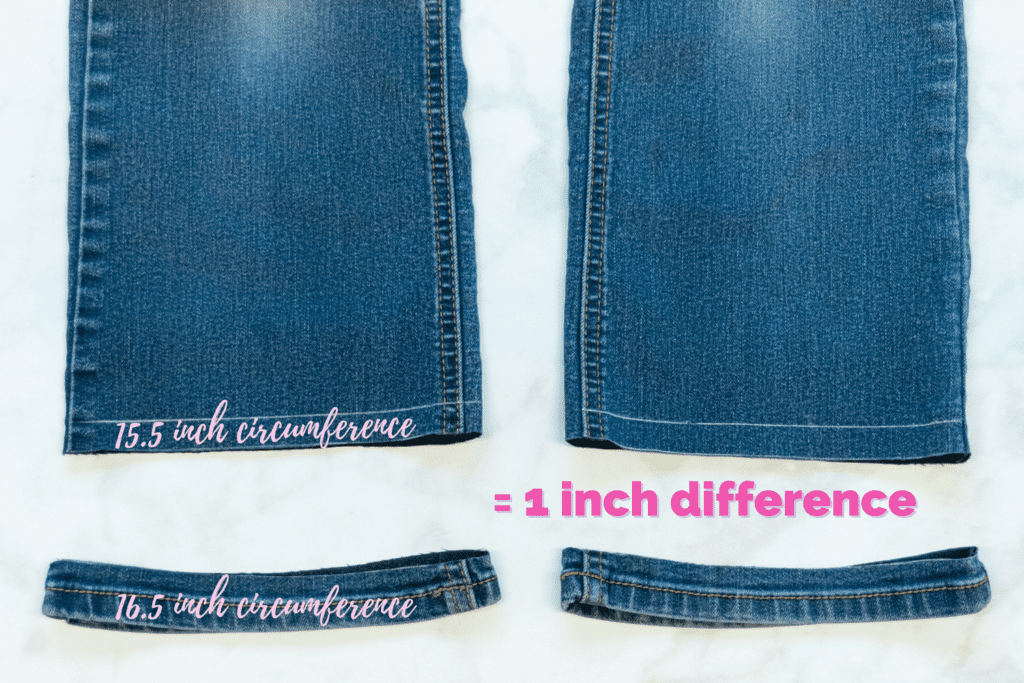
We need to take this excess width out of the original hem at the inseam or the outer leg seam - whichever is more inconspicuous. In my case, I chose the outer leg seam because it didn't have the topstitching detail that the inseam did.
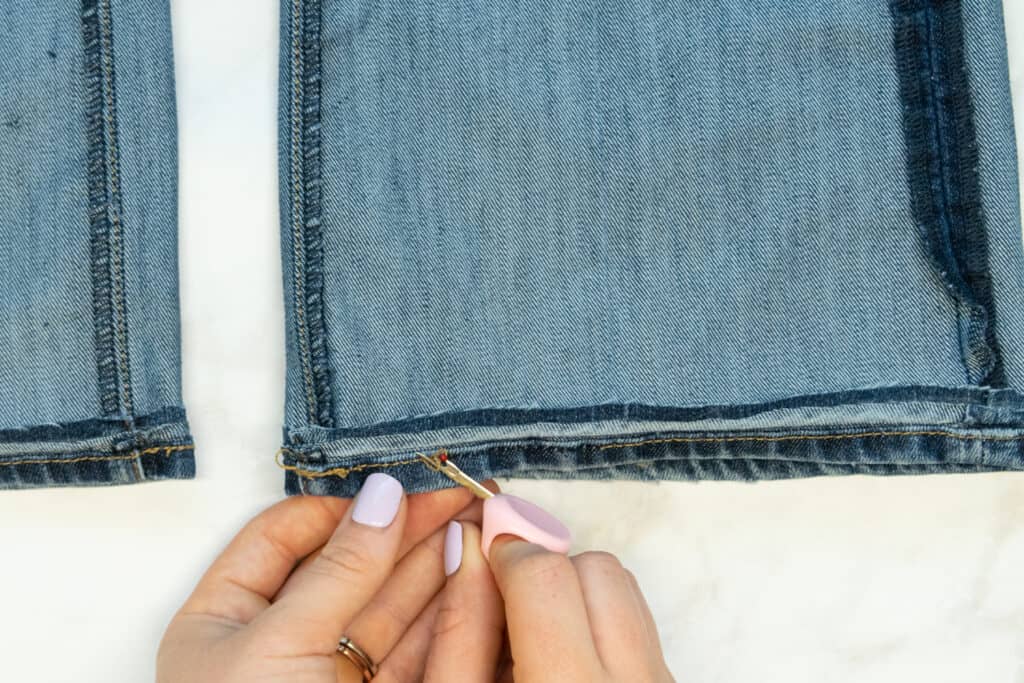
To do this, seam rip the topstitching around the outer leg seam or the inseam of the original hem to open up the hem around the seam.
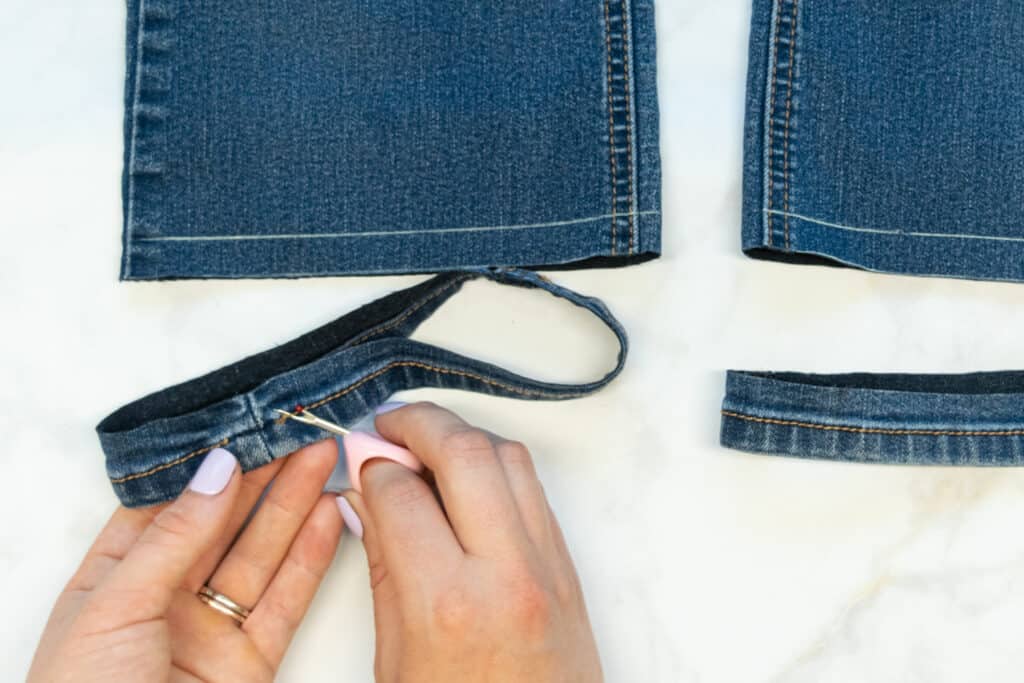
Open up the folds of the hem around the seam, then pin the seam flat with right sides together.
Stitch a new seam that is 1/2 of your circumference difference to the inside of the original seam.
For example - I needed to take 1 inch total out of my hem, so I sewed my new seam 1/2 inch in from the original outer leg seam. You have to use half of the total measurement since there are 2 layers of fabric in the seam. So, 1/2 inch will be taken out of each layer of fabric, for a total of 1 inch.
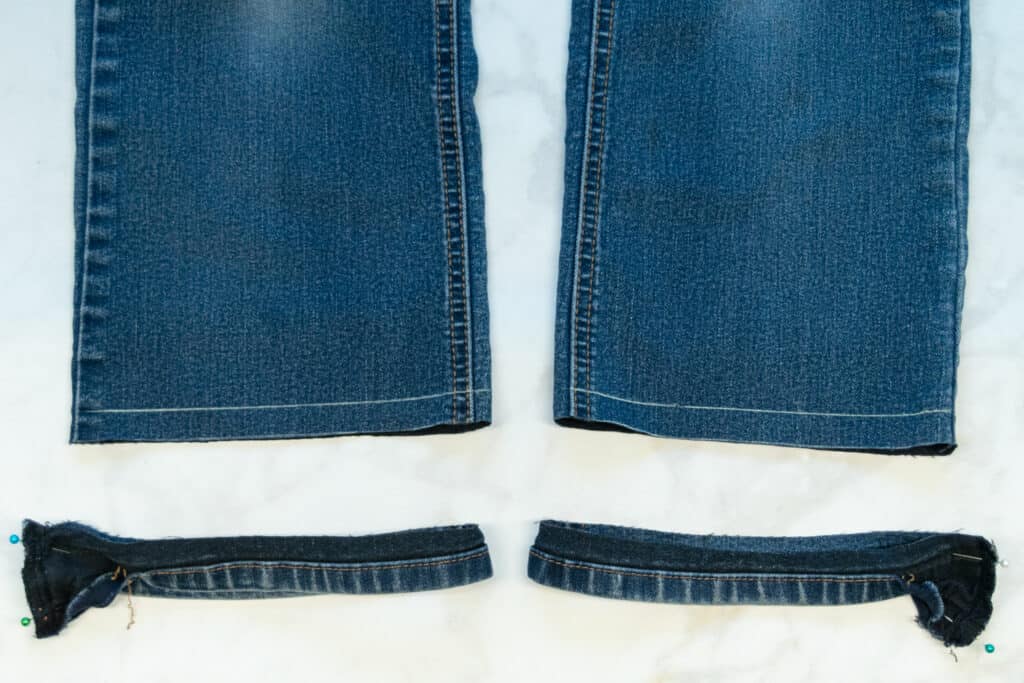
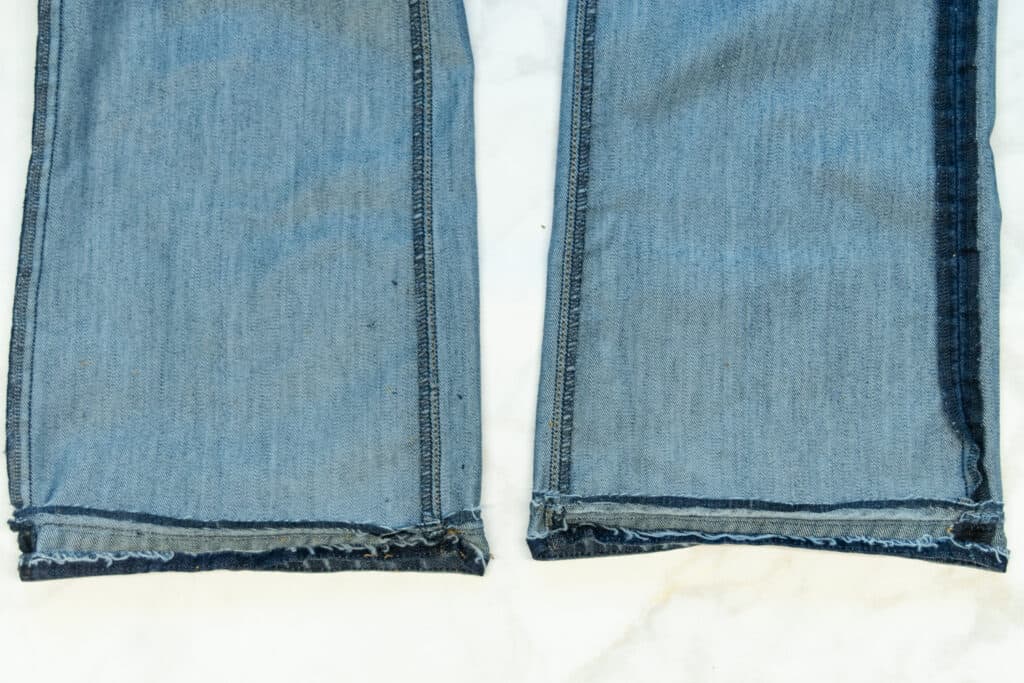
Trim the seam allowance to 1/4 inch.
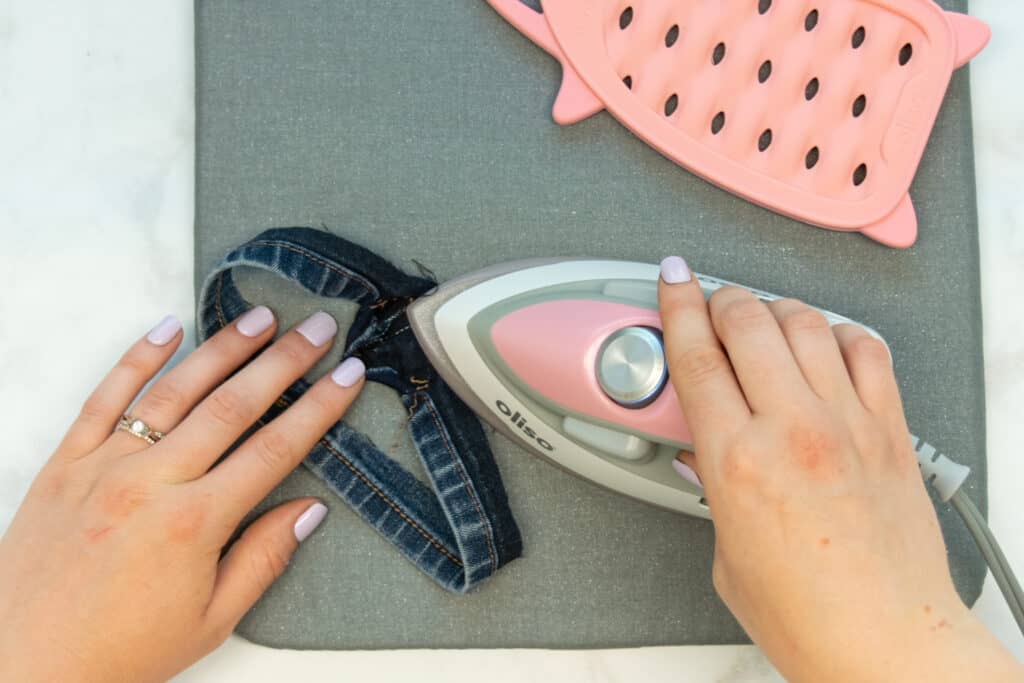
Press the seam allowance to one side.
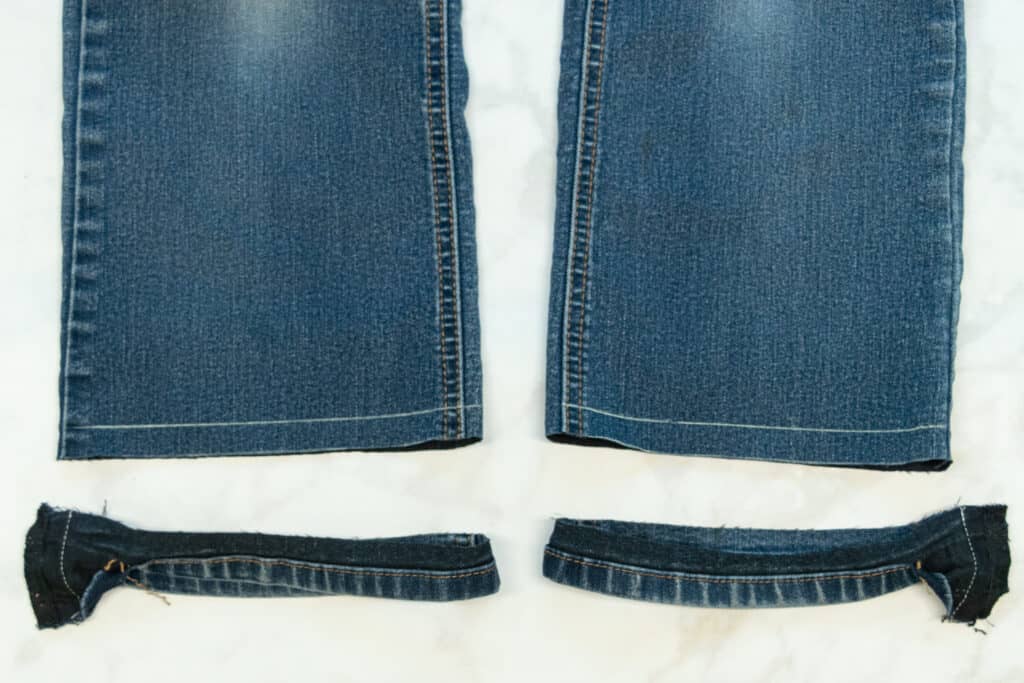
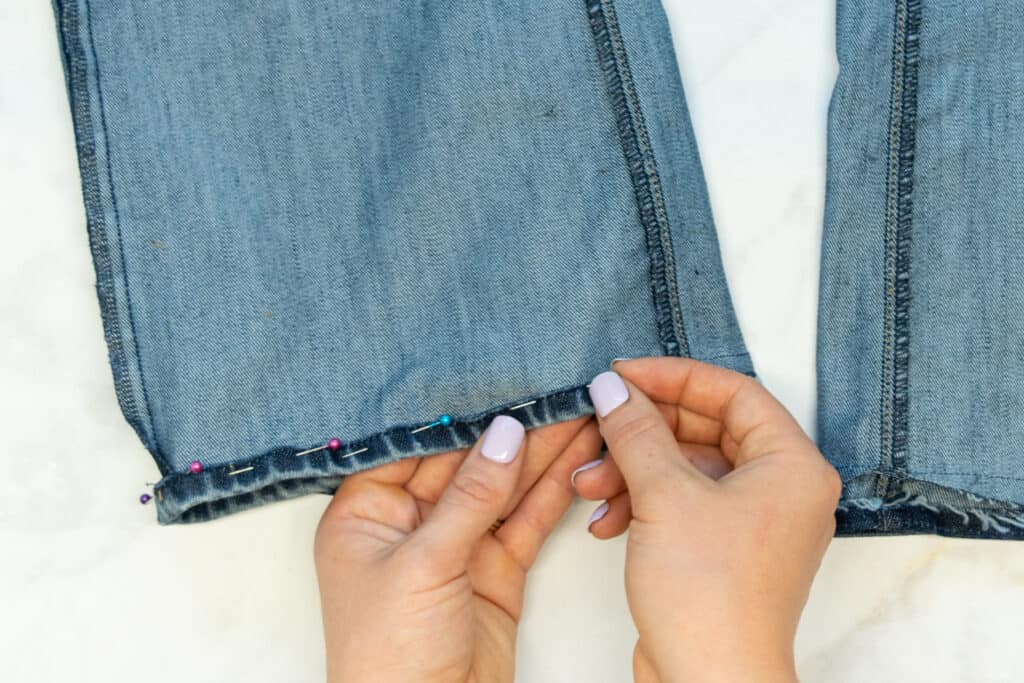
Then, pin each hem to the corresponding pantleg with right sides together, lining up the cut raw edge of the hem with the cut edge of the pantleg.
Put a zipper foot on your sewing machine so that the needle is to the left of the foot. If your machine allows, move the needle to the far left edge of the foot. The closer you can get to the original hem, the more professional your finished jeans will look!
Using matching all-purpose thread and a denim needle, stitch each hem to each pantleg, making sure to backstitch at the beginning and end.
As you sew, keep your stitching as close to the folded top edge of the original hem as possible.
Trim those thread tails and head to Step 3 to learn how to deal with the seam allowances and finish the hem!
Step 2c: Stitch the New Hem (Skinny/Tapered Jeans)
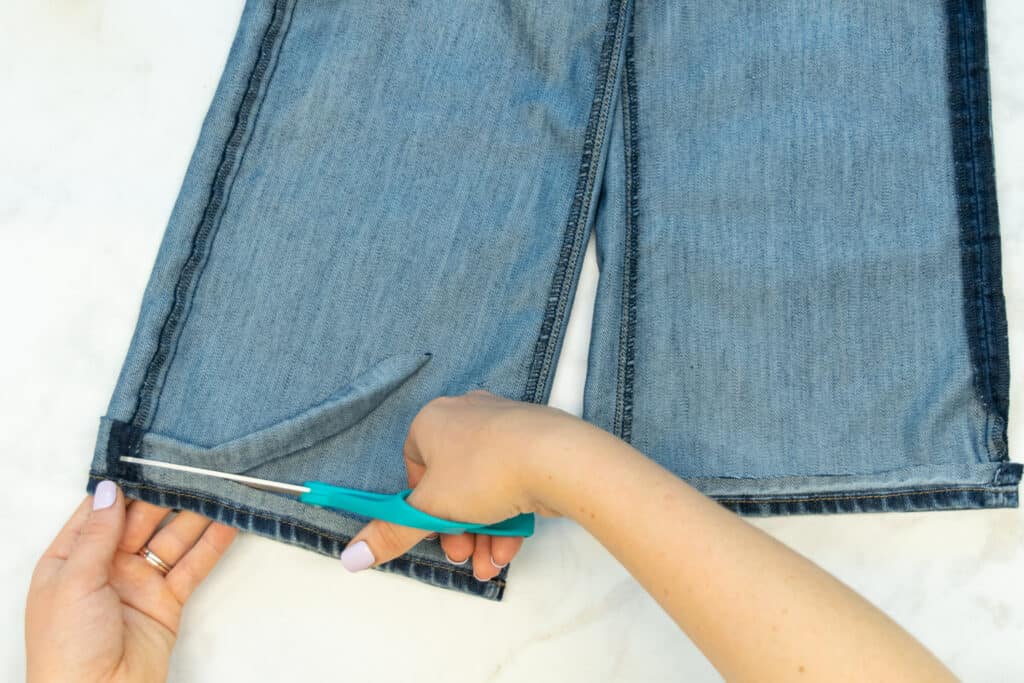
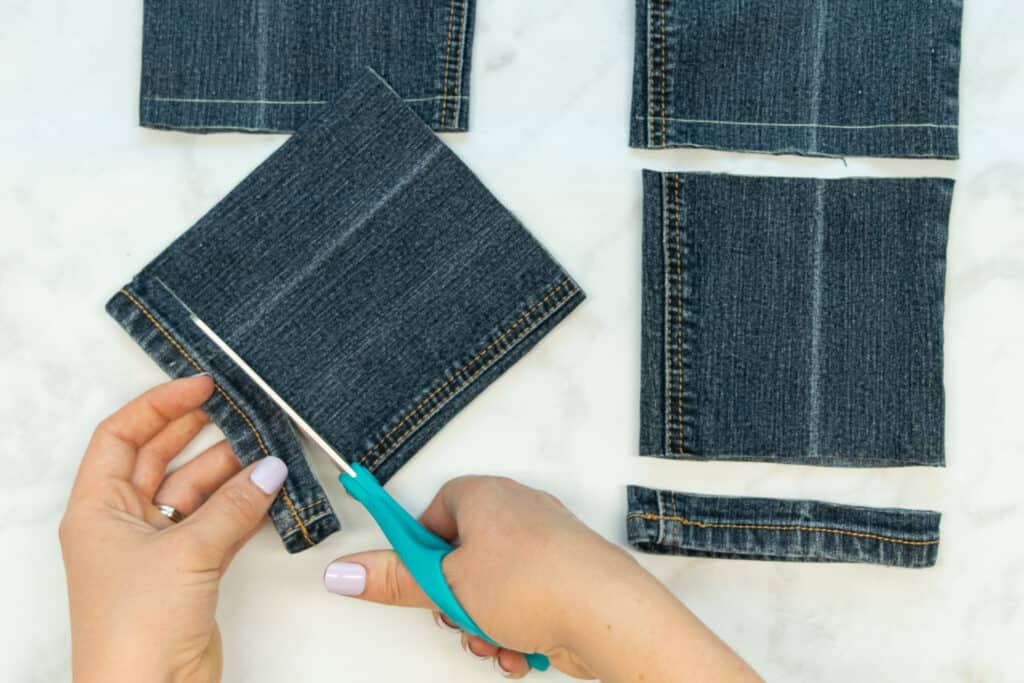
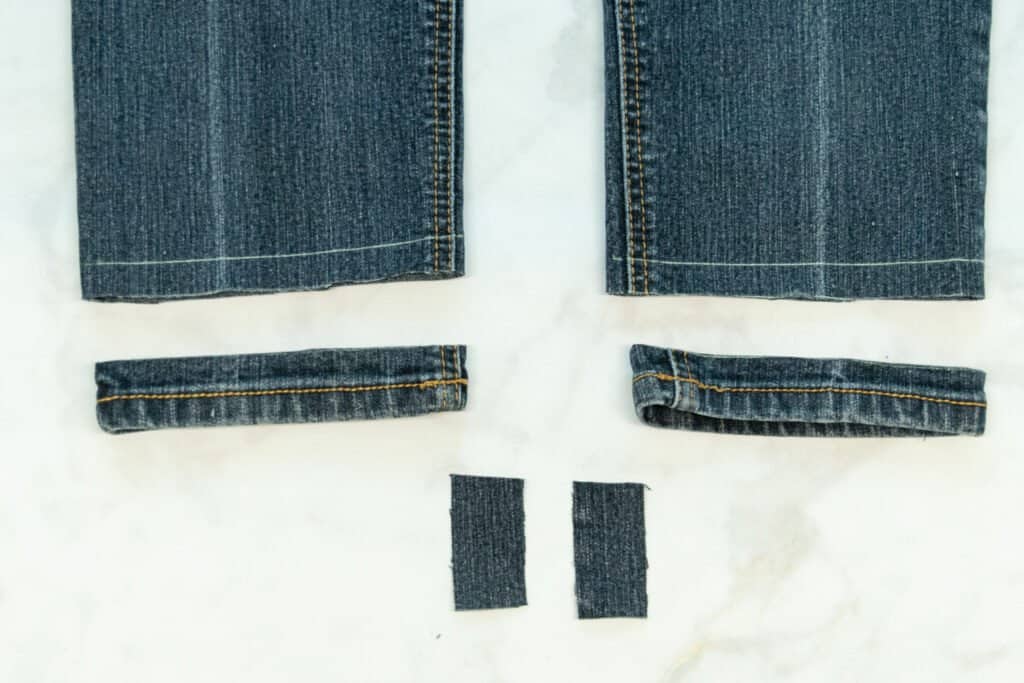
To hem skinny jeans or tapered leg jeans, first cut the lower portion of each pantleg off, cutting along the lower marker line on each leg.
Next, measure 1/2 inch up from the original hem on the removed portion of each pantleg and draw a line.
Cut each original hem off 1/2 inch above the folded upper edge of the hem, using your marked line as a guide.
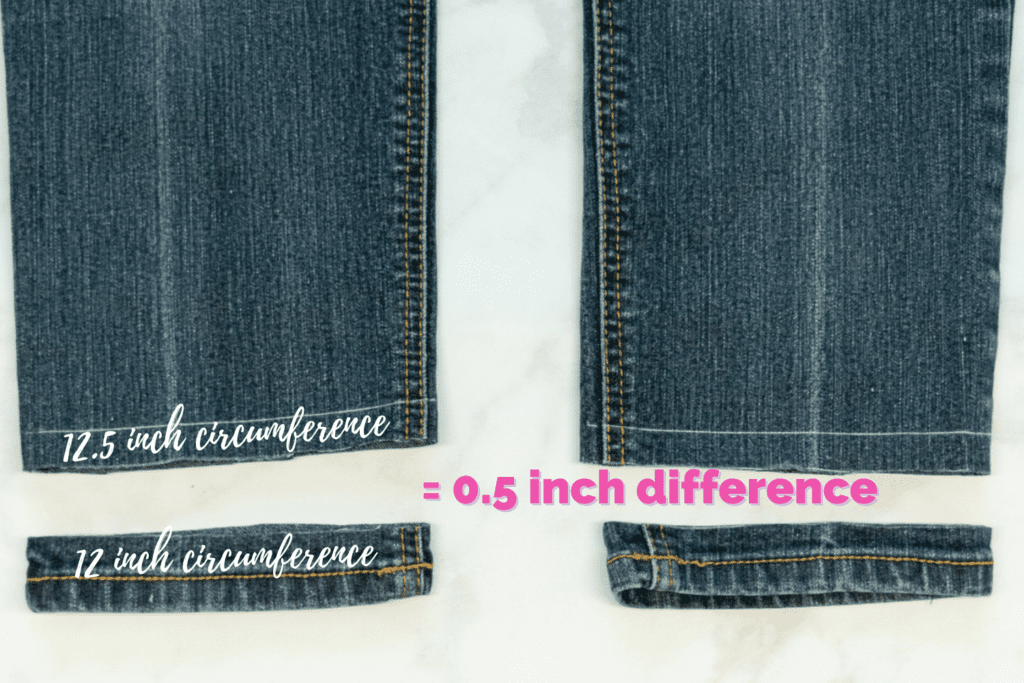
Then, measure the circumference of the original hem with a tape measure. Mine measured 12 inches.

Measure the circumference of the cut lower edge of the pantleg as well. My jeans pantleg measured 12.5 inches.
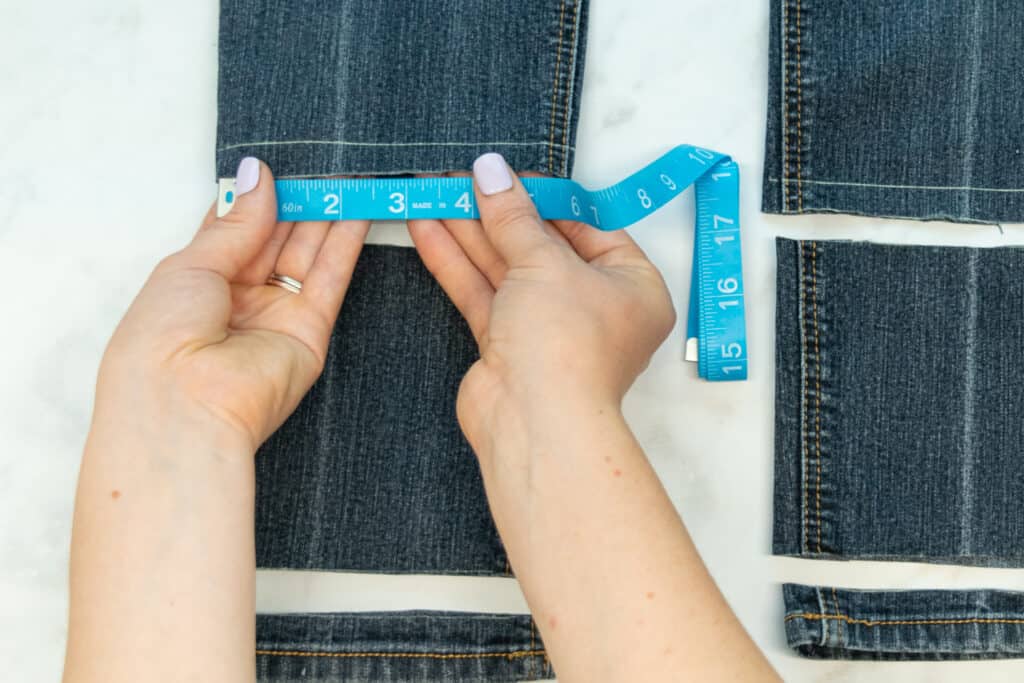
Take the difference between these two measurements by subtracting the circumference of the original hem from that of the pantleg. For example, my hem was 1/2 inch smaller than the pantleg edge.
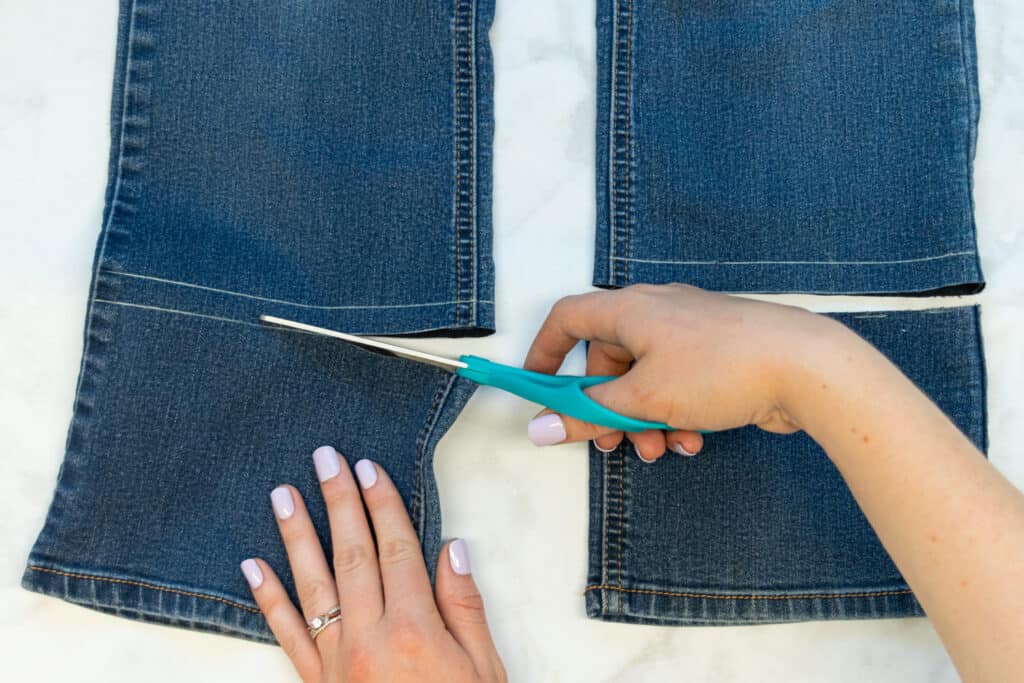
We now need to add a bit of fabric to the inseam of the hem to make it wide enough to fit to the pant.
Using the excess fabric cut away from the pantlegs, cut 2 pieces of denim that are 2 inches tall by the length of the circumference difference + 1/2 inch. This extra 1/2 inch is added for seam allowance. So, mine were cut 2" x 1".
Next, seam rip the topstitching around the inseam of one of the hems to open it up.
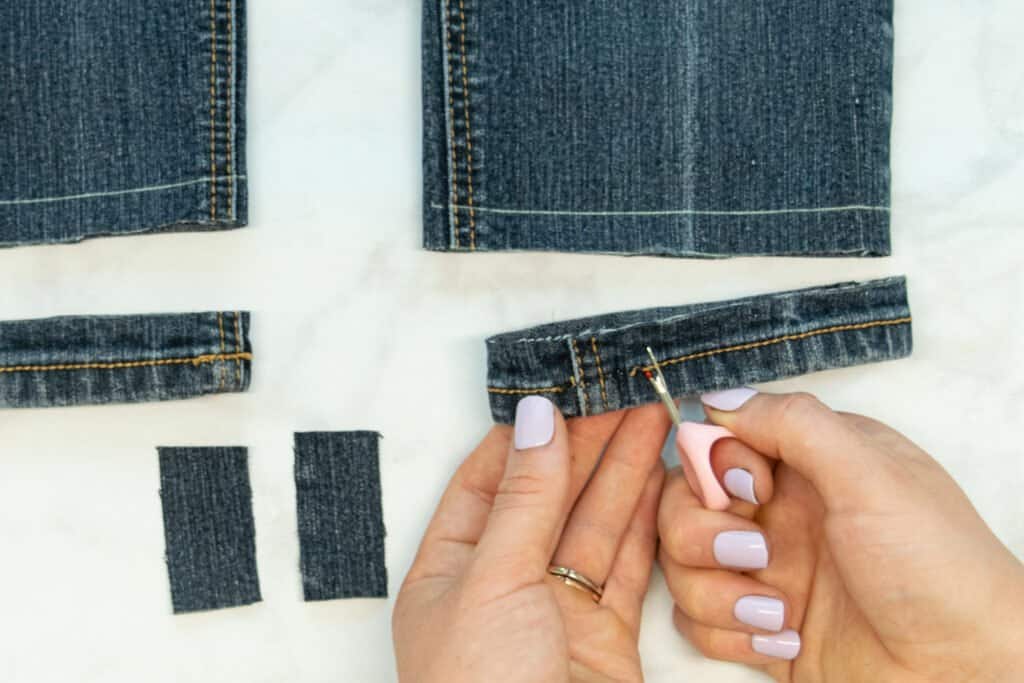
Then remove the stitches of the inseam to free the two edges of fabric.
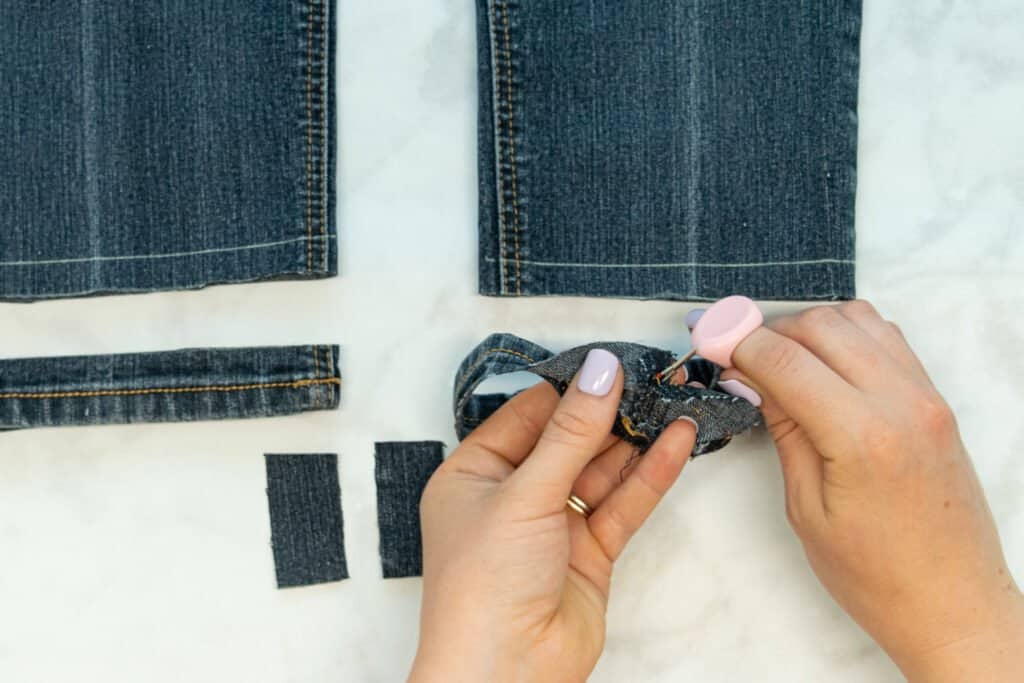
Pin one of your cut pieces of extra fabric to one of the raw edges of the opened up inseam with right sides together. The two-inch side of the piece should be vertical with the hem.
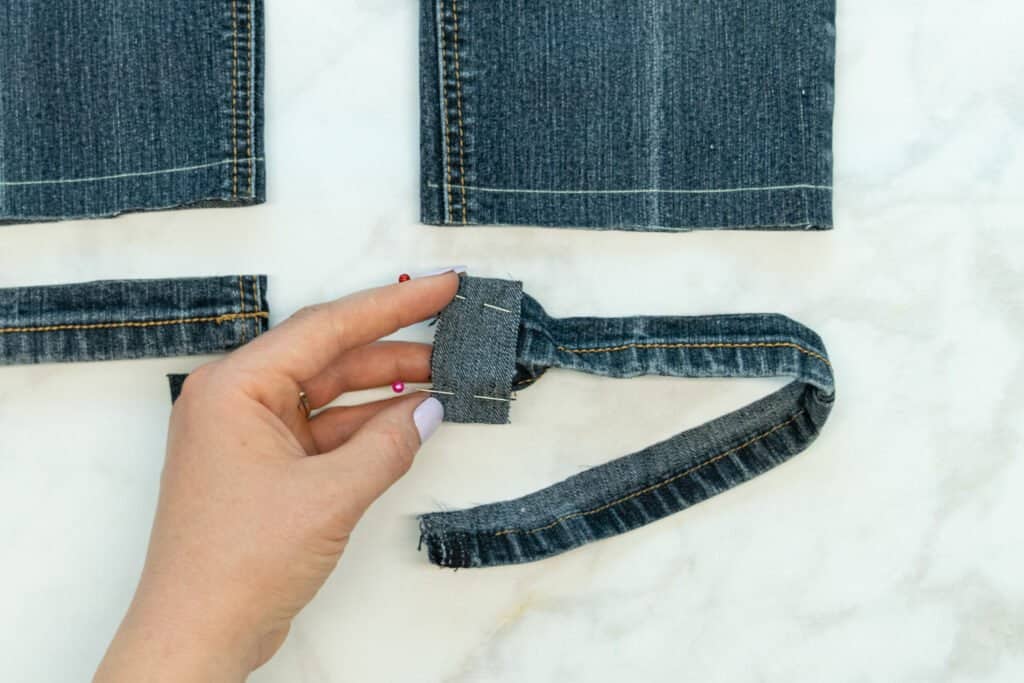
Stitch the piece of fabric to the hem with a 1/4 inch seam allowance.
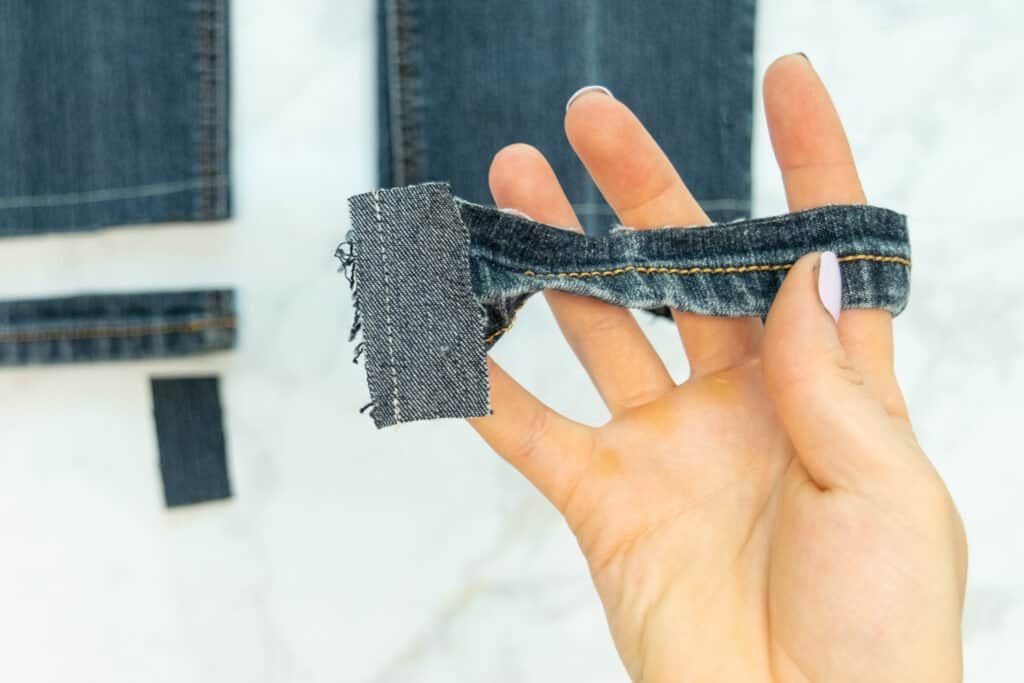
Next, pin the other 2-inch side of the small fabric rectangle to the other end of the hem with right sides together. Make sure the hem is not twisted!
Stitch this second side of the fabric piece to the original hem with a 1/4 inch seam allowance. The hem will now once again be a loop of fabric. Basically, this small piece of denim is acting as an extension of the hem.

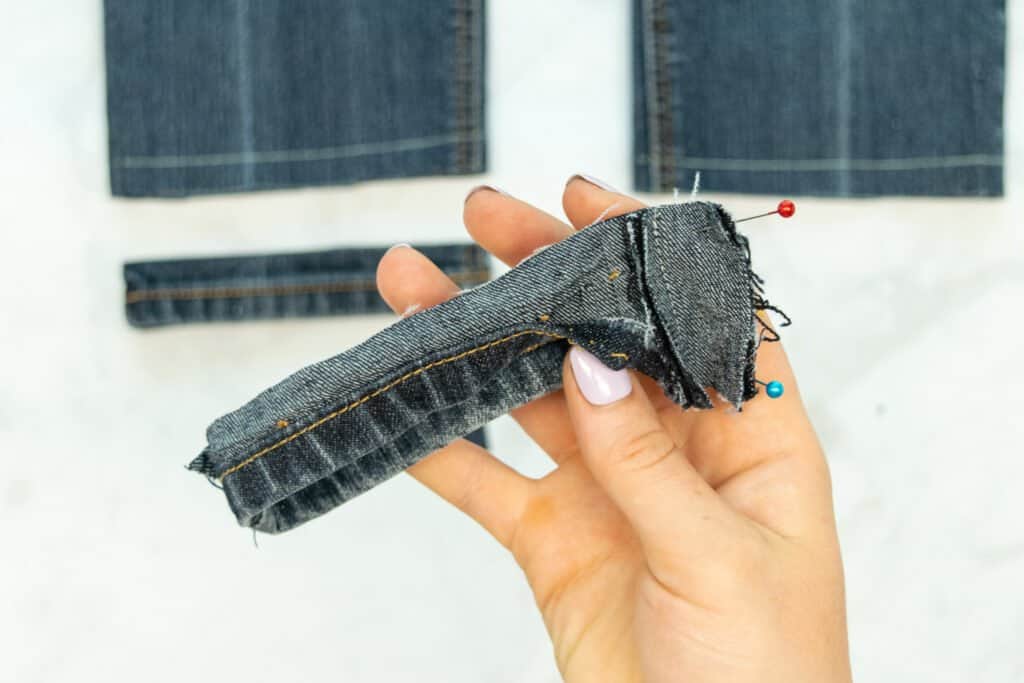
Press the seam allowances of the extension piece away from each other.
Then, refold and press the hem along the original folds, pressing the new extension to match the original hem.
Repeat this process to add the other extension piece to the other hem.
Next, pin each hem to the corresponding pantleg with right sides together. Match up the upper cut edge of the hem with the lower cut edge of the pant.
Then, put a zipper foot on your sewing machine so that the needle is to the left of the foot. If your machine has this capability, move the needle to the far left edge of the foot. The closer you're able to sew to the original hem, the more professional your results will be.
Using matching thread and a denim needle, line up the first hem under the sewing machine foot, keeping the upper folded edge of the original hem right along the left edge of the foot.
Stitch around the entire hem, making sure to backstitch at the beginning and end.
Repeat this process to stitch the other hem onto the other pantleg.
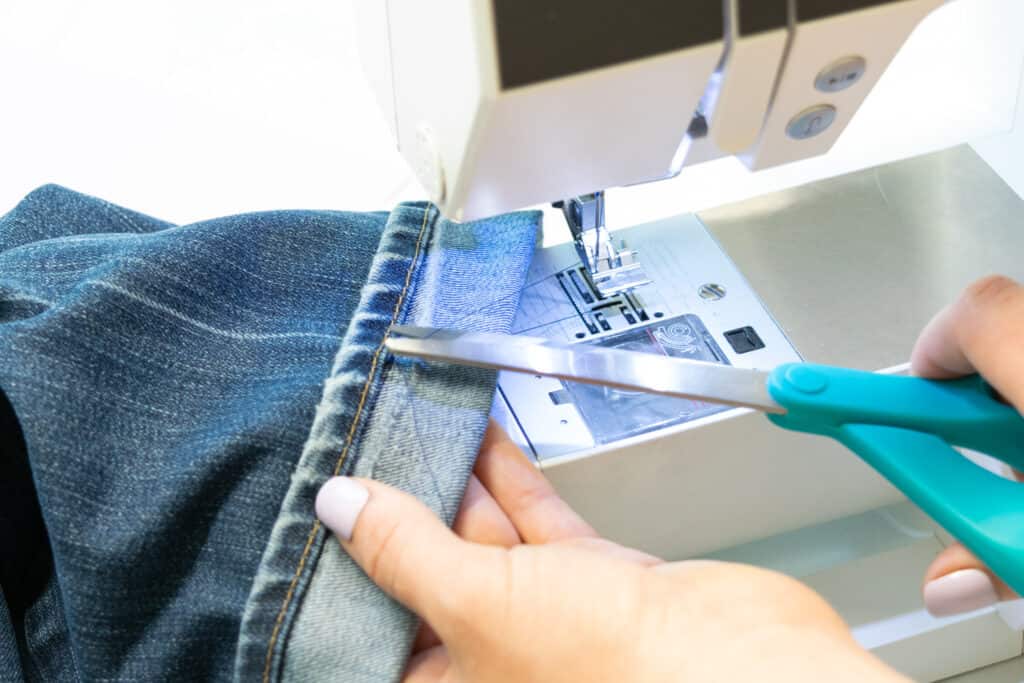
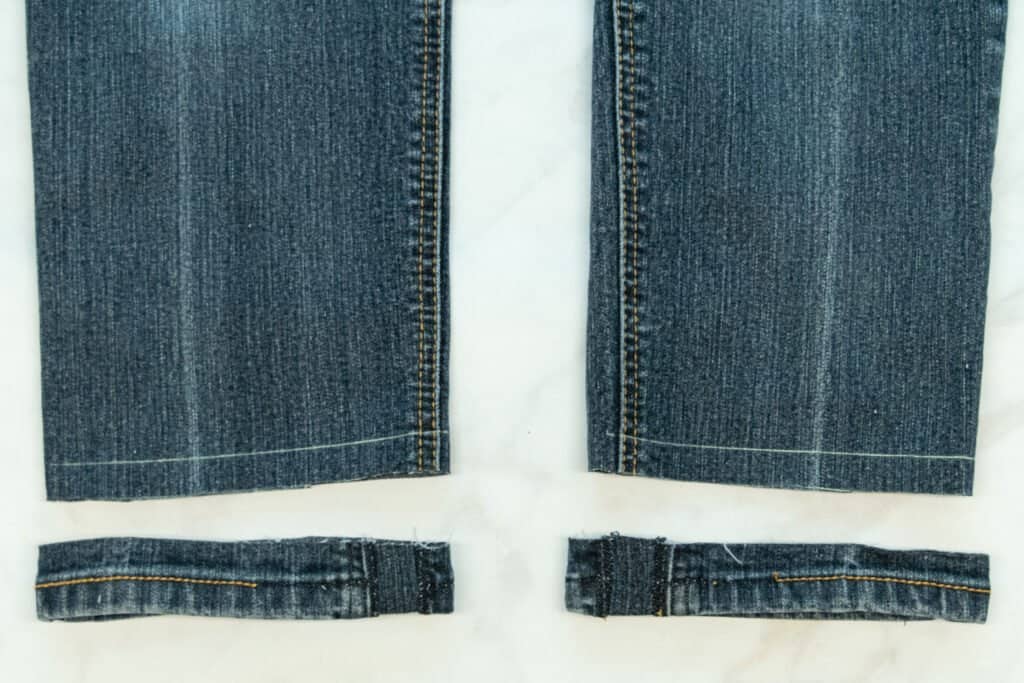
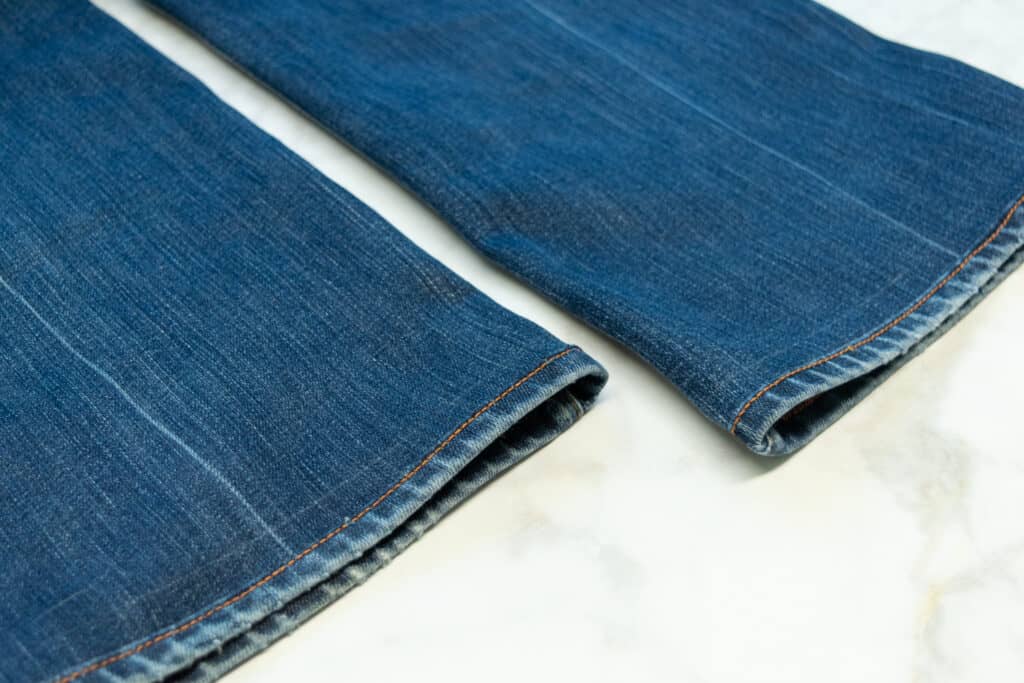
Step 3: Finish the Raw Edges
Your hem is now sewn! But there's still excess fabric inside the pantleg that needs to be dealt with before you can wear your freshly hemmed jeans.
Trim the top layer of the seam allowance to 1/4 inch.
Then, seam rip all of the original topstitching from the hem to completely open up the folds of the hem. If you're sewing wide or tapered leg jeans, some of the topstitching will already be removed around the inseam or outer leg seam.
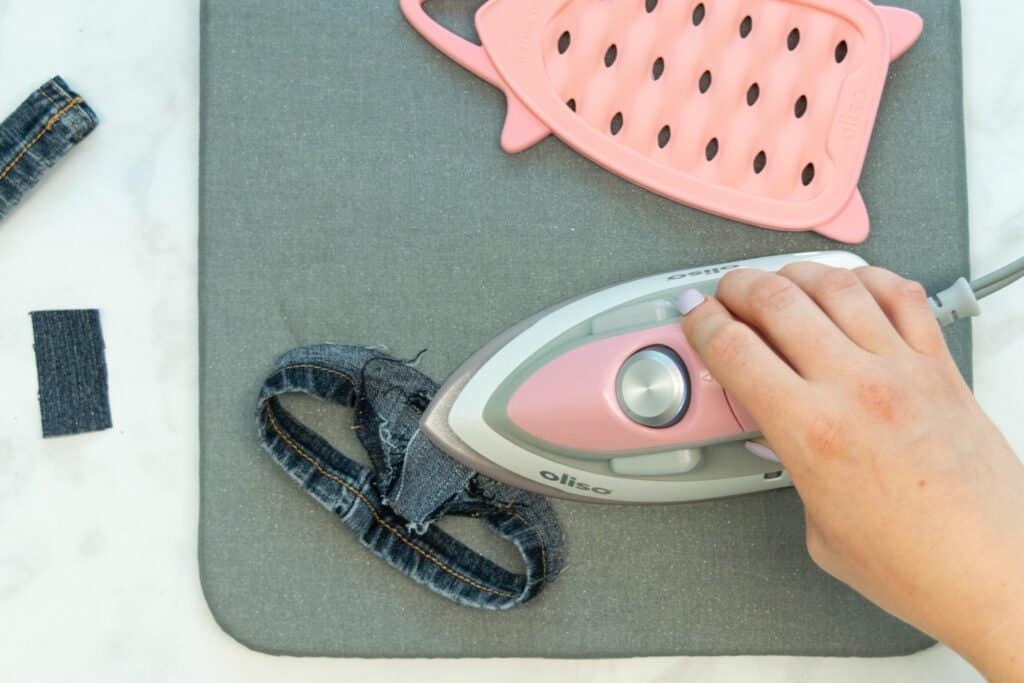
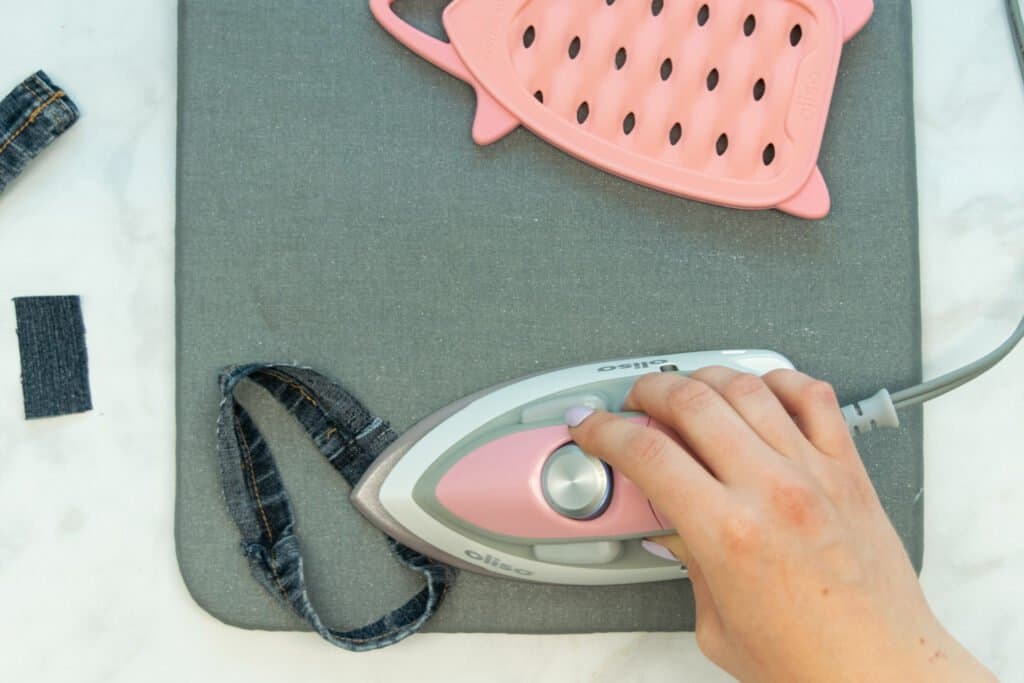
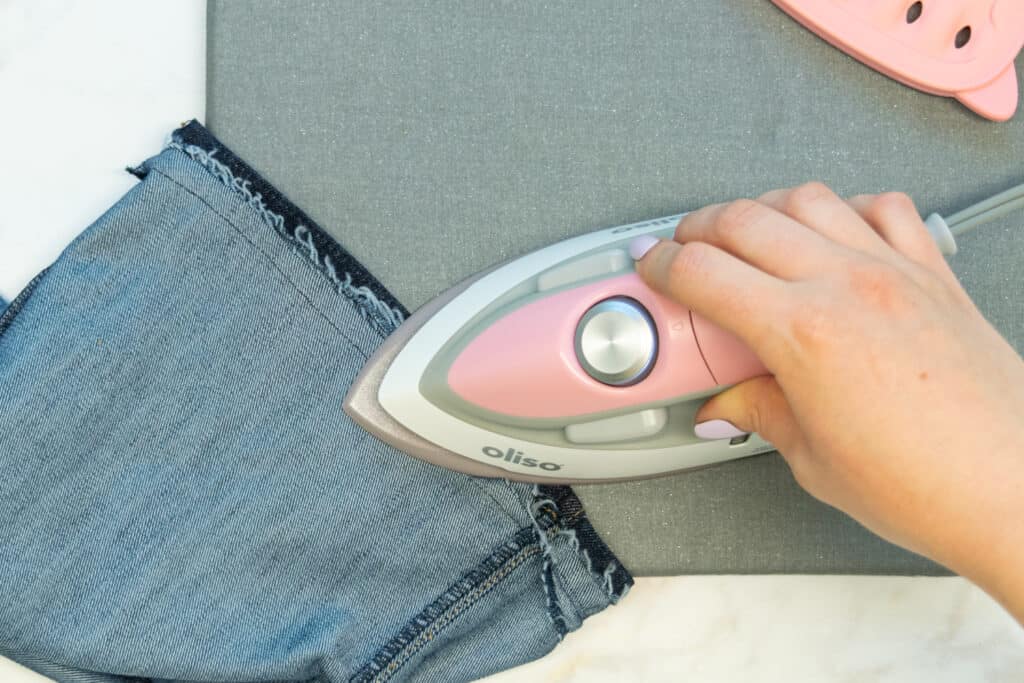
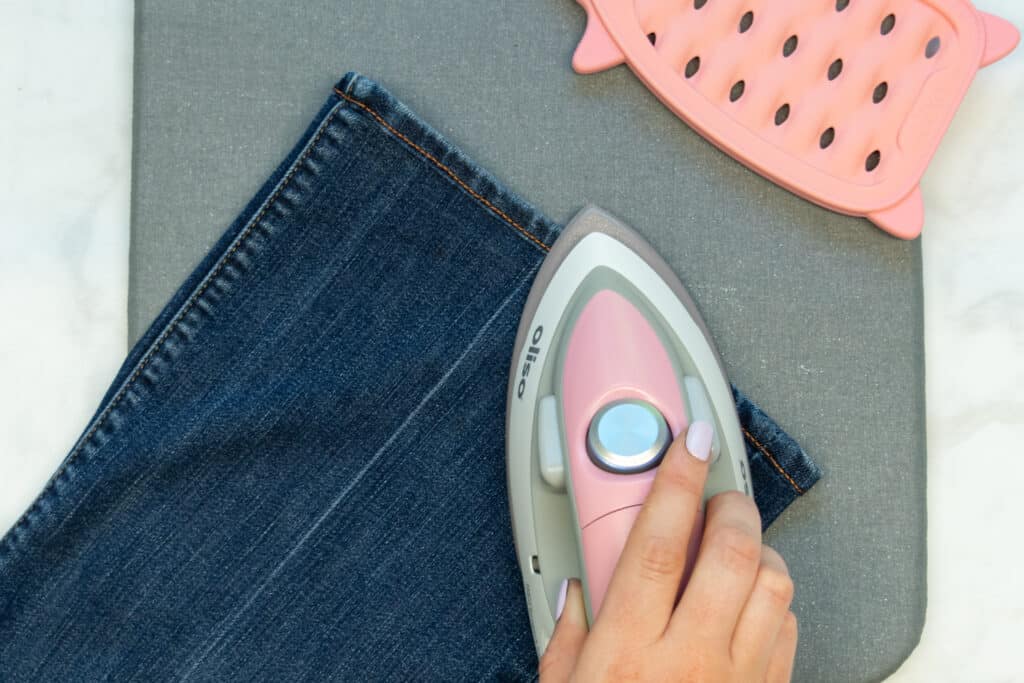
Press both layers of the seam allowance down into the unfolded hem with your iron.
To remove bulk, trim the side seam and inseam out of the seam allowance, trimming close to your stitching, but being careful not to cut through your seam.
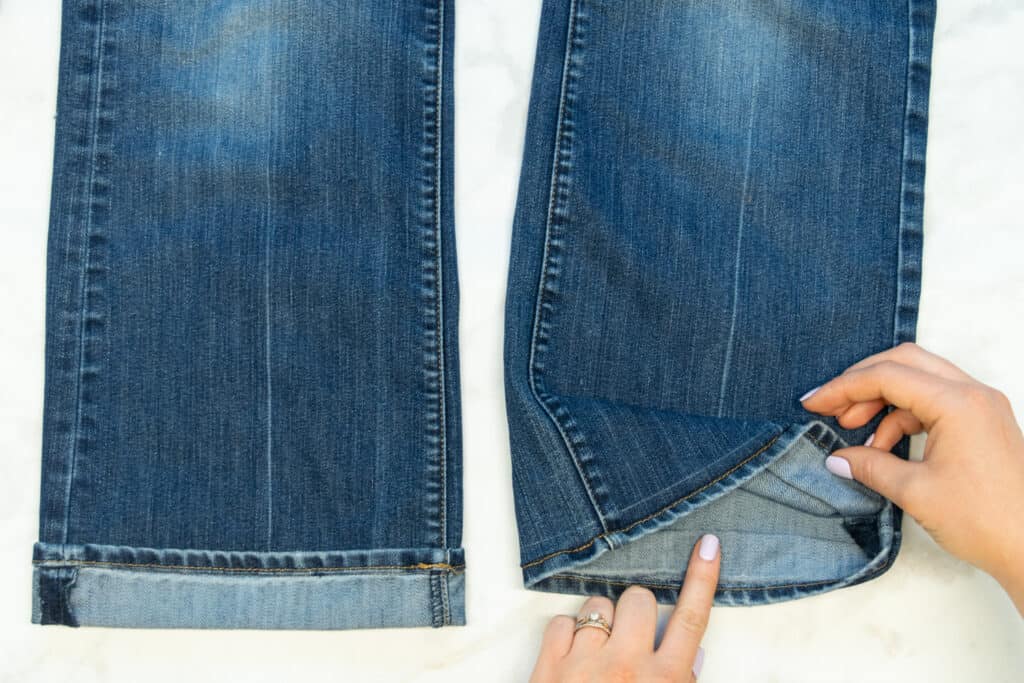
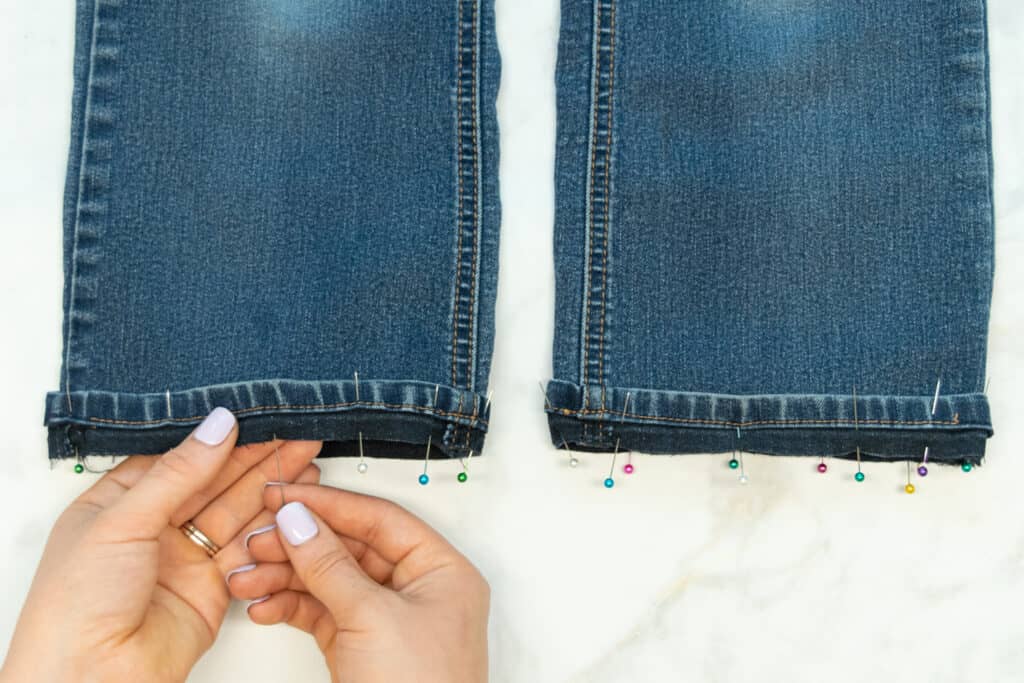
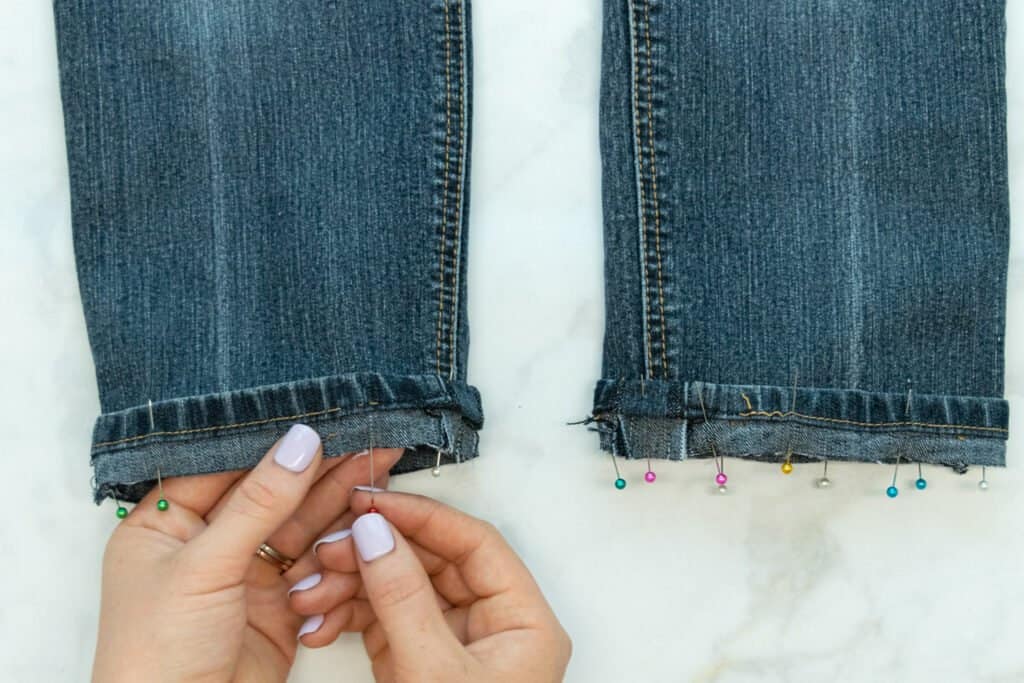
Fold the original hem back into place, folding it over your trimmed seam allowance to enclose the raw edges inside. Pin the it in place on both pantlegs.
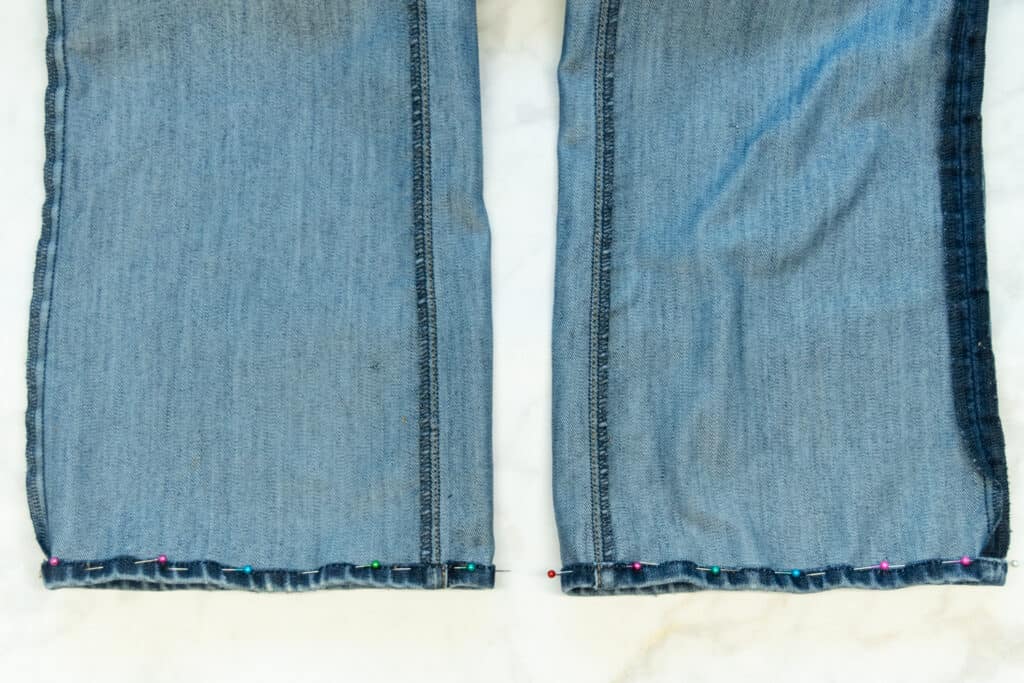
Then, stitch around the hems, sewing within the original topstitching lines. I like to use topstitching thread for this to make it look really professional.
*PRO TIP: For most home sewing machines, topstitching works best when using a topstitching needle and using topstitching thread in the needle only. I use regular all-purpose thread in the bobbin. I also like to slightly increase my stitch length to around 3mm and increase my thread tension to around 7 for topstitching thread.
Also, note that your topstitching will need to be sewn from the right side of the fabric!
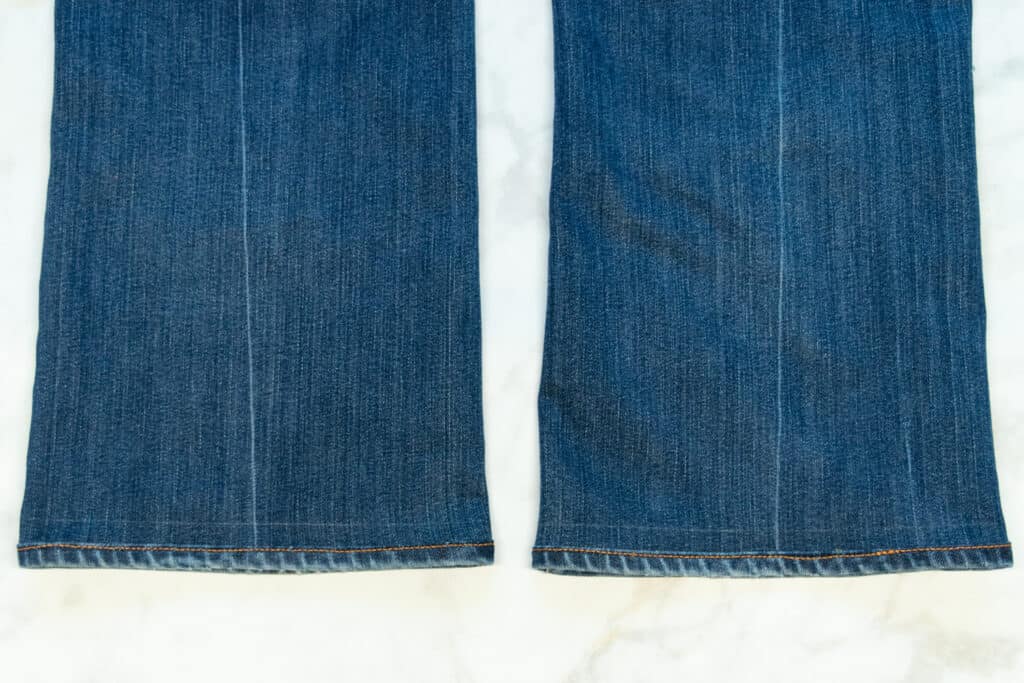
Give your freshly hemmed jeans a final pressing with lots of steam and you're done! Enjoy a perfectly fitting pair of jeans!
What's your favorite method of hemming jeans? Let me know in the comments below!
Want to learn more great sewing techniques? Check out one of the tutorials below!
Don't forget to join my Facebook group where you can show us what you're making, ask questions, and learn from others.
Don’t want to forget this technique? Click here to save this tutorial on Pinterest!

Thanks for this useful tip, especially for the flared jeans.
May I suggest that when trying on jeans, or any pants of any style, you should always wear the shoes you will mostly wear with that particular pair, e.g. sneakers or boots with jeans, dress shoes with business wear and heels with evening pants. I learnt this the hard way!
All the best to you and our Sweet Red Poppy community!
Sarah
love it, thanks
Do you have a video of hemming each style of jeans?
A much easier, and faster method would be matching the thread to the gold on the jeans, and do a folded machine stitched hem. I always blind hem my jeans - it's how I was taught while tailoring to pay for college.
Thank you! I just hemmed a new pair of flare jeans using your tutorial and they look professionally done- amazing!! Thank you so much for the clear and easy-to follow directions.
Wow, I have seen this method before online, there are so many videos and blogs that detail it - but none with this level of finish. None of them conceal that ugly seam allowance, they just tell you to serge or zigzag it. #impressed