Add a touch of personalization to your tumblers by downloading these FREE DIY Personalized Name Plate SVG files for your Stanley Tumbler!
These tumbler nameplates are going viral on TikTok and I wanted to try my hand at making my own Name Plate designs with my Glowforge Aura.
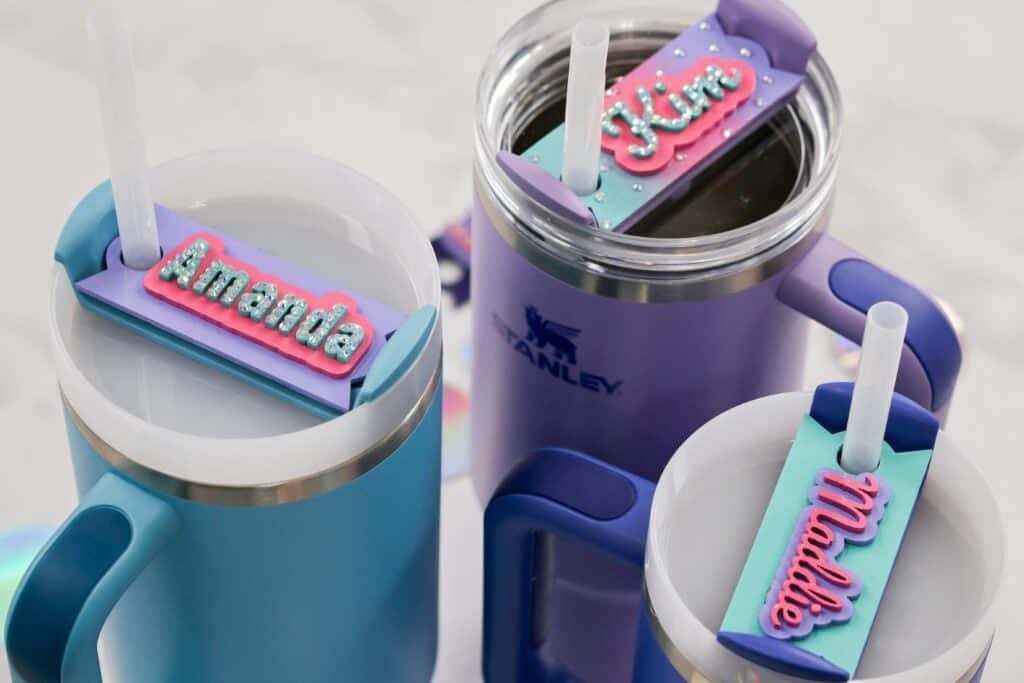
If you haven't seen or heard of this trending project, it's a customized piece of acrylic or wood with a name or cute saying you put on top of your Tumbler lid.
It's such a great way to customize your tumbler to make it your own!
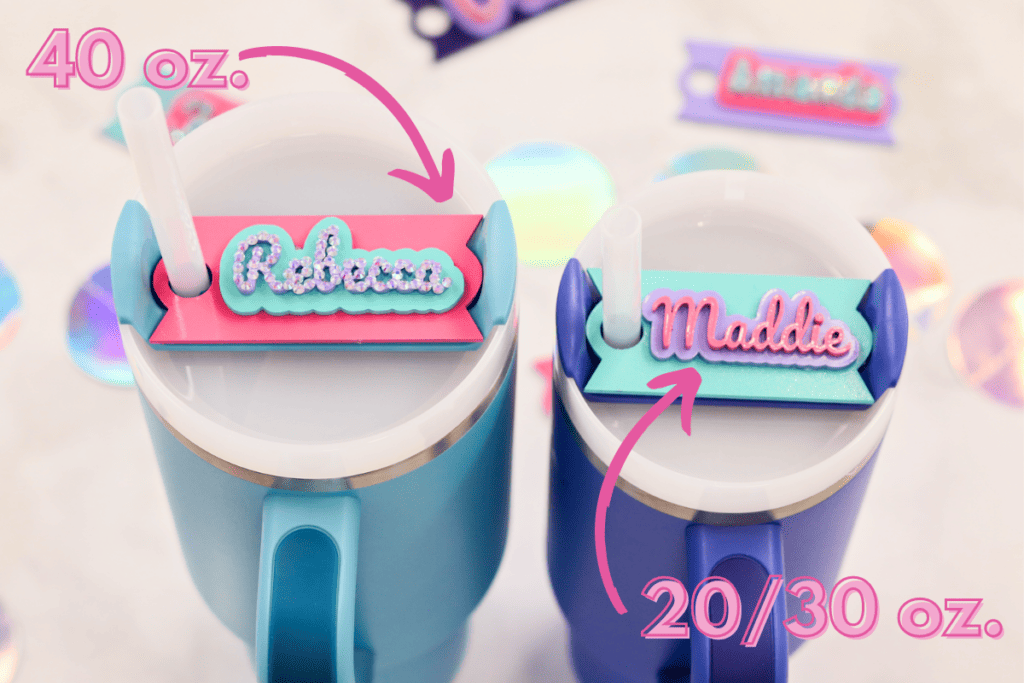
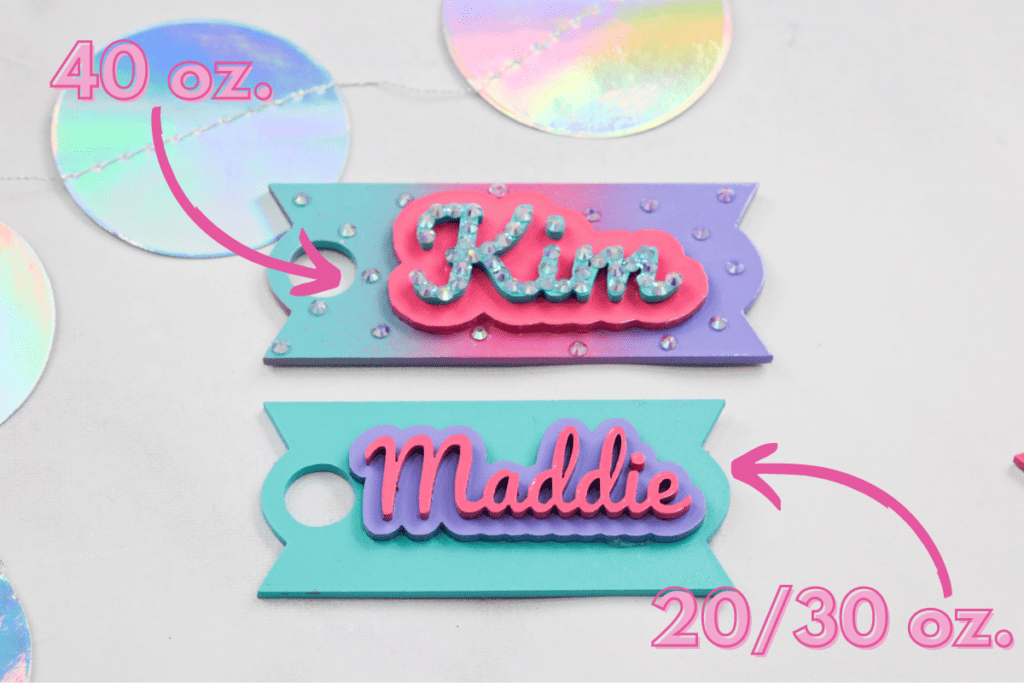
I made regular-sized name plate SVG's for 20/30 oz and 40 oz Stanley's that fit nice and snugly on top of your tumbler. This specific file is compatible with the newest H.20 lid that features a rubber inset.
Table of Contents
This file is compatible with The Stanley Quencher H2.O Flowstate™ Tumbler Lid in sizes 20, 30, and 40 oz.
To make these Name Plates, all you need is a piece of Proofgrade® material (I went with acrylic), the Glowforge App, and the free Name Plate SVG Files which I will link down below!
Download the Name Plate SVGs here to cut with your Glowforge machine!
Supplies:
- Glowforge Aura
- Name Plate SVG Files (Link Down Below)
- Proofgrade Material- Acrylic or Wood
- 20 oz or 30/40 oz Stanley Tumbler
- (Optional) Spray Paint- I used Color Shot spray paints: Farmer's Daughter (Pastel Pink), Island Girl (Turquoise Blue), and Aromatherapy (Pastel Purple).
Importing DIY Personalized Name Plate SVG into Glowforge App
Upload the files to the Glowforge App by clicking Create New Design in the top left corner.
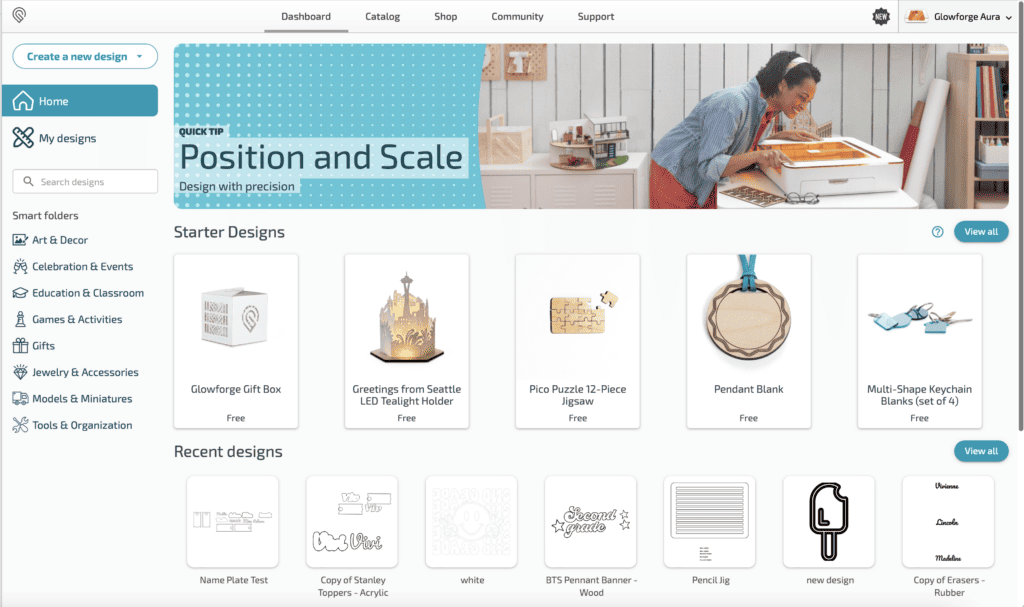
Next, click on the "+" above the canvas and import your artwork.
Move the design(s) to a place that fits onto your material.
Click Print in the top right corner of the workspace, and wait for the Glowforge button to blink on your machine. Press the glowing button, and let the machine do the cutting for you! Before opening the lid, wait a couple of minutes to let the fumes go down.
Then, remove the pieces from your Glowforge and test them out on your lid to make sure they fit.
If they are too loose, try increasing the length of the nameplate by .02 centimeters. If they are too tight, decrease by .02 centimeters.
*This file has been tested on Stanley Tumblers purchased from authorized Stanley vendors. If you purchased from an unauthorized retailer, there may be a small discrepancy in the sizing of the lid.
If desired, you can spray paint the acrylic name plate to achieve your desired color.
All that's left to do is assemble your Personalized Name Plates and put them onto your tumbler.
I hope you love your now-personalized Stanley tumbler with your new custom Name Plate!
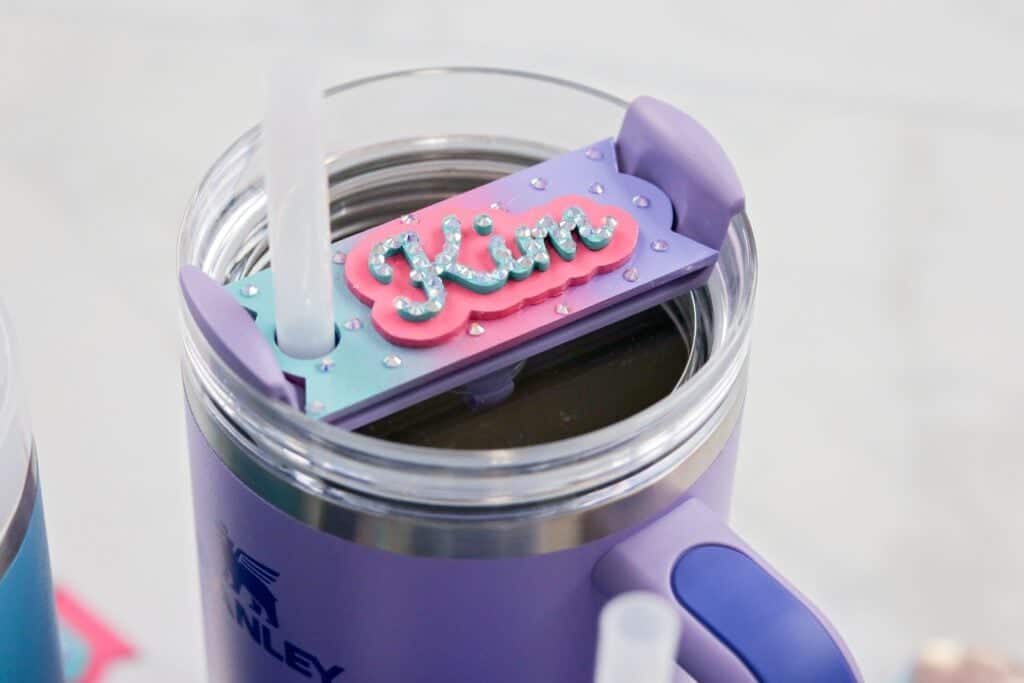
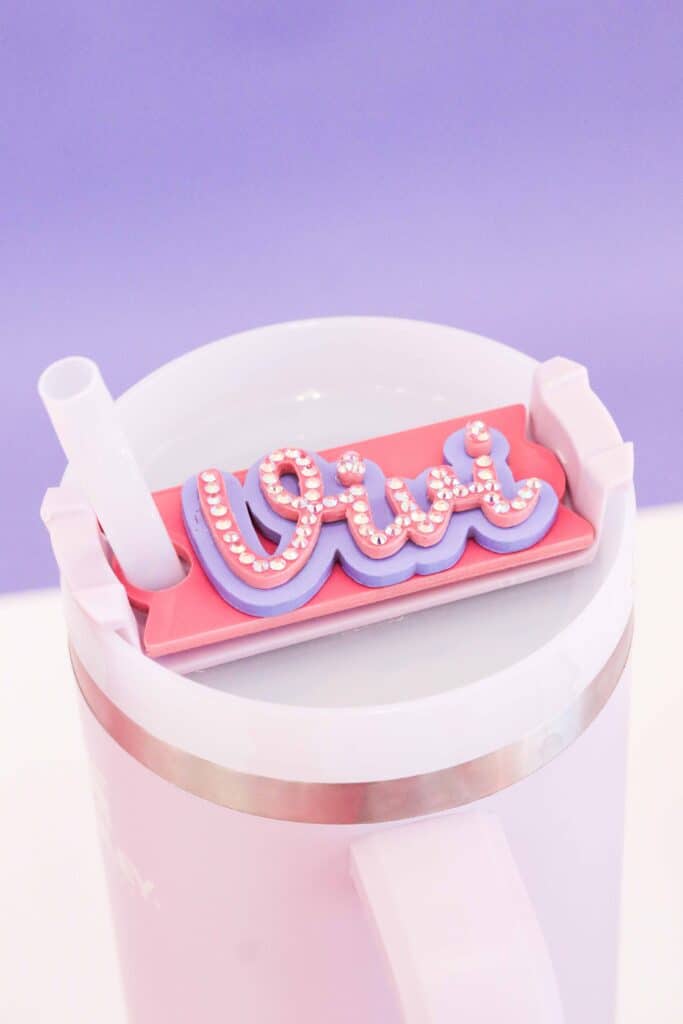
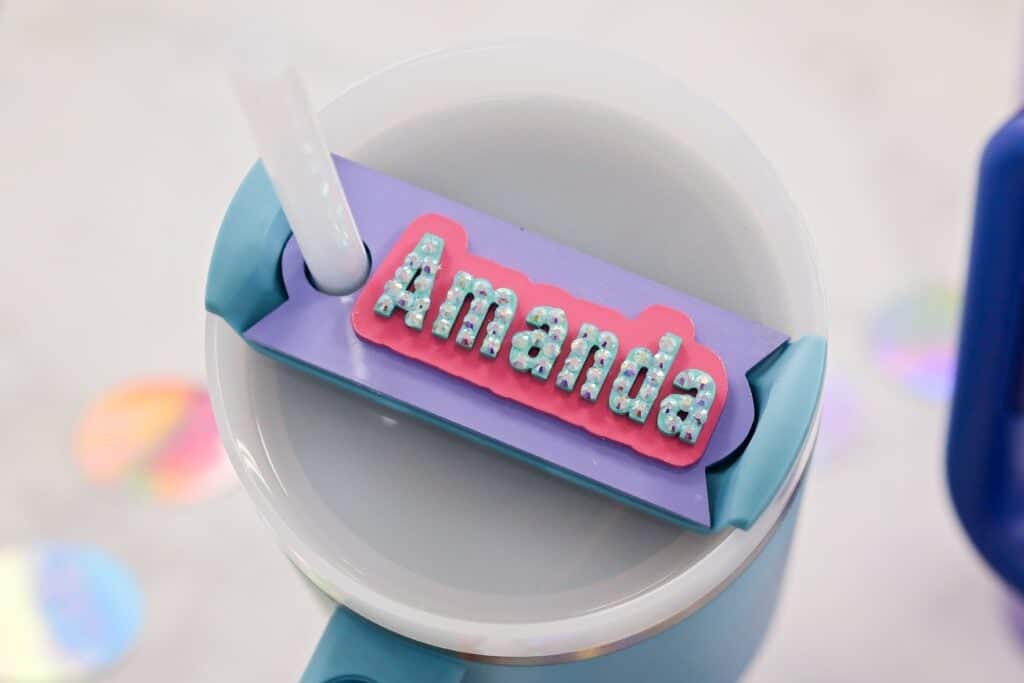
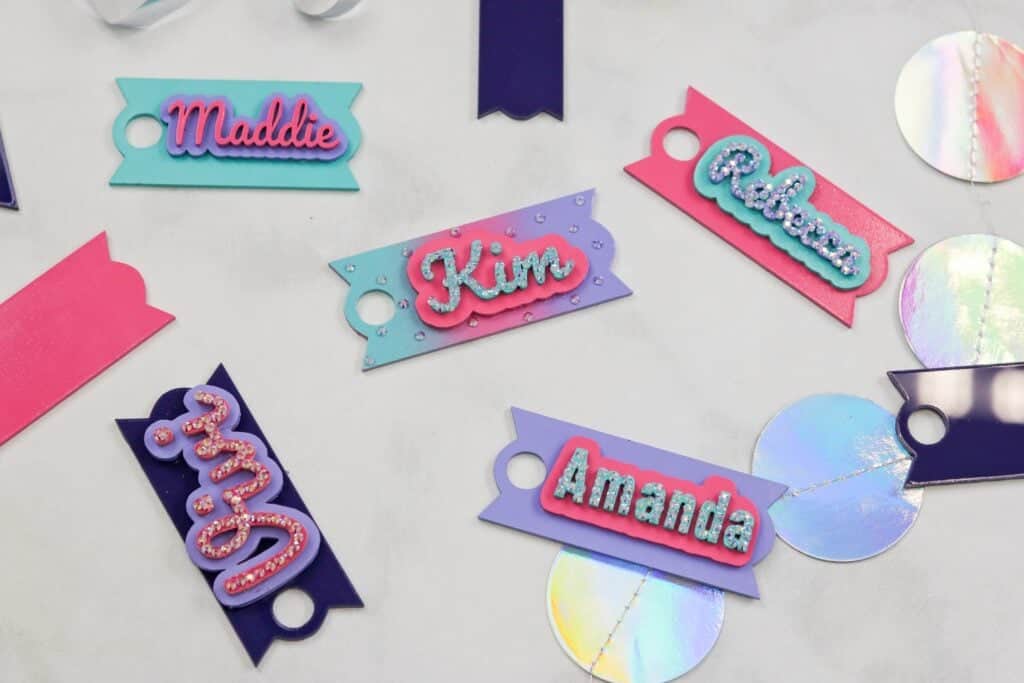
Finished DIY Name Plate!
Look how cute this turned out! Feel free to decorate your DIY Personalized Name Plate with rhinestones, glitter, paint, jewels, or even stickers!

I love this so much. Glow Forge is next on my list of craft machines to get!!!
Hi Kimberly
You have a beautiful name plate. I would love to have this file and can't find where to download. Please help me to find the link. Thank you.
these are great! Do you seal them with anything?