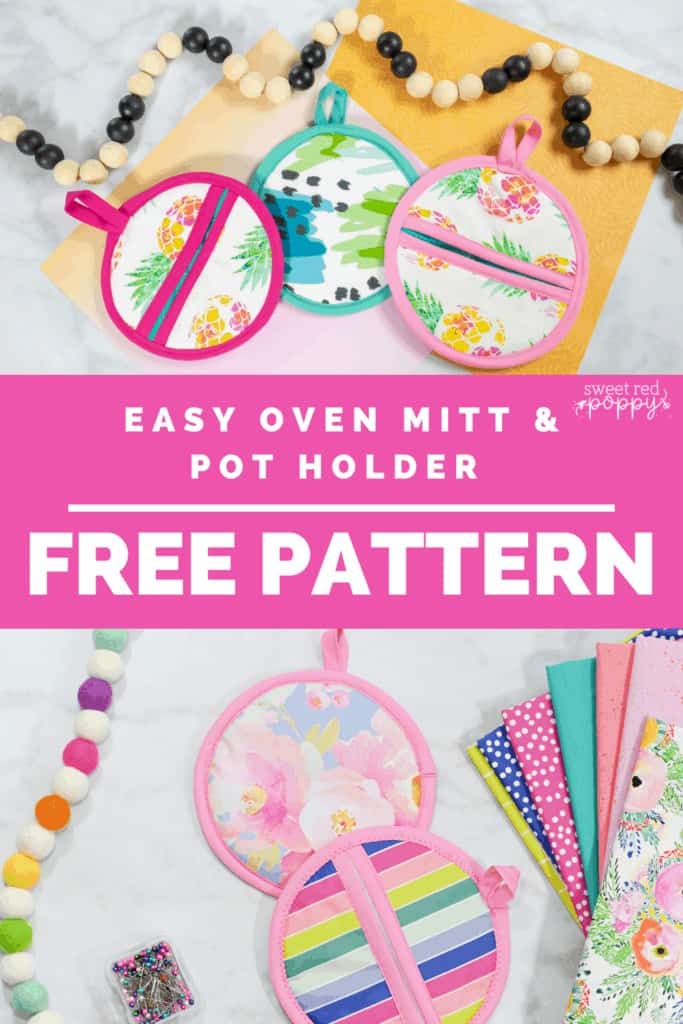
Learn how to sew adorable oven mitts and pot holders with this easy-to-use pot holder and oven mitt sewing pattern and step-by-step tutorial!
My kitchen was in desperate need of some new hot pads and oven mitts. After sewing up a few I just had to share the tutorial and a free pattern so that you can add them to your kitchen as well.
Beginner-Friendly Pot Holder/Oven Mitt Sewing Pattern
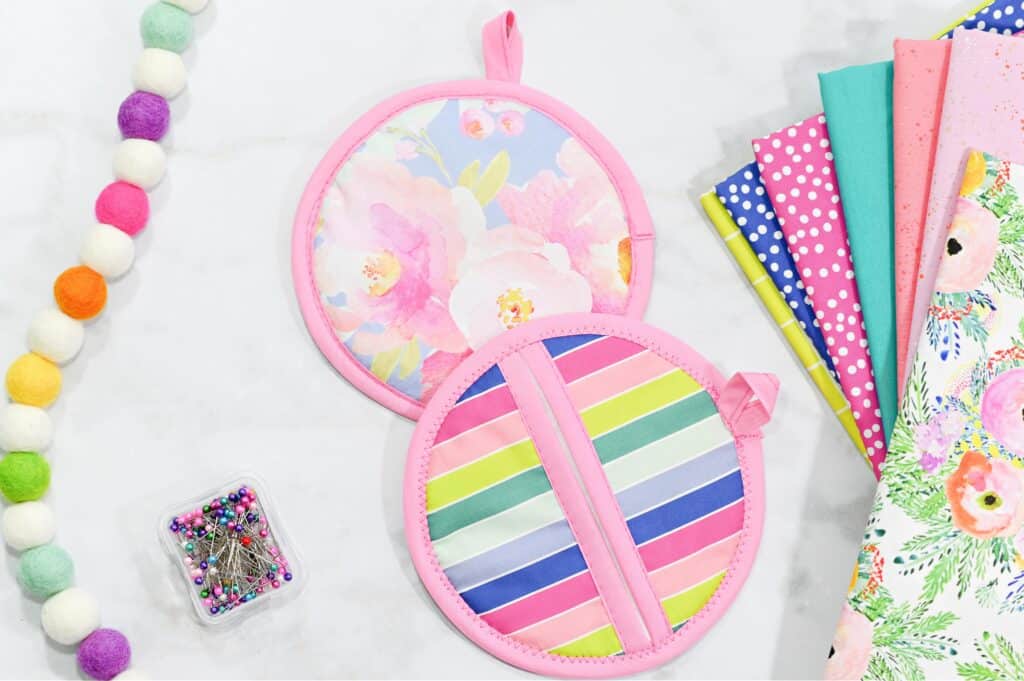
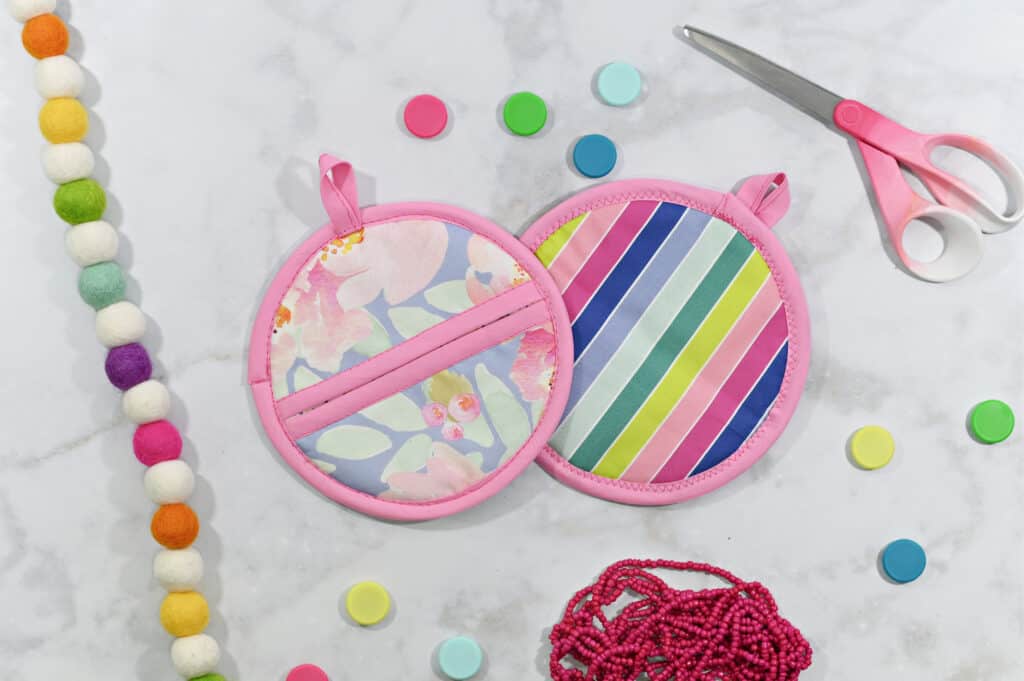
This download includes a professionally drafted oven mitt and pot holder pattern. The pot holder is 7” wide and features an opening along the center back to easily slide your hand inside to help protect it from burns.
Step-by-step detailed photos and detailed written instructions are also included.
Pattern Includes:
Included in this pattern is a professionally drafted and graded color-coded pattern. Use the 1×1 inch printing guide to ensure accuracy and quickly put this pattern together with its no-trim pieces.
Step-by-step detailed photo and written instructions are also included.
Why Shop Through My Links?
When you shop through my affiliate links, it doesn't cost you anything extra, but it helps me out in a big way! I earn a small commission from those purchases, and that support allows me to continue creating and sharing free tutorials and patterns for you. Thank you so much for helping me keep this creative community going! 💕
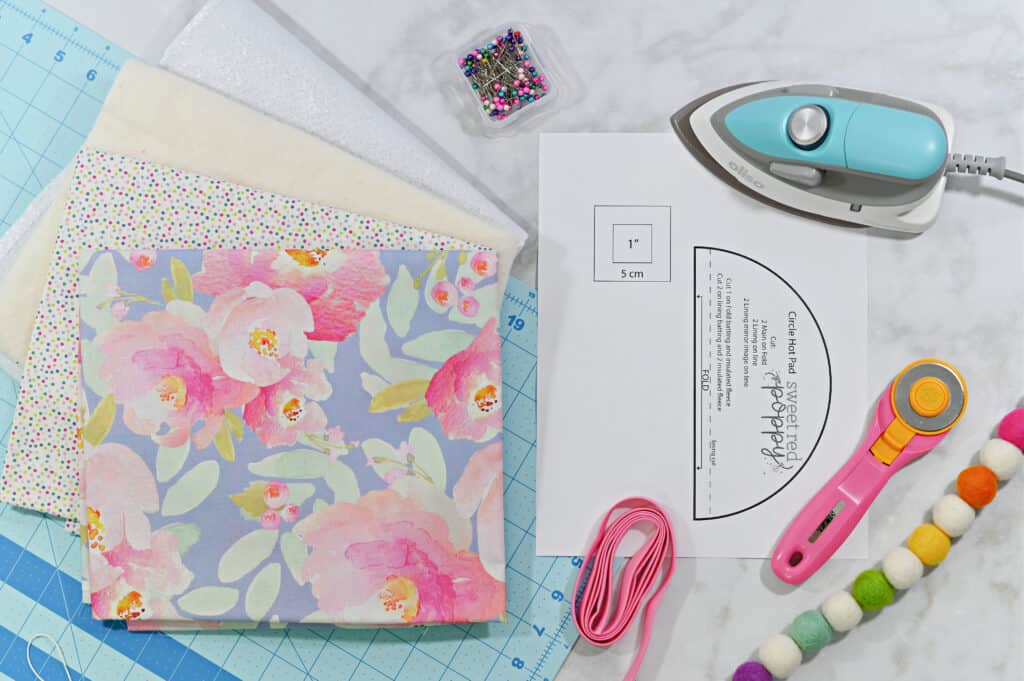
FABRIC REQUIREMENTS
Supplies Needed for your Oven Mitt/Pot Holder Sewing Pattern:
Shop my favorite sewing supplies here!
- 1/3 Yard Woven Fabric for Main Fabric (I prefer 100% Cotton)
- 1/3 Yard Woven Fabric for Lining
- 1/3 Yard Batting
- 1/3 Yard Insul Bright
- Double Bias Tape
- Sewing Machine
- Scissors or Rotary Cutter & Mat
- Thread
- Pins or Clips
- Iron & Ironing Board
- Tape Measure
- Needle
Download FREE Oven Mitt & Pot Holder Sewing Pattern
Looking for an ad-free experience? Download the entire sewing pattern and step-by-step instructions without any ads for only $3 from our shop. Click here!
Step 1: Download Oven Mitt & Pot Holder Sewing Pattern
Download this oven mitt pattern and print it out.
I like to print off my pattern on cardstock so that it will last for multiples uses.
Download the pattern to your computer and print the pattern at 100% with no scaling.
Step 2: Cut out Oven Mitt & Pot Holder Pattern and Fabric

- Cut 1 on fold in woven fabric (main)
- Cut 1 on fold in woven fabric (lining)
- Cut 1 on fold of Batting
- Cut 1 on fold of Insul Bright
- Cut on the dotted line on the pattern and cut out:
- Cut 2 in woven fabric (main)
- Cut 2 in woven fabric (lining)
- Cut 2 in batting
- Cut a 4” piece of bias tape for the hanger loop
- Cut two 8" pieces of bias tape
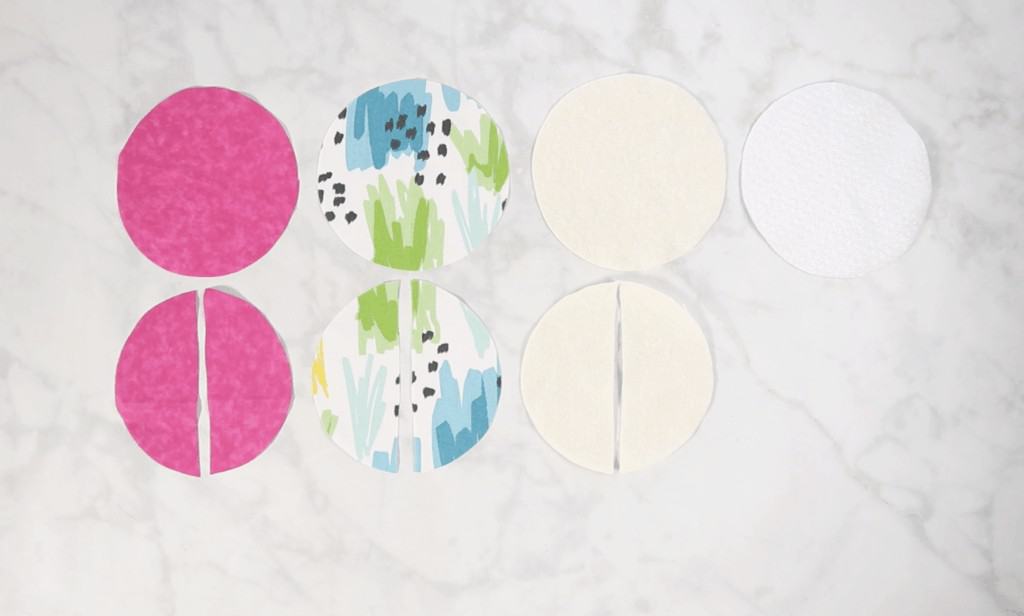
You will have 4 full circles and 6 half circles in total.
Make sure to iron fabric after cutting out.
Step 3: Pin Oven Mitt & Pot Holder Fabric Together
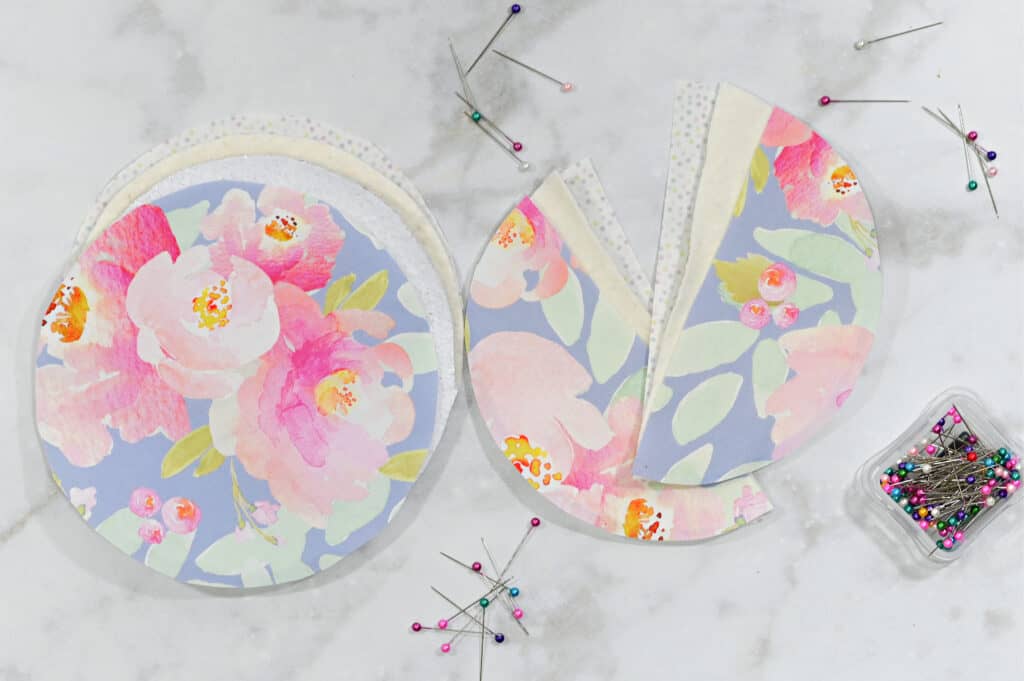
Layer the oven mitt, lining fabric (wrong side facing batting), batting, Insul Bright, main fabric (wrong side facing Insul Bright). Pin or Clip in place.
Then, layer each back piece by sandwiching the batting between both the main and lining fabric. Make sure the wrong sides of the fabrics face the piece of batting.
Pin in place.
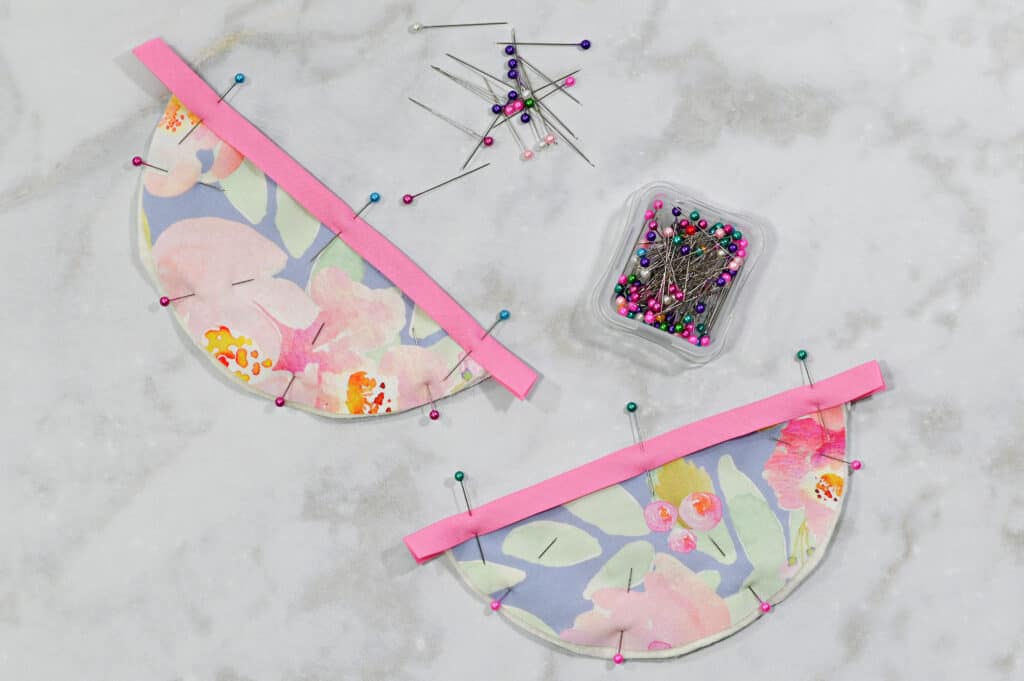
Next, take your 8" long pieces of bias tape and sandwich one backside along the straight edge into the bias tape, encompassing all layers of fabric and batting. Pin in place.
Repeat with the other back side.
Step 4: Sew Bias Tape On Oven Mitt & Pot Holder
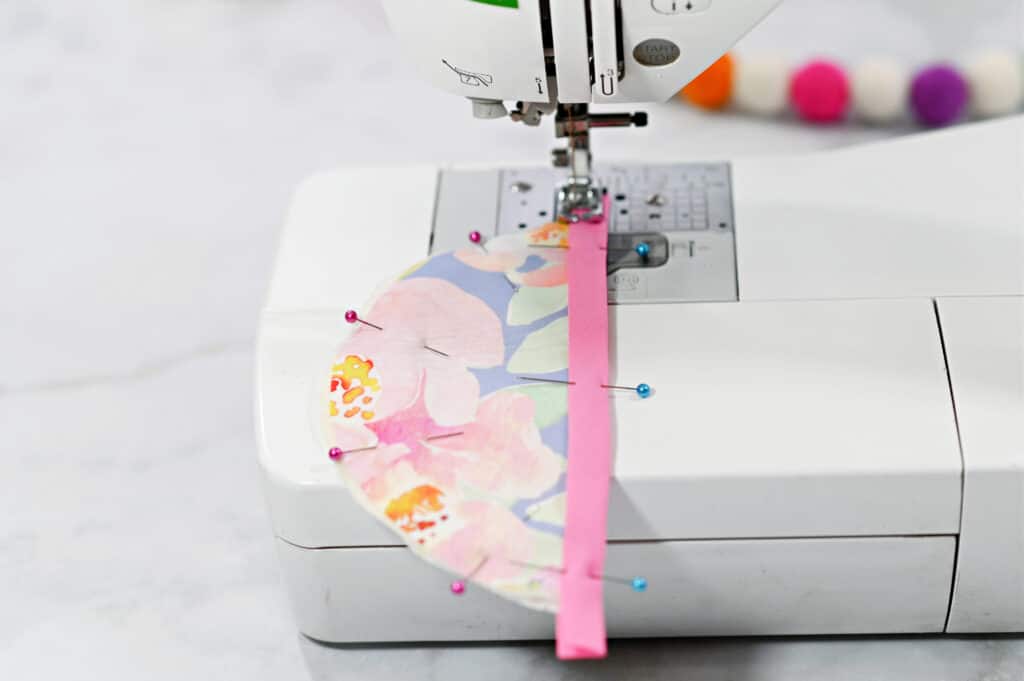
Sew along the edge of the bias tape using a 1/4" seam allowance.
Repeat with the other piece.
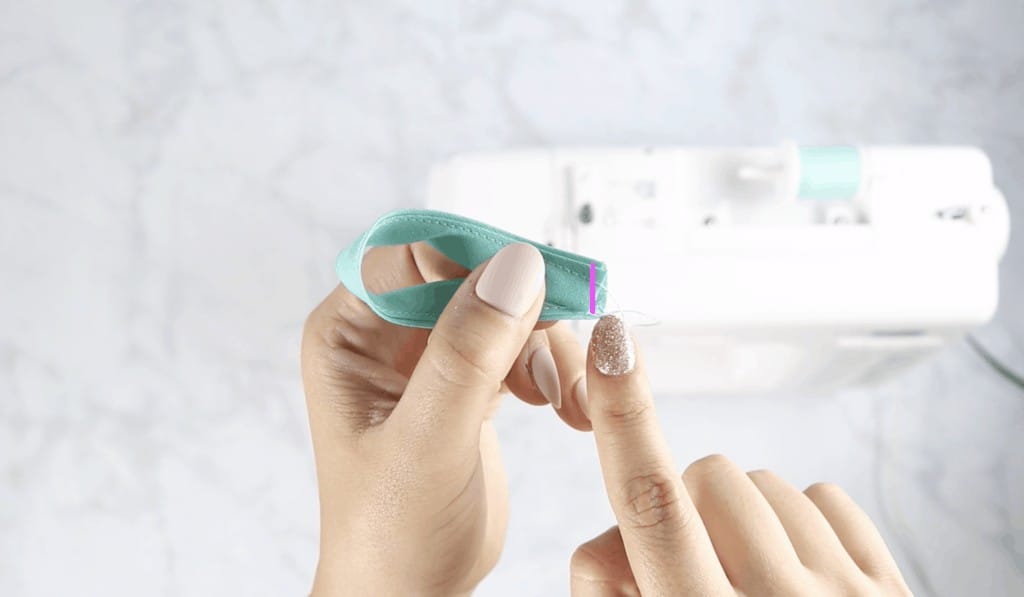
Sew the 6" piece of bias tape closed. Fold in half and align the raw ends. Pin in place and sew along the edge with a basting stitch. Set Aside.
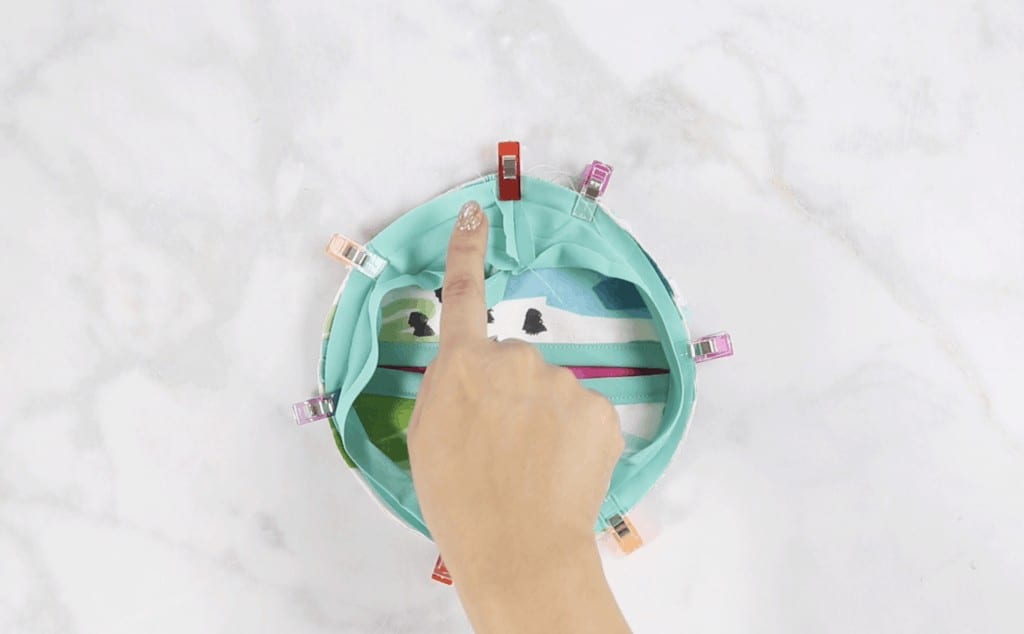
Place both back pieces lining sides facing the full circle. Make sure all lining sides are facing each other. Pin in place.
Use a basting stitch and baste the back pieces to the main circle.
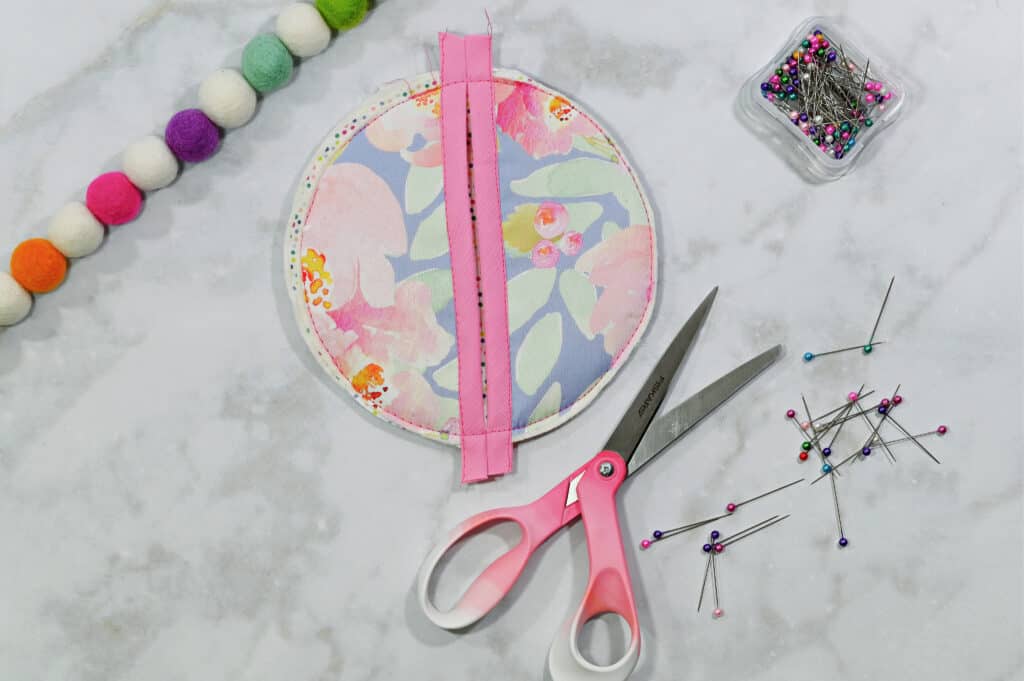
Trim 1/8" to the basting stitch. Remove pins as you sew.

Place hanging loop perpendicular to the back opening of your oven mitt facing down to the center of the mitt. Baste in place using a 1/8" seam allowance.
Sandwich the edges of the oven mitt into the bias tape.
Slightly pull to keep the bias tape from bunching. Start pining in place.
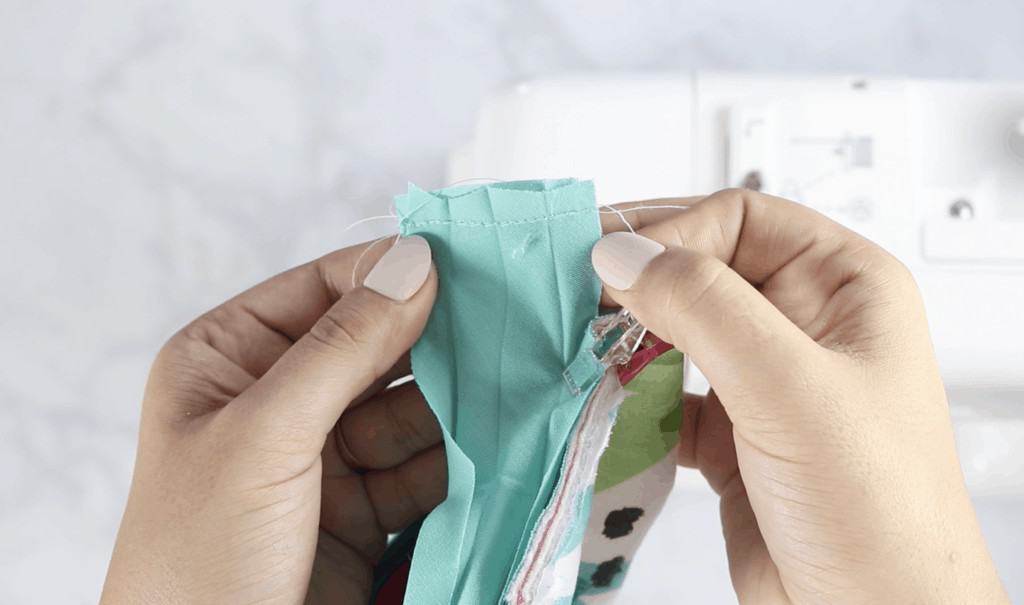
When you meet back at the beginning of the bias tape, measure 1" over and cut excess bias tape off.
Match raw edges of bias tape right sides together and pin in place. Sew with a 1/4" seam allowance.
Pin in place and sew the bias tape along the fold of the crease of the bias tape.
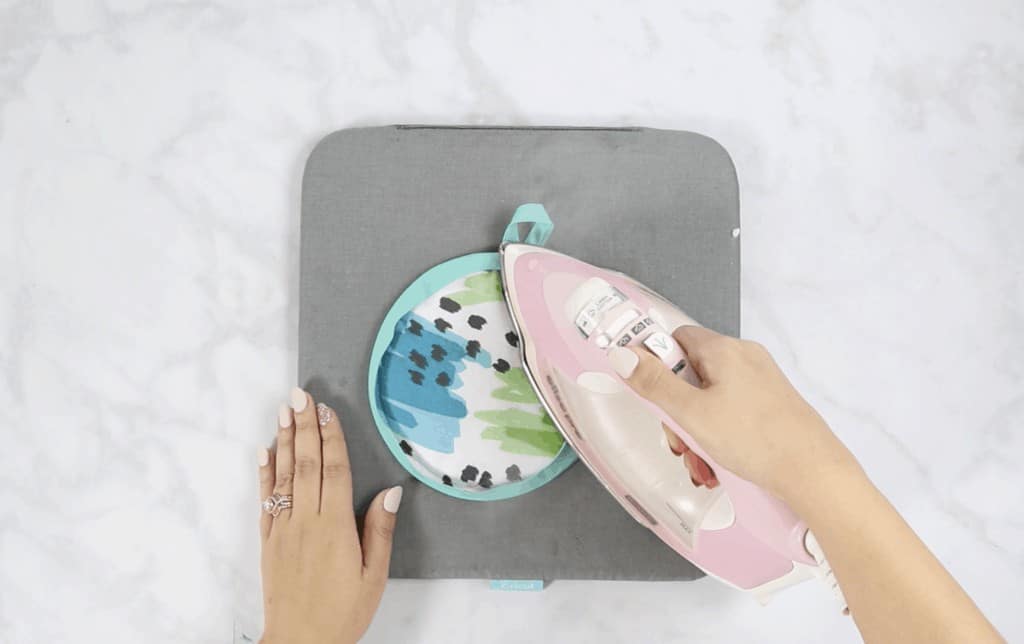
Fold the bias tape over the edges and press the top of the oven mitt.
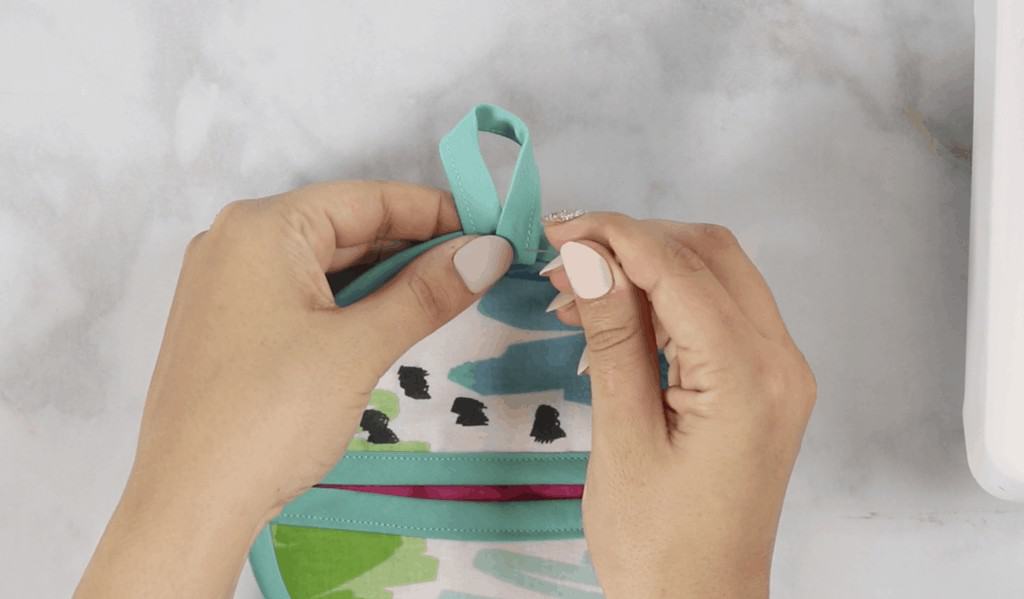
Fold hanging loop up away from the oven mitt and pin in place.
Topstitch along the bias tape. Press for a professional finish.
Finished Oven Mitt/Pot Holder
Now you have an adorable oven mitt/pot holder. Wasn't that easy? Now you can repeat this process and create one for friends and family!
Let me know how it turned out. Be sure to post a picture on Instagram or Facebook and tag me so I can see it!
Don’t want to forget about this? Save this project for later! Click here to save this project on Pinterest.
Looking for another oven mitt project? Check out this ruffled oven mitt post HERE and this one HERE!
Or are you looking for more sewing projects? Click here to find more.
Do you have any questions about this pot holder and oven mitt sewing pattern? Let me know in a comment below!
Love the pattern. How do I print out the tutorial?
Look for the "File" option on the top left of your screen. From the drop-down menu, choose "Print". On the print menu, you should be able to "Save as PDF" or select your printer. The down side of this is that your tutorial will be 20/21 pages long. If there is a more compact PDF available, I don't know where it is.
You can buy it from her website
Hi Dolores, the printable step-by-step instructions are available in our shop for $3 if you would like an ad-free experience.
https://sweetredpoppy.shop/products/oven-mitt-pot-holder-pdf-pattern
Love your patterns…..your face mask patterns for toddler to extra large adult was used by me many many times. Glued the patterns to cardboard and reused dozens of times. Because of my husband’s hearing aids and glasses, we changed the elastic on the top of the mask to two 12” lengths and used toggles we got from Amazon to fasten the two lengths to connect at the back of his head. This design was also the only one my son-‘in-law could wear comfortably.
Hi Joanne, thanks so much for using our face mask pattern! I'm glad to hear you were able to use it so many times and make adjustments so it worked better for your husband! 🙂
Hi, My light weight knit shirts keep getting small sized holes on the lower right side, is there a way to fix them? I’ve tried fusible tape, but with multi holes it’s not working out well. The Old Navy are the worst. I tried a cloth glue also. I have more shirts to wear while cleaning and gardening than I do for wearing out in public.
I used both your patterns for face masks last year and made over 350 masks for family, friends , strangers. My Scout grandson helped me sew over 100 masks (working on his Citizens in the Community-Merit Badge) and I sent them to the Navajo reservation in Arizona. Thanks for your help.
Thank you!
Could you please tell me why when I download the Oven Mitt and Pot Holders pattern all I got was the round pattern. There were no other patterns and no instructions. How can I get the pattern and instructions. Thank you
Hi Josephine, the step-by-step tutorial is available as a printable download in our shop here: https://sweetredpoppy.shop/products/oven-mitt-pot-holder-pdf-pattern
loved making the easy oven mitt.
It took 14 pages to print out. the ads did not print out. the ad left a lot of space. I am a fixed income and printing that many pages is expensive for me. Is there a way to condense the space so it would be so few pages.
thank you
Randina Bliss
na*******@***il.com
The pattern is basically just a circle (half). The diameter is about 7 inches or so. I used a bowl from my kitchen to draw my own pattern.
I like to highlight the pattern and copy it to a Word Document then I can take out all the extra space between the instructions.
Hi Randina, this pattern is available for download as a condensed printable in our shop without ads for only $3. You can purchase the pattern here: https://sweetredpoppy.shop/products/oven-mitt-pot-holder-pdf-pattern
What brand of iron do you use when sewing?
I use an Oliso Pro! You can read my review here: https://sweetredpoppy.com/oliso-pro-tg1600-iron-review/
Thank you very much. These oven mitt & pot holder are so beautiful and easy to sew. The instructions are very clear and your fabrics are so lovely. I love it
Love the patterns and tutorials. I hate the ads .
Hi Konnie, ads are what keeps our business running. Without them, I wouldn't be able to share this content as it's a full-time job to create it.
If you're looking for an ad-free experience you can always shop our store and download our patterns there. This pattern is available for downloads without ads here: https://sweetredpoppy.shop/products/oven-mitt-pot-holder-pdf-pattern
Hi Kim,
Great pattern! I would like to find some of the clips you use in your tutorial. Do you sell them on your site? I looked but couldn’t find them.
Thanks!
Theresa
Thanks for the free pattern! I made a pot holder tonight. What kind of batting did you use? Yours looked WAY more manageable than mine. I used the 100% cotton that I use for bowl holders that can go in the microwave. I had to use binder clips because pins weren't long enough! Thanks also for the video. It was helpful when trying to figure out the binding ends.
Where’s the video ?
Love your patterns, and the fabric is always so bright and cheerful! Just a quick note regarding the bias tape. In the cutting instructions, you have the bias tape for the hanger cut at 4”. But in the sewing instructions, you have it listed at 6”. I went with 6” to make a larger loop. If I’m incorrect, I apologize. Thank you for sharing your love of crafting with us!
These are so cute! What a great gift idea.
Would you please elaborate on this step? TIA.
Match raw edges of bias tape right sides together and pin in place.
I really want this pattern but every time I try to grab the free pattern it takes me to a subscription thing and doesnt actually email me the pattern. 🙁