• Skip to primary navigation
  • Skip to main content
  • Skip to primary sidebar
Sweet Red Poppy logo
  • Cricut
    • Free SVG Files
    • Paper Flowers
    • Mandala
    • Iron-On
    • Vinyl
    • Maker
    • Explore Air 2
    • Joy
  • Sewing
    • Baby
    • Kids
    • Accessories
    • Christmas
    • Blankets
    • Womens
    • Learn to Sew Tips & Tricks
    • Face Masks
  • DIY Crafting
    • Paint
    • Paper
    • Food
    • Kids
  • Holiday Crafts
    • Valentine’s Day
    • Easter
    • 4th of July
    • Halloween
    • Thanksgiving
    • Christmas
  • Books
    • Cricut Printed Book
    • Cricut E-Book
    • Cricut Joy Printed Book
    • Cricut Joy E-Book
    • Paper Flower E-Book
    • Sewing Printed Book
    • Sewing E-Book
    • Face Mask E-Book
    • Mandala E-Book Bundle
    • Mandala E-Book - Inkscape
    • Mandala E-Book - Adobe Illustrator
    • Mandala Printed Book - Inkscape
    • Mandala Printed Book - Adobe Illustrator
    • Baby Pattern E-Book
  • Courses
    • Cricut Course
    • Sewing Course
    • Serger Course
    • Quilting Course
    • SVG Design Course
    • Course Login: Teachable
  • Shop
    • E-Books
    • Printed Books
    • Sewing Patterns
    • SVG Files
    • Baby Patterns
    • Subscribe to Emails
    • Course Login: Teachable
    • Contact
  • Search

How to Sew a Ruffled Oven Mitt | Cricut Maker

Written by Kimberly Coffin · This post may contain affiliate links · 7 Comments

550 shares

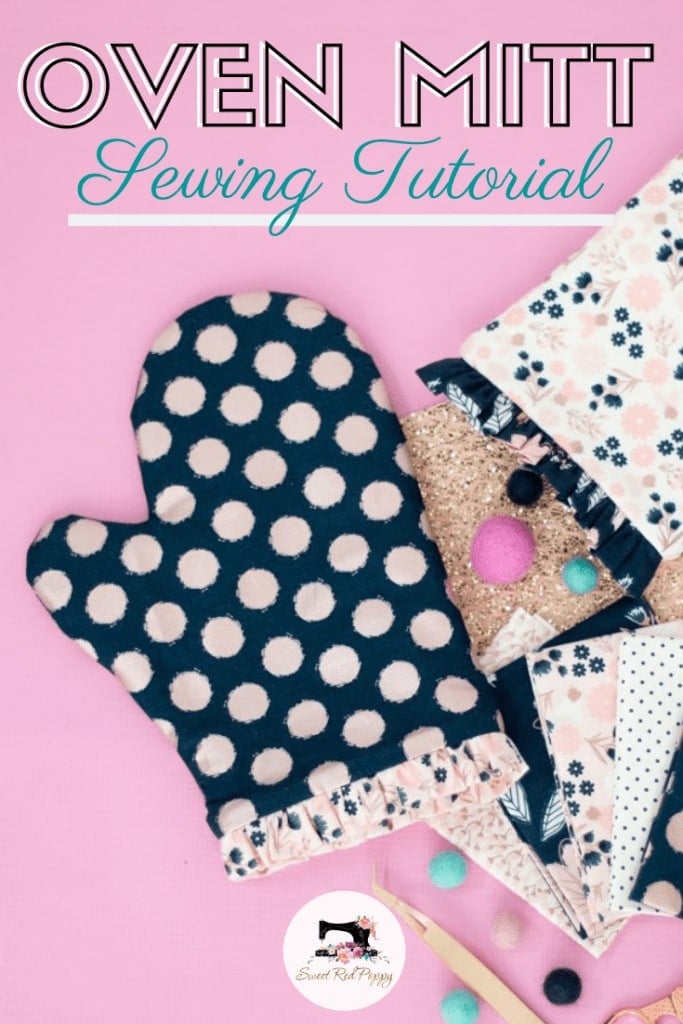
Learn How to Sew a Ruffled Oven Mitt the Easy Way with the Help of the Cricut Maker.

Learn How To Sew an Oven Mitt with the Help of the Cricut Maker.

As I was making dinner the other day the timer started to beep and I found myself frantically searching every drawer in my kitchen for an oven mitt. I came up empty handed and I knew I had exactly 34 seconds before the bottoms of my perfectly browned cookies began to burn.

In an act of desperation, I grabbed a stack of paper towels sitting to my right and quickly took the pan out without missing a beat. I may or may not have a few burnt fingers as a result of my hasty decision. Ooops!

Cricut Maker How to Sew With Fabric Oven Mitt Pattern

I figured it was time I made some new oven mitts since all of mine seem to have all disappeared. I'm guessing they are all hiding somewhere...probably the same place that socks go to hide.

Riley Blake Fat Quarters Fabric

I ran up to my sewing room after I put all the kids to bed, pulled up Cricut's Design Space and found the perfect sewing pattern from Simplicity to make a few Oven Mitts.

Are you ready to get started?

Sewing Tutorial: Cricut Maker Oven Mitts Simplicity Pattern Free Download

Why Shop Through My Links?

When you shop through my affiliate links, it doesn't cost you anything extra, but it helps me out in a big way! I earn a small commission from those purchases, and that support allows me to continue creating and sharing free tutorials and patterns for you. Thank you so much for helping me keep this creative community going!

Oven Mitt Supply List
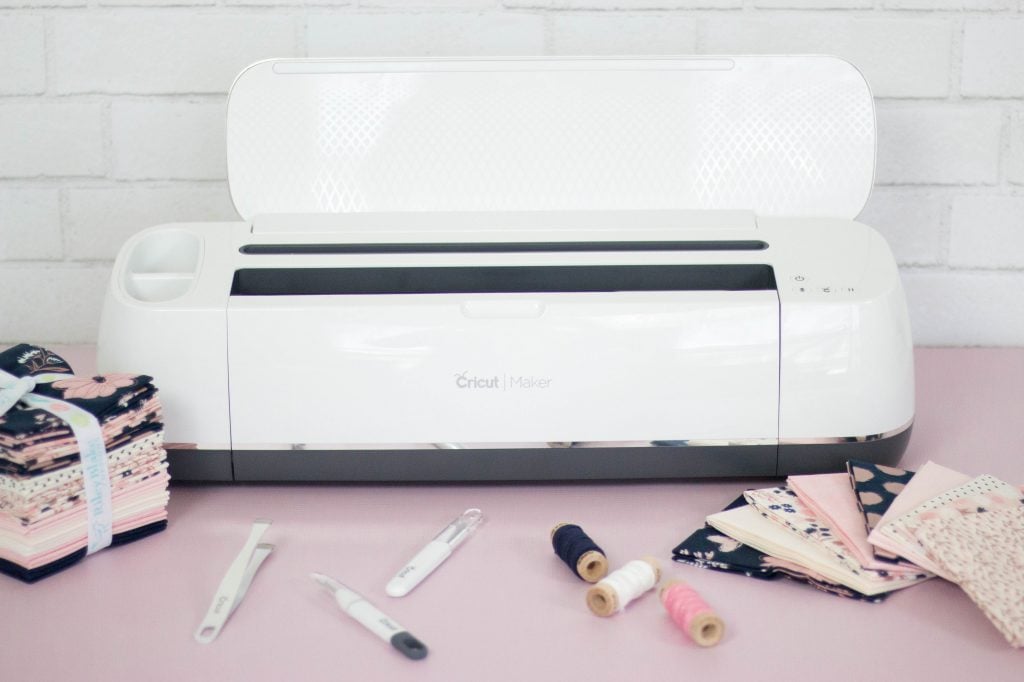
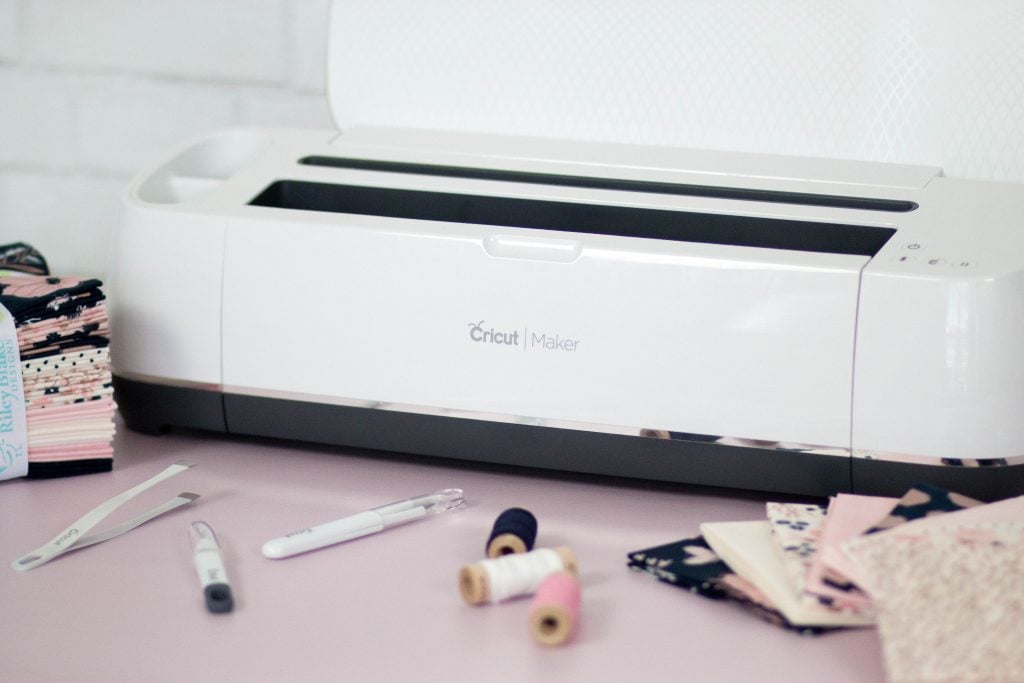
  • Cricut Maker
  • Cricut 12 x 24 Fabric Grip Mat
  • Cricut Washable Fabric Pen
  • 1/3 Yard Batting
  • Ribbon * Optional
  • Insul Bright
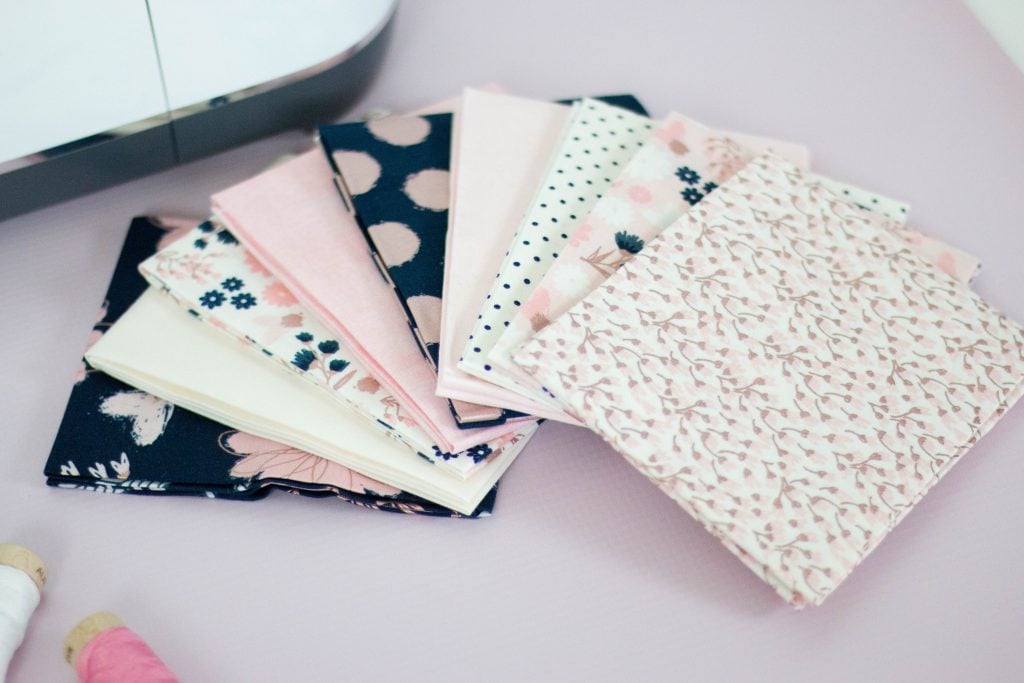
  • 1 Yard of Cotton Fabric or a Stack of Fat Quarters
Cricut Maker Cuts Fabric and Sewing Patterns

Oven Mitt Sewing Tutorial

Begin by preparing the Cricut Mats and fabric for the Maker to cut. If you have multiple mats you can prepare them all at the same time.

* If you are new to sewing with the Cricut Maker read this post that covers fabric and mats.

Cut Fabric out with Cricut Maker

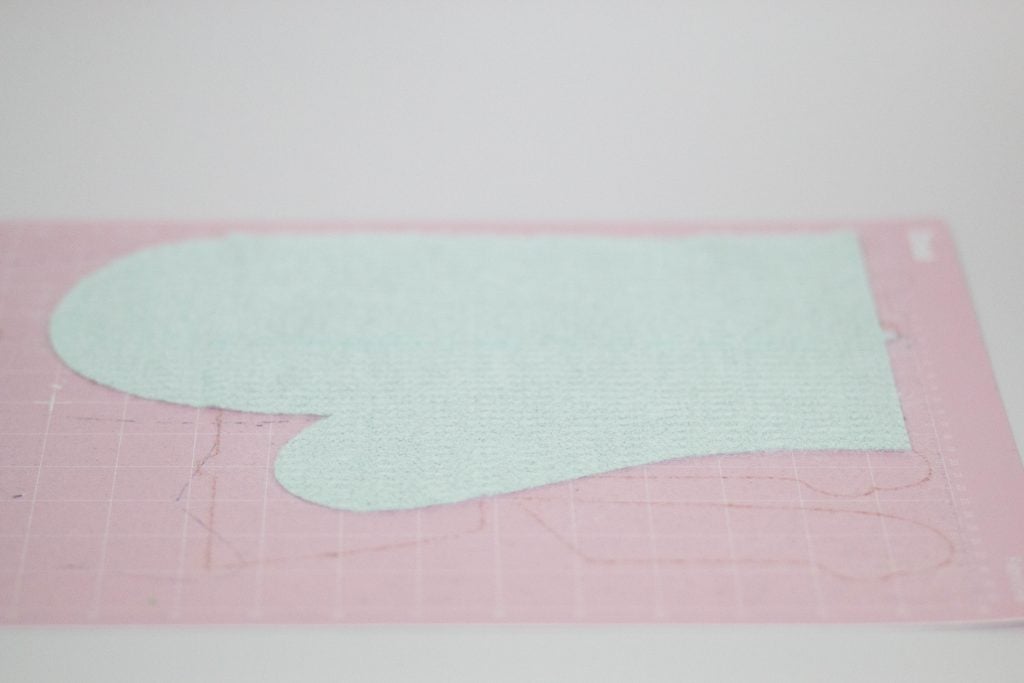
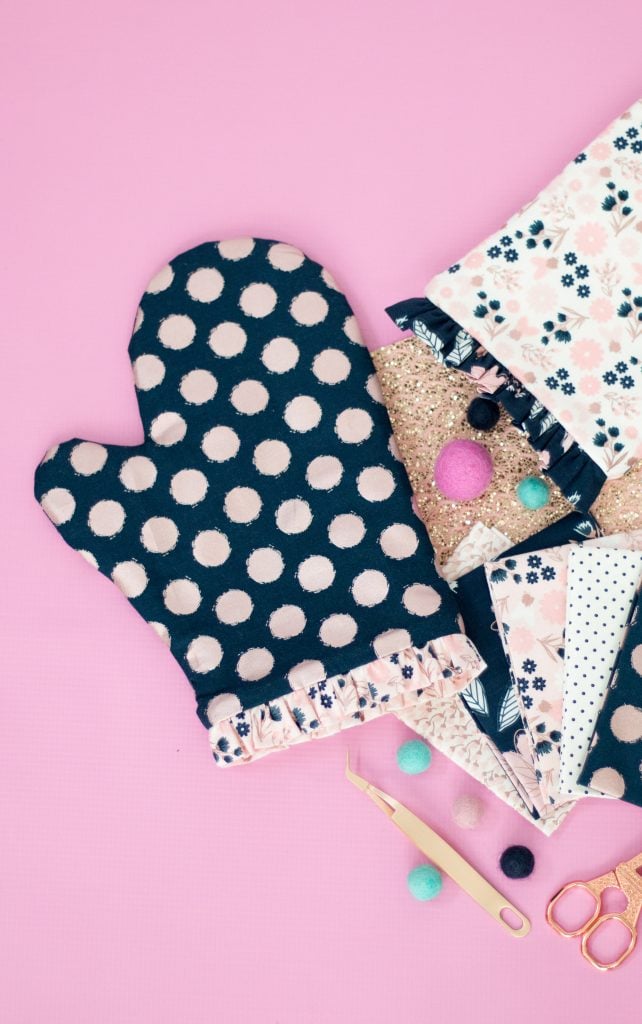
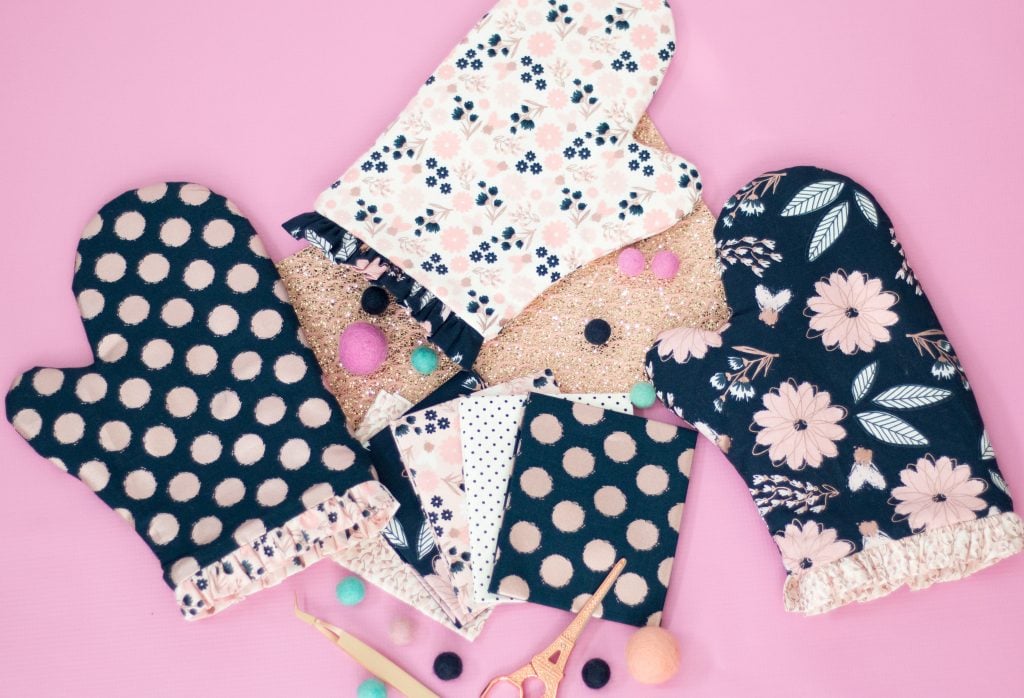
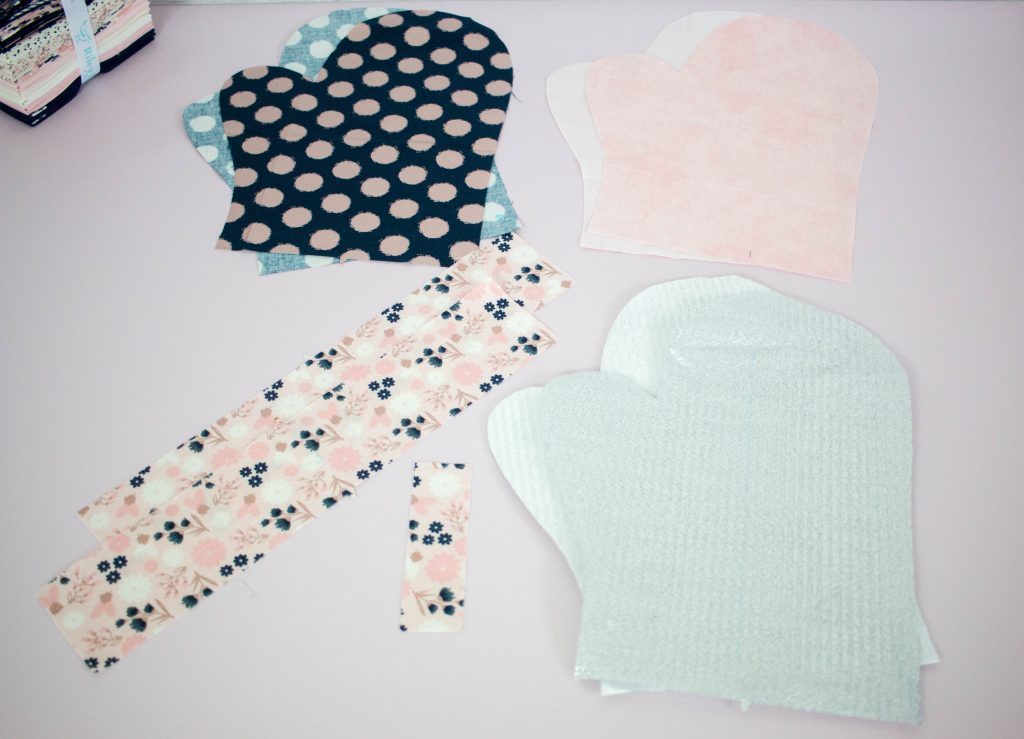
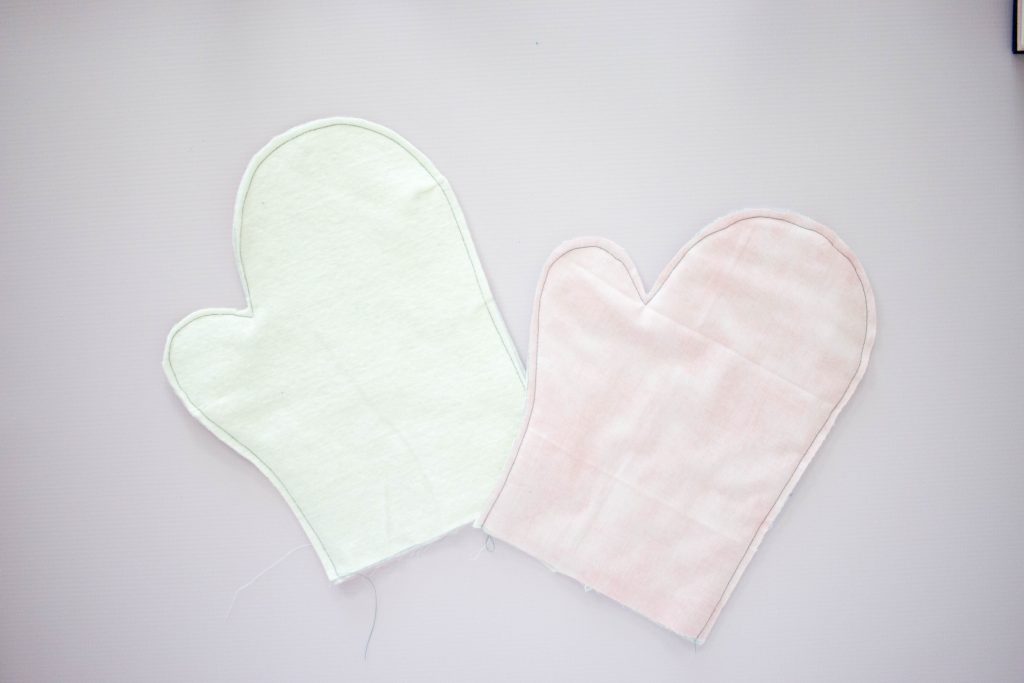
You should have 4 Cotton Oven Mitt patterns pieces, 2 Insulated Fleece pieces, 2 Batting pieces 2 long ruffle pieces and a small hook cut out. (We won't be using the hook in this tutorial, so you can set it aside.)

Oven Mitt Pattern Pieces

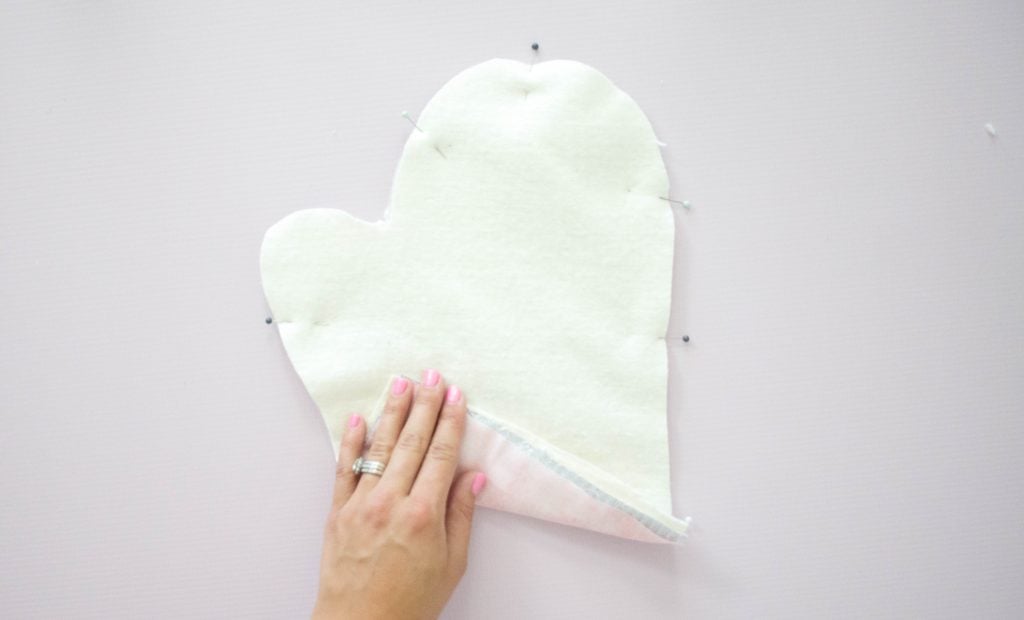
Pin the lining, batting and the Insul Bright together.

Pin the Oven Mitt Layers Together

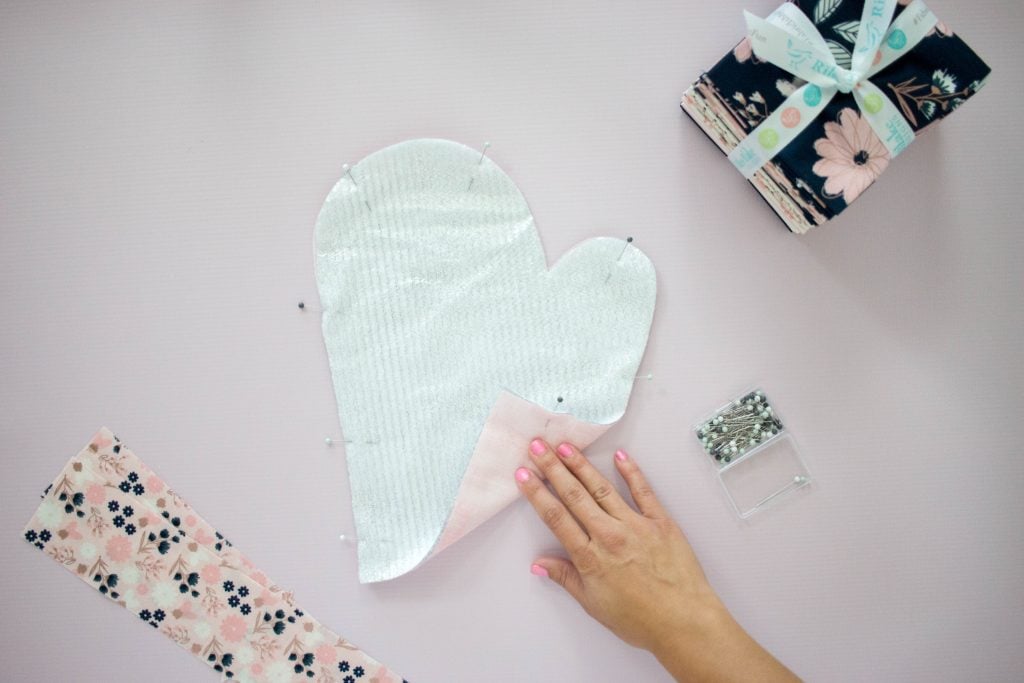
Each Mitt should have three layers are this point. Sew around the outside of the Oven Mitt leaving the bottom unsewn.

How to Sew Over Mitt Ruffle

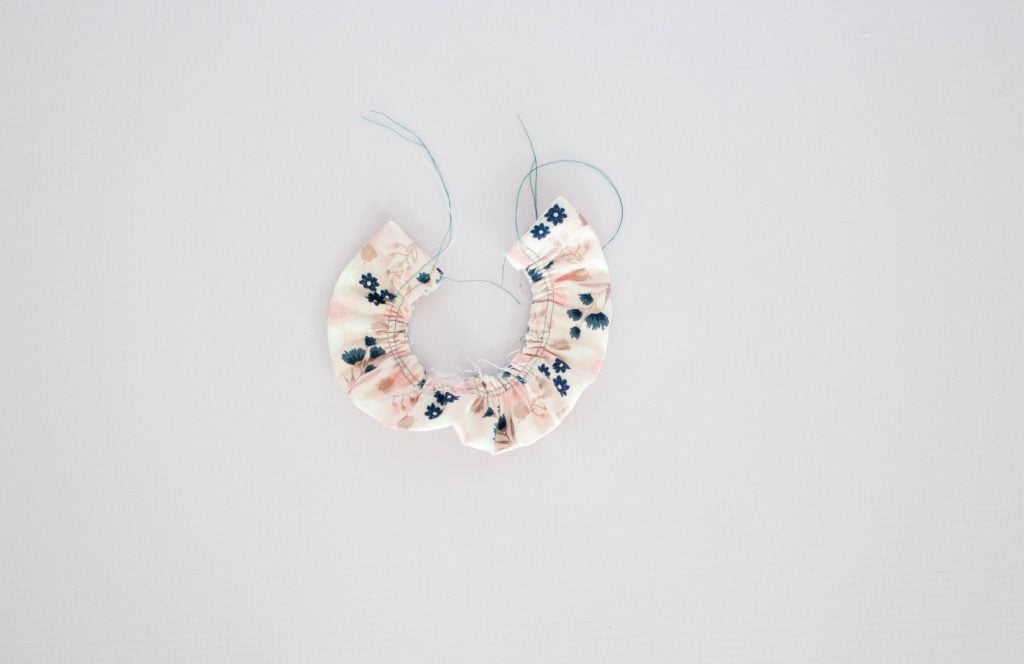
Fold the ruffle in half lengthwise with right sides together. Sew along both short edges.

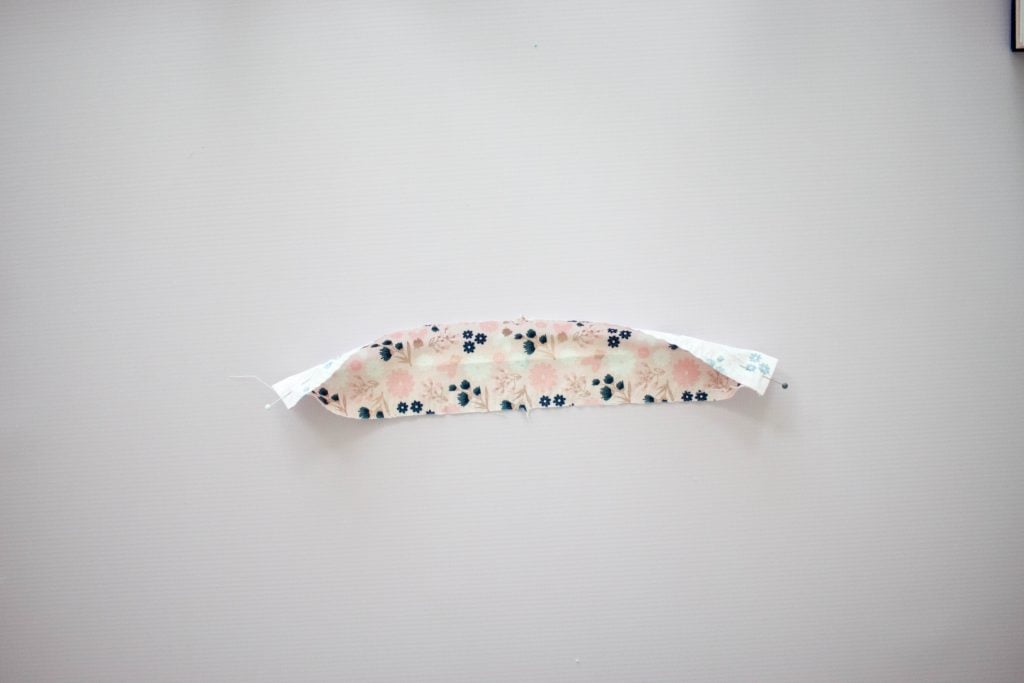
Flip the ruffle right side out so that the sewn edges are on the inside and press the seams with an iron.

Sew two lines of basting stitches (set your machine stitch length to 5) to gather the ruffle.

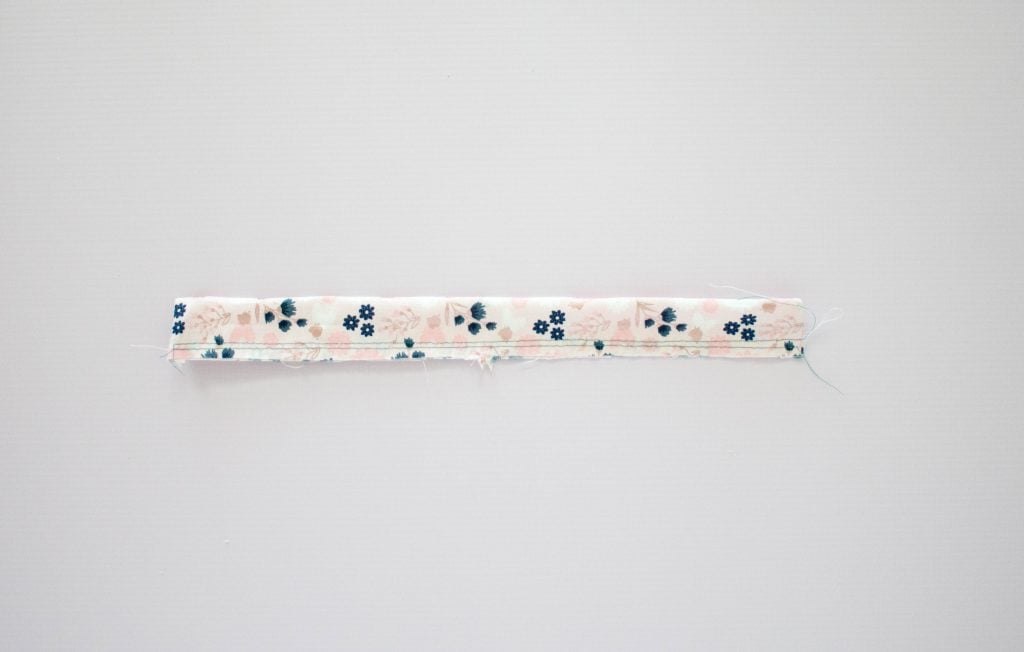
Pull on both strings and ruffle the fabric until it's slightly smaller than the size of the the oven mitt.

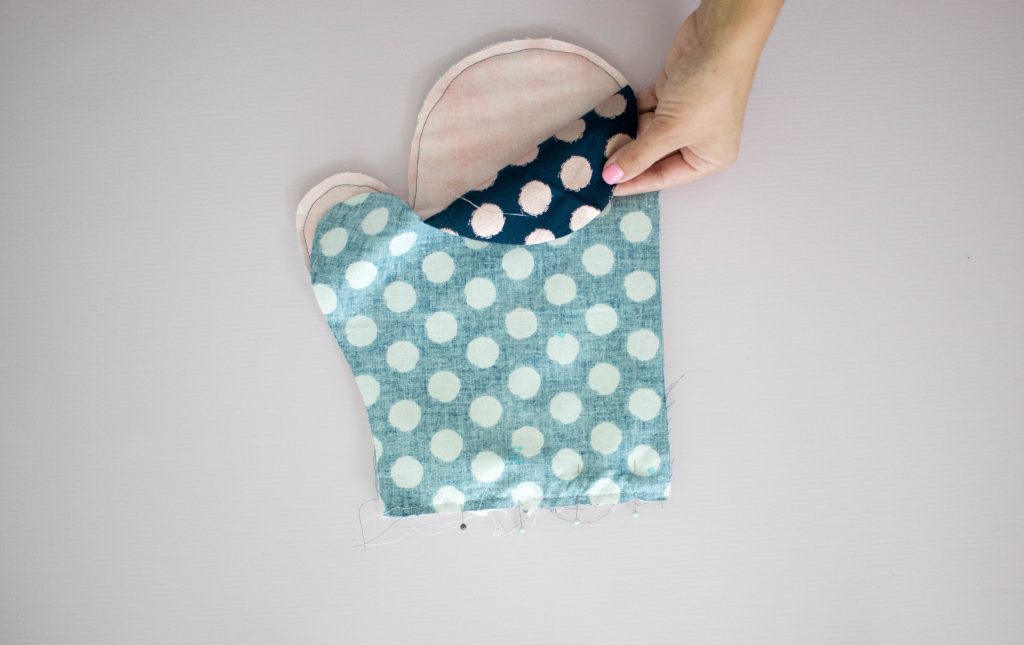
Align the ruffle with the edge of the oven mitt and pin it in place so that the oven mitt extends 1/2" beyond the ruffle on either side.

Sew the Oven Mitt lining and the main fabric together by placing the Oven Mitt with the ruffle on top of the lining fabrics and pin the straight edge together.

Oven Mitt Sewing Tutorial

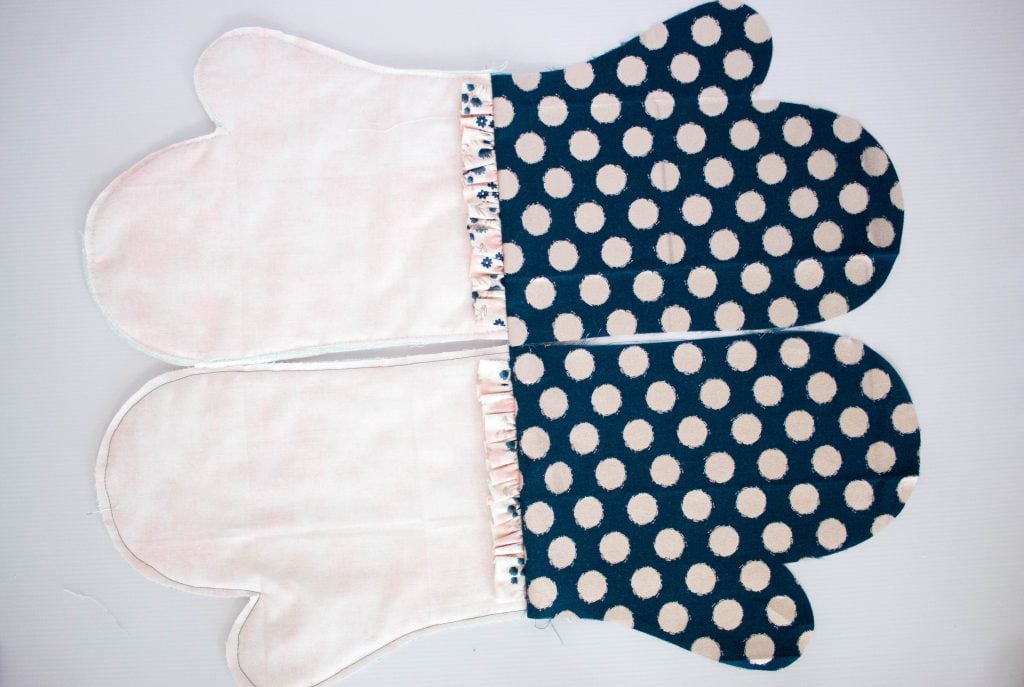
With a normal stitch length. Sew the Oven Mitts together along the straight seam at the top.

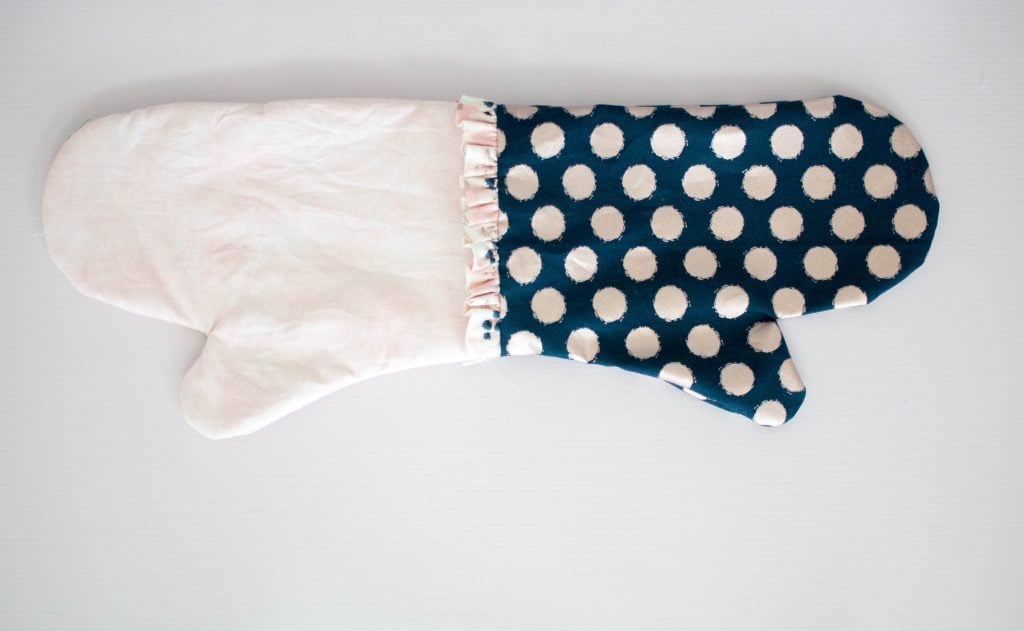
Use an Iron to press the seam flat and open up the Oven Mitts. They should resemble the photo below.

Cricut Maker Oven Mitt Sewing Pattern Sewing Tutorial

Lay the two Mitts on top of each other, with right sides together and sew around the entire Oven Mitt leaving a 2-3 inch opening for turning.

Don't forget to backstitch at the beginning and ending of your seam because it will have extra stress on it as you turn the Oven Mitt right side out.

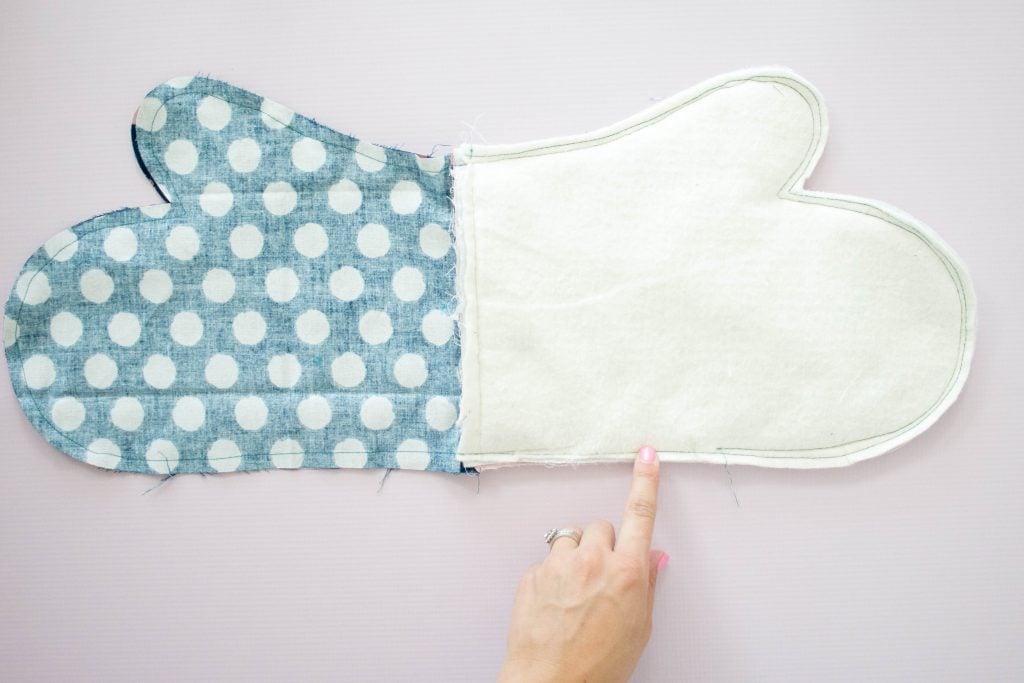
Turn the Oven Mitt right side out through the opening.

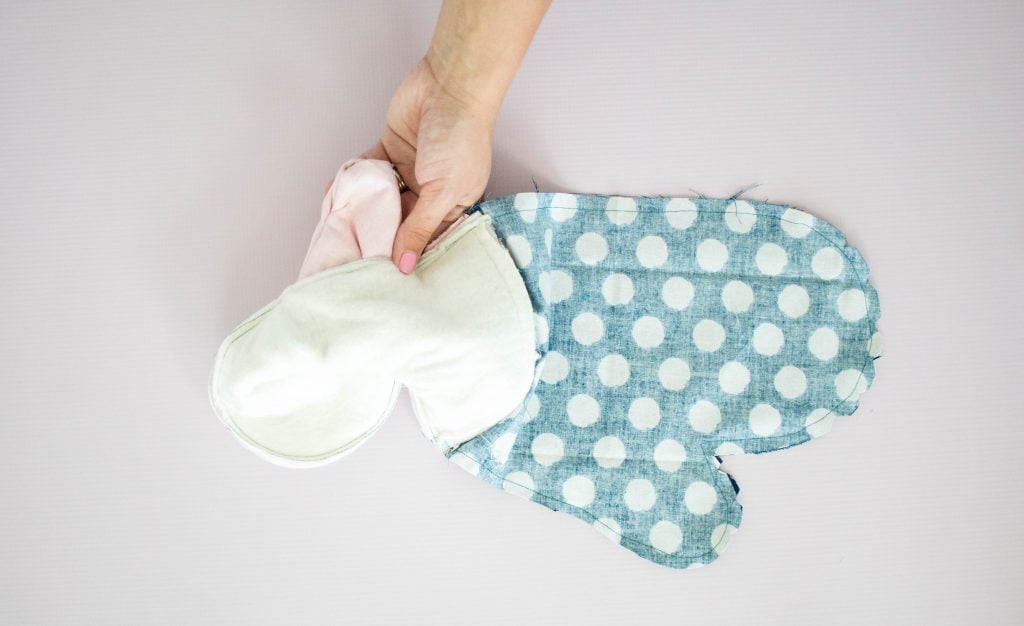
Push the lining side of the Oven Mitt into the main fabric. With an iron press the top of the Mitt with plenty of steam to get a nice flat seam allowance.

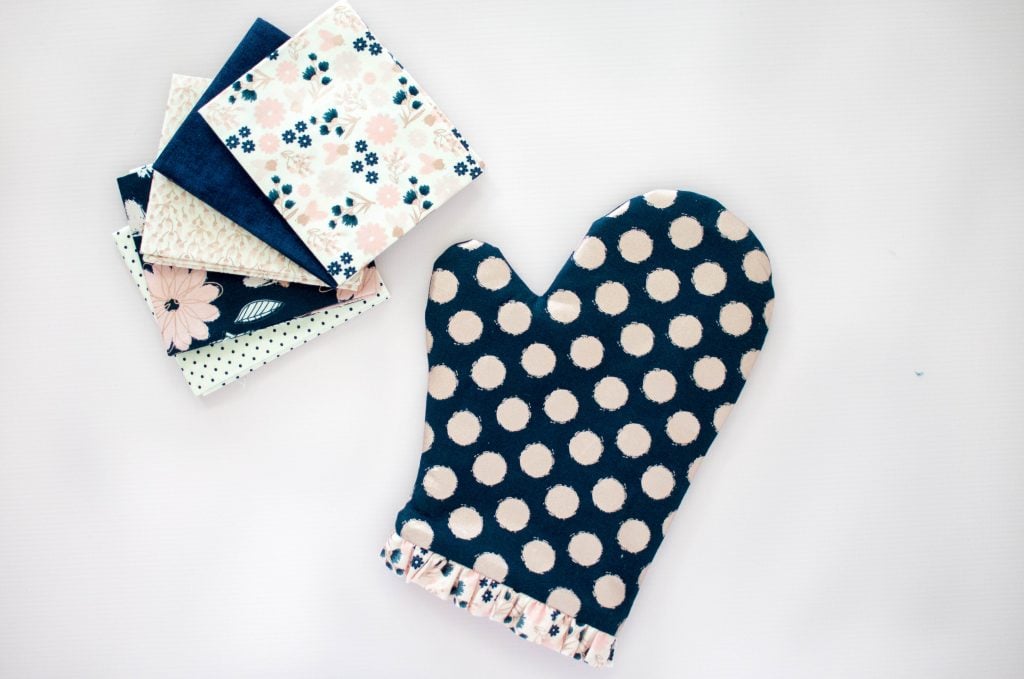
Now you have an adorable Oven Mitt! I love making this pattern for friends and family durin the holday season and you can customize it however you would like!

Cricut Maker Simplicity Sewing Pattern
Cricut Maker Simplicity Sewing Pattern Oven Mitts
Cricut Maker Cutting Machine

Let's get social! I'd love to see what you make with this tutorial.

Find me on Instagram here and tag me in your photo to be featured on my account!

Learn How to Sew an Oven Mitt using a Free Simplicity Sewing Pattern

This is a sponsored conversation written by me on behalf of Cricut. The opinions and text are all mine.

« Create A Cricut Craft Room On A Budget | EasyPress 2
Knotted Baby Turban Pattern »

Reader Interactions

Comments

  1. YOYO says

    July 27, 2020 at 6:53 am

    I don’t have a cricut but would Love to make an over. Not. Do you have a pdf pattern?

    Reply
    • Gina Kleinsmith says

      June 04, 2021 at 1:42 pm

      I would love a PDF pattern or a template for the mitt so I can hand cut. no Cricut here either.

      Reply
  2. JanetK says

    November 13, 2020 at 11:30 pm

    Very cute oven mitt!

    Reply
  3. Karen M. says

    November 14, 2020 at 6:24 pm

    Your tutorials are so good. You explain the instructions so well! Love the oven mits!

    Reply
  4. Melissa says

    November 16, 2020 at 7:18 pm

    Awesome project!!❤️❤️

    Reply
  5. Lavina says

    June 29, 2021 at 1:12 am

    I need a copy of the mitts

    Reply
  6. Marlene Person says

    July 10, 2021 at 11:44 pm

    I don't have a cricut either and would love a pattern I can print out. Need to make new oven mitts as ours are wearing out.
    Regards. Marlene

    Reply

Leave a Reply Cancel reply

Your email address will not be published. Required fields are marked *

This site uses Akismet to reduce spam. Learn how your comment data is processed.

Primary Sidebar

Ready, Set, Sew! An online sewing course for beginners by top US sewing blogger, Sweet Red Poppy.

Hello, I’m Kimberly, the creator of Sweet Red Poppy!

I’m a wife, mother to 3, seamstress, and lover of all things crafty! Sweet Red Poppy is my creative outlet where I find and create inspiration. It’s a place where I can share my never-ending sewing projects and my love of learning!

Read more about me →

The Latest

  • DIY Father's Day Magnetic Photo Frame
  • Aeon Mira5 S Sweet Red Poppy
    Aeon Mira5 S Redline Laser: Everything You Need to Know Before You Buy
  • How to Make a Large Crepe Paper Peony
  • The New Cricut Maker 4- What's the Difference Between Cricut Maker 4 vs Maker 3?
  • How to Make Easy DIY Glitter Ornaments
  • Walmart Nutcracker Tutorial

Footer

↑ back to top

Legal

  • Privacy Policy
  • Disclosure

Newsletter

  • Get My Cricut Book HERE
  • Sign Up! For Emails and Updates

About

  • Contact
  • About
  • Home

Copyright © 2024 Sweet Red Poppy