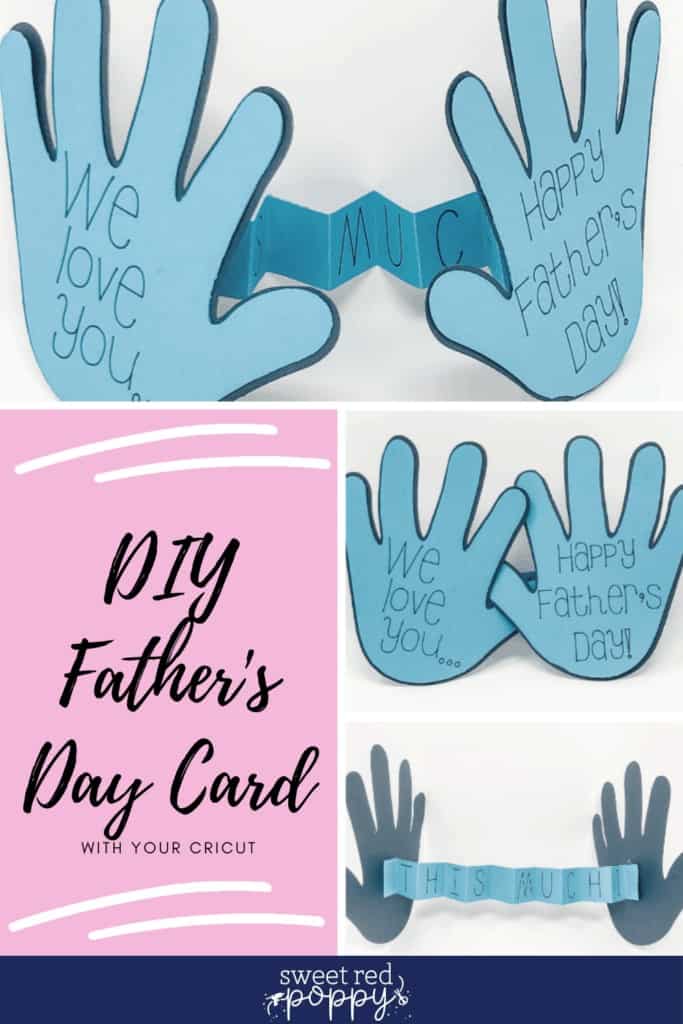
We Love You This Much Card is a simple, DIY Father's Day card craft kids can make for Father's Day or any occasion to show they care about someone special.
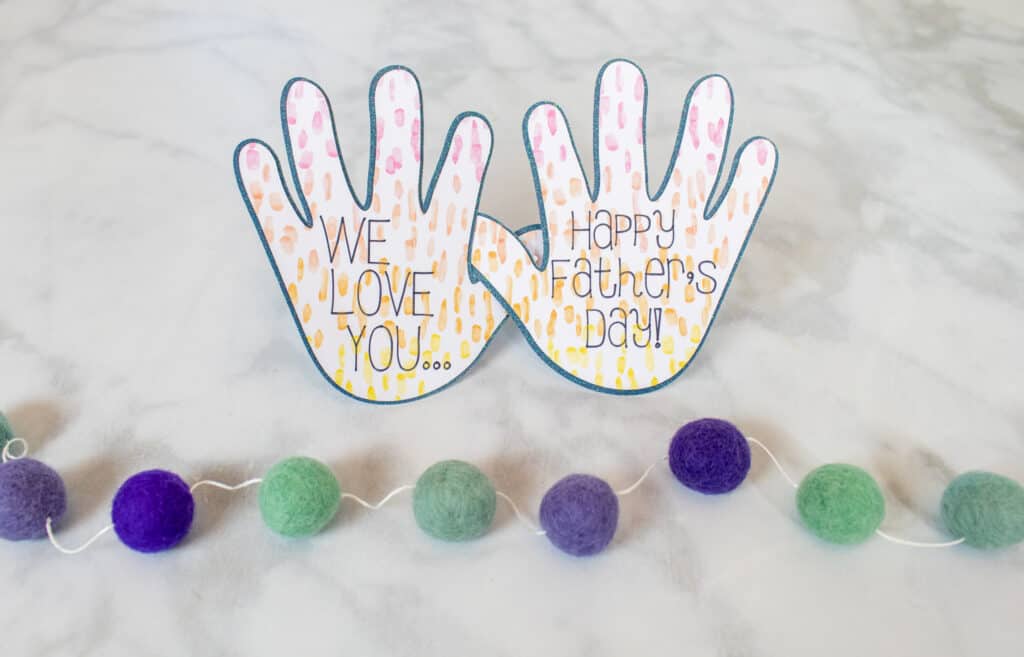
I love simple crafts I can do with my kids! They think my Cricut is magic and I can see why. You push a blinking button and magically this machine writes and cuts for you! AMAZING! I love watching their reactions when we craft together. That’s why I designed this simple DIY Father’s Day Card.
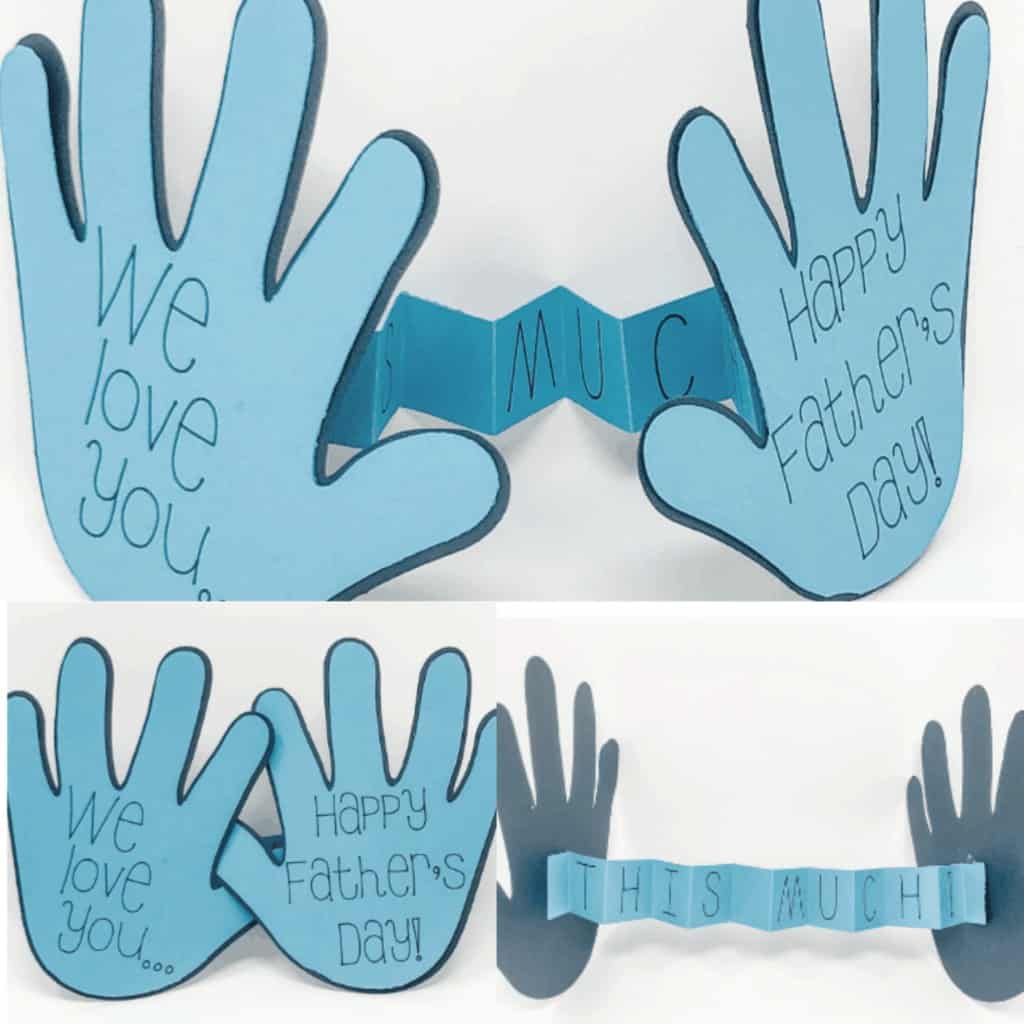
This card is a simple card craft that you can do alone or have your littles help out with! Let them pick out the paper and pens, push the button to GO, and then help them to glue it all together. Easy on you and so fun for them!
While I designed this card for Father’s Day, it can be used for any occasion. Simply change the colors or message to completely personalize this card! I can’t wait to use this file to make a Valentine’s Day card, Thank You card, and an I Miss You card.
For this Project, You Need:
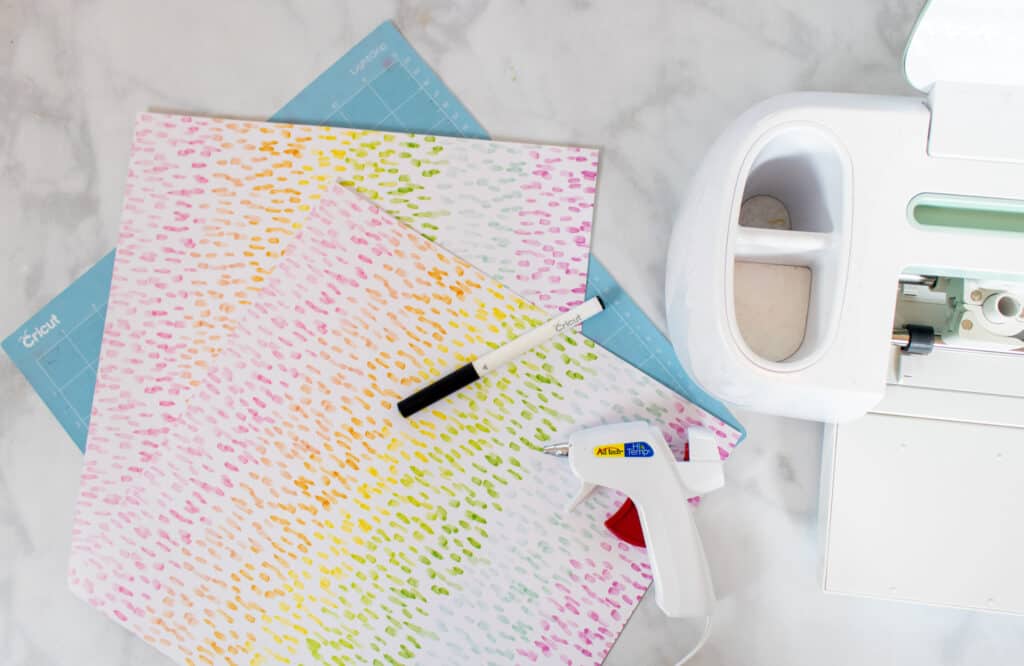
- Cricut Explore or Cricut Maker
- Fine-Point Blade
- StandardGrip Mat or LightGrip Mat
- Cardstock
- Cricut Pen
- Glue or Glue Dots
Download the We Love You This Much SVG File. Click HERE to download the file.
How to Make the "We Love You This Much" Card
Follow these easy steps to make the We Love You This Much card using Cricut Design Space.
Step 1 - Insert File Into Design Space
Within your Canvas in Design Space, click on “Upload.”
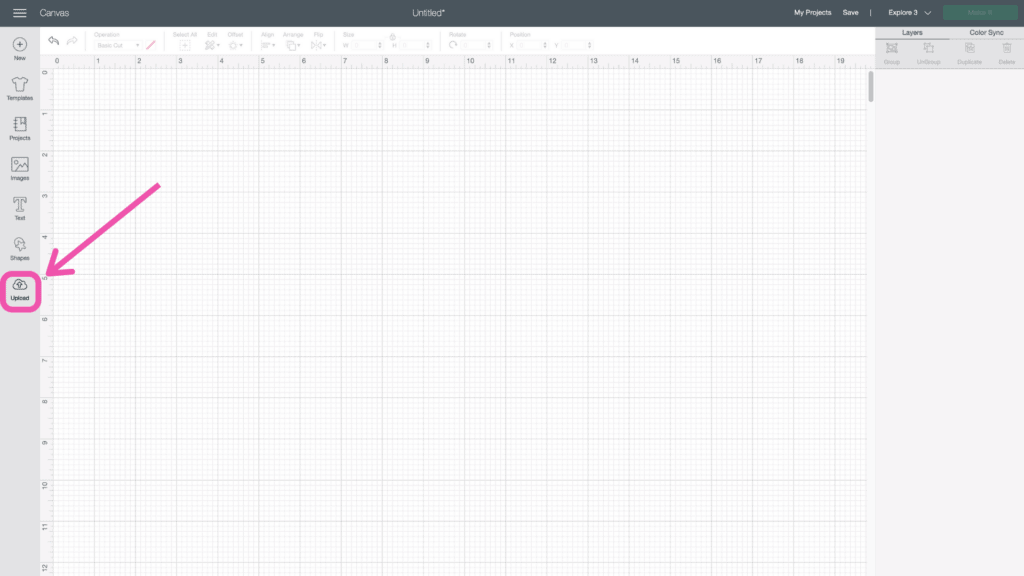
Click “Upload Image.”
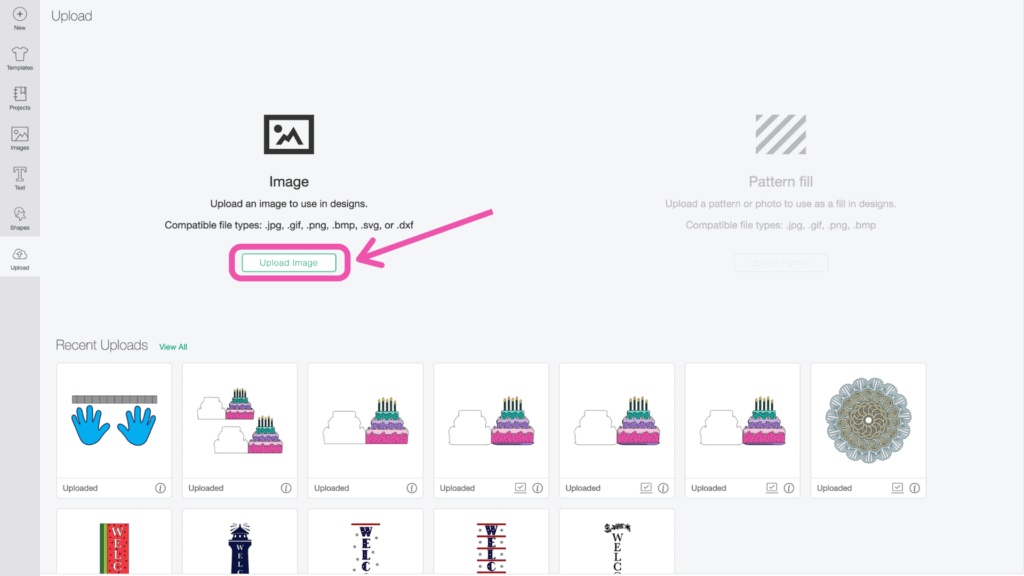
Click “Browse”, and navigate to the We Love You This Much file on your device to upload it to Cricut Design Space.
Here you can change the name and add tags. Click "Upload."
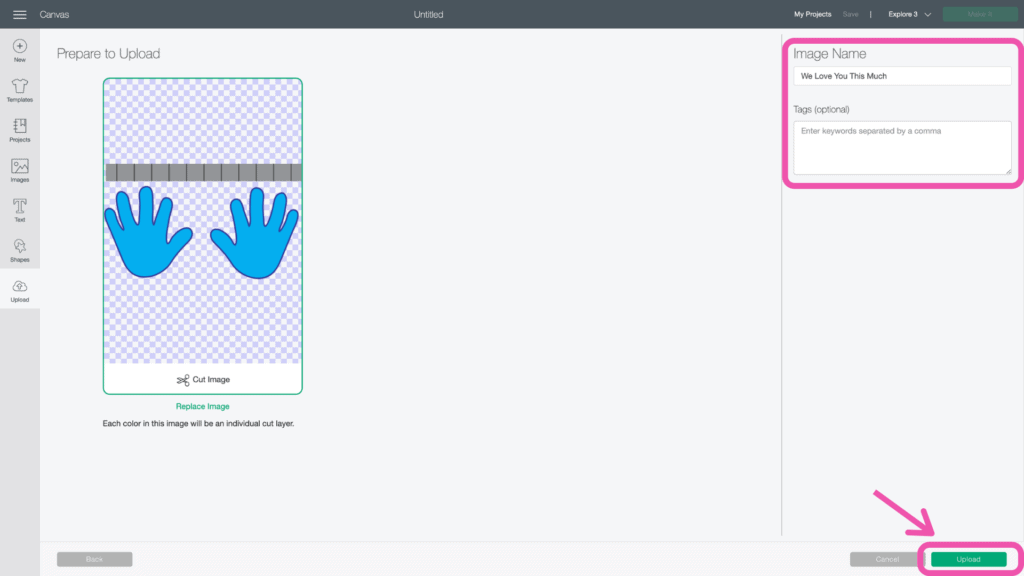
Once you have the file uploaded, select it and click "Insert Images" to bring it onto your canvas.
Step 2 - Adjust LineTypes
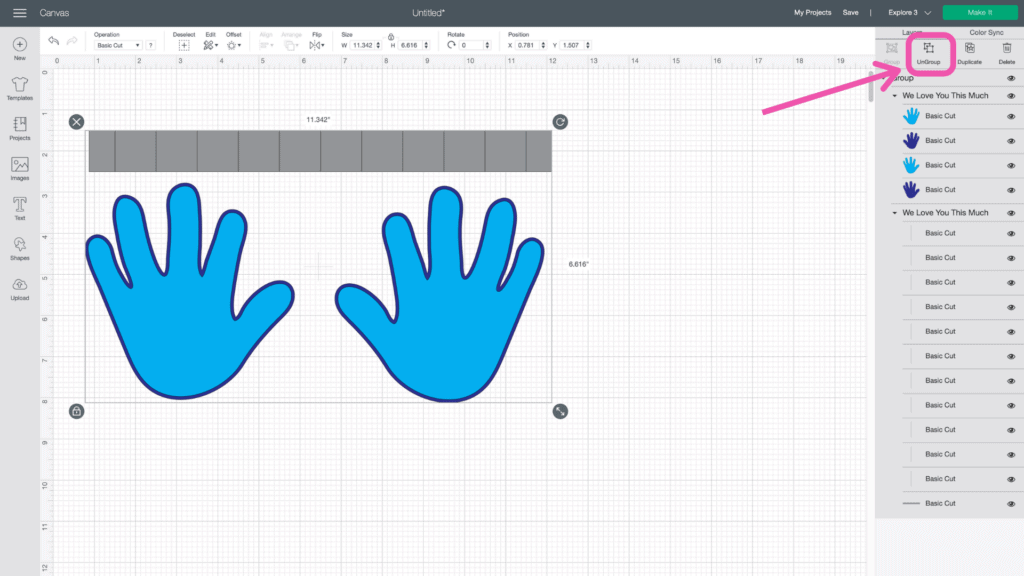
You can see all of the layers in the Layers Panel on the right side of your screen.
Ungroup the layers but clicking “Ungroup” at the top of the Layers Panel. Ungroup everything so each piece is its own layer and nothing is grouped together.
Next, select all 11 vertical lines on the gray rectangle by holding down the Shift key as you click each one in the layers panel.
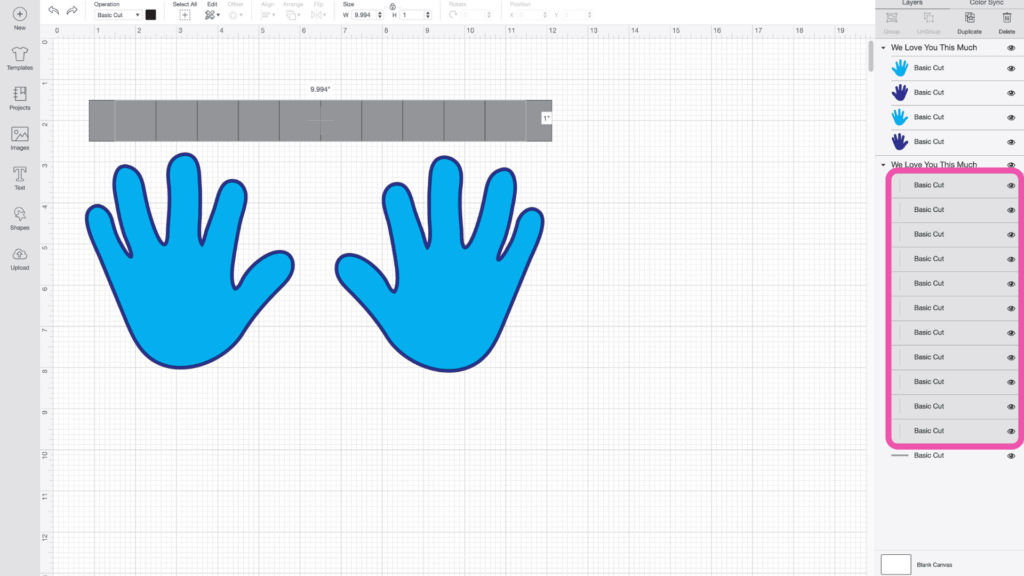
Change them from cut lines to score lines by changing the Linetype in the top toolbar to Score.
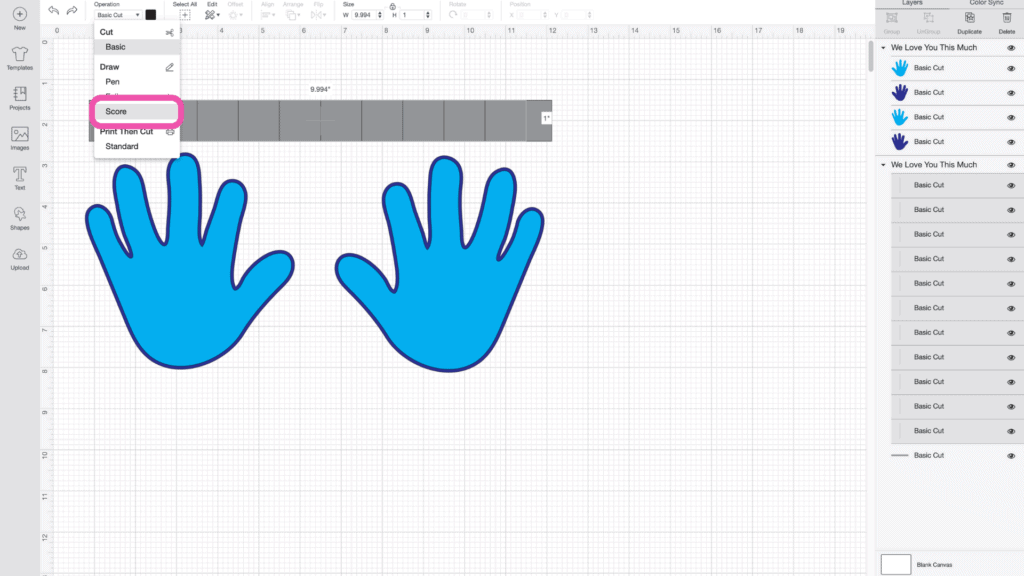
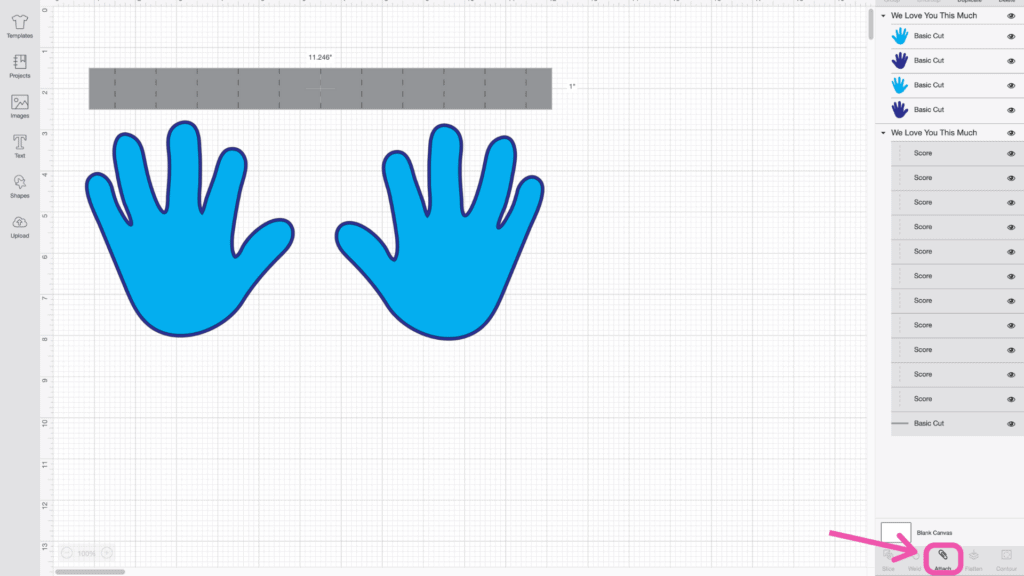
With the new score lines still selected, hold down the Shift key and click the gray rectangle. Click “Attach” at the bottom of the Layers Panel. This ensures that the score lines are scored on the gray rectangle as seen on your canvas.
Step 3 - Insert Text
Select “Text” from the Design Panel to the left of your canvas and type “THIS MUCH!”.
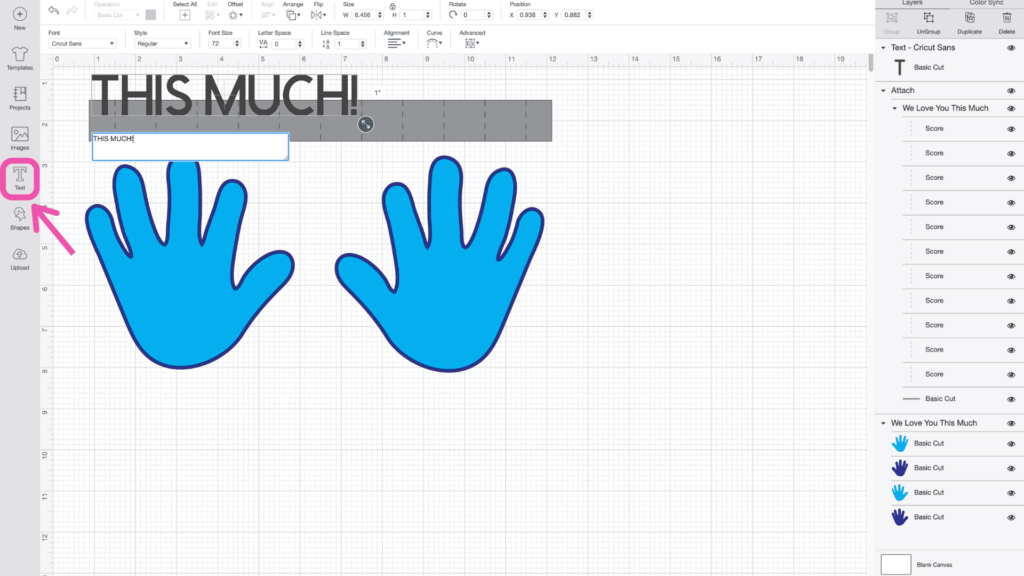
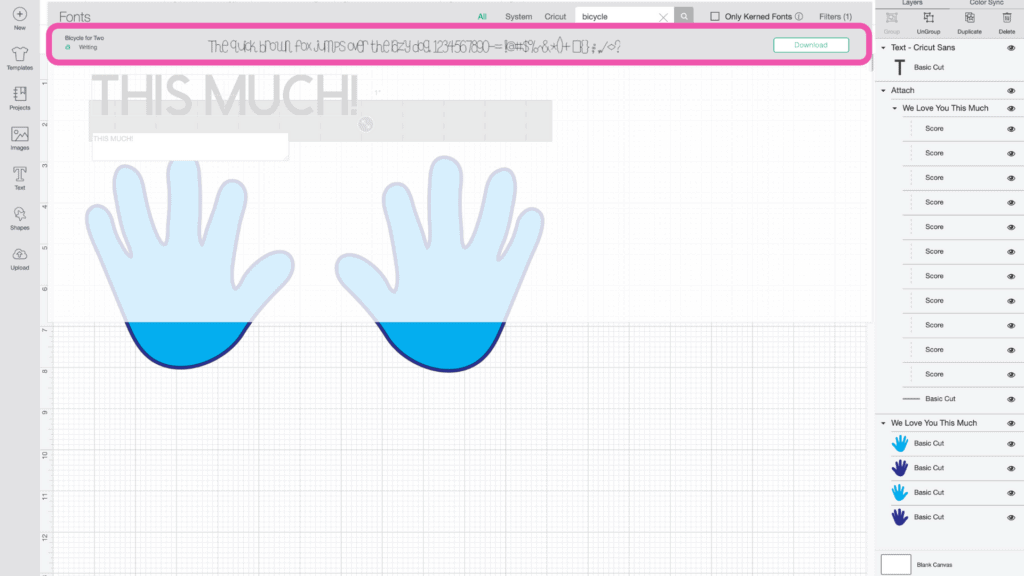
Select a Writing font. I'm using Bicycle for Two which is a Cricut Access font.
Change the height of the font to 0.75 in the Edit Toolbar at the top of your canvas.
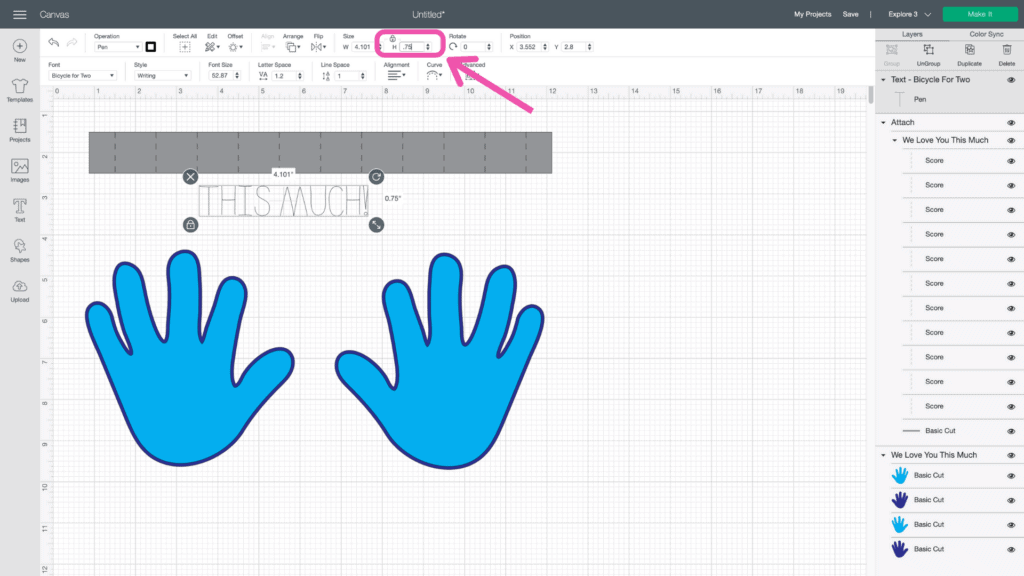
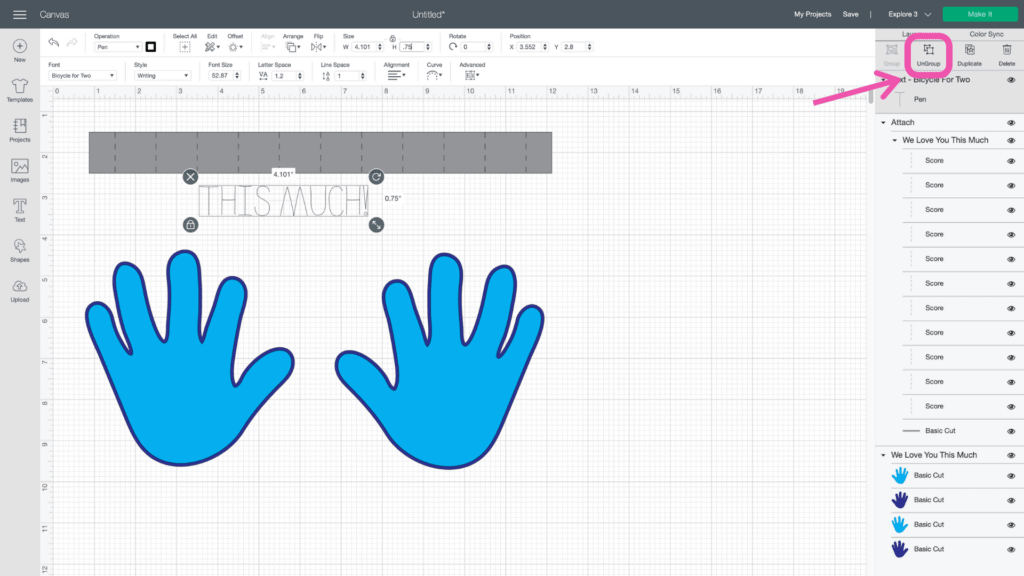
With the text still selected, click "Ungroup" to ungroup the letters. This separates the text into individual layers for each letter.
Next, add each letter to a square on the gray rectangle starting with the second spot. Try to center the letters within each box.
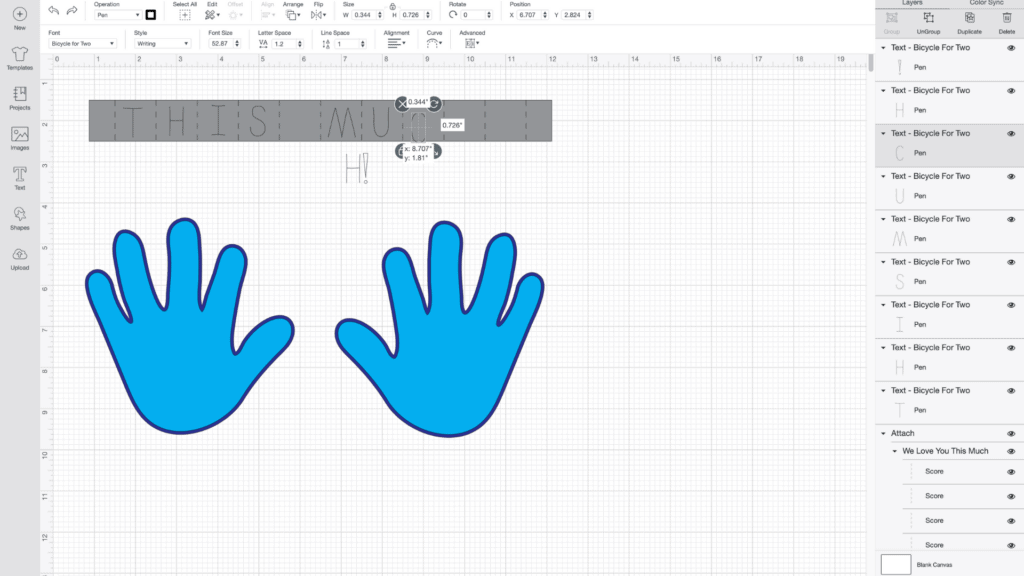
Select all of the letters and the gray rectangle by clicking and dragging your mouse over everything.
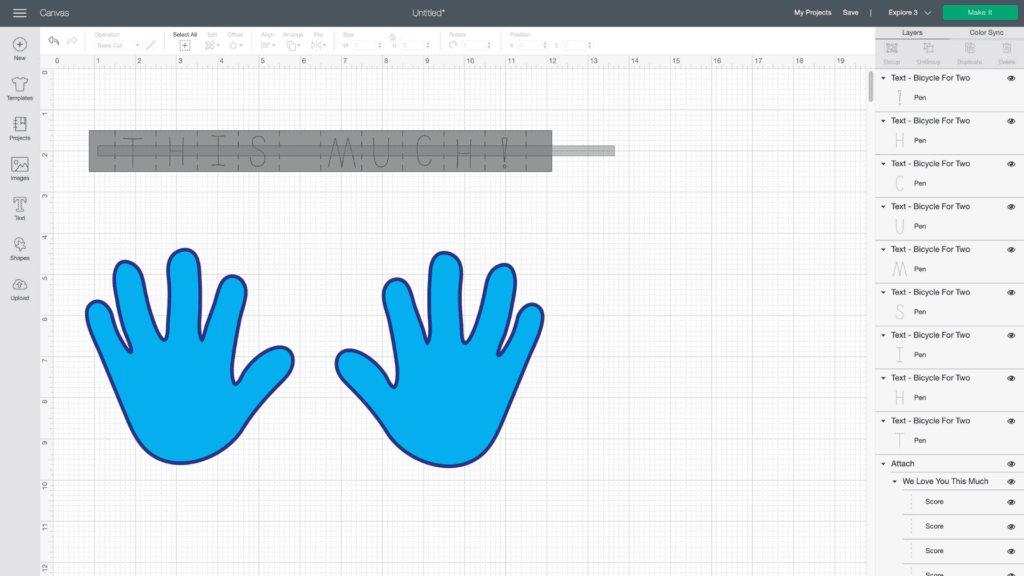
Once it's all selected, click “Align" then "Center Vertically.” This ensures the letters are centered vertically on the gray rectangle.
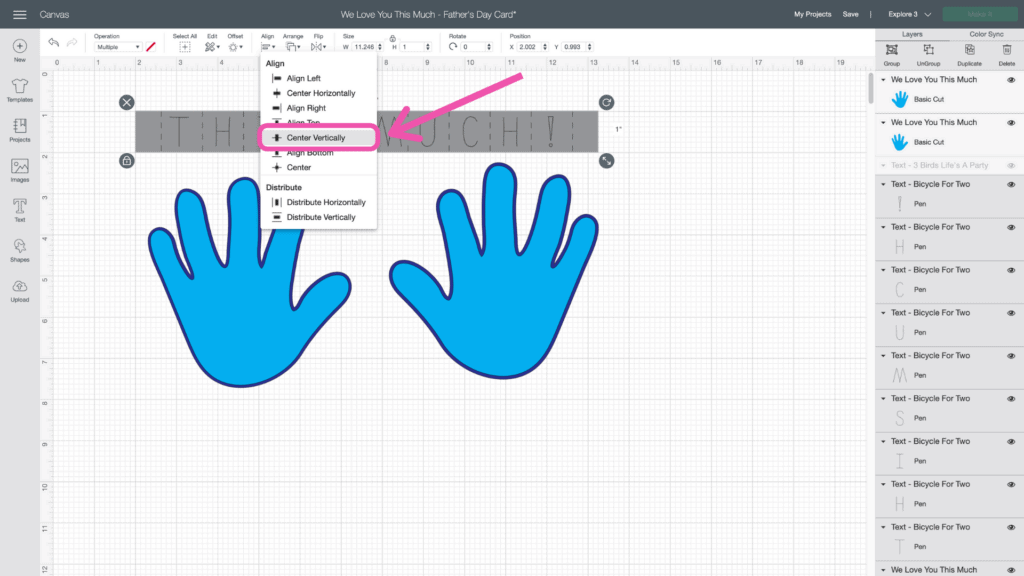
With all of the letters, score lines and gray rectangle still selected click “Attach.” This ensures that the letters are drawn on the rectangle.
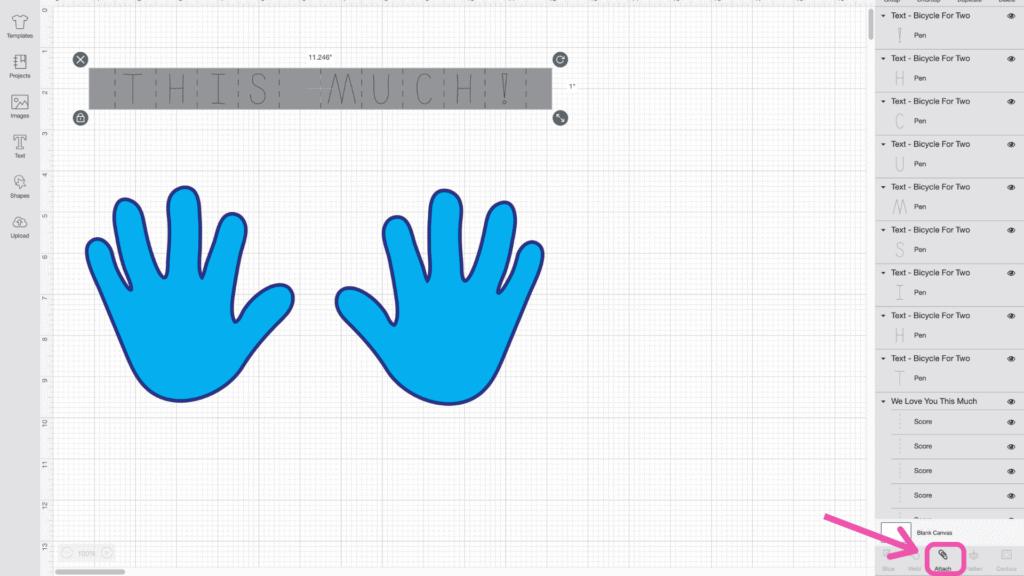
Now, let's add text to each hand. Select “Text” and type “We Love You…” (or We miss you, We care about you, etc.). Make sure to select a Writing font. I used the same Bicycle for Two font as before.
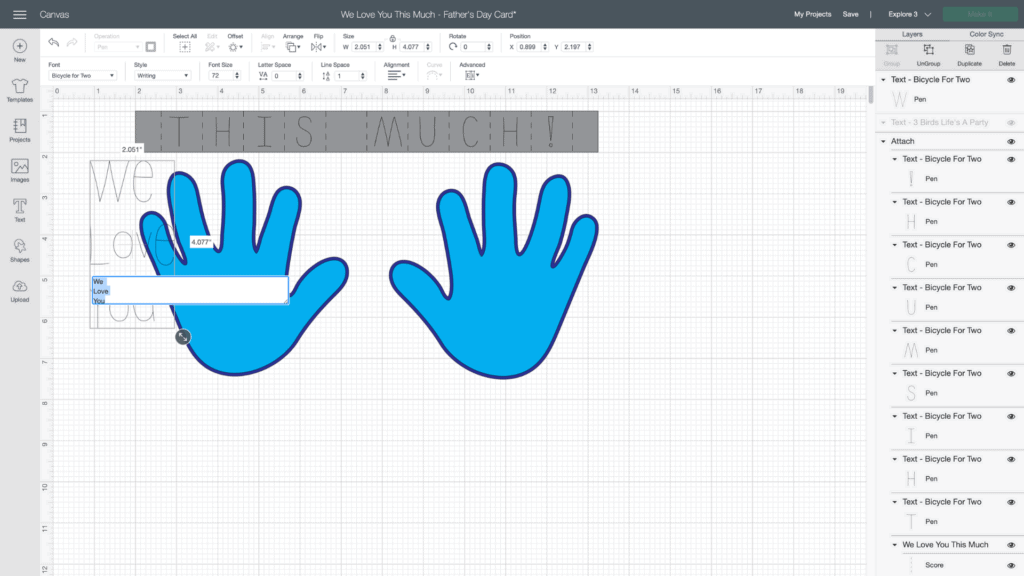
Resize the text to fit on the left hand.
To make the text fit better, click “Advanced” and click “Ungroup to Lines.” This makes each line of the text its own layer.
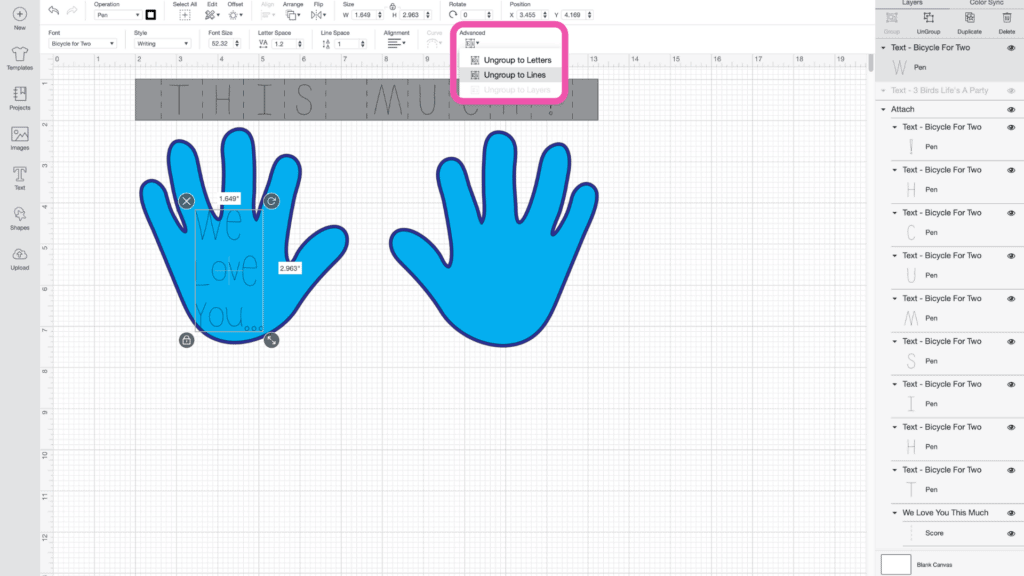
Move each line around to make it fit better on the hand.
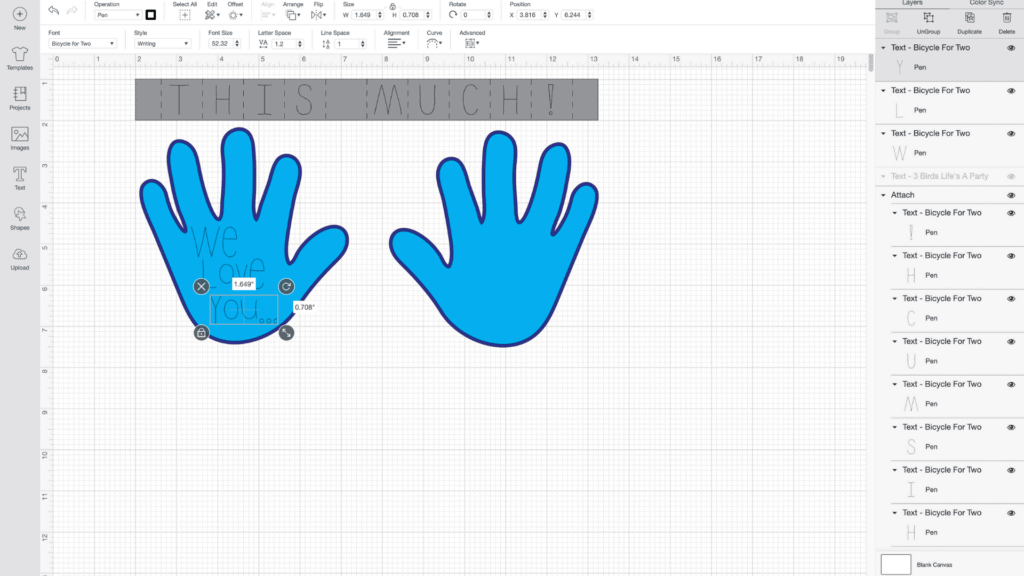
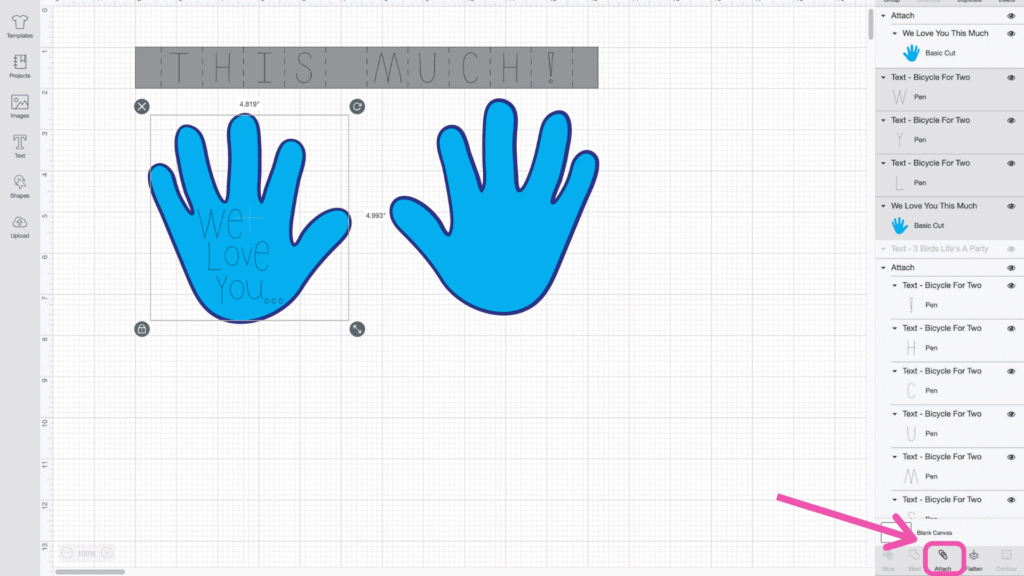
Select the layers of the 'We love you' text and the left light blue hand. Click "Attach" at the bottom of the Layers Panel. This ensures this text is drawn on the left hand.
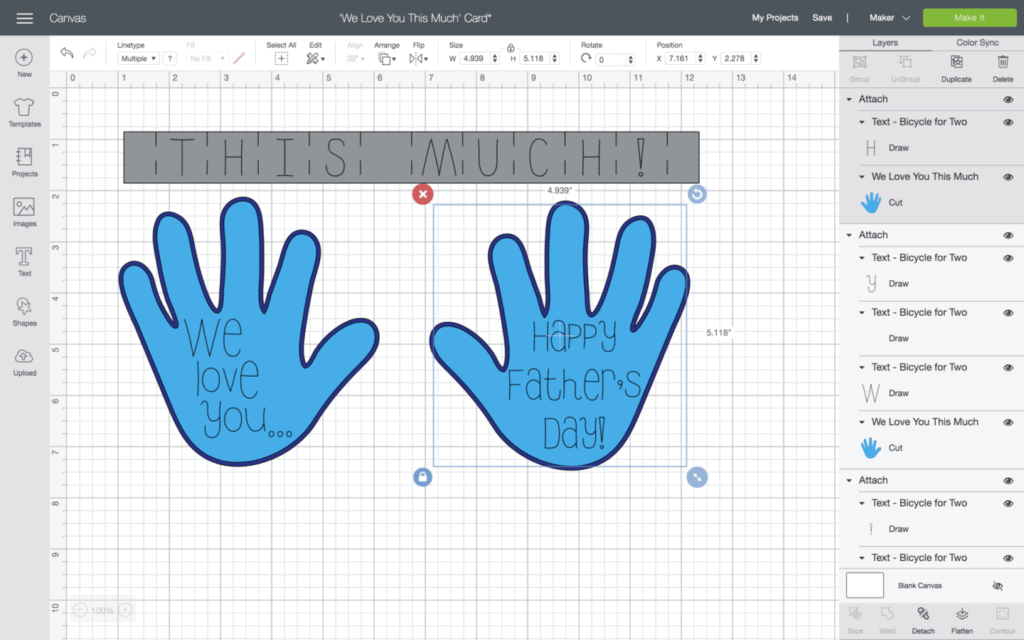
Add, text to the right hand in the same way you did the left hand. For the Father's Day card I added “Happy Father's Day” but you can add any message you want.

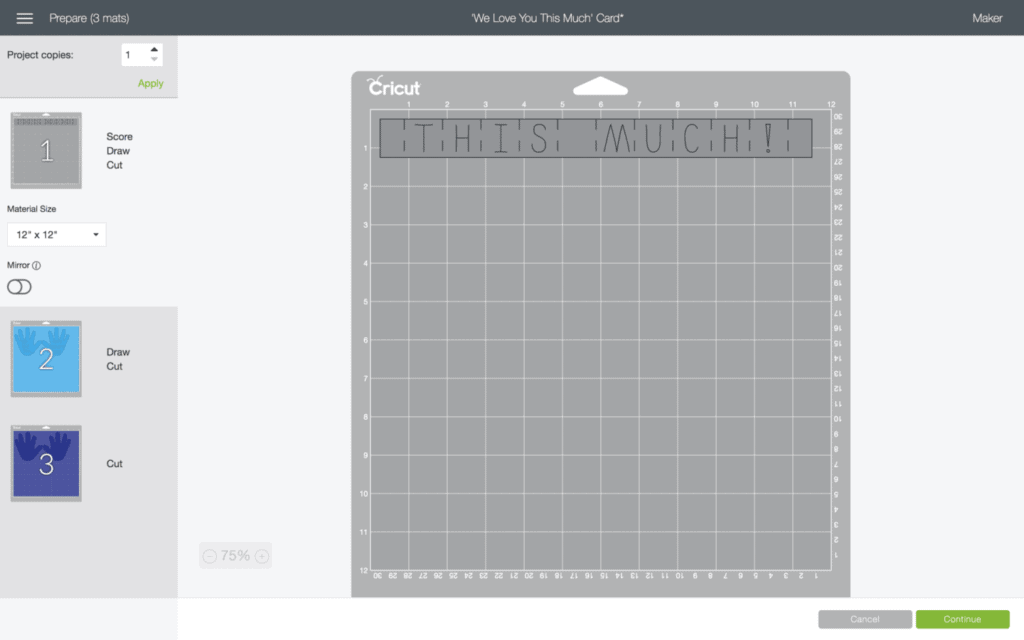
Now you're ready to cut the design. Click “Make It” in the upper right-hand corner of the screen.
Step 4 - Cut and Assemble Card
Continue following the prompts within Design Space to cut out your card.
Remove your cuts from the mat by carefully peeling the mat away from the paper. This prevents your paper from bending.
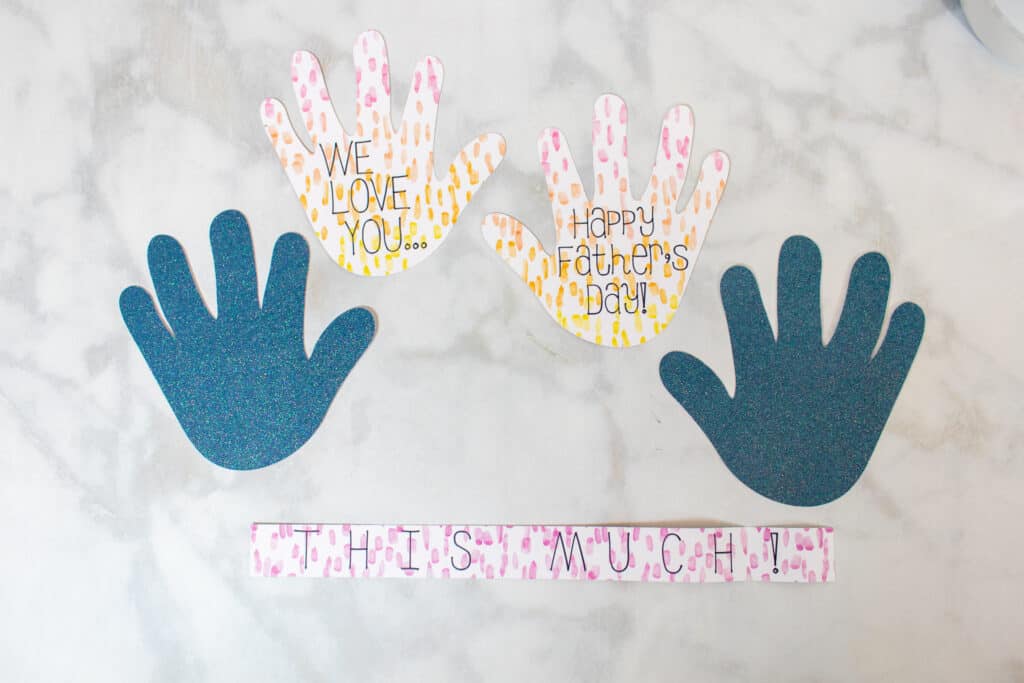
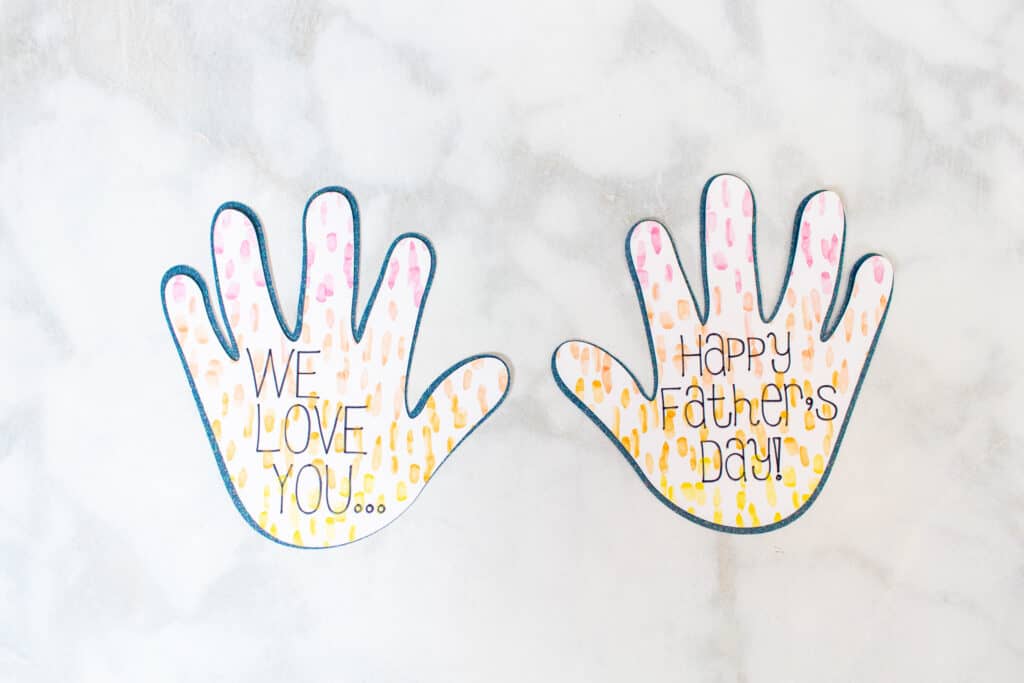
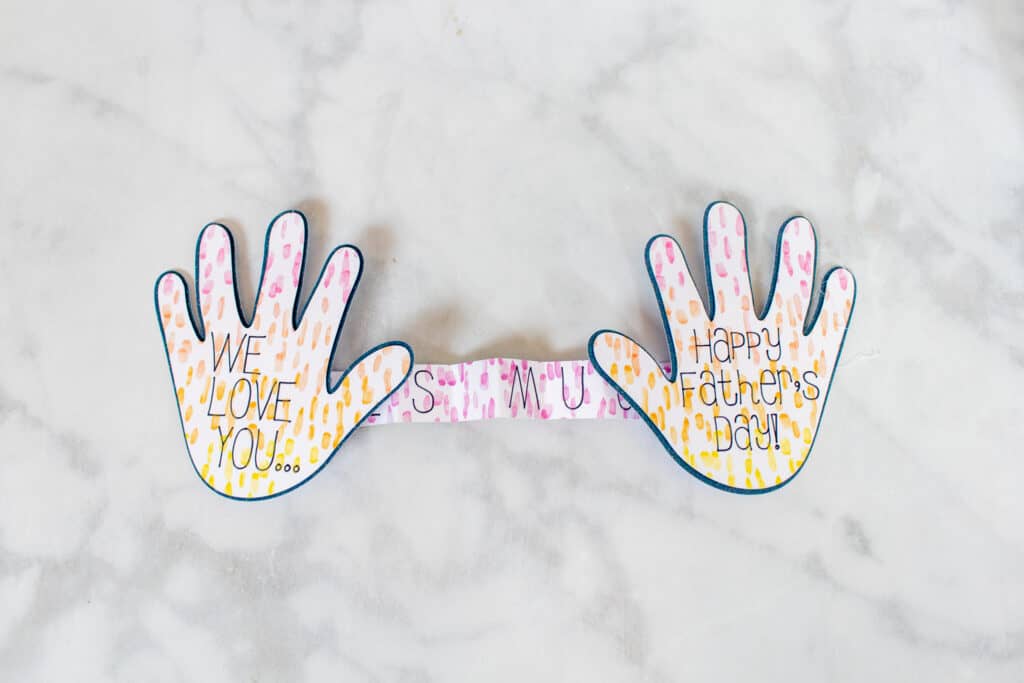
Glue the front cards to the back.
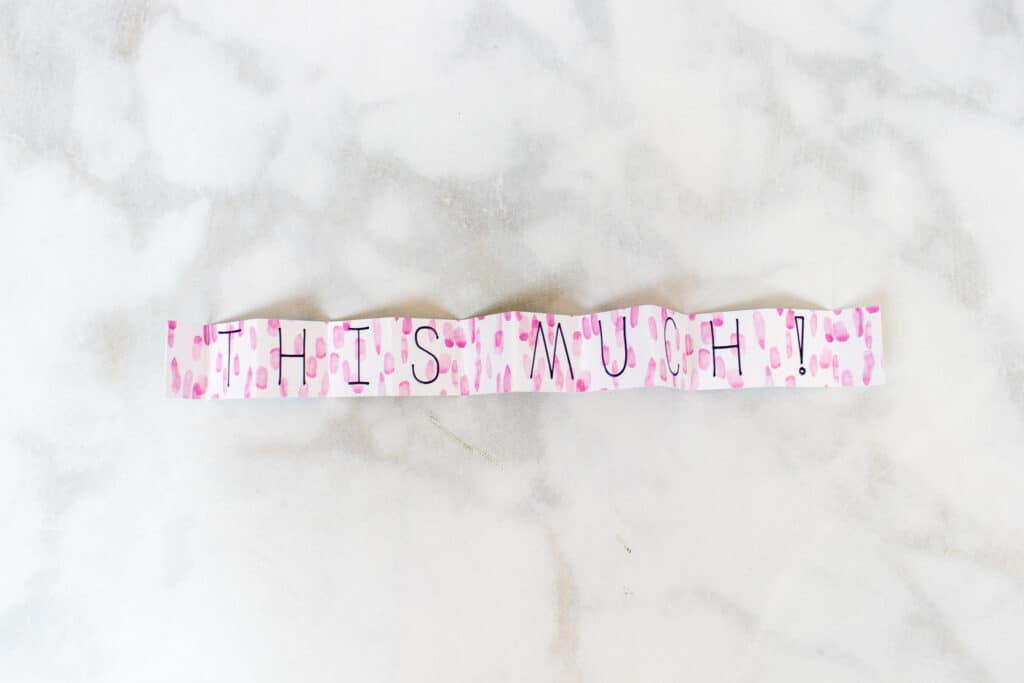
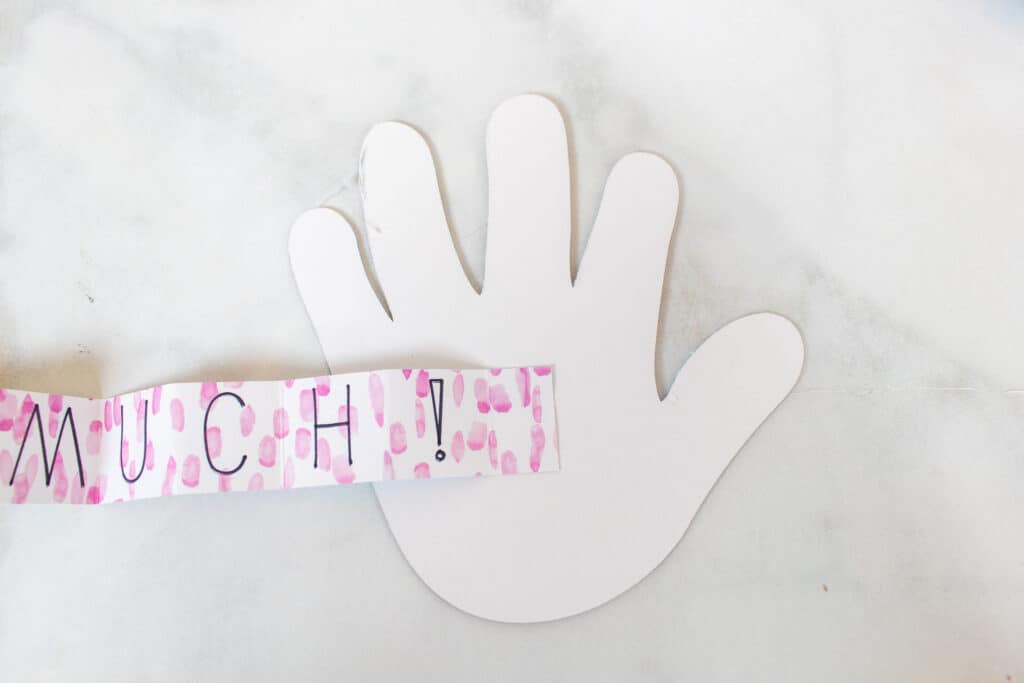
Fold your long rectangle back and forth on the score lines like an accordion.
Fold the end flap and apply glue.
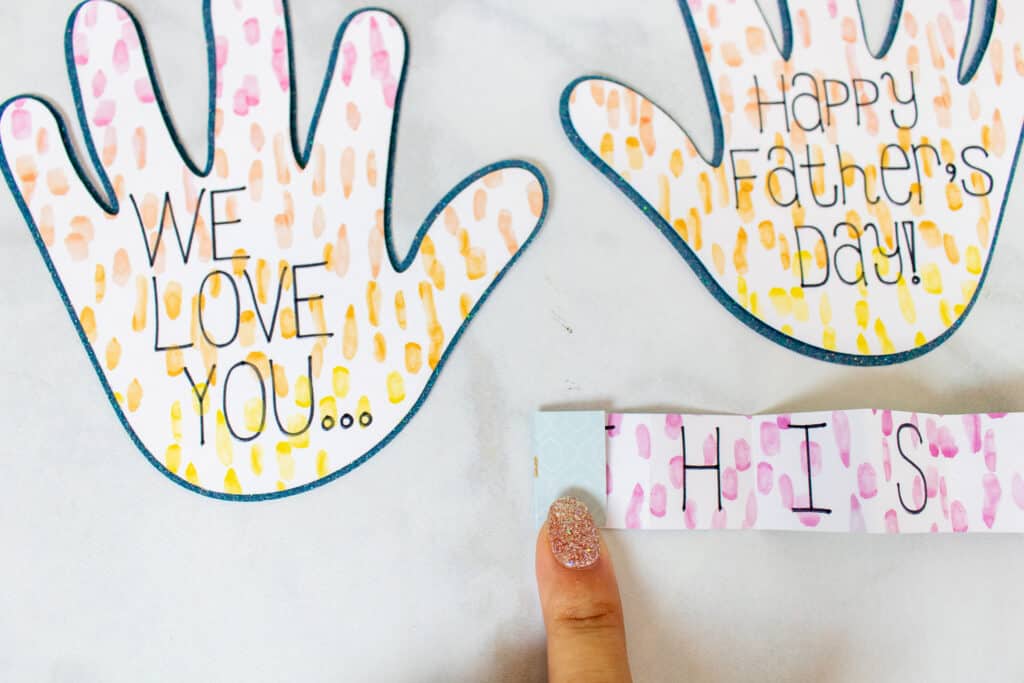
Attach it to the back of the "We Love You..." hand.
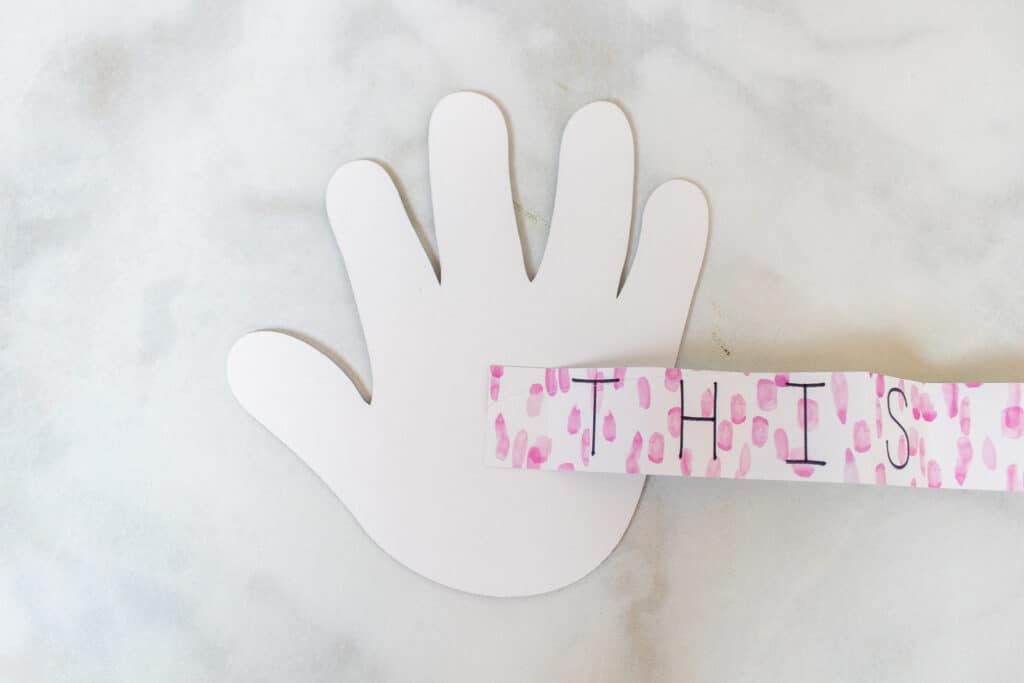
Apply glue to the other end and attach to the 'Happy Father's Day" hand.
Fold it up and give it to the father-figure in your life! I love creating custom DIY cards with my Cricut!
How did your card turn out? Be sure to post a picture on Instagram and tag me so I can see it!
Are you making a DIY Father's Day card this year? How will you be celebrating the special men in your life? Let me know in a comment below!

Awesome card and hat and legging tutorial
Thanks for sharing
I love this cute father day idea. Thanks for sharing.