Create a Layered Card Stock Thank You Apple Mandala With This Free SVG Cut File and Step-by-Step Tutorial
This free Layered Apple Mandala cut file makes the perfect DIY teacher gift.
It's hard to figure out what to give as a teacher's gift throughout the year. Often times you have to think of a teacher's gift for back to school, a holiday gift, and an end-of-the-year gift.
There are a lot of amazing ideas out there, some store-bought, some handmade. I wanted to contribute a DIY teacher gift with this layered apple mandala design.
My kids love helping out with gifts, especially when I’m using my Cricut. They all love to help me load the mat into the machine and press go. Plus, they always have so much fun choosing the colors they want!
This is a fun project for us to do together a great way for us to say “Thank You” to their teachers.
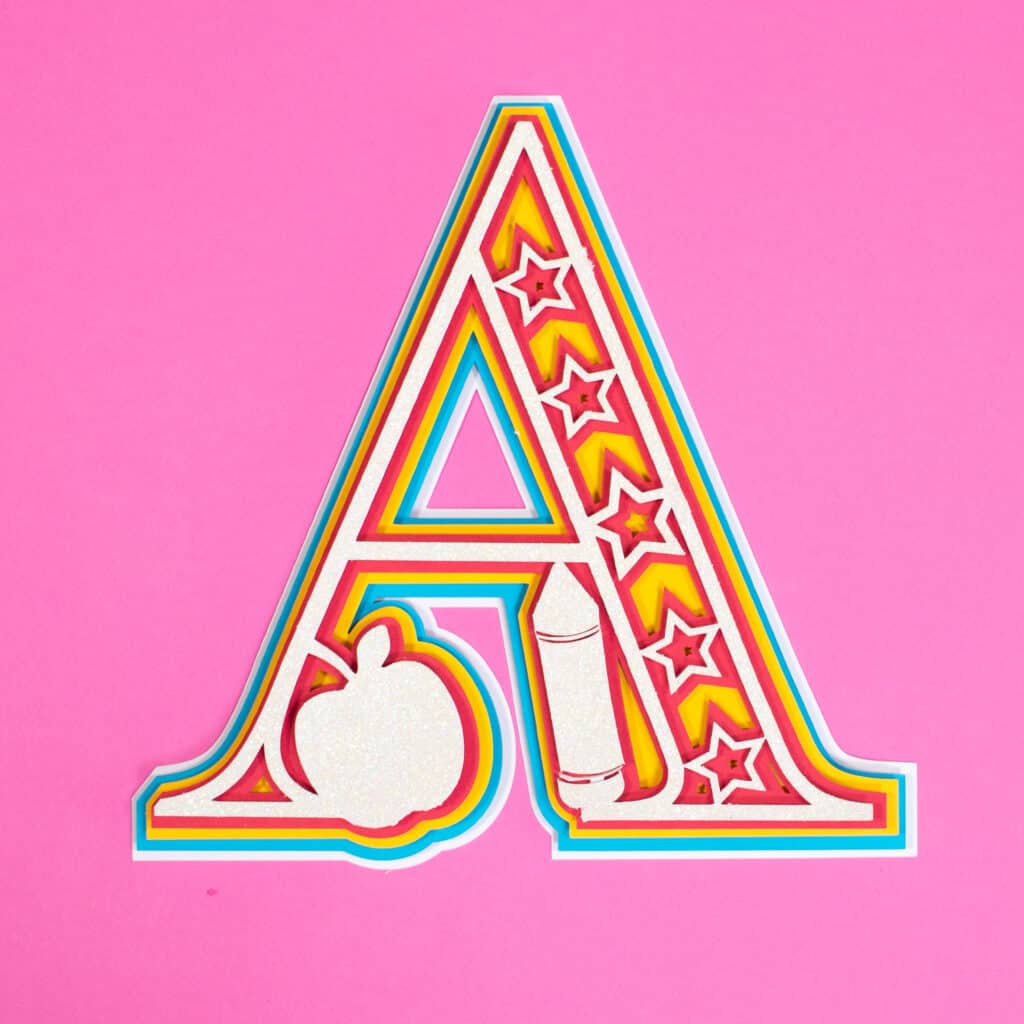
Looking for more school mandalas? Check out my DIY Alphabet Mandala HERE.
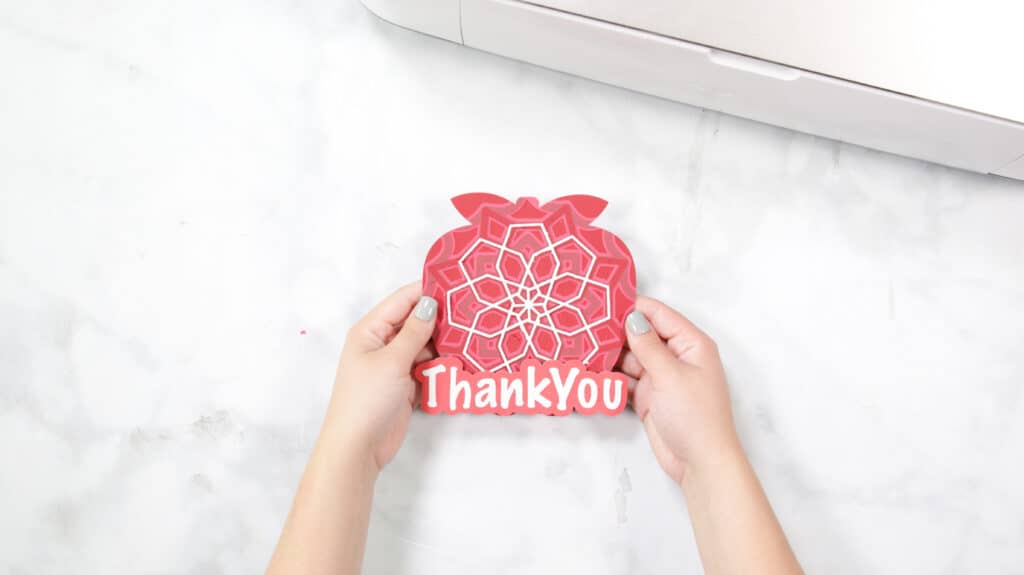
Layered Apple Mandala
How to Layer Mandalas
Before we begin, let’s talk about a couple of different ways to attach and layers your mandala together.
Foam Adhesive
My favorite way is using foam adhesive. Foam adhesive secures your layers together while creating a three-dimensional effect. If you’re looking for a stand-out look, I’d recommend using foam adhesive.
Craft Glue
Another way to attach your layers together is by using craft glue. I use craft glue when working with thing layers or when creating a mandala I want to be flat.
Learn How to Make Your Own Layered Apple Mandala in this Step-by-Step Tutorial.
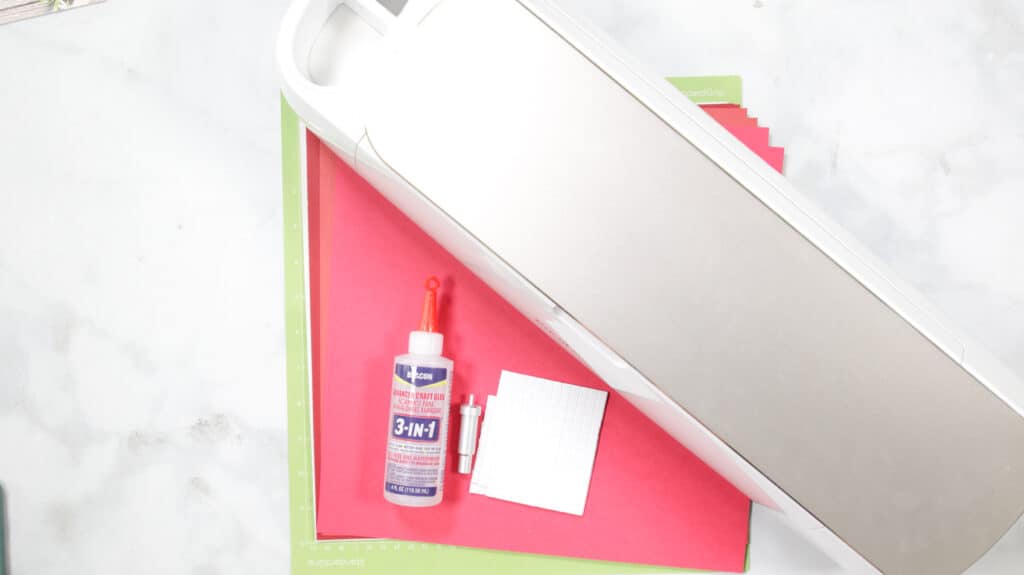
For this project, you need:
- Free Layered Apple Mandala Cut Files (link below)
- Cricut Explore, Cricut Joy, or Cricut Maker
- Fine-Point Blade
- StandardGrip Mat
- Cardstock
- Scraper Tool
- Foam Adhesive Dots or Craft Glue
Click Here to Download the FREE Cut Files!

Step 1 - Upload SVG File to Design Space
Open Cricut Design Space and click the + to create a new project.
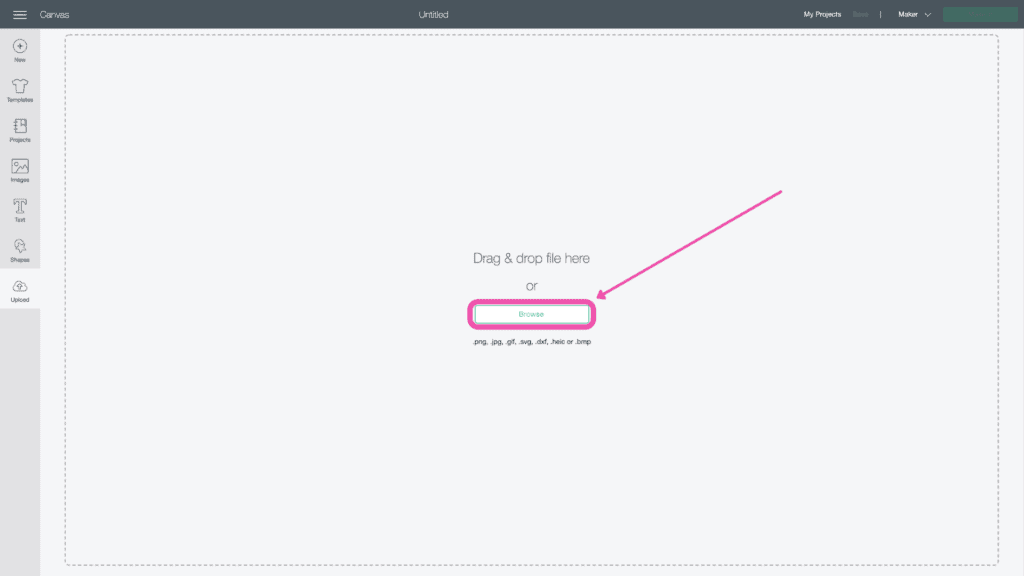
In the Design Panel on the left, select "Upload."
Click “Upload Image.”
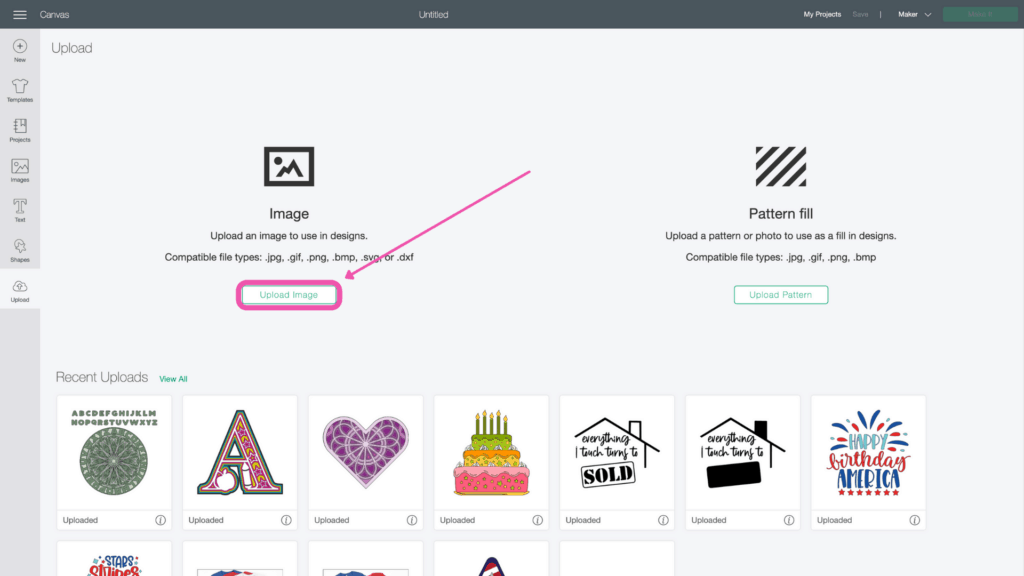
Click “Browse.”
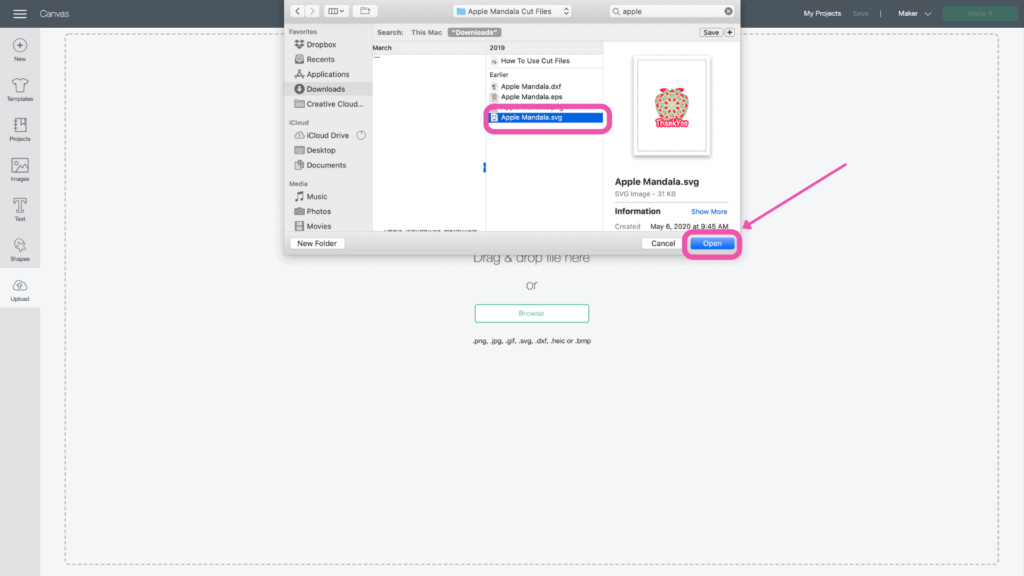
Navigate to the file on your device and click "Open."
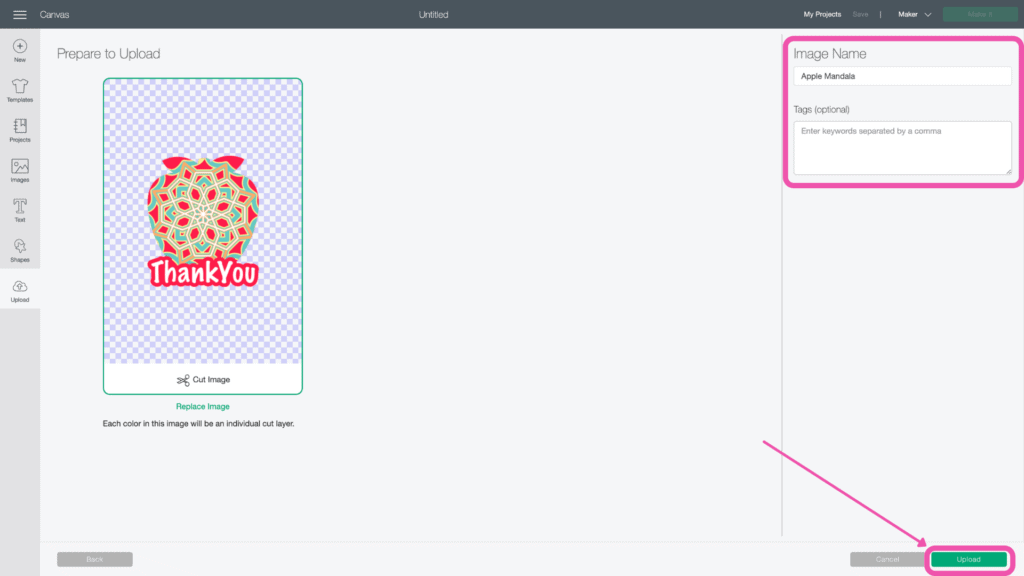
Here you can change the name and add tags. Click "Upload."
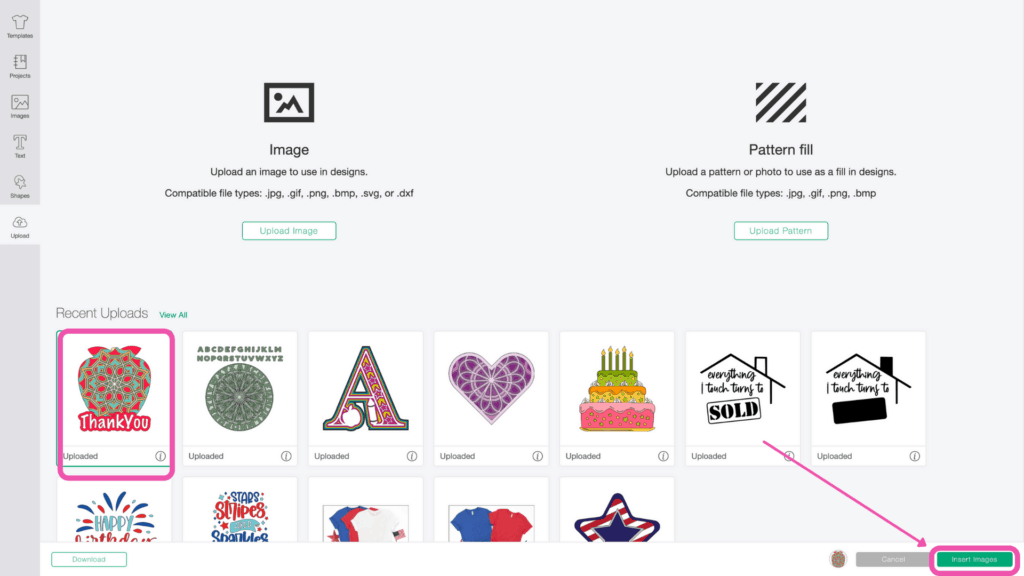
Once you have the file uploaded, select it and click "Insert Images" to bring it onto your canvas.
Step 2 - Resize Design (optional)
You'll see all of the layers in the Layers Panel on the right side of your screen.
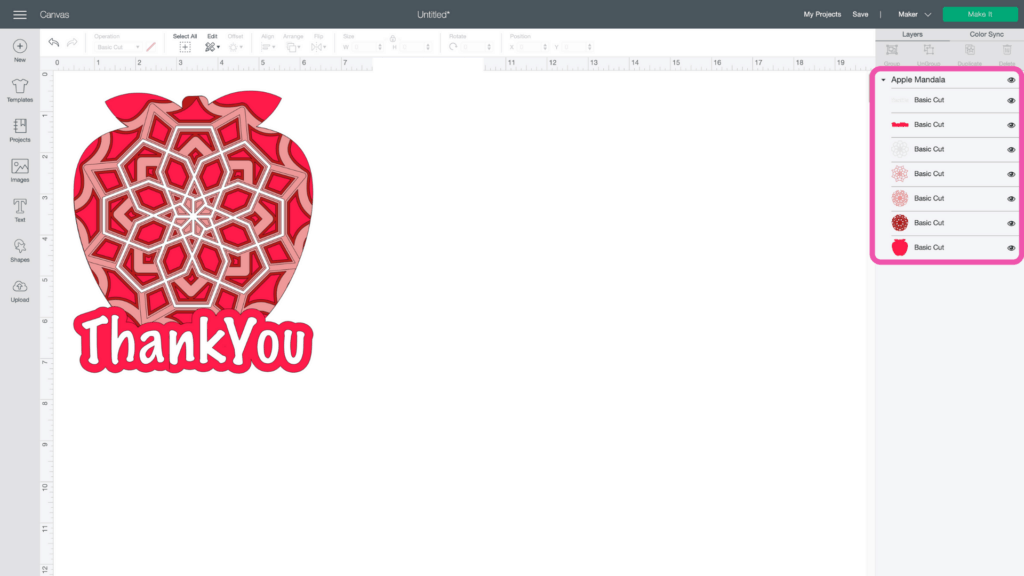
Keep the layers grouped and enter the size you want the mandala to be. Remember, the maximum size you can go in Cricut Design Space is 11.5 inches.
Now you're ready to cut the design! Click “Make It” in the upper right-hand corner of the screen.
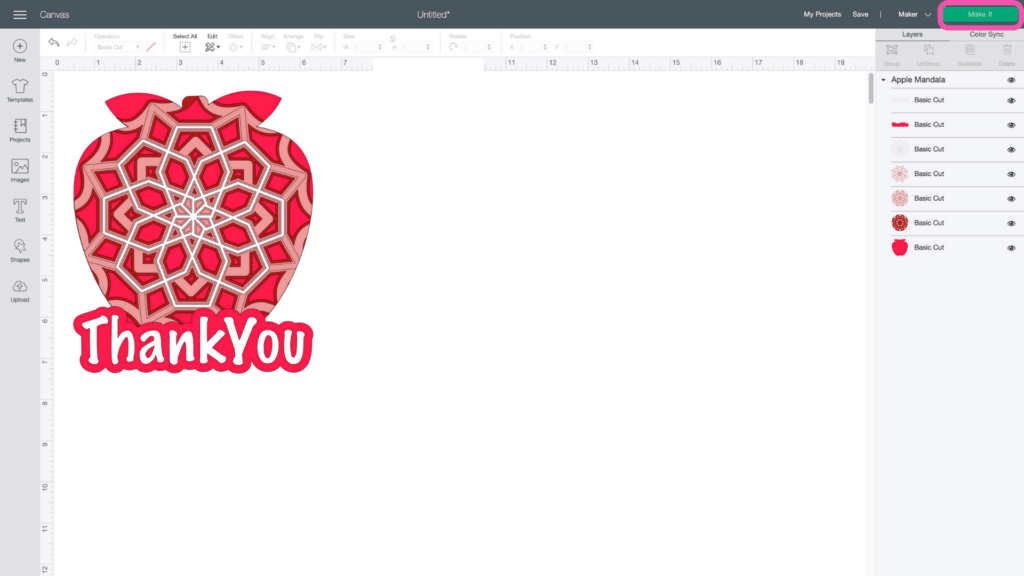
This brings you to the preview screen.
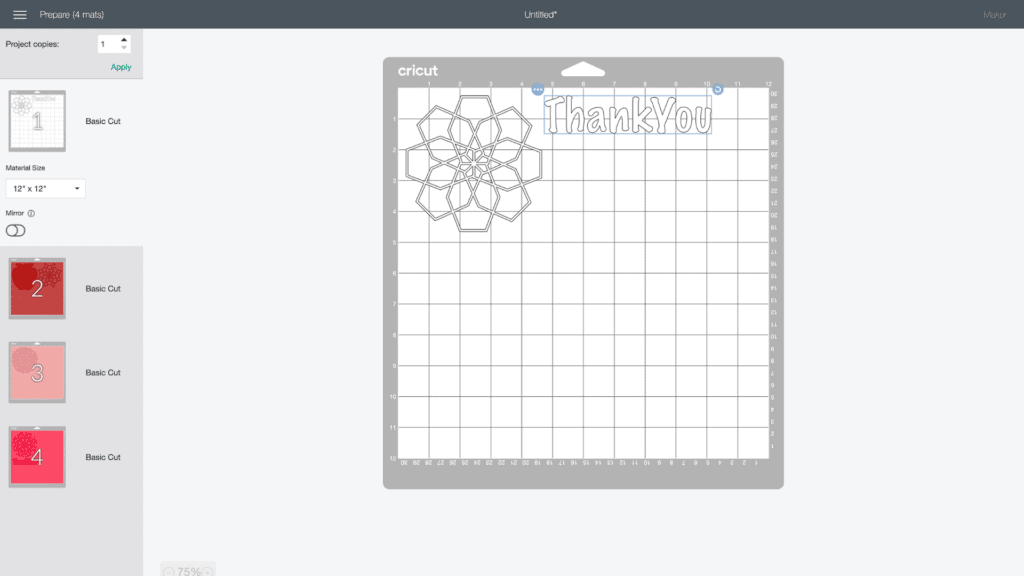
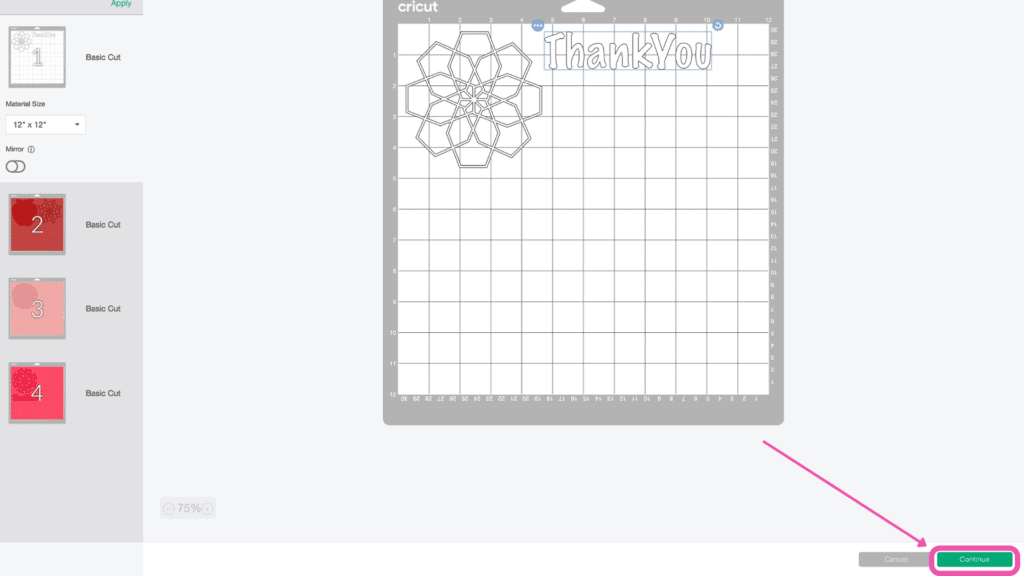
Click “Continue.”
Now it’s time to connect to your machine and select your material. For all of my layered designs, I use the Cardstock (for intricate cuts) setting.
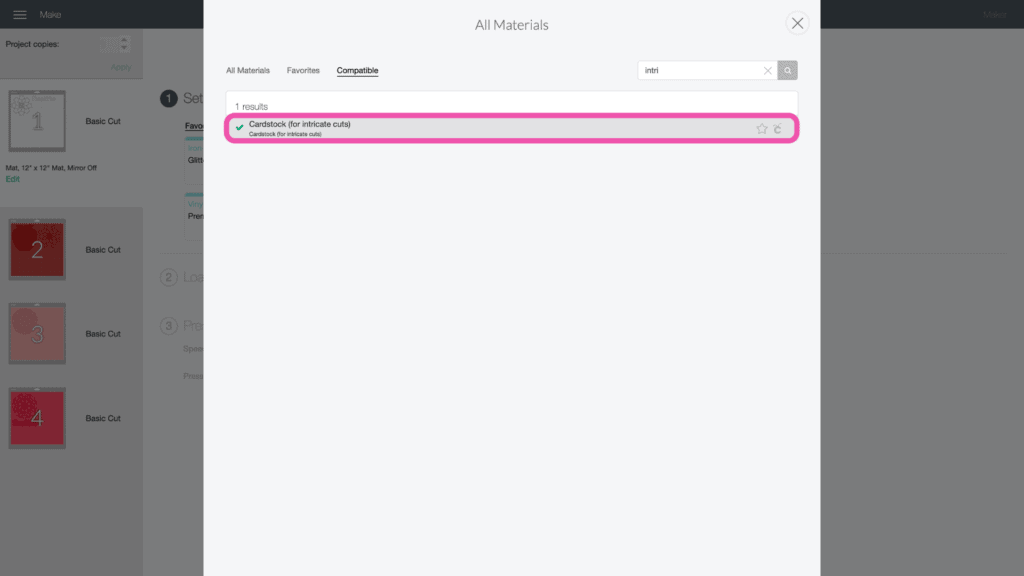
This setting along with a clean, sticky mat ensures a nice, clean-cut.
Ensure your Fine-Point Blade is loaded into your machine.
Step 3 - Cut Out Design
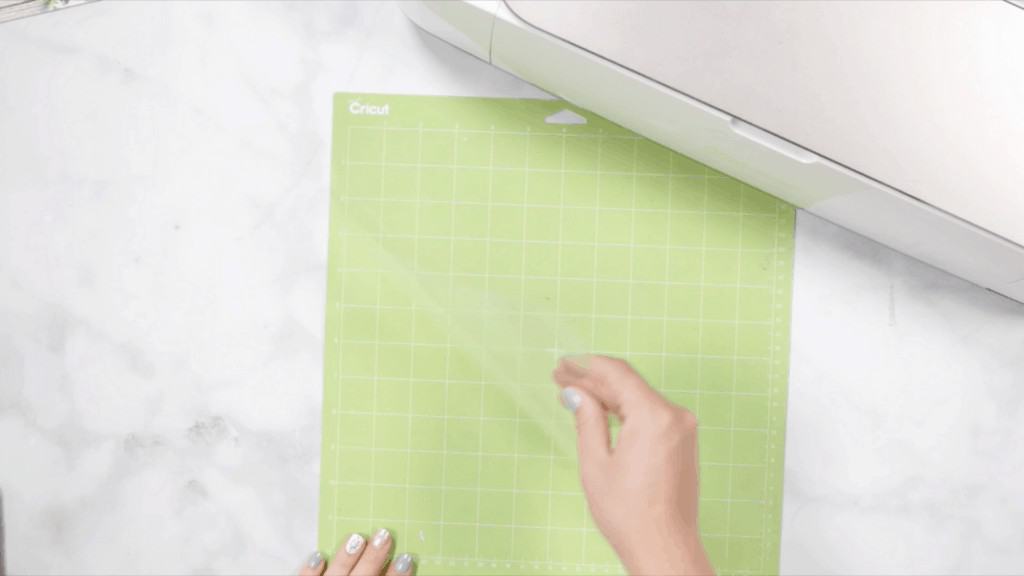
Peel the clear liner away from your mat.
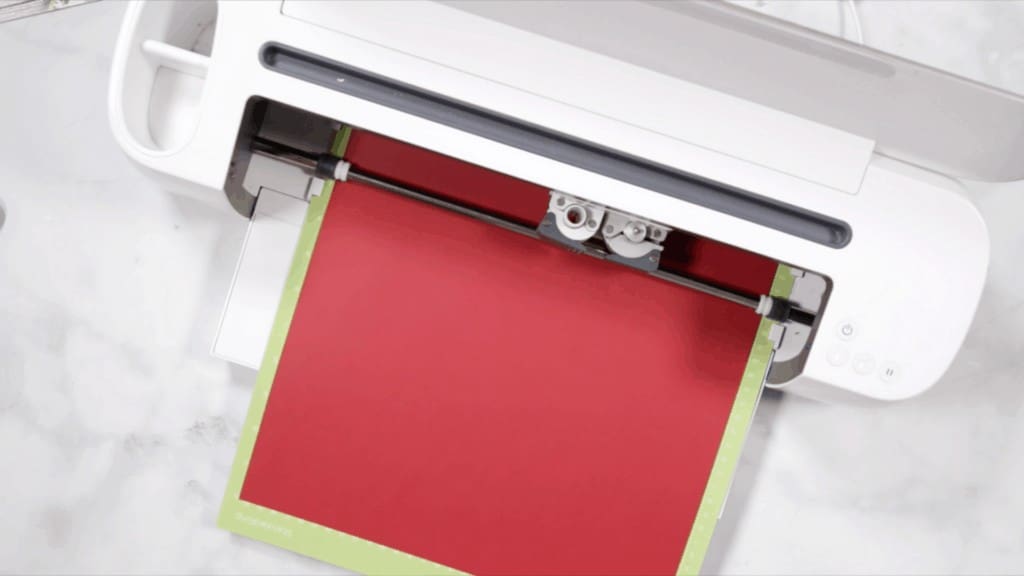
Following Design Space’s prompts, place your first color of cardstock on your mat.

Press the load button to load the mat into your machine. Press the go button to begin the cut.

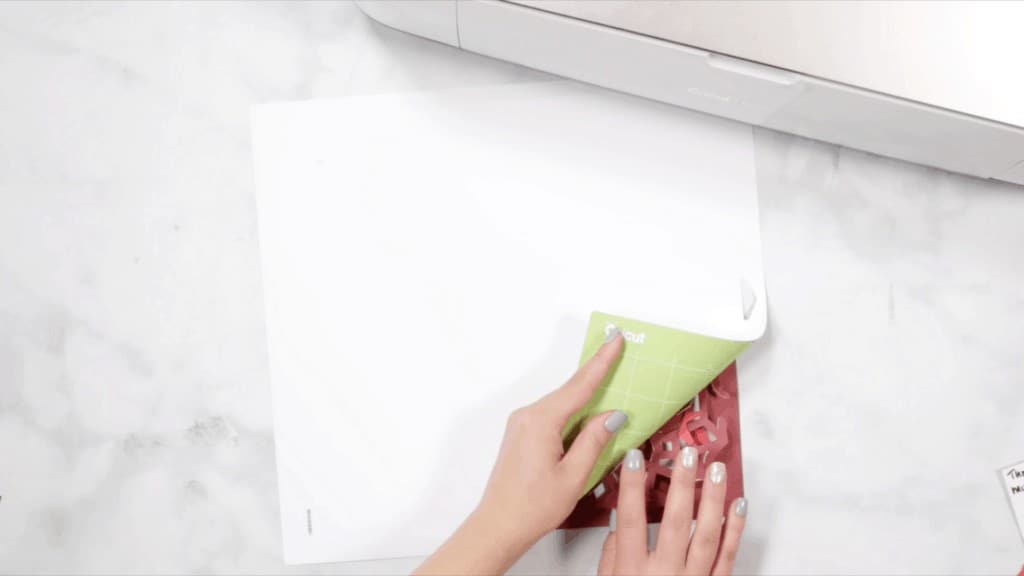
Once your first cut is complete, unload the mat.
Following the prompts in Design Space, place the second color of cardstock on your mat.
Continue to load, cut, and unload the rest of the cuts until you have all of the elements cut out.
Pro Tip - Carefully peel your mat away from the cardstock to avoid tearing or rolling your cardstock.
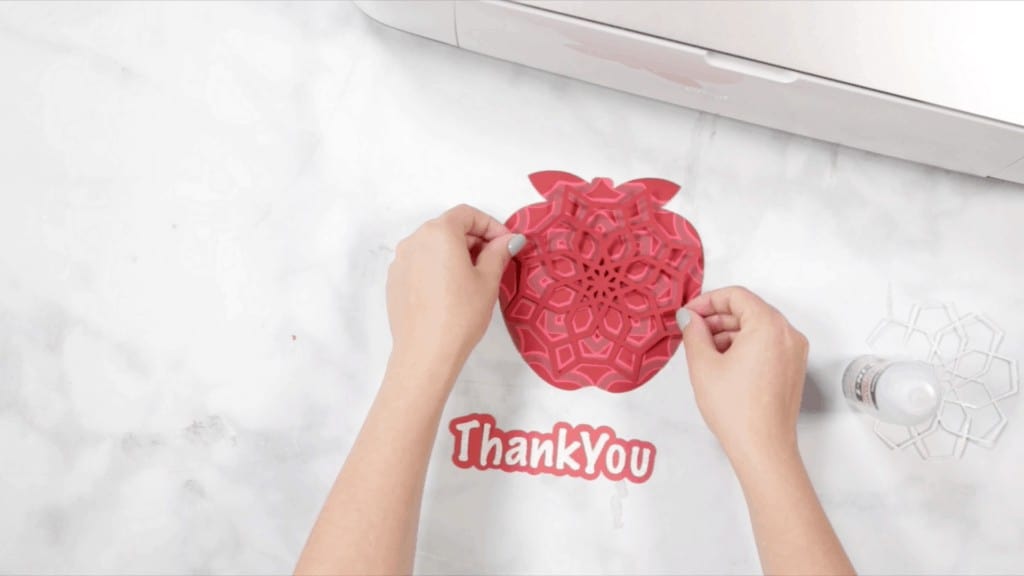
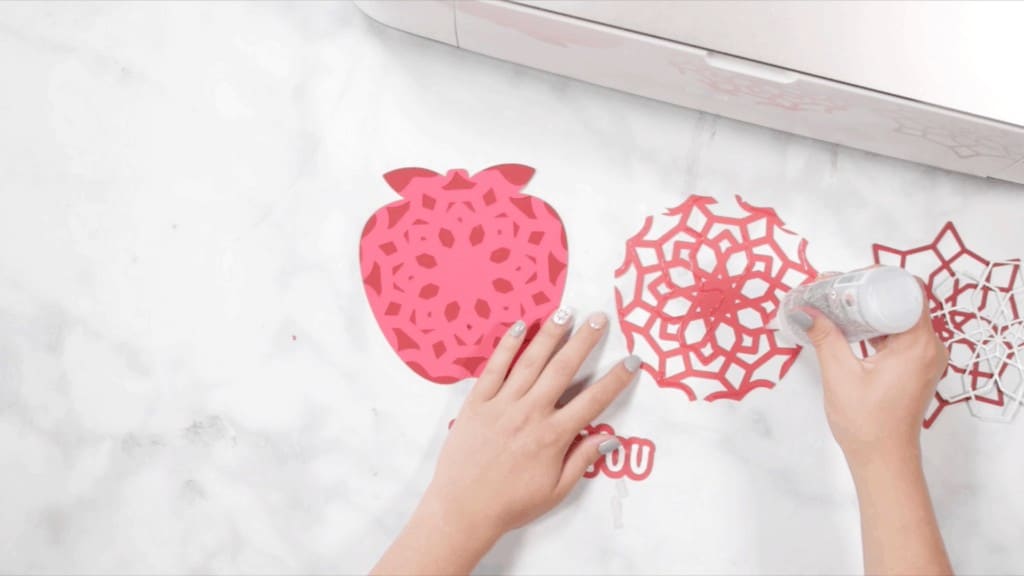
Step 4 - Assemble Layered Mandala
After you cut the design, use the foam adhesive and/or craft glue to put it together. For this file, I’m going to use both foam adhesive and craft glue.
I used craft glue to attach the letters to their backing as well as the apple mandala. Then, I used foam adhesive to attach the letters to the apple mandala.
Cricut Design Space doesn’t cut out the layers in order so it can get confusing to piece together. Head back to Design Space to see the layers as a reference for how to put them together.
The image below shows you from bottom to top how the layers should be placed.

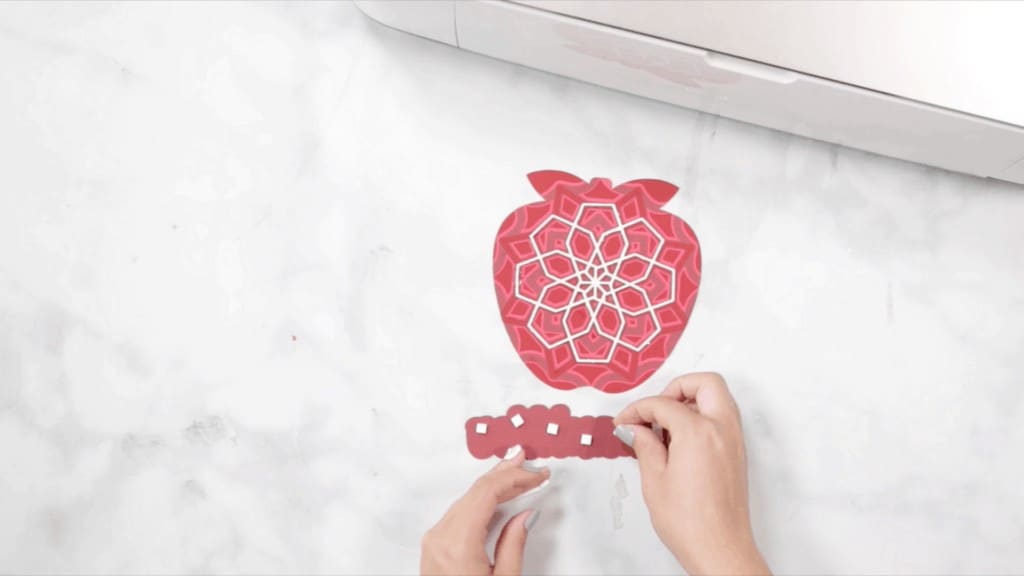
Begin gluing each letter to the letter backing. Line it up and press it in place.
Glue to apple mandala together from bottom to top. Be careful not to use too much glue as it will bleed through your project, creating an unprofessional look.
Finally, attach your “Thank You” letters to your apple mandala using craft foam.
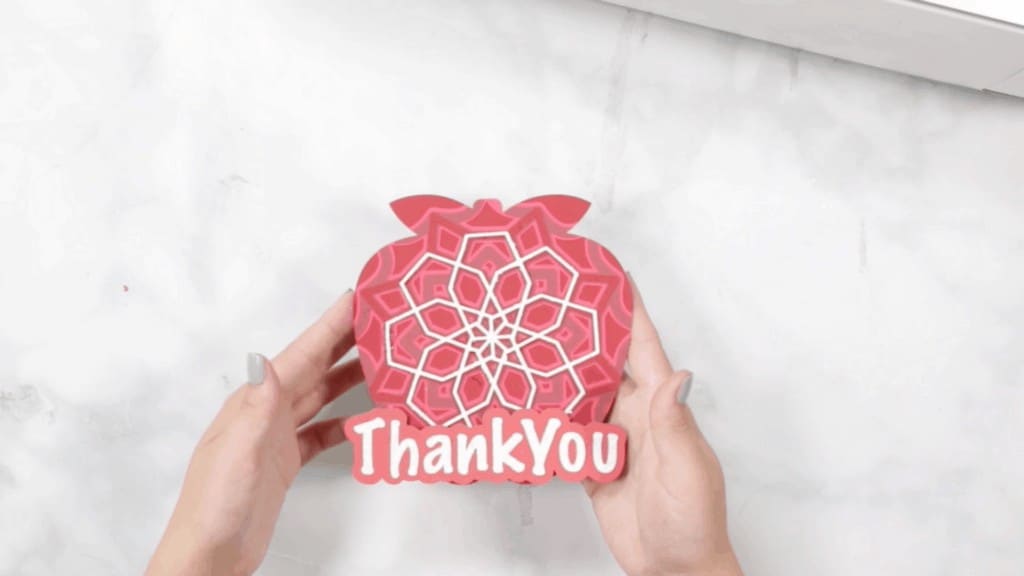
Now you have this adorable layered apple mandala. I love being able to say “Thank You” with a homemade gift!
Looking for more mandalas? Check out my other mandalas HERE.
Don't want to forget about this project? Save it to Pinterest here!
Do you have any questions about this layered apple mandal? What are some of your favorite teacher appreciation gifts? Let me know in a comment below!
Thank you so much for all your wonderful projects and excellent process steps. abundant blessings to you
Helio. My name is Theresa. I bought the Cricut machine over 2 years ago and is still in the box. I am so intimidated to use it. Please help me. I’m struggling for sure. Thank you so much in advance. 🙂