Never Lose Your Chapstick Again With This Free DIY Keychain Chapstick Holder Pattern And Step-By-Step Sewing Tutorial!
Are you always digging through your purse for your chapstick? Or do your kids complain that they need chapstick every time you leave the house, but no one has any on them? That's where a keychain chapstick holder comes in!
This nifty little device keeps your chapstick handy everywhere you go. Plus, it's a super quick and easy project to sew - it comes together in less than an hour.
Table of Contents
Why Keychain Chapstick Holders Are Awesome
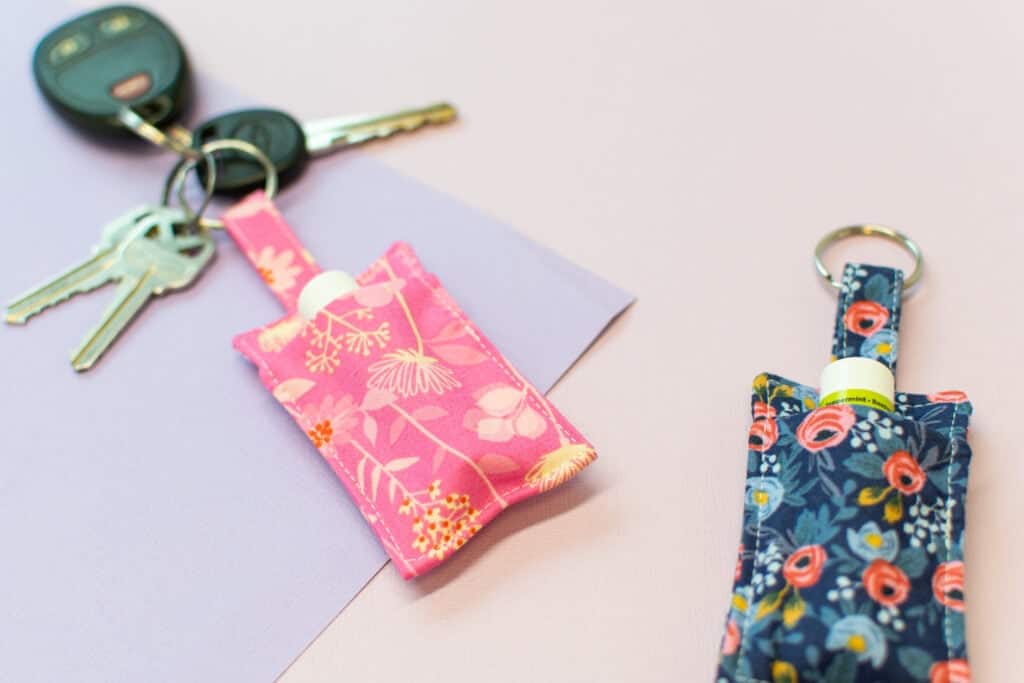
I love my keychain chapstick holders because I can attach one to my keys and keep chapstick easily accessible all the time. My kids can even use them to keep chapstick with them at school by attaching the chapstick holder to the inside or outside of their backpacks!
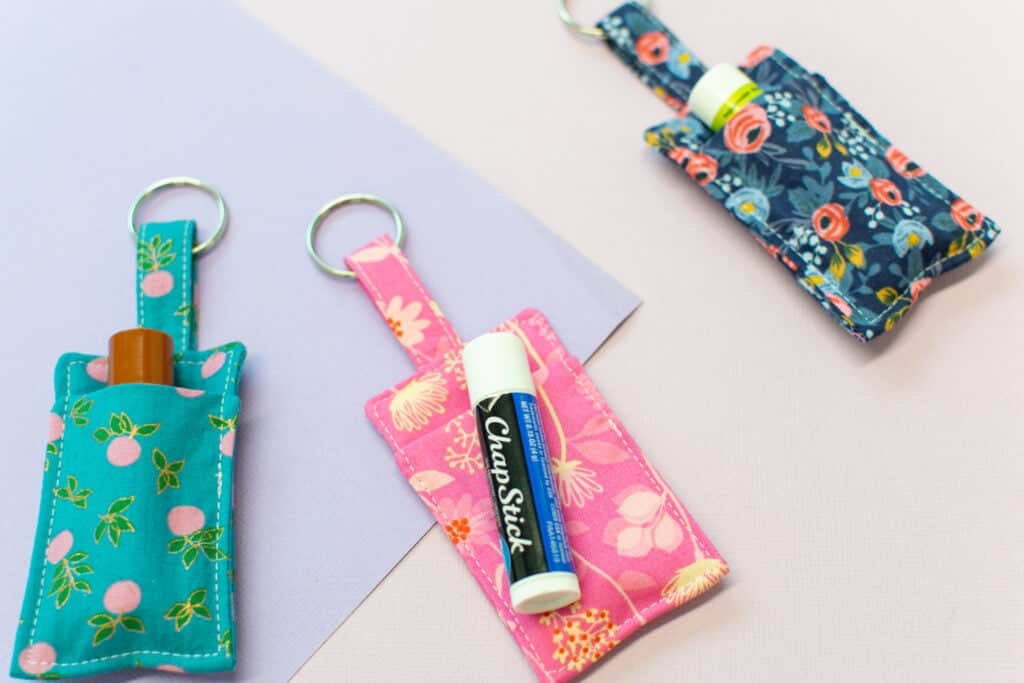
These DIY chapstick holders are so fast and simple to sew that they make wonderful gifts. They're also a great scrap-buster to use up leftover fabric scraps laying around your sewing room. One of my favorite things to do around Christmas is to make a bunch of these chapstick holders with scrap fabric, add a new tube of chapstick to each holder, and pop one in everyone's stocking!
About the Keychain Chapstick Holder Pattern
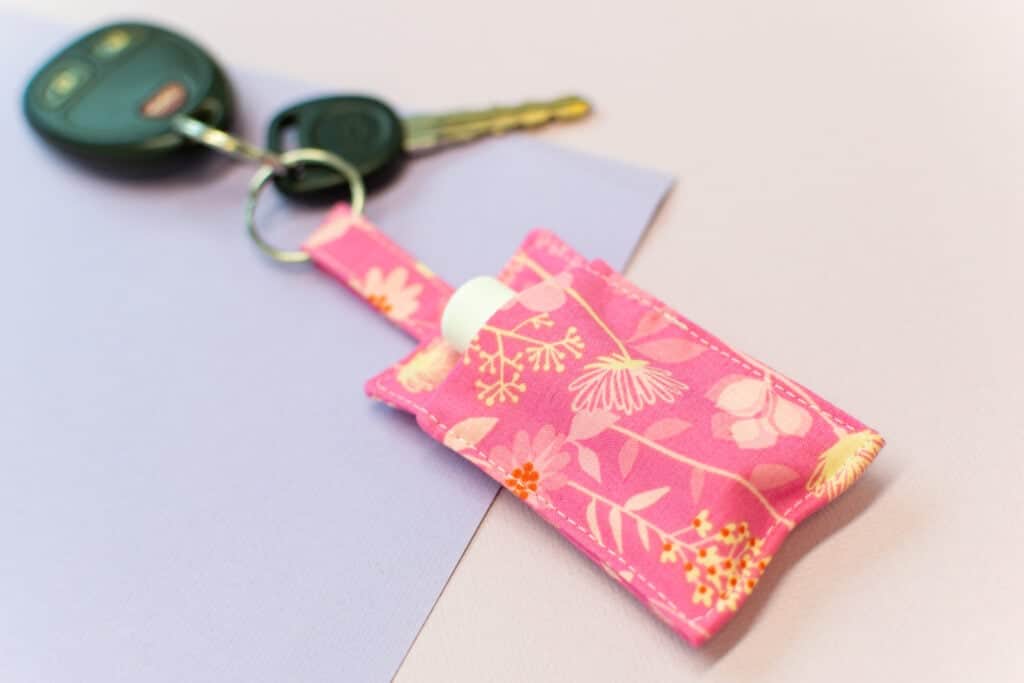
My sewing pattern makes an adorable fabric chapstick holder that measures 2" x 3.25". Note that the size of this pattern is intended for standard-sized chapstick tubes. If you want a holder for a different type of lipstick or lip balm that has a larger tube, you may need to adjust the size of the pattern.
The chapstick holder has a fabric ring tab that is 0.5" x 1.5". The ring tab is used to hang the chapstick holder from a keyring. This ring can then be attached to your most-used set of keys, a lanyard, or your kid's backpack!
Best Fabric for a Keychain Chapstick Holder
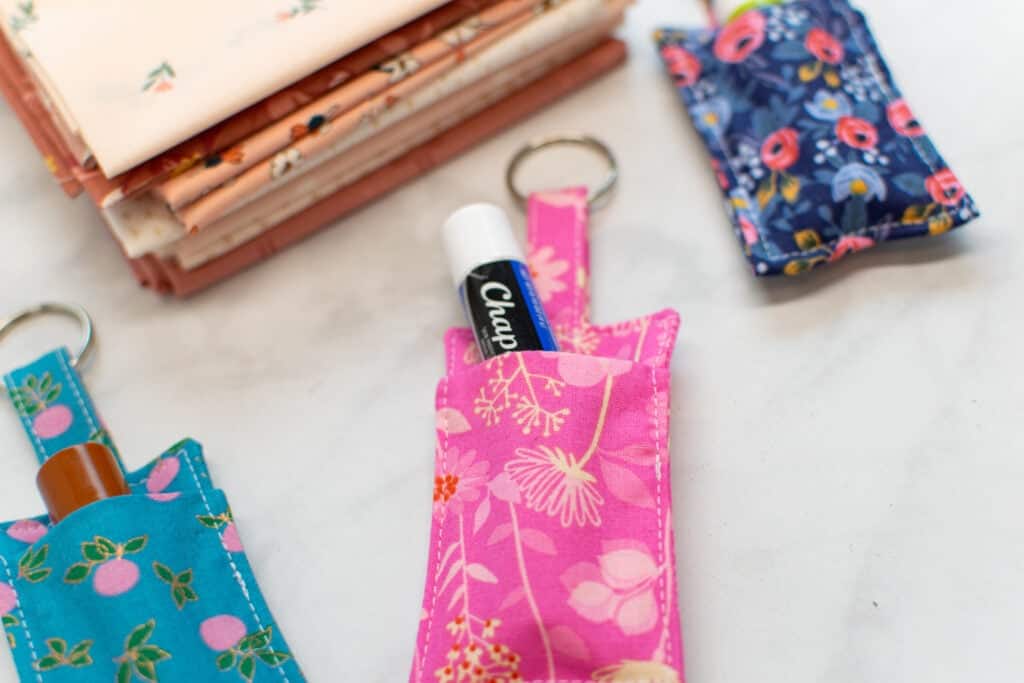
When choosing fabric for your keychain chapstick holder, I highly recommend using quality quilting cotton. Quilting cotton is perfect because it's non-stretch, easy to sew, inexpensive, easily accessible, and available in a huge range of colors and prints.
Plus, using quilting cotton is a win-win if you're a quilter because you probably already have tons of cotton scraps laying around!
Now, if you'd rather use a different fabric than quilting cotton, you totally can! Just make sure to choose something reasonably durable (not uber-thin or sheer) that isn't too thick or textured. Any good, medium-weight woven fabric will work well for this project.
Here are a few examples of fabrics that would be great choices for your keychain chapstick holder.
- Quilting Cotton
- Denim
- Twill
- Flannel
- Cotton Lawn
- Poplin
- Linen
Click Here to Download the FREE Keychain Chapstick Holder Pattern

Supplies for the Chapstick Holder
Shop my favorite sewing supplies here!
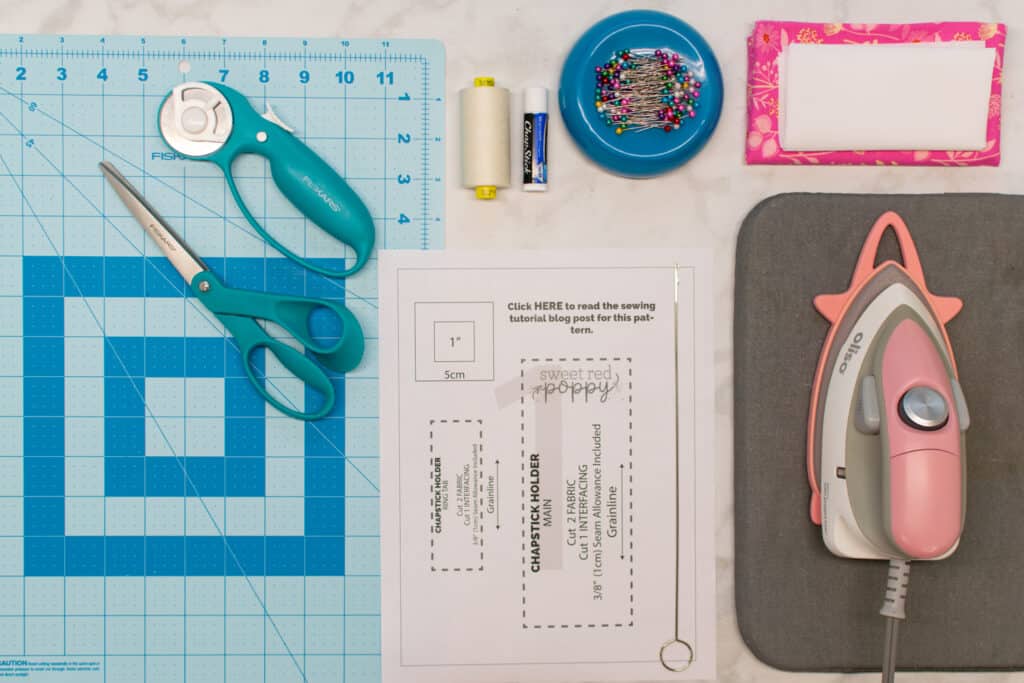
Here are the supplies you'll need to sew your chapstick holder.
- Chapstick
- 10" Square (or 1/8 Yard) of Fabric
- 10" Square (or 1/8 Yard) of Fusible Interfacing
- Keychain Ring (I like to use a ring anywhere from 20 - 30mm across)
- Loop Turner or Safety Pin
- Scissors
- Rotary Cutter
- Rotary Cutting Mat
- Thread
- Sewing Pins
- Iron
- Ironing Board
- Sewing Machine
- Sewing Machine Needle
- Printer
- Printing Paper
Why Shop Through My Affiliate Links?
When you shop through my affiliate links, it doesn't cost you anything extra, but it helps me out in a big way! I earn a small commission from those purchases, and that support allows me to continue creating and sharing free tutorials and patterns for you. Thank you so much for helping me keep this creative community going!
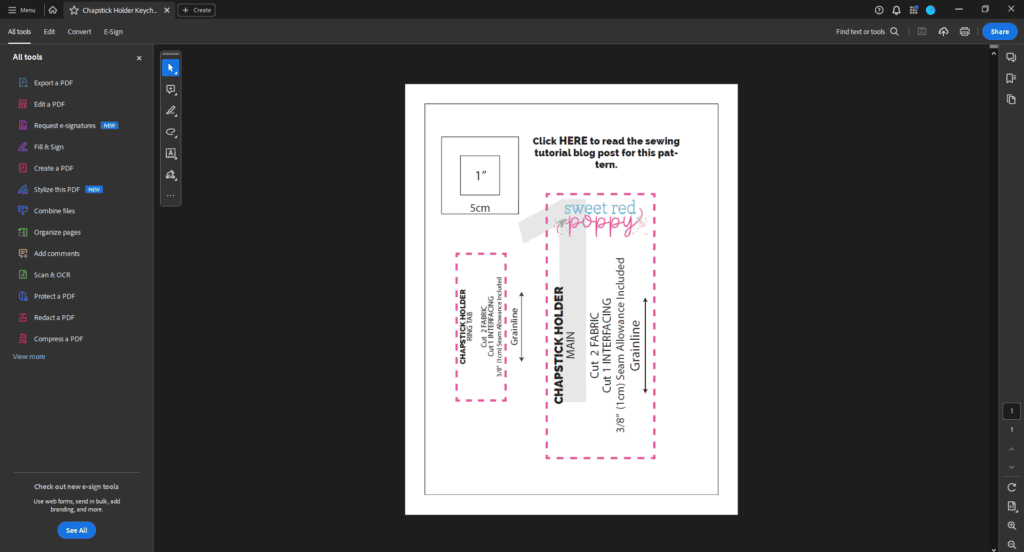
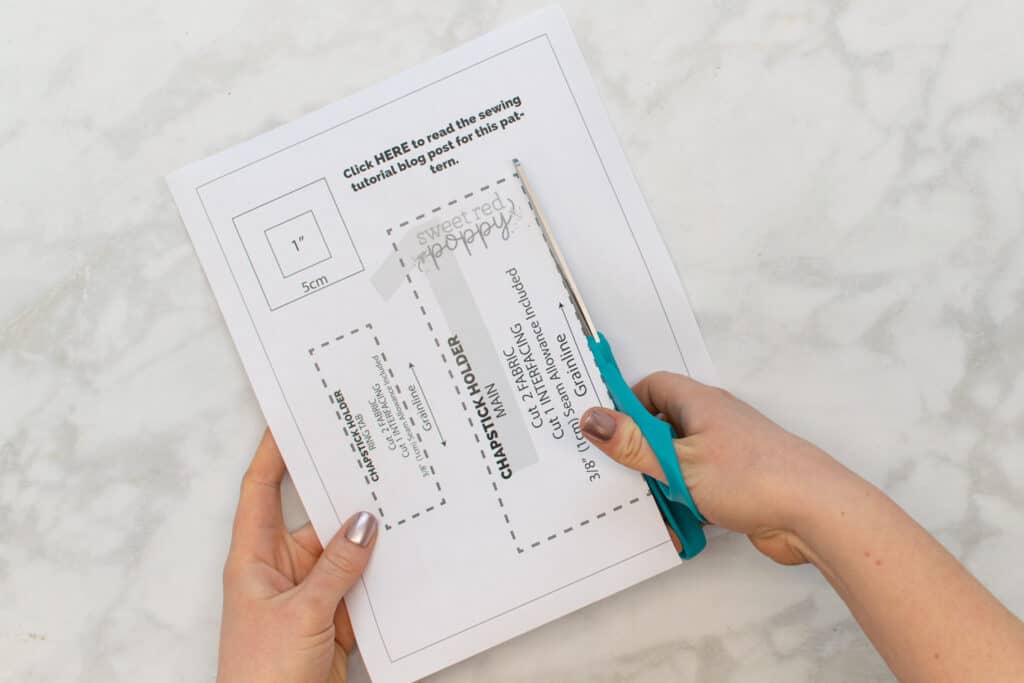
Step 1: Download and Cut Out the Pattern
Start by downloading the free pattern to your computer and opening it in your favorite PDF reader. I highly recommend using Adobe Acrobat.
*It's important not to print the pattern directly from your internet browser. This is because printing from the browser can mess with the scaling as well as cause it to print with incorrect border lines.
Once the pattern is open in your PDF reader, select the "Print" button. This will open the print settings dialog box.
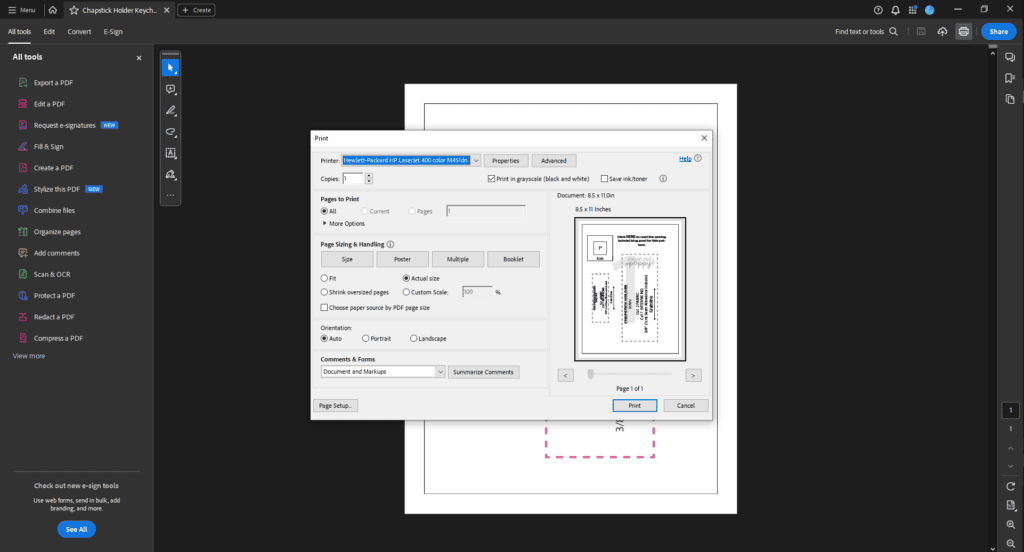
In the "Scaling" section, make sure that either "Actual Size" or "Custom: 100%" is selected.
Then, print the pattern.
After printing, measure the 1" x 1" test square in the top left of the page.
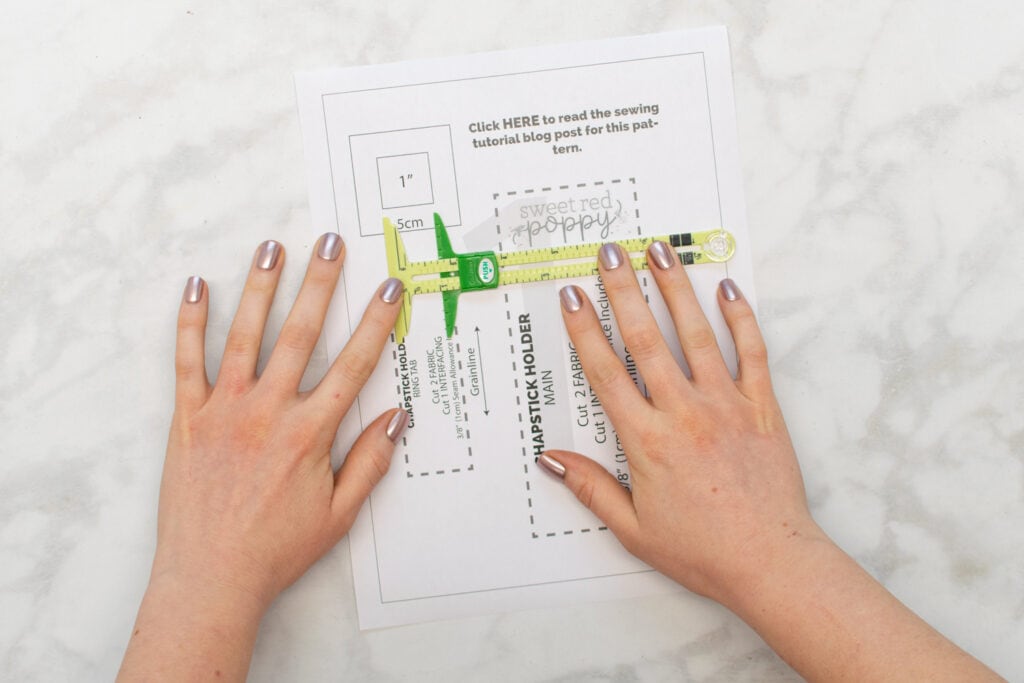
If the square measures exactly 1" x 1", you're good to start cutting your pattern out. However, if the test square does not measure the correct size, something is off with your scaling settings. In this case, you will need to double-check your scaling and reprint the pattern.
Cut out the pattern pieces. The chapstick holder pattern has 2 pattern pieces: "Main" and "Ring Tab".
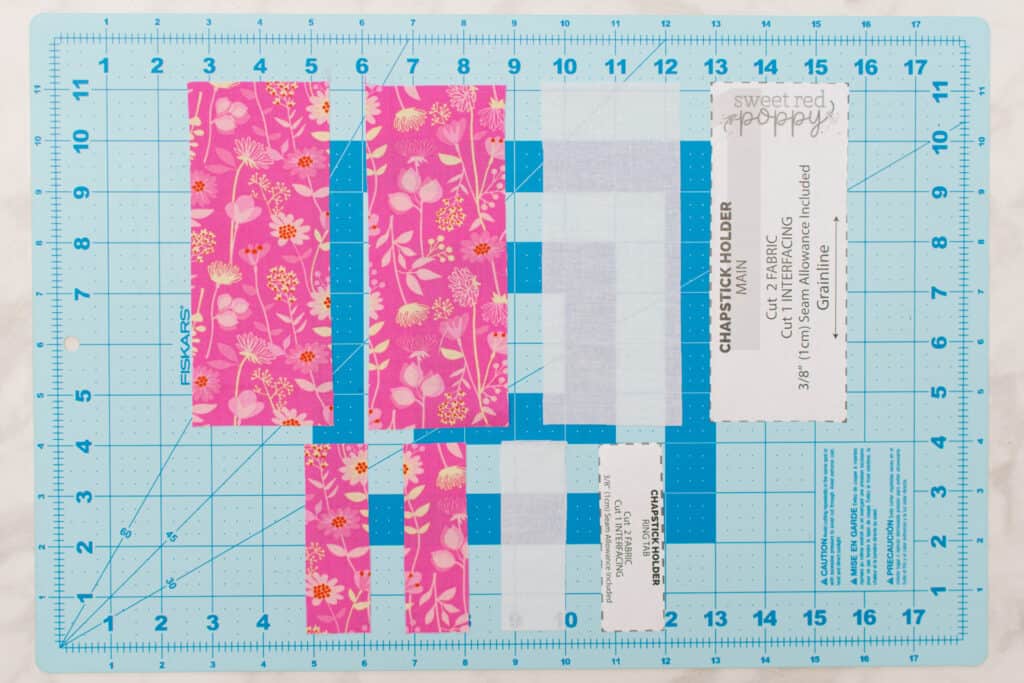
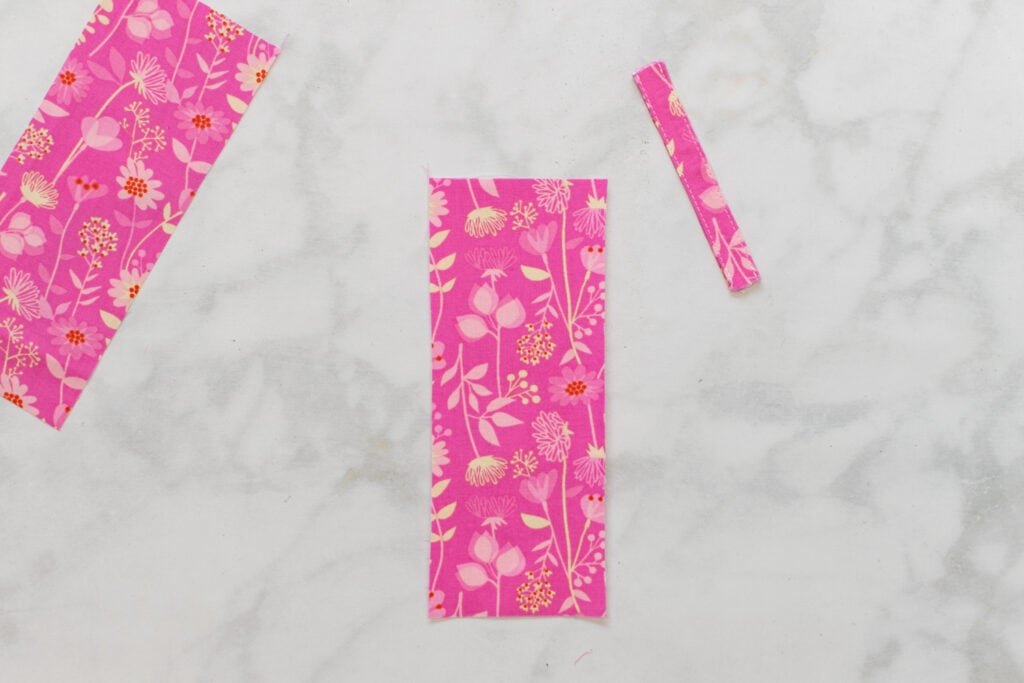
Step 2: Cut Your Materials
Once the pattern has been cut out, it's time to cut all the materials for your keychain chapstick holder!

Cut the following number of pieces from your fabric and interfacing.
Fabric
- Main: Cut 2
- Ring Tab: Cut 2
Interfacing
- Main: Cut 1
- Ring Tab: Cut 1
Step 3: Apply Interfacing
The first step, before we can get to sewing, is to apply the interfacing.
Place one of the fabric Main pieces and one of the Ring Tab pieces wrong sides up on your ironing board or mat.
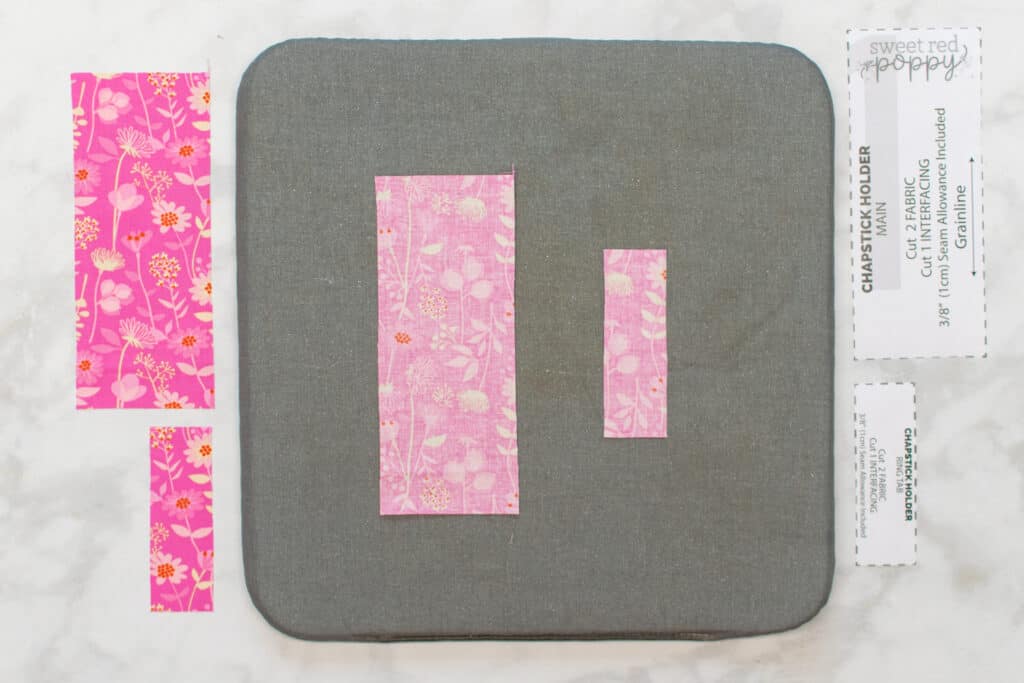
Place the corresponding piece of interfacing bumpy side down on each fabric piece.
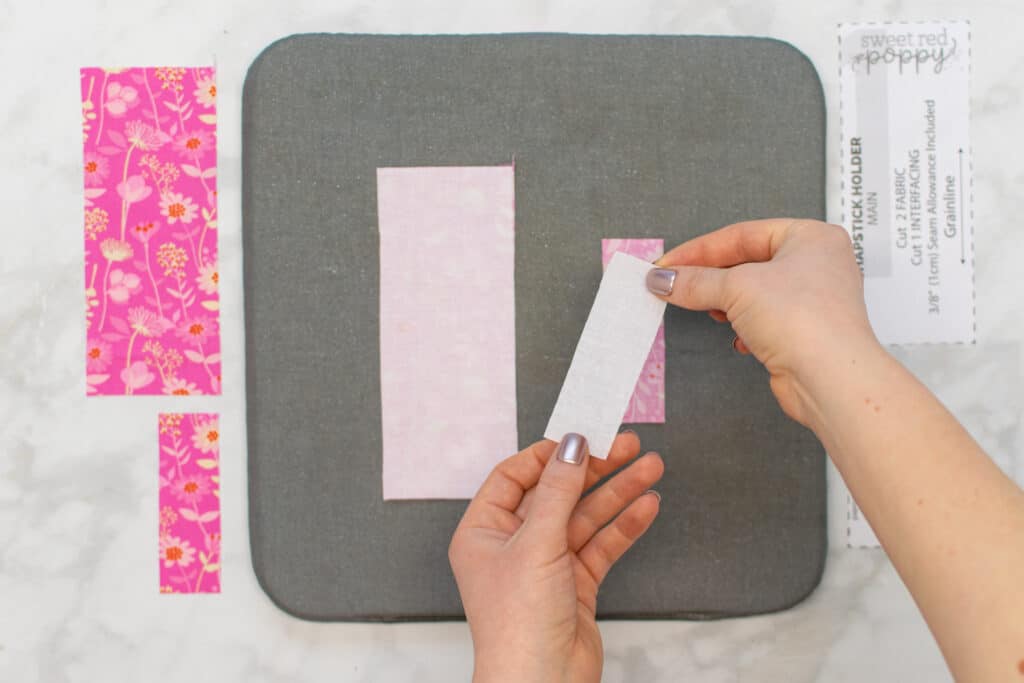
Next, fuse the interfacing to the fabric.
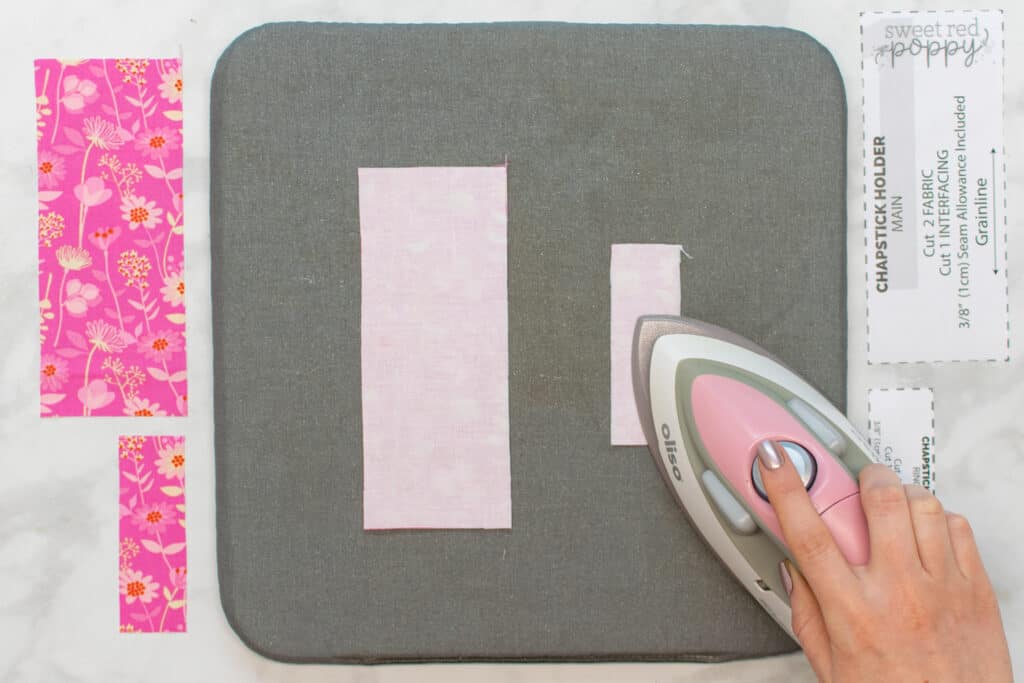
To do this, you will usually place a damp cloth on the interfacing, then press on the cloth for 10-15 seconds with your iron. However, the method can vary based on the brand of interfacing you are using - so make sure to check the instructions that came with your interfacing!
Step 4: Prepare the Ring Tab
Next, it's time to prepare the ring tab for the chapstick holder.
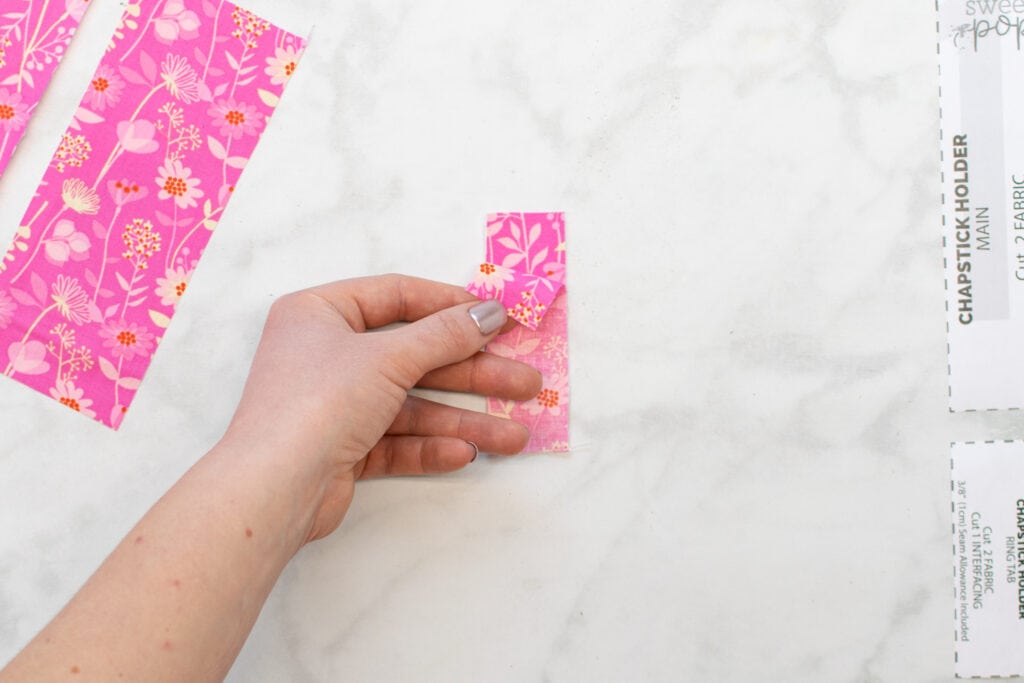
Start by placing the two ring tab pieces right sides together.
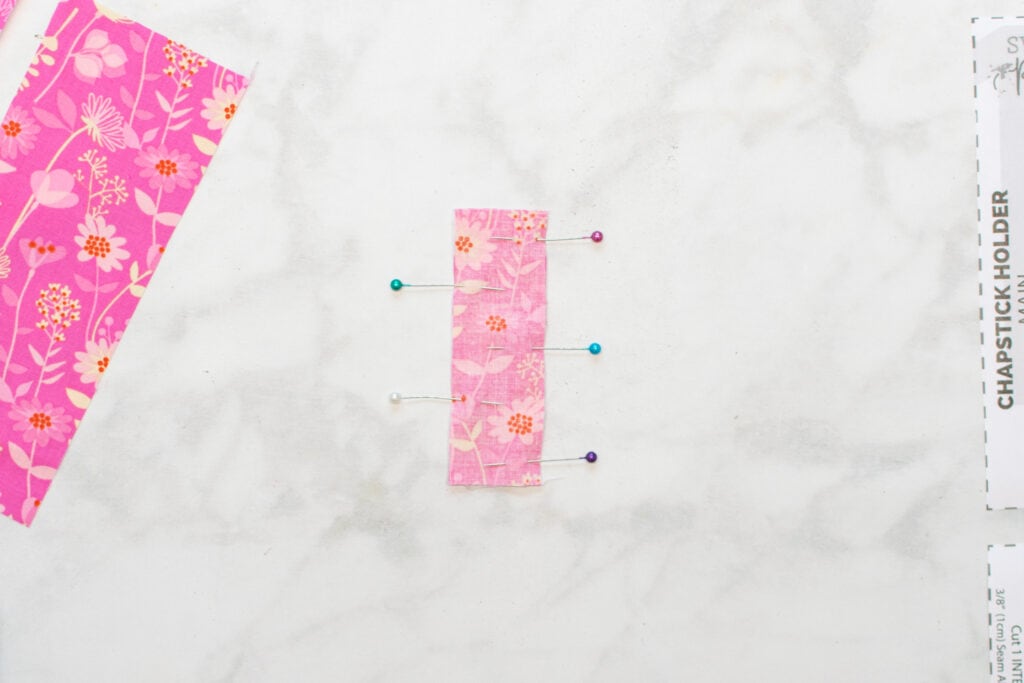
Then, pin them together along the long edges.
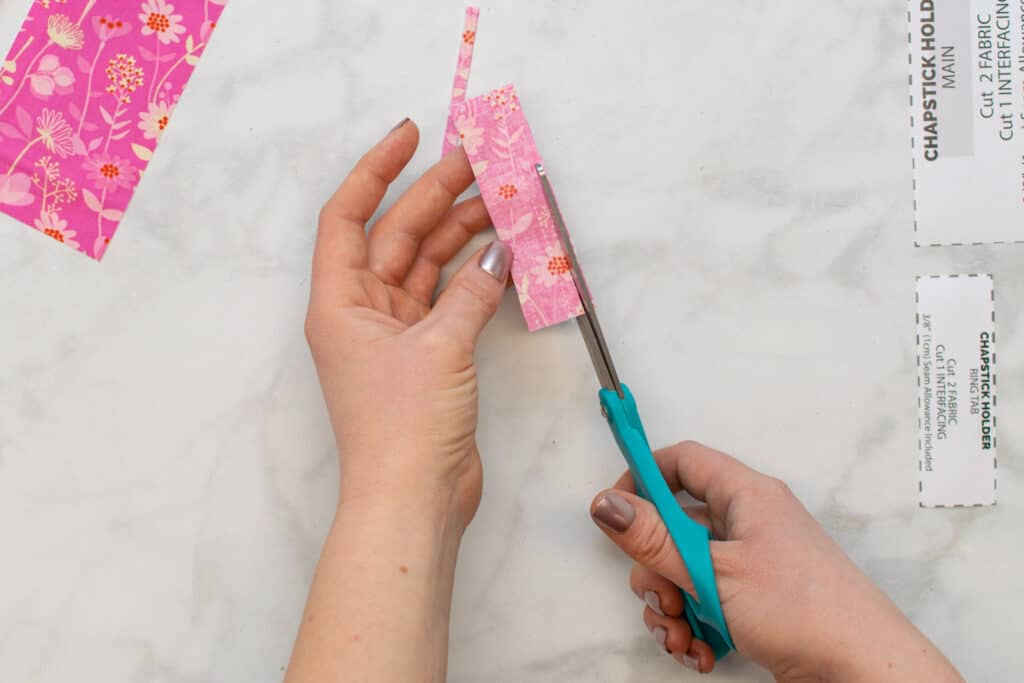
Stitch along each long side of the ring tab with a 3/8" seam allowance.
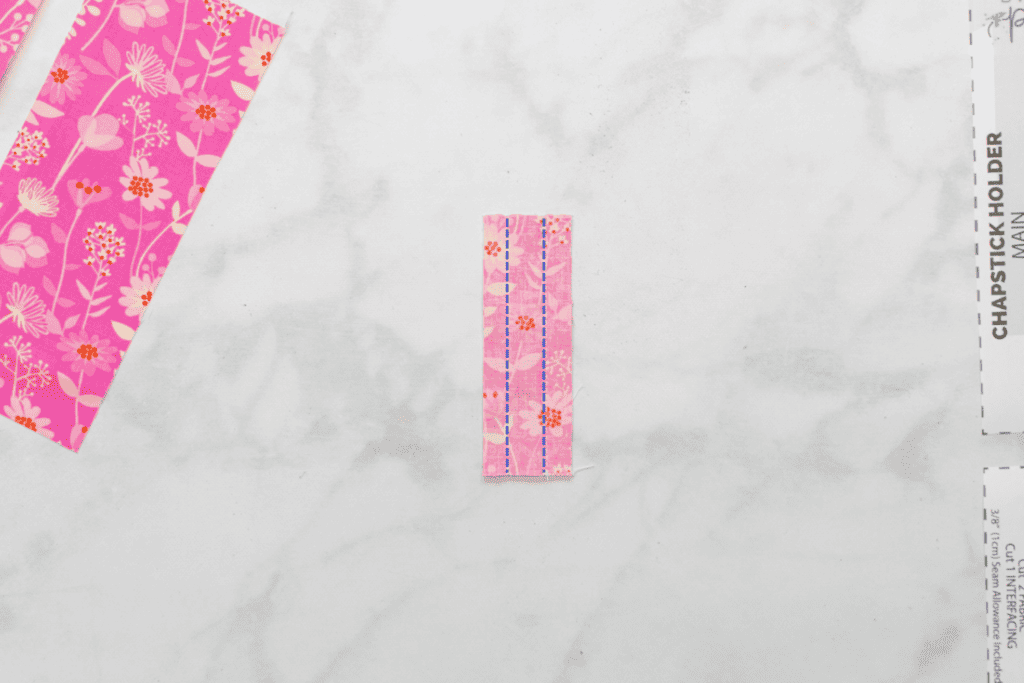
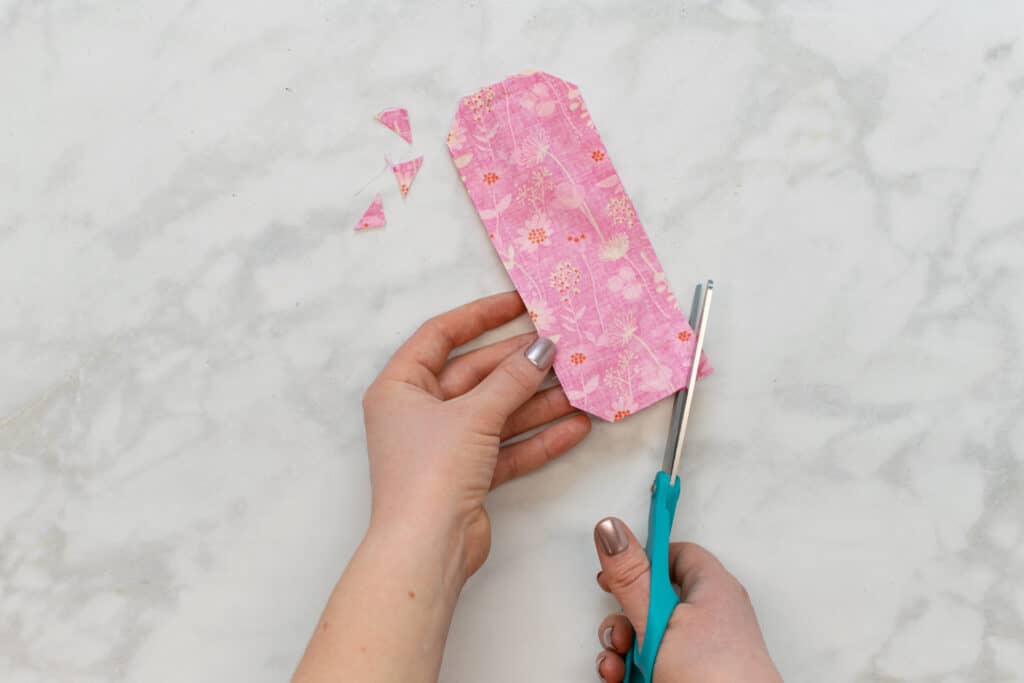
Next, trim the seam allowances down by approximately half with a rotary cutter or scissors. This will reduce bulk and make turning the tab right sides out easier.
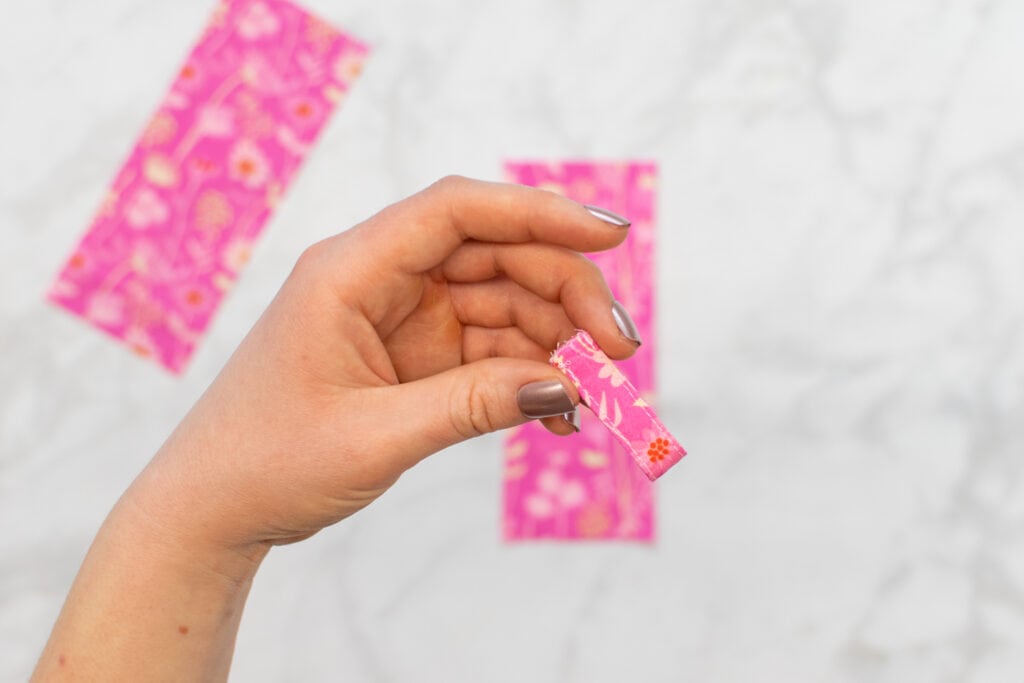
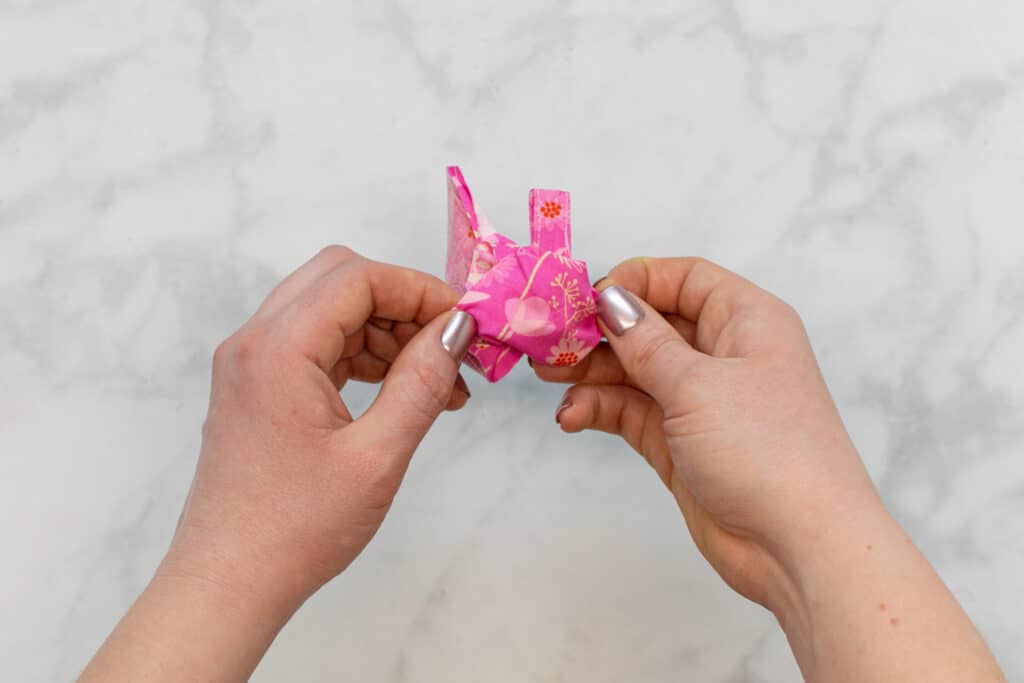
Then, turn the ring tab right sides out by pulling the tube through itself with a loop turner or safety pin.
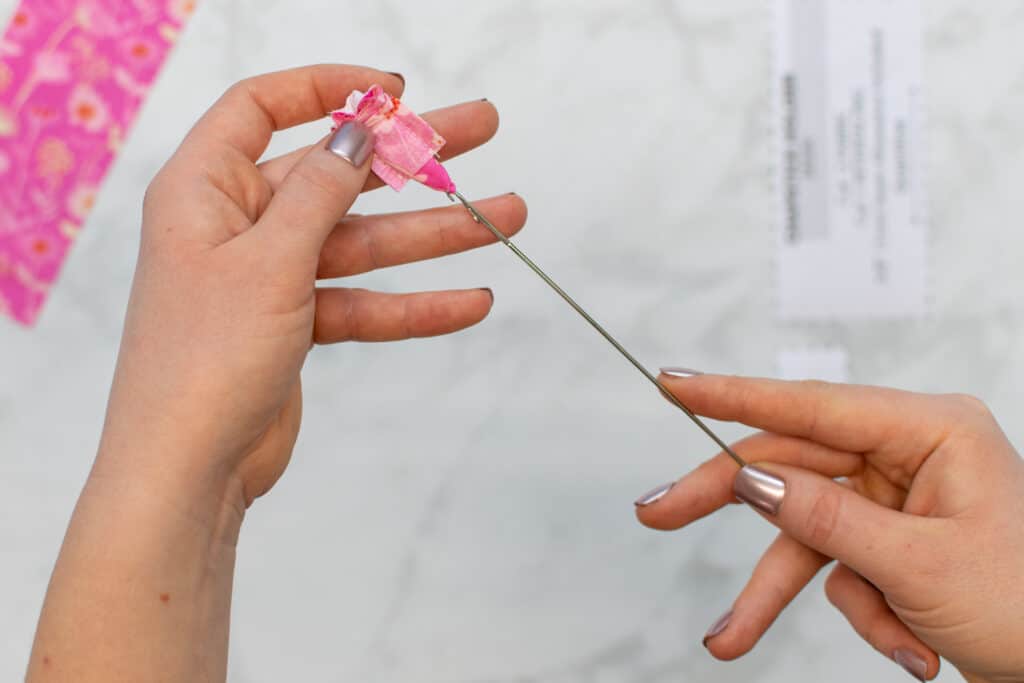
To do this, I like to use my loop turner. To turn the tube right sides out with a loop turner, push the end of the loop turner through the tube. Then, hook it over the edge of the fabric. Pull it back through the tube, pulling the fabric through with it. You might have to work the fabric with your fingers to get it started, but once the end starts going down the tube, it should pull through pretty easily.
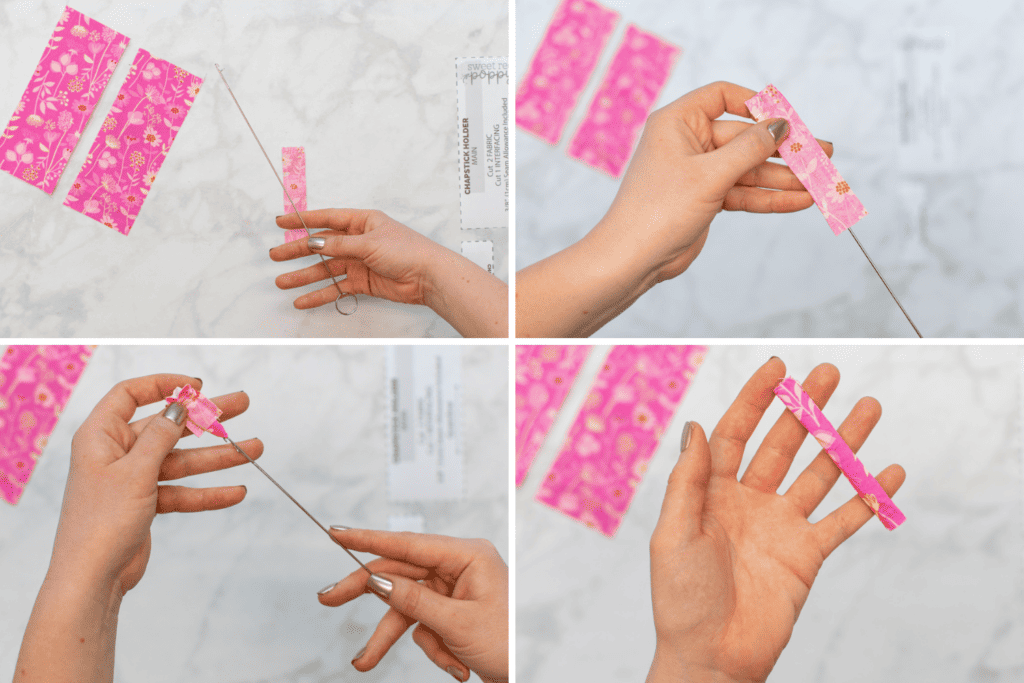
If you don't have a loop turner, you can use a safety pin instead. To do this, hook a safety pin through the fabric near one end of the tube. Then, push the safety pin down into the tube. Pull the safety pin through the tube, pulling the fabric with it. Like with the loop turner, you may need to work the fabric into the tube with your fingers at the beginning to get it started.
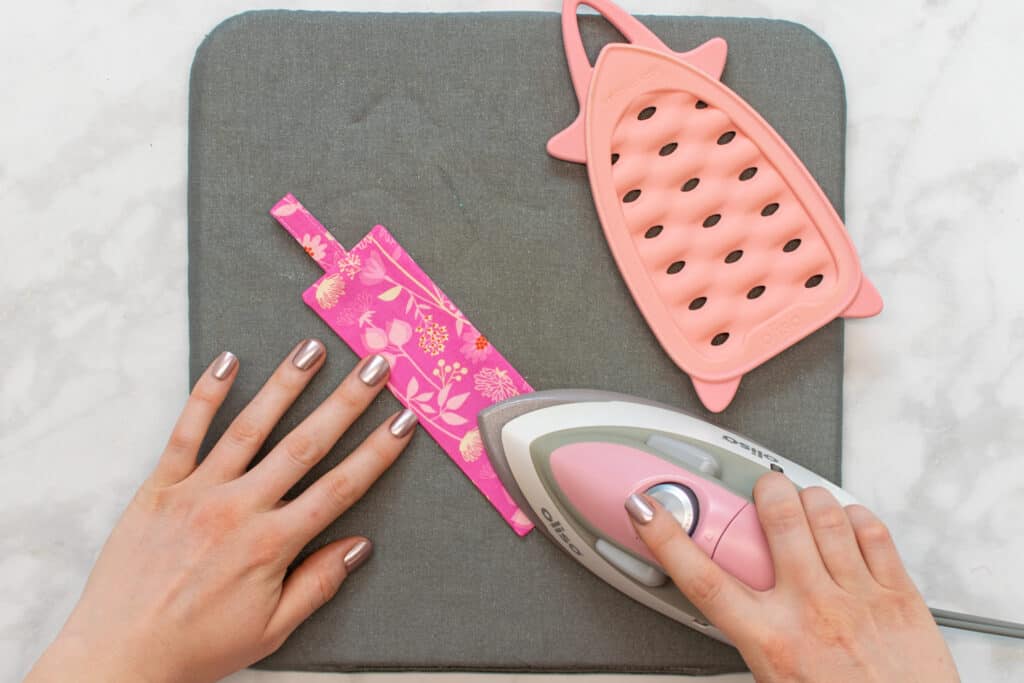
Once the tube has been turned right sides out, press it flat, pressing the seams to the edges.
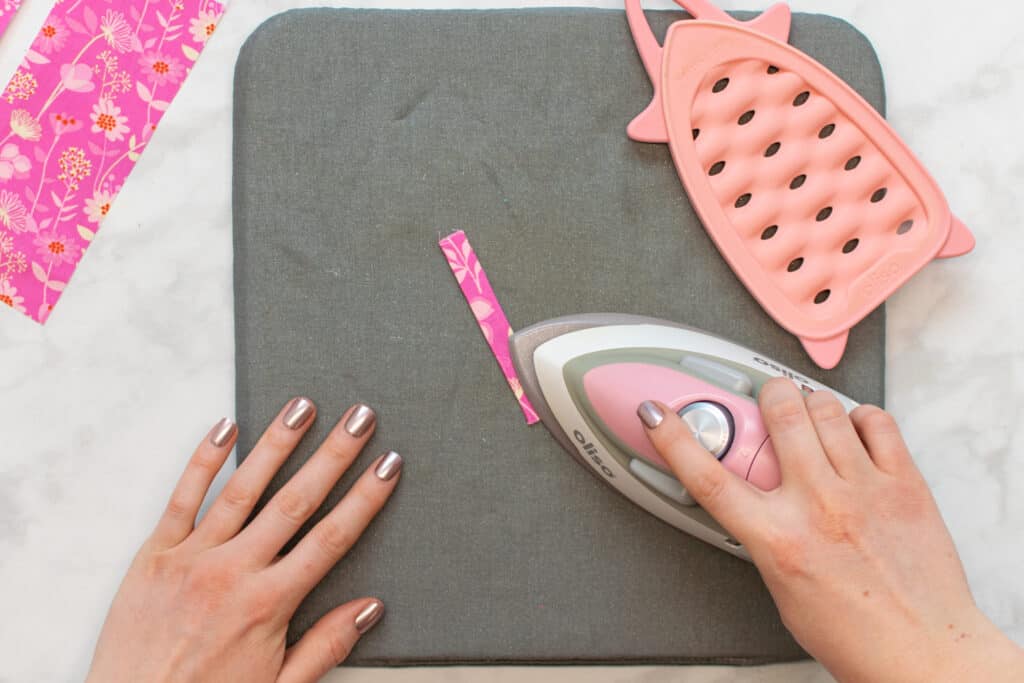
Finally, topstitch along both long edges of the ring tab, sewing approximately 1/8 - 1/16" from the edge of the fabric.
Step 5: Assemble the Chapstick Holder
With the ring tab prepared, we're ready to put this chapstick holder together!
First, lay the interfaced Main piece right side up on your table.
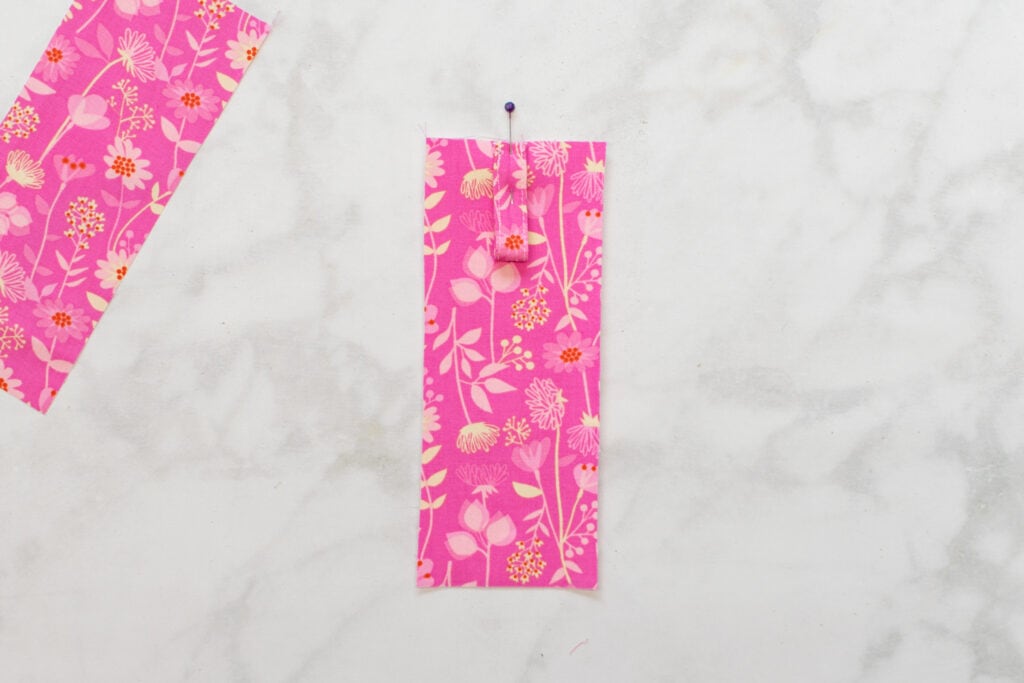
Next, fold the ring tab in half, matching up the two unfinished ends.
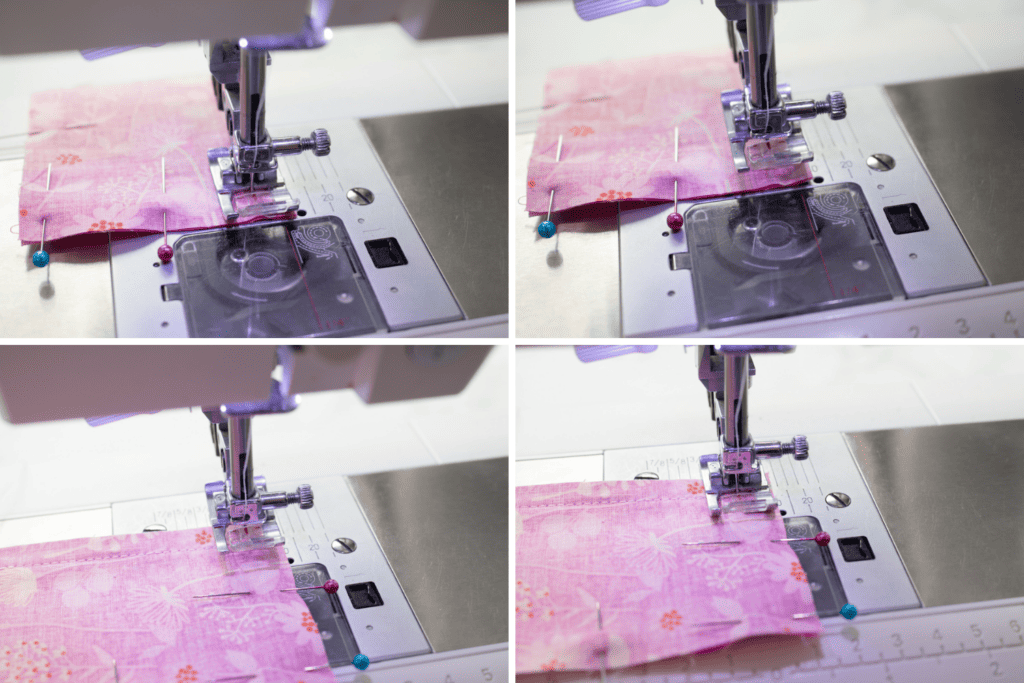
Place the ring tab approximately at the center of the top edge of the Main piece with the unfinished ends along the top edge of the fabric. Pin the ring tab to the Main piece.
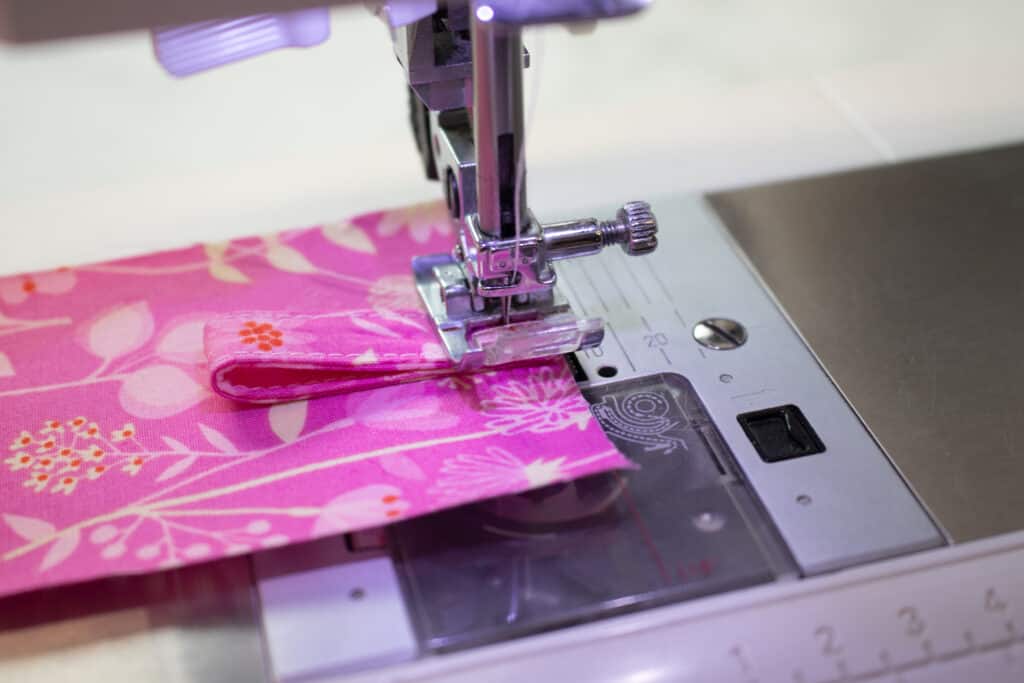
Then, stitch the ring tab to the Main piece, sewing with a 1/4" seam allowance.
Next, place the uninterfaced Main piece on top of the interfaced Main piece with right sides together.
Match up the edges and pin them together around all 4 sides.
Stitch the chapstick holder around all 4 edges, leaving an opening on one side approximately 2 inches long. This is important to be able to turn it right sides out through later.
While sewing, I like to rotate around the corners to keep them nice and sharp.
To do this, stop sewing when you reach 3/8" from the first corner. Make sure the needle is down in the fabric. Then, lift the presser foot and rotate the fabric 90 degrees. The next straight edge should now be in front of the needle. Put the presser foot down and continue stitching, repeating this process at each corner.
Once the chapstick holder has been stitched, trim the seam allowances off of the corners diagonally. Make sure to cut up to (but not through!) your stitching. This helps to reduce bulk for sharper corners later.
Next, turn the fabric right sides out through the opening you left in the seam.
Press the chapstick holder flat, pressing the seams to the edges.
At the opening, press the raw edges to the inside by 3/8" to create a continuous straight edge.
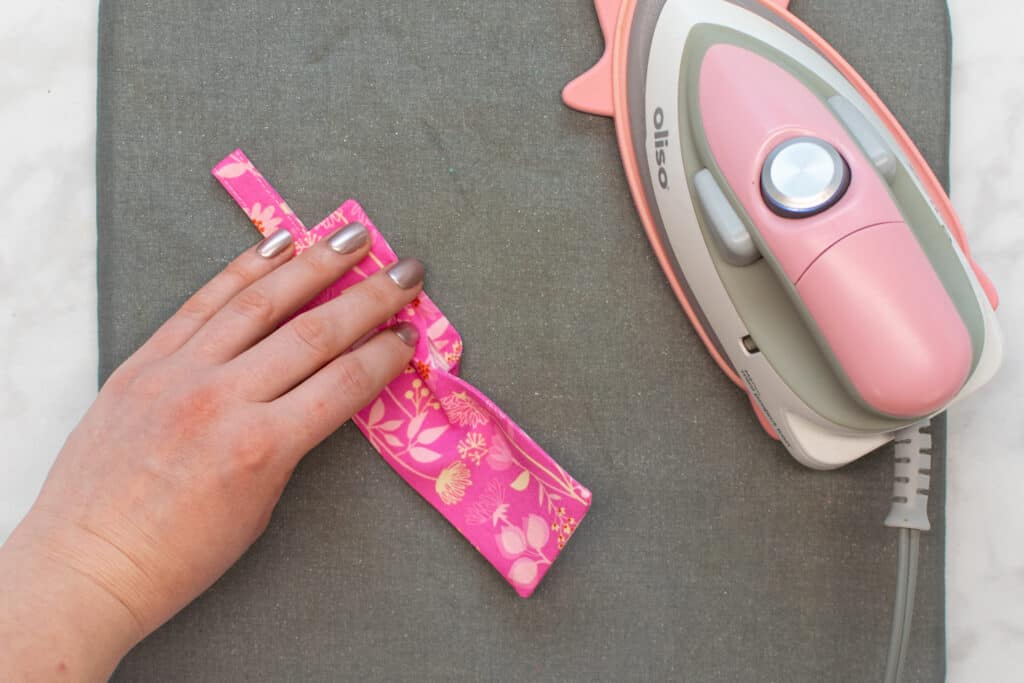
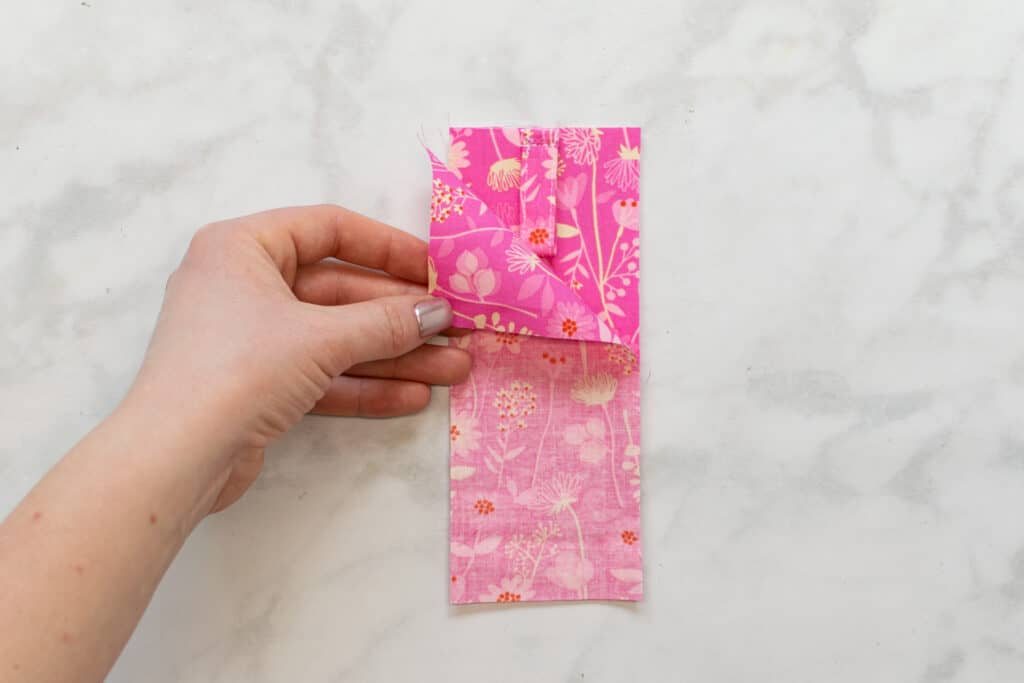
Next, fold the bottom of the chapstick holder up, lining up the bottom edge about 3/4" below the top edge of the chapstick holder.
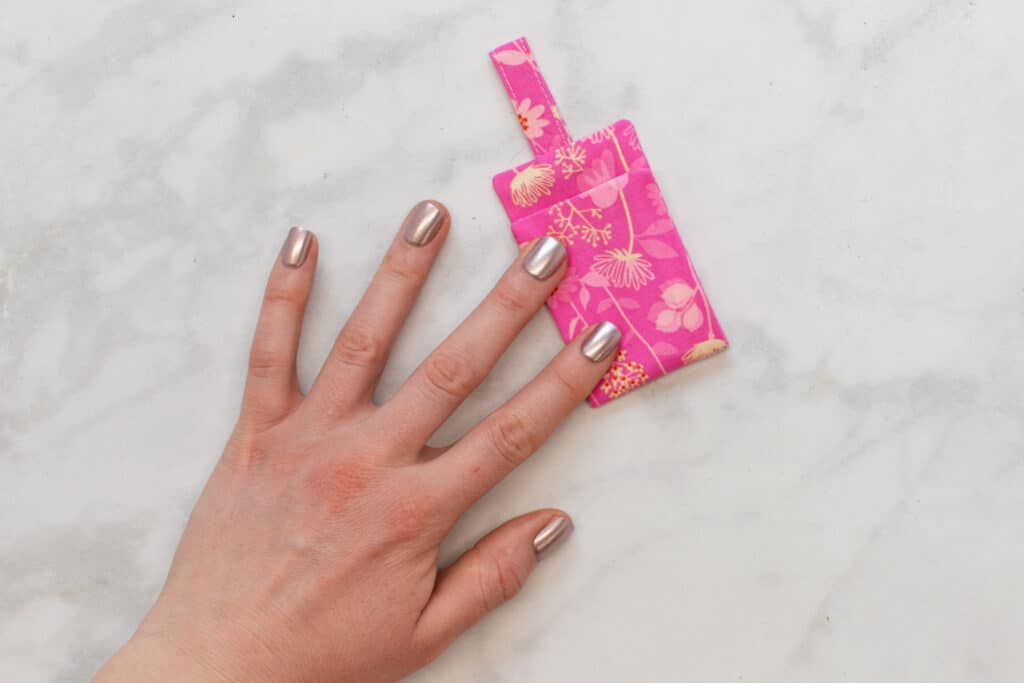
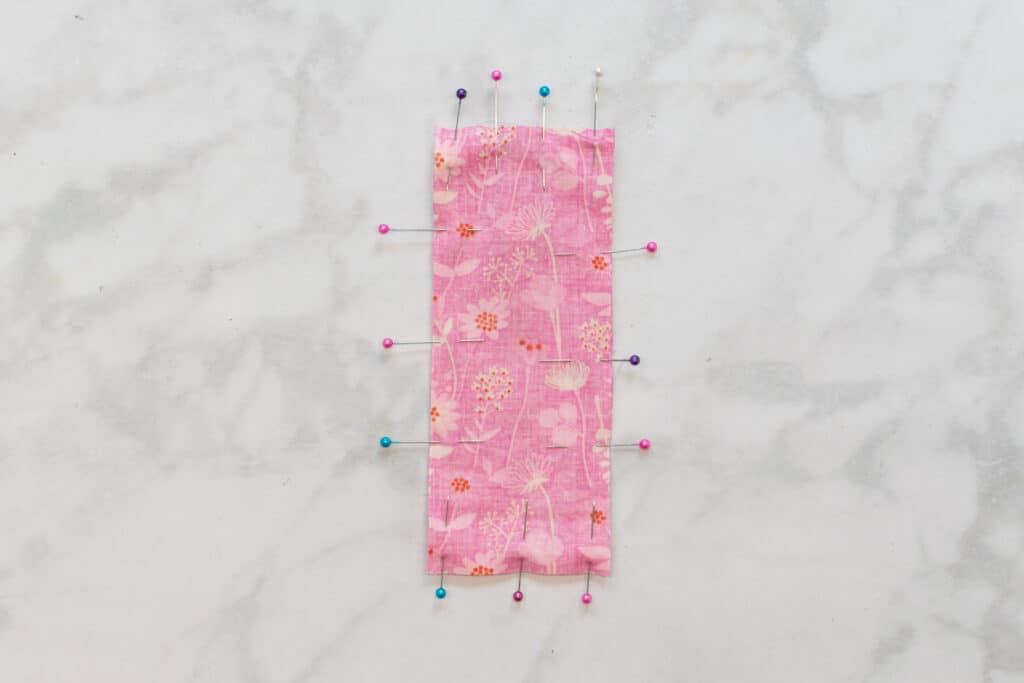
Pin the folded sides in place.

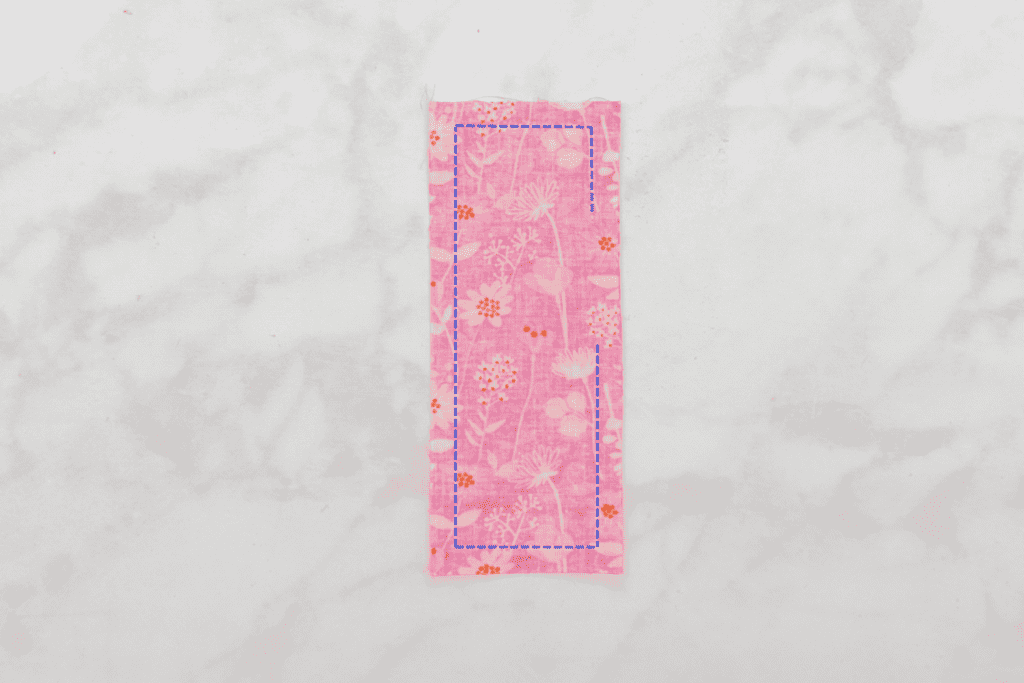
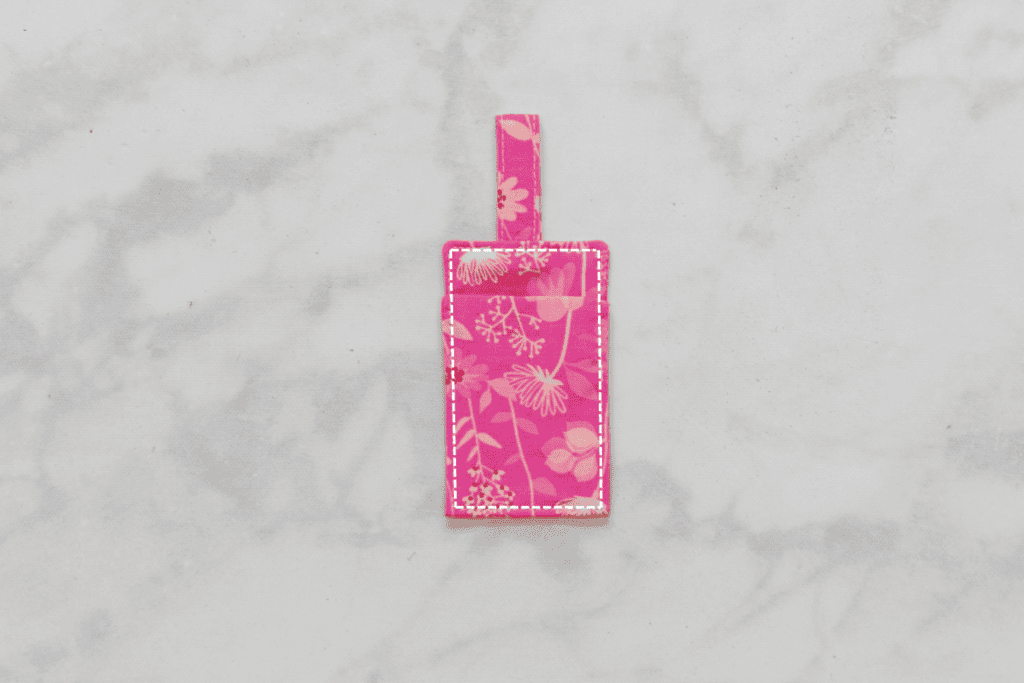
Then, topstitch around all 4 edges of the chapstick holder, sewing with a 1/8" seam allowance.
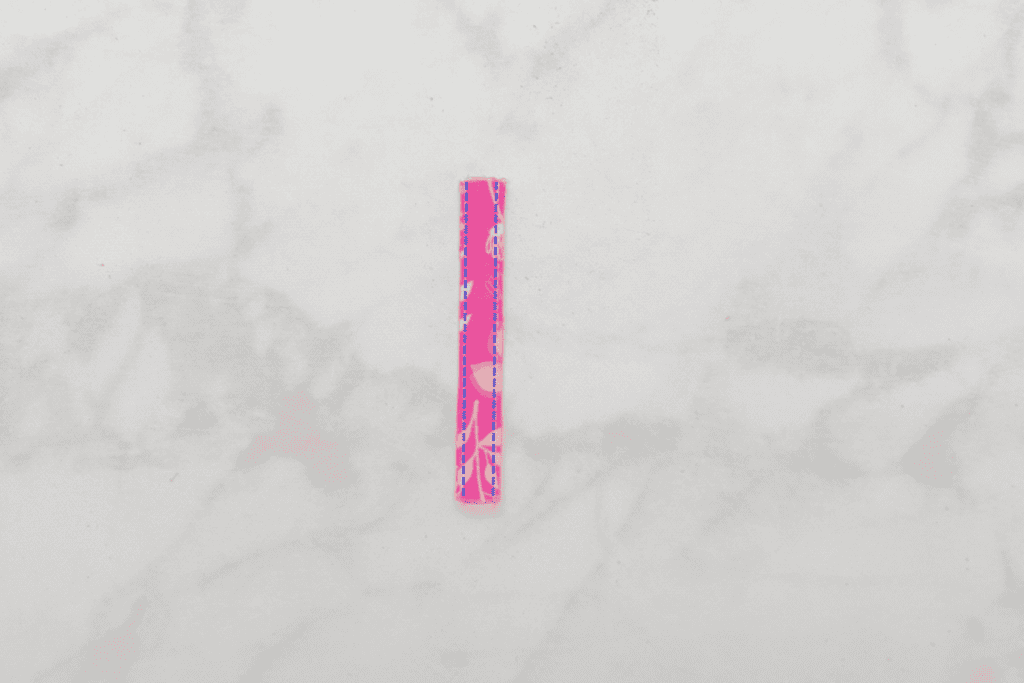
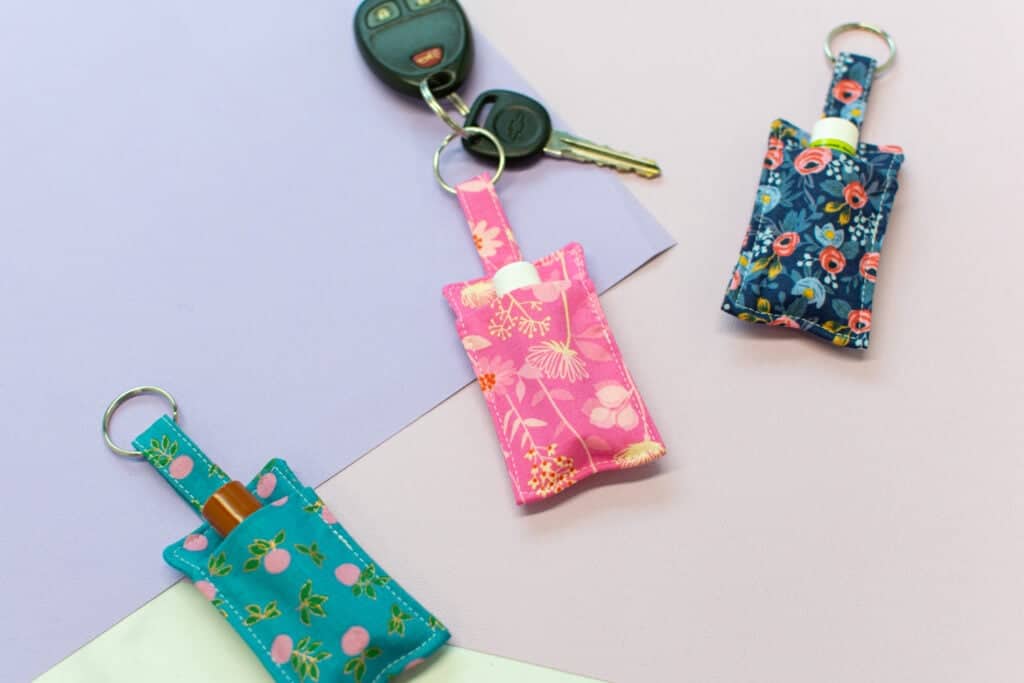
Finally, finish everything off by adding a keychain ring to the ring tab and popping a tube of chapstick into the pocket.

Your adorable keychain chapstick holder is finished! Congrats!
Want to save this project for later? Click here to save it to Pinterest!
I there a shortened print version for the instructions? It was 388 pages!
I tried to do the same but just copied and pasted into a word document to print on less pages. Hope that helps!
Looking for good keonhacai? FB88 keeps showing up, Anyone used FB88 for keonhacai? What's the lowdown? keonhacai fb88 Let me know what you all think!
Alright, fellow ssgamer fans, listen up! This site is legit. Seriously, if you're looking for a good time, give it a shot. You might just find your new favorite spot. Go get your game on right here ssgamer!
W88.ngo looks legit! I've heard good things, might give it a shot. Seems like a solid option for betting. Check it out folks! w88.ngo
Naprawdę podoba mi się twój szablon wp, skąd go pobrałeś? Z góry dziękuję!