Learn How To Sew A Nine Patch Quilt Block With This Step-By-Step Tutorial. Make It Fast And Easy With Strip Piecing.
Today I'm sharing my favorite method to sew one of the most versatile blocks in quilting - the nine patch block. In this tutorial, you'll learn how to utilize strip piecing to make sewing a nine patch quilt block quick and easy!
Plus, I've put together a downloadable cheat sheet that does all the math for you! With the cheat sheet, you can see at a glance what width to cut your strips for your desired finished block size. In addition, the cheat sheet lays out exactly what length to cut your strips to make your desired number of blocks.
Table of Contents
What is a Nine Patch Quilt Block?
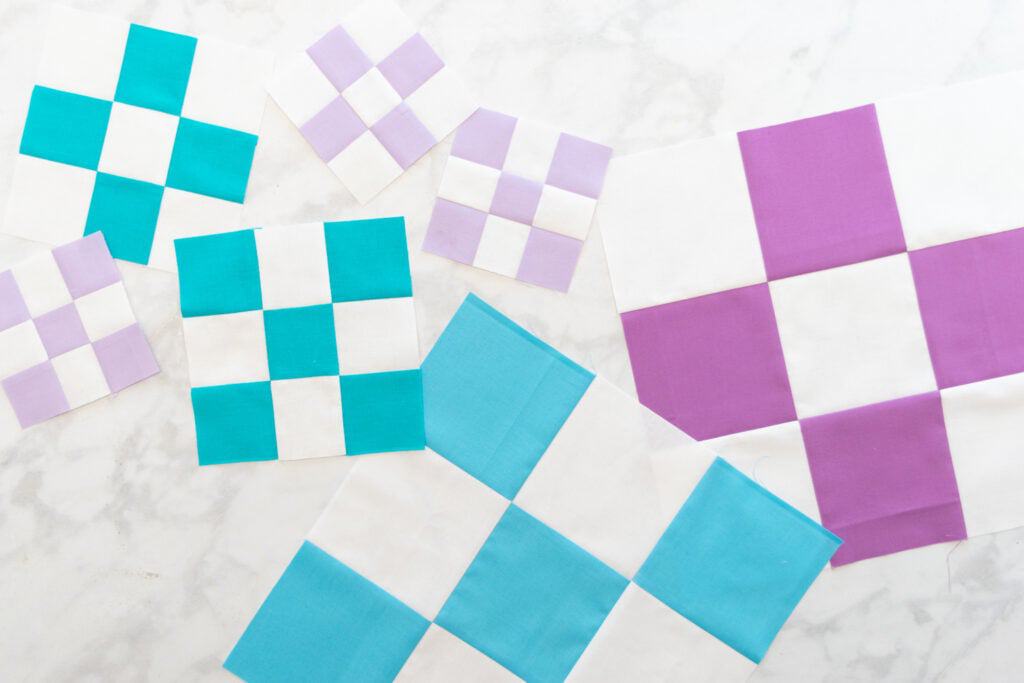
The nine patch block is one of the most commonly used and versatile blocks in quilting. It is composed of nine equally-sized squares, cut from two or more colors and arranged into a square block.
The most common type of nine patch block is composed of two different colors, usually a light and a dark color, that are arranged in a checkerboard pattern. The colors in a checkerboard nine patch can be arranged in two ways: either "positive" or "negative."

Strip piecing can be used to create either positive or negative nine patch quilt blocks. Using strip piecing makes the process much faster and easier - plus, it often produces more accurate results.
What is Strip Piecing?
In strip piecing, narrow strips are cut from each of your fabrics. These strips are usually cut across the entire width of the fabric.

The strips of different colors of fabric are then stitched together lengthwise. This forms long pieces of fabric composed of several different strips sewn side-by-side.

Next, the long pieces of fabric are subcut widthwise, cutting perpendicular to the long strips. This creates shorter strips of fabric composed of several different colors of squares or rectangles.
Finally, the shorter, multi-colored strips are stitched together to form blocks.
Depending on the order the strips are stitched together, how they are cut apart, and how the units are then arranged, you can create all sorts of different blocks with strip piecing. A nine patch is one of the easiest blocks to create with strip piecing - and I'll show you exactly how in the tutorial below!
DOWNLOAD THE FREE MATH CHEAT SHEET HERE

Supplies to Sew a Nine Patch Quilt Block
Here are the supplies you'll need to sew a nine patch quilt block with strip piecing.
- Three Strips Each of Two Different Fabrics
- Rotary Cutter
- Rotary Cutting Mat
- Acrylic Quilting Ruler
- Thread
- Sewing Pins
- Iron
- Ironing Board
- Sewing Machine Needle
- Sewing Machine

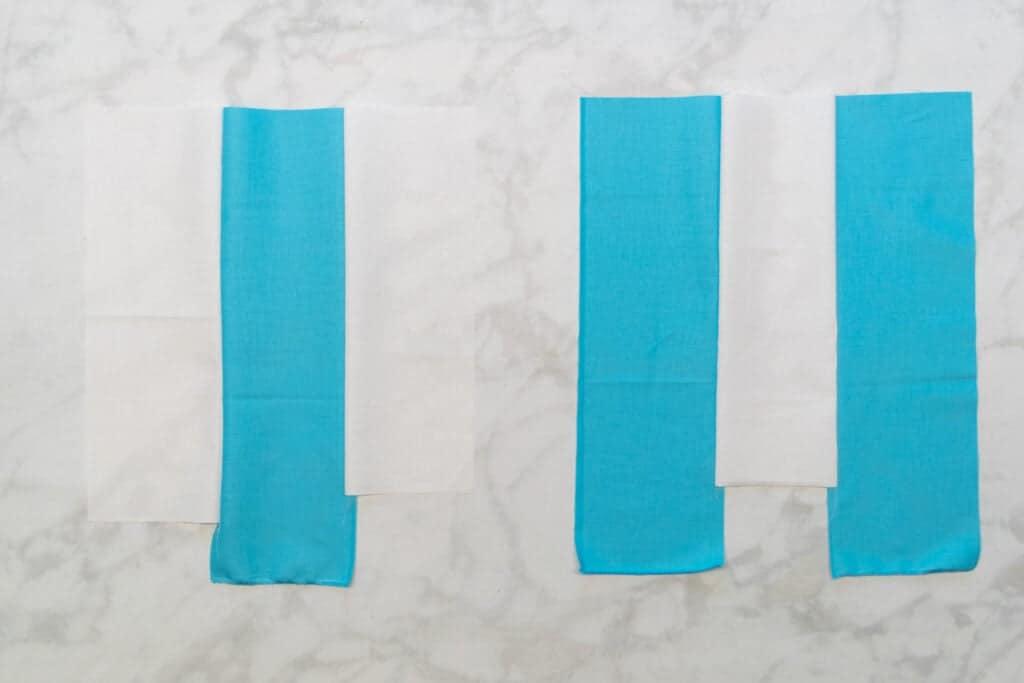
Step One: Cut the Strips
First, you'll need to cut the strips for your nine patch block. Cut 3 strips from each of two different fabrics, preferably a light-colored fabric and a dark-colored fabric.
Refer to the Math Cheat Sheet Printable (located above the supply list) for exact measurements.

The formula for calculating the width to cut your strips is this:
Width of Strips = (Desired Finished Block Size + 1.5) / 3

Typically, you would cut these strips across the entire width of the fabric (WOF). How many blocks you can make from 6 WOF strips depends on the size of the finished block.
To make one 12" finished block, make sure to cut your strips at least 10 inches long.
For a cheat sheet showing exactly how long to cut your strips to make specific numbers of blocks, make sure to download the free cheat sheet above.
Step Two: Sew the Strips
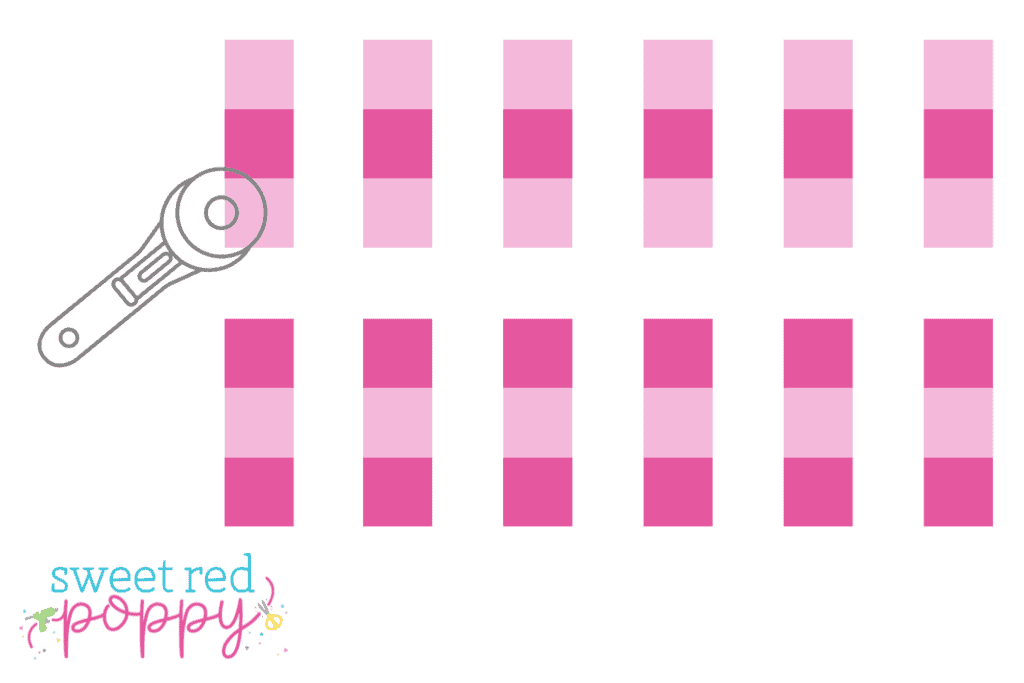
Once you have your 6 strips cut - 3 of each color - it's time to sew them together!
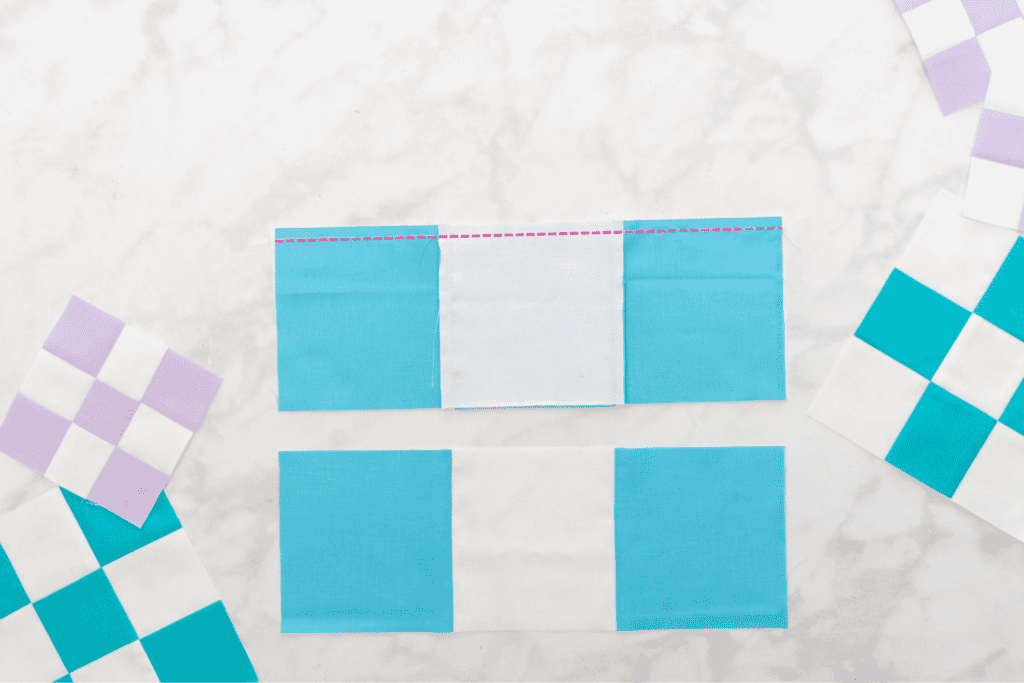
Arrange your strips into 2 sets of 3. In one set, place a dark fabric strip at the center, with 2 light-colored strips on either side. In the second set, reverse this arrangement, placing a light-colored strip at the center and 2 darker fabrics on either side.

Sew the 3 strips in each set together lengthwise with 1/4" seam allowances.
*PRO TIP: When sewing my strips together, I prefer not to use pins. I find it easier to just line up the ends of the strips before starting them through the machine. Then, I guide them through the machine, lining them up as I go.
Press the 2 strip sets flat, pressing the seam allowances towards the darker fabric.
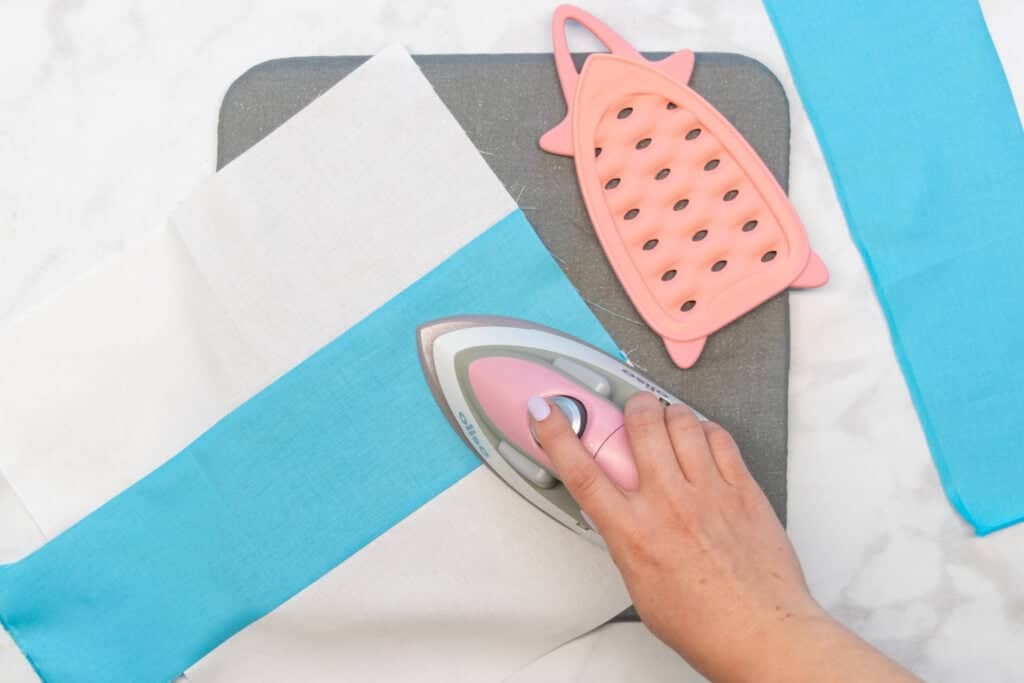
This means that on one set of strips, the seam allowances will be pressed towards the center. On the second set, they'll be pressed towards the outside edges.
This will ensure that when you assemble the finished blocks, the seam allowances will nest together perfectly!
Step Three: Subcut the Strips
Next, it's time to subcut each set of strips to form the units for your finished block.
Start by laying out your first strip set on your cutting mat. Straighten one of the short ends with a quilting ruler.
To do this, line up the edge of the ruler about 1/4" in from the end of the fabric. Use the straight bottom and top edges to make sure the ruler is straight up and down. Next, use your rotary cutter to trim off the very end of the fabric and straighten it up.
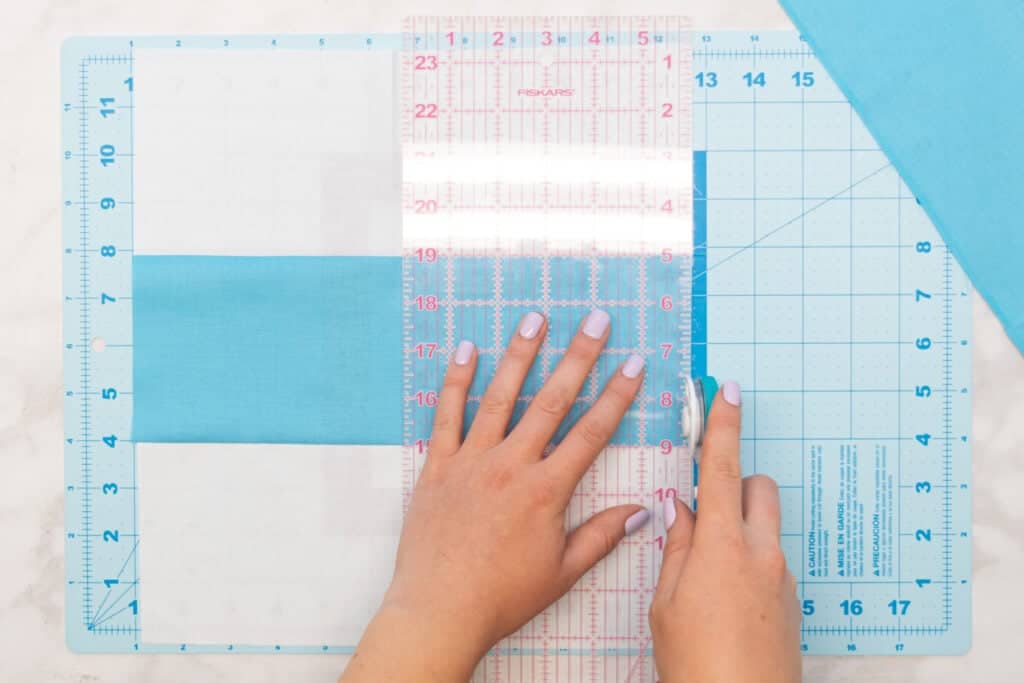
Then, move the ruler in, lining up the appropriate line on the ruler with the straight edge of the fabric strips. You should cut these strips to the same width that you cut your 6 strips at the beginning.

Cut along the edge of the ruler, cutting your first set of squares.
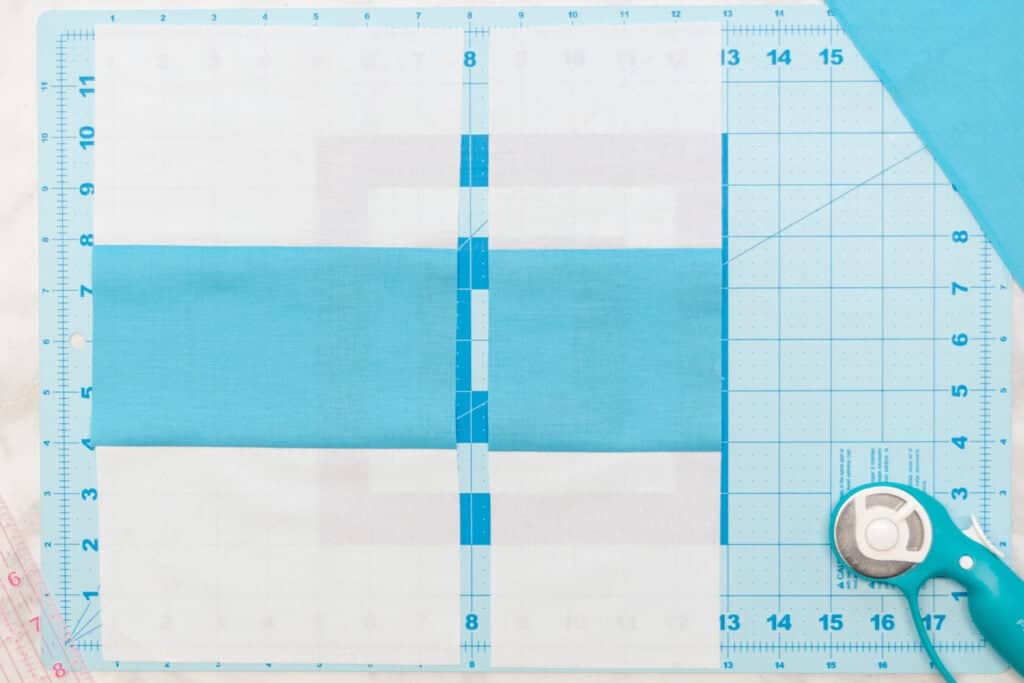
Repeat this process to subcut the entire piece of fabric.

Repeat to subcut the second strip of fabric.

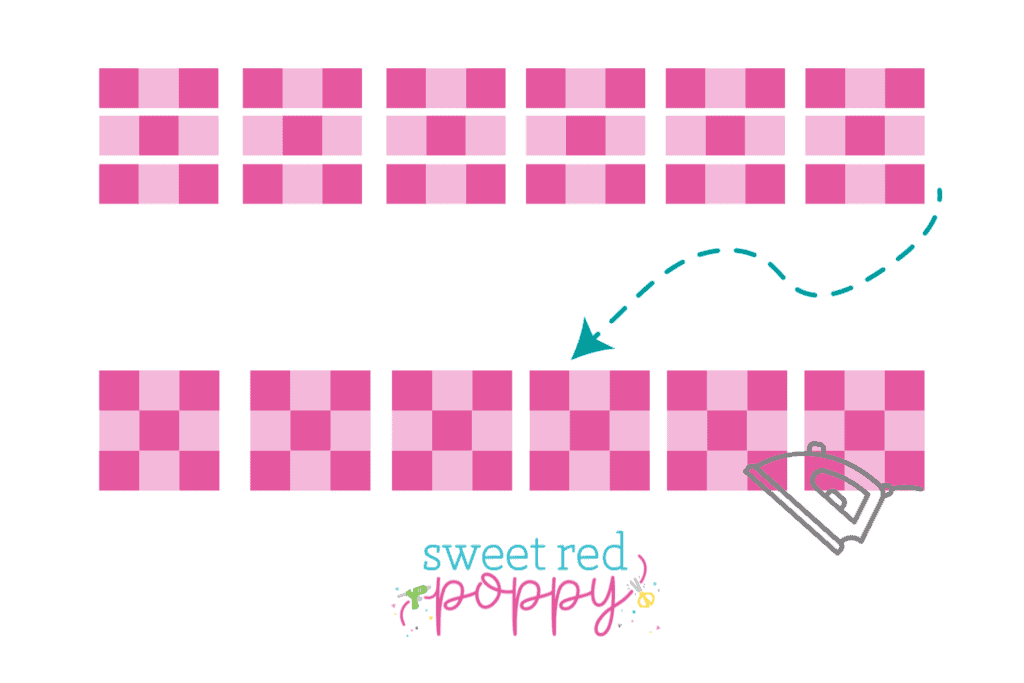
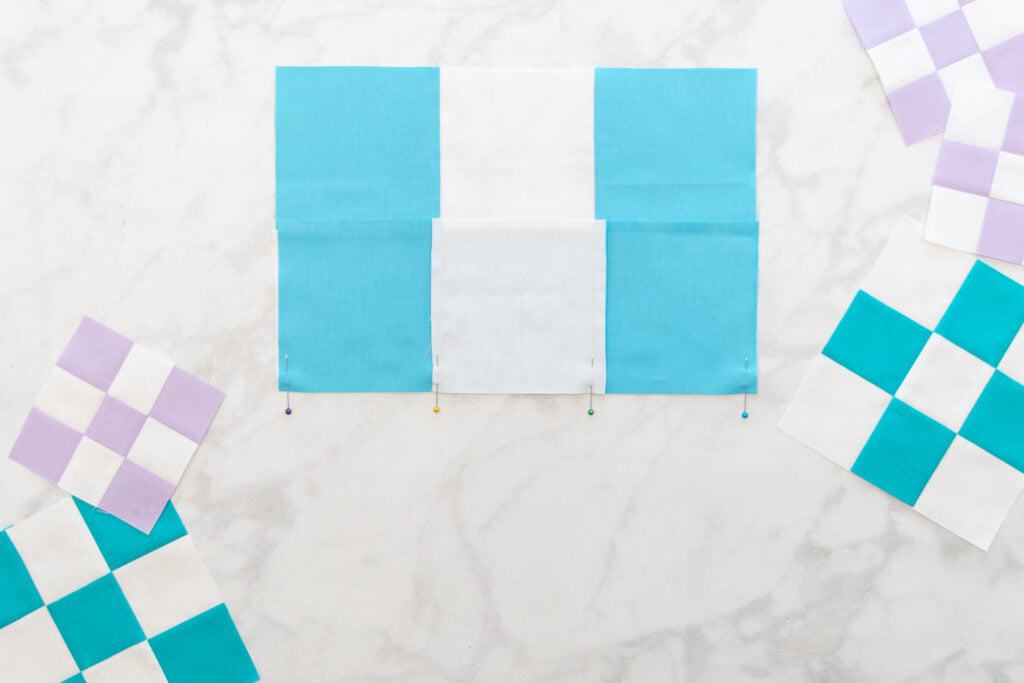
Step Four: Assembling the Nine Patch Quilt Blocks
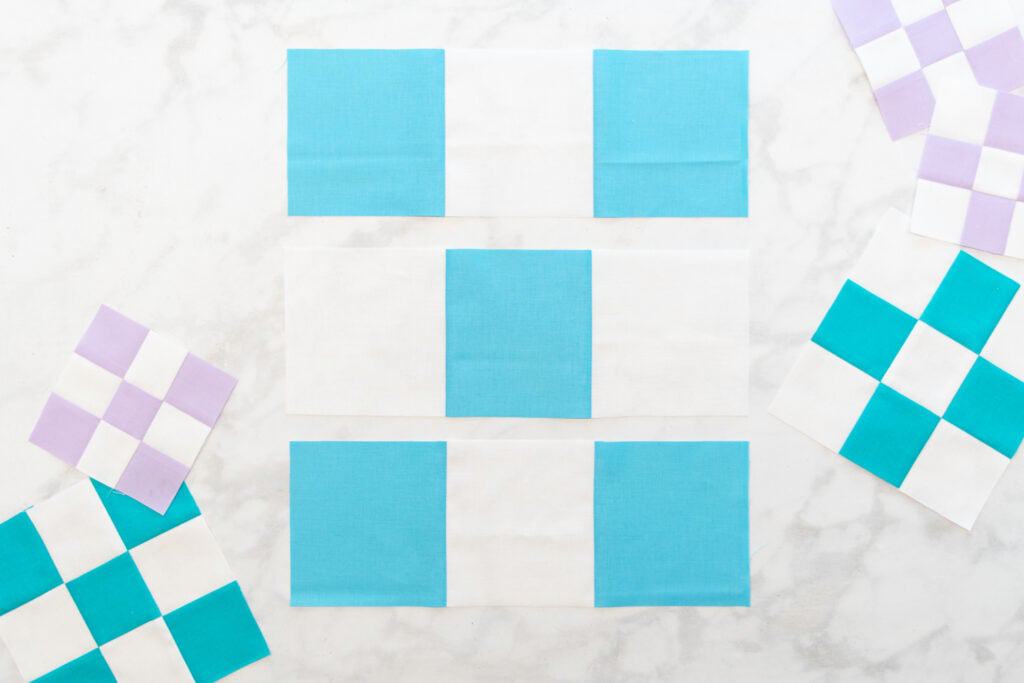
You should now have several square sets - each with 3 squares each.

Arrange the square sets into nine patch blocks - ordering them in either the negative or positive arrangement.
Flip the upper row of squares down over the middle row. Align them along the upper edge with right sides together.

The seam allowances should nest together nicely. I like to place a pin at each seam allowance to ensure they stay lined up.

Stitch the upper row to the middle row with a 1/4" seam allowance. This is a great time to utilize chain piecing to speed things up if you've got multiple blocks to put together.
Press the seam allowances either up or down. Then, replace the stitched units to the block layout.

Next, flip the lower row up and over the middle row. Pin the bottom and middle rows together along the bottom edge.
Stitch the bottom and middle rows together with a 1/4" seam allowance. Again, if you have lots of blocks to put together, chain piecing can speed up this process.
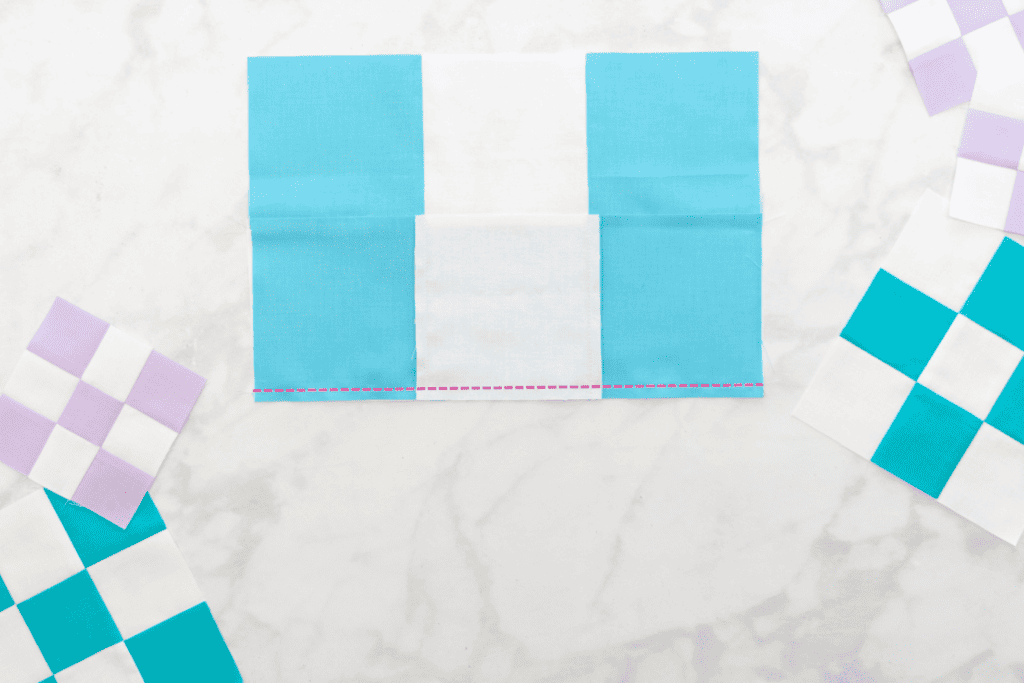
Once again, press the seam allowances either up or down.

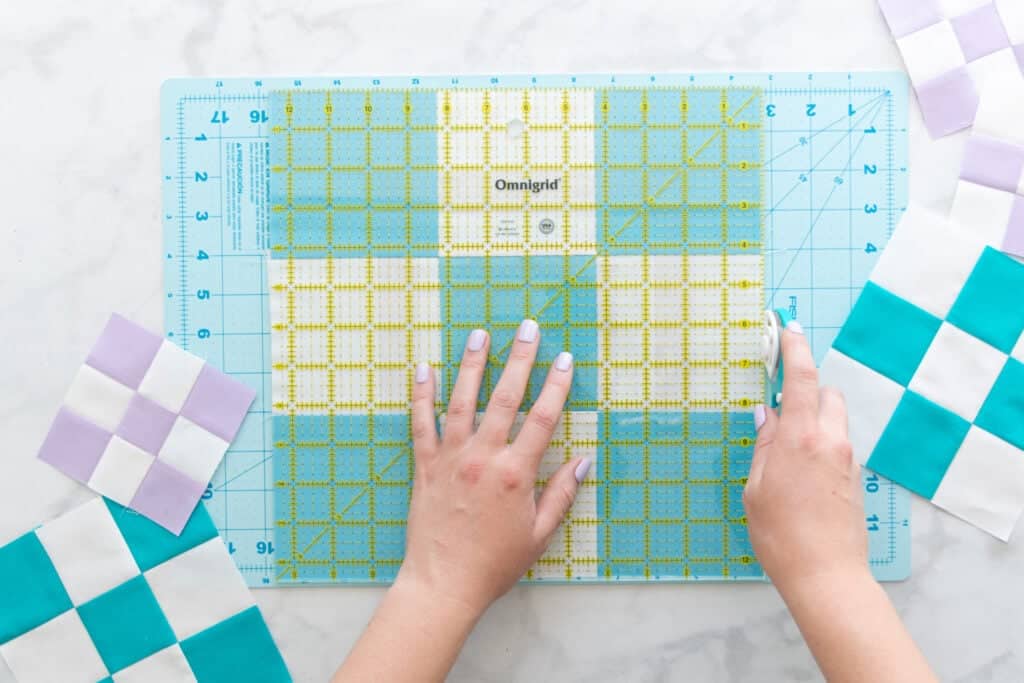
Step Five: Square up the Blocks
You should now have all of your nine patch blocks stitched up and looking great!
The last step is to square them up. No matter how accurate my stitching is, my blocks usually still require a bit of squaring up!
To square up a block, first place it on your cutting mat. Next, confirm what size your block should be squared to - it should be squared to 1/2" larger than the intended finished block size. This is to account for a 1/4" seam allowance on each side of the square.

If you have a square ruler that measures the exact size you need to square your block to, then squaring up is easy! Simply center the ruler on the block and trim the edges down to match the edge of the ruler.
If you don't have a square ruler that measures exactly the size you need to square your block to, then instead use a larger square ruler.
First, line up the corner of the ruler in the upper right corner of the block. If some sections of the block are a bit short, that's OK - just make sure they aren't more than 1/8" or so inside the edge of the ruler.
Trim the right-hand and upper edges of the block straight, cutting along the edges of the ruler.
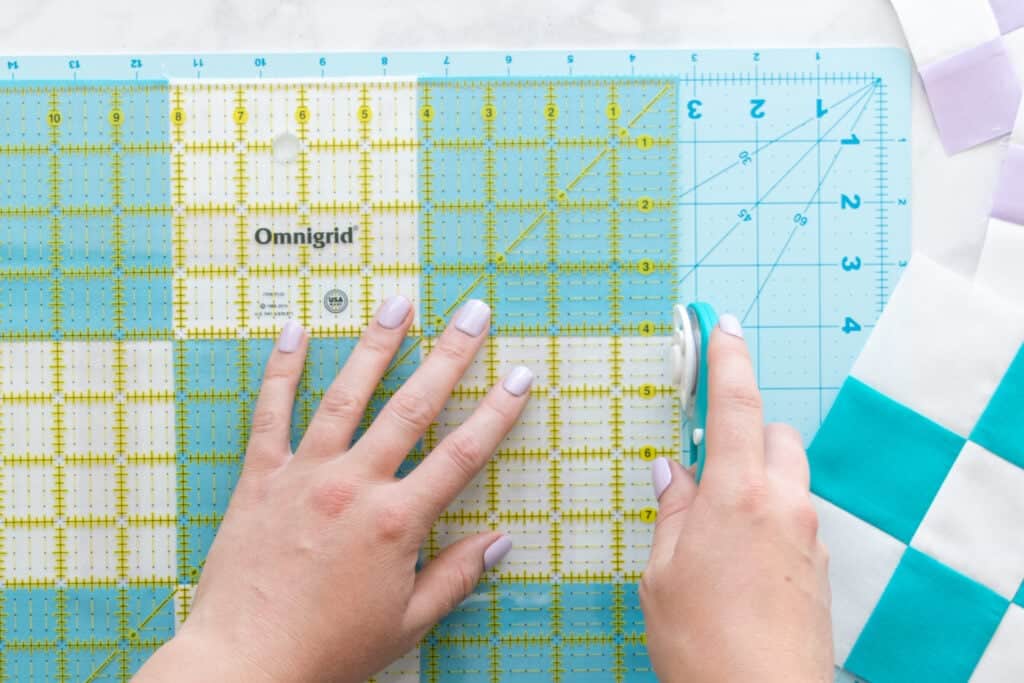
Repeat this process with the ruler in the lower left corner, trimming the left-hand and lower edges.

Once the edges have been straightened, use them to work from as you trim down the edges further to bring the block to the intended size.
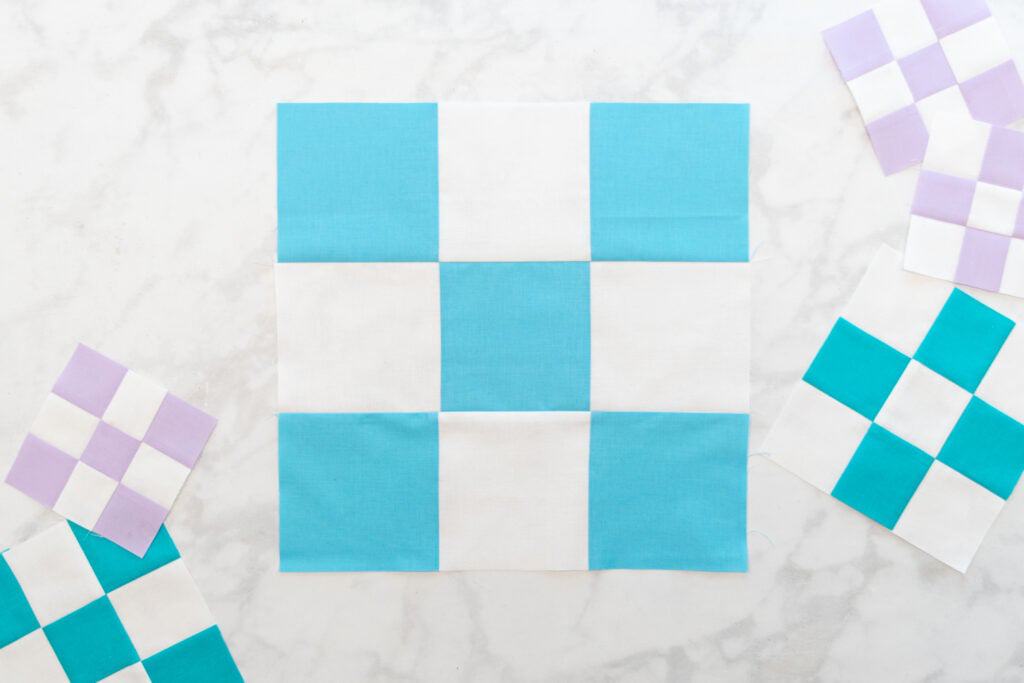
Your nine patch blocks are finished! These blocks are a wonderful place to start as a beginner quilter. You can even stitch a bunch of them together to create a stunning quilt top!

Leave a Reply