Melt your aches and pains away with my simple DIY heating pad sewing pattern - this microwaveable heating pad is quick and easy to sew!
A heating pad is the perfect way to ease cramps, back pain, muscle soreness, or arthritic pain - or just to relax on a cold winter evening! I love my heating pad, it's so relaxing and feels wonderful even when I'm not experiencing any soreness or pain.
Today I'm bringing you my soft and cozy microwaveable heating pad sewing pattern. With this pattern, you'll be cozying up with a toasty heating pad to ease away your pain and soreness in no time! Plus, with my step-by-step tutorial, it comes together easily, even for a beginner.
Table of Contents
What is a Heating Pad?
A heating pad is a fabric pad that is filled with some type of heat-retentive material. The pad can be heated up, either in the microwave or, in the case of an electric heating pad, by turning it on.
You can then place the warm heating pad on your body to gently heat that part of your body and ease any aches and pains. It's a wonderful way to help make back pain, neck pain, abdominal cramps, or arthritic pain more manageable.
Microwaveable Heating Pad vs Electric Heating Pad
I love my microwaveable heating pads! While electric heating pads are fancier (and more expensive), I find that they don't actually work better than plain old microwaveable heating pads.
Here's why I love using microwaveable heating pads rather than their electric counterparts:
- They're more convenient. You're not tethered to a cord with a microwaveable pad, which means you can move around and use your heating pad anywhere!
- They get hotter. I find that microwaveable heating pads tend to start out much warmer than an electric pad, then they slowly cool off. I find this actually results in better pain relief because the more intense heat at the beginning helps with deeper muscle aches.
- You can make them yourself! A microwaveable heating pad is simple to make yourself - which means it's custom-made just for you. Plus, the materials needed are inexpensive, so you'll save money over buying one.
How to Use a Microwaveable Heating Pad
Using a microwaveable heating pad is easy!
First, take the heating pad out of the minky cover. Then, place it on a clean dinner plate and put the plate into the microwave. It's best not to place the pad directly onto the microwave turntable because if it gets any grease or food residue on it, it may cause the fabric to burn.
Now it's time to figure out the optimal heating time for your heating pad. Every microwave is a little bit different, so you might need to experiment a bit the first few times you heat your pad. I find that 1 minute and 30 seconds is usually a good starting place.
Set the microwave to 1 minute and 30 seconds, and press "Start".
After the timer goes off, feel the heating pad. It should be quite hot to the touch, but not so hot that it feels like it might burn you. If it isn't quite warm enough, heat it for another 30 seconds.
Repeat this process, heating it 30 seconds at a time, until you're happy with the heat level. Once you've heated it to your liking, write down the total amount of time you heated it for - so that next time you can just set the microwave for that specific time right off the bat.
Finally, place the heating pad into its cover, place it over whatever muscles you want to ease, secure the velcro straps, and you're ready to relax!
What is the Best Filling for a Heating Pad?
Microwaveable heating pads are filled with some kind of heat-retentive material. This is important because you want your pad to retain its heat for as long as possible.
My favorite filling for my handmade heating pads is rice. It heats quickly, stays hot for a good long while, it's inexpensive, and it has a nice rice-y smell when heated. However, if rice isn't for you, there are other options to fill your heating pad.
Here are a few favorites:
- Rice: heats quickly, great heat retention, smells pleasant, comfortable feel, forms to the body well, inexpensive
- Corn (whole feed corn): heats quickly, great heat retention, light corn smell, comfortable feel, forms to the body well, inexpensive
- Wheat: heats quickly, OK heat retention, doesn't have much smell, comfortable feel, forms to the body well, inexpensive
- Dried beans: heats quickly, great heat retention, unpleasant beany smell, comfortable feel, forms to the body well, inexpensive
- Walnut shells (crushed): heats slowly, great heat retention, wonderful nutty smell, chunky feel, washable (won't absorb water like the grains), inexpensive
Choosing Fabric for a Microwaveable Heating Pad
I love the cozy feel of minky fabric against my skin. However, minky is made from polyester, which tends to be heat-sensitive. I wouldn't recommend putting it in the microwave, as it might melt!
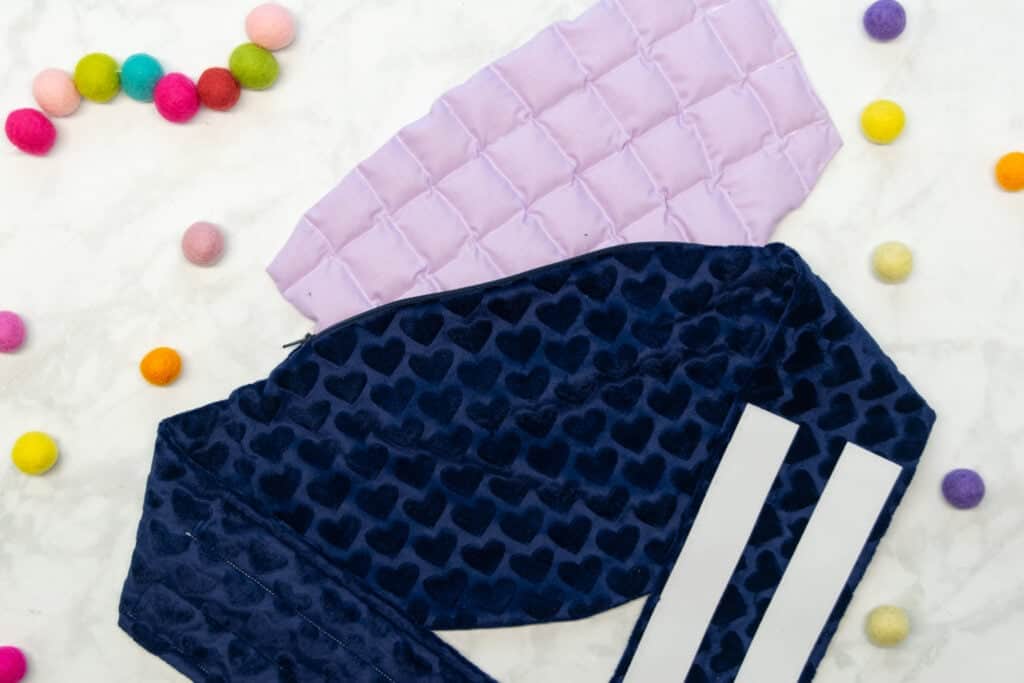
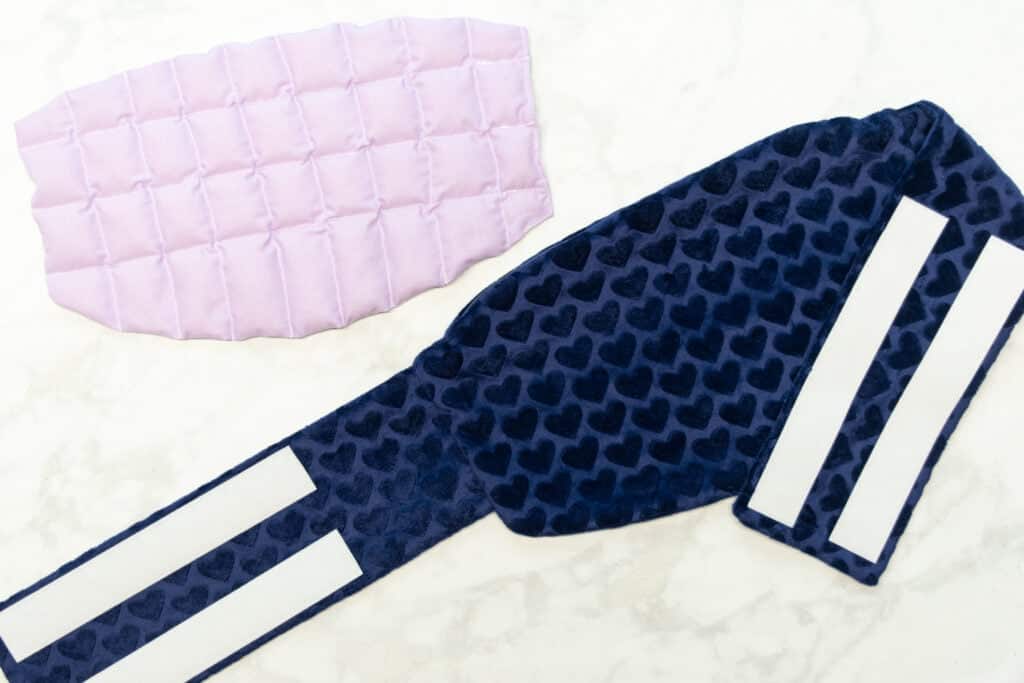
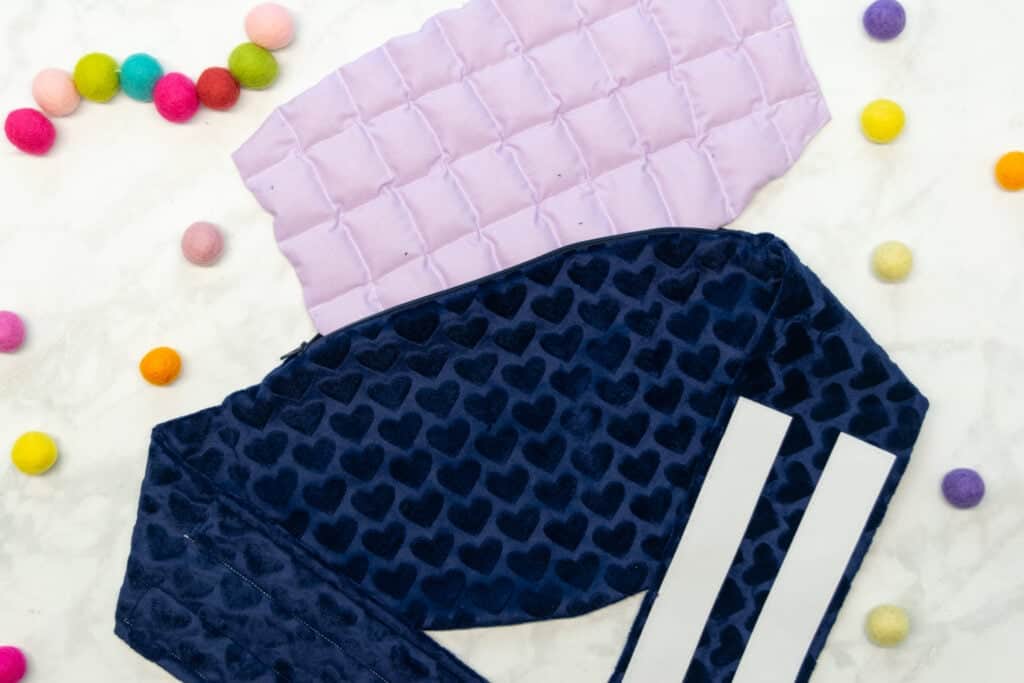
Because of this, I've come to a compromise - my heating pad has a minky fabric cover, but the actual heating pad is made from quilting cotton. The cotton heating pad can be placed in the microwave on its own and heated with no issues.
The cover is also great for another reason - it can be washed in the washing machine with the heating pad removed! Unfortunately, rice will absorb water, so the heating pad itself can't be washed, but the cover makes it possible to keep your heating pad clean for years of use.
When it comes to choosing fabric, it's best to avoid any synthetic fibers when making your heating pad, because they are not likely microwave-safe. I highly recommend using 100% cotton fabric as well as cotton thread for your heating pad.
However, the cover can be made from any cozy fabric your heart desires! I love using cuddle minky for mine.
About the Heating Pad Pattern
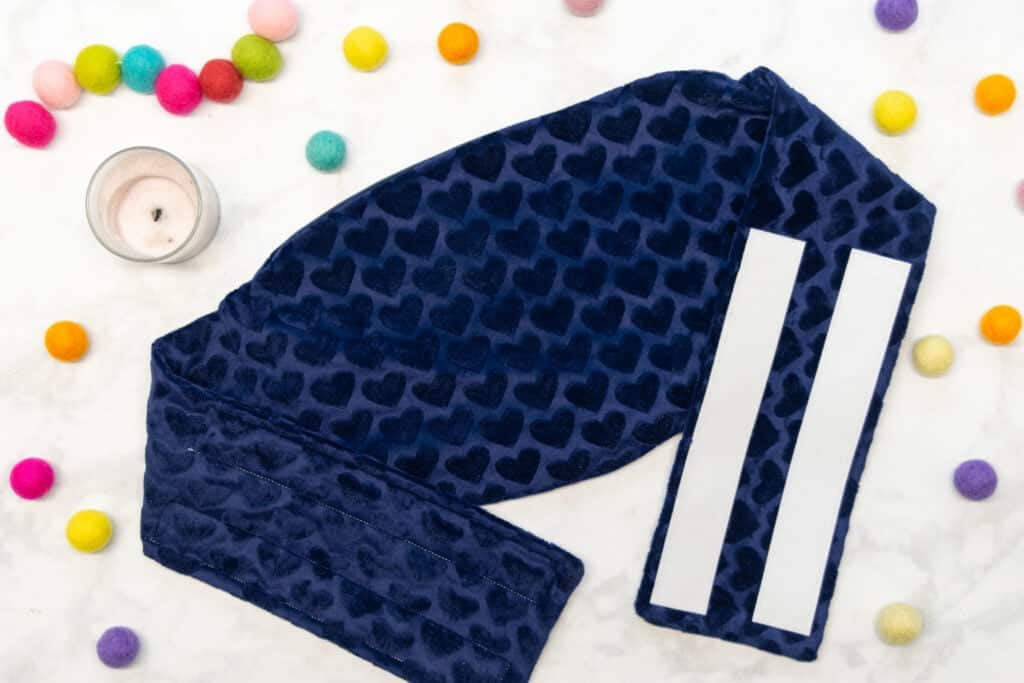
My heating pad pattern makes a relatively large heating pad that is perfect for easing back and abdominal pain. It's approximately 16" wide and 9 inches tall. The curved design fits well into the curves of your back. It can also be draped over your shoulders or neck if you tend to have tight shoulders.
The heating pad itself is made from regular quilting cotton fabric and the rice is quilted into rectangles across the surface of the pad. This crisscross quilting pattern holds the rice in place and helps the heating pad to hold its shape, even when in an upright position.

My pattern also makes a cozy minky cover for the heating pad. This is my favorite feature because not only does it make the heating pad extra cuddly, but it also makes it washable! The rice in the heating pad can't be washed because it will absorb water, but the cover can be machine-washed. This means that you'll be able to use your heating pad over and over for years without worrying about it getting dirty or stinky.
The cover also includes comfortable, wide straps that secure with velcro. The straps make it possible to secure the heating pad to your back or front, so that it won't budge even if you're moving around. I love being able to strap the heating pad to my back while still having the freedom to get things done around the house!
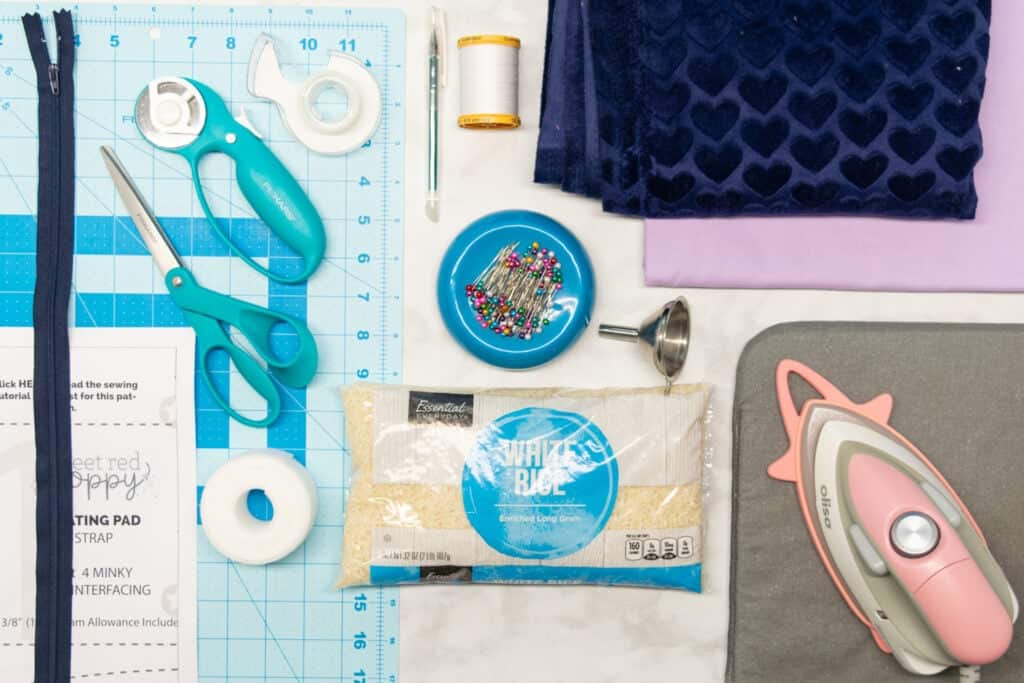
Supplies for a DIY Heating Pad
Here are the supplies you'll need for your heating pad:
- Free Heating Pad Sewing Pattern
- 1/2 Yard Quilting Cotton
- 3/4 Yard Minky Fabric
- 1 1/4 Yard 1.5" Wide Velcro
- 14" (Or Longer) Zipper
- 2lb Bag of Rice
- Funnel
- Scissors
- Rotary Cutter
- Rotary Cutting Mat
- Cotton Thread
- Sewing Pins
- Iron
- Ironing Board
- Sewing Machine
- Sewing Machine Needle
- Zipper Foot
- Printer
- Printing Paper
- Tape
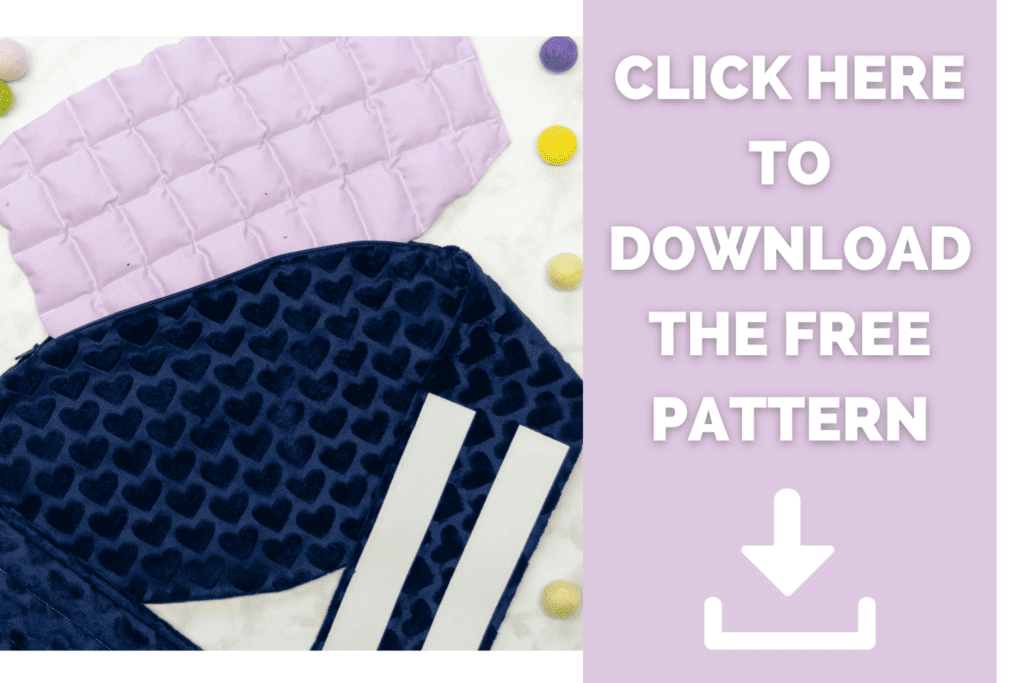
Click Here to Download the FREE Heating Pad Pattern
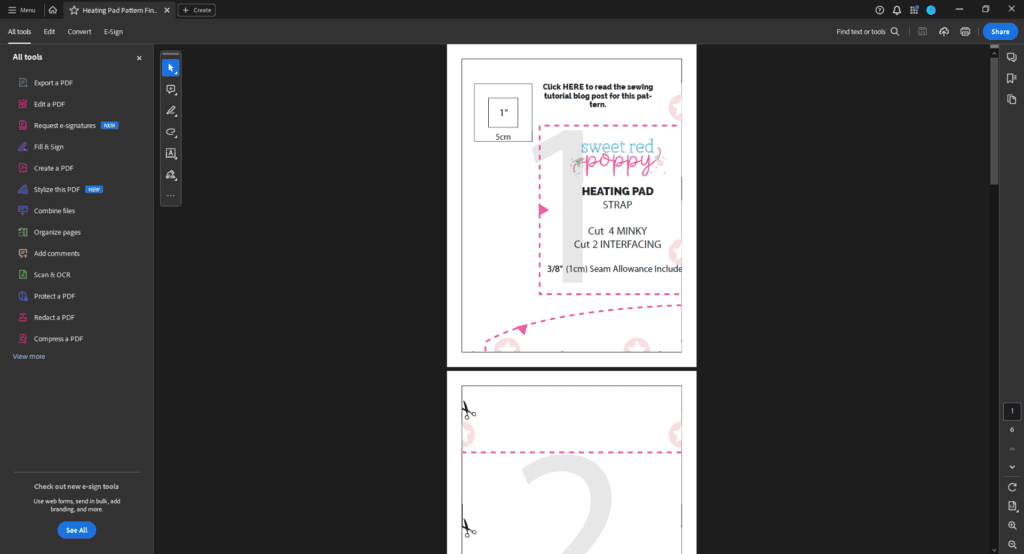
Step One: Download and Assemble the Pattern
Start by downloading the pattern and opening it in your PDF reader. I highly recommend using Adobe Acrobat.
*It's important not to print the pattern directly from your browser. This often results in the pattern printing with incorrect scaling or wonky border lines.
Click on the "Print" icon in your PDF reader. In the "Scaling" section of the print settings box, select "Actual Size" or "Custom: 100%".
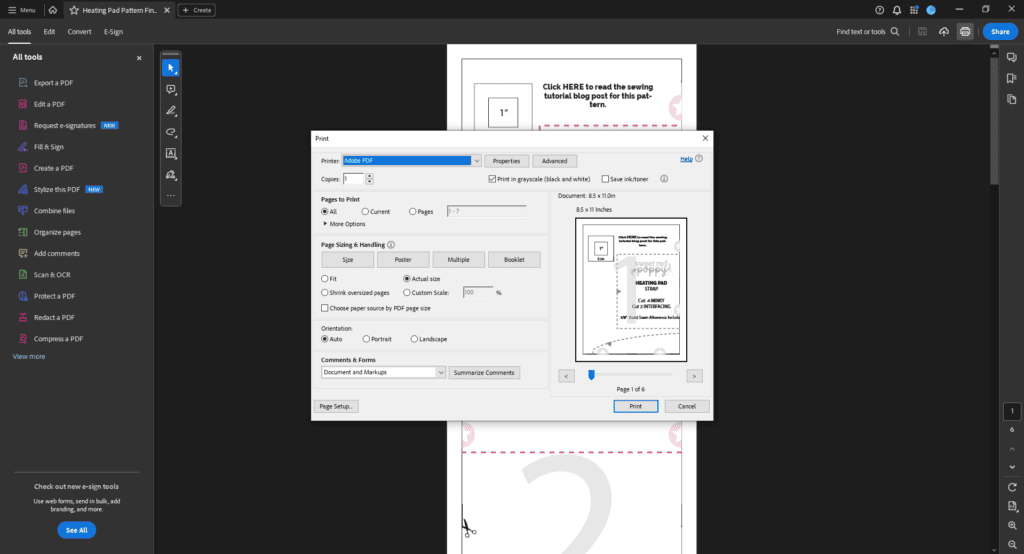
Then, print the first page of the pattern. This page contains a 1" x 1" test square. Measure the test square with a measuring tape or seam gauge.
If the test square measures 1" x 1", go ahead and print the rest of the pattern. However, if it doesn't measure exactly 1" x 1", you'll need to double-check your scaling settings and reprint.
Once the pattern has been printed, it's time to assemble it!
Arrange the pages according to the layout chart below. Each page has a large number printed in the center of it to help you keep the papers in order.
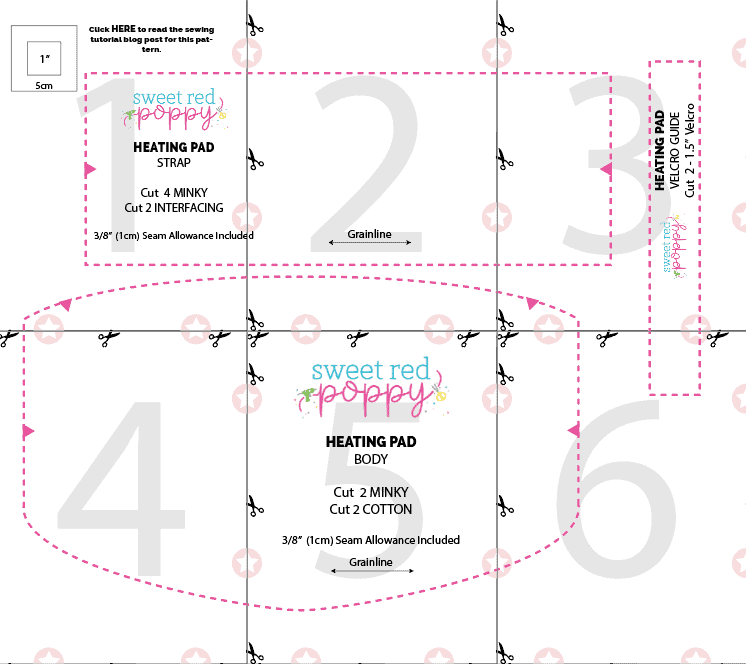
Line up the edges of the papers, aligning the border lines and the lines of the pattern. Tape the pages together.
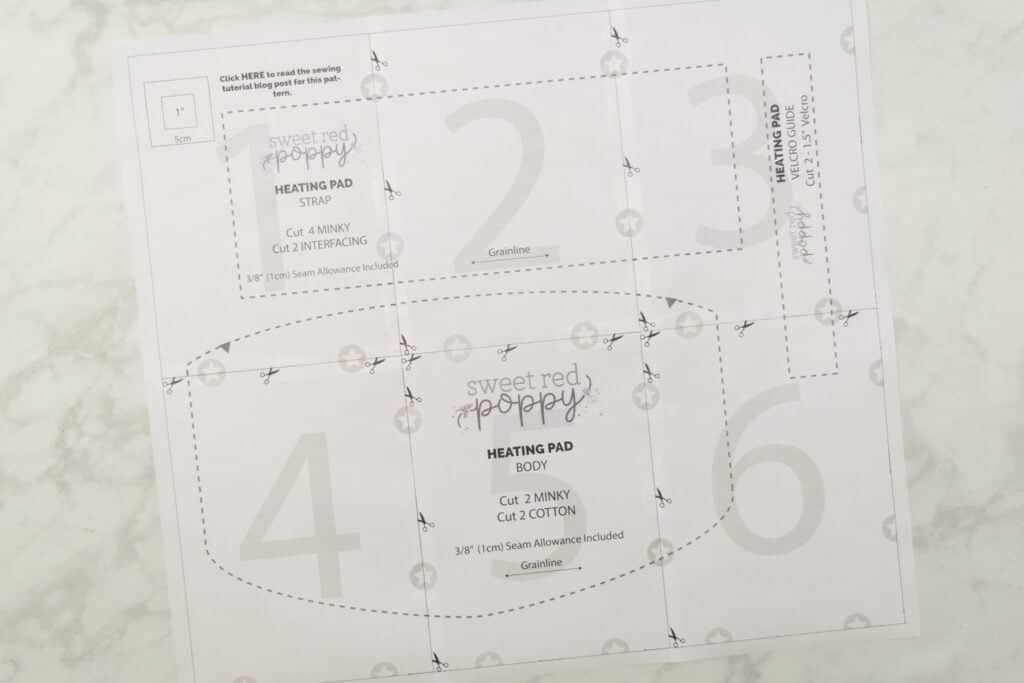
When aligning the pages, you can trim the edges of the papers first, or simply overlap the margins. If you decide to overlap the edges, it can help to hold the papers up to a light while aligning them.
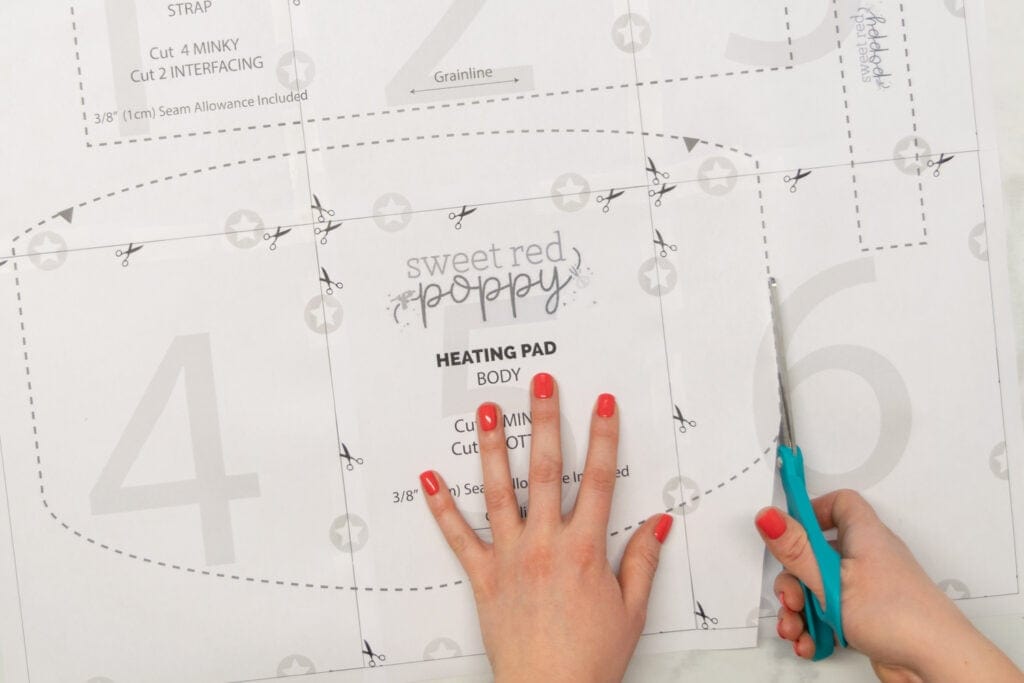
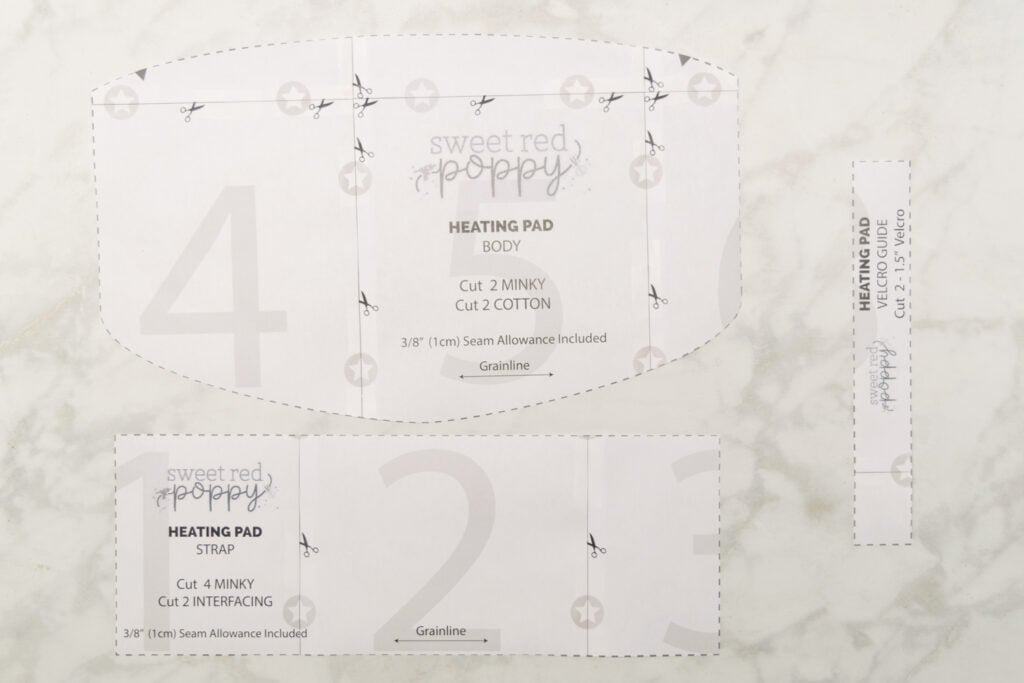
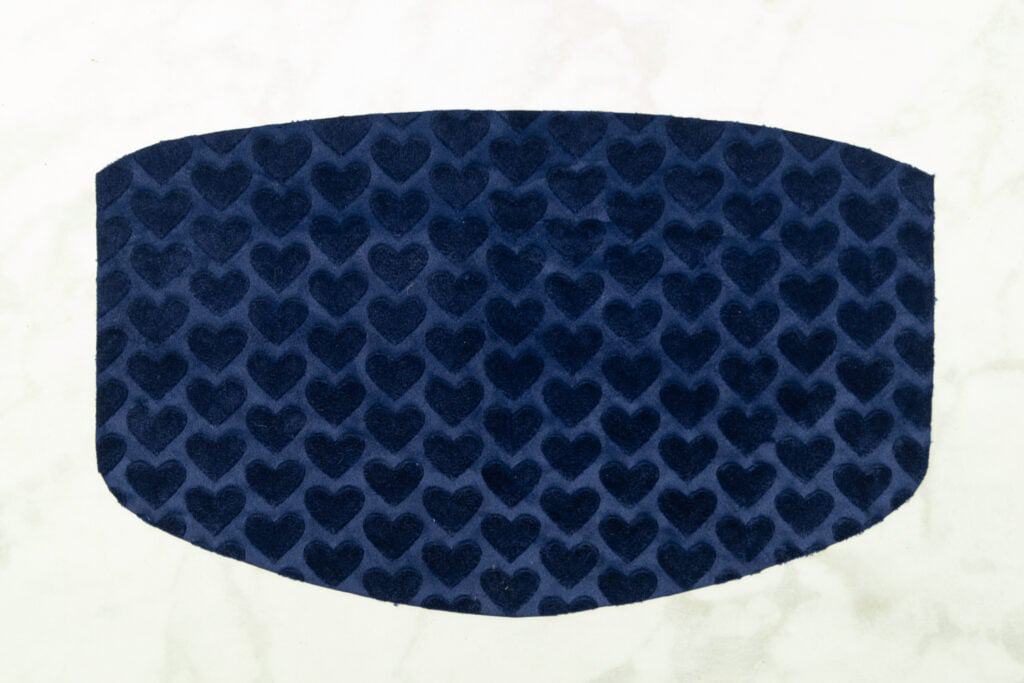
With the pattern assembled, cut out each pattern piece. There should be 3 pattern pieces: Body, Straps, and Velcro Guide.
Step Two: Cut the Materials
Next, it's time to cut the materials for your awesome DIY heating pad.
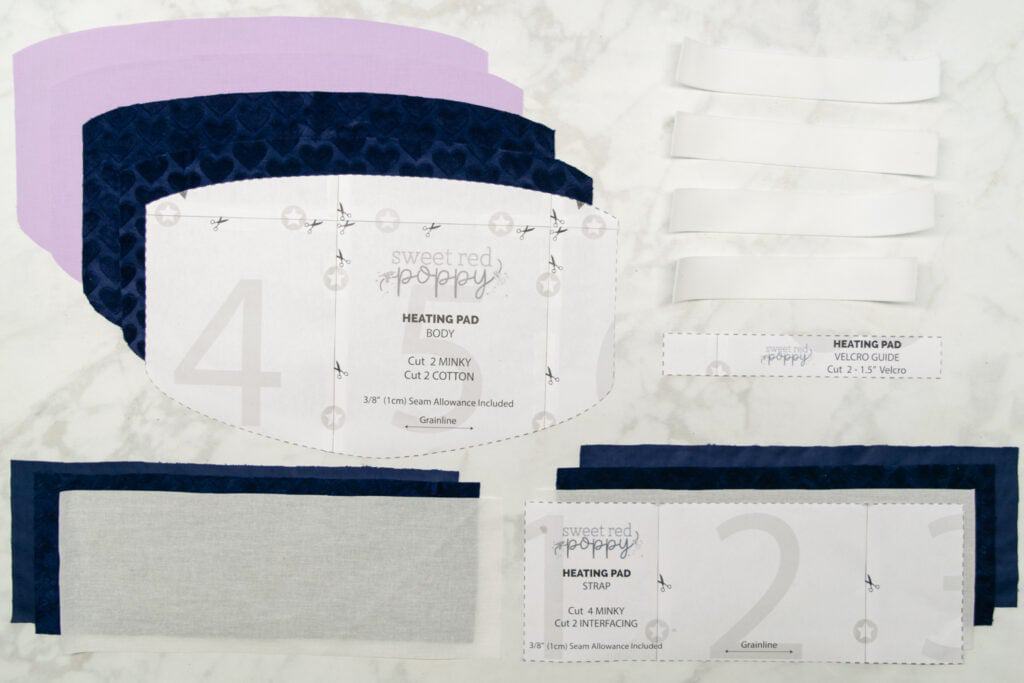
Cut out the following number of pieces from your fabrics, interfacing, and velcro.
Quilting Cotton
- Body: Cut 2
Minky
- Body: Cut 2
- Straps: Cut 4
Interfacing
- Straps: Cut 2
Velcro
- Cut 4 to Length of Velcro Guide
Step Three: Sew the Heating Pad
We're ready to sew! Let's start with the quilting cotton body of the heating pad.
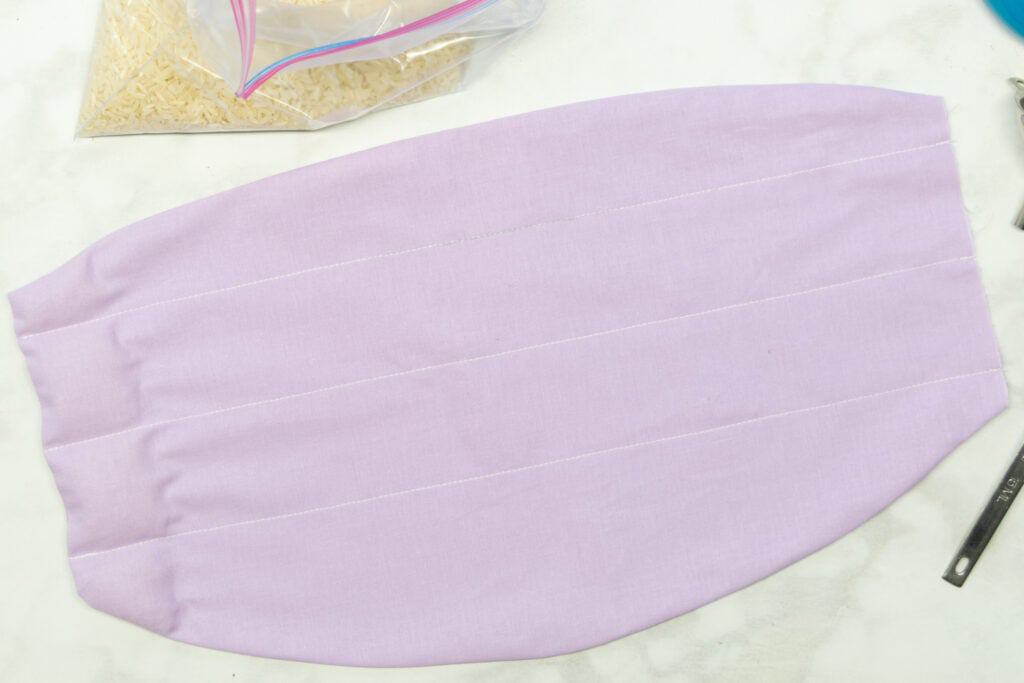
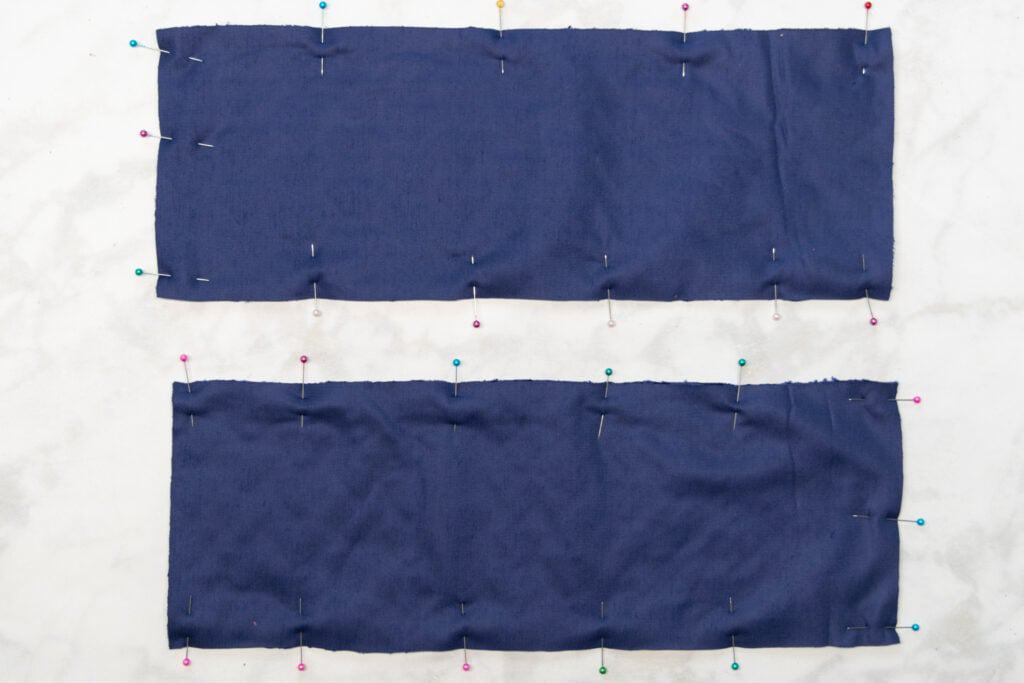
Place the two quilting cotton Body pieces with right sides together. Align the edges, then pin the two long edges and 1 of the short edges together.
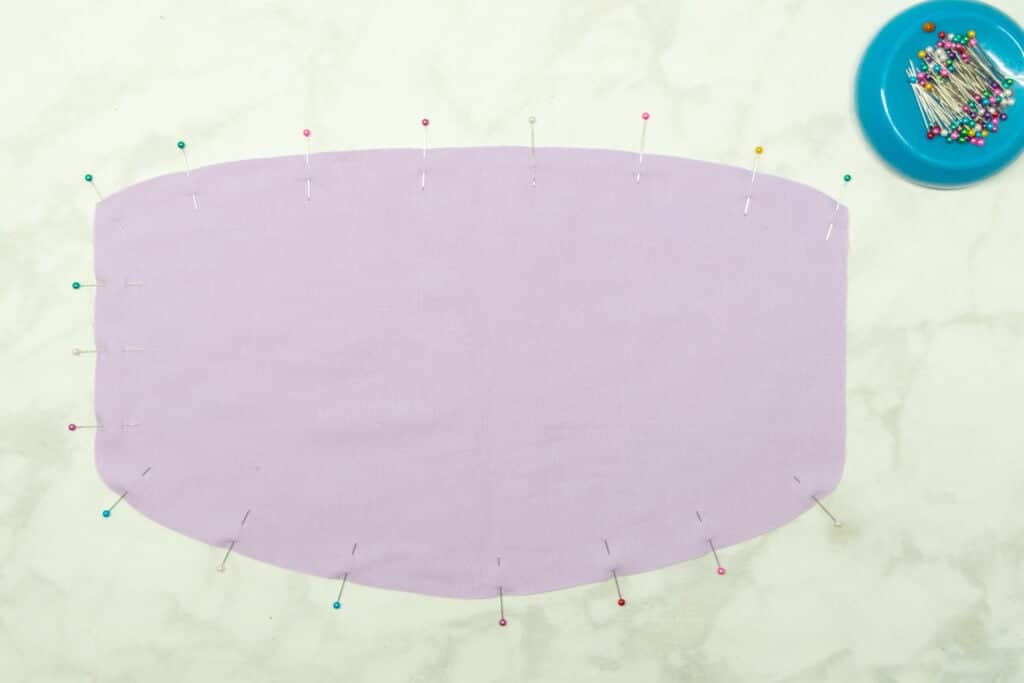
Make sure to leave one short end open to insert the rice through later!
Stitch the Body pieces together around the three pinned edges with a 3/8" seam allowance. Make sure to backstitch at the beginning and end of your stitching!
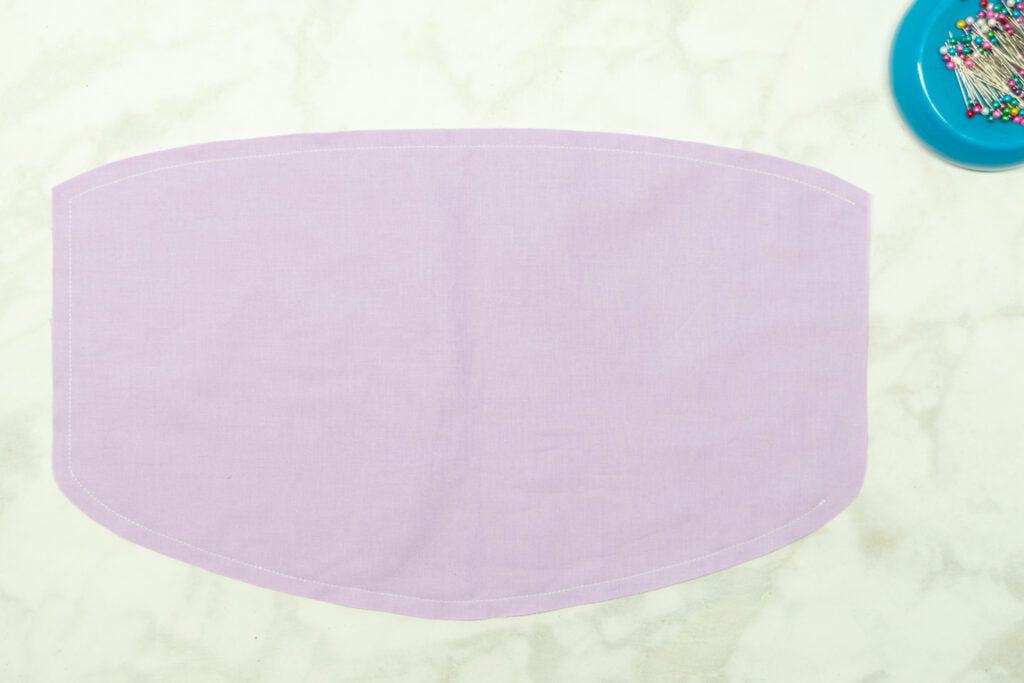
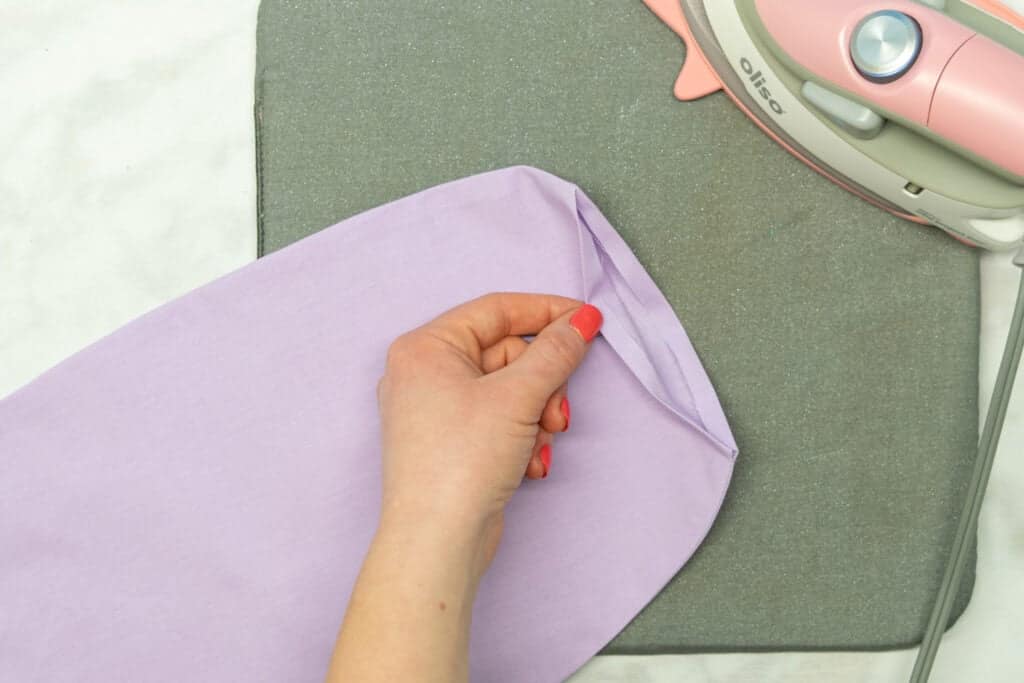
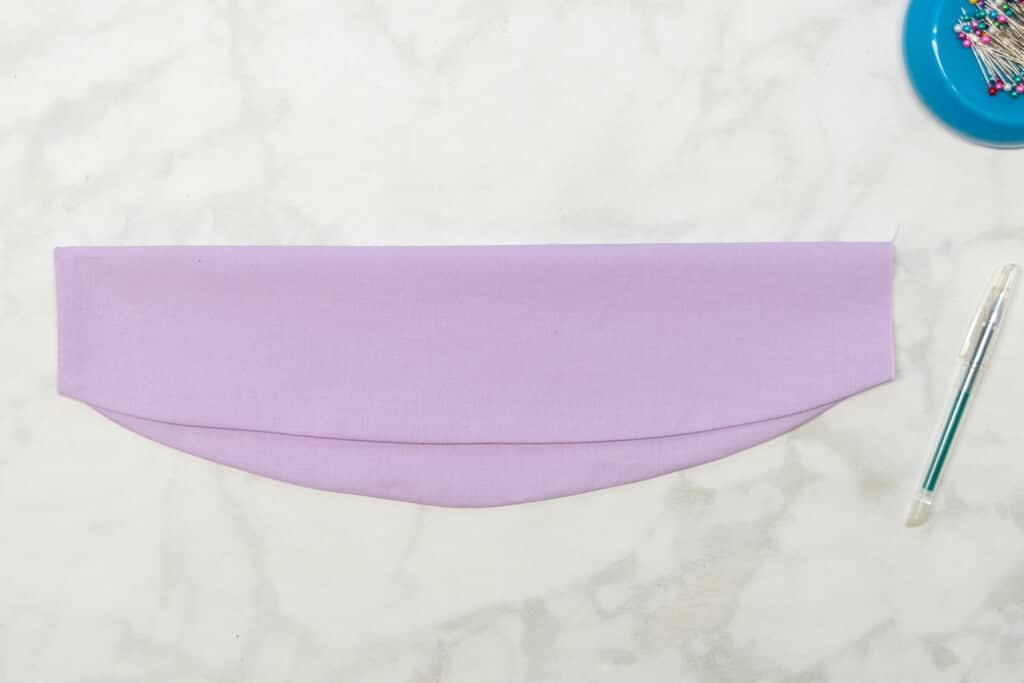
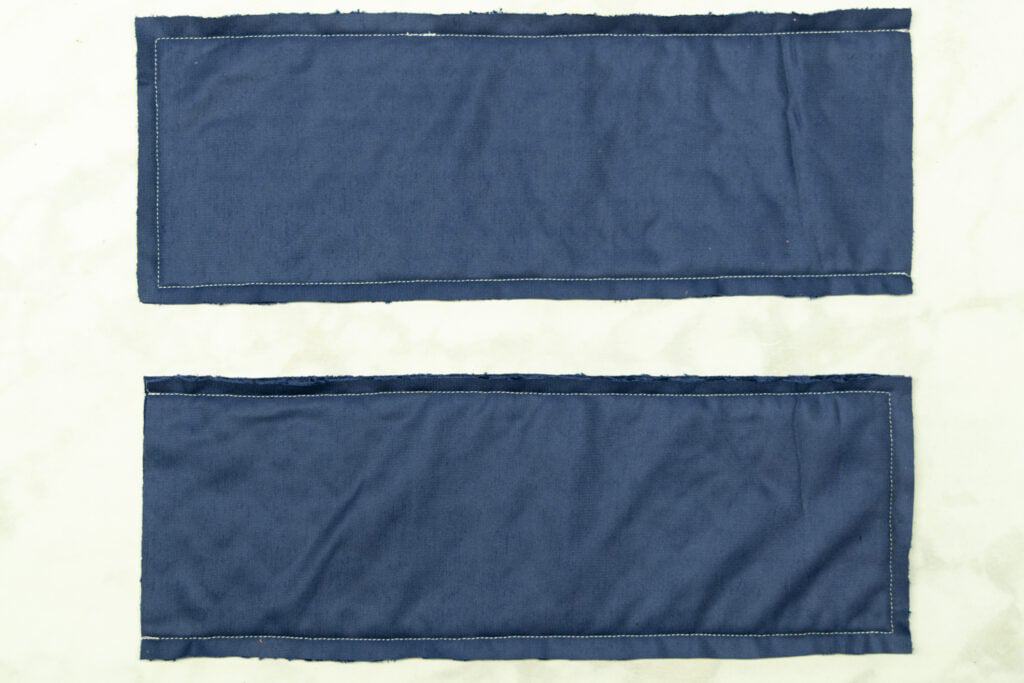
Next, turn the heating pad right sides out through the open end. Push the edges out with your fingers.
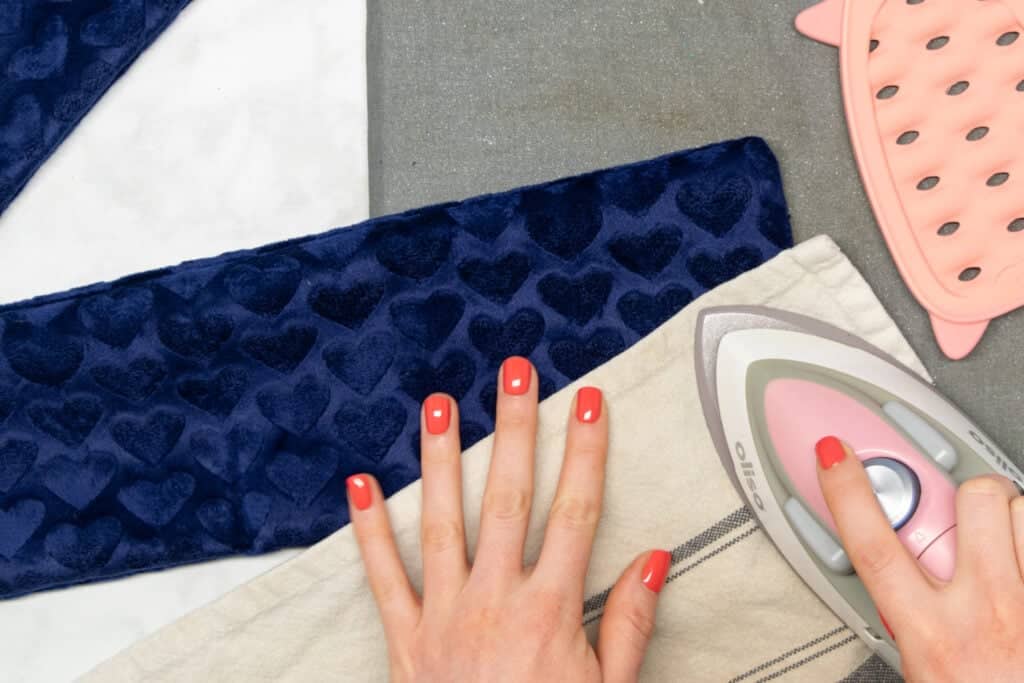
Press the 3 stitched edges flat with your iron, focusing on pressing the seams out all the way to the edges.

Then, turn under the open edges by 3/8" and press them flat with your iron.
This heating pad is ready to be quilted and filled with rice (or your favorite filling!).
Step Four: Quilt and Fill the Heating Pad
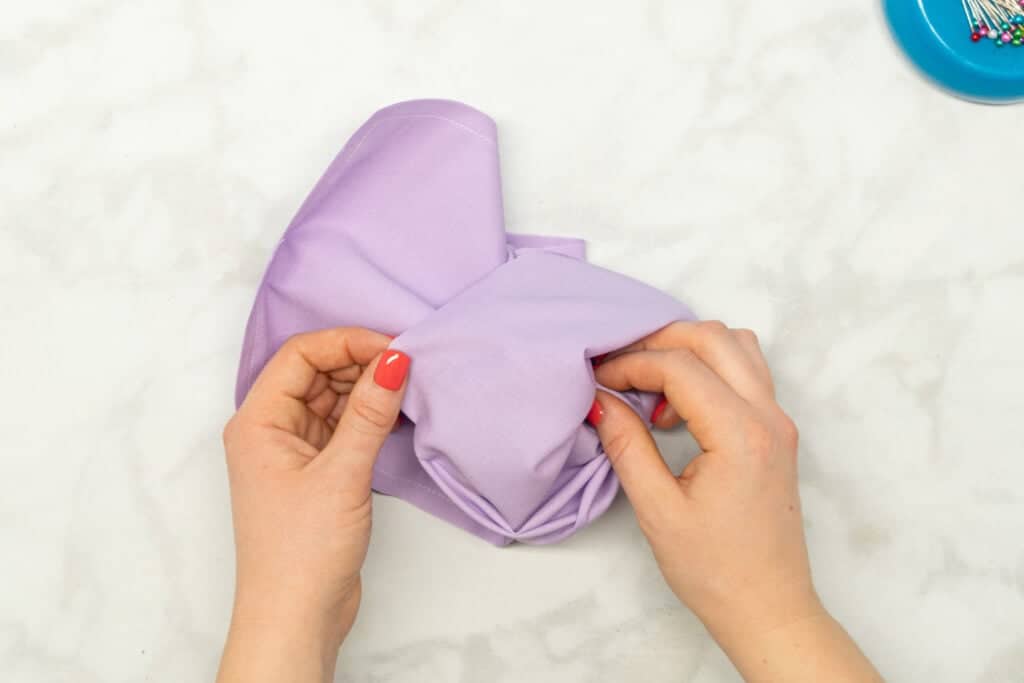
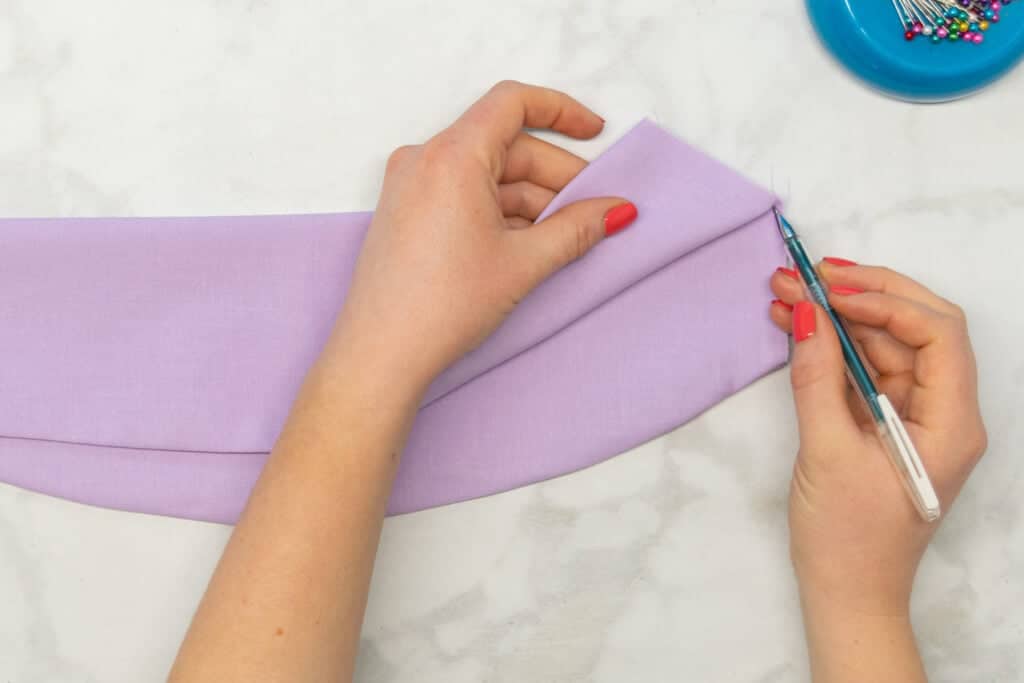
First, fold the heating pad in half lengthwise, lining up the corners of the short ends at the bottom.
Mark the centers of the short ends where the fabric folds with a fabric marker or pen.
Then, unfold the heating pad and lay a straight-edge ruler across it, going through the center markings on each end. Draw a straight line across the center of the heating pad with a fabric marker.
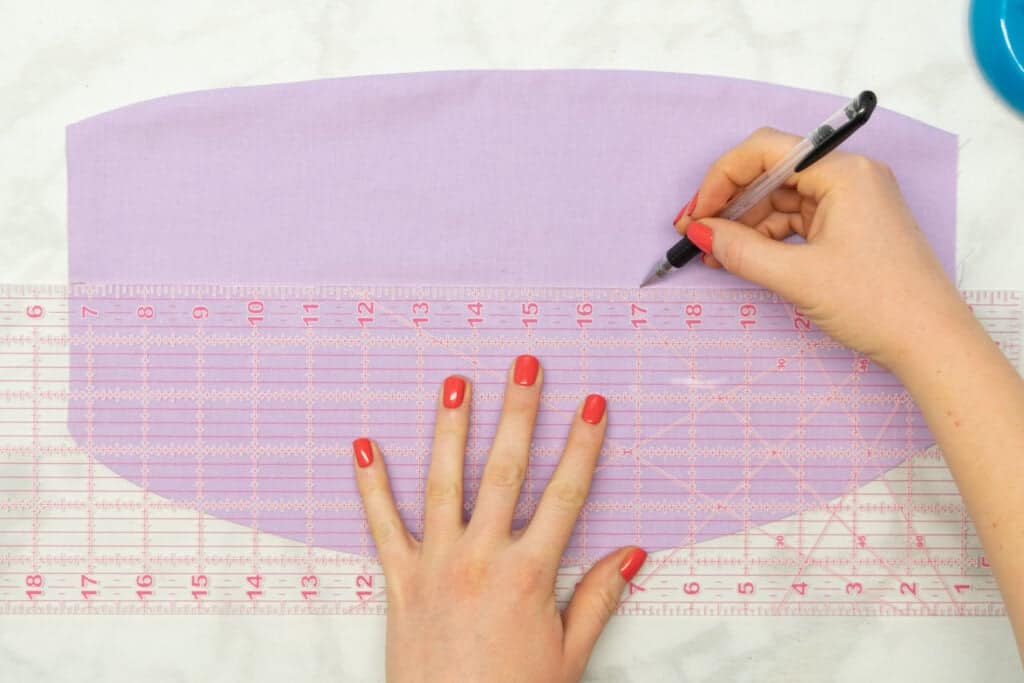
Measure 2" above this first line and draw another straight line across the heating pad, using your ruler as a guide.
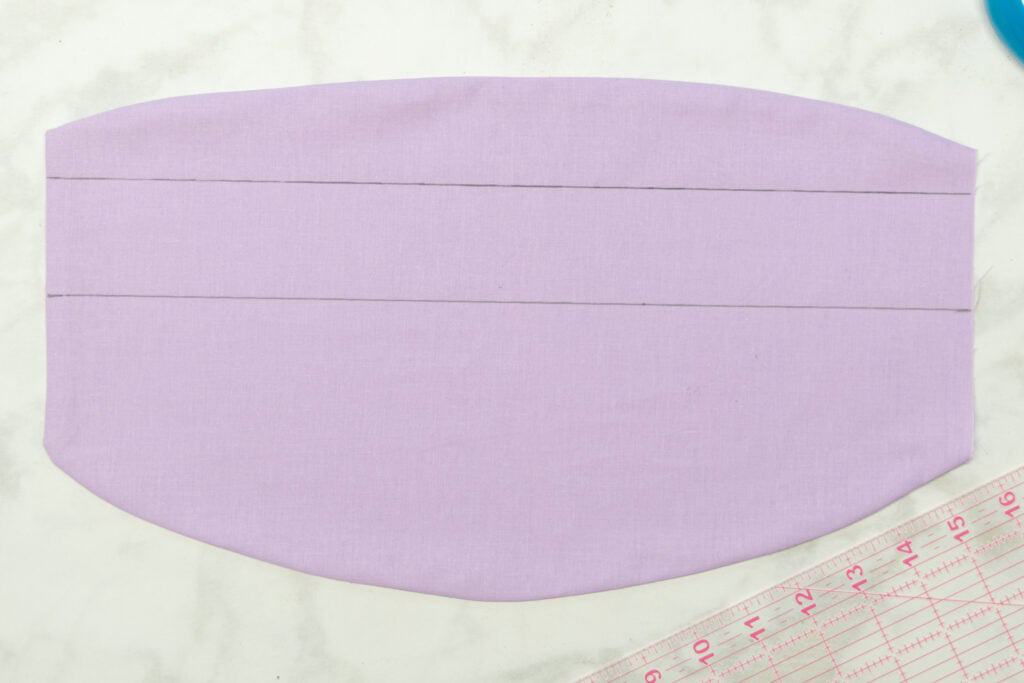
Repeat this process to draw a third line 2" below the first line.
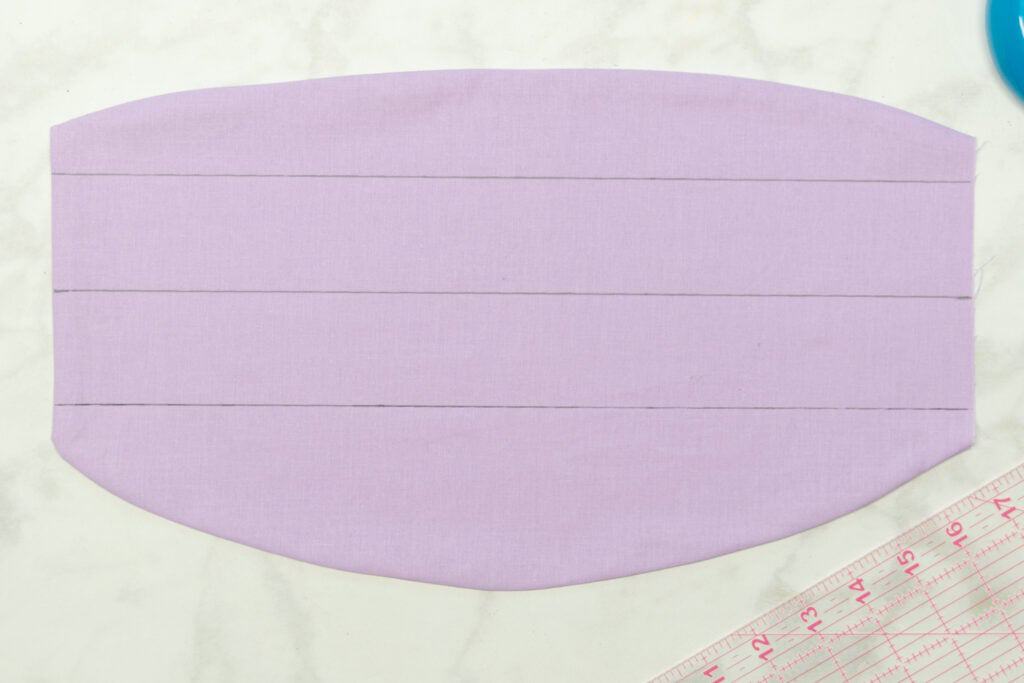
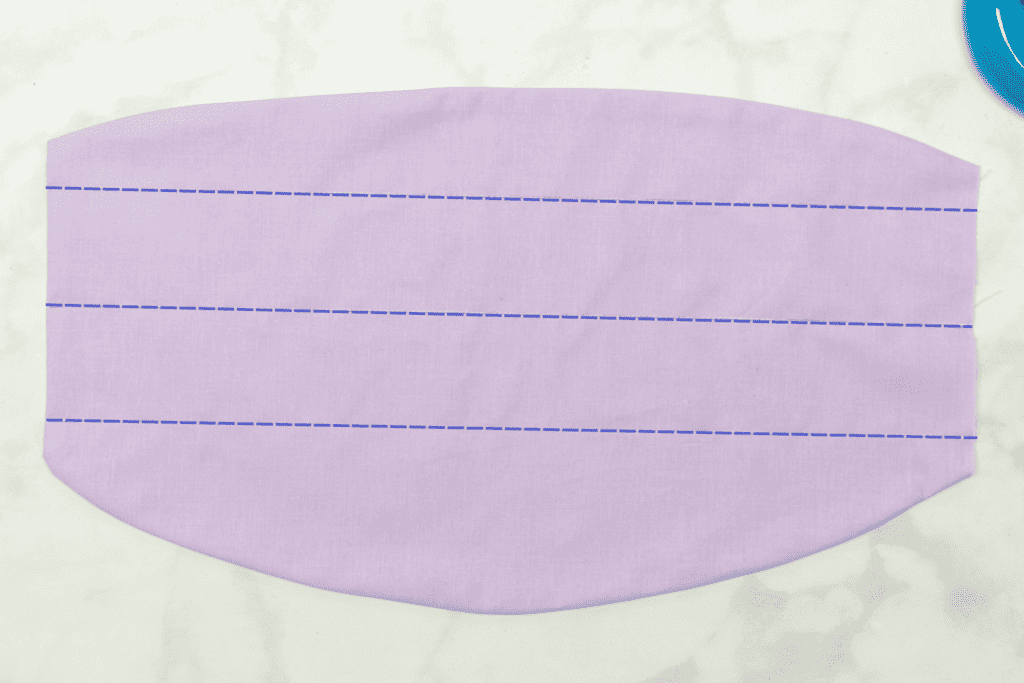
Next, stitch along each of the three lines. This will create the horizontal lines of our quilting.
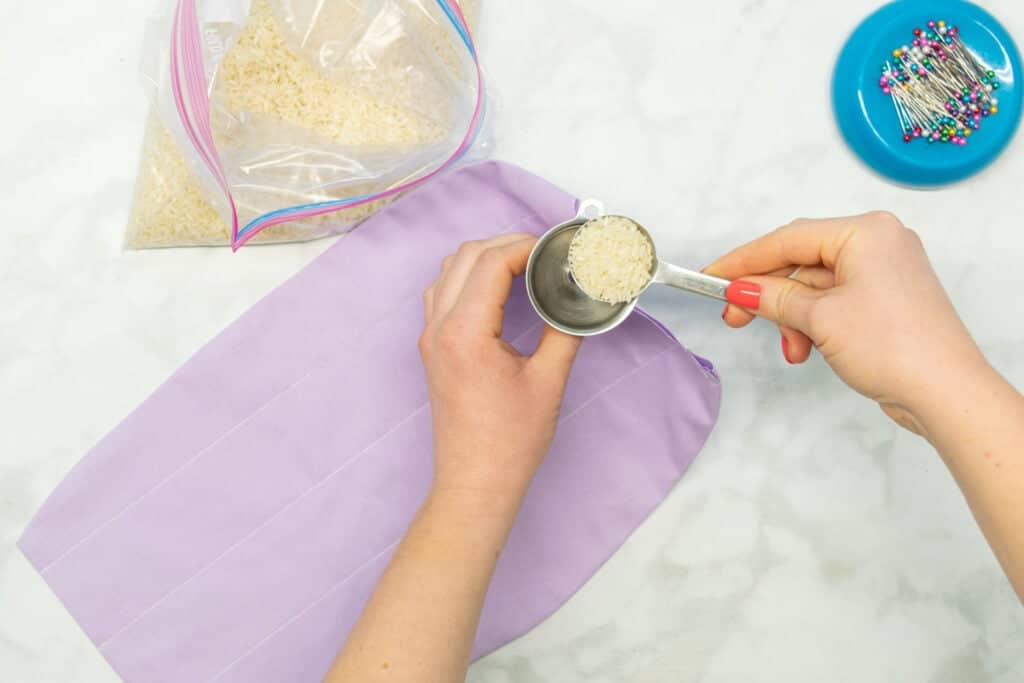
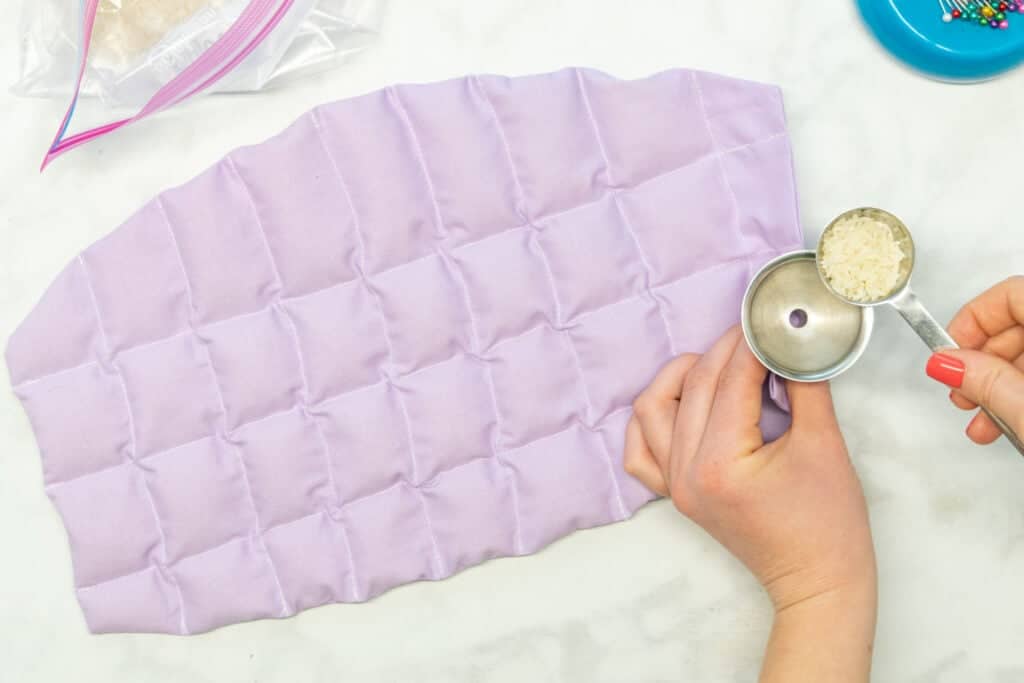
We're ready to start filling! Pour 1 tablespoon of rice each into the two center columns. I use a small funnel to make this easier.

Push the rice down to the very bottom of the heating pad.
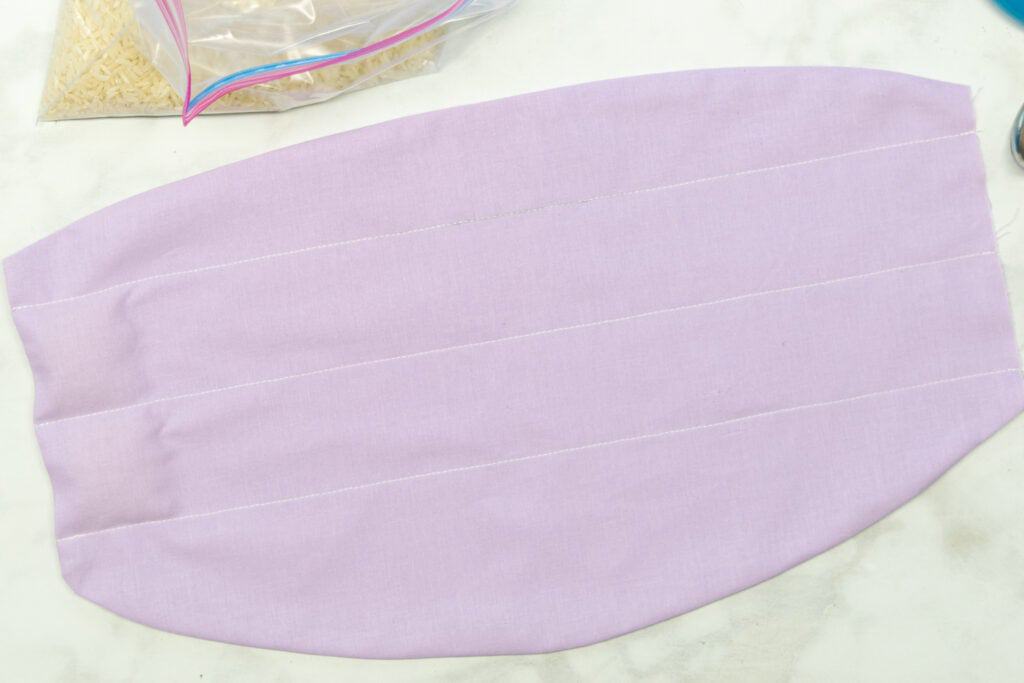
Next, fill the two outer columns up to the level of the rice in the center columns. Because of the curves along the outer edges of the heating pad, the two outer columns are not a consistent width. That's why I like to eyeball them, just filling them to the same level as the middle columns.
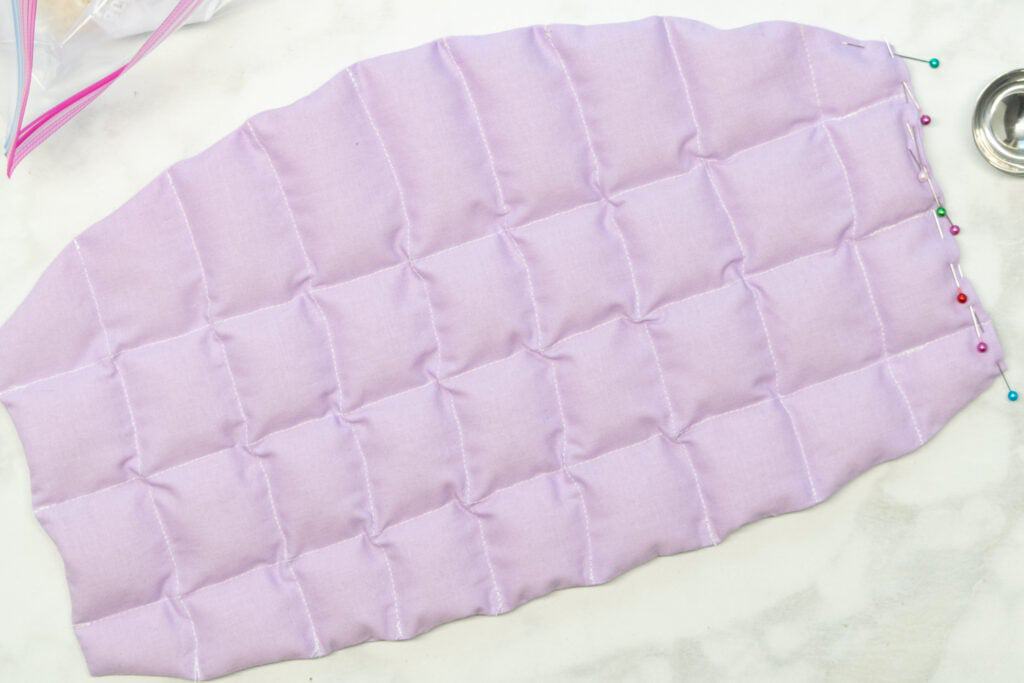
Then, use your fingers to press all the rice down to the very bottom of the columns. Place pins across the heating pad just above the rice. This helps to keep the rice in place while you sew.
Stitch across the heating pad, sewing just above the rice to hold it into the bottom of the columns. Make sure to remove your pins as you sew!
*PRO TIP: I love using a zipper foot for this step. It really makes it easier to stitch close to the rice without accidentally hitting the rice with your presser foot.
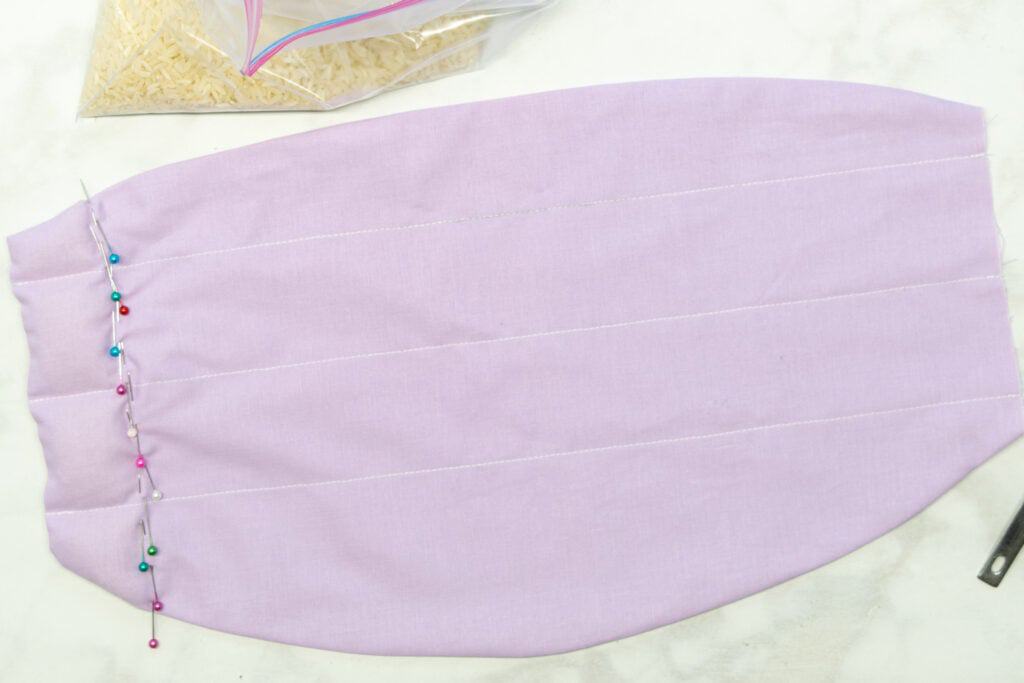
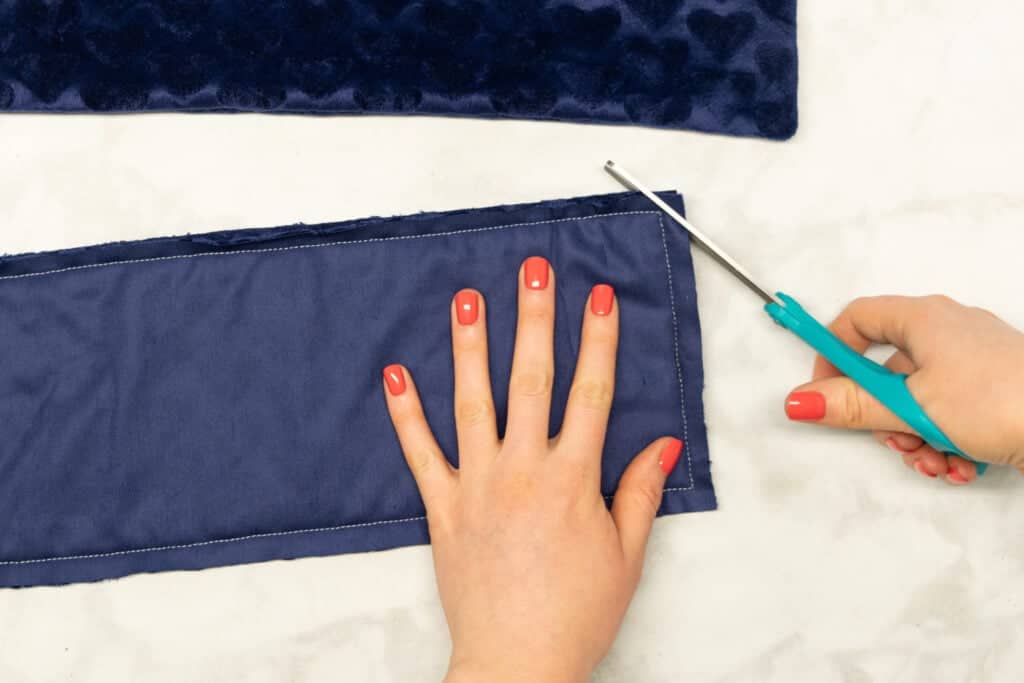
Repeat this process of adding rice, then stitching across the heating pad, until there's only about 3 inches left at the top of the columns.
In this very last section, add rice to each square until it reaches about 1/2" from the open end.
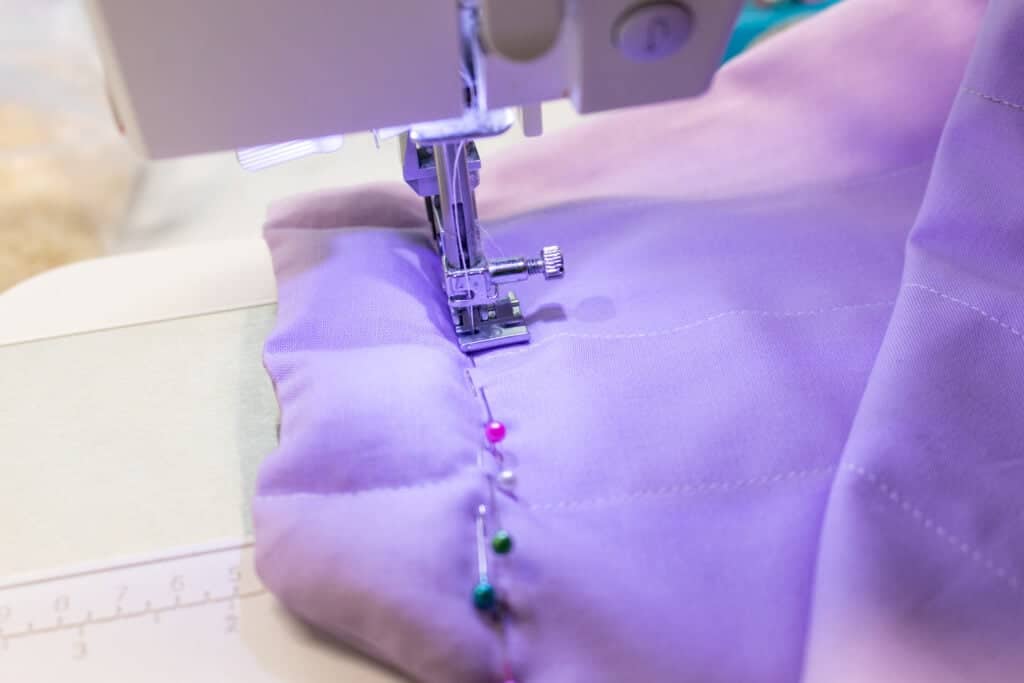
Then, pin the open end shut, pinning the folded edges together.
Stitch along the pinned edge of the heating pad, topstitching 1/16" - 1/8" from the folded edges. Again, using a zipper foot is a huge help with this step!
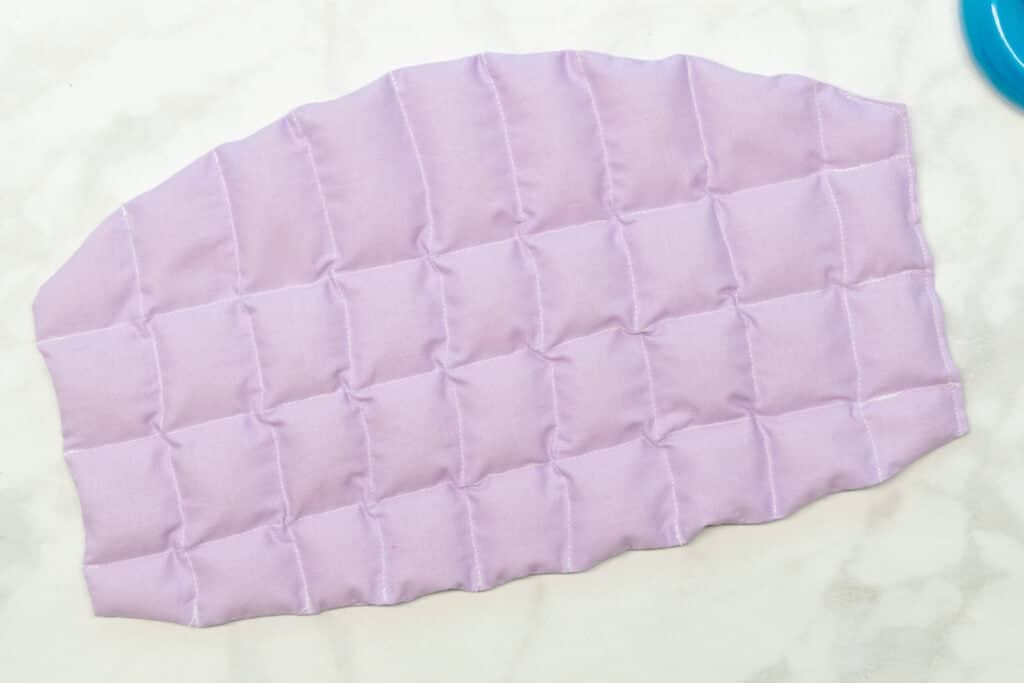
The heating pad is finished! Now we just need to put together the cozy minky cover.
Step Five: Assemble the Straps
Let's move on to assembling the straps. Start by fusing interfacing to the wrong side of 2 of the strap pieces.
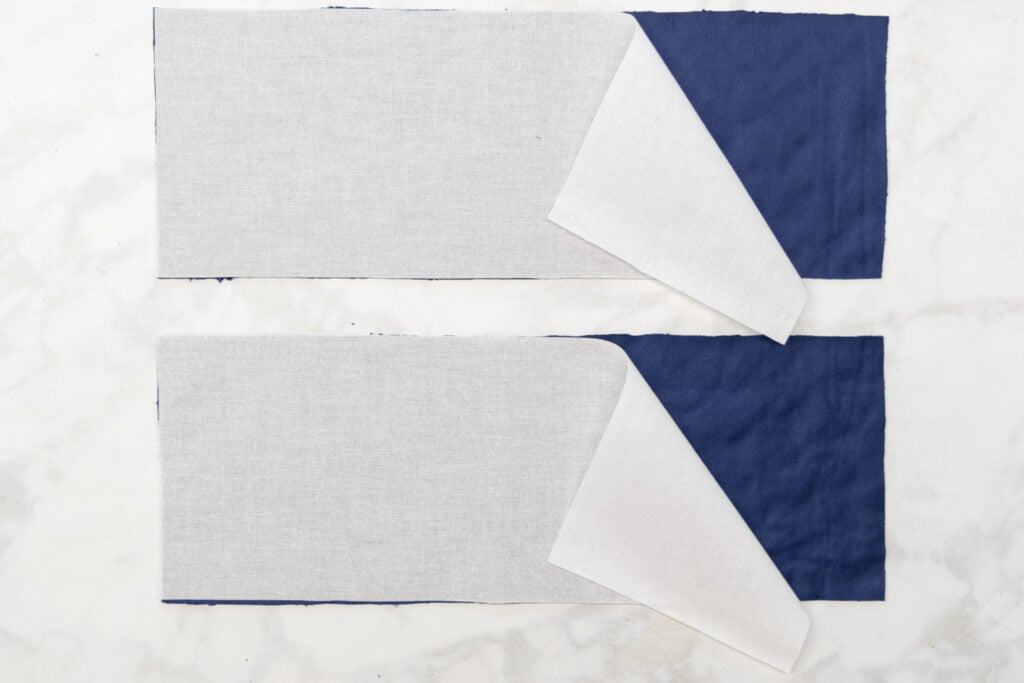
Next, place each of the non-interfaced straps right sides together with one of the interfaced straps.
Pin along the two long edges and one of the short edges of each set of straps.
*PRO TIP: If you're using a fabric with a directional print, like I am, then make sure to leave the right side open on one set of straps and the left side on the other set. If you're not using a directional print, then it won't matter which short end is left open.
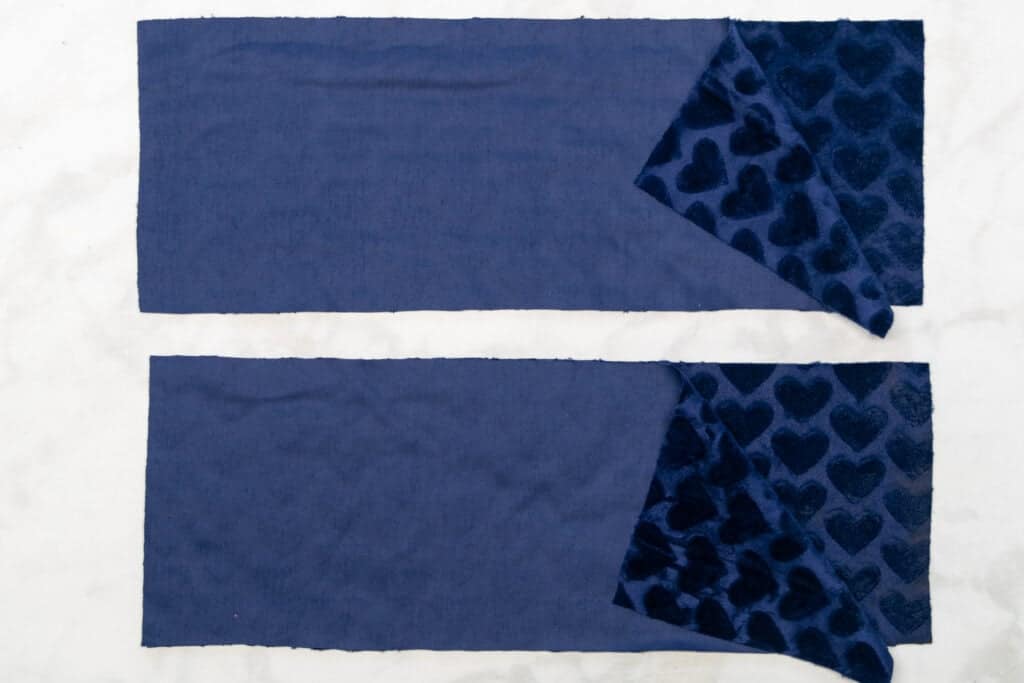
Next, stitch along the 3 pinned edges of each strap set with a 3/8" seam allowance.
After stitching, on each set, trim the seam allowances in the 2 stitched corners diagonally close to your stitches. This helps to reduce bulk for nice, sharp corners!
Turn each strap right sides out through the open end.
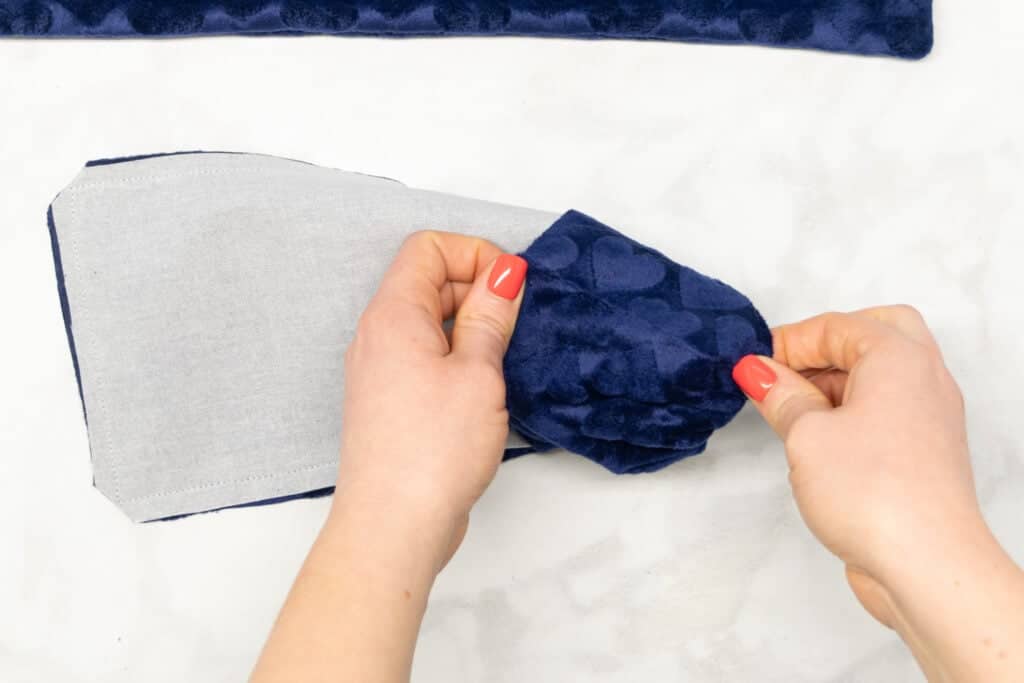
Then, carefully press the straps flat with your iron. Make sure to use a press cloth between the fabric and the iron because minky is heat-sensitive!
Step Six: Sew the Cover
Finally, it's time to assemble the cover and finish this heating pad!
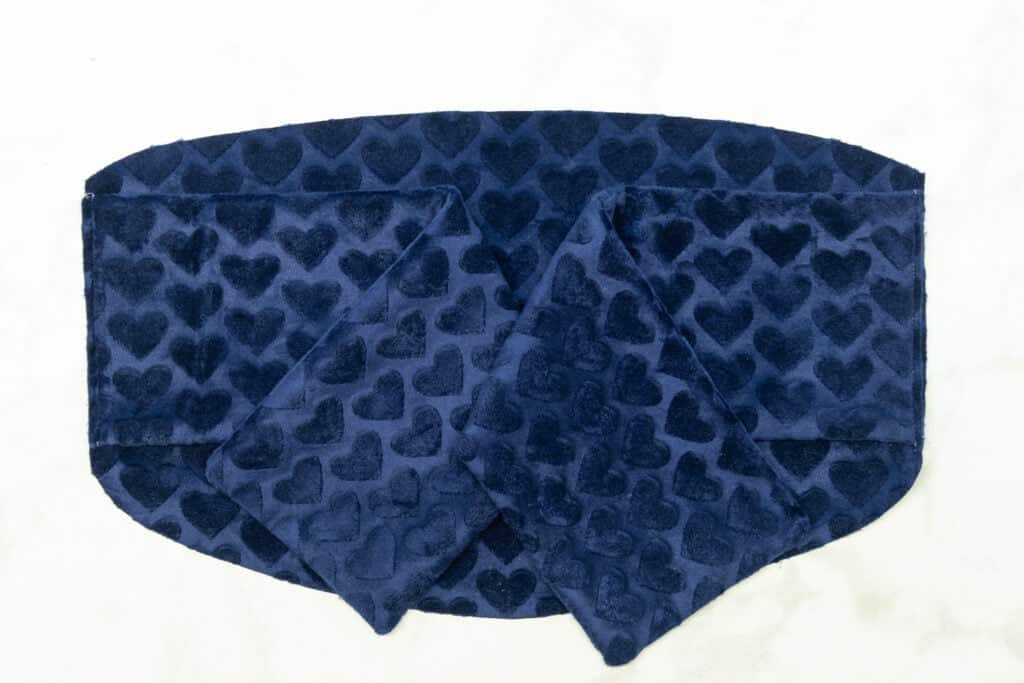
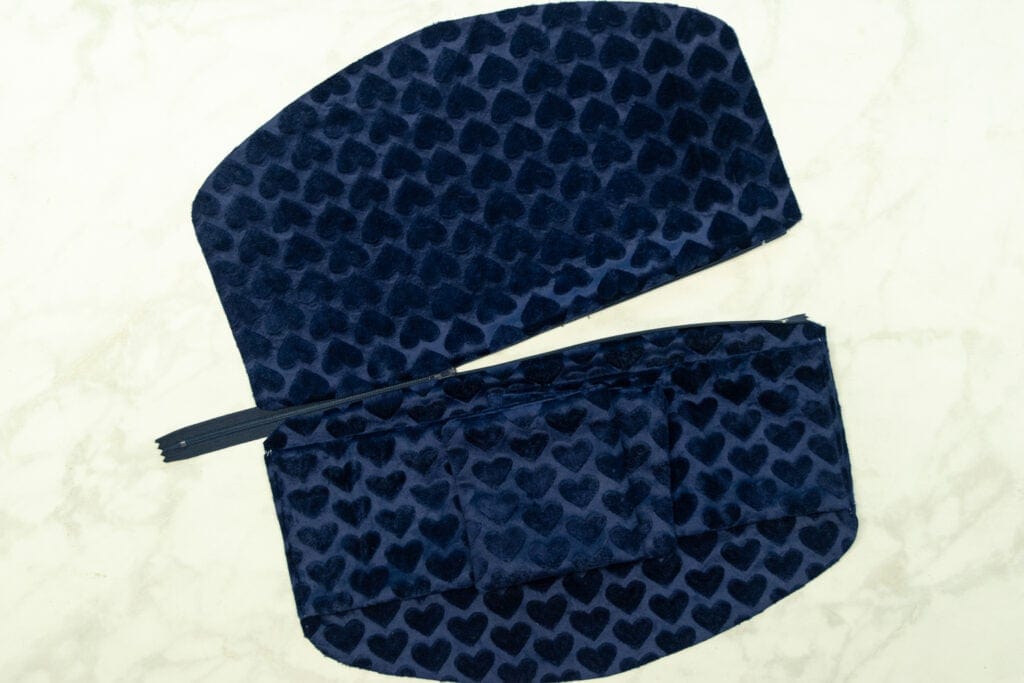
Place one of the minky body pieces right sides up on your table.
Lay one strap on each short side of the body piece, aligning the raw strap edges with the raw edge of the body piece. Line up the notches in the strap with the notches along the edges of the body piece, then pin the straps in place.
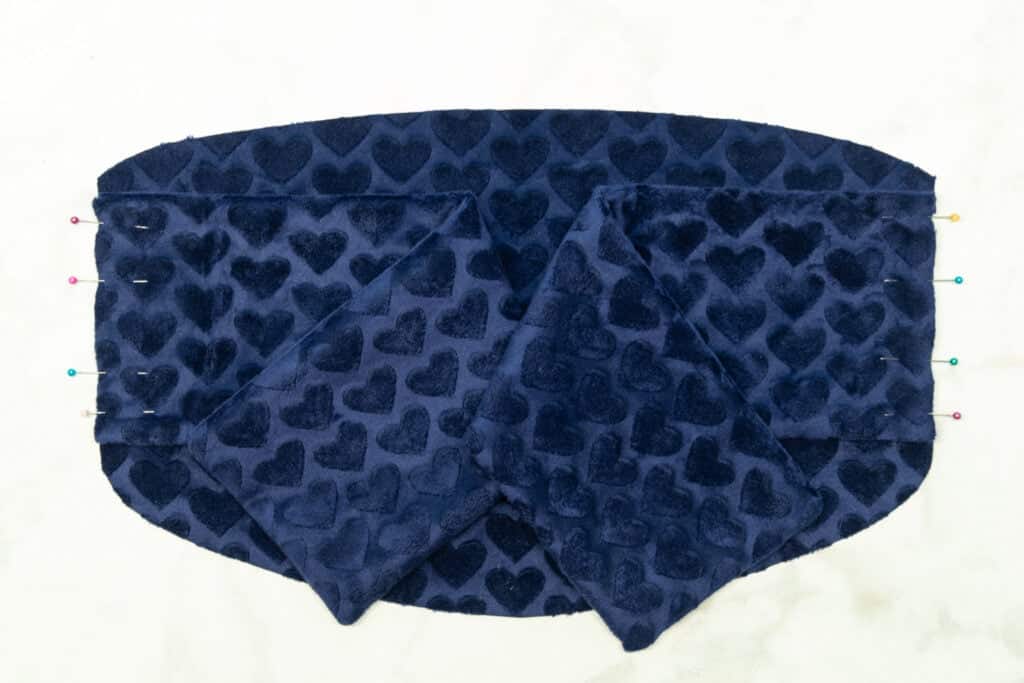
Next, stitch each strap to the body piece, sewing approximately 1/4" from the raw edges.
With the straps stitched in place, we now need to add the zipper along the upper edge.
Unzip your zipper and place it right sides down on the heating pad. Line up the top zipper stop at the right-hand notch in the fabric edge. Pin the zipper tape to the fabric, aligning the edge of the zipper tape with the edge of the fabric. Continue pinning it along the fabric edge until you reach the left-hand notch. Stop pinning at the notch.
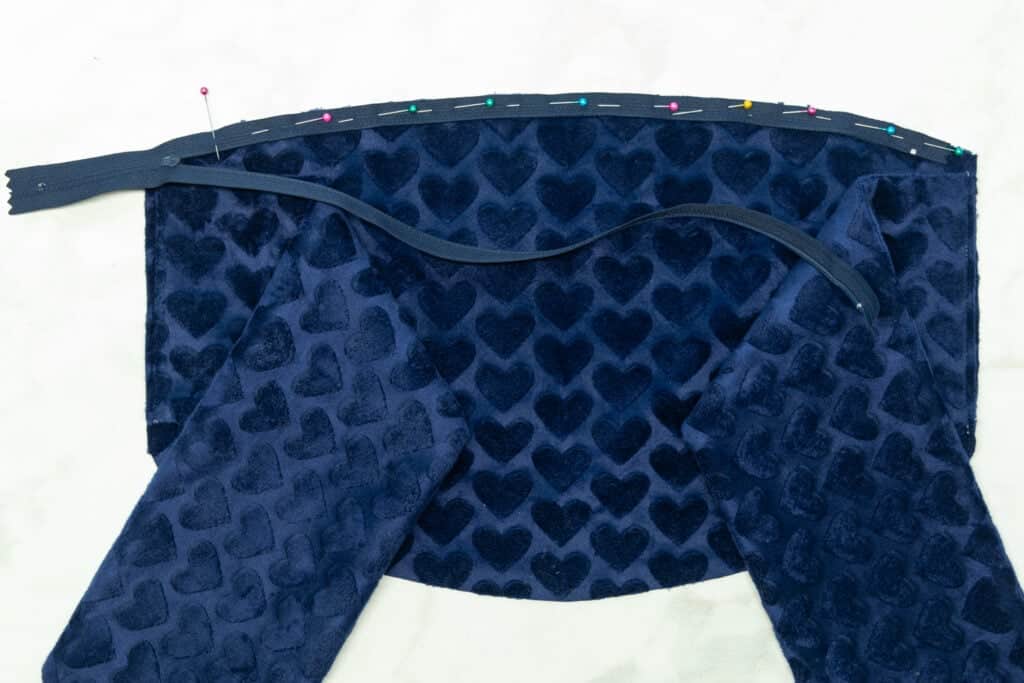
Then, using a zipper foot, sew the zipper tape to the fabric. Start stitching at one of the notches in the fabric and stop sewing when you reach the second notch. Make sure to backstitch at the beginning and end!

Repeat this process to line up and pin the second side of the zipper tape right sides together along the upper edge of the other body piece. Make sure to carefully align the upper zipper stop with the notch in the fabric. Before stitching, double check that there are no twists in the zipper!
Stitch the zipper tape to the fabric edge, again sewing just from notch to notch.
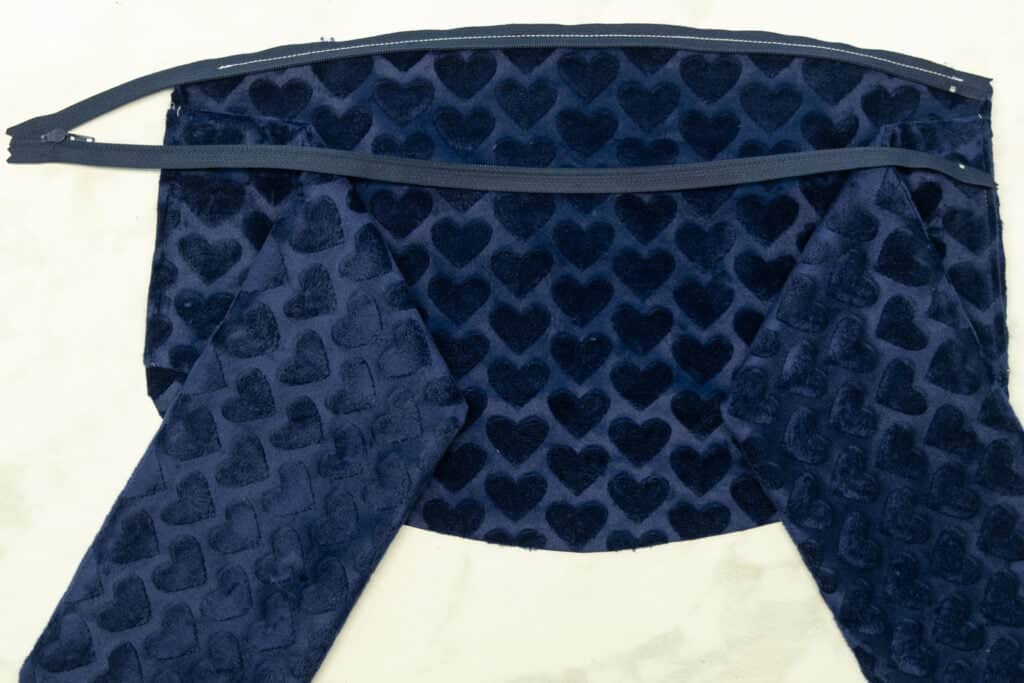
Once sewn, zip up the zipper to double check that the two body pieces are aligned properly.
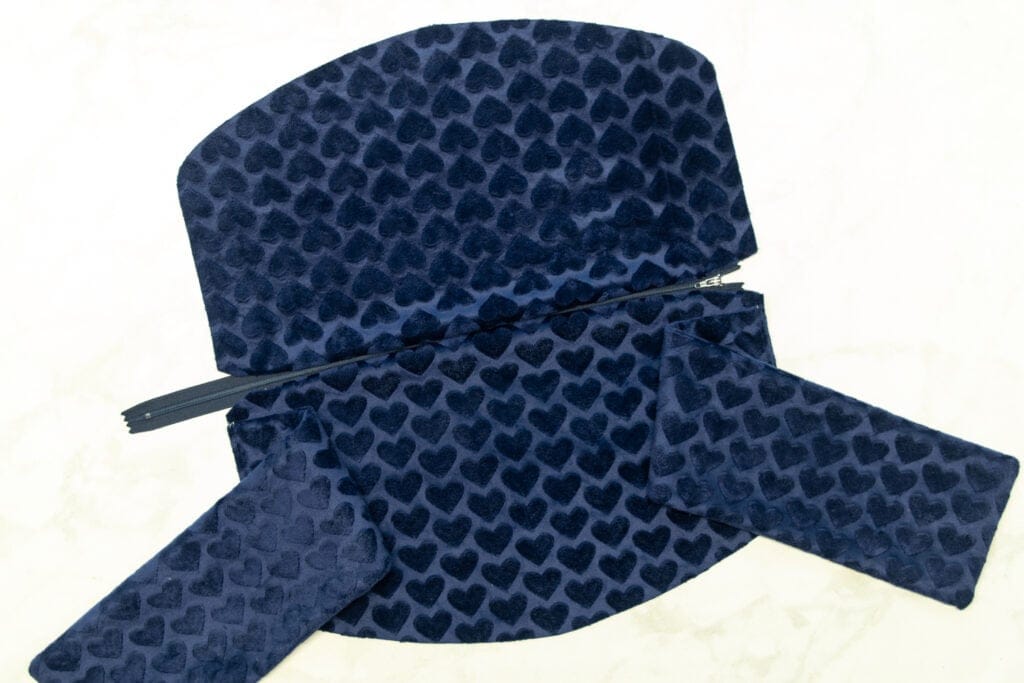
Next, unzip the zipper partway and fold the straps to the inside of the cover.
Then, align the two body pieces with right sides together. Pin them together along all the raw edges - from the end of the zipper on one side all the way around to the other end of the zipper on the other side.
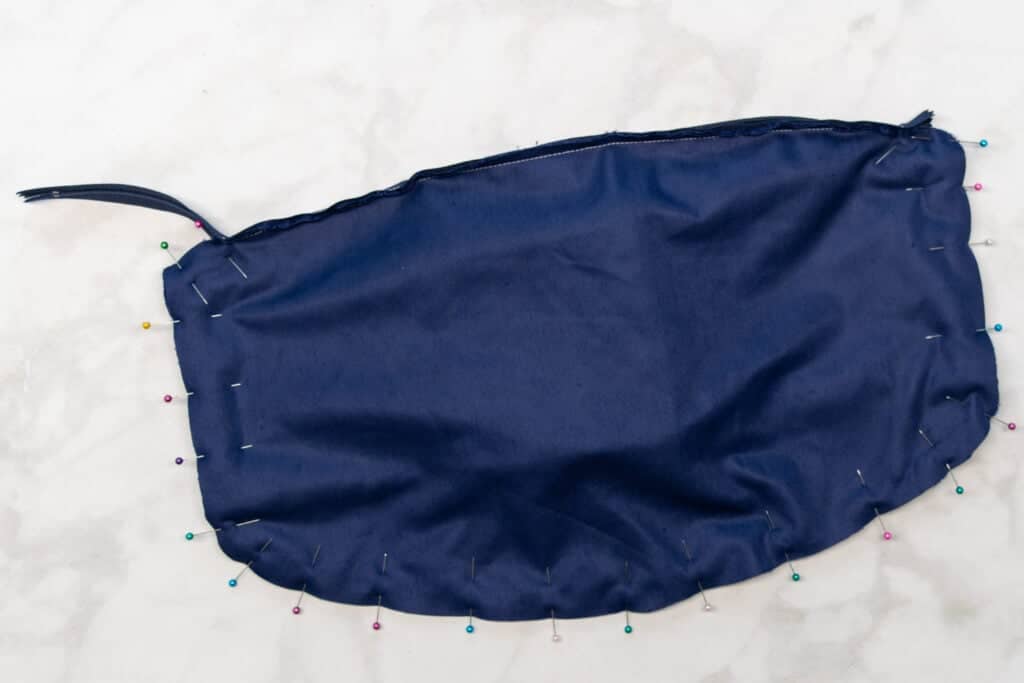
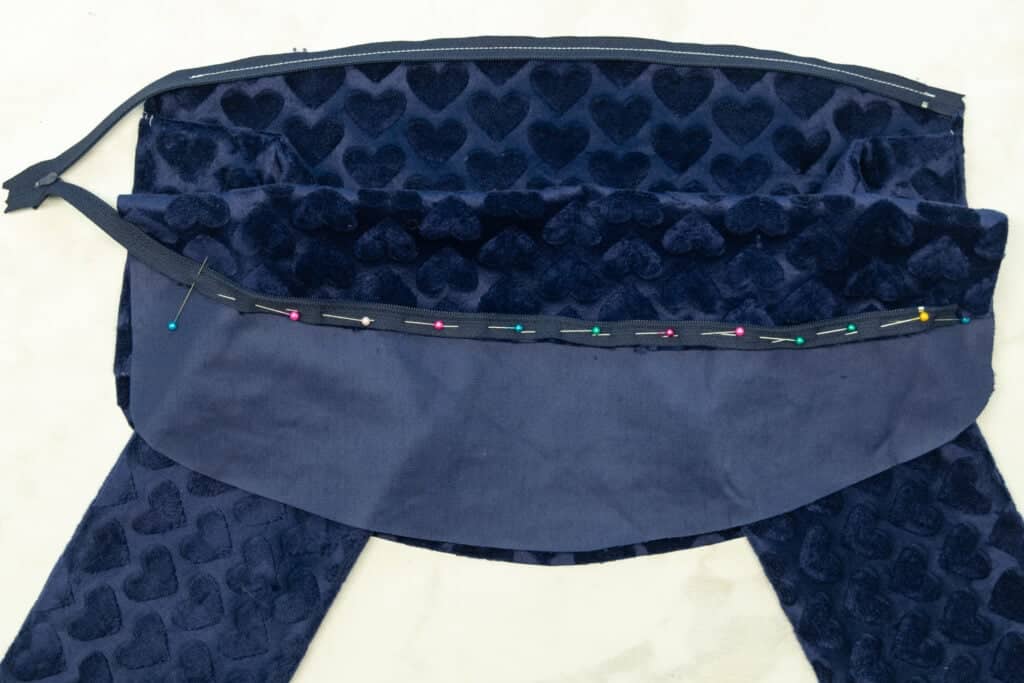
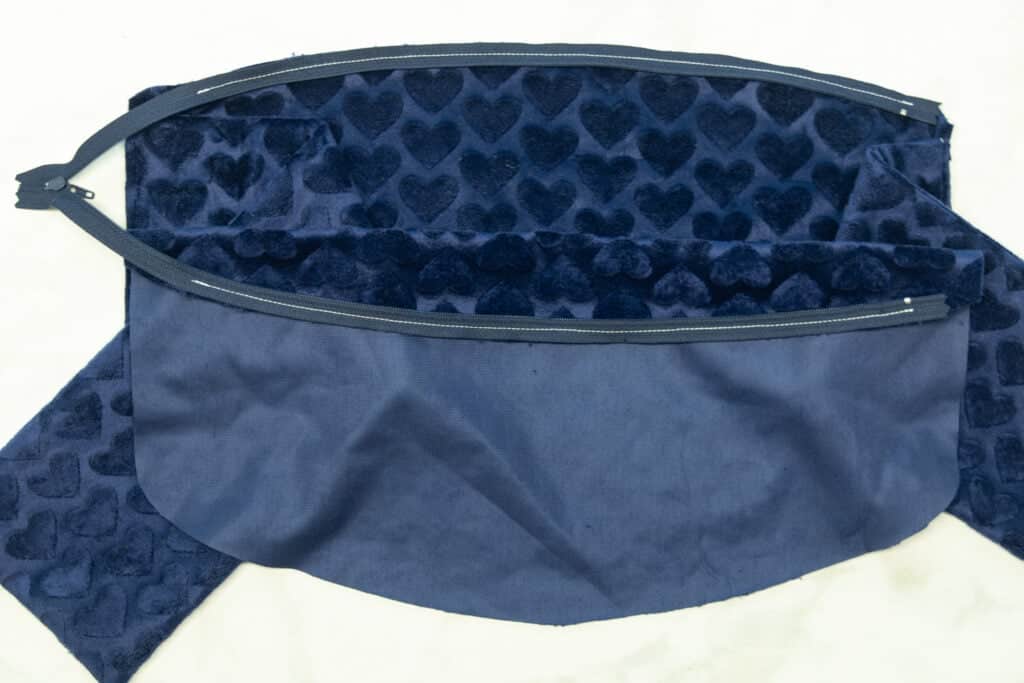
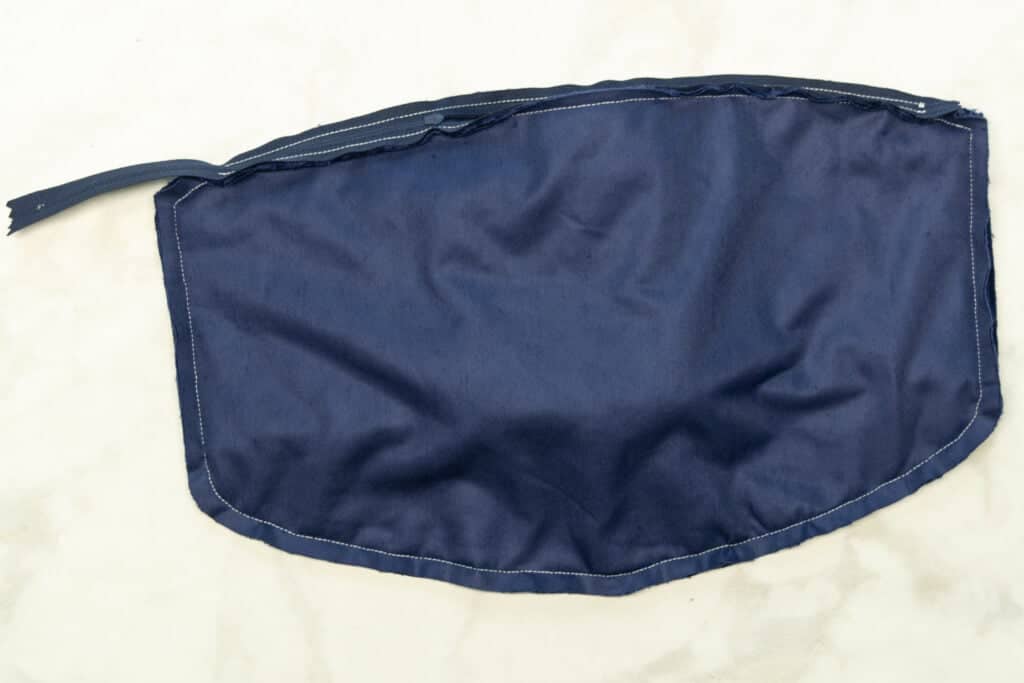
Stitch all the way around the body pieces with a 3/8" seam allowance. Start at one end of the zipper, stitching all the way around until you reach the other end of the zipper.
*PRO TIP: I like to use my zipper foot for this step as well. It helps me get right up to the edge of the zipper at the beginning and end of my stitching.
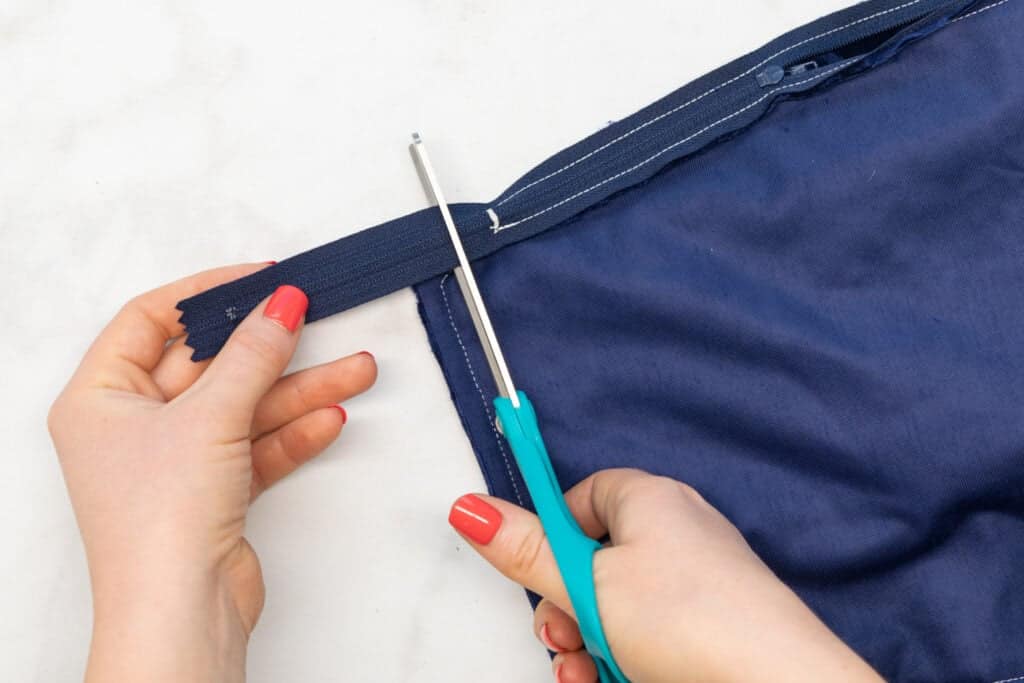
Then, using a hand sewing needle and thread, sew across the zipper teeth a few times right where the stitching ends at the bottom of the zipper. This creates a new zipper stop so that you can trim off the excess at the bottom of the zipper.
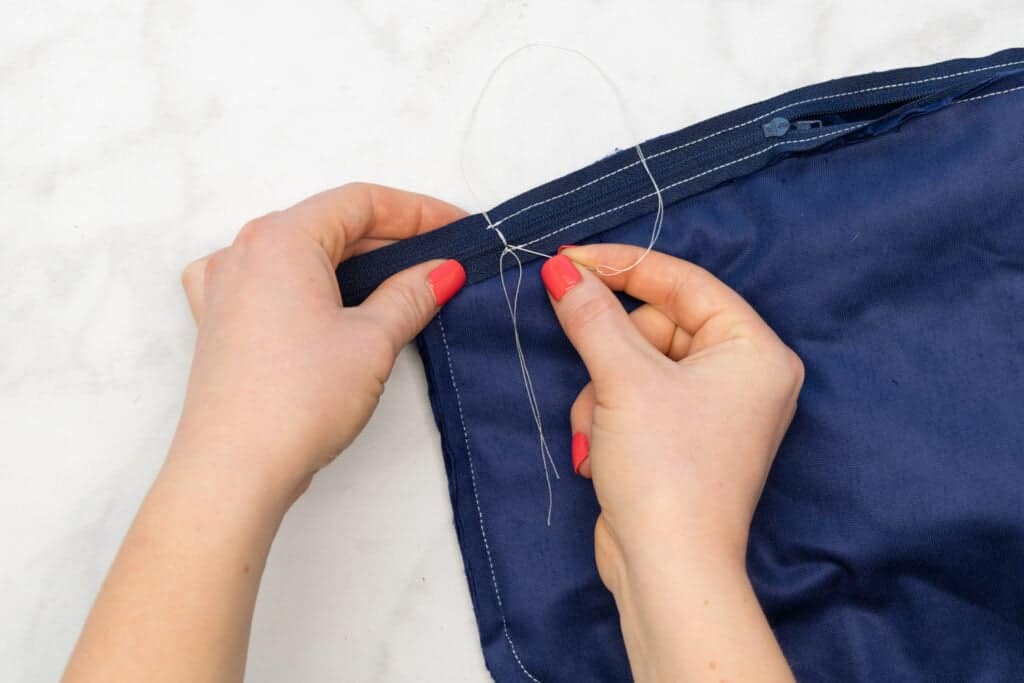
Trim the excess zipper away about an inch from the new zipper stop.
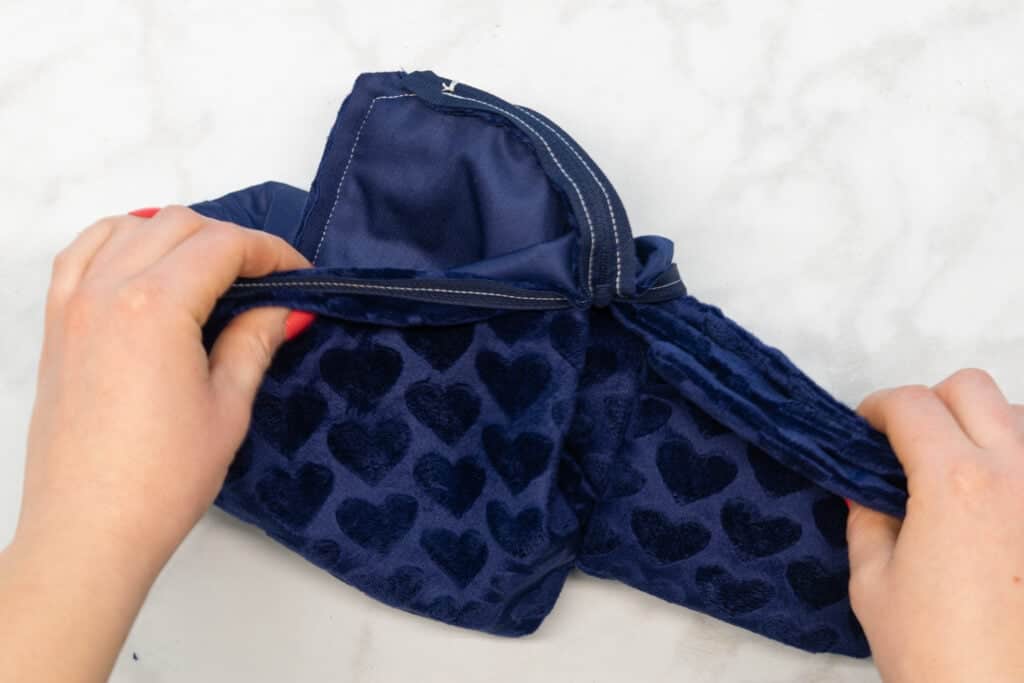
Turn the heating pad cover right sides out through the partially open zipper. If needed, you can press the edges flat with your iron, just make sure to use a press cloth!
Step Seven: Add the Velcro
The final step is to add the velcro. Honestly, this step can be done earlier in the process if you prefer. However, I like to do it at the end so that I'm not dealing with the velcro accidentally sticking to itself while I'm trying to manipulate the fabric during other steps!
To place the velcro, start by laying the cover out so that the left-hand strap extends away from the cover. Pin two of the pieces of velcro about 1/2" from the end of this strap. Align one approximately 1/2" from the upper edge and the other 1/2" from the lower edge.
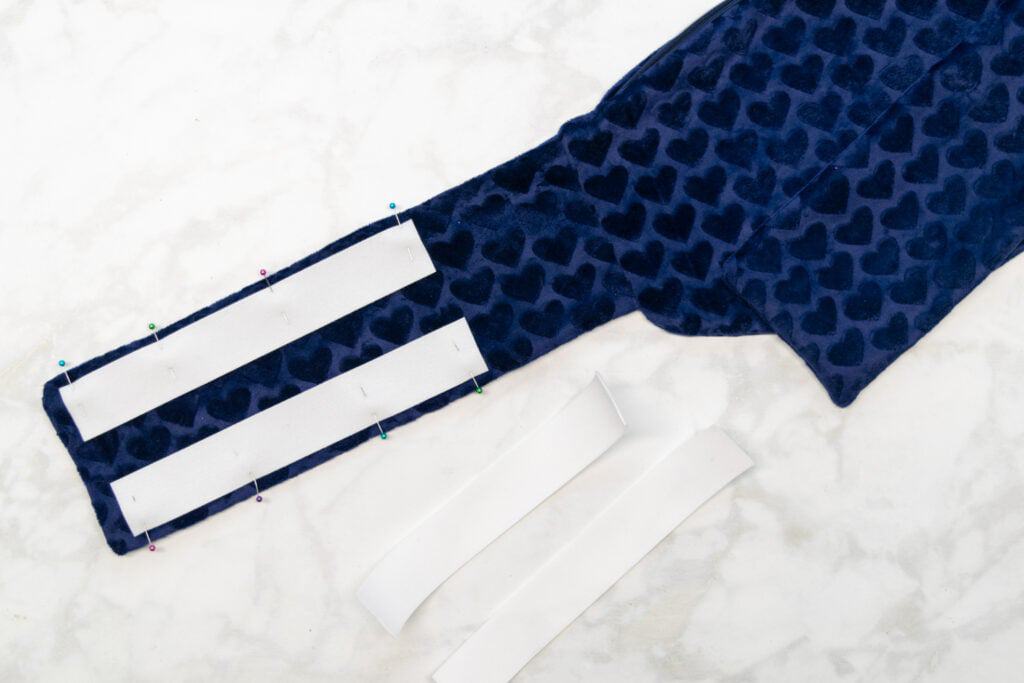
Don't worry about being super precise here. It's totally fine to eyeball the velcro placement!
Next, fold the other strap over the body towards the first strap.
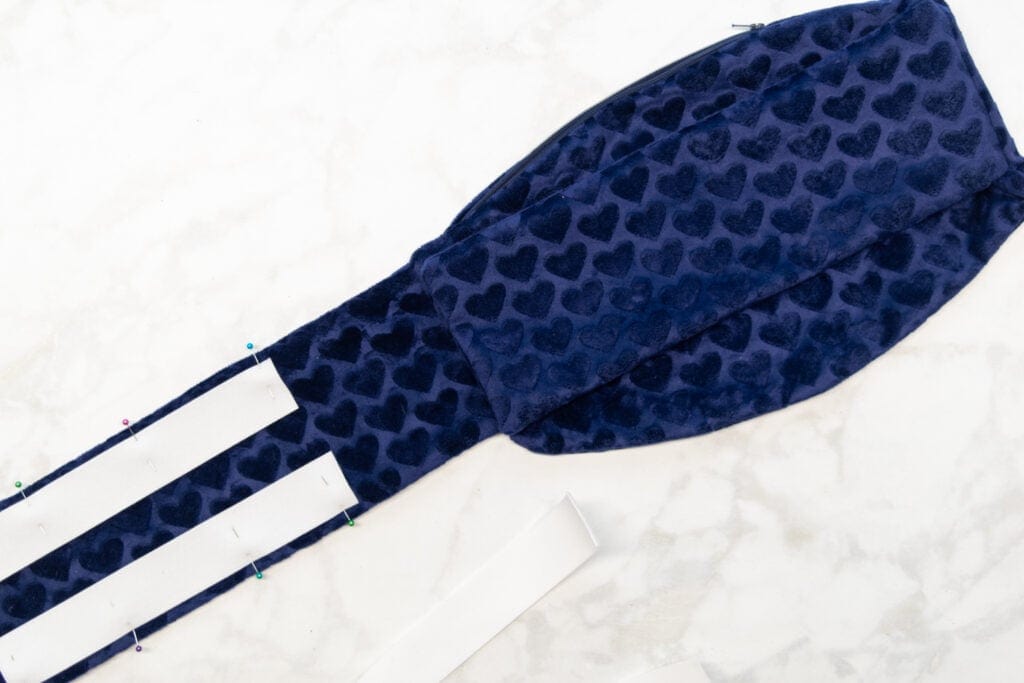
Pin the remaining 2 pieces of velcro at the end of the second strap. Again, just eyeball it to place it approximately 1/2" from all the edges.
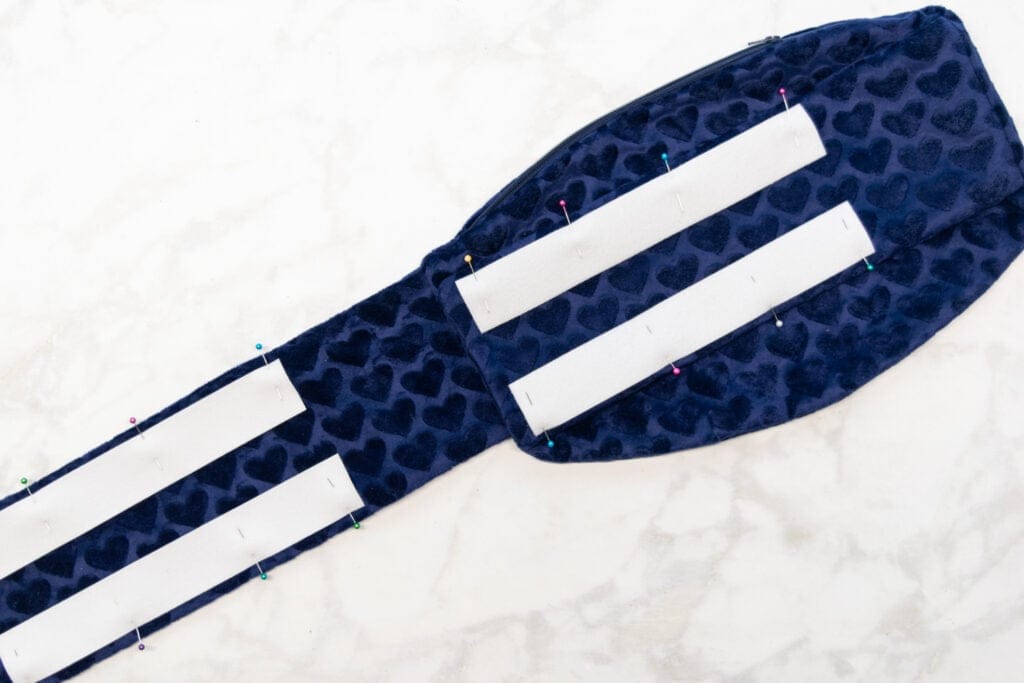
Finally, topstitch around each piece of velcro, sewing about 1/8" from each edge. If you want your stitching to be less visible, then match your thread color to the color of your fabric rather than the color of the velcro.
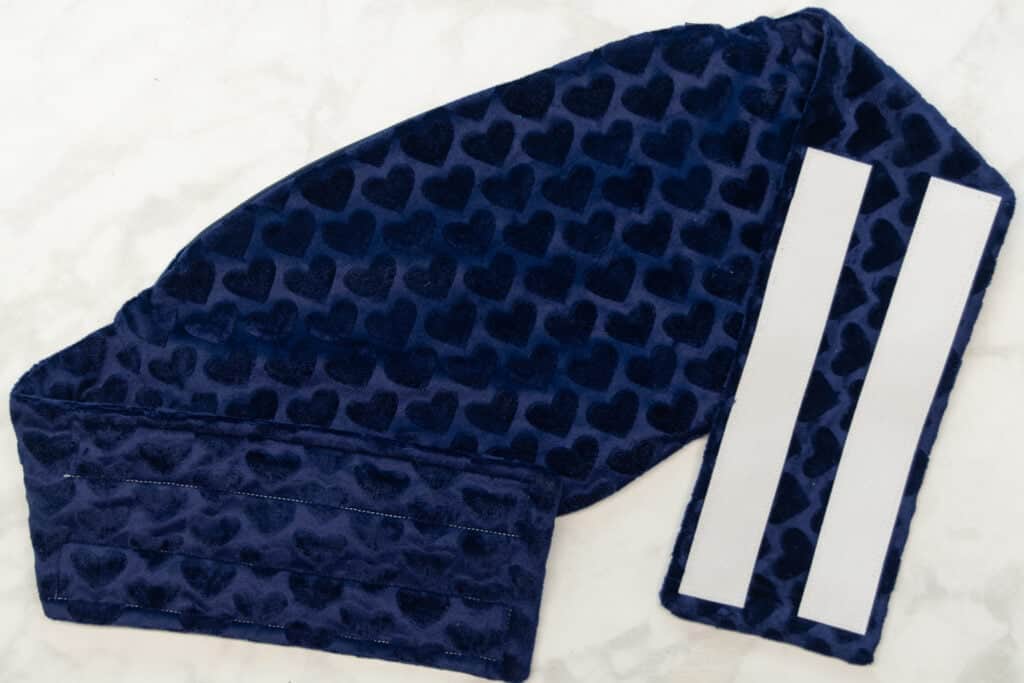
Good job! Your cozy microwaveable DIY heating pad is finished!
Save this blog post to your favorite board on Pinterest Here.
Love the heating pad pattern, but is there any way I can print out the directions without having to go into my computer to look at them?
Would this work as an ice pack as well?
Create a DIY microwaveable heating pad by filling a clean cotton sock with uncooked rice or flaxseed. Secure the open end tightly with a knot or sew it shut. Microwave for 1-2 minutes, then apply to sore muscles or joints for soothing warmth and relief.
While the cotton sock idea is perfect, this sewing pattern is a great idea for making gifts. Plus, I learn a lot of tips when I read her sewing instructions.
Great DIY project! Making a microwaveable heating pad is simple and cost-effective. Just fill a fabric pouch with rice or flaxseed, sew it shut, and pop it in the microwave for soothing warmth. Perfect for relieving sore muscles or relaxing after a long day. Give it a try!
I’m a beggar and I need a free heating pad
A lot of thanks for all of your work on this web site. My mother loves conducting investigation and it's easy to understand why. My partner and i hear all about the dynamic ways you make useful guidance through your web site and in addition encourage contribution from other people on this topic so our favorite simple princess has been being taught a lot. Have fun with the rest of the new year. You have been conducting a great job.