These DIY Fabric Bookmarks Make Relaxing With Your Favorite Book Extra Special! Plus, They're Easy And Fast To Sew - The Perfect DIY Gift!
Are you tired of your regular paper bookmarks getting all bent up and worn out after only a few months of use? I definitely was! That's why I decided to use my sewing skills to create some fun fabric bookmarks. They stay looking new for years - unlike paper and cardstock bookmarks!
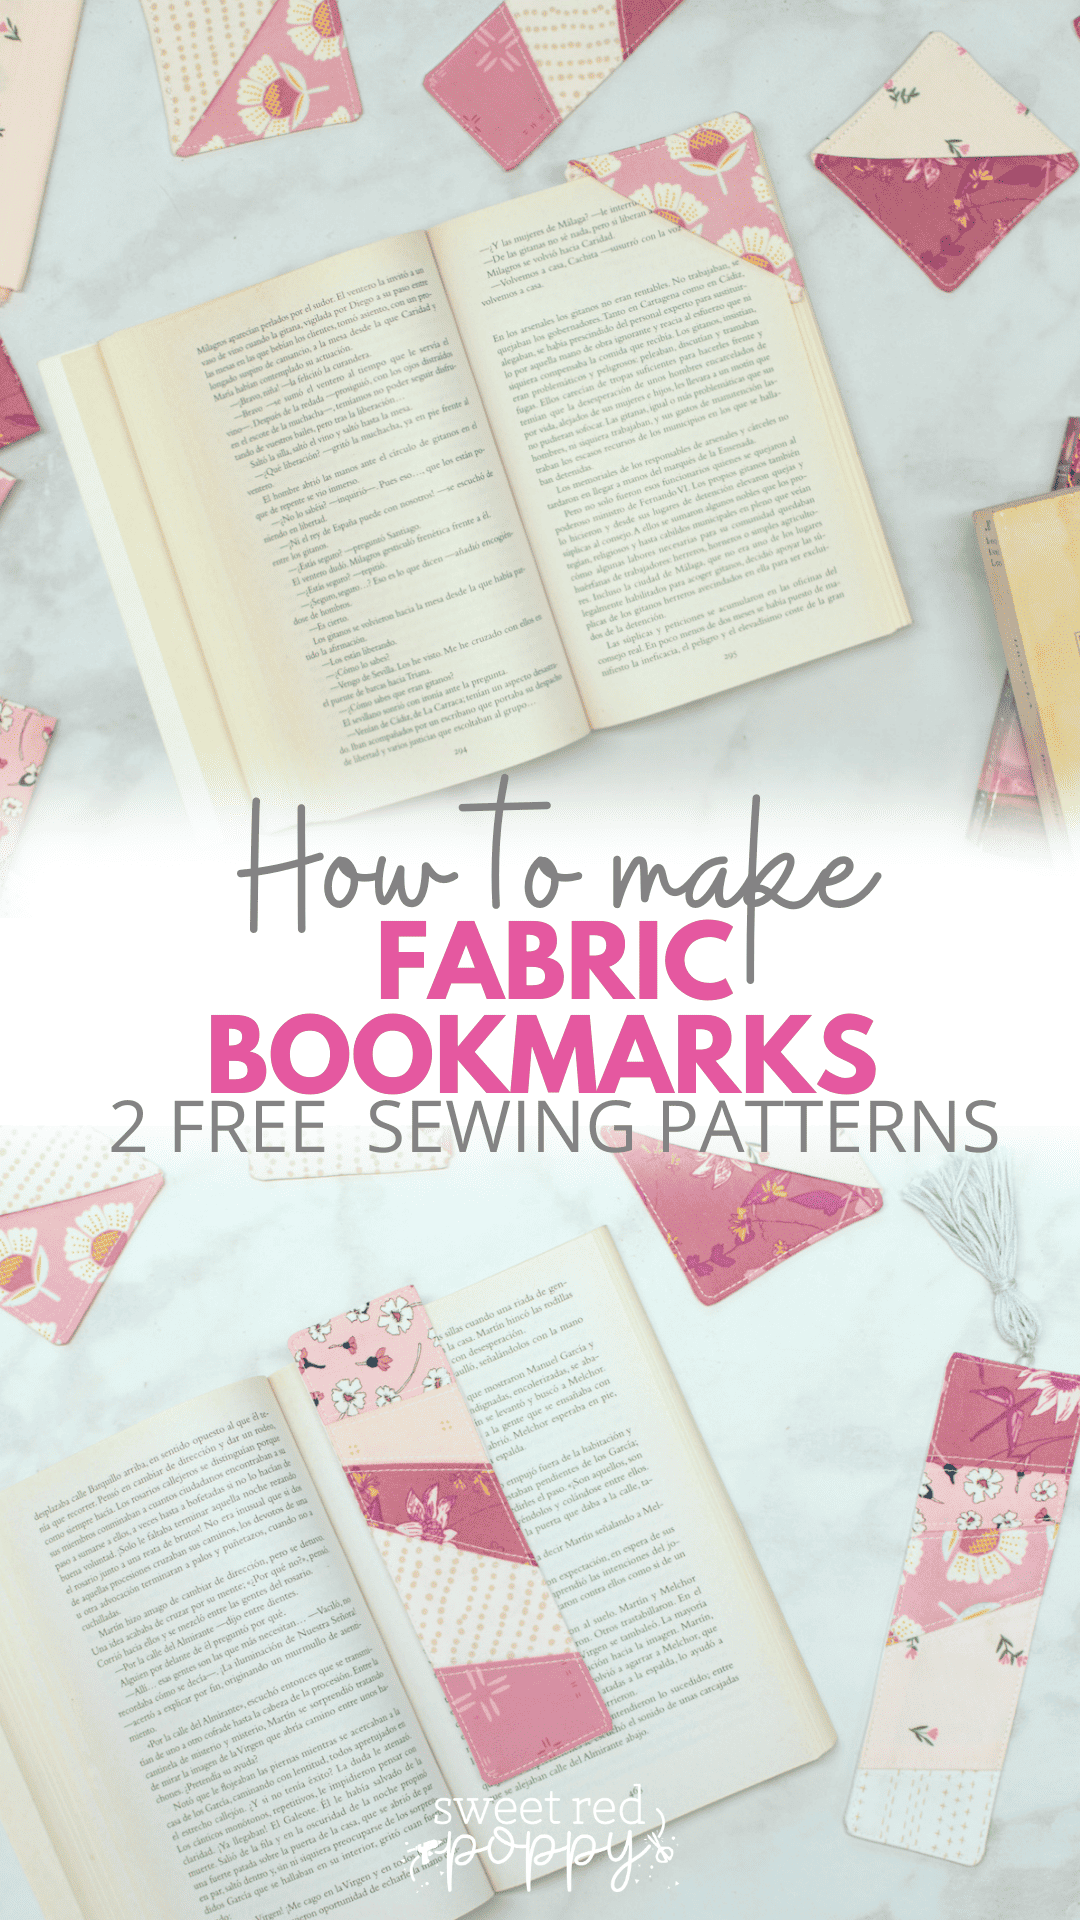
Today I'm sharing two awesome fabric bookmark patterns - one for a cute corner bookmark and one for a pieced bookmark with an optional tassel. Read on for the step-by-step tutorial and free pattern downloads!
Table of Contents
Why DIY Fabric Bookmarks Are Awesome
I love using fabric bookmarks for a few reasons. Most importantly, they last infinitely longer than standard paper bookmarks. If you make a couple of fabric bookmarks, you'll be using the same trusty bookmarks for years!
The other reason I love to DIY fabric bookmarks is that they're so pretty and customizable! You can select fabrics in your favorite colors and prints to really make the bookmark yours. If you want, you can personalize it even more by adding some fun embroidery designs!
Fabric bookmarks are also amazing scrap-busters! They use little pieces of several different fabrics, so it's a great way to use up scraps left over from other projects. Plus, they make great gifts or stocking stuffers!
About the DIY Fabric Bookmark Patterns
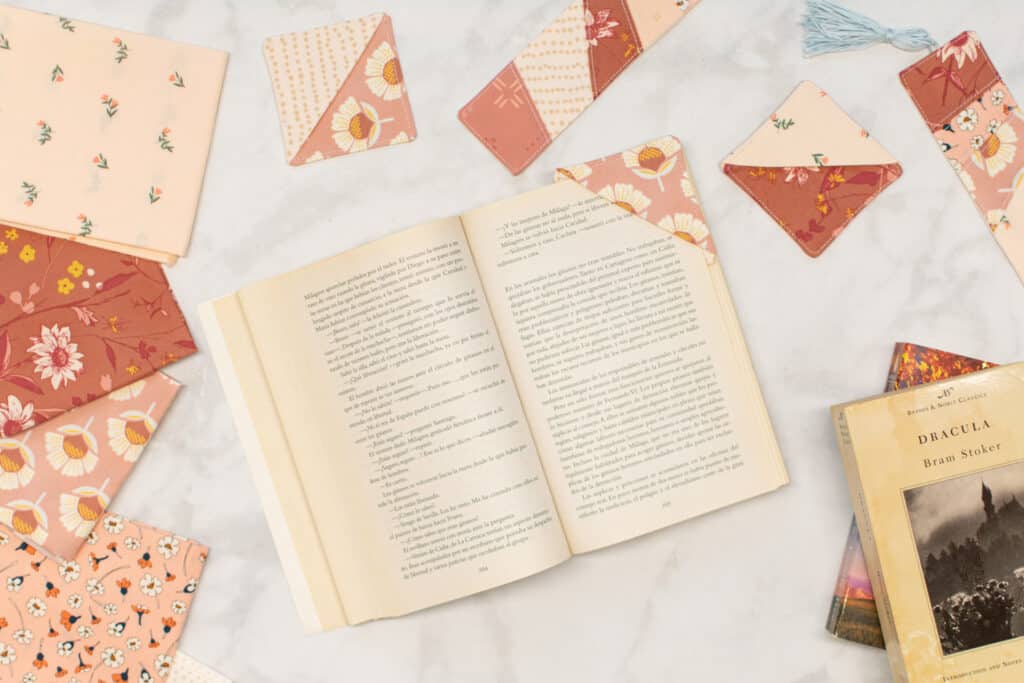
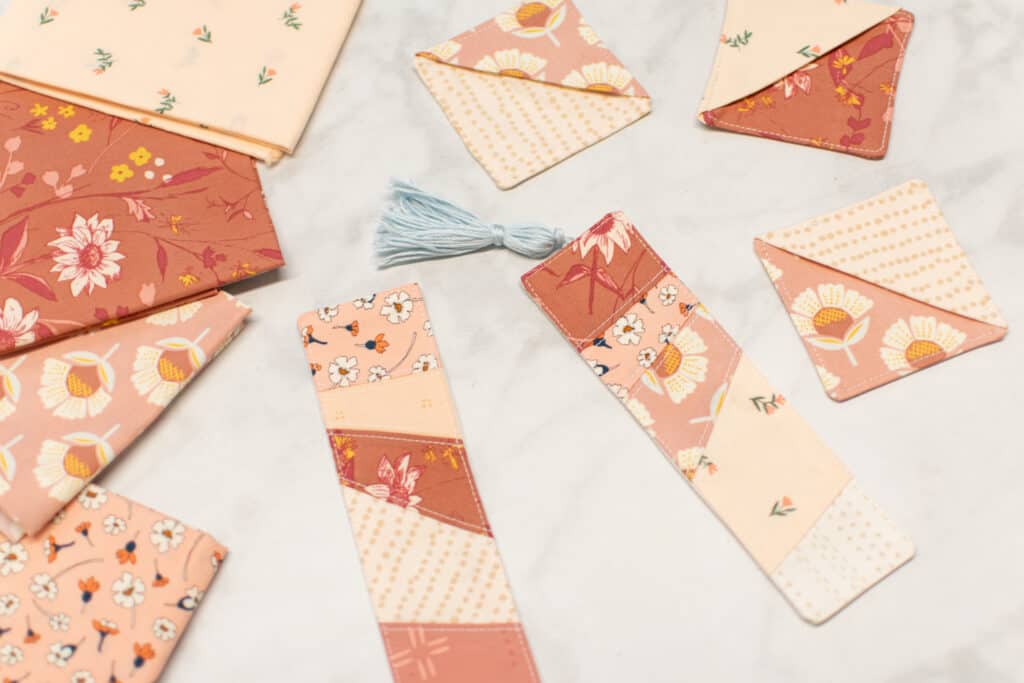
My bookmark pattern includes patterns for two different styles of bookmarks.
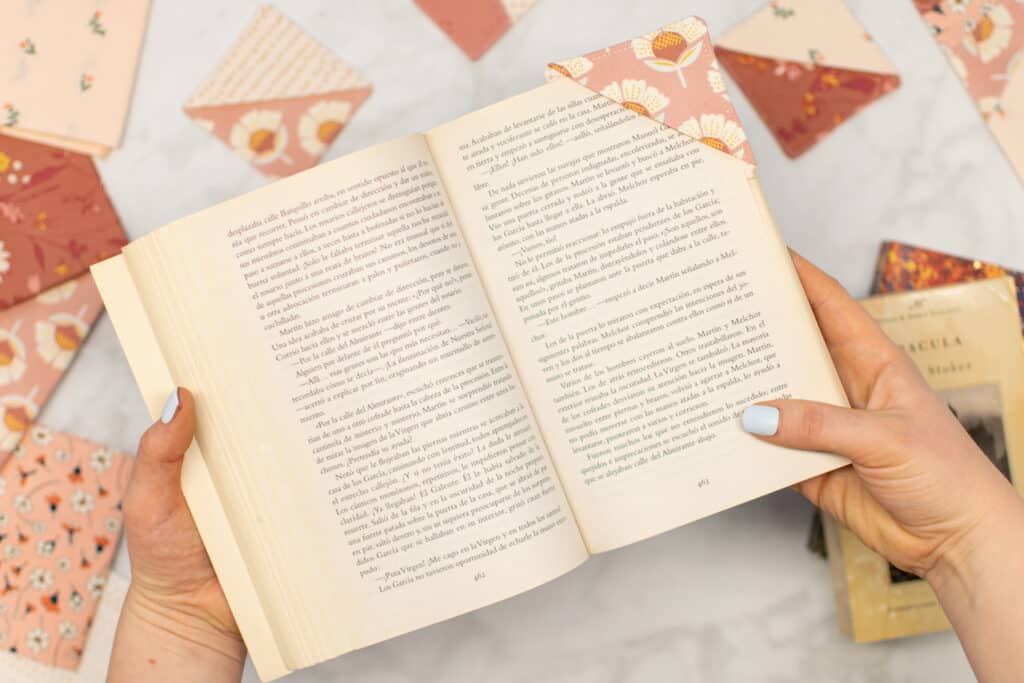
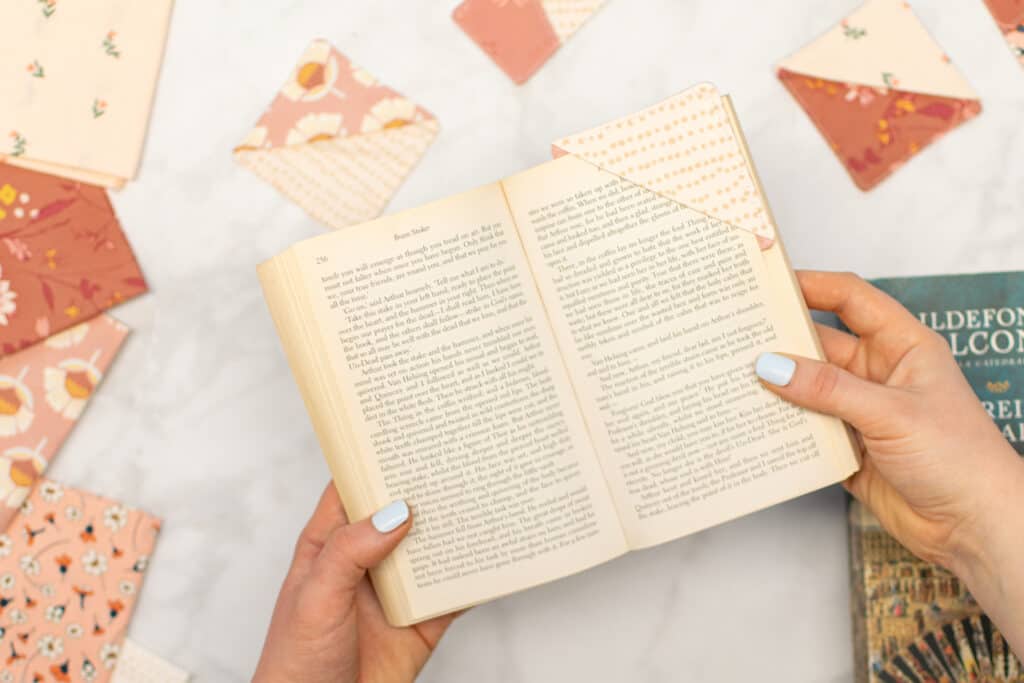
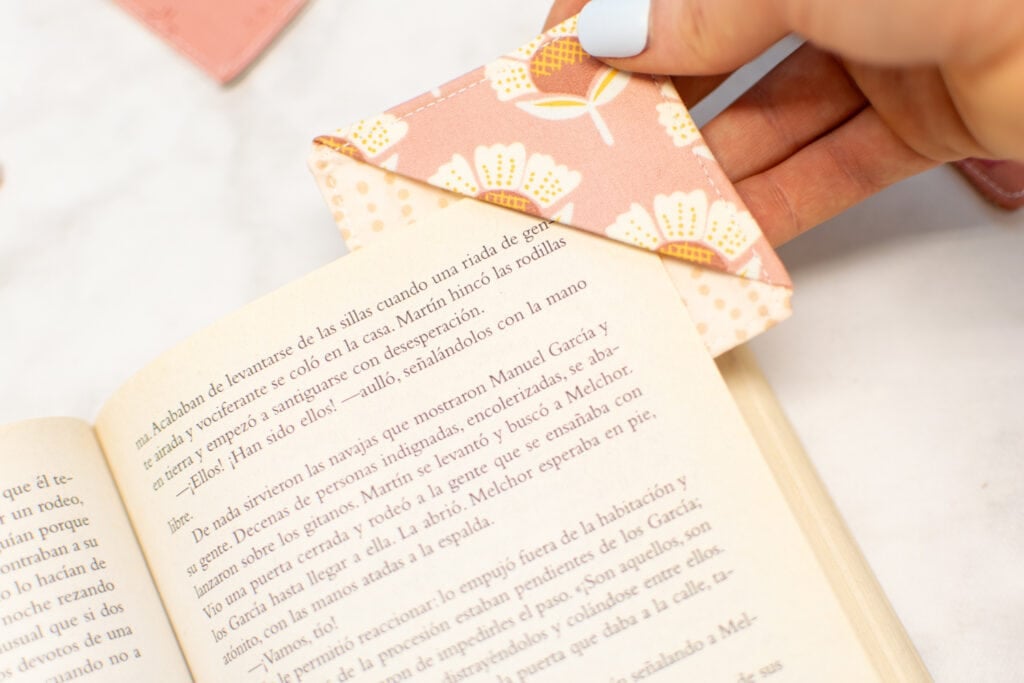
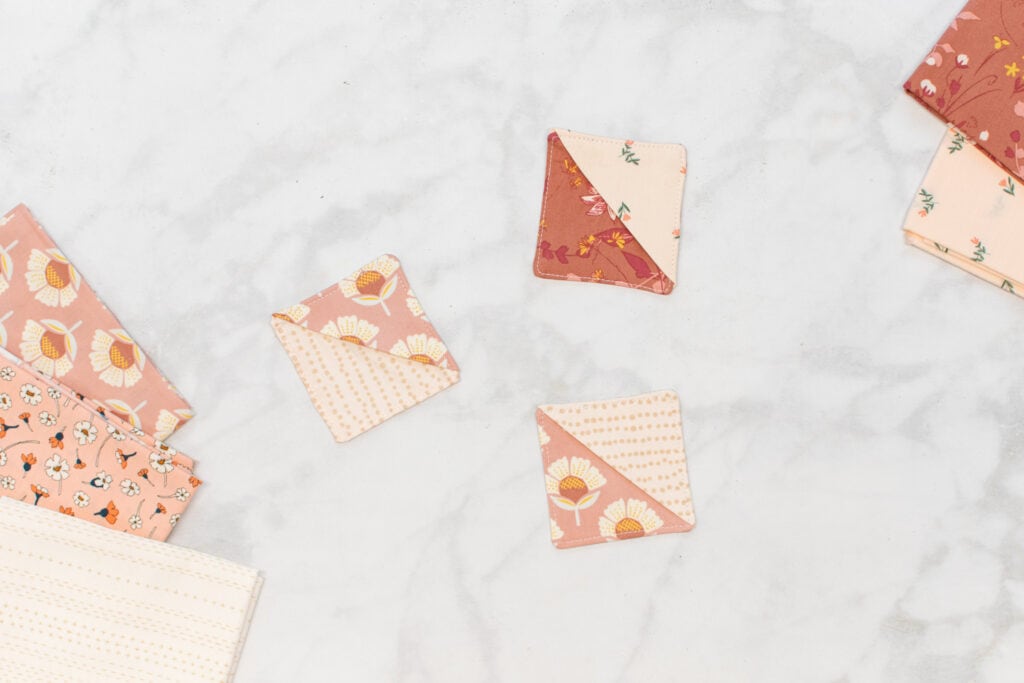
The first is an adorable corner bookmark. This bookmark is a 3-inch square with a triangular pocket in one corner. This pocket can be placed over the corner of the page you need to mark, holding your spot in the book - and looking cool while doing it! Plus, it won't slip down into the book like regular rectangular bookmarks sometimes do.
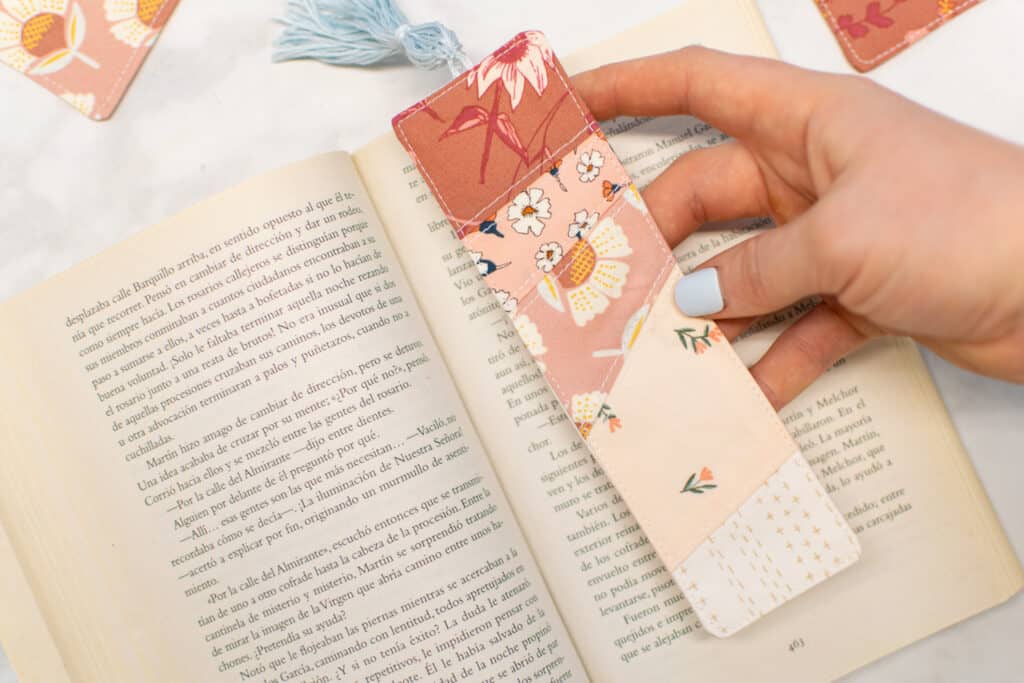
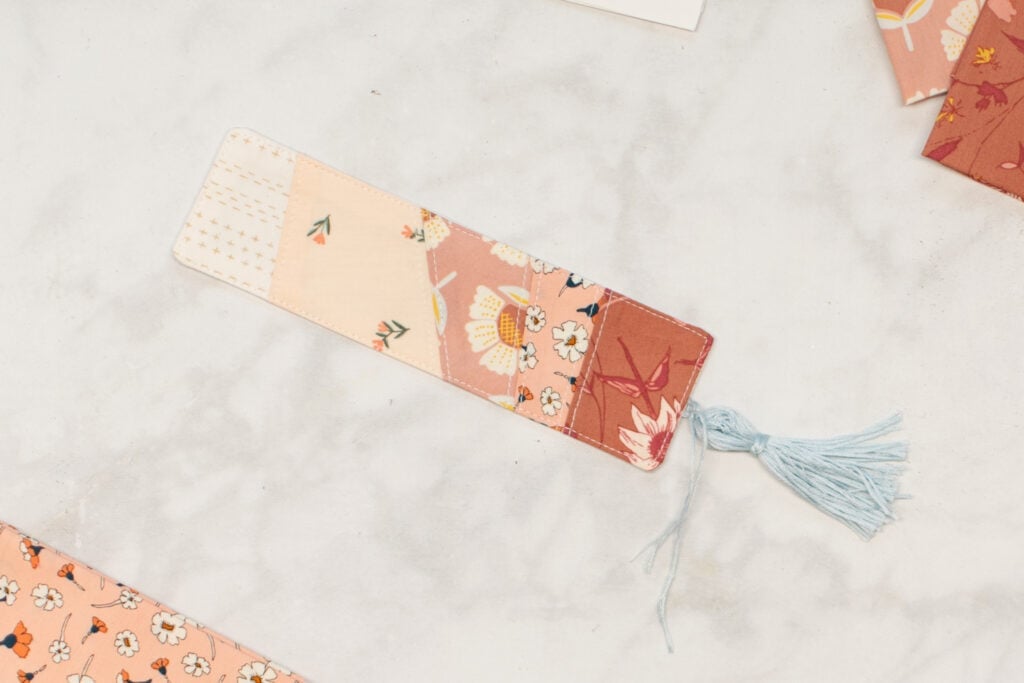
The second bookmark pattern makes a beautiful pieced bookmark. This bookmark is a good size for most books; 2" x 7". The front of the bookmark is pieced together from scraps of 5 different fabrics. Topstitching around the seams adds a cool, "quilted" look without the bulkiness of actual quilting.
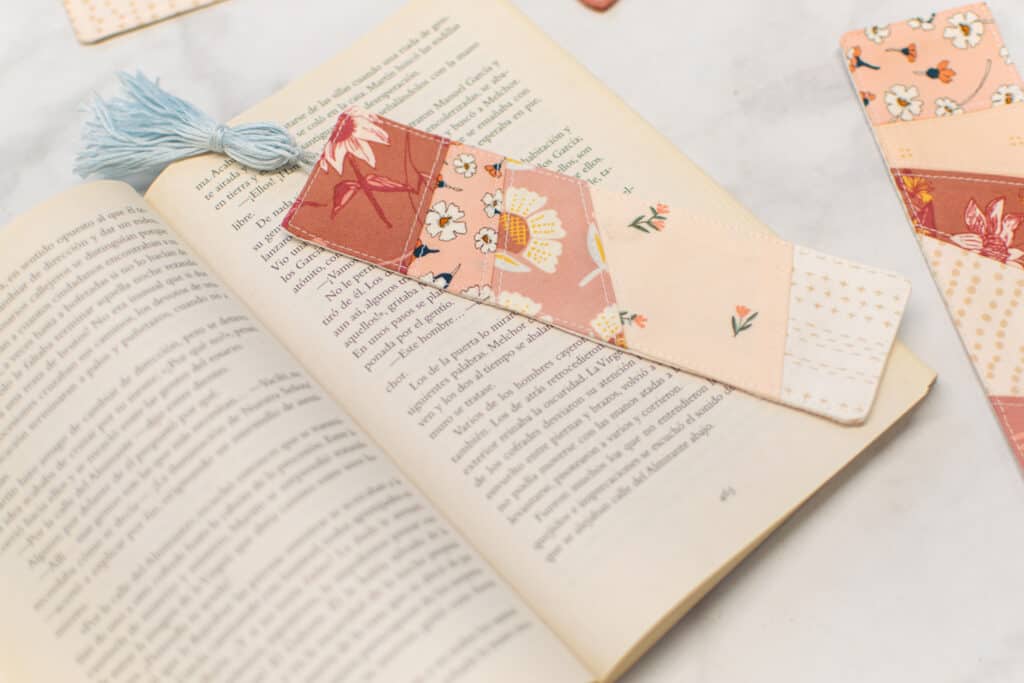
I love adding a tassel to the pieced bookmark - it adds a cute, whimsical touch and helps to prevent the bookmark from slipping down into the book. I've included instructions in the tutorial for adding the optional tassel.
What Fabric to Use for Your DIY Fabric Bookmarks
I highly recommend using quilting cotton to make your DIY fabric bookmarks. It's thin, easy to sew, and is available in a huge range of different colors and prints. Plus, if you're a quilter, you probably have TONS of quilting cotton scraps just lying around. And this pattern is the perfect way to use up a few of them!
If you're just not a quilting cotton person, you can use another non-stretch fabric for your bookmarks. This key is to choose something that is thin. You definitely don't want a bulky bookmark that won't allow your book to lay flat. This could potentially even damage your book, especially the spine of a hardback book.
Here are a few other fabric types that would be fun choices for your bookmarks:
- Organza
- Satin
- Chiffon
- Taffeta
- Linen
Click Here to Download the FREE DIY Fabric Bookmarks Pattern

DIY Corner Bookmark Tutorial
Let's start with the corner bookmark tutorial.
Supplies to Sew the Corner Bookmark
Here are the supplies you'll need to sew the DIY corner bookmark.
Shop my favorite sewing supplies here!
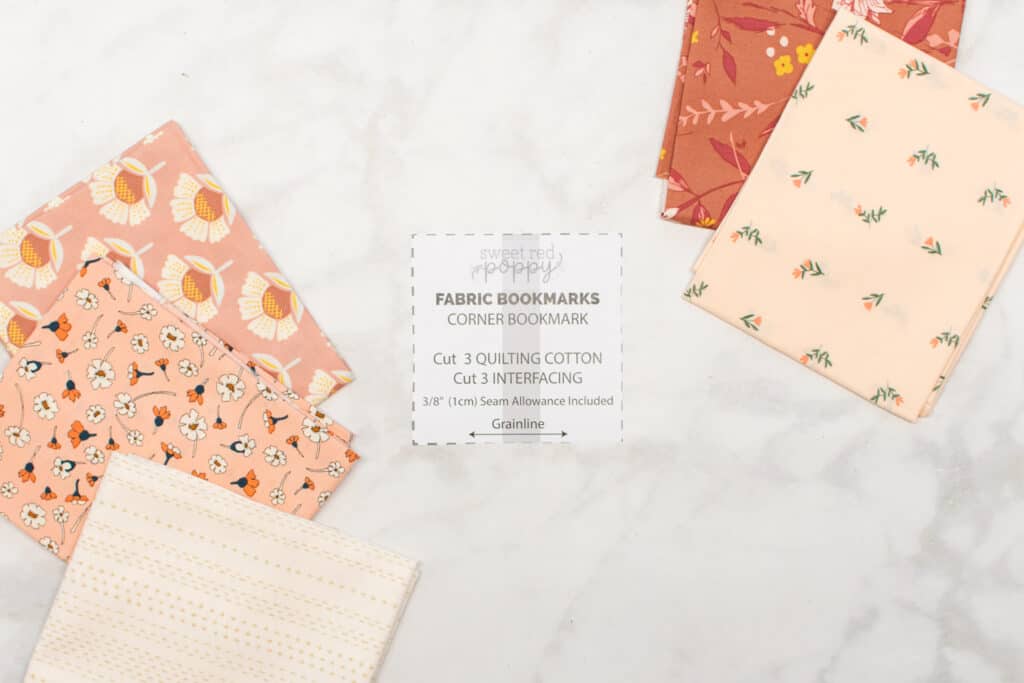
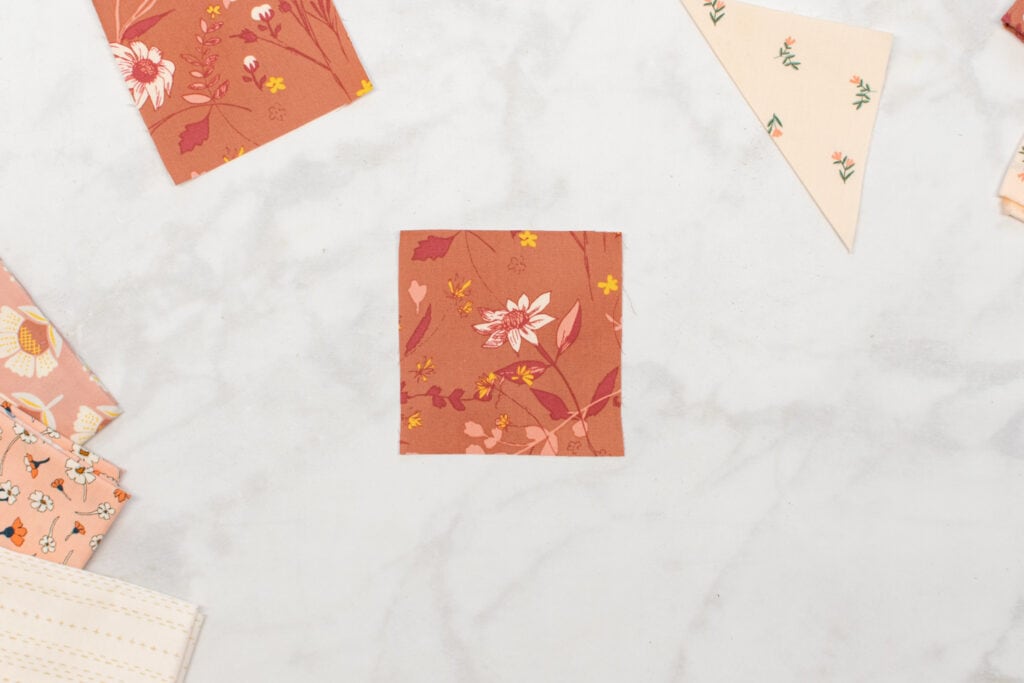
- 3 Scraps of Quilting Cotton (Each At Least 4" Square)
- 1/8 Yard Fusible Interfacing
- Scissors
- Rotary Cutter
- Rotary Cutting Mat
- Thread
- Sewing Pins
- Iron
- Ironing Board
- Sewing Machine
- Sewing Machine Needle
- Printer
- Printing Paper
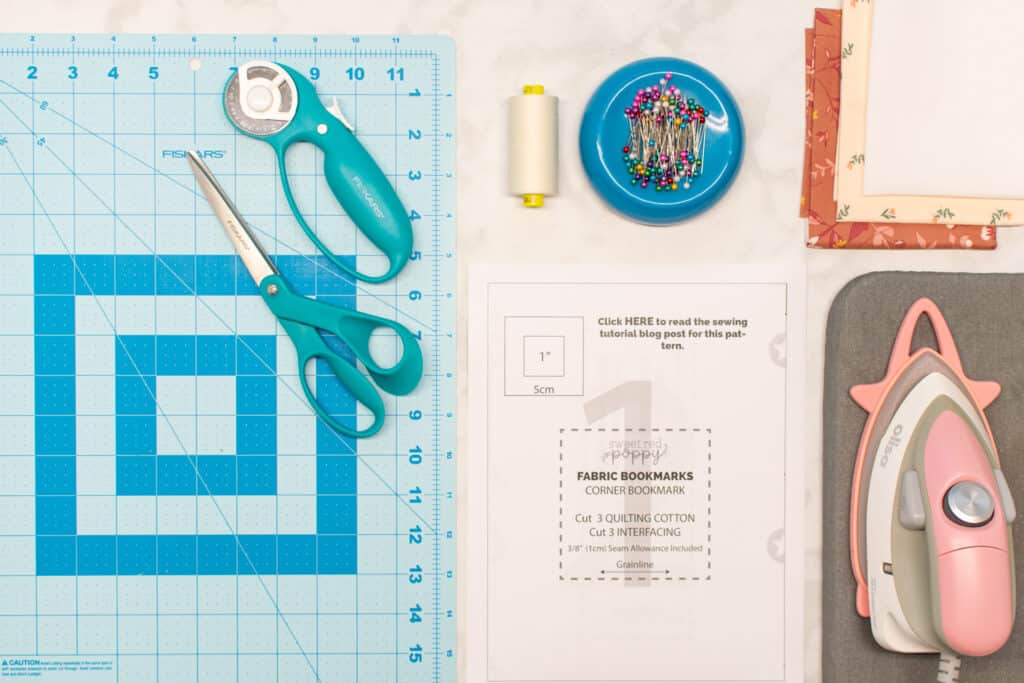
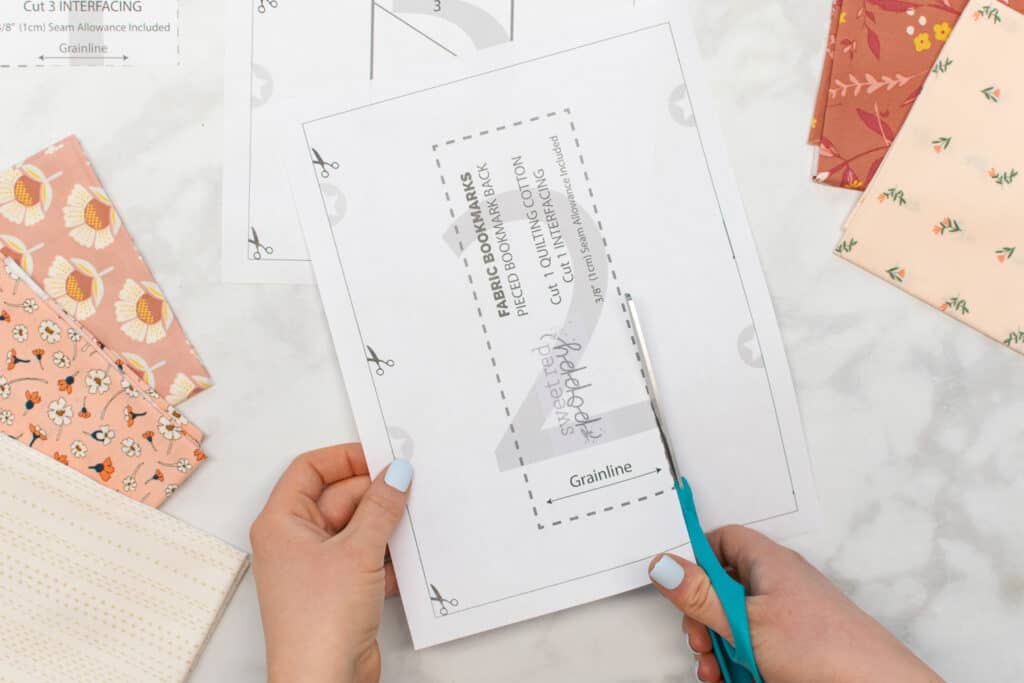
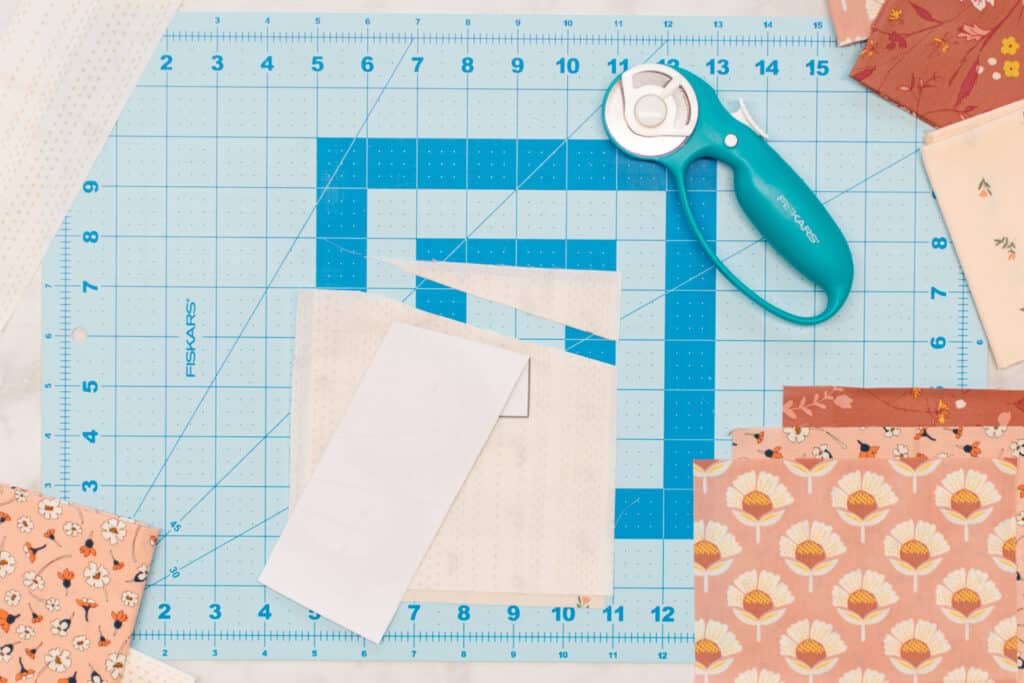
Step 1: Download and Cut Out the Pattern
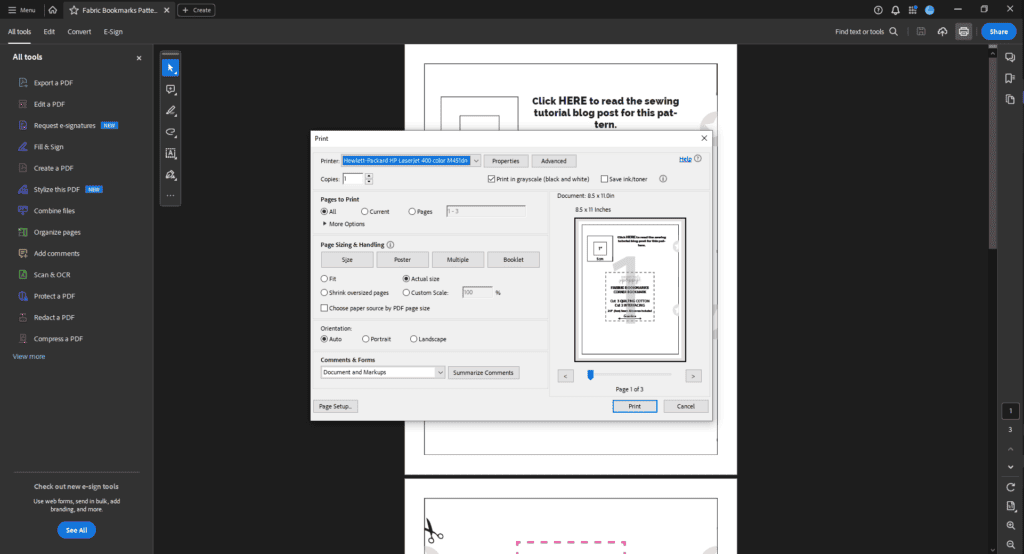
Start by downloading the DIY fabric bookmarks pattern. Open the pattern in your PDF reader. I highly recommend using Adobe Acrobat.
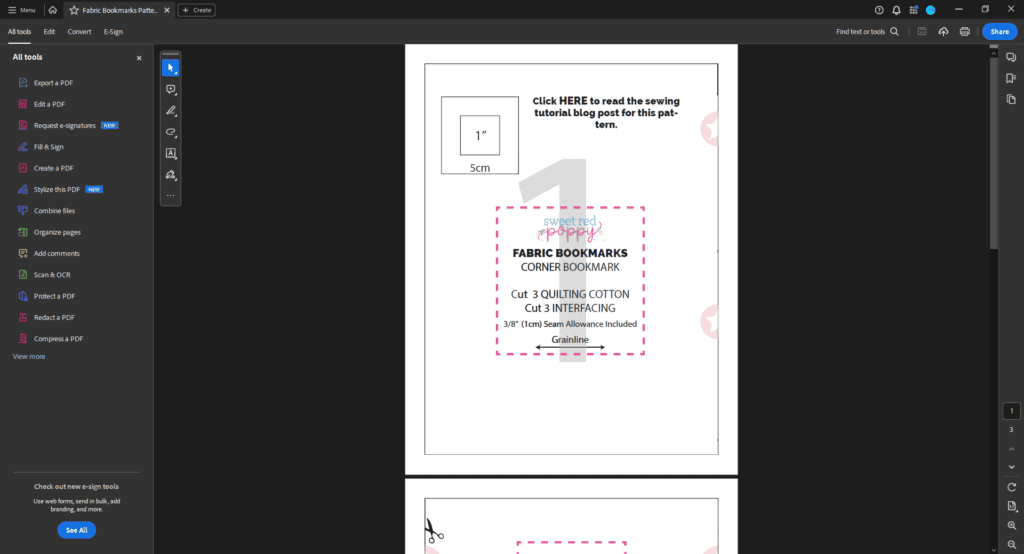
It's important not to print the pattern directly from your browser. This can result in the pattern printing with wonky border lines or incorrect scaling.
Once the pattern is open in your PDF reader, click on the "Print" icon. In the print settings dialog box, update the scaling to "Actual Size" or "Custom: 100%".

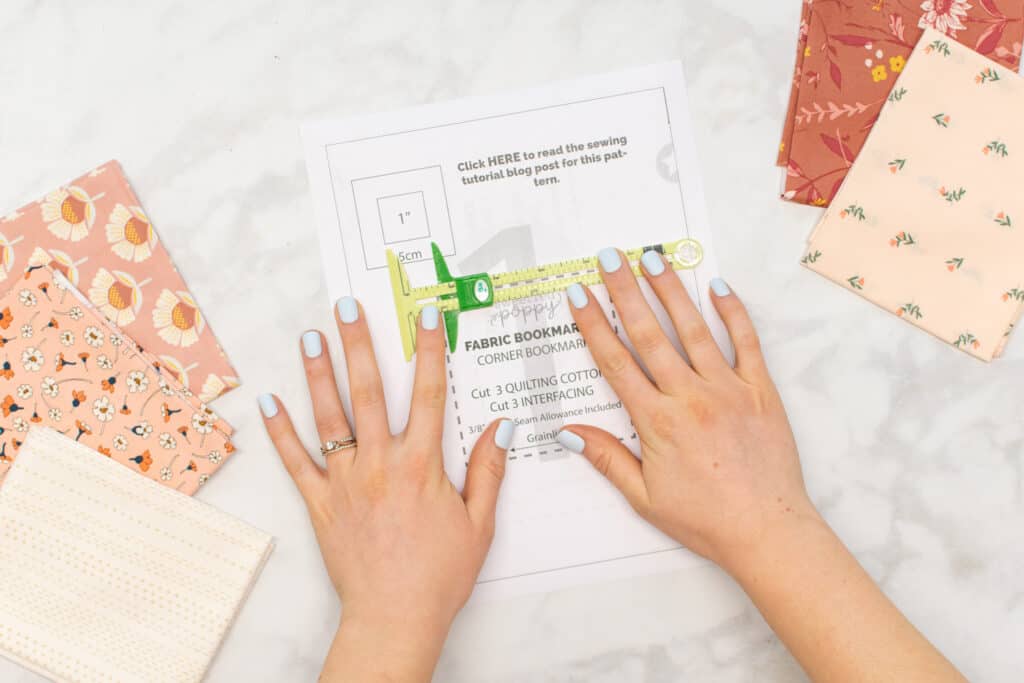
Next, print the first page of the pattern. This page contains a 1" x 1" test square. Measure the test square with a measuring tape, ruler, or seam gauge.

If the test square accurately measures 1" x 1", you're good to go! Go ahead and print the remaining pages of the pattern. However, if it doesn't measure 1" x 1", recheck your print settings and try printing again.
This pattern doesn't require any taping and assembly because there is no overlap between pages. So, simply cut out the pattern piece for the Corner Bookmark.

There will be only one pattern piece for this bookmark.
Step 2: Cut Your Materials
Next, cut the following number of pieces from your fabrics and interfacing, using the pattern as a guide:
Quilting Cotton: Cut 3
Interfacing: Cut 3
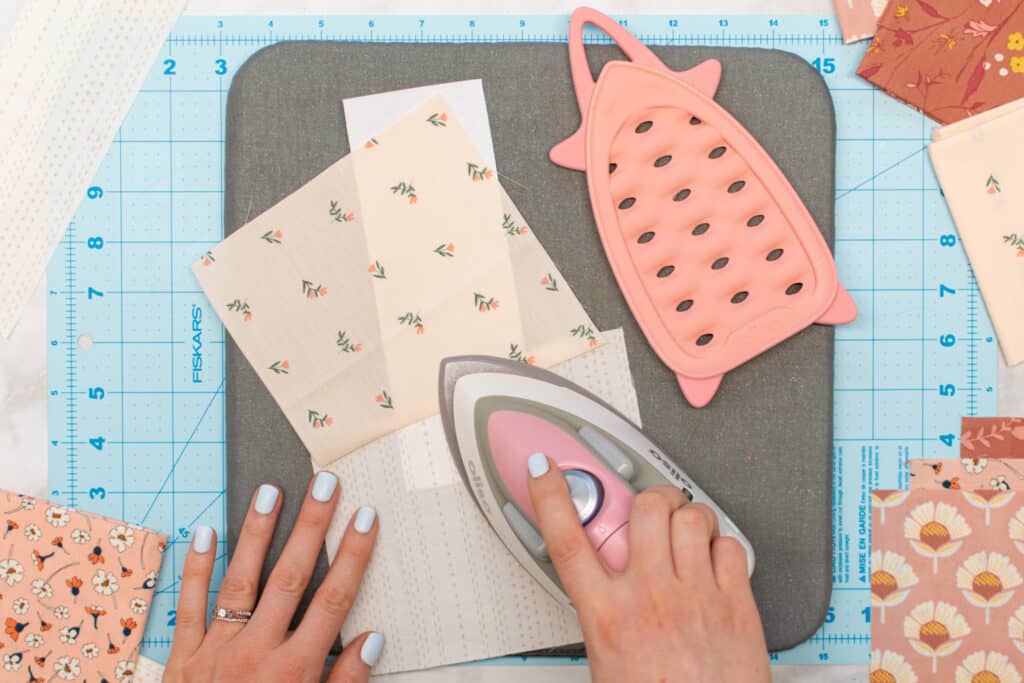
Step 3: Apply Interfacing
The next step is to apply the fusible interfacing. Start by placing all 3 quilting cotton pieces wrong side up on your ironing board or pressing mat.
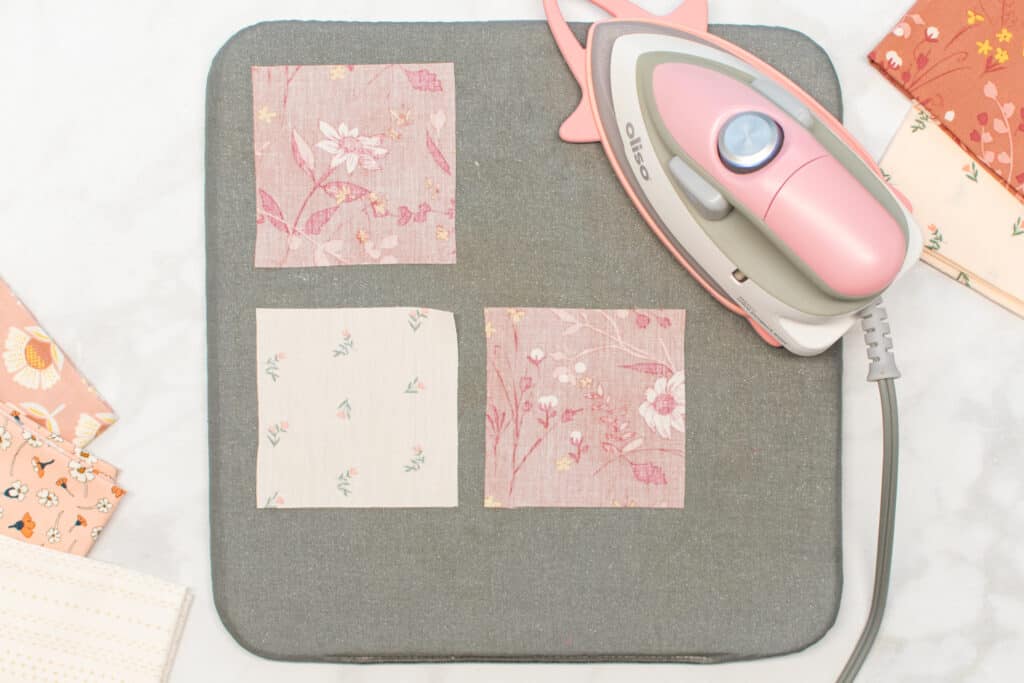
Then, lay 1 piece of fusible interfacing down on each piece of quilting cotton. Make sure that the bumpy side of the interfacing is against the wrong side of the fabric.
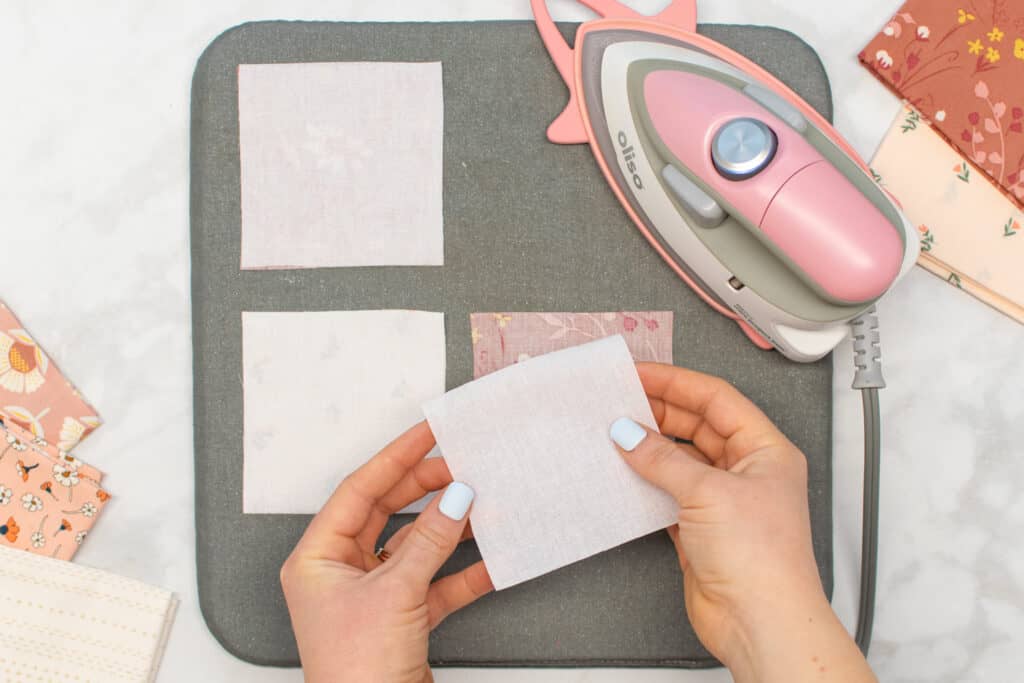
Next, use your iron to press and fuse the interfacing in place. Make sure to check the instructions for your specific interfacing on how to do this.
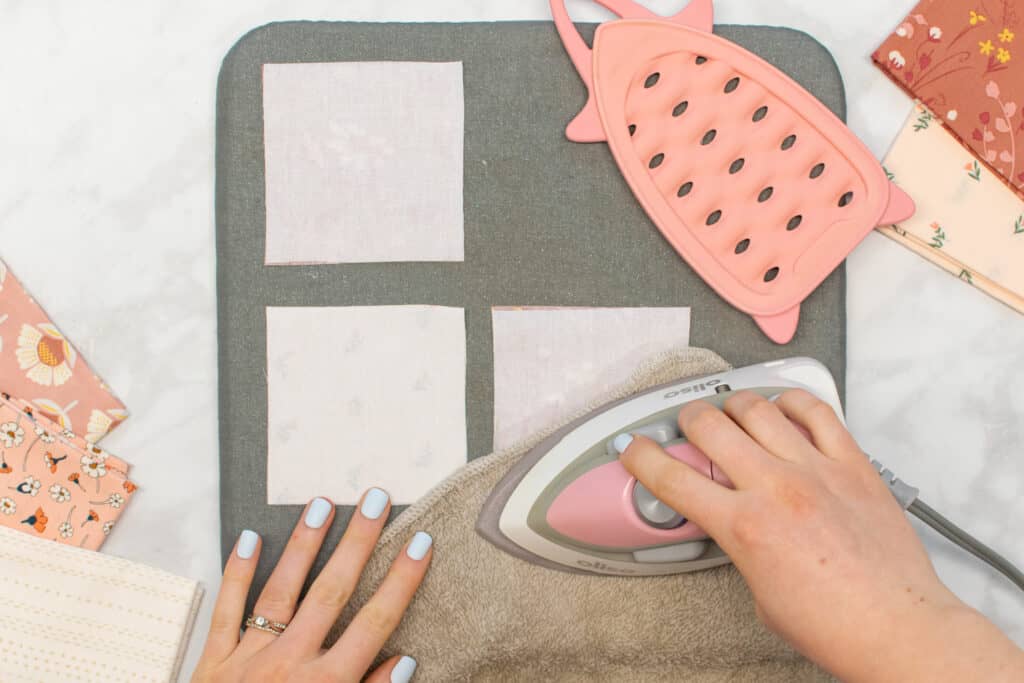
Usually, this involves placing a damp cloth over the interfacing before pressing. However, it really depends on the brand of interfacing you are using!
Step 4: Sew the DIY Fabric Bookmarks
Once all 3 pieces have been fused with interfacing, you're ready to start putting this bookmark together!
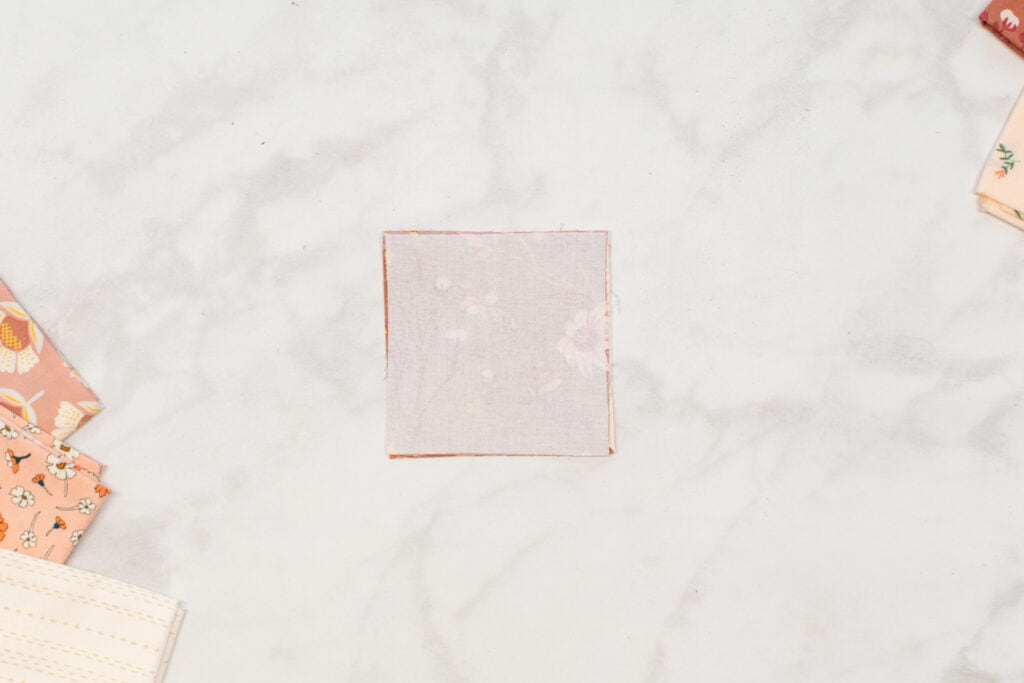
First, fold one of the fabric pieces in half diagonally with wrong sides together and press it flat. Make sure to carefully align the corners.
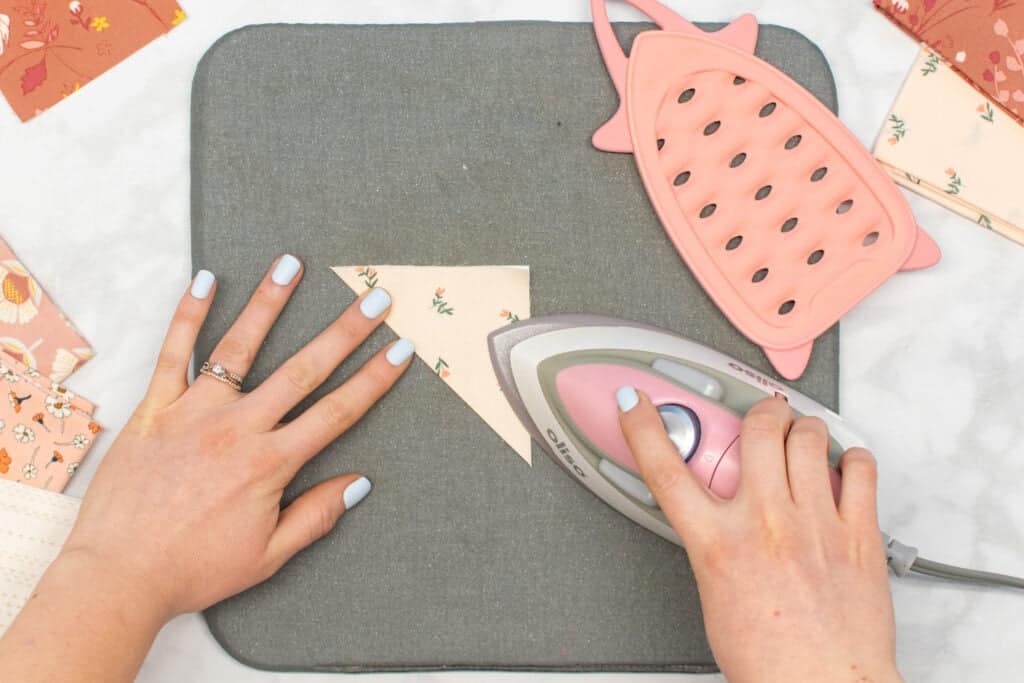
Next, lay one of the unfolded pieces right sides up on your table. If the fabric has a directional print, make sure it is oriented correctly.
Then, place the folded triangular piece on top of it. Line up the corner of the folded piece in the upper right corner of the piece below it.
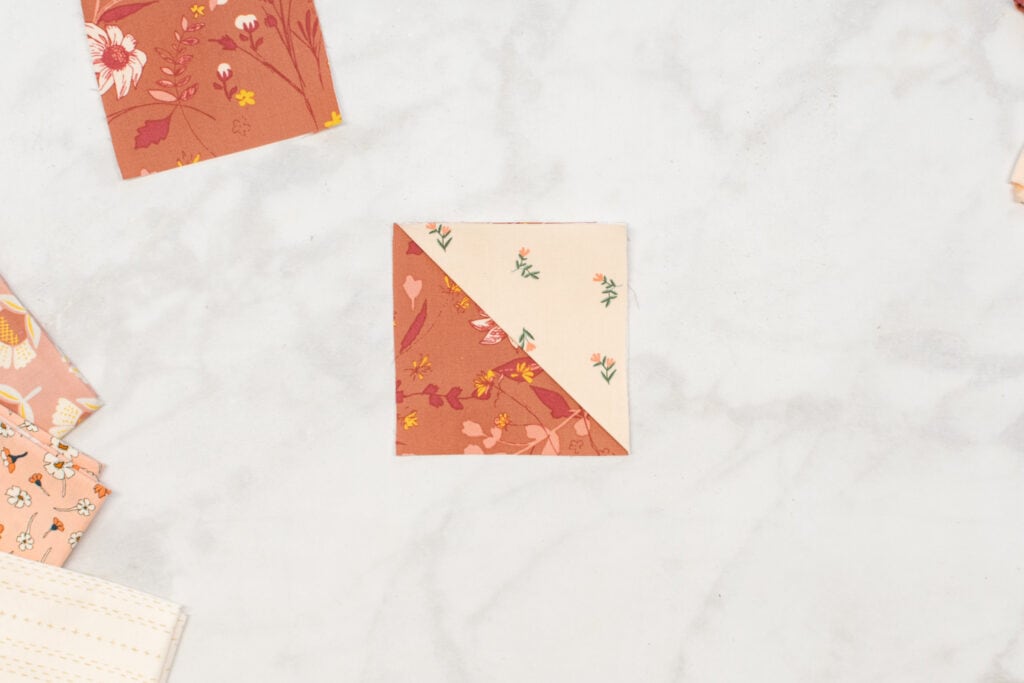
Finally, place the remaining square face-down on the other two pieces. Again, if it has a directional print, make sure the print is oriented correctly.
Pin the three stacked pieces together around all four edges.
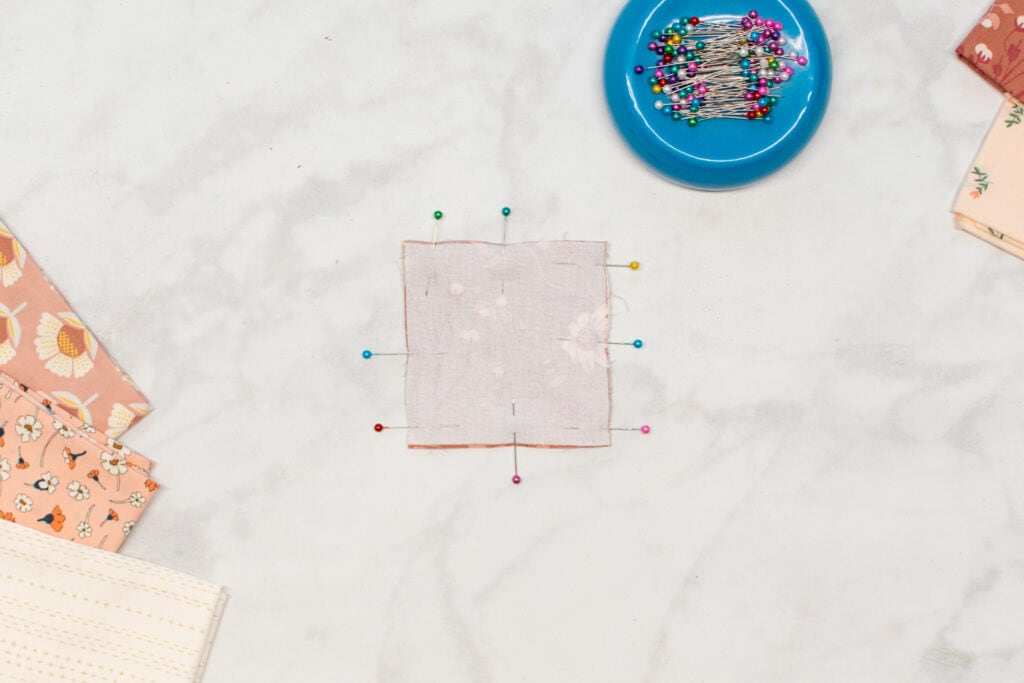
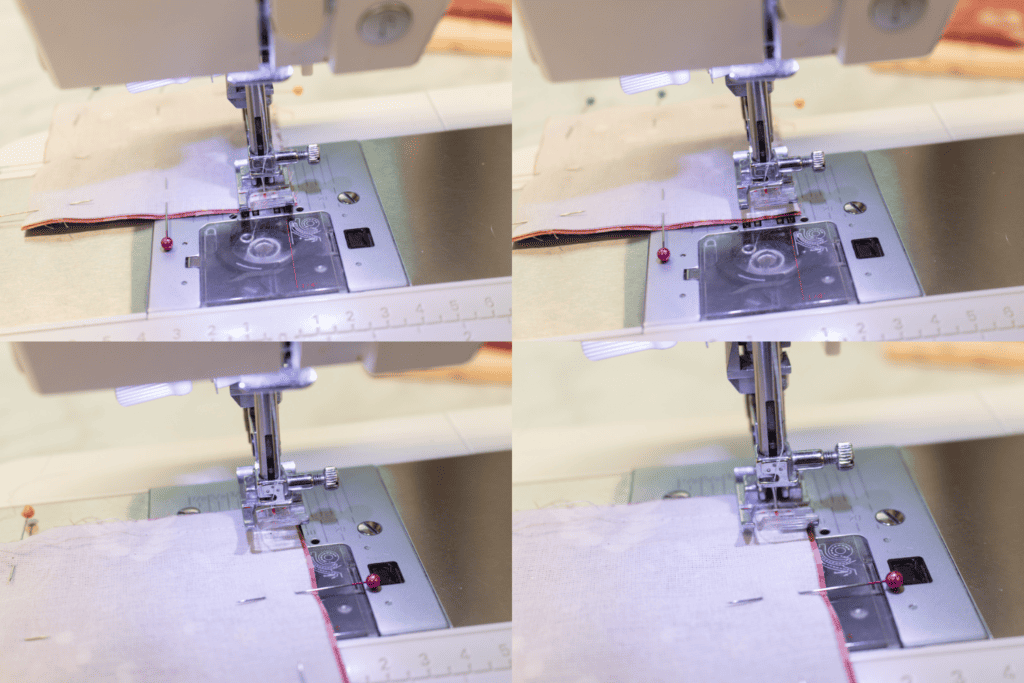
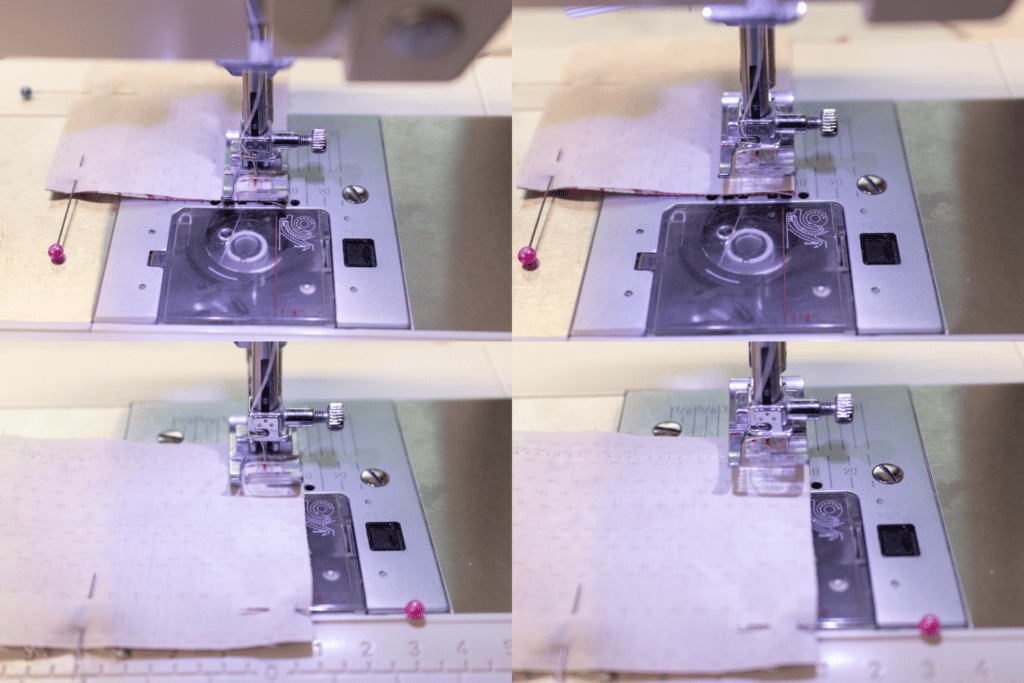
Next, stitch around the four edges with a 3/8" seam allowance, making sure to leave an opening at least 2" wide along one of the edges. This is important because we will need an opening to turn the bookmark right sides out through later.
When sewing the corners, I like to rotate around each corner for a nice, sharp corner. To do this, stop sewing 3/8" before reaching the first corner, making sure that the needle is down in the fabric. Then, lift the presser foot and rotate the fabric 90 degrees. The next straight edge should be in front of the presser foot. Repeat this process to rotate around each corner.
Step 5: Turn and Finish the Bookmark
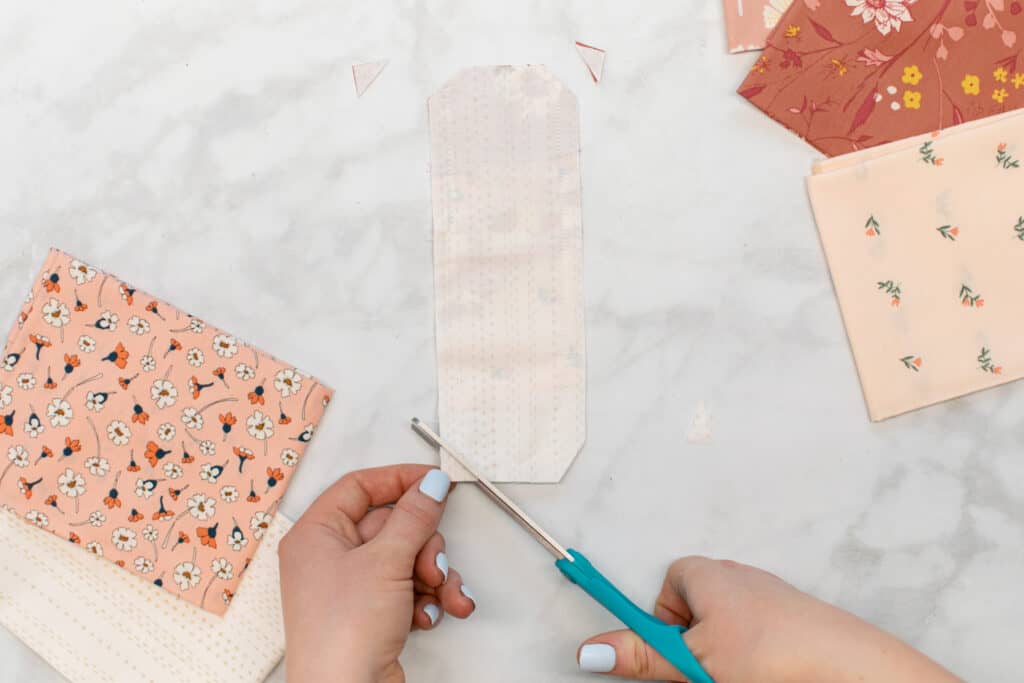
After sewing, cut the seam allowances off at a diagonal at each corner. Cut close to (but not through!!) your stitching. This will reduce bulk and help you to achieve sharper corners.
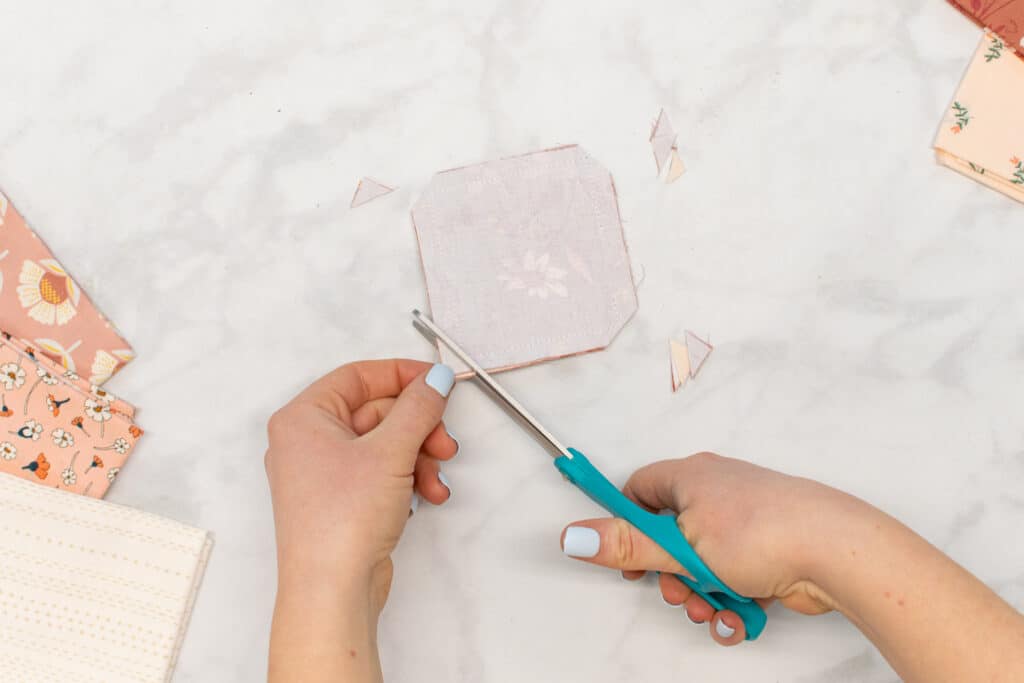
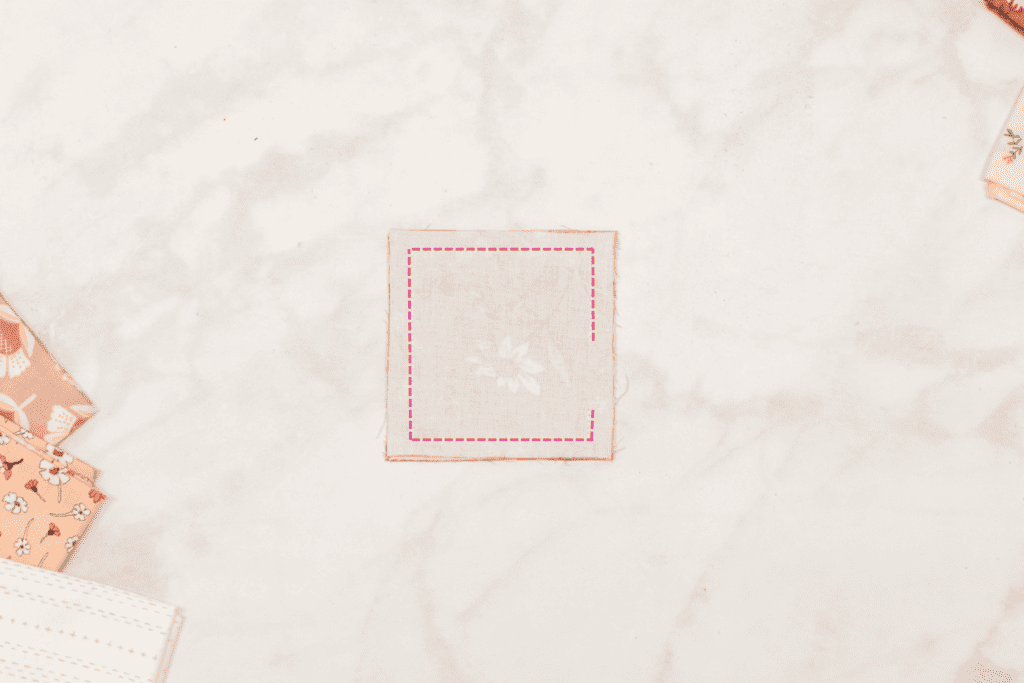
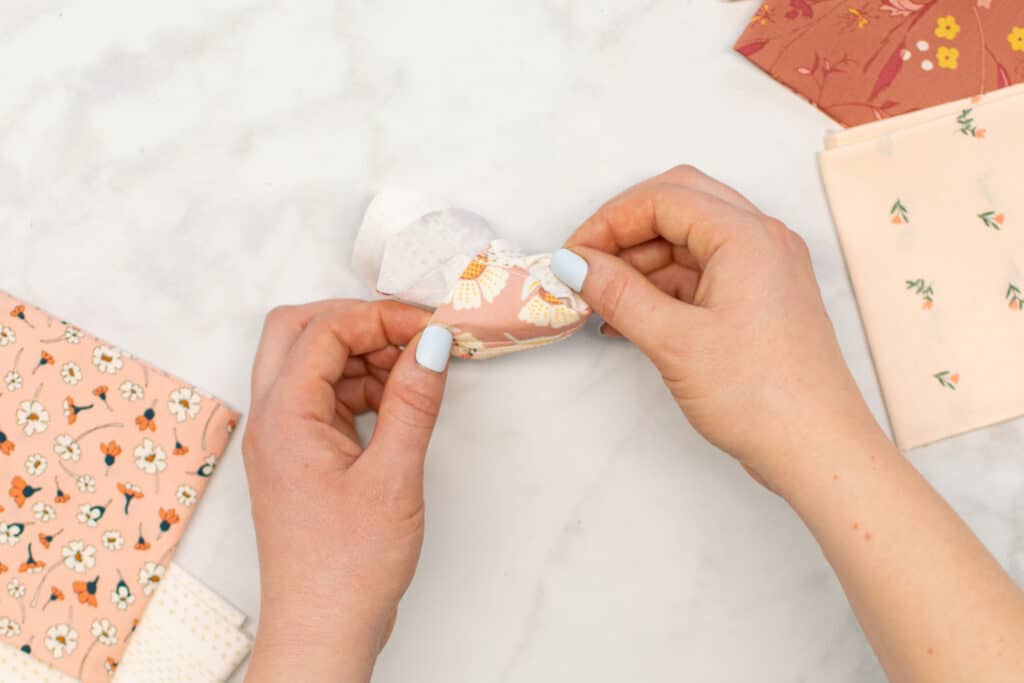
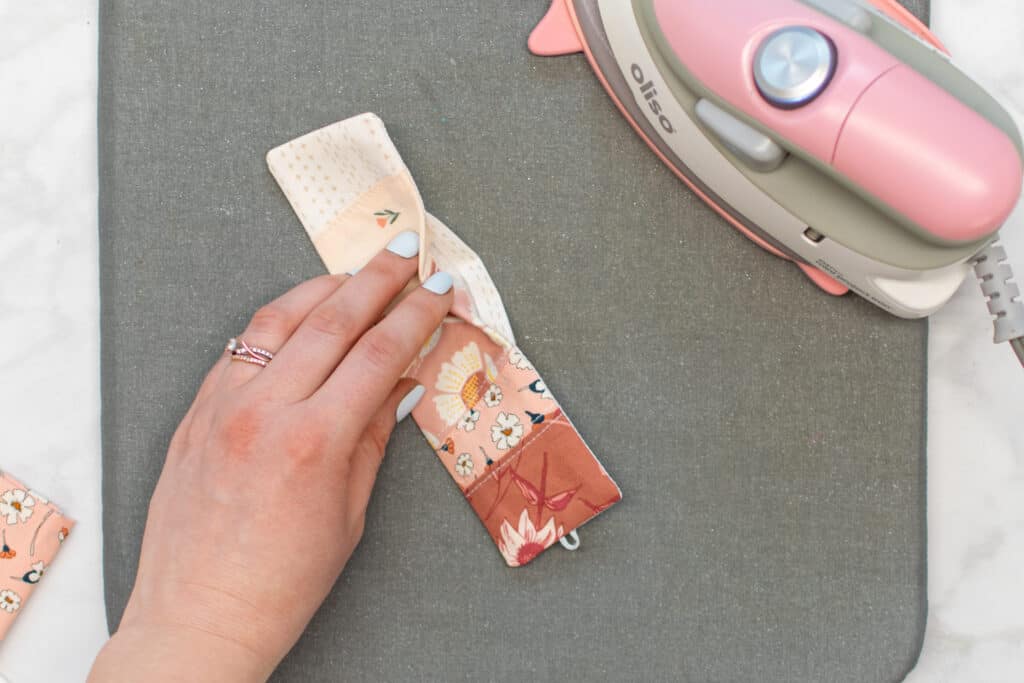
Next, turn the bookmark right sides out through the opening in the seam.
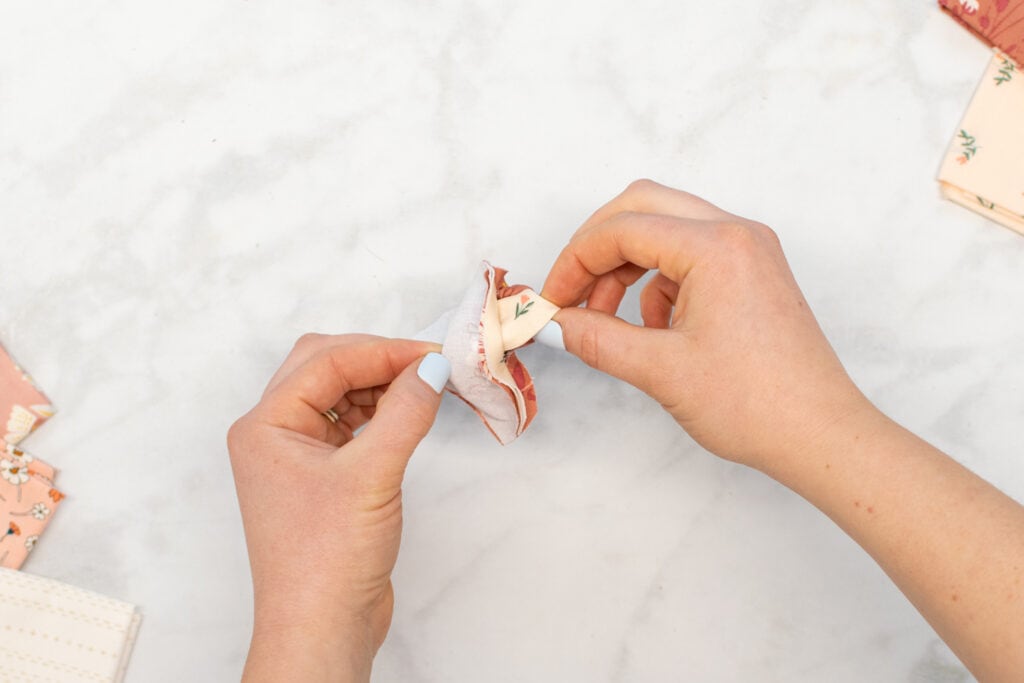
Press the bookmark flat. At the opening, press the seam allowances to the inside by 3/8" so that it creates a continuous straight edge.
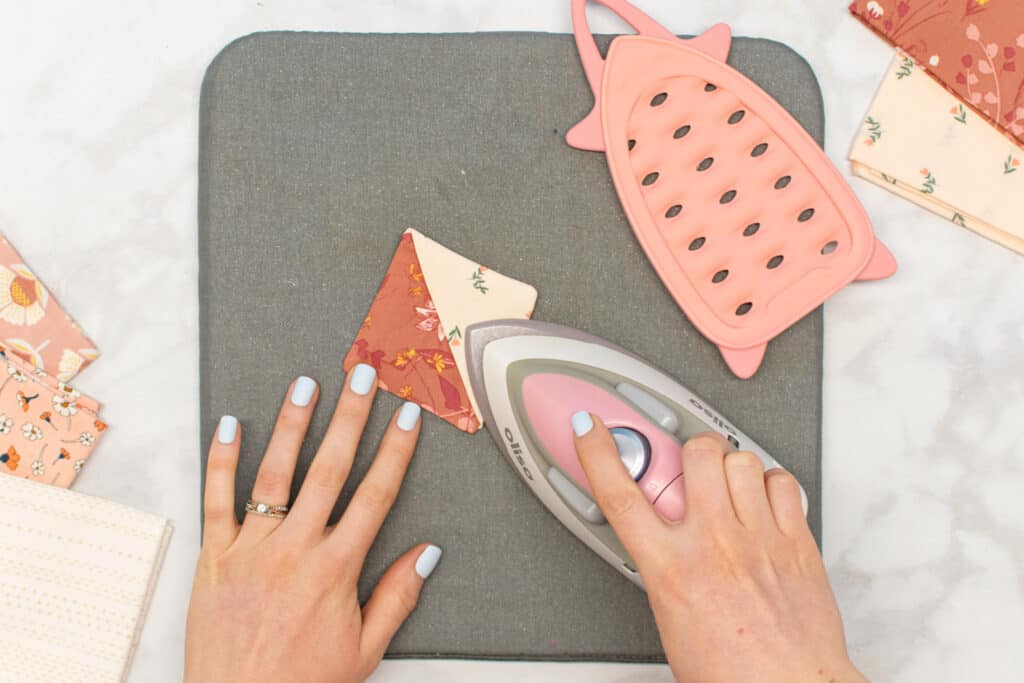
Finally, topstitch around all 4 edges of the bookmark with a 1/16 - 1/8" seam allowance. Make sure to backstitch at the beginning and end and to rotate around the corners as you topstitch.
Your adorable corner bookmark is finished!! Congrats!
If you'd like to also learn how to make the pieced rectangular bookmark, read on!
DIY Pieced Bookmark Tutorial
This tutorial for my favorite scrappy bookmark also includes instructions for an optional (and adorable!) tassel.
Supplies to Sew the Pieced Bookmark
Here are the supplies you'll need to create your cute pieced bookmark.
- 1/8 Yard Quilting Cotton (Scraps For Front - At Least 4" x 4")
- 1/8 Yard Fusible Interfacing
- (Optional) Embroidery Floss for Tassel
- Scissors
- Rotary Cutter
- Rotary Cutting Mat
- Thread
- Sewing Pins
- Iron
- Ironing Board
- Sewing Machine
- Sewing Machine Needle
- Printer
- Printing Paper

Click Here to Download the FREE DIY Fabric Bookmarks Pattern
Step 1: Download and Prepare the Pattern
First, download the free pattern and open it in your PDF reader. I highly recommend using Adobe Acrobat.

It's important not to print the pattern directly from your browser. This can cause the pattern to print with incorrect scaling or wonky border lines.
With the pattern open in your PDF reader, click on the "Print" icon. In the print settings dialog box, change the scaling to "Actual Size" or "Custom: 100%".
Print the first page of the pattern. This page has a 1" x 1" test square. Measure the test square with a ruler, measuring tape, or seam gauge.
If it does not measure 1" x 1", you'll need to recheck your scaling settings and reprint. However, if it does measure 1" x 1", go ahead and print the rest of the pattern.
Once the pattern has been printed, cut out the 2 pattern pieces for the Pieced Bookmark.
This will include these 2 pieces: Pieced Bookmark Back and Pieced Bookmark Front Template.

This pattern does not have any overlap between pages, so there's no need to assemble and tape the papers together.
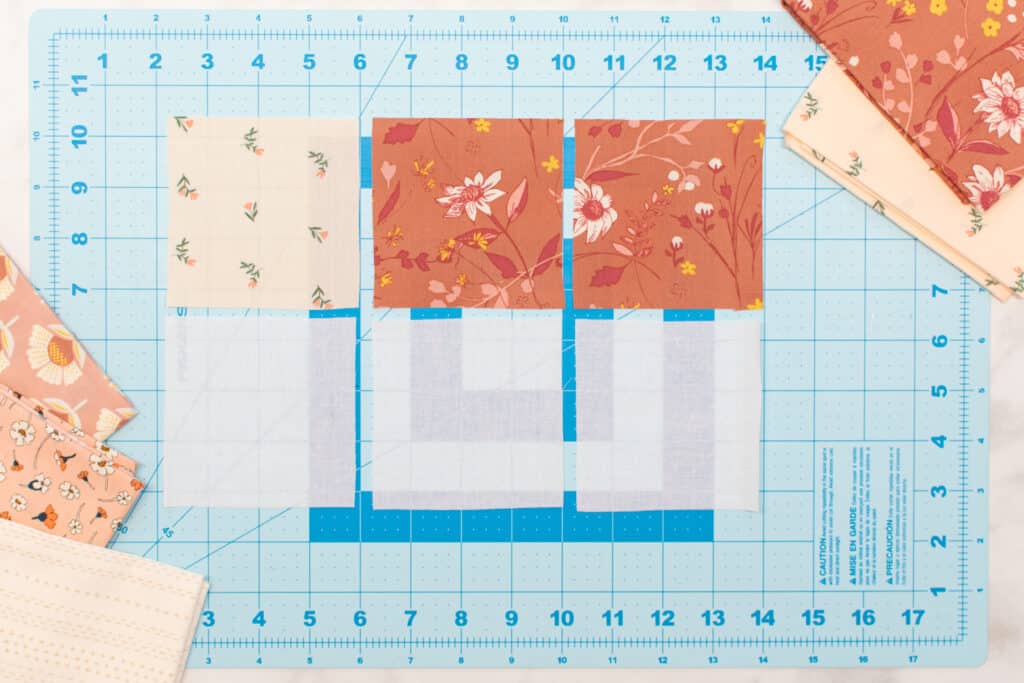
Step 2: Cut Your Materials
We're ready to cut everything out!

Cut the following number of pieces from each of your materials:
Quilting Cotton Scraps (For Pieced Front)
- Choose 5 Scraps, each at least 6" x 6" (They can be smaller, but you'll have to be more careful about placement on the template during piecing. I only recommend using smaller pieces if you're familiar with FPP.)
Quilting Cotton (For Back)
- Pieced Bookmark Back Pattern Piece: Cut 1
Fusible Interfacing
- Pieced Bookmark Back Pattern Piece: Cut 1
Step 3: Piece the Bookmark Front
The first step is to piece the bookmark front. To do this, we're going to use something called Foundation Paper Piecing (FPP). However, if you don't know what FPP is, don't worry about it! I'll show you exactly how to piece this bookmark in the steps below.
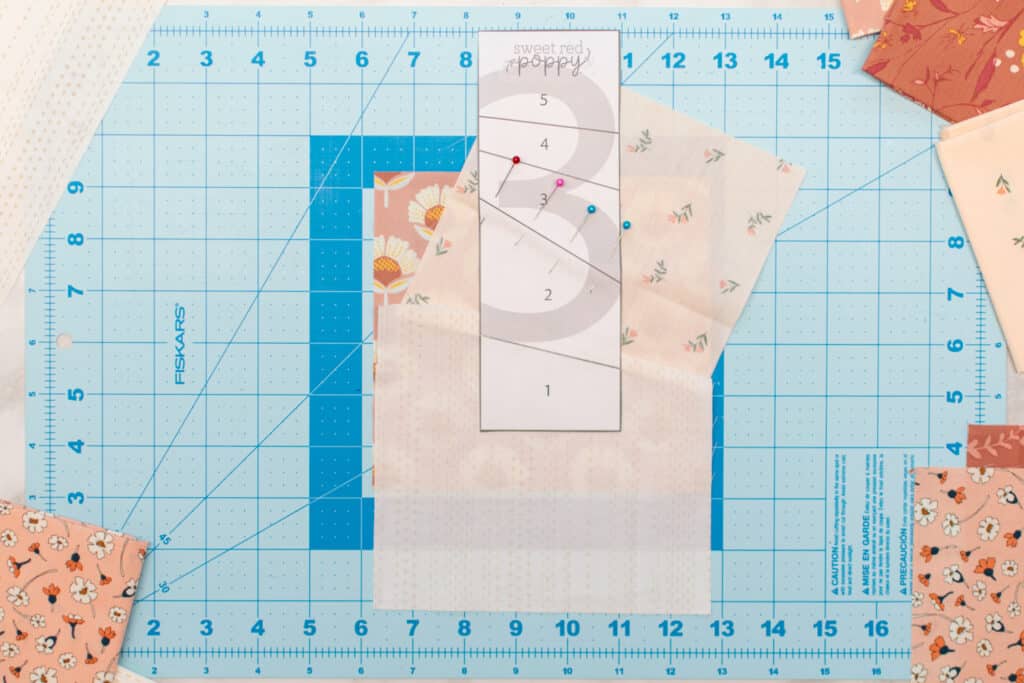
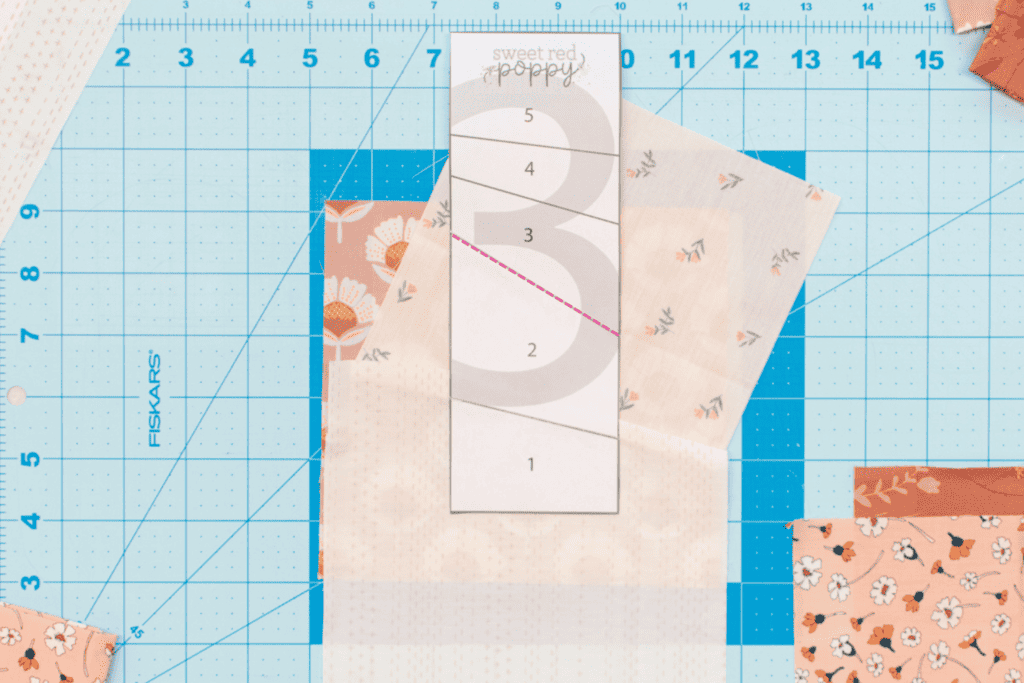
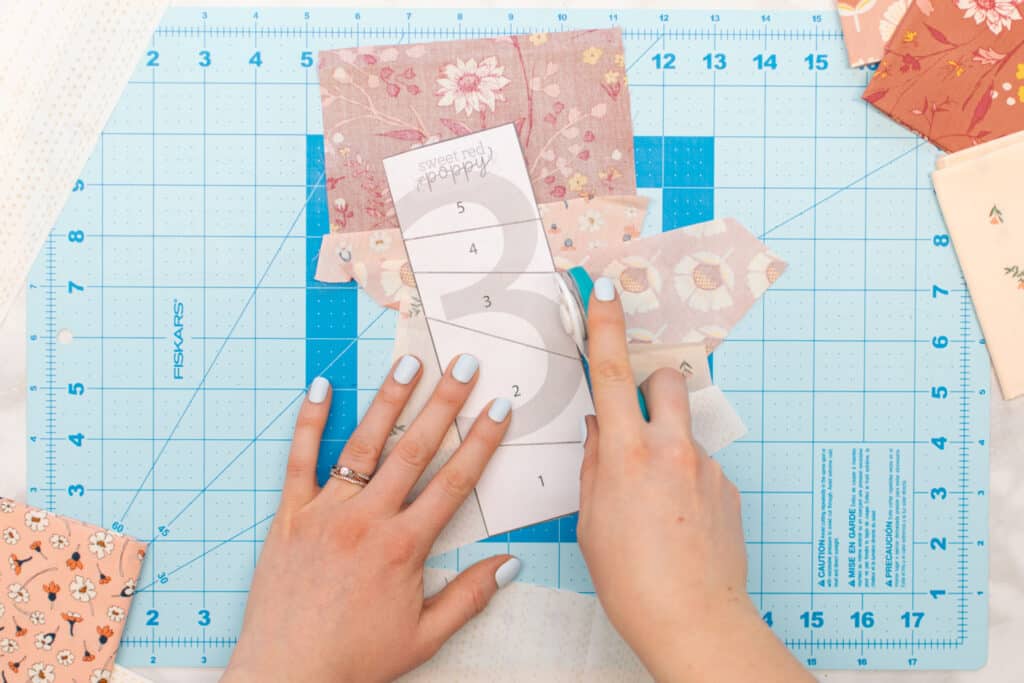
First lay your Pieced Bookmark Front Template on the table in front of you.
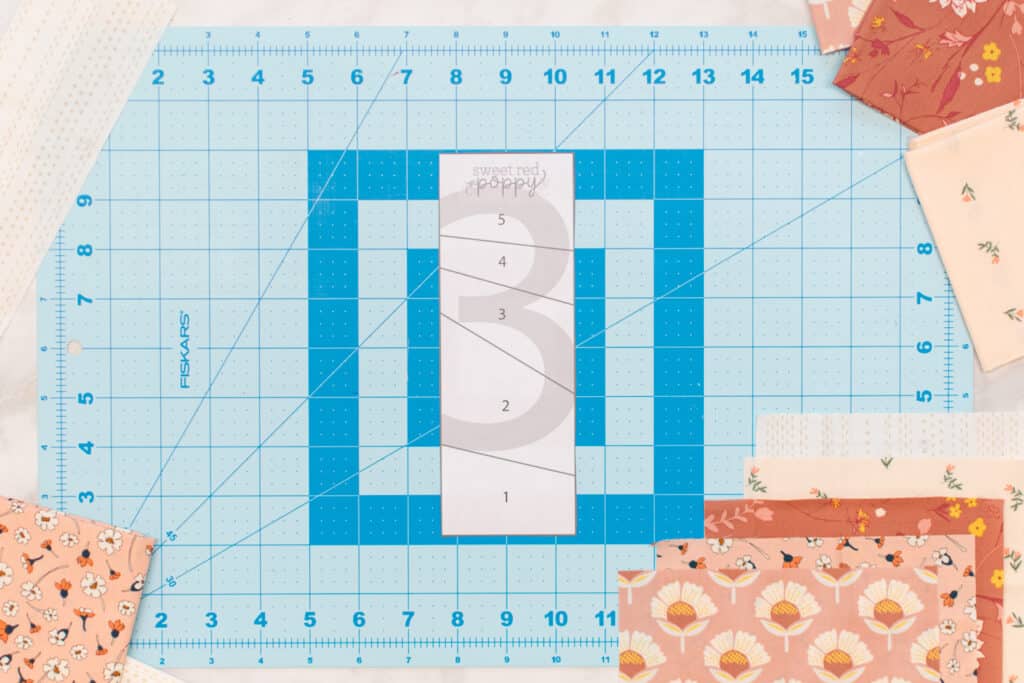
*PRO TIP: If you have a lightbox, such as a Cricut Brightpad, lay the template on the lightbox instead of your table. A lightbox makes this process super easy, though it's still totally doable if you don't have one!
Next, place your first scrap of fabric underneath the section on the template labelled "1". Make sure that the fabric is fully covering section "1" and that at least 3/8" of fabric is extending above the line between sections "1" and "2". The wrong side of the fabric should be against the back of the paper template.

Pin the fabric to the paper template. You don't need to use a whole bunch of pins for this, I find that just 1 pin is usually plenty!
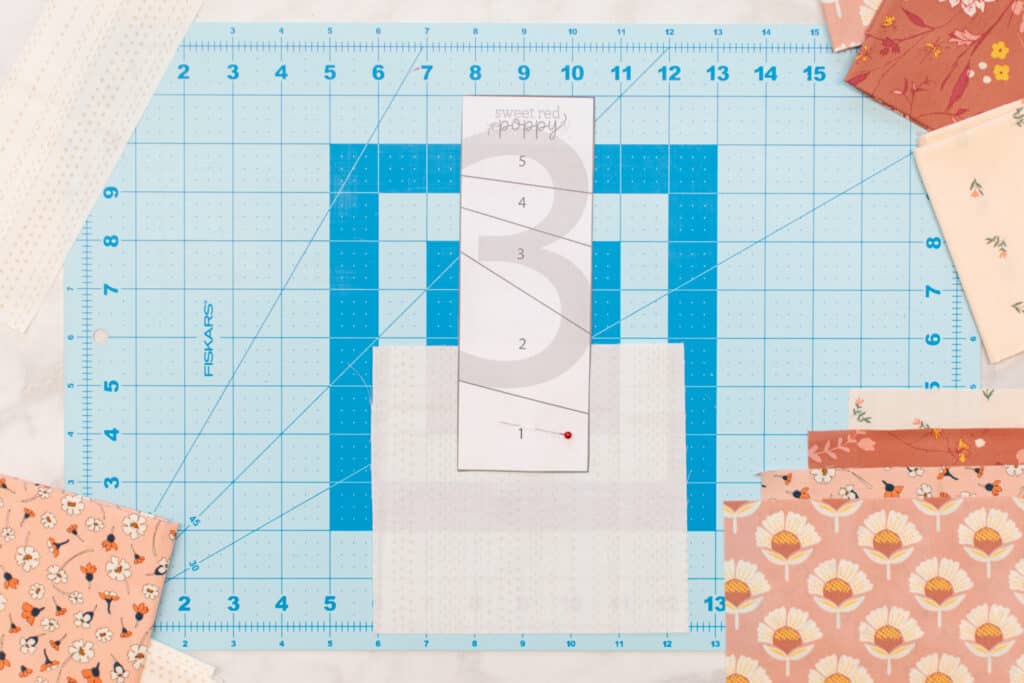
Next, place your next scrap of fabric underneath the first piece of fabric. Make sure that the 2 fabrics are right sides together. Align the 2nd fabric so that the upper edge extends into section "2" by approximately 3/8".
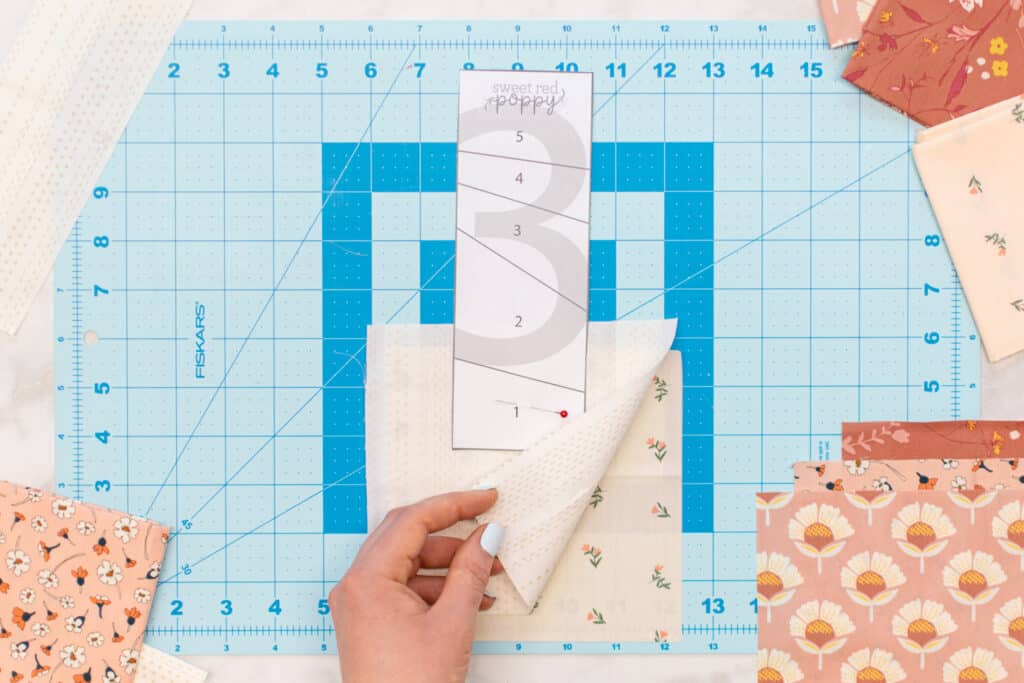
Pin the 2 fabric scraps together to the template. This will hold them in place while you sew.
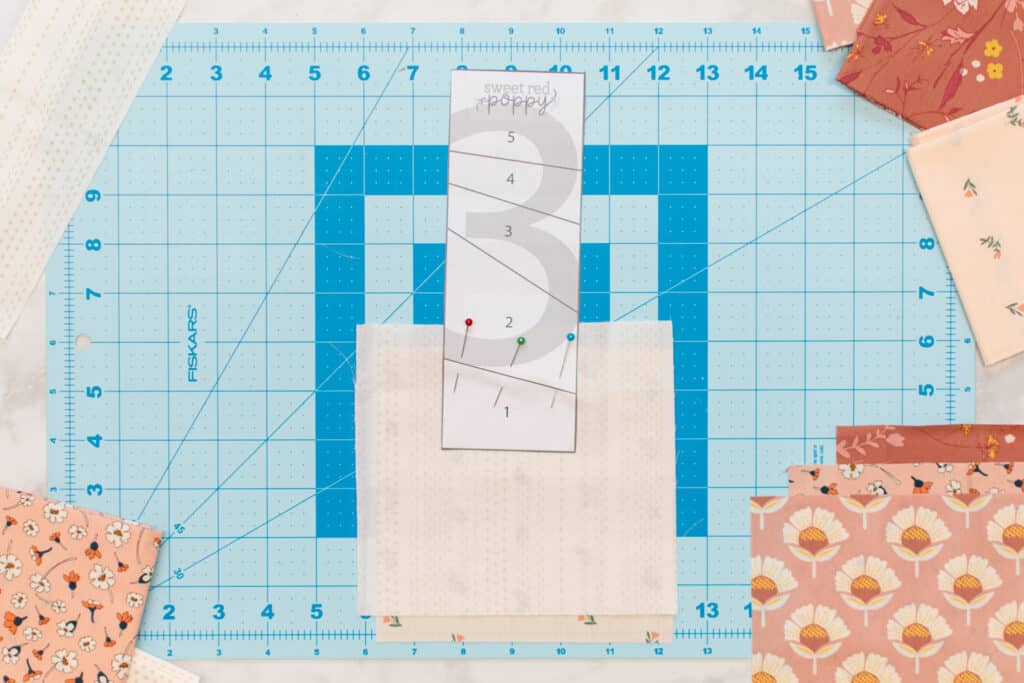
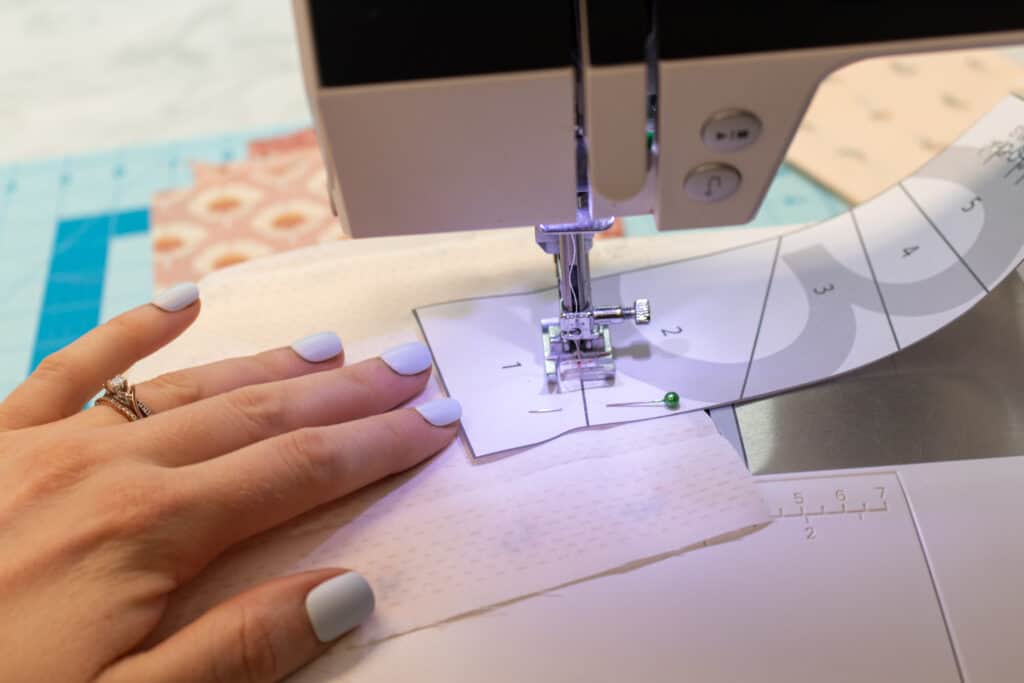
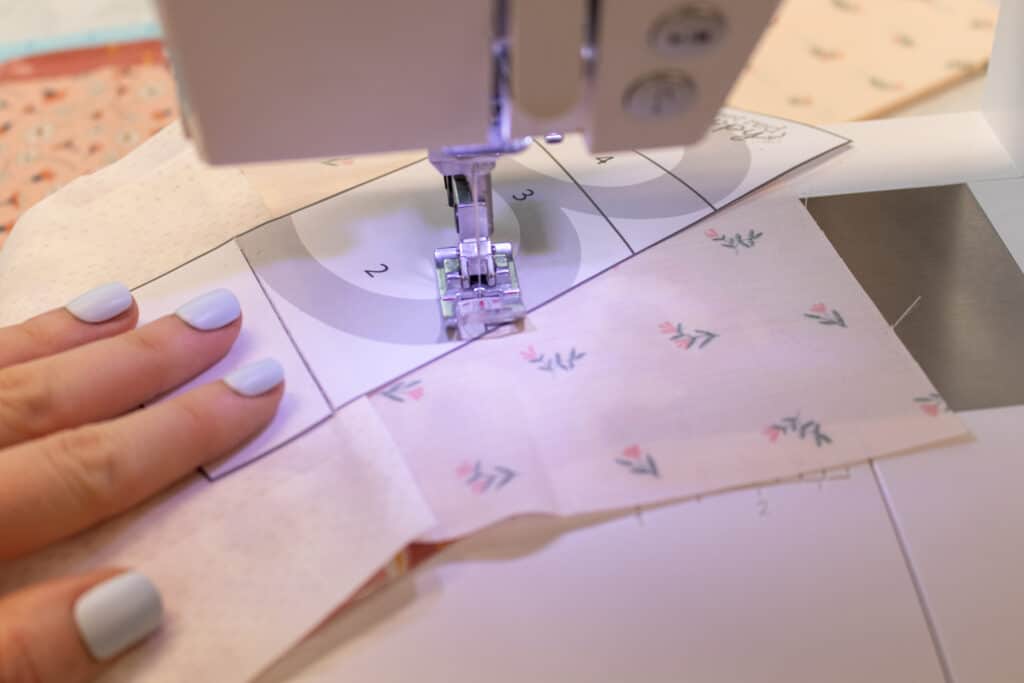
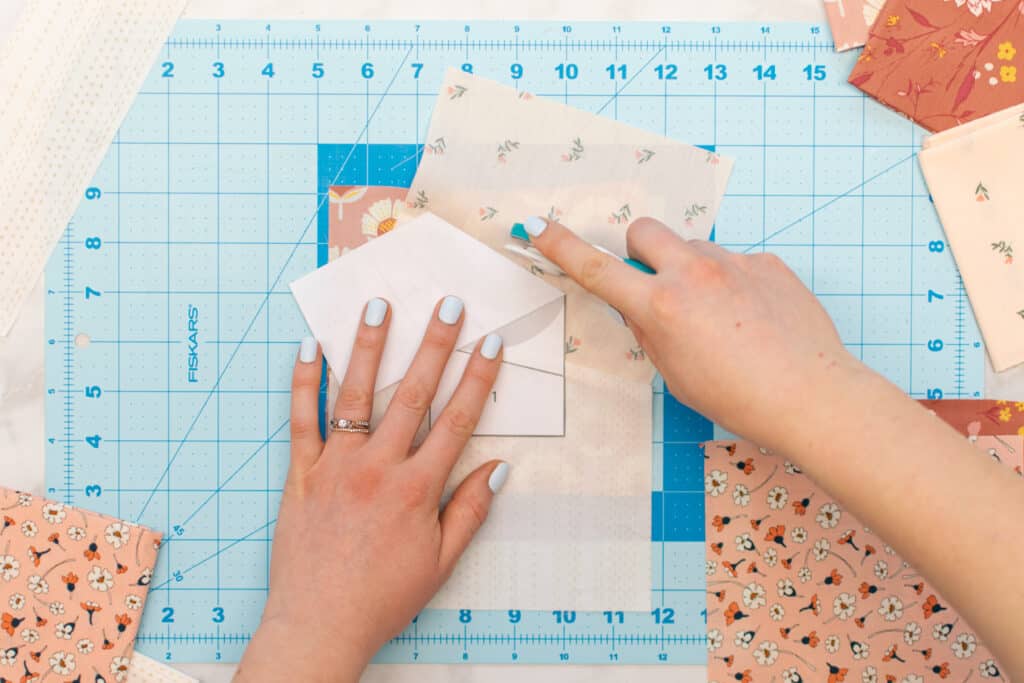
Next, sewing with the paper side up, stitch along the line between sections "1" and "2".
*PRO TIP: I like to sew my FPP with a shorter stitch length of 1.0mm. It makes it super easy to remove the paper template at the end!
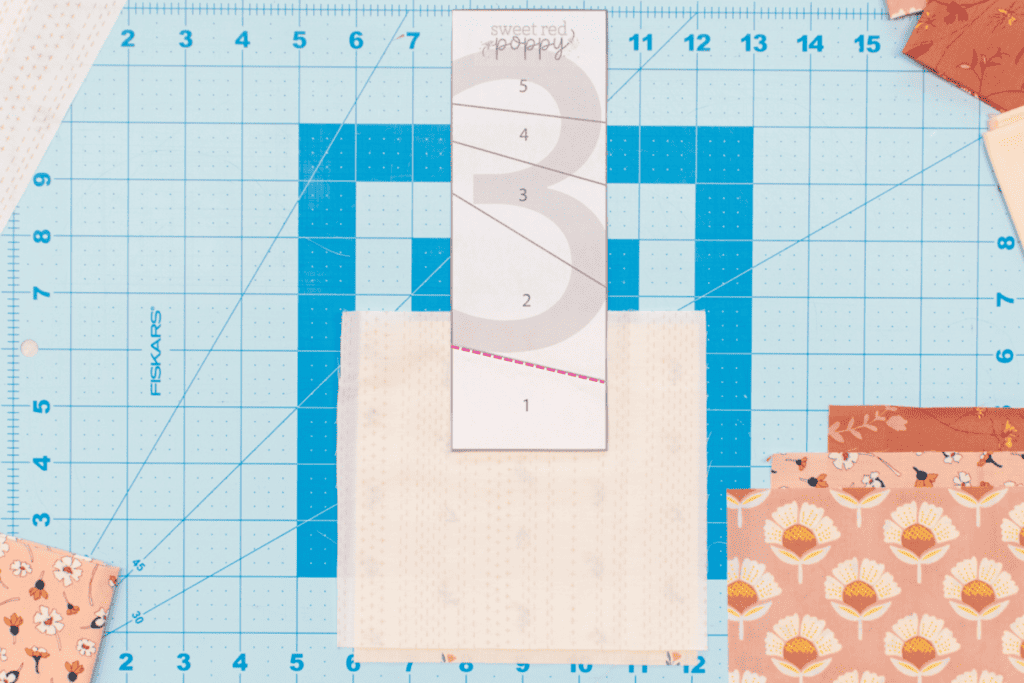
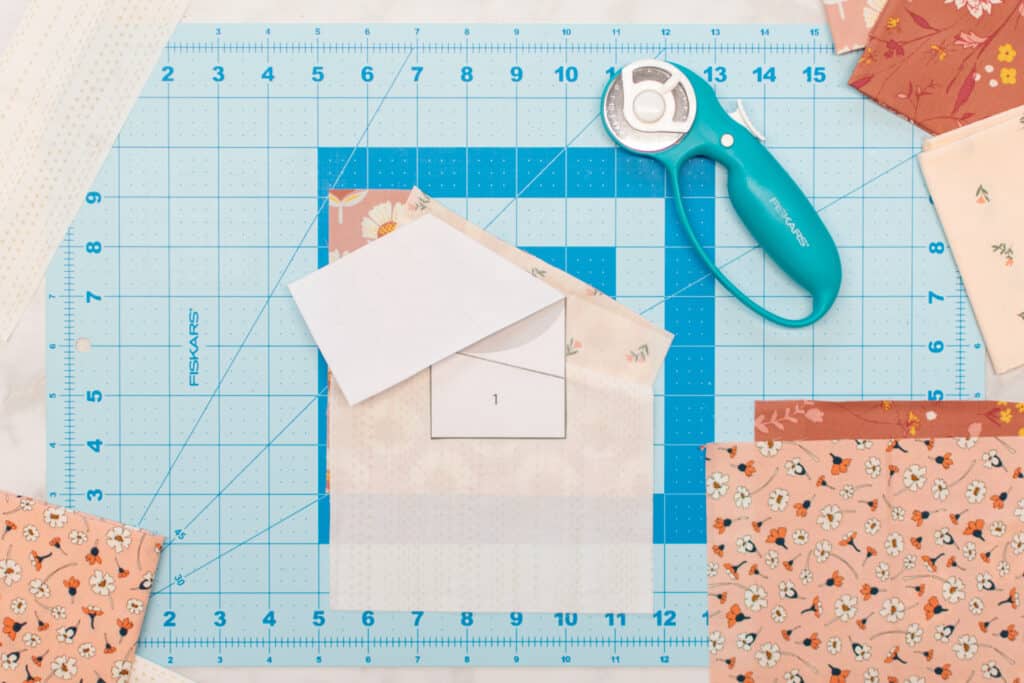
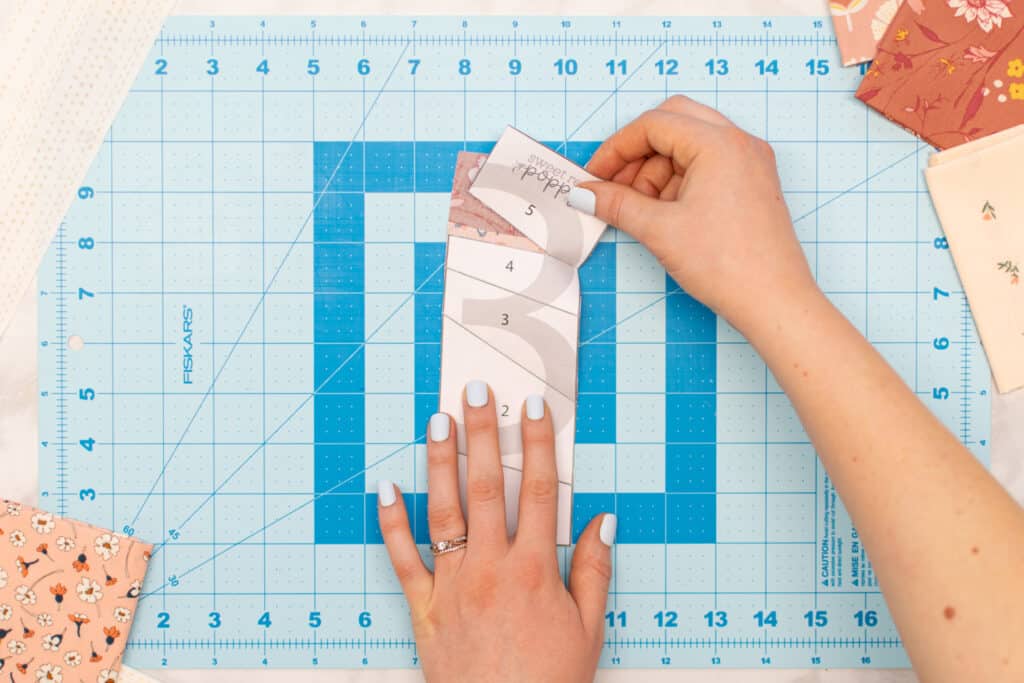
After sewing this first stitching line, fold the template down towards the bottom along the stitching. Trim the fabric to about 1/4" above the stitching line.
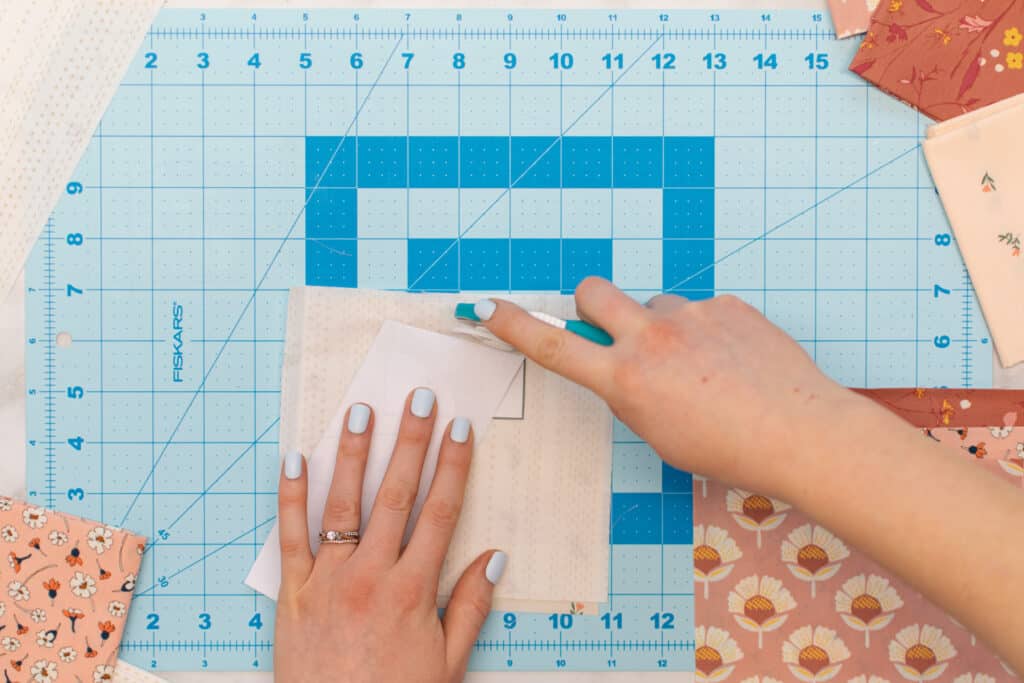
After trimming, unfold the paper template.
Flip Fabric Scrap 2 away from Fabric Scrap 1 and press it flat. It should now cover the "2" section and extend at least 3/8" above the line between sections "2" and "3".
Place your 3rd fabric scrap right sides together with the 2nd scrap. Place the 3rd fabric so that it extends above the stitching line by approximately 3/8".Pin the fabrics together to the template.
Stitch along the line between sections "2" and "3".
Fold back the template, then trim the seam allowances to about 1/4" above the stitching line.
Flip Fabric Scrap 3 up away from Fabric Scrap 2. Press it flat.
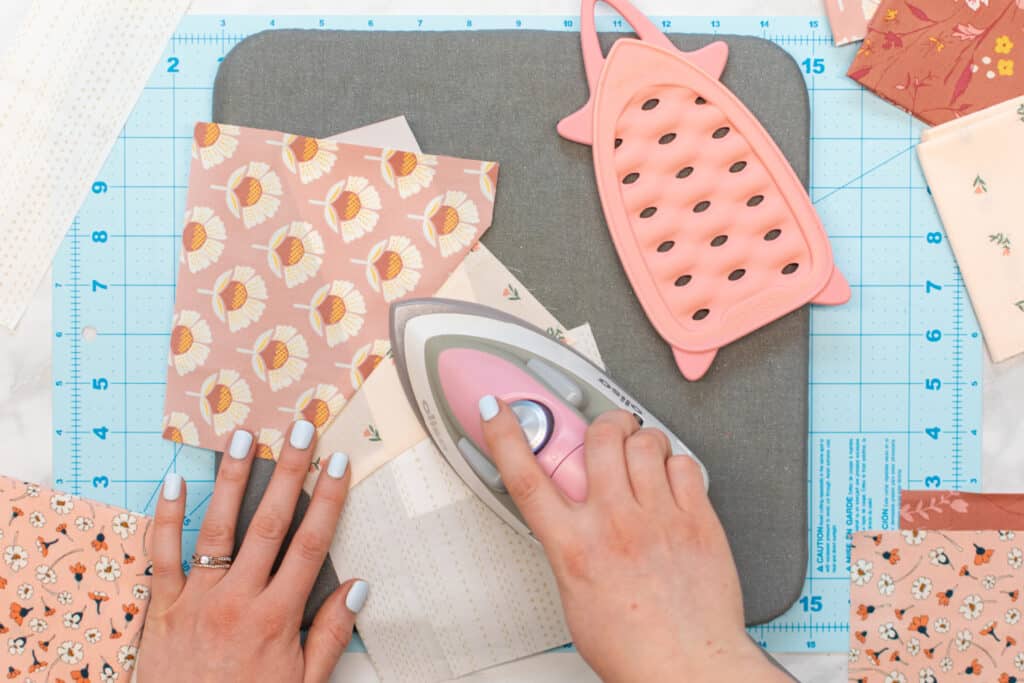
Repeat this process to add the fabric scrap for section "4", then the scrap for section "5".

You should now have all 5 fabric scraps stitched together and the paper template should be fully covered with fabric.

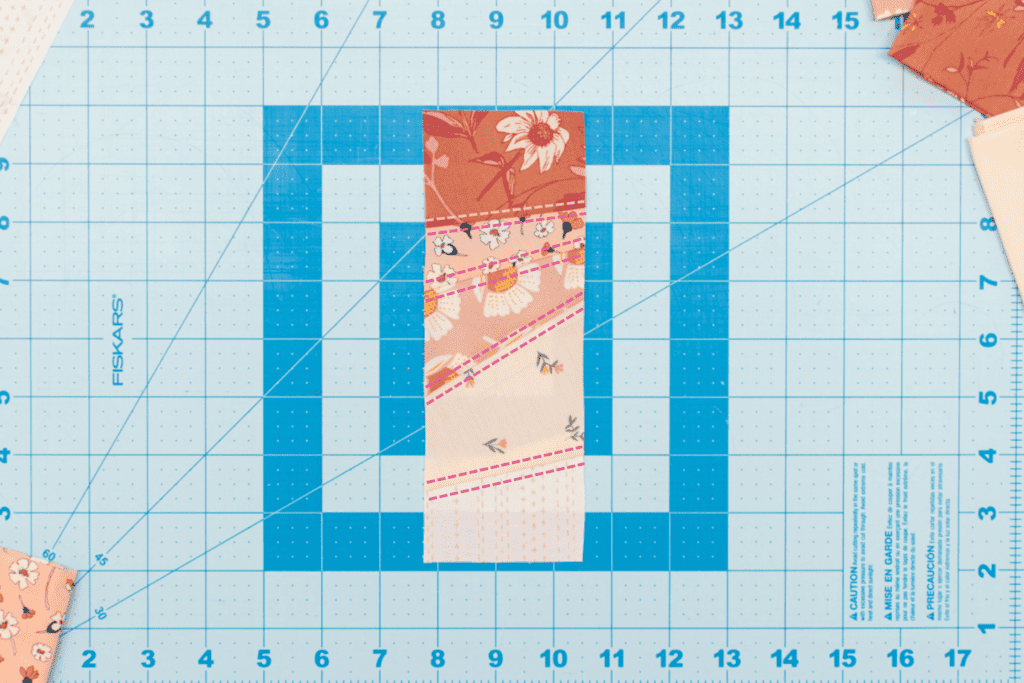
Trim the edges of the fabric to match the edges of the template.
Finally, tear the paper template away from the fabric. Generally, it will tear away from the stitching relatively easily. However, if you are having trouble, it can help to dampen the paper to soften it first.
Step 4: Apply Interfacing and Topstitch
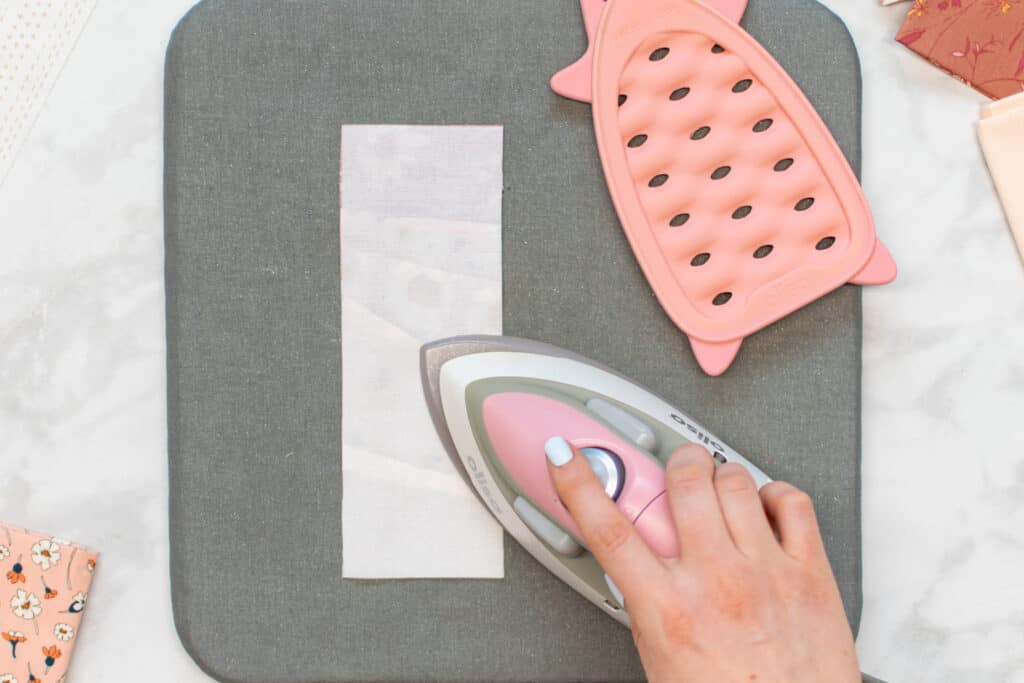
Now that you have the front of the bookmark pieced and cut out, we need to apply interfacing. This will help the bookmark to hold its shape long-term. It also helps to prevent the fabric from stretching out during topstitching.
Place the interfacing against the wrong side of the pieced bookmark front, making sure that the bumpy side of the interfacing is against the fabric.

Then, use your iron to fuse the interfacing to the fabric. Usually, this involves using a damp cloth between the interfacing and iron, but it depends on the brand of interfacing. So, double-check the instructions for your specific interfacing!
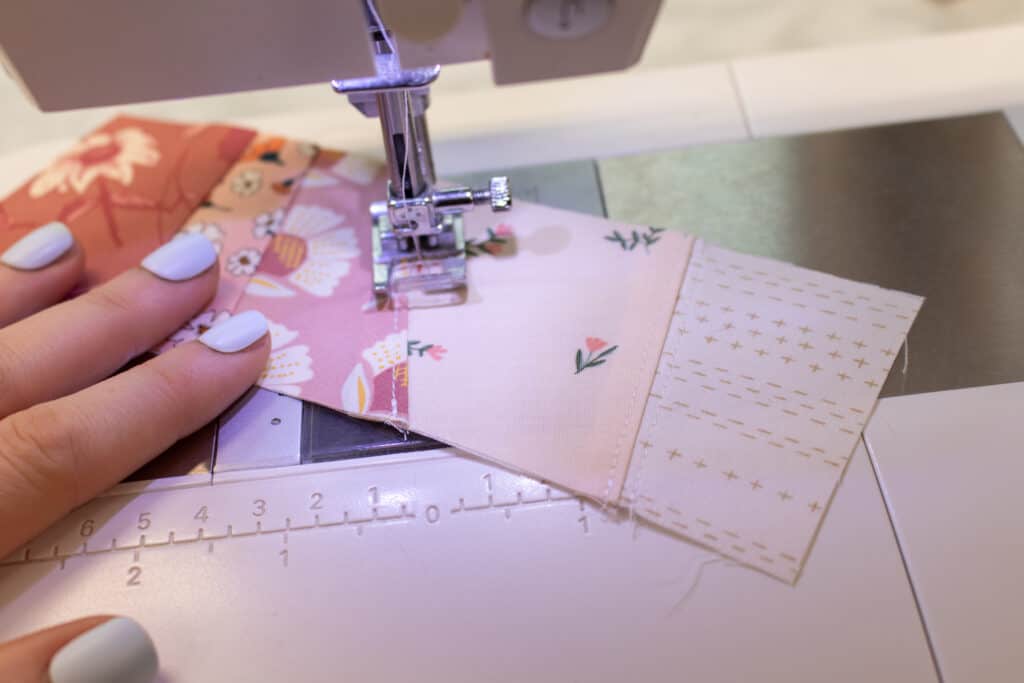
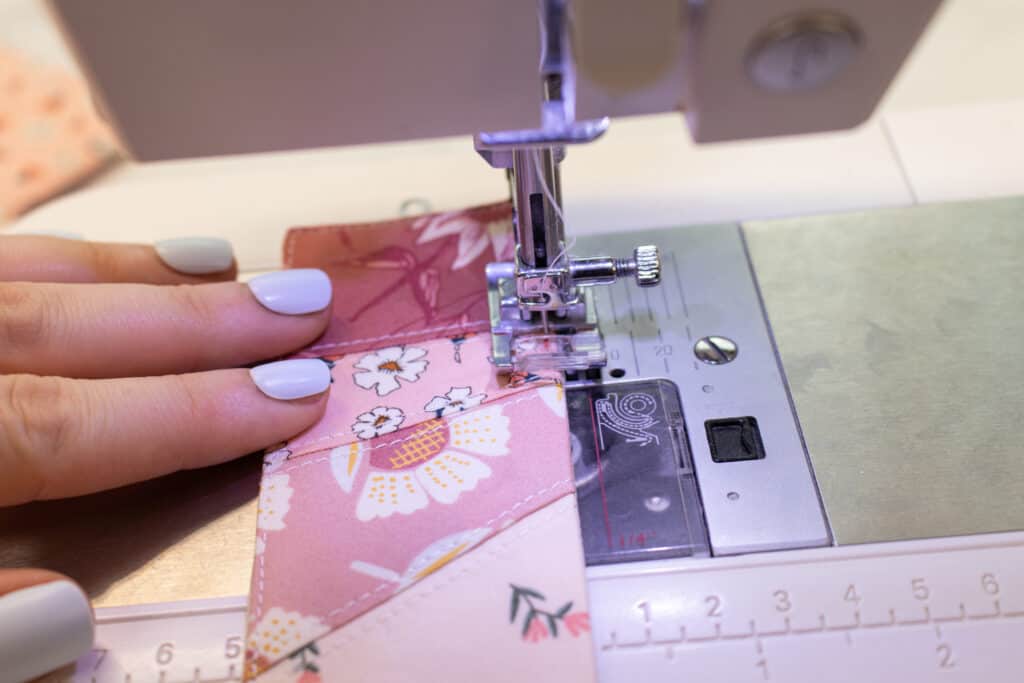
Once the interfacing has been fused to the fabric, let's do some topstitching. Topstitch along either side of each seam on the pieced front, sewing about 1/16" from the seam.
Step 5: Sew the DIY Fabric Bookmarks
Once you've got the front of the bookmark pieced, you're ready to assemble this adorable bookmark!
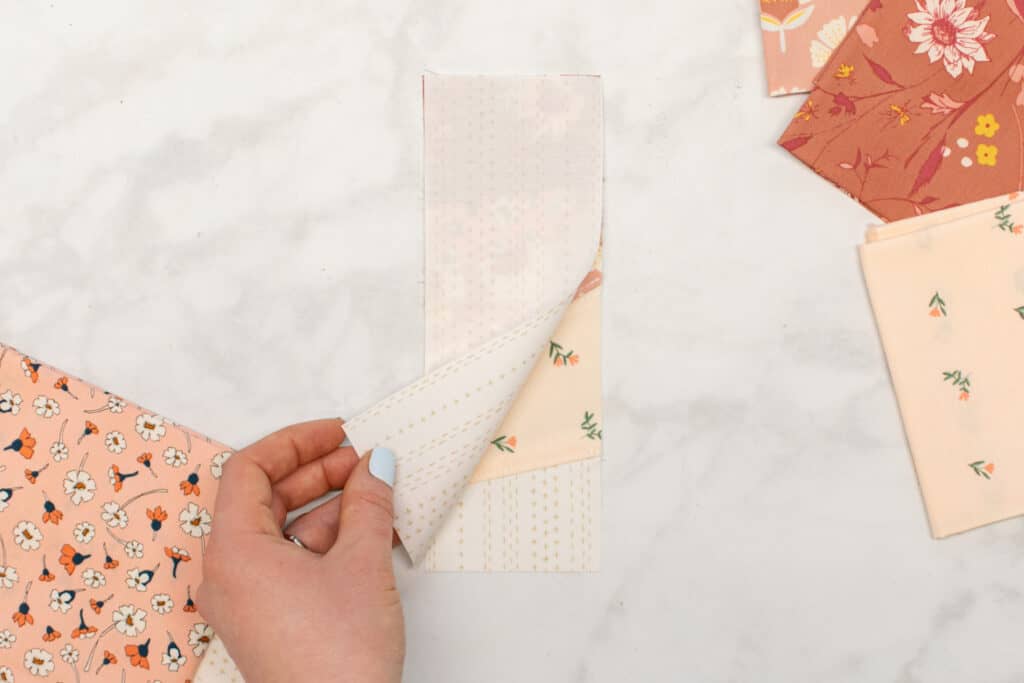
Start by laying the bookmark front on your table with the right side facing up.

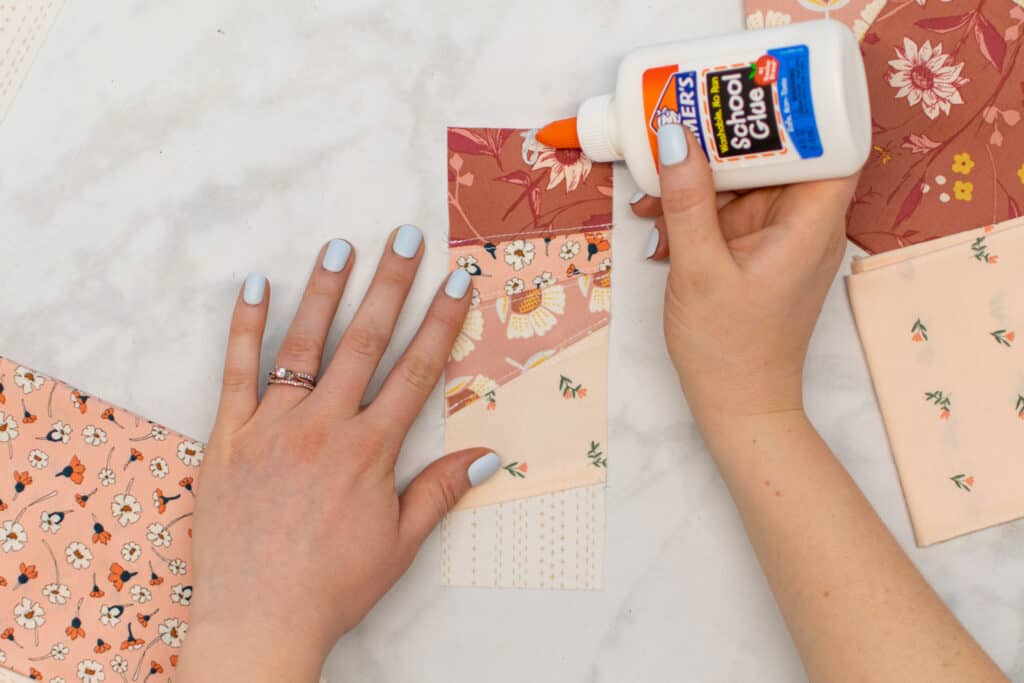
IF ADDING A TASSEL (SKIP IF NOT ADDING A TASSEL): If you will be adding a tassel, at this point, cut a short 1" piece of embroidery floss. Fold the piece of floss in half, then line up the unfinished ends at the center of the top edge of the bookmark. Dot a bit of glue over it to hold it in place.
Then, place the bookmark back piece on top of the front piece, aligning them with right sides together.
Pin them together along all 4 edges.

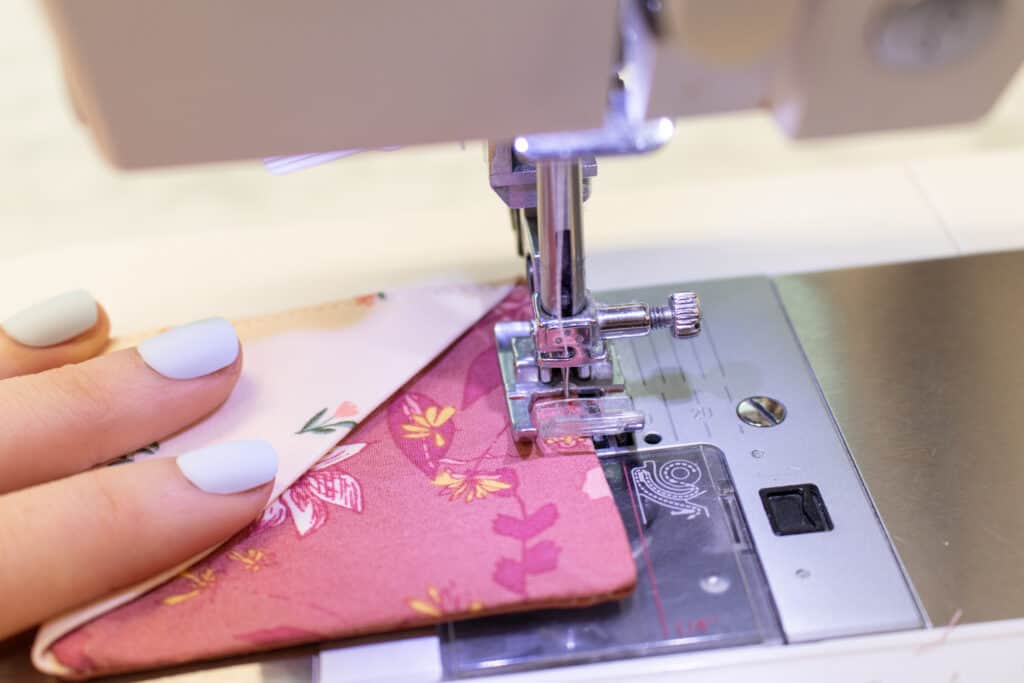
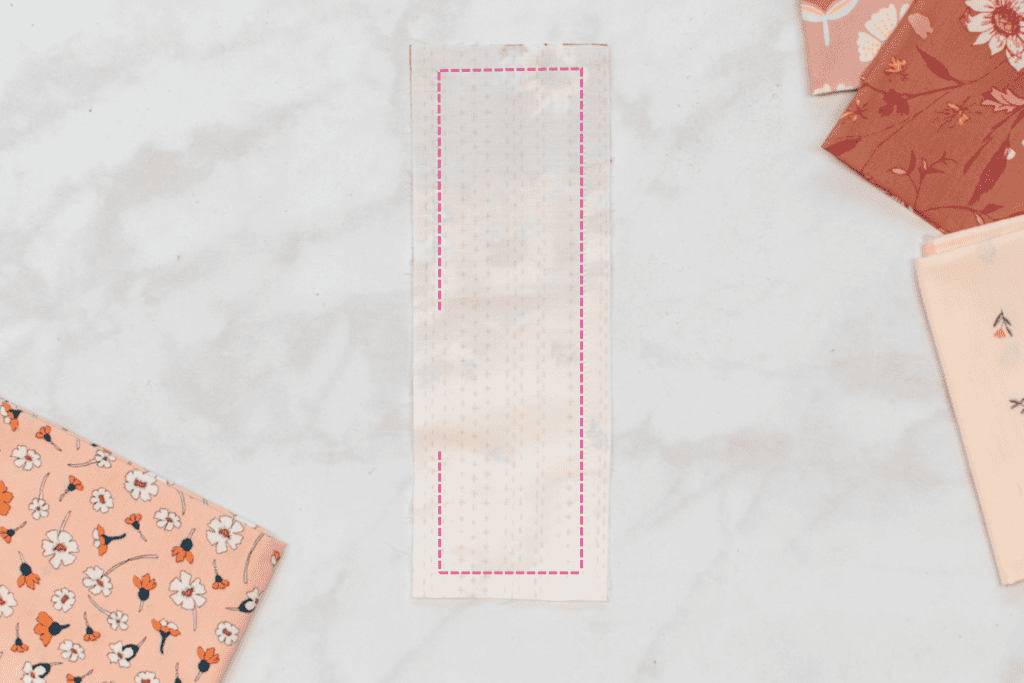
Stitch the bookmark along all 4 edges with a 3/8" seam allowance. Make sure to leave an opening at least 2" wide along one of the sides.
While sewing, rotate around each corner for a nice, sharp corner. To do this, stop sewing 3/8" before reaching the first corner, making sure that the needle is down in the fabric. Then, lift the presser foot and rotate the fabric 90 degrees. The next straight edge should be in front of the presser foot. Repeat this process to rotate around each corner.
After sewing, trim the seam allowances off diagonally at each corner. Cut the fabric up to (but not through!) your stitching at the corners. This will help to reduce bulk and results in sharper corners.
Next, turn the bookmark right sides out by pulling it through the opening in the seam.
Then, press the bookmark flat with your iron.
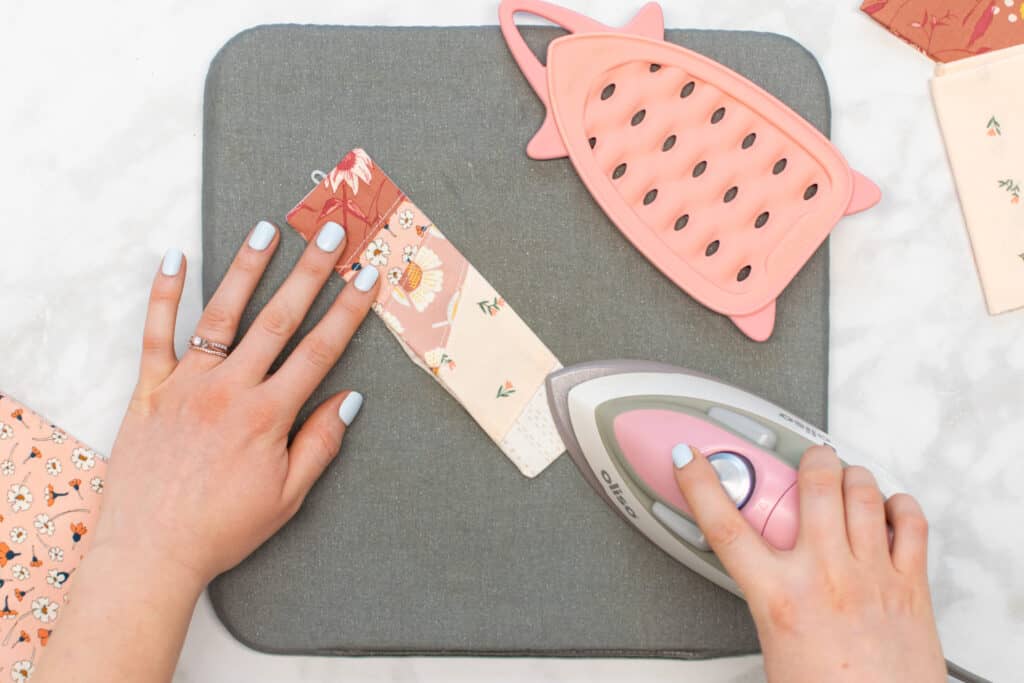
At the opening, press the fabric edges to the inside by 3/8" to create a continuous straight edge.
Finally, topstitch around all 4 edges with a 1/16" - 1/8" seam allowance.
If you're not adding a tassel, your bookmark is finished! If you are adding a tassel then head on to the next step.
Step 6: Make the Tassel (optional)
Once you've got your bookmark put together, it's time to make this adorable tassel!
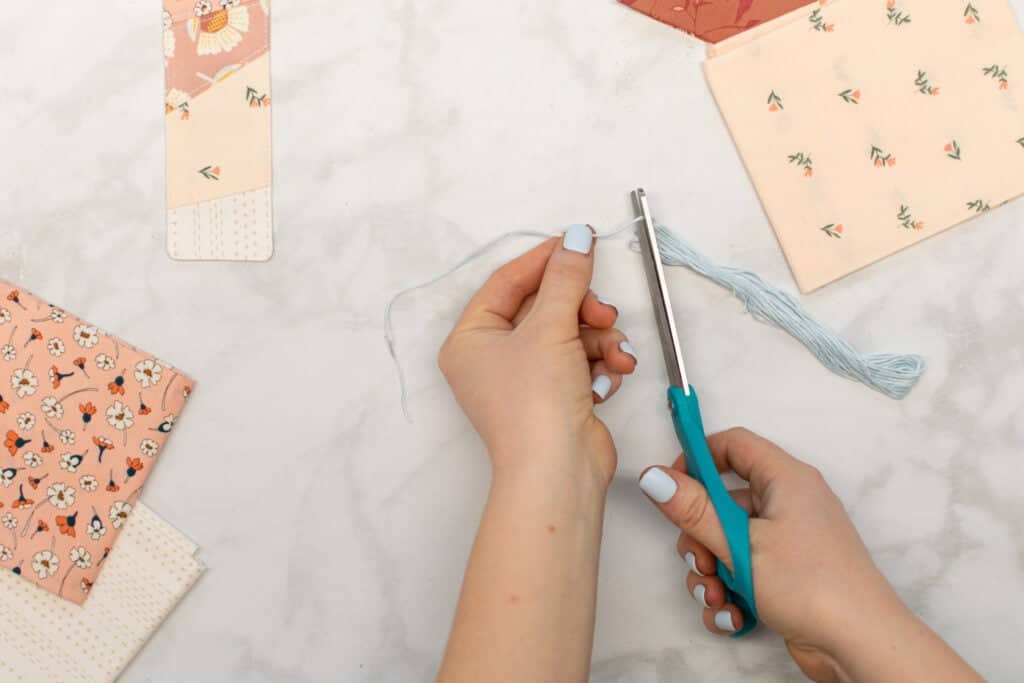
Grab your embroidery floss - yarn works as well - and cut a piece approximately 7 inches long.
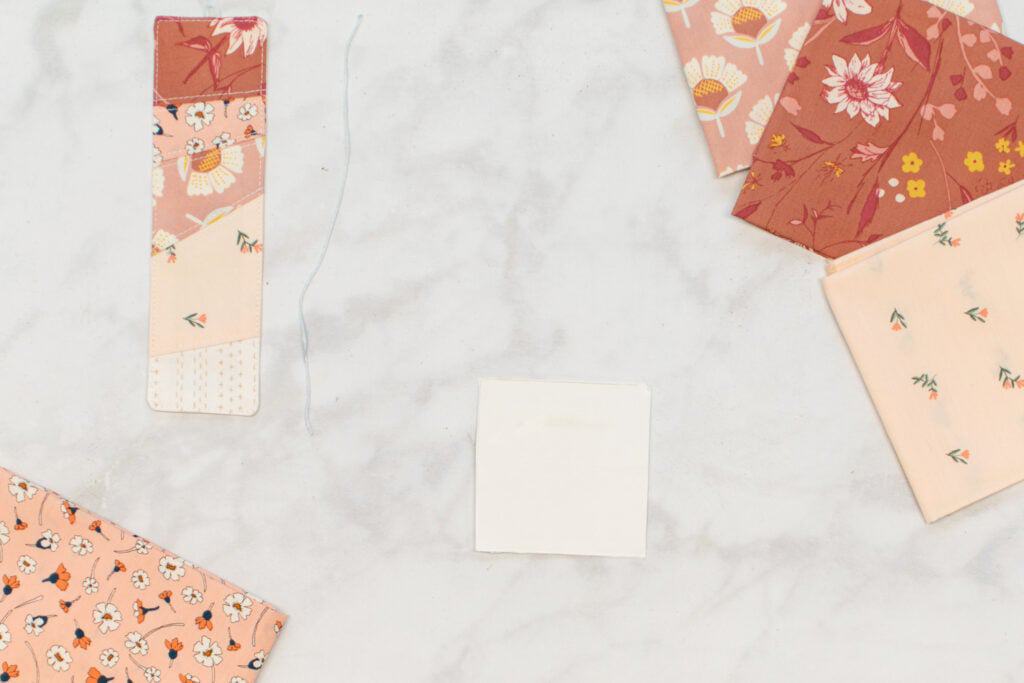
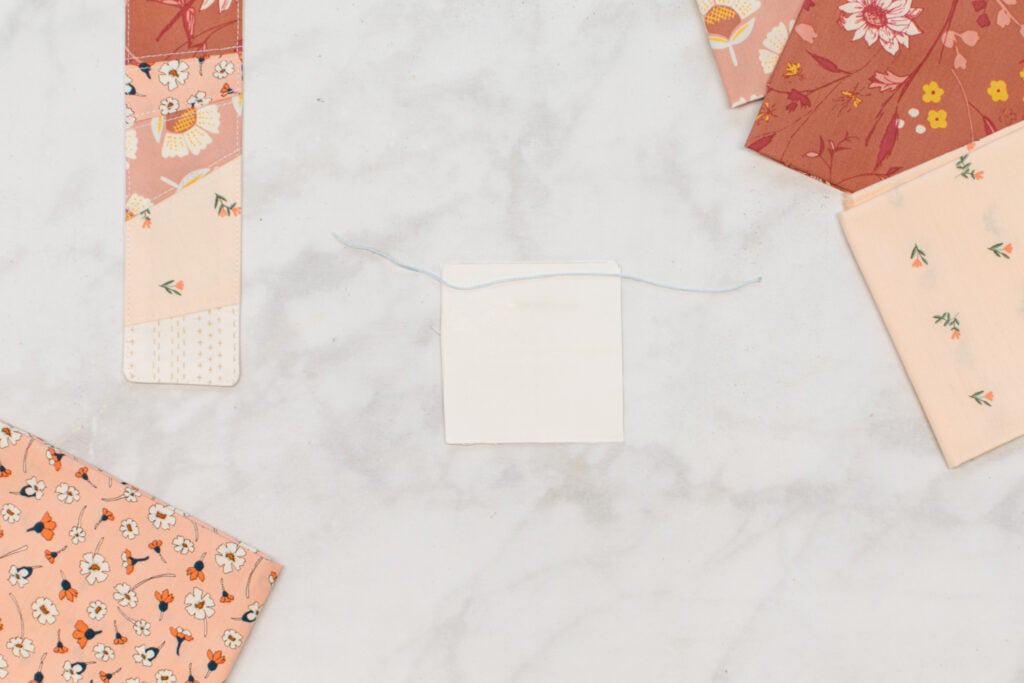
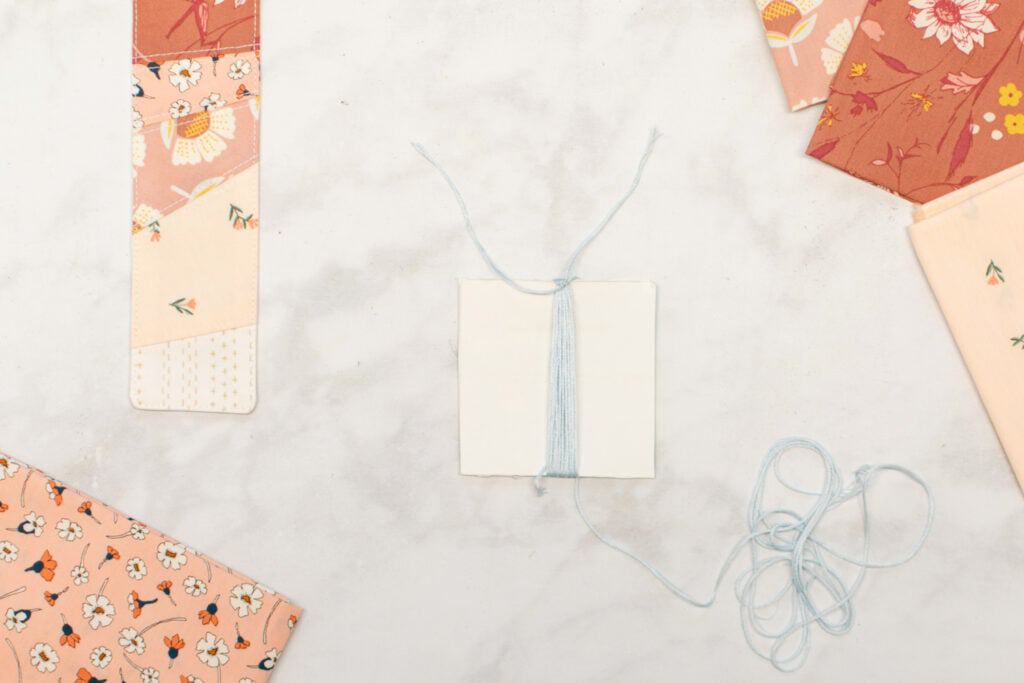
Next, we need a template for our tassel. I like to use cardstock or cardboard. Cut a square template approximately 3" x 3". Don't worry about being super exact with these measurements!
Then, place the template on your table and lay the cut piece of embroidery floss horizontally across the top of it.
Next, take the end of your main ball of embroidery floss (or yarn) and start wrapping it around the template from top to bottom. Make sure that the horizontal piece of yarn is underneath the wrapped embroidery thread.
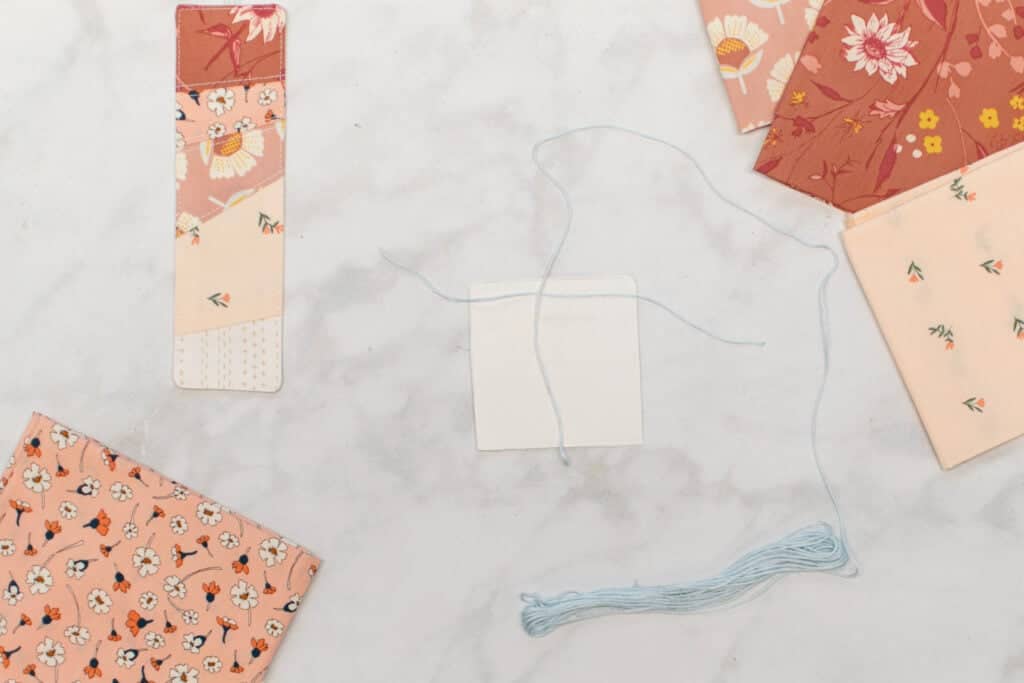
Continue wrapping the thread around the template until it's nice and dense. The amount of thread is totally up to you - more wraps will get you a thicker tassel, while fewer wraps will result in a thinner tassel.
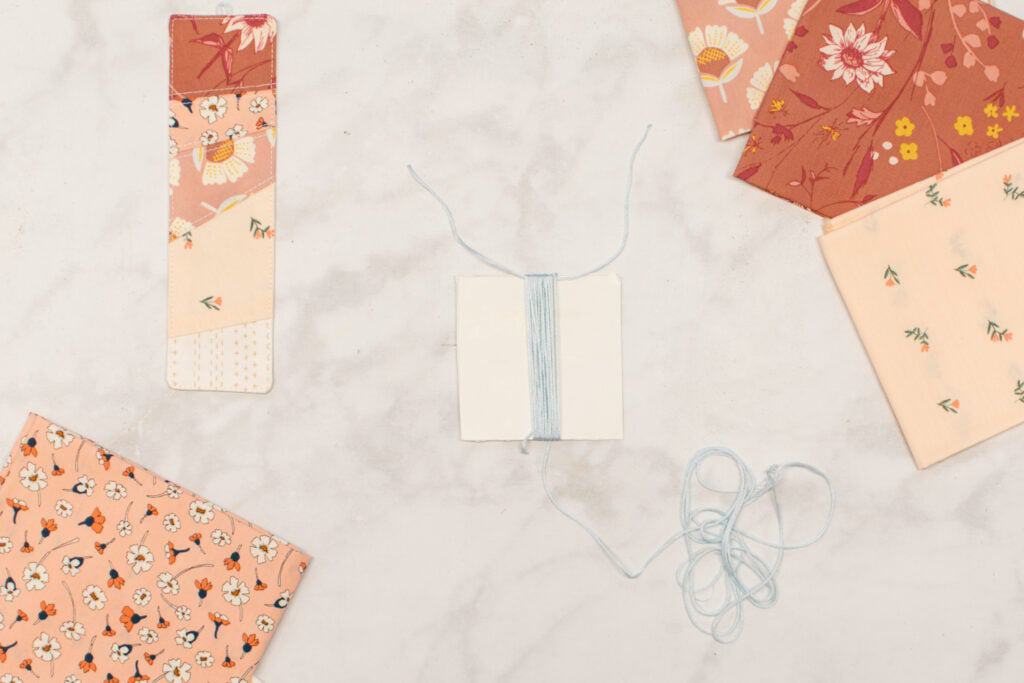
Next, tie the cut thread at the top of the template around the wrapped threads. Tie it nice and tight into a triple or quadruple knot.
Then, use your scissors to cut the wrapped ends of the thread free from the template, cutting along the bottom edge of the template opposite the knot.
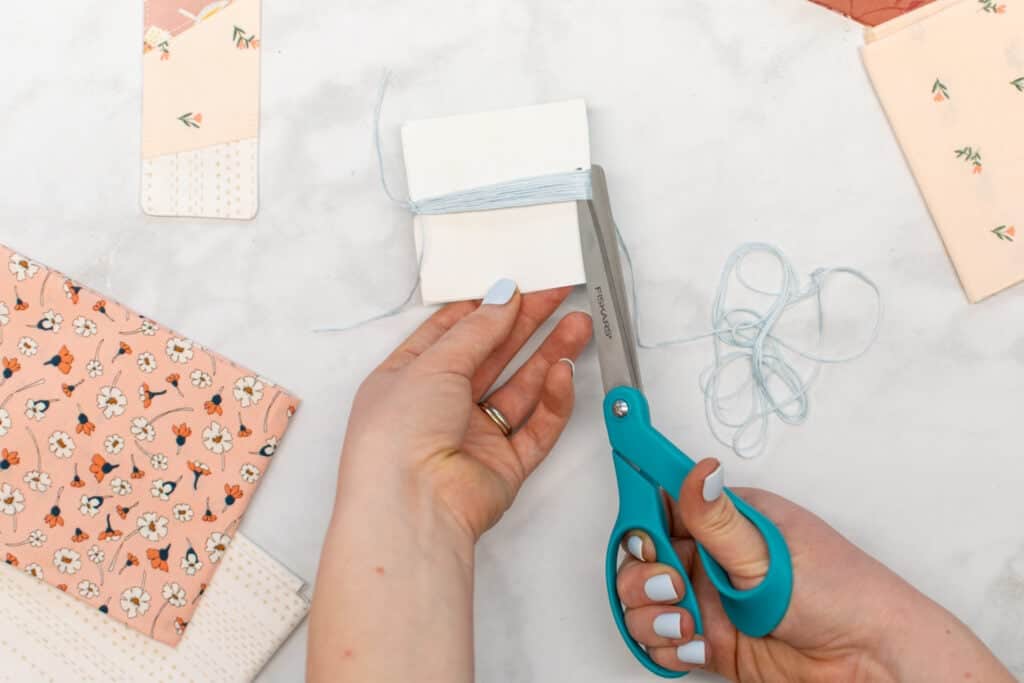
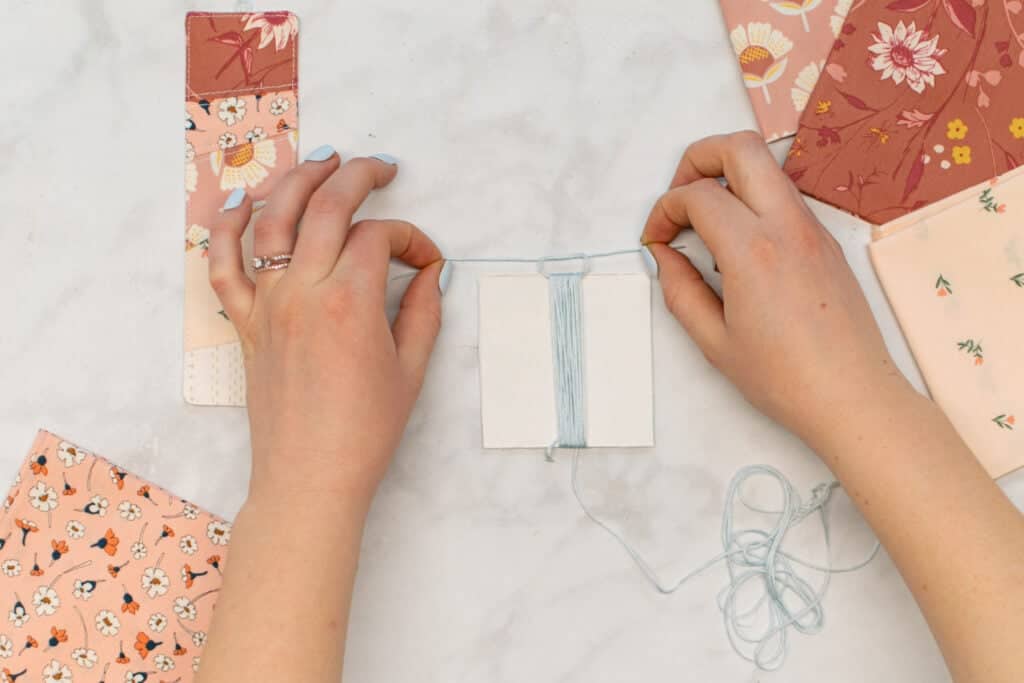
Next, trim the free ends of the thread approximately to the same length. This will help to even out any raggedly longer ends.
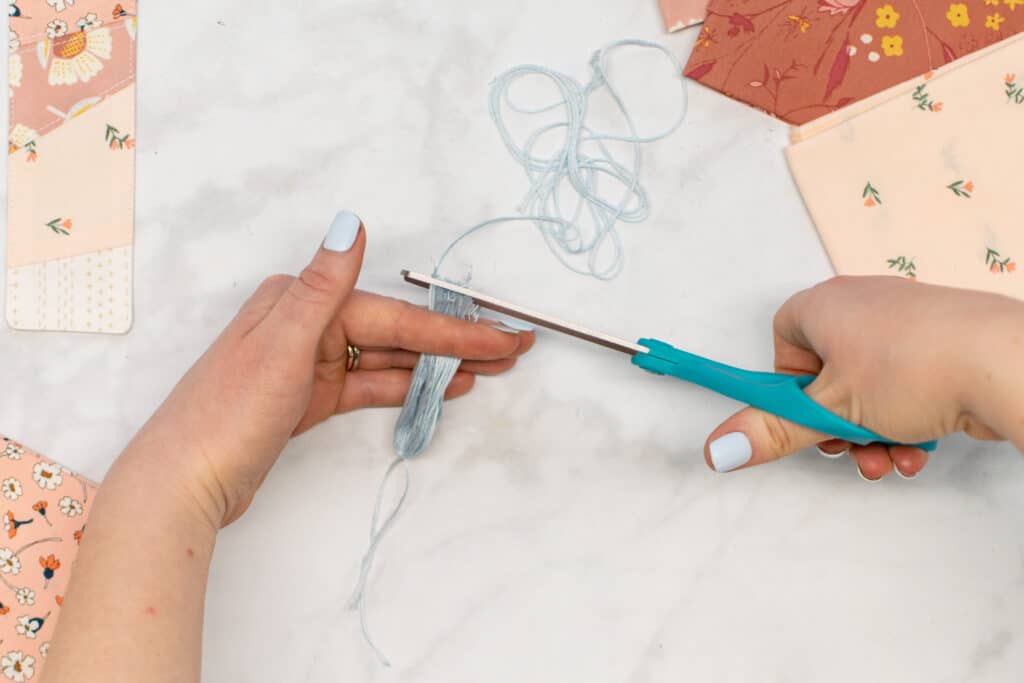
Cut another length of thread approximately 10 inches long.
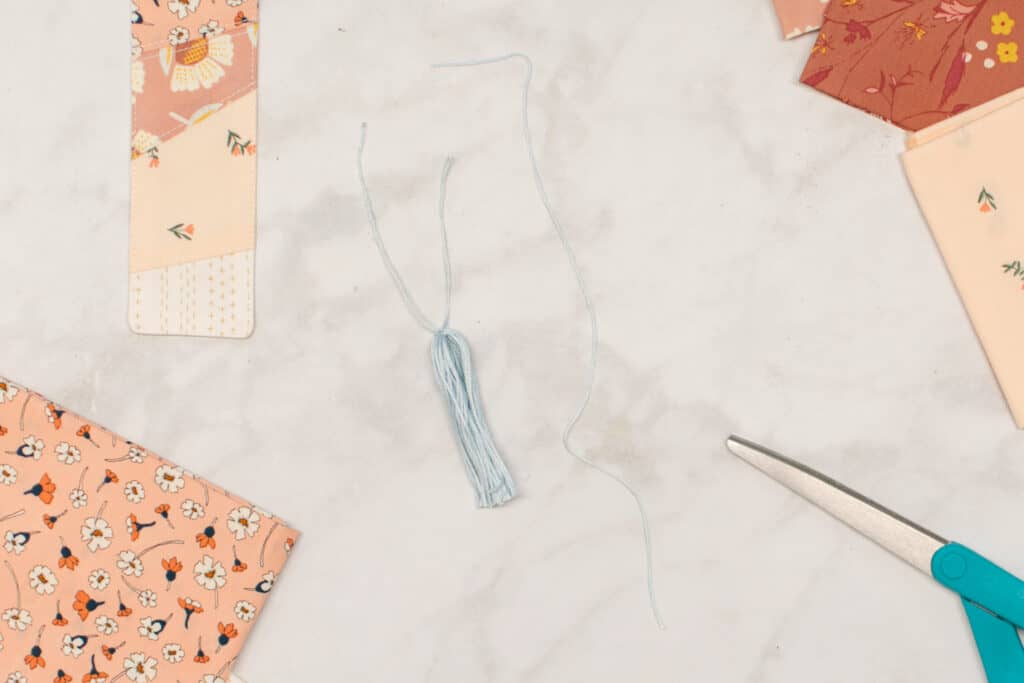
Tie this thread around the tassel about 1 inch below the top. Tie it nice and tight using at least a triple knot.
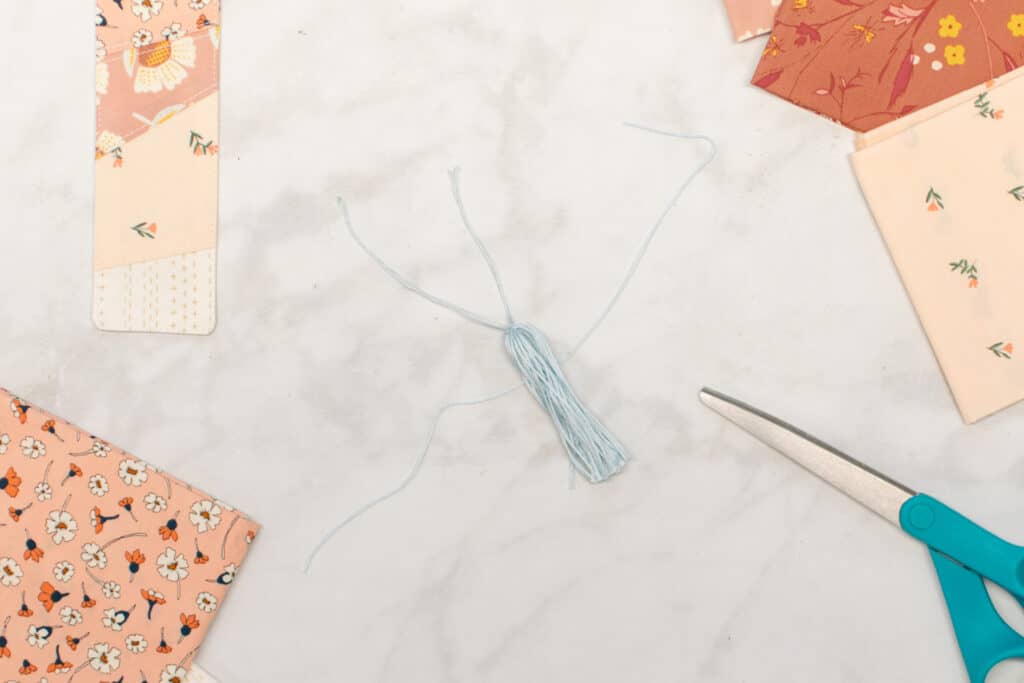
Then, wrap the ends of this thread around the tassel several times until approximately 3-4 inches of thread tails remain free.
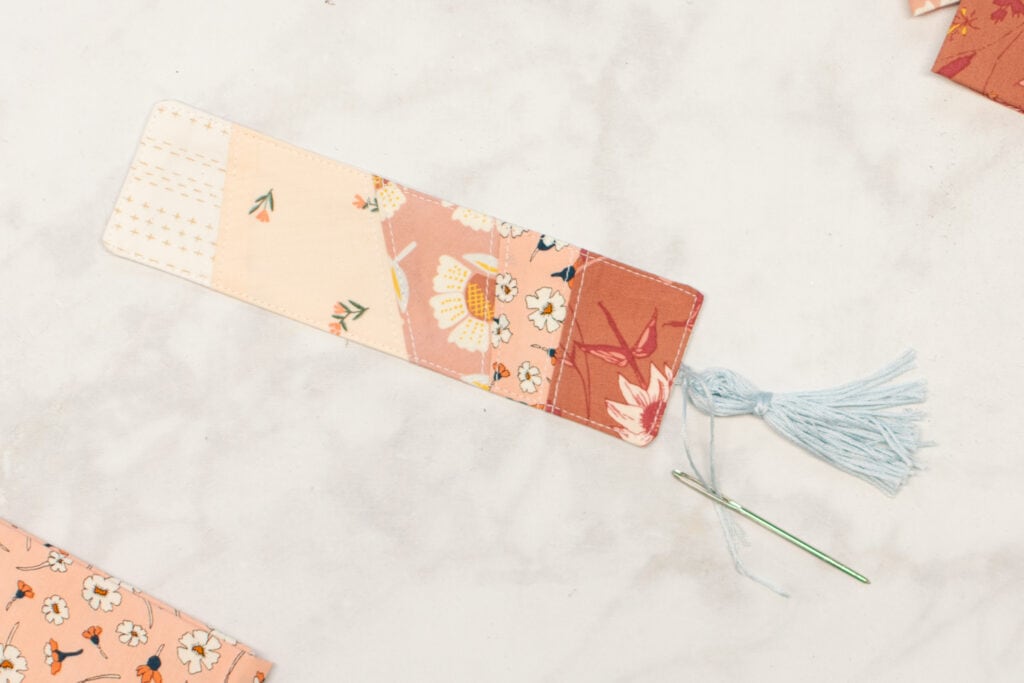
Thread these tails into a tapestry needle with a large eye.
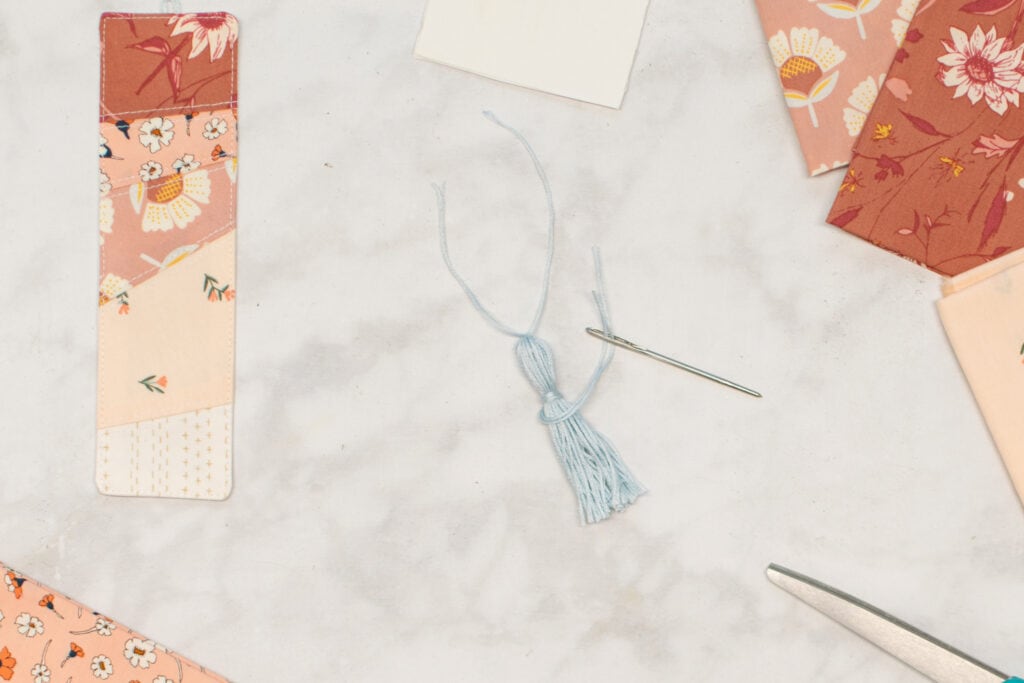
Then, push the needle down through the center of the tassel, pulling the thread tails through with it.
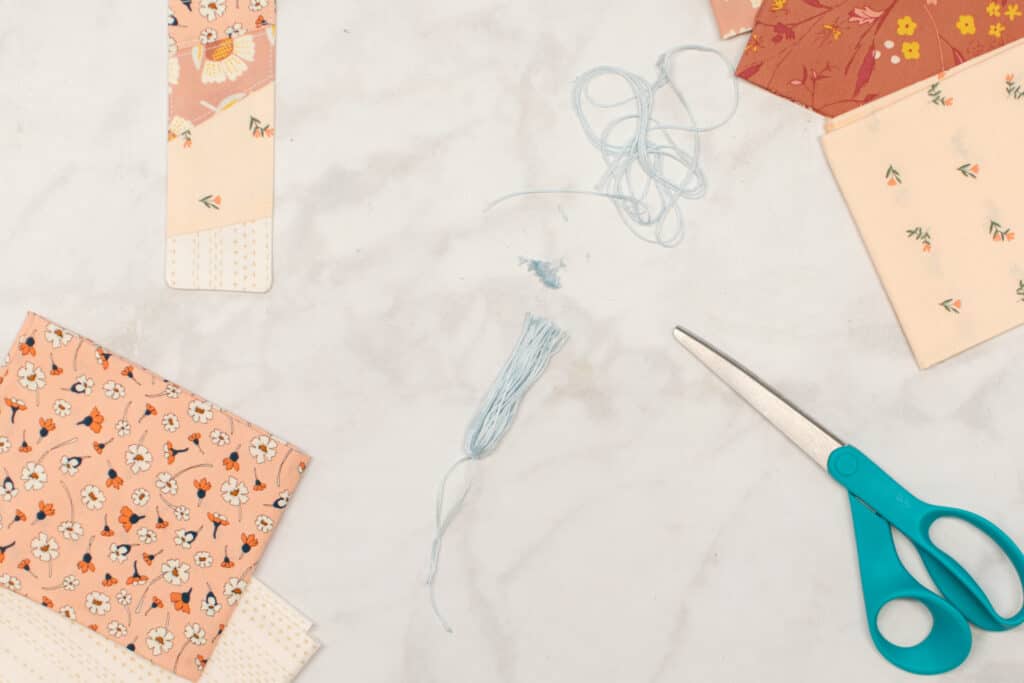
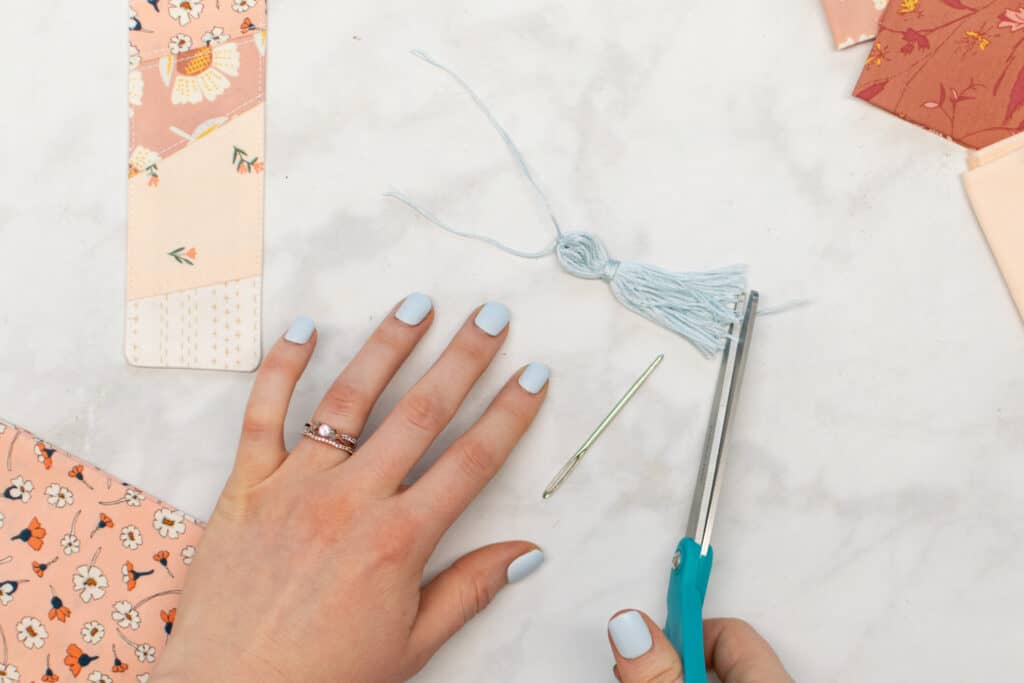
Trim the thread tails to match the rest of the length of the tassel.
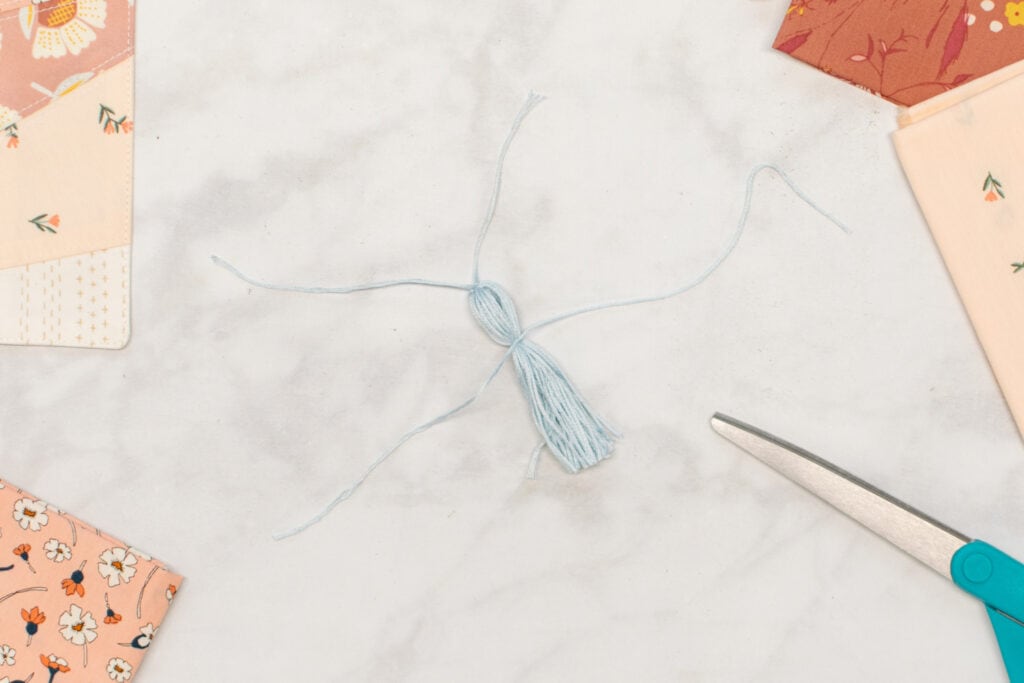
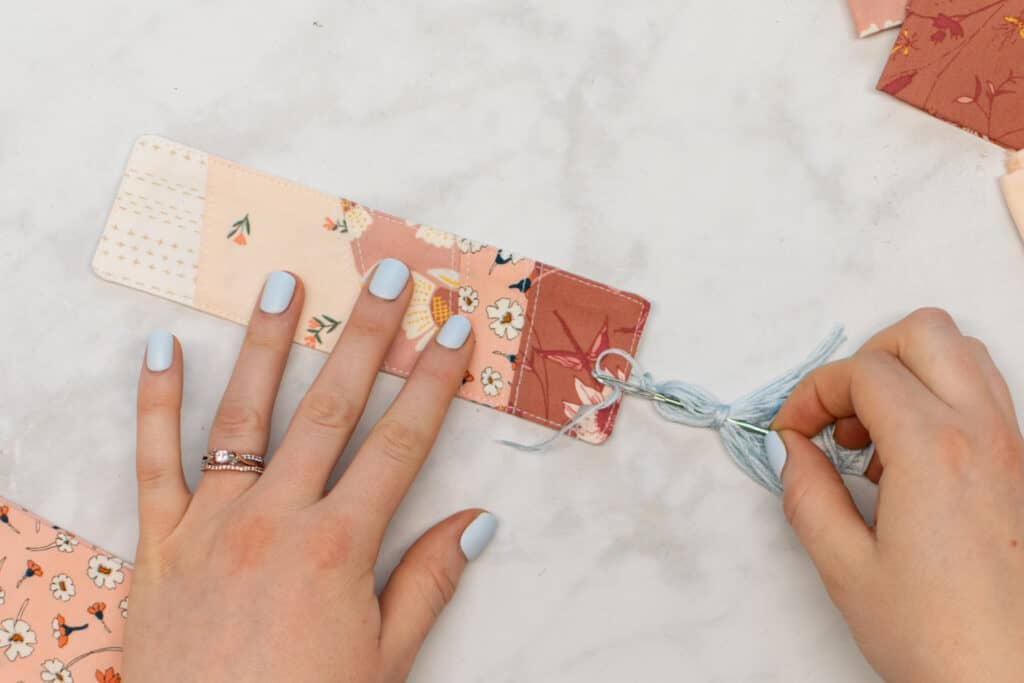
Next, thread one of the top thread tails through the loop at the top of the bookmark.
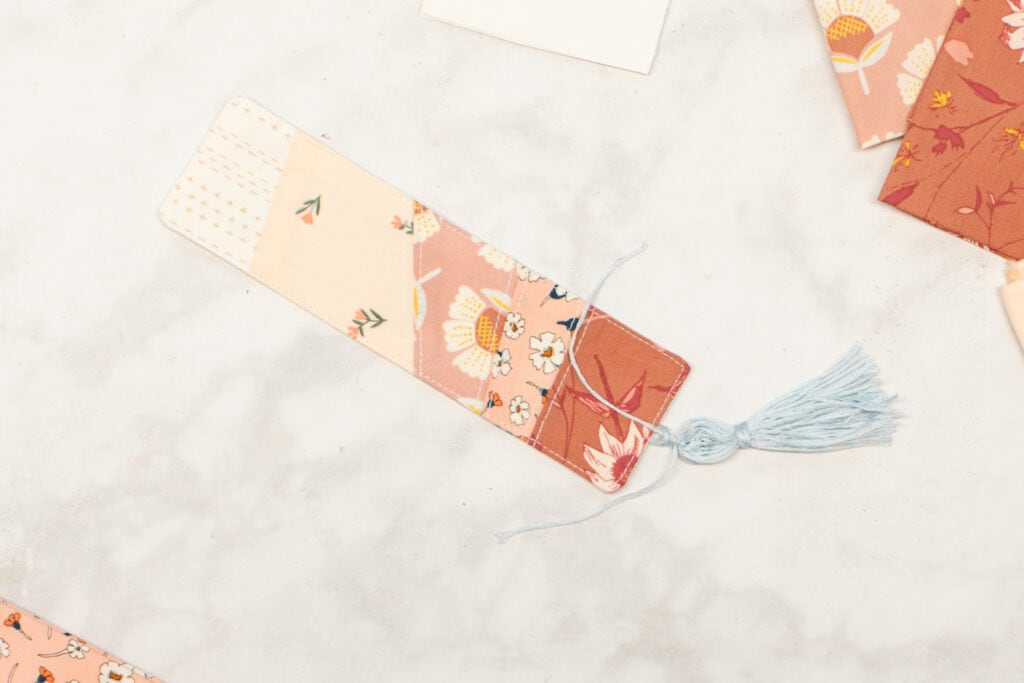
Knot the thread tails together using a triple knot.
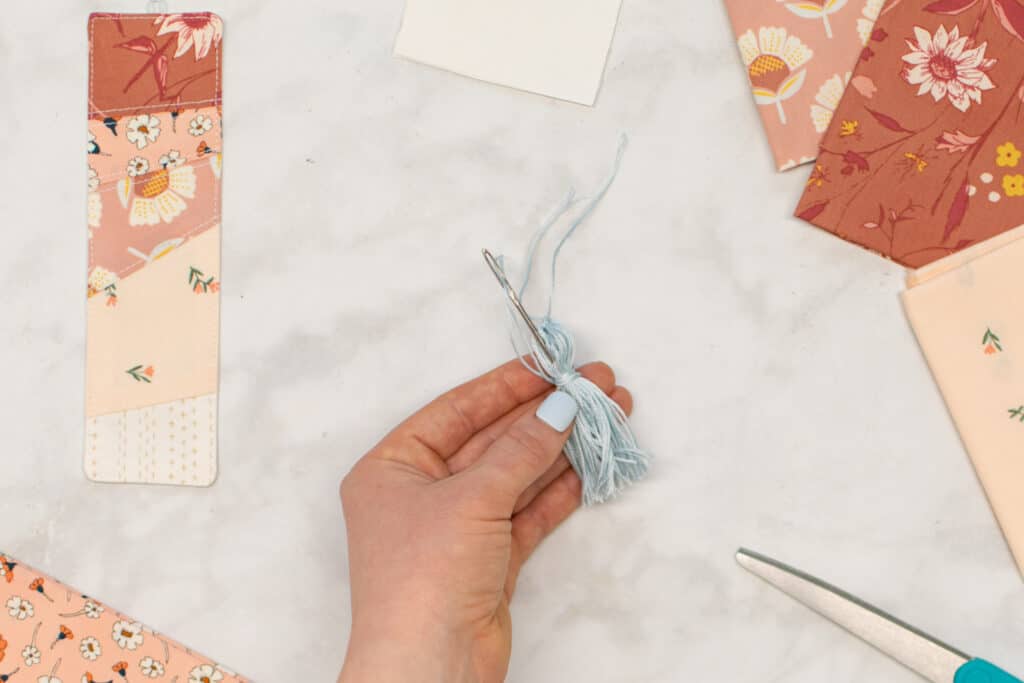
Thread the tails into a tapestry needle.
Push the needle down through the center of the tassel, then pull the thread tails through.
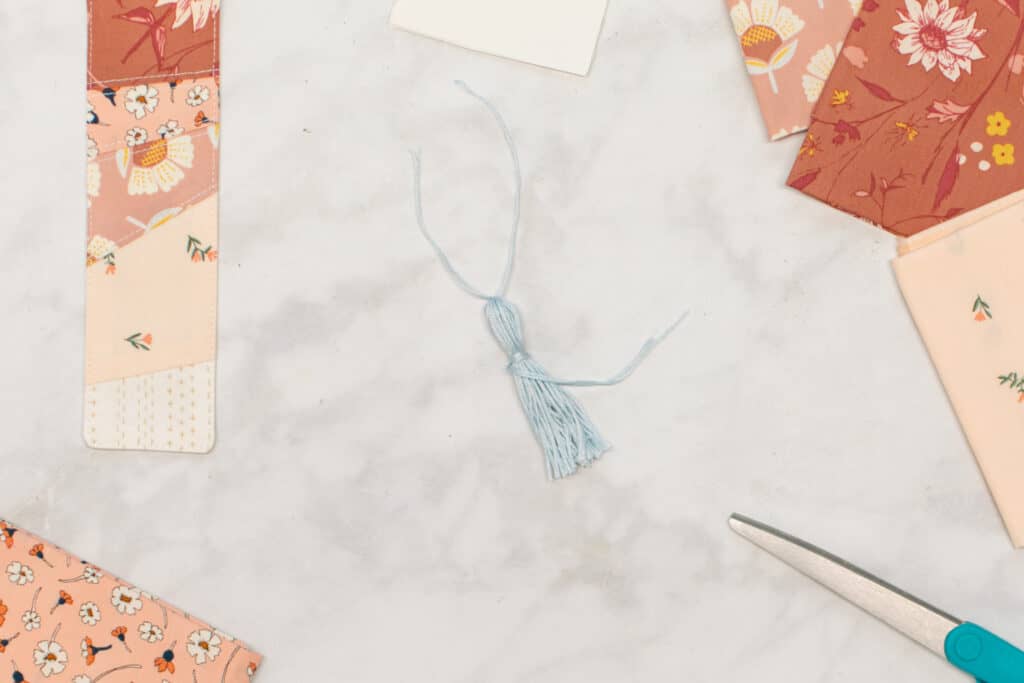
Finally, trim these last two thread tails to match the length of the rest of the threads in the tassel.
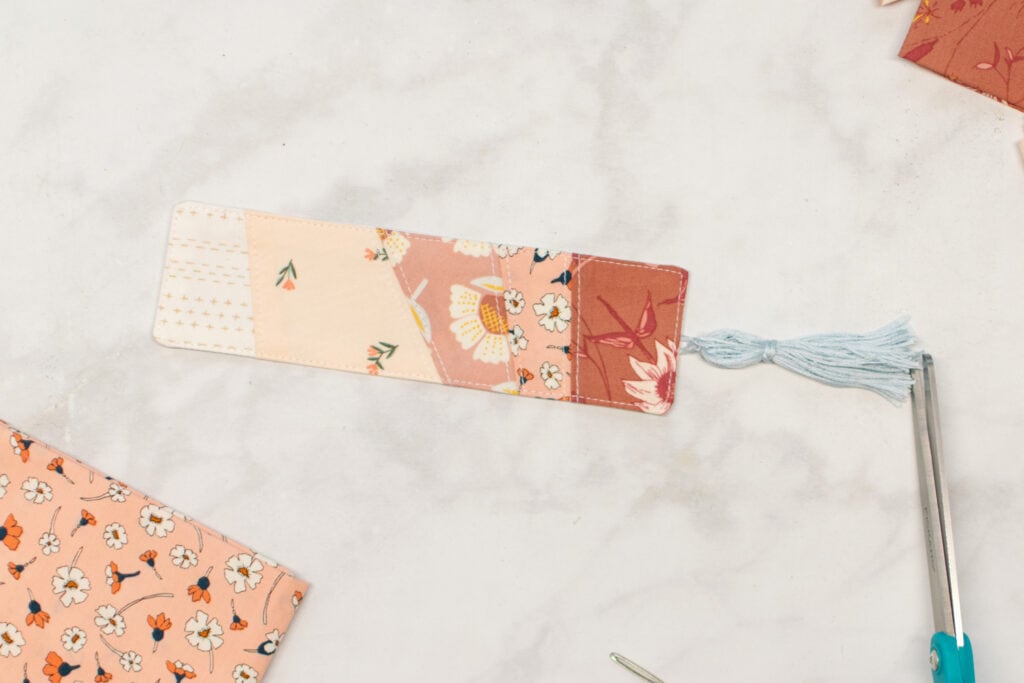
Congrats! Your adorable pieced bookmark is finished!

Save this to your favorite board on Pinterest Here.
Have always like bookmarks as they are fun! Love the corner ones. Tho there is so many designs to have for your mood on the longer ones, I've been hesitant to use since I have lost a couple of favorite ones over the years.
I did a sample of your long one & instead of using a tassle - I used a thin elastic attached at top & bottom when sewing the top seams. This can be slipped into the page to keep you place & while reading just slip over the cover (easier if a hard cover book) or over the pages you've read already.