Learn How to Make a Personalized "I'm Not a Cat" T-Shirt With This Step by Step Cricut Iron-on Guide With Free SVG Files.
When I first saw the I'm Not a Cat zoom recording I about fell out of my chair laughing!! If you haven't seen it already, you can view it here.
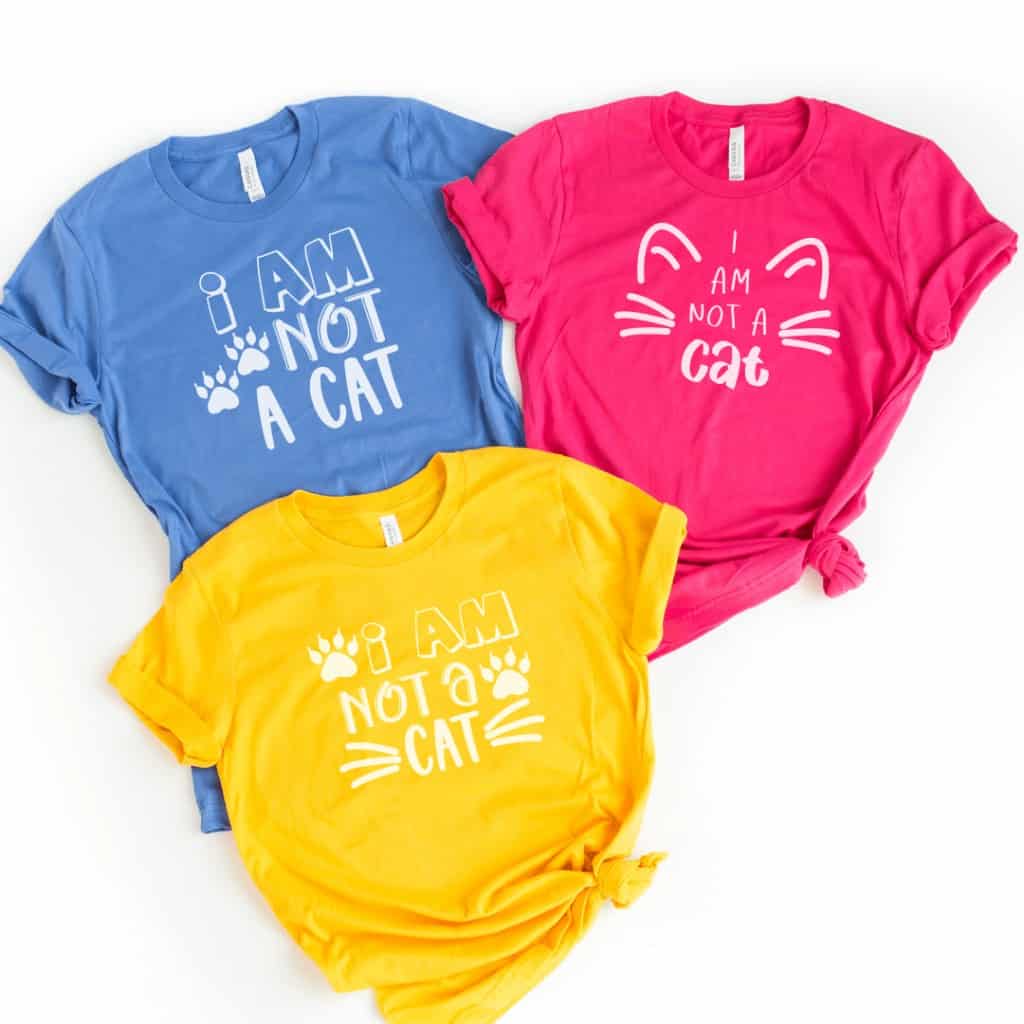
What started out as a cat filter quickly became an overnight sensation! So of course I whipped up three SVG files so you can be part of this funny viral video meme.
I Am Not A Cat SVG Files
Here's a quick summary of what happened in case you haven't seen it!
"When Judge Roy Ferguson opened up Tuesday's virtual proceedings of the 394th Judicial District Court in Texas on Zoom, he was not expecting to see two lawyers and a kitten. The blue-eyed "cat" in the bottom right corner was actually county attorney Rod Ponton, covered by a filter. Ponton said his assistant was trying to fix the settings, saying "I'm here live, I'm not a cat.” -Global News.
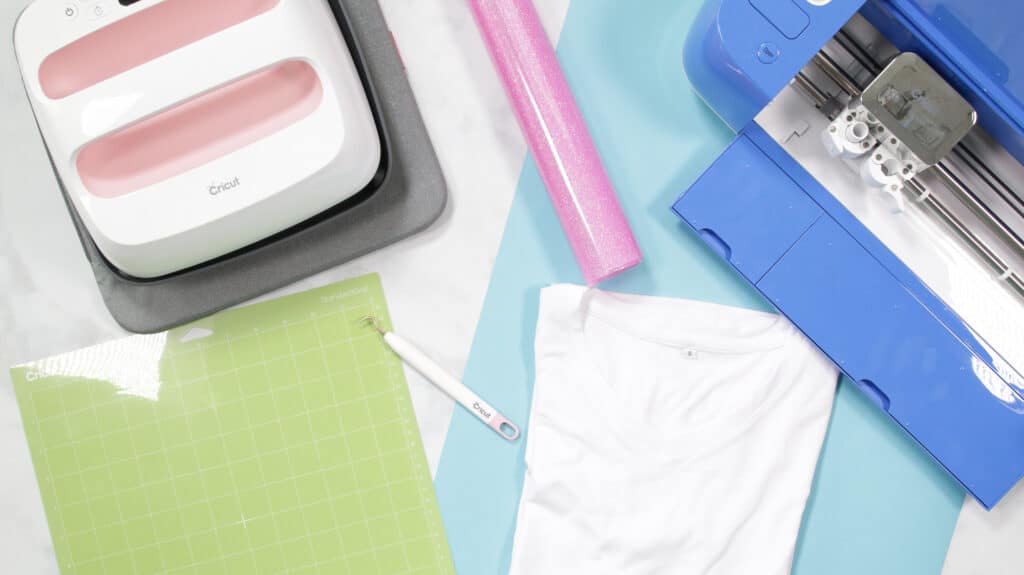
For this project, you will need:
- Cricut Everyday Iron-On Vinyl
- T-Shirt
- Cricut Explore or Cricut Maker
- Green Standard Grip Mat
- Cricut EasyPress or Iron
- Weeding Tool
- I'm Not a Cat SVG FILES
DOWNLOAD YOUR FREE "I AM NOT A CAT" SVG FILES HERE
Cut Your Design
While this SVG file is already sized for a t-shirt, feel free to adjust it as needed. You can use Design Space’s t-shirt template to ensure it cuts to the perfect size. Personally, I like to size my design to be around 8 inches wide.
Once you have your design ready, click “Make It” in the top right-hand corner to view the preview screen.
Be sure to mirror your image, that way it is cut the right way for iron-on. If you don’t do this, your image will be backward when you iron it onto your shirt. So, before you cut, double-check that your image is mirrored.
After clicking continue, the screen prompts you to select the material you are using. For this project, I am using Glitter Iron-On. To find my material quickly, I like to use the search bar. If you use this material frequently, save it as one of your favorites.
*Pro Tip - I always select "more" pressure to make sure it cuts completely through the Iron-On.
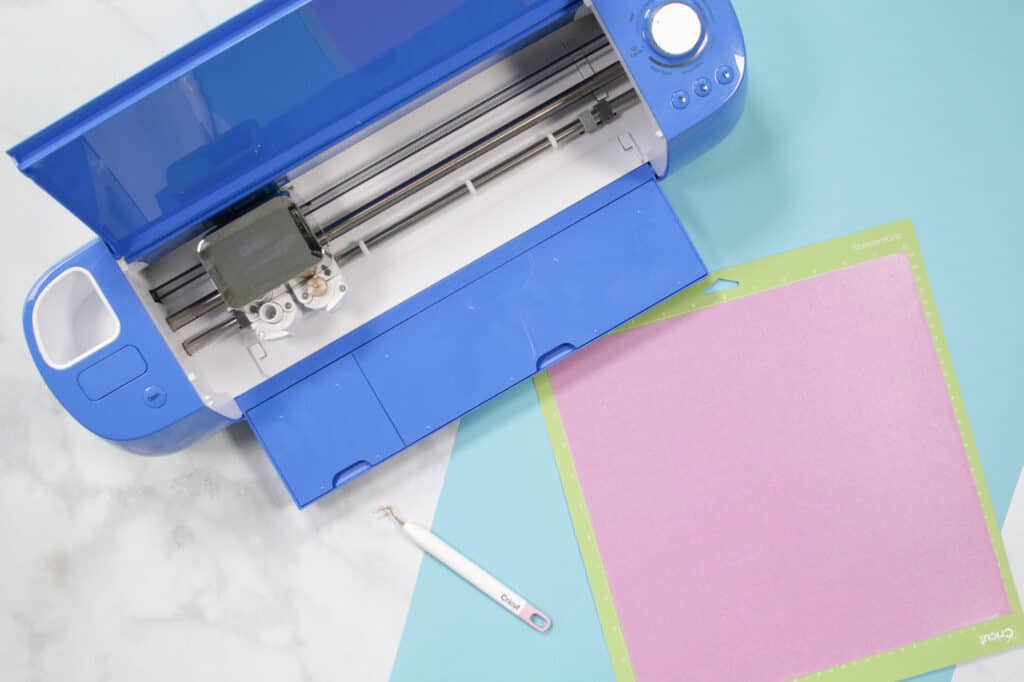
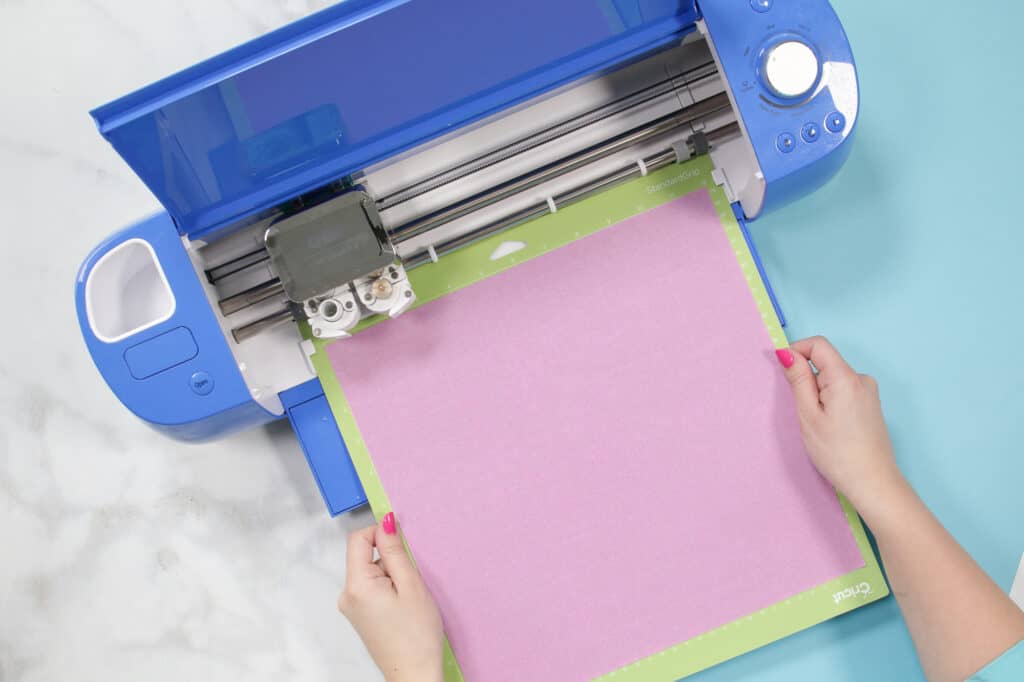
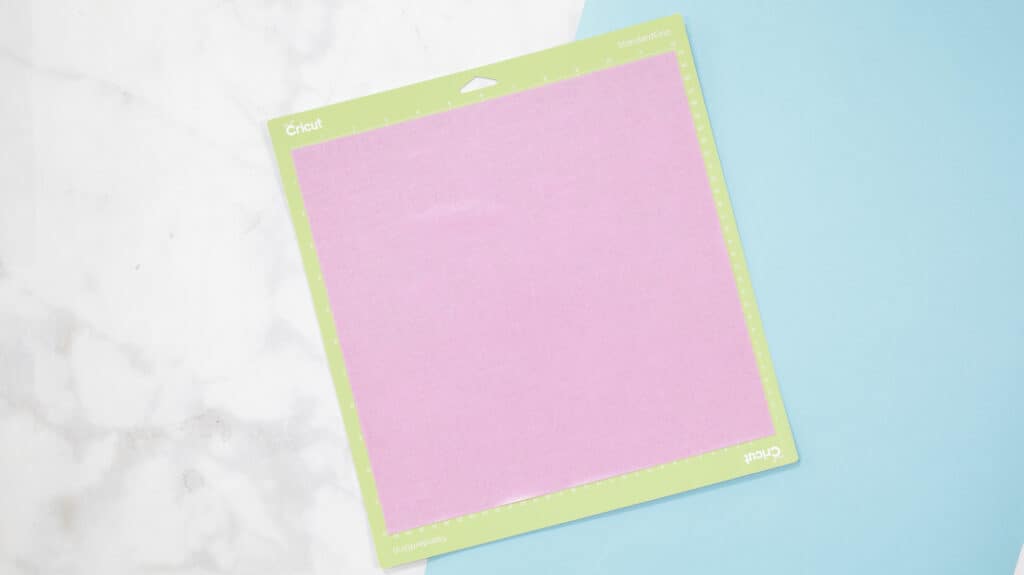
Place your iron-on vinyl shiny side down on your green mat.
Make sure that your Cricut is loaded with the fine point blade.
Next, insert your mat into either your Cricut Maker or Explore machine. Press the blinking Cricut “C” button and your Cricut will start cutting.
Once it is finished cutting, press the arrow button to release your Cricut Mat.
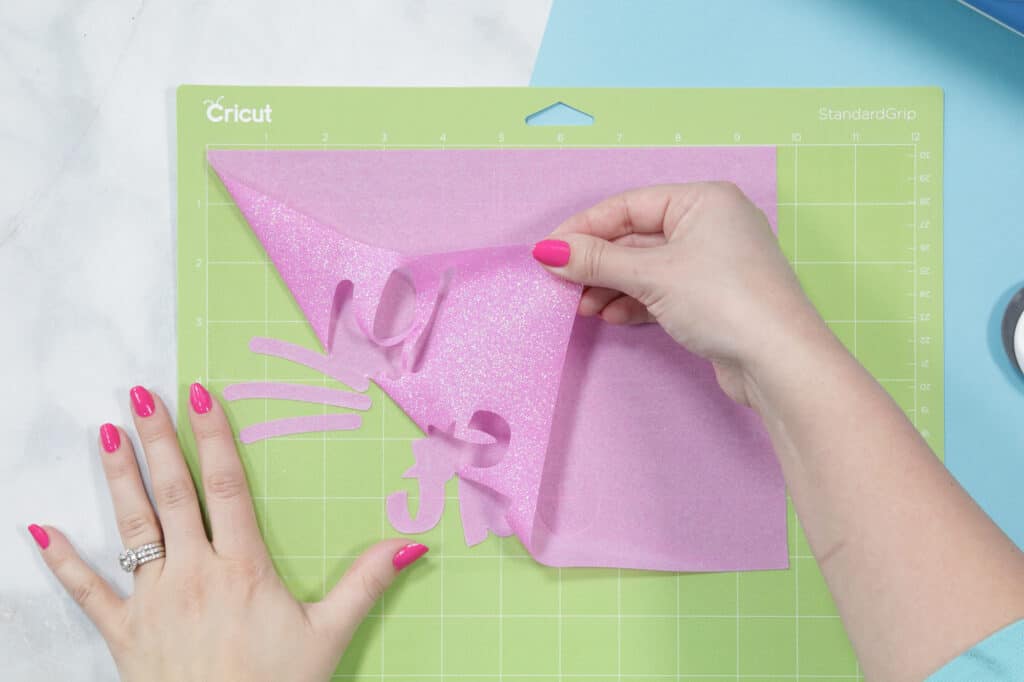
Weed Design
Once the cut has finished, it's time to start weeding your project. I like to use my true control knife to remove some of the excess vinyl from the edges of the design and save them for use later on.
You are going to be removing all of the vinyl that you do NOT want to transfer to your project.
I like to start weeding in the corner of my project.
Use a 45-degree angle to slowly pull the excess vinyl away from your project, being careful not to rip anything in the process.
I like using my weeding tool to get the more intricate parts of my design up, like the insides of letters.
If you need help seeing which parts of your design you need to weed, you can either hold it up to the light or use a lightbox. The light shows through the cracks, making it easier to see (especially on more intricate projects).
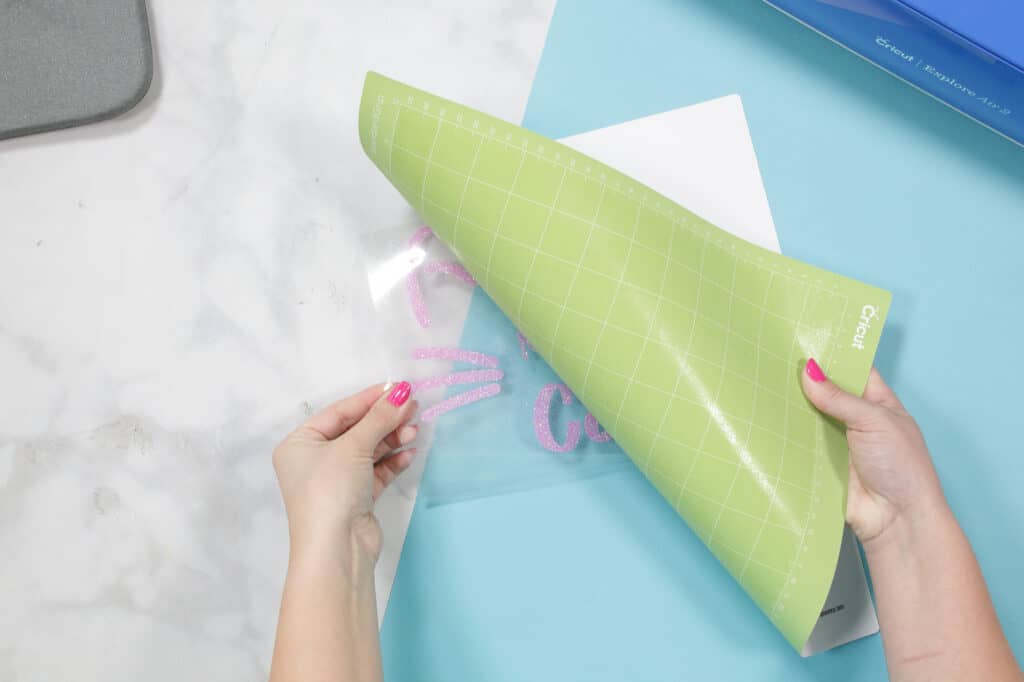
Flip your mat over and gently peel the mat away from the project. This will keep your Iron-On from wrinkling or bending. Don't worry, your mat is meant to be bent like this!
Flip over your design to make sure everything looks perfect.
Heat Up Your Iron or EasyPress
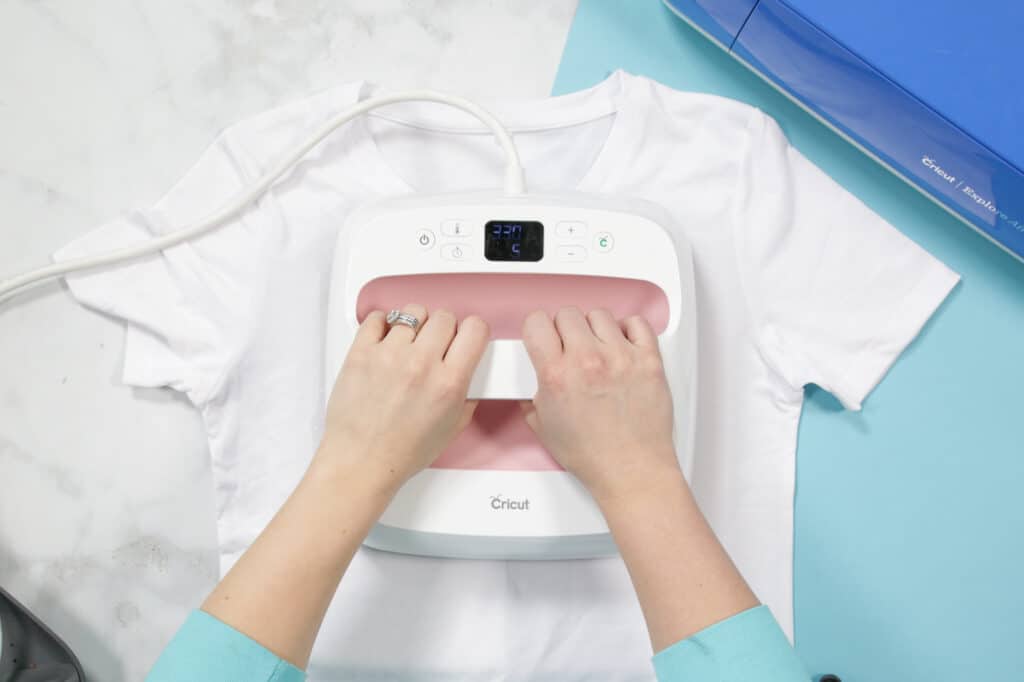
Now that your design is ready to go, it’s time to heat up either your EasyPress or iron to Cricut's recommended settings. I like using Cricut’s EasyPress since it has a large surface area, heats up to an exact temperature and has a timer so I know exactly how long to press my project for. Learn more about the Cricut EasyPress here.
If you are using an iron, set it to high heat with zero steam. Make sure the water basin is completely empty, otherwise the steam could ruin your vinyl transfer.
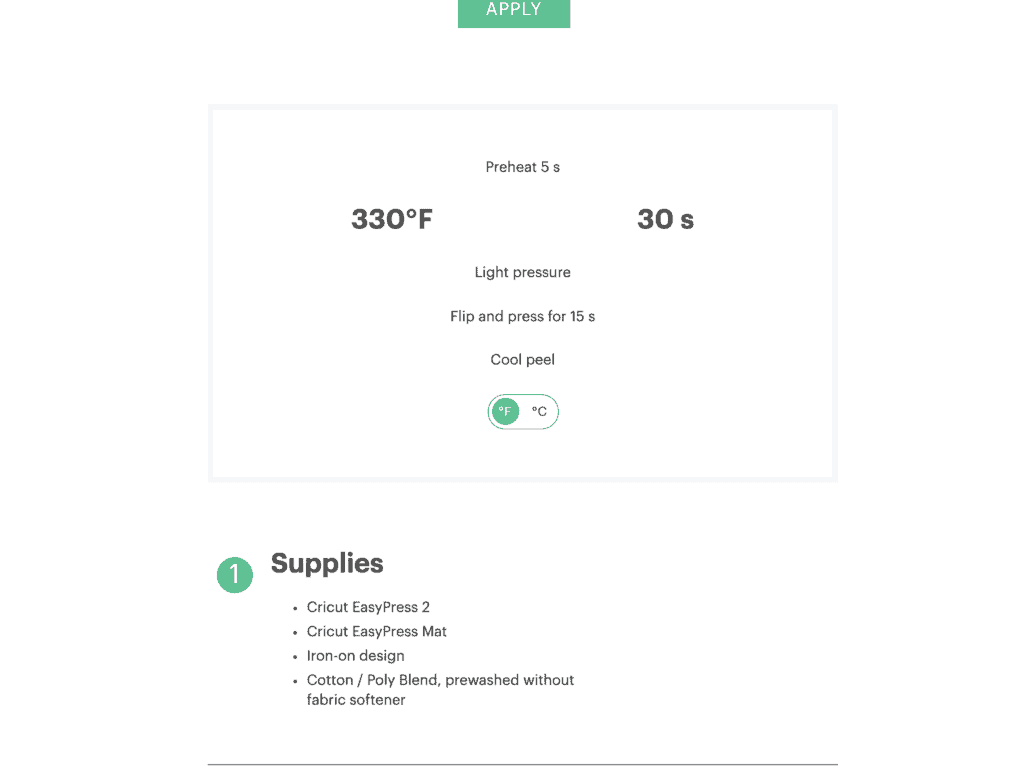
Cricut has an amazing online guide to tell you exactly what temperate, time and pressure you need to press your iron-on at. The exact settings vary depending on the type of iron-on vinyl you are using and the material you are transferring it to.
For this project, we are going to be heating the EasyPress to 315 degrees and pressing for 30 seconds.
Preheat Your Shirt
Preheating your shirt removes moisture, flattens it and ensures it is ready for iron-on application.
Find the Center of Your Shirt
Before ironing-on my design, I like to find the center of the t-shirt to ensure my design is centered. To find the exact center of the shirt, I fold my t-shirt in half and press the fold line, this gives me a line down the center of my shirt so that I can perfectly center my design later on. You can also fold your shirt down at the armpits to create a horizontal line.
Once you have your centerfold, open it back up and place it on top of your EasyPress Mat.
If you don't have an EasyPress mat, it's helpful to use a towel that's been folded over as a pressing base.
Position Design
Next, you’re going to place your decal sticky side down - use the ironed line to determine if your design is centered.
Once you are happy with its placement, press your design.
Press Your Design
Be sure to check that your EasyPress is heated to the correct temperature before you begin pressing.
Once your EasyPress is positioned, click the “C” to start the timer. After you have been pressing for 30 seconds, your EasyPress will beep to let you know that it is done.
After ironing the front, you are going to want to flip over your shirt and press the back for another 15-30 seconds. This helps to ensure that the Iron-On is completely adhered.
Cool and Peel
If your iron-on is a warm peel, allow the design to cool for about 10-15 seconds before peeling off the backing. If it is a cool peel, you are going to want to wait about 1-2 minutes, or until your design is completely cool to the touch before you peel it.
When your design is ready to be peeled, slowly peel it away from the shirt at a 45-degree angle. I like to start peeling from the corner of my design
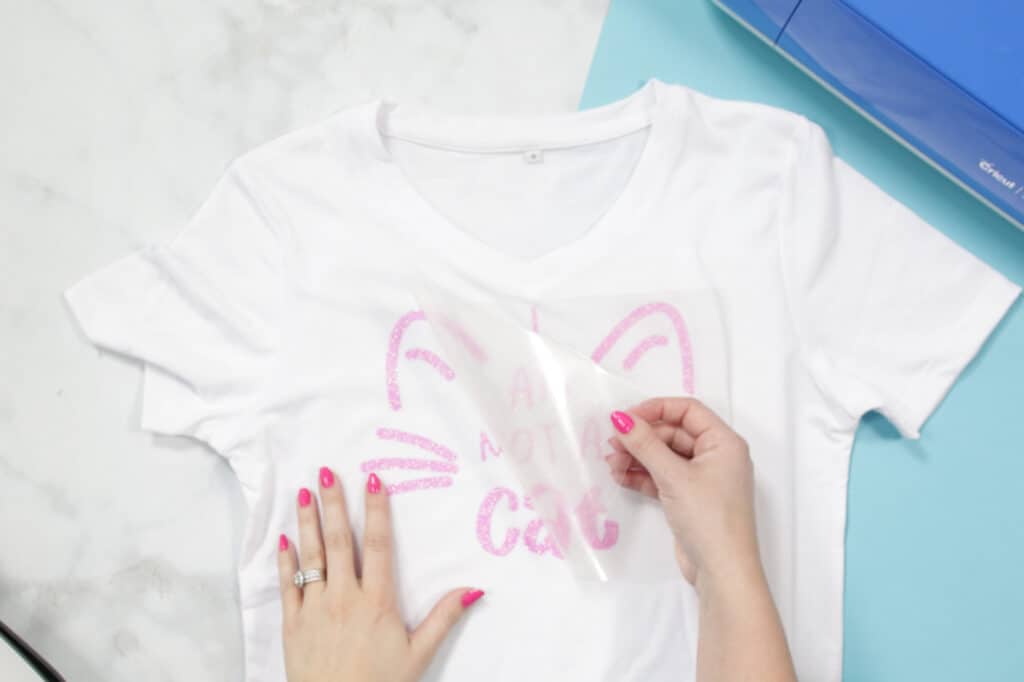
As you begin peeling, be sure to check to see if your design has completely transferred. If the Iron-On is coming up, lay the transfer back down and press for an additional 15 seconds.
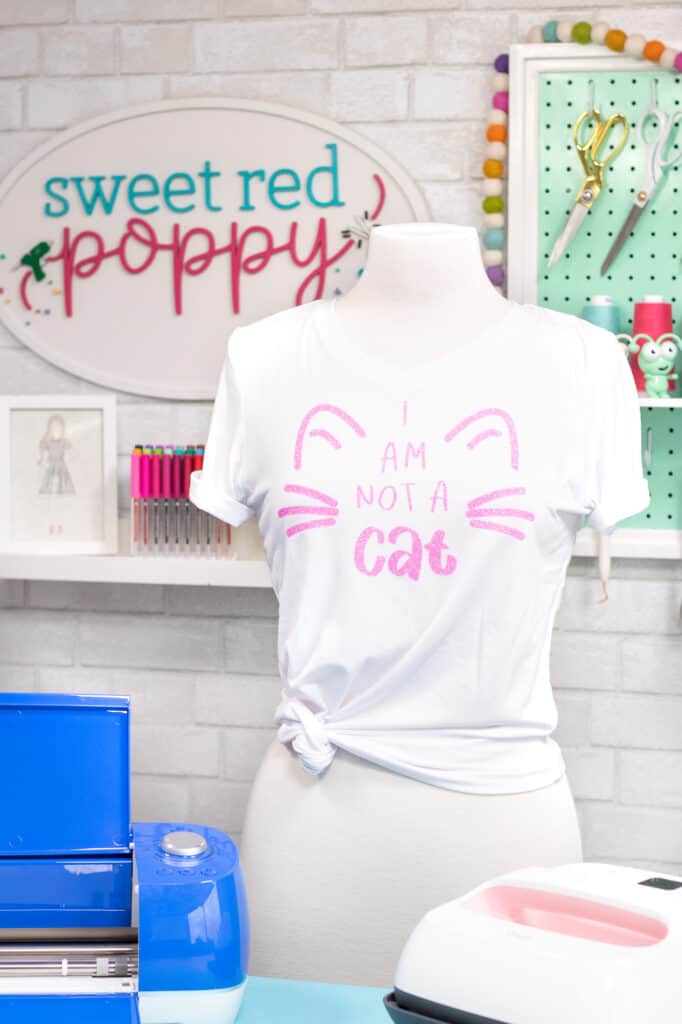
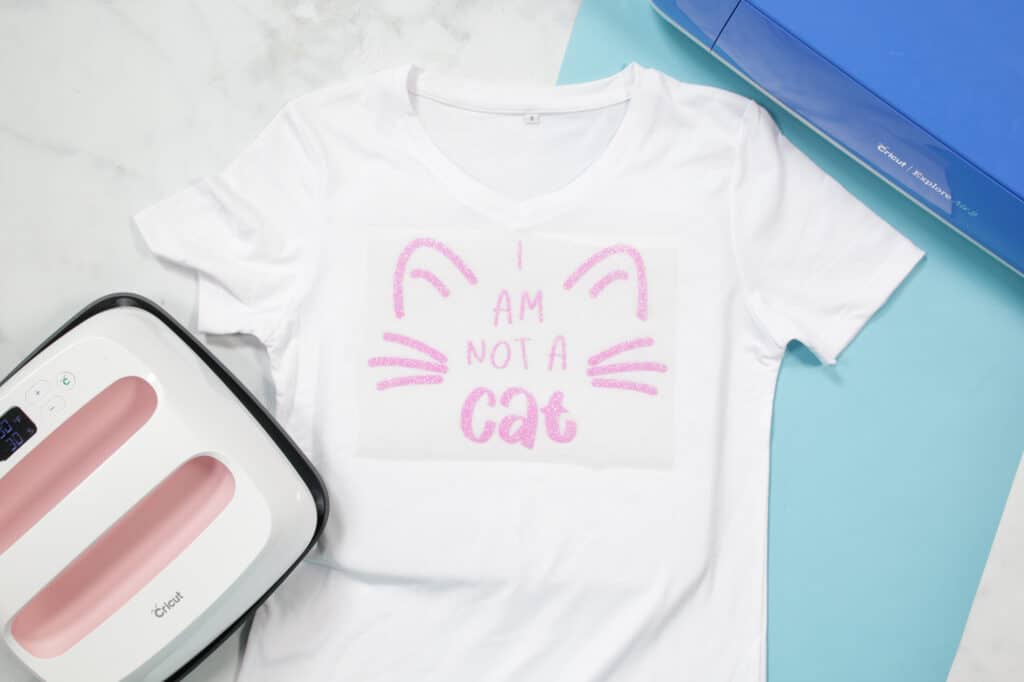
Now we have this cute “I'm not a cat" t-shirt. I can not wait to see the t-shirts you create!

Don’t forget to join my crafting Facebook group where you can show us what you’re making, ask questions, and learn from others! Follow me on Instagram for daily crafting inspiration and a look behind the scenes.
Do you have any questions about these SVG files? Let me know in a comment below!
I love these, thank you!! I laughed so hard when I saw the video! Where do you get your shirts? I love the colors!
LOVE THIS!! Thanks so much for sharing the video too! I passed it along to my lawyer friend!!