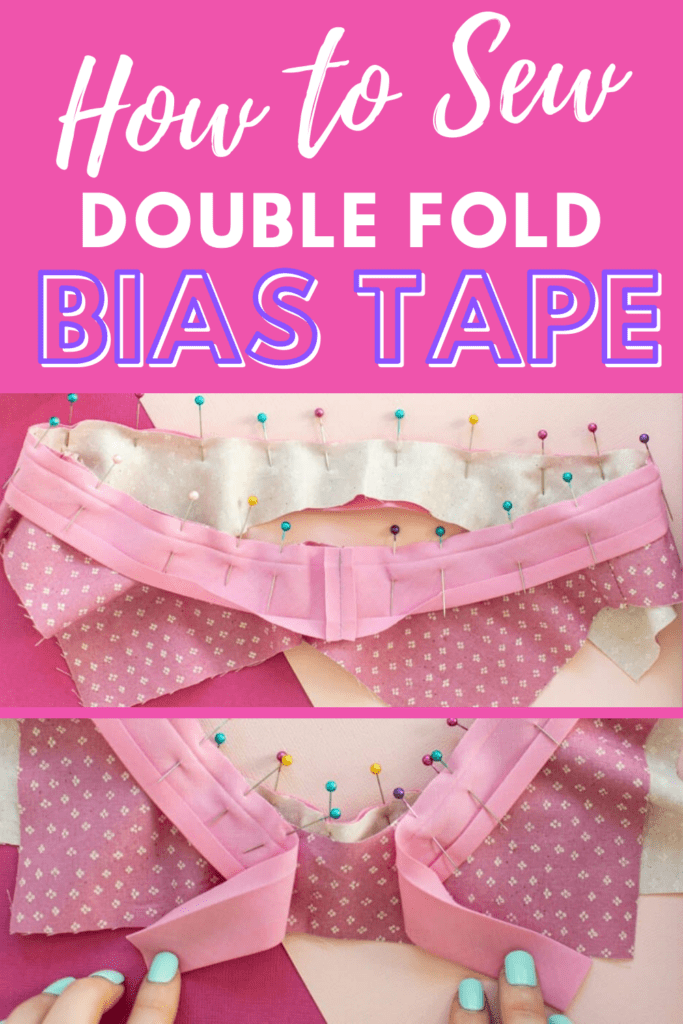
Learn How to Sew Double Fold Bias Tape to Finish Raw Edges with this Step-by-Step Tutorial
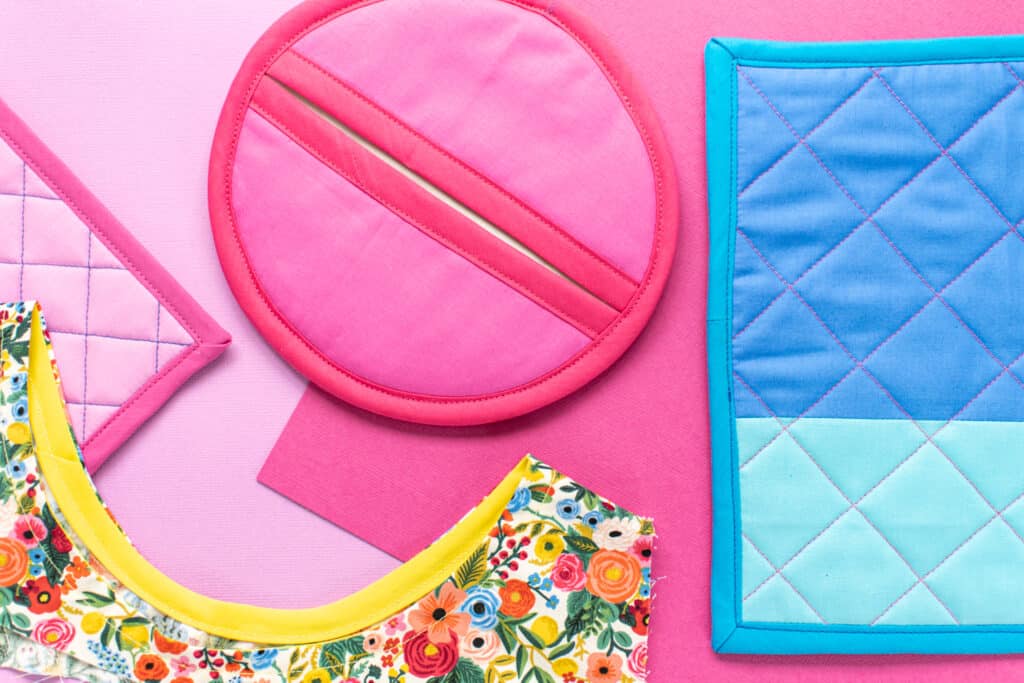
Bias tape is one of the best methods to finish raw edges on your projects. It’s great for everything from necklines and armholes on garments to contrasting bindings on potholders and pillows. Bias tape will really give your projects a professional touch – and a fun pop of color!
There are quite a few different methods out there when it comes to sewing bias tape to finish raw edges. Today, I’m sharing my favorite techniques for sewing double fold bias tape.
Table of Contents
What is Bias Tape?
First, if you’re new to bias tape, let’s start with a brief overview of this versatile notion. If you want a more detailed deep dive into bias tape and what you can use it for in your sewing, check out this post.
Bias tape is a strip of fabric with the edges folded in that has been cut on the bias of a fabric. The bias runs at a 45-degree angle to the grainline across the surface of a fabric and is the direction that woven fabrics have the most give.
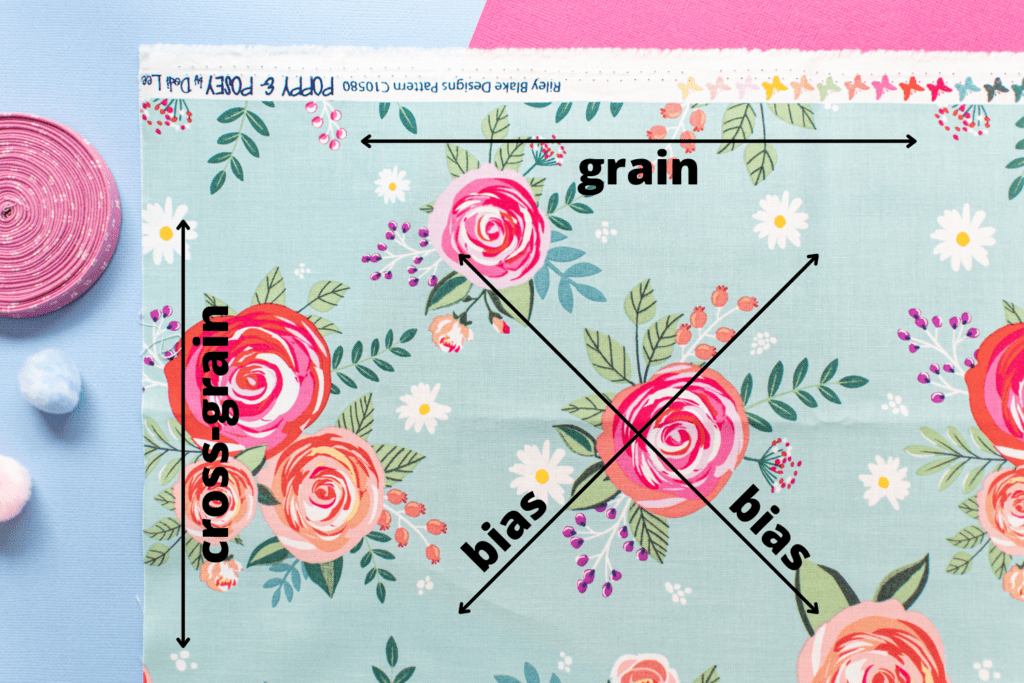
Because of this give, bias tape will have more stretch than a piece of woven fabric cut on the grain or cross-grain, making it great for forming to curves.
*NOTE: Bias tape is only made from and used on woven fabrics. Knit fabrics stretch more on the cross-grain than in any other direction, so for knit bindings it’s best if your fabric strips are cut on the cross-grain, not the bias.
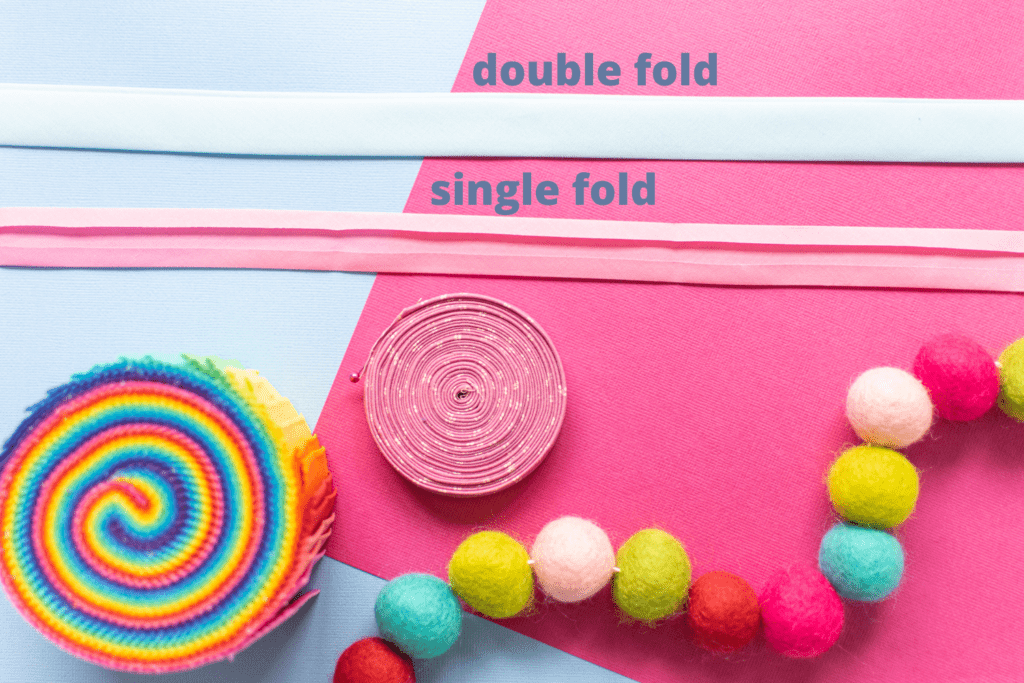
There are two primary types of bias tape – single fold bias tape and double fold bias tape. Both types are useful in their own way and are used slightly differently.
Single Fold Bias Tape
Single fold bias tape is a strip of fabric cut on the bias with each long edge folded to the wrong side once, so that the two raw edges meet near the middle.
This type of bias tape is usually used as an alternative to a facing – it is folded all the way to the wrong side of the fabric and stitched in place, so it won’t be visible from the right side of the project.
To learn how to sew single fold bias tape, check out this step-by-step tutorial.
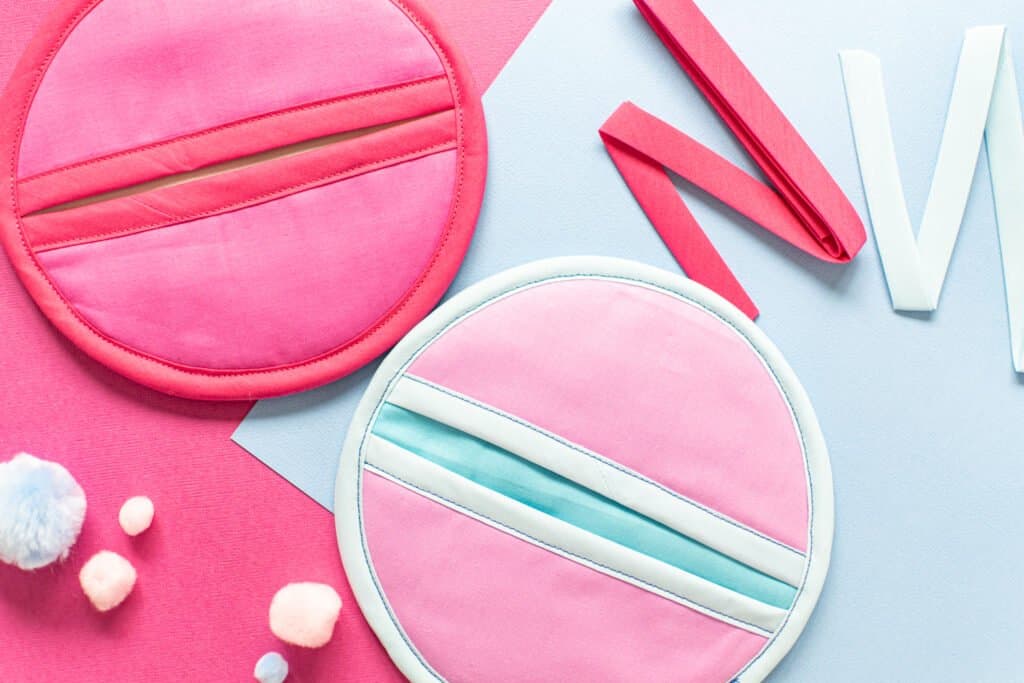
Double Fold Bias Tape
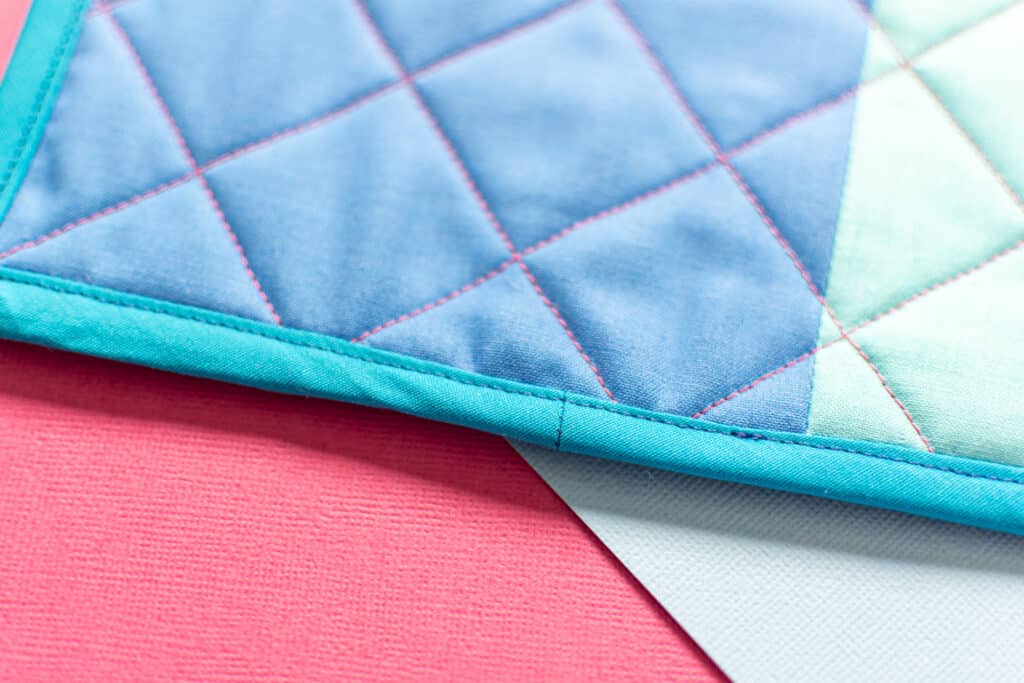
Double fold bias tape, on the other hand, is simply single fold bias tape that is folded in half lengthwise so that the raw edges are hidden on the inside of the tape.
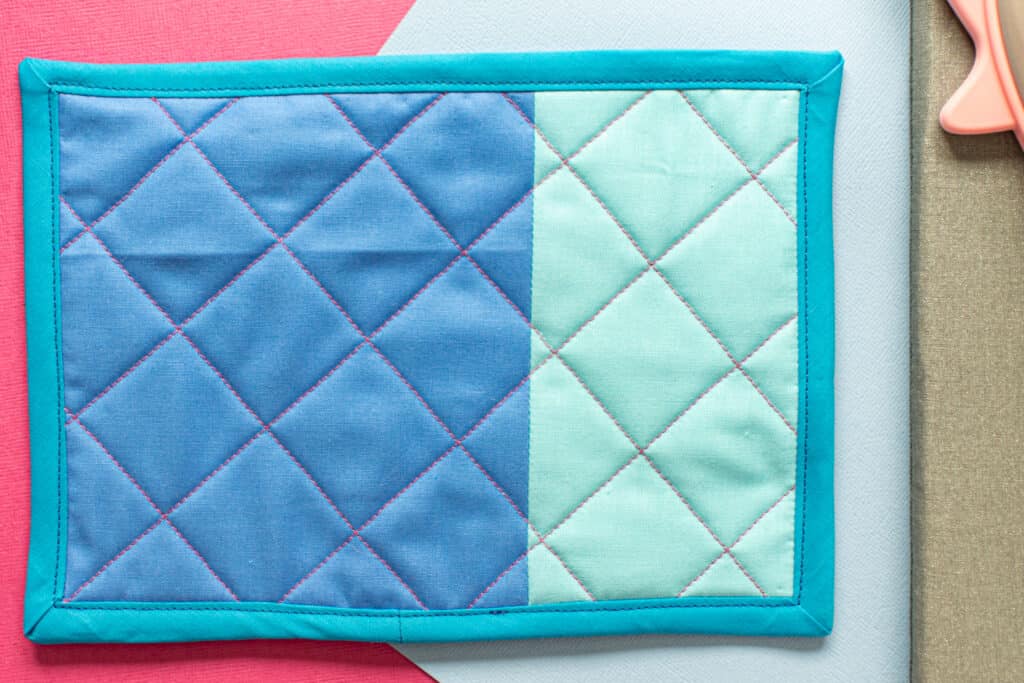
This type of bias tape is more often used as a binding rather than a facing – it sandwiches the edge of your project, creating a beautiful contrasting finish.
Store-bought Bias Tape vs. Handmade Bias Tape
You can purchase bias tape in a range of colors and even some cute prints from your local craft shop or online sewing supply retailers. Using store-bought bias tape is a convenient option and a great way to get started using this awesome sewing notion.
However, if you want customized colors and patterns, you can make your own bias tape with this easy method. Plus, handmade bias tape is often more flexible and easier to form to curves than its store-bought counterpart.
How to Sew Double Fold Bias Tape: 2 Methods
In this tutorial, I'm showing you how to sew double fold bias tape.
With double fold bias tape, you will typically be binding the edge of your project with a matching or contrasting strip of bias tape. There are two methods you can use to achieve this look – an easier method and more involved one that results in a more professional look.
Sewing Double Fold Bias Tape Method 1: Quick and Easy
Let’s start with the easier, dare I say… cheater, method.
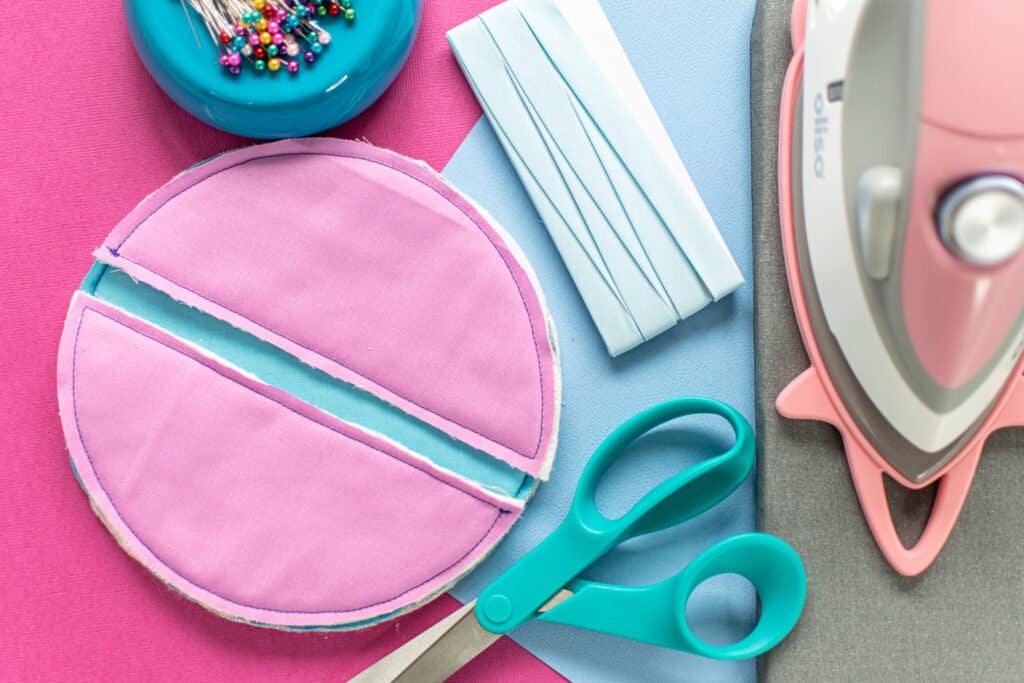
Supplies
These are the supplies you’ll need to sew double fold bias tape (the easy way) to finish an edge.
- Double fold bias tape
- Project you want to finish the edges on
- Scissors or rotary cutter & mat
- Sewing pins
- Thread
- Sewing machine needle
- Sewing machine
- Iron & ironing board
- Fabric chalk or marker
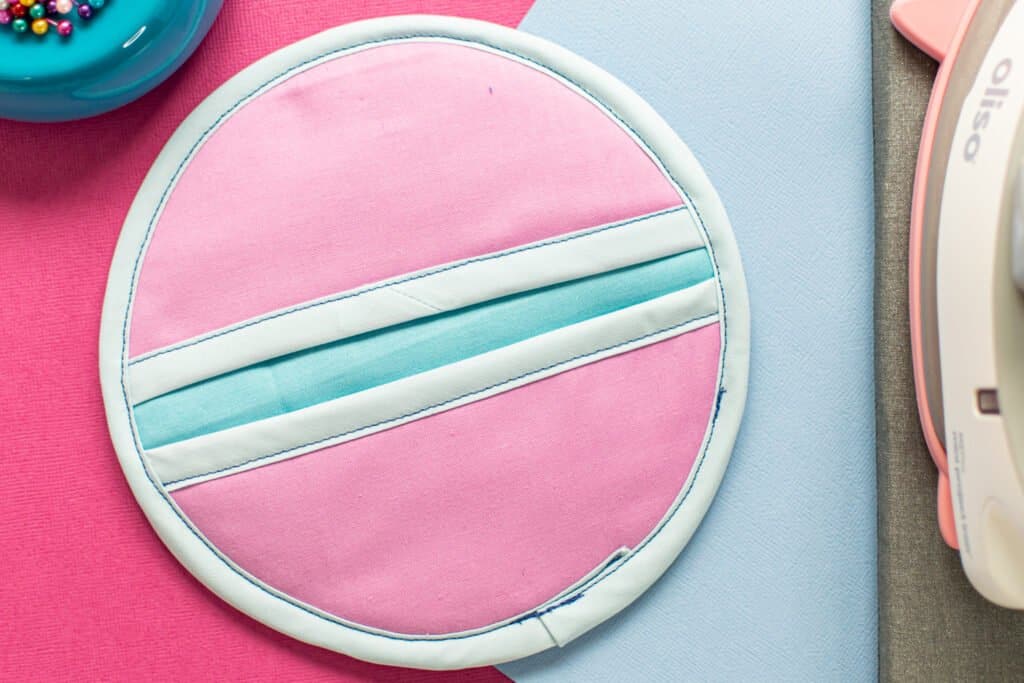
Step 1: Check Your Seam Allowance
When binding the edge of your project, the seam allowance won’t get folded under. This means that if your project includes seam allowance, you’ll need to trim it away along the edge you plan to finish.
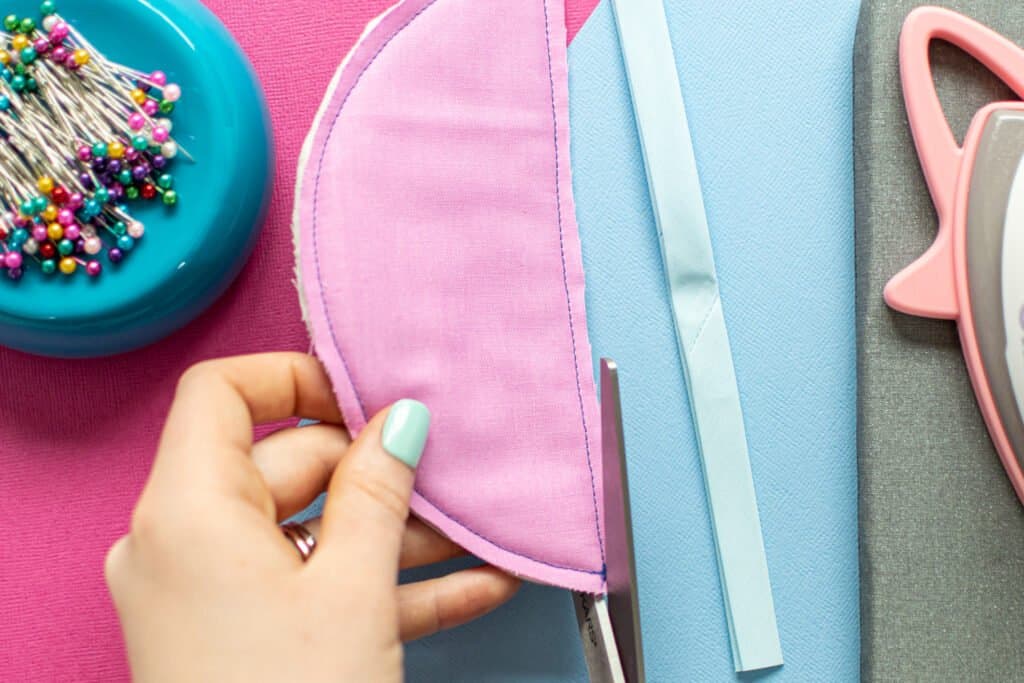
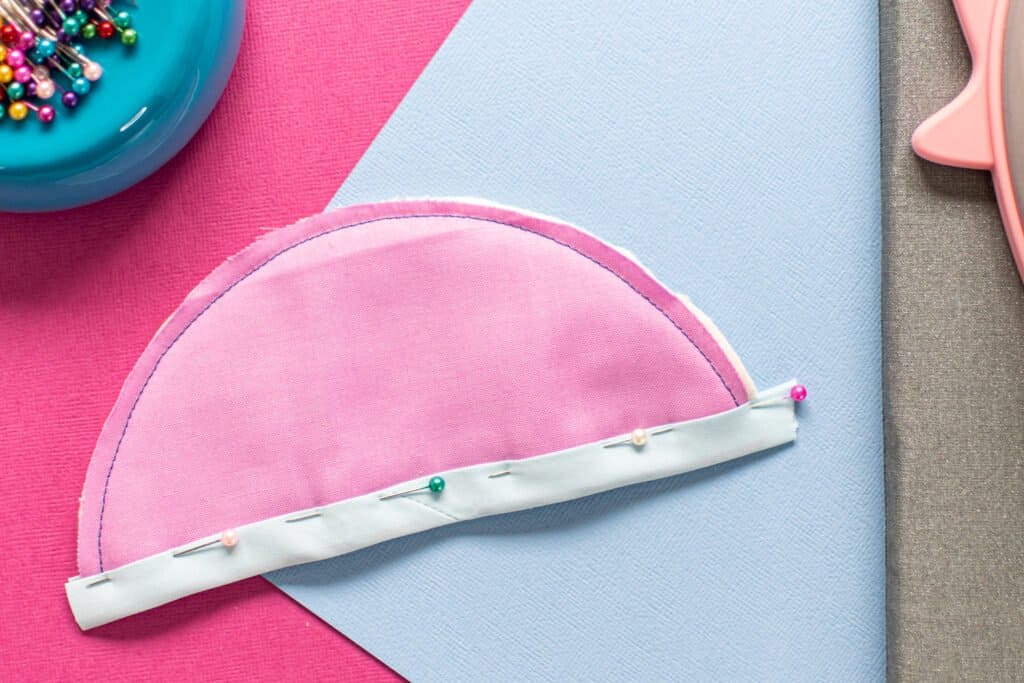
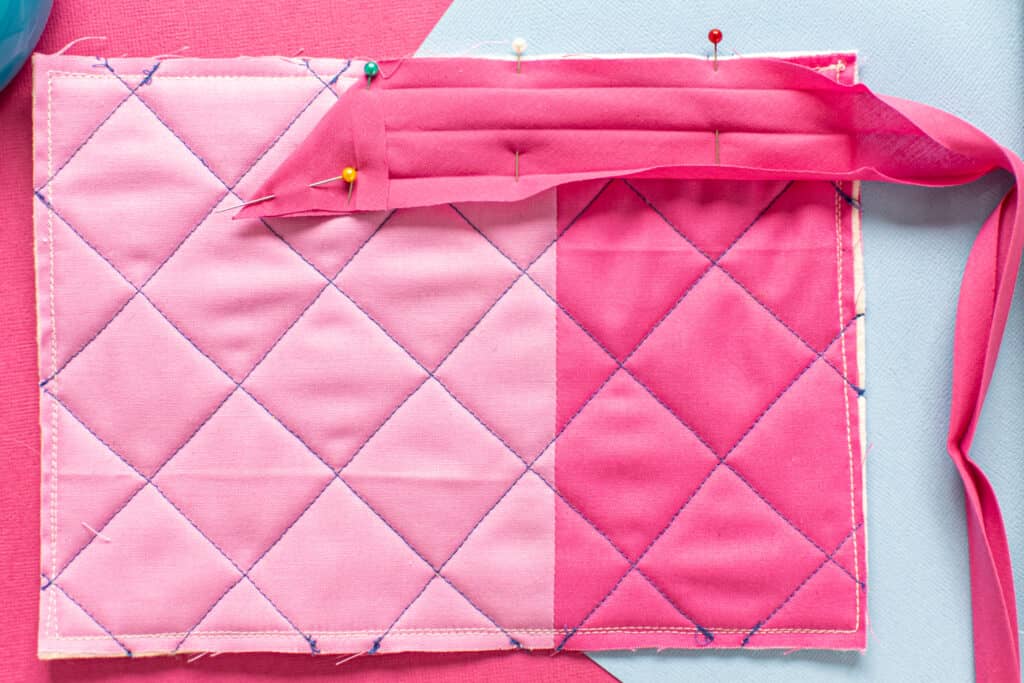
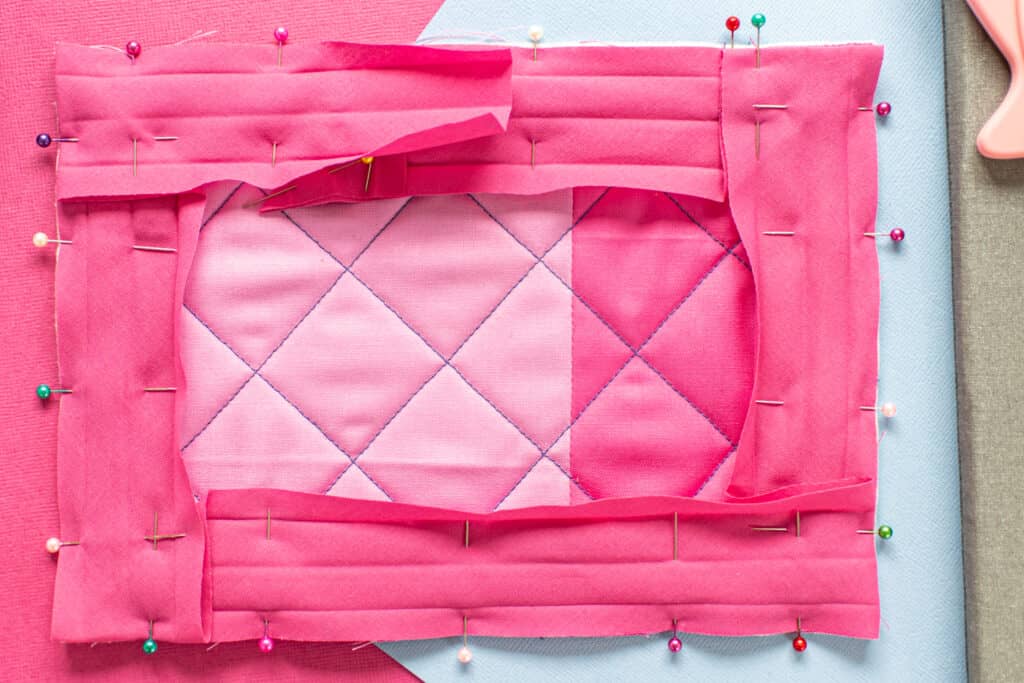
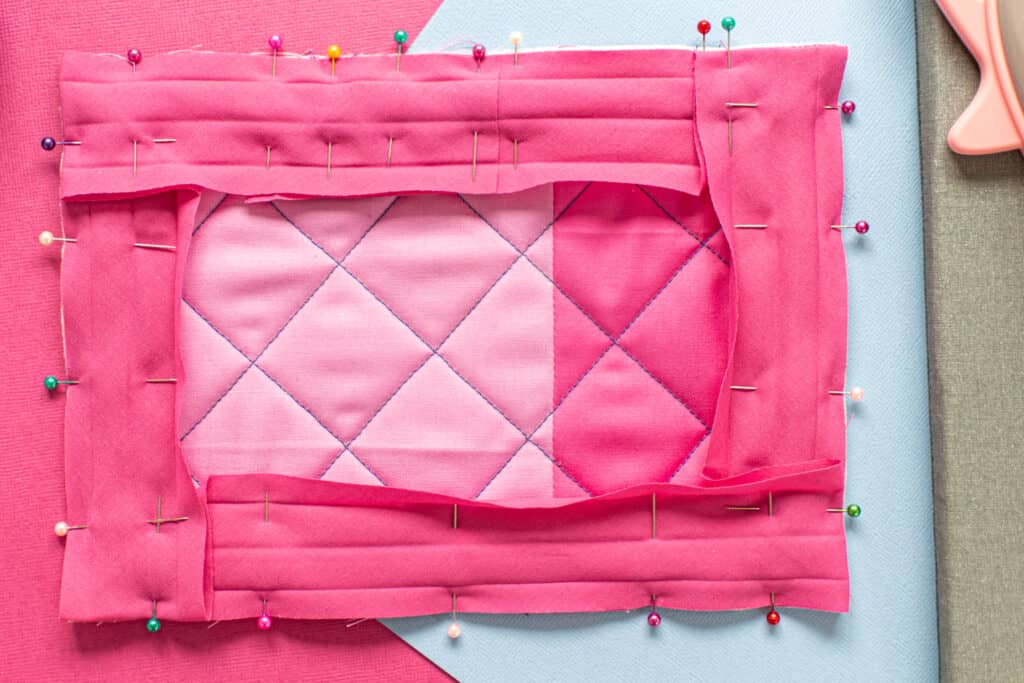
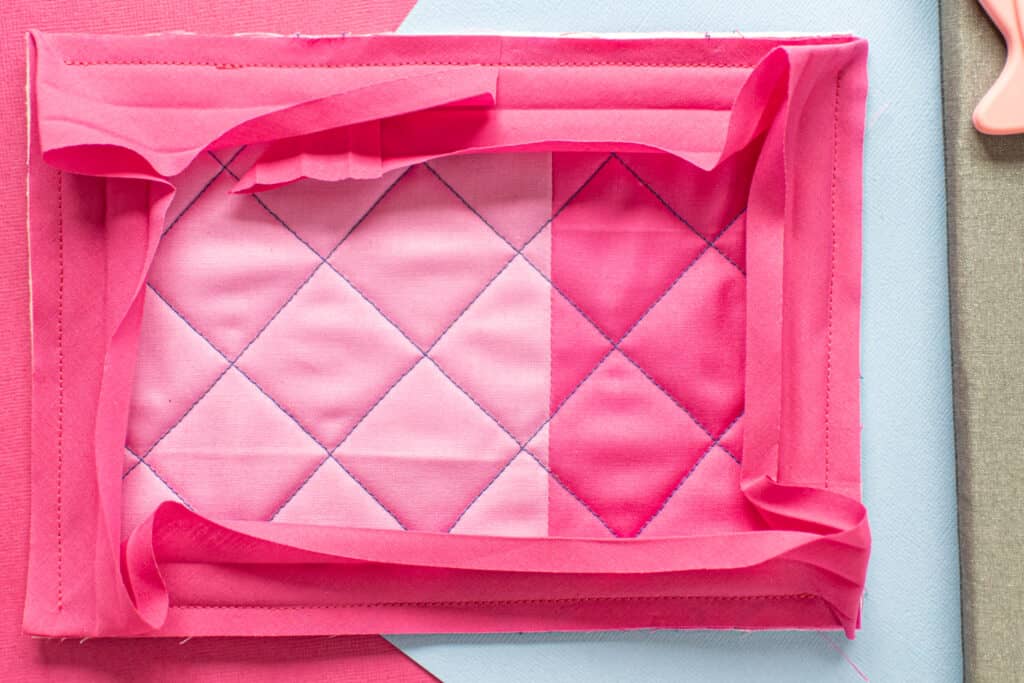
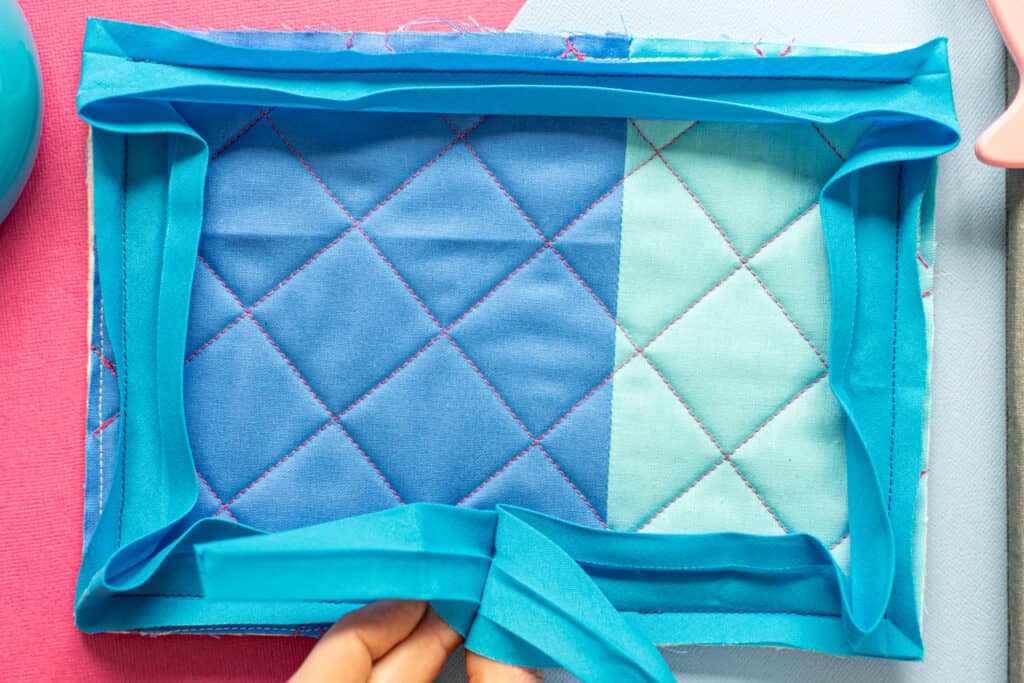
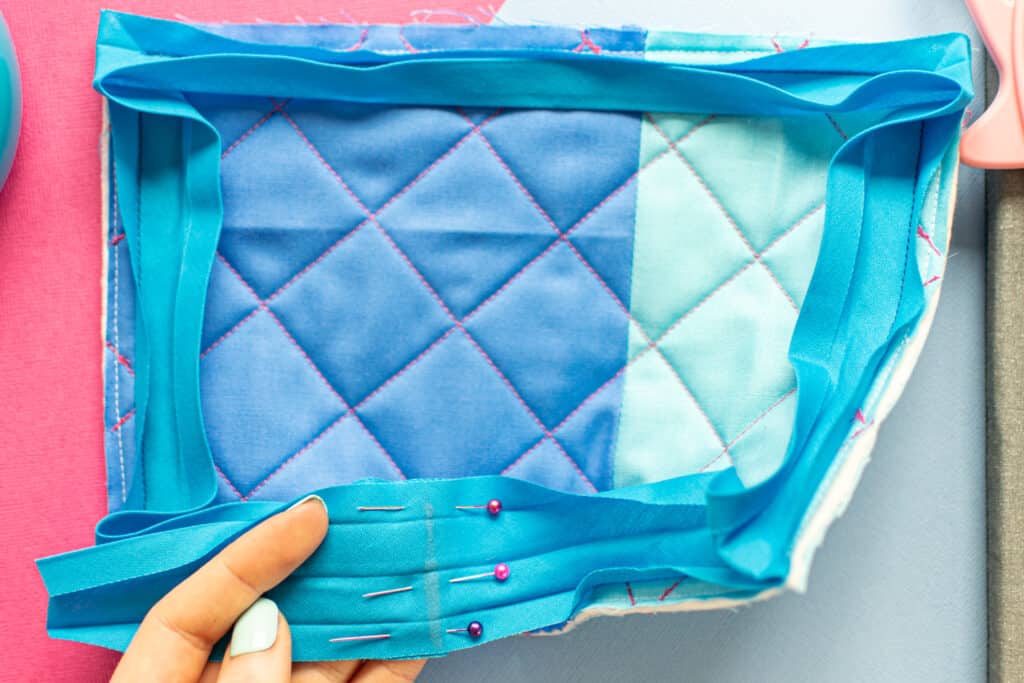
Step 2: Pin the Bias Tape in Place
Next, simply make a bias tape sandwich, pushing the edge of the fabric into the center of the bias tape, enclosing all the raw edges.
*PRO TIP: On store-bought double fold bias tape, one side of the tape will be slightly longer than the other. You want to make sure that the longer edge is on the wrong side of your project so that it will be easy to catch in the topstitching later.
Try to get the edge of the fabric all the way to the top of the bias tape without pushing it far enough that it is no longer flat.
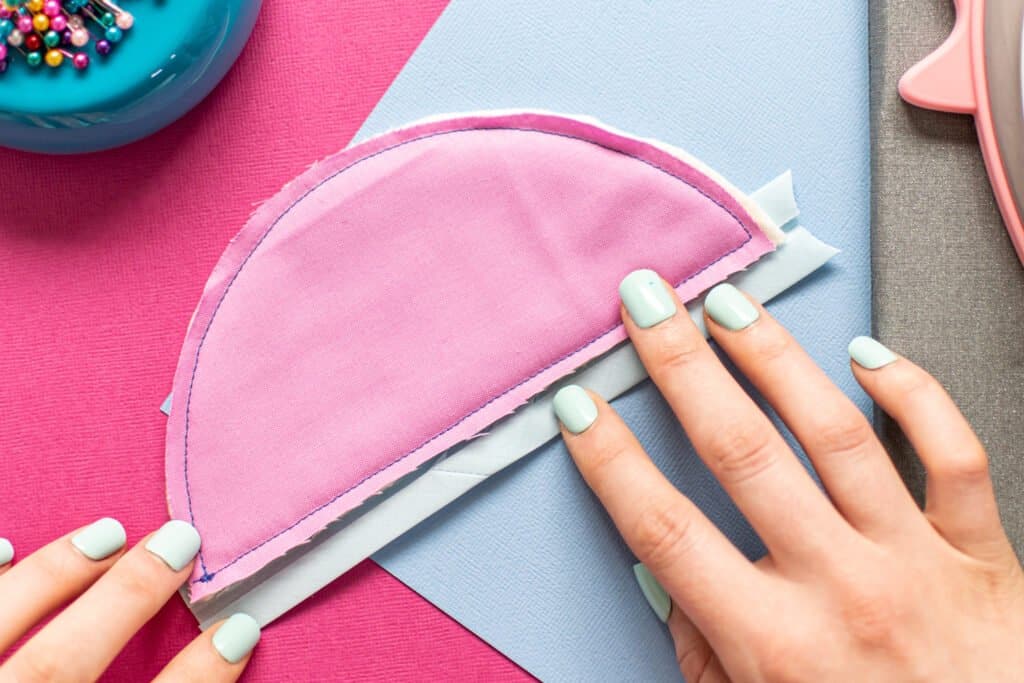
Pin it in place all the way along the edge of your project.
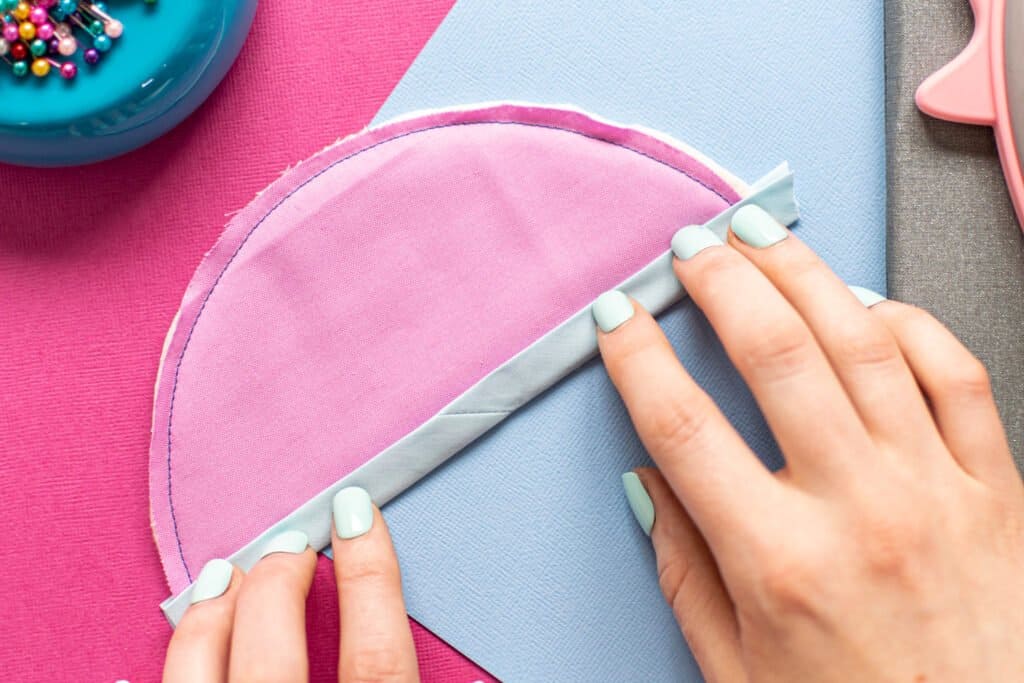
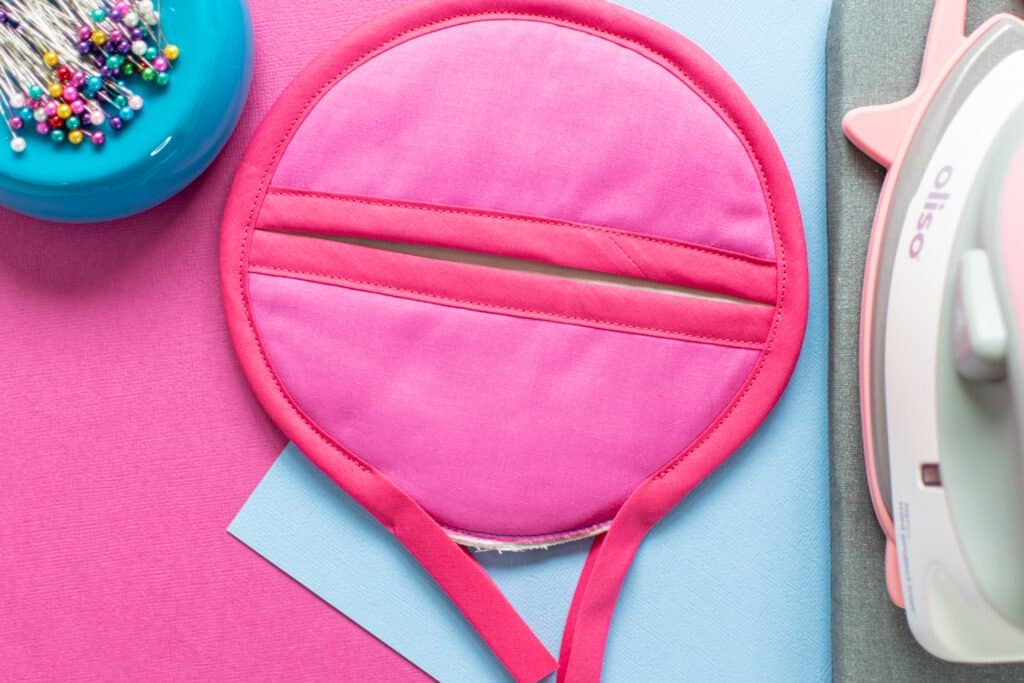
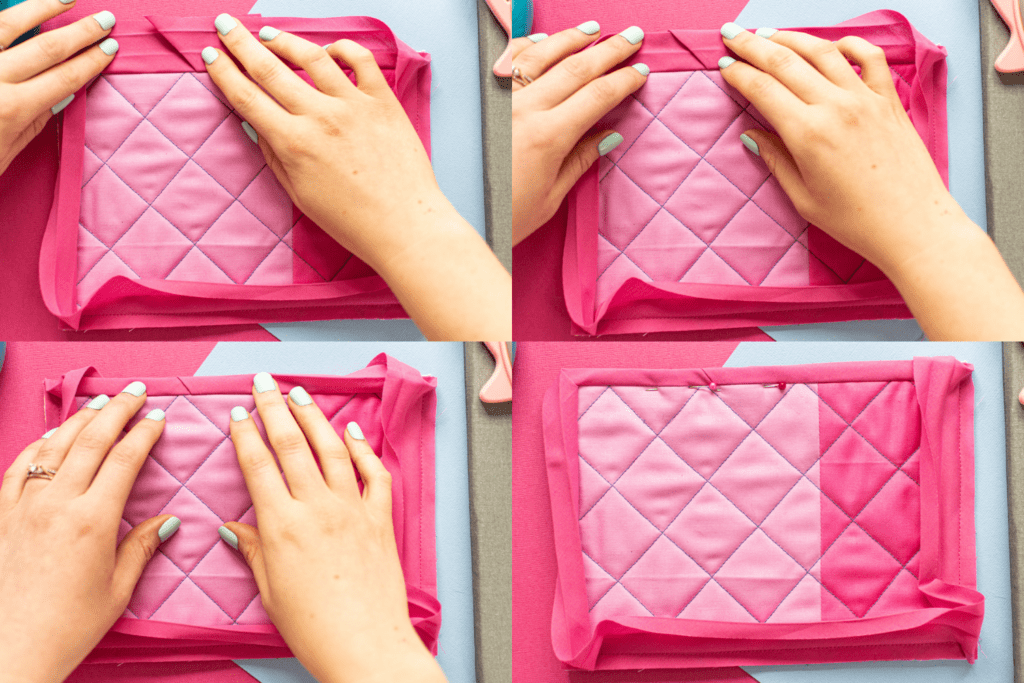
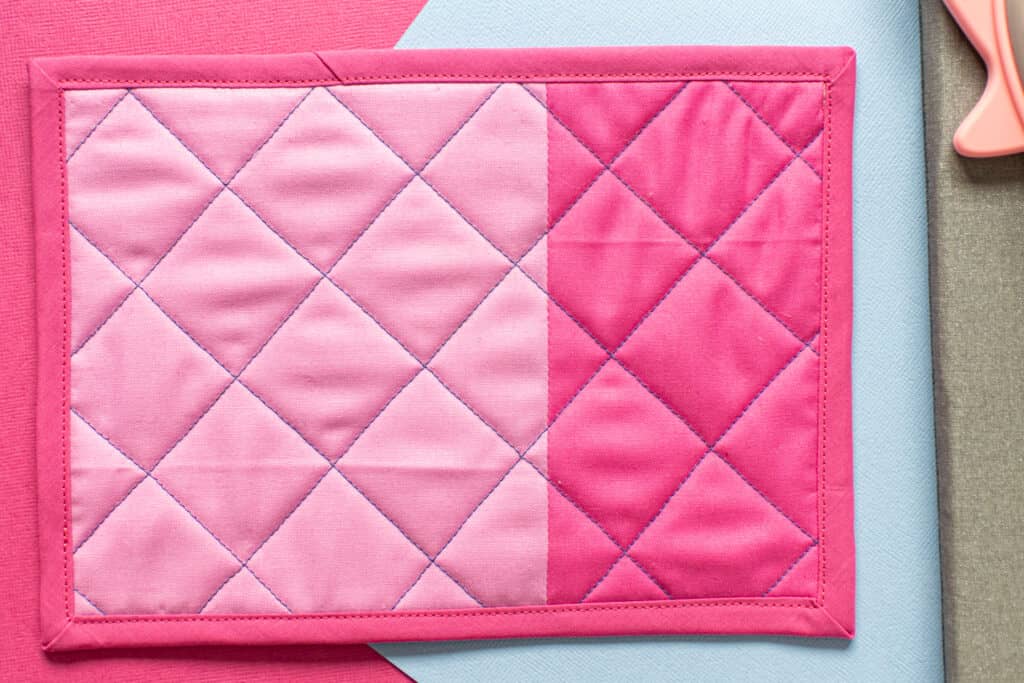
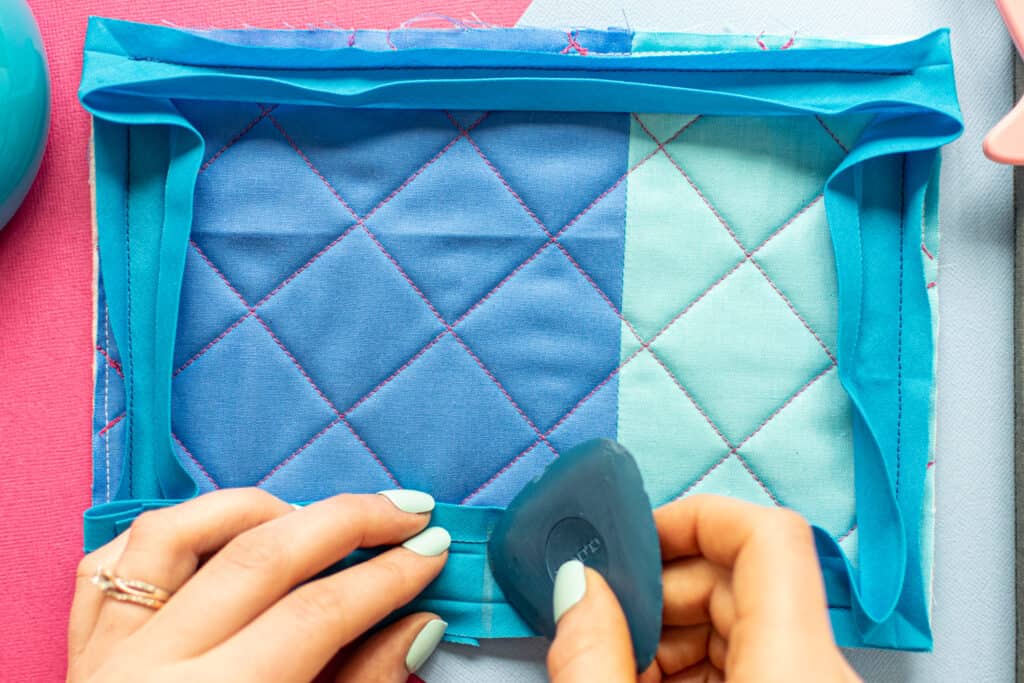
Step 3: Stitch the Bias Tape in Place
Finally, simply topstitch your bias tape in place close to the inner folded edge of the tape. Using a thread color that matches the bias tape will give you a nice, clean look.
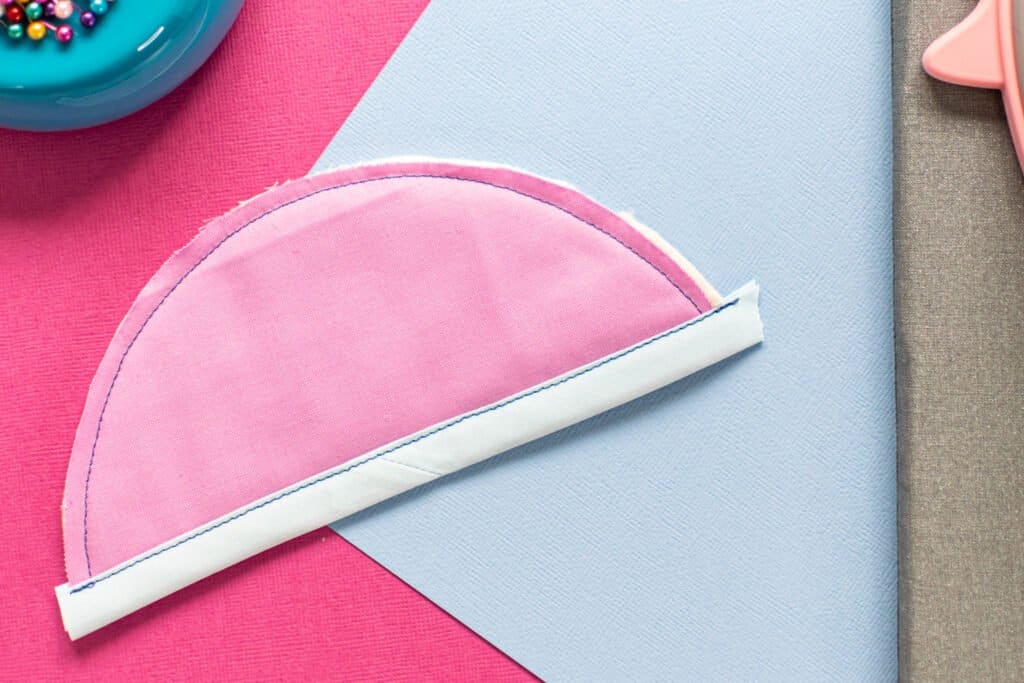
*PRO TIP: Try using an edgestitching foot to get super straight lines with your topstitching.
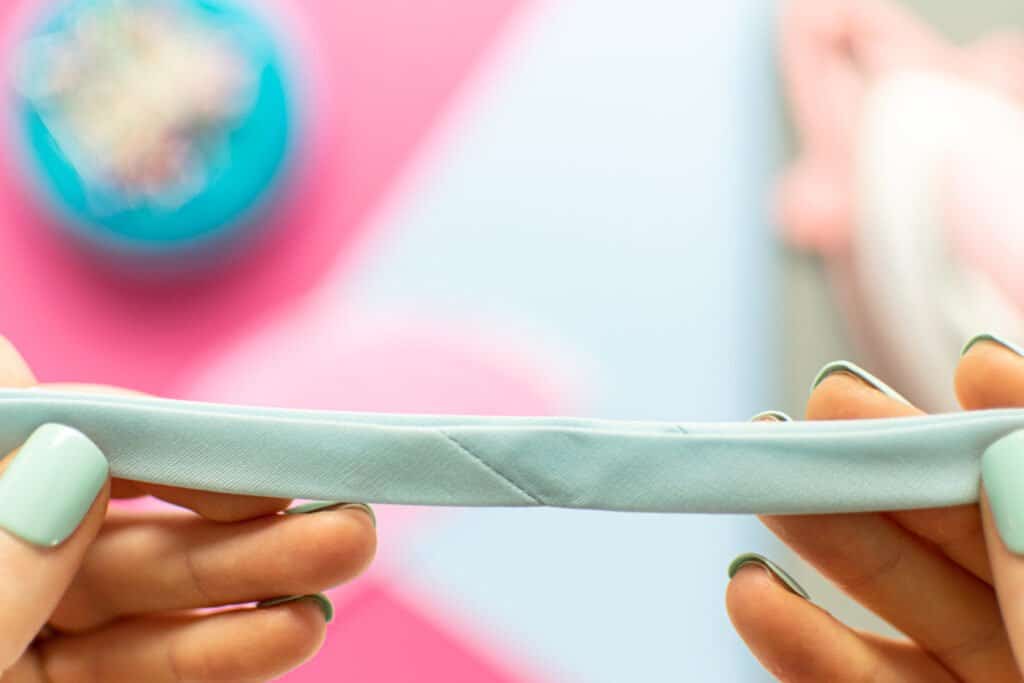
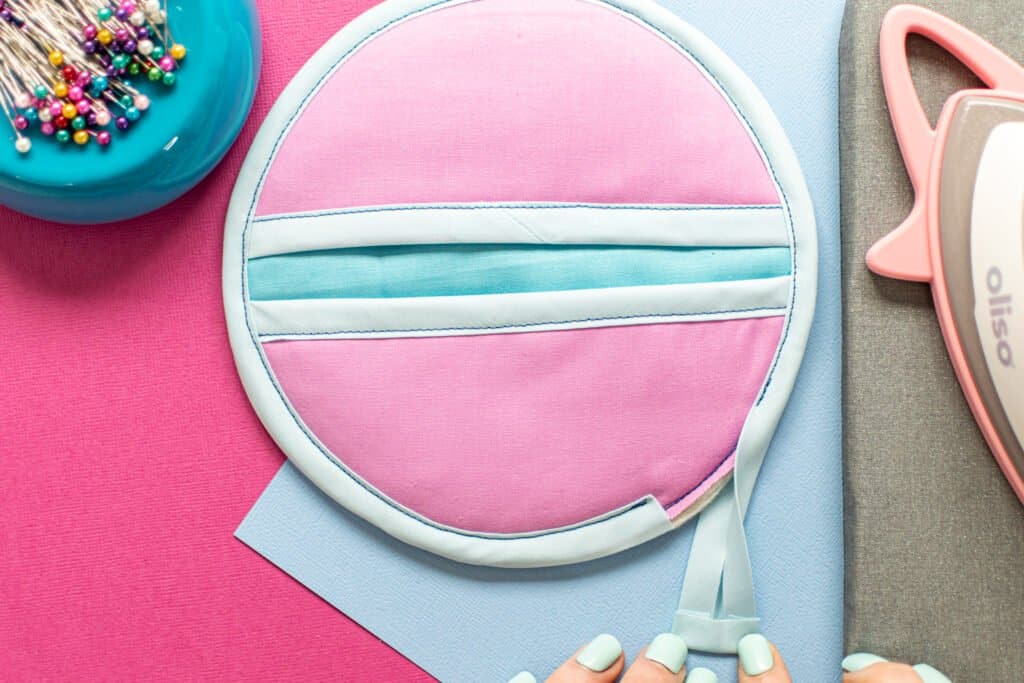
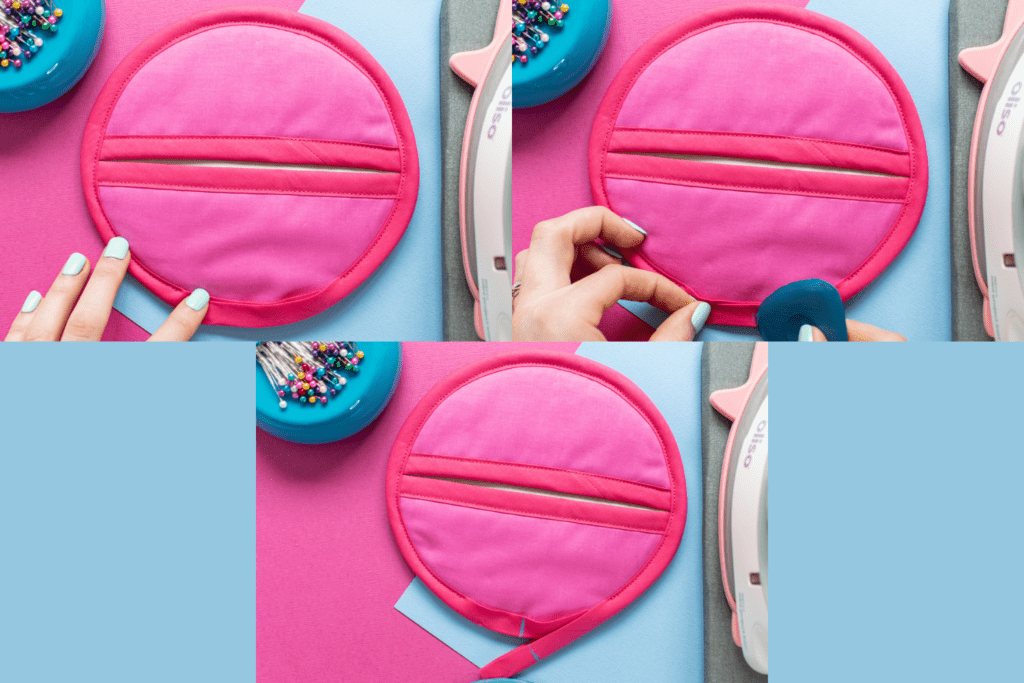
Overlapping the Ends: 2 Ways
There are two methods that can be used to overlap and finish the ends of your double fold bias tape if you’re sewing it onto an enclosed edge.
Method 1: Folding Method
The easier method results in a bit more of a bulky connection point, but it’s super fast and simple to sew.
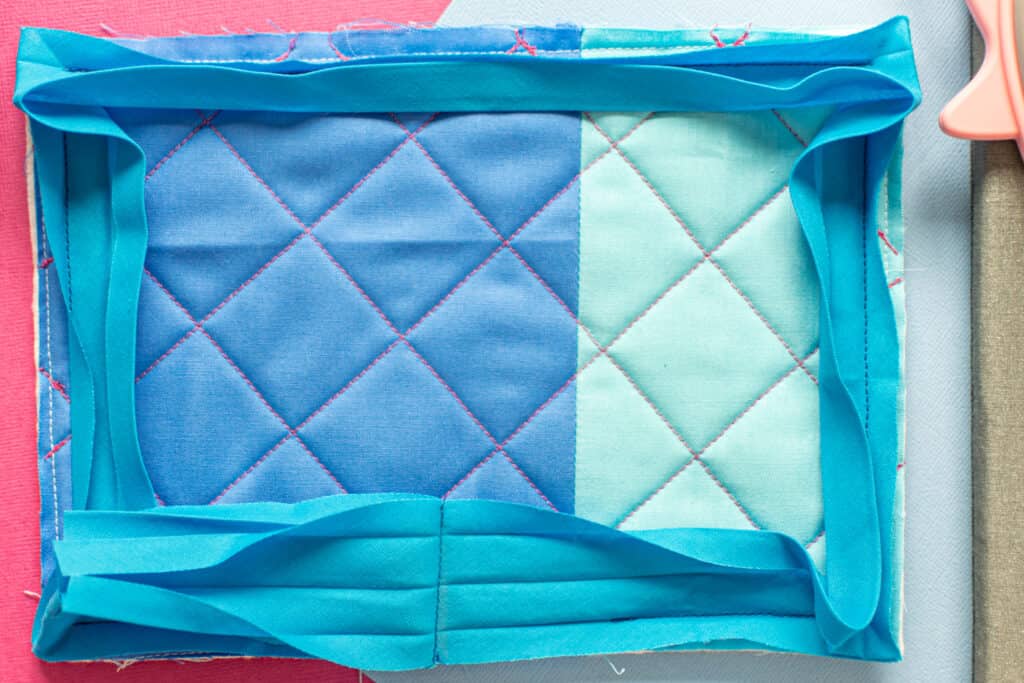
For this method, start sewing your bias tape to the edge you want to bind.
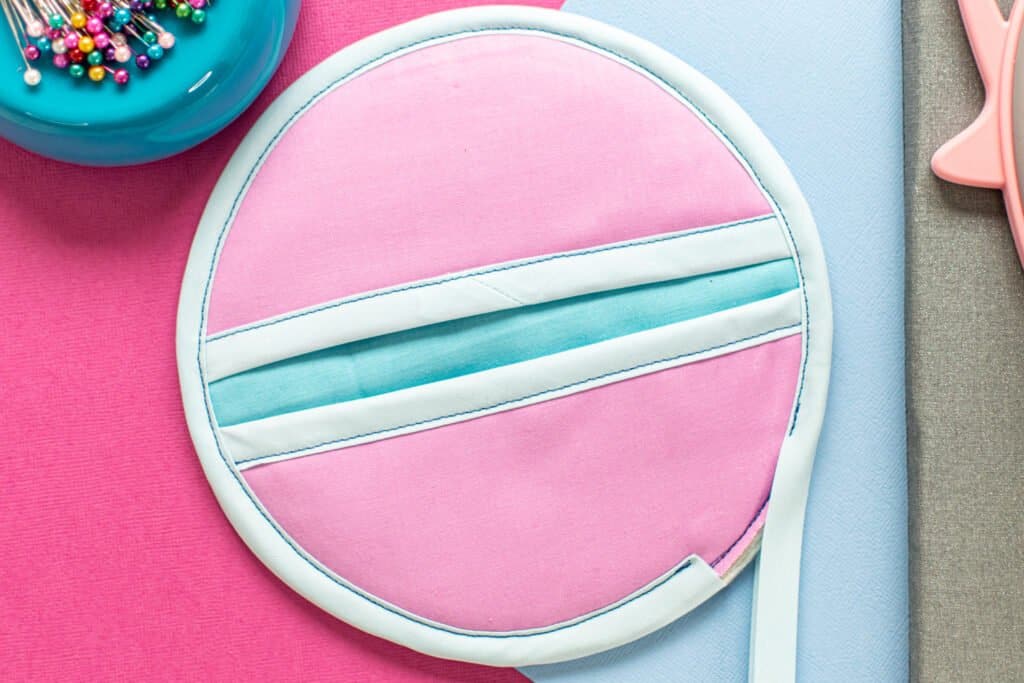
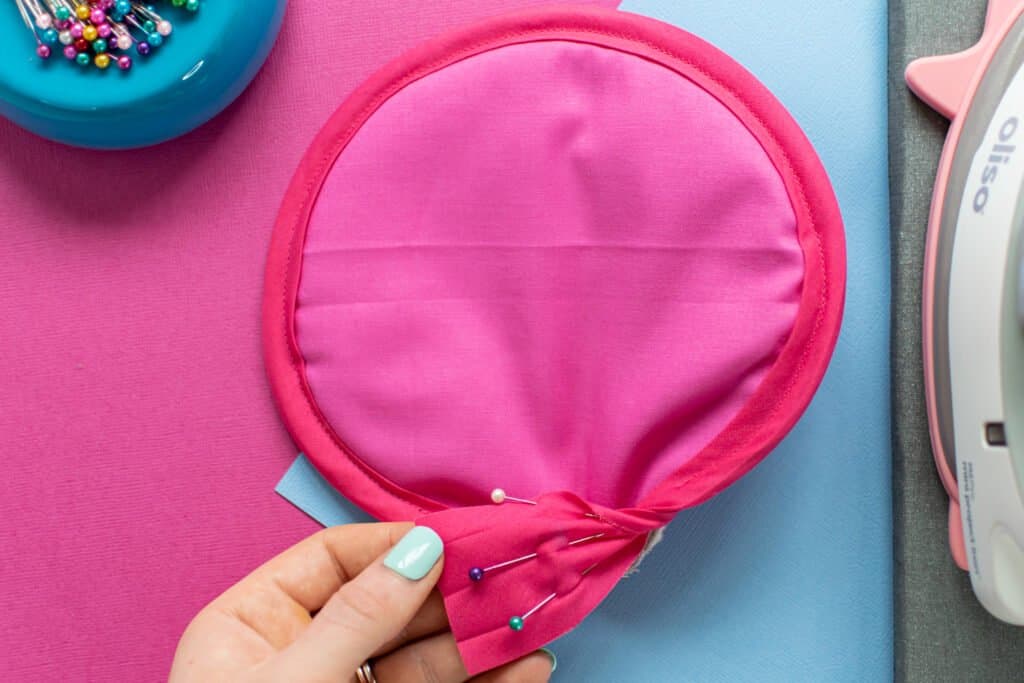
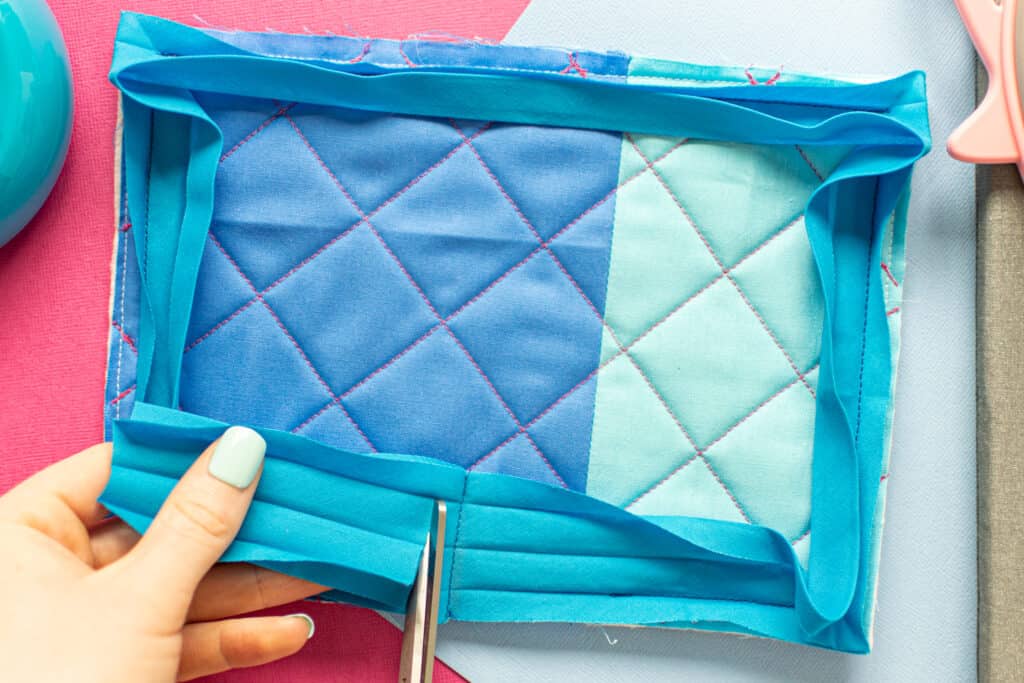
When you get near the end of your topstitching and are ready to start overlapping the tape, trim the unsewn end so that it will extend about 1.5 inches past the sewn end. Fold the unsewn short end of the bias tape to the inside by ½ inch.
Then, fold the corners of folded-in portion of the bias tape towards the center. This will keep the corners from sticking out from the fold.
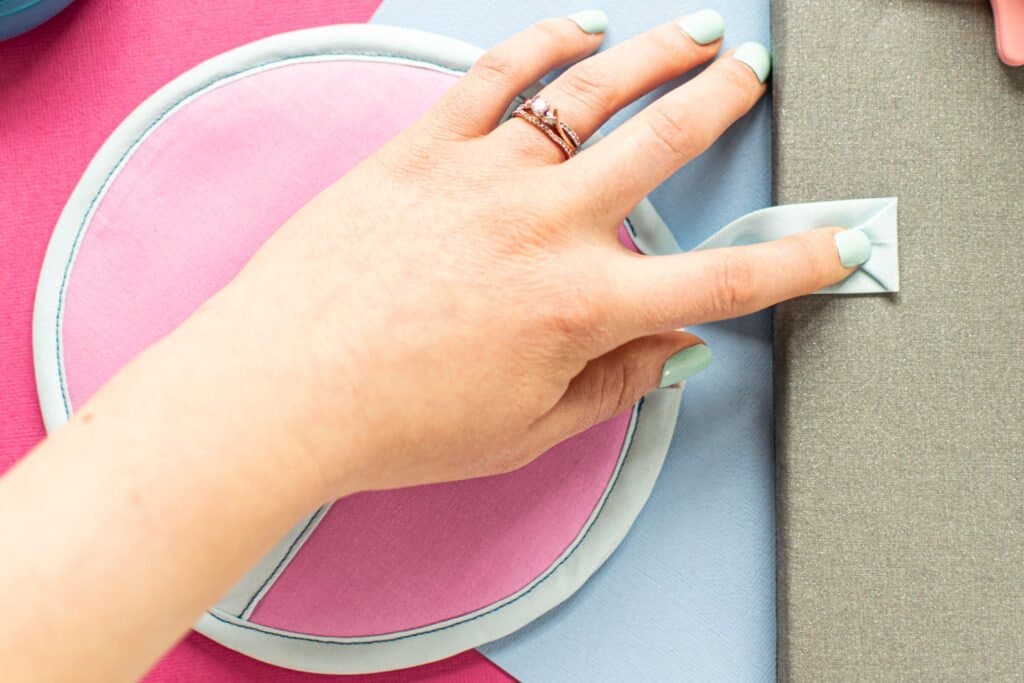
Press the folded end of the bias tape.
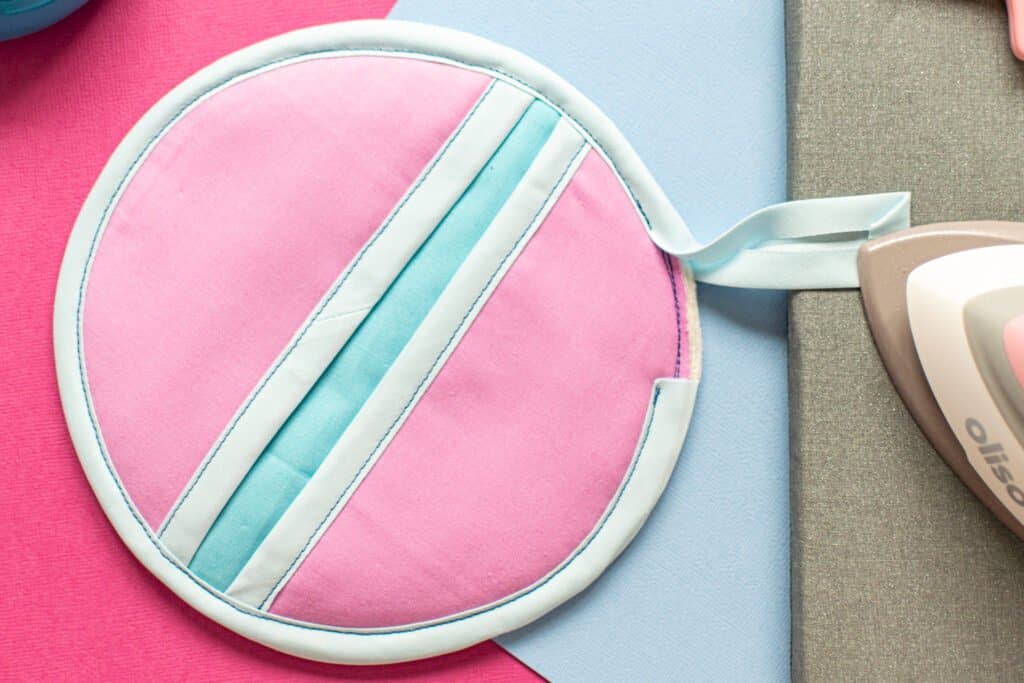
Overlap the folded end over the sewn end of the bias tape and pin it in place.
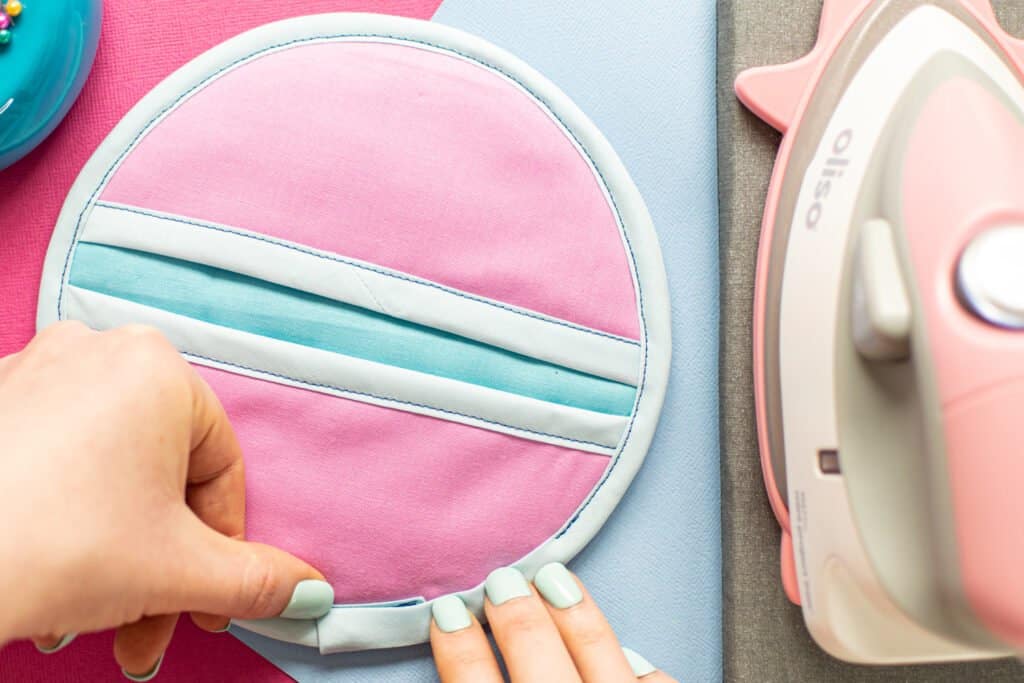
Finish topstitching the bias tape to secure this last bit in place.
Method 2: Seaming Method
The next method of joining the ends is definitely a bit more challenging, but it can be worth it for the cleaner finish.
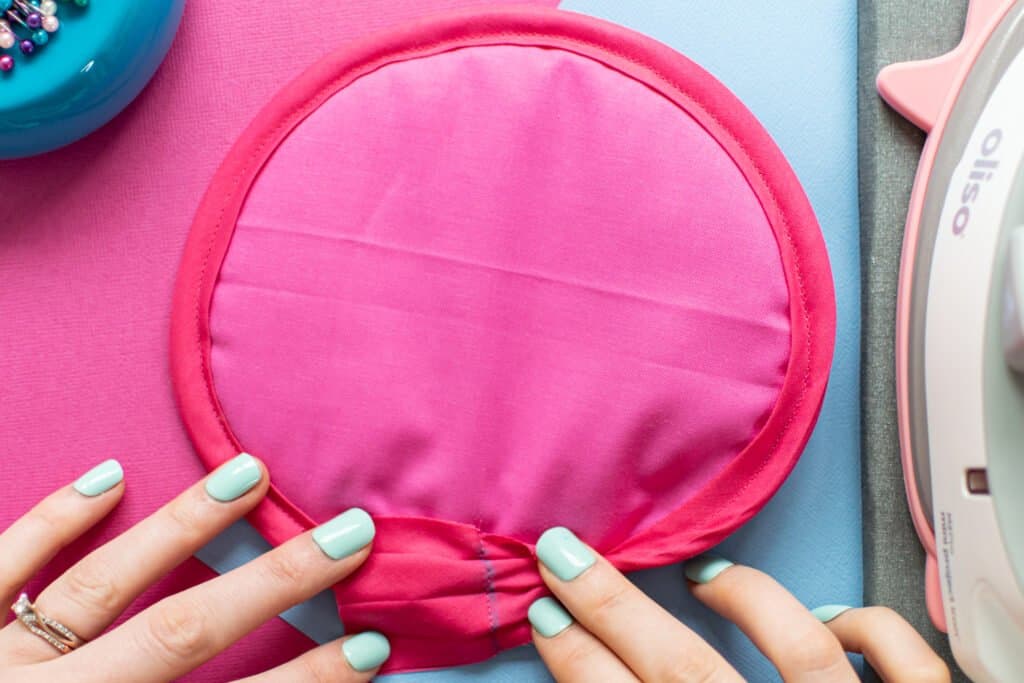
If you plan to use this method, start sewing the bias tape to your project about 3 inches from the end of the tape, leaving the end free. Stop topstitching about 2 inches from where you started.
Trim the longer tail of the bias tape to 3 inches. Mark an overlapping point on both pieces of bias tape near the center of the unfinished bit of your project.
Turn the ends of the bias tape so that they are right sides together and make sure to match up the markings you made in the last step.
Draw in your stitching line at the point where the markings match up.

Stitch the ends of the bias tape together along the stitching line.
Trim the seam allowances to ¼ inch and press them open.
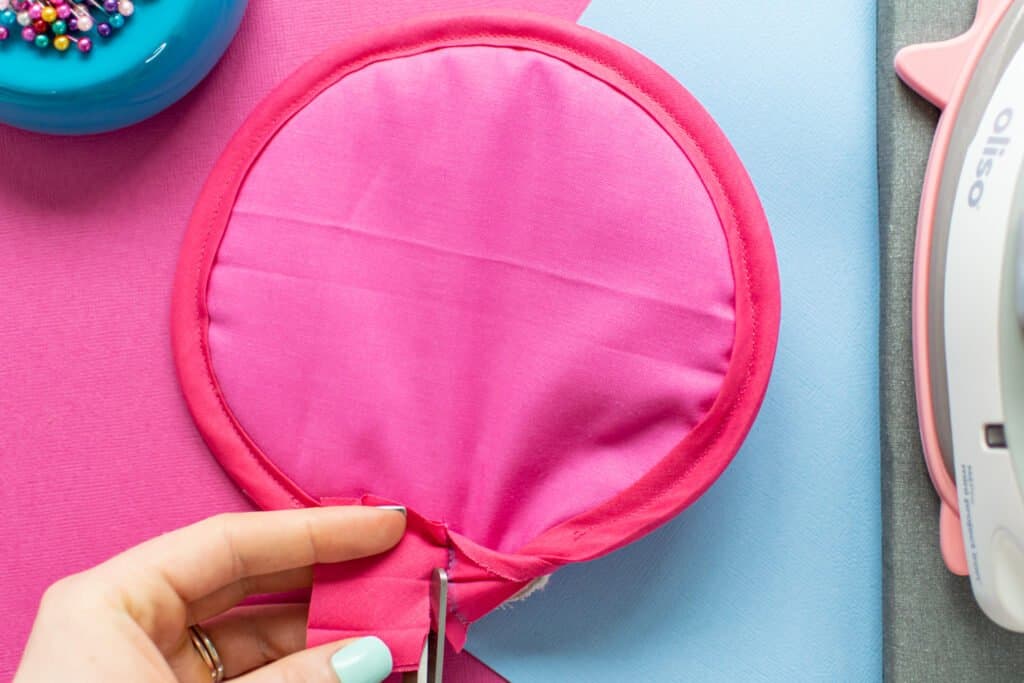

Finally, turn the bias tape back to the right side and finish topstitching it onto the edge of your project.

Sewing Double Fold Bias Tape Method 2: More Professional
This second method of sewing double fold bias tape allows you to form the tape to curves more easily, making it better when working with tighter curves or when you just want a bit more of a professional-looking finish.
Supplies
Here’s what you’ll need to finish an edge with double fold bias tape (the more professional way).
- Double fold bias tape
- Project you want to finish the edges on
- Scissors or rotary cutter & mat
- Sewing pins
- Thread
- Sewing machine needle
- Sewing machine
- Iron & ironing board
- Fabric chalk or marker
Step 1: Check Your Seam Allowance
Since double fold bias tape is binding the edge of your project, rather than folding it over, you will first need to trim the seam allowance off of the edge you plan to finish.
Step 2: First Pass of Stitching
Next, unfold one side of your double fold bias tape and pin it along the edge of your project with right sides together.
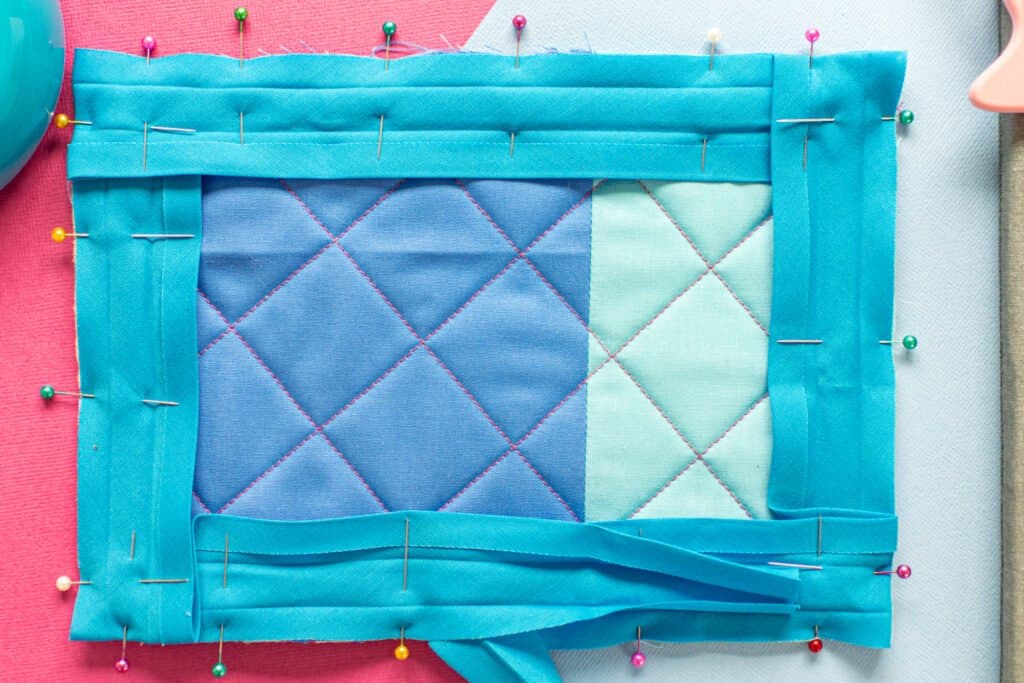
*PRO TIP: Make sure to pin the shorter edge of the bias tape to the edge of the fabric. This will make topstitching easier later.
Carefully stitch within the first crease of the bias tape to secure it to your project.
If you're sewing a square item like I am here, check out this post to learn how to sew mitered corners with bias tape!
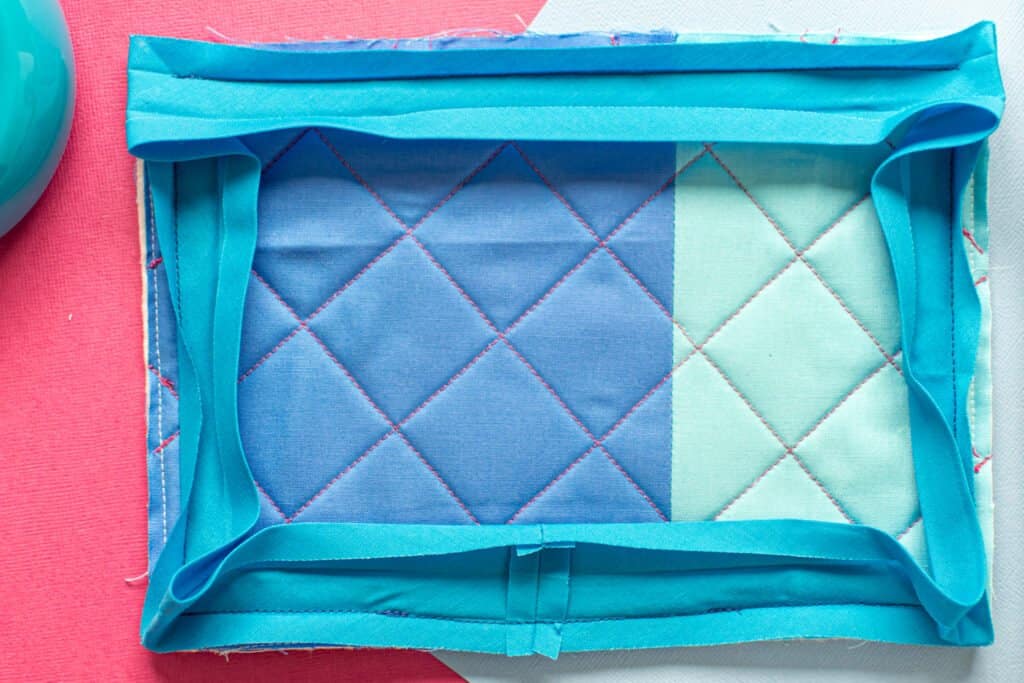
Step 3: Second Pass of Stitching
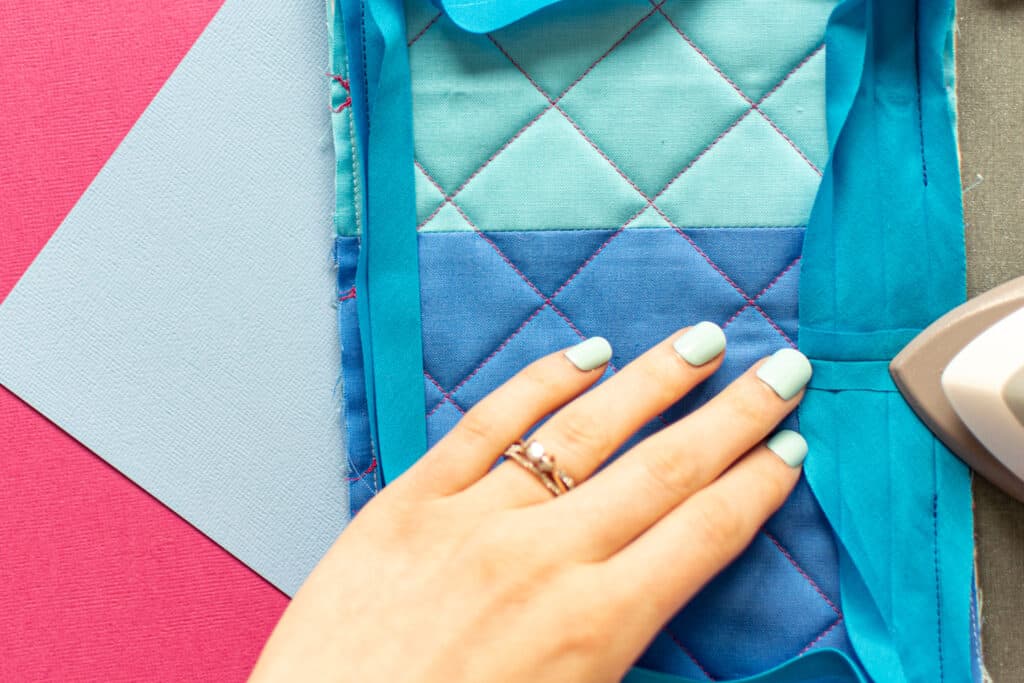
Next, fold the bias tape to the wrong side, up and over the edge of your project, folding it over the seam allowances to hide the raw edges inside. The lower folded edge of the bias tape on the wrong side should extend just past the stitching from your first pass.
Press the bias tape nice and flat with your iron and pin it in place.
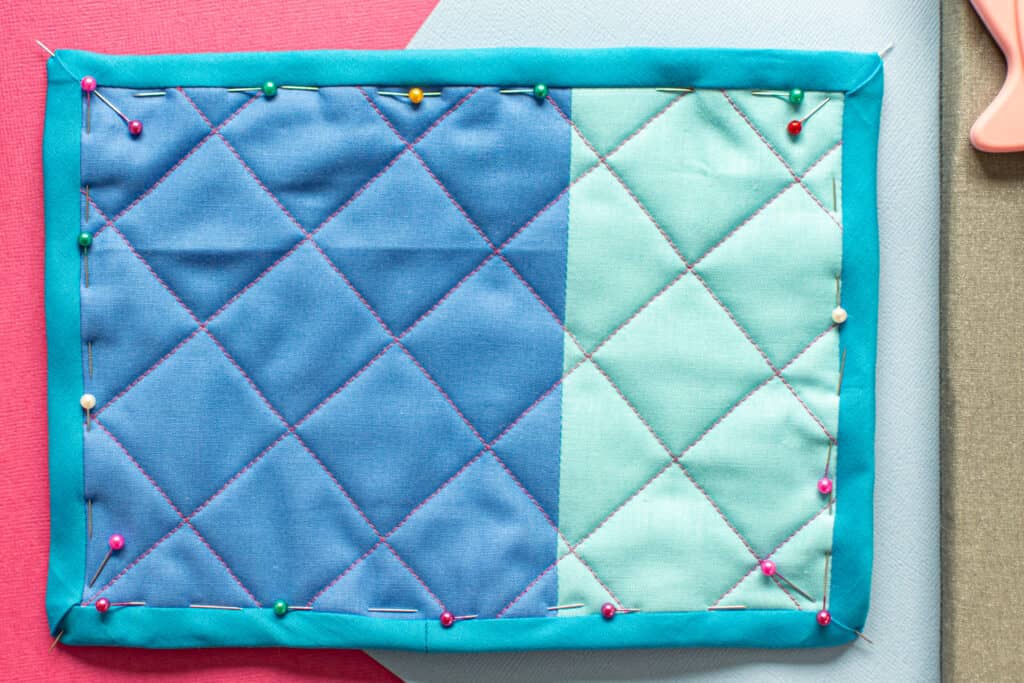
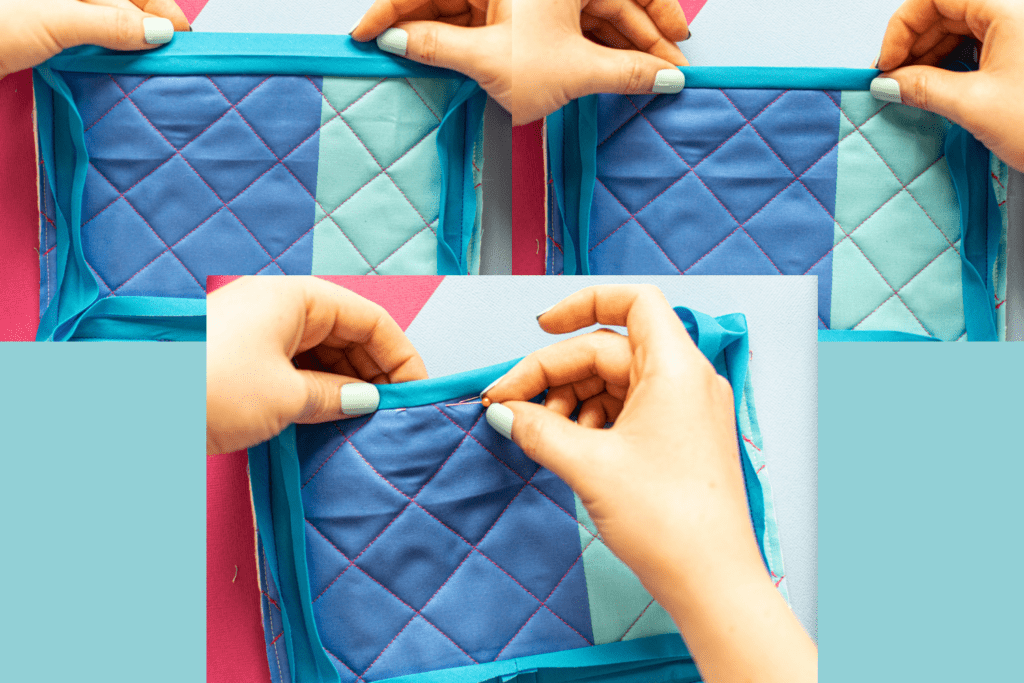
Finally, working from the front of your project, topstitch the bias tape in place, stitching through the bias tape right along the seam. Try to remember to use thread that matches the color of your bias tape. Since we made sure the longer edge of the bias tape would be to the inside, you should be able to easily catch it in your stitching.
*PRO TIP: For an ultra-professional finish, try “stitching in the ditch” instead of topstitching for your second pass of sewing.
Overlapping the Ends: 2 Ways
Once again, with this method there are two ways of overlapping and finishing the ends of the bias tape if you’re sewing it onto an enclosed edge.
Method 1: Folding Method
The easier method will provide a really nice finish but won’t get you quite as high-end a look as the second method we’ll go through.
For this first method, start out by folding the first end of your bias tape down at a 45-degree angle before pinning it to the edge of your project.
Finish pinning the bias tape all the way around the edge of your project. When you get all the way around and back to the folded end of the bias tape, trim the second bias tape end so that it will overlap by a few inches.
Pin the overlapping tail to the edge of your project.
Sew your first pass of stitching as normal.
Next, when you fold your bias tape up and over the fabric, the angled, folded end will cover the other end of the bias tape, hiding the raw edges.
Finish attaching your bias tape by topstitching it in place.
Method 2: Seaming Method
The second method is a bit more time-consuming but is well worth the effort for those projects where you want a really nice finish.
For this method, start sewing your first pass of stitching about 2 inches from the end of the bias tape, leaving the end free. Continue sewing around the tape, stopping approximately 1 inch before reaching your first stitch. Trim the longer end of the bias tape to 2 inches.
Next, hold the two ends of the bias tape with right sides together, lining them up so that the tape lays flat against the fabric. Mark the stitching line on one side of the tape right where the bias tape meets your project.
Pin the two ends of the bias tape together.
Stitch the ends of the bias tape together along the stitching line you drew in.
Trim the seam allowances to ¼ inch and press them open.
Finally, finish your first pass of stitching, then continue attaching the bias tape binding to your project as described above.
I hope you can see what a wonderful and versatile notion double fold bias tape is – and how easy it is to sew! What is your go-to method for sewing bias tape?
Don’t forget to join my Facebook group where you can show us what you’re making, ask questions, and learn from others!

Follow me on Instagram for daily crafting inspiration and a look behind the scenes.
Save this post for later! Click here to save this pin on Pinterest.
Hello!
I absolutely LOVE the tutorials and am inquiring if I may purchase hard copies. Or even without the ads, etc. I teach sewing at a Christian Academy and these would be perfect for my students.
Please advise.
Blessings!
Christine Humphries