Sew Yourself (And Your Family) Some Adorable One-Of-A-Kind Mittens This Winter With My FREE Fleece Mittens Pattern and Sewing Tutorial!
Mittens are the ultimate cozy accessory for those chilly winter days when you want to get out and play in the snow. They keep your fingers nice and toasty while you roll the perfect snowballs for the big family snowball fight!
Plus, they're pretty simple to stitch up yourself - so you can make personalized mittens in all your favorite fabrics! To make it easy for you to sew up some adorable new mittens, I'm sharing my free fleece mittens sewing pattern and step-by-step tutorial.

Table of Contents
Why I Love Wearing (and Sewing) Mittens for Winter
I have to admit, gloves are great - they help keep your hands warm while still allowing your fingers to move individually. But gloves just don't seem to keep my hands as warm as mittens do! They always seem to leave the tips of my fingers cold.
Mittens, on the other hand, seem to help my fingers stay warmer because they're not split into individual finger holes of a glove. The body heat from all the fingers and the palm hanging out together in the mitten helps to keep your hands warmer! Plus, mittens are just cute! And who doesn't love a cute winter accessory??
About the Fleece Mittens Pattern
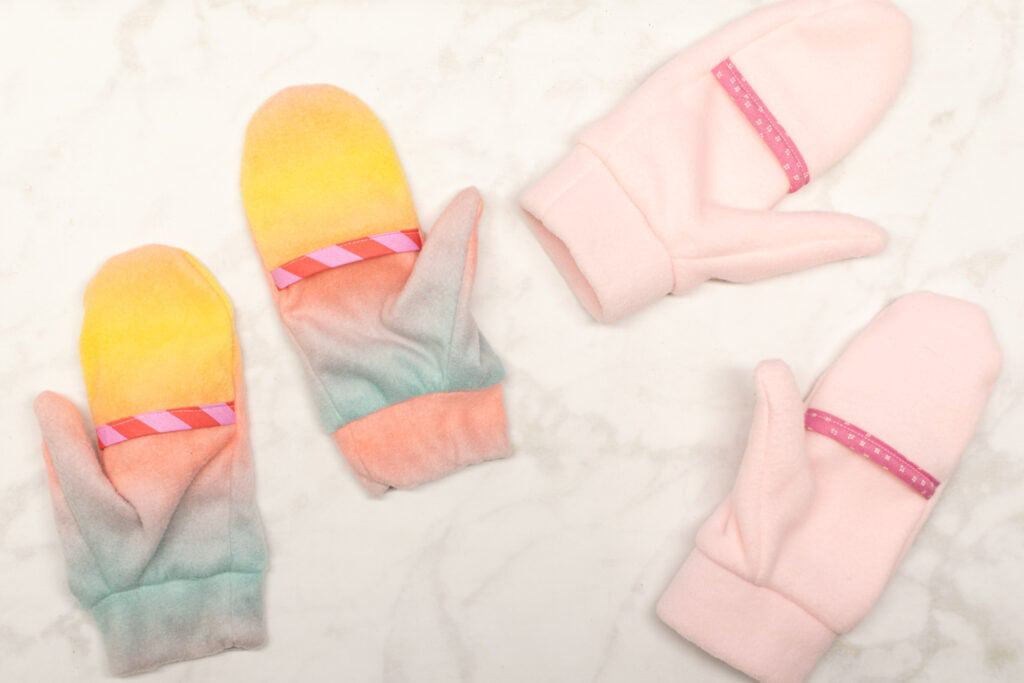
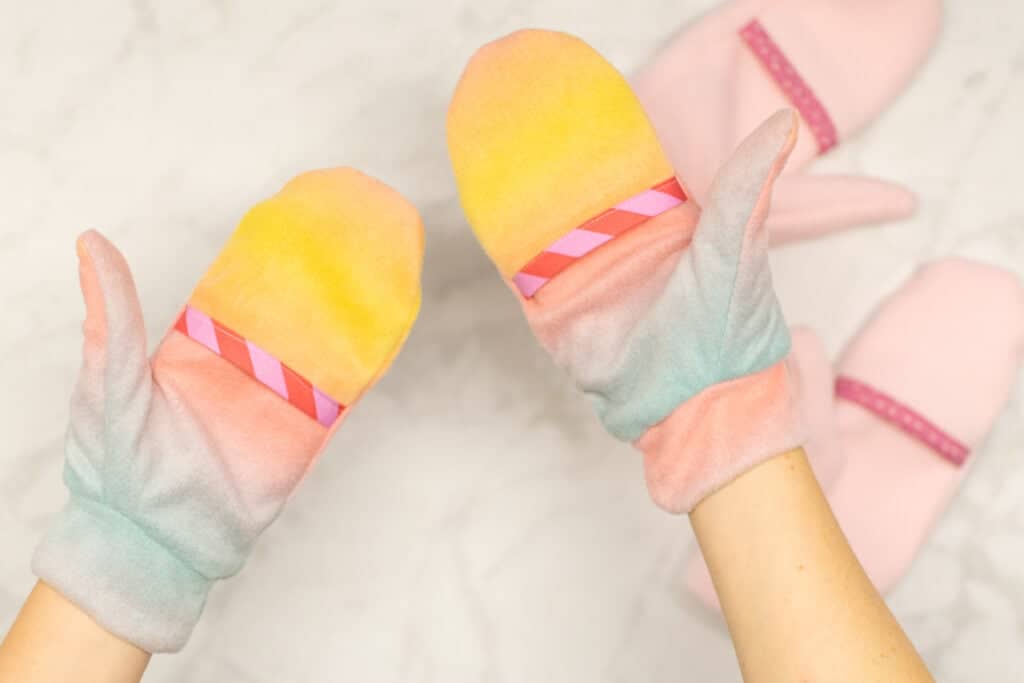
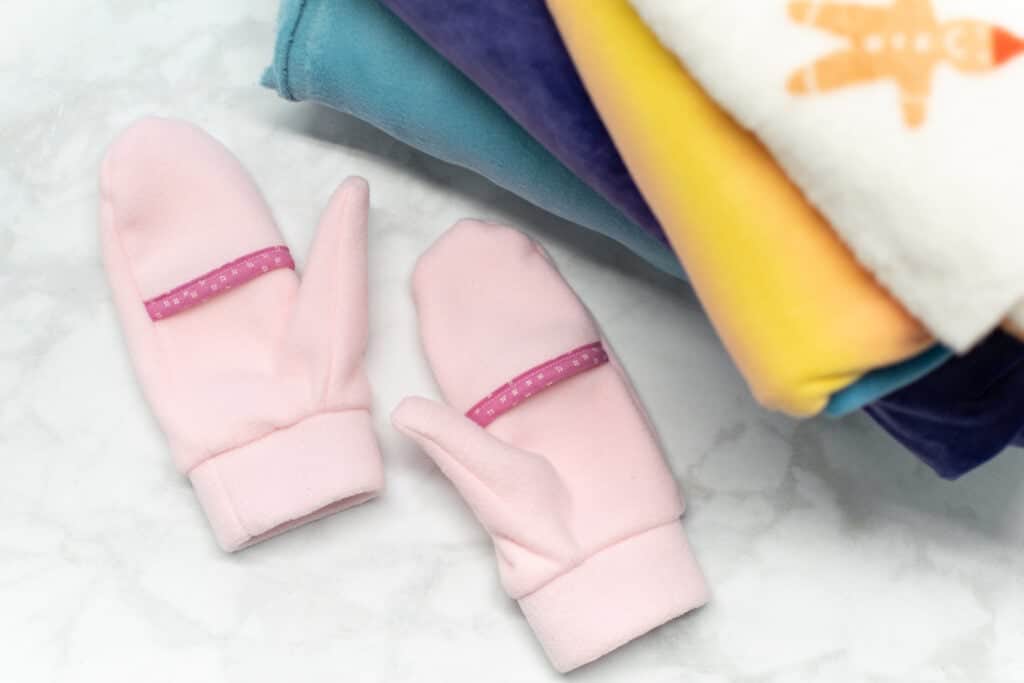
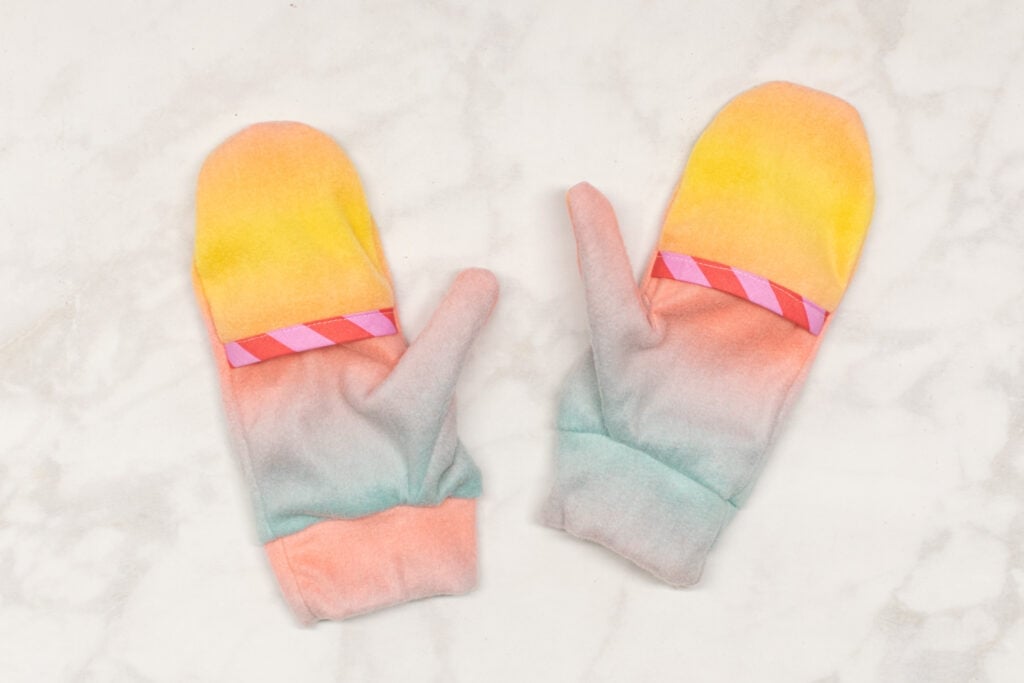
My mittens pattern design fits snuggly around the thumb and opens up to a roomy area for your palm and other fingers. The wrist cuffs keeps the gloves in place, even while playing in the snow! You can make the cuffs from either ribbed knit fabric or from fleece fabric, depending on the look you prefer.
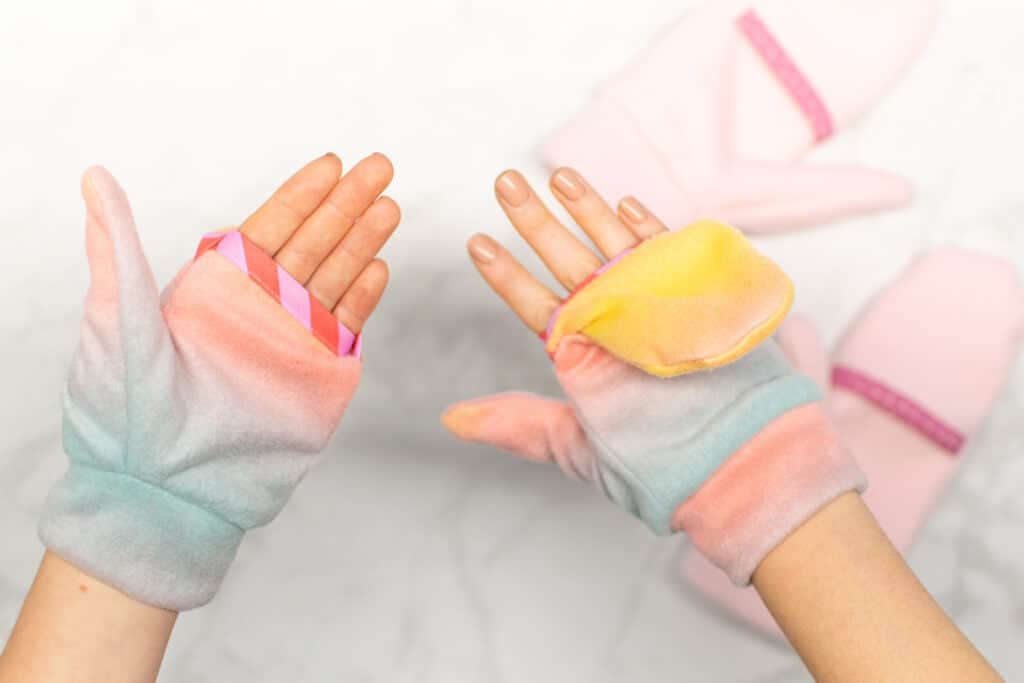
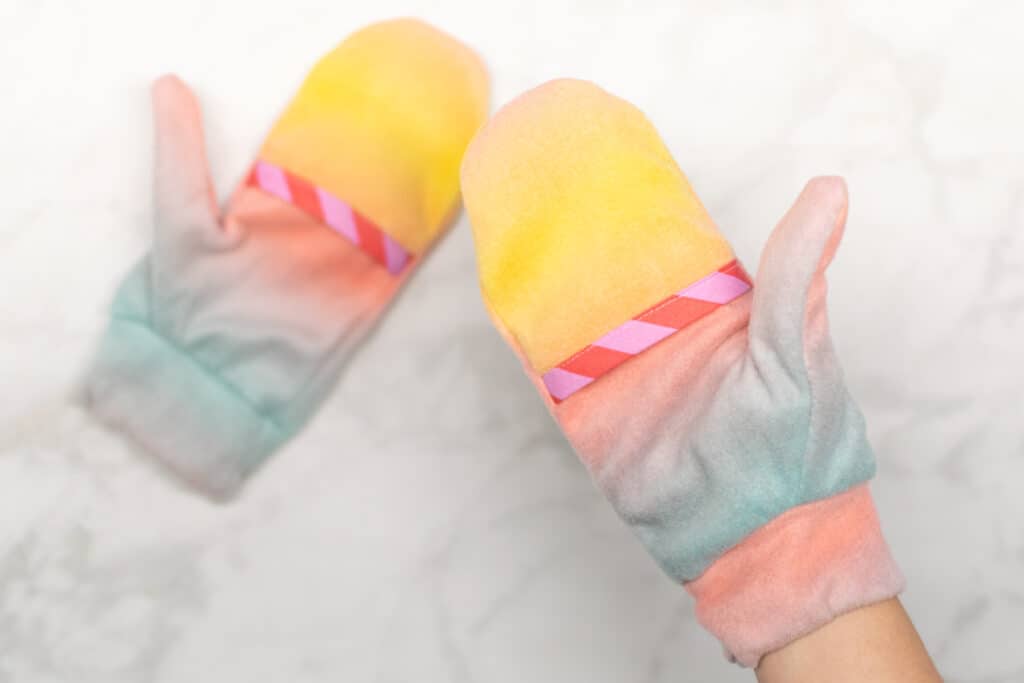
Plus, my mittens pattern makes it easy to pull out your phone and snap a picture or check your messages - all without taking the mittens off! The top of the mittens can be easily folded back when you need your fingers free. Then, just pop the top back over your fingers and you're good to go!
Handmade mittens make for a super fun gift or stocking stuffer. And my fleece mittens pattern makes it extra-simple by including 8 different sizes. You can make a pair of mittens for all of your loved ones with sizes from 0-6 months all the way through adult sizes!
Choosing Fabric for Your Mittens
Fleece is a wonderful choice for your cozy handmade mittens! It's soft, thick, and warm - everything you want your mittens to be.
I especially like a nice thick polar or luxe fleece. A fluffy sherpa can also be a great choice and will give your mittens a unique look.
Other fabrics that work well for these mittens are french terry, faux fur, and chunky sweater knits.
The wrist cuffs for these mittens can be made from the same fabric as the body of the mittens or they can be made from ribbed knit. The ribbed knit will give the wrist area of the mittens more of a sweatshirt-like feel, but probably won't keep your wrists as warm as fleece or another thick, cold-weather fabric.
Looking for even more FREE fleece sewing patterns? Click on the photos below!


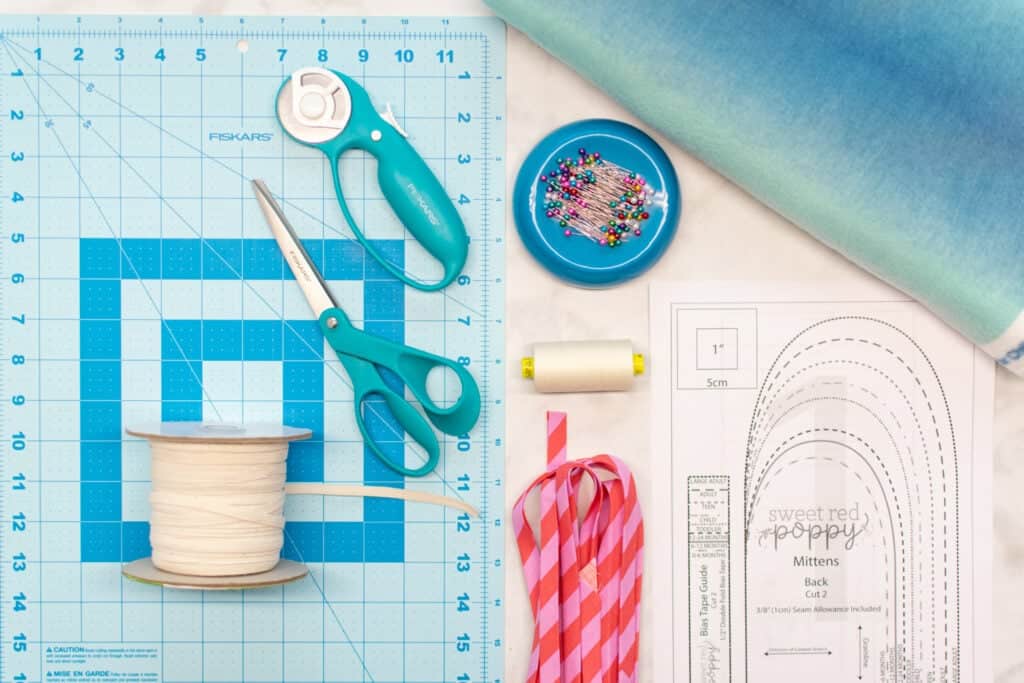
Supplies to Sew the Fleece Mittens Pattern
Here are the supplies you'll need to sew your own pair of fleece mittens.
- Free Fleece Mittens Pattern
- 1/2 Yard Fleece
- 1/4 Yard Ribbed Knit for Cuffs (Optional)
- 1/2 Yard 1/4" Wide Elastic (If Making Fleece Cuffs; Skip If Using Ribbed Knit)
- 3/4 Yard 1/2" Wide Double Fold Bias Tape (Make Your Own With THIS Tutorial)
- Scissors
- Rotary Cutter
- Rotary Cutting Mat
- Thread
- Sewing Pins or Clips
- Sewing Machine
- Serger (Optional)
- Sewing Machine Needle
- Printer
- Printing Paper
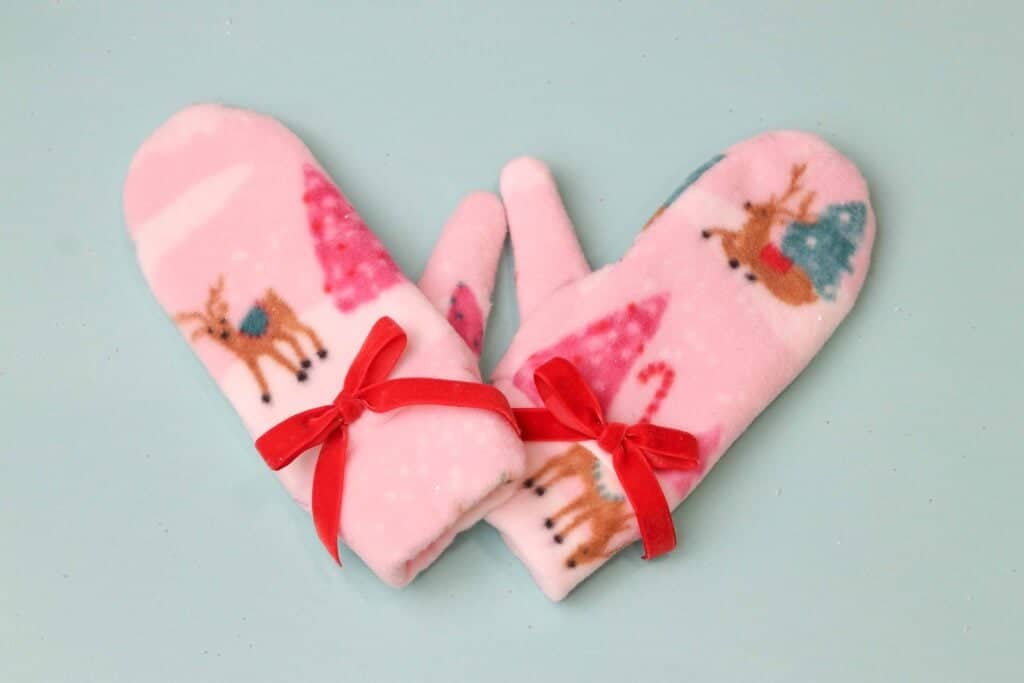
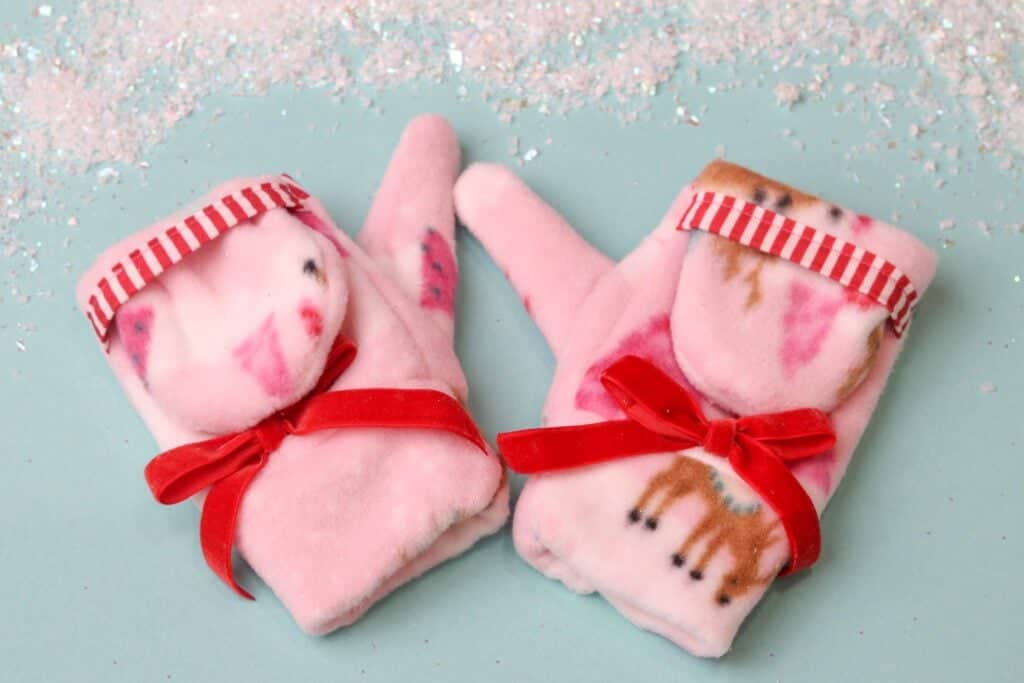
Optional - I added 1/4" wide velvet ribbons to one of the pairs of mittens I made for a fun, whimsical touch!
Click Here to Download the FREE Fleece Mittens Pattern
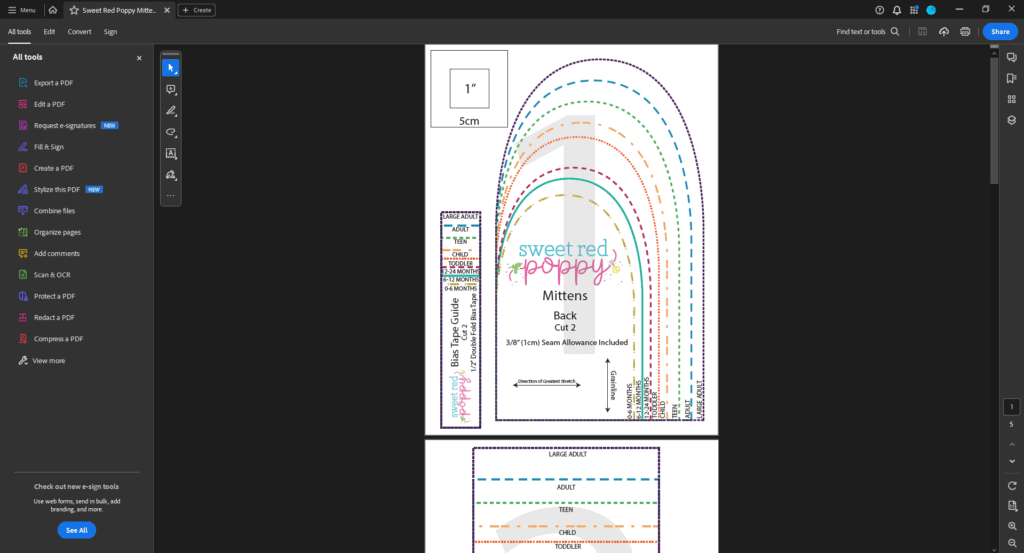
Step 1: Download and Cut Out the Mittens Pattern
Start by downloading the sewing pattern and opening it in your PDF reader. I highly recommend using Adobe Acrobat.
It's important not to print the pattern directly from your browser. This often results in incorrect scaling and wonky border lines.
Once the pattern is open in your PDF reader, click on "Print". In the scaling section of the print settings dialog box, select "Actual Size" or "Custom Scaling: 100%".
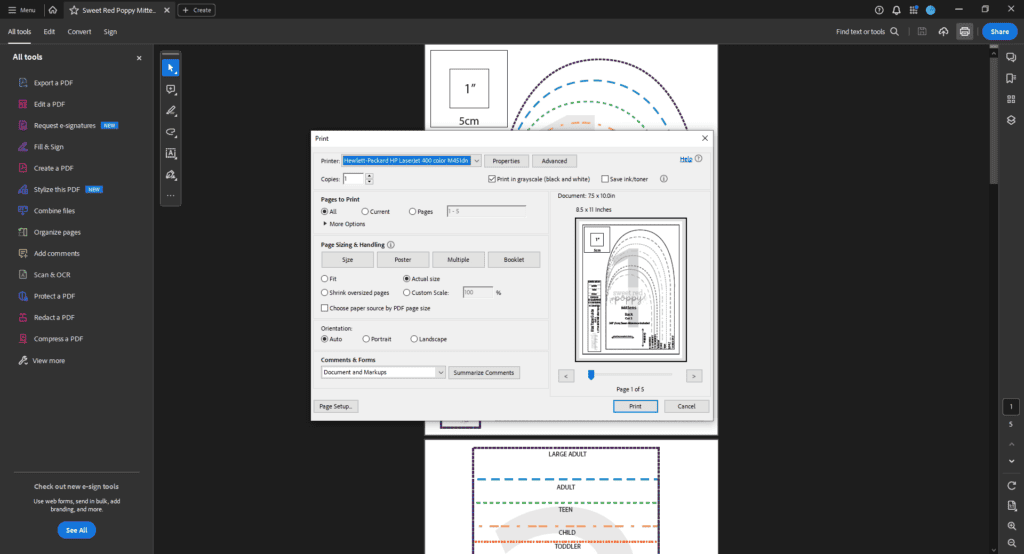
Then, print the first page of the pattern. This page contains a 1" x 1" test square. Measure the test square.
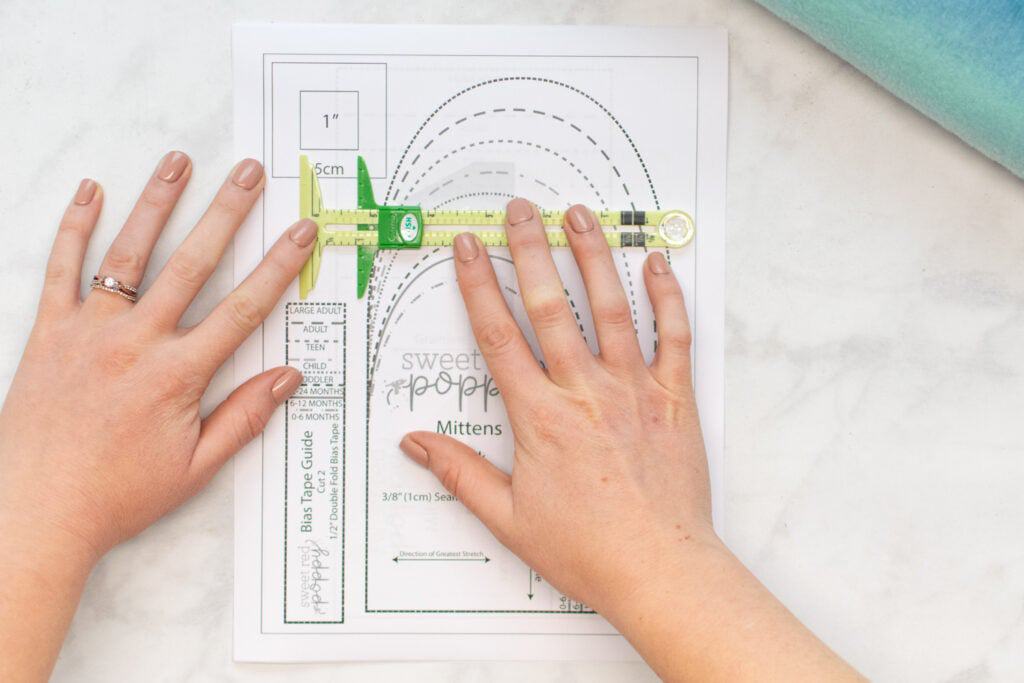
If the test square measures 1" x 1", go ahead and print the rest of the pattern. However, if it does not measure the correct size, you'll need to recheck your scaling and try printing again.
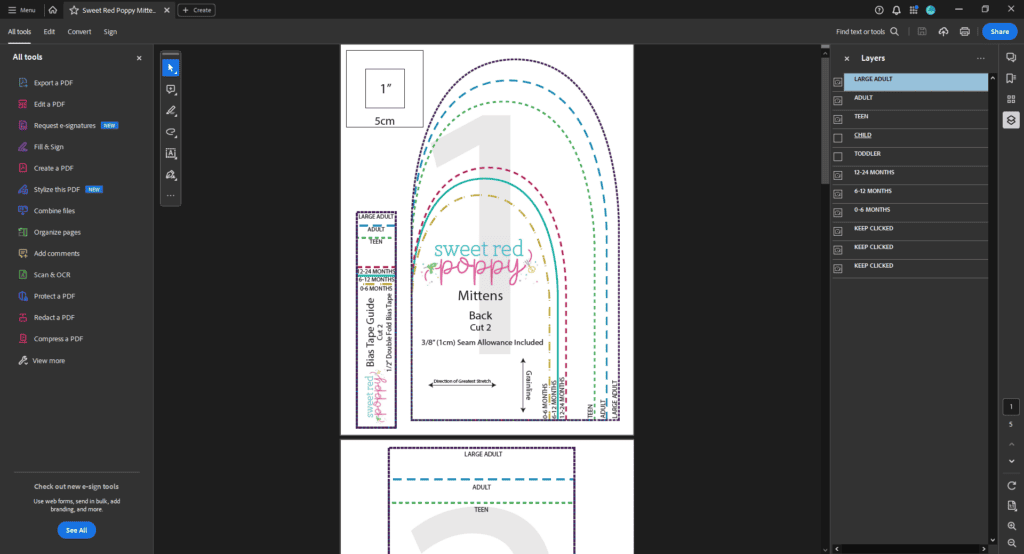
This pattern also includes a layers option to make it simple for you to print only the size(s) you want to sew. To utilize this feature, select the icon that looks like two stacked papers in your PDF reader. Then, deselect the "eye" icon next to the sizes you do not wish to print.
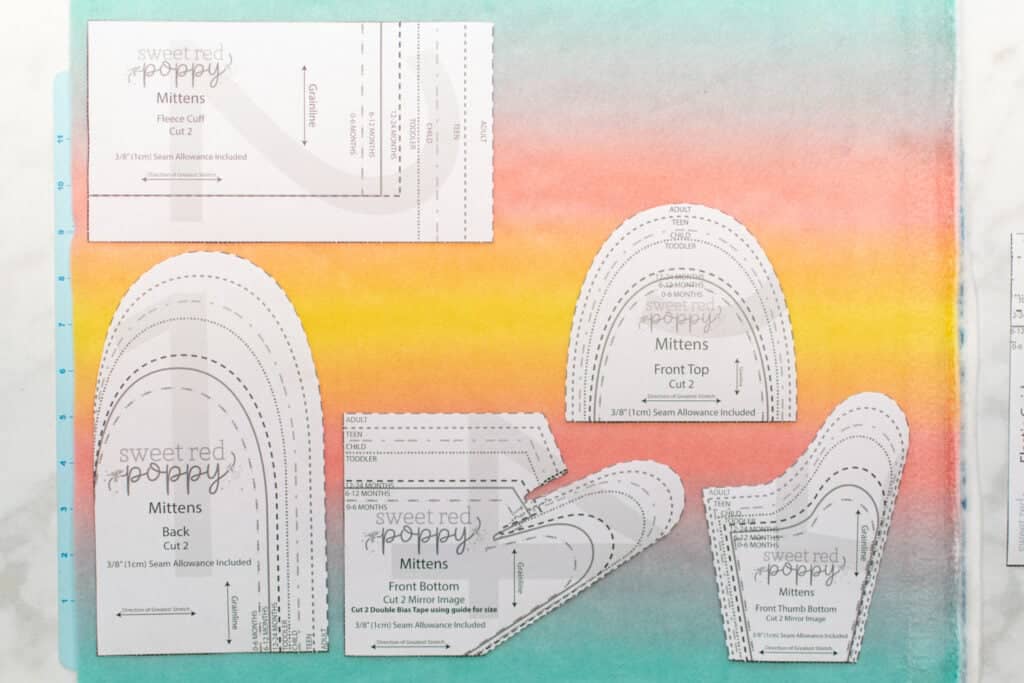
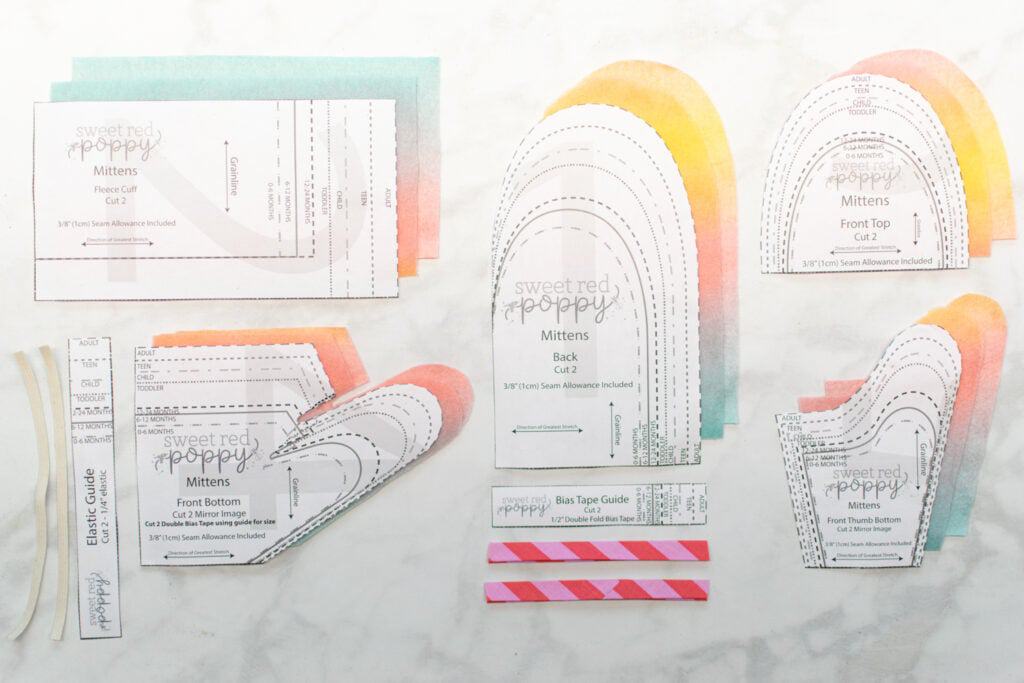
After printing, you're ready to cut! The great thing about this pattern is that none of the pattern pieces overlap the margins of the papers. This means you don't need to tape the pages of the pattern together. Simply cut out each of the pattern pieces following the lines corresponding to the size you want to sew.
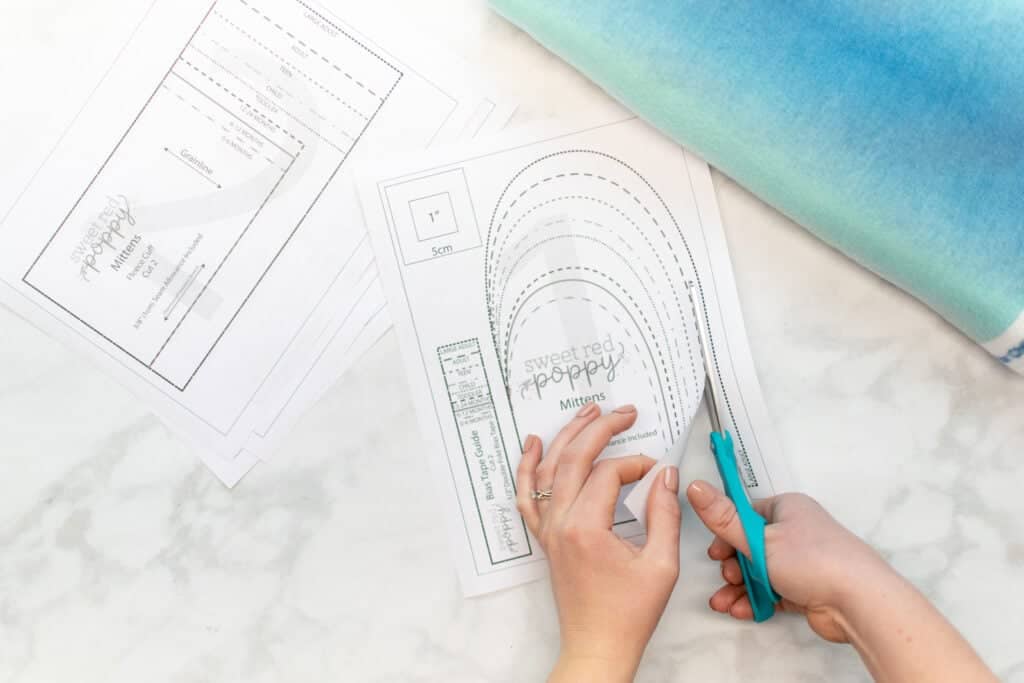
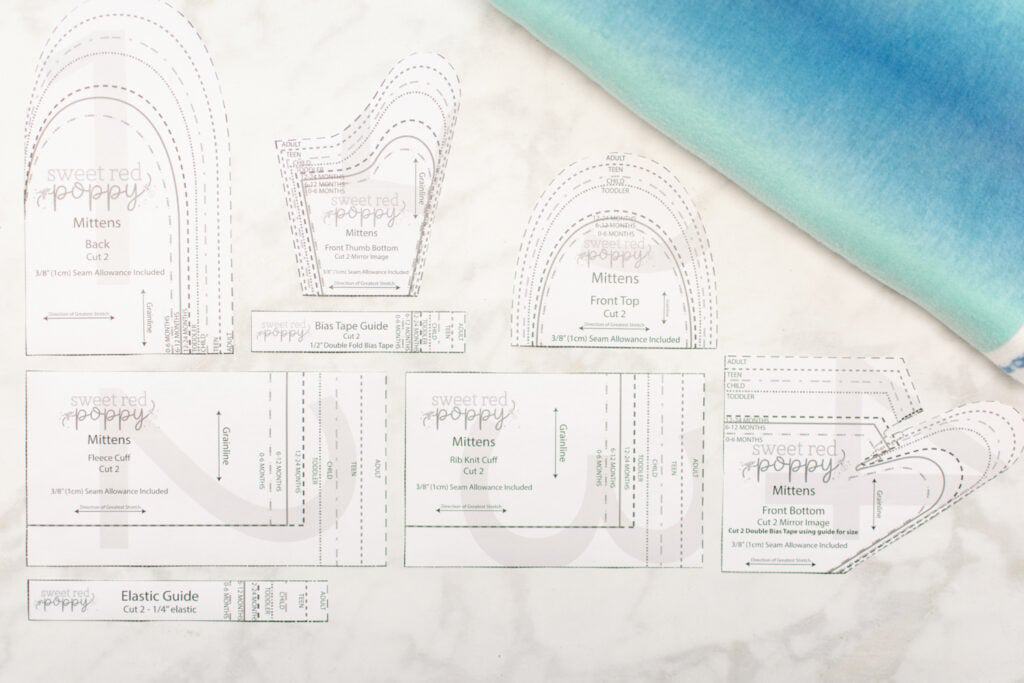
You should have 8 pattern pieces: the Front Bottom, Front Top, Front Thumb Bottom, Back, Fleece Cuff, Rib Knit Cuff, Elastic Guide, and Bias Tape Guide.
Step 2: Cut the Materials
Once the pattern is cut out, it's time to use it to cut the materials for your mittens.
Lay out your fabric on your cutting surface so that it is folded in half with the direction of greatest stretch running from left to right.
Place the Front Bottom, Front Top, Front Thumb Bottom, and Back Pieces on the fabric. If you will be sewing the fleece cuffs, place the Fleece Cuff pattern piece on the fabric as well.
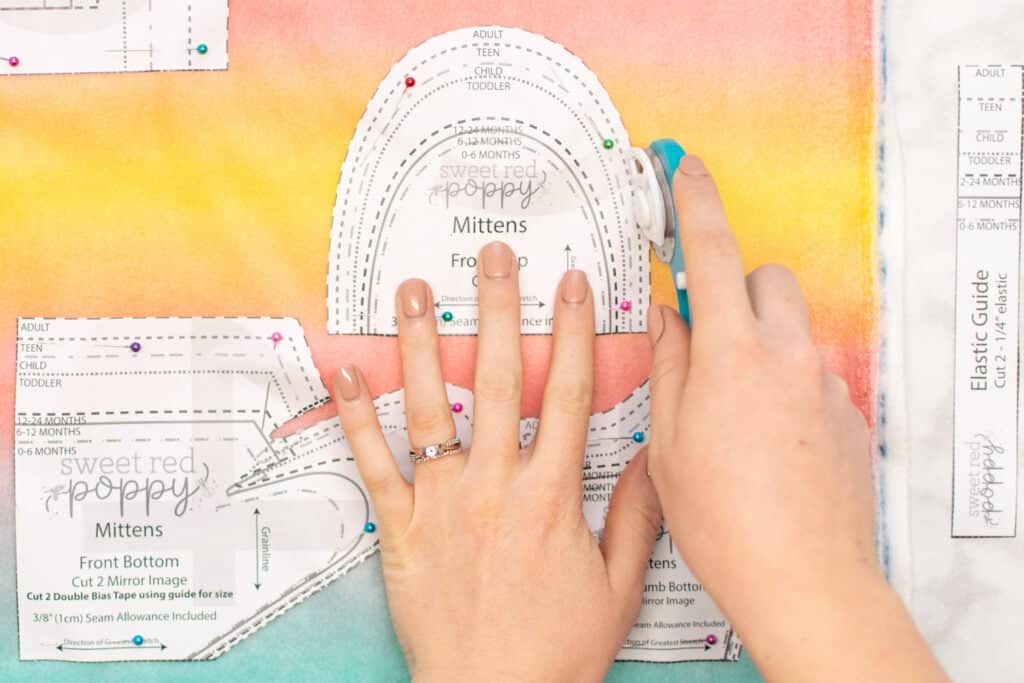
Pin or weight the pattern pieces in place.
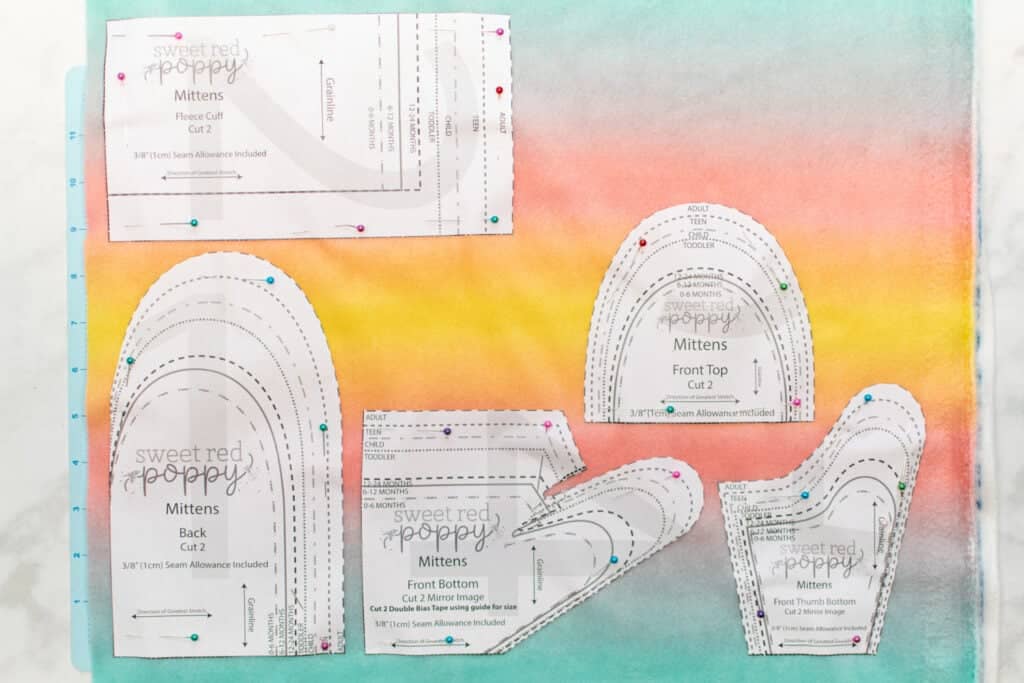
Cut around them with your scissors or rotary cutter. Cutting with the fabric in two layers like this will result in 2 mirror image pieces being cut at once.
If you are sewing the ribbing cuffs, fold your ribbed knit fabric in half with the ribs running up and down. Then, place the Rib Knit Cuff pattern piece on the fabric with the long sides of the rectangle running left to right, perpendicular to the ribs of the fabric. Pin the pattern piece in place and cut around it.
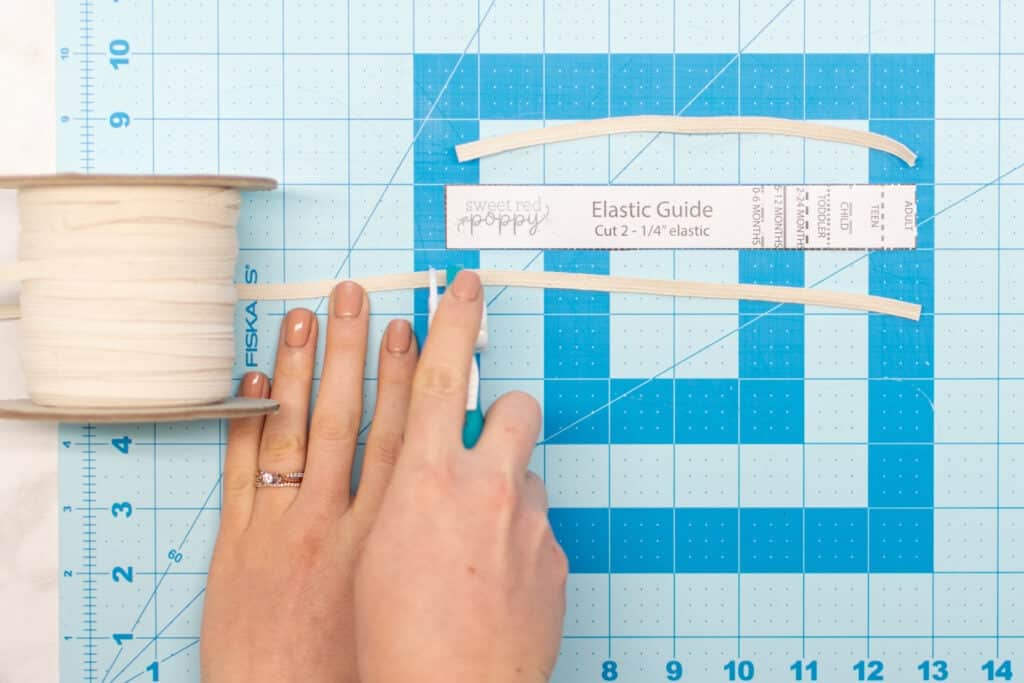
Next, cut 2 pieces of 1/4" wide elastic to the length of the Elastic Guide.
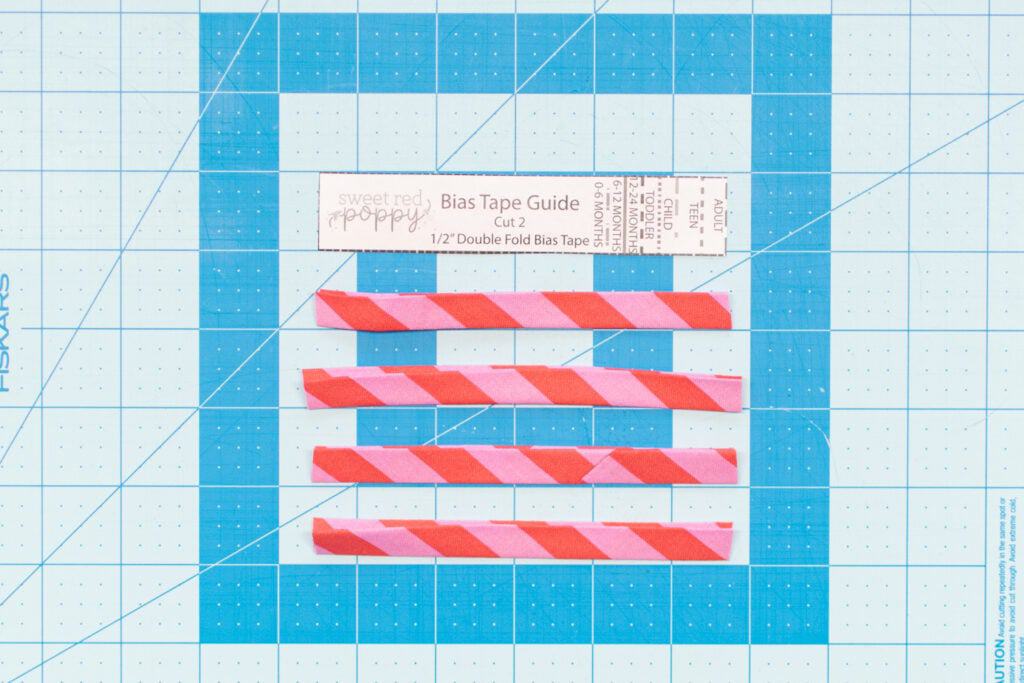
Then, cut 4 pieces of 1/2" double fold bias tape to the length of the Bias Tape Guide.
All your materials are cut - it's time to get sewing!
Step 3: Sew the Thumbs
To put together these mittens, we're going to start by sewing the thumbs. Getting these pattern pieces to fit together correctly is a little bit fiddly - but it results in a perfectly shaped thumb!
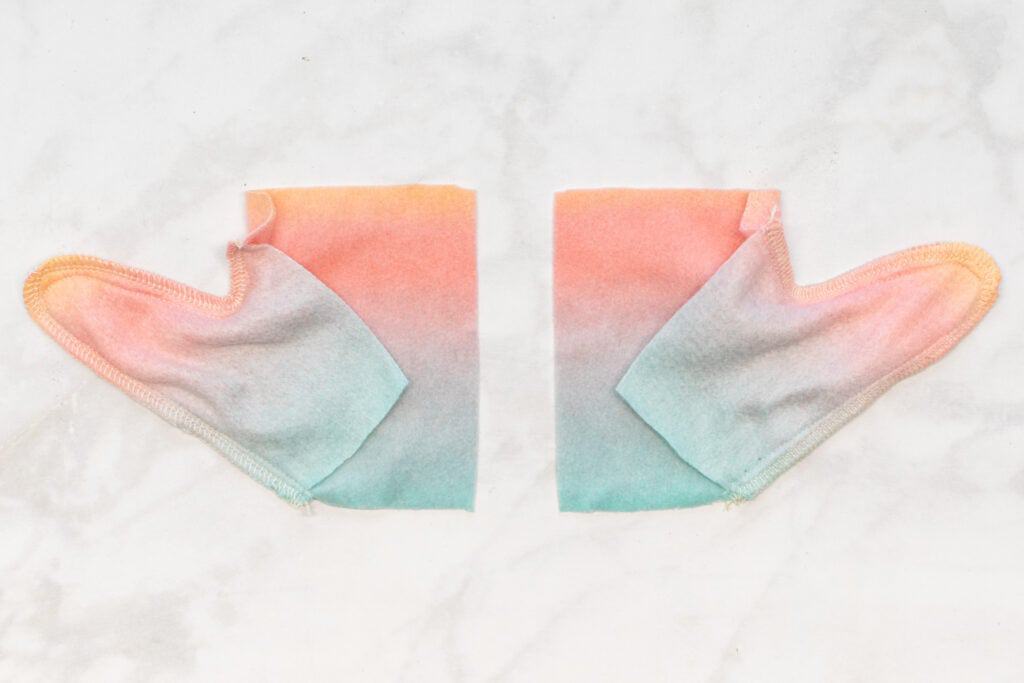
Place the Front Bottom pieces right side up on your table.

Then, place one of the Front Thumb Bottom pieces right sides together with the corresponding Front Bottom piece. Line them up along the bottom straight edge, pinning along this edge and around the end of the thumb.
Next, pull the top edge of the Front Thumb Bottom piece downwards to line up the upper edge of it with the upper edge of the thumb piece below it. Continue pinning along this edge until you reach the spot where it curves upwards.
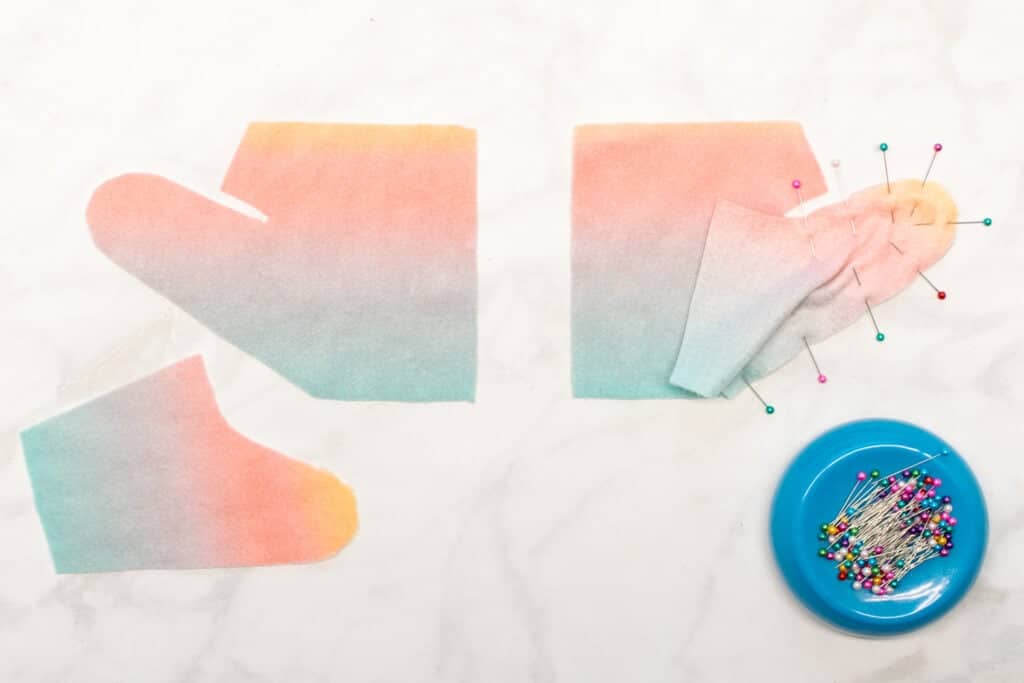
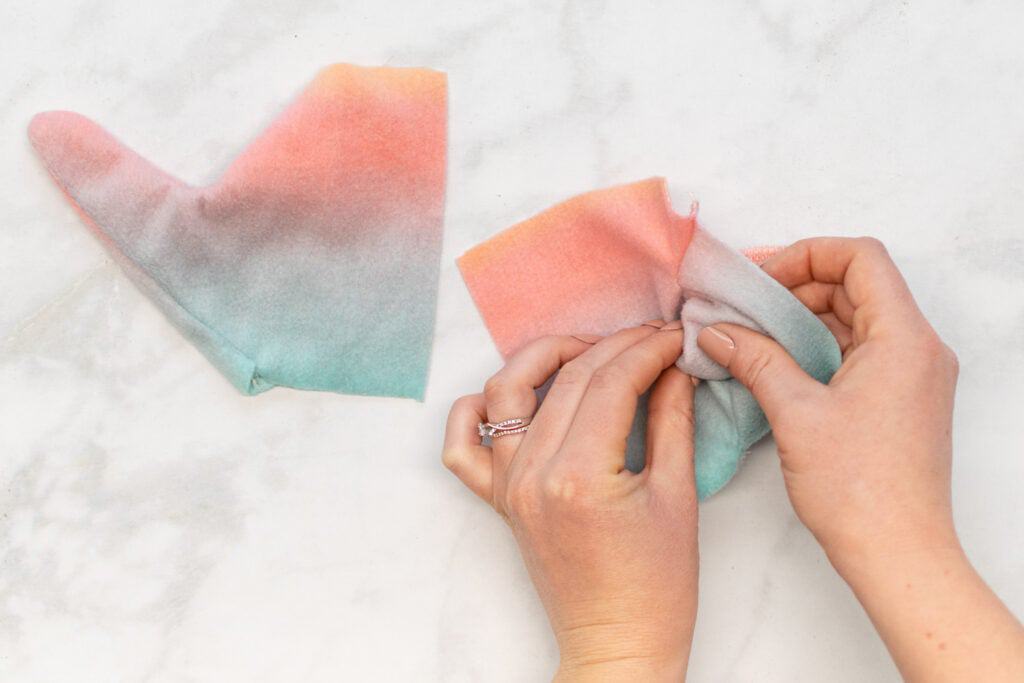
Then, pull the curves of the two pieces straight and pin this last little section together. This is the most fiddly part of the process but just focus on lining up the edges of the two pieces and you'll be good to go!
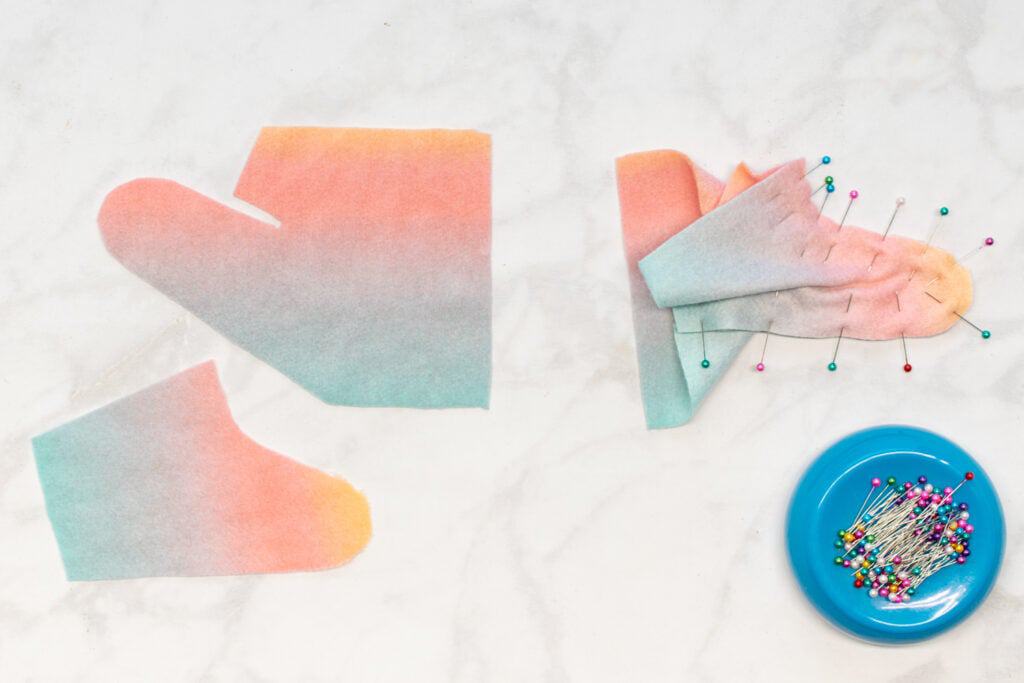
Repeat this process to pin the other Front Thumb Bottom piece to the other Front Bottom piece.
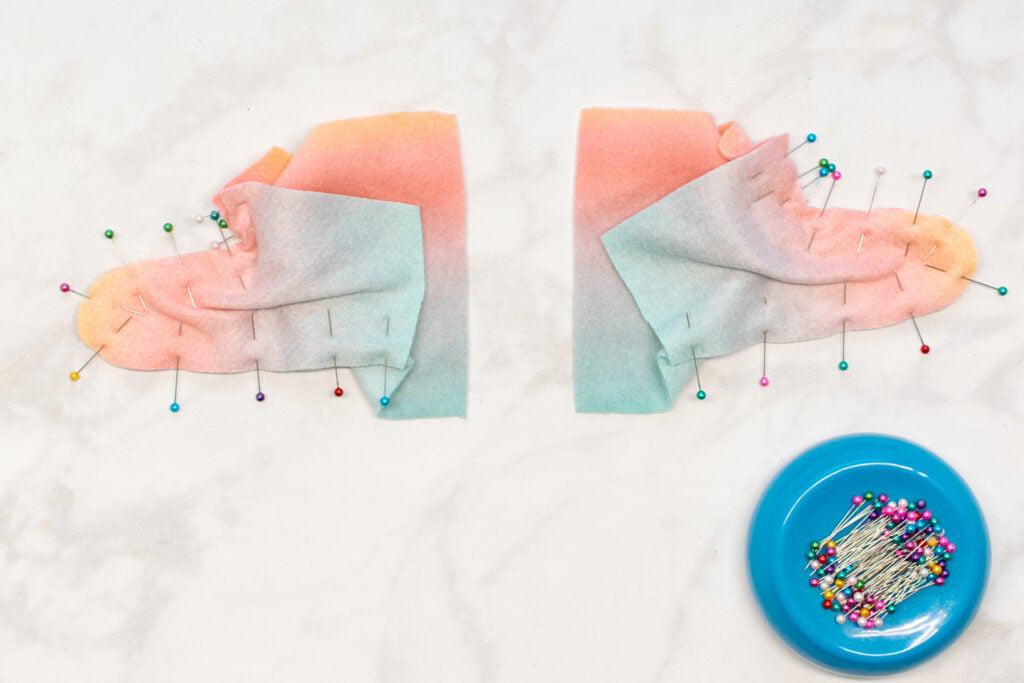
Next, sew around the pinned thumb edges of each set of fabric pieces with a 3/8" seam allowance.
*PRO TIP: The key to stitching these thumbs is to take it SLOW and check the fabric every few centimeters to ensure that there aren't any folds or tucks ahead of the needle. If you find a fold or tuck in front of the needle, use your fingers to push it towards the inside of the thumb and away from the presser foot before stitching that area.
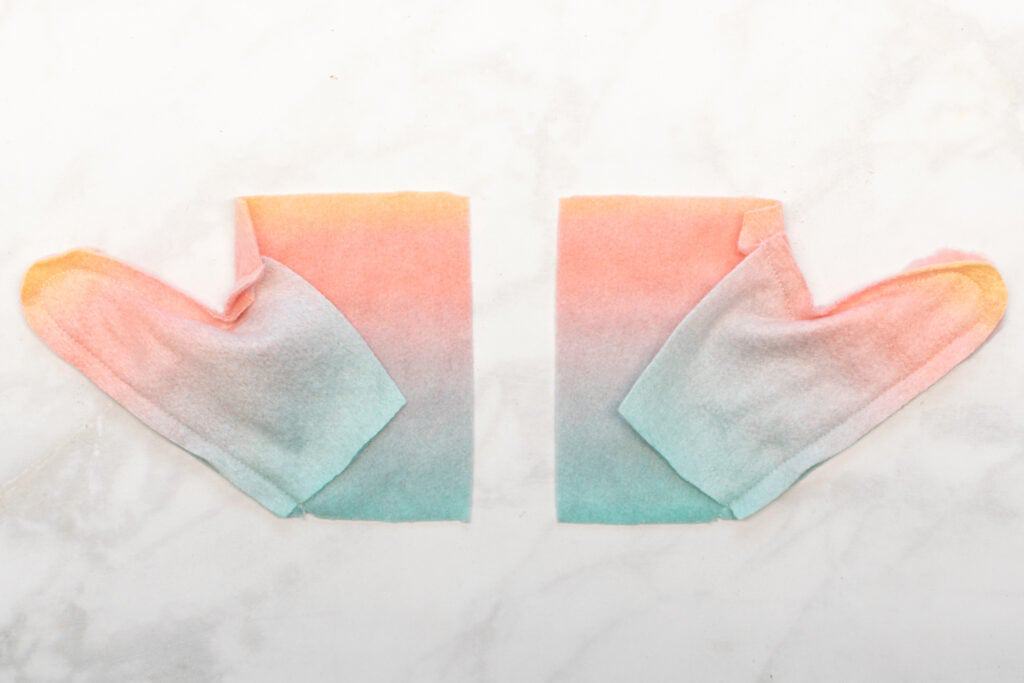
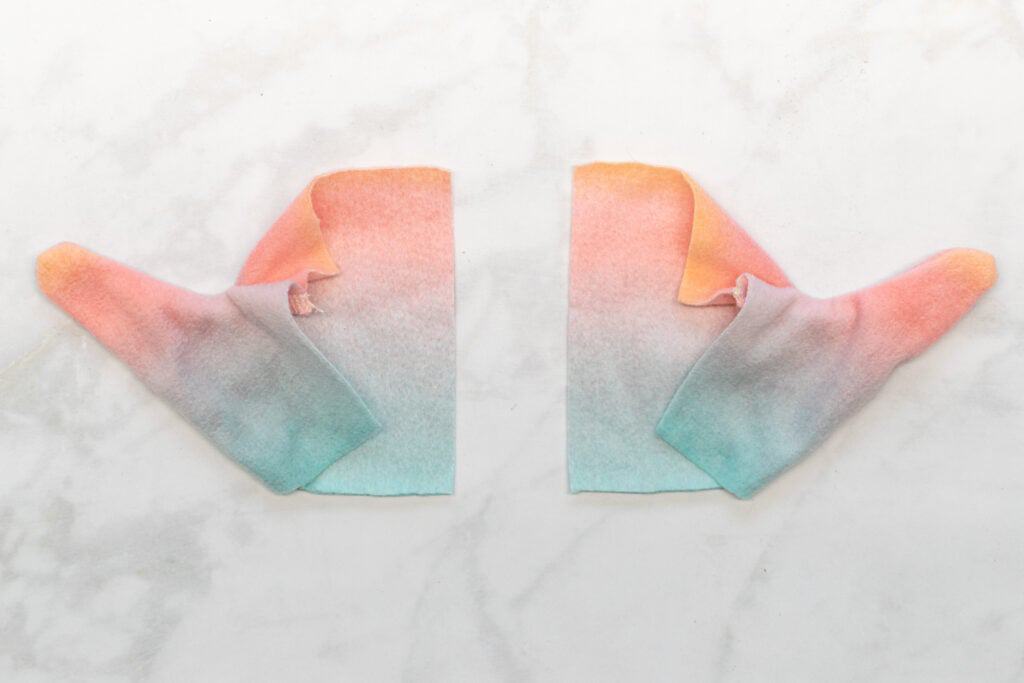
Finish the raw edges of each stitched thumb with a serger or a zigzag stitch along the edge of the fabric.
Finally, turn each piece right sides out - you should now have two beautiful thumbs!
Step 4: Attach the Bias Tape
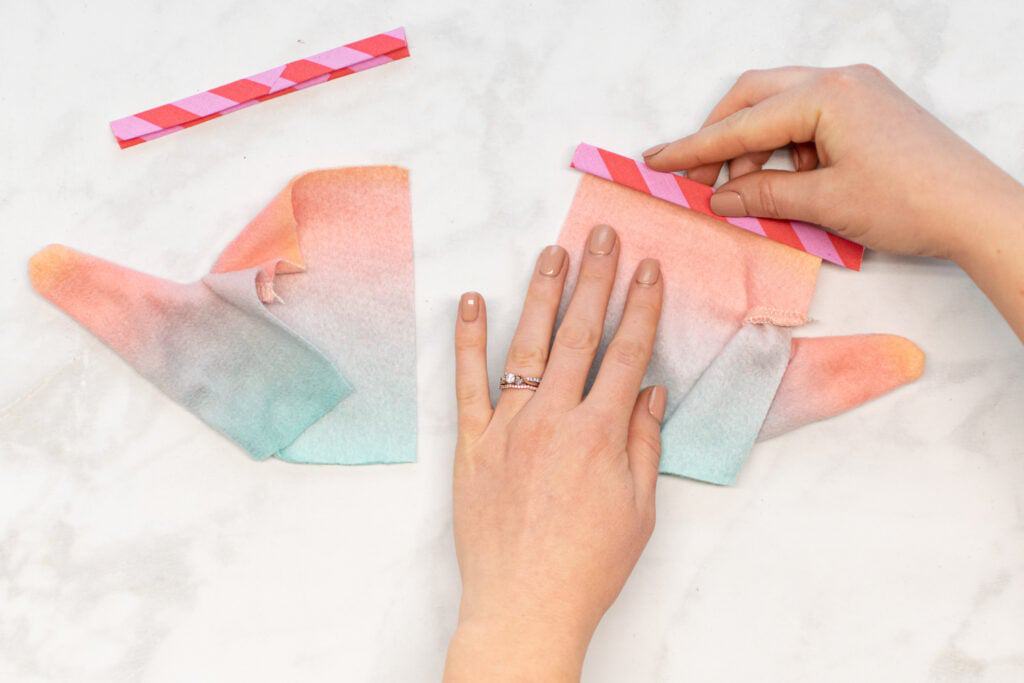
It's now time to finish the edges of the finger openings with bias tape.
Sandwich the upper edge of each Front Bottom piece inside one of your prepared pieces of bias tape. Push the edge of the fabric all the way up to the fold at the center of the bias tape. The bias tape will extend slightly beyond the edges of the fabric.
Next, pin each piece of bias tape in place.
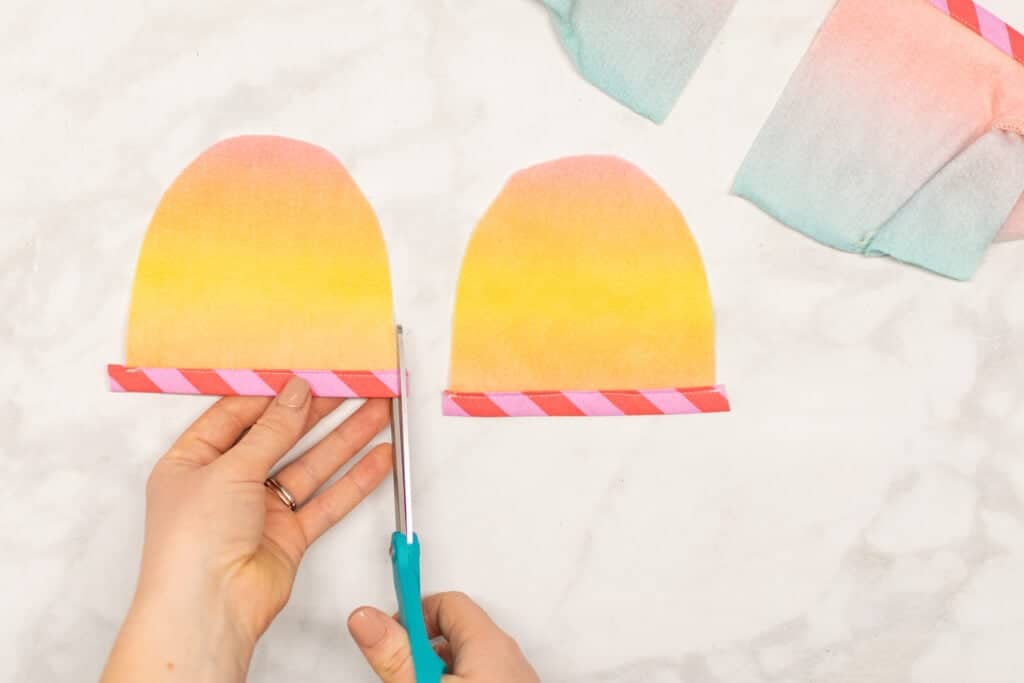
Topstitch along the interior edge of each piece of bias tape, sewing about 1/8" in from the edge.
Finally, trim the ends of each piece of bias tape to match the edges of the fabric.

Then, repeat this process to sandwich the lower straight edge of each Front Top piece inside one of the other two pieces of bias tape.
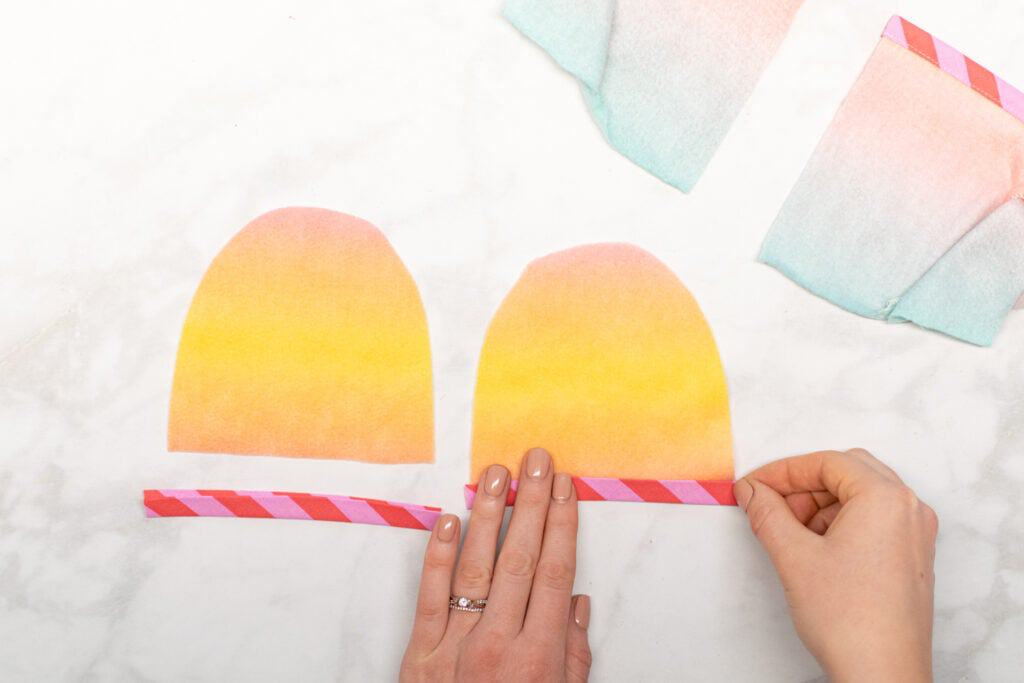
Again, pin and stitch the bias tape in place.

Then, trim the ends of the bias tape to match the edges of the fabric.
Step 5: Assemble the Body of the Mittens
Next, we're ready to assemble all of these components to create the body of the mittens.
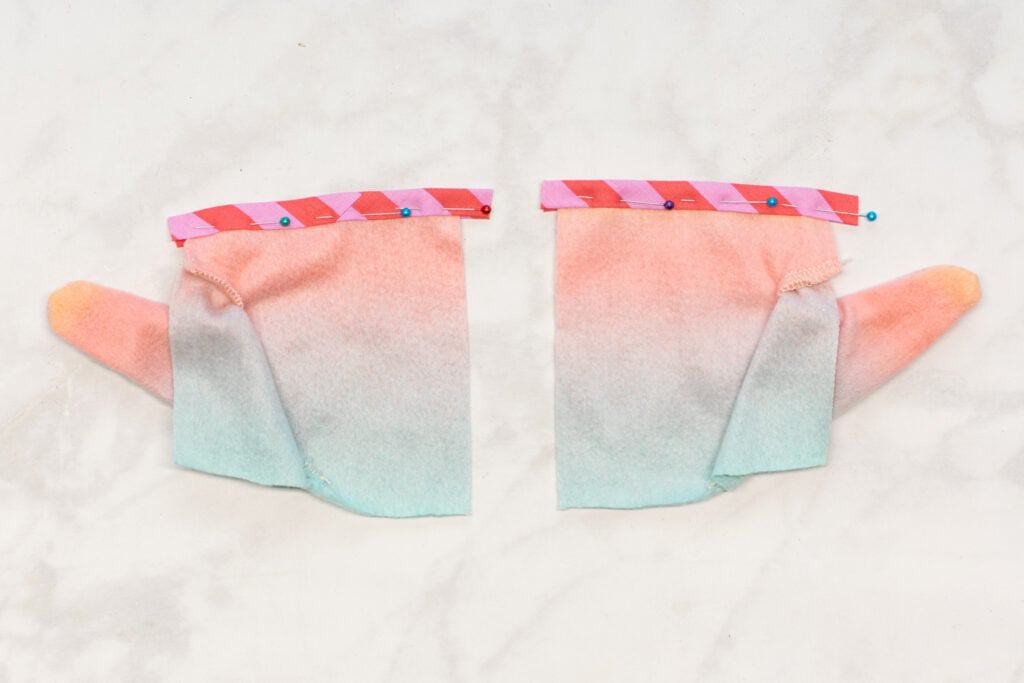
Lay the two Back pieces on your table with the right side of the fabric facing upwards.

Place one Front Top piece at the top of each Back piece, matching them up with right sides together.

Pin the Front Top pieces to the upper portion of each Back piece.

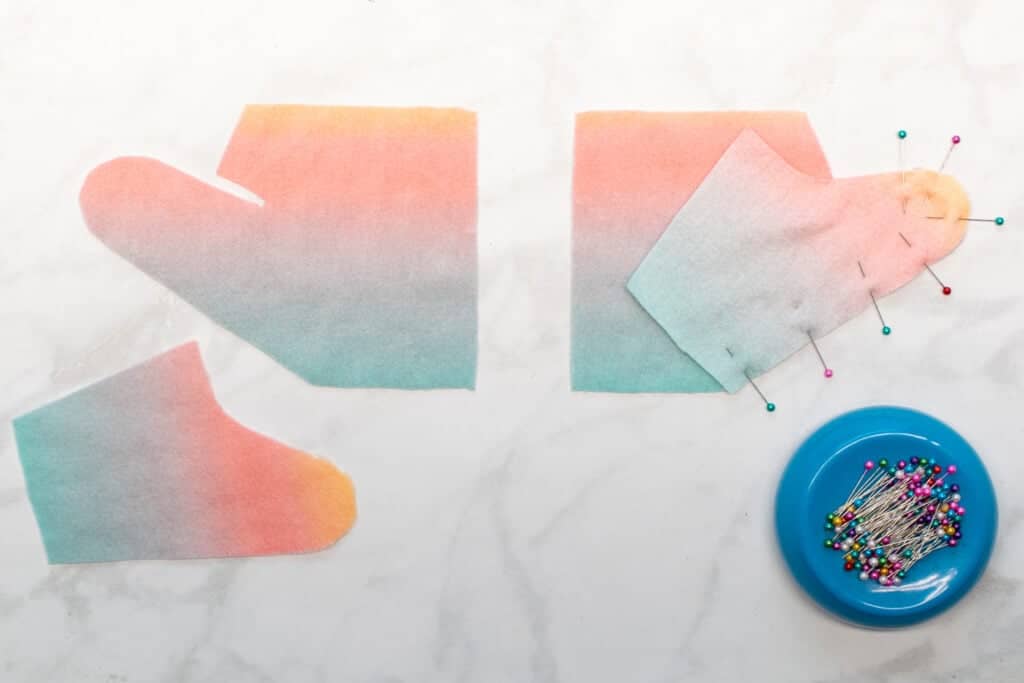
Next, take one of the stitched bottom Front pieces and fold the thumb towards the middle and away from the edges.
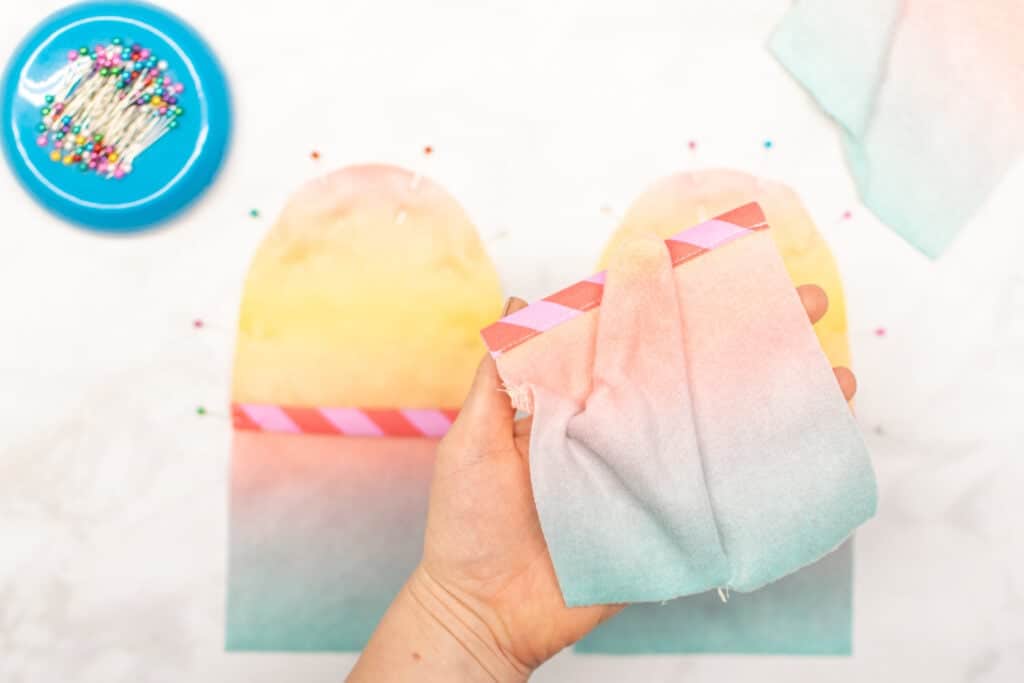
Place this bottom Front piece down on the lower portion of one of the Back pieces with right sides together.
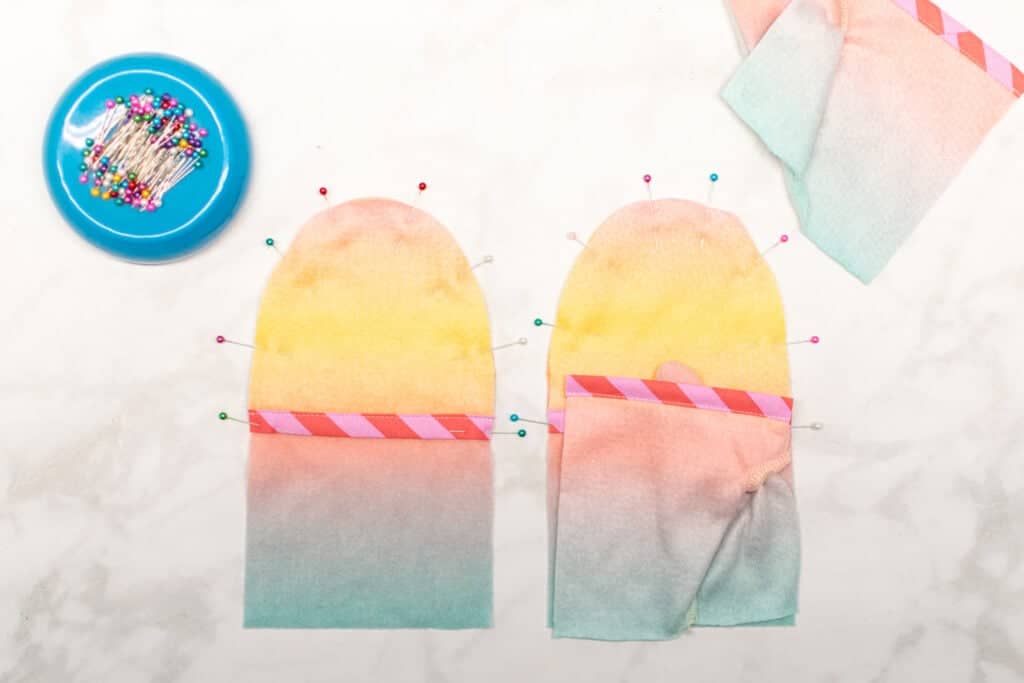
Repeat this process to place the second bottom Front piece right sides down on the second Back piece.
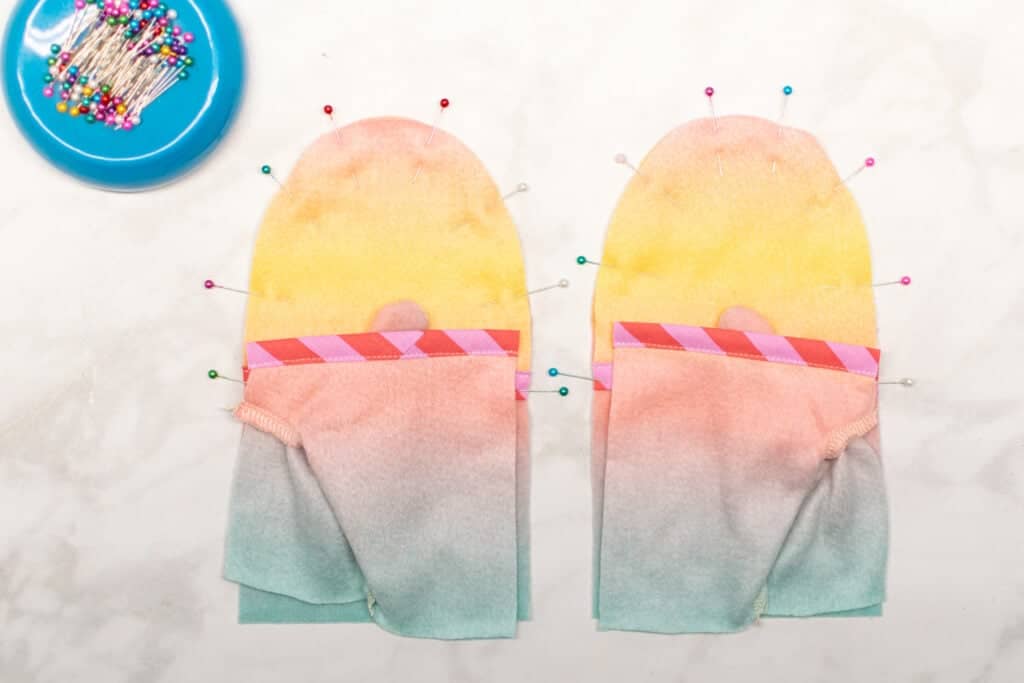
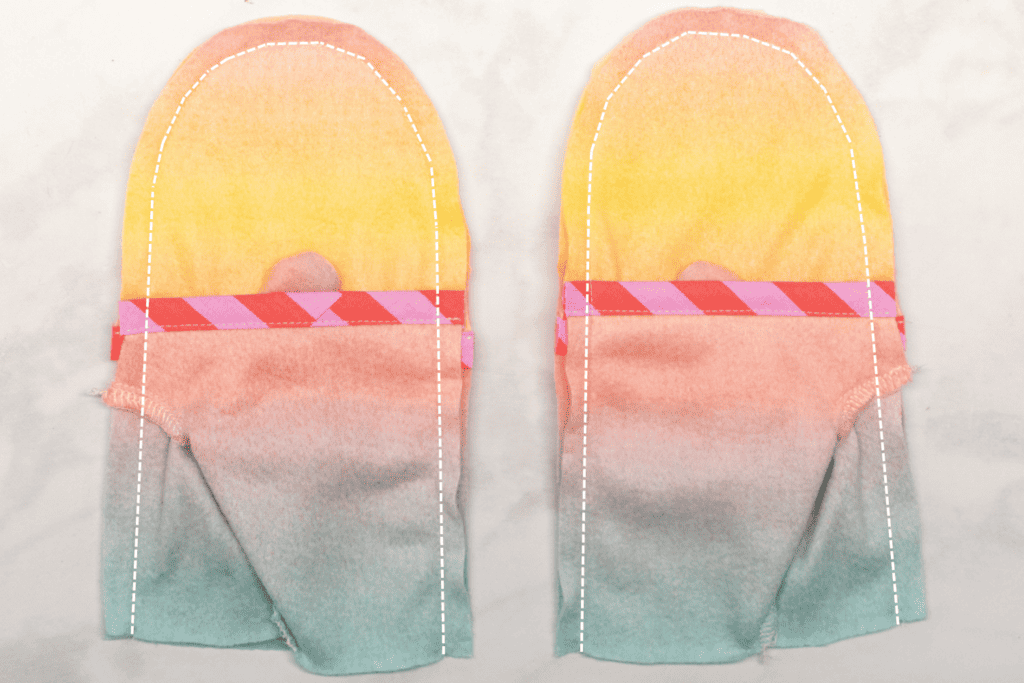
Line up each bottom Front piece along the side edges with the edges of the Back piece below it. Pin the side edges in place. Double-check that the thumbs are folded to the inside of the mittens and aren't caught up in the pinning!
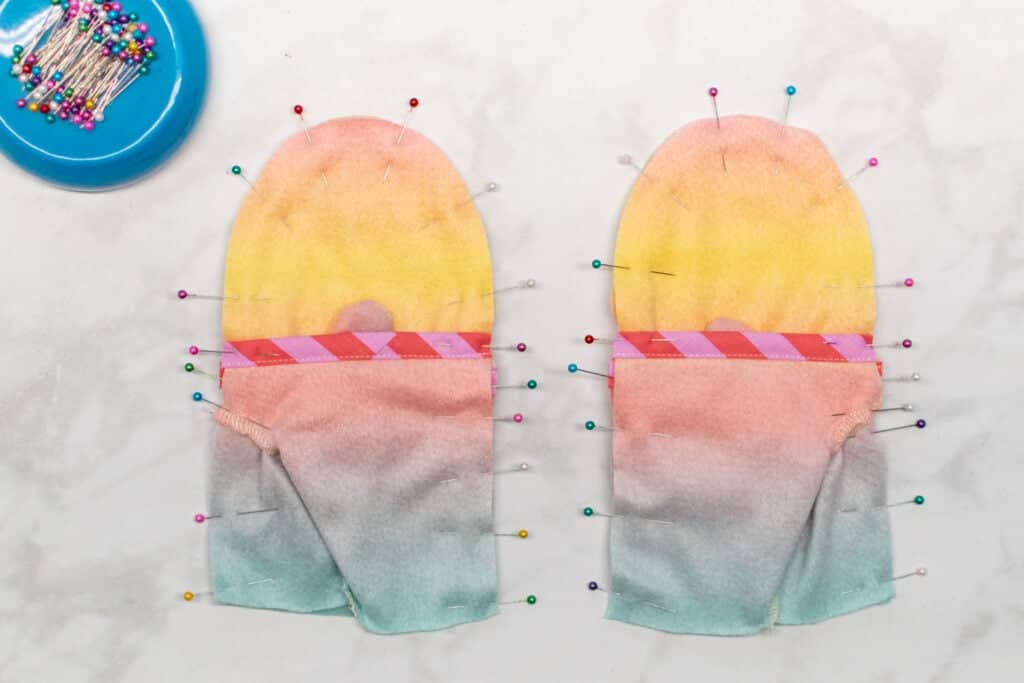
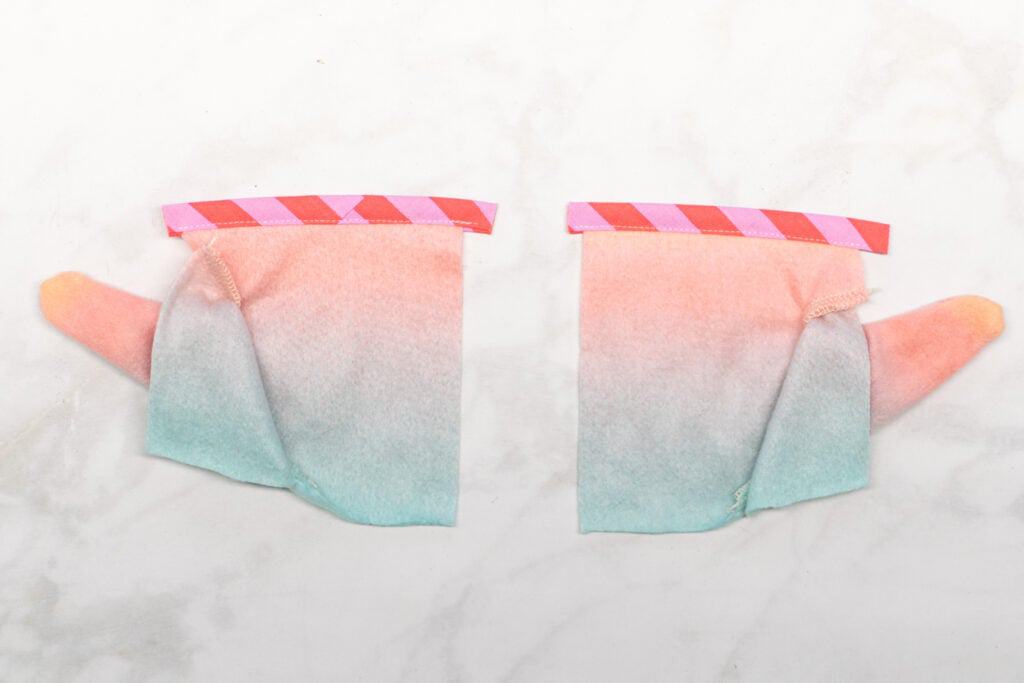
Stitch all the way up one side, around the curved top, and down the second side of each mitten. Make sure not to sew across the bottom edge of the mittens! Again, stitch with a 3/8" seam allowance.
Then, finish the raw edges along both sides and the curved upper portion of each mitten with a serger or zigzag stitch.
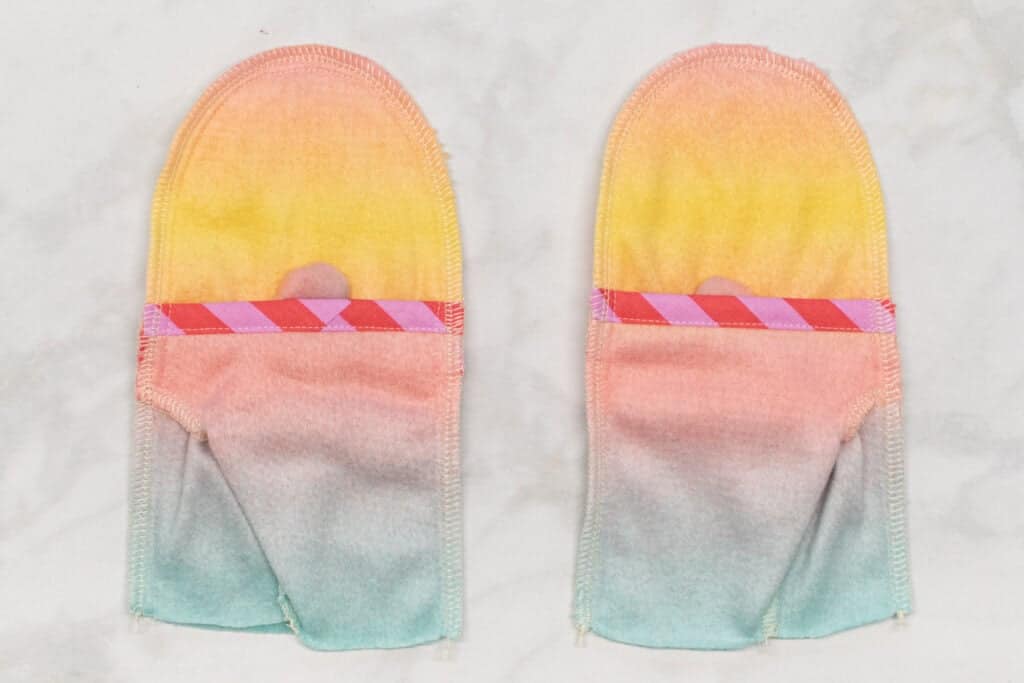
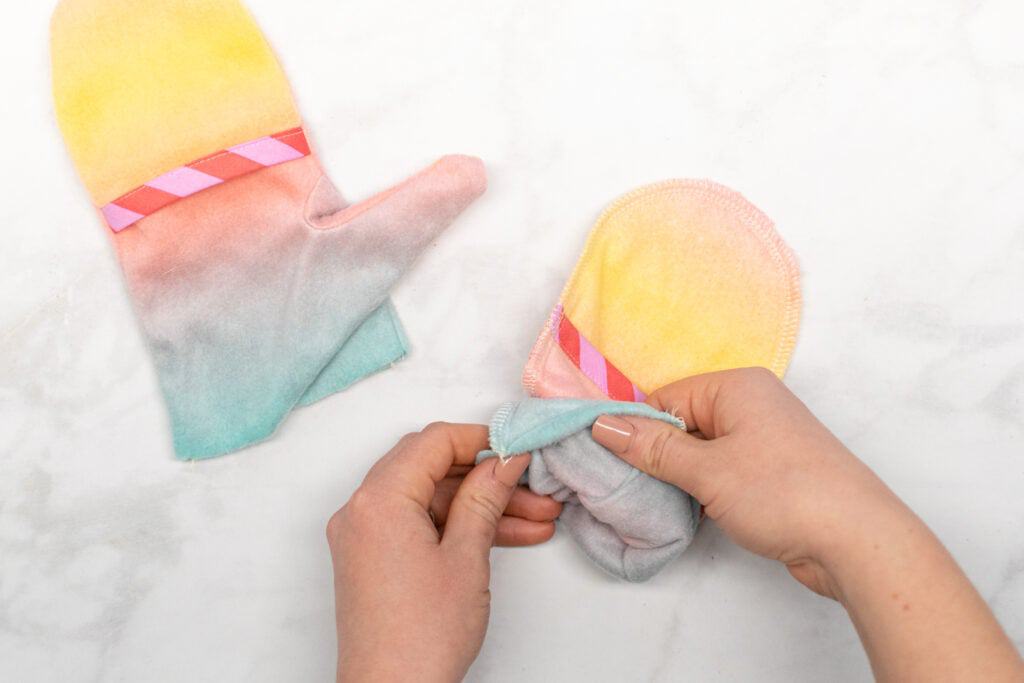
Finally, turn each mitten right sides out. Make sure to push the seams out all the way around the curved portion of each mitten!
Step 6: Make the Wrist Cuffs
Next, we need to assemble the wrist cuffs for our mittens.
If you're making fleece cuffs, continue with the instructions to add elastic. However, if you're making the ribbed knit cuffs, skip the elastic and go straight on to pinning the cuffs in half.

*This is because ribbed knit fabric has much better recovery over time than fleece. Without adding elastic, the fleece cuffs will become stretched out over time and lose their tightness around the wrist!*
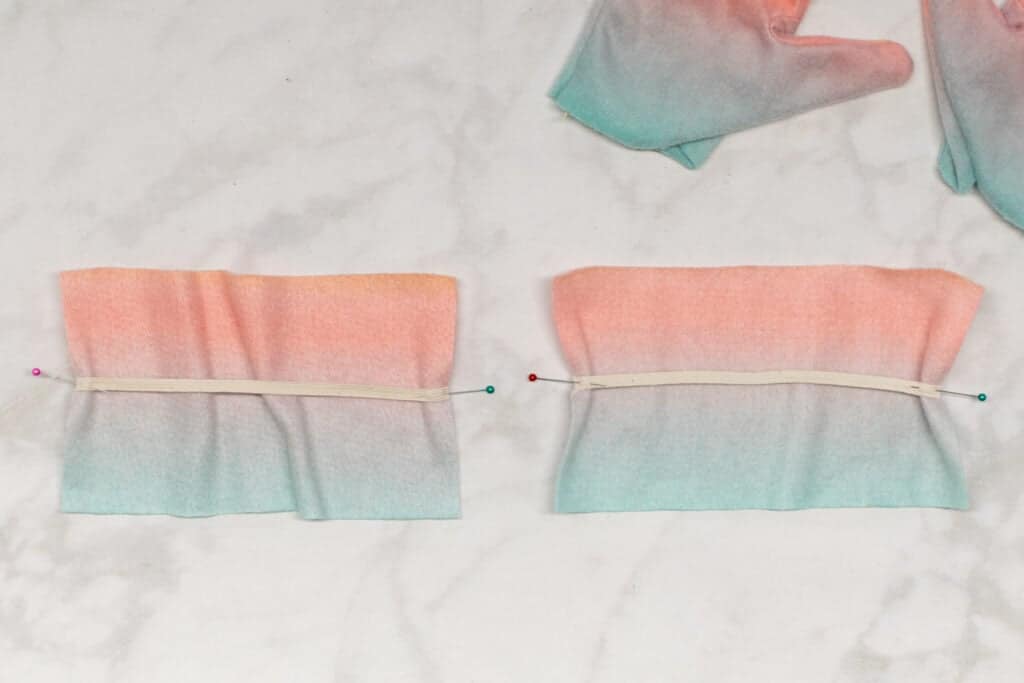
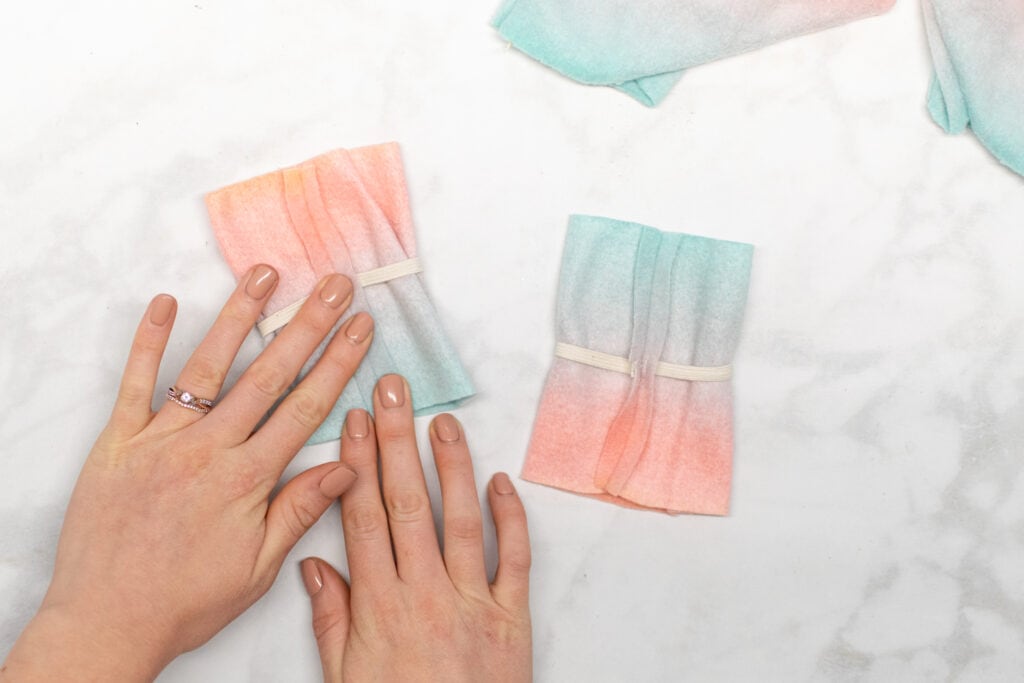
For the fleece cuffs, we first need to find the center of the short ends of each cuff. To do this, start by folding the cuffs in half lengthwise.
Then, mark where the fabric folds on each short end of each cuff. Because fleece doesn't show fabric pen markings well, I prefer to mark these centers by snipping into the fabric about 1/4" right where the fabric folds.

Next, pin the ends of one of your pieces of elastic right above the center markings at each end of one of the cuff pieces. The fabric of the cuff will be longer than the elastic.
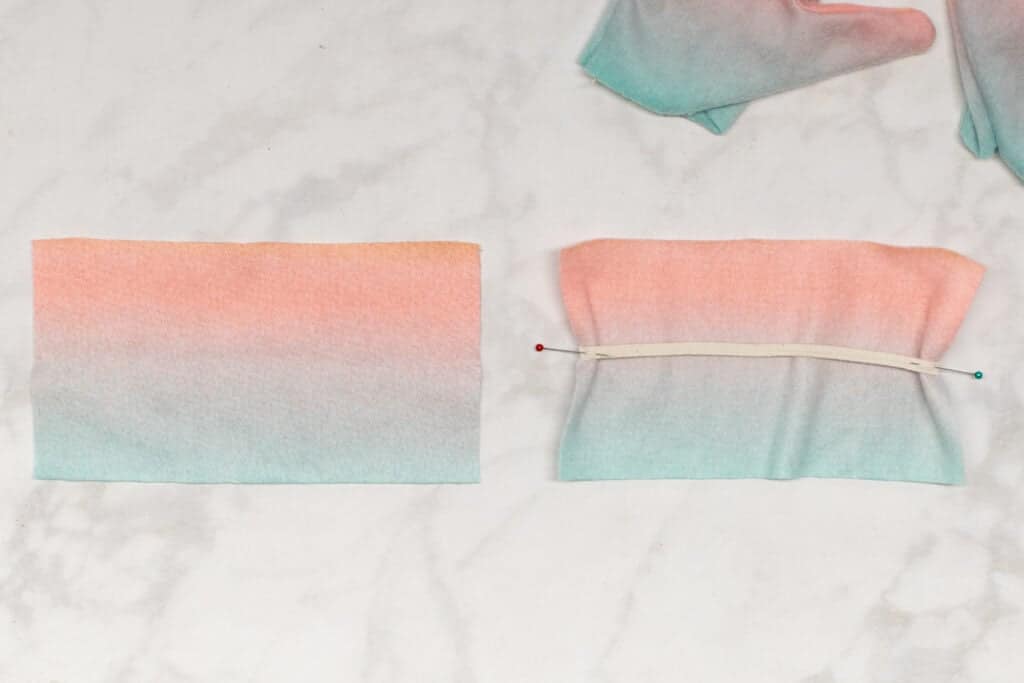
Repeat this process to pin the second piece of elastic above the center markings on the second cuff.
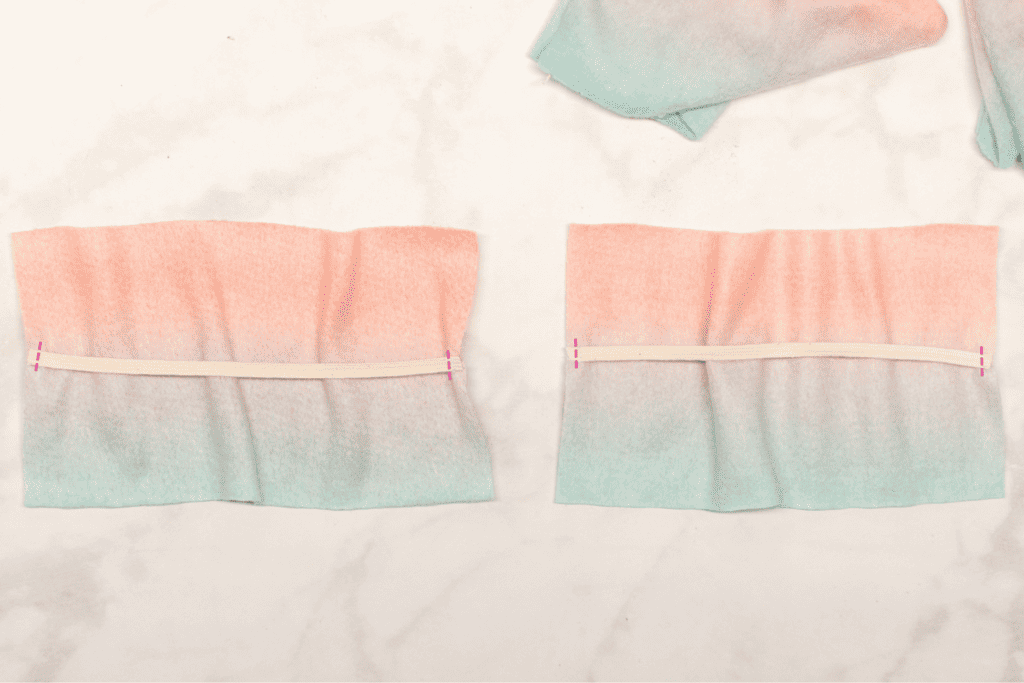
Then, stitch the elastic ends in place, sewing about 1/4" in from the edge of the fabric.
*PICK UP HERE FOR RIBBED KNIT CUFFS*
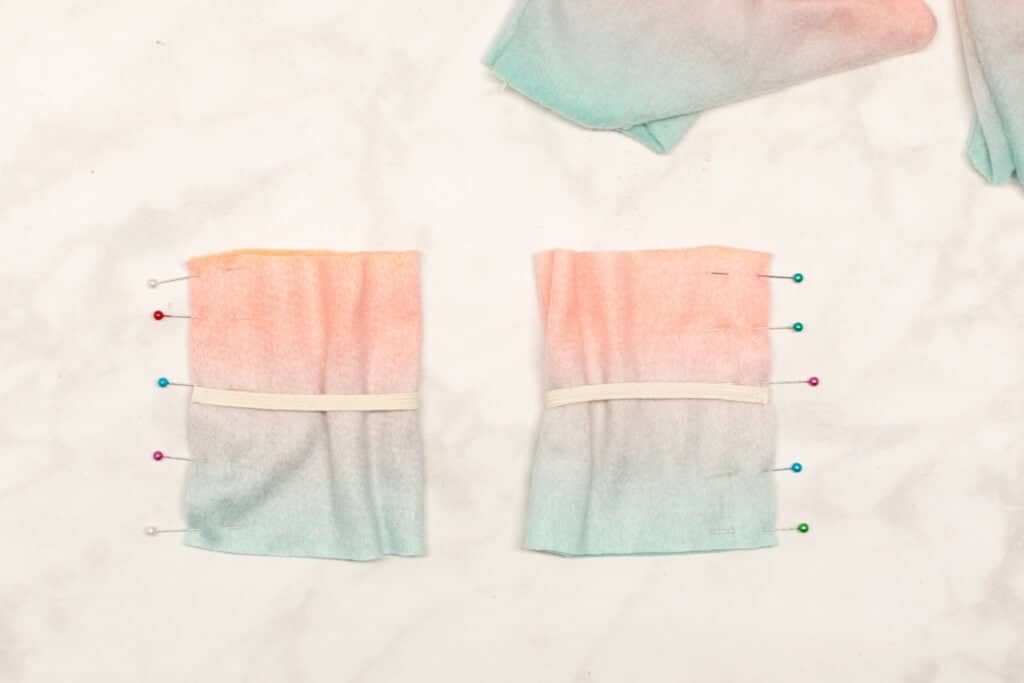
Next, fold your cuffs in half width-wise with right sides together. Line up the short ends and pin them together.
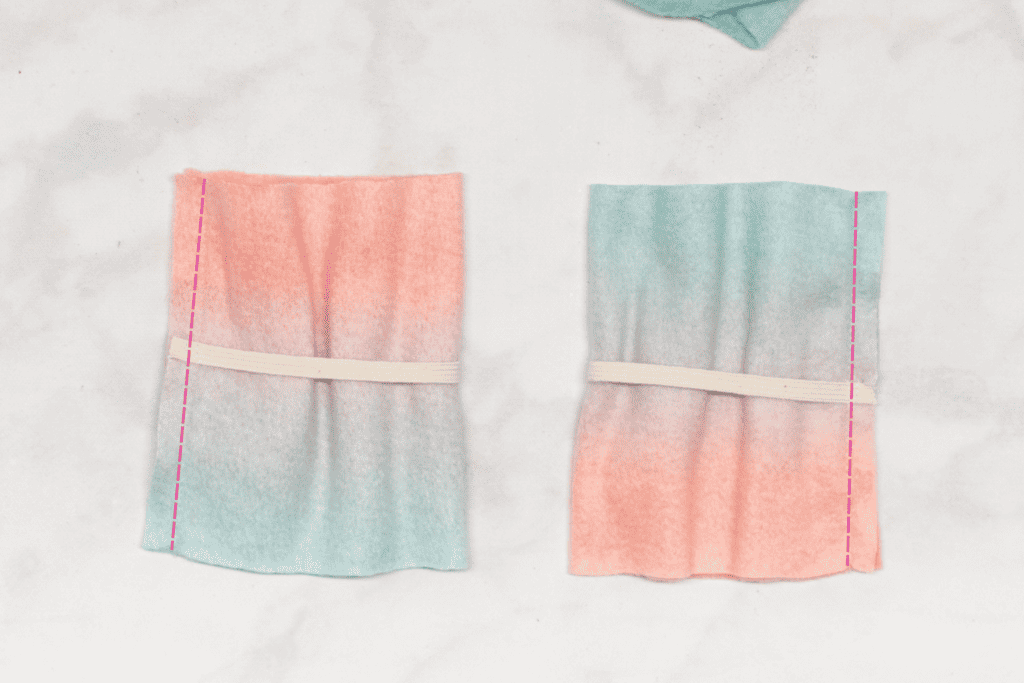
Then, stitch the short ends of each cuff together with a 3/8" seam allowance.
Finger press the seam allowances open. If you are using ribbing, you can use an iron to press the seam allowances instead of finger pressing.
Then, fold the cuffs in half with wrong sides together, lining up and pinning the raw edges together at the top.

Step 7: Attach the Cuffs to the Mittens
The final step to putting these adorable mittens together is to attach the cuffs to the body of the mittens!
To do this, slide one cuff over each mitten, aligning the raw edges of the cuff with the raw edges at the wrist of the mitten and pinning these edges together.
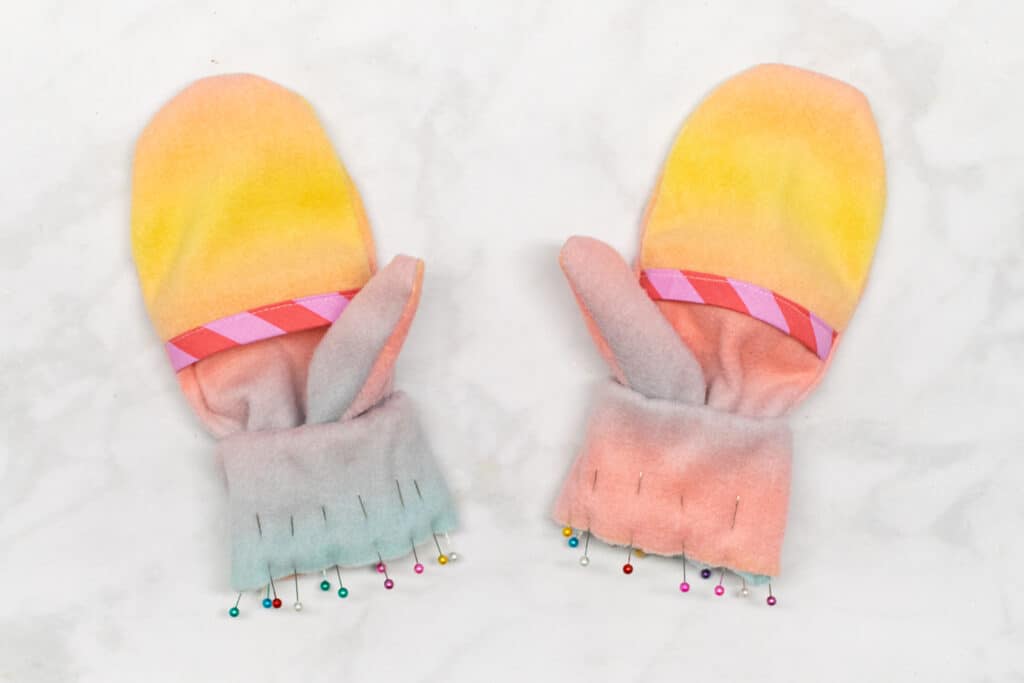
*PRO TIP: For a more professional look, I like to align the seam of the cuff with one of the side seams of the mitten, then pin the cuff in place. This just looks a little neater than allowing the seam of the cuff to be placed randomly somewhere along the wrist of the mitten.
Next, stitch each cuff in place, sewing with a zigzag stitch and using a 3/8" seam allowance.
Then, finish the raw edges by sewing along the fabric edges with a serger or a zigzag stitch on your sewing machine.
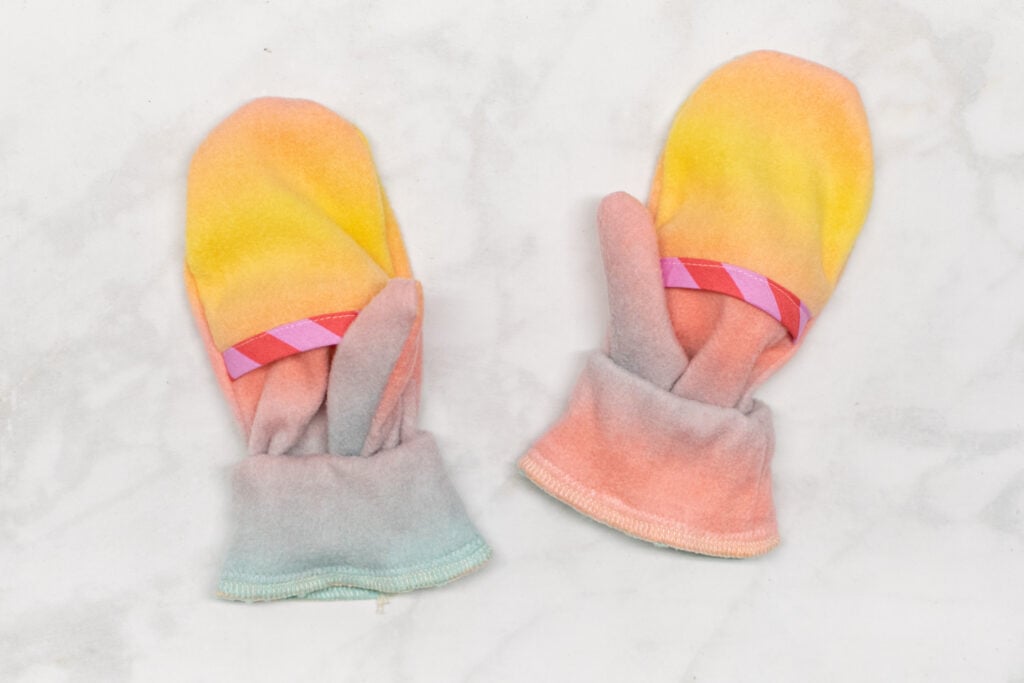
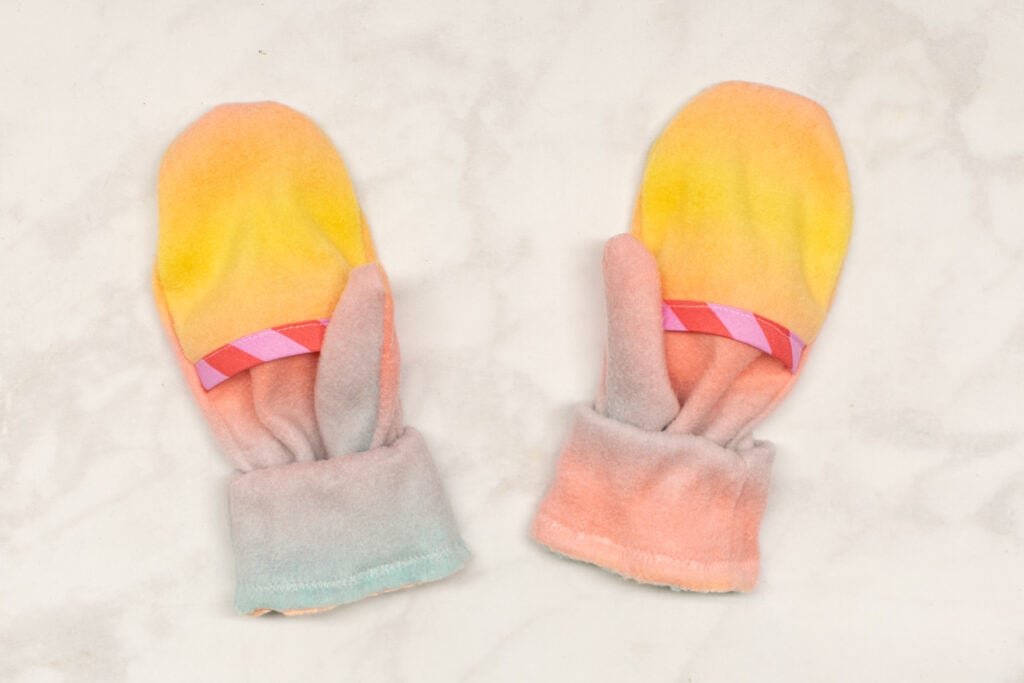
Finally, flip the cuffs down away from the body of the mittens. Finger press the seam flat.
Congrats! Your cute and cozy fleece mittens are finished!
To make my mittens extra cute, I hand-sewed a pair of velvet ribbons onto them.

Are you as excited as I am about wearing handmade (and oh-so-cute) mittens this winter?? Save this project to Pinterest here!
help with the download in the pdf is there another way to get the pattern
I want to voice my respect for your kindness giving support to persons that absolutely need guidance on in this matter. Your special commitment to passing the message around came to be quite interesting and has without exception permitted guys and women just like me to attain their ambitions. Your entire interesting key points indicates much a person like me and substantially more to my peers. Thanks a ton; from everyone of us.
cheapest prednisone no prescription: generic prednisone tablets - prednisone 475
Bardzo cenne i trafne wskazówki. Dziękuję!
where can i get prednisone over the counter: anti-inflammatory medication online - buy prednisone online fast shipping
https://northaccessrx.com/antibiotics-guide.html# buying from canadian pharmacies
pharmacy in canada: best canadian pharmacy - canadian pharmacy tampa
mail order pharmacy india: india pharmacy mail order - pharmacy website india
https://globalindiapharmacy.shop/# Global India Pharmacy
best canadian online pharmacy: canada ed drugs - buy prescription drugs from canada cheap
canadian drug pharmacy: canadian drug stores - canadian valley pharmacy
pet pharmacy online: Paw Trust Meds - Paw Trust Meds
https://northaccessrx.shop/# canadian mail order pharmacy
https://northaccessrx.com/# reputable canadian pharmacy
canadian pharmacies comparison: canadian online pharmacy - best canadian pharmacy to order from
Paw Trust Meds: dog prescriptions online - dog prescriptions online
https://globalindiapharmacy.shop/# Global India Pharmacy
reputable indian pharmacies: india online pharmacy - mail order pharmacy india
Paw Trust Meds: dog prescriptions online - best pet rx
canadadrugpharmacy com: NorthAccess Rx - canadian drug pharmacy
https://globalindiapharmacy.shop/# Global India Pharmacy
canadian pharmacy india: NorthAccess Rx - legitimate canadian mail order pharmacy
https://pawtrustmeds.shop/# canada pet meds
best canadian pharmacy online: canada ed drugs - is canadian pharmacy legit
https://globalindiapharmacy.shop/# Online medicine home delivery
Global India Pharmacy: Global India Pharmacy - Global India Pharmacy
online pet pharmacy: Paw Trust Meds - vet pharmacy online
Paw Trust Meds: pet pharmacy online - pet med
https://pawtrustmeds.com/# dog prescriptions online
india pharmacy mail order: п»їlegitimate online pharmacies india - top 10 pharmacies in india
https://globalindiapharmacy.com/# reputable indian pharmacies
legal to buy prescription drugs from canada: cheap canadian pharmacy online - ed drugs online from canada
Global India Pharmacy: Global India Pharmacy - indian pharmacy online
https://northaccessrx.com/canadian-pharmacy-rating.html# pharmacy canadian superstore
Global India Pharmacy: top 10 pharmacies in india - Online medicine order
reputable indian online pharmacy: Global India Pharmacy - Global India Pharmacy
canada pet meds: Paw Trust Meds - Paw Trust Meds
http://pawtrustmeds.com/# pet prescriptions online
onlinecanadianpharmacy: adderall canadian pharmacy - legitimate canadian pharmacy
http://pawtrustmeds.com/# vet pharmacy online
cheap canadian pharmacy online: NorthAccess Rx - canadian pharmacy reviews
indianpharmacy com: Global India Pharmacy - world pharmacy india
Paw Trust Meds: Paw Trust Meds - vet pharmacy online
canadian pharmacies compare: NorthAccess Rx - legitimate canadian pharmacies
canadian pharmacy online reviews: NorthAccess Rx - best canadian pharmacy
Paw Trust Meds: pet prescriptions online - Paw Trust Meds
the canadian pharmacy: NorthAccess Rx - real canadian pharmacy
https://pawtrustmeds.com/# pet meds online
Paw Trust Meds: Paw Trust Meds - pet pharmacy online
pet meds for dogs: pet rx - Paw Trust Meds
legitimate online pharmacies india: Global India Pharmacy - best india pharmacy
buying from canadian pharmacies: canadian pharmacy near me - canadian king pharmacy
Global India Pharmacy: best online pharmacy india - pharmacy website india
canadian pharmacy: canadapharmacyonline com - online canadian pharmacy
world pharmacy india: Global India Pharmacy - Global India Pharmacy
Online medicine order: mail order pharmacy india - top 10 online pharmacy in india
https://pawtrustmeds.com/# canada pet meds
https://northaccessrx.com/otc-meds.html# canadian pharmacy meds review
Cheap generic Viagra online: buy Viagra over the counter - CoreBlue Health
https://veritascarepharm.com/# Cialis over the counter
Buy Cialis online [url=https://veritascarepharm.com/#]Tadalafil Tablet[/url] Cialis without a doctor prescription
safe online pharmacy: CivicMeds - foreign pharmacy no prescription
Cialis over the counter: VeritasCare - VeritasCare
viagra without prescription [url=https://corebluehealth.shop/#]CoreBlue Health[/url] Viagra without a doctor prescription Canada
https://veritascarepharm.shop/# Buy Tadalafil 20mg
over the counter sildenafil: Buy generic 100mg Viagra online - CoreBlue Health
https://veritascarepharm.shop/# Buy Cialis online
Cheap Cialis: Generic Tadalafil 20mg price - VeritasCare
canadian pharmacy 24h com safe [url=https://civicmeds.com/#]polish pharmacy online uk[/url] canada drugs online review
Cialis 20mg price: VeritasCare - VeritasCare
cheap canadian pharmacy online: CivicMeds - online pharmacy europe
buying drugs from canada [url=http://civicmeds.com/#]CivicMeds[/url] cheapest pharmacy to fill prescriptions with insurance
https://corebluehealth.shop/# over the counter sildenafil
CoreBlue Health: CoreBlue Health - sildenafil 50 mg price
https://veritascarepharm.com/# Cheap Cialis
canadian pharmacies compare: CivicMeds - canada drugs
VeritasCare [url=http://veritascarepharm.com/#]VeritasCare[/url] VeritasCare
CoreBlue Health: sildenafil online - CoreBlue Health
VeritasCare: VeritasCare - VeritasCare
https://civicmeds.com/# canada drugstore pharmacy rx
generic sildenafil [url=https://corebluehealth.shop/#]buy Viagra online[/url] sildenafil 50 mg price
CoreBlue Health: CoreBlue Health - CoreBlue Health
VeritasCare: buy cialis pill - Buy Tadalafil 5mg
http://corebluehealth.com/# Viagra online price
Cheap Viagra 100mg [url=https://corebluehealth.shop/#]CoreBlue Health[/url] CoreBlue Health
VeritasCare: VeritasCare - VeritasCare
http://civicmeds.com/# canadian pharmacy review
Cialis over the counter: VeritasCare - cheapest cialis
VeritasCare [url=http://veritascarepharm.com/#]VeritasCare[/url] Buy Cialis online
buy cialis pill: Generic Cialis without a doctor prescription - Buy Cialis online
canadian pharmacy 24h com safe: canadian pharmacy without prescription - reputable canadian online pharmacies
http://veritascarepharm.com/# Cialis 20mg price
Generic Viagra online [url=http://corebluehealth.com/#]viagra without prescription[/url] Cheap Sildenafil 100mg
VeritasCare: VeritasCare - Generic Tadalafil 20mg price
Buy Tadalafil 20mg: Buy Tadalafil 20mg - VeritasCare
http://veritascarepharm.com/# Generic Cialis without a doctor prescription
australia online pharmacy free shipping [url=http://civicmeds.com/#]canadian pharmacy no scripts[/url] gold pharmacy online
VeritasCare: Cialis 20mg price - VeritasCare
https://corebluehealth.com/# CoreBlue Health
Cialis over the counter: VeritasCare - VeritasCare
VeritasCare [url=http://veritascarepharm.com/#]VeritasCare[/url] Cialis 20mg price in USA
cheapest cialis: VeritasCare - VeritasCare
canadian pharmacy viagra 50 mg: CivicMeds - cheap viagra online canadian pharmacy
CoreBlue Health [url=https://corebluehealth.shop/#]Viagra tablet online[/url] Buy Viagra online cheap
https://veritascarepharm.com/# cialis generic
https://civicmeds.shop/# your pharmacy online
no rx pharmacy: CivicMeds - us pharmacy
Cheap Sildenafil 100mg: CoreBlue Health - Buy generic 100mg Viagra online
good online mexican pharmacy [url=https://civicmeds.shop/#]CivicMeds[/url] online pharmacy australia paypal
CoreBlue Health: Buy generic 100mg Viagra online - CoreBlue Health
https://corebluehealth.shop/# CoreBlue Health
Cialis without a doctor prescription: п»їcialis generic - VeritasCare
п»їcialis generic [url=https://veritascarepharm.com/#]VeritasCare[/url] VeritasCare
https://civicmeds.com/# online pharmacy no prescription
canadian pharmacy viagra: CivicMeds - top 10 online pharmacy in india
tadalafil canadian pharmacy: CivicMeds - canadian family pharmacy
Cheap Viagra 100mg [url=https://corebluehealth.shop/#]Sildenafil 100mg price[/url] CoreBlue Health
https://civicmeds.shop/# canada drugs online reviews
express scripts com pharmacies: CivicMeds - thecanadianpharmacy
top 10 pharmacies in india: CivicMeds - best india pharmacy
CoreBlue Health [url=http://corebluehealth.com/#]Viagra online price[/url] CoreBlue Health
https://corebluehealth.shop/# CoreBlue Health
https://corebluehealth.com/# Sildenafil Citrate Tablets 100mg
VeritasCare: VeritasCare - Cialis 20mg price
sildenafil online [url=https://corebluehealth.com/#]Buy generic 100mg Viagra online[/url] CoreBlue Health
viagra without prescription: CoreBlue Health - buy Viagra online
CoreBlue Health: CoreBlue Health - CoreBlue Health
CoreBlue Health [url=https://corebluehealth.com/#]CoreBlue Health[/url] Buy Viagra online cheap
canadian pharmacy cialis: CivicMeds - usa pharmacy online
https://corebluehealth.com/# Cheap generic Viagra online
Tadalafil price: Cialis 20mg price in USA - Buy Cialis online
Cheap Sildenafil 100mg: order viagra - CoreBlue Health
canada pharmacy coupon: CivicMeds - canadian pharmacy viagra 50 mg
VeritasCare [url=https://veritascarepharm.com/#]Tadalafil price[/url] VeritasCare
professional pharmacy: prices pharmacy - reputable canadian pharmacy
CoreBlue Health: cheapest viagra - Cheap generic Viagra
order viagra [url=https://corebluehealth.com/#]CoreBlue Health[/url] generic sildenafil
http://veritascarepharm.com/# VeritasCare
canadian pharmacy world: CivicMeds - canada drugs online
CoreBlue Health: CoreBlue Health - Cheap generic Viagra online
canadian valley pharmacy: mexican online mail order pharmacy - canada drugs online
CoreBlue Health: cheap viagra - Buy Viagra online cheap
rx online pharmacy [url=http://civicmeds.com/#]canadian pharmacy ltd[/url] pharmacy wholesalers canada
canada pharmacy world: legit canadian pharmacy online - the canadian pharmacy
https://corebluehealth.shop/# CoreBlue Health
american online pharmacy: pharmacy websites - good value pharmacy
CoreBlue Health [url=https://corebluehealth.com/#]CoreBlue Health[/url] CoreBlue Health
CoreBlue Health: Viagra tablet online - CoreBlue Health
Sildenafil Citrate Tablets 100mg [url=https://corebluehealth.shop/#]sildenafil online[/url] sildenafil 50 mg price
http://corebluehealth.com/# buy Viagra over the counter
Buy Tadalafil 20mg [url=https://veritascarepharm.shop/#]cheapest cialis[/url] VeritasCare
Buy Cialis online [url=https://veritascarepharm.shop/#]п»їcialis generic[/url] Tadalafil price
https://veritascarepharm.com/# VeritasCare
https://veritascarepharm.com/# VeritasCare
VeritasCare [url=https://veritascarepharm.com/#]Cialis without a doctor prescription[/url] VeritasCare
viagra canada [url=https://corebluehealth.com/#]buy viagra here[/url] best price for viagra 100mg
https://veritascarepharm.com/# Generic Tadalafil 20mg price
top online pharmacy [url=https://civicmeds.com/#]rx pharmacy[/url] canadianpharmacymeds com
https://civicmeds.shop/# trustworthy canadian pharmacy
best online pharmacy usa [url=https://civicmeds.com/#]canadian pharmacy no scripts[/url] canadian pharmacy ltd
https://corebluehealth.com/# Cheap generic Viagra online
Cialis 20mg price in USA [url=http://veritascarepharm.com/#]cheapest cialis[/url] Generic Tadalafil 20mg price
Cialis over the counter [url=https://veritascarepharm.com/#]VeritasCare[/url] VeritasCare
http://civicmeds.com/# drugstore com online pharmacy prescription drugs
canada pharmacy world [url=http://civicmeds.com/#]canada online pharmacy[/url] mexican pharmacy online
VeritasCare: Generic Cialis price - buy cialis pill
https://corebluehealth.com/# over the counter sildenafil
https://corebluehealth.shop/# CoreBlue Health
CoreBlue Health [url=http://corebluehealth.com/#]CoreBlue Health[/url] viagra without prescription
canadian pharmacy levitra value pack: CivicMeds - pill pharmacy
online pharmacy discount code [url=http://civicmeds.com/#]CivicMeds[/url] good pill pharmacy
pharmacy online uae: CivicMeds - top 10 pharmacy websites
https://civicmeds.com/# online pharmacy pain
Generic Viagra for sale [url=https://corebluehealth.shop/#]CoreBlue Health[/url] buy viagra here
legit canadian pharmacy: CivicMeds - uk pharmacy
https://corebluehealth.shop/# Viagra tablet online
https://veritascarepharm.com/# VeritasCare
Cheapest Sildenafil online [url=http://corebluehealth.com/#]Cheapest Sildenafil online[/url] Generic Viagra online
non prescription medicine pharmacy: CivicMeds - usa pharmacy
canada pharmacy 24h [url=https://civicmeds.com/#]CivicMeds[/url] online pharmacy meds
CoreBlue Health: CoreBlue Health - CoreBlue Health
https://veritascarepharm.com/# VeritasCare
pharmacy [url=https://civicmeds.shop/#]top 10 pharmacies in india[/url] silkroad online pharmacy
VeritasCare: Cialis 20mg price - VeritasCare
Cialis without a doctor prescription [url=https://veritascarepharm.shop/#]VeritasCare[/url] VeritasCare
sildenafil online: CoreBlue Health - Cheap Viagra 100mg
https://corebluehealth.shop/# Buy Viagra online cheap
https://corebluehealth.shop/# cheap viagra
pin up pin up casino
https://pinupazz.top/ pin up
пин ап пин ап казино
pin up az online pin-up online casino
pin up pin up
пин ап пин ап казино
pin up pin-up online casino
pin up pin up az
pin up az online pin up
https://pin-up-kz.space/ пин ап казино kz
pin up pin up casino
https://pin-up-kz.space/ пин ап казино
pin up pin-up oyunu
https://pinupaz.online/ pin up az
https://pinupaz.online/ pin up casino
пин ап пин ап казино
pin up pin up casino
pin-up pin-up online casino
https://pinupazz.top/ pin-up oyunu
пин ап пин ап кз
https://pinupaz.online/ pin up az
pin up pin up casino
https://pin-up-kz.space/ пин ап казино kz
pin up pin up
https://pinupazz.top/ pin-up online casino
пин ап пин ап казино kz
mexico prescription online [url=https://accessbridgepharmacy.shop/#]AccessBridge[/url] AccessBridge Pharmacy
buying drugs from canada: SteadyMeds pharmacy - SteadyMeds
http://formulinepharmacy.com/# medstore online pharmacy
mexican online pharmacy: pharma mexicana - mexico meds
legitimate online pharmacy: FormuLine Pharmacy - overseas pharmacy no prescription
https://steadymedspharmacy.shop/# SteadyMeds pharmacy
AccessBridge: AccessBridge - AccessBridge
best online pharmacy: world pharmacy india - trusted online pharmacy
SteadyMeds [url=https://steadymedspharmacy.com/#]SteadyMeds pharmacy[/url] SteadyMeds
https://steadymedspharmacy.shop/# global pharmacy canada
SteadyMeds: SteadyMeds pharmacy - SteadyMeds pharmacy
SteadyMeds pharmacy: pharmstore canada - canadian pharmacy meds review
http://steadymedspharmacy.com/# legitimate canadian pharmacies
no prescription pharmacy paypal: buy medicines online in india - international pharmacy
SteadyMeds pharmacy: pharmacy canadian - SteadyMeds
https://steadymedspharmacy.shop/# canadian pharmacy no rx needed
worldwide pharmacy online [url=https://formulinepharmacy.shop/#]Online medicine order[/url] new pharmacy online
SteadyMeds: SteadyMeds pharmacy - canada drug pharmacy
https://formulinepharmacy.com/# legit online pharmacy
AccessBridge: AccessBridge Pharmacy - AccessBridge
https://accessbridgepharmacy.com/# AccessBridge Pharmacy
AccessBridge: AccessBridge - AccessBridge Pharmacy
http://steadymedspharmacy.com/# SteadyMeds
AccessBridge: AccessBridge - mexican pharmacy online medications
reputable online pharmacy no prescription: FormuLine Pharmacy - legit online pharmacy
mexico prescriptions [url=http://accessbridgepharmacy.com/#]AccessBridge Pharmacy[/url] mail order pharmacies
https://accessbridgepharmacy.com/# AccessBridge Pharmacy
https://formulinepharmacy.shop/# legal online pharmacies in the us
mexico pharmacy list: AccessBridge - AccessBridge
http://formulinepharmacy.com/# buy online medicine
pharmacy online: reputable indian pharmacies - express scripts mail order pharmacy
medicine online: top online pharmacy india - online pharmacy no prescription needed
http://formulinepharmacy.com/# online pharmacy without scripts
https://formulinepharmacy.shop/# best online pharmacy
online mexican pharmacy [url=https://accessbridgepharmacy.shop/#]AccessBridge[/url] AccessBridge
buy online medicine: FormuLine Pharmacy - online pharmacies
canadian pharmacy: SteadyMeds pharmacy - canadian pharmacy antibiotics
https://steadymedspharmacy.shop/# canadian pharmacy no rx needed
http://accessbridgepharmacy.com/# good online mexican pharmacy
online pharmacy without scripts: FormuLine Pharmacy - shop medicine online
http://accessbridgepharmacy.com/# AccessBridge
legal online pharmacies in the us: pharmacy website india - trusted online pharmacy
reputable overseas online pharmacies [url=http://formulinepharmacy.com/#]indian pharmacy paypal[/url] top-rated online pharmacies
online pharmacy: indian pharmacy online - best online pharmacy no prescription
http://accessbridgepharmacy.com/# pharmacy mexico online
https://accessbridgepharmacy.com/# mexican online pharmacy wegovy
reputable online pharmacy no prescription: india online pharmacy - online pharmacy no prescription needed
SteadyMeds pharmacy: SteadyMeds pharmacy - SteadyMeds
https://steadymedspharmacy.shop/# SteadyMeds
reliable canadian pharmacy reviews: SteadyMeds - legitimate canadian pharmacy
buy canadian drugs [url=https://steadymedspharmacy.shop/#]SteadyMeds pharmacy[/url] SteadyMeds
https://steadymedspharmacy.com/# canadian pharmacy no scripts
reliable online pharmacy: FormuLine Pharmacy - online pharmacies
order from mexico: AccessBridge - mexico drug store