Table of Contents
No-Sew Unicorn & Dragon Halloween DIY Costumes with the Cricut Maker
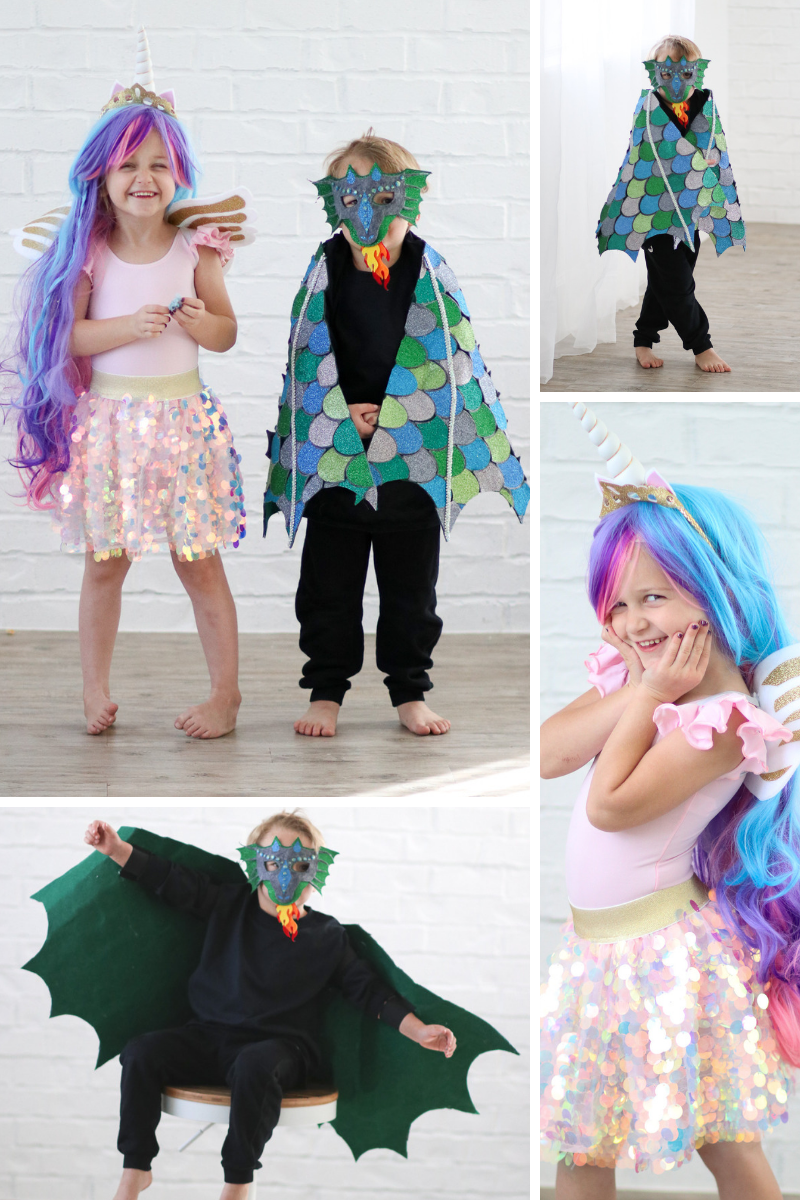
I love helping my children's Halloween costume visions come to life! This year I decided to use my Cricut Maker to speed up the process and allow me to be even more creative! I asked my children what they wanted to be this year and their responses were a unicorn (Princess Celestia to be exact) and a dragon. We set off to the local craft stores to pick up all of our supplies and then I came home to start designing some fun costumes to go with each idea.
This is a sponsored conversation written by me on behalf of Cricut. The opinions and text are all mine.
If you aren't already familiar with the Cricut Maker, here's a quick rundown. The Maker can cut hundreds of different materials ranging from delicate fabric like chiffon all the way to sturdy materials like basswood. What makes the Maker unique is its Adaptive Tool System. You can choose the tool that best suits your specific project (Rotary, Knife, or Scoring Wheel) to get perfect results! I've used it to cut quilt patterns, felt, wood, Iron-On, vinyl, paper, etc. The possibilities are truly endless!
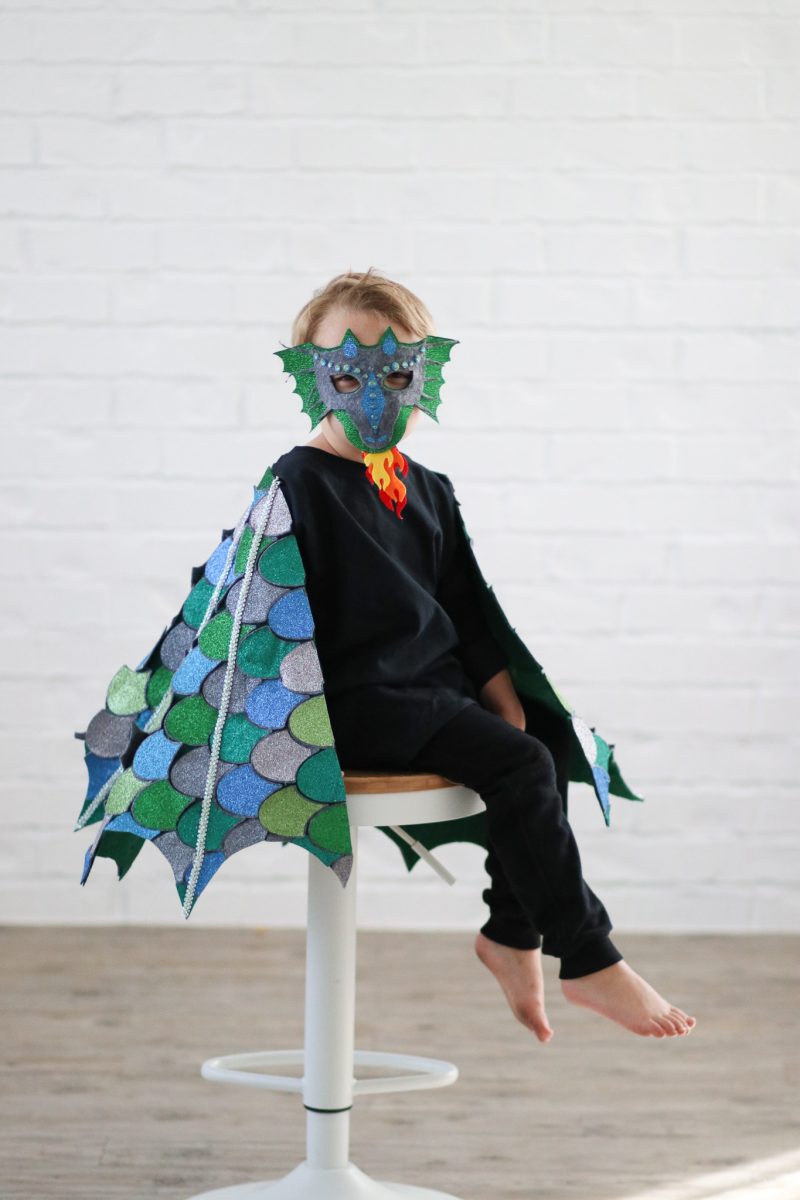
Let's start with the Dragon costume because this costume was a labor of love, and I'm a bit obsessed with how it turned out!
You can find the cut files for the Dragon Costume here
Supplies
Cricut Maker (read more about this machine here)
Cricut Glitter Iron-On I used a mixture of these colors, Cerulean, Aqua, Black Silver, Jade, Kelly, Kiwi, Green, Royal & Multi.
Cricut Mats (1 12x24 Inch Fabric Mat & 1 12x24 Standard Mat)
Weeding Tool
EasyPress 2 12 x 10 inch (read about the EasyPress here)
1 Yard Green Glitter Felt
1 Yard Gray Felt
Adhesive Gems
Silver Ribbon (Similar)
Black Elastic
White Skinny Elastic
Hot Glue Gun
VIDEO TUTORIAL
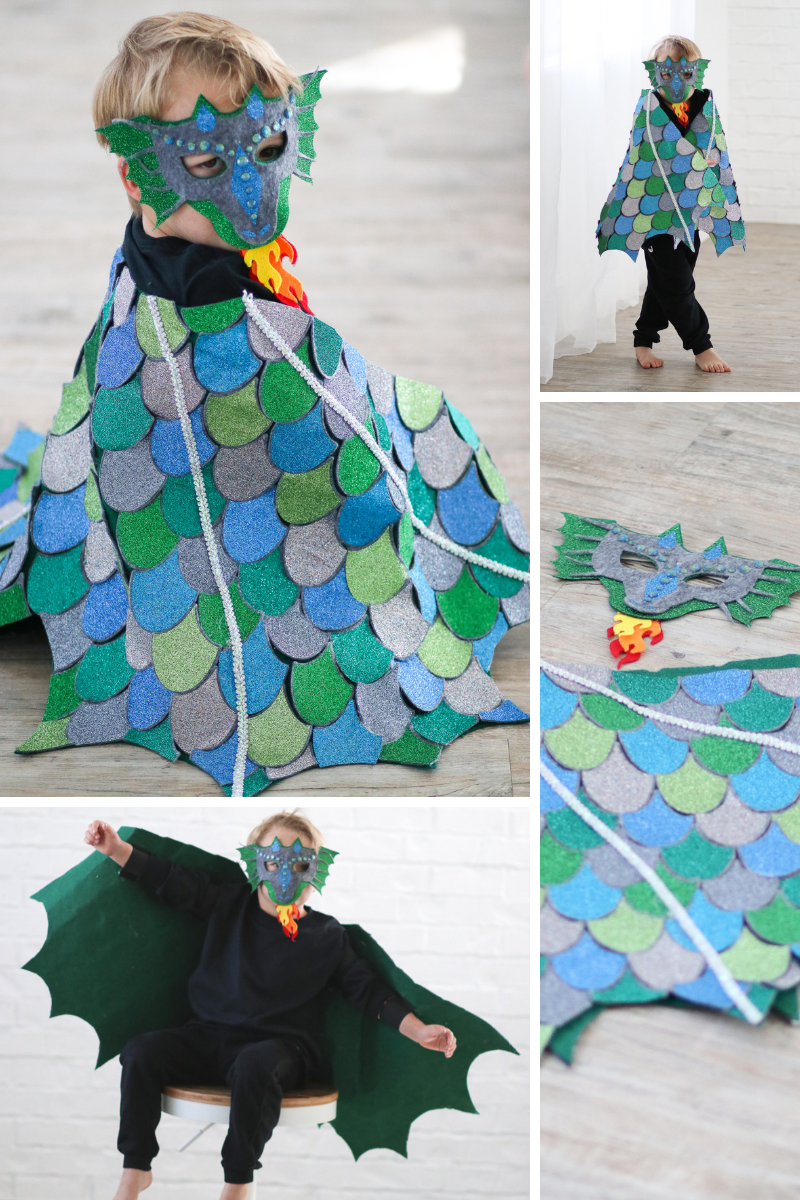
Create Scales
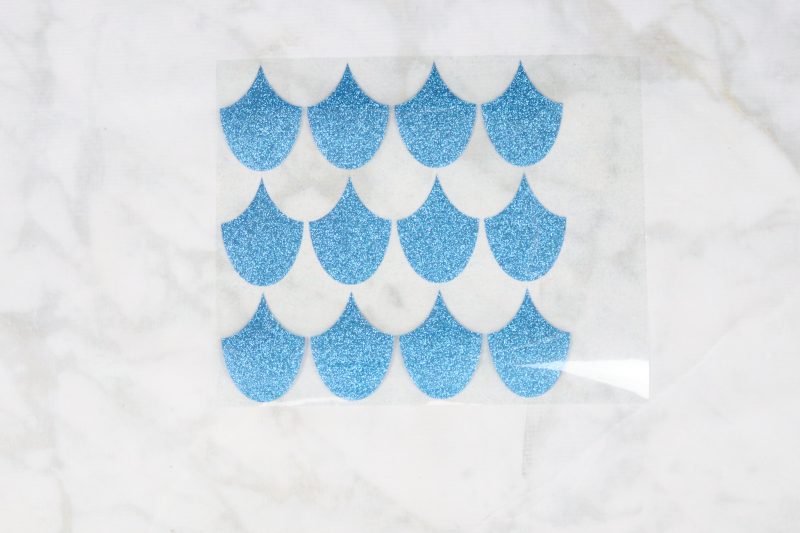
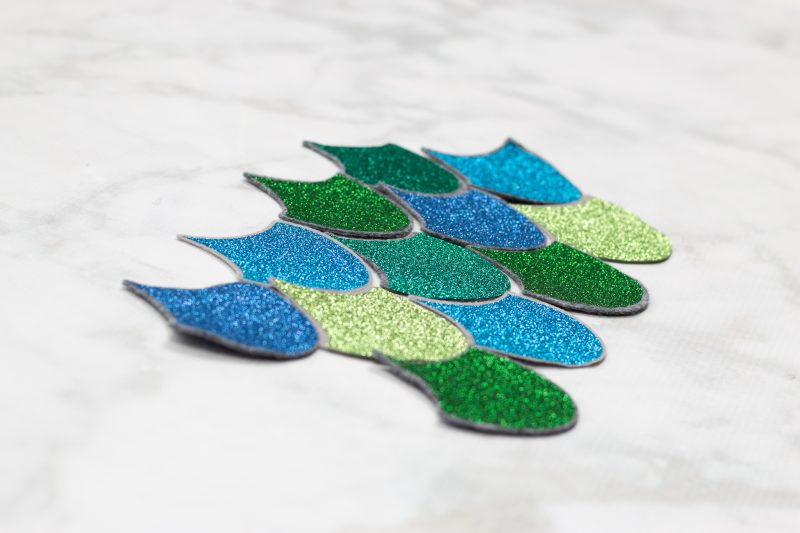
Begin by cutting out multiple scales from each different shade of Iron-On. I used about 8 rolls of Iron-On for this project.
If you need step-by-step instructions on how to cut Iron-On visit this post.
*You can rearrange the scales in D.S. so that there is less Iron-On being wasted when you cut out the scales.
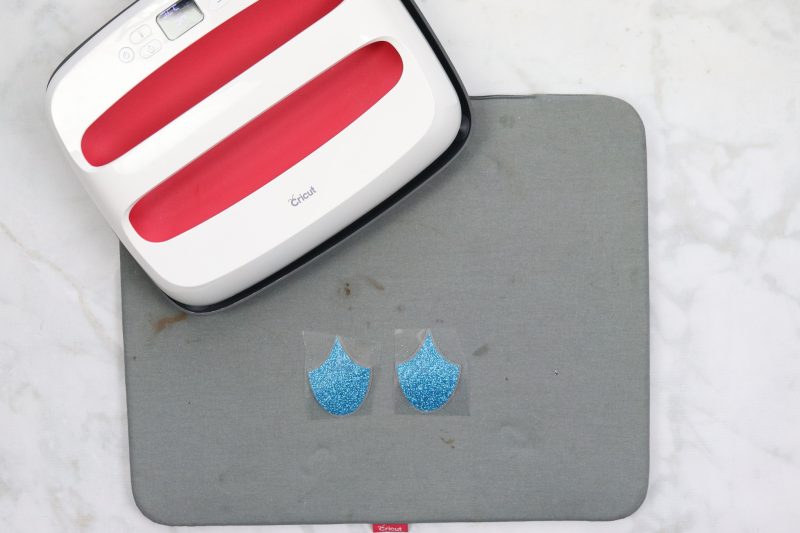
Once the scales have been cut out, cut out all of the grey felt scales. The felt scales are slightly larger than the Iron-On which gives them a bit of depth. If you wanted to save time, you could opt to only cut the Iron-On.
(Check for coupons and sales to save money on Iron-On before you buy it!)
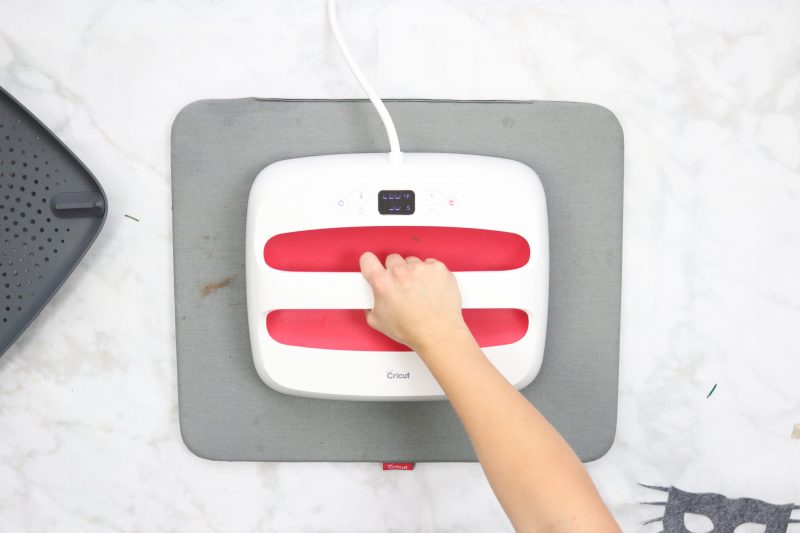
Center the Iron-On in the middle of the gray scale and use the EasyPress to adhere it completely.
I like to set out about 6 felt scales, place the EasyPress on them for about 15 seconds to heat them up and then lay the Iron-On on top. This ensures a better seal. Repeat this process until you have enough scales to cover the wings completely.
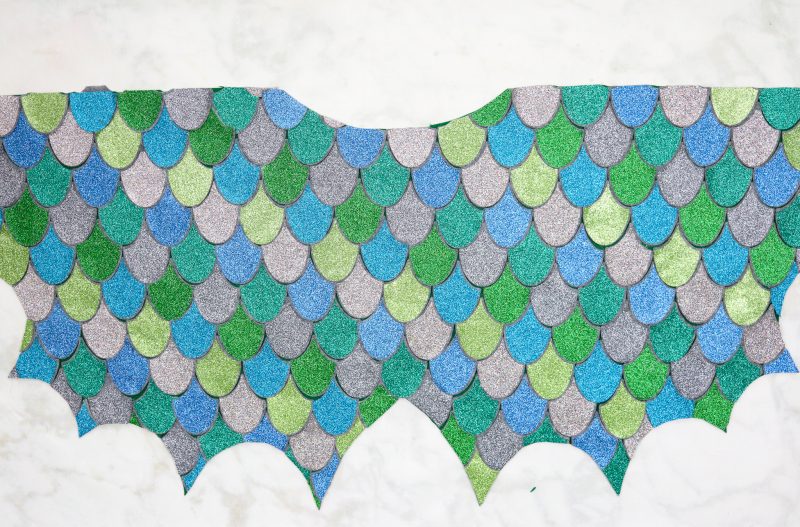
Create Dragon Wings
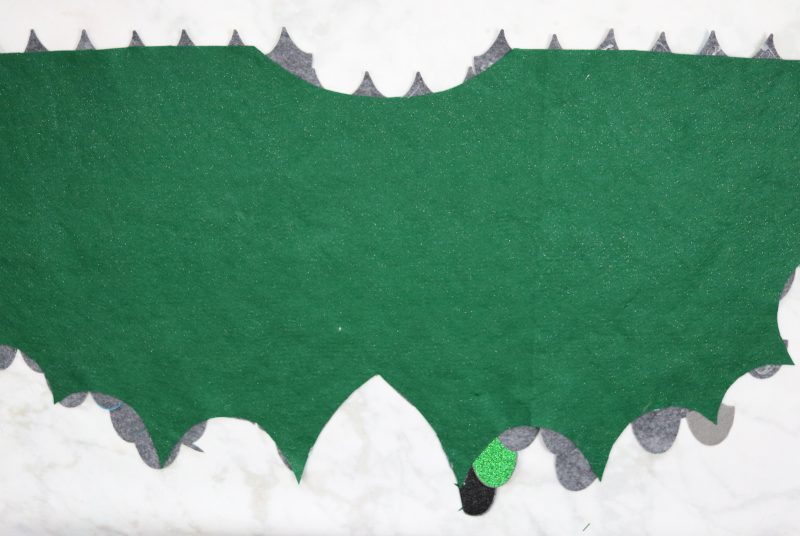
Cut out a set of wings. I measured my son's wingspan and cut out a large rectangle that was about 15 inches wider than that. I folded the rectangle in half and used a cereal bowl to cut out half circles around the bottom to give the wings some shape.
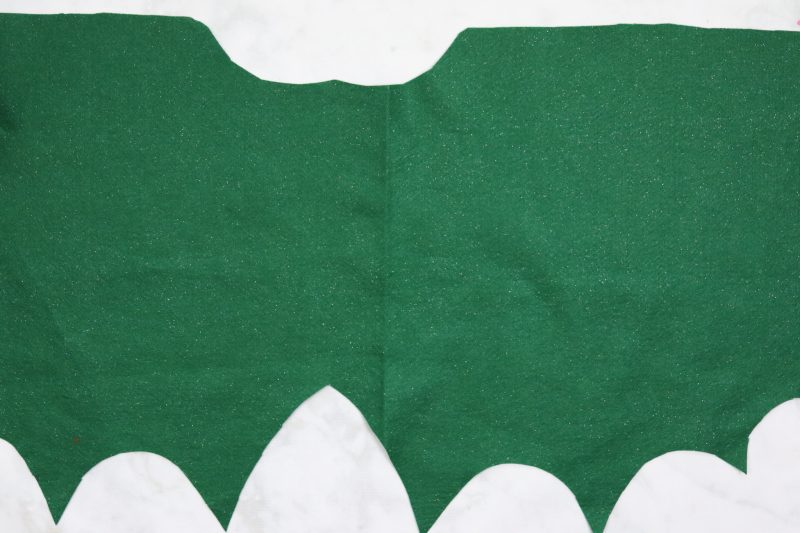
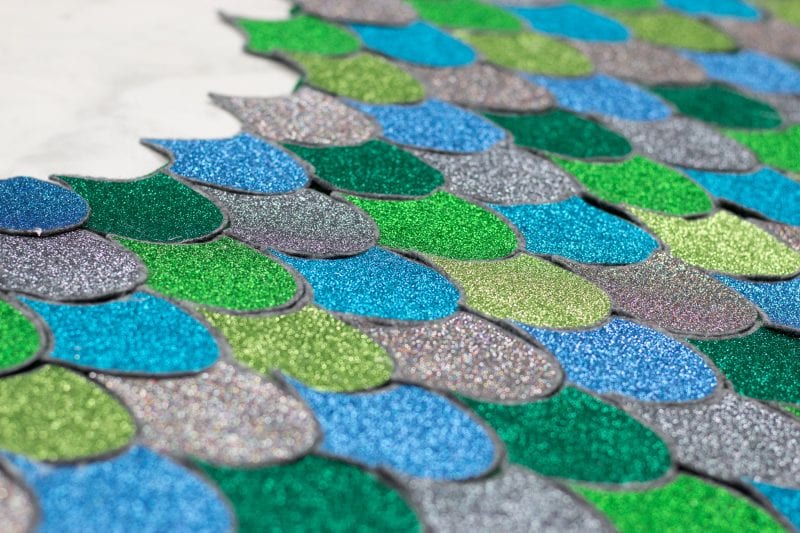
Place scales on top of the green wings until all of the green felt is completely covered.
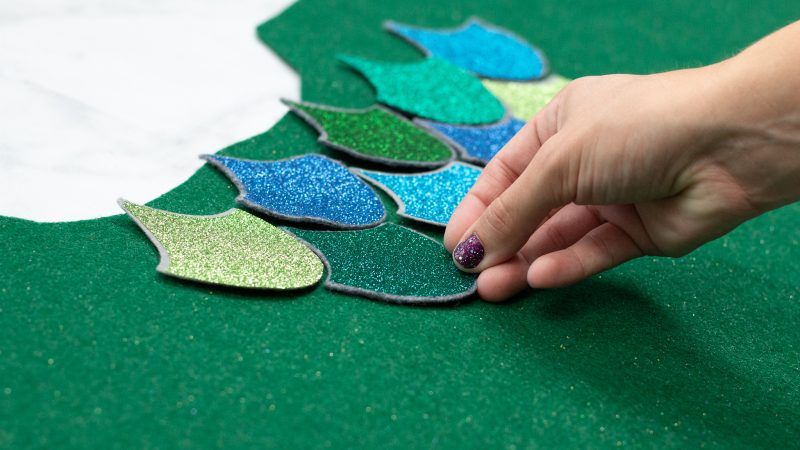
Attach Dragon Scales to Wings
Use hot glue or fabric glue to attach each of the scales to the wings.
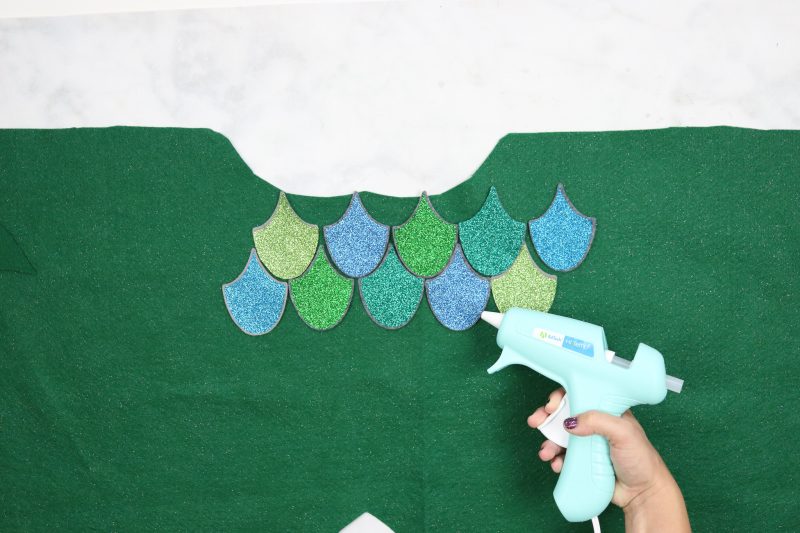
Flip the wings over. Cut away the excess scales from the wings following the green felt curves.
Doesn't it look pretty? Now I really want to make a mermaid tail with this same technique!

Attach Ribbon to Wings
Use ribbon and hot glue to create spines along the wings.
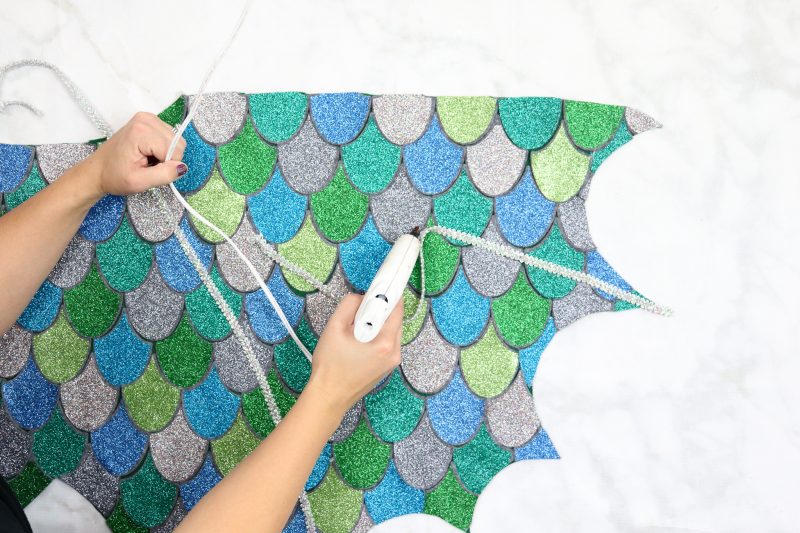
Attach Elastic
Attach elastic to the inside of the wings. Measure the child's wrist and bicep to get an idea of the size of elastic you will need.
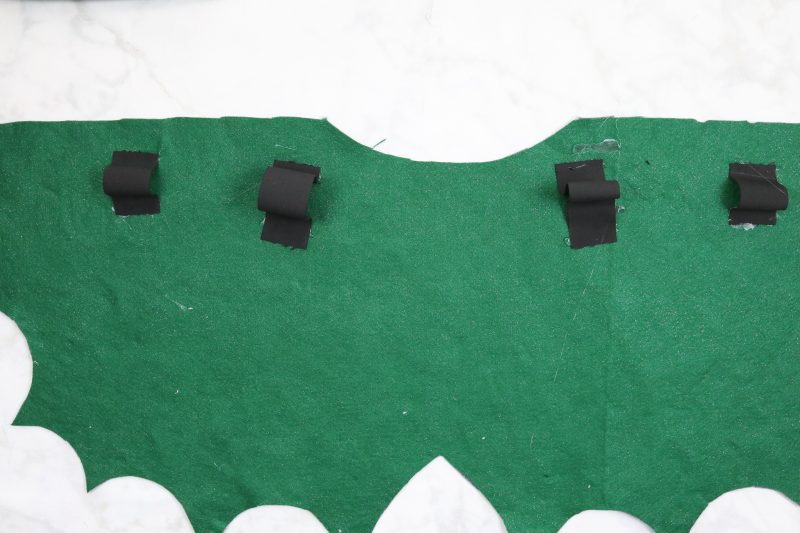
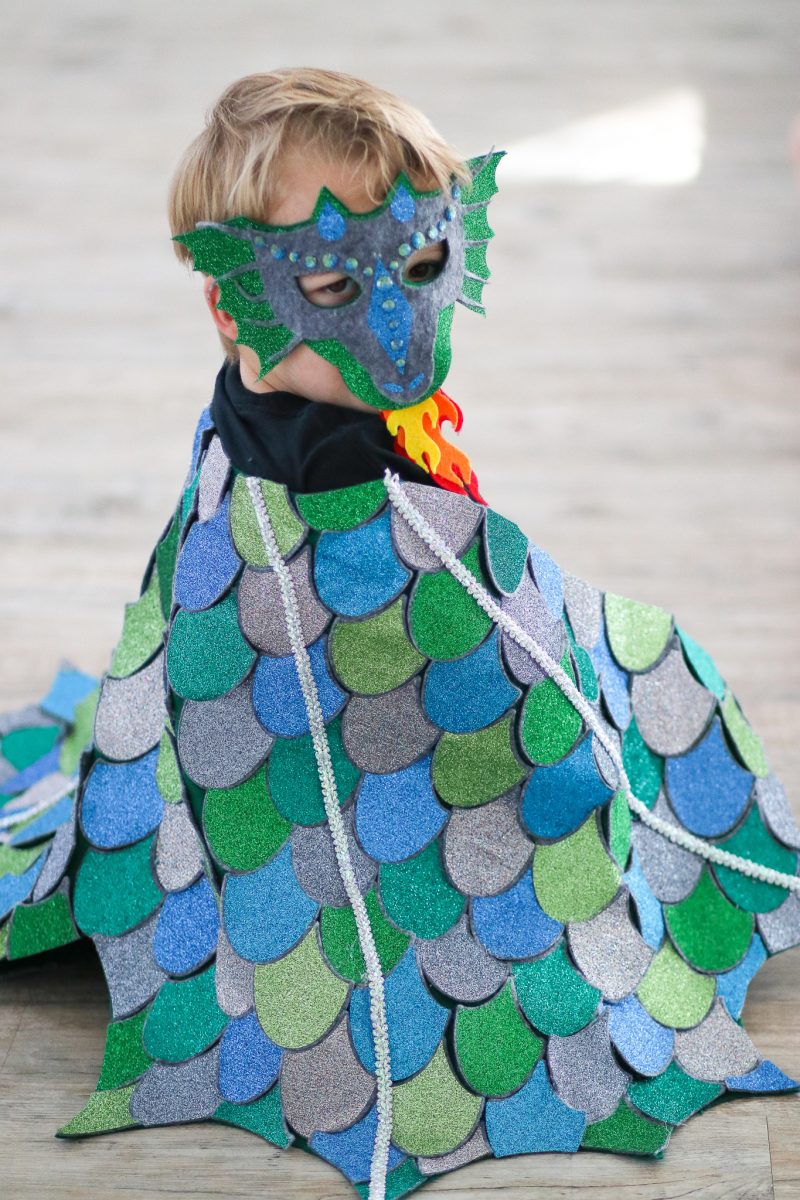
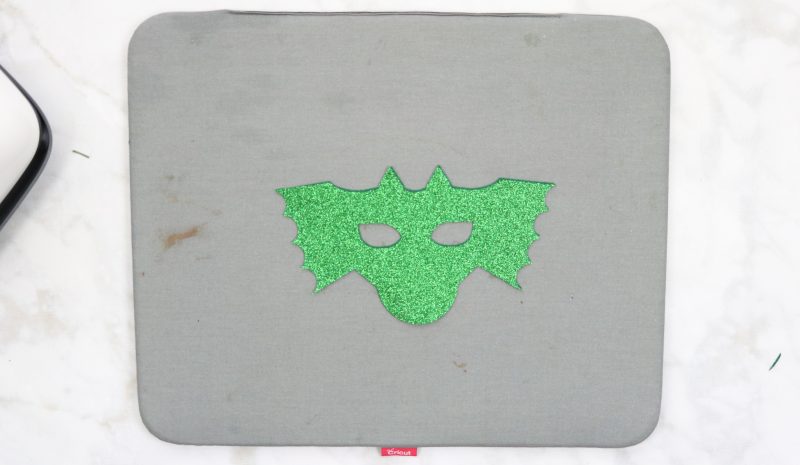
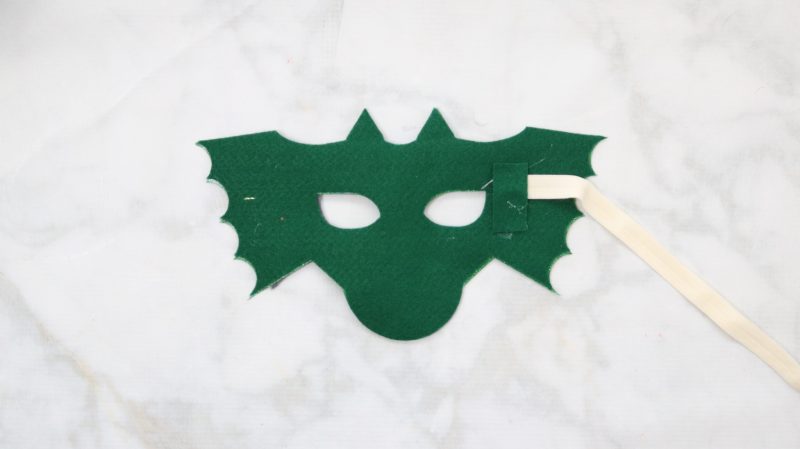
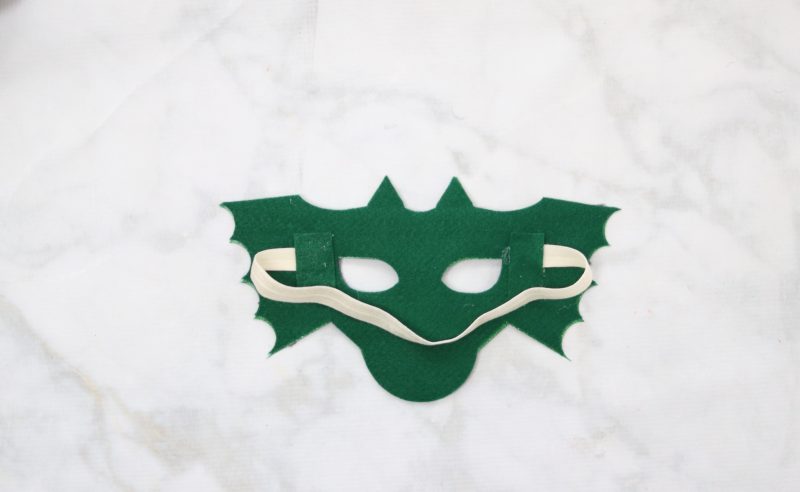
Create Dragon Mask
Cut out each of the pieces for the mask using your Cricut Maker.
Adhere Iron-On
Using the EasyPress iron the Green Glitter Iron-On to the green felt.
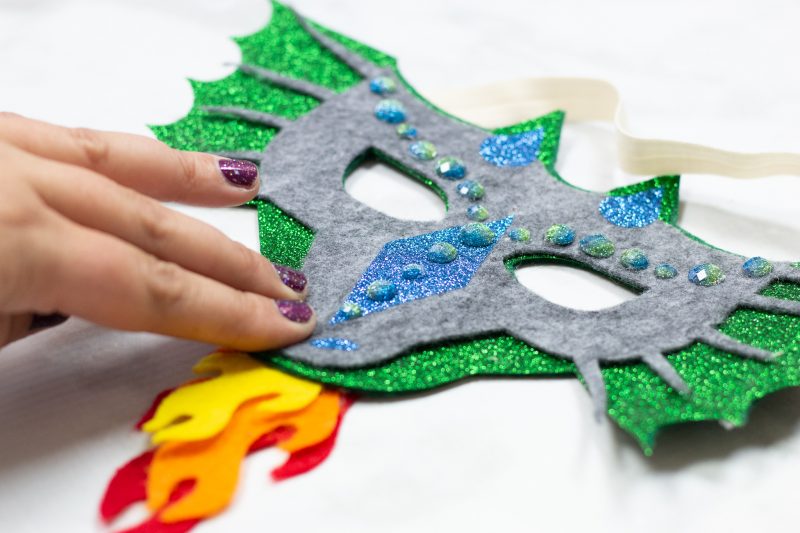
Attach the blue glitter Iron-On to the grey felt.
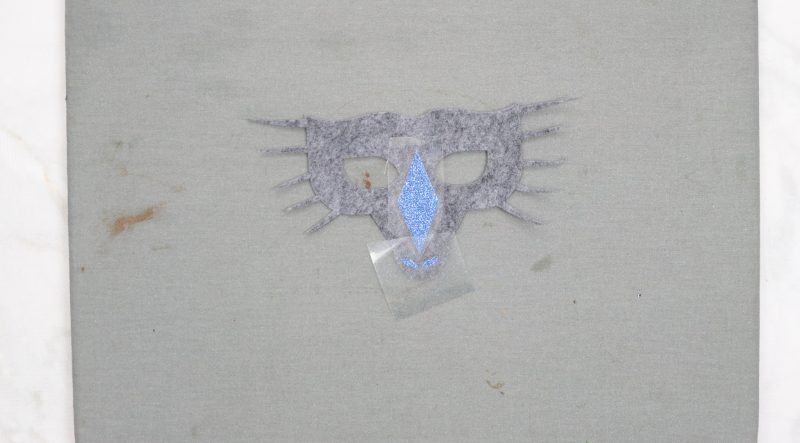
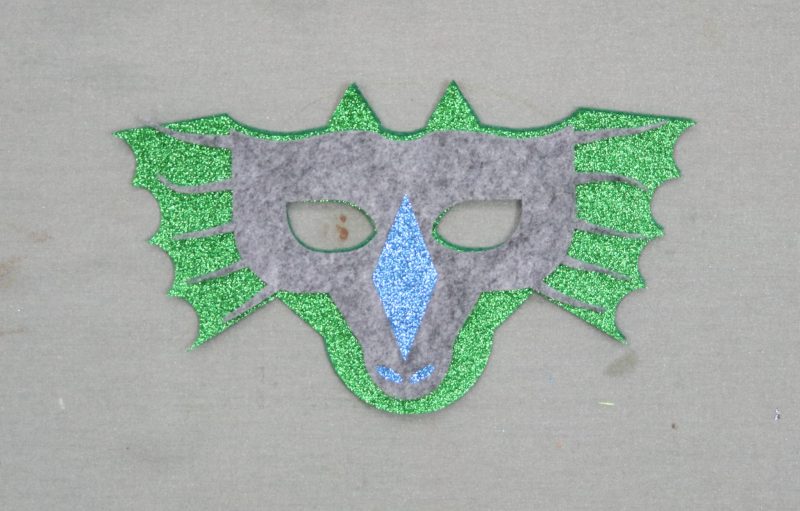
Using hot glue attach the grey felt to the green glitter. The eyeholes on the gray mask are slightly larger than the green so that it will peek through.
Attach Elastic
I added some pretty rhinestones along the brow and nose to give the mask a bit more definition.
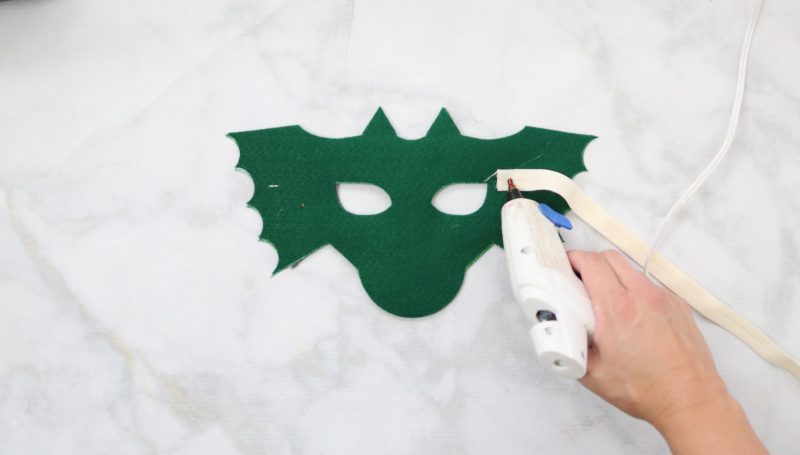
Place the mask on your child's face to get an idea of how long the elastic should be.
Using a hot glue gun attach the elastic to the felt mask. I added an extra piece of felt across the elastic to give it more support.
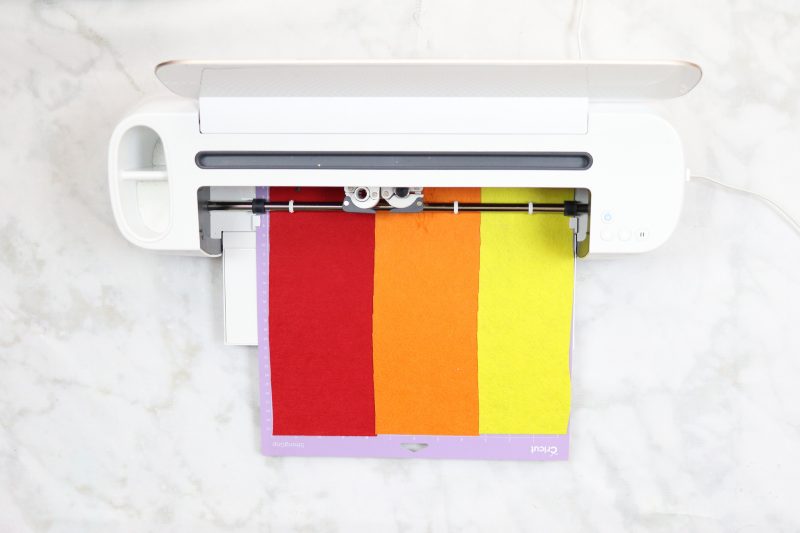
Add Flames
Cut out the flames. I moved all three images to the same mat so I could cut them all at once. I'm all about saving time while crafting!
My son was over the moon when I showed him his Halloween costume. I'm pretty glad too because he can be a harsh critic and it's always a risk making something for a finicky toddler! Ha!
Now I just have to convince him that he can't wear this costume to preschool every day. Wish me luck!
Unicorn Tutorial
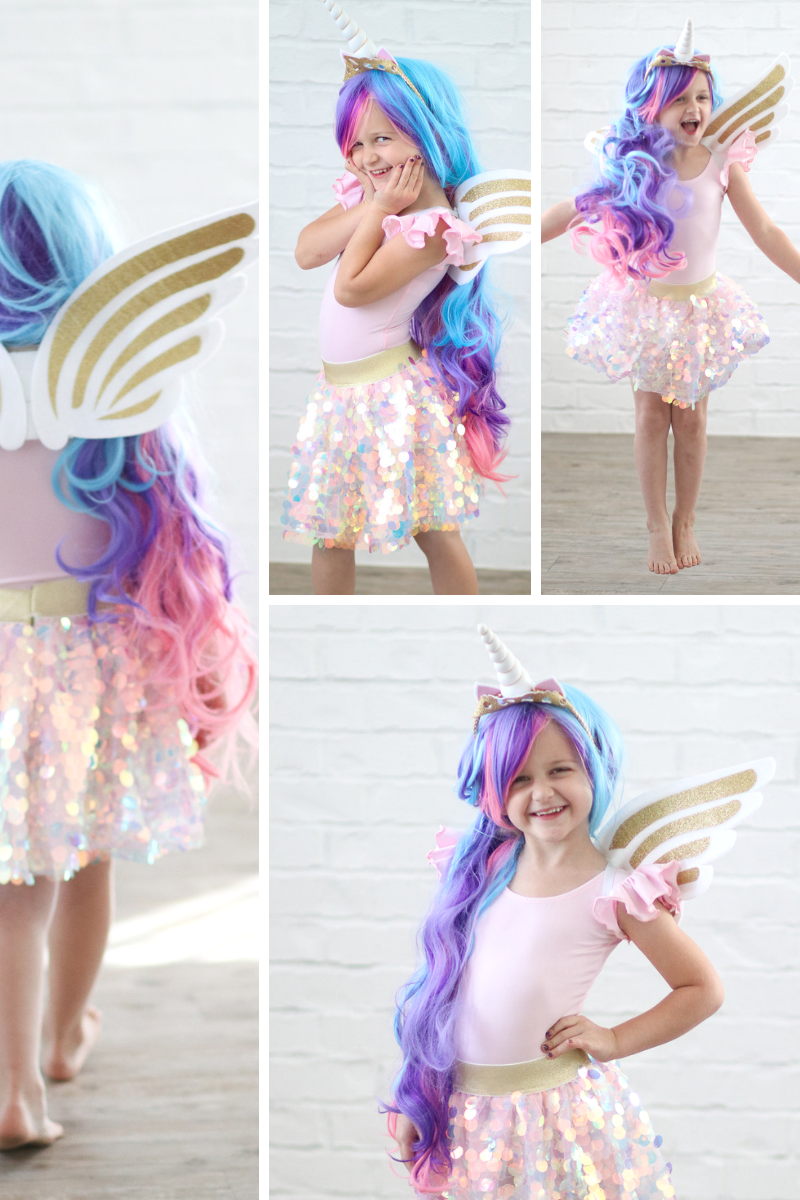
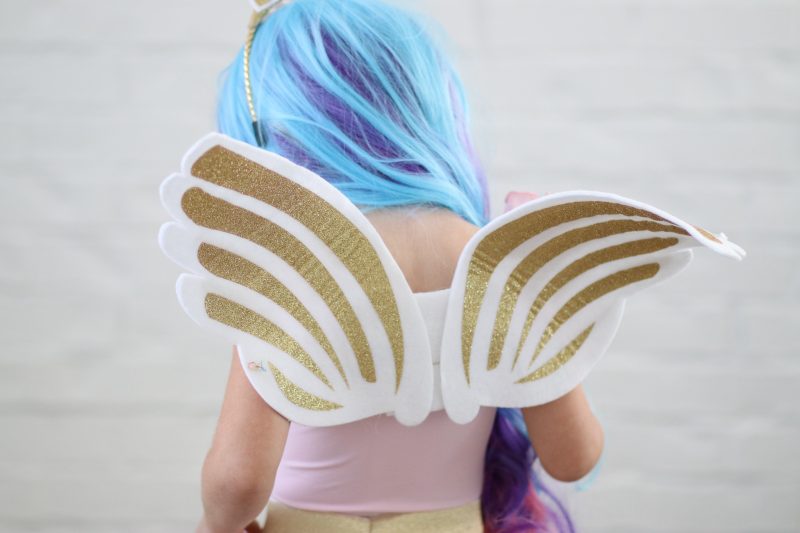
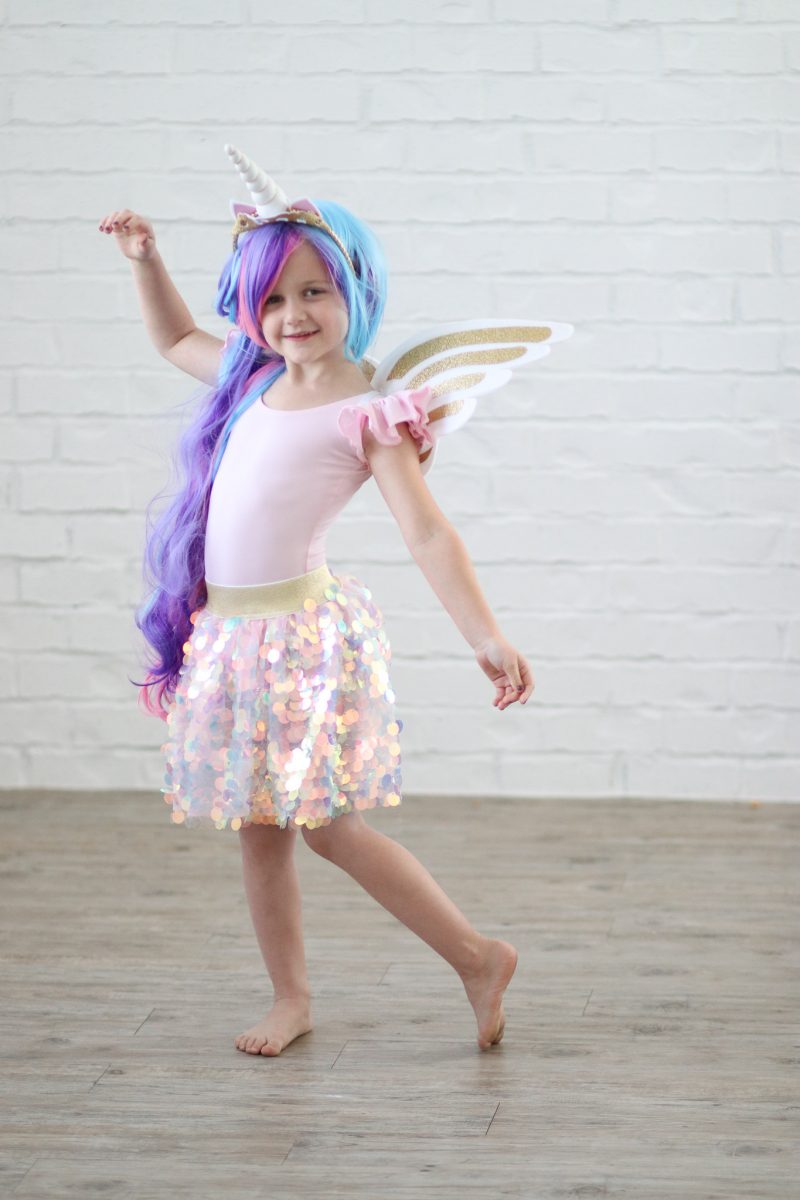
I'm dying over how this costume turned out!! Eek! My daughter requested a Princess Celestia costume complete with multi-colored hair, wings and plenty of sparkles! If you have a My Little Pony-loving daughter she's sure to love this costume!
I designed these cute wings in Designs space along with this crown and unicorn ears. We used felt and gold Iron-On to create all of these costume pieces. The skirt was also hand-made but it did include a sewing machine! Sorry, hot glue just wouldn't cut it for this project! 😉
Supplies
Cricut Maker (read more about this machine here)
Cricut Glitter Iron-On (gold and light pink)
Cricut Mats (12x24 Inch Fabric Mat & 12x24 Standard Mat)
Weeding Tool
EasyPress 2 12 x 10 inch (read about the EasyPress here)
1 Yard White Glitter Felt
Thermoweb Firm Craft Interfacing
1/2 inch White Skinny Elastic
Hot Glue Gun
Unicorn Horn
Gold Headband
Leotard (Similar)
Unicorn Wig (Similar)
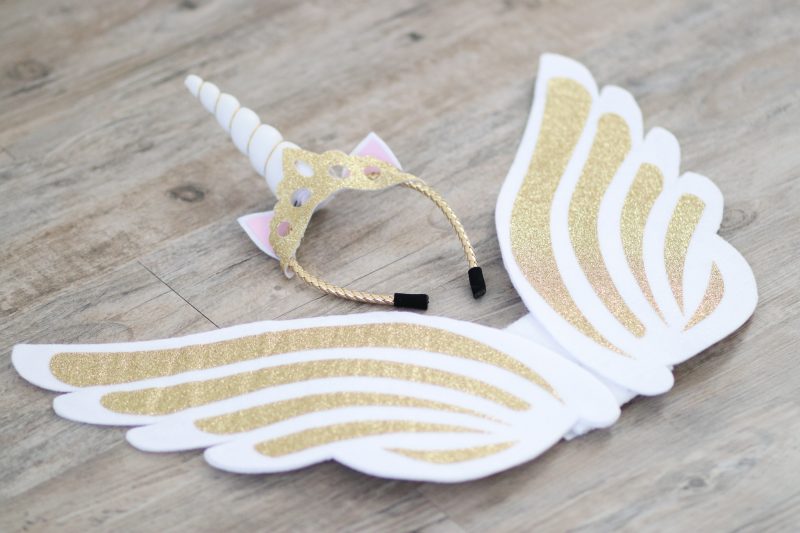
Cut out all of the pieces using this link to Design Space.
You should end up with two sets of felt wings, one set of interfacing wings, two sets of gold glitter accents for the front and back, a crown in felt and Iron-On and felt ears and accents.
VIDEO TUTORIAL
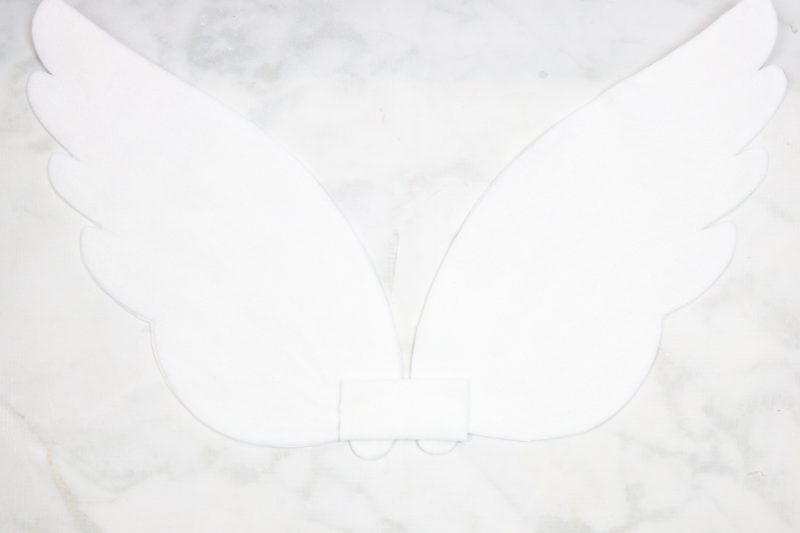
Create Unicorn Wings
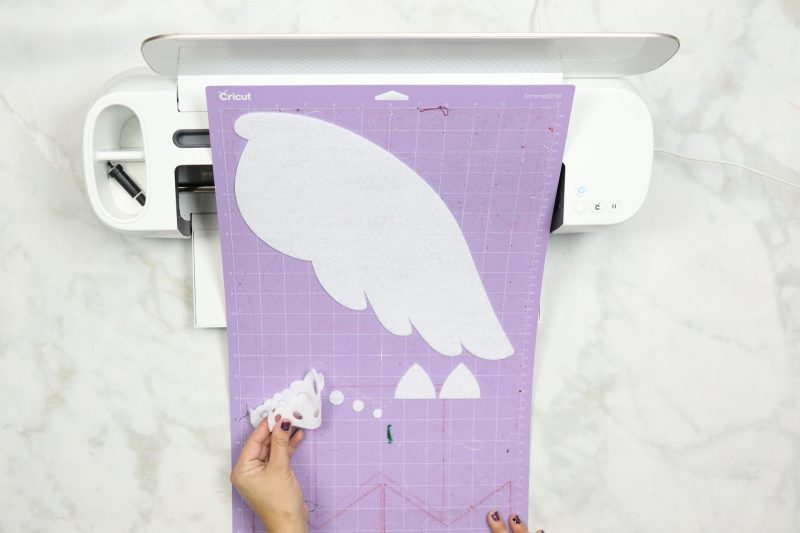
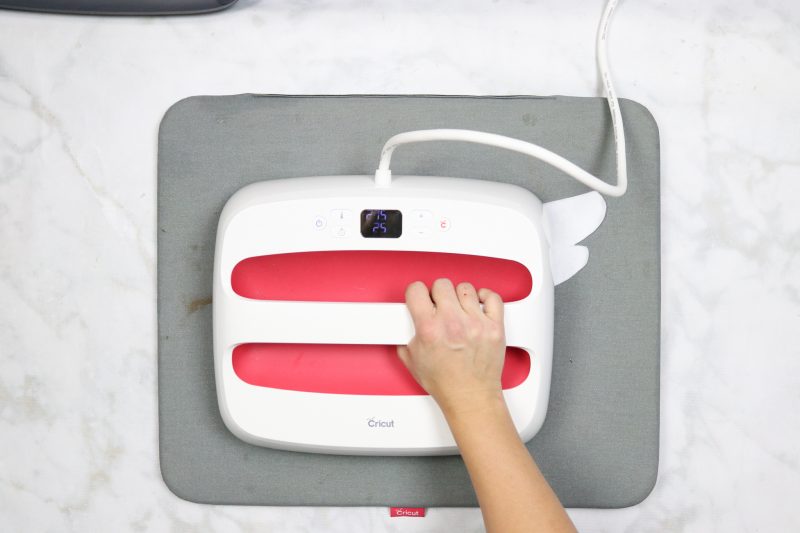
Apply the craft interfacing to the wings using the EasyPress. The interfacing will give the wings extra firmness, so they don't flop over while being worn.
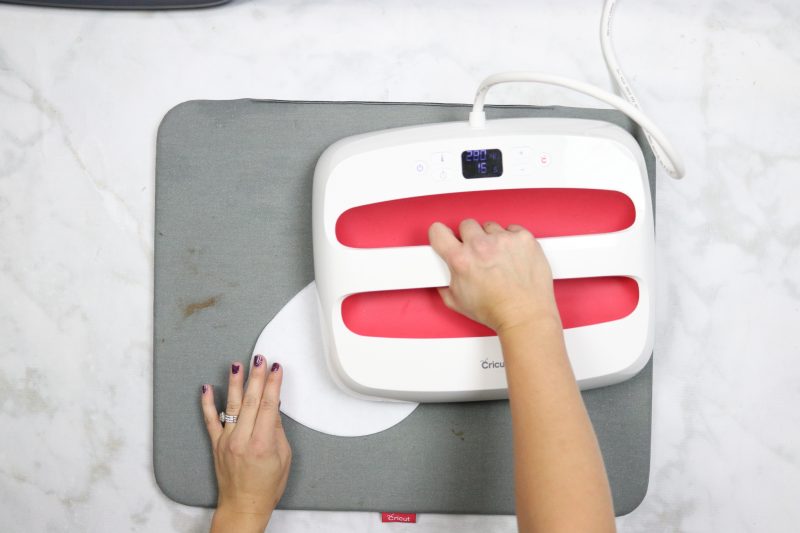
Apply the Gold Iron-On to the right side of all four pieces of white glitter felt. Then use hot glue to attach the front and back wings together.
Use a small rectangular piece of felt to attach the wings together. ( I ended up adding a thicker section a bit higher as well.)
Measure around the child's shoulder and attach elastic to the wings.
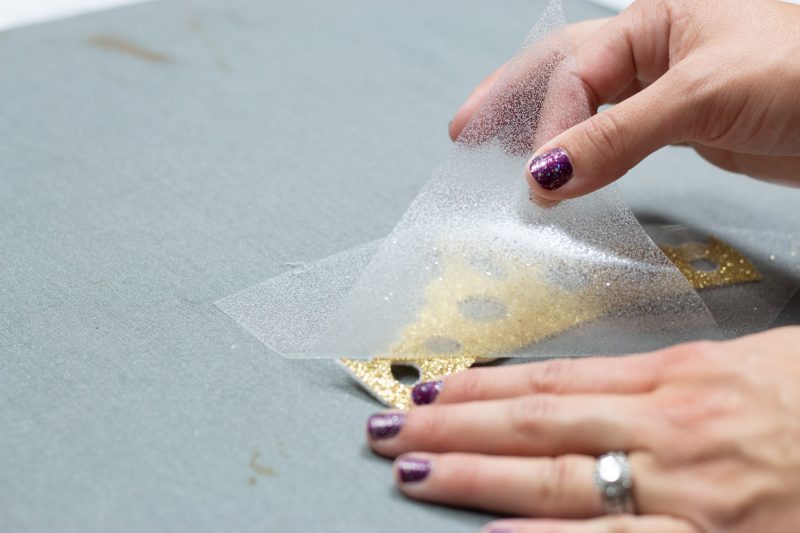
Create Crown
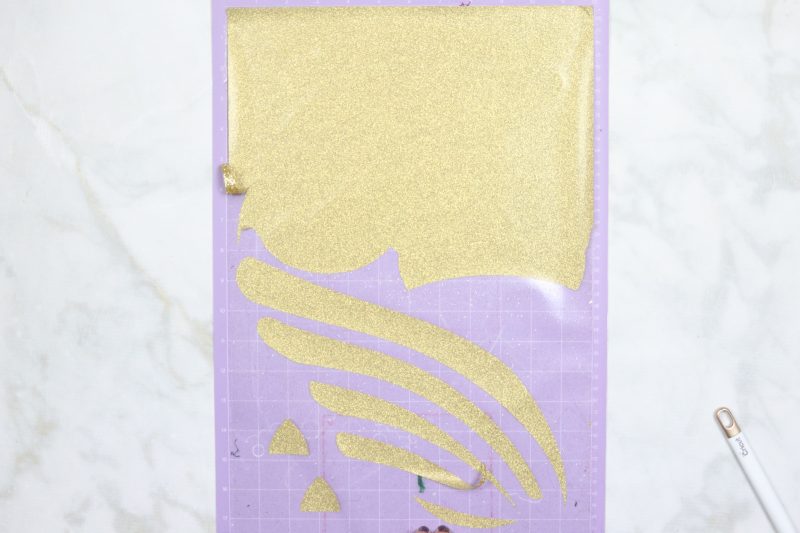
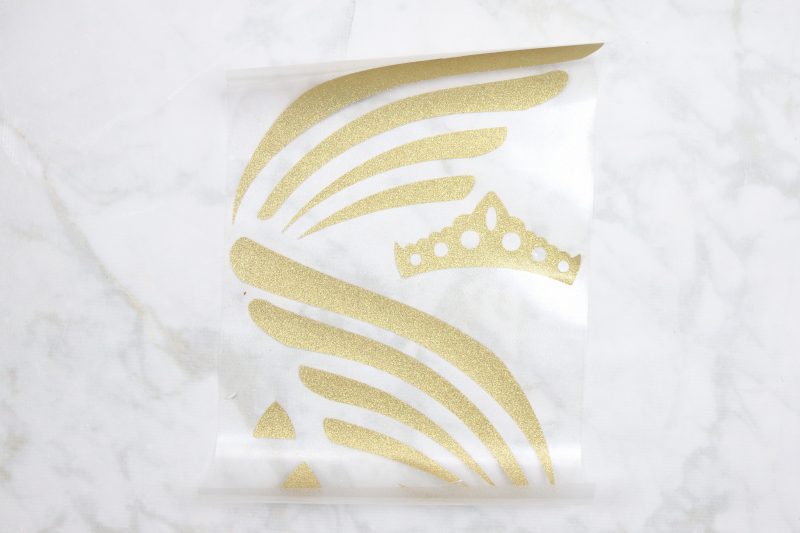
Apply the Gold Glitter Iron-On to the white felt crown.
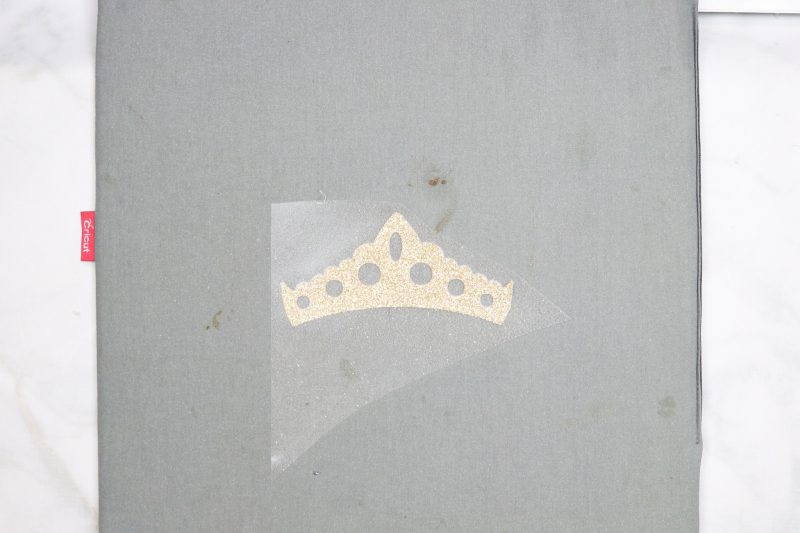
Gently peel back the protective sheet from the Iron-On, repeat this process with the ears.
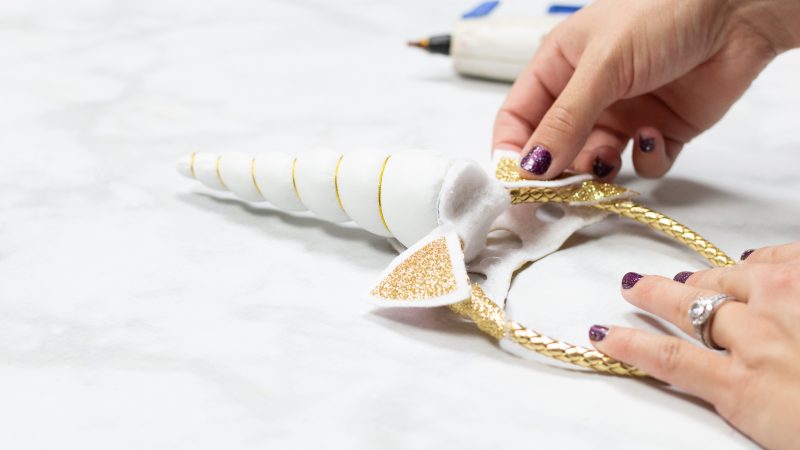
Assemble Unicorn Headband
Glue the unicorn horn, ears and crown to a headband.
Tadah! Wasn't that simple?
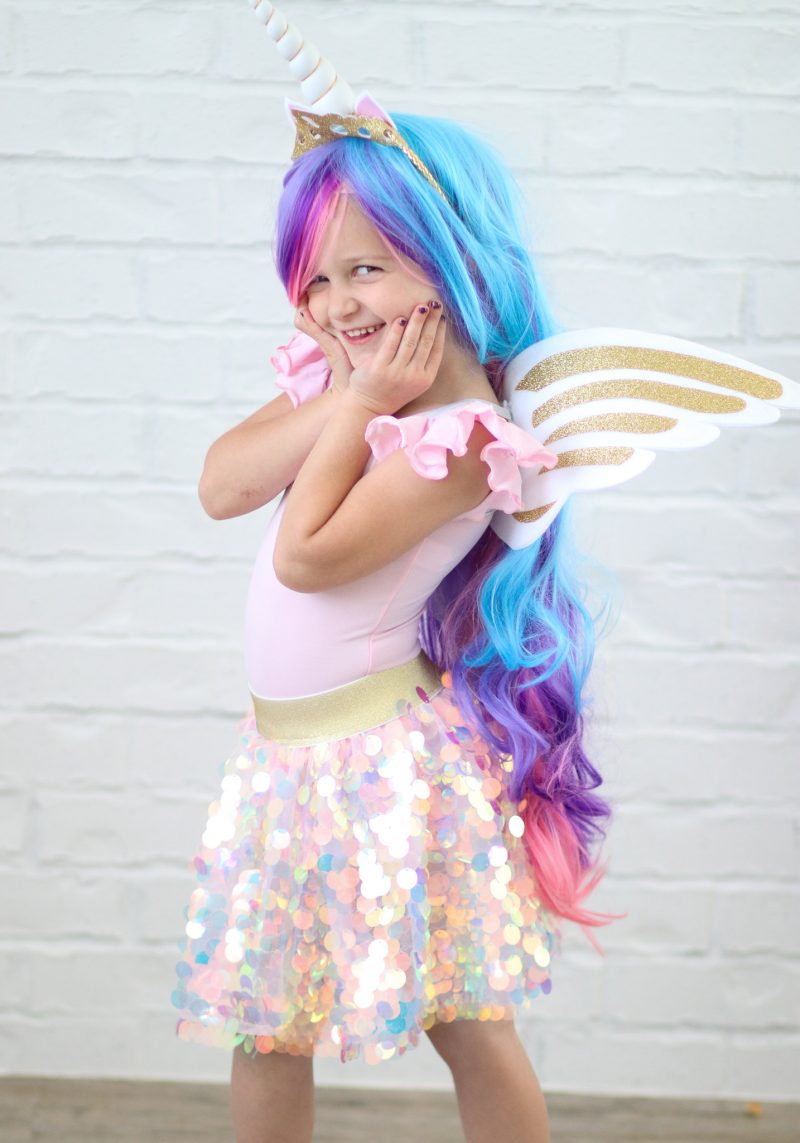
I told her to make a horse pose and this is what I got!
I don't know what I would have done without my Cricut Maker for these Halloween costumes! It was a huge time-saver and let's be honest; I would never have attempted the dragon costume without it!
I can't wait to see what you make with this DIY Halloween Costume Tutorial! Find me on Instagram and be sure to tag me with what you create!
This is a sponsored conversation written by me on behalf of Cricut. The opinions and text are all mine.
Leave a Reply