DIY Learn How to Make a Handmade Halloween Costume Mask with This Easy Step by Step Tutorial.
I’m a self-proclaimed Halloween lover and with the last name Coffin, how could I not be? There’s just something extra special about the chill in the air, the smell of all things pumpkin spice and the magic of dressing up in a costume.
I’ve been counting down the days until it was “socially acceptable” for me to start posting all things Halloween… Well, I’ve waited as long as humanly possible, so here it goes!
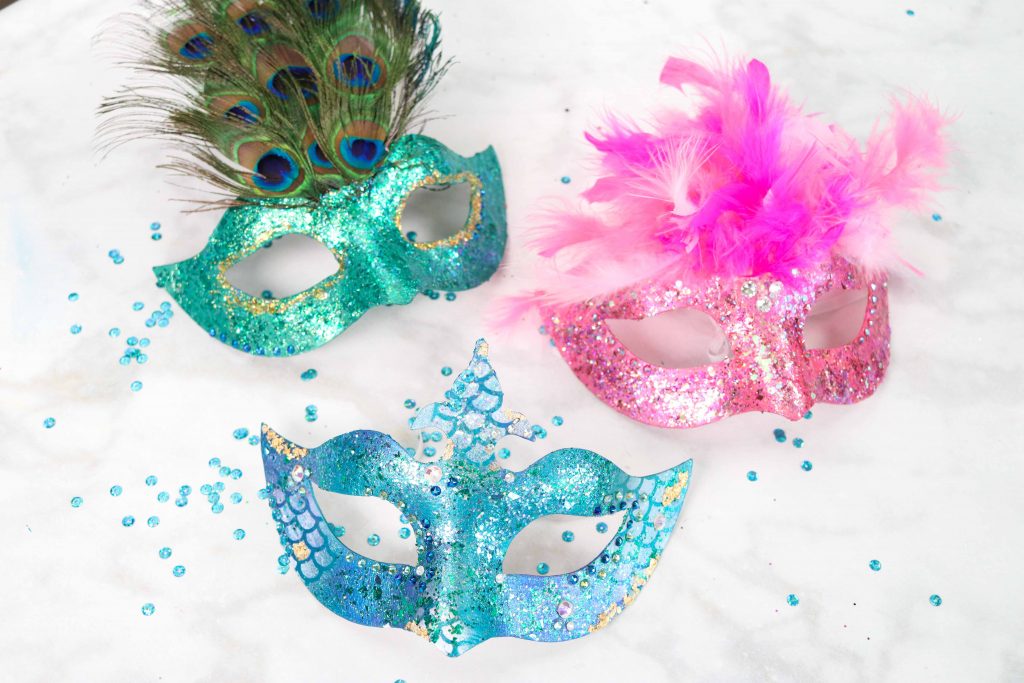
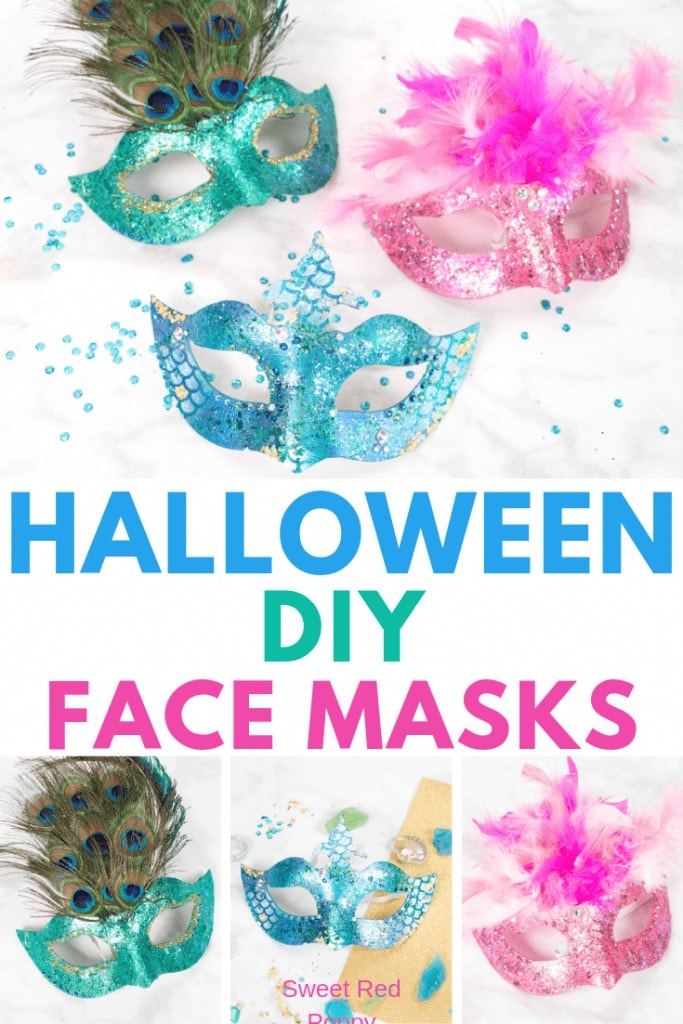
These DIY Halloween masks are easy to make and they are total show-stoppers. You’re sure to be the talk of the party with any one of these glittering masks!
Let's go ahead and get started on our Halloween masks! Below is a list of the supplies you will need. I found all of my supplies at my local craft store.
Supplies
- Paper Mask
- ColorShift Acrylic Paint
- Glitterific Paint
- Paint Brush
- Swarovski Crystals
- Beacon Gem-Tac
- Tweezers
- Optional: Feathers, Gold Foil, Spray Paint & Vinyl
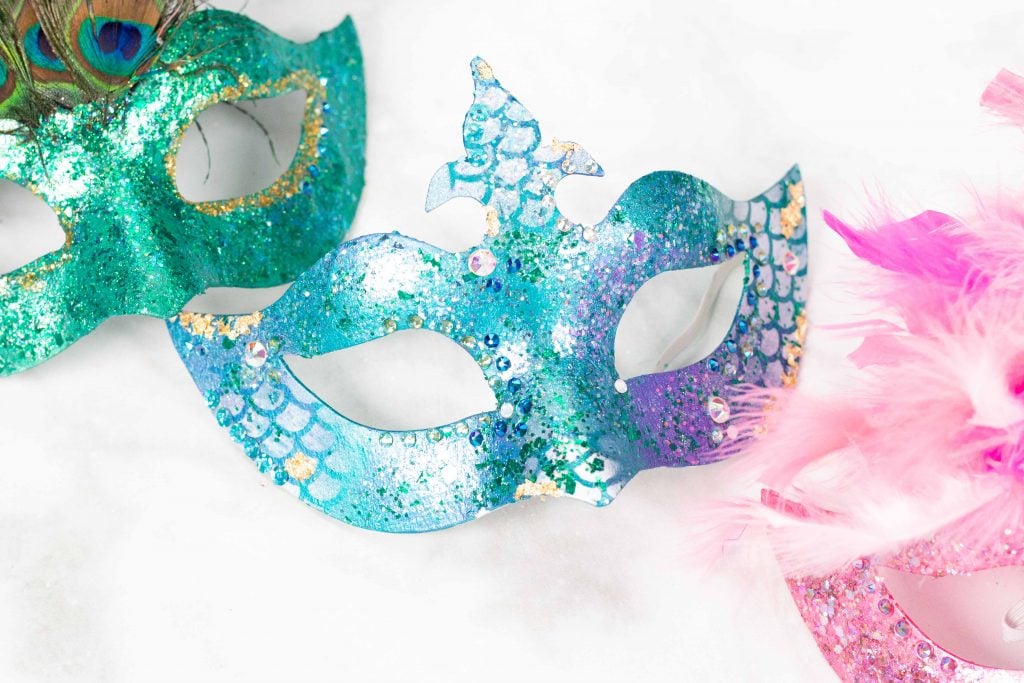
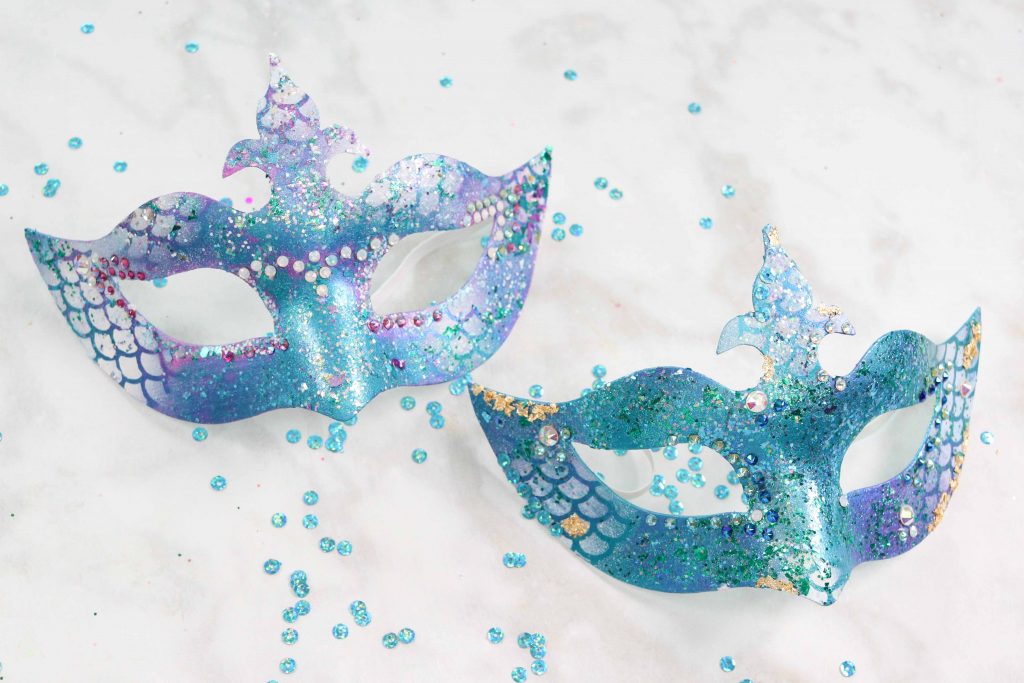
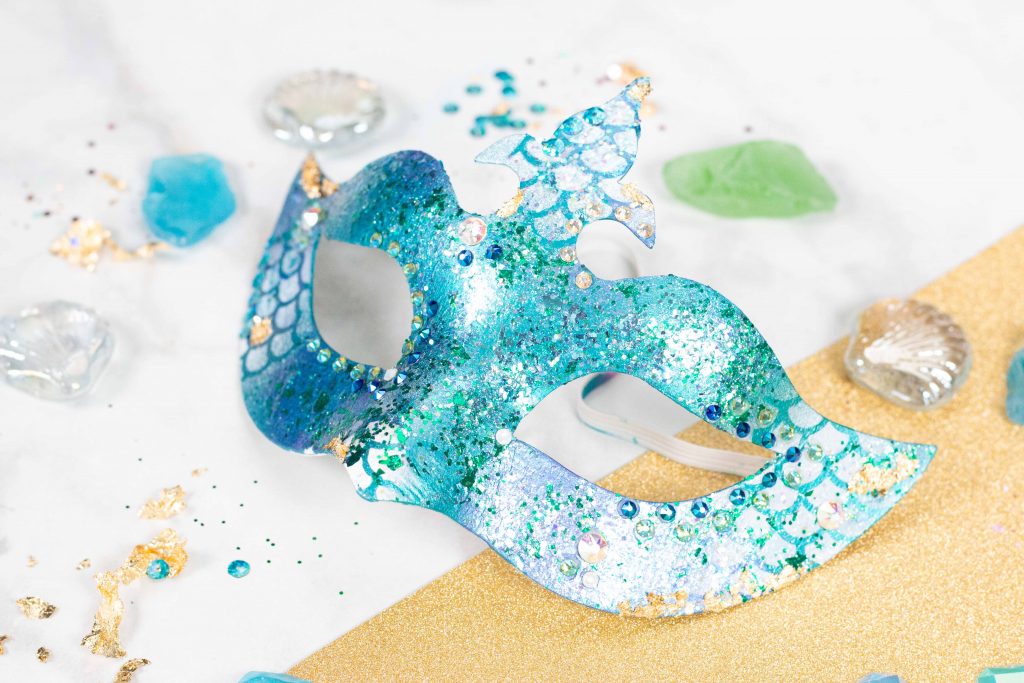
DIY Mermaid Mask
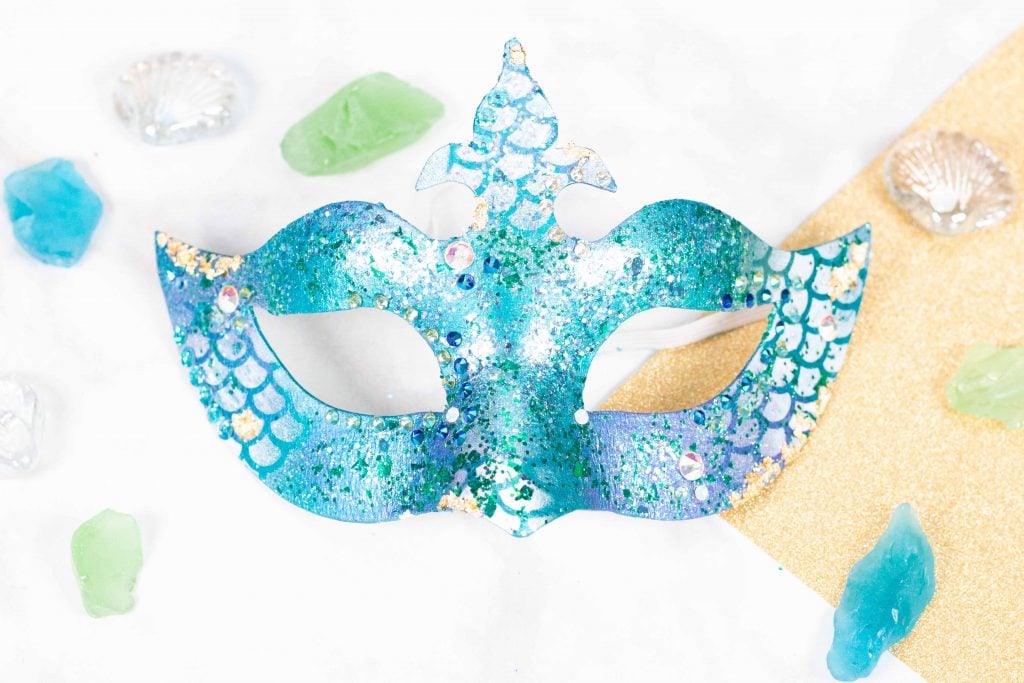
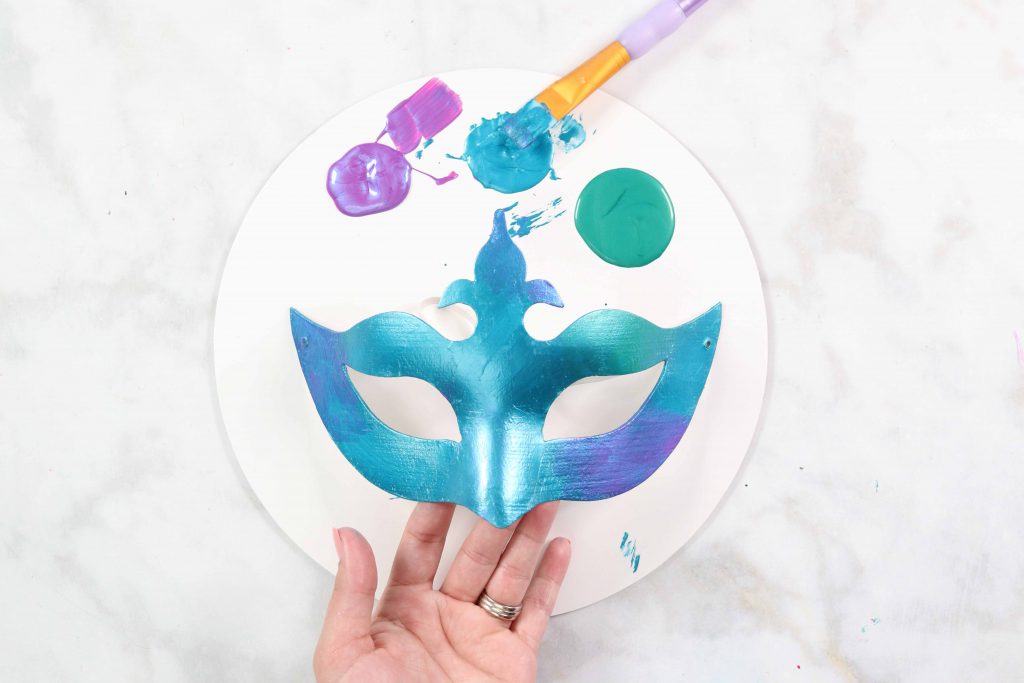
Begin by painting the mask with a base coat layer of blue paint.
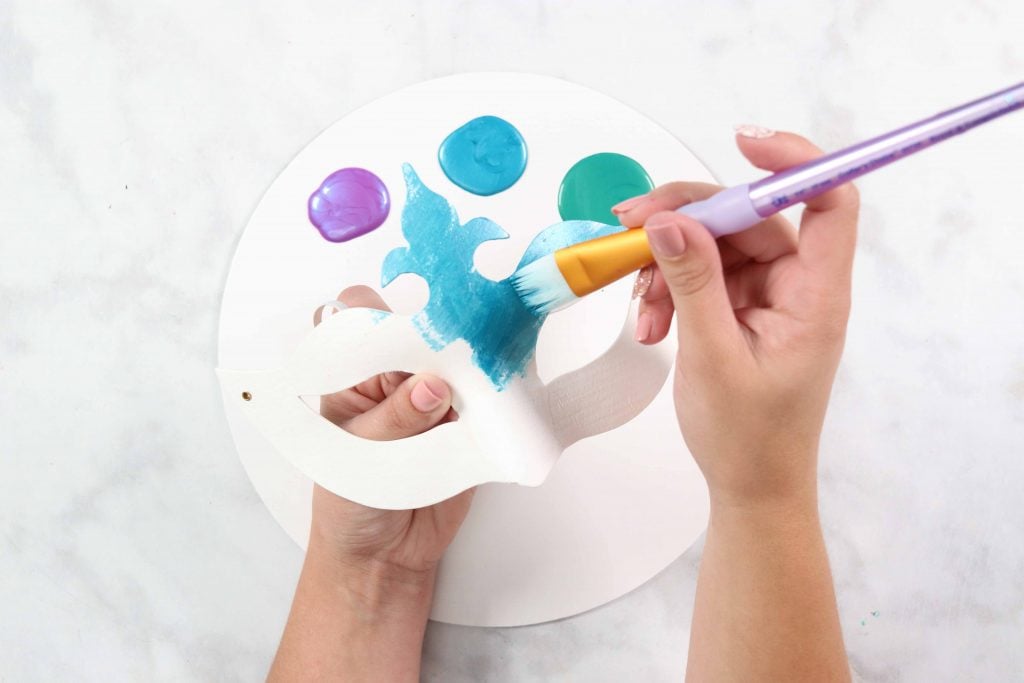
Add small touches of purple and green paint to the mask to give it
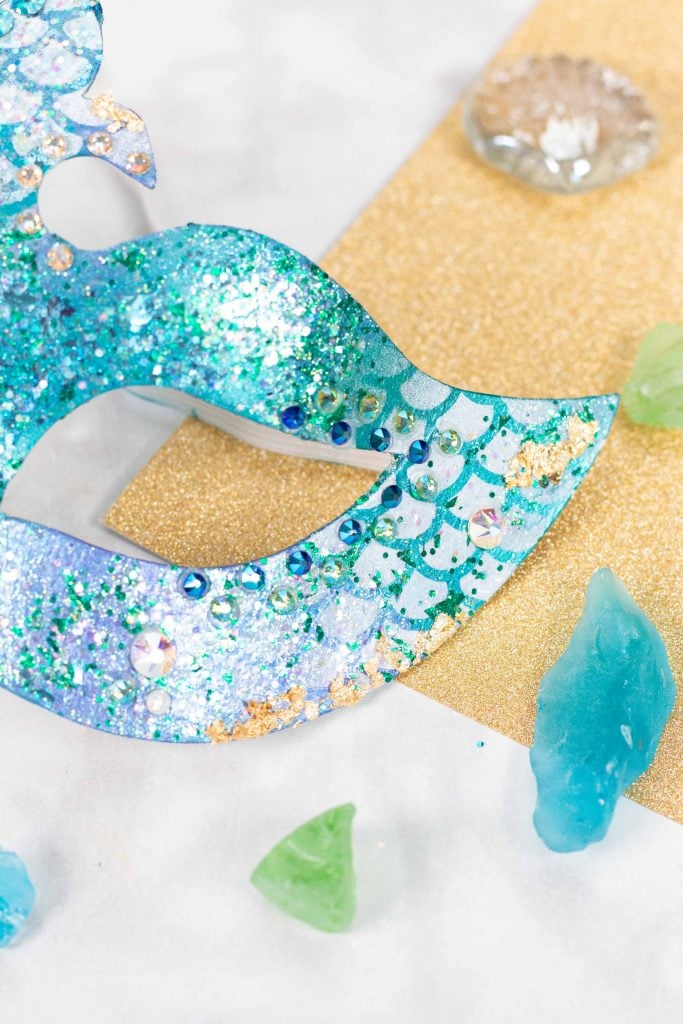
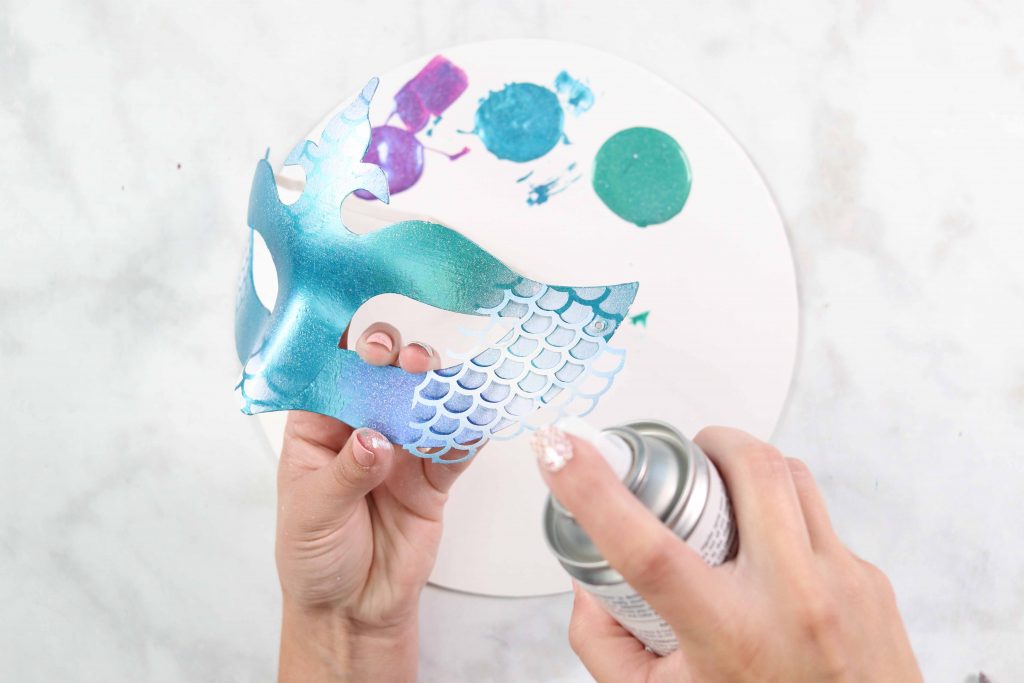
Using a Cricut machine, cut out a mermaid scale pattern out of removable vinyl.
Lightly adhere the vinyl to the mask and spray over it with white spray paint. It only needs a tiny amount, so don’t
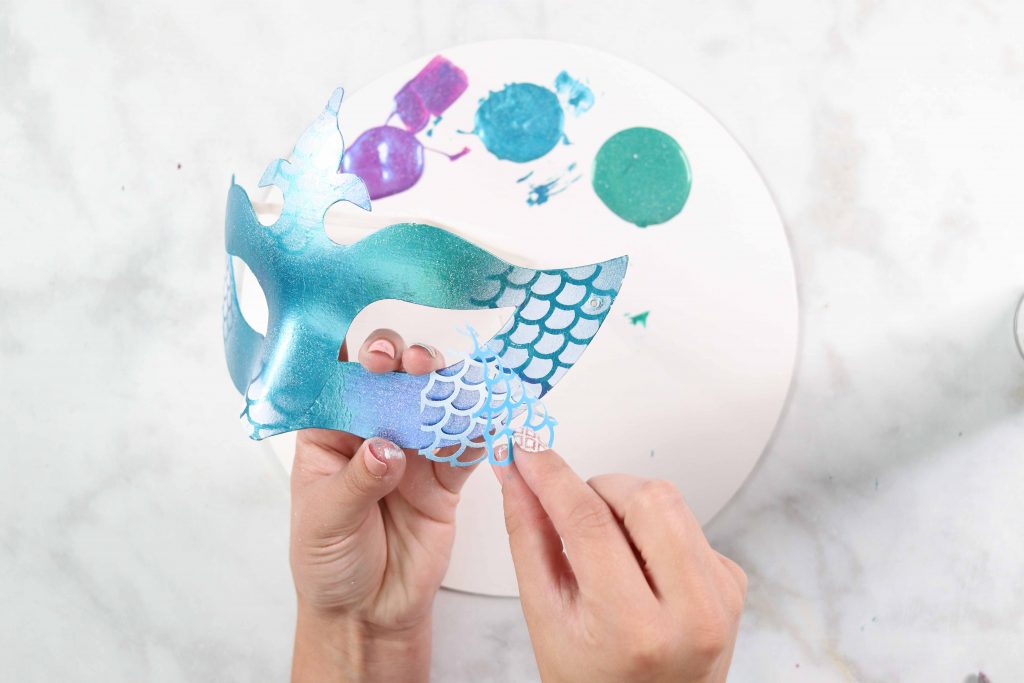
Carefully remove the vinyl to reveal the mermaid scale pattern. Repeat this process several times across the mask.
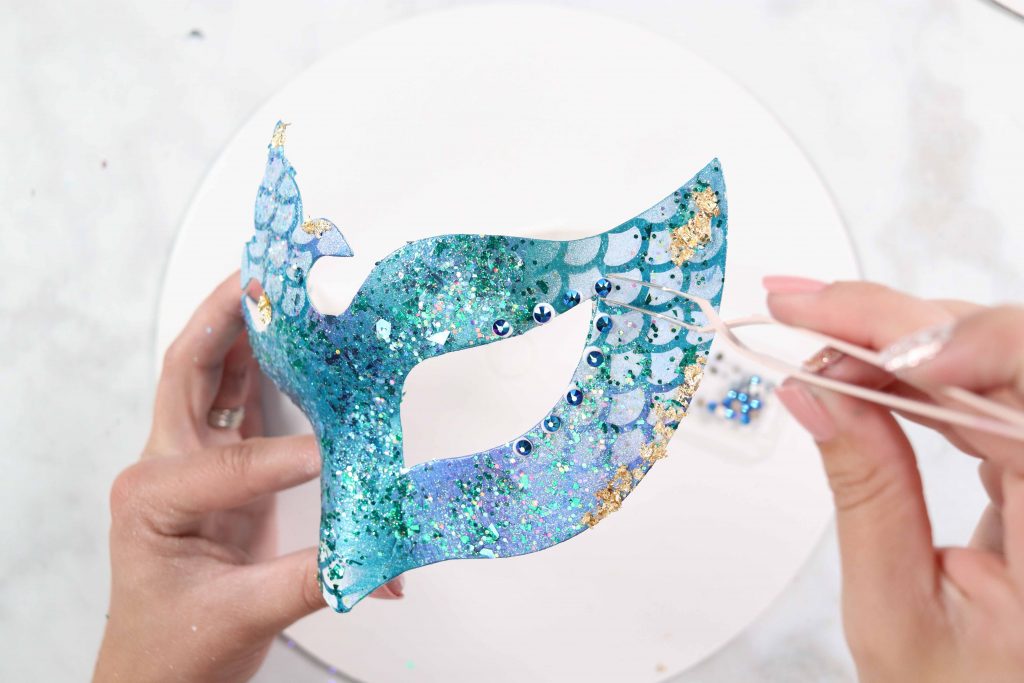
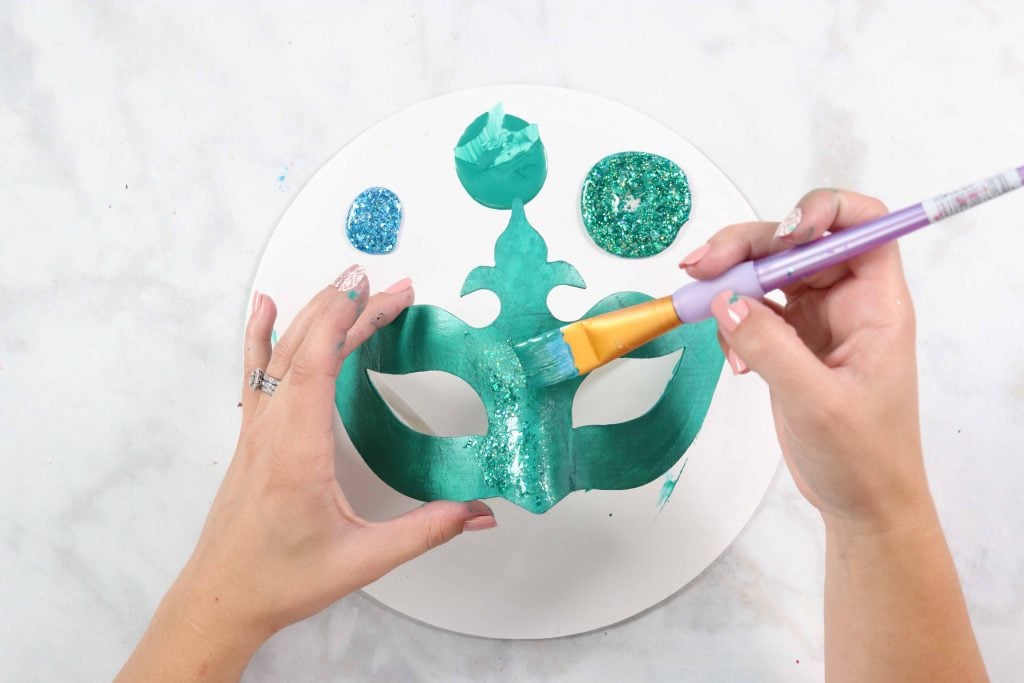
Once the spray paint has dried spread a layer of glitter paint over the entire mask.
Using Beacon Gem Tac, apply small dots of glue along the eyes of the mask. With a pair of tweezers, place Swarovski crystals securely on the gleaned gently press them downwards.
The gem tac will begin as a white color but it will dry crystal clear.
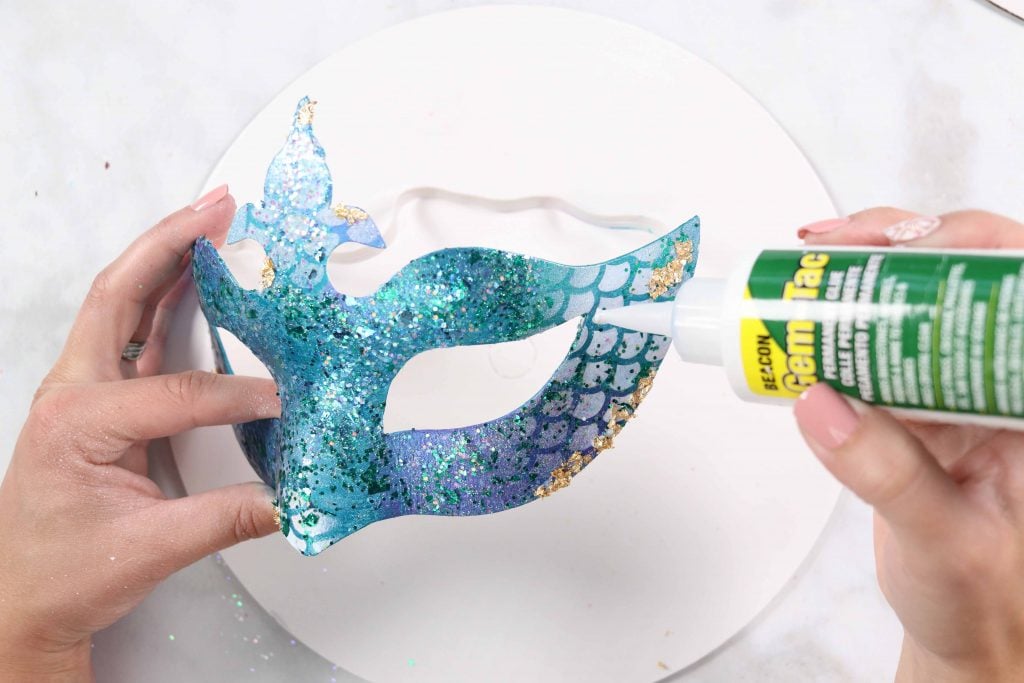
Add gold foil in small clusters around the mask as a finishing touch.
Allow the mask to dry completely before wearing it.
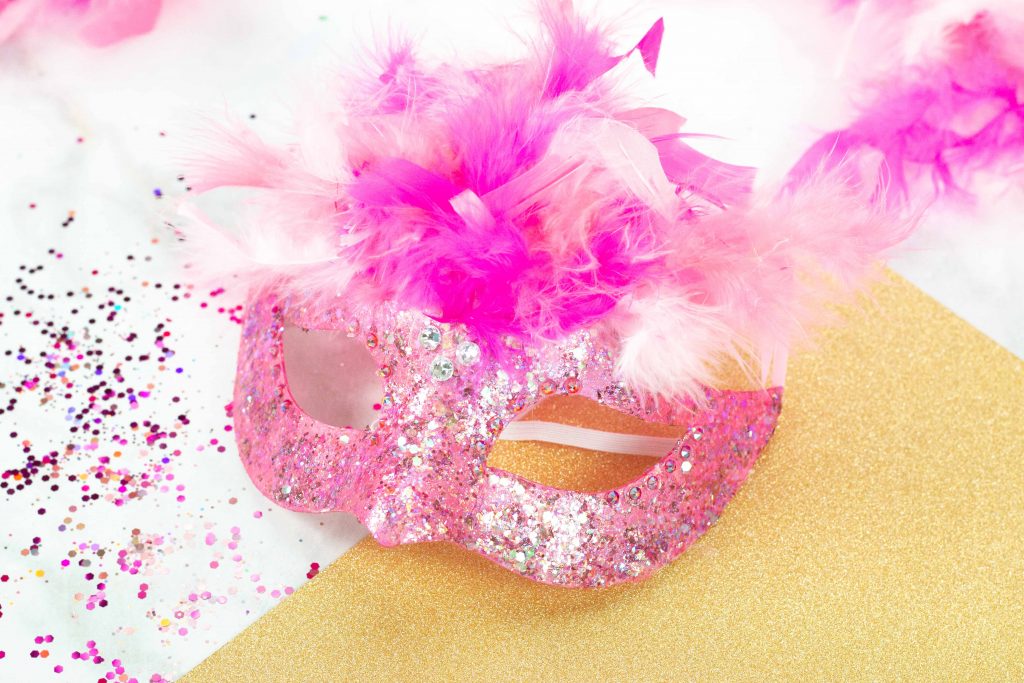
DIY Flamingo Mask
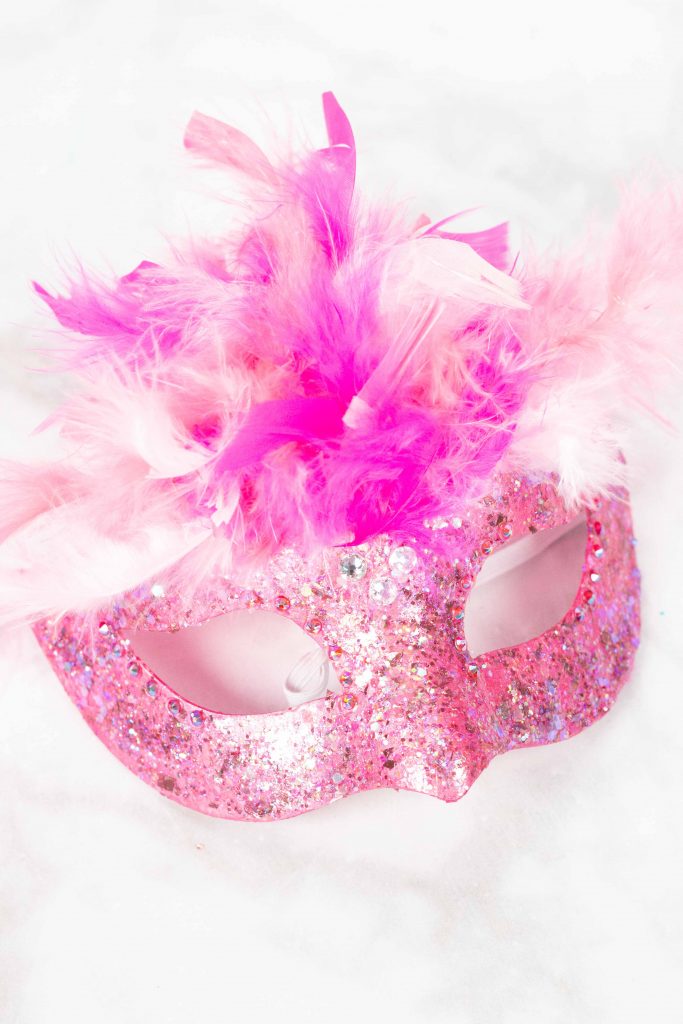
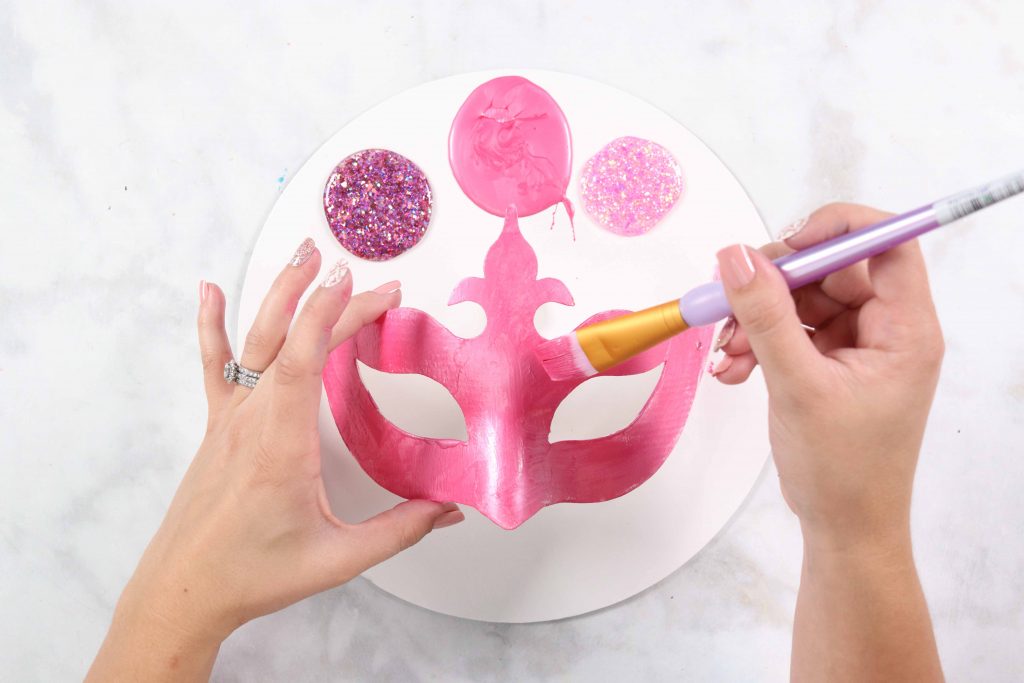
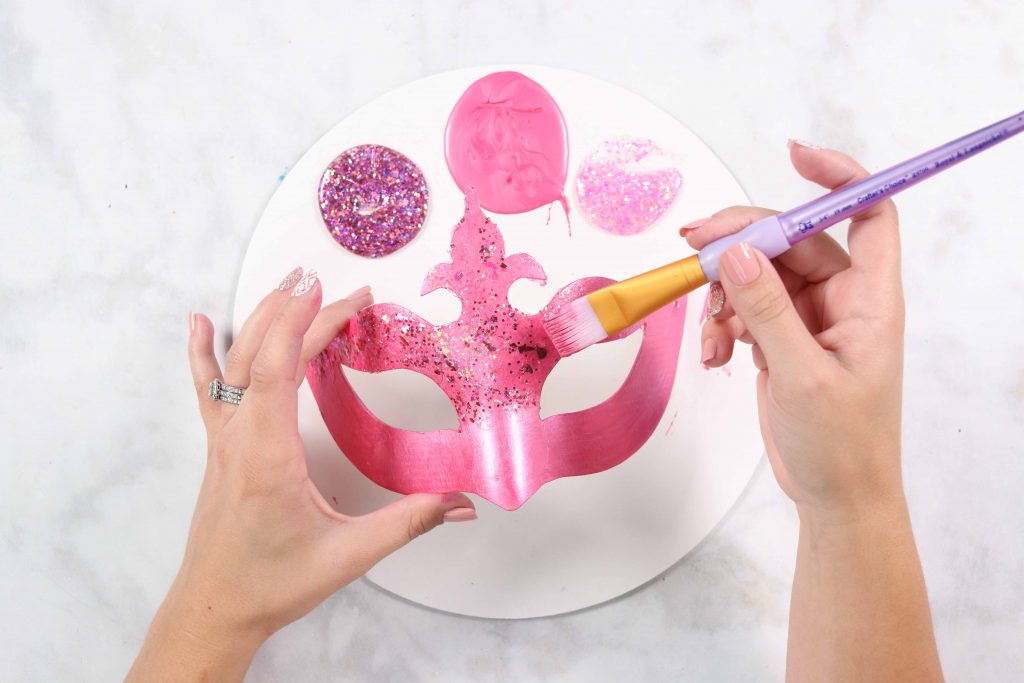
Begin by painting the mask with a base coat layer of pink paint.
Allow the mask 20 minutes to dry before applying a layer of Glitterific paint to the entire mask.
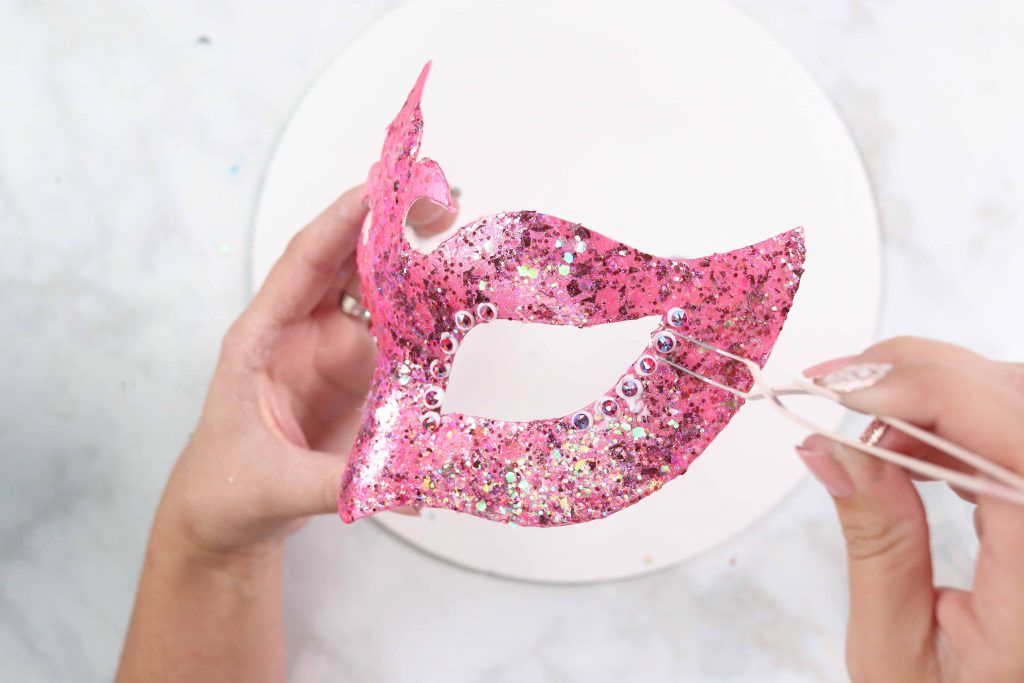
Using Beacon Gem Tac, apply small dots of glue along the eyes of the mask. With a pair of tweezers, place Swarovski crystals securely on the glue and gently press them downwards.
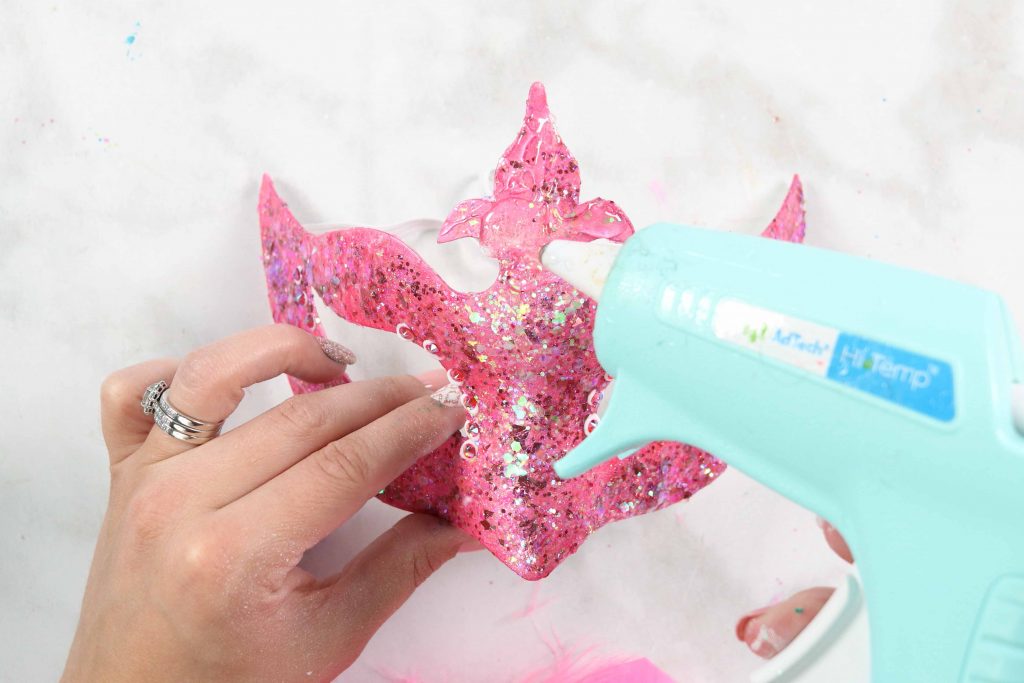
Apply a large circle of hot glue to the top of the mask.
Cut a 3-5 inch piece off of a feather boa and attach it to the hot glue.
Allow the mask to dry completely before wearing it.
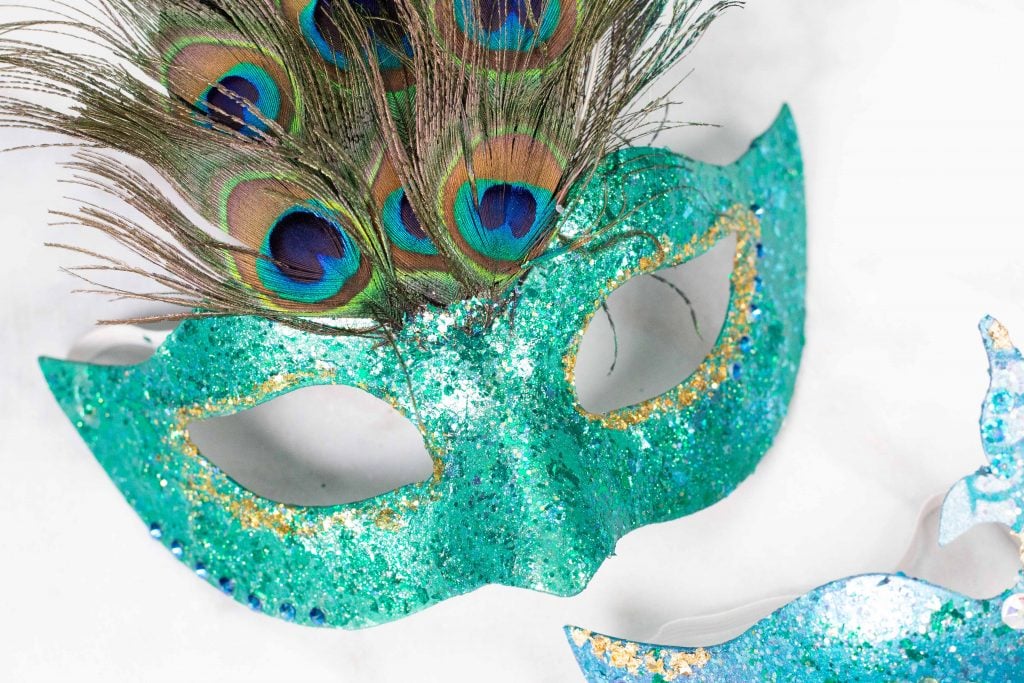
DIY Peacock Mask
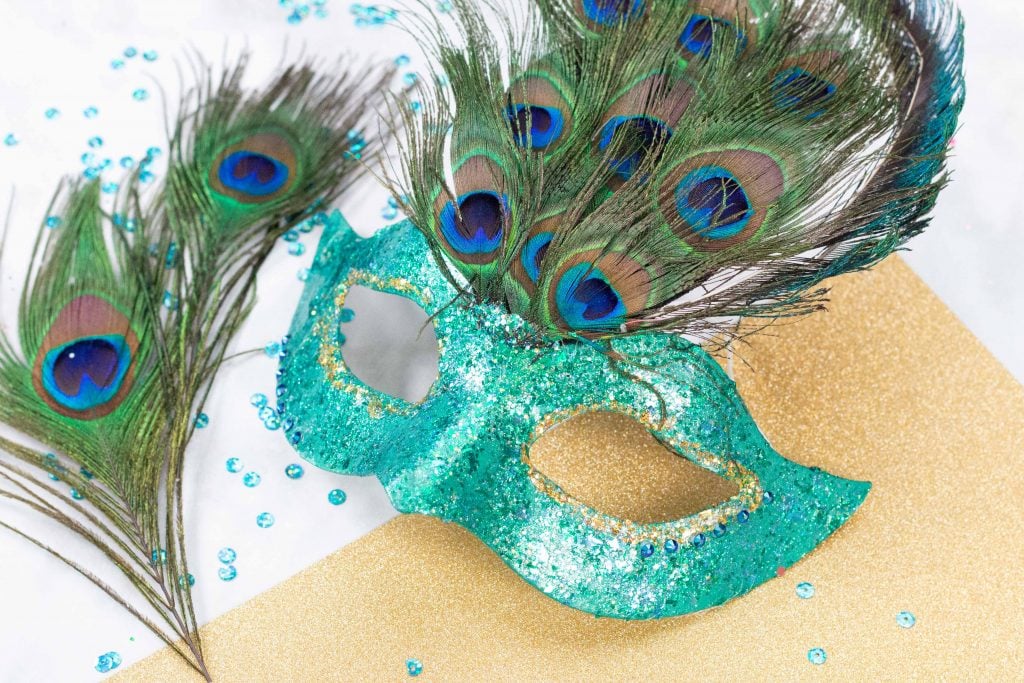
Begin by painting the mask with a base coat layer of blue paint. Add small touches of purple and green paint to the mask to give it extra dimension.
Allow the mask 20 minutes to dry before applying a layer of green Glitterific paint to the entire mask.

Add a layer of gold Glitterific paint around the eyes of the mask.
Apply a large circle of hot glue to the top of the mask and place the peacock feathers on top of the glue. Press down on the feathers until the glue cools down.

Allow the mask to dry completely before wearing it.
Make sure to join my Crafting & Sewing FB group and share what you are making with us!

I'd love to see photos of your Halloween masks!
Want more Halloween crafts? Learn how to make a Halloween Costume, or Trick-or-Treat bag. Click here for more!
Leave a Reply