Learn How to Make Christmas Lollipop Holders this Holiday with This Free Template and Tutorial
These cute holiday lollipop holders are the perfect gift to make for your students, friends, or family! They're easy to make with just a few pieces of cardstock, and it’s a great activity to do with your little ones this holiday!

How Many Designs and Styles Are There?
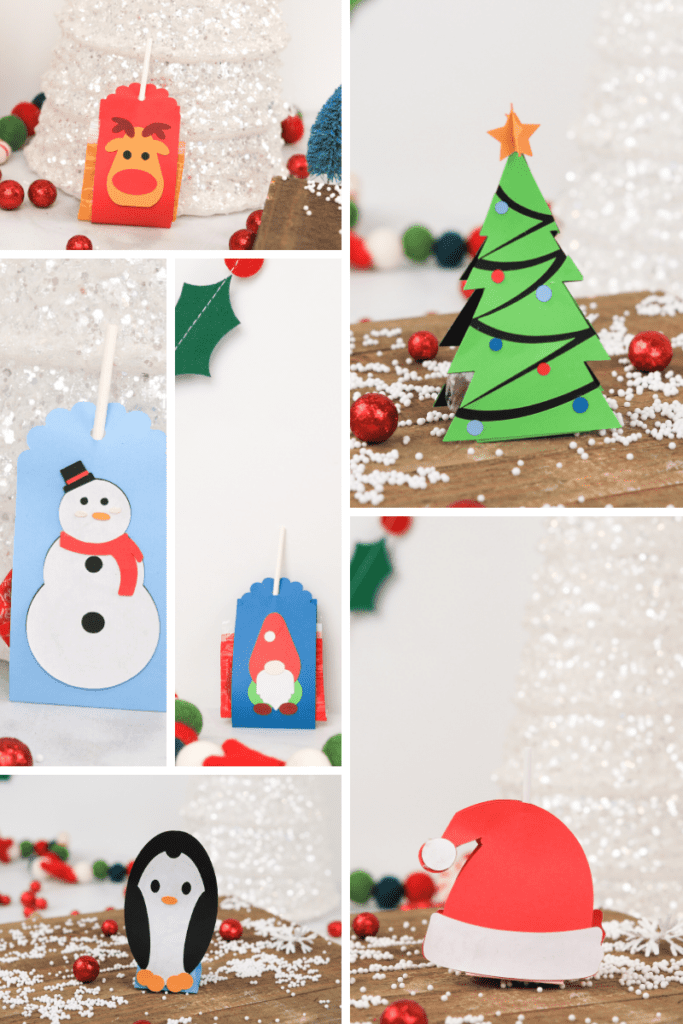
This holiday project includes seven designs in two styles. The box style includes a Christmas tree, Santa hat, Grinch and penguin design; the wrapper style includes a reindeer, snowman, and gnome design.
What Type of Cardstock Should I Use?
For this project, I recommend using lightweight cardstock. I used 65lbs cardstock, but if you want a sturdier base, I recommend using 80lbs cardstock and 65lbs cardstock for the details.
How Much Paper Do I Need?
The designs fit well with 8.5" x 11" pieces of paper. You'll need one 8.5" x 11" piece of paper for each color.
Table of Contents
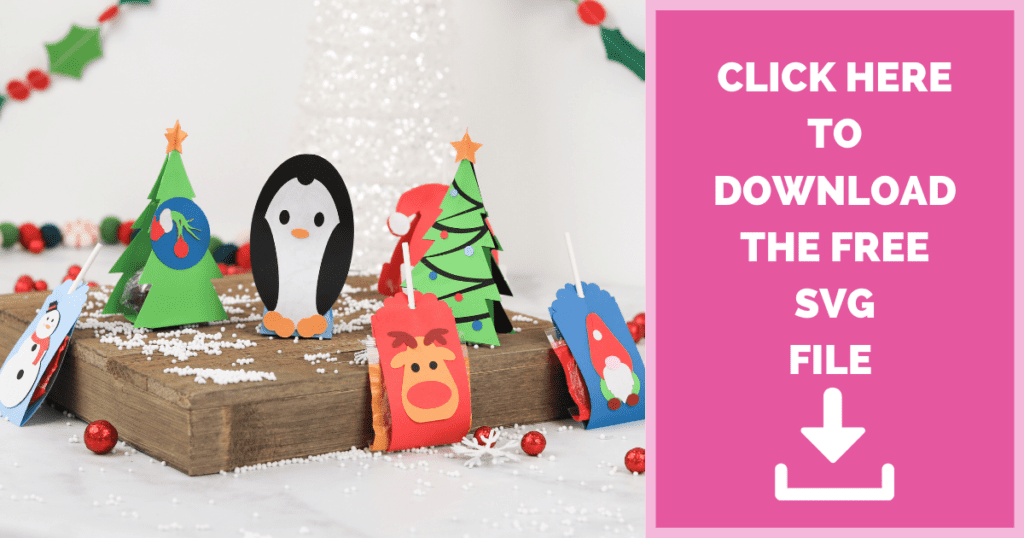
Download the SVG Files Here
Supplies Needed for Holiday Lollipop Holders
To make this project you will need a few pieces of paper, craft glue, and some suckers or gourmet lollipops (I found mine at the dollar store). I used gourmet lollipops because they’re bigger and are a good size for the box style.
For the wrapper style, I used Caramel Apple Pops because they’re flat and fit well inside the designs.
- Cricut Maker, Cricut Explore, or Other Cutting Machine
- StandardGrip Mat or LightGrip Mat
- Cardstock 65-80 lbs
- Fine-Point Blade
- Scraper Tool
- Scoring Wheel Tip & Housing or Scoring Stylus
- Hot Glue or Bearly Arts Craft Glue (This is my favorite tacky adhesive)
- Use the code SRP10 to save 10%
- Spatula Tool
- Tweezers
- Gourmet Lollipops

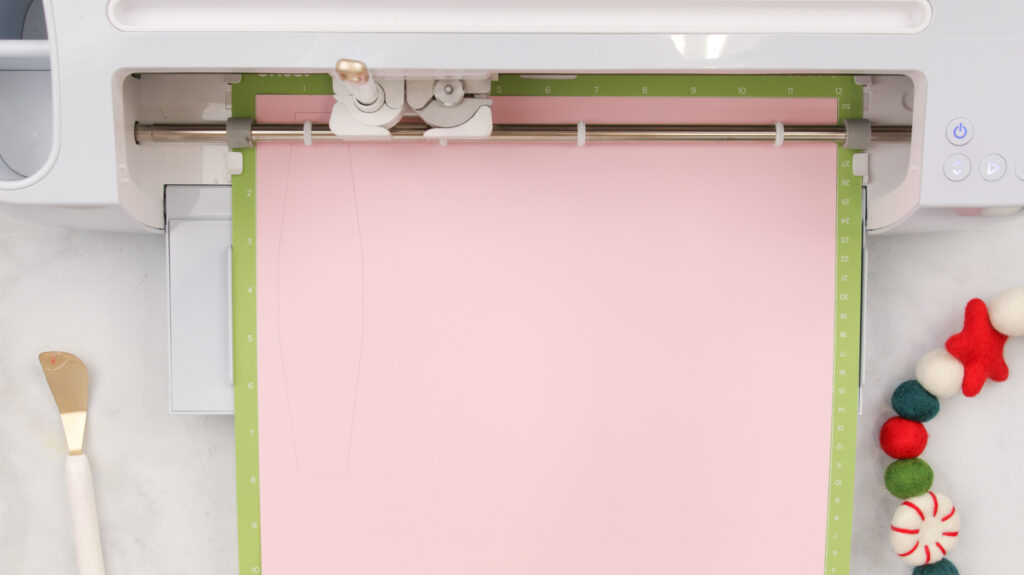
Upload SVG Design
Begin by downloading the SVG file to your computer, then Upload the design by going to Design Space and create a New Project. Then, click Upload and select the SVG file and Add to Canvas.
Once uploaded to your canvas, ungroup the design in the right panel, and turn the lines that are in the middle of the styles to score lines in the Operation Panel and attach them to their respective pieces in the bottom right hand panel.
Cut Out Holiday Lollipop Holder Design Pieces
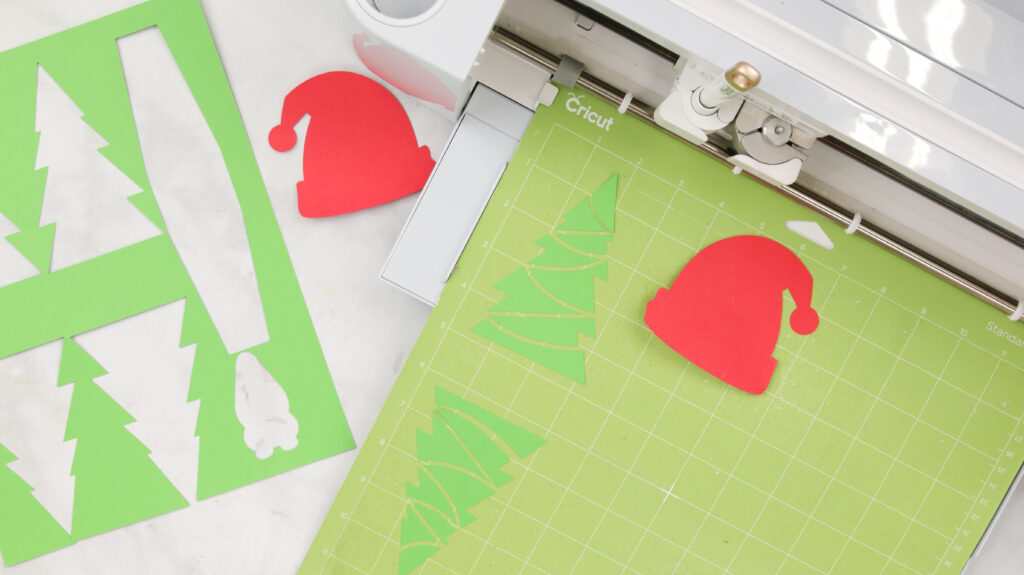
Once everything has been attached, click Make It and cut out all the designs by loading the mat with cardstock into your cutting machine.
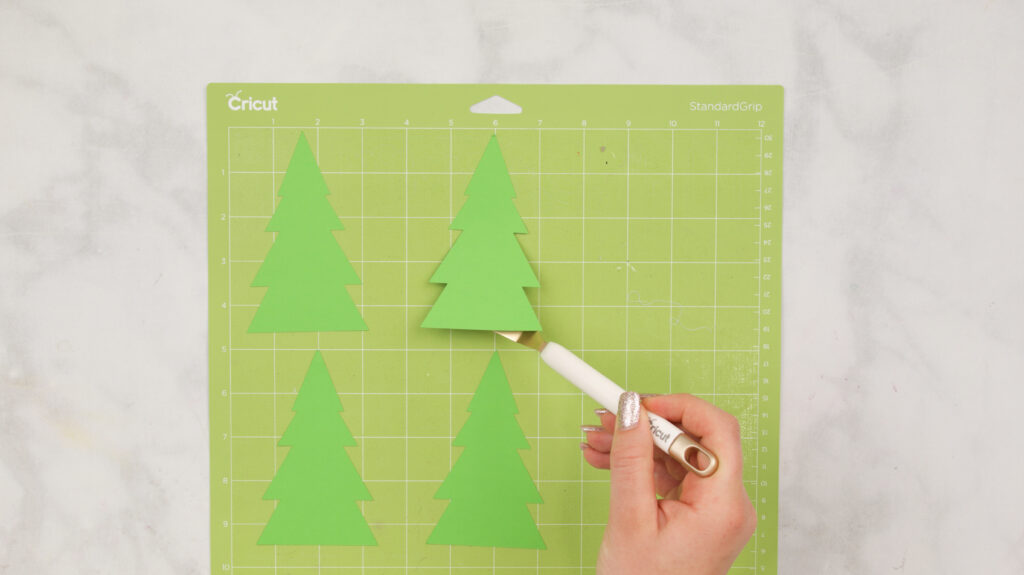
Afterward, peeling the pieces away from the mat helps so that the pieces don't bend, or you can use a spatula tool.
Wrapper Style
To start, I'll walk you through how to make the wrapper-style holders, then we'll move on to the box-style lollipop holders.
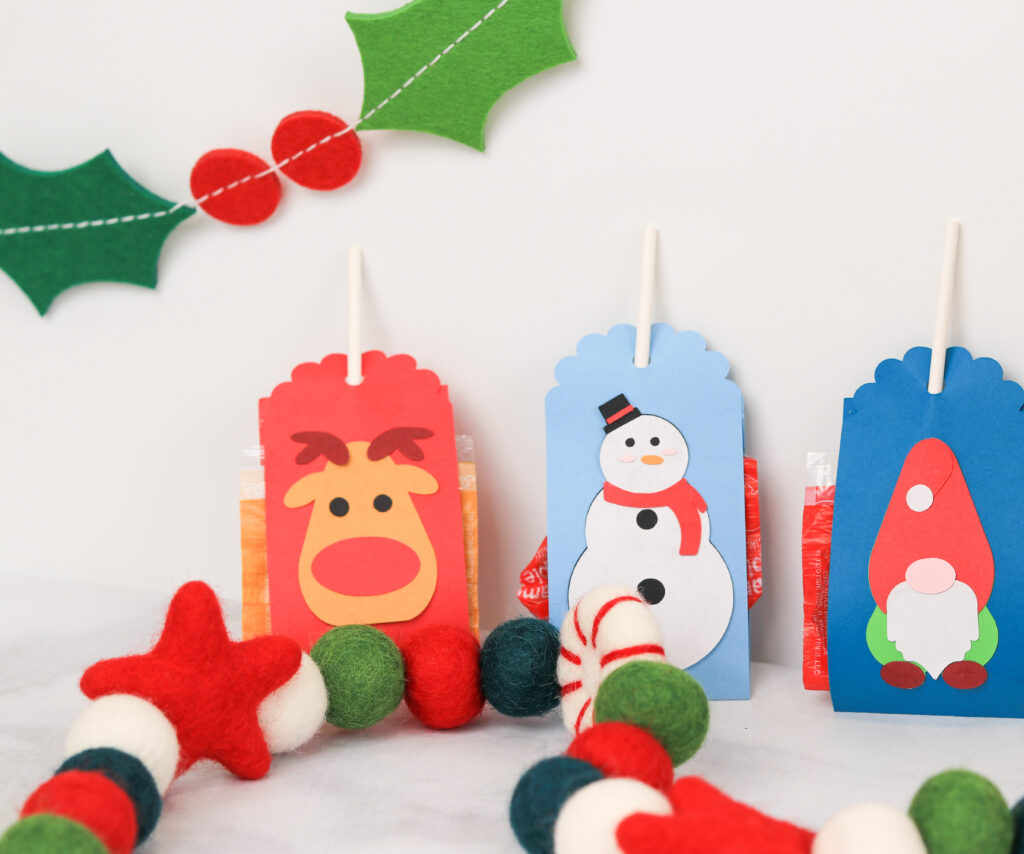
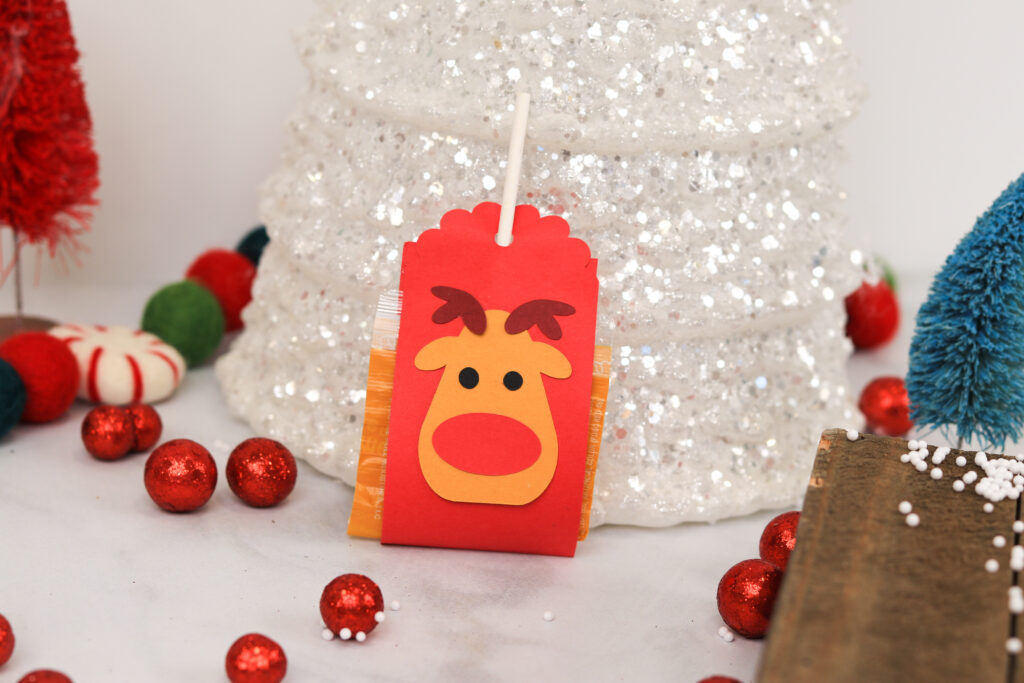
Reindeer Design
This Reindeer Design Consists of:
- 1 Wrapper Base
- 1 Reindeer Shaped Head Piece
- 1 Oval
- 2 Small Circles
- 2 Antler Pieces
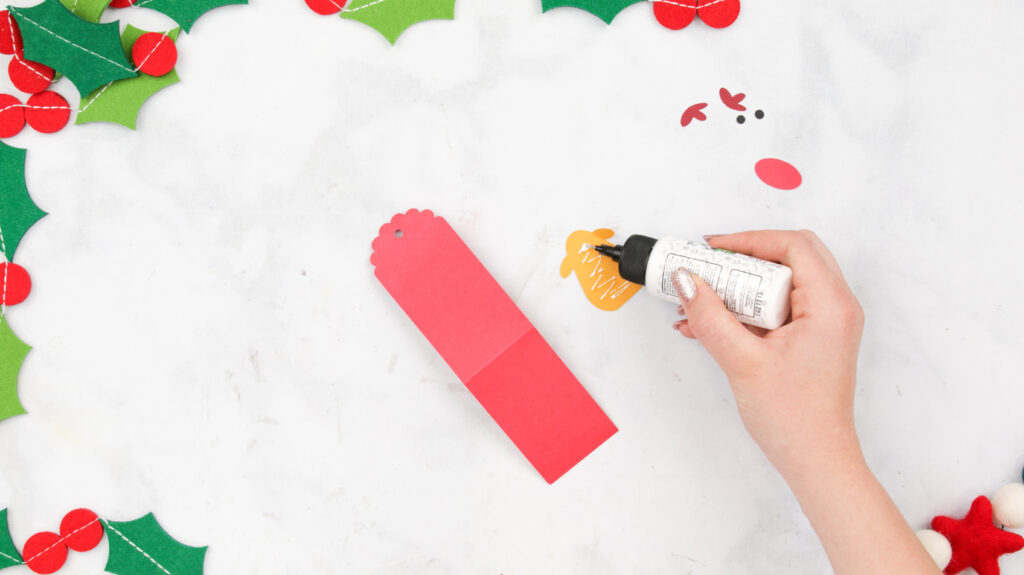
When you've gathered the reindeer pieces, grab the reindeer head piece and glue it to the middle of the wrapper base.
Then, glue the nose to the center of where it starts to curve on the head piece, and place the two small circle above the nose.

Finally, glue the antlers to each side of the head above the ears.
Slide your sucker through the hole at the top of the design and secure the sucker in place by gluing the flaps together.
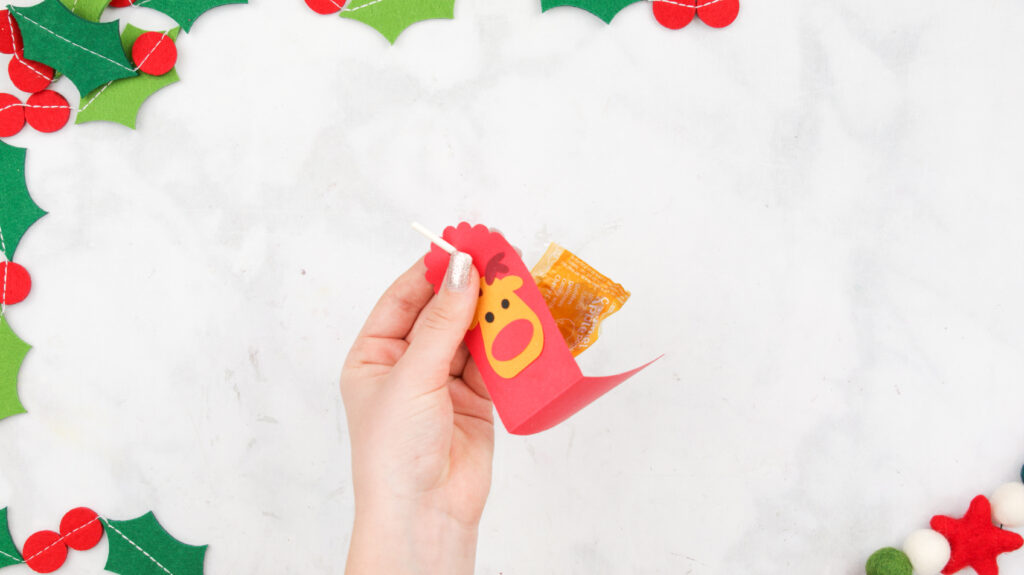
Just like that, this cute reindeer design is finished!
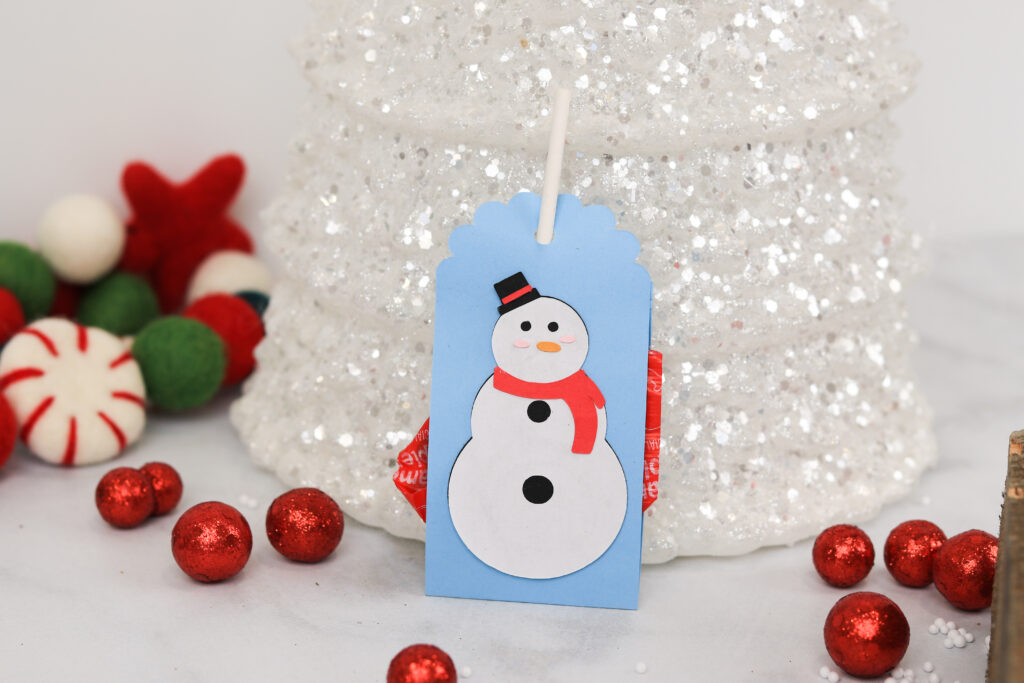
Snowman Holiday Lollipop Holder Design
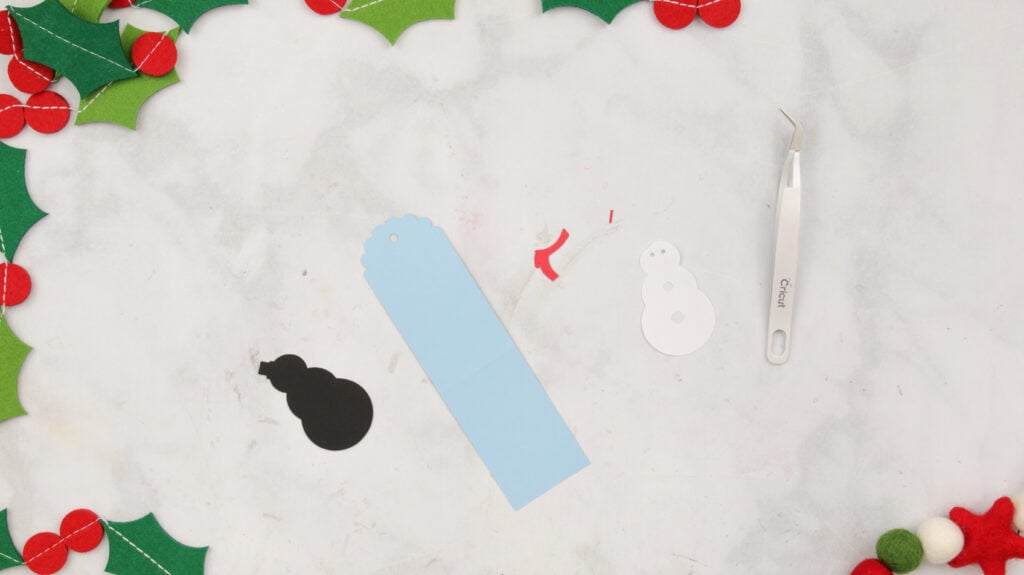
This Snowman Design Consists of:
- 1 Snowman Silhouette
- 1 Snowman With Detailed Cutouts
- 1 Scarf
- 1 Hat Band/Ribbon
- 1 Carrot Nose
- 2 Small Ovals
To assemble the snowman design, glue the snowman base to the center of the wrapper base, then place the snowman with detailed cutouts overtop making sure to align the pieces with one another.
Next, glue the scarf below the first circle and the hat band onto the hat silhouette (I used tweezers to attach the smaller details to the design).
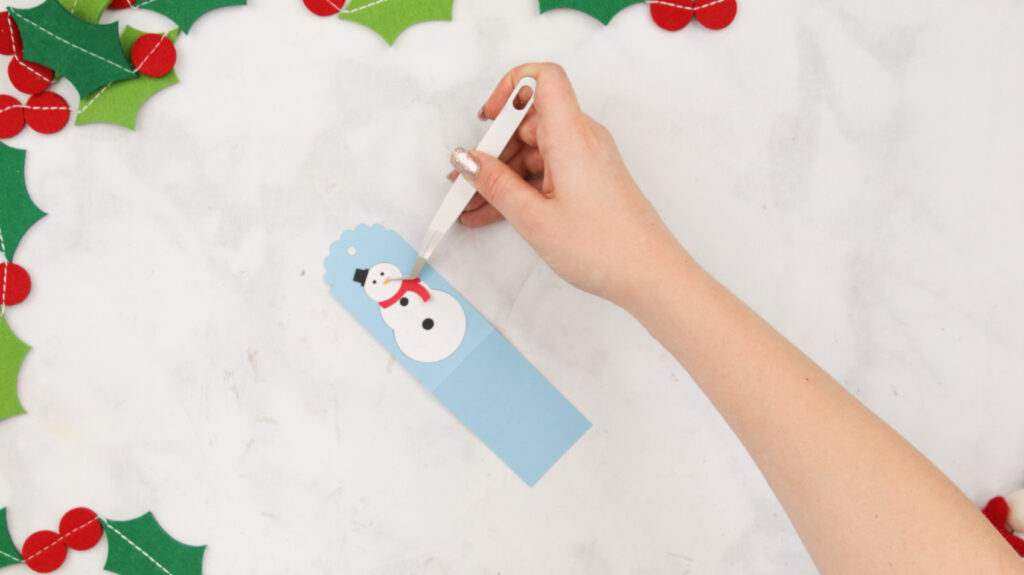
Then, place the carrot between the two eyes and the two pink ovals to the side of the carrot to give the snowman blushing cheeks.
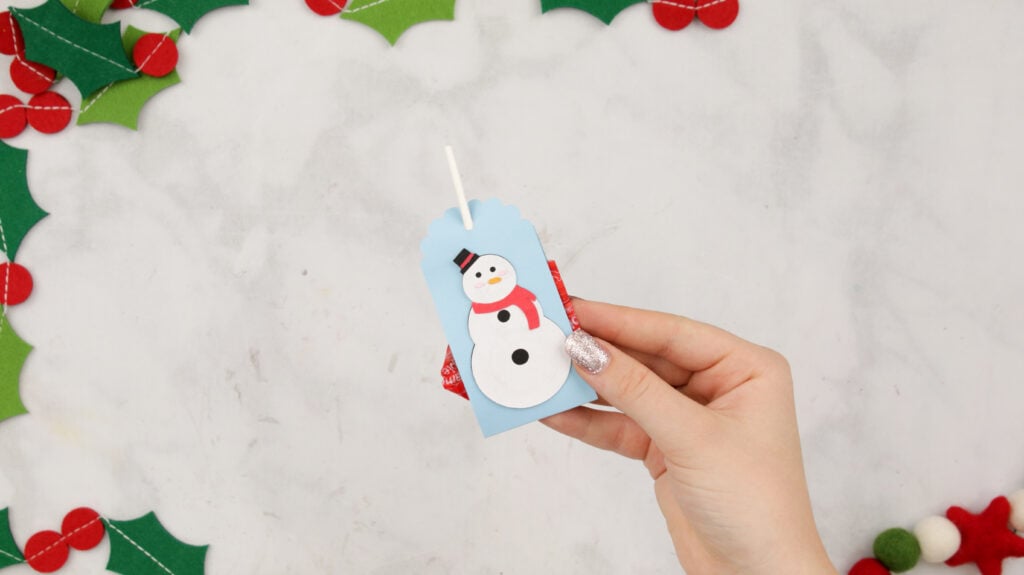
Finally, slide the sucker through the circle cutout at the top and secure the sucker into place by gluing the flaps together.
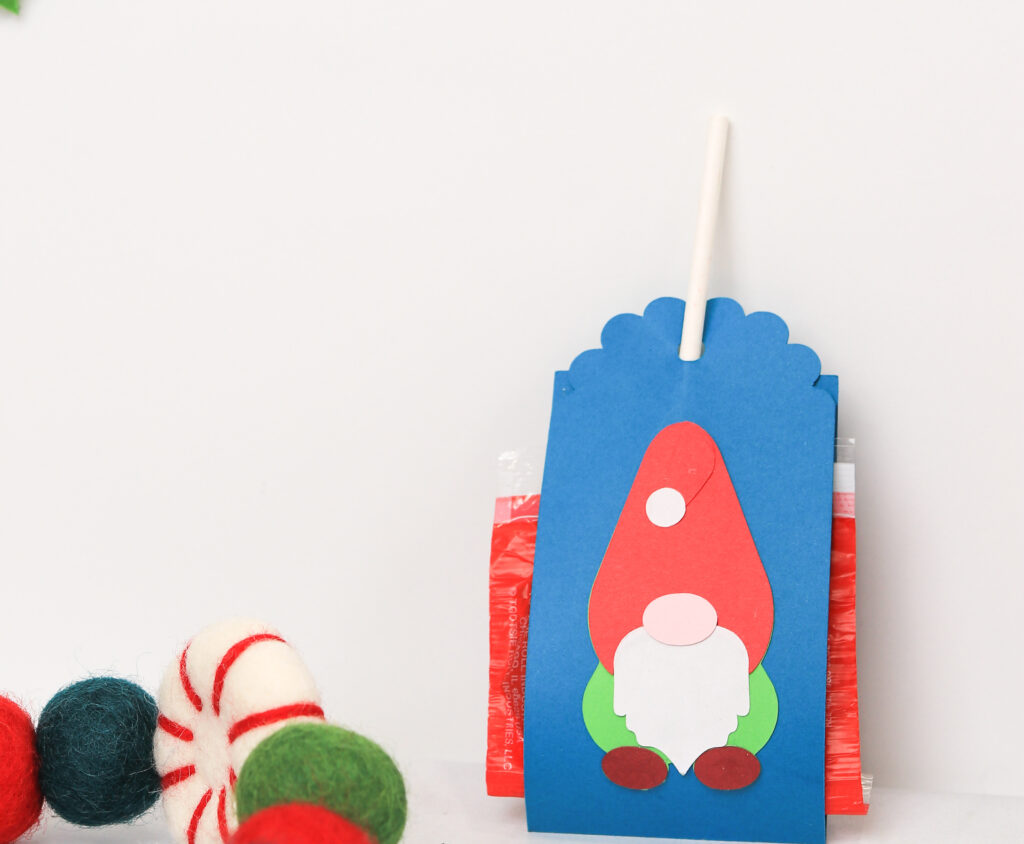
Gnome Design
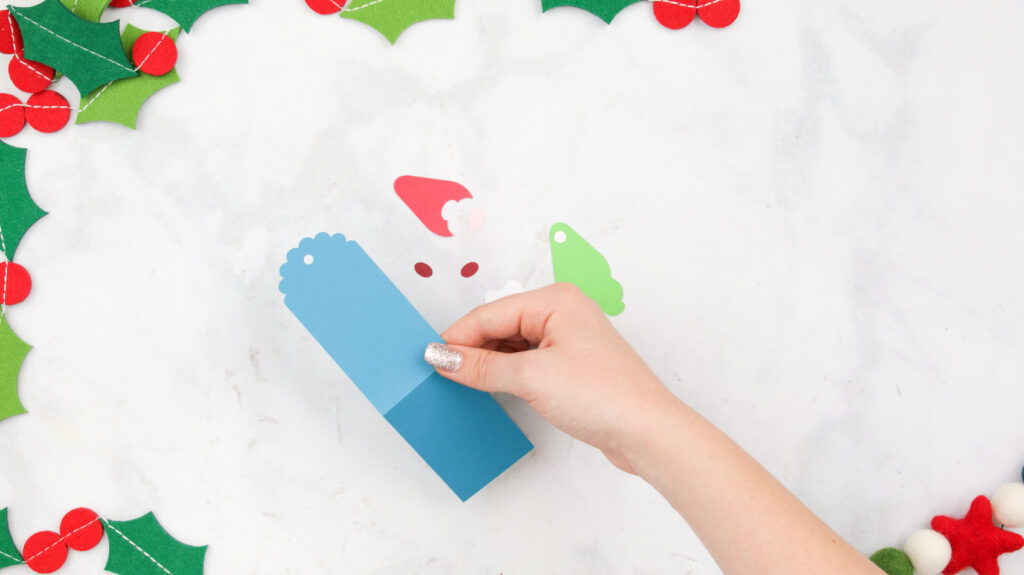
This Gnome Design Consists of:
- 1 Wrapper Base
- 1 Gnome Silhouette
- 1 Gnome Hat
- 1 Beard
- 1 Small circle
- 1 Oval Nose
- 2 Oval Shoes
Begin by gluing the gnome silhouette to the center of the wrapper base. Then, glue on the gnome hat on top of the silhouette, and glue the oval shoes to the bottom making sure to align them with the silhouette.

Next, glue the beard below the hat and the nose. Finally, place the white circle at the top of the hat.
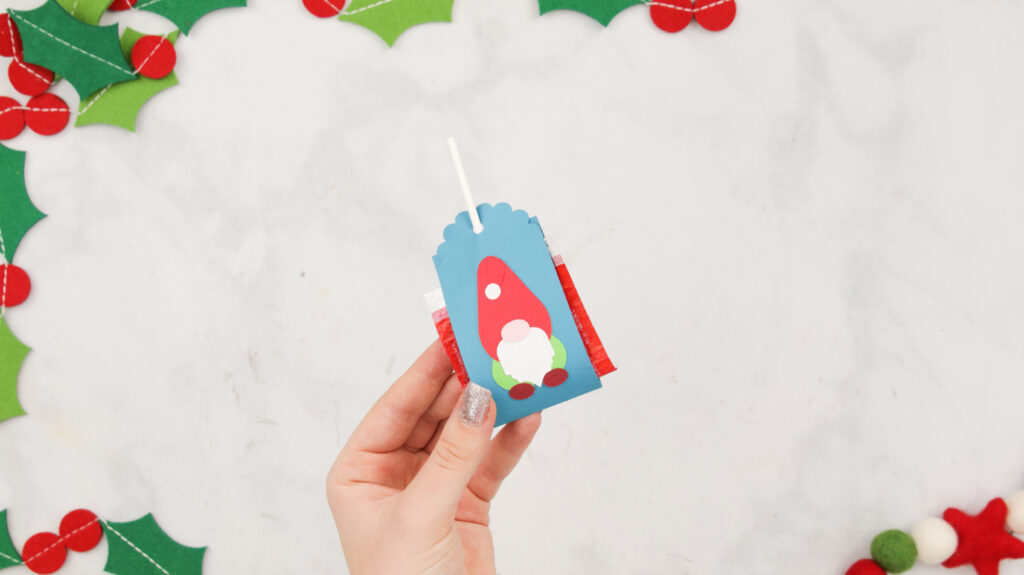
Slide the sucker through the circle cutout at the top and glue the flaps together securing the sucker in place.
Box Style Lollipop Holders
Now that we've walked through all of the flat lollipop style holders, let's move on to the box style! This style is ideal for large round lollipops.
The Reindeer, Snowman or Gnome design elements could also be used with this style of holder if you prefer those designs. Just be sure to use the regular box-shaped base.
Santa Hat Design
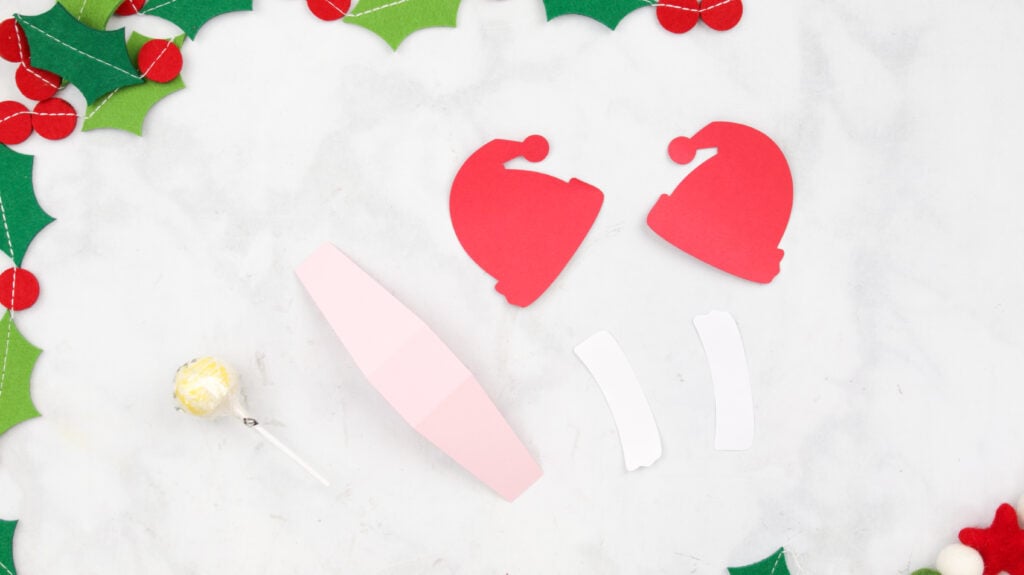
This Santa Hat Design Consists of:
- 1 Box Style Base
- 2 Santa hat Silhouettes
- 2 Hat Brims
- 2 Circles
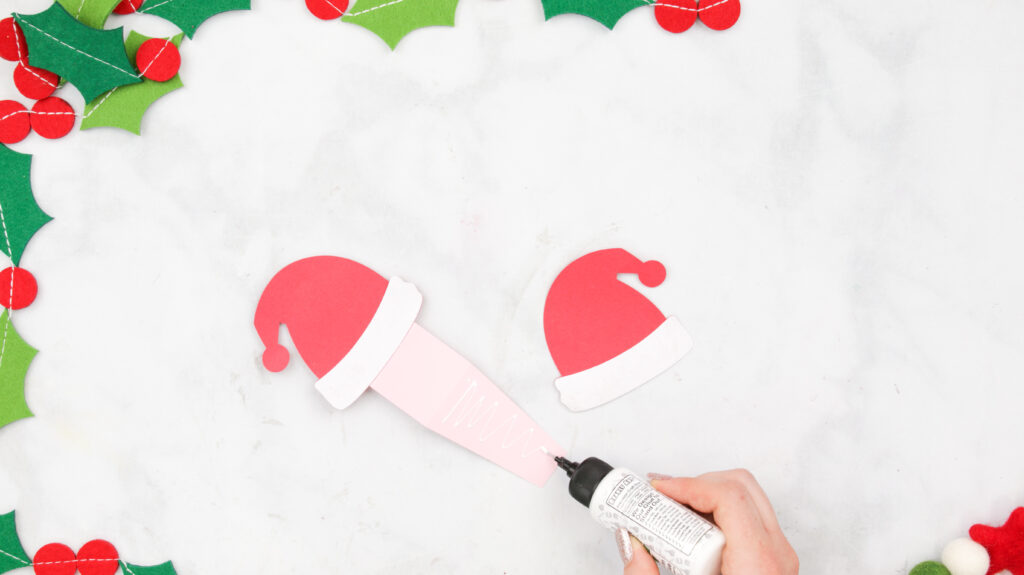
To assemble the Santa hat design, glue the white brims to the bottom of the Santa hat silhouettes.
Afterward, fold the lollipop holder base along the two score lines and glue one Santa hat on one end above the score line. Then, glue the other upside-down on the opposite end.
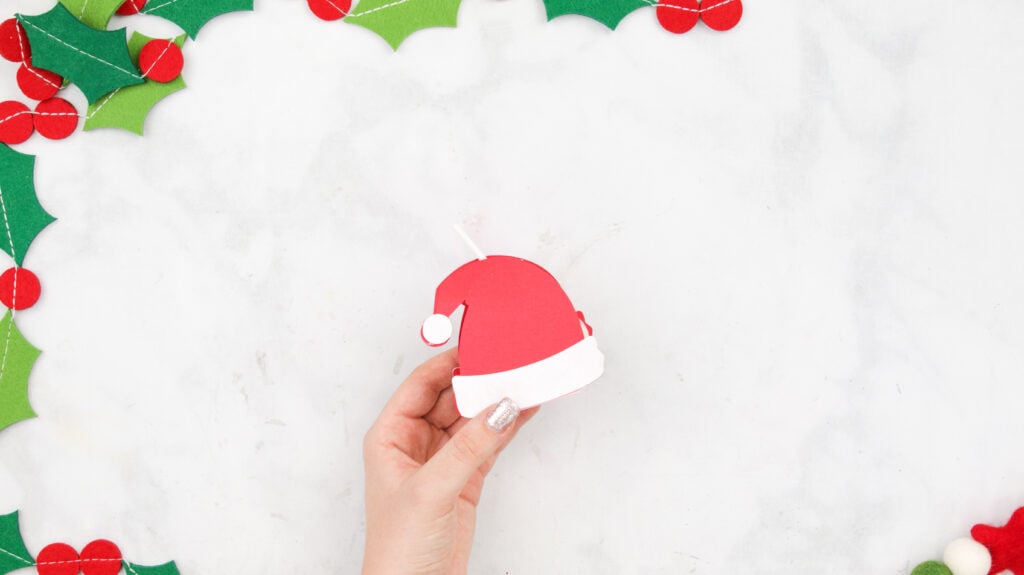
Place a Gourmet lollipop between the two scorelines and fold the flaps in towards the lollipop securing them with glue.

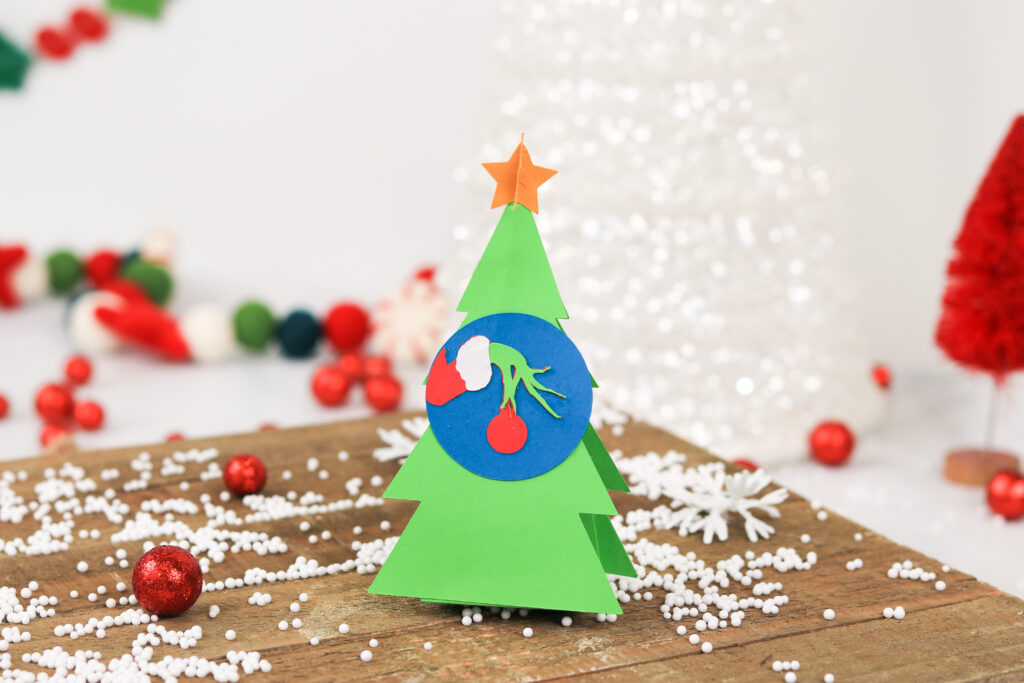
Christmas Tree Design
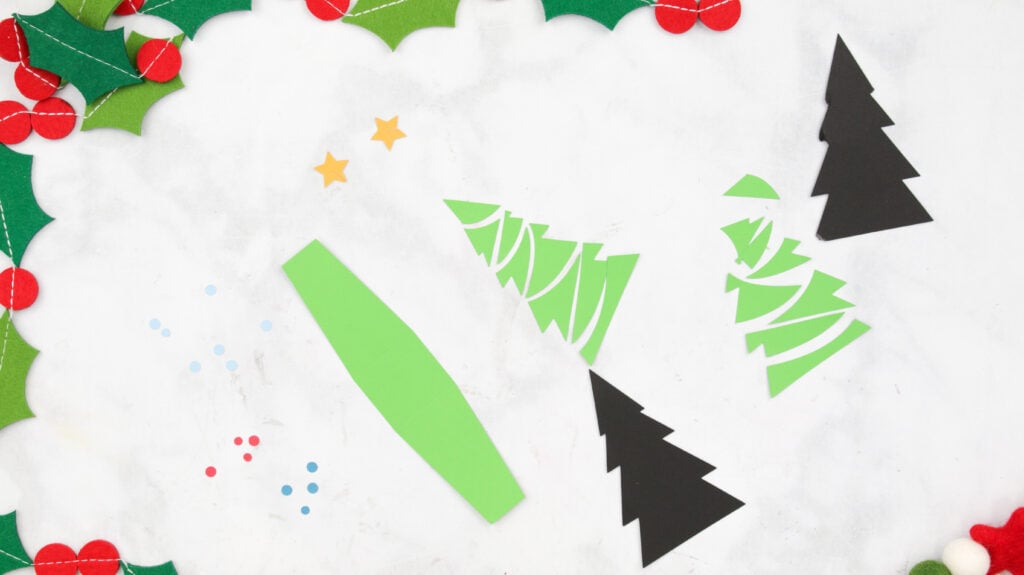
This Christmas Tree Design Consists of:
- 1 Box Style Base
- 2 Tree Silhouettes
- 8 Tree pieces for each Silhouette
- 14 Circled Ornaments
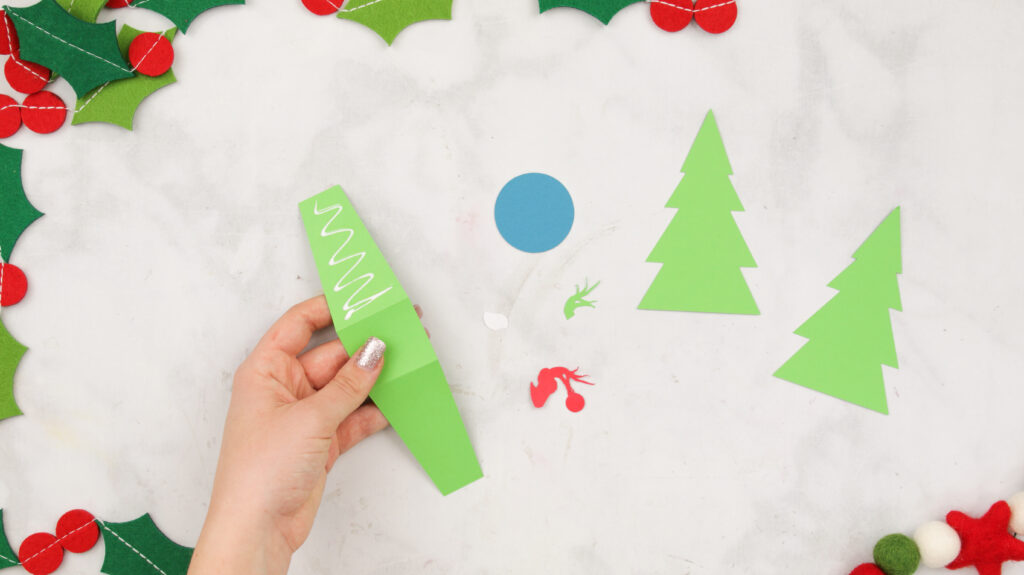
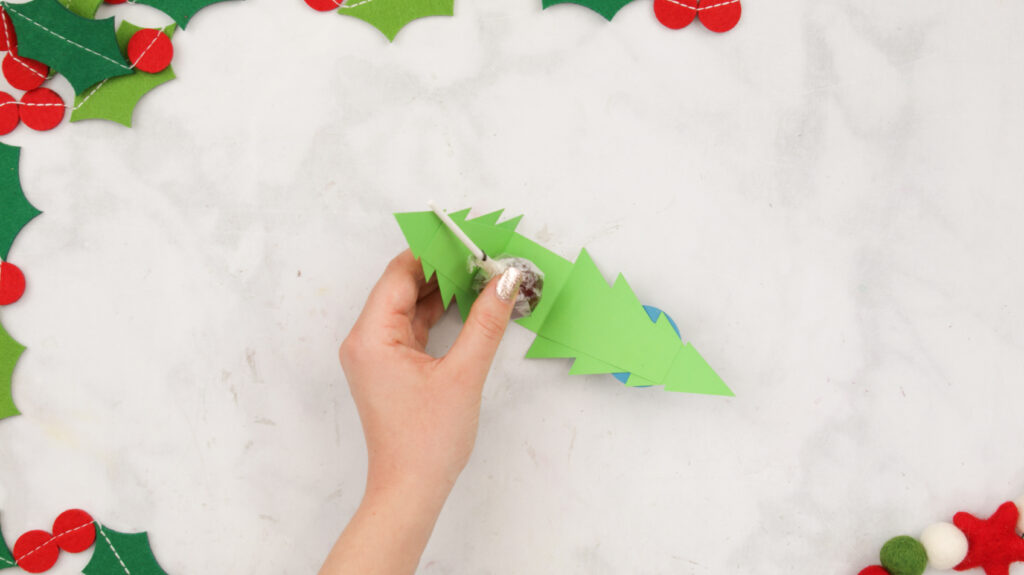
To assemble this Christmas tree design, fold along the two score lines of the base, then place the tree silhouettes to both ends above the score lines- one facing upside down.
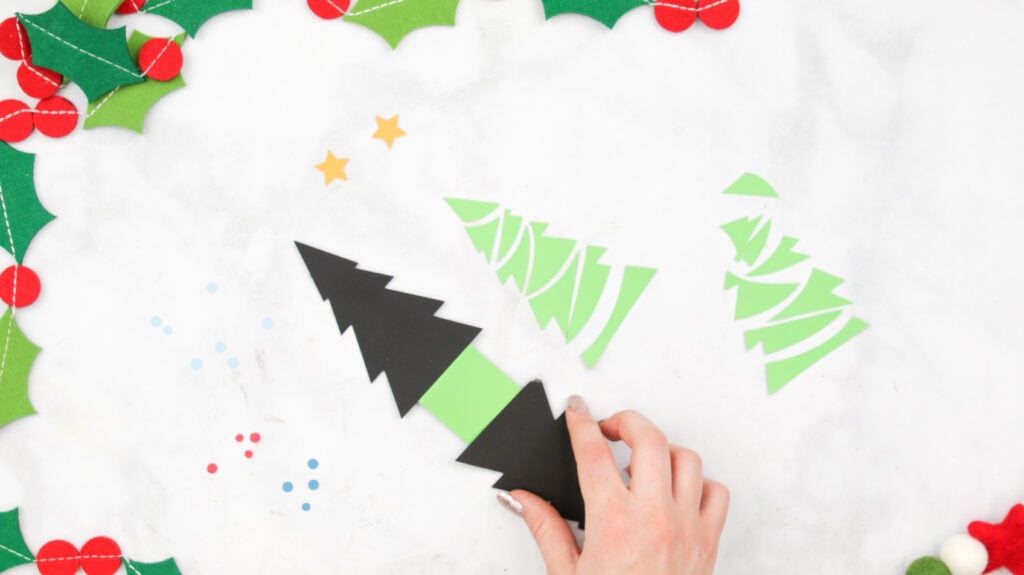
Afterward, glue the tree pieces to both sides, starting from largest to smallest, while ensuring the elements align with the tree silhouette. Eventually, it will look like the tree has a sting of lights.
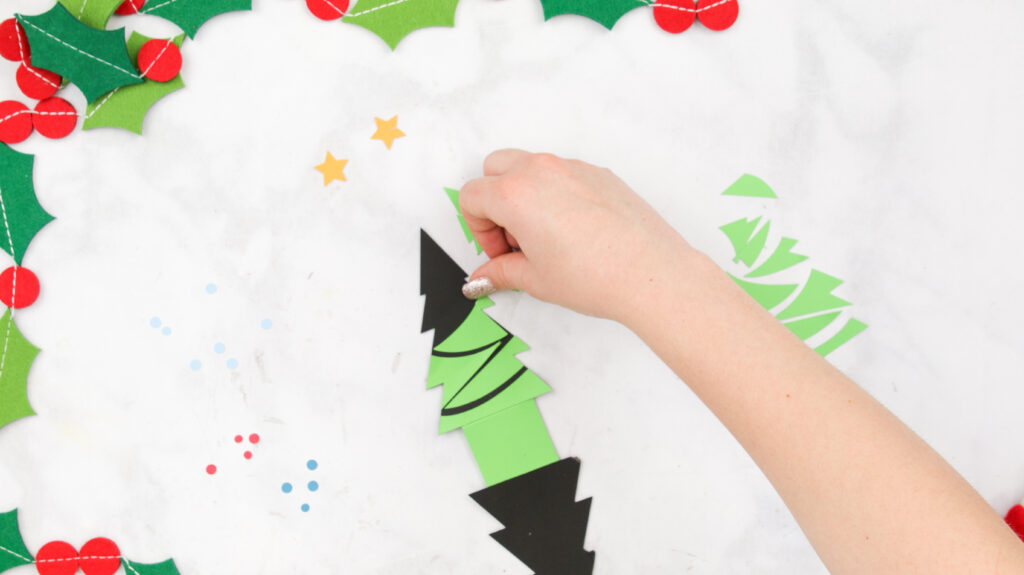
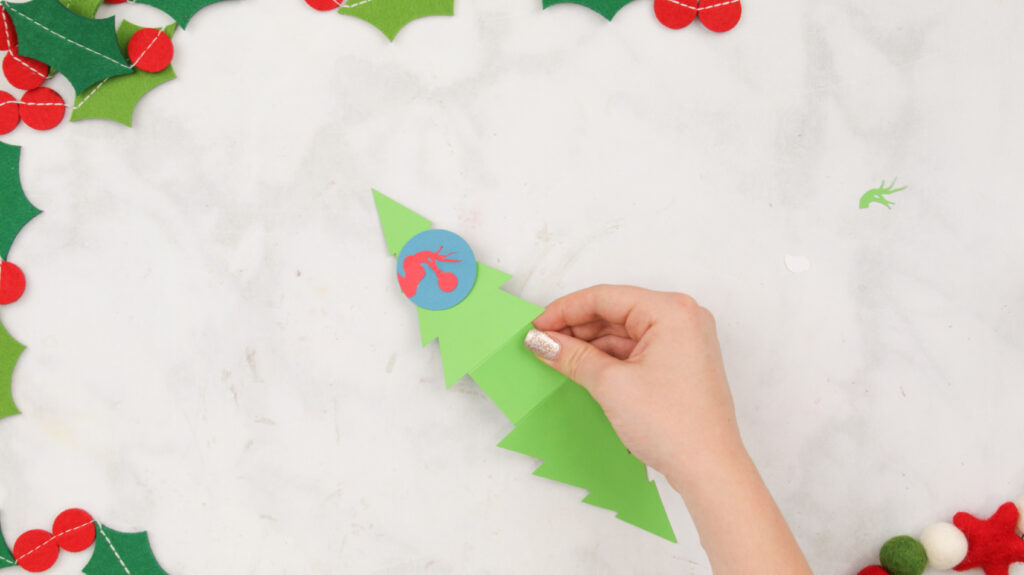
Once the tree pieces have been added, go ahead and glue the ornaments following the zigzag shape.
Next, glue the star with the slit at the point to the top of the tree.
Add your gourmet lollipop between the two score lines and fold the flaps together securing the lollipop in place.
Finally, add the second star with the bottom slit to the other by sliding the stars together.
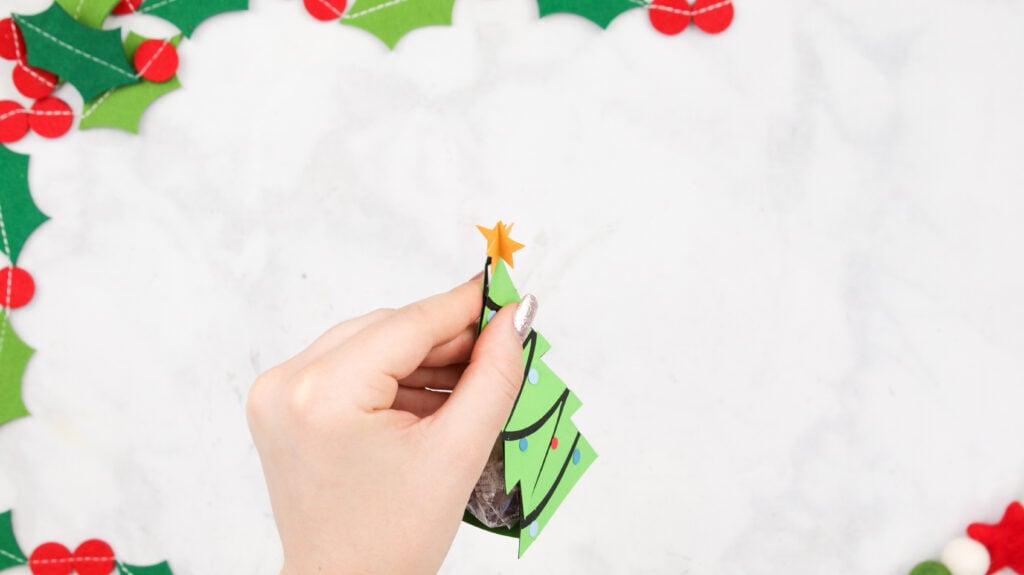
With that final detail, this Christmas tree design is done!
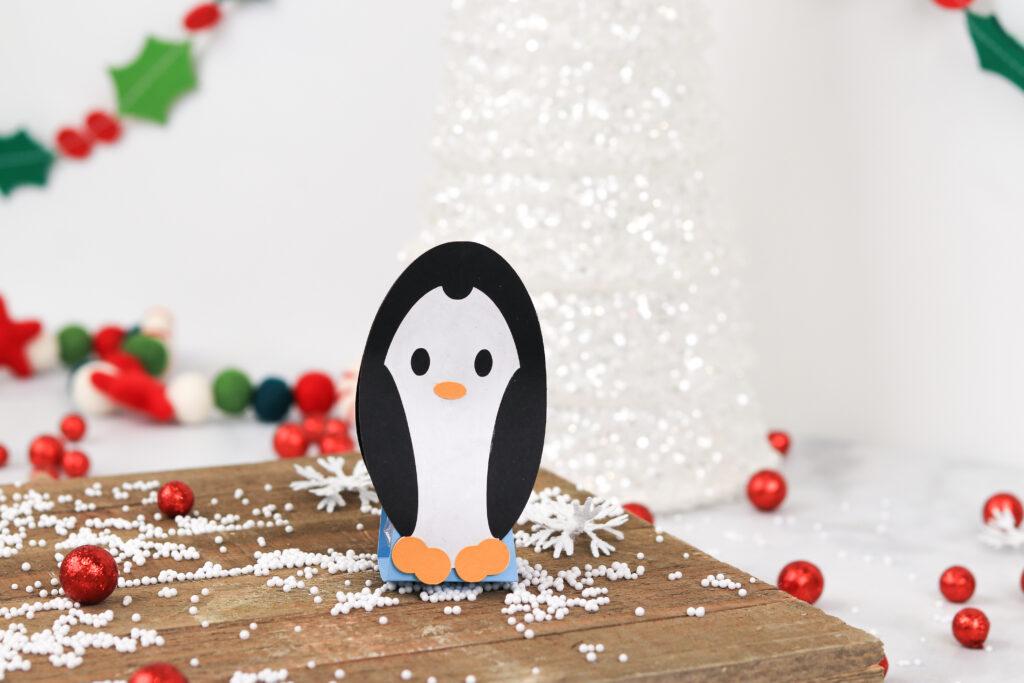
Penguin Design
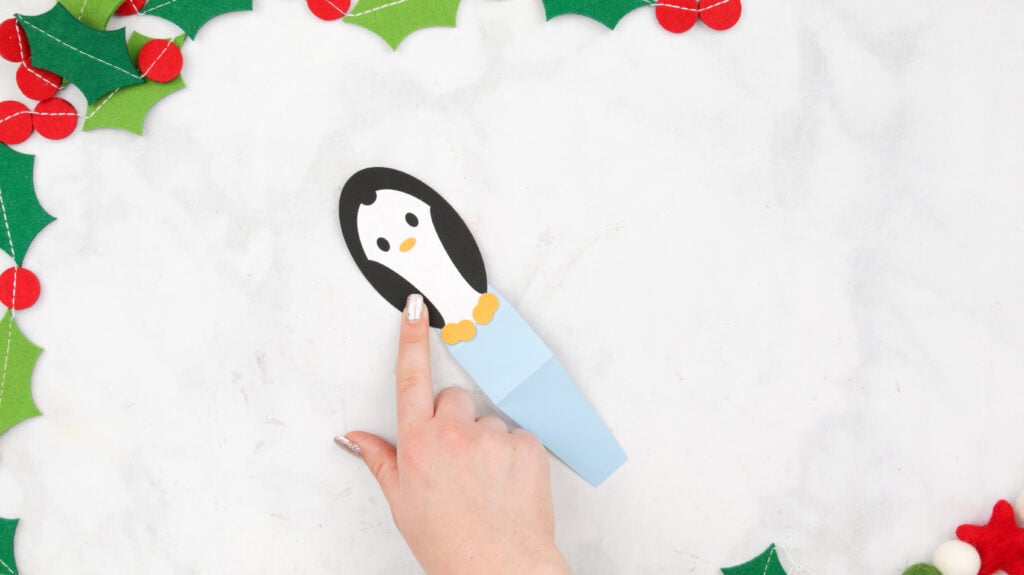
The Penguin Design Consists of:
- 1 Box Style Base
- 2 Oval Penguin Silhouettes
- 1 Detailed Penguin Cutout
- 1 Oval Beak
- 4 Feet Pieces
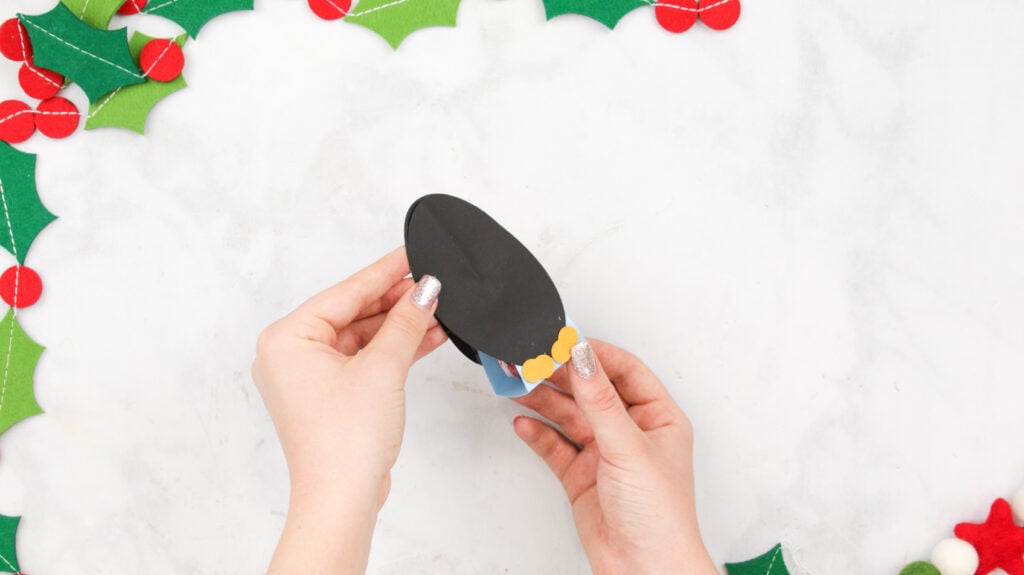
Fold along the two score lines on the base piece. Then, glue the detailed penguin cutout piece to one of the oval penguin silhouettes making sure to align it with the bottom.
Then, place two feet pieces at the bottom, aligning them with the shape of the silhouette. Afterward, place the beak between the eyes.
Next, place this assembled penguin piece to one of the ends of the sucker holder base piece above the score line.
Grab the other penguin silhouette and glue the two remaining feet pieces at the bottom (this is the back of the penguin). Glue this assembled piece to the opposite end of the sucker holder upside down.

Finally, place a gourmet lollipop in between the two score lines and glue the flaps together securing the lollipop in place.
Once everything is dried, this adorable penguin lollipop holder design is done!
Grinch Design
This Grinch Design Consists of:
- 2 Christmas Tree
- 1 Circle
- 1 Grinch hand With Ornament Silhouette
- 1 Grinch Had Cutout
- 1 Cuff Cutout
To assemble this design, fold the base piece along the two score lines. Afterward, glue the tree pieces to each flap- one upside down.
Then, assemble the Grinch graphic by taking the Grinch Silhouette and gluing it to the circle cutout, ensuring it follows the shape of the circle.
Align the Grinch hand cutout on top.
Finally, glue the cuff cutout to the left of the hand.
Glue the assemble Grinch graphic to the center of one of the trees.
Place a sucker between the two score lines and glue the flaps together securing the lollipop in place.
Once all the pieces are dried, this Grinch lollipop holder design is finished!
There's a lot of creative freedom when making these Holiday lollipop Holders. You can mix and match the designs or play around with the colors. It makes for a fun family or classroom activity!
Join my crafting Facebook group where you can show us what you’re making, ask questions, and learn from others!
Don’t want to forget about this free template? Save this project for later! Click here to save this project on Pinterest.
Looking for even more Cricut Christmas projects? Check out the links below!
Too cute. A lollipop holder and holiday decoration(s) as well.
What a great idea!
These would be brilliant for a child's Christmas stocking and Christmas parties too
So cute. Think of how many ways you could use these....delightful.
So very Cute, especially love the snowman
Love Love Love!
So cute for stocking stuffers!
super cute!!
These are so adorable. I love the styles that you picked to share.
The grandkiddos will LOVE these lollipop holders!
so cute
These are really adorable. I would love to make them and add little hanging name tags to use as placecards on our holiday table.
I love how unique an idea this is!
These are great for the neighborhood friends!
Cute!
Great stocking stuffer!
Those are adorable!
These are all so cool but the Grinch one is my fav!
Great gift for the grandchildren!
These are just too cute!
Perfect for the grandkids!
My granddaughter and I will have so much fun making these!
Pretty
Hello
Christmas lollipop holders are great gift ideas to make with the kids.
These are adorable and will be great for the grandkids!
Neat project
Such a fun idea!
What a cute idea and it can be hung on the Christmas tree as an ornament, also.
These are just too cute thanks
Cool lollipop holders
These are way too cute!
What a cute way to step up a simple treat!
Cute little buggers.
Love love
These are so cute! I can make these for my coworkers for their holiday treats.
So cute! Can’t wait to make some!
These are so cute!
Sweet little things
Hi
This is so fun. I could see doing this on Halloween for trick-or-treating too!
LOVE the holders! will be doing these for my grandkids.
They are really cute and look easy to make.
I love the Grinch ones!
These are so cute.
So cute
So very cute, will be making for grand kids for christmas
Home!
Now this is a idea to make for sure!
I think this would be a great project for your children or grandchildren to join in and have some fun!
I love this craft!
this is a cute idea
Such a cute idea for the littles... (and some grown-ups, too!)
Cute little critters.
Happy Thanksgiving!
I think the gnomes are my favorite!
Happy Holidays!
The Penguin is super cute!
These would make great Christmas ornaments.
Kindness
Adorable!
I love these kind of Christmas Crafts this is something even I can do! These are way too cute! It makes such a simple item seem unique and personal and more special!
great idea for my grandlittles!!
If you use them as ornaments you can hide them on the lower branch’s for the kids to find and get to keep the treat.
I love this craft project. Something my girls can do.
So cute!!!!
I see these candy holders popping up all over the place. Nice to see some that are different than the others. Thank you for the tutorial and design.
Awesome
Sweet!
Blessings!
added to my list of TO DO's Thank you for the inspiration
The kids will love these and they look so easy and festive for the holidays
Can you make a grinch or jack skeleton one. That woukd be cute.
Super cute. Can you make a grinch or jack skeleton one. That woukd be cute.
Love the penguin. Super cute
These are so cute and would be great for a classroom!
How cute. Makes me wish I had little kids.