Create Adorable Reversible Baby Ribbon Bibs using Ribbon and Cotton Fabric with this Beginner-Friendly Baby Bib Sewing Pattern and tutorial. Download the FREE Baby Bandana Bib Pattern File.
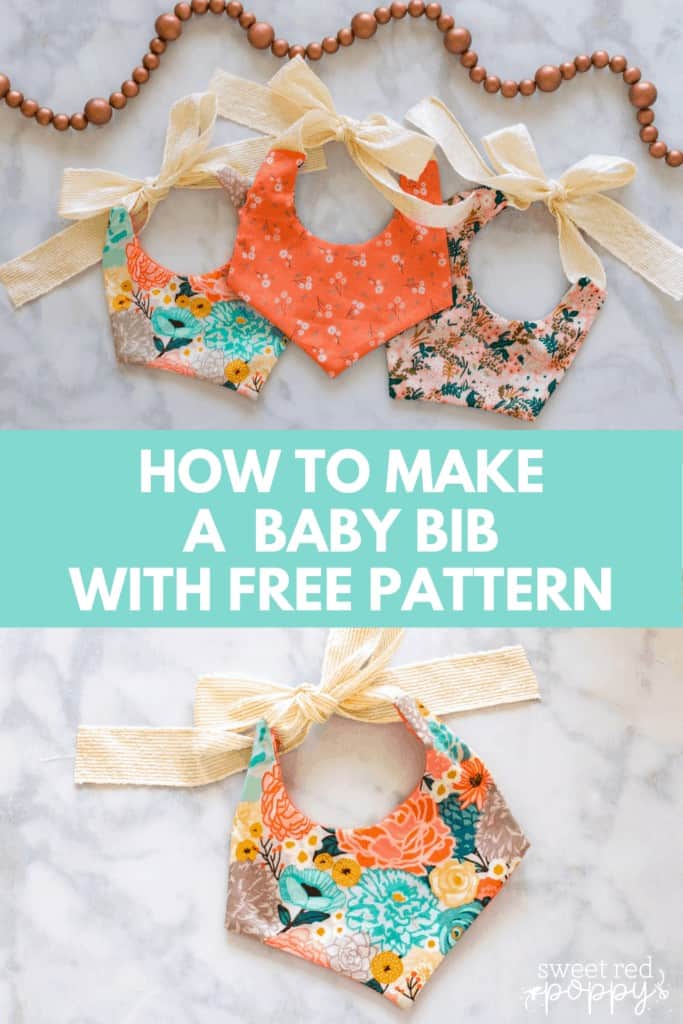
You know how obsessed I am with sewing for babies, so I had to share a new bib pattern with you! This pattern basically combines my Bandana Bib pattern and Baby Bib Pattern together with a subtle touch of ribbon.
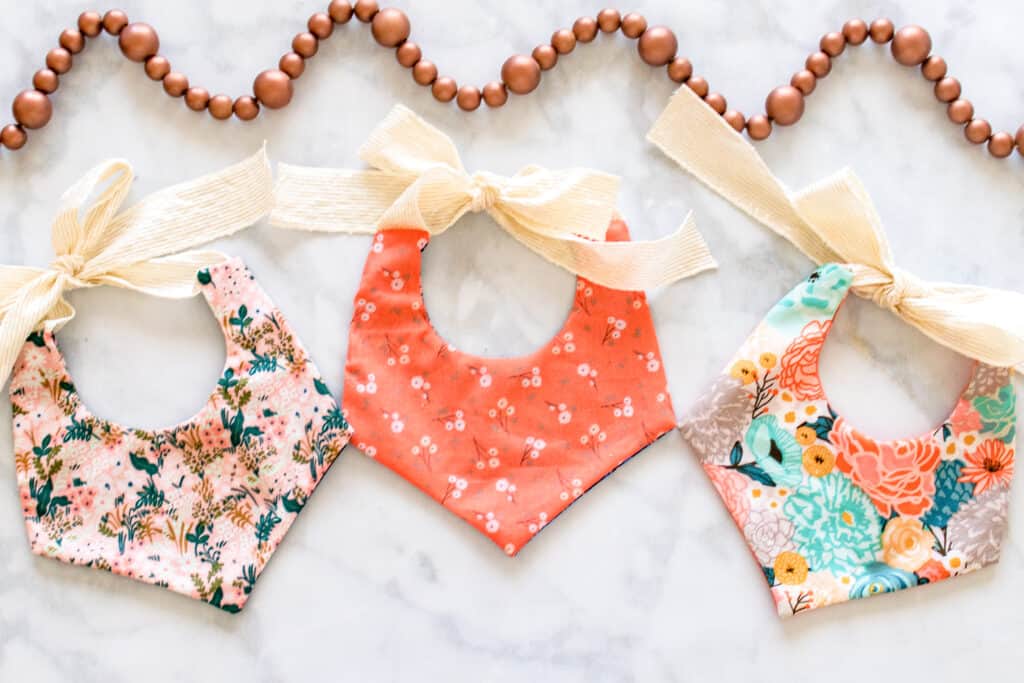
I can't wait for you to try this pattern and give all those special babies a boutique-worthy bib! Are you ready to get started? Gather all of your supplies and let’s get sewing!
Reversible Baby Bib Sewing Pattern
Supply List:
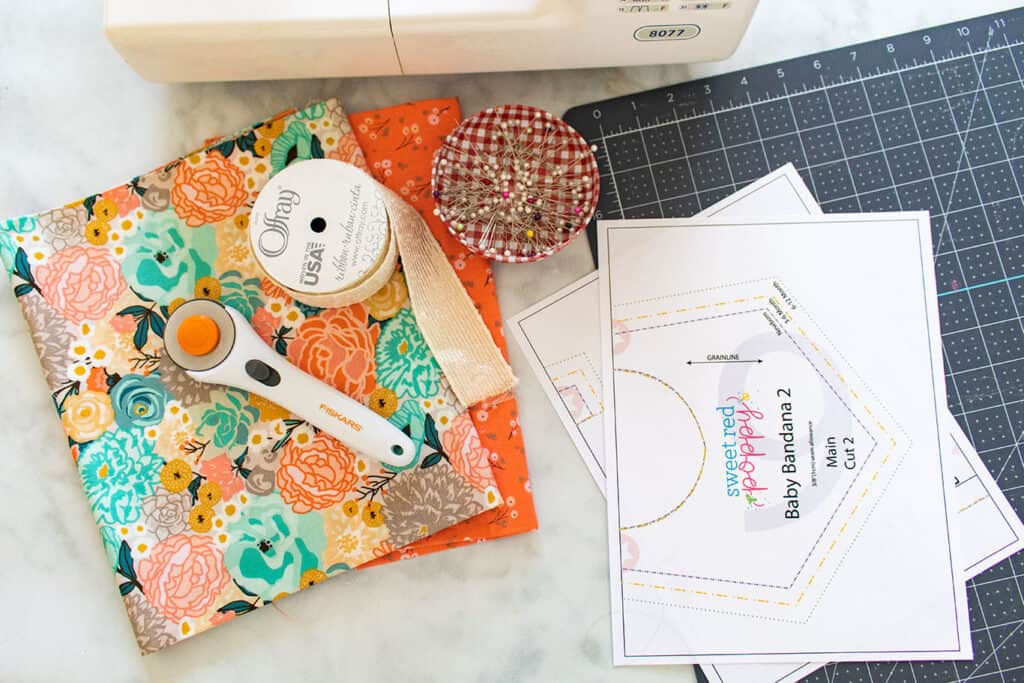
- 2 Fat Quarters Cotton Fabric
- 1 yard of Ribbon
- Sewing Machine
- Thread
- Scissors or Rotary Cutter and Mat
- Iron & Ironing Board
- Turning Tool
- Beacon Fabric Glue
- Pins
Shop my favorite sewing supplies here!
Why Shop Through My Links?
When you shop through my affiliate links, it doesn't cost you anything extra, but it helps me out in a big way! I earn a small commission from those purchases, and that support allows me to continue creating and sharing free tutorials and patterns for you. Thank you so much for helping me keep this creative community going! 💕
DOWNLOAD THE FREE SEWING PATTERN HERE!
Step #1: Cut Fabric & Ribbon
Download the pattern and print it out. Measure the 1”x1” square to make sure it was printed correctly. Piece it together and cut it out according to the size you are making.
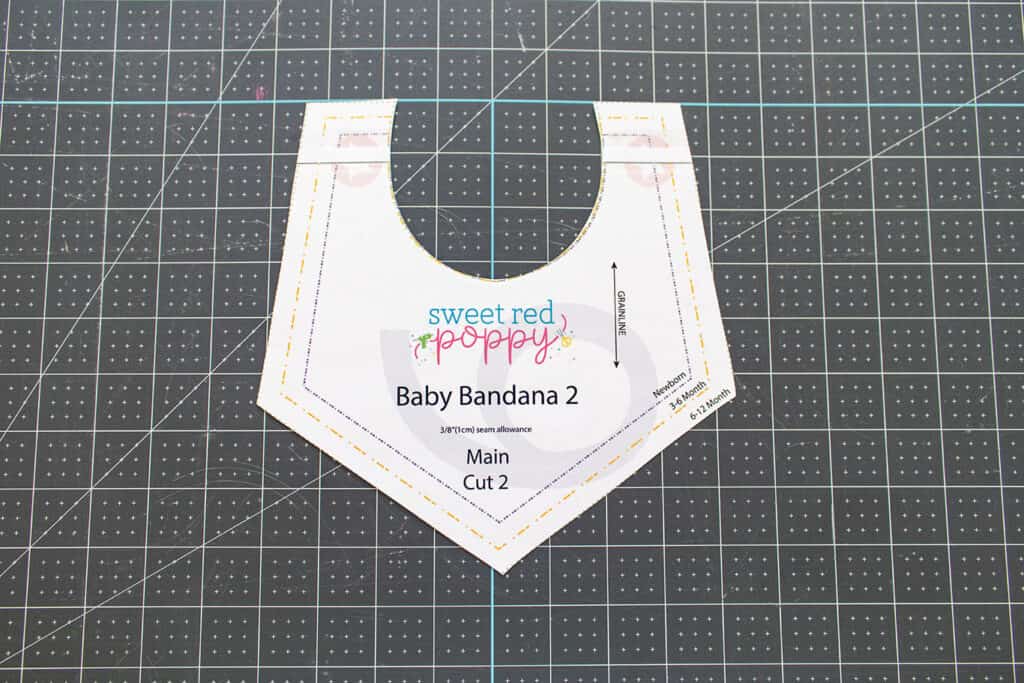
Lay your fat quarters on top of each other and place the pattern on top of the fabric paying attention to the direction of the grainline.
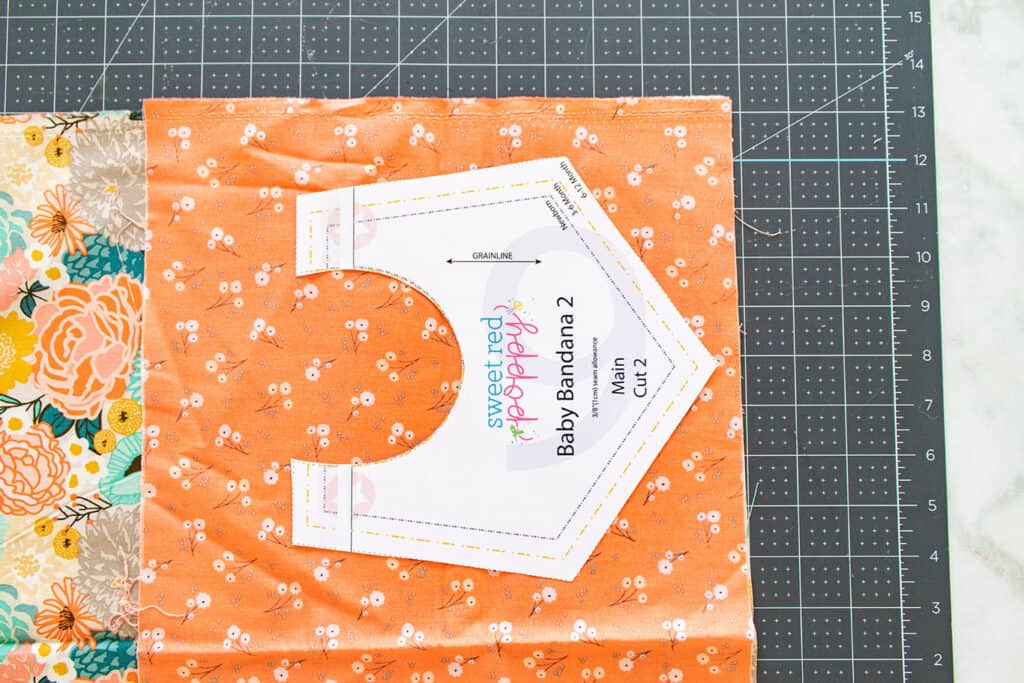
Using your rotary cutter or scissors, cut out your fabric. You should end up with two pieces.
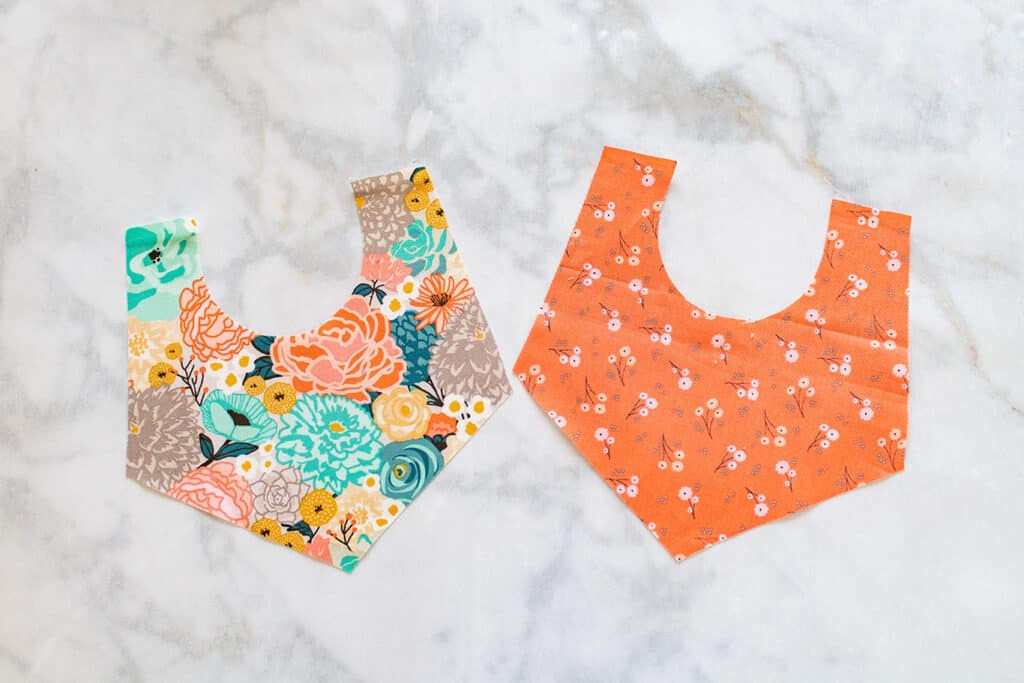
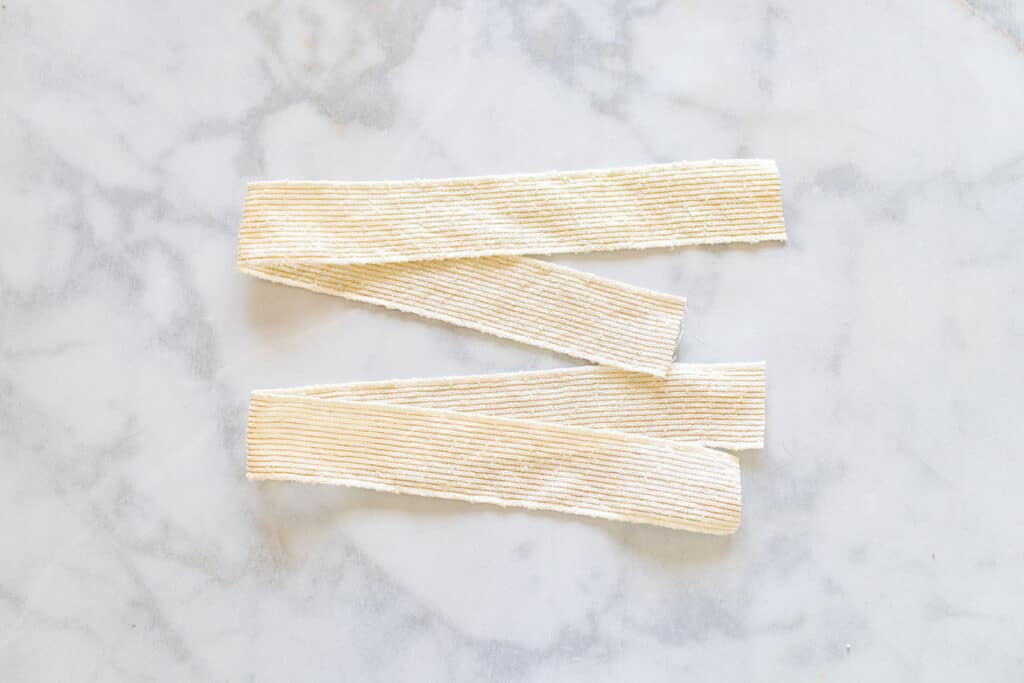
Next, take out your ribbon and cut two 18” pieces. If you bought 1 yard, you can just cut your ribbon in half!
Step #2: Pin Together
Lay one piece of the bandana bib right-side up and place the two pieces of ribbon on top.
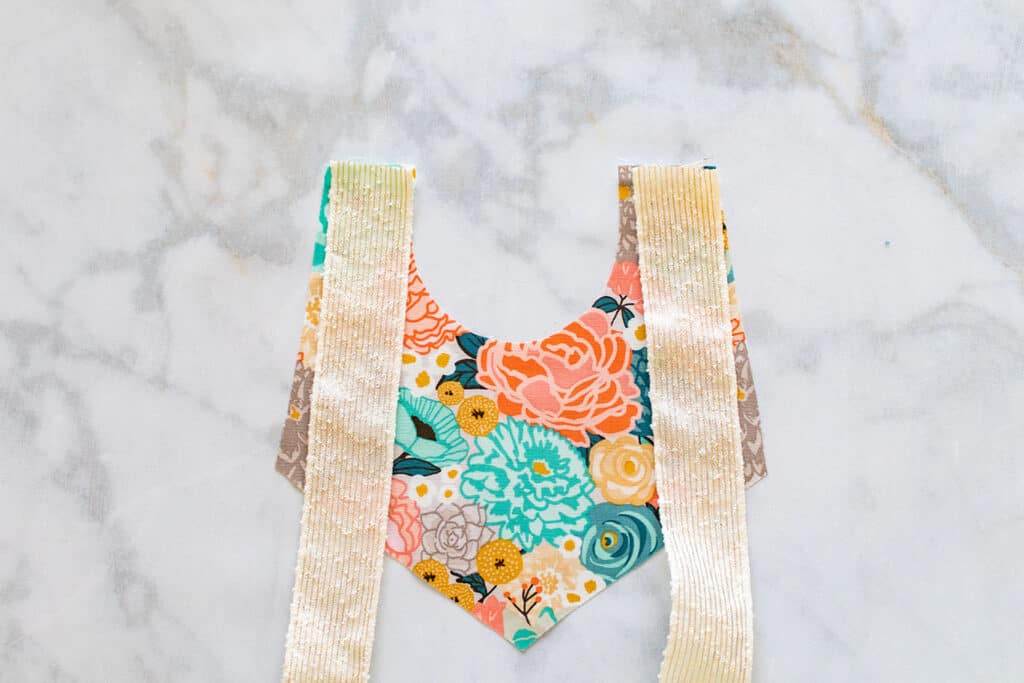
Now place the other piece of the bib on top of that right-side down.
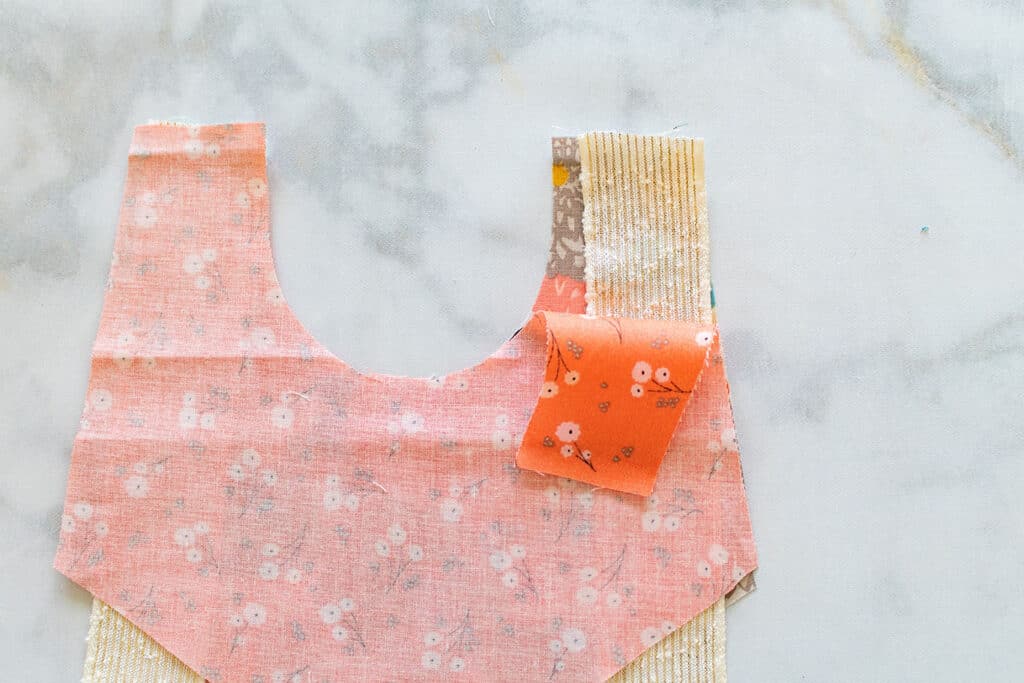
Pin everything in place. You are going to want to feed both ends of the ribbon through one hole to turn, so make sure to pin accordingly.

Step #3: Sew Together
Using a 3/8th’s inch seam allowance sew the bib together along the raw edges. When you reach the point of the bib, lower the needle, lift the foot and pivot the fabric. This will help you to create a sharp point.
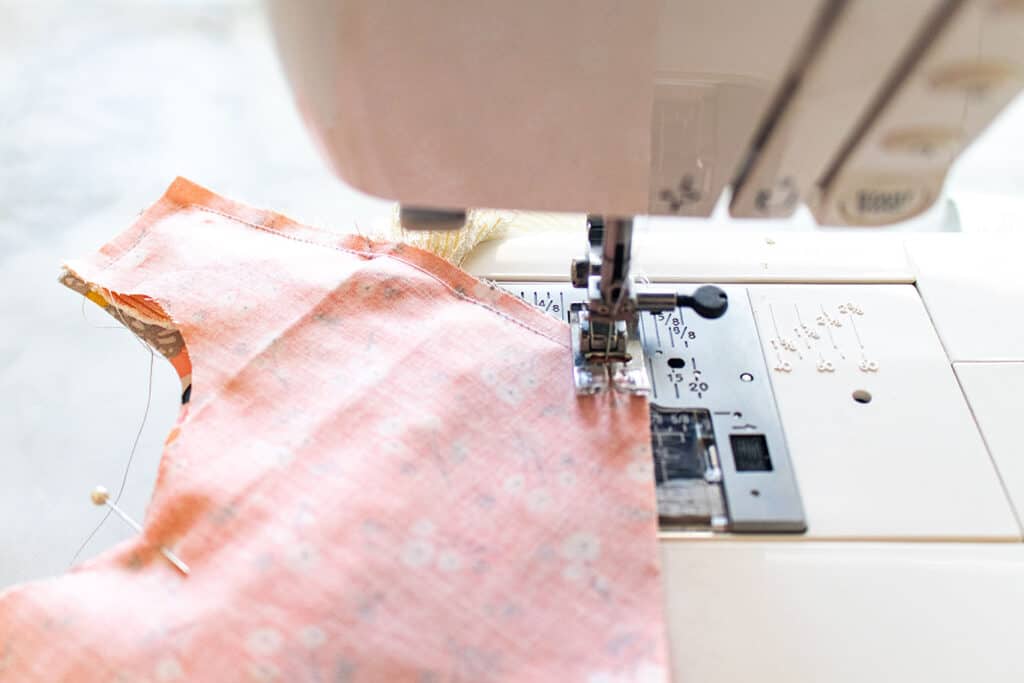
Don’t forget to backstitch at the beginning and end of your seams, otherwise the seams will pull apart when you flip the bib right side out. Also, make sure to not sew any other part of the ribbon into a seam.
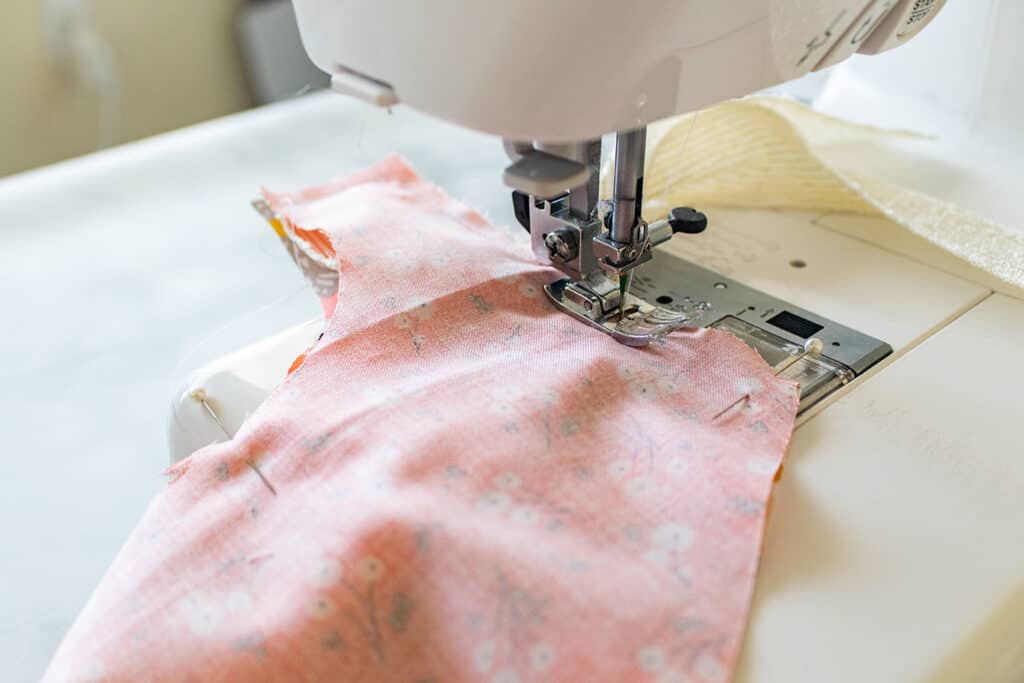
Leave a 1” opening for turning. (This is where you should have both tails of the ribbon sticking through.)
Step #4: Turn Right Side Out
Clip the curves of the bib. This helps the fabric to lay flat once you turn it right side out and prevents any bunching.
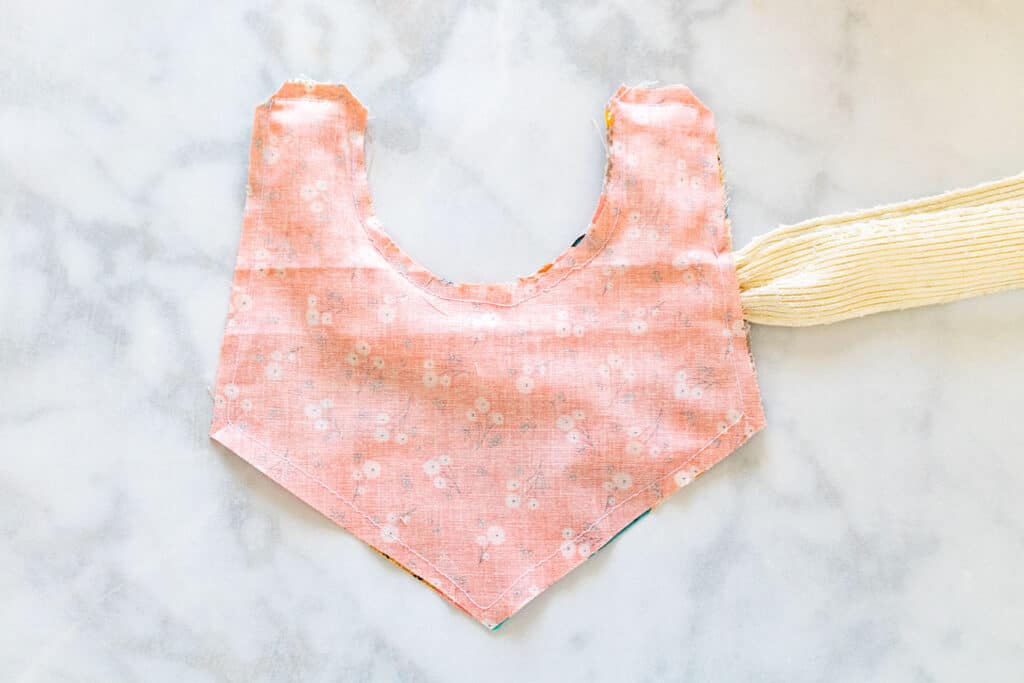
Turn the bib right side out and with your turning tool, push out the seam allowances.
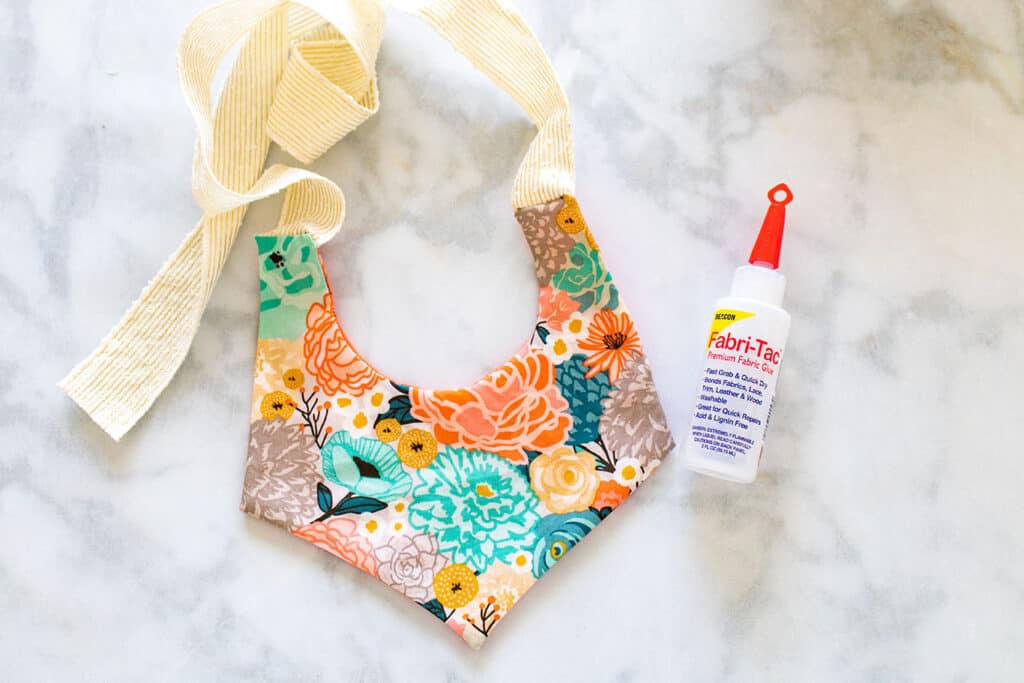
Step #5: Finishing Touches
Using plenty of steam, iron the entire bib to create a crisp professional looking finish. Using your thumb and pointer finger roll the seam allowances outwards along the edges of the bib.
With your Beacon Fabric Glue, close the opening.
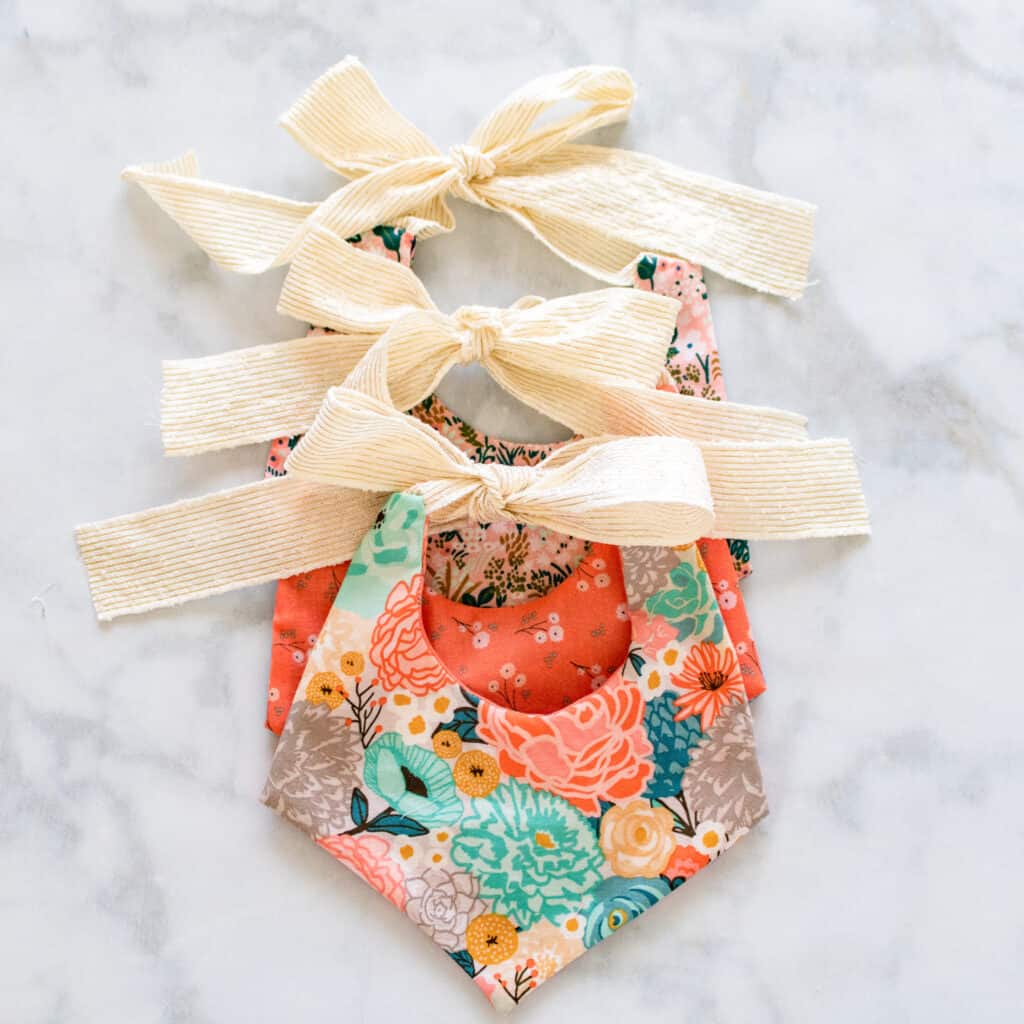
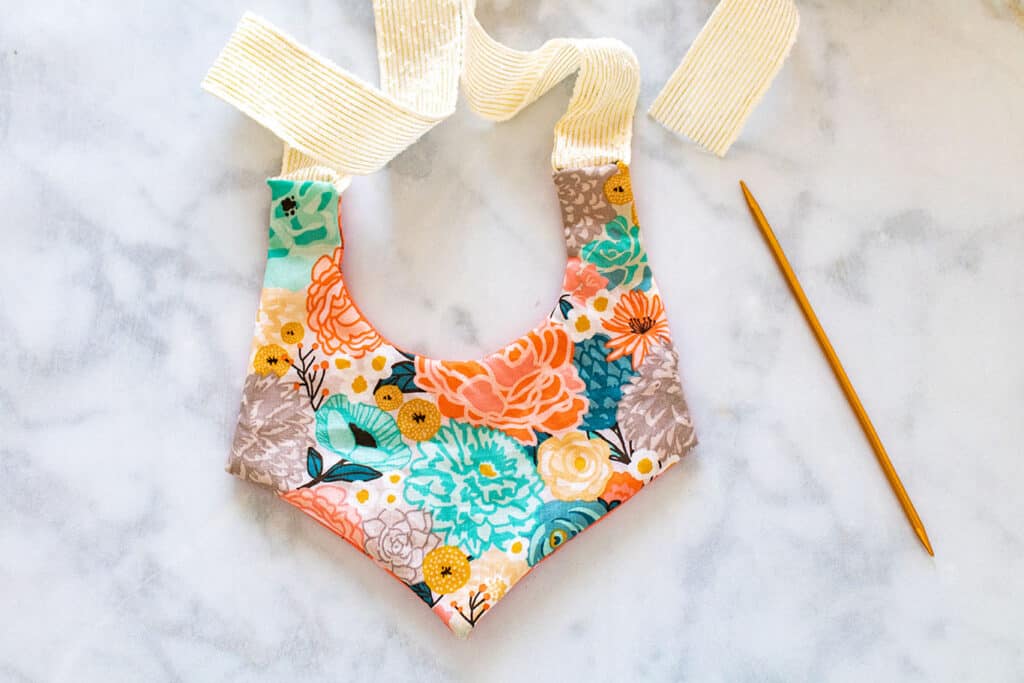
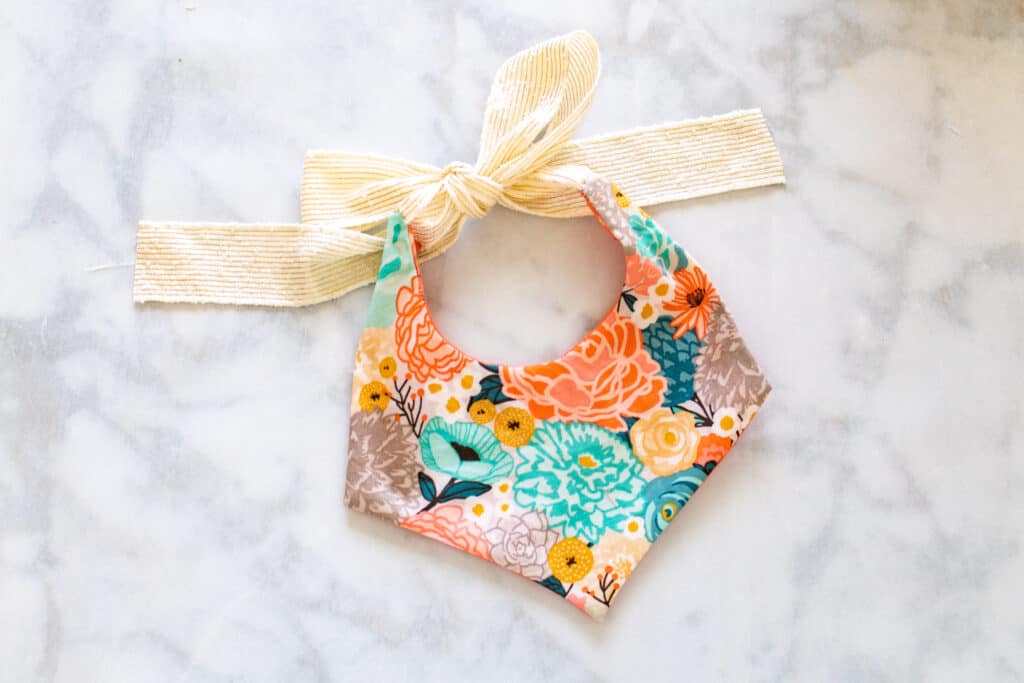
Now you’re finished and you have an adorable, boutique-worthy Baby Ribbon Bib!
I can’t wait to see what you make with this free pattern!
Make sure to join my Crafting & Sewing FB group and share what you are making with us!
Leave a comment below telling me which bib is your favorite.
Do you have any questions about this baby bib sewing pattern? Let me know in a comment below!
Where did you get the ribbon?
Did you find out? I want to know the same. Love that ribbon!
Very cute! Thank you for sharing this.
This looks so cute thank you so much
Love the ribbon.....More details please on how to get ahold of it!
They’re adorable! I can’t pick just one.
Thanks for sharing this pattern. It’s much easier than others I’ve made in the past.
I printed the pattern but it doesn't have the square to check the size.
Ditto. Thanks for the pattern. With no square, could you let me know the size it should be (in inches)?
very cute but obviously not for baby boy
I'm actually making some for a boy, there are very cute ribbons for boys with trucks and robots. I will also line with diaper fabric for greater absorbency, especially for drooling.
Awww! Love it very cute. How to get it?
Love the bib pattern! Thank you! I put a piece of flannel in between the two printed pieces for extra absorbency, and top stitched around the outer edge once the opening was closed. I will keep things from shifting around and will remain flat longer when washing on a regular basis.