Find out the Secret to Sewing a Dress in Less Than an Hour With This Beginner-Friendly Step-By-Step Detailed Tutorial!
This beginner-friendly sewing tutorial will have you making dresses in no time at all. And yes, I said DRESSES (plural) because once you start, you won’t want to stop. Don't say I didn't warn you!🤣

Just imagine how impressed you’ll be with yourself once you make your very first dress!!
I’m warning you now: buy enough fabric for a few dresses because you’re about to have a closet full of the comfiest handmade dresses!🤣
Table of Contents
Is This Project Beginner Friendly?
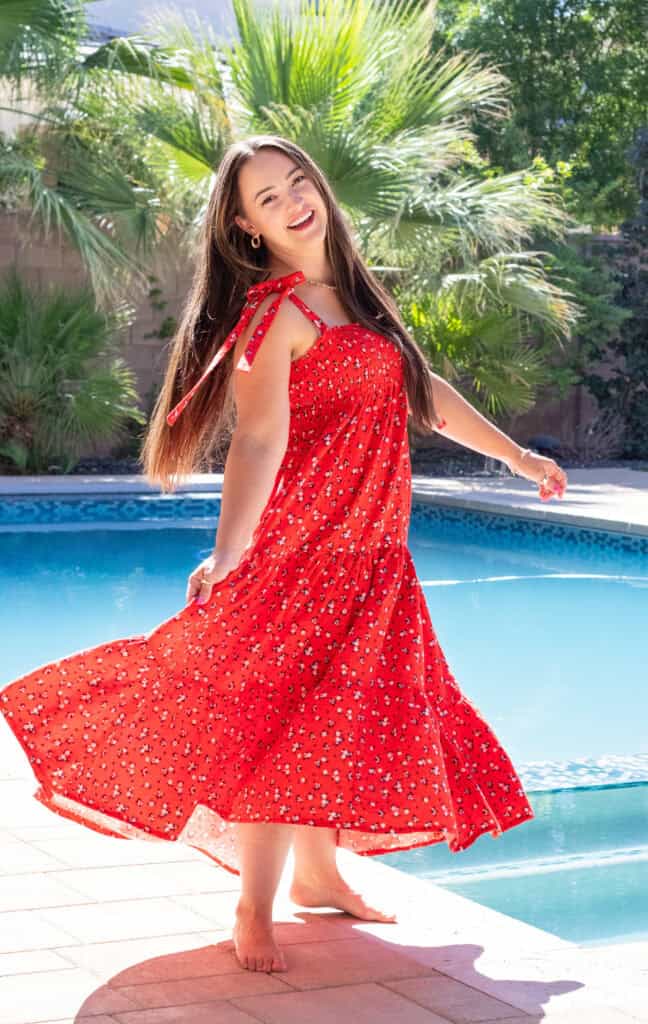
This dress requires just one piece of fabric! Yep, you heard me right. No need to worry about complicated patterns or custom measurements. Smocked fabric makes this project a dream! It’s extra stretchy and easily forms to fit any body without the need for finicky darts or zippers.

Even better, all you need to know how to do is sew a straight line and you’ll be able to make this dress!
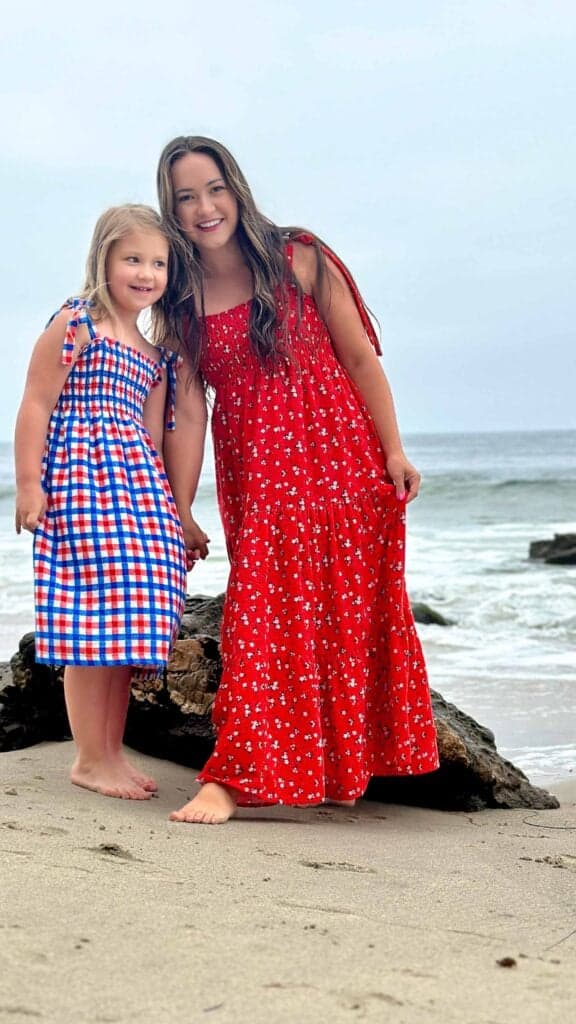
And in the words of my 8-year-old daughter, "It's so easy even a kid like me can do it." That's right, she made the dress she's wearing in the photo below!
Selecting The Right Fabric
To sew this dress, you'll need to select a pre-smocked fabric. You can find a wide variety of options at your local craft store or online.
Choosing a smocked fabric for a beginner-friendly sewing project is great for several reasons:
Stretch and Fit: One of the greatest things about elastic is its forgiving nature! With this project, you won’t have to worry about perfecting the measurements. Plus, this dress can adjust to a range of sizes. So even if your size increases or decreases, your dress will still fit.
Simplicity: This dress can be made with only one seam! How’s that for easy? Simply omit the straps, and you’ll make the world’s easiest dress!
Versatility: Smocked fabric comes in a wide variety of colors, prints, and materials, so you can customize this dress to fit your personal style.
How to Make a Smocked Dress
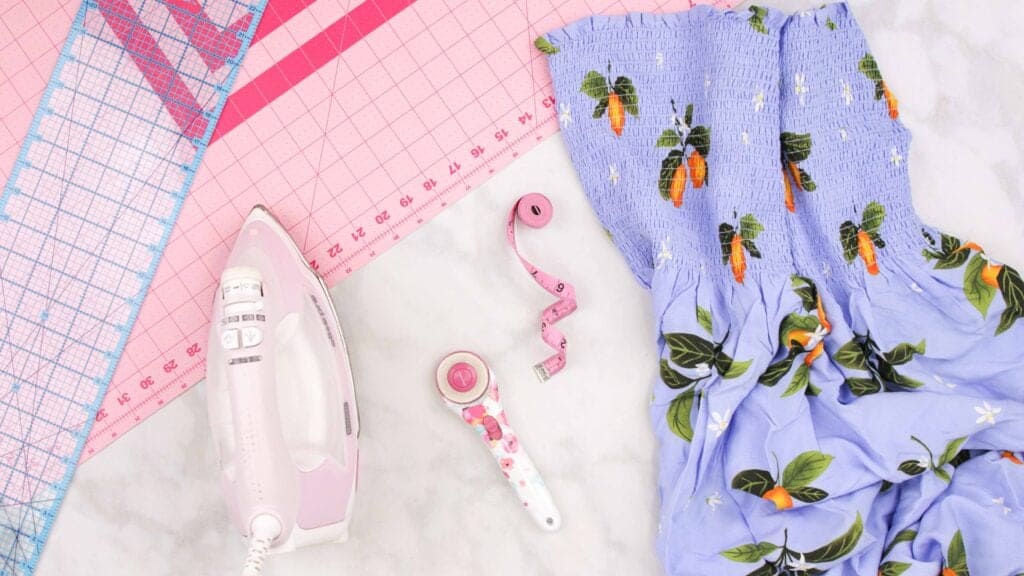
Smocked Dress Supply List
- Pre-smocked fabric (Read Step One to determine how much fabric you will need)
- Scissors
- Rotary Cutter
- Rotary Cutting Mat
- Thread
- Sewing Pins
- Iron
- Ironing Board
- Sewing Machine
- Sewing Machine Needle
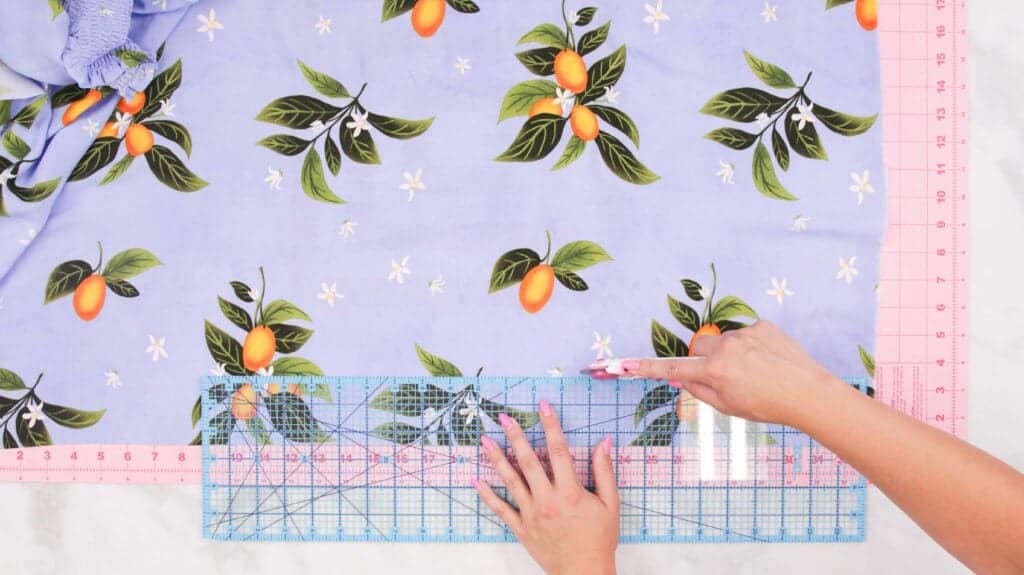
Step One: Measure and Cut the Fabric
To measure your chest for this project, stand up straight with your shoulders relaxed at your sides. Wrap a soft tape measure around the fullest part of your chest. The tape measure should be parallel to the floor. Keep the tape snug but not too tight, check the measurement and write it down so you don’t forget it!
Purchase your width of fabric using your chest measurement.
The amount you'll need to sew the dress is three inches less than your chest measurement. However, you'll want to purchase the full chest measurement.
The extra three inches will account for prewashing and any shrinkage that might occur during this process and the possibility of the fabric begin cut off grain. Wash and dry the fabric (before sewing it) the same way you plan to launder your dress once it's sewn.
For example, my chest measures 35”; I subtracted 3”, and my final measurement is 32”. This is the width of fabric that I will be using for my dress.
If you don't have your model on hand to measure, here's a cheat sheet you can use when shopping for fabric.
Kids
- 2/3 Yard: Kid’s Size 12-18m - 5/6
- 3/4 Yard: Kid’s Size 7/8 - 10
- 1 Yard: Kid’s Size 12 - 14
Adult
- 1 Yard: Women’s Size 0-10
- 1 1/2 Yards: Women’s size 12 - 3x
- 1 3/4 Yards: Women’s 4x - 5x
- 2 Yards: Women’s 6x - 7x

*Pro Tip: Snip one inch into the smocked fabric and then rip the remaining fabric for a clean, straight line.

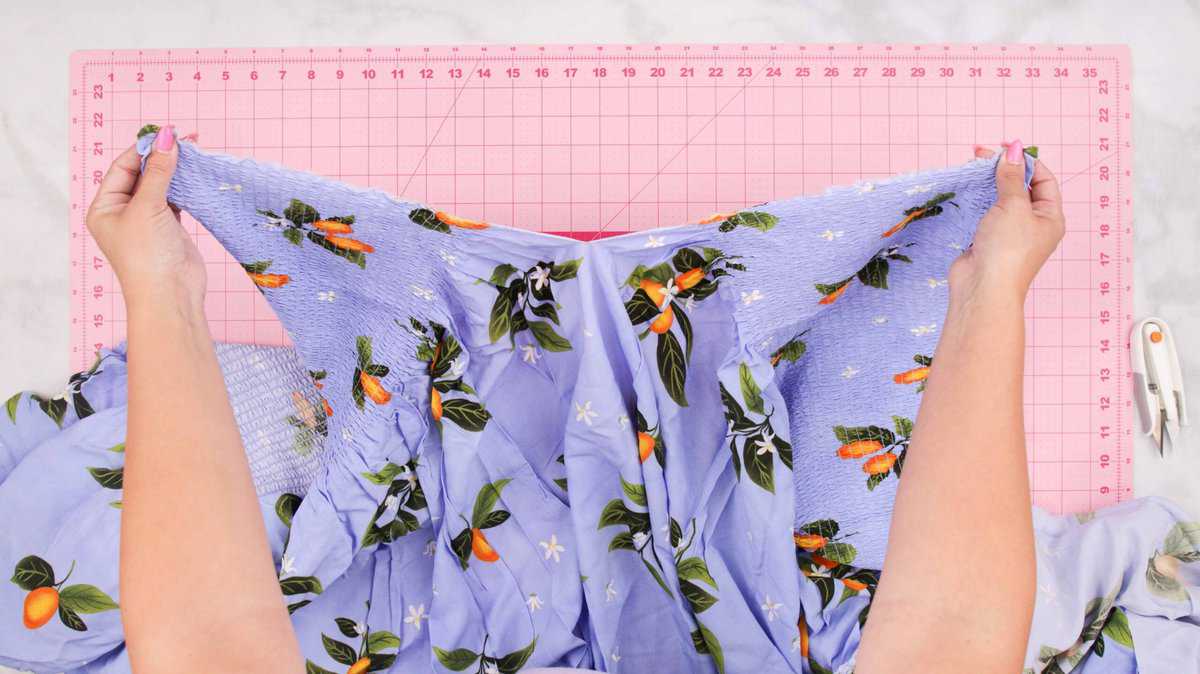
Next, you'll need to determine the length of your dress. Hold your fabric up to your chest and determine how long you'd like your dress to be.
Add one inch to the desired length of the dress to account for the hem, cut your excess fabric, and set it aside for the next step.
*If you're on the taller side (for reference, I'm only 5'2") and you'd like to keep the full length of your fabric for a maxi dress, you may need to purchase additional yardage to create your straps.
Step Two: Prepare the Straps
You're ready to start sewing! Let's begin by preparing the straps for the dress.
The straps can be cut from the excess fabric that you cut off of the length.
Cut 4 Straps
- Child 2.5" x 23"
- Adult 2.5" x 30" (you can increase the length for longer ties or increase the width for thicker straps)

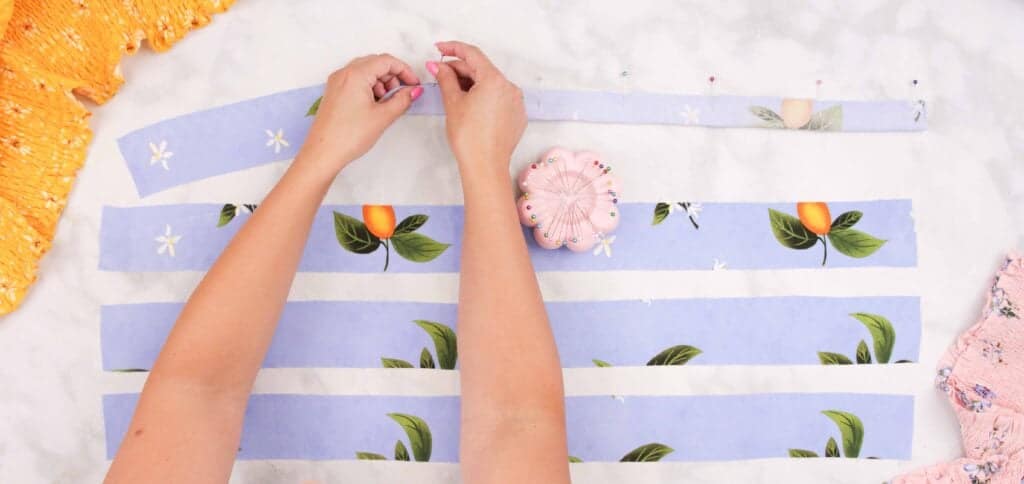
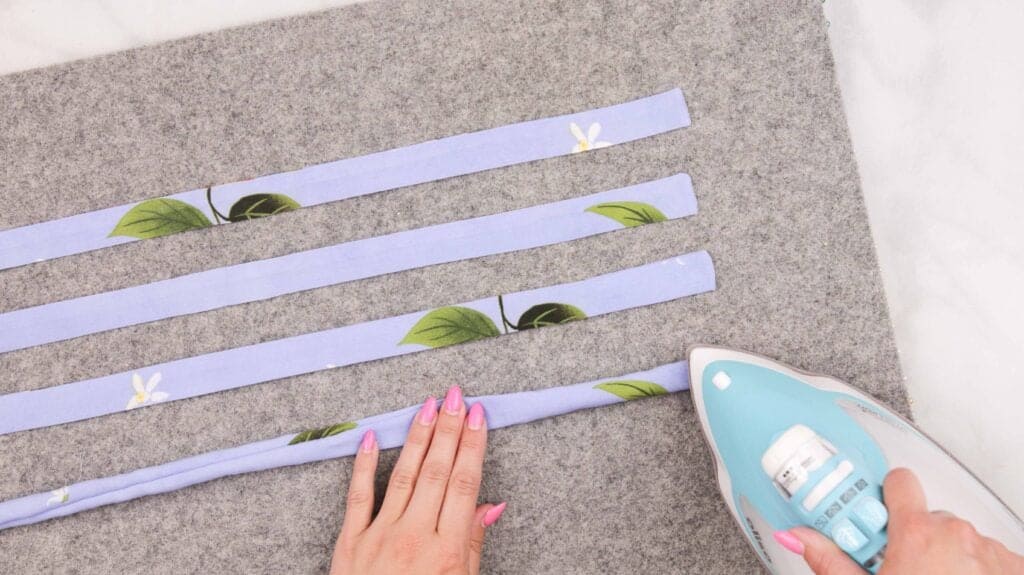
First, fold and press each strap in half lengthwise with the right sides together.
Pin the edges together.
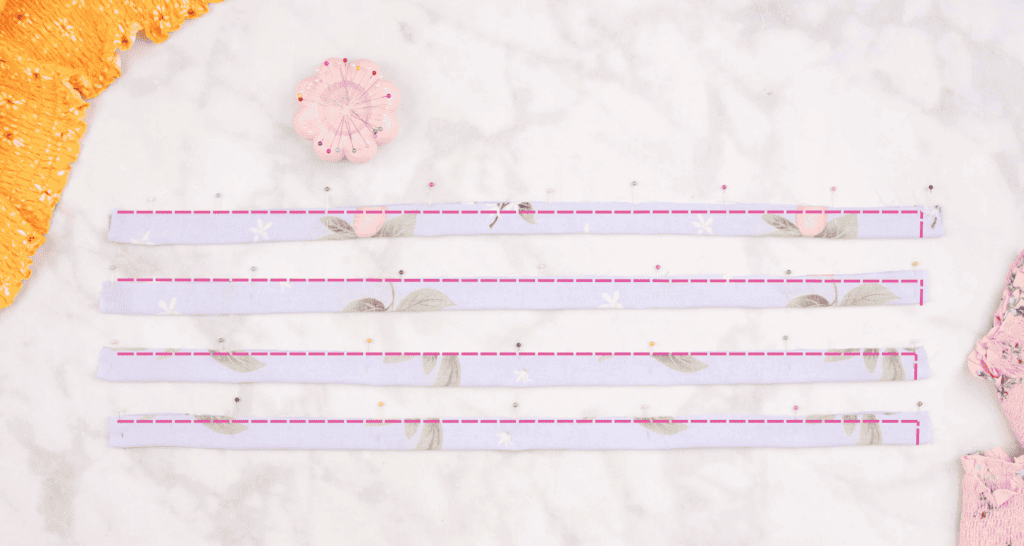
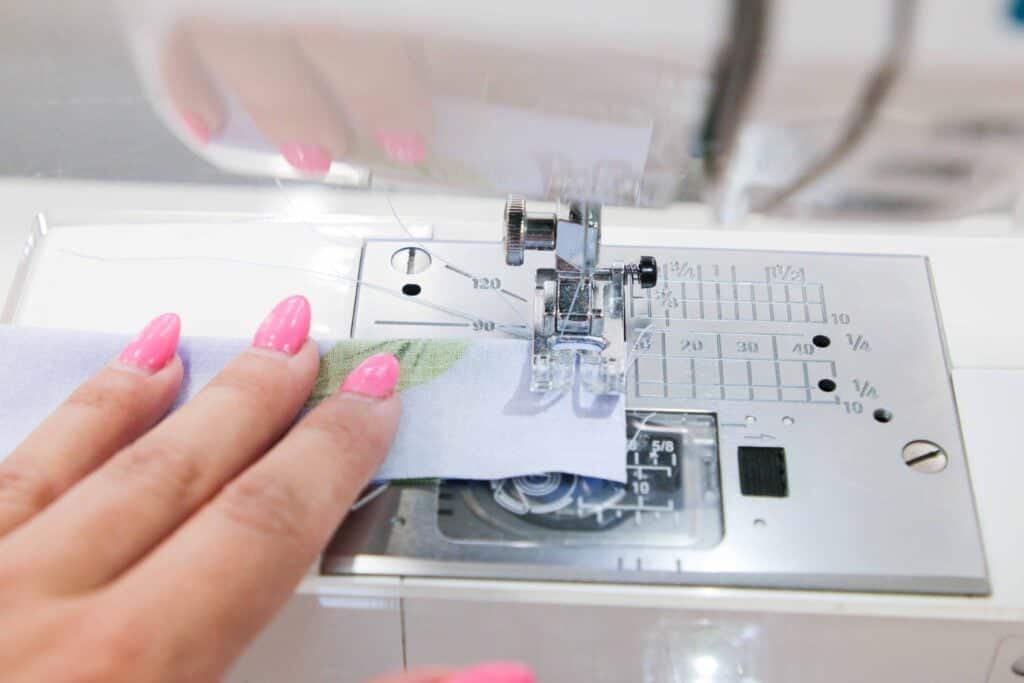
Use a 3/8" seam allowance to stitch along one short end, rotate around the corner, and then sew along the pinned long edge. Make sure to backstitch at the beginning and end of your seam.

To rotate around the corner, stop sewing when you reach 3/8" from the end of the corner. Then, lift the presser foot, ensuring that the needle is still down in the fabric. Rotate the fabric 90 degrees. The next straight edge should now be in front of the presser foot. Go ahead and put your presser foot down and continue sewing.
Then, repeat this process to stitch the remaining three straps.
Next, trim the seam allowance off the stitched corner at a diagonal on each strap. Make sure to cut close to (but not through!) your stitching.

Then, trim the remaining seam allowances down by approximately half. This will help to reduce bulk in the finished straps.
Once the straps have been stitched, turn them right sides out through the open end.

To turn the straps, you can either use a loop turner or safety pin to hook the end and pull it through the tube or use a chopstick or skewer to push the stitched end through the tube.
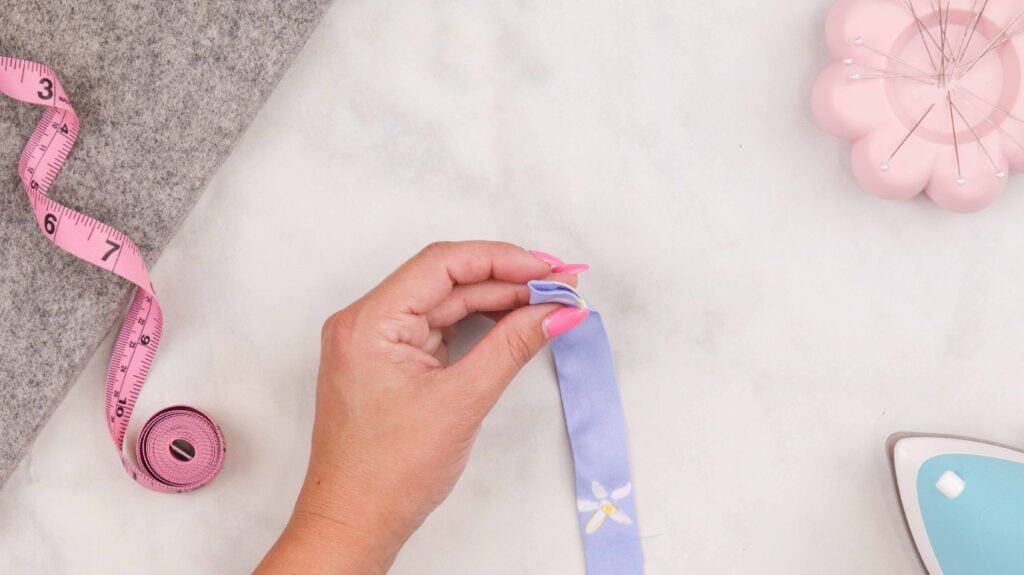
Finally, press the straps flat, pressing the seams to the very edges of each strap.
Turn the raw edge of the strap inward 1/2” to enclose the raw edge, and press it with plenty of steam to set it in place.

Optional: Top stitch 1/8" from the edge around the entire strap. This adds extra strength and prevents it from becoming unsightly and wrinkled after washing.
Step Three: Sew the Side Seam
Set aside the straps for now - it's time to move on to putting together the body of the dress.
Start by folding the body piece in half right sides together.

Line up and pin the seam.
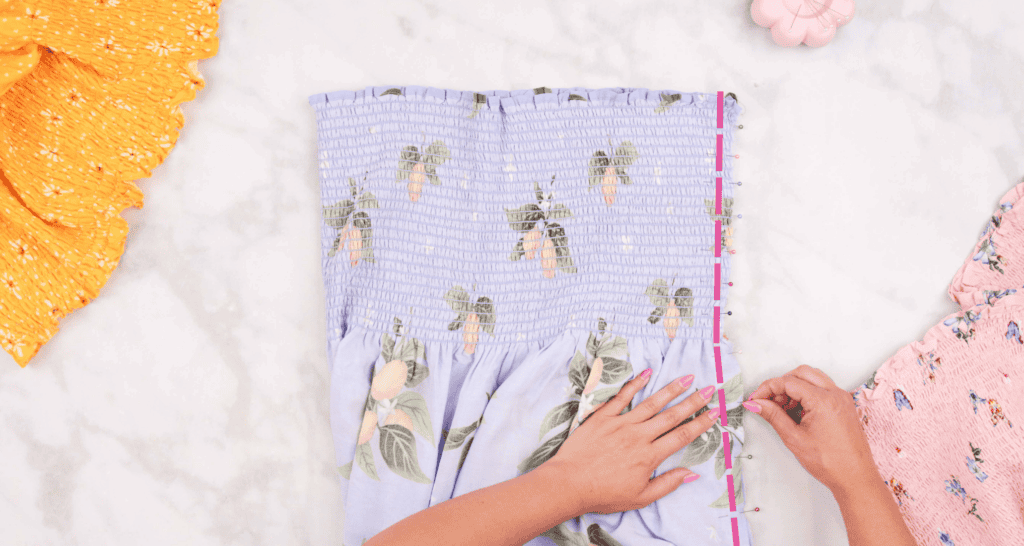
Then, stitch the side seam with a 3/8" seam allowance. Make sure to backstitch at the beginning and end.

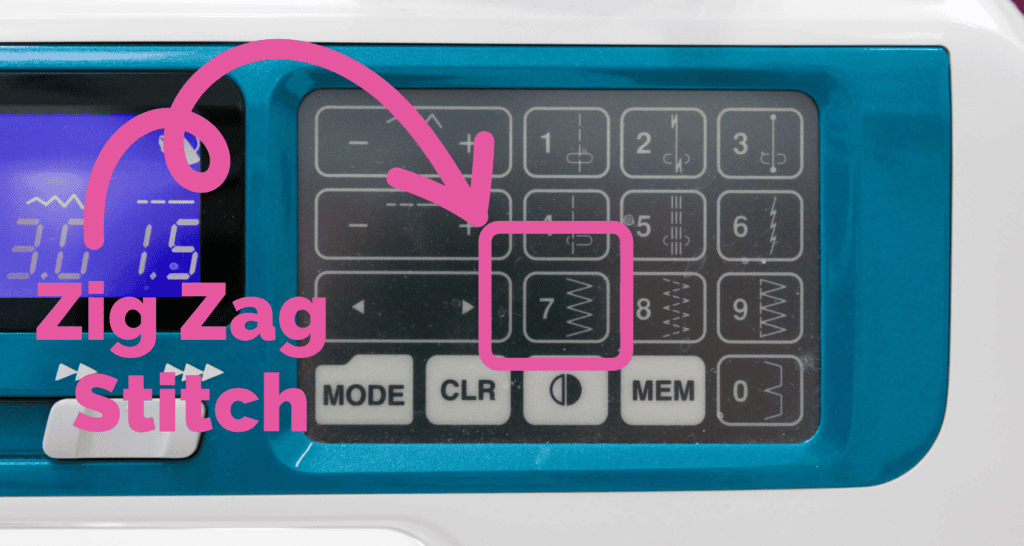
After sewing your seam, finish the edge with a zigzag stitch.
Using a zigzag stitch along the raw edge of the seam allowance will bind the raw edge and prevent it from coming apart.
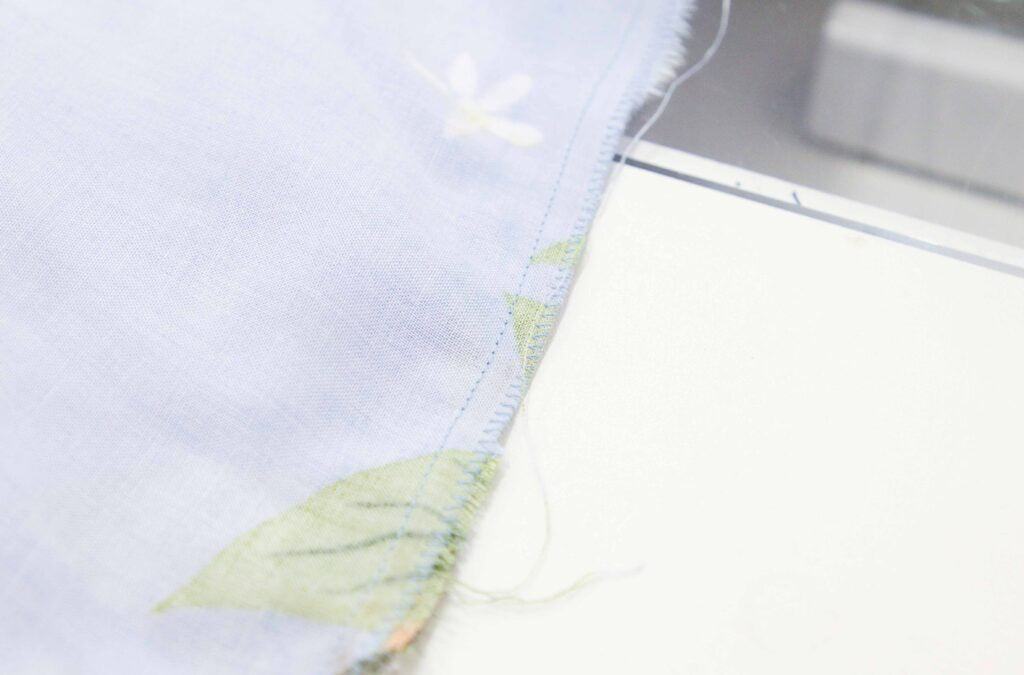
Finally, press the seam allowances to one side. The seam will become the side of the dress.
Step Four: Pin and Sew Straps
To find the placement for the straps, divide the smocked portion of the dress into four equal sections. The seam should be to one side of the dress.
You can also try your dress on at this point to get a more accurate idea of where to place your straps. Placement will differ for each person depending on chest size.
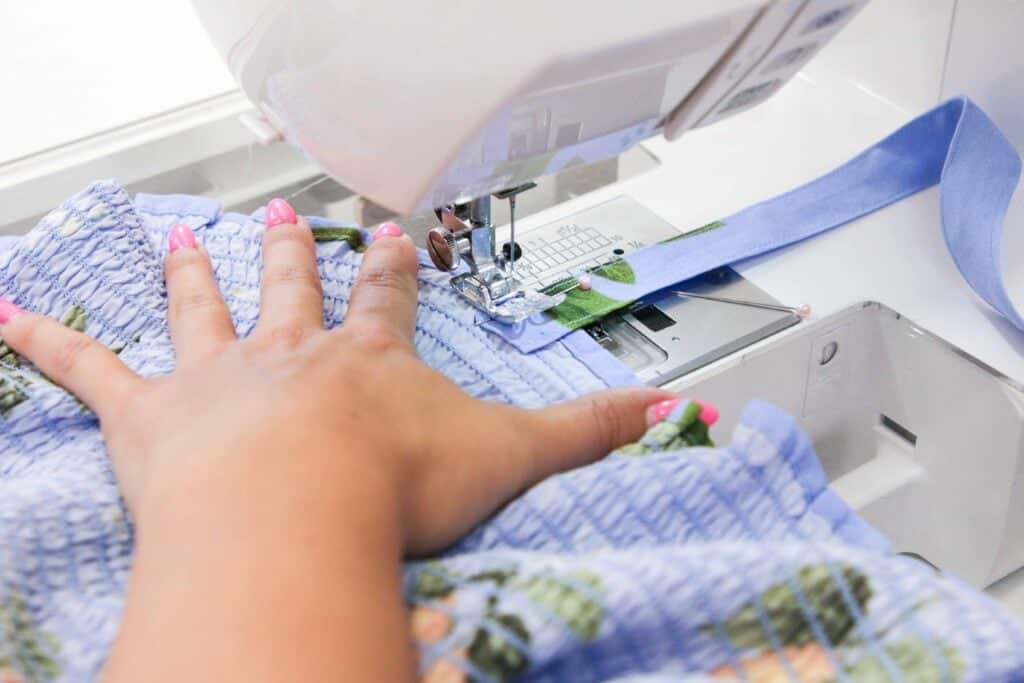
Pin the straps to the wrong side of the smocked fabric so they overlap the bodice by one inch. The straps should extend upwards away from the dress.

Sew over the strap 1/4” from the smocked fabric’s edge to secure the strap in place.
Sew another line 1/4" from the first row to add extra strength to the straps.
Don’t forget to backstitch at the beginning and end to ensure your stitching doesn’t unravel.
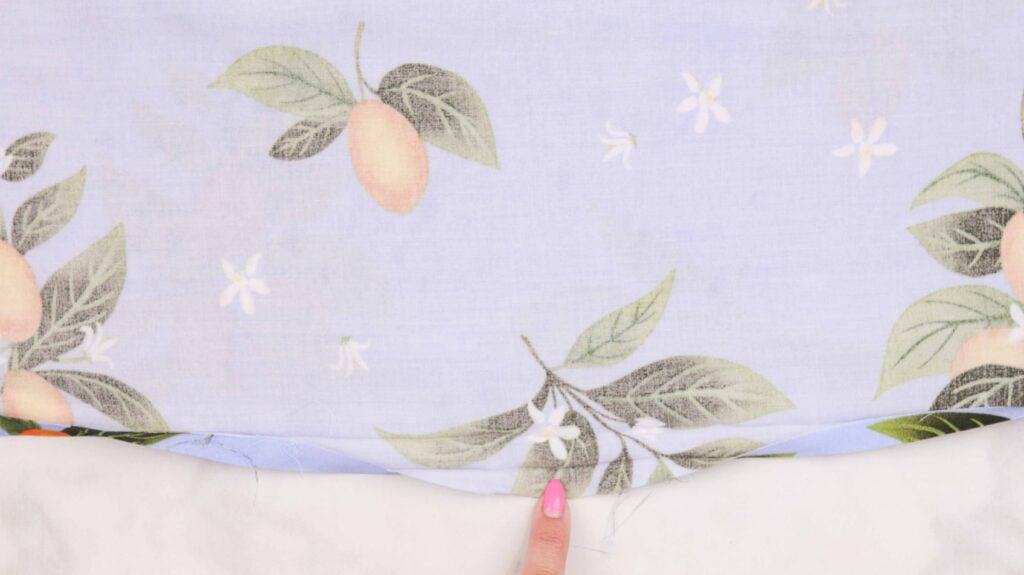
Step Five: Hem and Press the Dress
The final step is to hem the bottom of the dress!
To do this, turn the dress inside out and place it on your ironing board or mat.
Press the bottom edge of the dress up to the inside by approximately 1/2".
Then, fold it up again by a second 1/2" and press the hem flat. This second fold will encase the raw edges inside the hem.
Then, pin the hem in place.
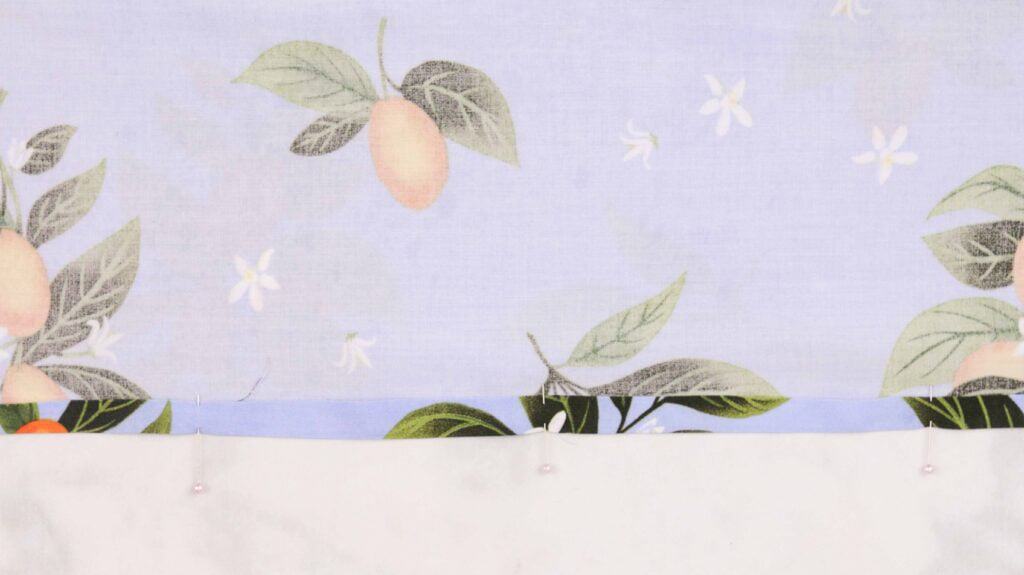
Topstitch the hem, sewing 1/4" from the interior folded edge of the hem.

Give everything a final press with your iron, trim away any loose threads, and you're finished! Congratulations!

Did you try this pattern out? Post a picture on Instagram with the hashtag #sweetredpoppy - I would love to see how it turned out!

Don't forget to join my Facebook group where you can show us what you're making, ask questions, and learn from others.

Looking for even more free sewing patterns? Be sure to check out the posts below!
How can we make the smocked dress tiered like the red one you made?
I would love to make the tiered red dress. What are the measurements and directions? I love all of your tutorials!
I love them all too, she's a great crafter and a beautiful model!!
I would love to know how to make the red tiered one as well
And thank you !!!
I want to make matching dresses for me and my daughters but the smocked part seems to be their whole body/whole dress. What are your suggestions to make it more like a dress and less like a tube?
Love your directions for the smocked dress. Very easy to follow. My daughter wants pockets in her dress. How can I add pockets?
Thank you.
D-Mac
Where did you buy the smocked fabric? I have been looking for it everywhere but none of our craft stores have it.
This is brilliant! A one-seam dress is a dream come true. Today I’ve featured your tutorial on Crafts on Display, I hope you enjoy it! - https://craftsondisplay.com/sewing/one-seam-maxi-dress-189442/