Table of Contents
Create a Small Cricut Craft Room on a Budget!
This is a sponsored post written by me on behalf of Cricut. All words and opinions are my own.
This Space Will Not Only Keep You
I used my Cricut Maker to put the finishing touches on my budget-friendly craft space and now it's perfect!! I'm SO excited to share this space with all of you!

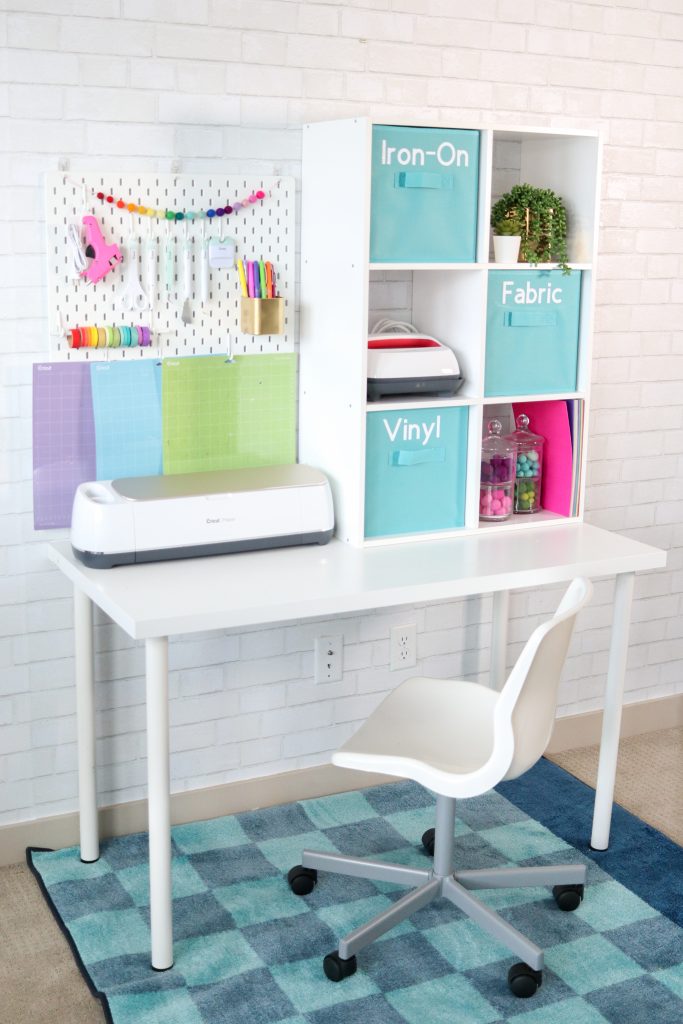
Most of you have seen my craft room before (if you haven't you can see it here) and as much as you all love it, I get asked over and over for a budget-friendly craft area that will fit into a small space. Well, here it is!!
I searched high and low for the best-priced items to help you create your own crafting space that is budget-friendly and can fit into any small space.
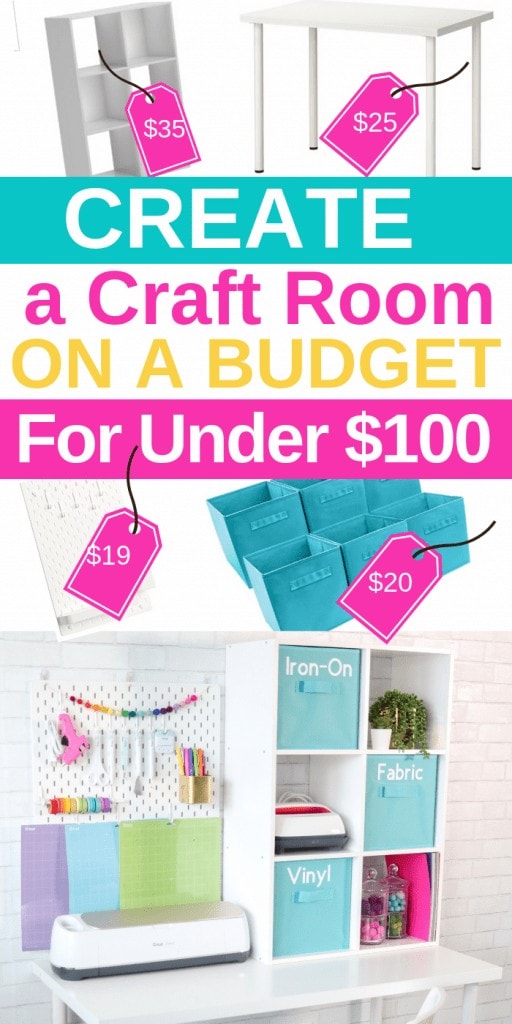
You can create this crafting space for under $100. YES, that's right! Under $100!
Let's walk through the tutorial for the Square Storage Totes and then I'll give you ALL of the details on this craft room set up!
SUPPLIES
- White Glitter Iron On
- Cricut Maker
- Weeding Tool
- EasyPress 2 or Iron
- EasyPress Mat or Ironing Board
- Scissors
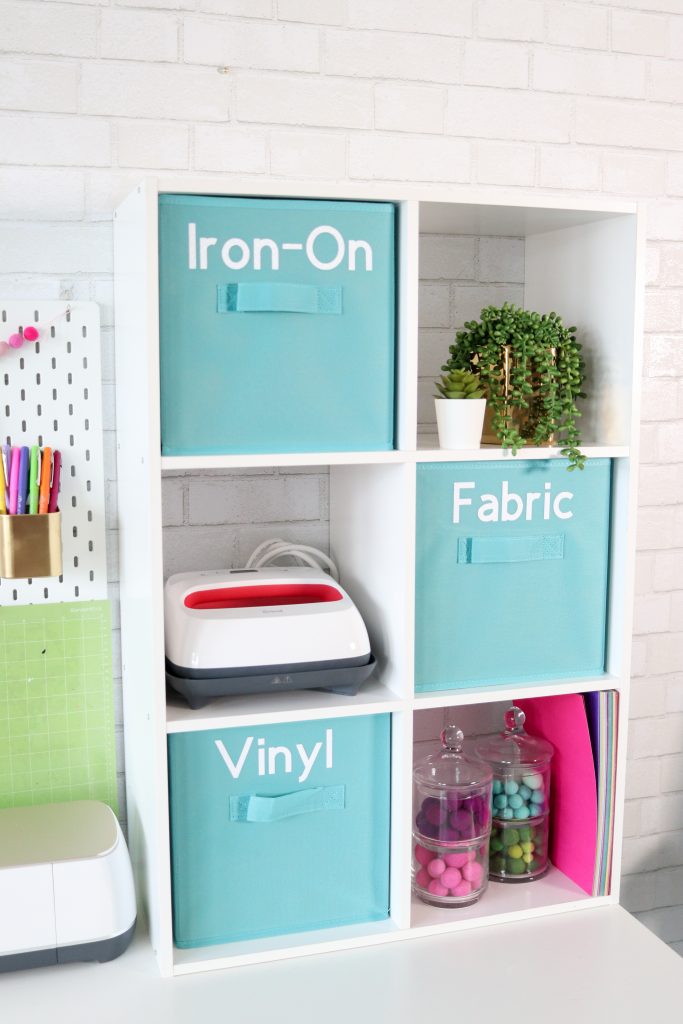
- Square Storage Tote
DIY Tutorial: How To Apply Iron On
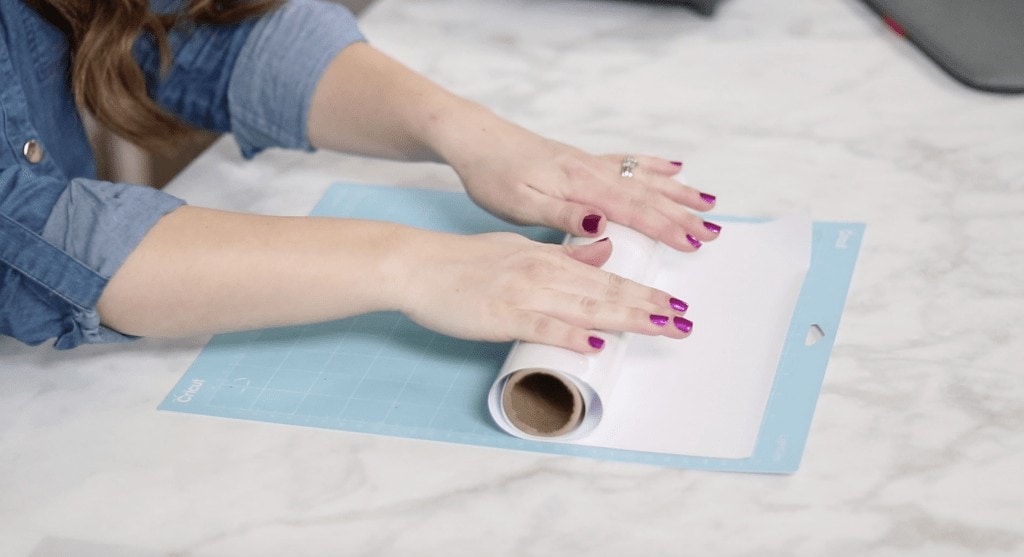
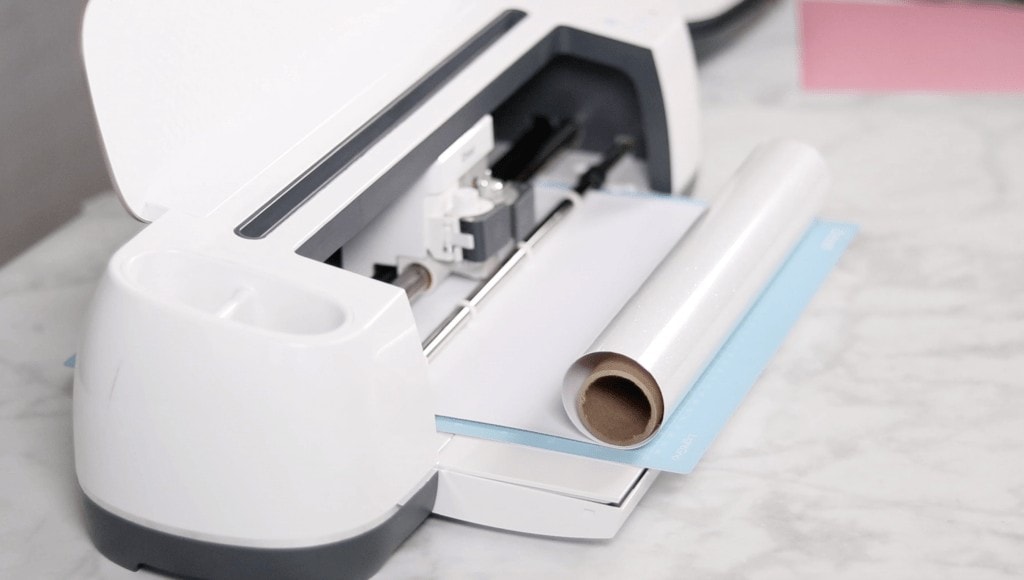
Begin by unrolling the Iron-On and placing it onto a Cricut Mat. The clear protective liner should be facing the mat with the Iron-On facing upwards.
Open Design Space here to access the cut files I used for my crafting space.
Select “Mirror” within Design Space. This step is VERY important. If you do not select “Mirror” the images will be backwards once they are applied to the material.
Insert the mat with the Iron On into the cutting machine. Select the correct settings (within DS) for the specific material that you are using.
Unload the mat once the cutting has finished and the Cricut buttons begins to flash.
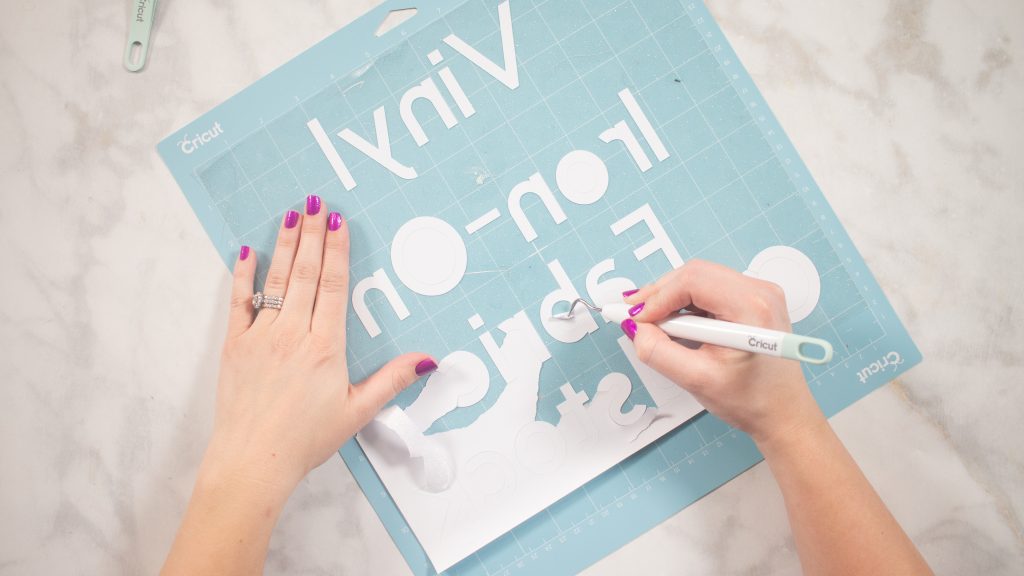
With a weeding tool, carefully peel back the negative Iron On to reveal the cut designs. I find it’s easiest to do this while the Iron On is still on the mat.
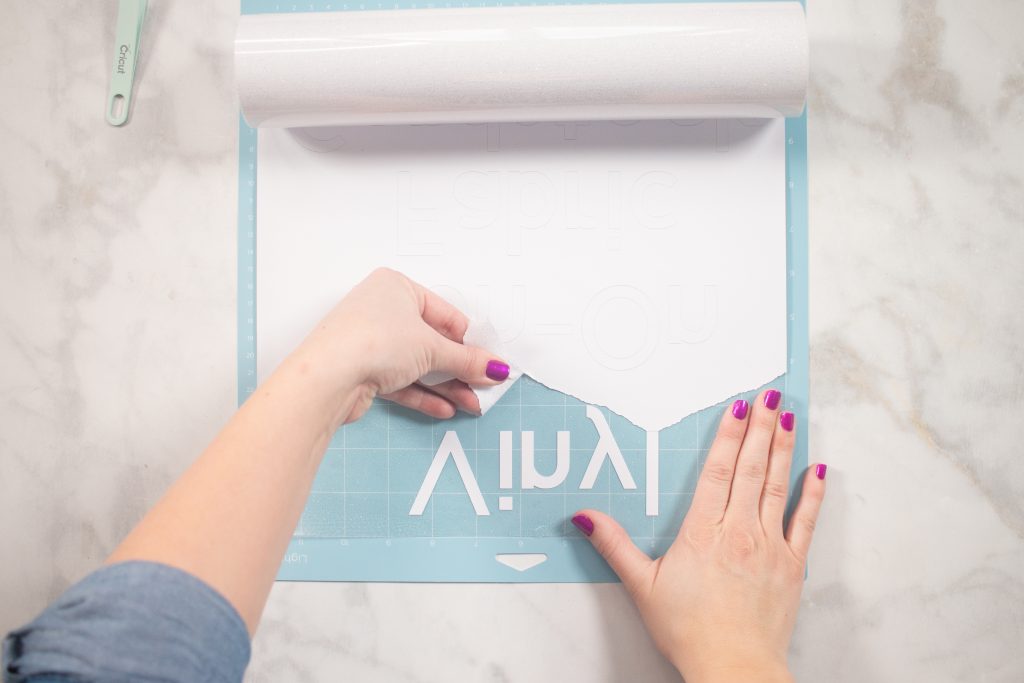
Once everything has been weeded, flip the mat upside down and peel the mat away from the Iron On. This will prevent the Iron On from bubbling or cracking.
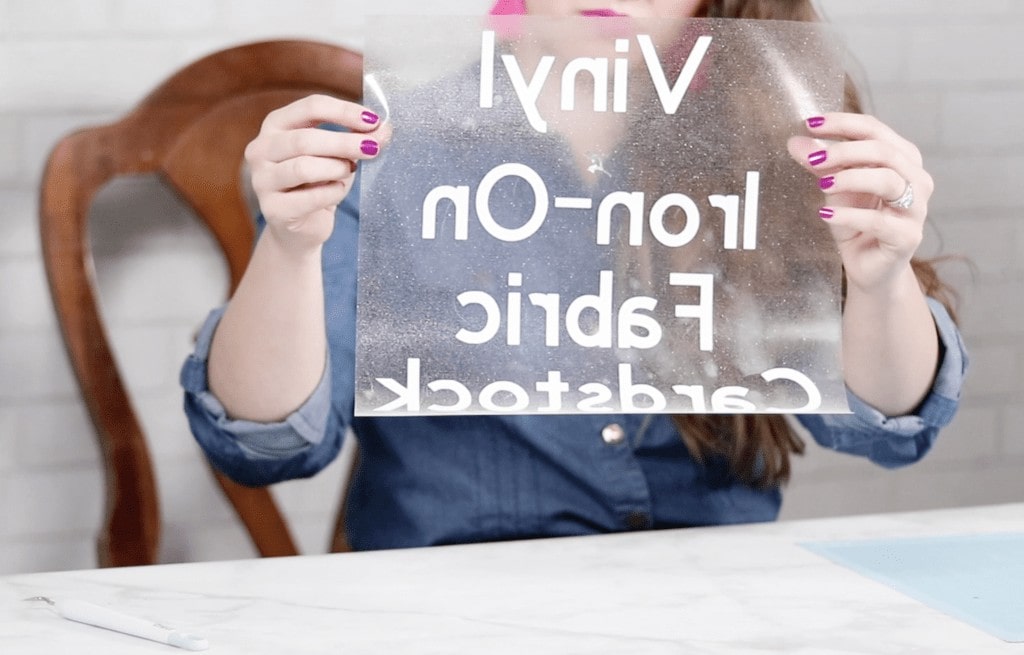
Cut around each word leaving about 1 inch of protective liner around each word.
Use either an EasyPress Mat or an ironing board as the protective base for your project.
Preheat the surface (fabric tote) that you intend to apply the Iron On to for 10-15 seconds. This will allow the Iron On to adhere fully.
Immediately apply the Iron On to the tote taking extra care to center the design.

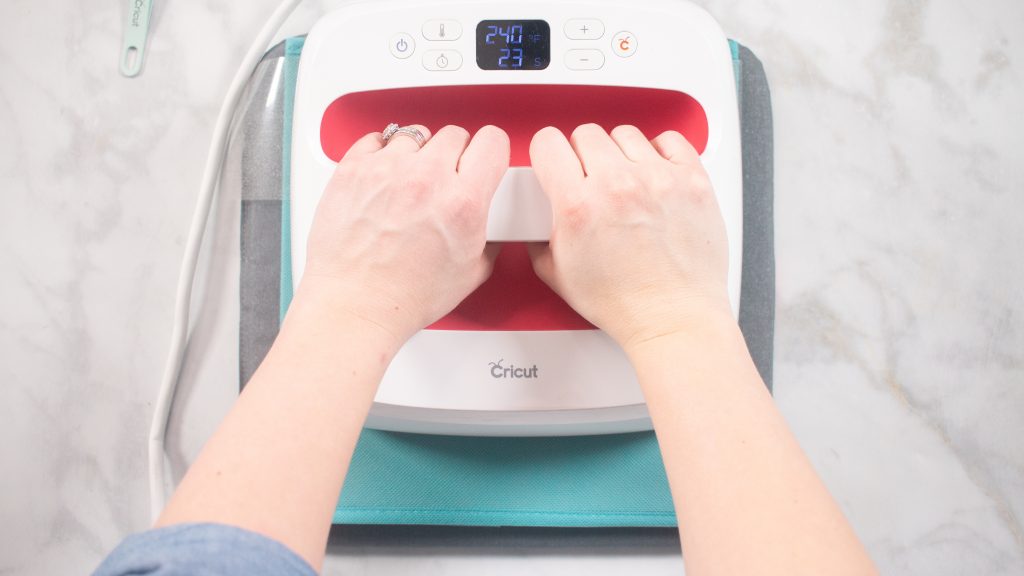
Apply heat with an iron or EasyPress following the directions for the specific type of Iron On that you are using.
I love using my EasyPress 2 for Iron-On projects because it offers edge-to-edge heating, which means the entire plate heats up (up to 400°F)
The EasyPress 2 makes Iron On projects foolproof! Just set the temperature, select the time and apply pressure to the item you are making and it creates amazing long-lasting results!
You can read even more about my thoughts on the Cricut EasyPress 2 here.
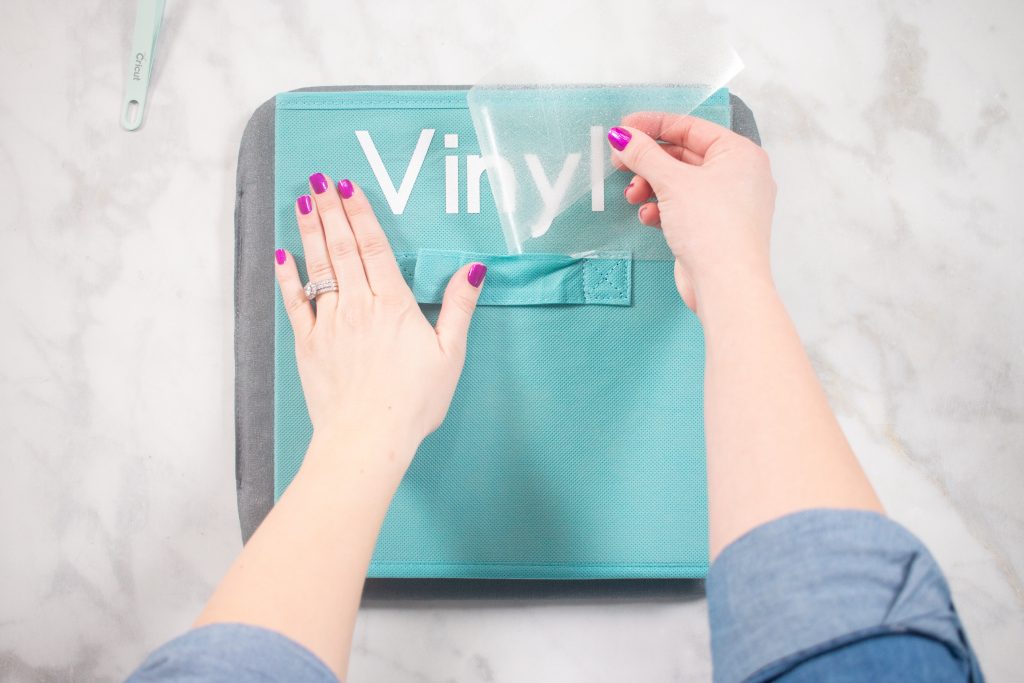
Remove the iron and allow the Iron On to cool before slowly peeling away the protective liner at a 45 degree angle. Check each letter to make sure that all of the edges have been fully adhered.
If an edge or letter is loose, reapply the protective liner and
Repeat this process on as many fabric totes as you desire to quickly and easy organize your crafting supplies!
"How Do You Find Time to Craft?"
This is one of the questions I get asked EVERY single day! The most important answer I can share is to create a designated crafting space where all of your machines and supplies are easily accessible!
If you have to haul your machines and supplies out of a closet every single time you want to create and then load them back into the same closet once you have finished, you'll be wasting precious time!
Plus, I know the thought of setting up and taking down can be overwhelming which might lead you to skip crafting all together. EEK!
"But Where Should I Put My Craft Table?"
This answer depends on your own personal situation!! Do you want easy access to your craft
Personally, I like to have my crafting space behind a locked door that way I know my children won't be able to access it.
Here are a few ideas of
- Laundry Room- Some laundry rooms are oversized leaving valuable space untouched.
- Closet- This is a popular choice! Many closets have unused space that can be easily converted into a crafting area.
- Dining room- I've set up my sewing space along the dining room wall before. As long as you take the time to keep it neat and organized it will look great!
- Hallway- Many houses that have a small loft at the top of the stairs with space that is completely unused.
Get creative! Your crafting space can go ANYWHERE! It might not be "Pinterest Perfect" but somewhere is most definitely better than nowhere!
Supplies
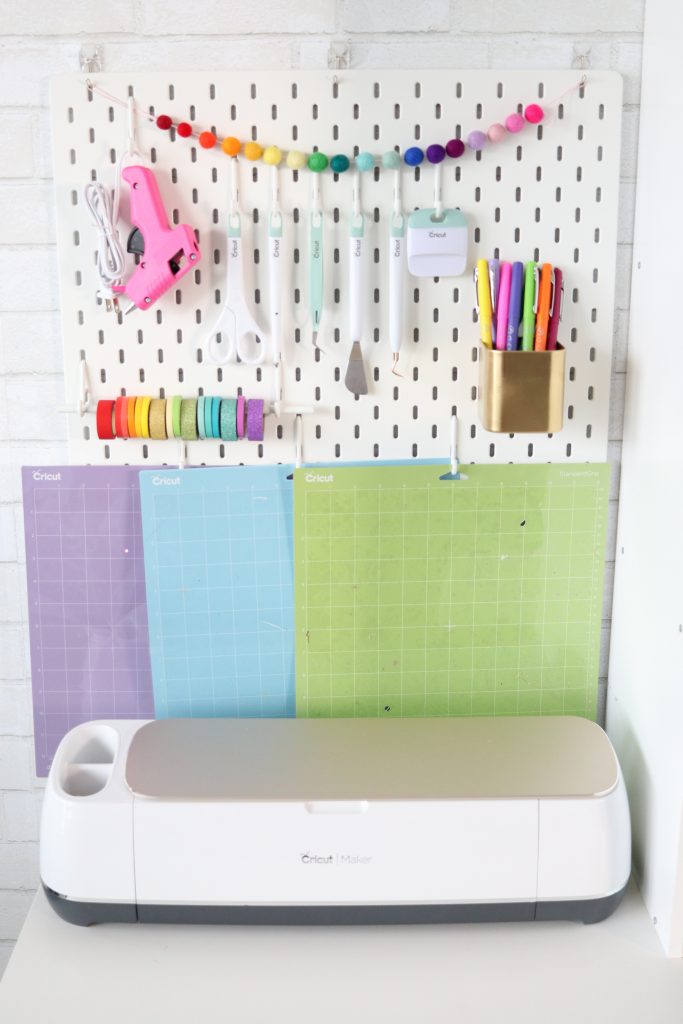
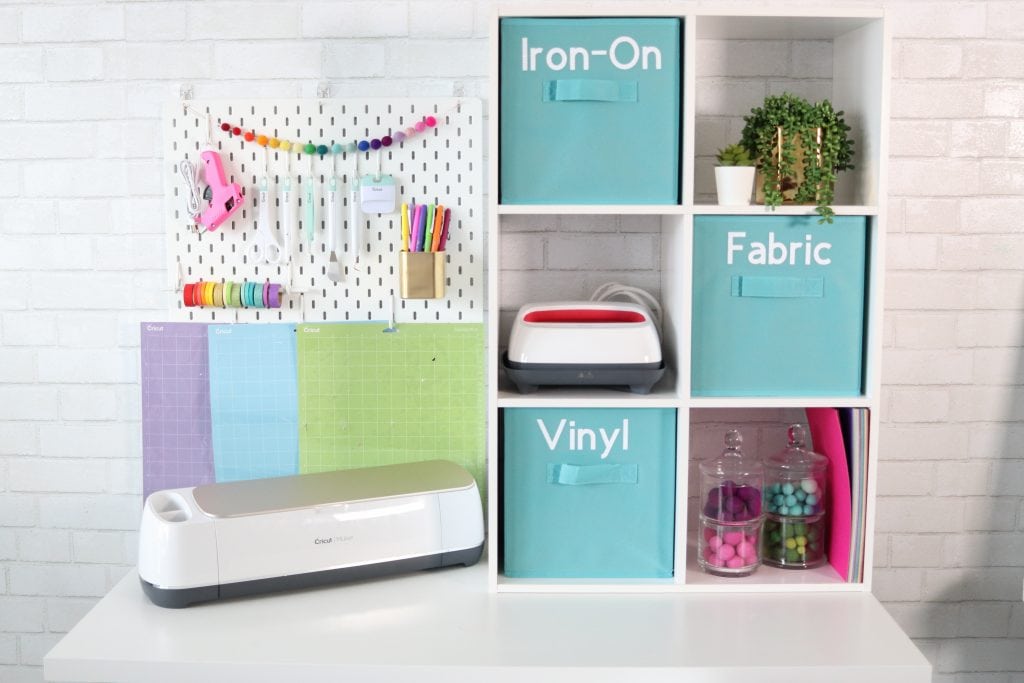
To create your new workstation, assemble the table and the cube organizer. Place the cube organizer on one side of the table and mount the Pegboard on the opposite side.
The remaining space is the perfect width for either a sewing machine or a Cricut Machine.
*Mount the cube organizer to the wall to ensure it isn't a hazard for young children.
I can't wait to see what you make with this craft space inspiration! Share your new crafting space with me on Instagram by tagging Sweet Red Poppy in your photo!
This is a sponsored conversation written by me on behalf of Cricut. The opinions and text are all mine.
Where did you get it ?
Looks like she got it from ikea
If you select the items on her list (highlighted in pink) it will take you directly to that specific item on the retailers website.
If you select the items on her list (highlighted in pink) it will take you directly to that specific item on the retailers website.
Is there enough room for the cricket to stay there and use it there