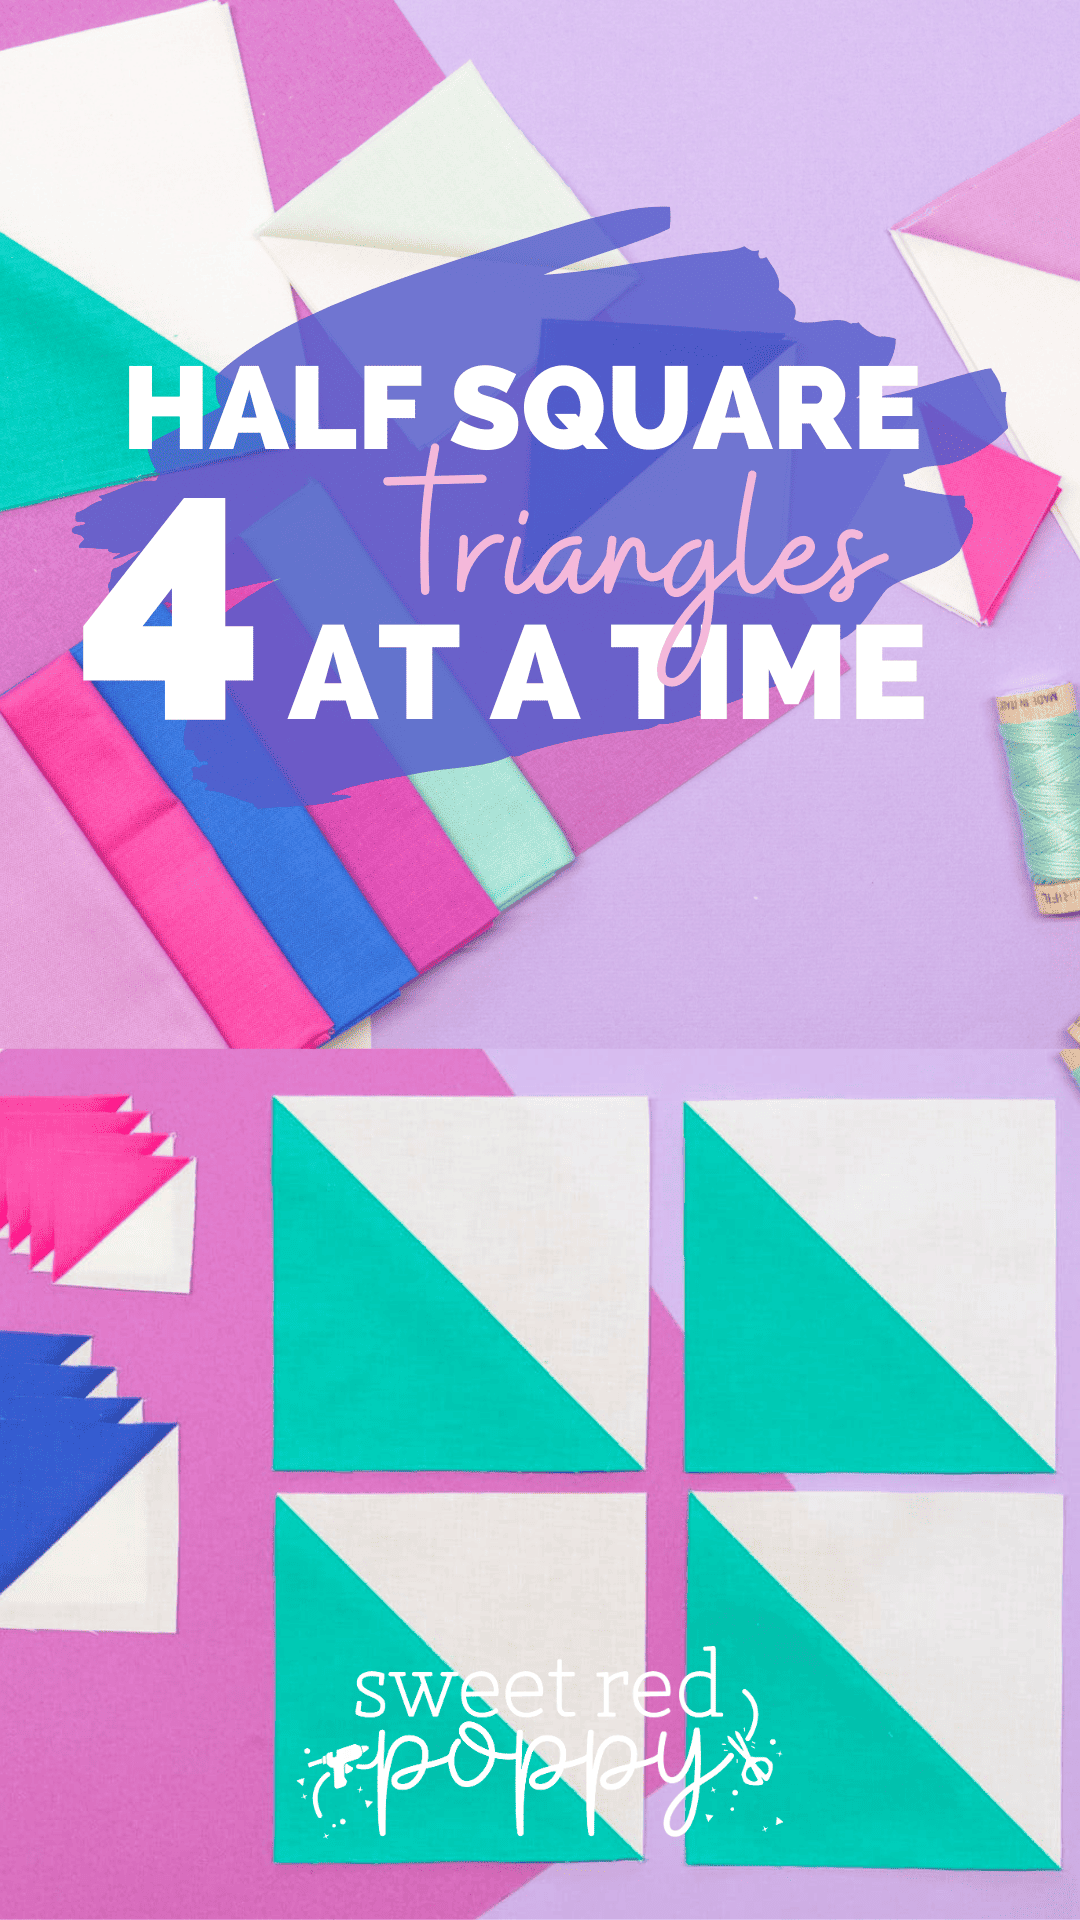
Learn how to sew a half square triangle unit fast and with no fabric waste - with the simple, 4-at-a-time HST method.
When you are first starting out in the quilting world, all the complex, multi-step quilt blocks can be quite intimidating - not to mention confusing. But did you know that some of the most intense quilt blocks are actually made up of really simple blocks?
The half square triangle (HST) block is one of these “simple” blocks that is used extensively in creating all types of quilt blocks.
Today, we’re going to go over the steps in creating 4 HST blocks at one time. Plus, I'm sharing my math cheat sheet to make it super simple for you to make any size of HST you need!
Table of Contents
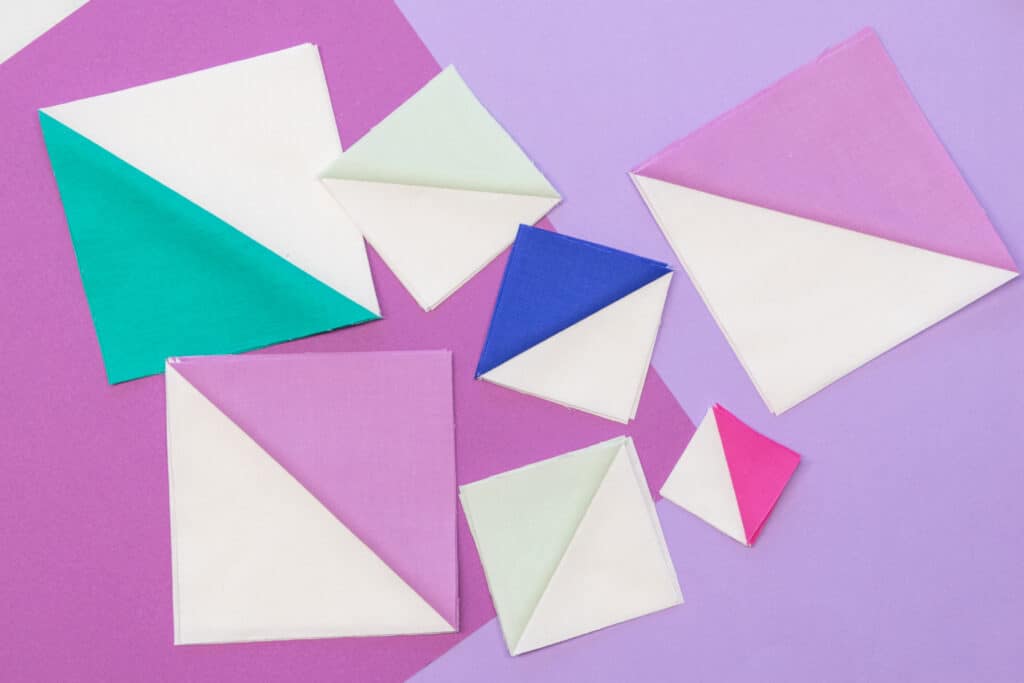
What Kind of Quilt Blocks Can I Make with HST?
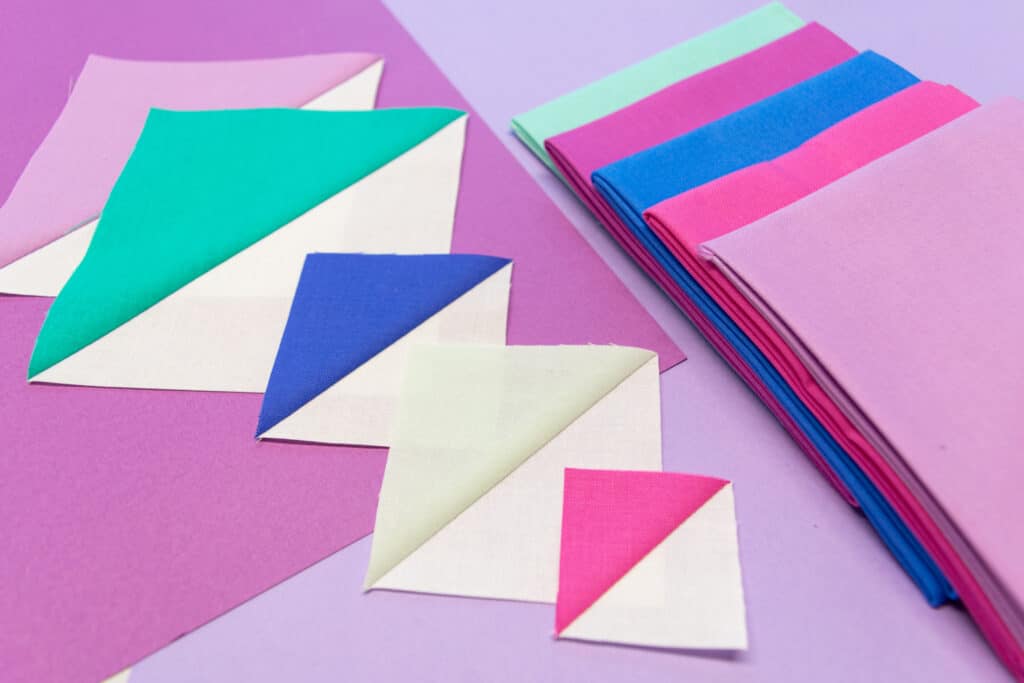
I know you’re probably wondering, is the HST block really “that” versatile? How many different blocks can it be used for? Here are just a few example blocks that use only HST in their construction:
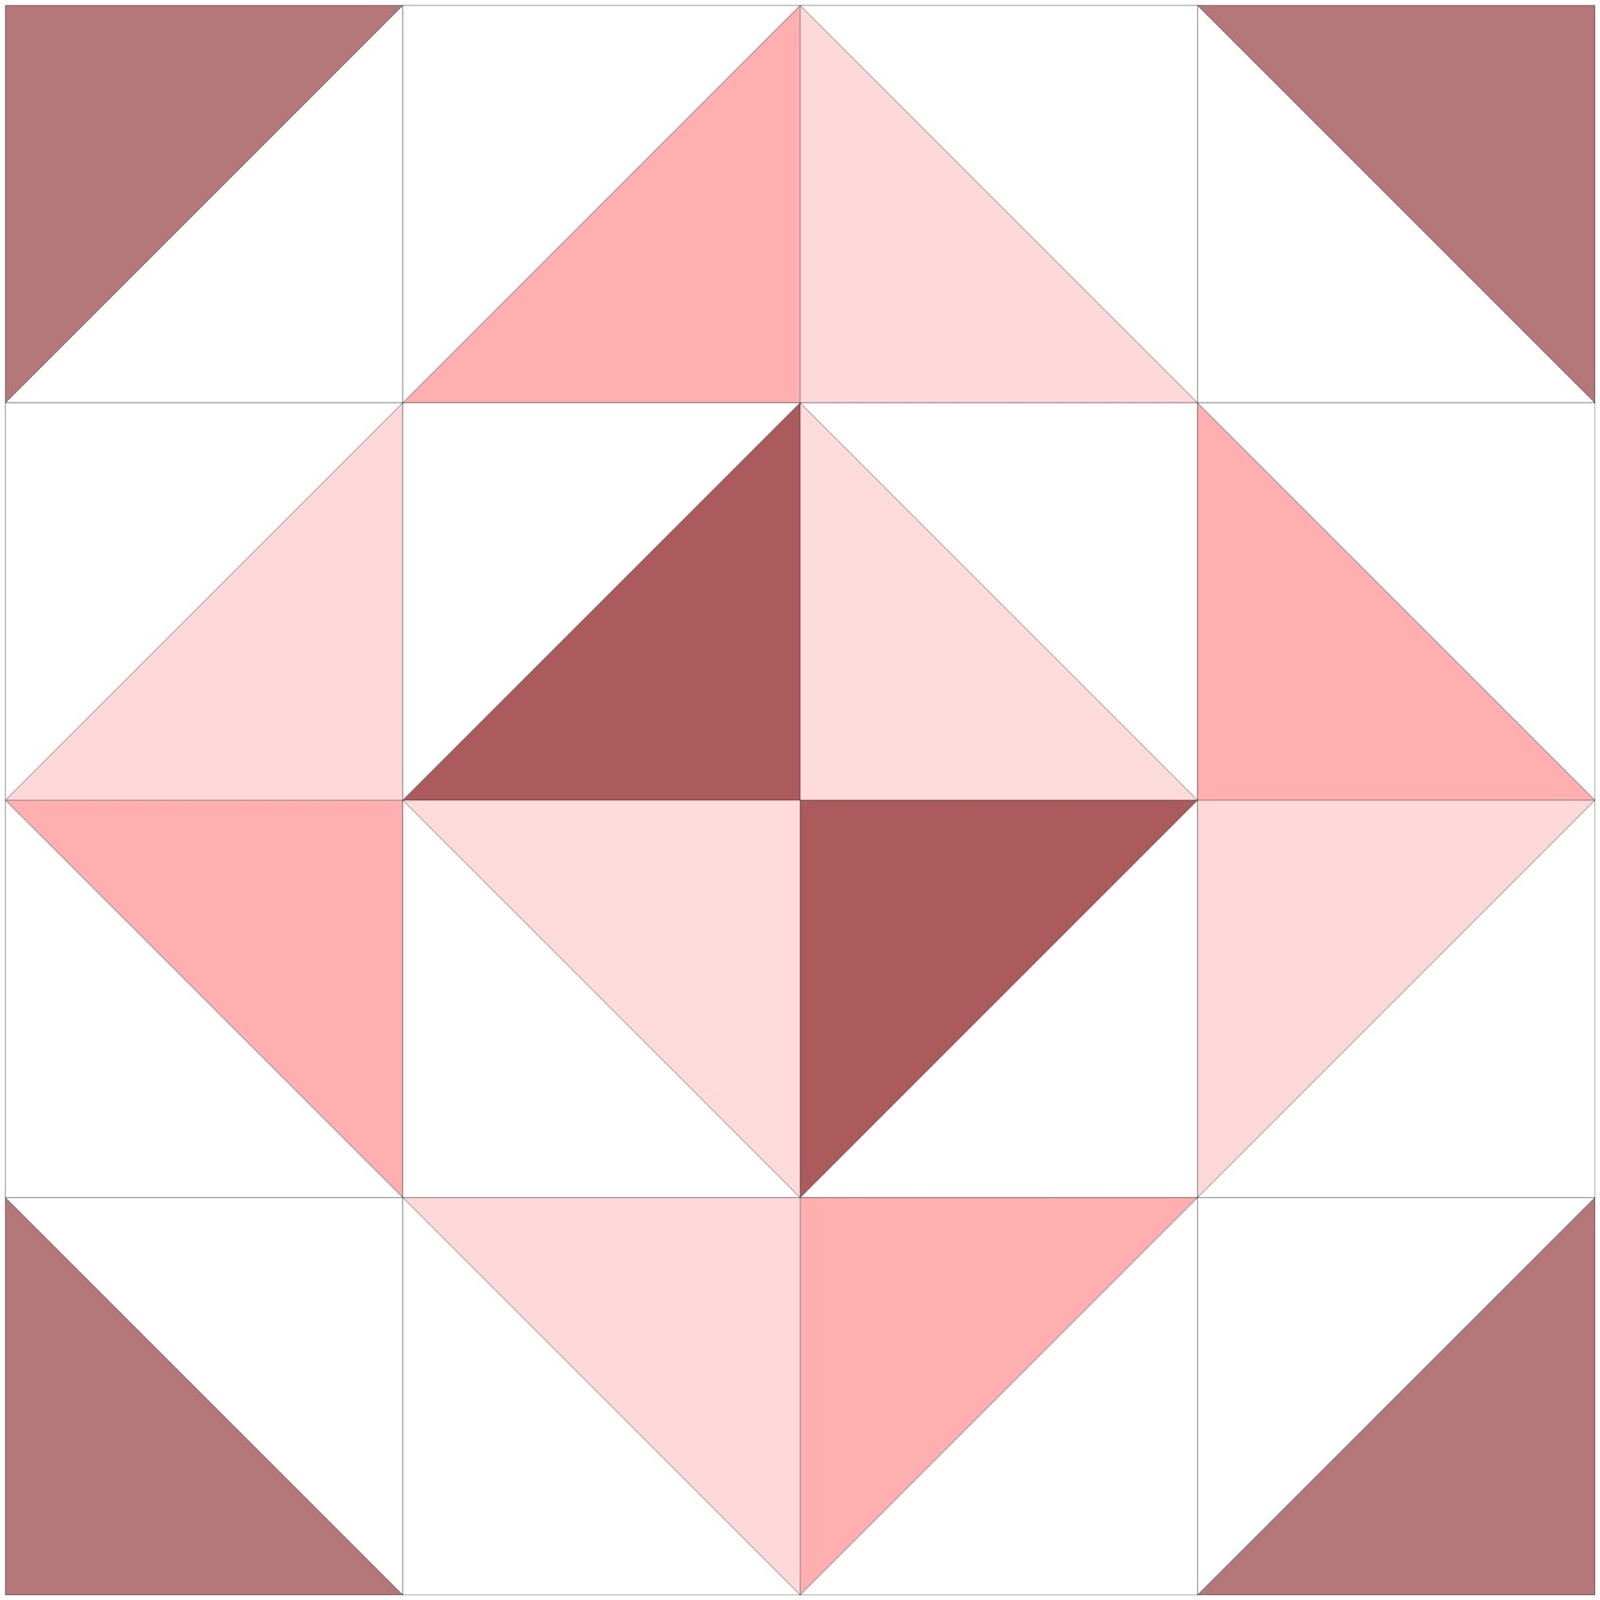

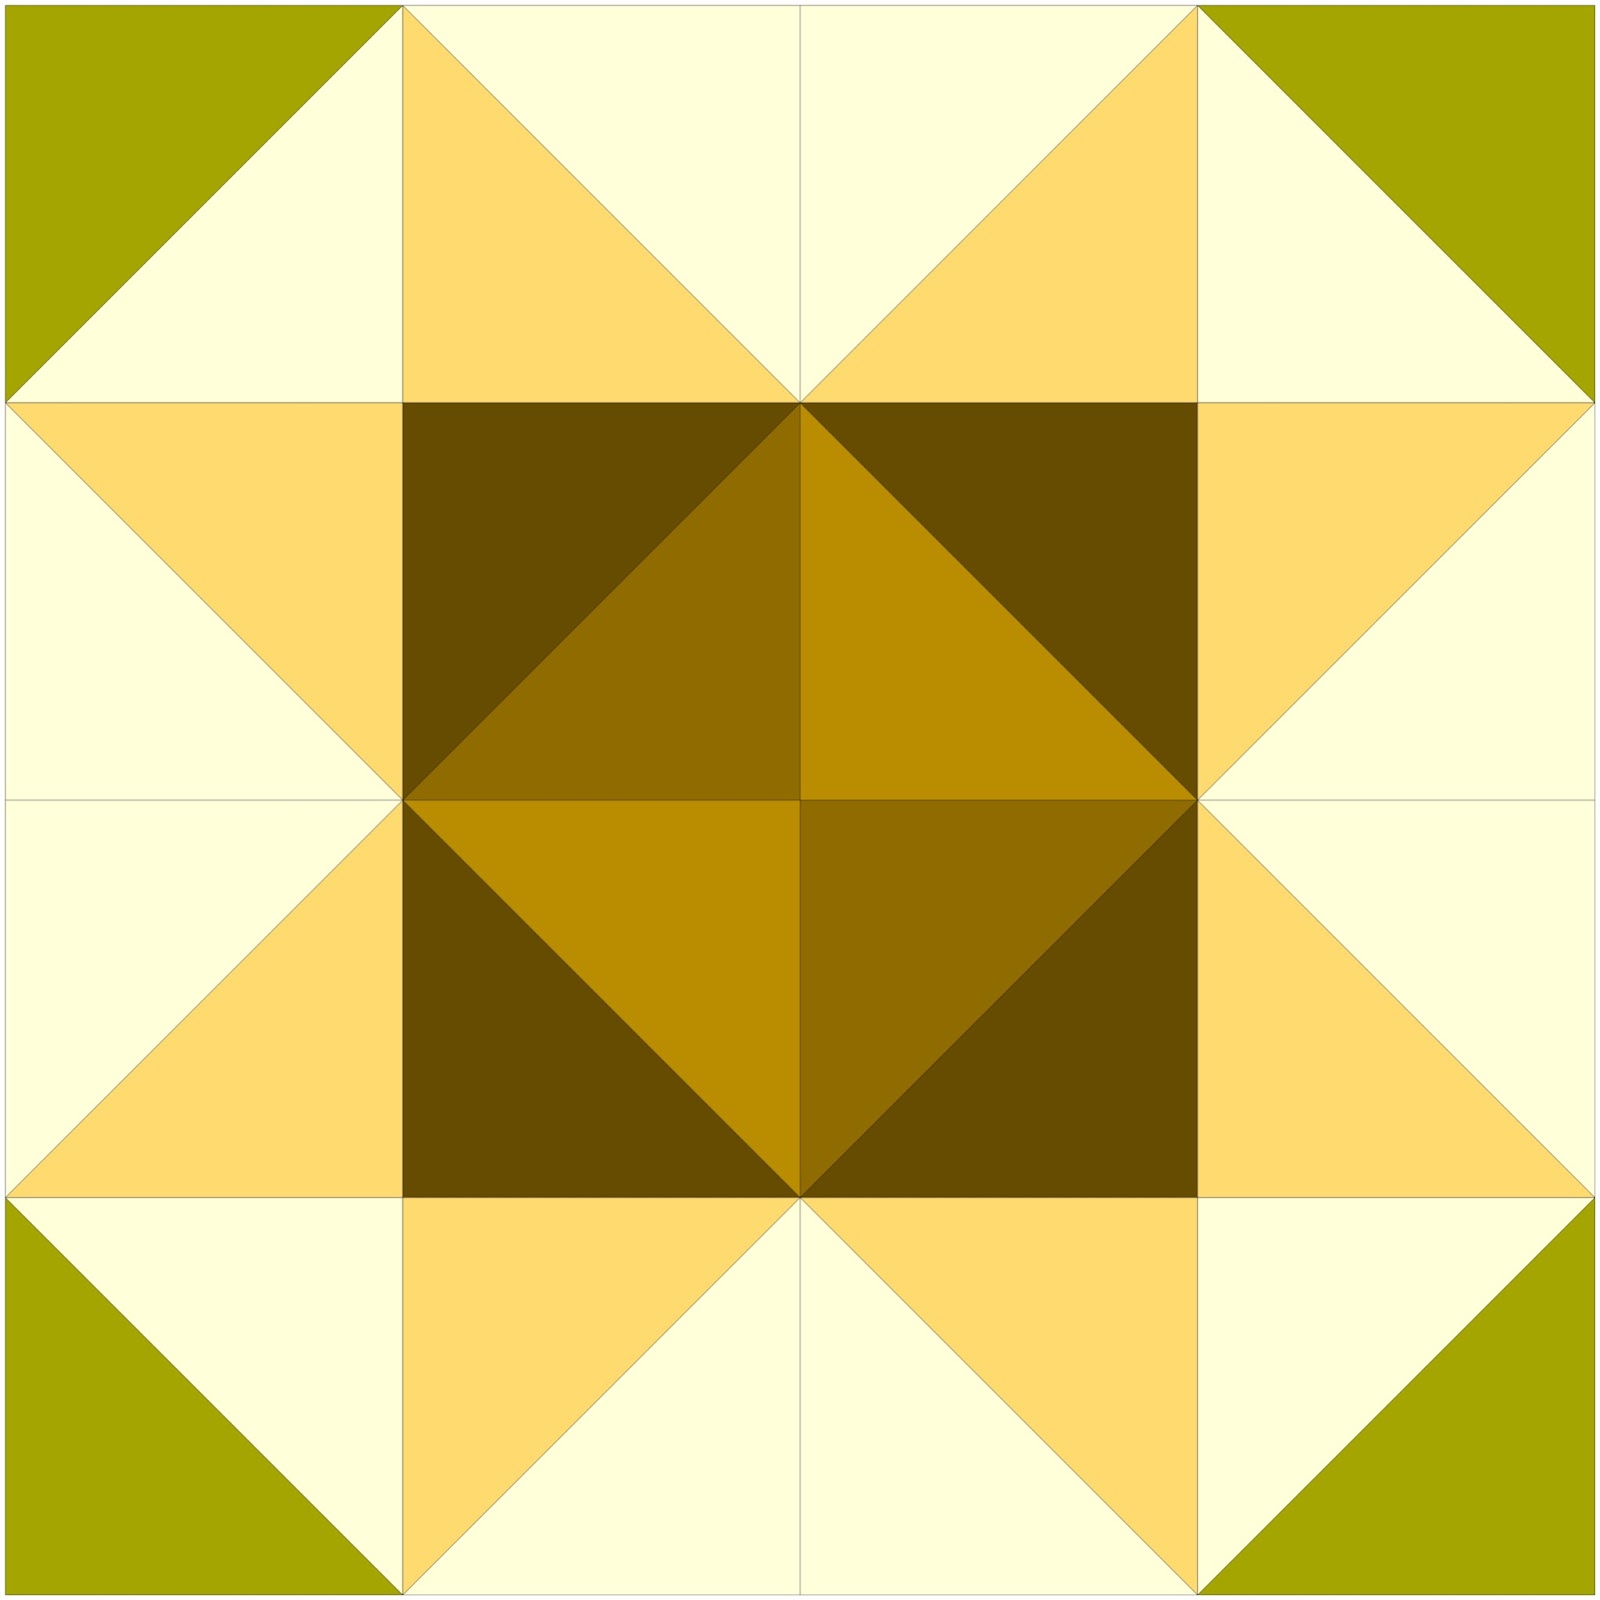

Isn’t it amazing how completely different these 4 blocks look? Each one is completely made up of HST units! Now that we have your inspiration peaked, let’s look at what we will need to make some half square triangles for ourselves.
Supplies You Need To Make HST Blocks
- Fabric- When you are practicing a new block, it’s always best to use some fabric that you aren’t in love with just in case you need to tweak your measurements or design.
- Sewing Machine
- Thread- 100% cotton works great for quilts.
- Cutting mat and rotary cutter-Yes, you can use scissors, but a mat and rotary cutter are going to help you get the precise cuts that you need for quilting.
- Ruler-Used for measuring as well as a straight edge to get perfectly straight cuts.
- Marking Pen (optional)- I recommend using a pen that has washable or vanishing ink.
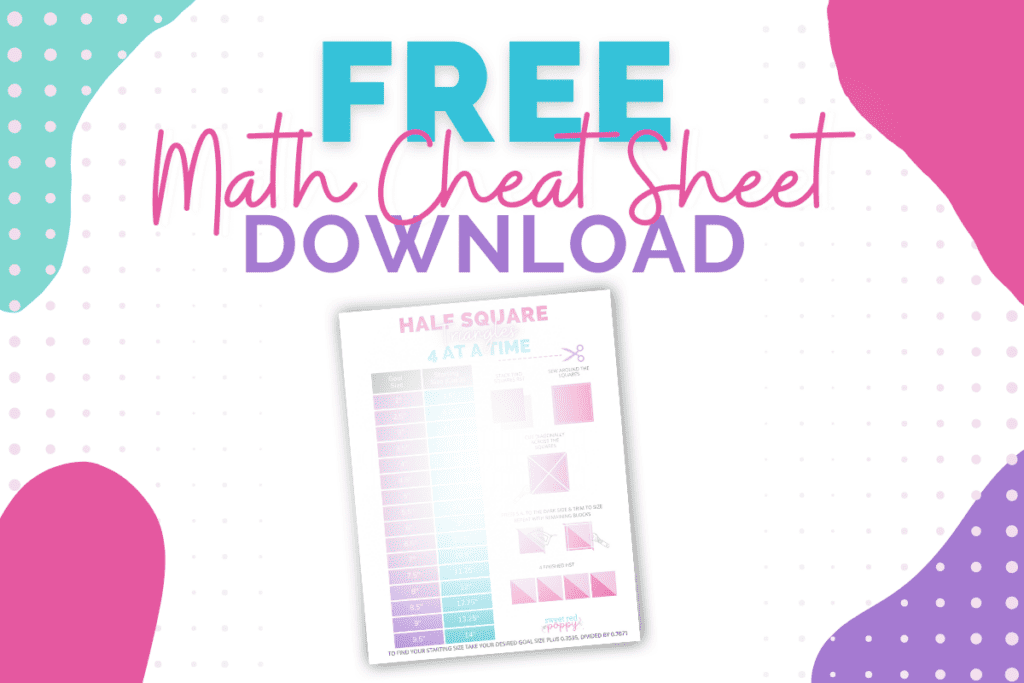
DOWNLOAD THE FREE MATH CHEAT SHEET HERE!
Half Square Triangles- “4 at a time” Method
Now comes the fun part, actually making your first half square triangles! This first step is going to be a doozy (the math step), but don’t worry, I’ve broken it down for you so it will be much easier to understand.
Step 1: The Math
Before we get into the equation, I want to make sure you know these terms:
- Cut size- refers to the size that you cut your fabric to before any sewing.
- Goal size- refers to the size of the block after we have pieced it together and before we have sewn it into the quilt. Sometimes called the “unfinished size”.
- Finished size- refers to the size of the block after it has been sewn into the quilt and there will be no more sewing on this block.
Knowing these terms is very important when figuring out the math for your specific project. Now let’s look at the equation:
y= 0.7071x - 0.3535
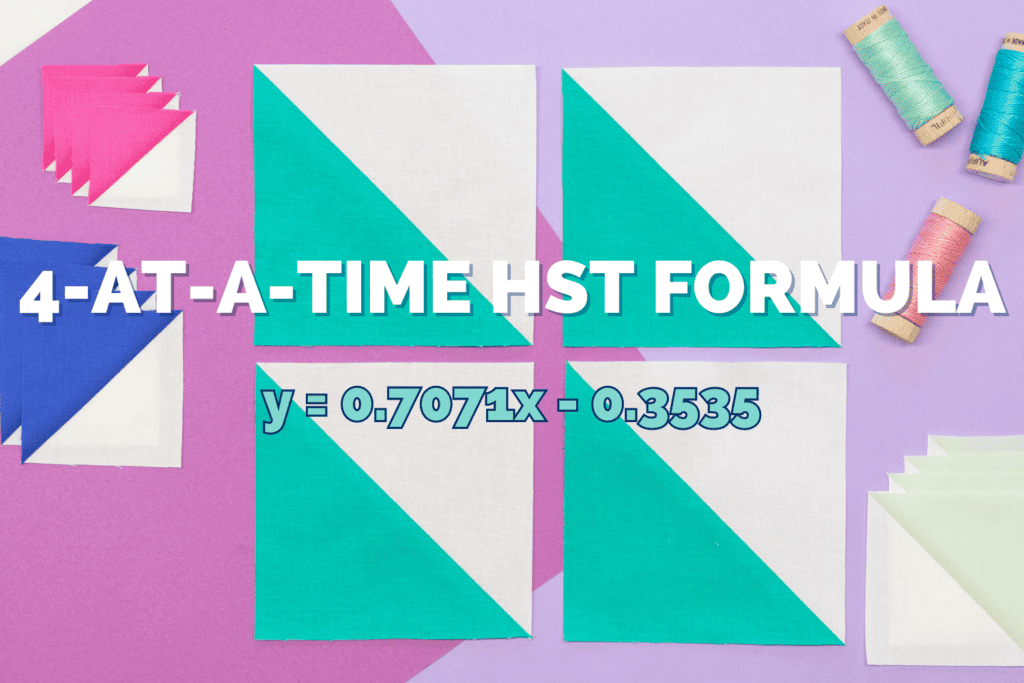
I know…yikes! Don’t worry, I’ll break it down for you.
y= Goal size
x=Cut size
To find “y” we need to first choose “x”. For example, if you have a layer cake (a precut fabric bundle of 10” squares), you will take 10 and multiply it by 0.7071.
10 x 0.7071= 7.071
Now subtract 0.3535 from 7.071
7.071-0.3535= 6.7175
Now round that number down to the nearest quarter of an inch, ie 0.25, 0.5, 0.75, 1. You will need to trim the squares down to this new rounded number.
6.7175 rounded down will be 6.5. This means I will be able to get 4- 6 ½” squares from a 10” square.
Now, if you don't want to deal with all this math, I've put together a math cheat sheet for you. This sheet tells you exactly what size to cut your starting squares to create any size of HST! You can download the cheat sheet above.
Step 2: Cut the Fabric
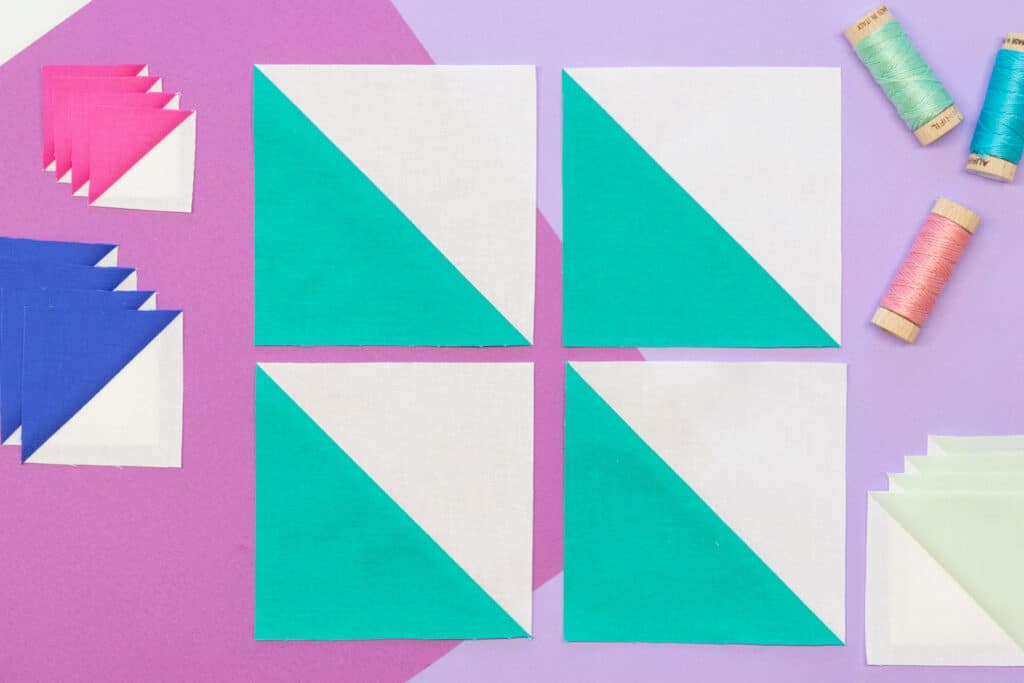
You will need 2 equal squares to create 4 HST at a time. Choose 2 fun, coordinating fabrics.
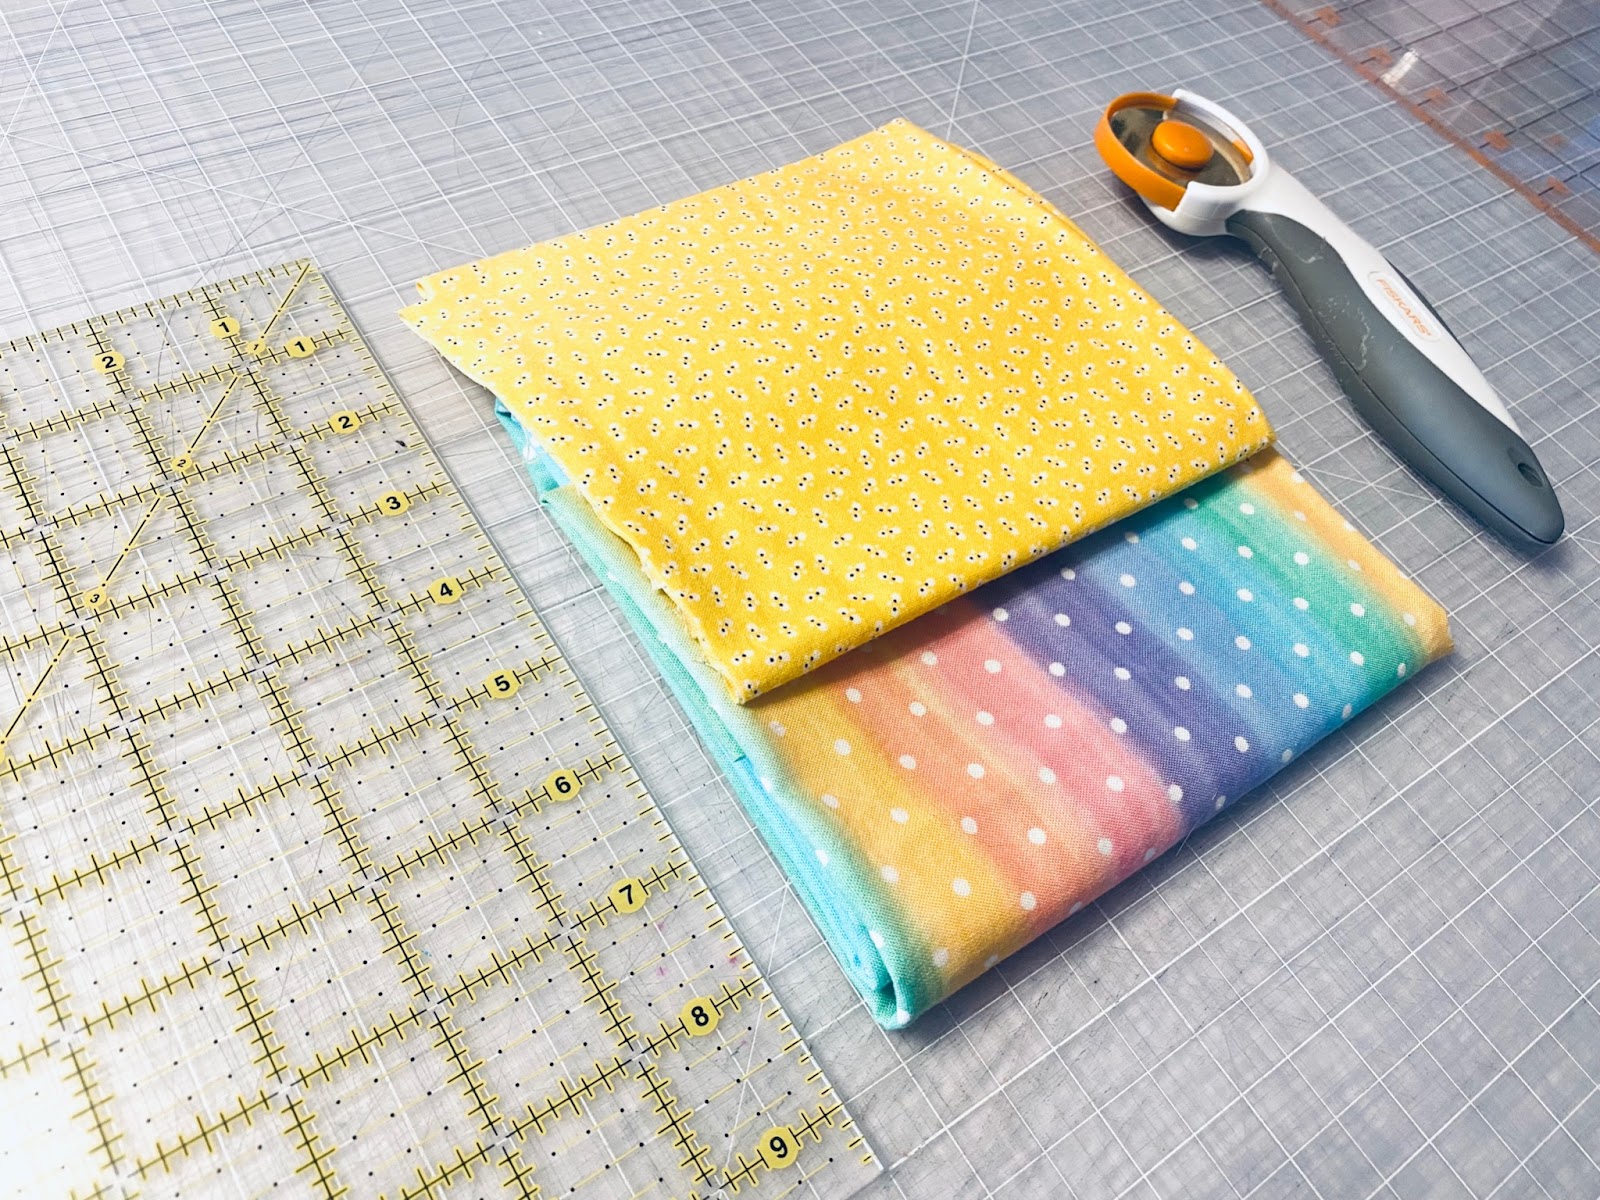
I am going to cut 2- 10” squares for this example to go along with the math we did in Step 1.
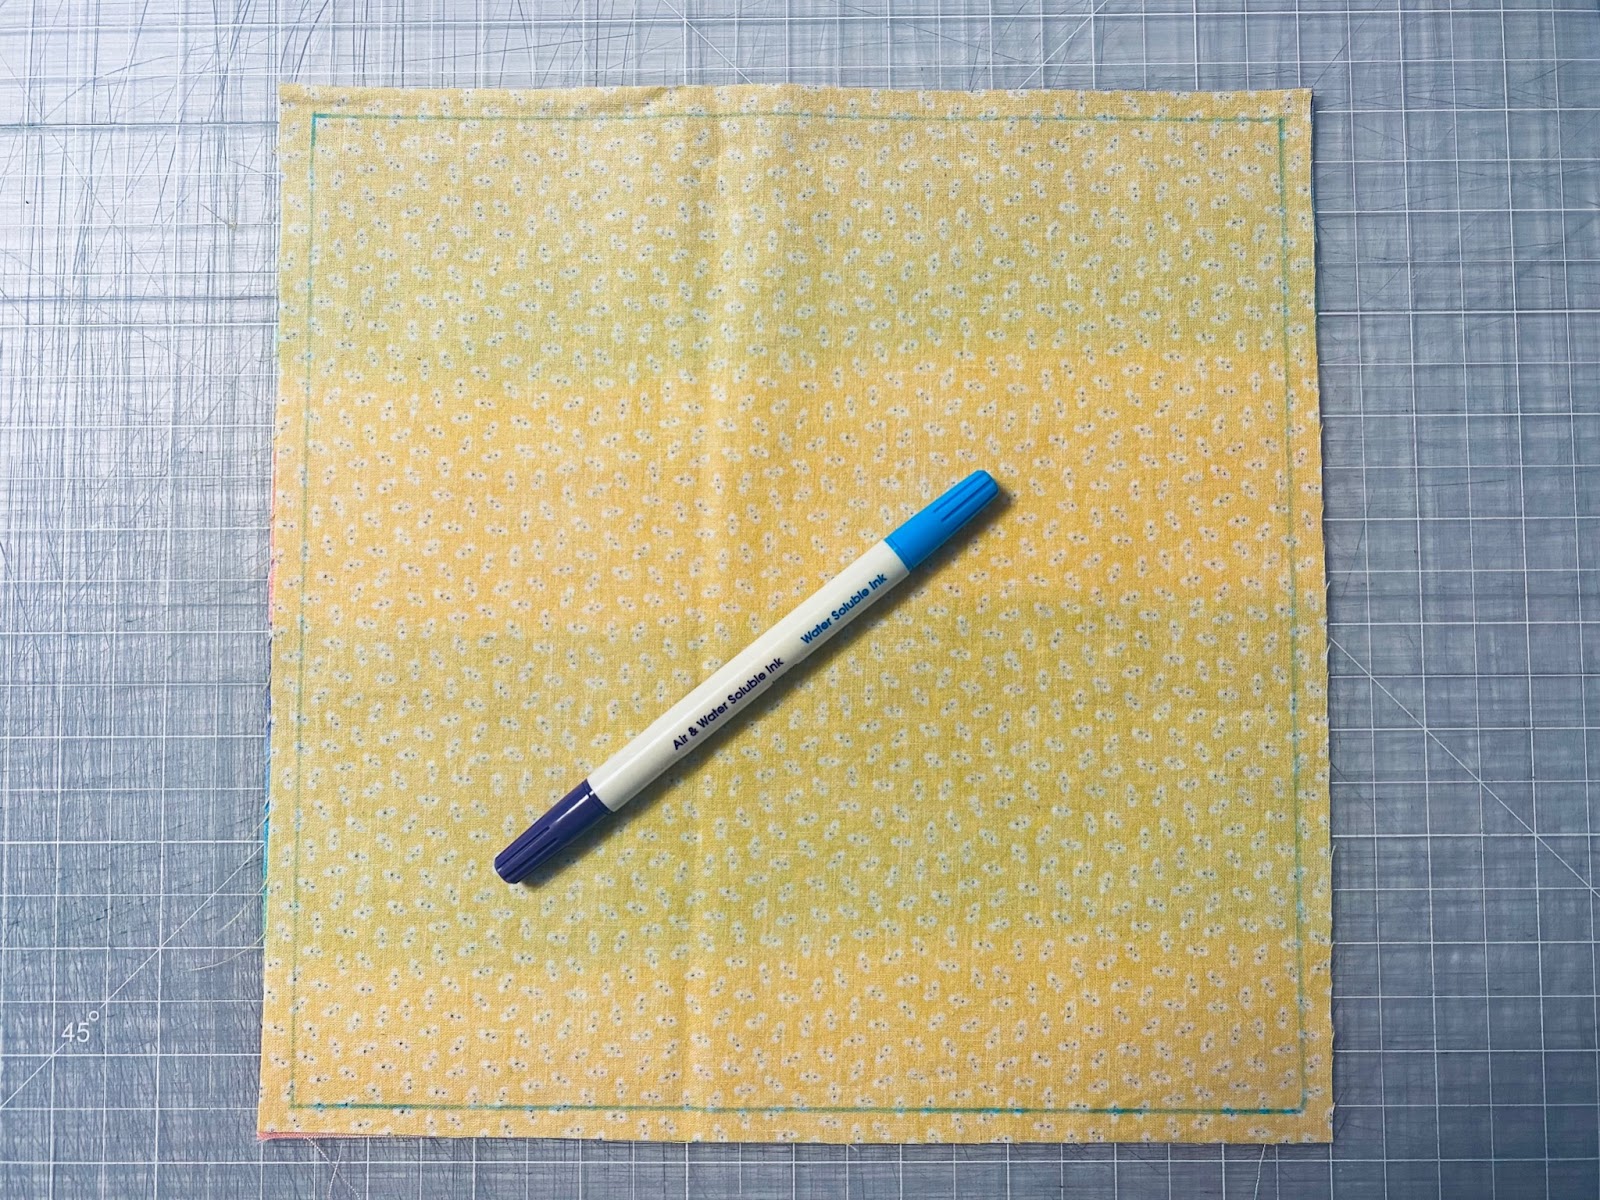
Step 3: Sew the Fabric
Optional: If you want, you can mark a line all around the circumference of the square to make sure you sewing ¼” all the way around, but most sewing machines come with a ¼” foot that will help with this.
Take your squares to your sewing machine and place them right sides together. Make sure they are lined up perfectly, if you need to, place a few pins in the fabric to hold it in place.
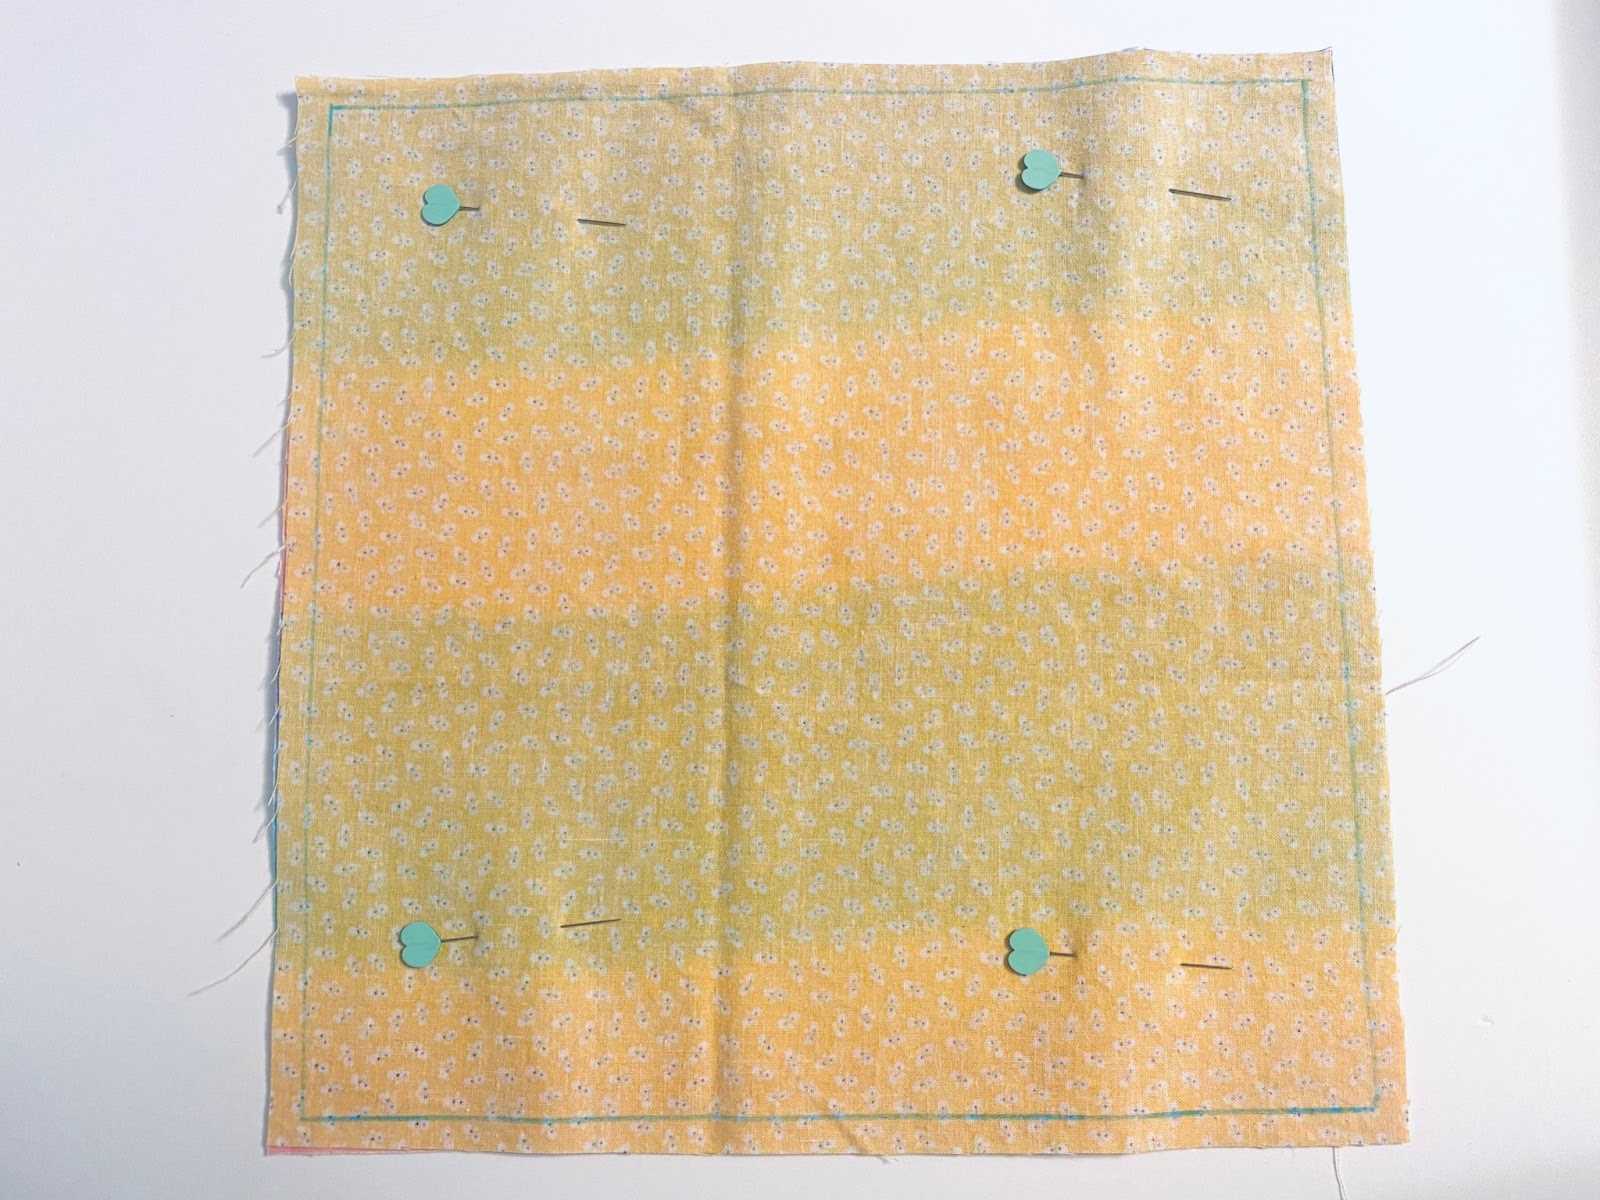
Pro Tip: Make sure you are not pulling or tugging the fabric while you are sewing. This will create puckers and over-stretch the fabric which is definitely not what you want.
Sew around the entire square, making sure you are leaving a ¼” seam allowance. If you mess up, don’t be afraid to pull out your seam ripper, snip the stitches, and start again. You want this seam allowance to be precise.

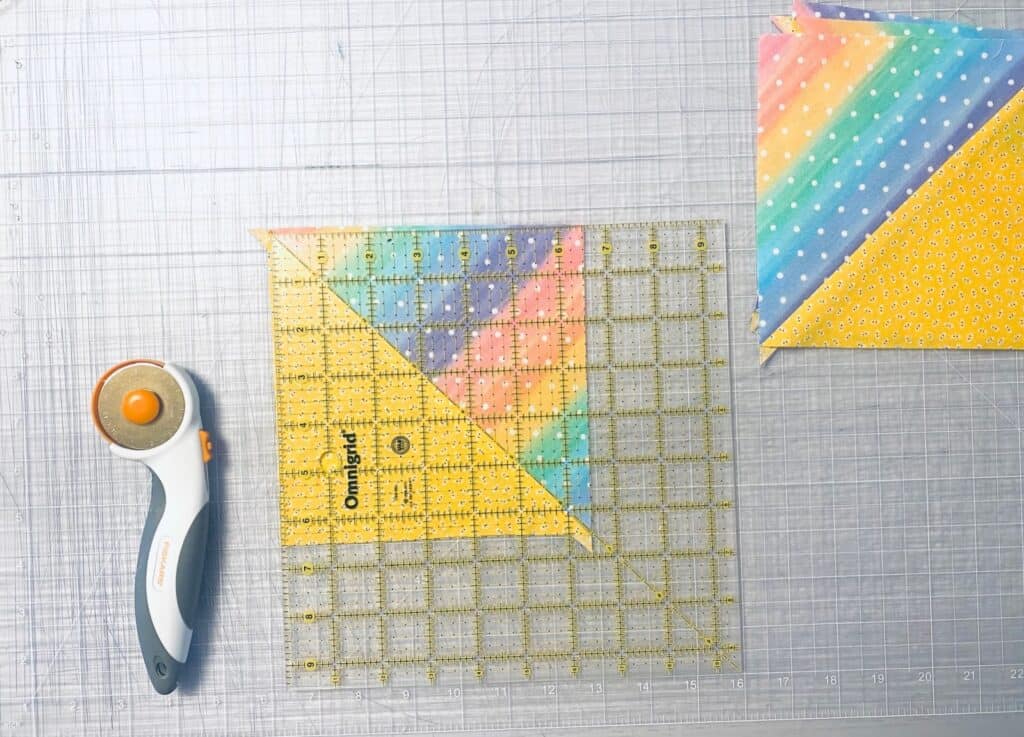
Step 4: Cut the 4 HSTs
Take your sewn square back to your cutting mat and use your ruler as a guide to cut the square diagonally, creating 2 large triangles.
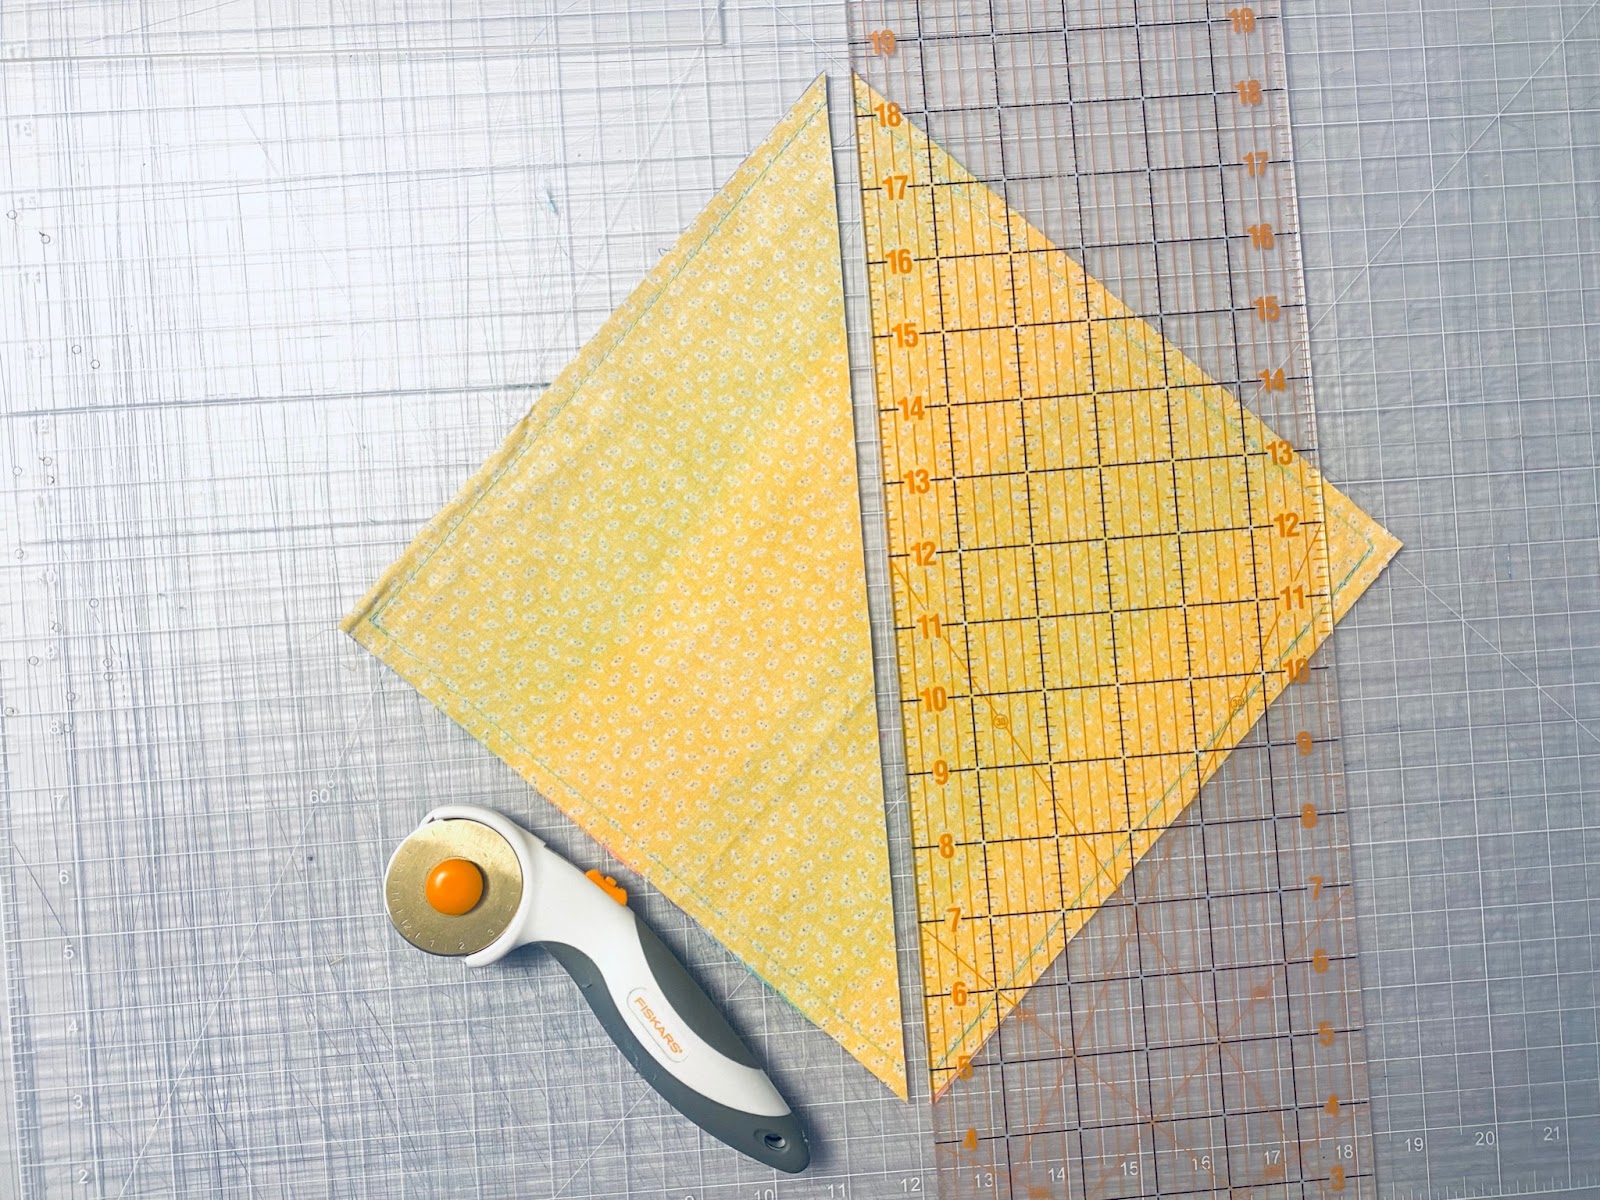
Now cut the opposite diagonal line to create the 4 half square triangles. Pretty neat, right?
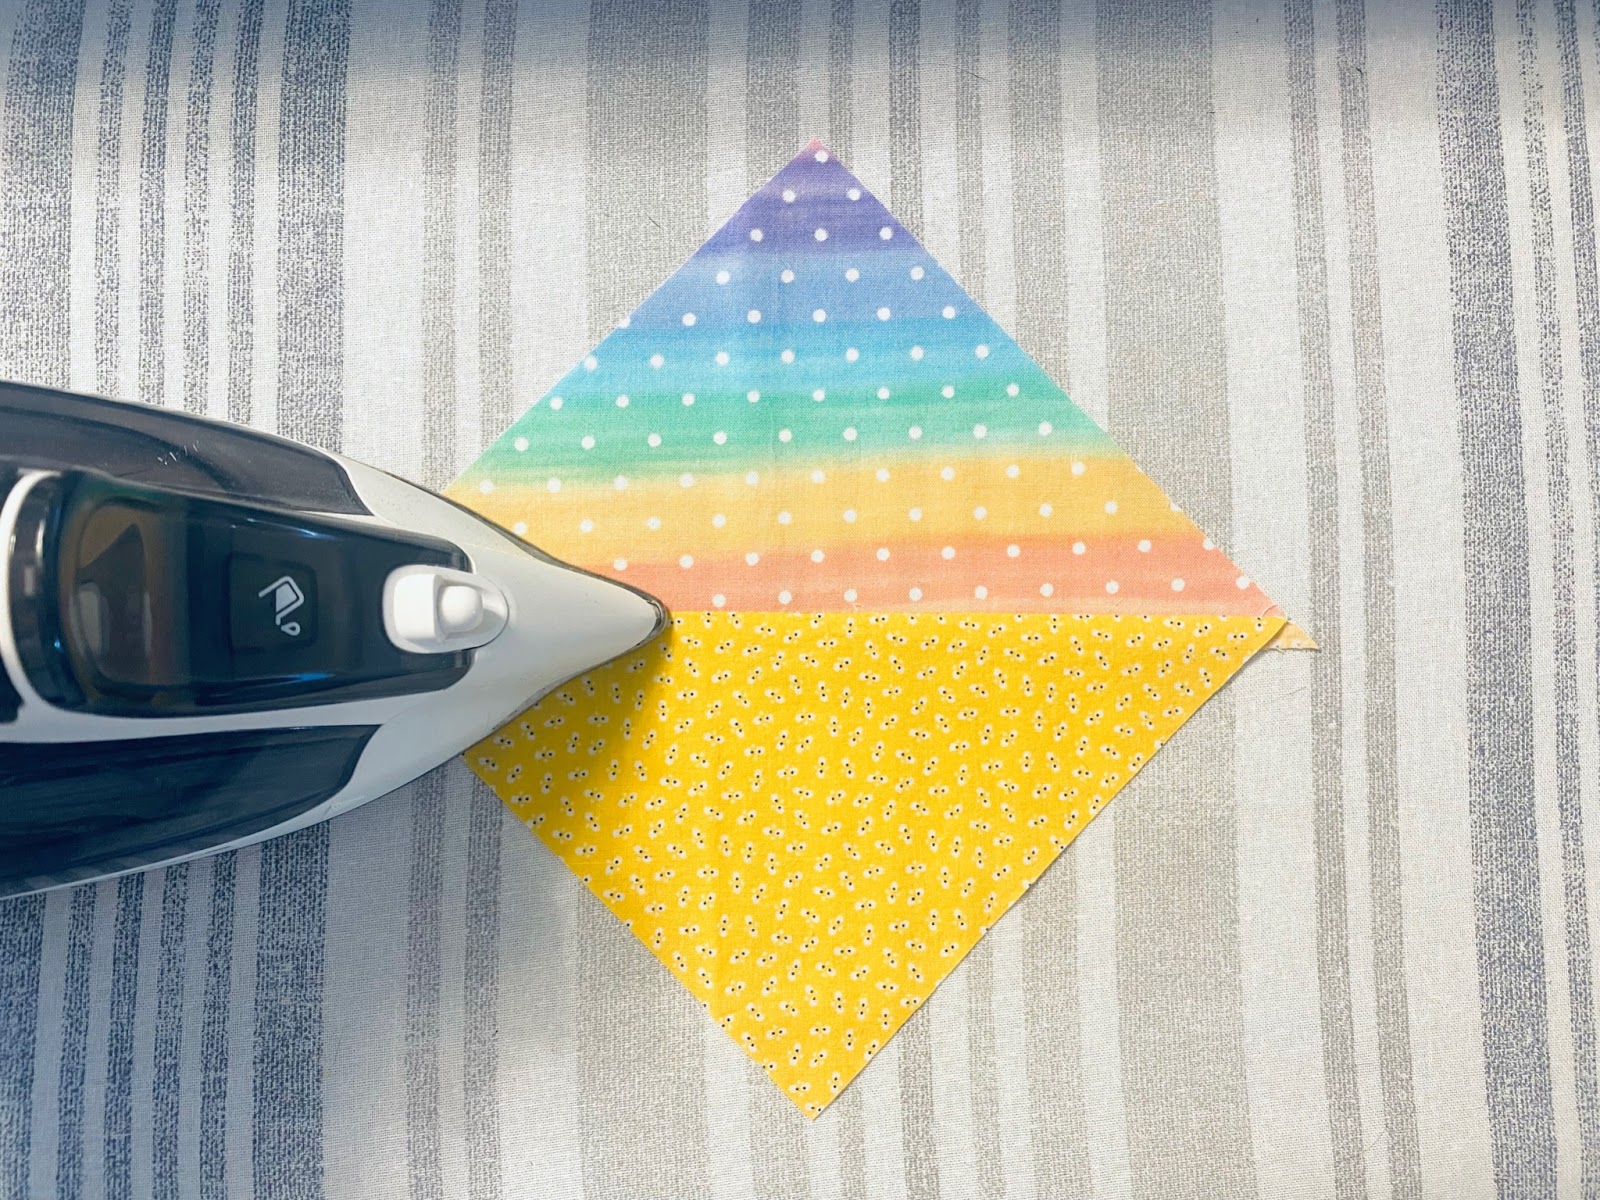
Step 5: Press the HST blocks
Lay each HST unit on your ironing board right sides facing up and press the seam towards the darker fabric. Pressing towards the darker fabric helps to avoid seam allowances showing through light-colored fabrics.
Pro Tip: Be careful when you are pressing that you aren’t running your iron back and forth on the fabric. You don’t want to accidentally stretch the HSTs out of shape. Just take it nice and easy and press with an up-and-down motion. Think press, not iron.
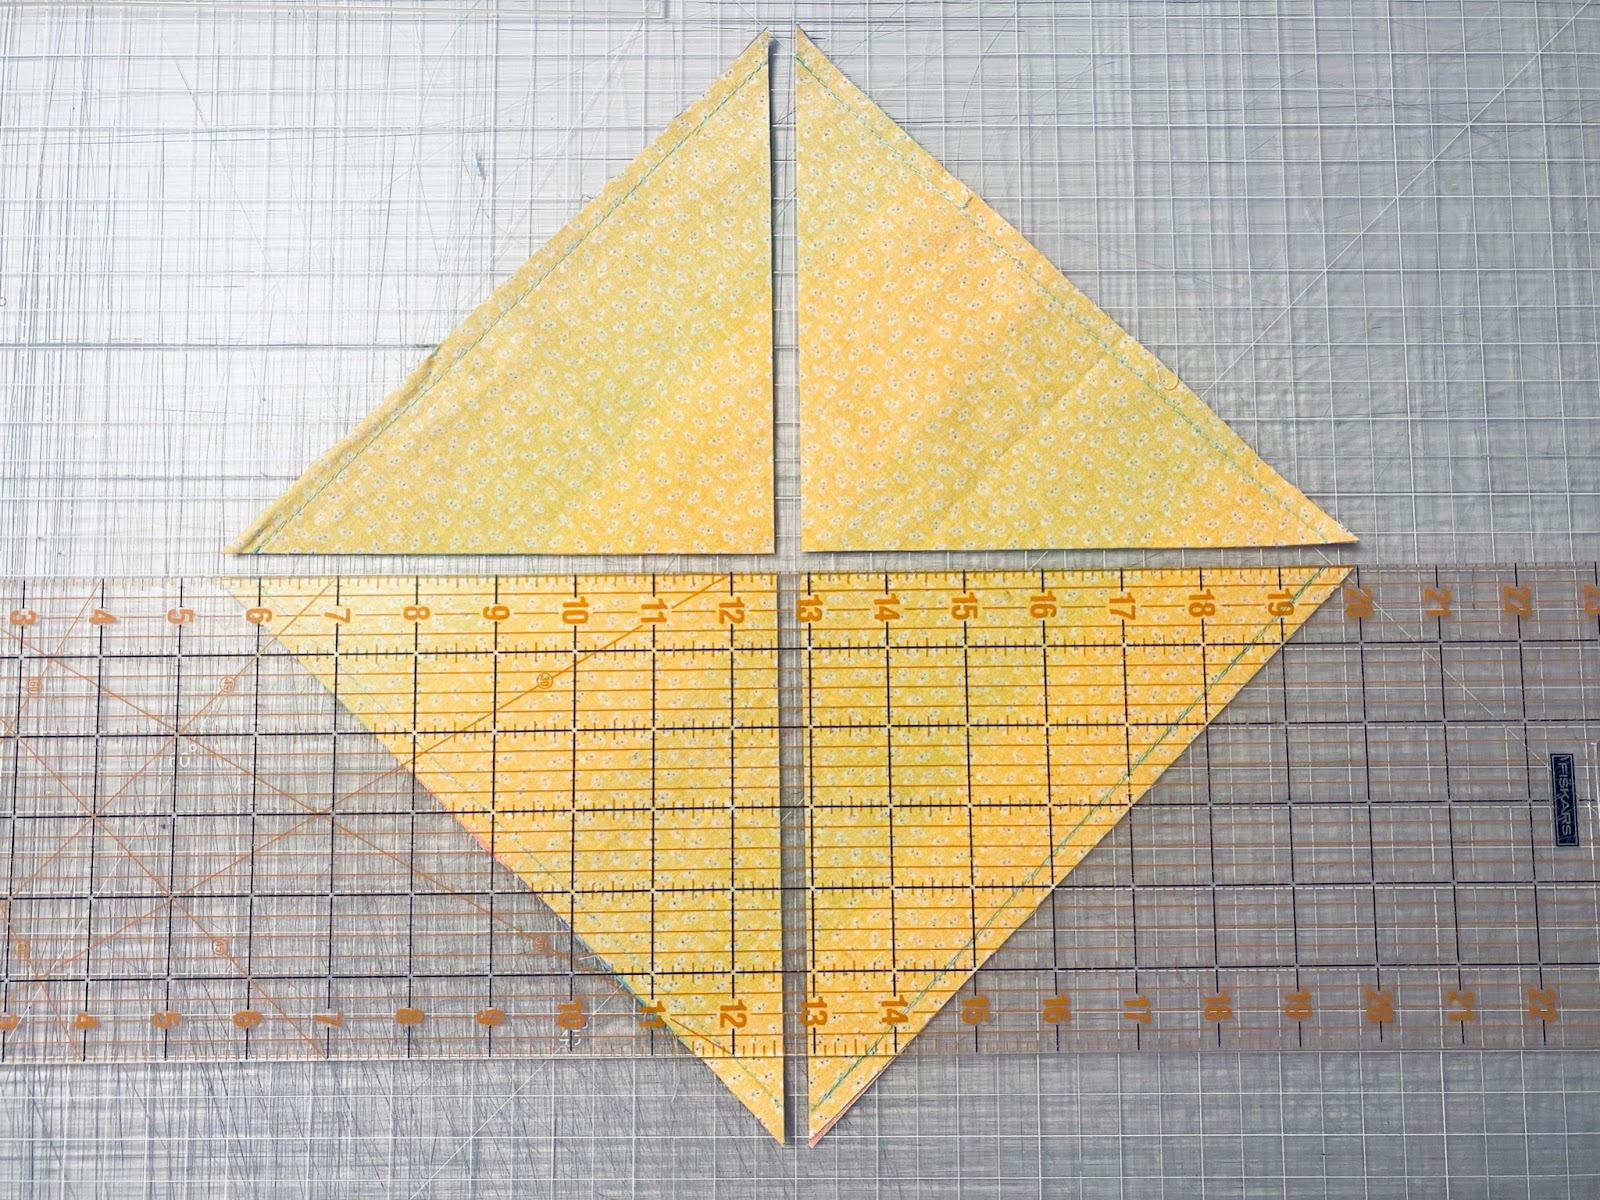
Step 6: Trim to size
You definitely want to do Step 5 before Step 6. Pressing the blocks will ensure they lay nice and flat for trimming. Now it's time to trim the blocks to the desired size. For this example, I want 6 ½” blocks.
See the excess fabric on the sides? It may not seem like a lot, but think about it: If you have that much excess fabric on each block of a quilt top, by the time you have completed the quilt the measurements will be WAY off.
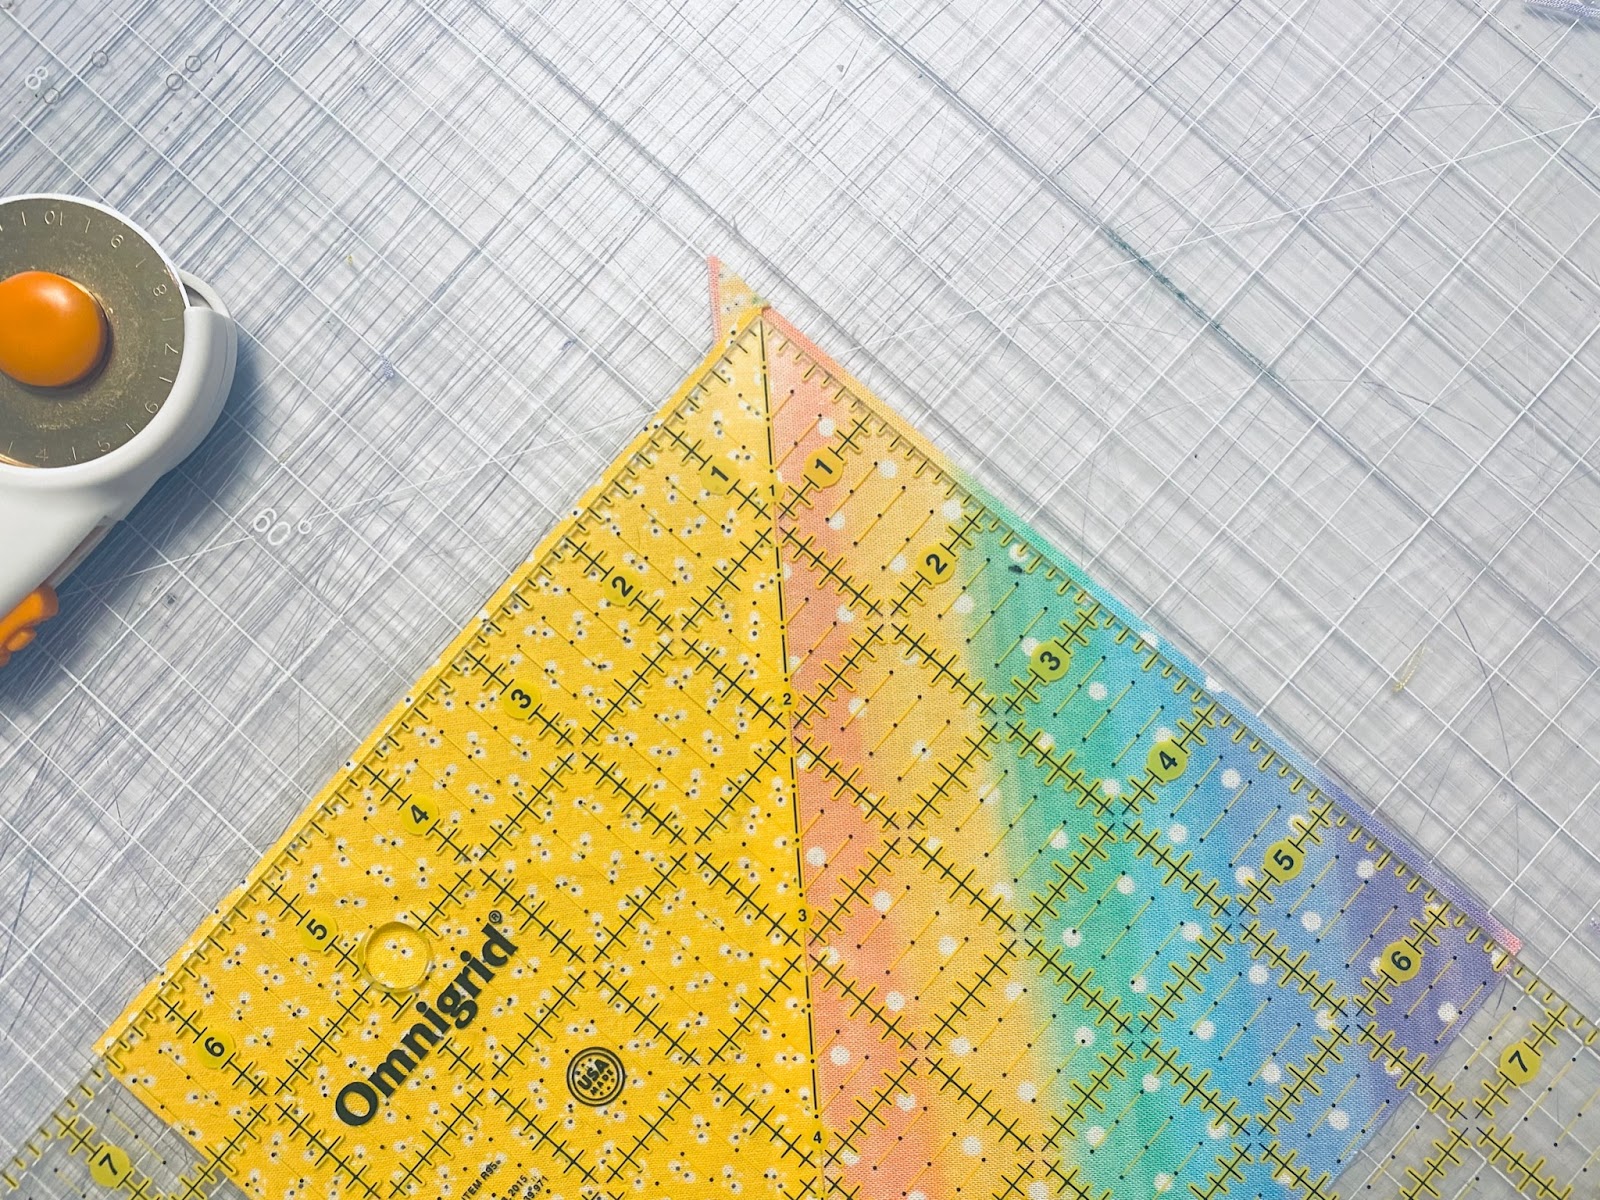
To square up these blocks perfectly, use the 45° line on your ruler and line it up with the seam of the block. Trim a small amount off the 2 edges emerging from the ruler.
Then, flip the ruler, lining the 45° line up with the seam in the other direction. Trim the remaining 2 edges, trimming the square down to exactly 6.5 inches.
Take a step back and admire your gorgeous half square triangle quadruplets!
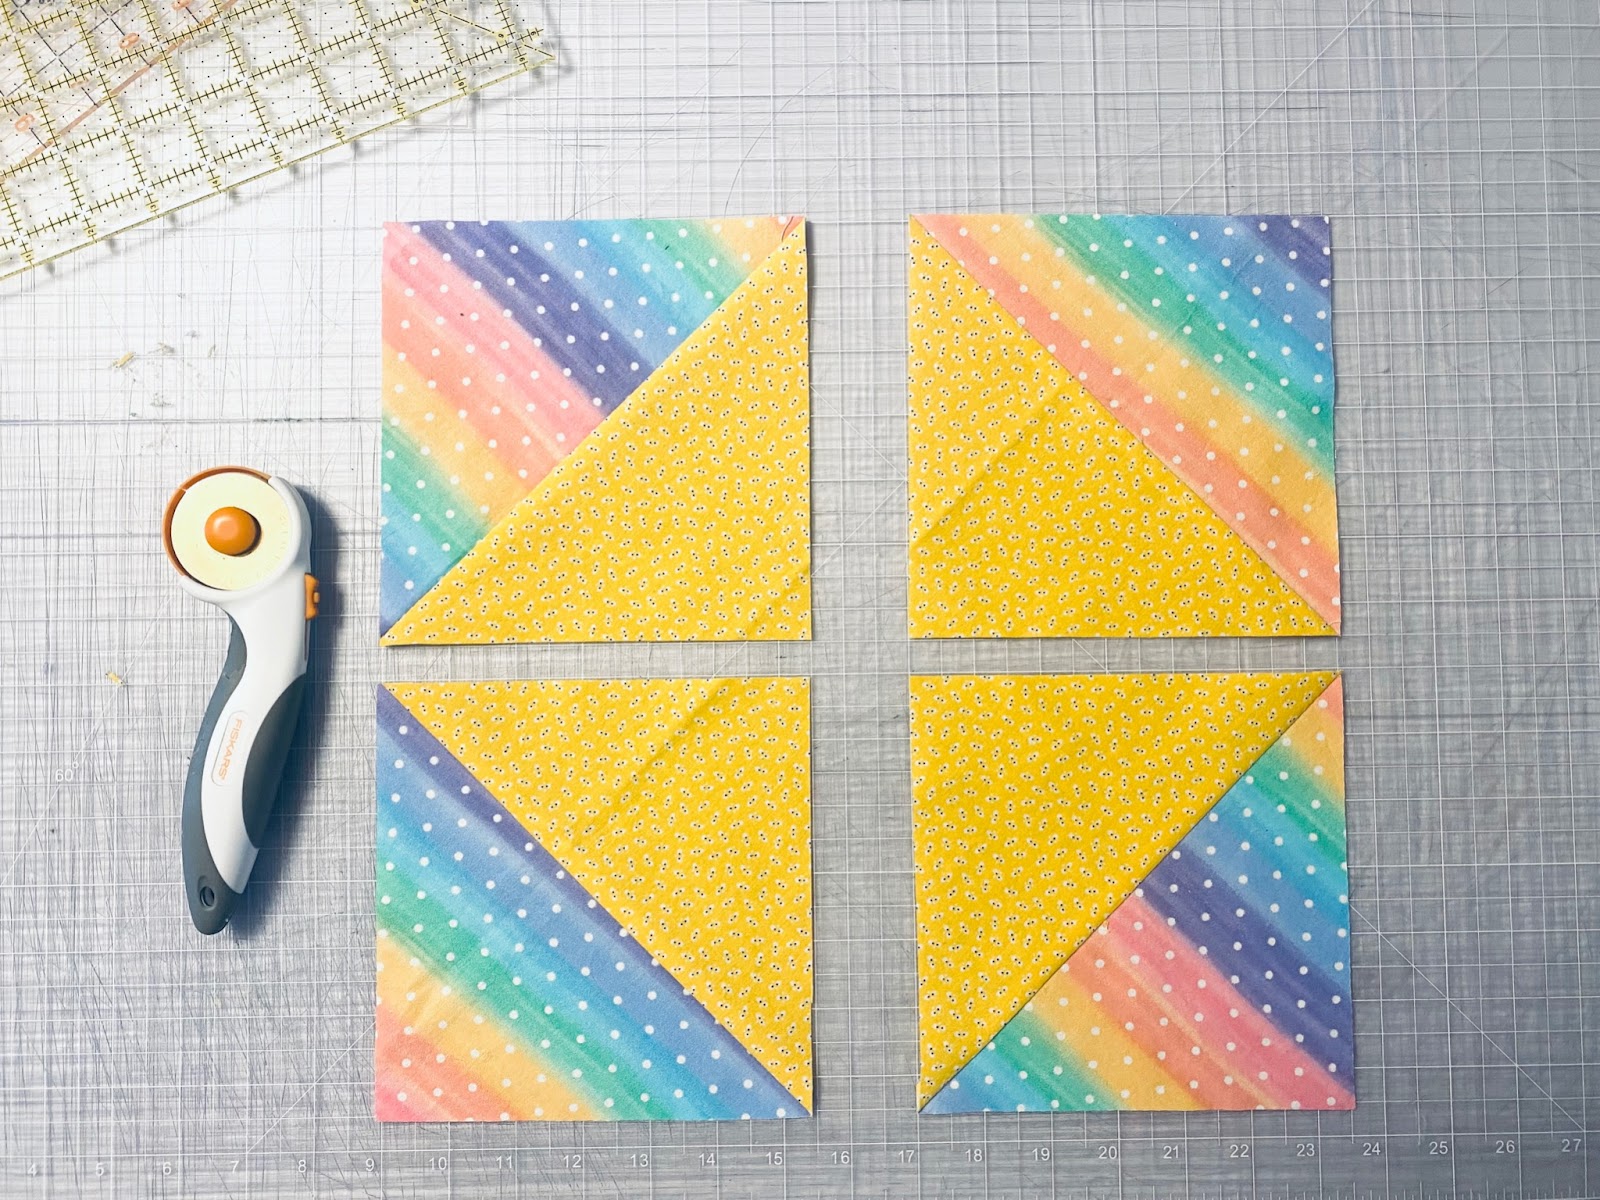
Once you get past the math of this method, these blocks are so fun to make - and extremely versatile!
No matter what your skill level is, the HST unit will become your friend and you will thank yourself later for learning how to make this awesome foundational block.
Want a method to make even more HST units at once? Try this: How to Make a Half Square Triangle 8-At-A-Time.
Want to remember this? Save it to your favorite board on Pinterest here.
Love the look and patterns for the half square triangles
I like how simple it is for a great look
I love how this is no waste!
Love this! Such a great idea.
Great tutorial, thanks for sharing!
I like the stress point of the formula, it stinks when your off on the final piece and the seam's don't line up. You put the work in and you want a great product coming out, not ''just okay''..
Love HST projects and with the 4 at a time and 8 at a time method it makes it a breee. Thanks for this post and instruction.
Lots of great time savers!!
A must know for quilters!
This would be so much faster than trying to cut with scissors!!
I have been wanting to make a quilt this seems like a great way to start
This is a wonderful tutorial!
Great cheat sheet and easy to follow tutorial. Thank you for sharing.
Learning to quilt has been a long time goal- so excited to try this!
These methods are definitely tried and truce! Thanks for the quilting tips. I need to print this now!
Nice tutorial!
Good job. I love it
Thank you for sharing easy to follow tutorial!
Great tutorial on a classic quilt style
Going to try my first quilt this summer!
I would LOVE to improve my quilting!
Great tutorial!
I love and need directions when doing this.
Thanks for the tips!
Love this!
Love the explanation of it! Sounds very simple.have to try it thank you for sharing
Love the samples of different quilt blocks and the cheat sheet!
This take so much of the work out of it! Love it!!
Great explanation!
I am a beginner and I absolutely love your tips and tricks
Thanks for the guidance
I’m just getting back into sewing, so I appreciate all of your tutorials!
Thank you!
Thank you for sharing!
very clear!
Loved this. Great idea
Thank you for the easy to follow instructions!
thanks for the info
Great tips!
That’s awesome!!
I liked this tutorial so much, I think I downloaded it more than once. Thank you for posting.
Thanks for your amazing tips and instructions.
Thanks for the cheat sheet!
Nice tutorial for triangle squares!
Thanks for the tutorial!
Love the chevron design!
I wish I could quilt ... this looks cool!
Feeling motivated to try this!
I don't quilt but this is good info!
I don't sew but this looks interesting
looks so simple
thanks for sharing!
idk if i would be able to quilt
Wow, you are soo talented! wish I could think of those things!
Great tips!
Great tutorial, thanks for sharing!
Love the versatility of what you can do with the half square triangle.
Thank you for the great ideas
I am definatley going to try this!
Great tutorial if you make quilts!
Great idea
Thanks for sharing this tutorial!
Thank you for this and the reminder...for all newbies...don't stretch the fabric and you will have beautiful perfect HSTs. Thanks for all you share!!
For someone who quilts this is a great tutorial!
Thanks for the tutorial!
Love this
So many patterns can be madee with the 1/2 squares. Thanks for sharing!
It's nice to know that even complex projects can be broken down into much simpler steps 🙂
Thanks for the cheat sheet. I like all the different ways the1/2 squares can go together.
You're so talented. I need to learn more from you!
Love it
Love the bright contrasting colors you used in your instructions.
The math is what usually keeps me from trying to quilt.
So efficient
Thank you
Thanks for doing the math! This awesome!!
My goodness, you are so talented! Great idea!
This was so much simpler and easier, thank you.
I wonder if my grandmother knew this technique
Love the patterns you can make
I had a quilt like this growing up
Great tutorial!
Thanks--this looks great!