Learn How to Sew Half Square Triangles Eight at a Time With This Sewing Hack, Free Math Measurement Chart, and Step-by-Step Tutorial and Video! This Easy-to-Sew HST Method Is Perfect for Beginners.
Today I'm sharing my time-saving secret for making 8 Half Square Triangles at once! You're going to love this easy-to-sew beginner-friendly method for constructing Half Square Triangles.
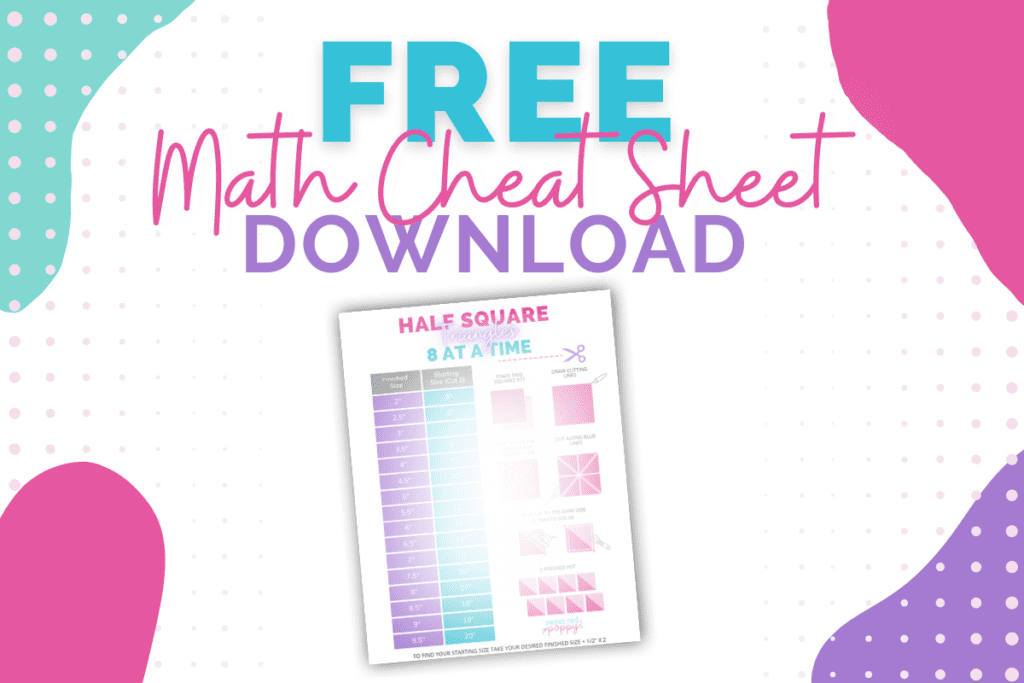
Plus, I'm sharing my measurement charts and math cheat sheets to help you get perfectly sized Half Square Triangles for any project. With all of these tips and tricks, you'll be making tons of HST's in no time at all!
Many modern quilt patterns utilize the half-square triangle, and for good reason. It is easy to assemble and can be used to create a multitude of different designs. If you've started quilting recently, learning how to make this block is a must! Let’s dive into this fun tutorial, shall we?
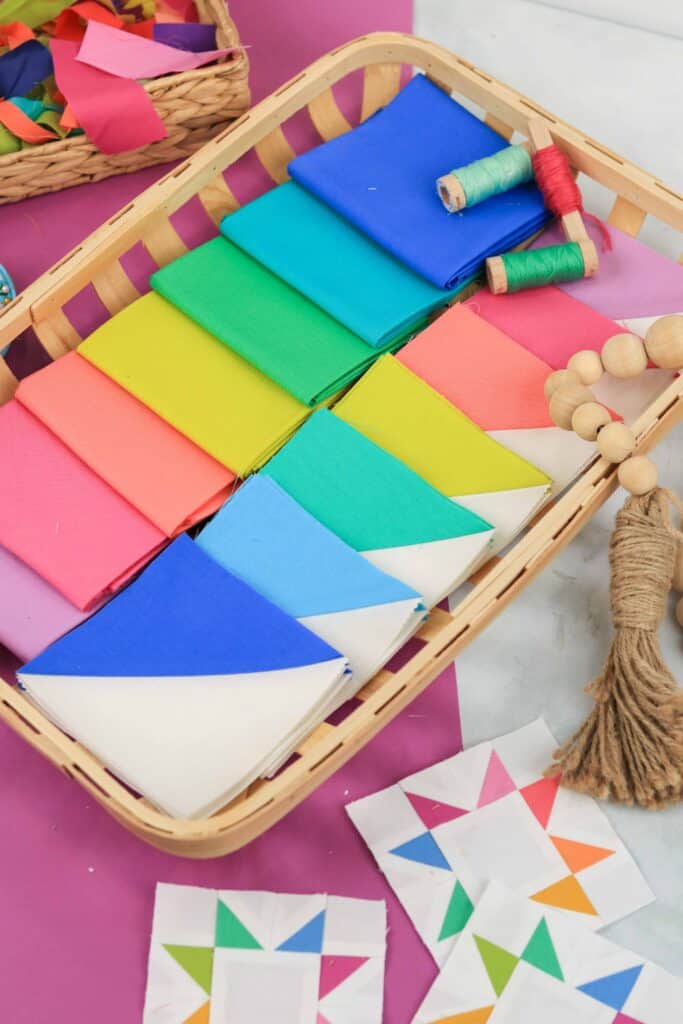
Table of Contents
Supplies You Will Need and Terms You Should Know
I totally understand, jumping into the craft of quilting can be overwhelming and confusing so before we get into the tutorial for today, let’s go over the supplies you will need to create HST units and some terms I will be using that you will need to know.
Why Shop Through My Links?
When you shop through my affiliate links, it doesn't cost you anything extra, but it helps me out in a big way! I earn a small commission from those purchases, and that support allows me to continue creating and sharing free tutorials and patterns for you. Thank you so much for helping me keep this creative community going!
Half Square Triangle Supplies
Shop my favorite sewing supplies here!
- Sewing Machine: You do not need a fancy, expensive sewing machine to create gorgeous quilts.
- Thread
- Fabric: Quilting cotton is best for this tutorial
- Marking Pen: Use a pen with disappearing or water-soluble ink so it won’t show through on your finished quilt.
- Cutting Mat
- I prefer a rotating cutting mat for HST
- Rotary Cutter: This will help you get precise cuts on your fabric.
- Ruler: I would recommend a large ruler around 6”x24” if you are just starting out. This size ruler is really versatile, and you can use it along with the markings on your cutting mat to cut pretty much any size block.
- A square ruler is also great, especially if it's close to the size of your goal size for your blocks.
- Iron
- Pressing Mat
- Pins
DOWNLOAD THE FREE MATH CHEAT SHEET HERE!
Terms
- Cut Size: refers to what size you cut your pieces before you do any sewing.
- Goal Size: also called “unfinished size” this refers to the block after it is constructed but before it is sewn into the quilt.
- Finished Size: refers to the block after it has been sewn into the quilt and completed.
- Seam Allowance: refers to the excess fabric to the right of the seam. In quilting, the seam allowance is usually ¼” unless specified differently.
- Right Side of the Fabric: the “front” or “top” of the fabric where the design is vibrant.
- Wrong Side of the Fabric: the “back” of the fabric that is not meant to be seen.
Looking for more free quilting tutorials? Click here!
Half Square Triangles- “8 at a Time” Method
Now that we’ve gathered up our supplies and understand the terms that will be used, let’s get into the tutorial! This method is especially helpful if you need to make several smaller HST units for a project.
Step 1: The Math
HST “8 at a Time” equation: Cut size = Goal size + ½” x 2
For this example, I want to create 8 - 3 ½” HST units. So my equation will look like:
Cut size = 3 ½” + ½” x 2
Cut size = 8”
Make sure to add the 1/2" before multiplying by 2!
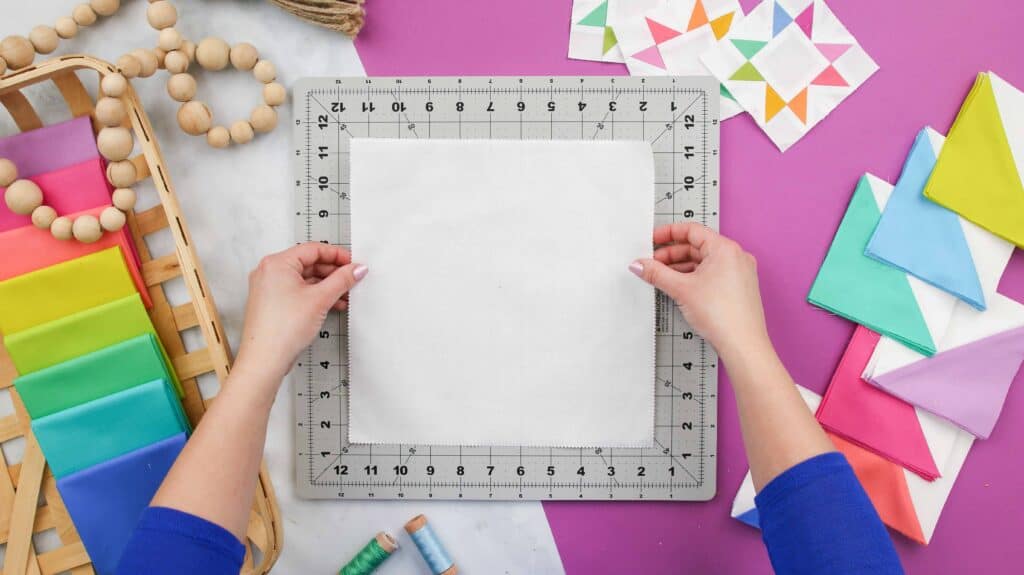
Since I need 2 squares to create these HST units, I will choose 2 coordinating fabrics and cut 1 - 8” square from each fabric.
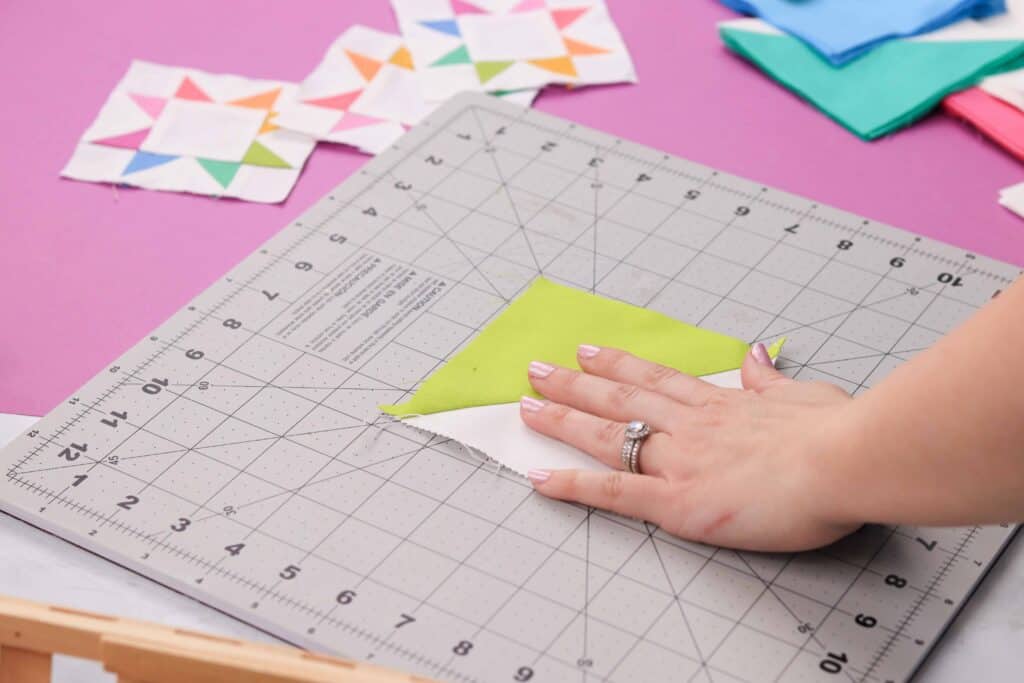
Step 2: Cut the Fabric
Pro Tip: When you are cutting with a rotary cutter, it is extremely important to be aware of where your fingers are at all times. You don’t want to accidentally cut yourself with the blade.
Cut 2- 8” squares from the fabric you selected. Make sure you are keeping your ruler stationary on your fabric so you get a perfect, straight cut.
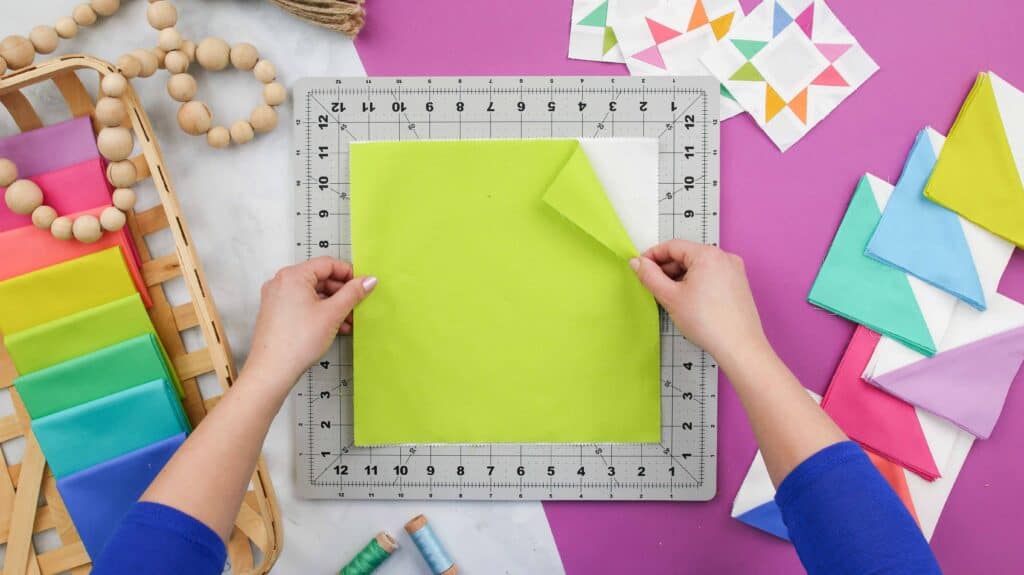
Place your 2 squares right sides together. If you don’t, when you go to sew your squares, half of the HST pieces will be inside out which isn’t what you want.
Line up your squares perfectly. If it will help you, place a few pins in the squares to hold them in place.
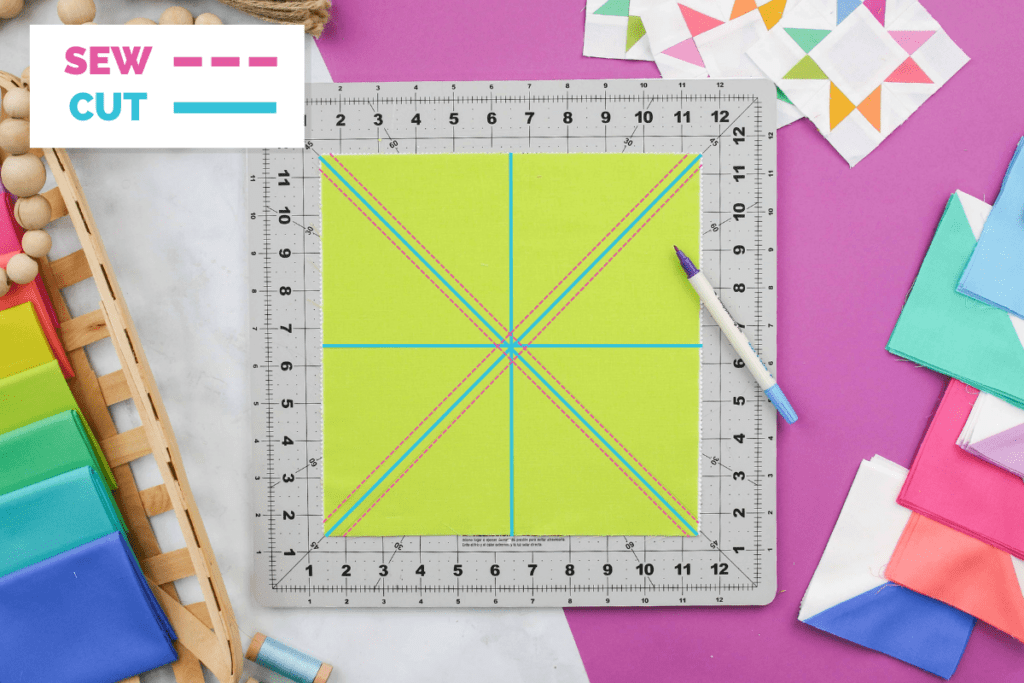
Step 3: Mark the Fabric
This is an important step and you want to be sure to make exact marks on the fabric. These lines will be your guidelines when you go to sew the squares together. To draw your lines, line up your ruler diagonally from the top right corner down to the bottom left corner and draw your first line.
Next, do the same thing, but draw the line from the top left corner down to the bottom right corner.

If this is your first time sewing HST's it's helpful to also draw in your cut lines and stitching lines.
Draw a stitching line ¼ inch to either side of each of the diagonal lines.
Next, draw a vertical line from the center of the top to the bottom and a horizontal line from the center of the left side to the right side.
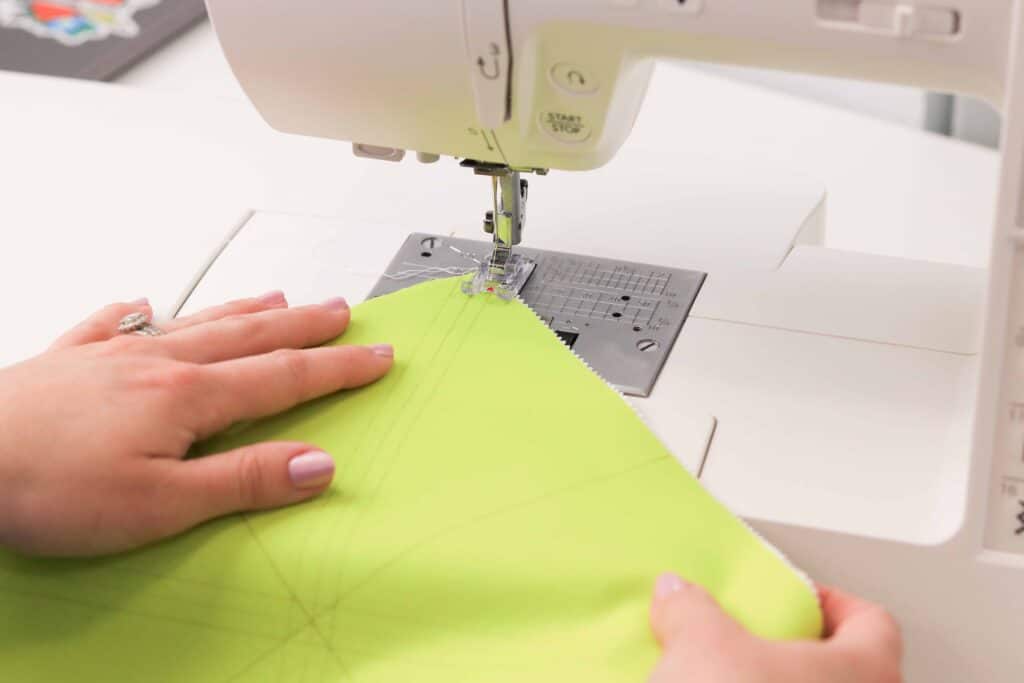
Step 4: Sew the Squares Together
Take your squares to your sewing machine and use your pen markings as guidelines. You will sew ¼” away from each guideline on either side.
After you have sewn both guidelines. It should look like an “x” when you are done sewing.
Step 5: Cut the Half Square Triangle Units
Bring your square back over to the cutting mat and lay it down so it looks like a large “x”. Now we are first going to cut a vertical line from bottom to top in the center of your square.
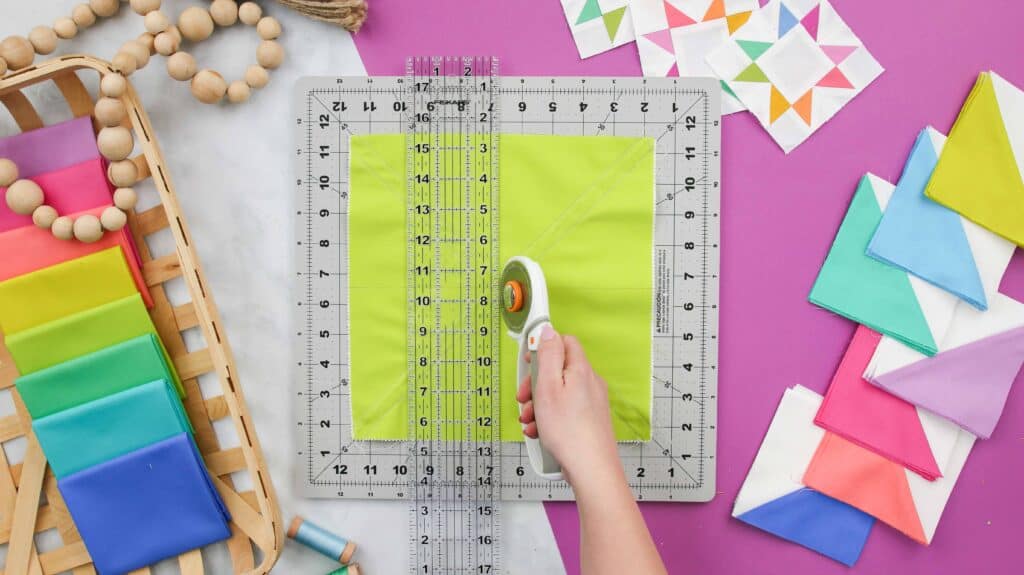
Next, cut a horizontal line from left to right. The cuts should make a large “+” sign.
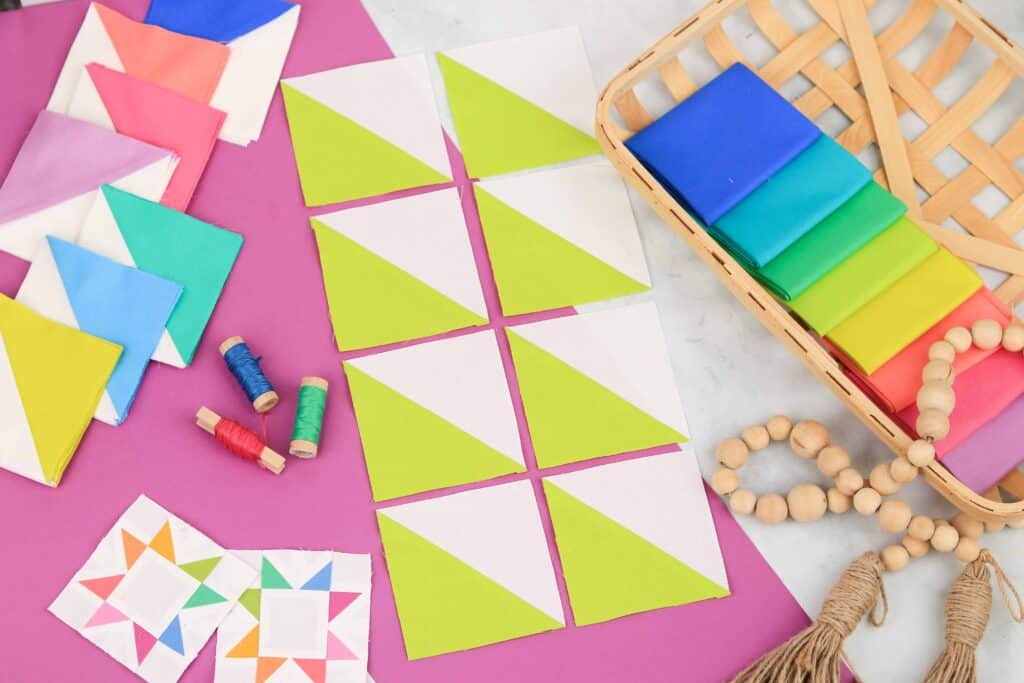
Take the 4 squares you have now and cut the diagonal guideline on each square to reveal 2 HST units from each square.

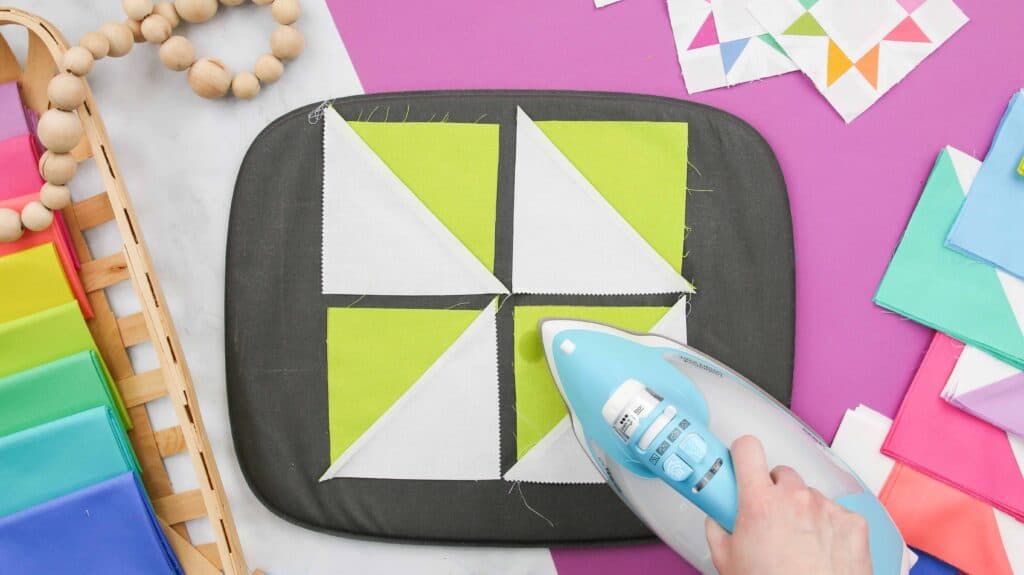
Step 6: Press Each Half Square Triangle Block
Using your iron, press each seam from each block towards the darker fabric. Be careful when pressing these blocks that you don’t stretch the fabric.
To press, place an HST unit onto the ironing board with the wrong side of the fabric against the board. Carefully fold open the block and press the seam. Pressing will also help when/if you need to trim the squares down.
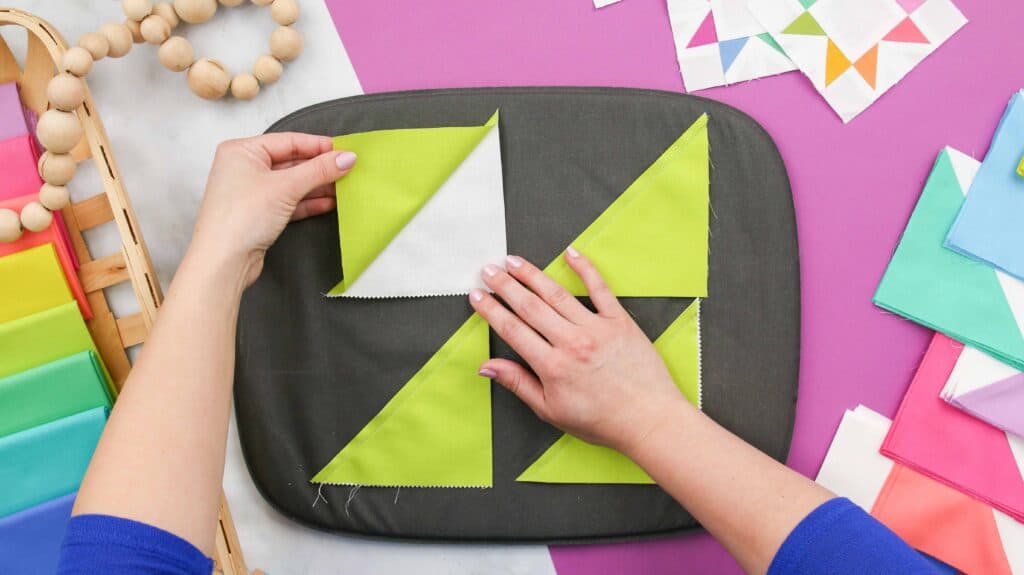
Step 7: Trim Excess Fabric
Since we are working with fabric, it is possible that the fabric will stretch even when we are cautious. After you have pressed the blocks, take them back to the cutting mat again and measure them.
Even if you see just a tiny bit of excess fabric, go ahead and trim it off. It may not seem like a lot on one block, but if you left that much on each block, it can greatly mess with the measurements of an entire quilt top.
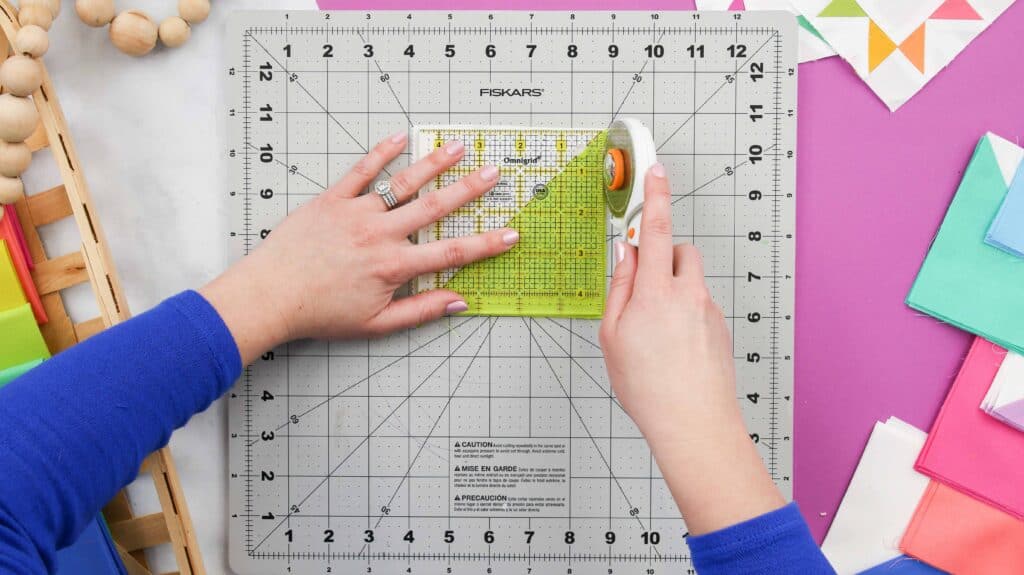
Tip: To make sure you are squaring up your blocks properly, use the 45° line on your ruler and line it up with the seam of your HST unit. This will ensure you are trimming the square correctly.
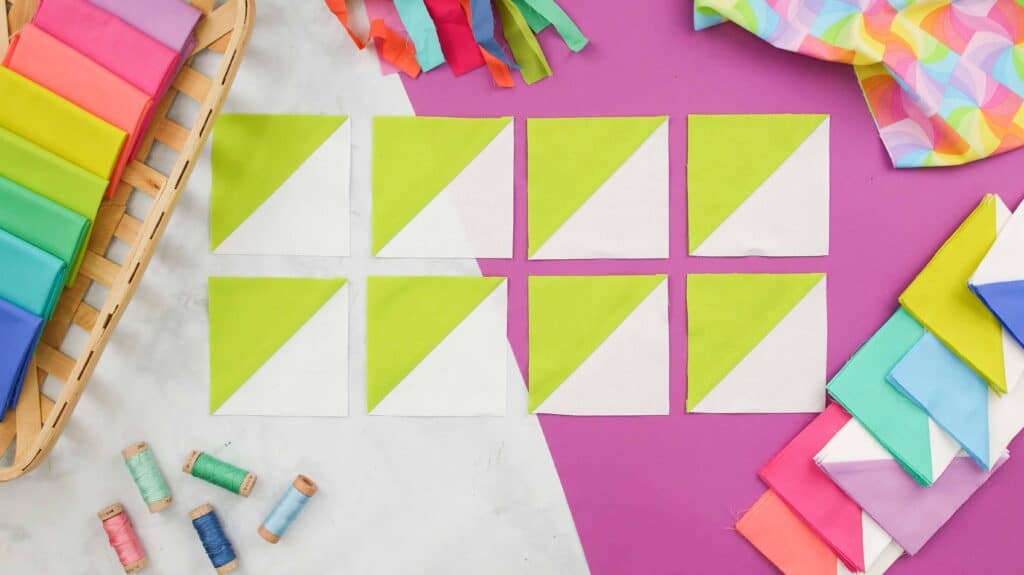
Trim all excess pieces and take a moment to admire your 8 beautiful half square triangle blocks!
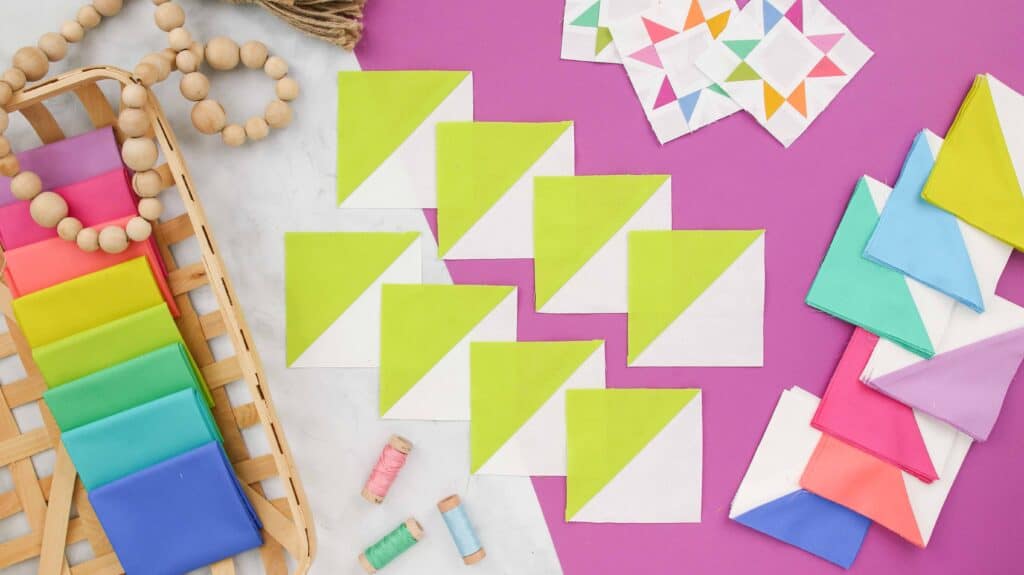
Wasn’t that so satisfying? Being able to master the construction of the half square triangle is a must for any quilter, and by using this tutorial you will be able to cut that construction time way down!
Quilting is a labor of love and a super exciting and rewarding craft. Don’t forget to have fun with it!
Looking for more free quilting tutorials? Click here!

Always wanted to make a quilt this will help!
This looks like it would save so much time!
I agree definitely going to try it.
Great trick! Thanks.
This is great & looks so easy! Thank you!
This is a great shortcut!
Such invaluable info!
This was such a well detailed article! So specific & easy ✂️❤️
Thank you for this! This helps a lot!
Always love a good sewing hack!
This is so helpful! Thanks!
This is pure genius! Just bookmarked this for later! Thank you!!! ❤️
Thanks for the tips
This was such a well detailed article. Really enjoyed
Love how this tutorial was so short & straight to the point ✂️
Making a quilt has always been an interest of mine. Thanks for this video , cutting squares eight at a time is going to be very helpful and time saving.
So easy! Thank you!
If I ever add quilting to my list of things to learn, this will be helpful!
I'm sure that this makes it a lot easier and faster to make a quilt. Love it!
I love time saving, bulk creating ideas. I make many of the same items and will never tire of saving time (and my fingers & eyes) doing things in bulk. Thank you for the share.
I don't make quilts but for someone who does this would be great info.
Thanks for the tutorial!
Thanks for the helpful tips!
This will help with so many things!
This is great ideal.
What a great tutorial!
Would love to see your finished quilt!
Great tutorial!
Great ideal.
love this
You are amazing at what you do
Always interested in your tips and tricks that make my quilting move so much faster. Can't wait for the next one.
Beautiful quilt design!!!
This is a wonderful time saver. Thank You!
Genius! I have to try it out!
Really enjoyed this tutorial
Thank you Kim for all the great information. I can't wait to start.
I just might have to attempt making a quilt now. Thank you!
I love how easy this looks! CAN'T WAIT TO TRY IT.
Maybe ill take up quilting one day
amazing
Live these tips!
Definitely must try this
I love your tips and tricks. Thanks
So cool!
You make it look so easy!
What a great tip. Thank you!
Awesome! Thanks for posting!
Great!!!
I hink I could do that!!
This looks like even I could finally give quilts a try 🙂 Thank you!
Now I want to make a quilt. Lol
Thanks! Going to try this sometime soon!
So cute!
Such a great time saver.
Such a great tutorial! Thank you!
What a game changer! Can't wait to try this!
such a time saver!!
This is so neat!
The colors you picked are gorgeous!
Looking forward to trying this.
Thank you!
I've done a few quilts and wish I would have known this shortcut! Thanks for sharing!
I cannot wait to try this!! I have so much trouble doing these two at a time! This makes it a LOT easier. Thank you so much!!
I am very much a newbie to sewing and Cricut. But this video and math cheat sheet are incredibly helpful and boost my confidence!
I've always wanted to attempt a quilt but was often overwhelmed by the amount of work involved. Having seen your tip, I may just give it a try this fall. Thanks.
This may be a dumb question but what did you use to draw the dotted cut lines?
you make it look so easy.
When I sew my straight lines are more like well a mess
Wow. This makes it so much. Simpler.
I am not an experienced sewer but even I can manage this
I will definitely try this with my next HST quilt! Thank you!
Super helpful tips! My daughter quilts so I am sharing with her!
super cool ideas
Great time saving shortcut! Thanks!
Such a creative idea.
I never knew how to do this, Such great information to have for reference. Excited to try this!
I was doing it the hard way. Thank you for this tutorial
That spinning cutting mat is awesome.
So awesome!!
Thanks for the step by step tutorial! Very helpful for a beginner!
Such a good and helpful tutorial!
GREAT way to make that, those tool's make it much easier...
Thanks for a great Tutorial. Very detailed and simple to follow and understand.
This will make it so much faster to make my half square triangle quilt I decided to do for our new home!
Definitely bookmarking this! I've always wanted to make quilts, but sewing has not been my strongest skill lol.
I'm learning to quilt and this is awesome!
Love this method for HSTs. Thanks for the cheat sheet. So helpful.
Thisnis really cool! Not sure I'm brave enough to try it, but I'm saving it for the day that I am! Lol
Need to get out my scraps and finish my quilt!
Love this!!
So much quicker than the Cut, sew, trim method! Can't wait to give it a try.
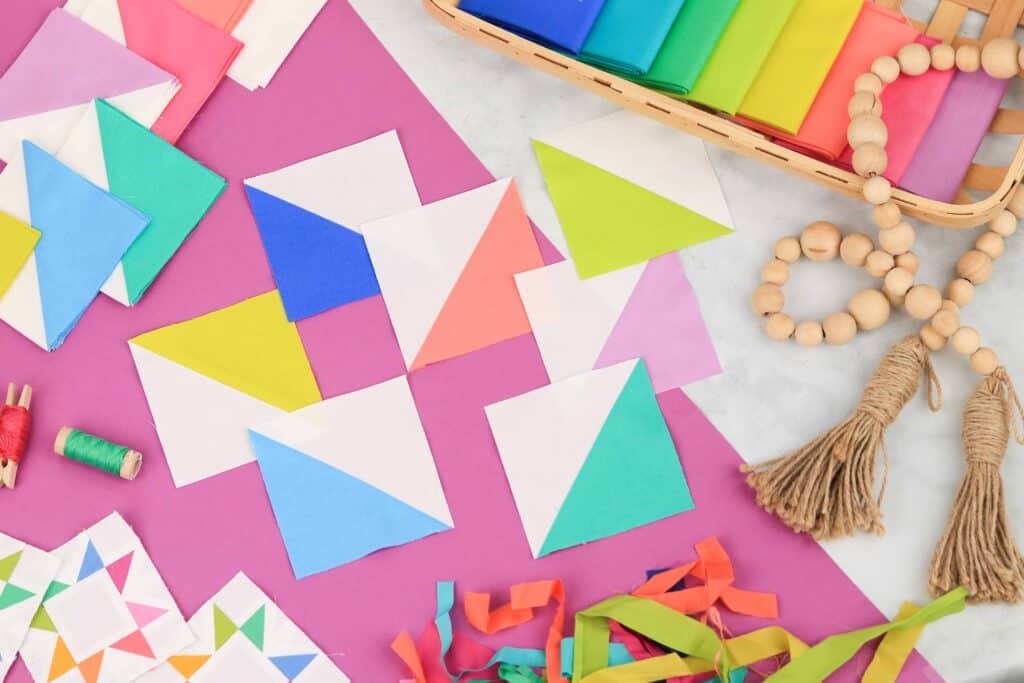
They look like I need to figure out something to use them in.
Looks like a great way to make quilt squares!!
Love to see yellow and purple together!
Great tutorial! Thank you!
Awesome to make these all at one time!
Saving me time and showing simpler way to complete a complicated stitch, is probably my most favorite part about your blog, Kim. Freakin love this post and all the time you take to create these brilliant productions!
Absolutely love your color choices on this one!
Excellent tutorial and video. Thanks!
Love your hints and this streamlined process! Makes it so easy!
Thanks so much for the tip!
This makes me want to get my sewing machine back out and attempt this once again. The first time was an emoticon fail. Thank you for sharing and inspiring us
This is really cool! Thank you!!!
Love this tii!
Thanks for letting us know about the rotating cutting mat.
I love your stars! Make me think of spring! Love how you did them!
Thank you!
So festive! You make it so easy, thank you!
Always looking forward to watching or reading your ideas. Great and detailed instructions, I must try the one soon.
This was a real blessing to us beginners! I could easily follow the directions and they came out perfectly. The cheat sheet is a great help too. Saves me time and makes it so much more fun. Thank you for taking the time to do this. Hope I can find more!!
This is a great idea. Thank you for sharing this idea with all of us.
Very informative video. Loved it
Thank you so much for all you do for us here on your website!! Really appreciate everything!
I love this video. Thank you for sharing.
So earlier on a video I commented about cutting through the seam; thinking it would come out. But after some thought I've realized that these are just the first steps in the quilting process so you'll be sewing them again. I tried quilting once but I believe that I did not know enough about it to do it correctly. This video is quite helpful. Thank you for sharing. 🙂
Love the colors shown here. Very inspiring!
Looks so easy!!!
You make things look so easy - so much so that I might have to give it a try.
This pattern would make a wonderful quilt.
I love this idea, I also think I really need one of those rotating cutting boards .
Such a great trick, would love to try it!
I HAVE TO HAVE! the spinning cutting mat!
Such a time saver! I like to be able to trim units to the correct size, so this is great.
Love Kimberly’s professionalism way of explaining and expressing herself. How she been a novice when she started her craft and blog. Kim have given me the inspiration that a needed to start again and try so many unfinished projects. Thank you!
I can't believe how easy you make this look. I haven't ventured into quilting yet.
THIS IS SO UNDERSTANDING
Great trick!
Thank you for sharing
Thank you for sharing! What a wonderful time saver!
Awesome idea.
One of my fave ways to make HSTs!!!
Love all your tutorials
Love this! My wife is a huge fan and glad to see how well done these are
Thanks!
This is helpful. Thanks for sharing.
;looking forward to making this ty
This will be very helpful.
Thank you for the great idea
Makes it so nice and easy - your vidoe is straightforward and I’m looking forward to trying this method!
I would love to make a quilt. This makes it look so easy.
So awesome! Thanks for sharing!
Quilting seems so difficult and intimidating. You make it look easy.
Such a great tip!
Great tips!
Enjoyed the video!
WOW, what a great idea and tutorial! Definitely going to be using this in the future. Thank you!
Thanks so much for this tutorial!
AWESOME tip!♀️tfs
Just watched the video on YouTube I love having a written tutorial to refer to as well so I don’t have to keep replaying bits. So thank you for the effort involved in making written and video tutorials. Also excited about the link to that rotating cutting board!
Always wanted to try quilting.
Kimberly makes it look so easy! I wish I had the time to try; I've always wanted to make quilts.
I love this method! My daughter has requested a ‘heart’ quilt and how can I say no? I’ve never quilted before but your video is definitely an inspiration for a new quilter like myself! Thank you!
Love the rotating mat! Looks so easy to make the squares.
I love this method. Several years ago I made a memory quilt that called for half square triangles and there was so much waste and so much stretching on the bias. This method has very little waste and no stretch of the bias edge! Love it!!
You make it look so easy! Thank you for the great tips! Love it
you make it look so simple!!
Great tip! Thanks for sharing!
Neat trick, they look perfect!
Thank you for the knowledge!
This is super helpful thank you
This is way easier than I ever could’ve imagined! Thanks for posting.
I feel like this might make the seams easier to secure.
beautiful mini. perfect size for just starting out quilting
Your tutorial is very informative!! Thank you for sharing!
Can’t wait to try
Yes a new idea
Great quilting info
I always thought it was so hard and time consuming to do the squares. This will save me a lot of time and thread!! Thanks for sharing such a great idea!
A very quick and easy way to do these triangles.
This is such a timesaver--great ideas!
thank you for the math cheat sheet. and your easy to follow directions you are very talented thank you for sharing
Thank you for always being informative! I’ve learned soo much from you sharing!!!
I love how simple this is, thank you!
i love how easy this is
If I had learned this 30 years ago, I might enjoy quilting now.
What a great reminder for those of us that love to quilt but don't have time because life at this time doesn't allow.
This will definitely make it much easier in making quilts, I am always looking for better ways to complete my crafts and in sewing! Thank you.
I like how the stitching looks reinforced.
Never made a quilt, but that looks fun!
it!!!
the cheat sheet and tutorial were helpful, thanks
Gotta love math cheat sheets! Thanks!
I am so glad I found you two years ago. You have a great teaching ability.
Sewing is one craft I never tried before. Will consider now!
This is amazing idea. Thank you for sharing
Cool time saver for a quilt!!! LOVE IT!
I love quilts!
Love this
I need to invest in a good iron, after trying this
Love these hacks and tips! TFS
This is such a great idea. I am using this technique for my next project!
great post
great ideas, love your videos
Such a great idea!!
It has been a hot minute, but I have quilted before. I love this article. Such a time saver and a game changer. I will be watching more of your content. As I said I haven't quilted in a while, but I would like to make one for my son. He has truly worn out the one I made him in middle school.