Learn How to Make a Realistic Large Peony Flower with Crepe Paper in this Step-By-Step Tutorial with FREE Downloadable Peony Files.
There’s something so dreamy about oversized crepe paper flowers, they’re bold, beautiful, and surprisingly easy to make! If you love peonies as much as I do, you’ll love this DIY. 🌸
In this tutorial, I’ll walk you through how to create giant crepe paper peonies with delicate, fluttery petals and that signature full, ruffled shape. Whether you’re making them for a special event, home decor, or just because (because honestly, who needs an excuse?), these stunning blooms are the perfect way to add a touch of handmade charm to any space.
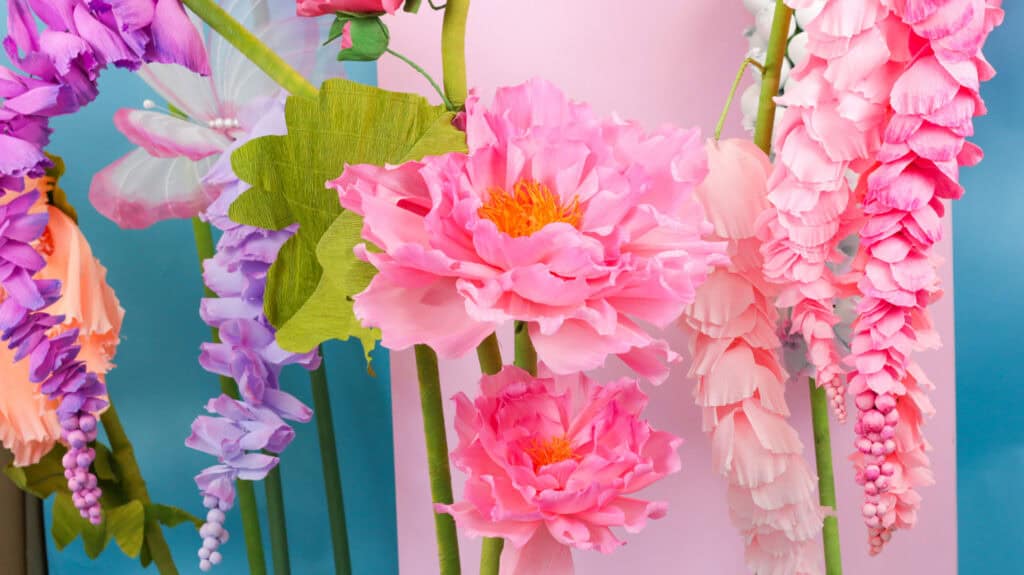
Table of Contents
What is Crepe Paper?
Is this your first time working with crepe paper? Don't worry, I've got you covered with everything you need to know! Click here to read my Crepe Paper Resource Guide to learn more about what crepe paper is, how to cut it, all the different weights, and where to buy it. Crepe paper is a textured paper with stretch that is ideal for making realistic-looking flowers.
What Type of Crepe Paper Should I Use for this Project?
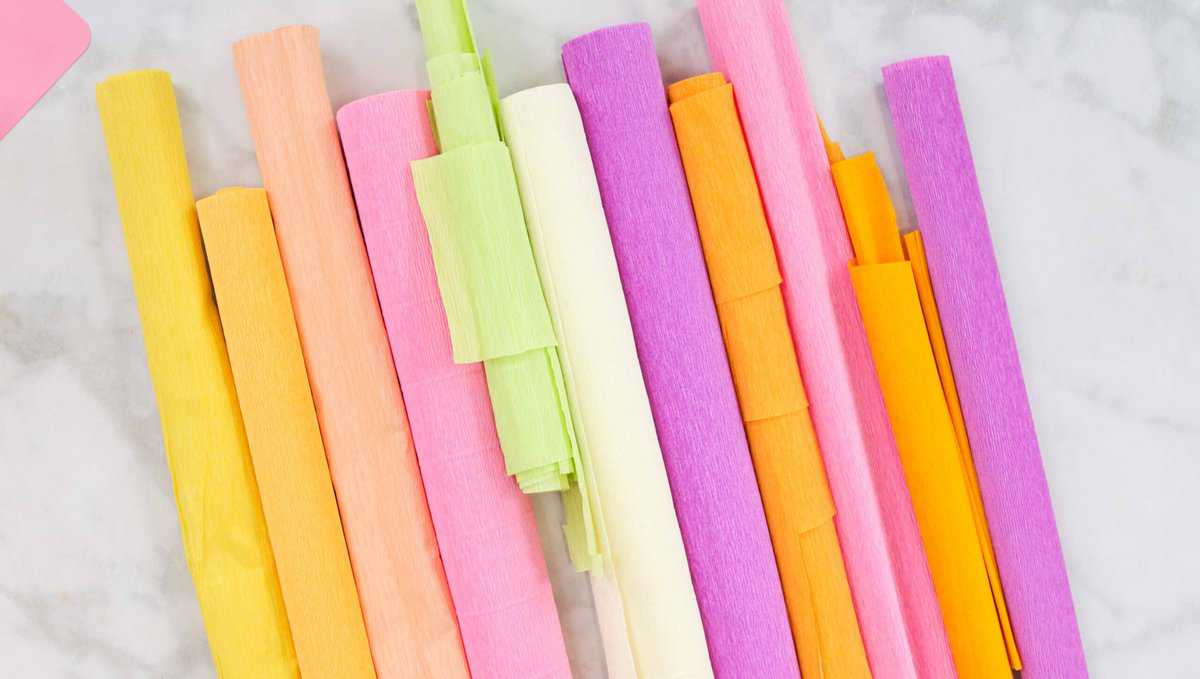
For this project, I used lightweight crepe paper for my petals and centers and heavyweight crepe paper for the leaves.
I usually stick to lightweight crepe paper for the centers of my flowers since it’s so delicate, and heavyweight for the petals because it offers more structure and flexibility. But this time, I went with lightweight crepe for the petals too, because if you look at a real peony, you’ll see just how soft and fragile those petals are!
I chose lightweight crepe paper because I wanted my petals to be realistic and reflect the fragile petals of a peony. Lightweight crepe paper typically weighs between 30-60 grams.
For my leaves, I used Medium-Weight (80-100 grams) crepe paper because it's a great in-between weight. It has structure while maintaining a smooth appearance.
If you want to learn more about different weights of crepe paper, click here.
Characteristics of a Peony Flower
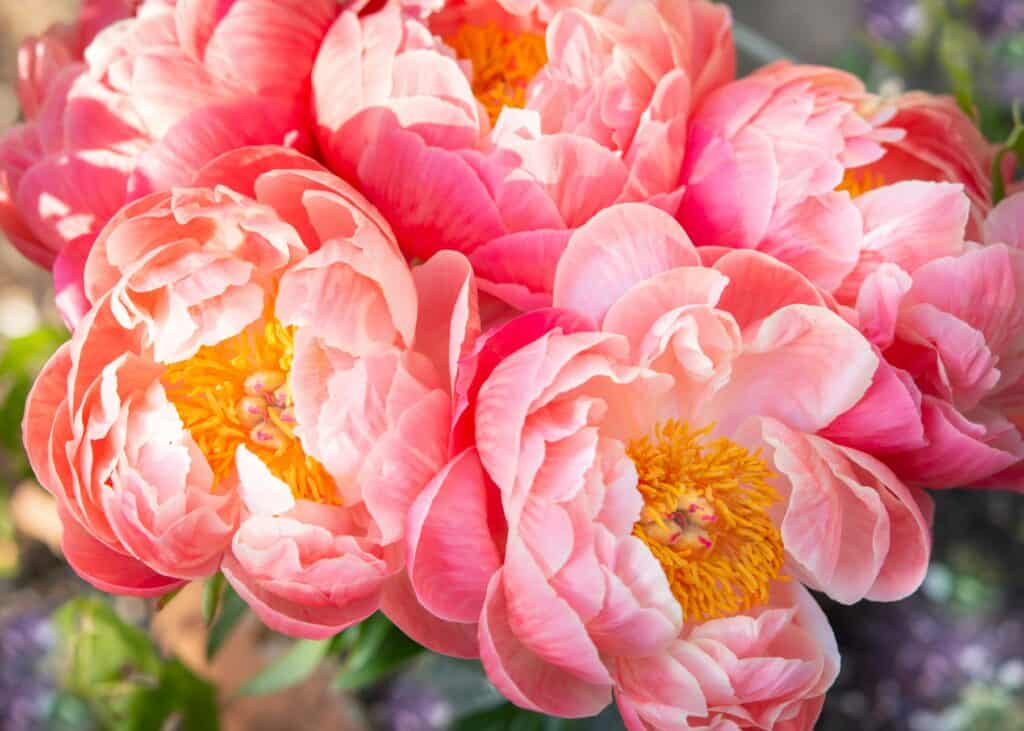
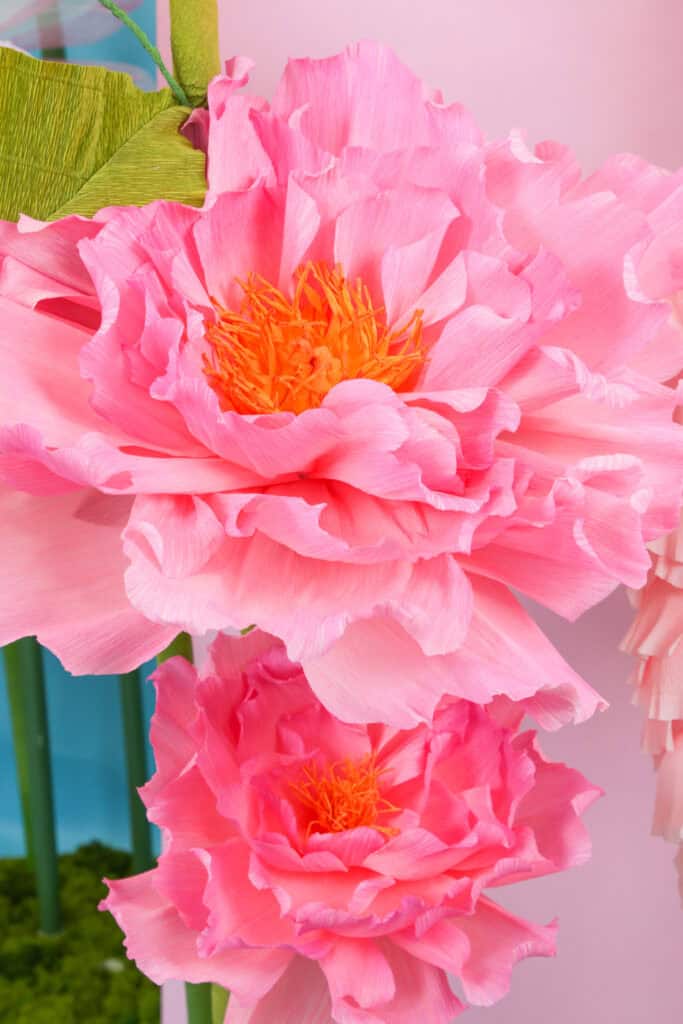
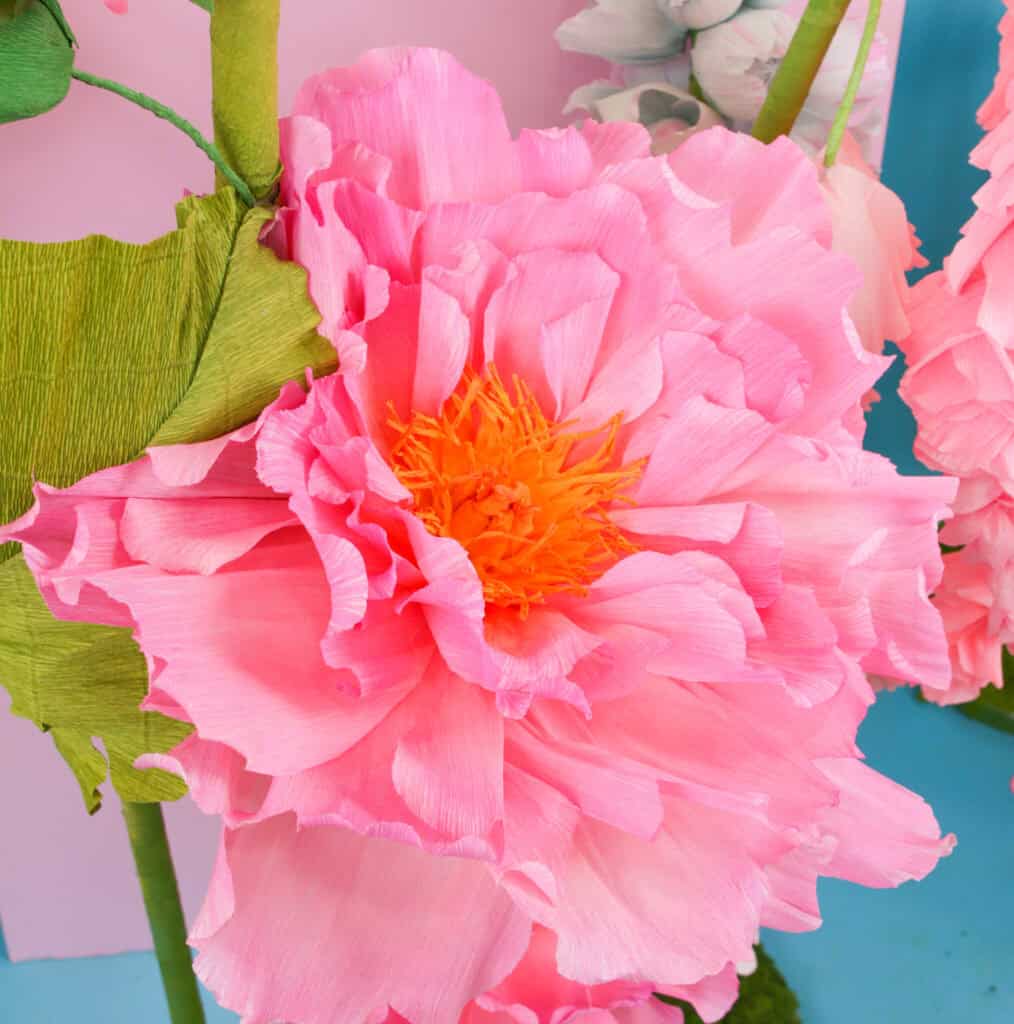
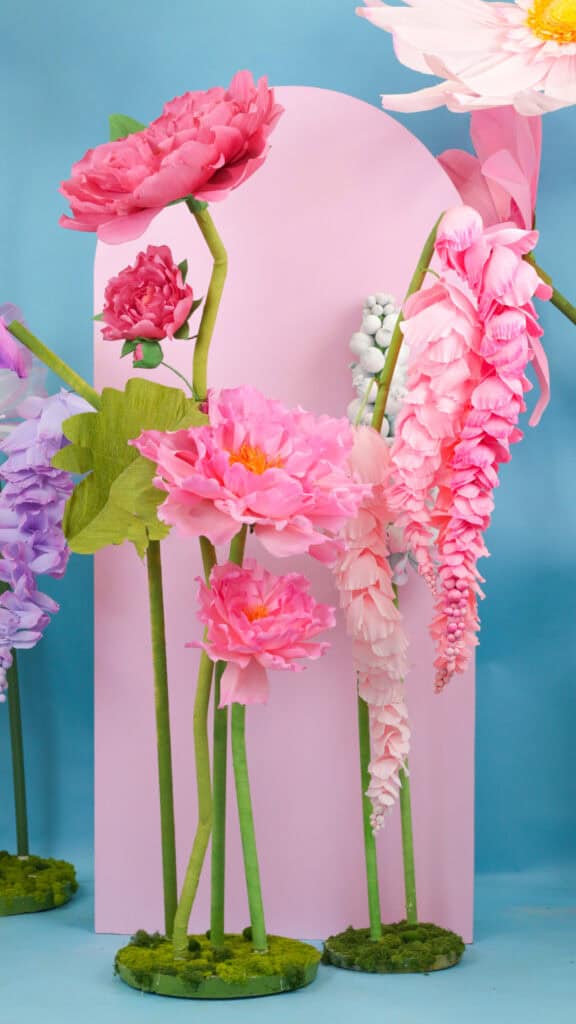
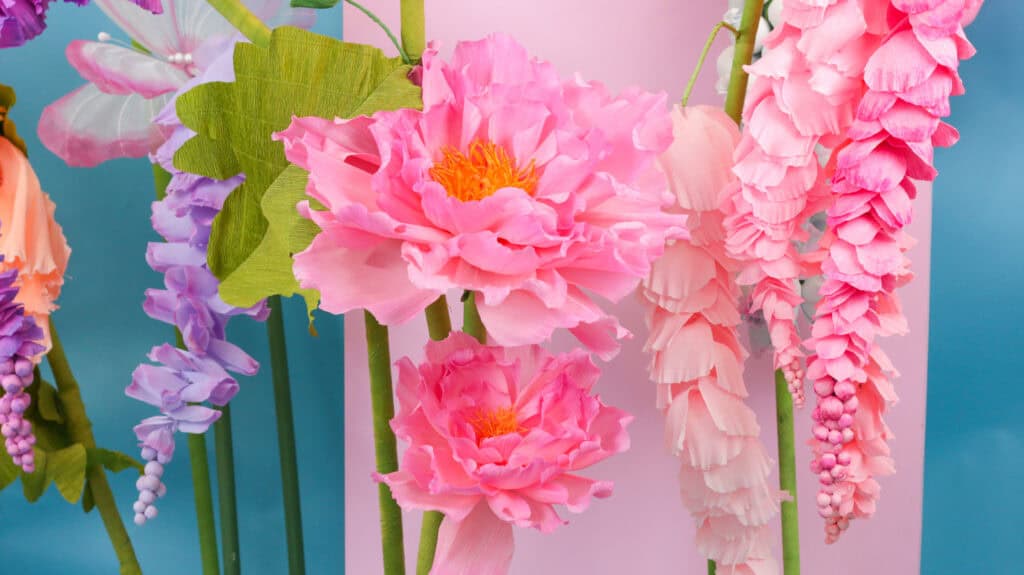
Peony flowers bloom in a variety of colors and are composed of layers of delicate, fluffy petals that form a dome-like sphere surrounding a bright yellow center.
Why Use Pan Pastel or Floral Spray?
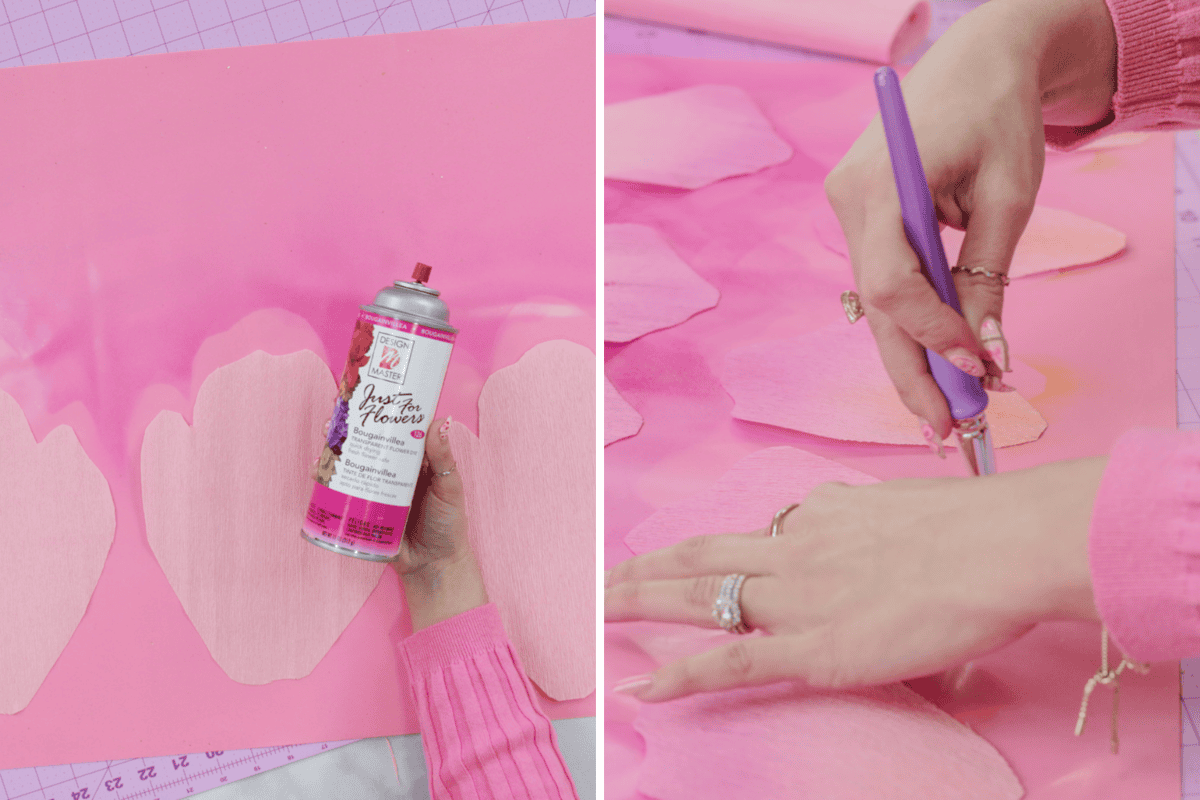
If you want your crepe paper flowers to look next-level realistic, floral spray and PanPastel are incredible. Floral spray is perfect for adding soft, blended color without soaking the paper, while PanPastel lets you shade and highlight with super fine control. Both give your flowers that natural depth and dimension that make people do a double take—because let’s be real, no flower is just one flat color!
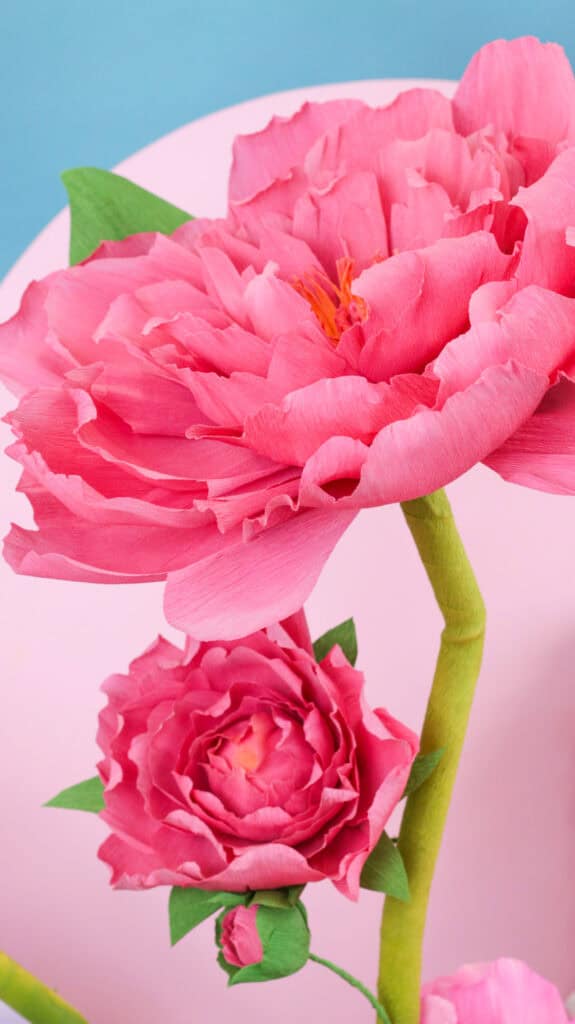
How Big is this Peony Flower?
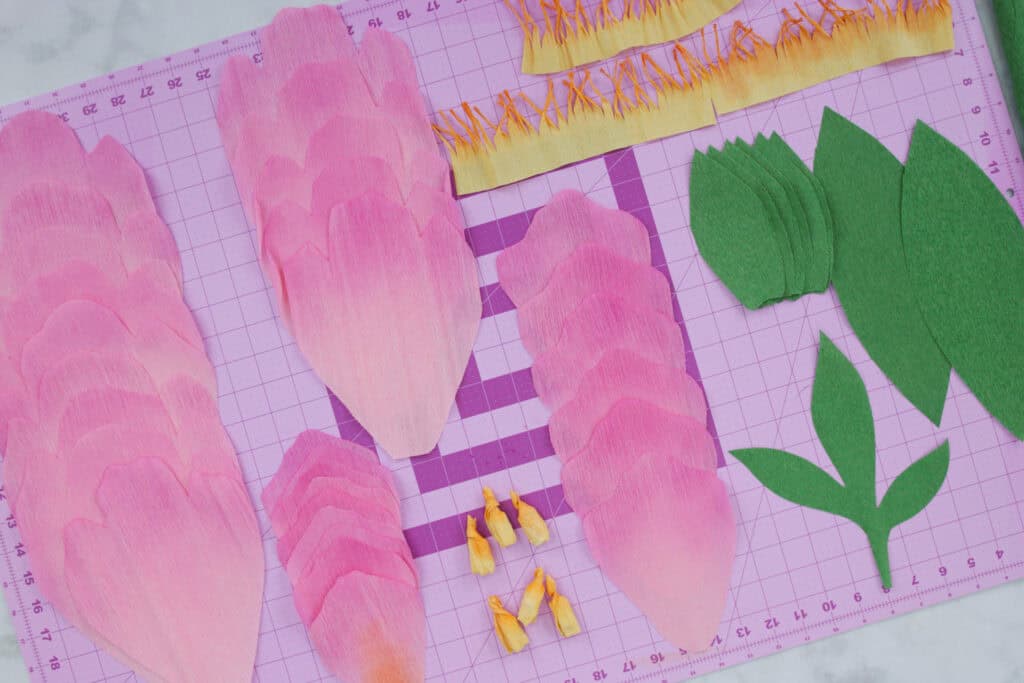
This large peony flower measures 14 inches across, and the petals vary in size, ranging from XL-XXS.
I also made some blossoms and small blooms by utilizing the smaller petals that are provided in the free template.
Why Shop Through My Links?
Just click on the links below and purchase whatever you need for this project! I’ll earn a small commission at no extra cost to you.
Your support helps me continue creating and sharing free content with you.
It's a simple way to show your support and keep our community thriving. Thanks for your support of my small business, it means the world to me and my family! 💕
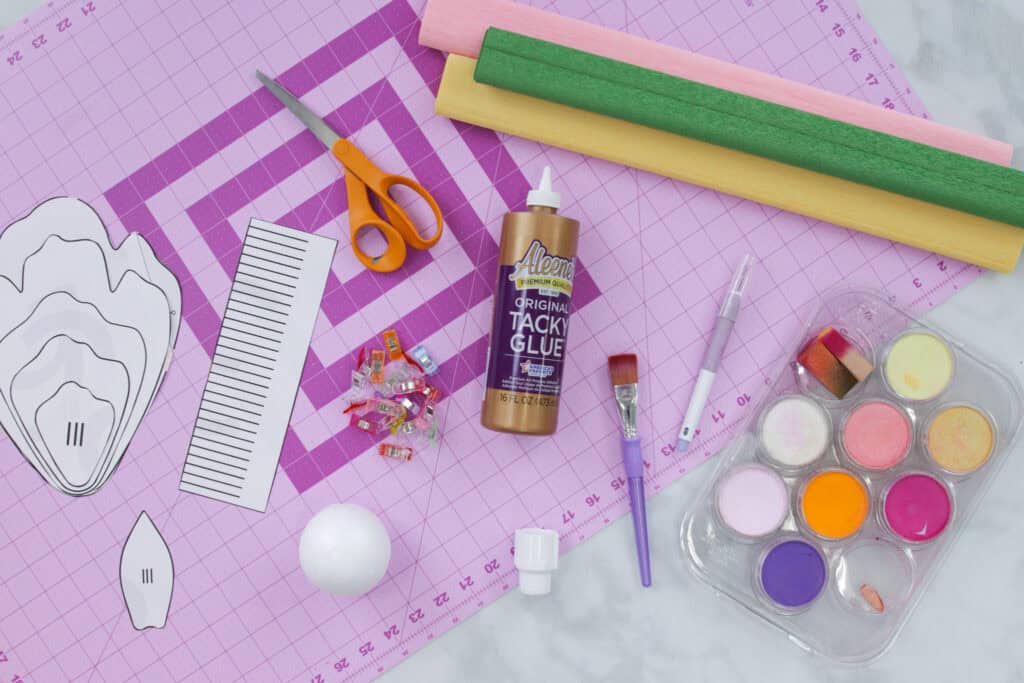
Supplies
Shop all the large crepe paper peony supplies here!
- 1 Roll of Light Weight Pink Crepe Paper
- 1 Roll of Green Light Weight Crepe Paper
- 1 Roll of Yellow Light Weight Crepe Paper
- Large Peony Flower Sweet Red Poppy Files
- Self-Healing Cutting Mat
- Rotary Cutter or Craft Scissors
- Square PaintBrush
- Sponge
- 3-Inch Styrofoam Ball
- Aleene's Tacky Glue or Dual Temp Hot Glue Gun
- A PVC Pipe Coupler
- Craft Knife
Optional Supplies
Download Large Peony Files Here!
What's Included in the Large Peony Flower Files?
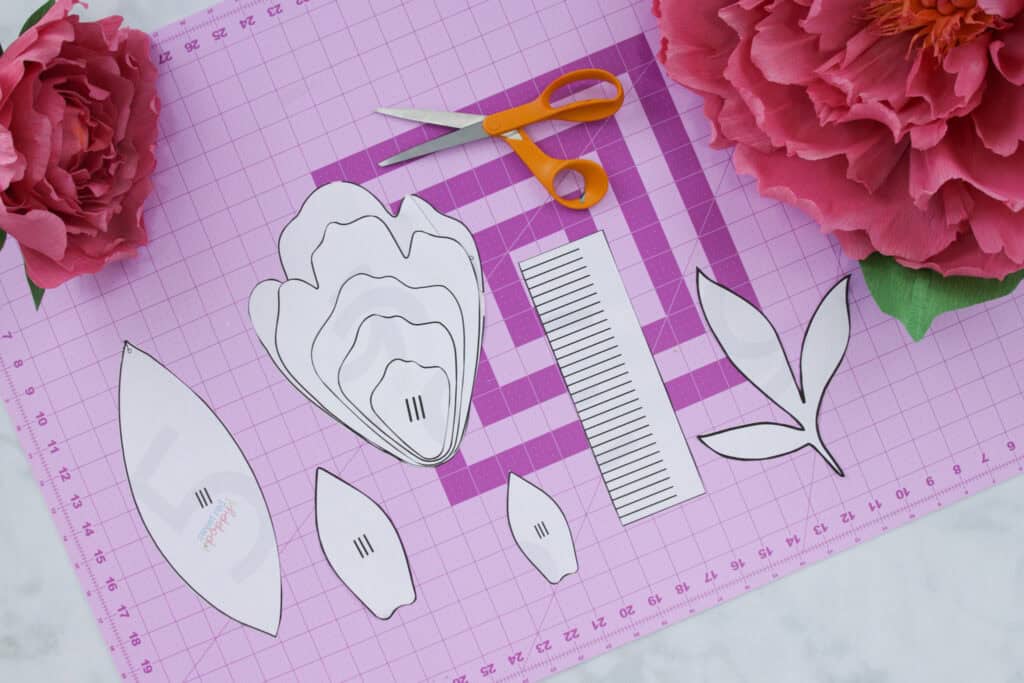
The file has 6 pages that includes:
- 6 petals ranging from XL to XXS.
- 4 Leaves
- 1 Center
- 1 Circle Piece
Step One: Print Template & Cut Printable
The first step is to download and print out the six pages from the Peony PDF file.
Once it's printed, measure the test square on the first page and make sure it measures 1 inch. If it doesn't, you may have to enable the "Actual Size" option or adjust the scaling in your print settings until it does.
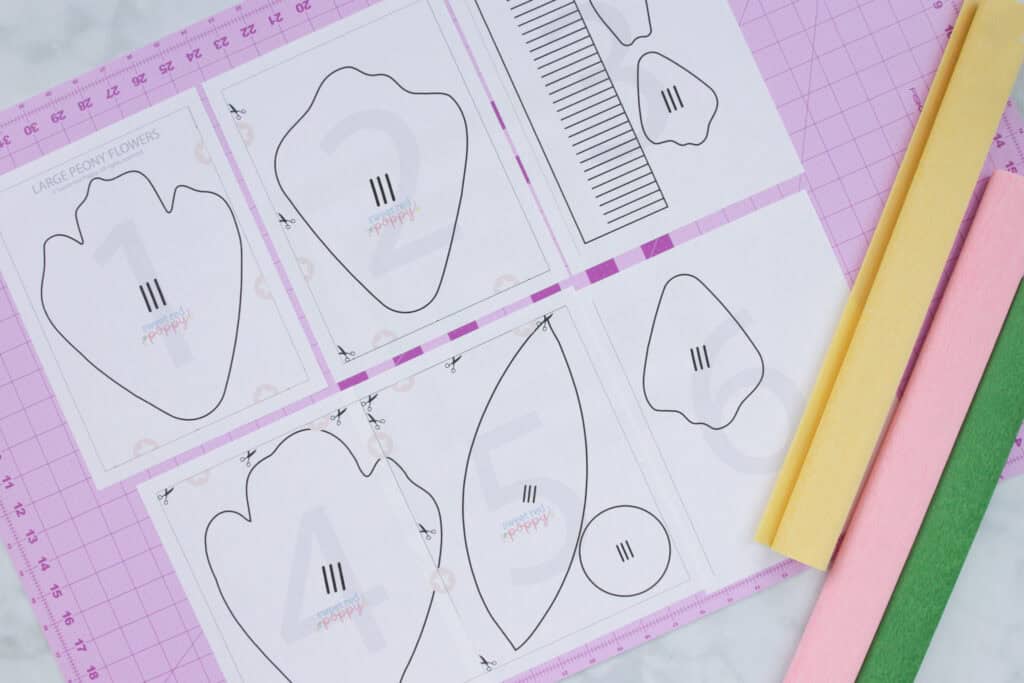
Pages 4 and 5 need to be taped together. To do this, line up the stars and page borders, then tape them together.
Once you've taped those two pages together, it's time to cut! You can choose to cut the flower pieces out using a pair of craft scissors or a rotary cutter. I prefer to cut the petals with a rotary cutter. For the more detailed pieces, I cut around the piece with the rotary and then use the craft scissors to cut closer to the edges of the design.
Whether you cut with scissors or a rotary depends on personal preference.
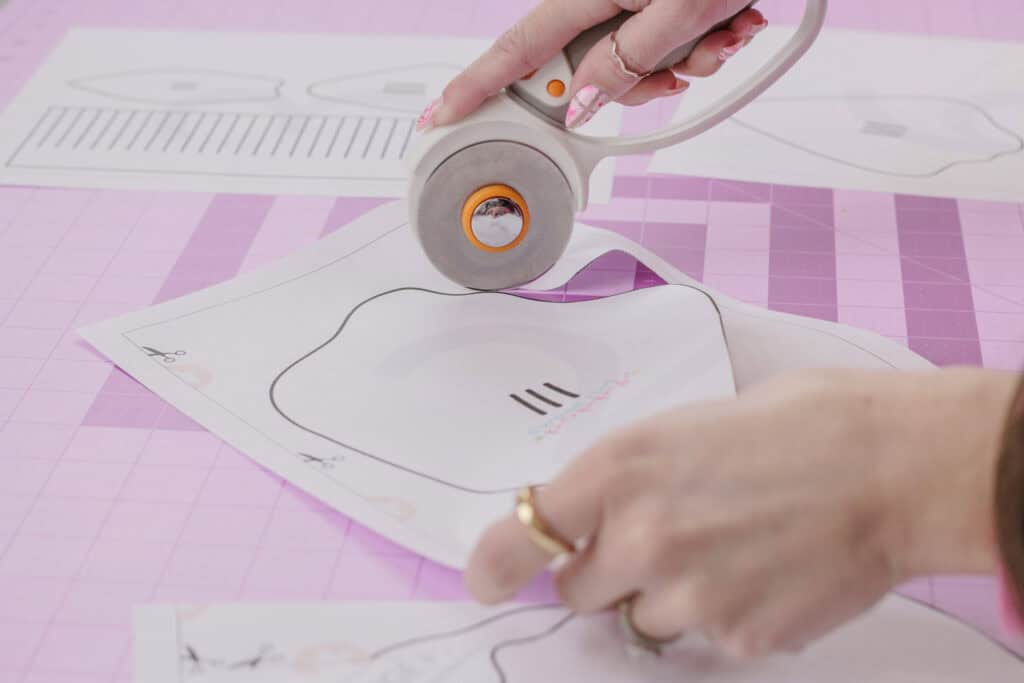
Step Two: Cut Out Peony Flower Pieces
The next step is to cut your peony pieces out of crepe paper. You'll notice three lines in the center of the peony piece. These three lines are the grainline and represent the direction the grain of the crepe paper should be running when you lay out the pattern on top of the crepe paper. Doing this will give more stretch across the petals and allow you to shape and form the petals to look more realistic.
The file also includes the number of pieces of each petal I cut out to create my flower, but you can cut out as many pieces as you would like.
This is the amount of each piece I cut:
- 10-12 XL Petals
- 9 Large Petals
- 5 Medium Petals
- 6 Small Petals
- 7 XS Petals
- 5 Sepal Leaves
- 3 Leaf Pieces
- 1 Circle Piece
A tip to save material and time when cutting your crepe paper is to fold it until it is the same width as the biggest petal (7 inches), then lay the petal on top and adjust the fold if needed.
Continue folding the paper and stacking the folds until you have several layers. Then, lay the petal on top again, clipping it into place, before cutting it out. *Make sure your grainlines are lining up with the crepe papers grain.* Then you can cut out your petals.
Fill up any empty spaces on the crepe paper with smaller peony pieces.
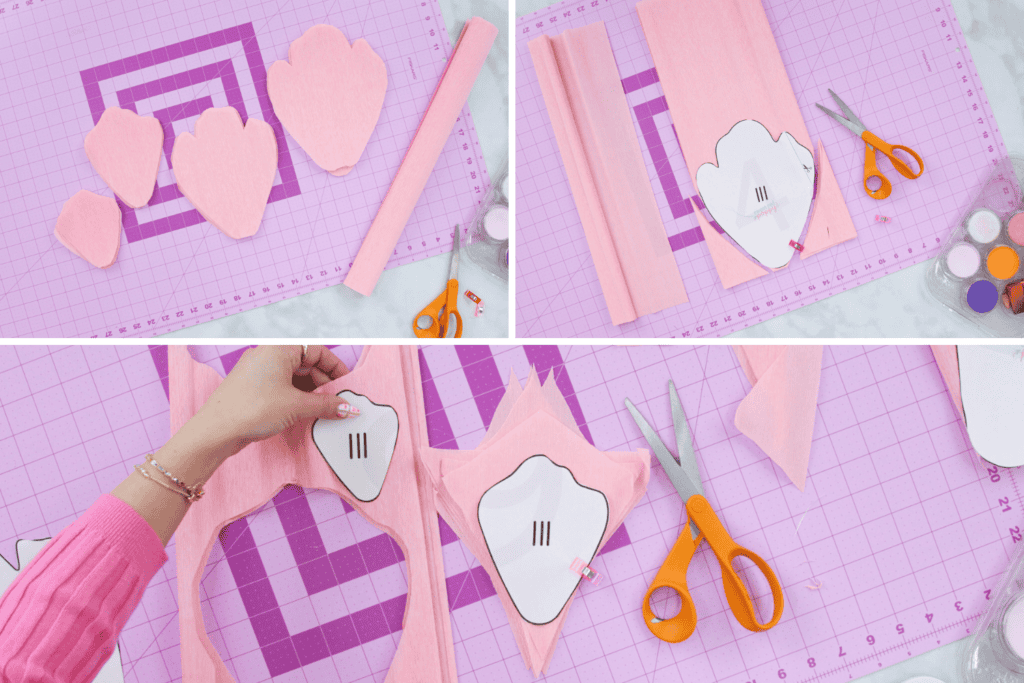
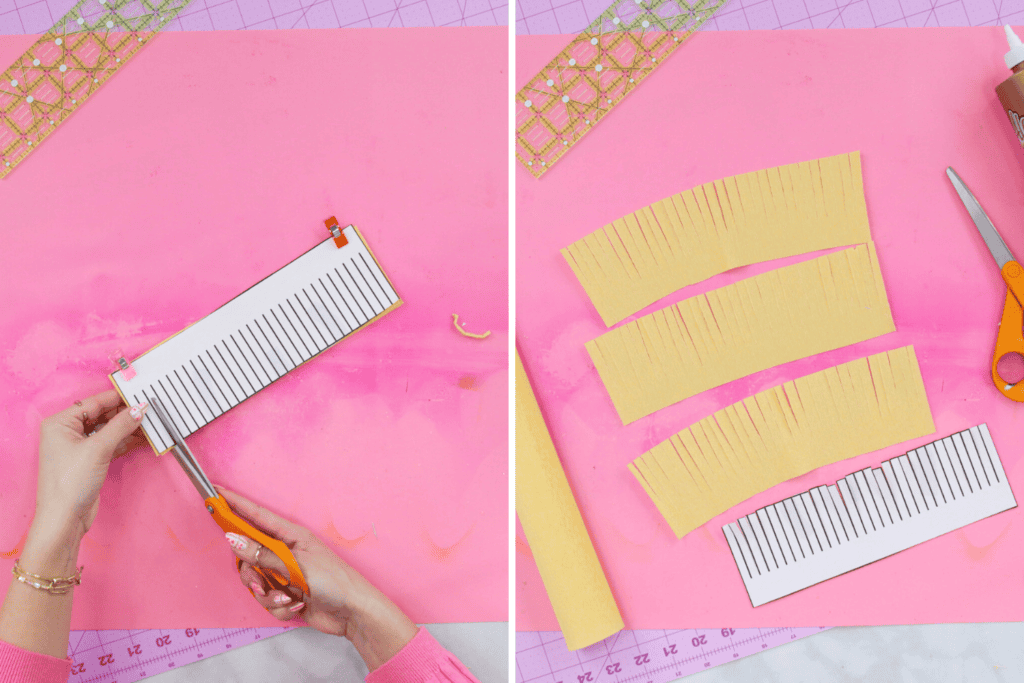
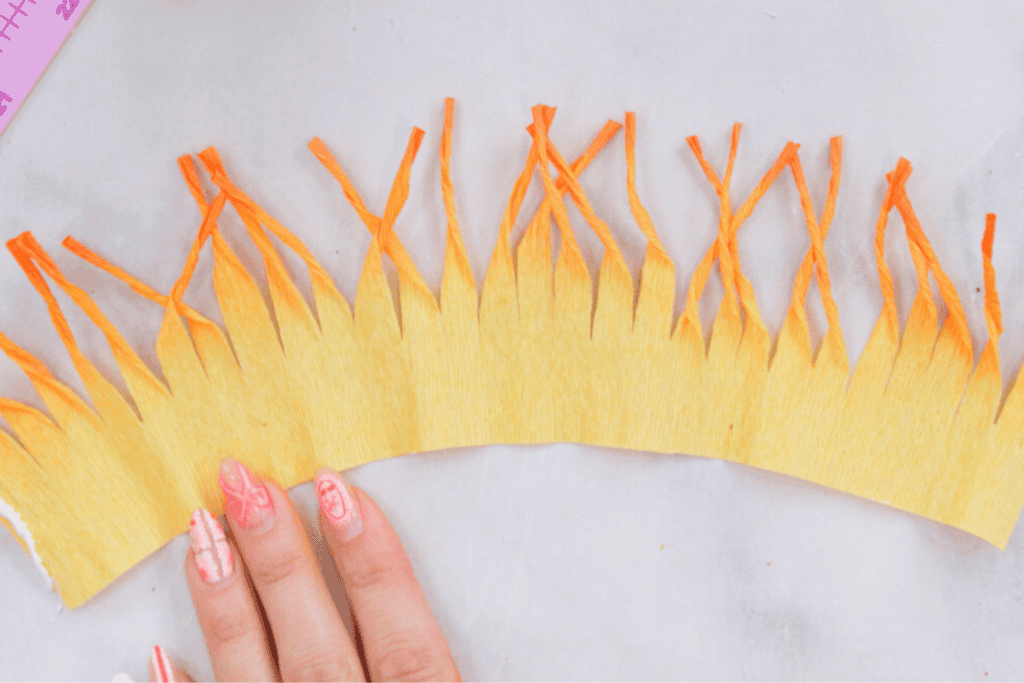
To cut out the center, cut out the rectangle shape first, then go in with scissors and cut the slits every 2 cm.
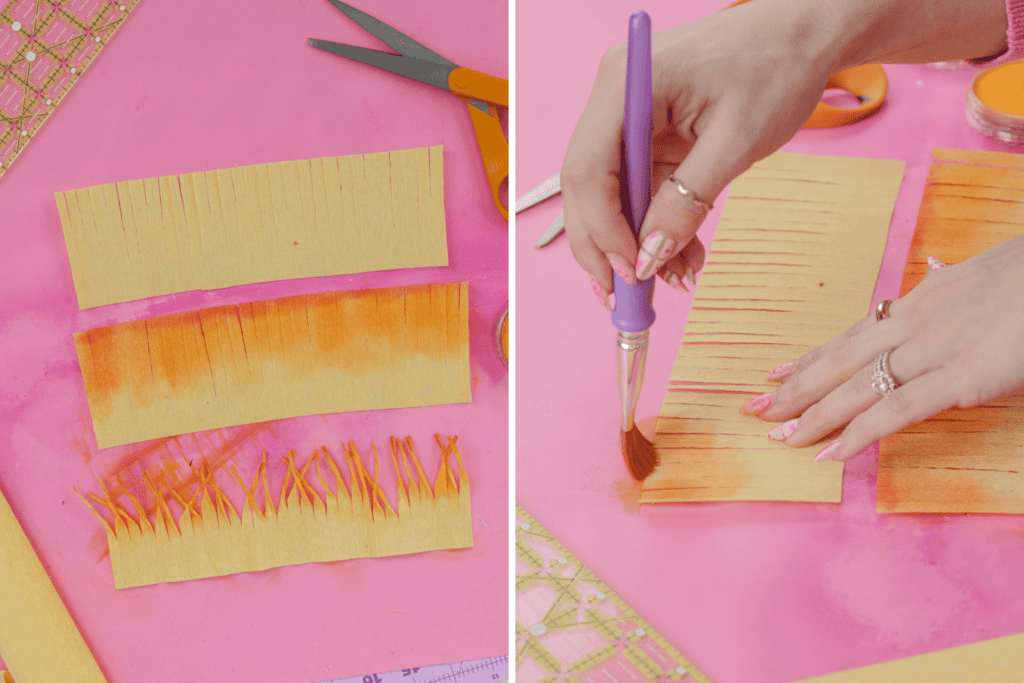
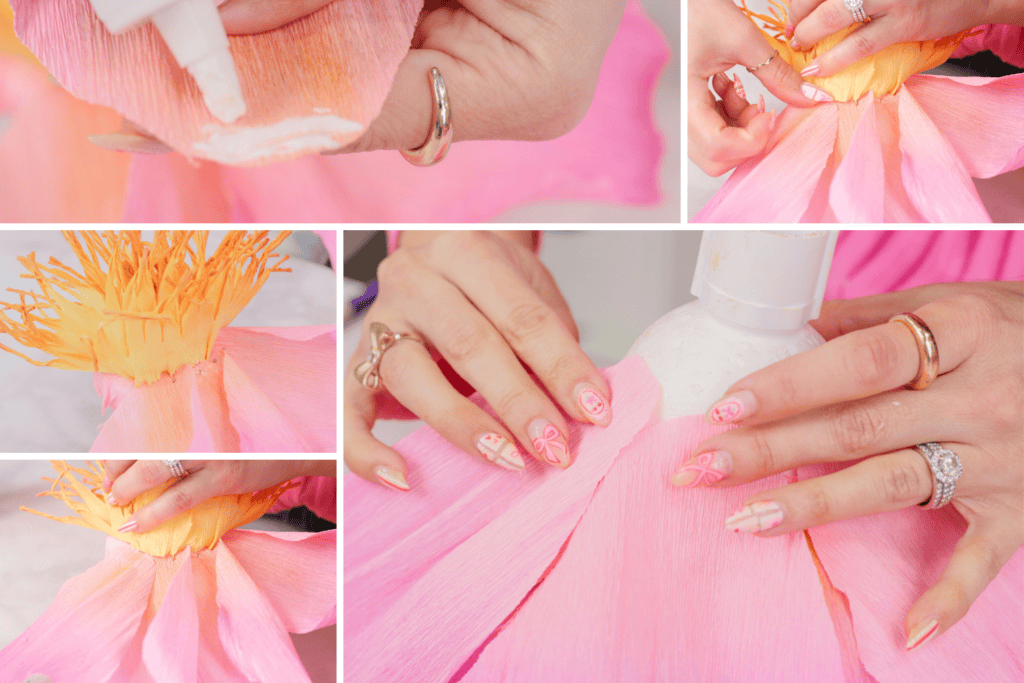
Step Three: Apply Color to Petals & Centers
This is the most fun part of the process and, to me, a vital step in making a paper flower more realistic by adding depth.
This step is optional, but I applied floral spray to the tips of the front and back of each petal.

Because the smaller petals are closer to the center, I brushed on yellow pan pastel to the bottom and gradually dragged the color to the top. This will make the center of the flower pop!
For the stamen, I brushed on orange pan pastel to the tips of my three stamen pieces.
Step Four: Shape Peony Flower Pieces
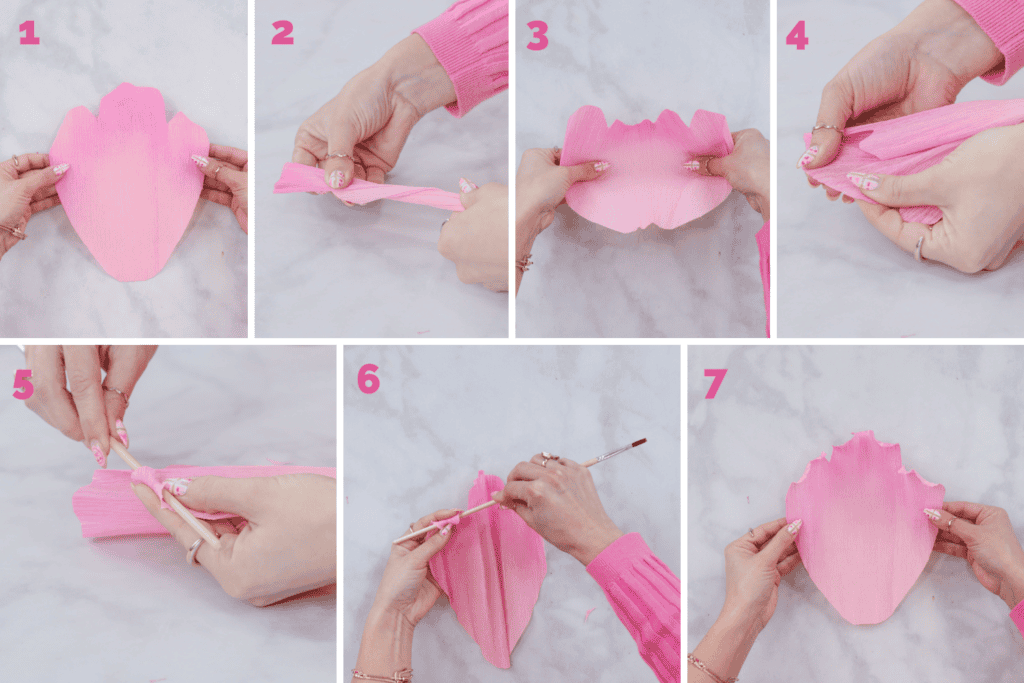
To shape your flower pieces, twist them back and forth with both hands to give them more texture. Grip your petal by placing your thumbs in the center of the petal and stretch it outward, creating a dome-like effect.
Gently stretch the tips of the flower, making waves. Then, with a paintbrush, wooden dowel, or chopstick, wrap the tip of the flower inward and some outward to create a realistic flower petal. Repeat the steps above for the rest of your petals.
After applying the pan pastel to my stamen pieces, I twisted each stamen between my fingers to give it more structure to hold its shape.
Step Six: Assemble Base
To assemble the base of the flower, grab a 3-inch styrofoam ball, a craft knife, and a 1-inch PVC coupler. Carefully start by cutting the styrofoam ball in half with your craft knife.
Next, place your coupler on top of the rounded side of the styrofoam ball and firmly press it in. Now that you have an outline of the coupler, cut out a hole that is big enough to fit the coupler.
Squeeze glue into the hole, around the coupler, and place the coupler inside.
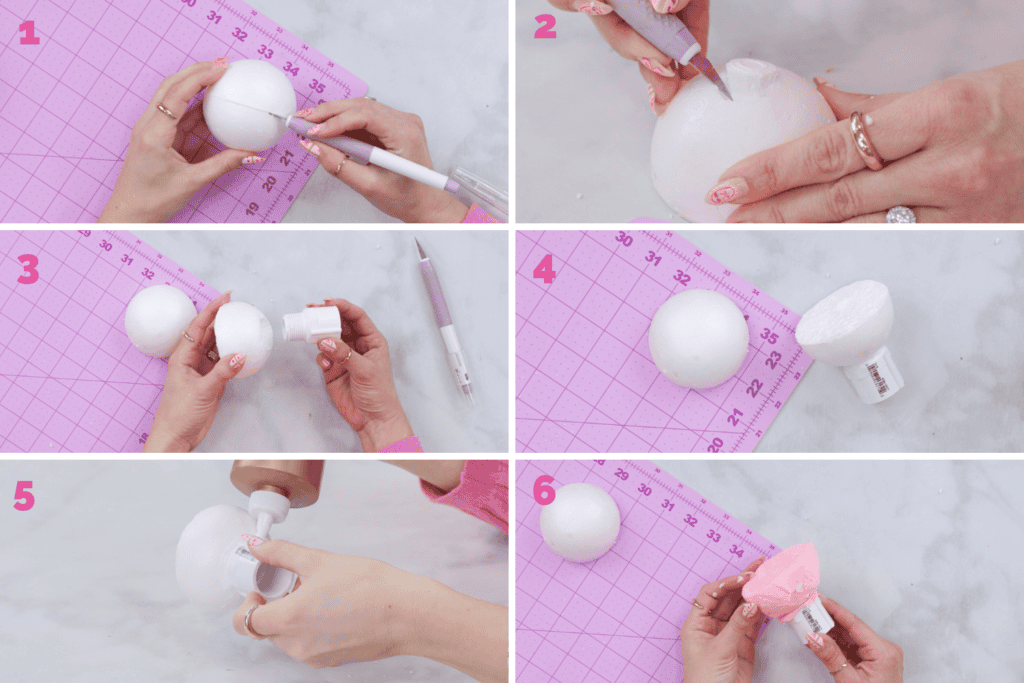
Grab the circle piece that you've cut out and stretch and wrap it around the styrofoam until it's completely covered, and glue it in place as you go.
Step Seven: Assemble Center
To create the bulbs in the center of the flower, cut out a 6-inch square out of yellow crepe paper. Make a half-inch fold and glue it in place.
Pro Tip: Use an acrylic ruler as a folding tool to make a crease in the crepe paper that will aid with folding.
Keep making folds until you reach the other end of the square, gluing it in place as you go, and let it dry.
After it dries, cut the folded strip every inch so that you end up with six squares. (Reference photo below).
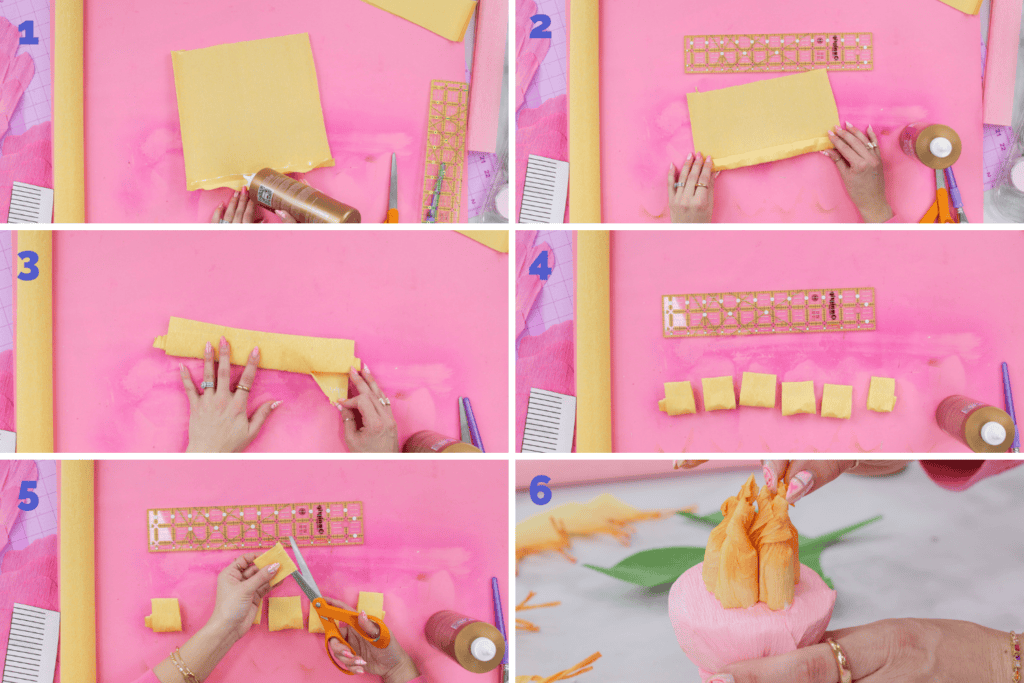
Cut a closed end of a square, twist it until it starts looking like a cone, applying glue as you go, and clip it in place as it dries. Repeat this to the rest of the squares. Once they all dry, apply orange pan pastel to the tips.
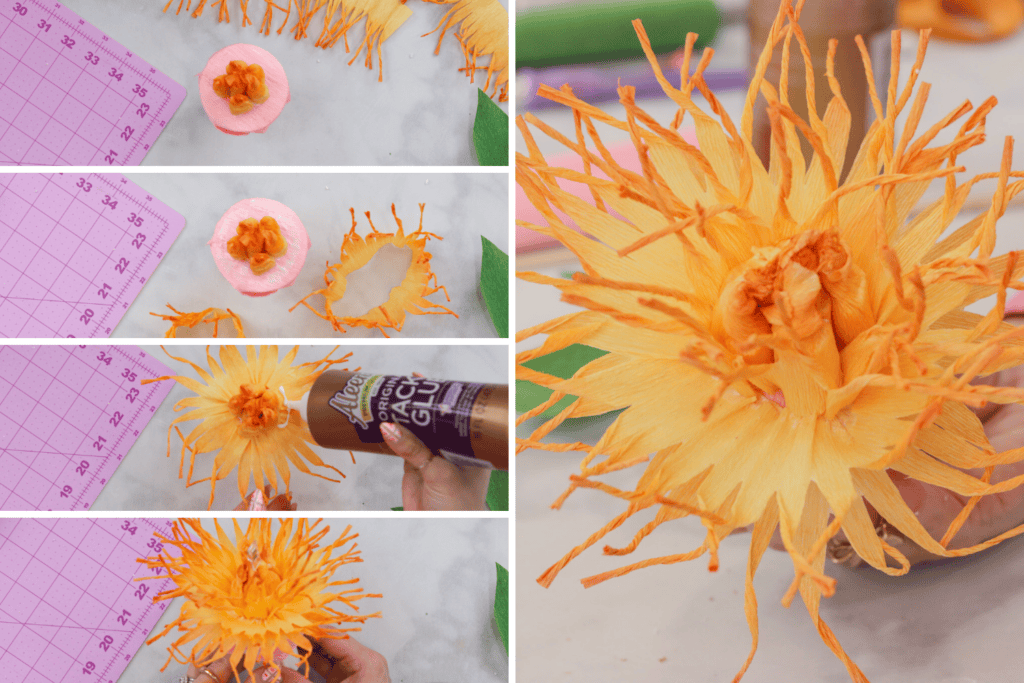
Now that we've created the bulbs, it's time to add them to the center. Glue them to the center of the halved styrofoam ball and lay one of the stamen pieces around it with glue. Continue layering the other two stamen around the bulbs and let it completely dry.
Step Eight: Attach Petals
Next, it's time to start attaching the petals to the styrofoam.
I started placing the medium-sized petals around the stamen and continued placing the small and extra small petals around the stamen.
Pro Tip: Use straight pins to keep the petals in place as they dry.
After all the petals have dried, flip the flower over so it's face down. Then, continue gluing the large petals around the outside of the smaller ones. Finally, glue the extra large petals around the outside of the large petals.
Step Nine: Attach Leaves
Moving on to the greenery, this is the final step!
Apply a line of glue at the base of the leaves and brush it with a paintbrush for an even application. With the flower still face down, start by gluing the five sepals, placing them evenly around the PVC, and let them dry. Then, glue the bigger leaves on top.
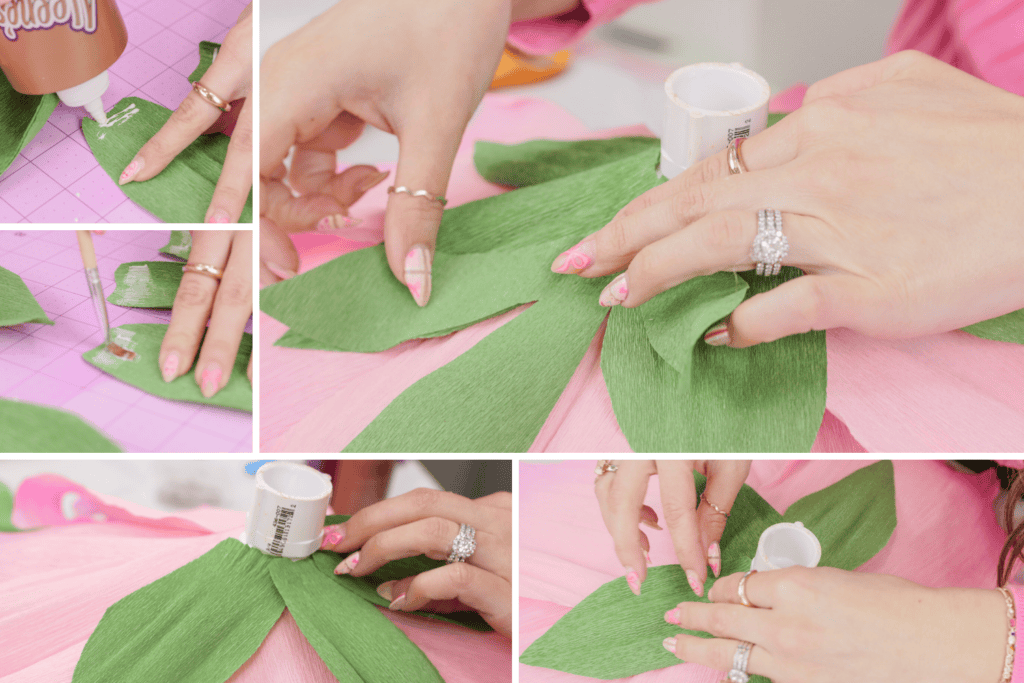
Finally, cut a long strip of green crepe paper and wrap it around the PVC until it's completely covered and no white is showing.
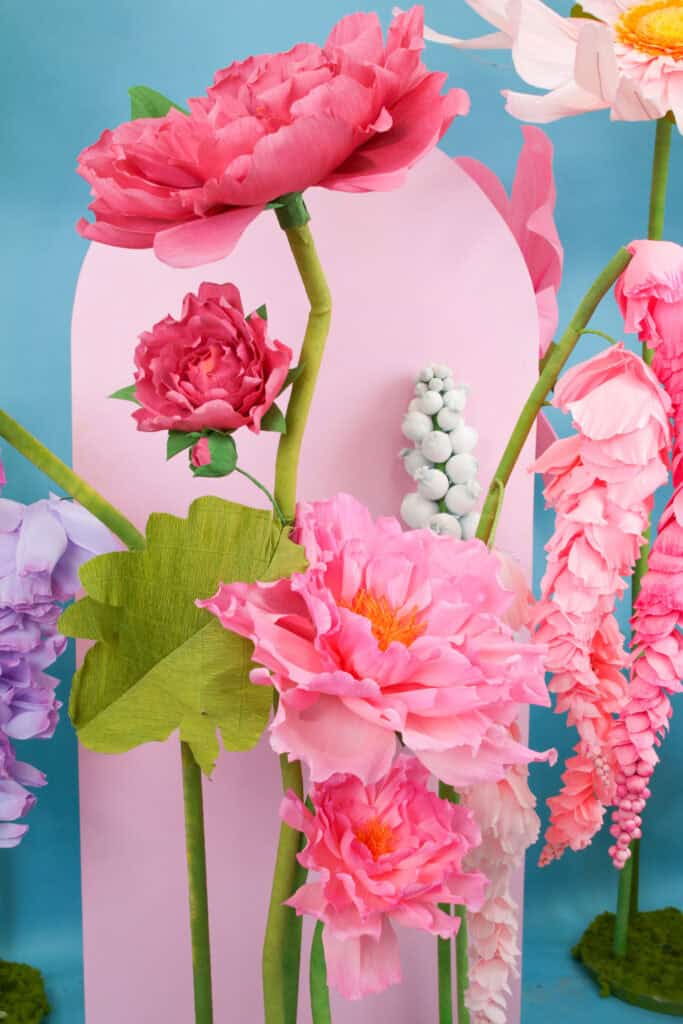
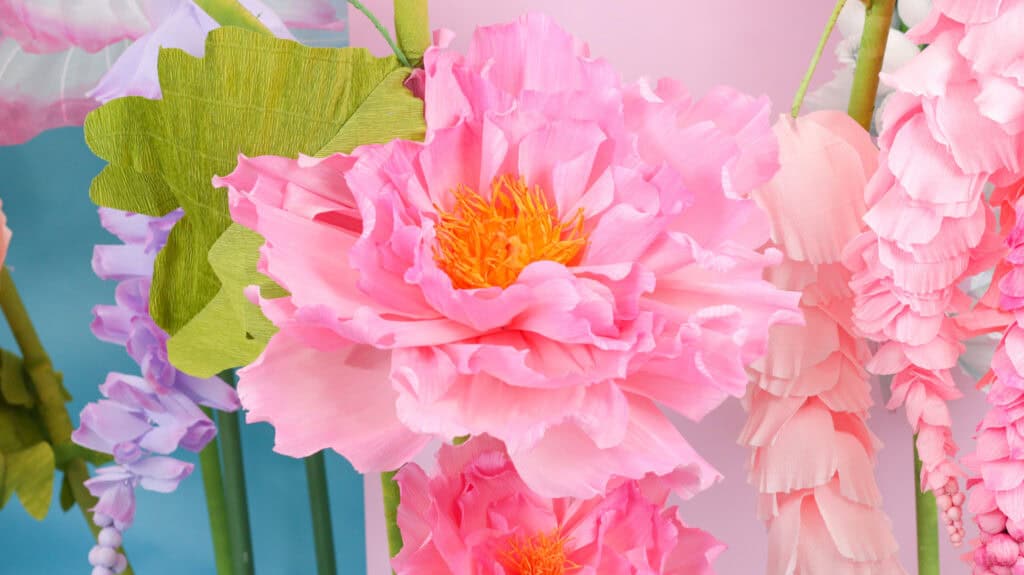
Finished Large Peony Flower
When all your pieces have dried, this large peony flower is finished! Attach it to a PVC pipe that's connected to a base. Check out this tutorial to learn how I created the concrete bases for my standing flowers here!
And that’s it, your giant crepe paper peonies are ready to shine! Whether you’re using them for party decor, a statement wall, or just to brighten up a space, these oversized blooms are sure to turn heads. I’d love to see how yours turn out, so be sure to tag me if you share them! Now go enjoy your gorgeous, handmade flowers!!


If you have any questions, leave them below in the comments!
Join my crafting and sewing Facebook group, where you can show us what you’re making, ask questions, and learn from others!
Want to save this project for later? Save it to your favorite Pinterest board! Click here to save it to Pinterest.
Hello there, where can I find a pdf of the tutorial? Thanks!
Apparently we can;t.
how many flowers does 1 roll of crepe paper make
What is used efor stem? I read and reread and could not find that information.